440 Select from e420c install
 03-21-2011, 10:08 PM
#1
Senior Member
Thread Starter

Join Date: Nov 2007
Location: somewhere in NoVA
Posts: 533
Total Cats: -1
Heey all,
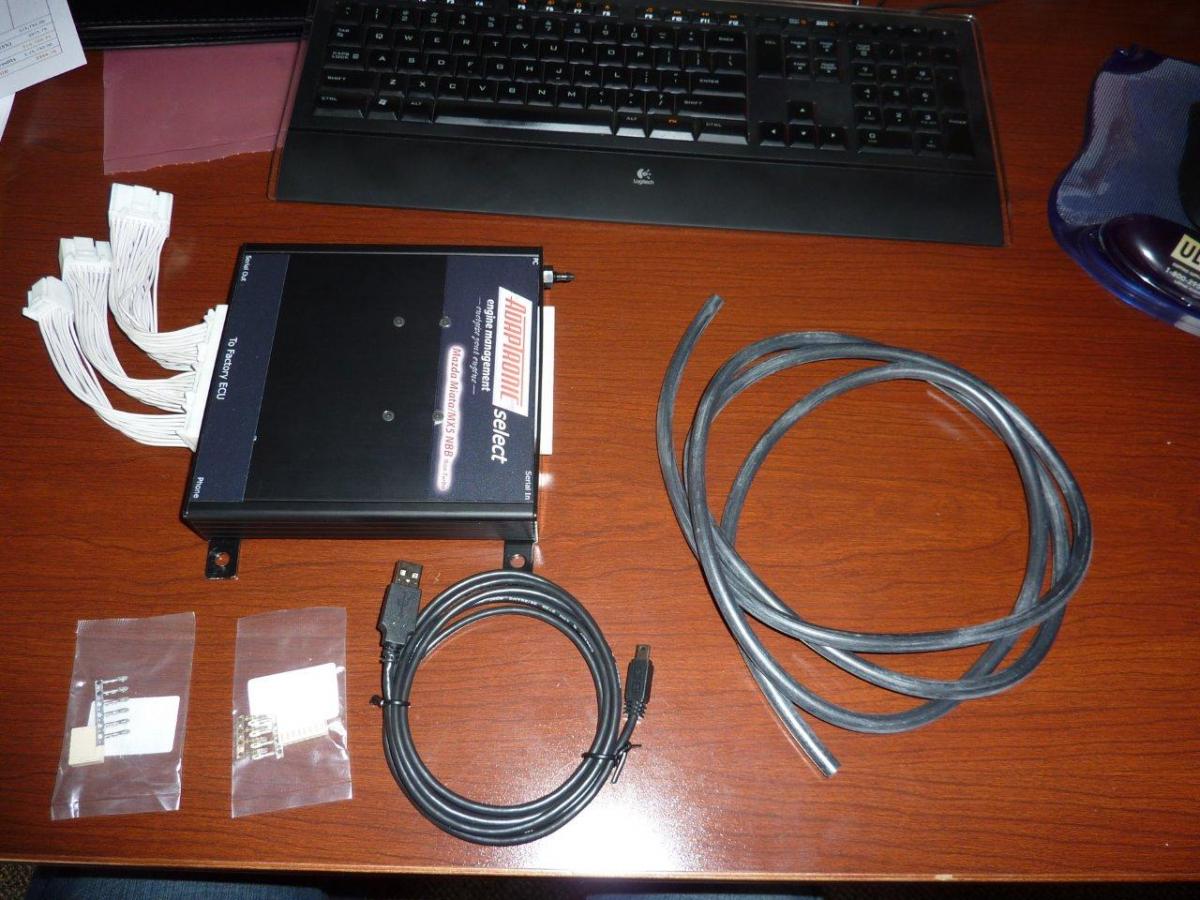
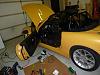
Got my 440 Select this afternoon from UPS and am itching to get it in. Still gimpy as hell from surgery 2 weeks ago; so will be recruiting a little help from a friend to do the under the dash stuff.
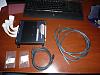
Anyhow... wanted to get the party started and did some prep-work tonight. Learned that if you're in a hurry, there are a few things to pick up before you start.


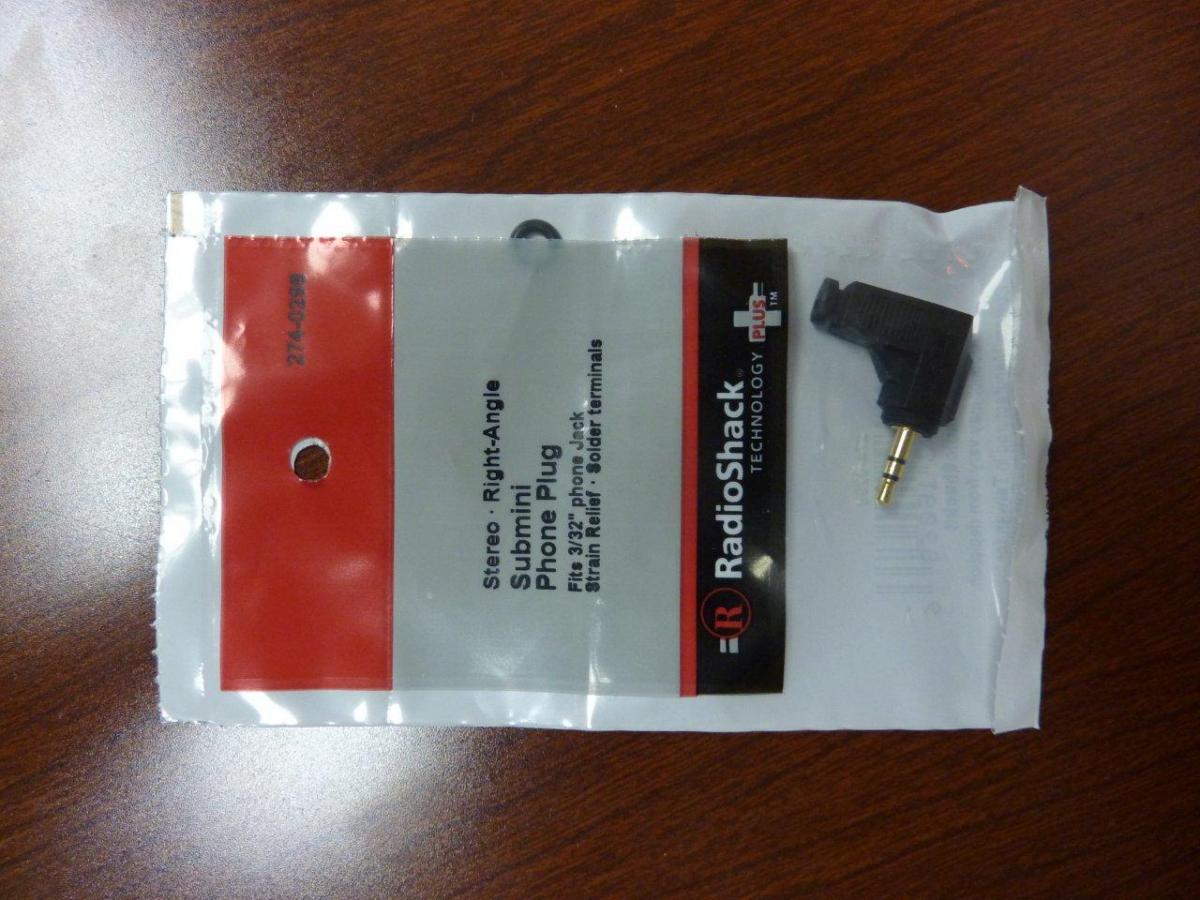
The serial input for your wideband is a 2.5mm (smaller than standard headphone) adapter, which I picked up 2 from the local Radio Shack.
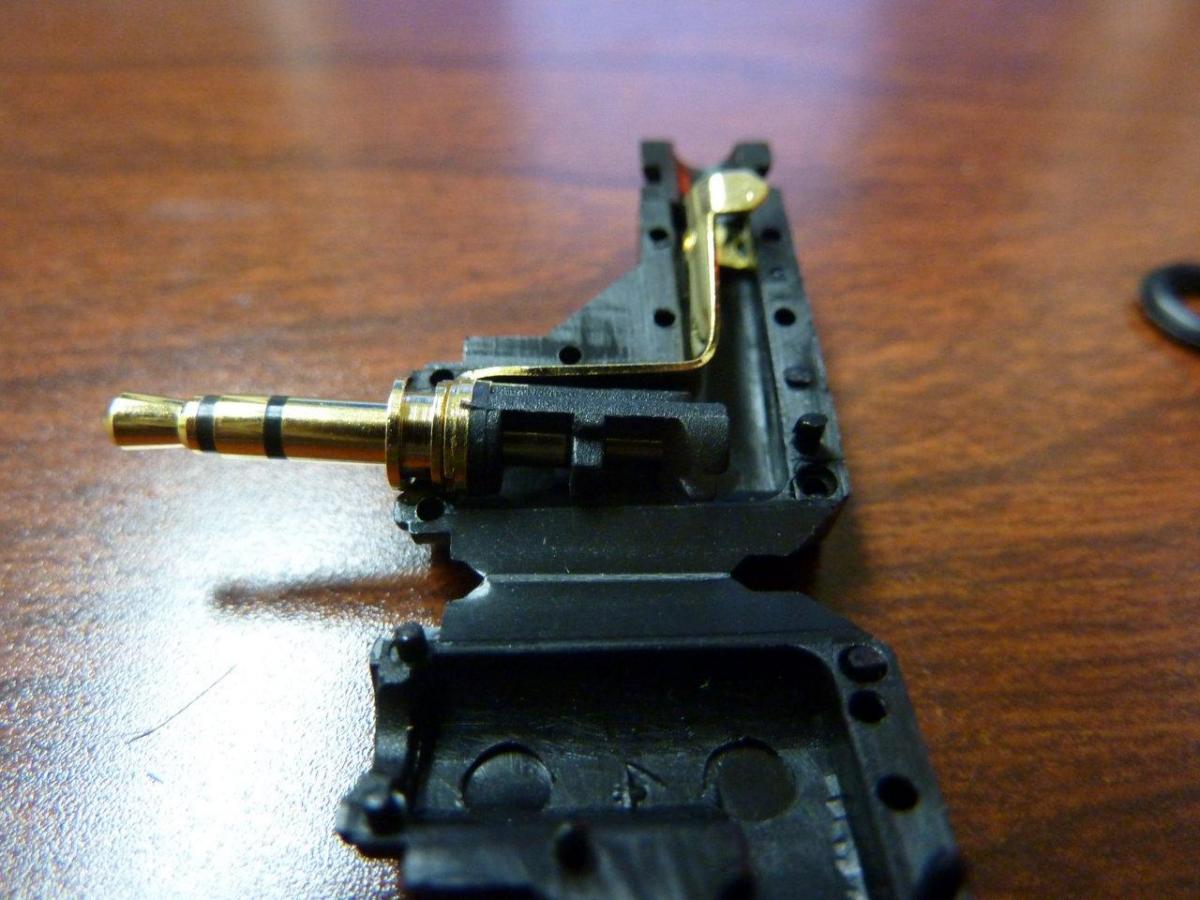
Tip = RX
Ring = Not Used
Sleeve = Signal Ground
Two wires need to be connected to a RS-232 serial port. The BLUE wire from the AEM UEGO Gauge shall be connected to the tip (RX) on the serial port for receiving data. Sleeve (GND) on the serial port shall be grounded.
If you have an LC1, they already have this connection and you simply plug and play...
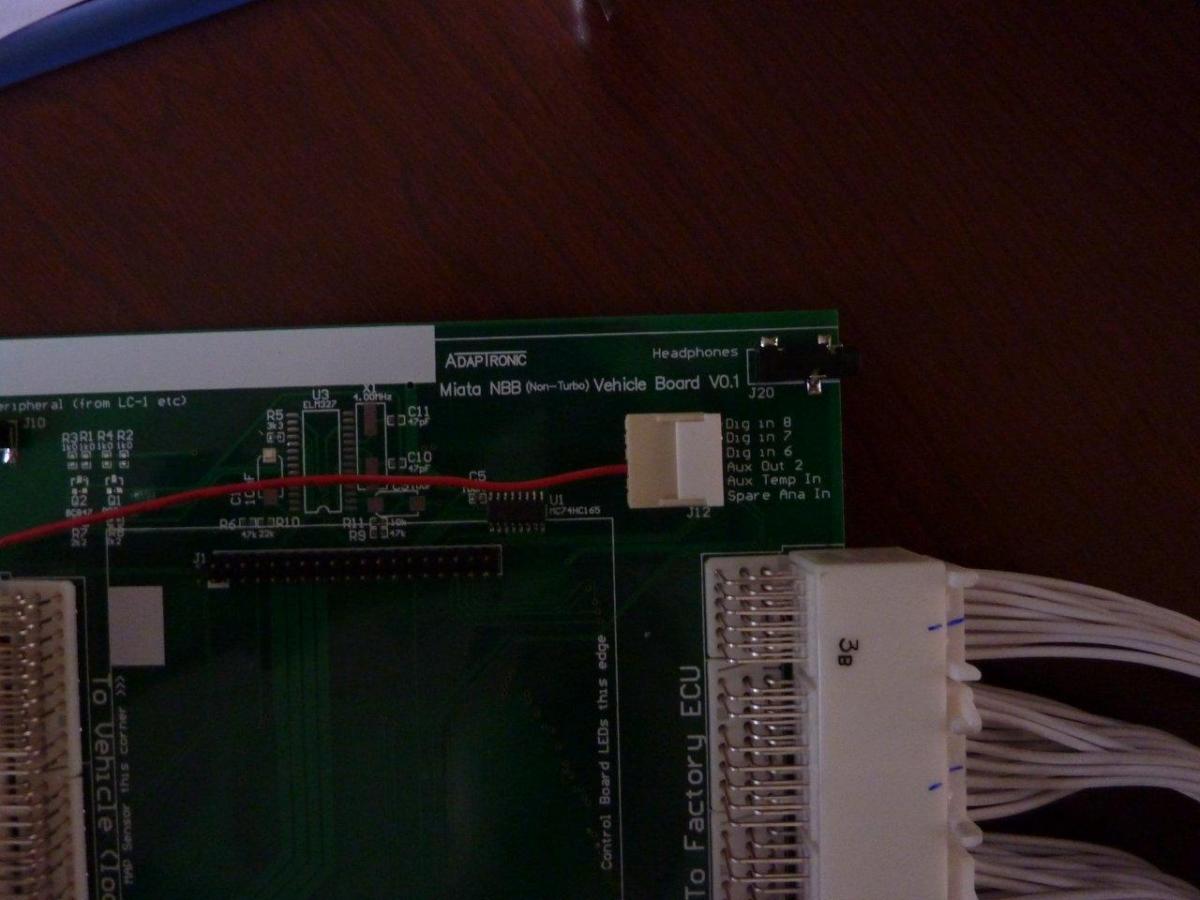
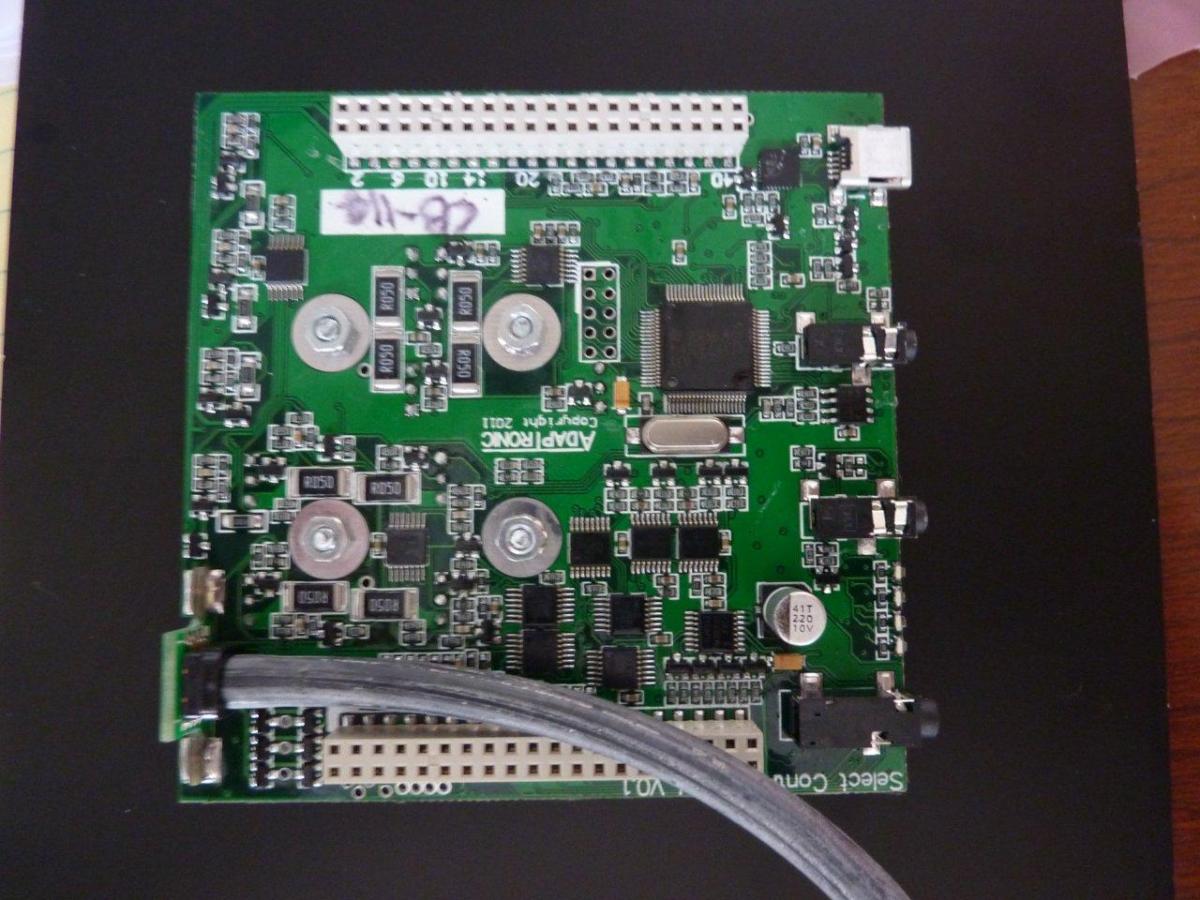
Since I am using EBC, I needed to connect the output from the main board. Adaptronic supplied the connectors and pins; so a shot of 22 ga wire and a crimp later and we're in.
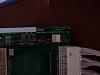
I ran this out through the front plate where the factory ECU wires will be plugged in later. There are a few holes where the wire fits with no problem...
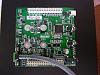
If you end up needing to get your ECU apart to get inside... All you have to do is remove the 4 screws from each end of the case, pull off the end without the vacuum nipple and then carefully slide the top of the ECU and the green PCB off at the same time. I pulled mine out in the direction of the plate with the vacuum port. Chassis came out in the right hand and the PCB sandwich in my left. Once the bottom chassis is free; just carefully remove the top and bottom of the PCBs like an oreo. Just don't twist They are held on by some connectors.

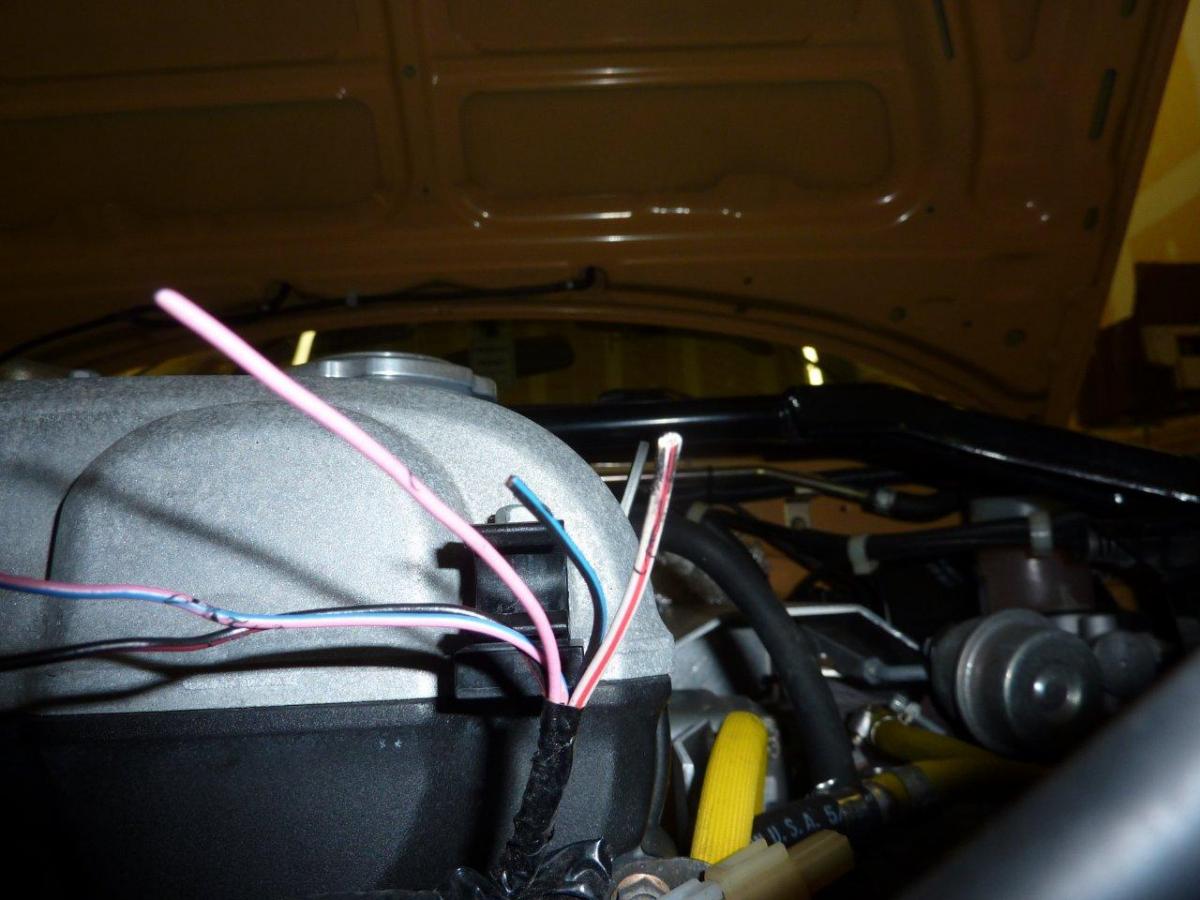
Alright, so now the EBC wire is in... Wideband connector is done... I now have to un-install the old MAP sensor (it was borrowing the pink wire on your old MAF connection and the +5VDC and GND from your TPS) So far I'm just going to cut the signal line where I tapped it before amd call it a day. The power I am stealing from the TPS should not be a big deal once I unplug my old MAP sensor.
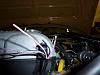
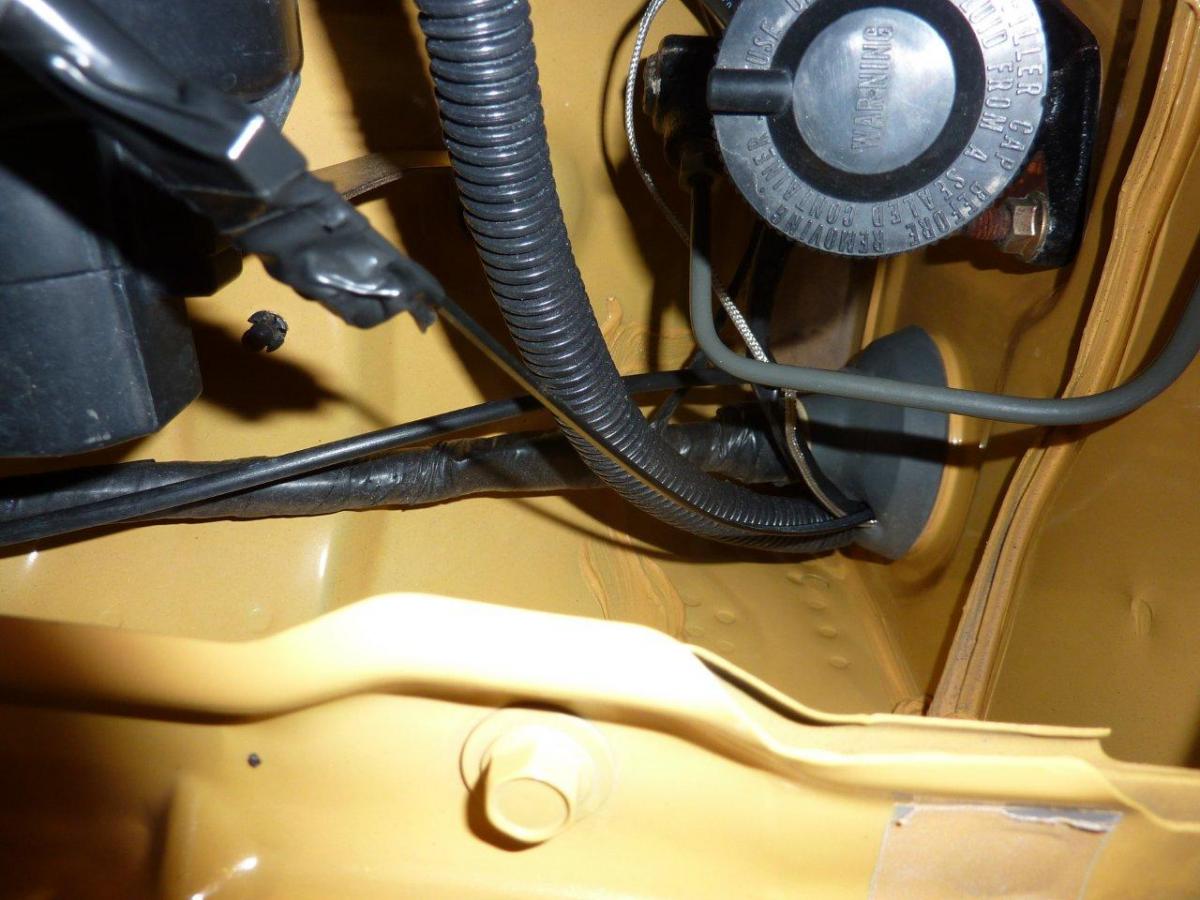
Ran the supplied vacuum line from where I had my first MAP sensor connected all the way under the dash.

Right, the rest will be mostly done from under the dash; so I'm calling it a night. More to come tomorrow... but this hopefully will help someone a little
Cheers,
Matt
Got my 440 Select this afternoon from UPS and am itching to get it in. Still gimpy as hell from surgery 2 weeks ago; so will be recruiting a little help from a friend to do the under the dash stuff.
Anyhow... wanted to get the party started and did some prep-work tonight. Learned that if you're in a hurry, there are a few things to pick up before you start.
The serial input for your wideband is a 2.5mm (smaller than standard headphone) adapter, which I picked up 2 from the local Radio Shack.
Tip = RX
Ring = Not Used
Sleeve = Signal Ground
Two wires need to be connected to a RS-232 serial port. The BLUE wire from the AEM UEGO Gauge shall be connected to the tip (RX) on the serial port for receiving data. Sleeve (GND) on the serial port shall be grounded.
If you have an LC1, they already have this connection and you simply plug and play...
Since I am using EBC, I needed to connect the output from the main board. Adaptronic supplied the connectors and pins; so a shot of 22 ga wire and a crimp later and we're in.
I ran this out through the front plate where the factory ECU wires will be plugged in later. There are a few holes where the wire fits with no problem...
If you end up needing to get your ECU apart to get inside... All you have to do is remove the 4 screws from each end of the case, pull off the end without the vacuum nipple and then carefully slide the top of the ECU and the green PCB off at the same time. I pulled mine out in the direction of the plate with the vacuum port. Chassis came out in the right hand and the PCB sandwich in my left. Once the bottom chassis is free; just carefully remove the top and bottom of the PCBs like an oreo. Just don't twist
They are held on by some connectors.
Alright, so now the EBC wire is in... Wideband connector is done... I now have to un-install the old MAP sensor (it was borrowing the pink wire on your old MAF connection and the +5VDC and GND from your TPS) So far I'm just going to cut the signal line where I tapped it before amd call it a day. The power I am stealing from the TPS should not be a big deal once I unplug my old MAP sensor.
Ran the supplied vacuum line from where I had my first MAP sensor connected all the way under the dash.
Right, the rest will be mostly done from under the dash; so I'm calling it a night. More to come tomorrow... but this hopefully will help someone a little
Cheers,
Matt

Reply
 0
0

0

 03-25-2011, 05:58 PM
#7
Senior Member
Thread Starter
Join Date: Nov 2007
Location: somewhere in NoVA
Posts: 533
Total Cats: -1
Wow, sorry it took so long since my last post. It�s been a mad-house at my office lately and work had to come first. Anyhow, I got a little more time to play with the car and here�s the next part of the install.
So I left off with the ECU ready for hanging under the dash and basically connecting the serial cable for the wideband and my EBC wire. First things first:
Disconnect your car battery just to prevent anything stupid from happening! It takes 3 min to pull the ground off; so just do it and save yourself the agony of kicking yourself if you goof up.
Right, battery is disconnected and you can get under the dash. I pulled my driver�s seat out just to make life easier and more comfortable.
First, I pulled out the existing adapter board from the previous install and then removed the e420c, adapter loom, serial cable from wideband, and put it all aside. With all of this done� the installation becomes universal for if you had an e420c or nothing at all.
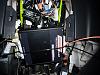
For the sake of making life easier, I followed the OEM wire harness from the factory ECU and located where it was tied down. I removed the ties and fasteners and left as much room for movement as possible. I routed my harness to the opposite side of the steering shaft tube. Then I took the 440 Select and aimed it with the vacuum port aiming at the passenger side. Ran the loom from the 440 into the factory ECU and then brought the 440 to where it is resting with the label aiming at the floor. The vacuum port and USB ports are by my right knee and the Headphone jack on my left knee. Using wire ties, I secured the 440 around the steering tube and then from the mounting tabs to the little holes where my knee bolster was. After that, the factory wire harness went in and that�s it for wires. Of course the new serial connector goes into the Serial In hole, same side as the Vacuum line. I also tied in my vacuum line, secured it with a wire tie for peace of mind and then finally routed my USB cable.
The USB cable from the box is a 6-foot cable and I routed it under my center console and have the connector coming out right next to the passenger seatbelt. I can keep my laptop on the passenger seat without an extension cord; but it�s a little tight. I�ve also picked up another 6 foot USB extension cable for later on.
Right, so it starts to get fun here and some really cool features of the 440 show up now. So without any battery connected, you can simply plug your USB cable into the PC and 440. Windows will try to install the drivers; but on all of my laptops� it failed to install automatically. Therefore you may have to do the driver install automatically.
1) Download, unzip, and install the latest Adaptronic files from http://adaptronic.com.au/downloads.html
2) Once the program is installed, plug in the ECU to your PC with the USB cable. Wait for windows to do its thing. If the drivers are installed with no problem; then just launch WARI for the Select.
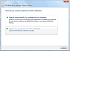
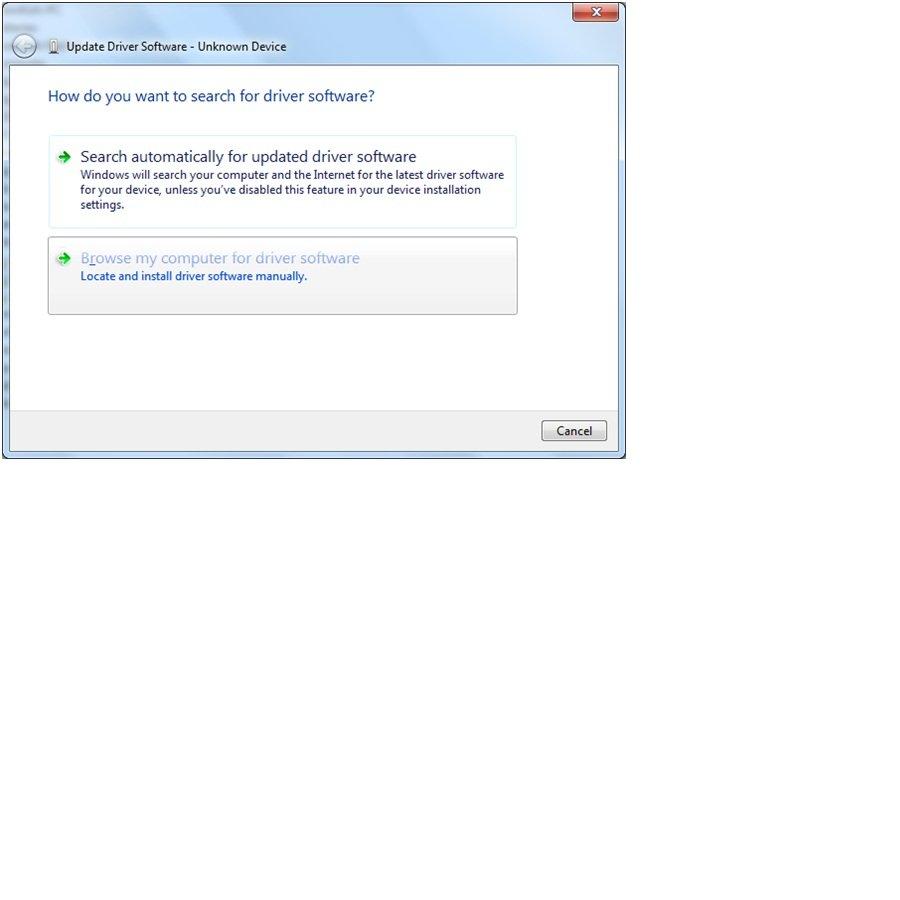
3) If windows doesn�t find the drivers, when prompted� just direct windows to where it can find them.
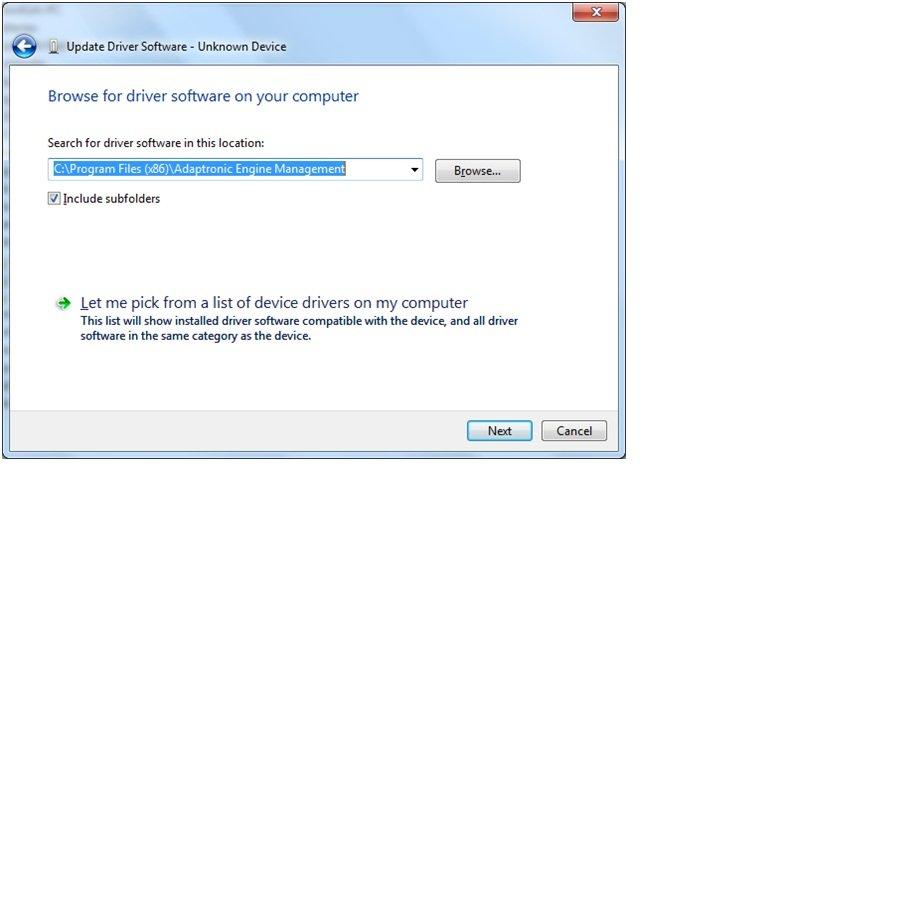
4) When prompted by Windows, select �Browse my computer for driver software� option
5) Go to the path where you installed the Adaptronic files. The path in the window below is the default.
6) Accept the Windows testing warning and �Install Anyway�
7) Wait for it and you�re done in about 30 seconds.

Once the ECU has been installed� Launch WARI for Select
The ECU will come from Adaptronic with the base map for your car pre-installed and mostly pre-configured. There are some changes that I need to make for my installation; but the basics are all going to be about the same for everyone.
Once WARI is launched and your ECU is connected� within a few seconds, fast as hell compared to the e420c� the settings are brought in from the ECU and are on your PC. All of this is powered by the USB; so no risk of blowing something up since there is no power anywhere else.
Before you make any changes, Save a copy of the virgin map onto your PC. Just in case something goes bad you will need a backup. I would name it Original MAP or something you will not overwrite by accident.
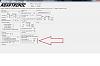
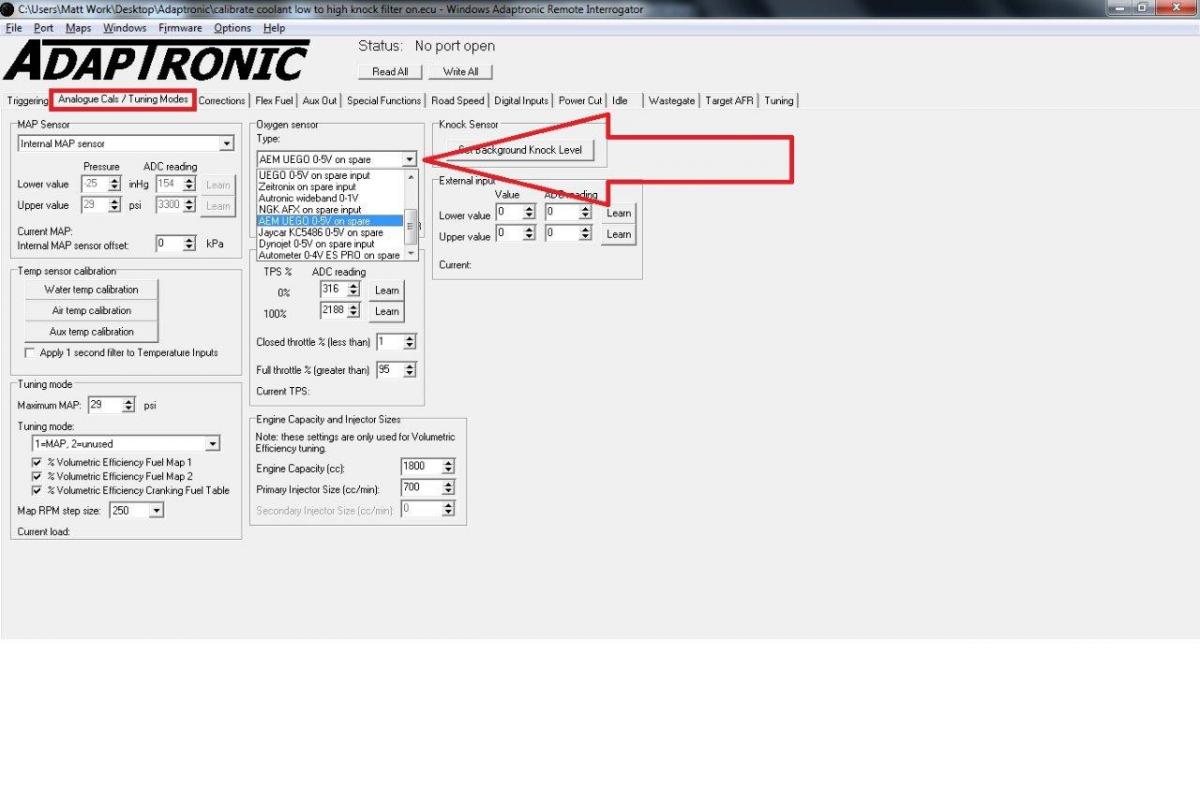
Next I am going to specify my wideband option. Under Analouge Cals / Tuning Modes choose your Wideband from the drop down menu.
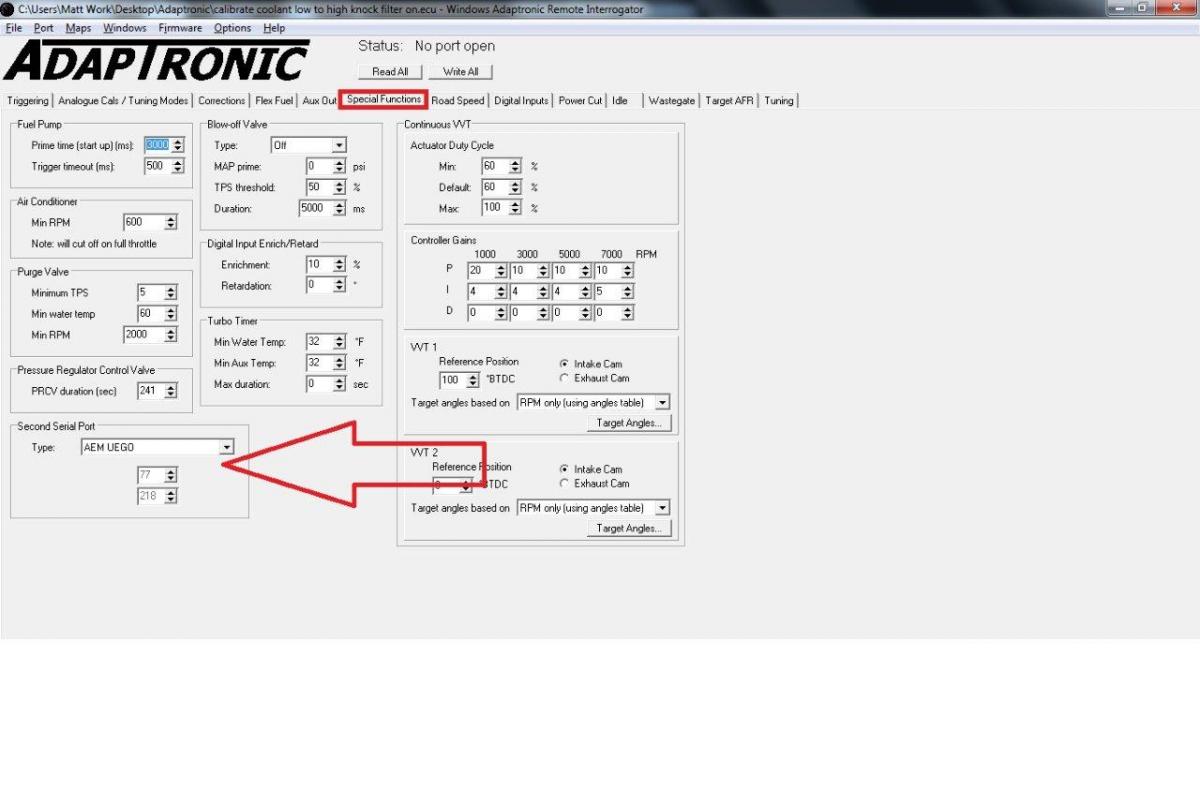
Then go to the Special Functions tab and under �Second Serial Port� also select your Wideband.
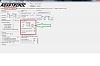
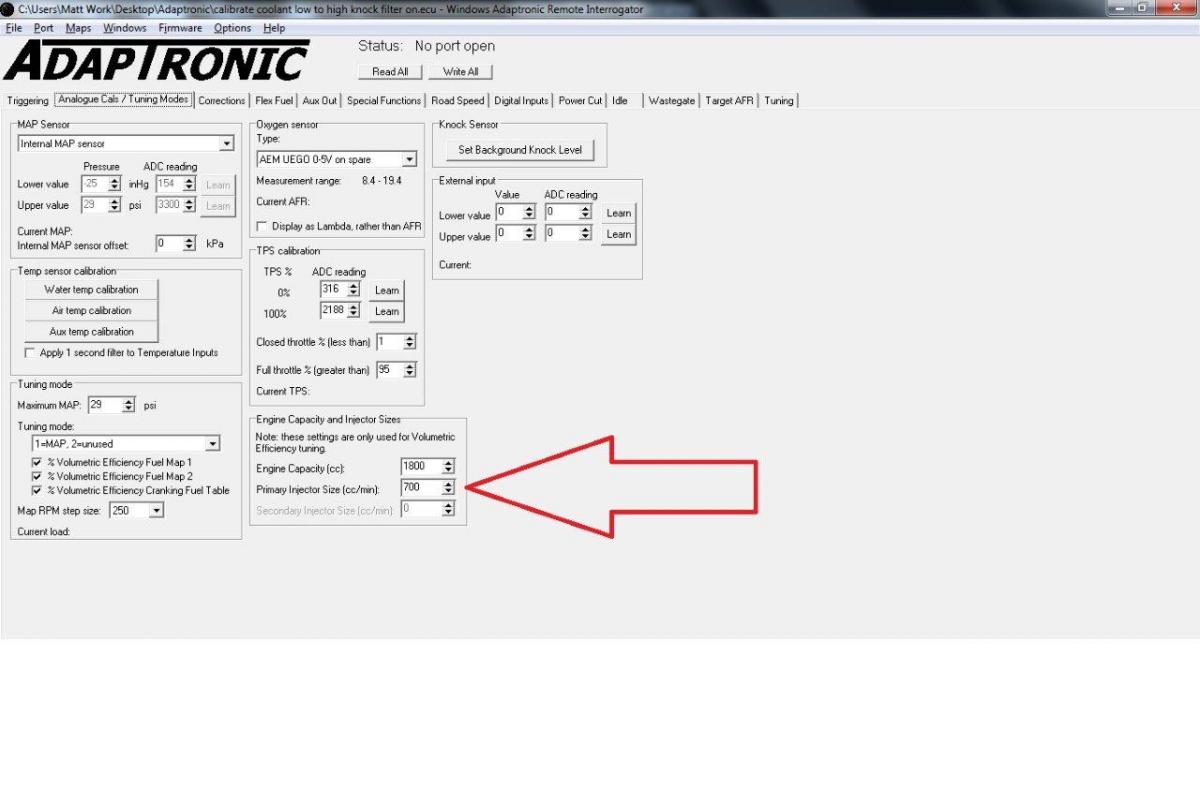
Now, let�s set up your injectors by entering your injector size in the box as seen below:
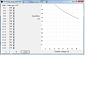
Now enter in your �Dead Time Corrections� in the Corrections Tab.

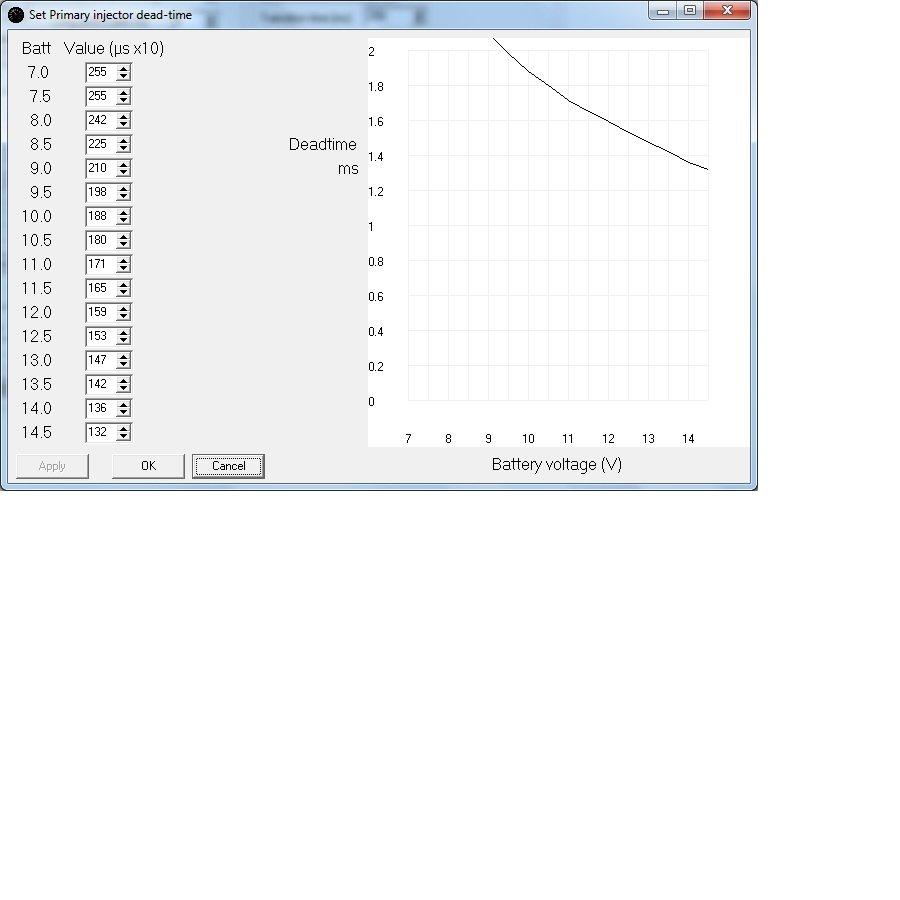
Select the �Set Primary� button and it will spawn a new window. Populate it with your injector�s data. This shot is for DW 600cc injectors.
Now it�s time to save your work onto the PC. Then connect your battery and grab your keys.
Turn your ignition on and kill all of your accessories, lights, fans, stereo, and all that.
With your gas pedal at full off, you can teach its position to the ECU. All you need to do is keep your foot off the gas, then press the �Learn� button on the TPS menu. This is for 0%. Then mash the gas to the floor and hold it there while pressing the learn button for 100%. Then excersize the pedal a few times to make sure 0% is off gas, 100% is all the way on. If it fluctuates more than 1%, I would re-teach it.
More to come tomorrow....
So I left off with the ECU ready for hanging under the dash and basically connecting the serial cable for the wideband and my EBC wire. First things first:
Disconnect your car battery just to prevent anything stupid from happening! It takes 3 min to pull the ground off; so just do it and save yourself the agony of kicking yourself if you goof up.
Right, battery is disconnected and you can get under the dash. I pulled my driver�s seat out just to make life easier and more comfortable.

First, I pulled out the existing adapter board from the previous install and then removed the e420c, adapter loom, serial cable from wideband, and put it all aside. With all of this done� the installation becomes universal for if you had an e420c or nothing at all.
For the sake of making life easier, I followed the OEM wire harness from the factory ECU and located where it was tied down. I removed the ties and fasteners and left as much room for movement as possible. I routed my harness to the opposite side of the steering shaft tube. Then I took the 440 Select and aimed it with the vacuum port aiming at the passenger side. Ran the loom from the 440 into the factory ECU and then brought the 440 to where it is resting with the label aiming at the floor. The vacuum port and USB ports are by my right knee and the Headphone jack on my left knee. Using wire ties, I secured the 440 around the steering tube and then from the mounting tabs to the little holes where my knee bolster was. After that, the factory wire harness went in and that�s it for wires. Of course the new serial connector goes into the Serial In hole, same side as the Vacuum line. I also tied in my vacuum line, secured it with a wire tie for peace of mind and then finally routed my USB cable.
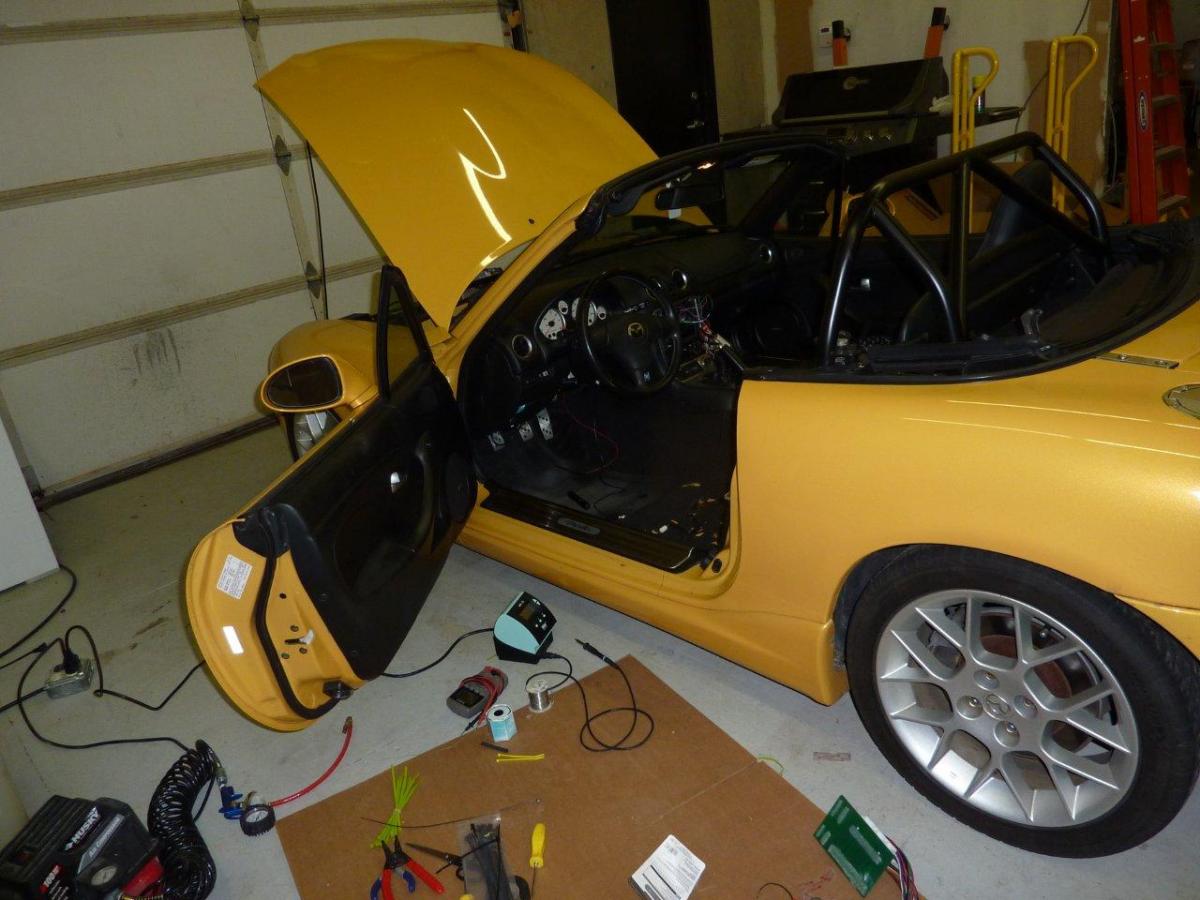
The USB cable from the box is a 6-foot cable and I routed it under my center console and have the connector coming out right next to the passenger seatbelt. I can keep my laptop on the passenger seat without an extension cord; but it�s a little tight. I�ve also picked up another 6 foot USB extension cable for later on.
Right, so it starts to get fun here and some really cool features of the 440 show up now. So without any battery connected, you can simply plug your USB cable into the PC and 440. Windows will try to install the drivers; but on all of my laptops� it failed to install automatically. Therefore you may have to do the driver install automatically.
1) Download, unzip, and install the latest Adaptronic files from http://adaptronic.com.au/downloads.html
2) Once the program is installed, plug in the ECU to your PC with the USB cable. Wait for windows to do its thing. If the drivers are installed with no problem; then just launch WARI for the Select.
3) If windows doesn�t find the drivers, when prompted� just direct windows to where it can find them.
4) When prompted by Windows, select �Browse my computer for driver software� option
5) Go to the path where you installed the Adaptronic files. The path in the window below is the default.
6) Accept the Windows testing warning and �Install Anyway�
7) Wait for it and you�re done in about 30 seconds.
Once the ECU has been installed� Launch WARI for Select
The ECU will come from Adaptronic with the base map for your car pre-installed and mostly pre-configured. There are some changes that I need to make for my installation; but the basics are all going to be about the same for everyone.
Once WARI is launched and your ECU is connected� within a few seconds, fast as hell compared to the e420c� the settings are brought in from the ECU and are on your PC. All of this is powered by the USB; so no risk of blowing something up since there is no power anywhere else.
Before you make any changes, Save a copy of the virgin map onto your PC. Just in case something goes bad you will need a backup. I would name it Original MAP or something you will not overwrite by accident.
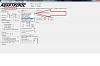
Next I am going to specify my wideband option. Under Analouge Cals / Tuning Modes choose your Wideband from the drop down menu.
Then go to the Special Functions tab and under �Second Serial Port� also select your Wideband.
Now, let�s set up your injectors by entering your injector size in the box as seen below:
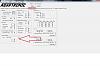
Now enter in your �Dead Time Corrections� in the Corrections Tab.
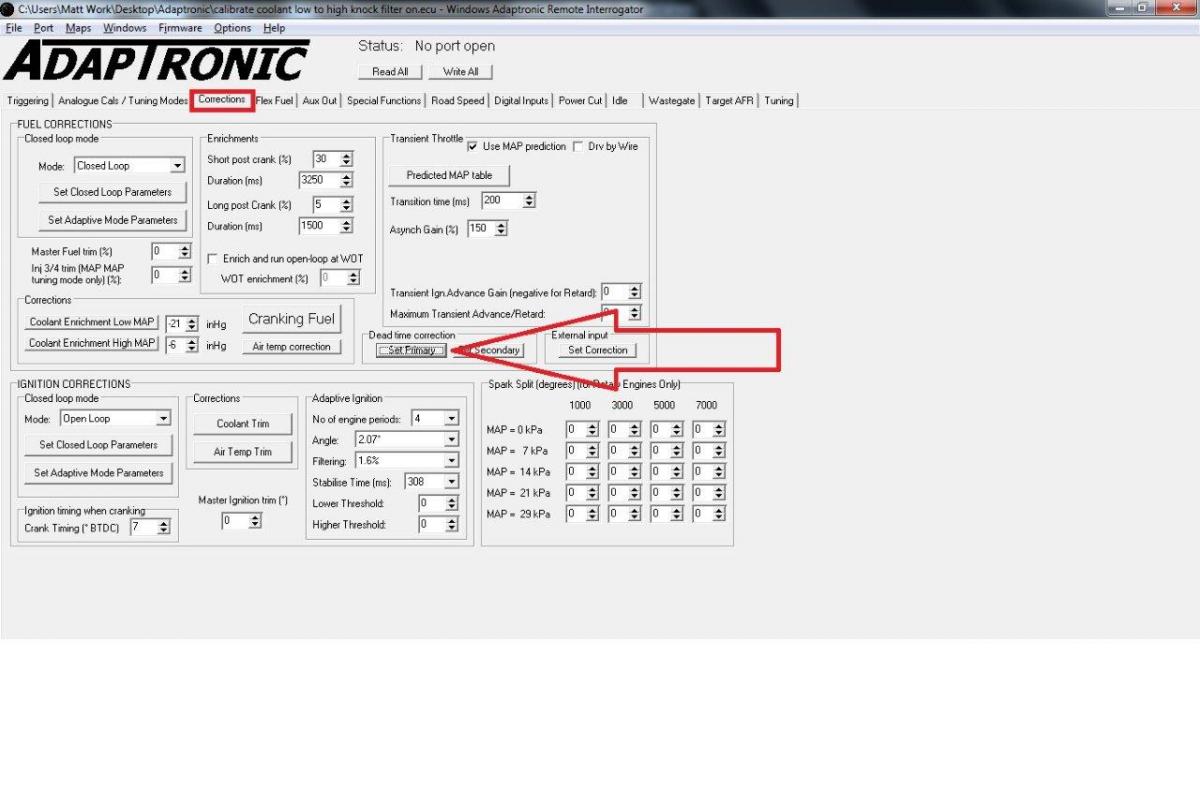
Select the �Set Primary� button and it will spawn a new window. Populate it with your injector�s data. This shot is for DW 600cc injectors.
Now it�s time to save your work onto the PC. Then connect your battery and grab your keys.
Turn your ignition on and kill all of your accessories, lights, fans, stereo, and all that.
With your gas pedal at full off, you can teach its position to the ECU. All you need to do is keep your foot off the gas, then press the �Learn� button on the TPS menu. This is for 0%. Then mash the gas to the floor and hold it there while pressing the learn button for 100%. Then excersize the pedal a few times to make sure 0% is off gas, 100% is all the way on. If it fluctuates more than 1%, I would re-teach it.

More to come tomorrow....
Reply
0
0


 03-25-2011, 09:16 PM
#11
Senior Member
Thread Starter
Join Date: Nov 2007
Location: somewhere in NoVA
Posts: 533
Total Cats: -1
The 440 doesn't connect the CEL at all; so there is technically no CEL. Actually I have pulled off my MAF but I assume that it should work. I will know more this weekend when I go and scan for codes.
Cheers,
Matt
Actually I have pulled off my MAF but I assume that it should work. I will know more this weekend when I go and scan for codes.Cheers,
Matt
Reply
0
0

Thread
Thread Starter
Forum
Replies
Last Post
StratoBlue1109
Miata parts for sale/trade
21
09-30-2018 01:09 PM
stoves
Suspension, Brakes, Drivetrain
5
04-21-2016 03:00 PM
JesseTheNoob
DIY Turbo Discussion
15
09-30-2015 02:44 PM


