second attempt at a FI setup, lets hope Warbird will see boost this time....
 12-17-2014, 04:25 PM
#1
I'm Miserable!
Thread Starter
iTrader: (3)

Join Date: Dec 2013
Location: Central Texas
Posts: 242
Total Cats: -1
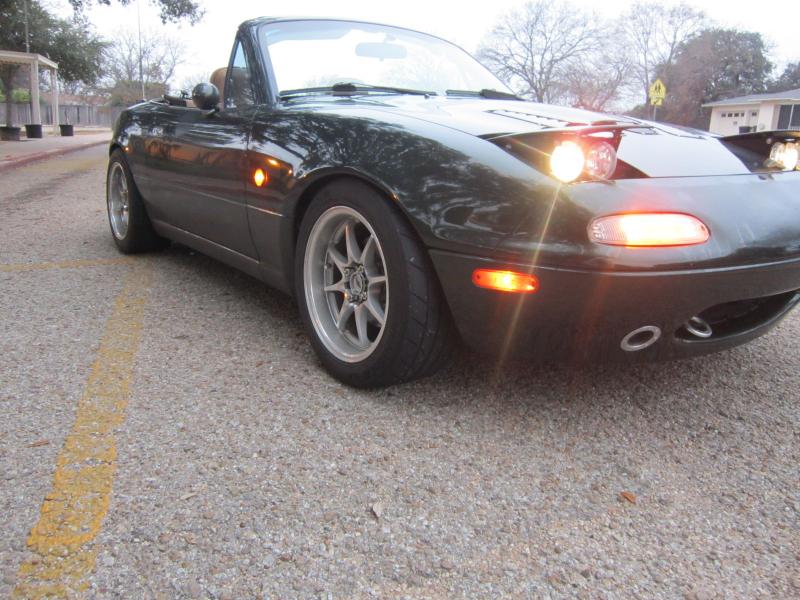
Hello Miata Turbo members! My name is Chad and have been on this forum for exactly one year today and hopefully finally on my way to having a un-naturally aspirated Miata!
I have had around 18 cars in 16 years of driving and pretty much every single one I wish I still had but in all honesty none has been as fun and had such a great group of fellow enthusiast as Miata's. I first bought a NB1 in January of 2013 and sold it this February of this year, I did a few things to it, here is the 3 page build thread:
[NB] Greasemonkey2000's 2000 Miata LS build thread - MX-5 Miata Forum
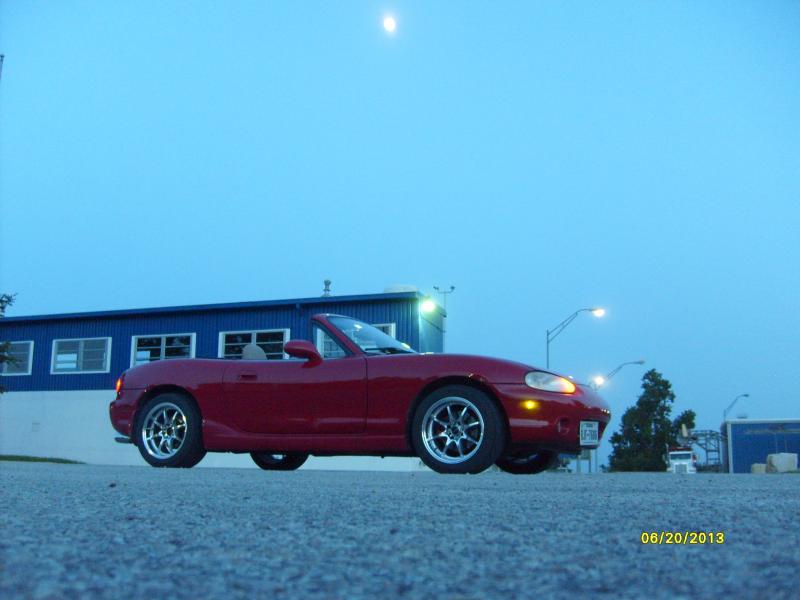
While still owning the NB1 I bought my '97 M, which I named Warbird, September 2013 and have done a fair amount, here is its build thread:
1997 M - Warbird Edition - ClubRoadster.net
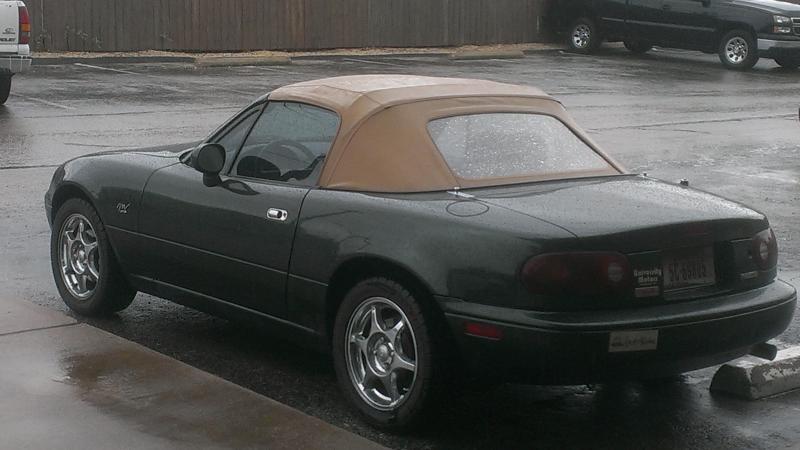
Here is a run down of what I have done so far and some pics to cover work so far on Warbird:
In stock form the day I picked it up:
Modifications done in the past 15 months of ownership....
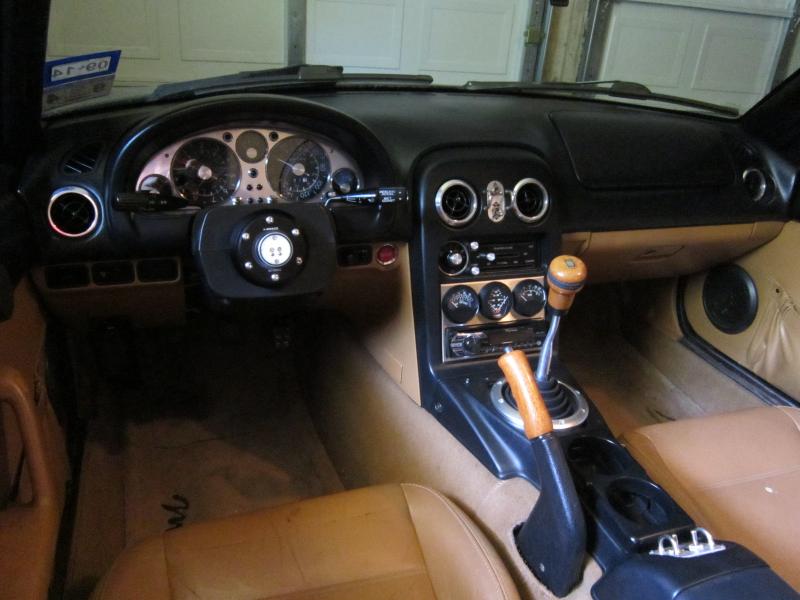
Interior:
-custom Revlimiter Warbird Edition gauges
-KG Works aluminum gauge surround
-Revlimiter brushed finish hazard switches
-Revlimiter brushed finish window switches
-Revlimiter Warbird HVAC panel
-Revlimiter vent rings
-Zeromotive a/c ring, button and *****
-DDM Works ss din w/ 3 gauge panel
-Westach dual air temp gauge
-Westach oil pressure gauge
-Westach water temp gauge
-custom "ripcord" release for trunk and fuel lid
-Pioneer head unit w/ Rockford Fosgate door and headrest speakers
-Cobalt foot well LED light kit
-Audi TT shift ring and boot(removed currently)
-Miata Roadster 5'' angled shift extender(need to replace, second one to slowly bend/deform??)
-OEM Nardi wood shift ****
-OEM wood brake handle
-360mm Nardi Classico steering wheel
-NRG short hub
-NRG 2.0 quick release
-S2000 push button start
-Flyin Miata clutch override
Exterior:
-Singular Motorsports hood louver kit
-aluminum brake duct inlets
-Ryoku Rob tow hooks
-Zoom carbon fiber mirrors
-KG works spoiler
-Cobalt low pros w/ Revlimiter quad high beam mod
-IL Motorsports side marker lights
-louvered passenger side headlight lid
-custom Revlimiter Warbird Edition center cap decals
-GarageStar license plate bracket
-Project G driver side vent window
-Runabout type II fuel lid
Suspension/chassis:
-Fat Cat Motorsports Elite 2040 coilovers 375/325 springs and 39mm stops set at 12.25"F/12.5"R
-949 Racing end links
-Racing Beat 1.125'' front tubular sway bar w/ blocks
-new OEM eccentric alignment bolts
-Flyin Miata frame rails w/ butterfly brace
-GarageStar fender braces
-949 Racing rear subframe brace
-Centric C-tek rotors
-Technafit ss braided brake lines
-Motul RBF600 brake fluid
-Singular Motorsports 2.5 brake ducts
-Butler Built 2.5'' brake ducting
-ARP extended wheel studs
-front wheel bearings cleaned and repacked w/ Lucas Red n Tacky
-15x8 Konig Flatouts w/ machined lip(12.4lbs each)
-225/45/15 Hankook Ventus RS-3's
-949 Racing forged aluminum lug nuts
Drivetrain:
-Miata Roadster short throw shifter and turret rebuild kit
-ss braided clutch line
-Exedy master and slave cylinder
Engine:
-Moroso aluminum expansion tank
...uh that's it for the motor so far.

I did buy a MP62 kit from cheeseitnation on here and sent it to Jon Bond Performance to get it ported only to find out it had two failing bearings so they did a full rebuild but unexpected house expenses dictated I sell it, so it never made it on Warbird but it is finally on someone's Miata getting enjoyed. I still have a fair amount of parts that need to be installed like GarageStar brushed aluminum latchless radiator panel and cowl panel, Aerocatch flush mount latches, Project G COP cover, Project G oil cap, Fab9 COP kit, MS Labs MS3 basic, AEM UEGO gauge, Westach boost gauge, Falcon voltage gauge, Westach oil temp gauge, Spec Stage 3 6 puck clutch w/ approx. 2k miles, Mazda Comp motor mounts and probably a few other things I can't recall currently.
That brings us today and why I am finally making a build thread on miataturbo.net. I still wanted to do forced induction and wish I hadn't had to sell the MP62 but no reason in looking back. I have been looking at different turbo kits/setups since I bought a Miata and none has captivated my attention like Abe's aka ARTech, so after probably 2-3 dozen emails over the past year I finally decided to commit to a setup from him and paid my deposit today for the following:
-T2 steel log ac/ps manifold
- 2.5" ss dp w/ v bands, x2 o2 bungs
- 2.5" ss dual exhaust w/ v bands
- ss oil feed & drain line
- -6an ss extended coolant lines
- 2.5'' vband test pipe
I also received two parts to contribute to the turbo setup....

A GT2560R w/ approx. 15k miles, ported wastegate and Kinugawa adj. wastegate actuator from fellow Texan and mt.net member ScottyP and a CNC machined coolant spacer from fellow mt.net member skou for the coolant reroute I just started collecting parts for.
I have only had one other FI vehicle and it was a '04 SRT-4 that I did basic bolt ons so I consider myself fairly ignorant of turbocharging , especially adding a setup to a N/A car and thus have a lot to learn.
I really am excited but know I have a long road ahead and as of know I established a "deadline" of the beginning of the summer to have the turbo setup and installed. Since this is my daily, down time has to be kept to an absolute minimum and to do so I know lots of planning, reading and parts gathering will have to take place. I look forward to everyone's help/information/advice/constructive criticism and comments on my turbo build and hopefully I learn enough to assist others in the future!
I have had around 18 cars in 16 years of driving and pretty much every single one I wish I still had but in all honesty none has been as fun and had such a great group of fellow enthusiast as Miata's. I first bought a NB1 in January of 2013 and sold it this February of this year, I did a few things to it, here is the 3 page
build thread:[NB] Greasemonkey2000's 2000 Miata LS build thread - MX-5 Miata Forum

While still owning the NB1 I bought my '97 M, which I named Warbird, September 2013 and have done a fair amount, here is its build thread:
1997 M - Warbird Edition - ClubRoadster.net
Here is a run down of what I have done so far and some pics to cover work so far on Warbird:
In stock form the day I picked it up:

Modifications done in the past 15 months of ownership....
Interior:
-custom Revlimiter Warbird Edition gauges
-KG Works aluminum gauge surround
-Revlimiter brushed finish hazard switches
-Revlimiter brushed finish window switches
-Revlimiter Warbird HVAC panel
-Revlimiter vent rings
-Zeromotive a/c ring, button and *****
-DDM Works ss din w/ 3 gauge panel
-Westach dual air temp gauge
-Westach oil pressure gauge
-Westach water temp gauge
-custom "ripcord" release for trunk and fuel lid
-Pioneer head unit w/ Rockford Fosgate door and headrest speakers
-Cobalt foot well LED light kit
-Audi TT shift ring and boot(removed currently)
-Miata Roadster 5'' angled shift extender(need to replace, second one to slowly bend/deform??)
-OEM Nardi wood shift ****
-OEM wood brake handle
-360mm Nardi Classico steering wheel
-NRG short hub
-NRG 2.0 quick release
-S2000 push button start
-Flyin Miata clutch override
Exterior:
-Singular Motorsports hood louver kit
-aluminum brake duct inlets
-Ryoku Rob tow hooks
-Zoom carbon fiber mirrors
-KG works spoiler
-Cobalt low pros w/ Revlimiter quad high beam mod
-IL Motorsports side marker lights
-louvered passenger side headlight lid
-custom Revlimiter Warbird Edition center cap decals
-GarageStar license plate bracket
-Project G driver side vent window
-Runabout type II fuel lid
Suspension/chassis:
-Fat Cat Motorsports Elite 2040 coilovers 375/325 springs and 39mm stops set at 12.25"F/12.5"R
-949 Racing end links
-Racing Beat 1.125'' front tubular sway bar w/ blocks
-new OEM eccentric alignment bolts
-Flyin Miata frame rails w/ butterfly brace
-GarageStar fender braces
-949 Racing rear subframe brace
-Centric C-tek rotors
-Technafit ss braided brake lines
-Motul RBF600 brake fluid
-Singular Motorsports 2.5 brake ducts
-Butler Built 2.5'' brake ducting
-ARP extended wheel studs
-front wheel bearings cleaned and repacked w/ Lucas Red n Tacky
-15x8 Konig Flatouts w/ machined lip(12.4lbs each)
-225/45/15 Hankook Ventus RS-3's
-949 Racing forged aluminum lug nuts
Drivetrain:
-Miata Roadster short throw shifter and turret rebuild kit
-ss braided clutch line
-Exedy master and slave cylinder
Engine:
-Moroso aluminum expansion tank
...uh that's it for the motor so far.


I did buy a MP62 kit from cheeseitnation on here and sent it to Jon Bond Performance to get it ported only to find out it had two failing bearings so they did a full rebuild but unexpected house expenses dictated I sell it, so it never made it on Warbird but it is finally on someone's Miata getting enjoyed. I still have a fair amount of parts that need to be installed like GarageStar brushed aluminum latchless radiator panel and cowl panel, Aerocatch flush mount latches, Project G COP cover, Project G oil cap, Fab9 COP kit, MS Labs MS3 basic, AEM UEGO gauge, Westach boost gauge, Falcon voltage gauge, Westach oil temp gauge, Spec Stage 3 6 puck clutch w/ approx. 2k miles, Mazda Comp motor mounts and probably a few other things I can't recall currently.
That brings us today and why I am finally making a build thread on miataturbo.net. I still wanted to do forced induction and wish I hadn't had to sell the MP62 but no reason in looking back. I have been looking at different turbo kits/setups since I bought a Miata and none has captivated my attention like Abe's aka ARTech, so after probably 2-3 dozen emails over the past year I finally decided to commit to a setup from him and paid my deposit today for the following:
-T2 steel log ac/ps manifold
- 2.5" ss dp w/ v bands, x2 o2 bungs
- 2.5" ss dual exhaust w/ v bands
- ss oil feed & drain line
- -6an ss extended coolant lines
- 2.5'' vband test pipe
I also received two parts to contribute to the turbo setup....

A GT2560R w/ approx. 15k miles, ported wastegate and Kinugawa adj. wastegate actuator from fellow Texan and mt.net member ScottyP and a CNC machined coolant spacer from fellow mt.net member skou for the coolant reroute I just started collecting parts for.
I have only had one other FI vehicle and it was a '04 SRT-4 that I did basic bolt ons so I consider myself fairly ignorant of turbocharging
, especially adding a setup to a N/A car and thus have a lot to learn. I really am excited but know I have a long road ahead and as of know I established a "deadline" of the beginning of the summer to have the turbo setup and installed. Since this is my daily, down time has to be kept to an absolute minimum and to do so I know lots of planning, reading and parts gathering will have to take place. I look forward to everyone's help/information/advice/constructive criticism and comments on my turbo build and hopefully I learn enough to assist others in the future!
Last edited by Greasemonkey2000; 12-17-2014 at 08:35 PM.

Reply
 0
0

0
12-20-2014, 03:11 PM
#2
I'm Miserable!
Thread Starter
iTrader: (3)
Join Date: Dec 2013
Location: Central Texas
Posts: 242
Total Cats: -1
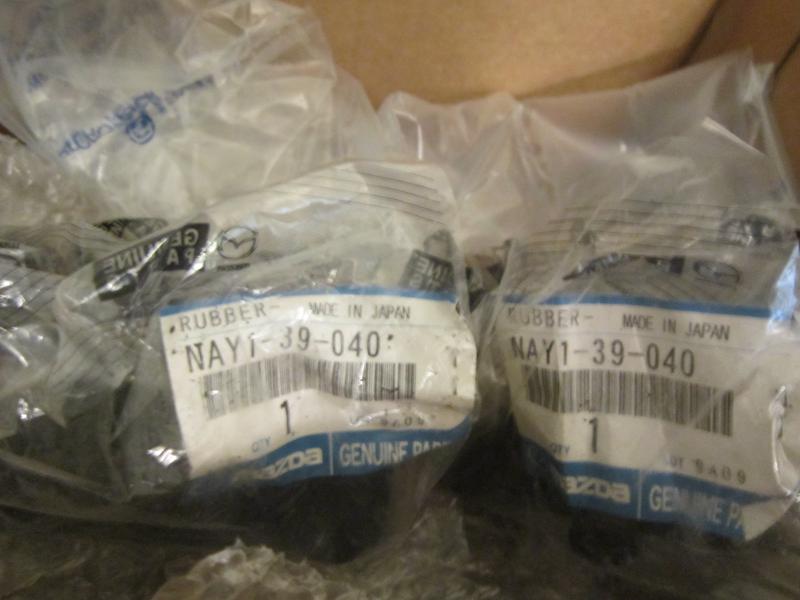
12-20-14: Just more parts hoarding for the turbo setup...Mazda Competition motor mounts that I bought from Flyineunos , thanks for another great deal Alfred!

Reply
0
0
 01-16-2015, 03:20 PM
#4
I'm Miserable!
Thread Starter
iTrader: (3)
Join Date: Dec 2013
Location: Central Texas
Posts: 242
Total Cats: -1
01-16-14: Well last weekend when I came home from work there was a pungent smell of coolant and as I walk towards the front of Warbird I could hear a ever so slight hissing sound...... I knew what this was more than likely so I popped the hood and took a flashlight and started looking around and just to the right of the upper hose was a very small crack from which there was coolant seeping out of.
The radiator had that "ticking time bomb green/brown" tint to it since I brought her home so it was no surprise other than that it took this long for it to die. After a few days of trying to source a SuperMiata crossflow and exploring my other options I decided to go with a CSF aluminum radiator, which just so happens to manufacture the SuperMiata unit, purchased thru Goodwin Racing. I also went ahead and ordered auxiliary coolant and heater hoses thru Rosenthal Mazda, t-bolt clamps thru Jegs for the radiator hoses and the Flyin Miata lower radiator silicone hose to replace the two lower hoses and the factory metal tube.
I had also been talking to Alex aka Speedworks and secured a Kia water neck that he modified for me with a -6 AN male fitting for one of the turbo coolant lines, originally this was meant to completely remove the need for the coolant spacer but since I wanted to retain the factory heater, have the factory temp senor, add a temp sensor and have the -6 AN fitting for the coolant line it would have been too many holes for the kia water neck so that's why I went ahead and got in on the buy for a cnc machined coolant spacer from skou aka Steve.
I think I will go ahead and do the coolant reroute with the radiator install using the popular GM hose upper hose, part #E71989 thru Advance Auto, since I have everything I need and have a temp gauge that has been installed for some time but now hooked up. I also have a Track Dog Racing oil filter relocation/cooler kit but I have decided to just facilitate the oil filter relocation portion for now so I can also go ahead and install the oil pressure gauge sensor to finally put the oil pressure gauge I have had installed for some time to use as well. I hate doing things twice so I have been waiting on other parts to complete the reroute, sensor(s) install and oil filter relocation.
Enough chit chat here are some pics of said parts I have received, I should also receive the FM silicone hose today but I ain't waiting on UPS.
CSF 42mm aluminum radiator
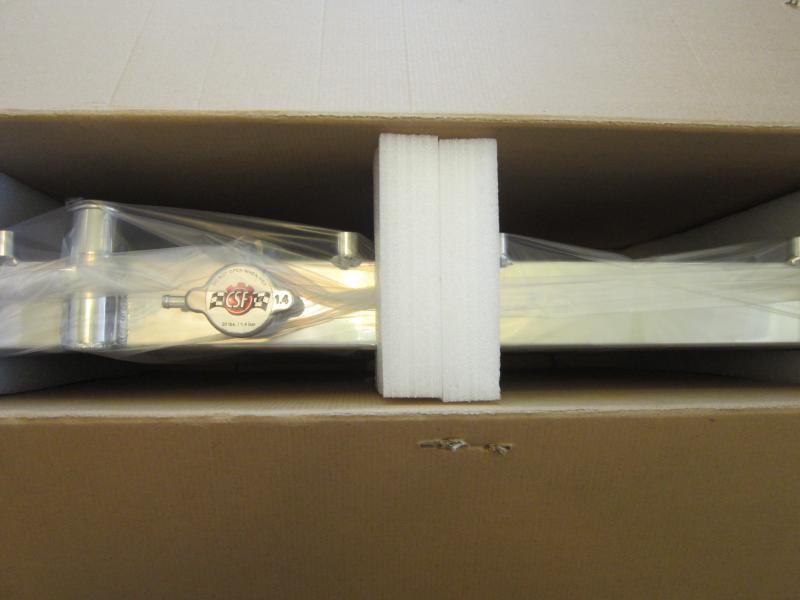
It was packaged well....
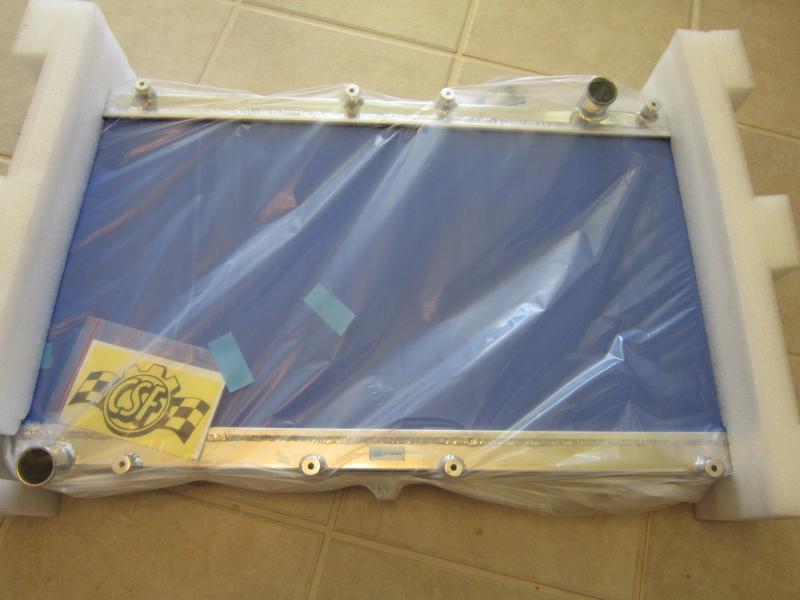
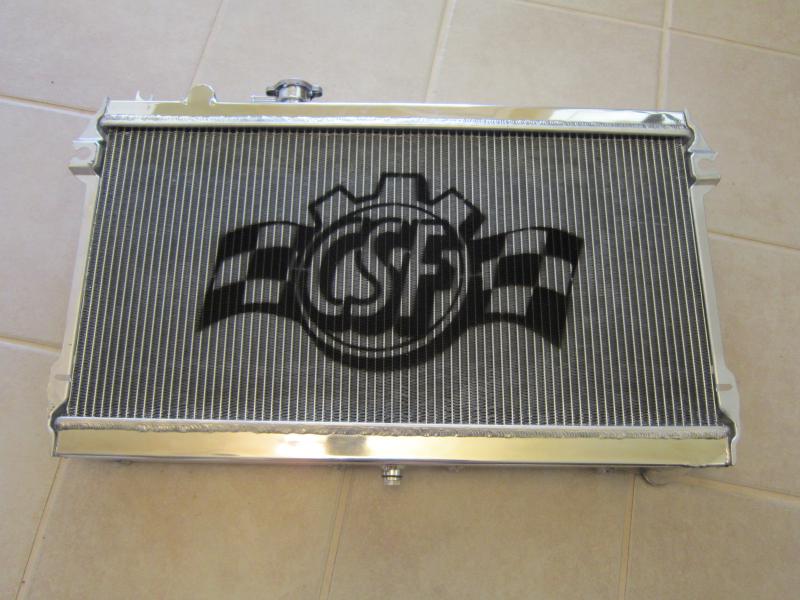
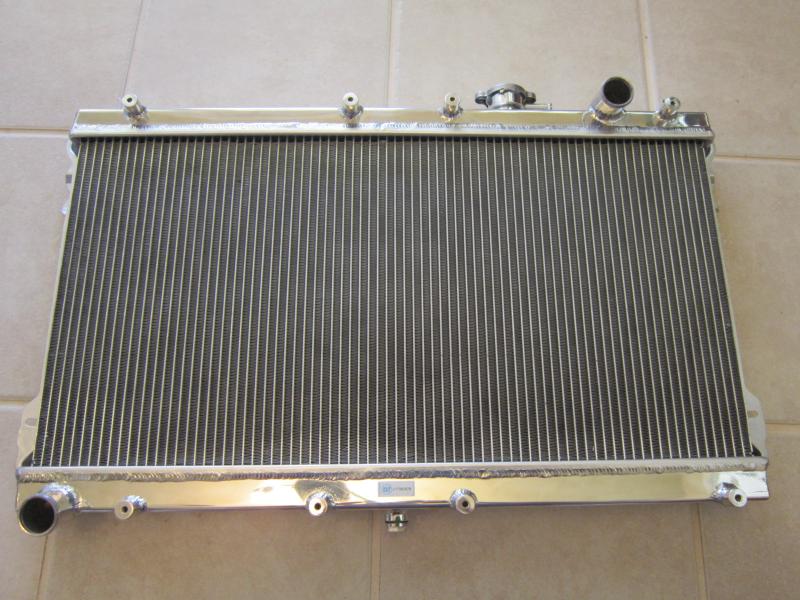
Construction seems of high quality and has a nice mirror finish on the end tanks.
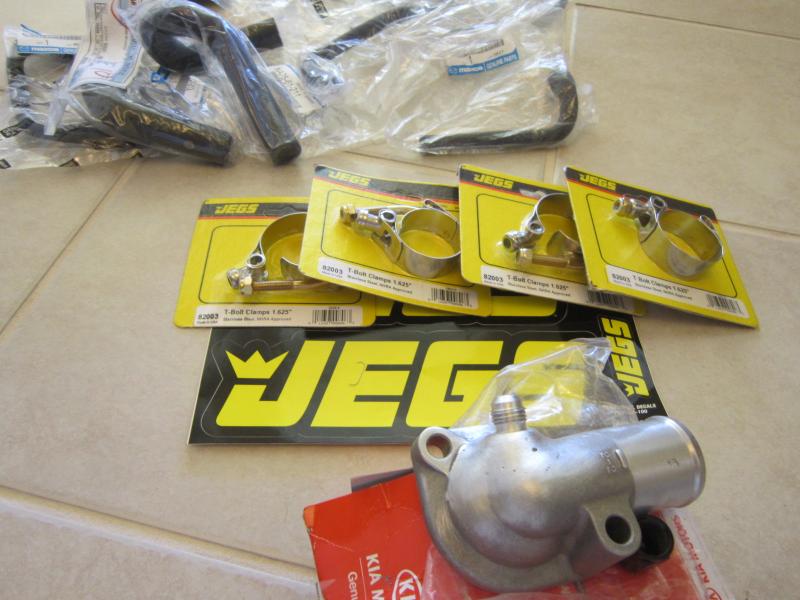
Auxiliary coolant & heater hoses, 1.620" t-bolt clamps and the modified KIA water neck w/ -6an male fitting from Alex aka Speedworks
I still need to pick up the upper radiator hose, a new thermostat, radiator fluid, Redline water wetter, oil(T5/T6? Shell) & filter and I bought the coolant block off plate for the front coolant neck and heater hose barb from BEGI which should be here tomorrow. I was hoping someone can confirm the larger capacity oil filter that can be used which I believe is from the Mazda 626, this correct?
I knew what this was more than likely so I popped the hood and took a flashlight and started looking around and just to the right of the upper hose was a very small crack from which there was coolant seeping out of. The radiator had that "ticking time bomb green/brown" tint to it since I brought her home so it was no surprise other than that it took this long for it to die. After a few days of trying to source a SuperMiata crossflow and exploring my other options I decided to go with a CSF aluminum radiator, which just so happens to manufacture the SuperMiata unit, purchased thru Goodwin Racing. I also went ahead and ordered auxiliary coolant and heater hoses thru Rosenthal Mazda, t-bolt clamps thru Jegs for the radiator hoses and the Flyin Miata lower radiator silicone hose to replace the two lower hoses and the factory metal tube.
I had also been talking to Alex aka Speedworks and secured a Kia water neck that he modified for me with a -6 AN male fitting for one of the turbo coolant lines, originally this was meant to completely remove the need for the coolant spacer but since I wanted to retain the factory heater, have the factory temp senor, add a temp sensor and have the -6 AN fitting for the coolant line it would have been too many holes for the kia water neck so that's why I went ahead and got in on the buy for a cnc machined coolant spacer from skou aka Steve.
I think I will go ahead and do the coolant reroute with the radiator install using the popular GM hose upper hose, part #E71989 thru Advance Auto, since I have everything I need and have a temp gauge that has been installed for some time but now hooked up. I also have a Track Dog Racing oil filter relocation/cooler kit but I have decided to just facilitate the oil filter relocation portion for now so I can also go ahead and install the oil pressure gauge sensor to finally put the oil pressure gauge I have had installed for some time to use as well. I hate doing things twice so I have been waiting on other parts to complete the reroute, sensor(s) install and oil filter relocation.
Enough chit chat here are some pics of said parts I have received, I should also receive the FM silicone hose today but I ain't waiting on UPS.
CSF 42mm aluminum radiator

It was packaged well....


Construction seems of high quality and has a nice mirror finish on the end tanks.
Auxiliary coolant & heater hoses, 1.620" t-bolt clamps and the modified KIA water neck w/ -6an male fitting from Alex aka Speedworks

I still need to pick up the upper radiator hose, a new thermostat, radiator fluid, Redline water wetter, oil(T5/T6? Shell) & filter and I bought the coolant block off plate for the front coolant neck and heater hose barb from BEGI which should be here tomorrow. I was hoping someone can confirm the larger capacity oil filter that can be used which I believe is from the Mazda 626, this correct?
Reply
0
0
 01-16-2015, 08:21 PM
#6
I'm Miserable!
Thread Starter
iTrader: (3)
Join Date: Dec 2013
Location: Central Texas
Posts: 242
Total Cats: -1
Thank you kindly Ben!
One last part for today from the UPS man with the FM lower radiator silicone hose...
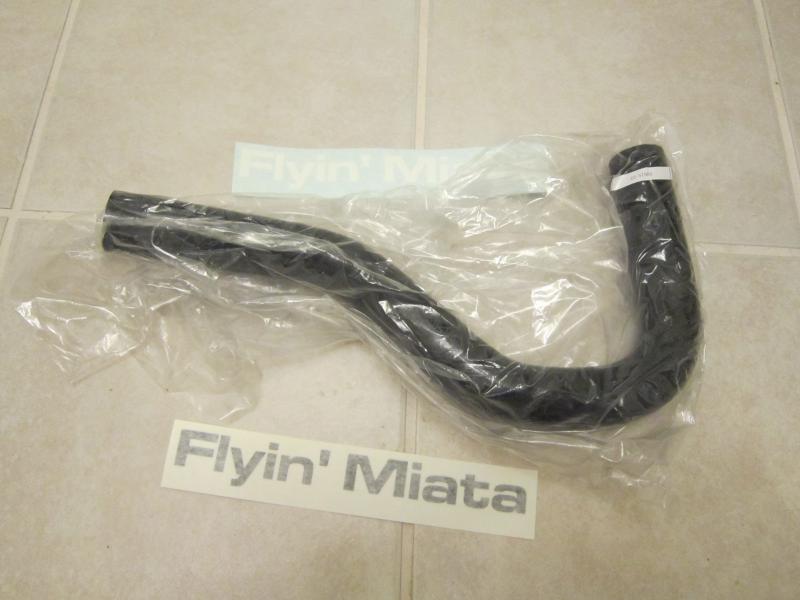
Also I was going to go ahead and pick up a 323 GTX pcv valve, so there wouldn't be any adverse affects if I installed it before I boost? I mean it just holds pressure better, right? So no harm, no foul....
One last part for today from the UPS man with the FM lower radiator silicone hose...

Also I was going to go ahead and pick up a 323 GTX pcv valve, so there wouldn't be any adverse affects if I installed it before I boost? I mean it just holds pressure better, right? So no harm, no foul....
Reply
0
0
01-17-2015, 08:18 PM
#7
I'm Miserable!
Thread Starter
iTrader: (3)
Join Date: Dec 2013
Location: Central Texas
Posts: 242
Total Cats: -1
01-17-15: Didn't get a lot done today but I got started.... 
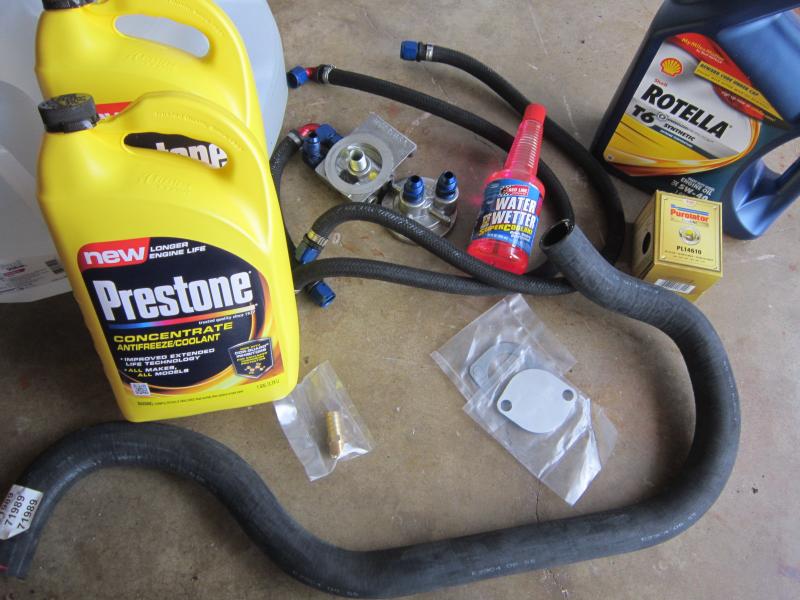
Still had to go pick up more parts/supplies, in the form of a GM Sierra/Yukon upper radiator hose, Redline water wetter, Prestone coolant concentrate, distilled water, Rotella T6 oil, Puralator Pureone filter for the 2.5L v6(KL?) and I received the front coolant neck block plate and hose barb from BEGI.
Also the Track Dog Racing oil filter relocation/cooler that I am just using the filter relocation as of now.
When I removed the intake tube I decided I would remove the resonator chamber of the intake crossover tube, here it is stock:

Here it is w/ the resonator removed and I just cut off part of the flat area of the resonator off and used plastic weld to "weld" the piece in place.
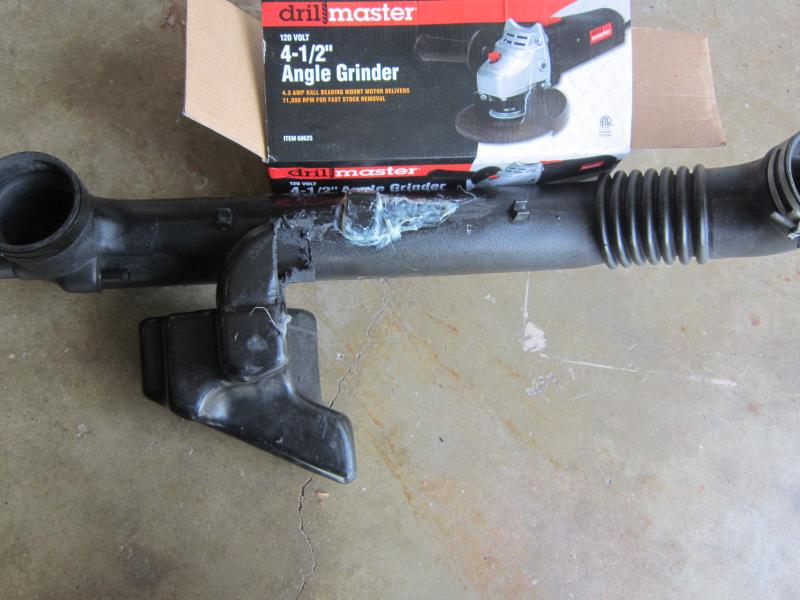
You can see where I cut off the piece to seal the hole.
I thought I bought black plastic weld but I guess I got off white so I just spray painted it.
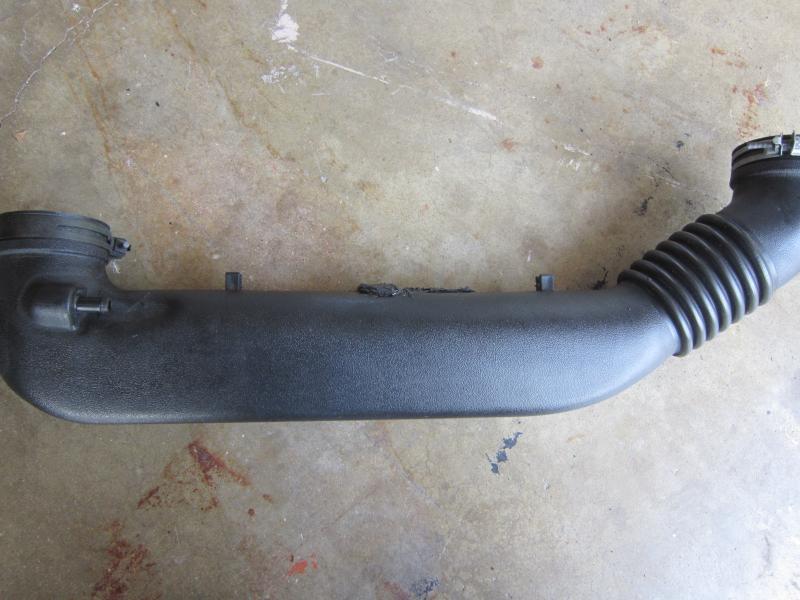
I don't know how much of a difference it will make I terms of sound but I would like a little growl under the hood till I have other noises to enjoy.
Here is the crack that provoked all this....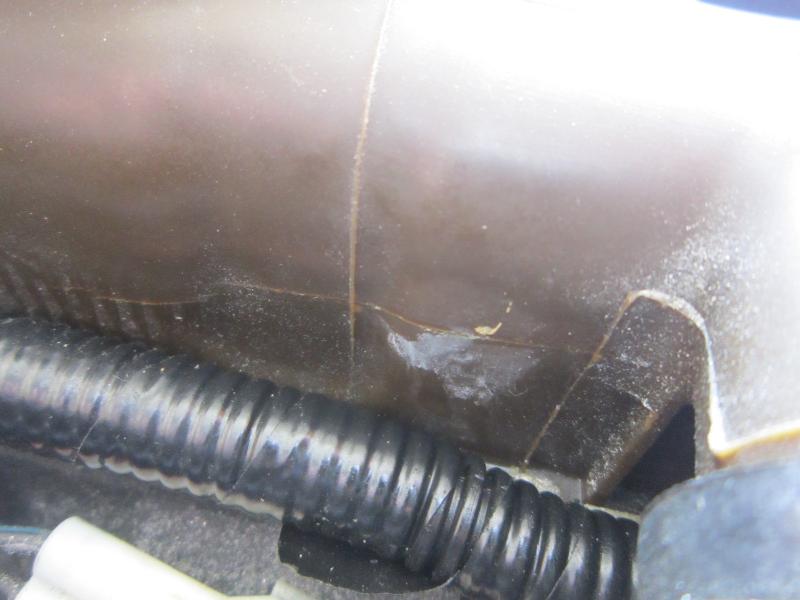
You can see the white residue where it just started to seep but there is a surface crack that I am sure would have split wide open if I had drove it anymore.
I figured I would remove the air box to make it easier to remove the lower radiator hose.
Only to see I had to remove the air box to get to these two 10mm bolts.

I went ahead and removed the cruise control since it hadn't worked since I bought it and not a real big fan of cruise control, though it is nice on long trips but oh well. I got the radiator removed, oil drained and hoses removed but that's about it before I fired up the grill to make dinner, so will get back at it tomorrow.
Still had to go pick up more parts/supplies, in the form of a GM Sierra/Yukon upper radiator hose, Redline water wetter, Prestone coolant concentrate, distilled water, Rotella T6 oil, Puralator Pureone filter for the 2.5L v6(KL?) and I received the front coolant neck block plate and hose barb from BEGI.
Also the Track Dog Racing oil filter relocation/cooler that I am just using the filter relocation as of now.

When I removed the intake tube I decided I would remove the resonator chamber of the intake crossover tube, here it is stock:

Here it is w/ the resonator removed and I just cut off part of the flat area of the resonator off and used plastic weld to "weld" the piece in place.

You can see where I cut off the piece to seal the hole.
I thought I bought black plastic weld but I guess I got off white so I just spray painted it.

I don't know how much of a difference it will make I terms of sound but I would like a little growl under the hood till I have other noises to enjoy.
Here is the crack that provoked all this....

You can see the white residue where it just started to seep but there is a surface crack that I am sure would have split wide open if I had drove it anymore.
I figured I would remove the air box to make it easier to remove the lower radiator hose.

Only to see I had to remove the air box to get to these two 10mm bolts.

I went ahead and removed the cruise control since it hadn't worked since I bought it and not a real big fan of cruise control, though it is nice on long trips but oh well. I got the radiator removed, oil drained and hoses removed but that's about it before I fired up the grill to make dinner, so will get back at it tomorrow.
Reply
0
0
01-18-2015, 10:02 PM
#8
I'm Miserable!
Thread Starter
iTrader: (3)
Join Date: Dec 2013
Location: Central Texas
Posts: 242
Total Cats: -1
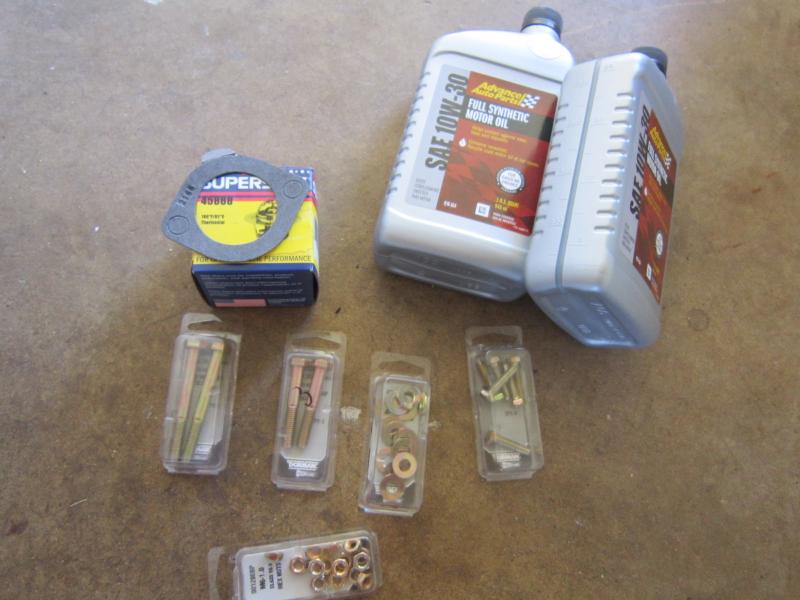
01-18-15: Had to pick up a few more parts today before getting started today, namely a SuperStant 180* thermostat (part #45868), thermostat gasket (part #2168), m8x1.25 50mm and 70mm bolts (for the kia water neck and coolant spacer), m6x1.0 35mm(?)(for mounting the remote oil filter), 1/4 washers and some Advance Auto 10w30 synthetic oil to "flush" the motor out.
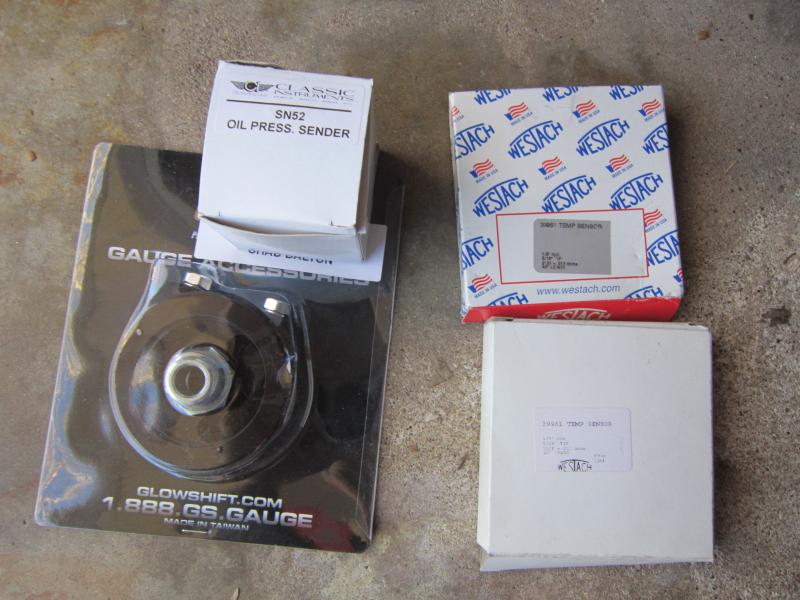
Here is the GlowShift oil sandwich plate, Westach oil pressure sender and Westach fluid temp sensor(s) I purchased some time ago, finally going to get installed.
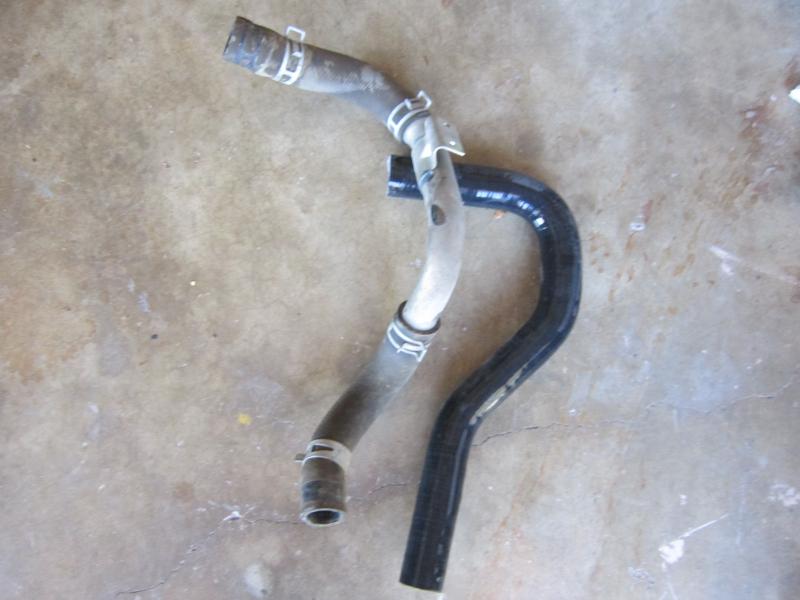
A comparison of the lousy OEM lower radiator hoses w/ metal connecting tube vs the much improved Flyin Miata silicone lower radiator hose.
It is my understanding that the BEGI coolant spacer comes w/ 80mm m8x1.25 bolts and that Adam aka Revlimiter found that they were too long and I believe he suggested using 60mm/75mm bolts but the parts store didn't have those so I got m8x1.25 50mm and 70mm bolts and as you can see the 50mm for the lower side of the kia water neck is a nice fit but the longer side could benefit from another 5mm in length.
I decided to do like many others and remove the manifold support bracket, here it is in the way.
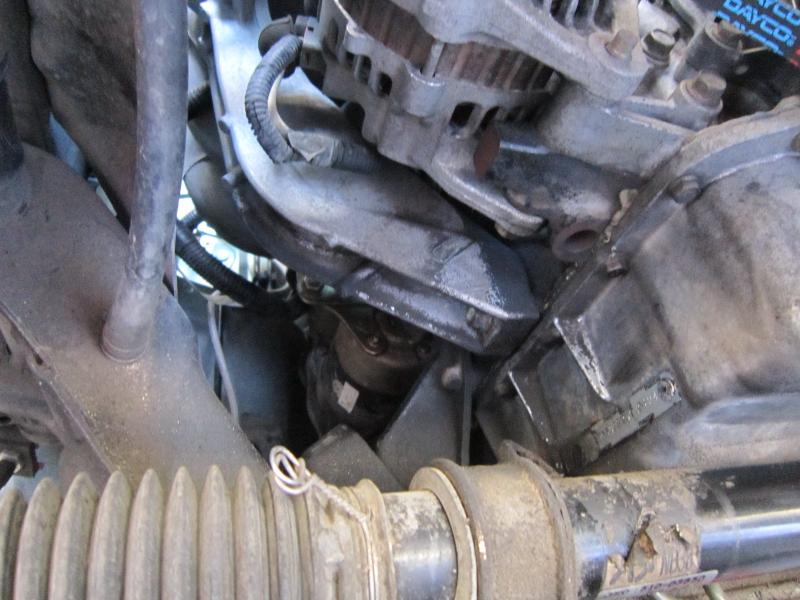
What do you know there is a oil filter behind it!!!

Here is the GlowShift oil sandwich plate, Westach oil pressure sender and Westach fluid temp sensor(s) I purchased some time ago, finally going to get installed.

A comparison of the lousy OEM lower radiator hoses w/ metal connecting tube vs the much improved Flyin Miata silicone lower radiator hose.

It is my understanding that the BEGI coolant spacer comes w/ 80mm m8x1.25 bolts and that Adam aka Revlimiter found that they were too long and I believe he suggested using 60mm/75mm bolts but the parts store didn't have those so I got m8x1.25 50mm and 70mm bolts and as you can see the 50mm for the lower side of the kia water neck is a nice fit but the longer side could benefit from another 5mm in length.

I decided to do like many others and remove the manifold support bracket, here it is in the way.

What do you know there is a oil filter behind it!!!

Reply
0
0
01-18-2015, 10:07 PM
#9
I'm Miserable!
Thread Starter
iTrader: (3)
Join Date: Dec 2013
Location: Central Texas
Posts: 242
Total Cats: -1
01-18-15 cont'd: Got the BEGI front coolant block off plate and auxiliary hoses installed...
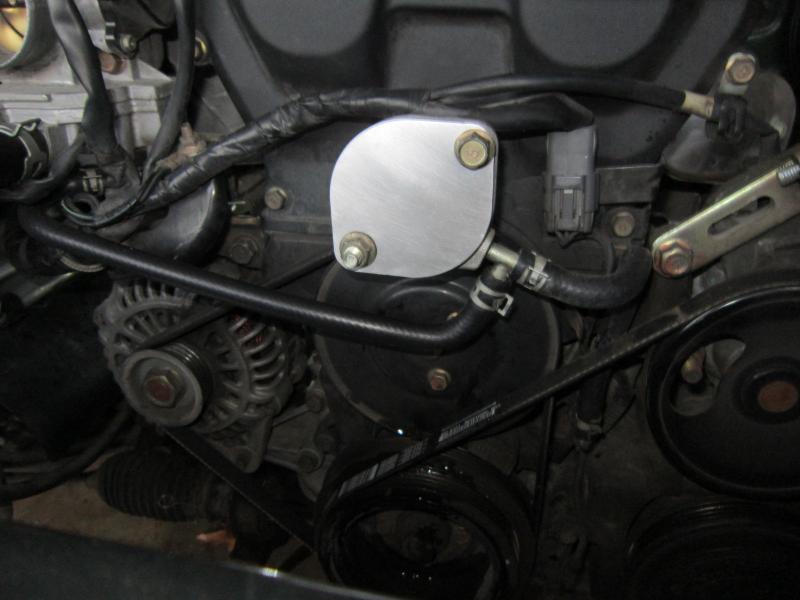
...and then the Flyin Miata silicone lower radiator hose w/ Jegs t-bolt clamp...
...and the CSF 42mm radiator installed.....

...and here is the stock radiator(12mm IIRC) for comparison in thickness and clearance...
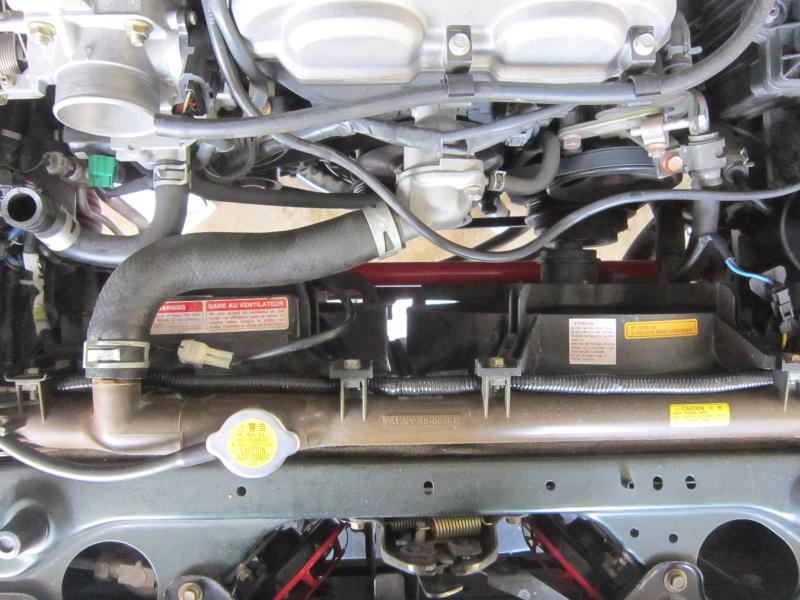
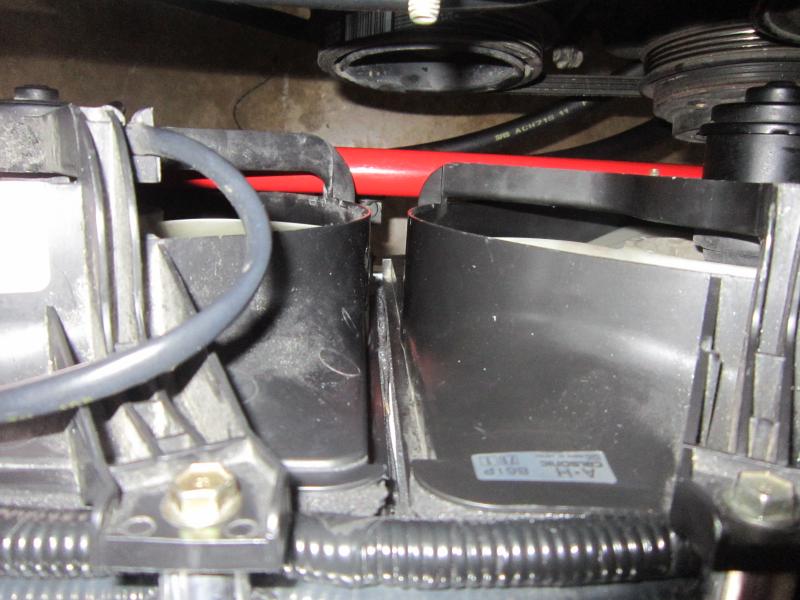
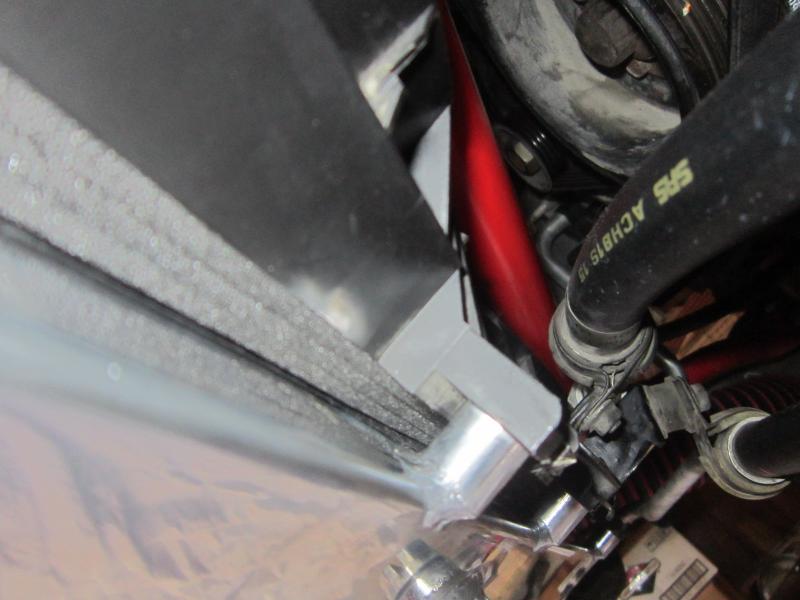
....here is a pic of driver side lower radiator/fan to sway bar clearance....
....here is a pic of passenger side lower radiator/fan to sway bar clearance....

....as you can see there is just a "hair" of clearance with a 42mm radiator.
..and here is the Glowshift oil sandwich plate w/ Westach oil pressure sender and Westach temp sensor(for oil) installed and the TDR oil filter relocation adapter installed....
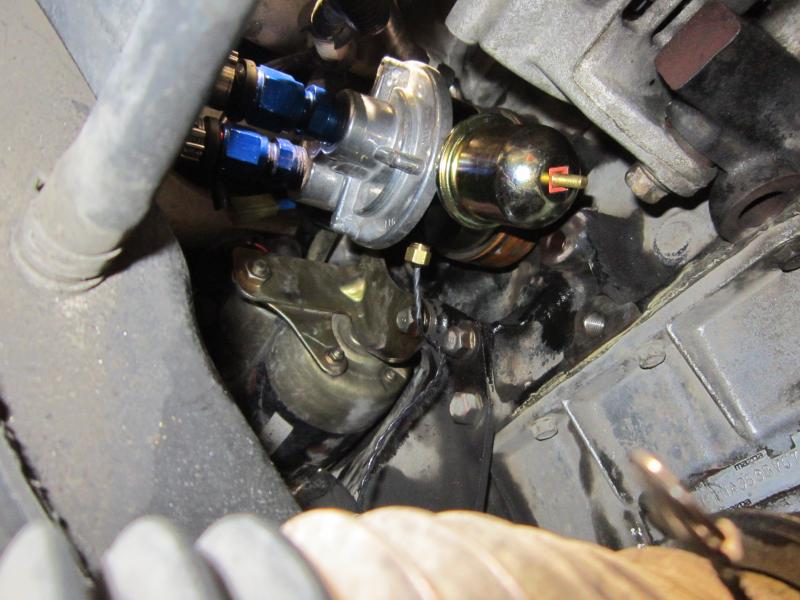
....also you can see that the intake manifold brace wouldn't work with the oil sender and such anyways....
...this is where I believe I am going to mount the remote oil filter unless it needs to be no higher than the motor in which case I can mount it where the washer fluid bottle is....
So would that mounting location suffice or does it need to be lower? If lower then would just a few inches lower to where the washer fluid bottle be good?

...and then the Flyin Miata silicone lower radiator hose w/ Jegs t-bolt clamp...

...and the CSF 42mm radiator installed.....

...and here is the stock radiator(12mm IIRC) for comparison in thickness and clearance...

....here is a pic of driver side lower radiator/fan to sway bar clearance....

....here is a pic of passenger side lower radiator/fan to sway bar clearance....

....as you can see there is just a "hair" of clearance with a 42mm radiator.
..and here is the Glowshift oil sandwich plate w/ Westach oil pressure sender and Westach temp sensor(for oil) installed and the TDR oil filter relocation adapter installed....

....also you can see that the intake manifold brace wouldn't work with the oil sender and such anyways....
...this is where I believe I am going to mount the remote oil filter unless it needs to be no higher than the motor in which case I can mount it where the washer fluid bottle is....

So would that mounting location suffice or does it need to be lower? If lower then would just a few inches lower to where the washer fluid bottle be good?
Last edited by Greasemonkey2000; 01-19-2015 at 12:42 AM.
Reply
0
0
01-19-2015, 12:50 PM
#10
Elite Member
iTrader: (15)

Join Date: Jan 2007
Location: Murfreesboro,TN
Posts: 2,042
Total Cats: 265
I have had mine mounted in that same location for years without any problems. The only reason I removed it was when I removed the remote filter to install an oil cooler (reduction of potential failure points).
Reply
0
0
01-26-2015, 11:00 PM
#11
I'm Miserable!
Thread Starter
iTrader: (3)
Join Date: Dec 2013
Location: Central Texas
Posts: 242
Total Cats: -1
Thanks Midtenn, this is what my "research" turned out as well!
01-26-15: I will be perfectly honest....I am taking WAY too long to get this done, it has now been 16 days since I have driven her and it feels like a lot longer but made a little progress today.
Part of the issue is I keep adding task to the list and not having all the need parts to start with so....lesson here is be well prepared which NORMALLY I am.
Removed the valve cover since I decided to go ahead and install the shaved valve cover, Fab9 COP's, Project G COP cover and Project G oil cap and everything under there looked good.
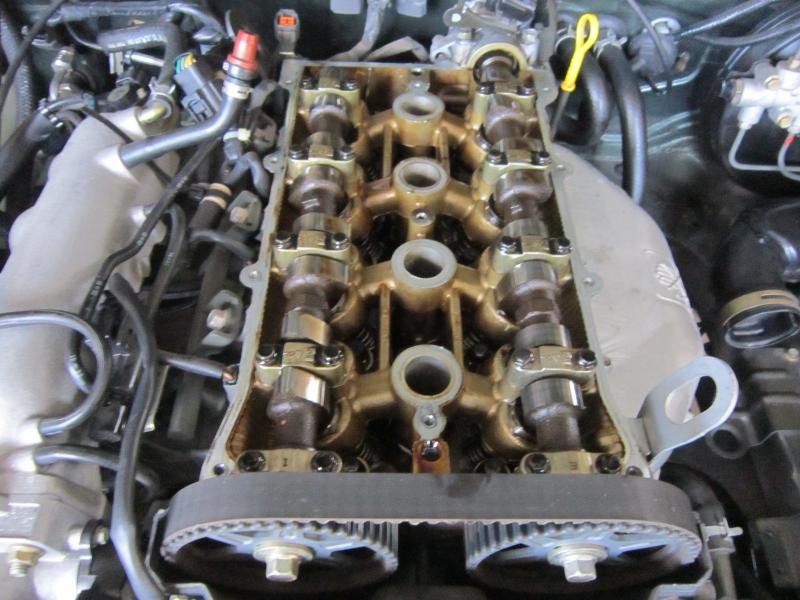
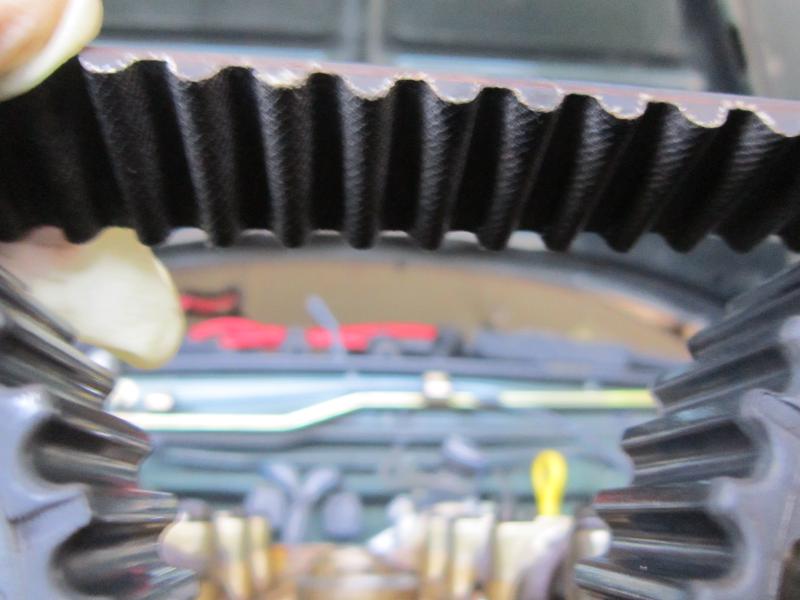
And the timing belt, that according to records, was replaced at 76k miles and looks to be in good shape at 102k miles.
The spare valve cover has been sitting for a while and since I shaved it, I knew metal shavings would have gone everywhere so I figure removing the baffles and cleaning everything thoroughly would be wise. Here is it prior to cleaning:
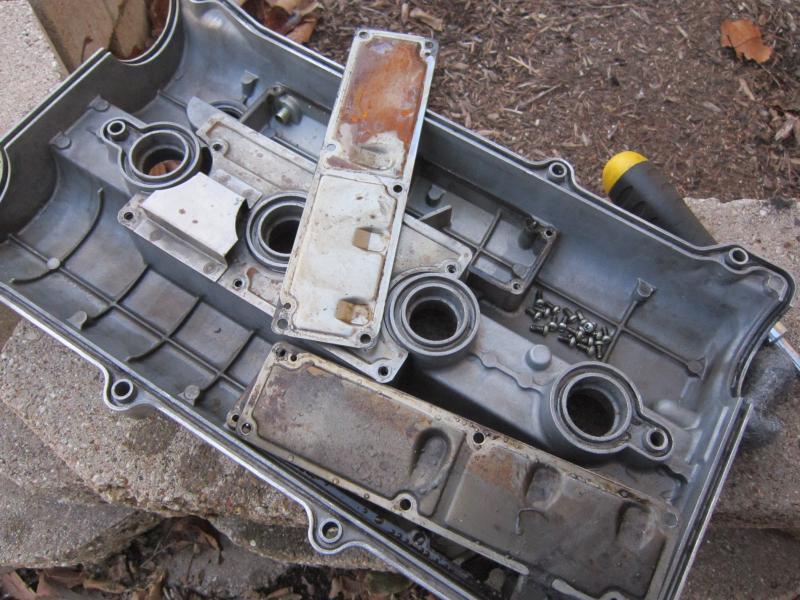
As you can see there is some surface rust that might as well go...
Here are the baffles all cleaned up.....
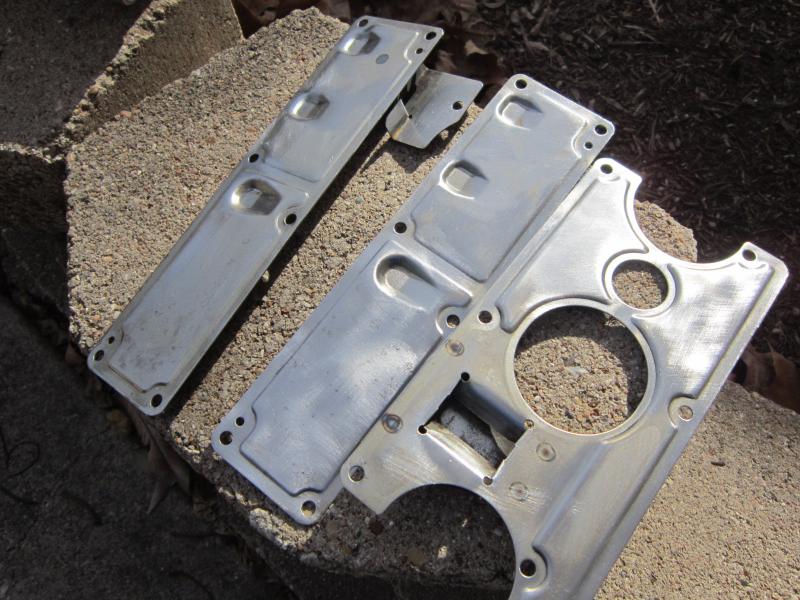
.....and the valve cover...

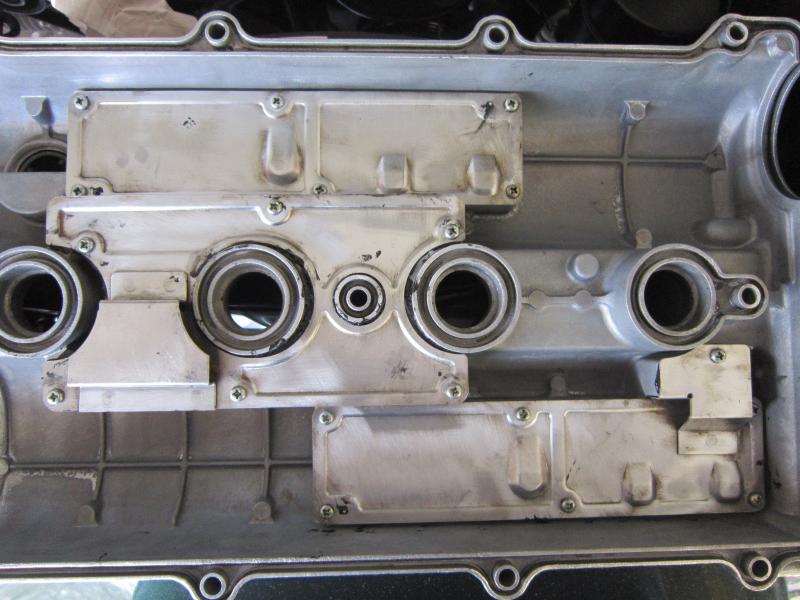
After putting silicone on all the mating surfaces of the baffles, I reinstalled all the baffles.
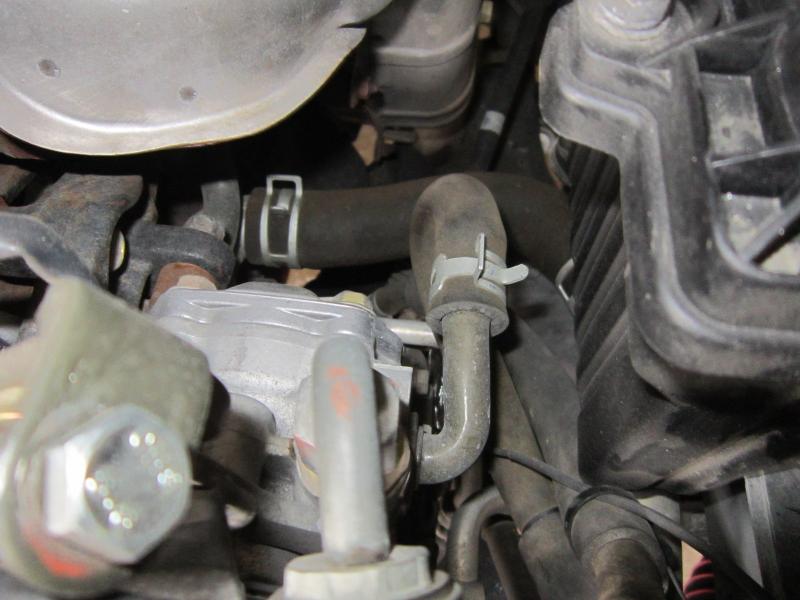
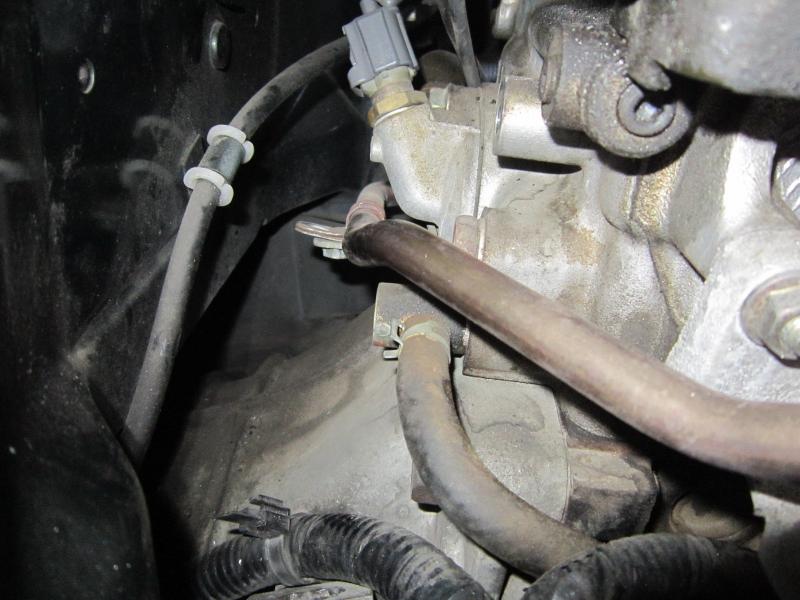
Next I started removing everything that was in the way of installing the rear coolant spacer, only to realize the factory egr tube wasn't going to work with the reroute.
Here is my solution....
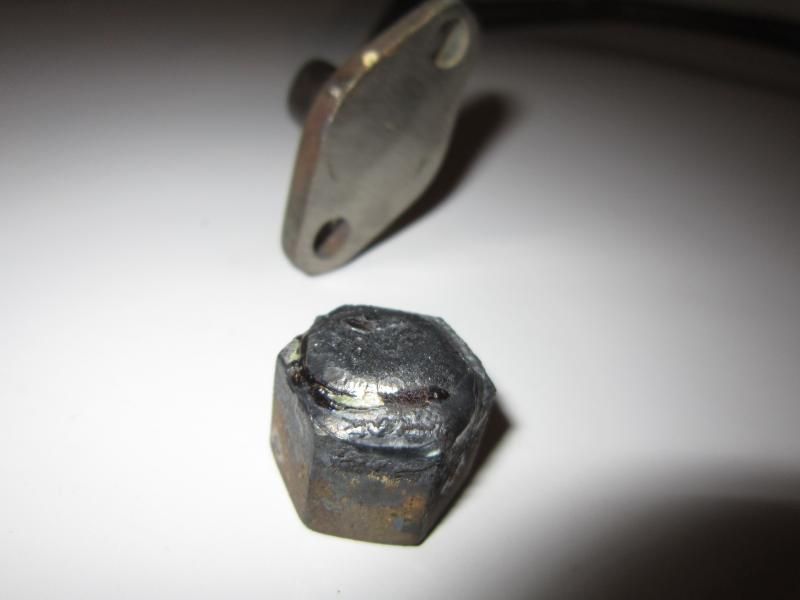
....just welded the flange and nut or rather my cousin did, thanks cuz! Here is a solution to retain the egr tube:
https://www.miataturbo.net/diy-turbo...onflict-59397/
Well that's all folks! At least for tonight...
01-26-15: I will be perfectly honest....I am taking WAY too long to get this done, it has now been 16 days since I have driven her and it feels like a lot longer but made a little progress today.
Part of the issue is I keep adding task to the list and not having all the need parts to start with so....lesson here is be well prepared which NORMALLY I am.
Removed the valve cover since I decided to go ahead and install the shaved valve cover, Fab9 COP's, Project G COP cover and Project G oil cap and everything under there looked good.

And the timing belt, that according to records, was replaced at 76k miles and looks to be in good shape at 102k miles.

The spare valve cover has been sitting for a while and since I shaved it, I knew metal shavings would have gone everywhere so I figure removing the baffles and cleaning everything thoroughly would be wise. Here is it prior to cleaning:

As you can see there is some surface rust that might as well go...
Here are the baffles all cleaned up.....

.....and the valve cover...

After putting silicone on all the mating surfaces of the baffles, I reinstalled all the baffles.

Next I started removing everything that was in the way of installing the rear coolant spacer, only to realize the factory egr tube wasn't going to work with the reroute.

Here is my solution....

....just welded the flange and nut or rather my cousin did, thanks cuz! Here is a solution to retain the egr tube:
https://www.miataturbo.net/diy-turbo...onflict-59397/
Well that's all folks! At least for tonight...
Last edited by Greasemonkey2000; 01-28-2015 at 05:47 PM.
Reply
0
0
 01-30-2015, 11:43 PM
#13
I'm Miserable!
Thread Starter
iTrader: (3)
Join Date: Dec 2013
Location: Central Texas
Posts: 242
Total Cats: -1
Thanks for dropping in Yazen! The parts for this reroute are tried and true selection.
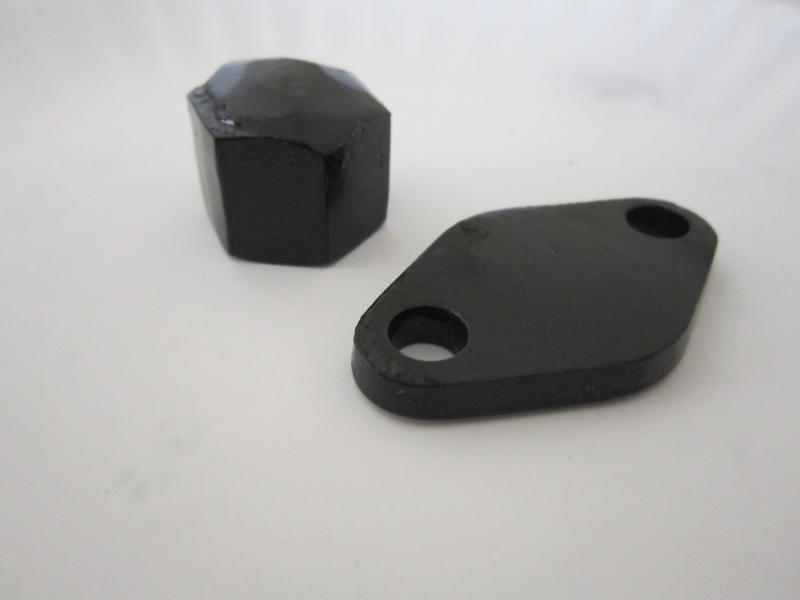
Just some pics for the most part, haven't really made any "head way". Here is the egr flange and nut that my cousin welded shut for me, that is grinded down...
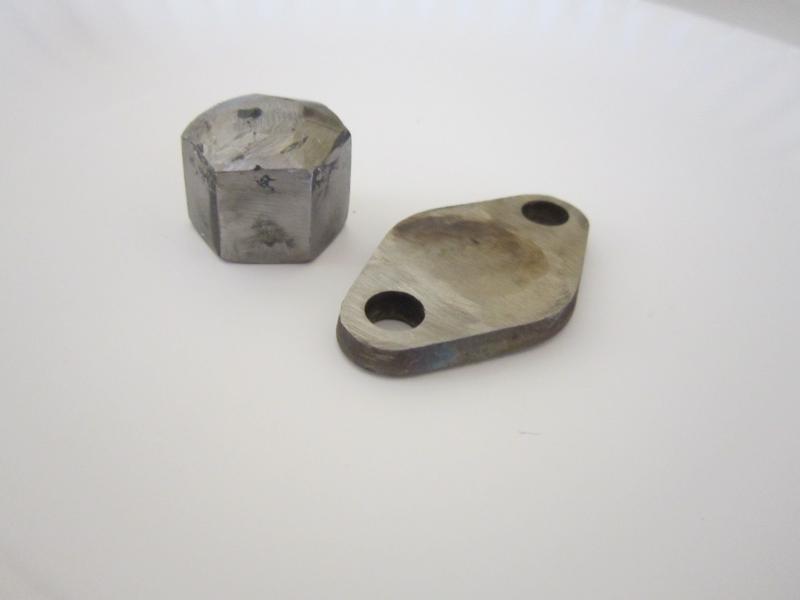
..and then painted w/ high temp paint and clearcoat.
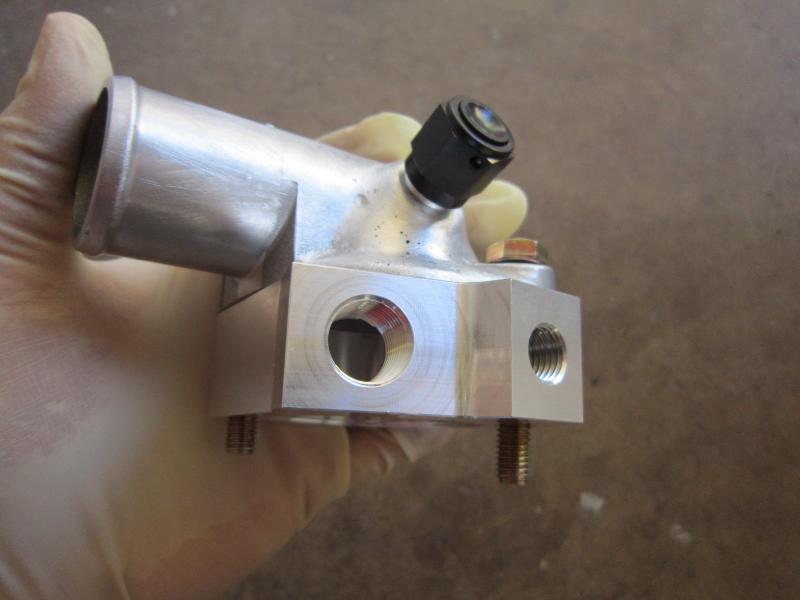
Here is the cnc machined coolant spacer from Steve aka skou here on miataturbo w/ factory temp sensor, Westach temp sensor and 3/8''x5/8'' hose barb.
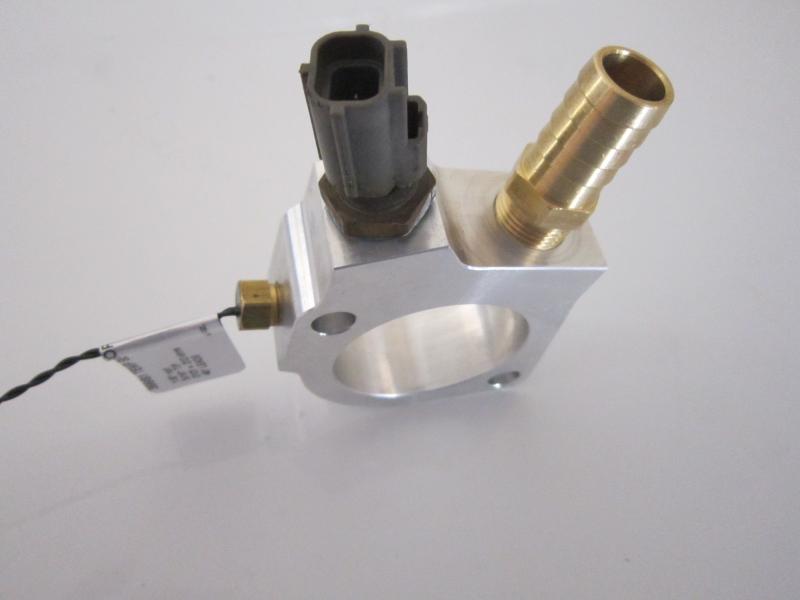
The factory rear housing that you see pictured in my prior post has a bolt and a stud/nut that hold it on so you have to remove the stud to install the spacer/kia water neck so I used the nut from the stud and a shouldered but used for the factory air box to remove the stud, just a tip for people like me that need helpful tips.
Of course MORE PARTS!!
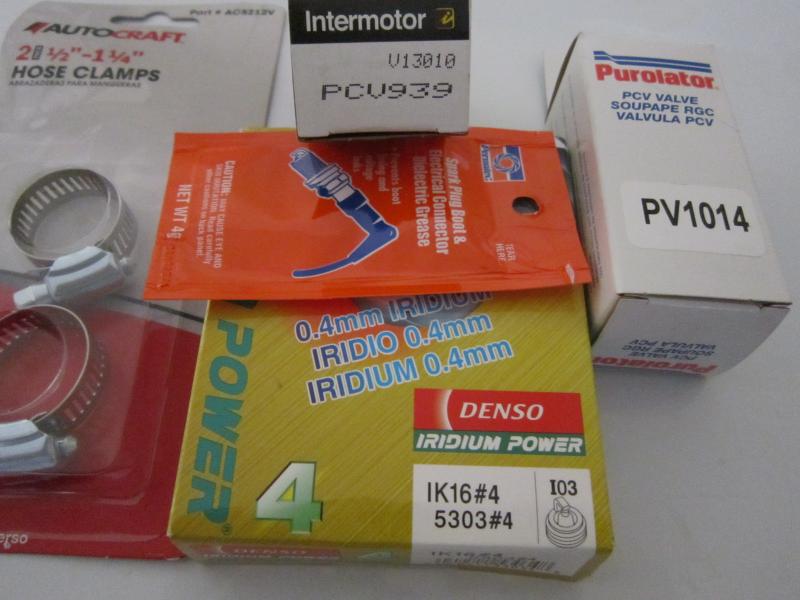
Denso iridium plugs #IK16 for the Fab9 COP's, Purolator pcv #1014 for a Mazda 323 GTX to help prevent blowby once above atmospheric pressure is present, BWD pcv grommet #PCV939, hose clamps for heater hose and dielectric for plugs/cops.
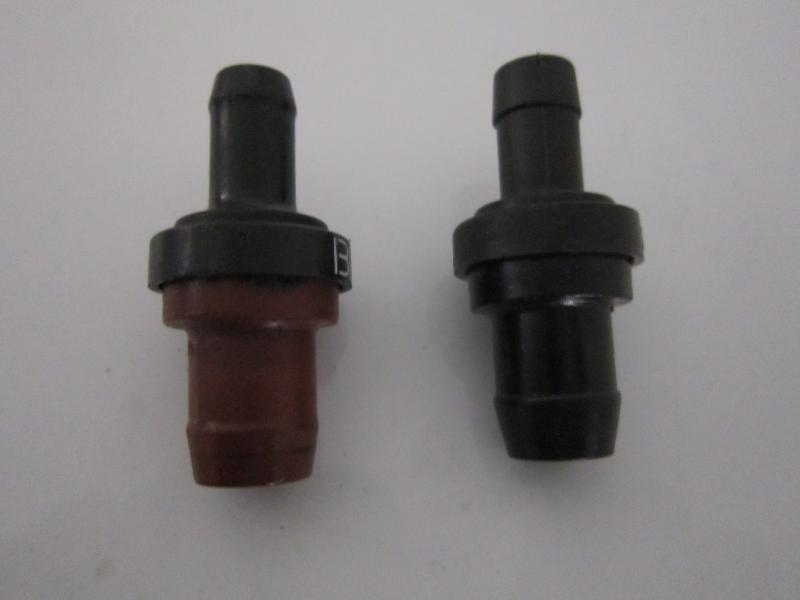
A side by side comparison of the stock pcv valve and the pcv for a mazda 323 GTX, not a huge difference but one can be seen in the main body.
Just some pics for the most part, haven't really made any "head way". Here is the egr flange and nut that my cousin welded shut for me, that is grinded down...

..and then painted w/ high temp paint and clearcoat.

Here is the cnc machined coolant spacer from Steve aka skou here on miataturbo w/ factory temp sensor, Westach temp sensor and 3/8''x5/8'' hose barb.

The factory rear housing that you see pictured in my prior post has a bolt and a stud/nut that hold it on so you have to remove the stud to install the spacer/kia water neck so I used the nut from the stud and a shouldered but used for the factory air box to remove the stud, just a tip for people like me that need helpful tips.

Of course MORE PARTS!!

Denso iridium plugs #IK16 for the Fab9 COP's, Purolator pcv #1014 for a Mazda 323 GTX to help prevent blowby once above atmospheric pressure is present, BWD pcv grommet #PCV939, hose clamps for heater hose and dielectric for plugs/cops.
A side by side comparison of the stock pcv valve and the pcv for a mazda 323 GTX, not a huge difference but one can be seen in the main body.

Last edited by Greasemonkey2000; 01-31-2015 at 12:02 AM.
Reply
0
0
01-30-2015, 11:57 PM
#14
I'm Miserable!
Thread Starter
iTrader: (3)
Join Date: Dec 2013
Location: Central Texas
Posts: 242
Total Cats: -1
oem NGK R plugs(@102k miles), probably the ones installed on the assembly line in the factory from the land of the rising sun.
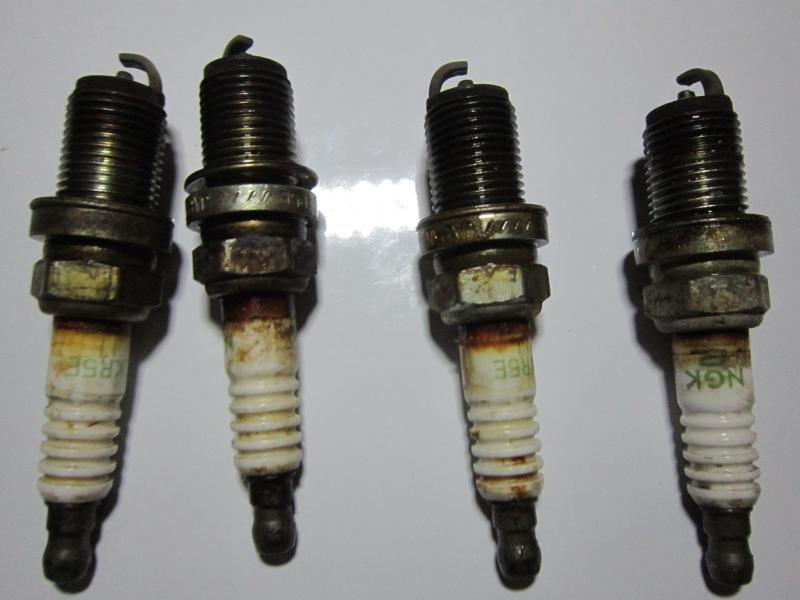
(1-4 from left to right)
I kind of freaked out because the plug from the #4 cylinder had water staining on the top and water on the threads so I automatically thought worse case scenario of a failing head gasket...
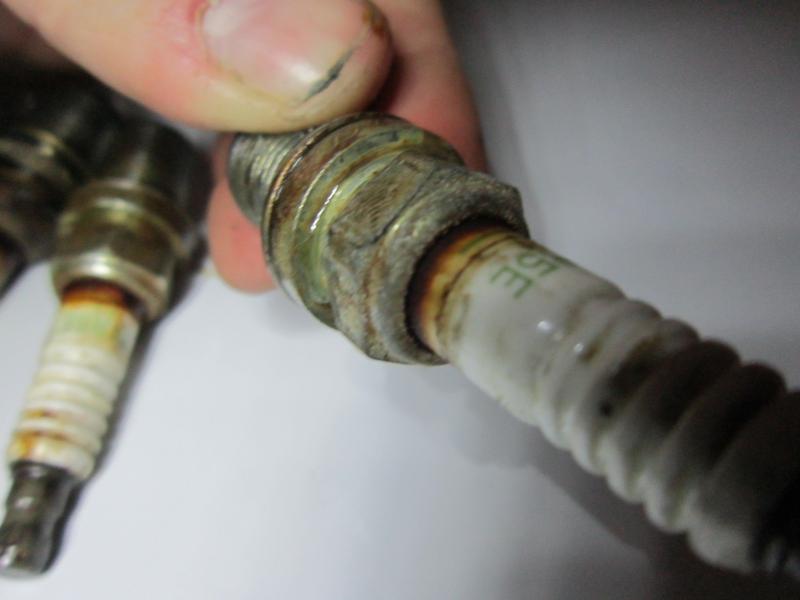
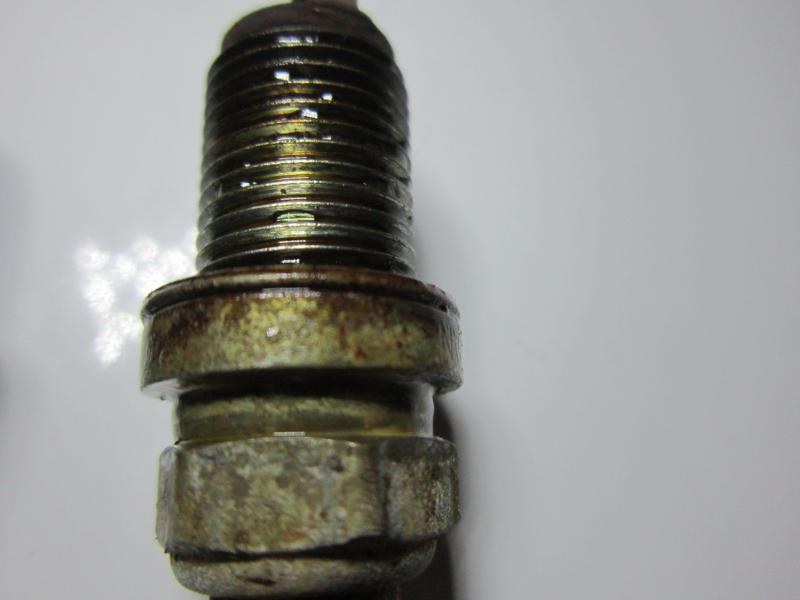
...but the tips looked good??
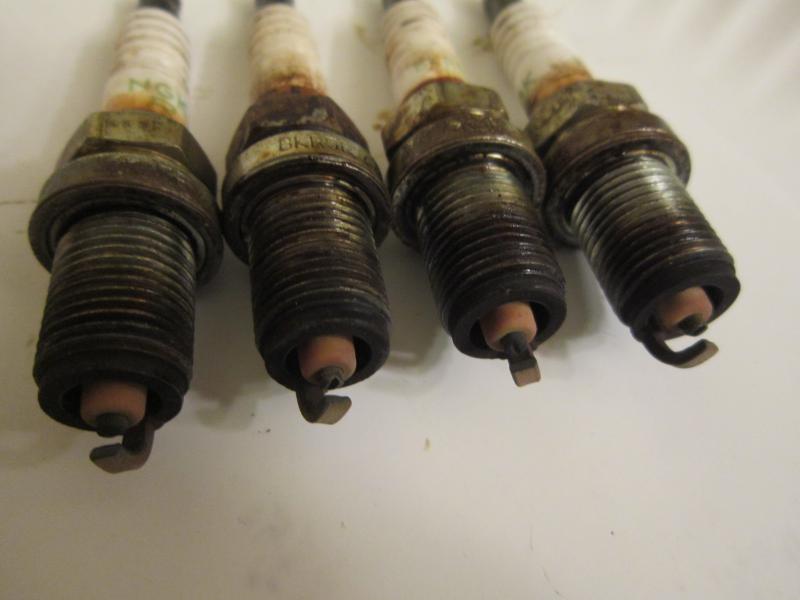
(1-4 from left to right)
So after consulting the "on the net" fellow enthusiast I have come to the conclusion I was being a pansy and "counting my eggs before they hatched", so hopefully all is well with the head gasket and the water just made it past the wire plug boot.
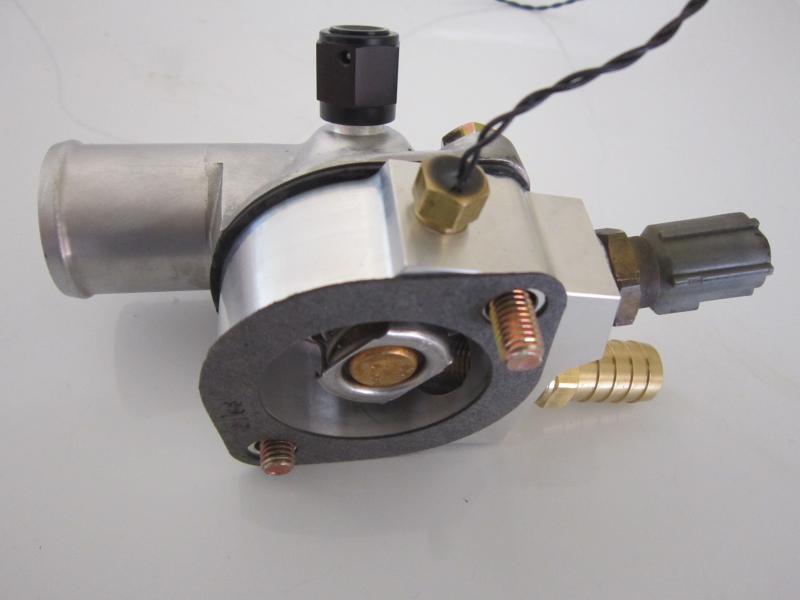
Finally a picture of the modified kia water neck w/ -6 AN male fitting, thermostat gasket, Stant 195* thermostat(changed from 180 to this since the factory ecu likes the 195 more, according to my findings), coolant spacer from Steve aka skou here on miataturbo w/ factory temp sensor, Westach temp sensor and 3/8''x5/8'' hose barb.

(1-4 from left to right)
I kind of freaked out because the plug from the #4 cylinder had water staining on the top and water on the threads so I automatically thought worse case scenario of a failing head gasket...


...but the tips looked good??

(1-4 from left to right)
So after consulting the "on the net" fellow enthusiast I have come to the conclusion I was being a pansy and "counting my eggs before they hatched", so hopefully all is well with the head gasket and the water just made it past the wire plug boot.
Finally a picture of the modified kia water neck w/ -6 AN male fitting, thermostat gasket, Stant 195* thermostat(changed from 180 to this since the factory ecu likes the 195 more, according to my findings), coolant spacer from Steve aka skou here on miataturbo w/ factory temp sensor, Westach temp sensor and 3/8''x5/8'' hose barb.

Reply
0
0
01-31-2015, 08:07 PM
#15
I'm Miserable!
Thread Starter
iTrader: (3)
Join Date: Dec 2013
Location: Central Texas
Posts: 242
Total Cats: -1
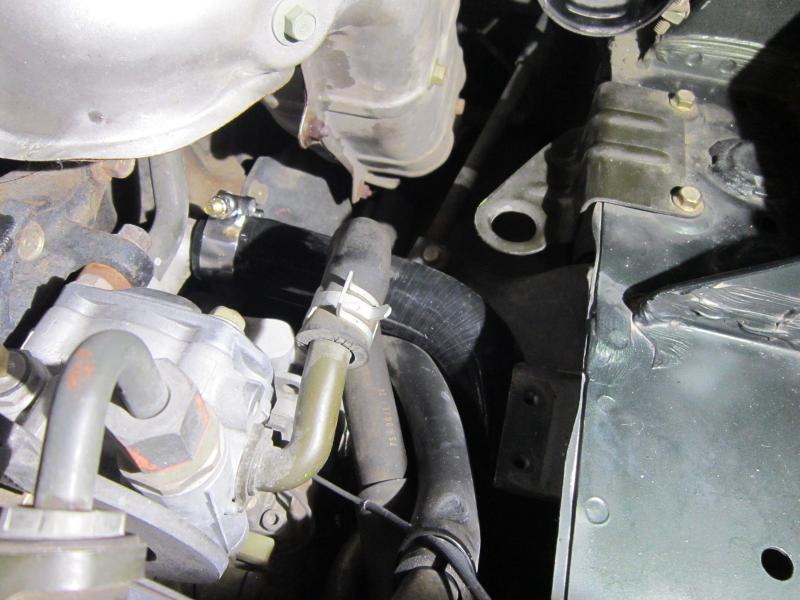
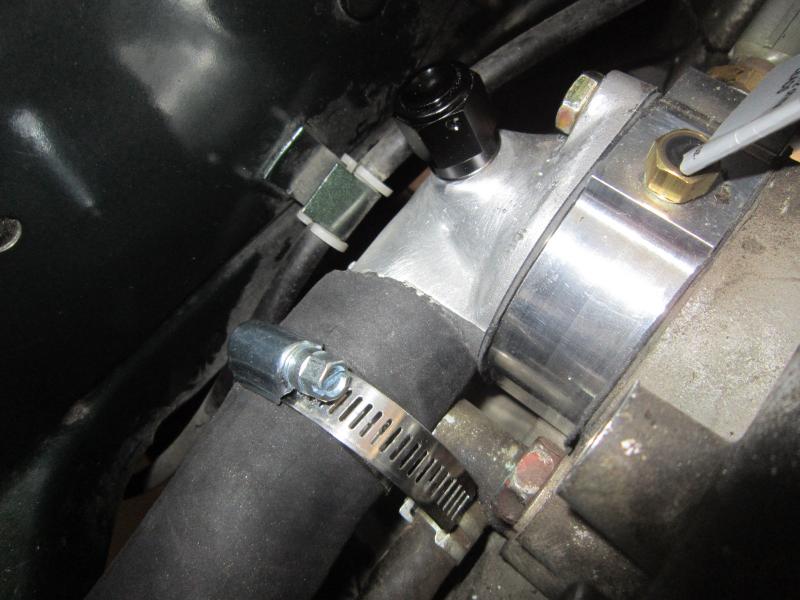
01-31-15: I have had a rather difficult time with the rear/upper radiator hose and the clearance w/ the 45* coolant fitting to the left of the spacer/water neck, as seen here:
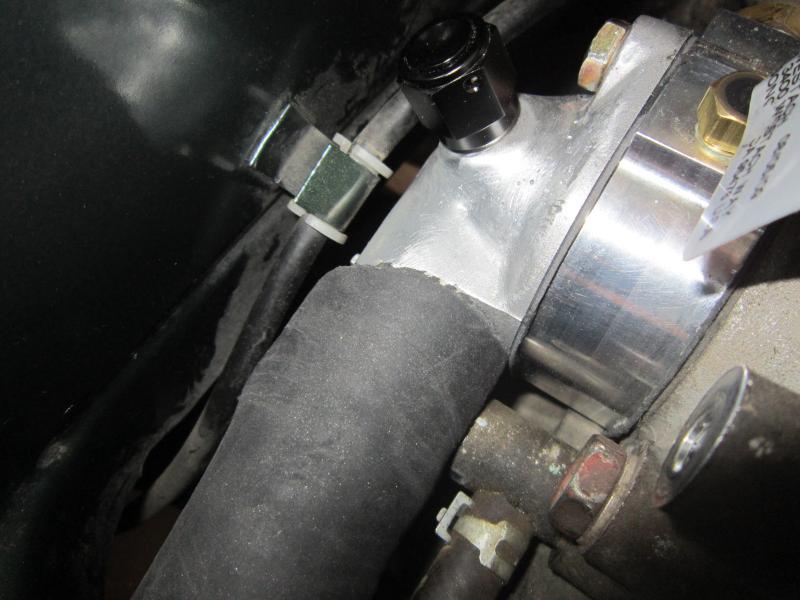
....making it impossible to use the tbolt clamp due to it being about 3/4'' wide so after grinding it down and it still not working I reluctantly tried a worm clamp, since it is only about 1/2" wide, and it worked.
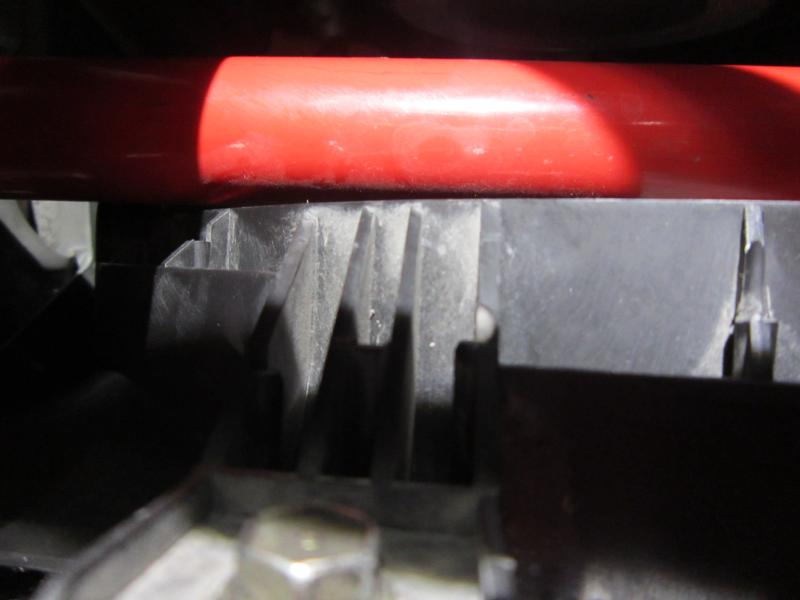
Bought some 1/8''x2'' insulation w/ adhesive backing from Home Depot.....
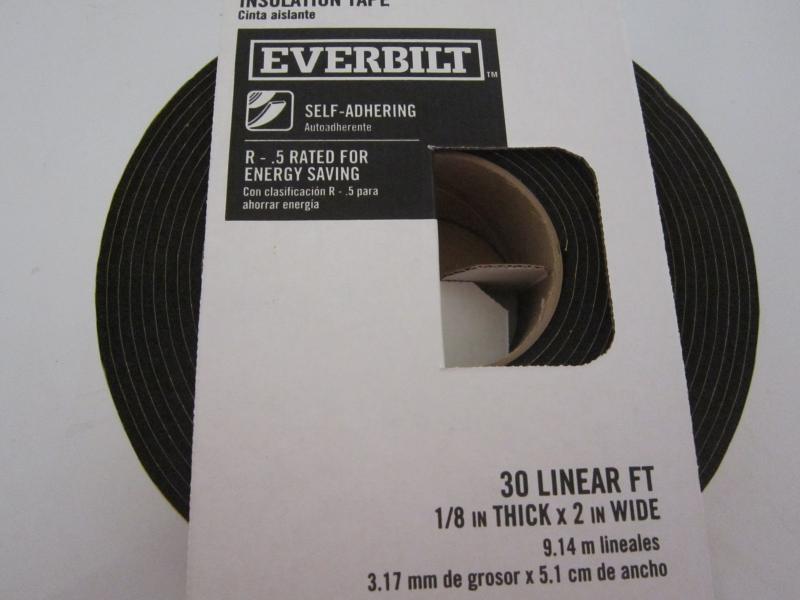
.... to seal the fans to the radiator, not sure why I didn't think about this before installing the fans.
Here it is installed on one of the fans....
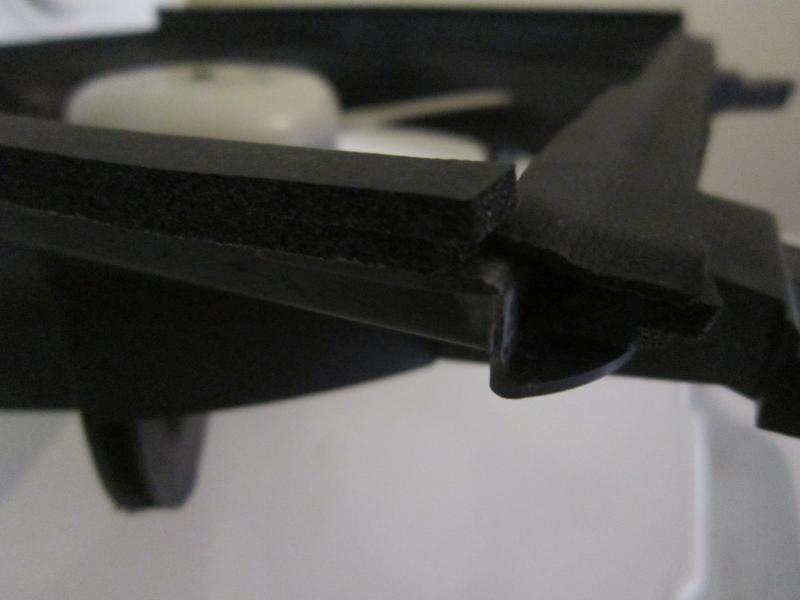
...I cut it down to the right width and used three layers on the bottom and two layers on the sides and on top.
Fans reinstalled with the insulation....
...top and inside sides are sealed up....
...bottom sealed up....

....still a little gap on the outside edges but no way to completely seal them and be able to install the fans w/o tearing off the insulation on the outer edges.....
...probably only about 1/8'' of a gap.
Don't have much left but to install valve cover w/ new valve cover gasket(was going to do the CAS o ring but it has a maintenance record it was change at approx. 76k miles when the timing belt was done and its not leaking) , Project G COP cover, Denso iridium spark plugs, Fab9 COP kit, Project G oil cap, hook up the oil pressure and coolant temp sensor, put everything back together and refill coolant/distilled water and Rotella oil and burp the coolant system and back on the road after only......three weeks.

....making it impossible to use the tbolt clamp due to it being about 3/4'' wide so after grinding it down and it still not working I reluctantly tried a worm clamp, since it is only about 1/2" wide, and it worked.

Bought some 1/8''x2'' insulation w/ adhesive backing from Home Depot.....

.... to seal the fans to the radiator, not sure why I didn't think about this before installing the fans.
Here it is installed on one of the fans....

...I cut it down to the right width and used three layers on the bottom and two layers on the sides and on top.
Fans reinstalled with the insulation....

...top and inside sides are sealed up....
...bottom sealed up....


....still a little gap on the outside edges but no way to completely seal them and be able to install the fans w/o tearing off the insulation on the outer edges.....

...probably only about 1/8'' of a gap.
Don't have much left but to install valve cover w/ new valve cover gasket(was going to do the CAS o ring but it has a maintenance record it was change at approx. 76k miles when the timing belt was done and its not leaking) , Project G COP cover, Denso iridium spark plugs, Fab9 COP kit, Project G oil cap, hook up the oil pressure and coolant temp sensor, put everything back together and refill coolant/distilled water and Rotella oil and burp the coolant system and back on the road after only......three weeks.
Last edited by Greasemonkey2000; 01-31-2015 at 10:52 PM.
Reply
0
0
02-01-2015, 08:21 PM
#16
I'm Miserable!
Thread Starter
iTrader: (3)
Join Date: Dec 2013
Location: Central Texas
Posts: 242
Total Cats: -1
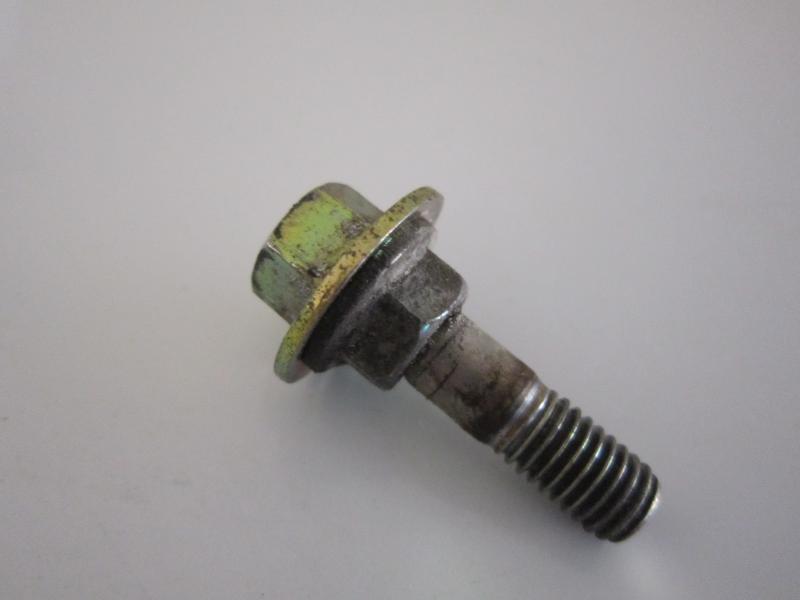
02-01-15: Well I should be done but this happened....
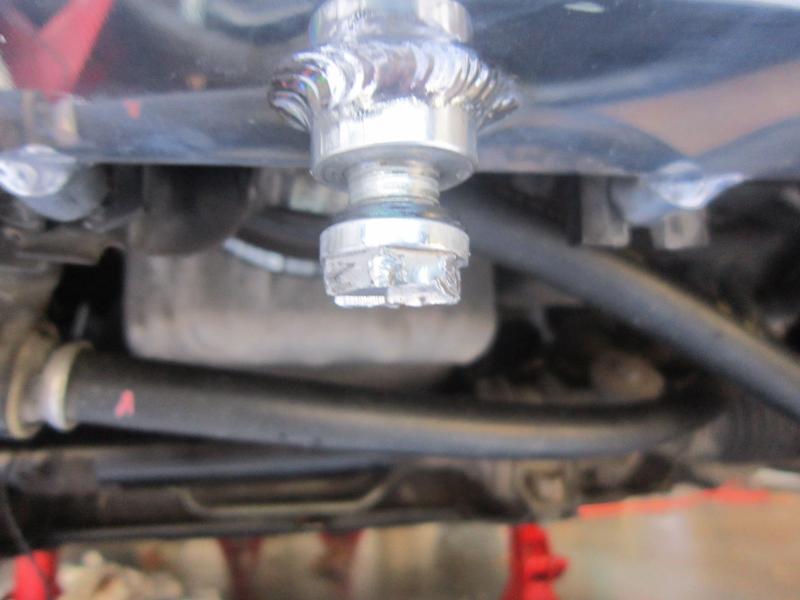
..well obviously its the radiators drain plug but although its difficult to tell in the pic, it is cross threaded. Not sure why it happened , I didn't force it and it was easy going and the next turn it got REALLY tight and I tried backing it off but too no avail and this is what remains of the drain plug...

....yay it be jacked up! So I guess I need to get a tap and rethread the drain and get a bolt for a plug. :(
This is actually the SECOND thing I have cross threaded on this project, I thought I had taken a picture but I guess not....I cross threaded the egr nut that goes on the manifold fitting, so bad that it was almost at a 45* angle and put JB Weld to ensure it didn't leak...me oh my.
I did make a fair amount of head way and installed this nice PNP COP kit from Fab9 along with needed Denso IK16 (for n/a application) iridium plugs since you have to remove the tips and for some reason most plugs no longer have this function, I thought use to most did.

Had to extend the two wires for the factory water temp sensor since it is now at a 90* on the driver side vs a 45* on the passenger side in the stock configuration....
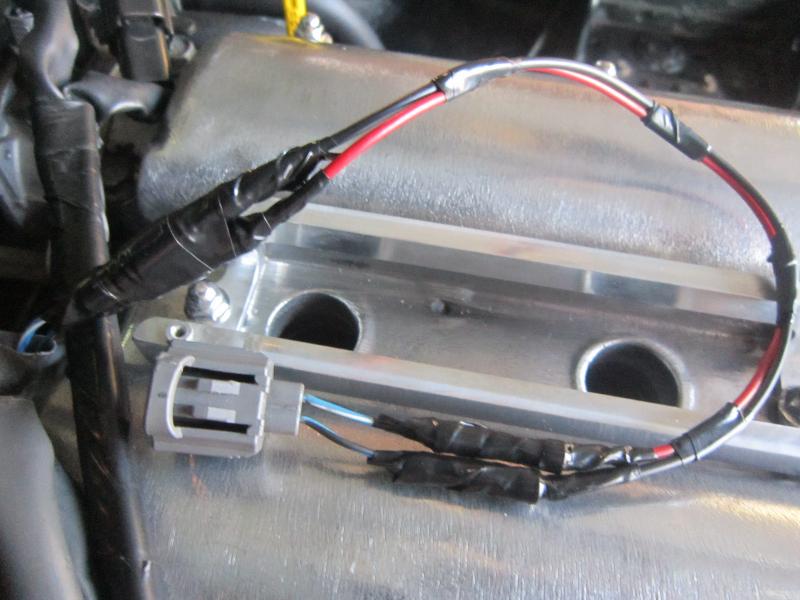
.....of course put plastic loom and 3m electrical tape around the wires...

...no reason for it not to look like I don't know what I am half way doing.
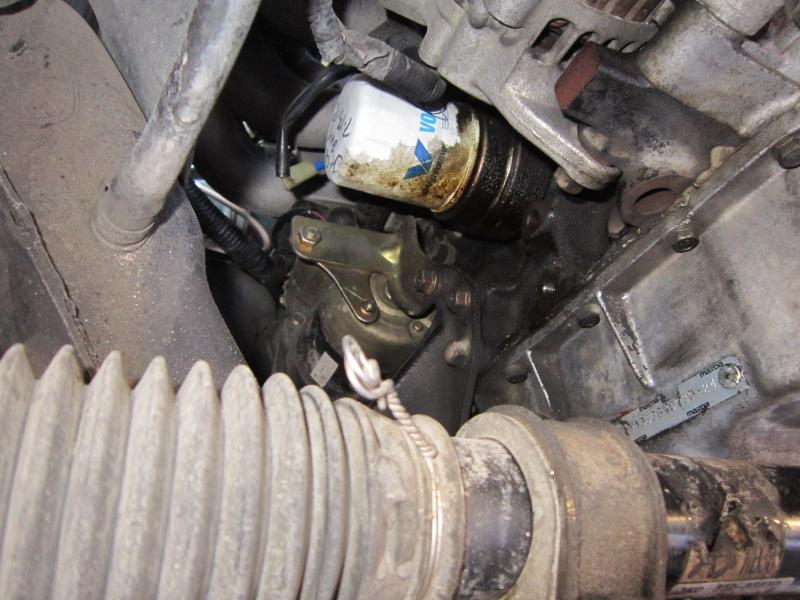
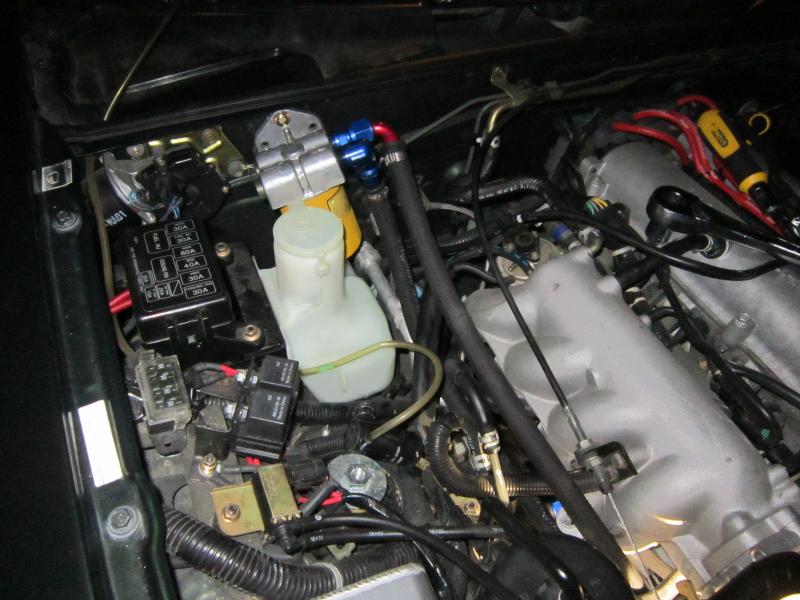
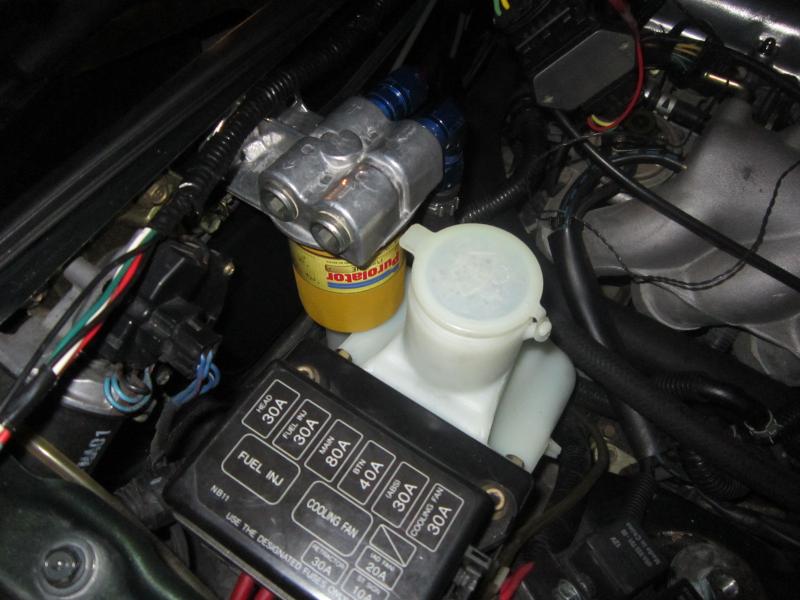
I got the Track Dog Racing remote oil filter mounted on the fire wall w/ the Purolator PureOne filter for a Mazda KL v6....
.....and this is where I stopped for tonight....
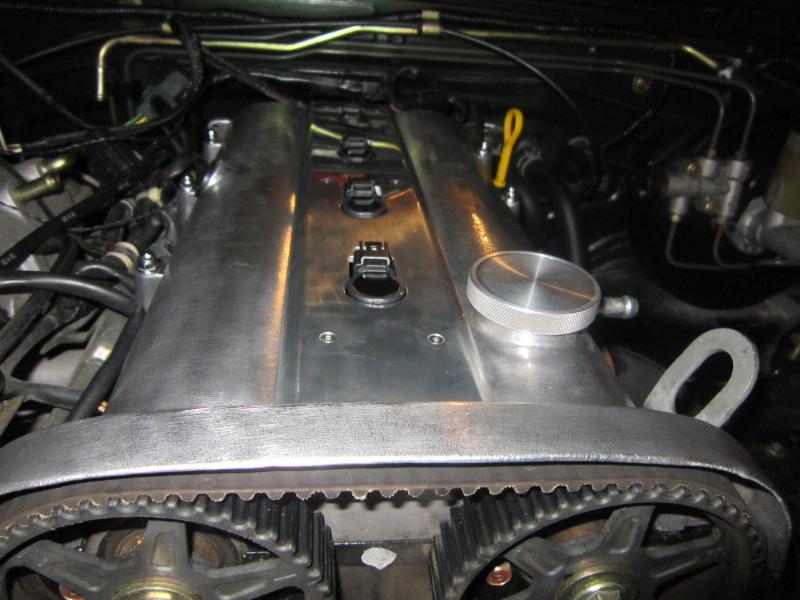
...shaved and brushed finish valve cover w/ new gasket, Fab9 PNP COP kit for 96-97, Project G COP cover in brushed finish (currently the ONLY one on a customers car holla! Thanks again to Steve and the guys at Project G for taking on that project and hopefully they are able to start making the production run) and Project G Precision Series 1.1 brushed finish oil cap installed. Of course there was other little things that got done but not worth pics or mentioning. 
So I still need to hook up the Westach water temp sensor wires, Westach oil pressure sensor wires, retap the radiator drain, refill the CSF radiator w/ distilled water/Prestone coolant, at a 70/30 mix I believe, and Redline Water Wetter and recheck everything and burp the coolant system...I think that's everything f any significance.

..well obviously its the radiators drain plug but although its difficult to tell in the pic, it is cross threaded. Not sure why it happened , I didn't force it and it was easy going and the next turn it got REALLY tight and I tried backing it off but too no avail and this is what remains of the drain plug...

....yay it be jacked up!
So I guess I need to get a tap and rethread the drain and get a bolt for a plug. :(This is actually the SECOND thing I have cross threaded on this project, I thought I had taken a picture but I guess not....I cross threaded the egr nut that goes on the manifold fitting, so bad that it was almost at a 45* angle and put JB Weld to ensure it didn't leak...me oh my.
I did make a fair amount of head way and installed this nice PNP COP kit from Fab9 along with needed Denso IK16 (for n/a application) iridium plugs since you have to remove the tips and for some reason most plugs no longer have this function, I thought use to most did.

Had to extend the two wires for the factory water temp sensor since it is now at a 90* on the driver side vs a 45* on the passenger side in the stock configuration....

.....of course put plastic loom and 3m electrical tape around the wires...

...no reason for it not to look like I don't know what I am half way doing.
I got the Track Dog Racing remote oil filter mounted on the fire wall w/ the Purolator PureOne filter for a Mazda KL v6....

.....and this is where I stopped for tonight....

...shaved and brushed finish valve cover w/ new gasket, Fab9 PNP COP kit for 96-97, Project G COP cover in brushed finish (currently the ONLY one on a customers car
holla! Thanks again to Steve and the guys at Project G for taking on that project and hopefully they are able to start making the production run) and Project G Precision Series 1.1 brushed finish oil cap installed. Of course there was other little things that got done but not worth pics or mentioning. So I still need to hook up the Westach water temp sensor wires, Westach oil pressure sensor wires, retap the radiator drain, refill the CSF radiator w/ distilled water/Prestone coolant, at a 70/30 mix I believe, and Redline Water Wetter and recheck everything and burp the coolant system...I think that's everything f any significance.
Reply
0
0

Thread
Thread Starter
Forum
Replies
Last Post


