When you click on links to various merchants on this site and make a purchase, this can result in this site earning a commission. Affiliate programs and affiliations include, but are not limited to, the eBay Partner Network.
Currently the goal for this car is to keep it streetable, but run in TTB out at Miller. I'm going to run the car in SSM at local autox evens for shakedown/fun until everything feels nice and sorted and I'm not as worried about it blowing up at the track.
This is a migration of my build thread from CR to get caught up on where the car is night now.
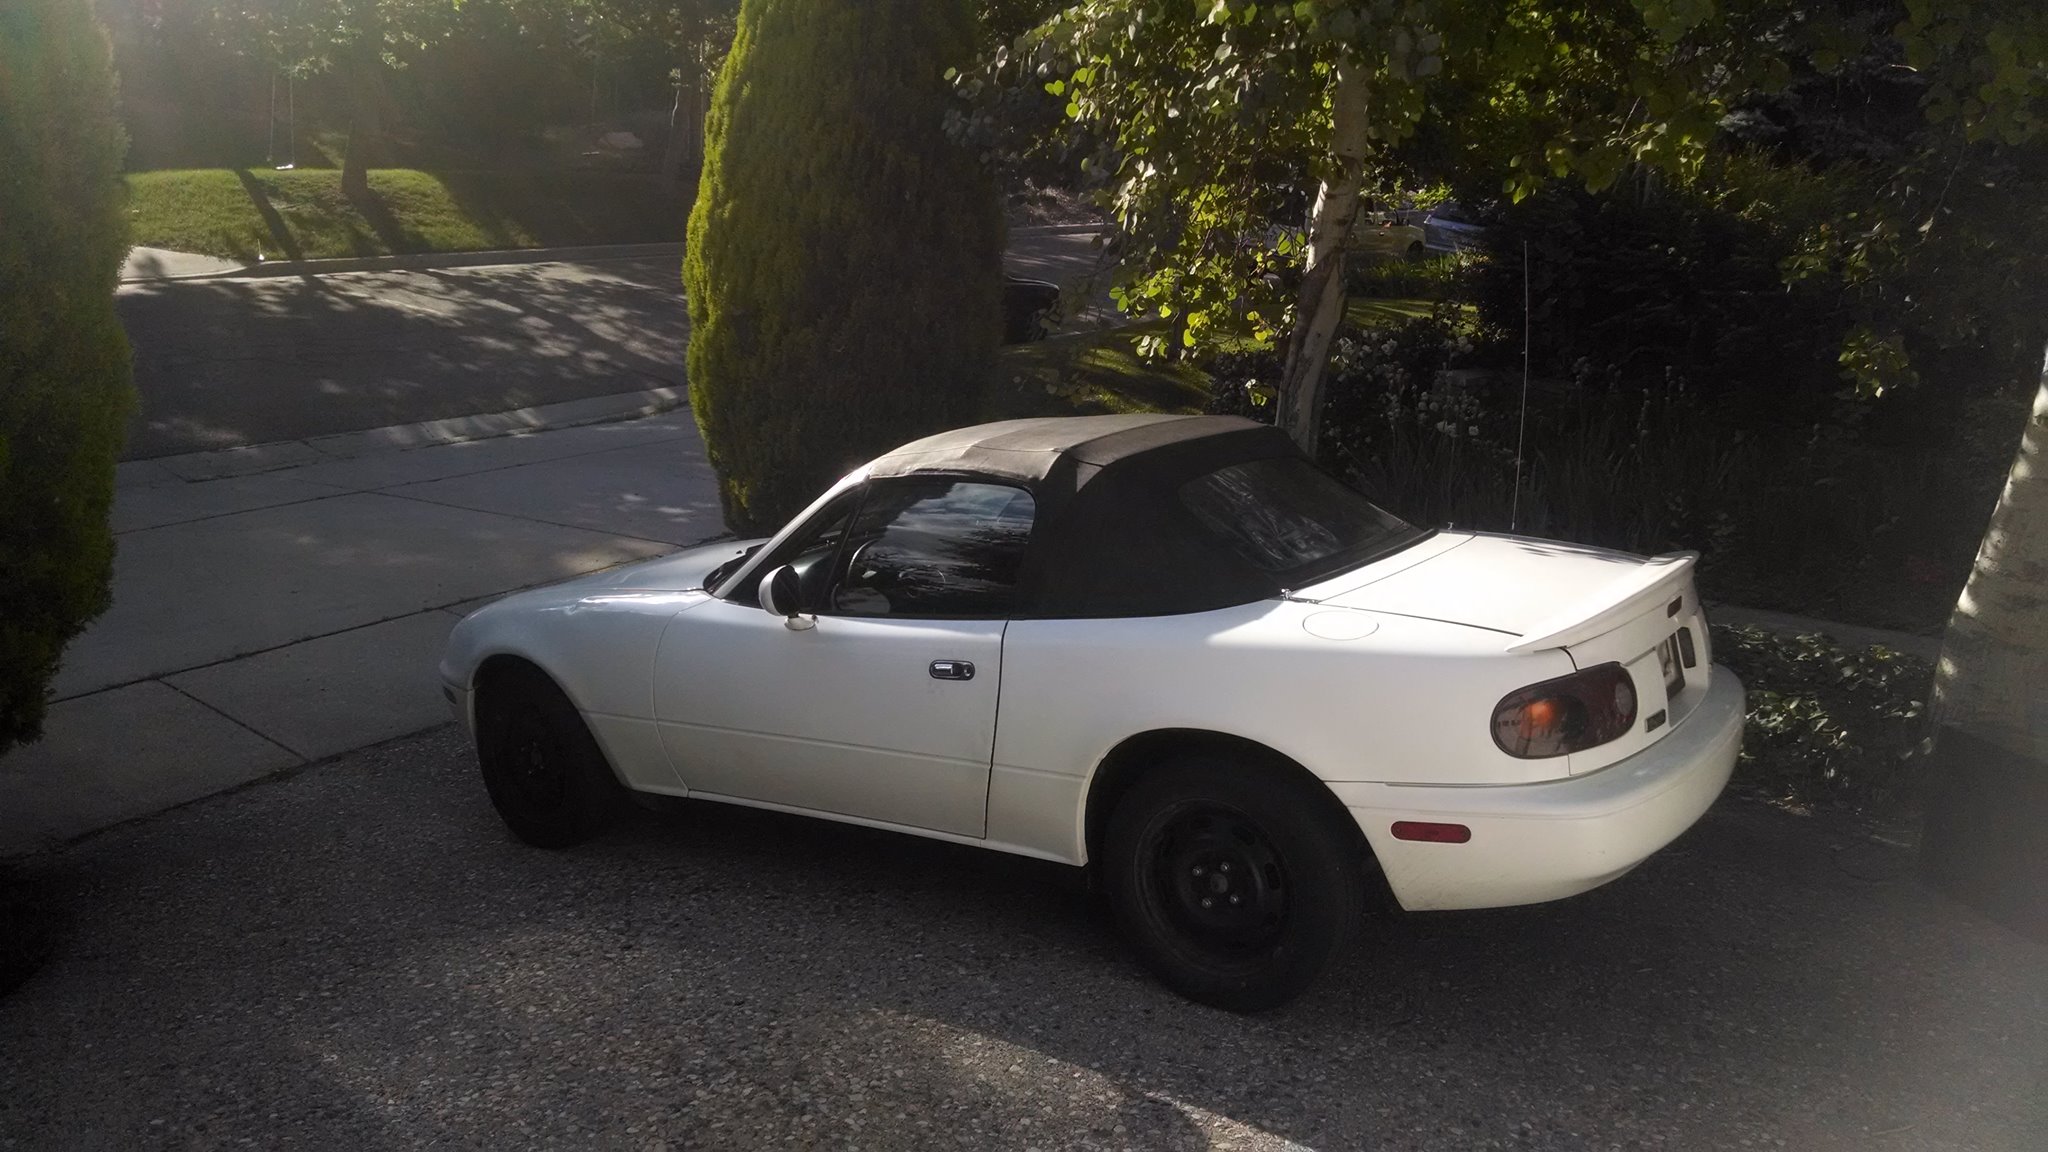
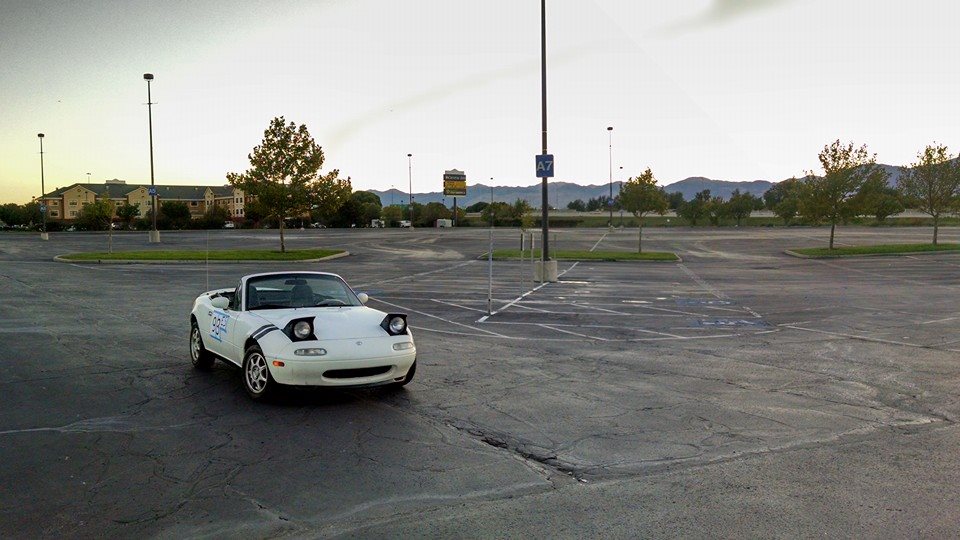
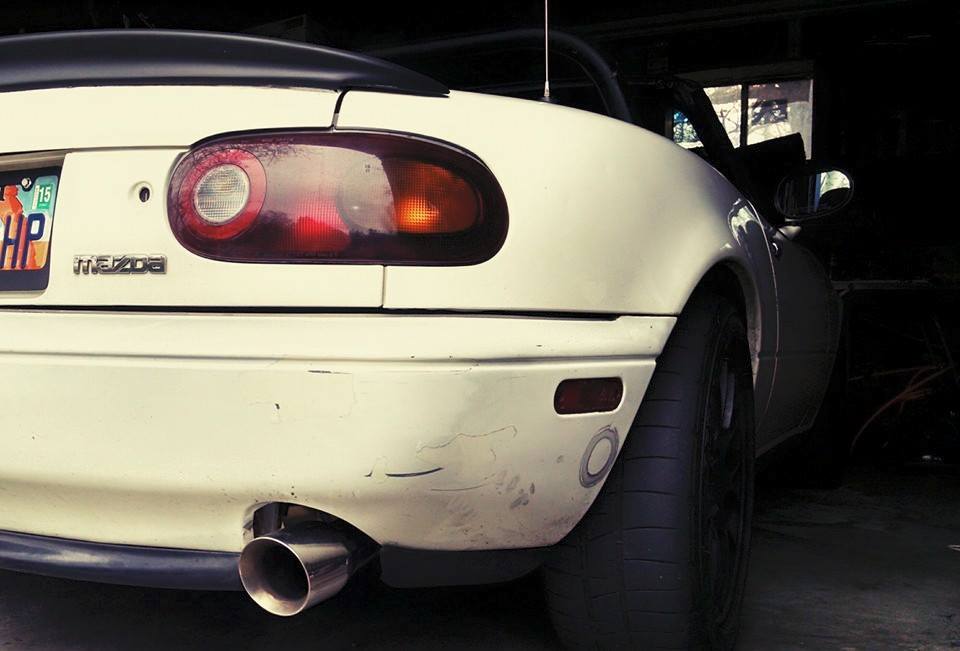
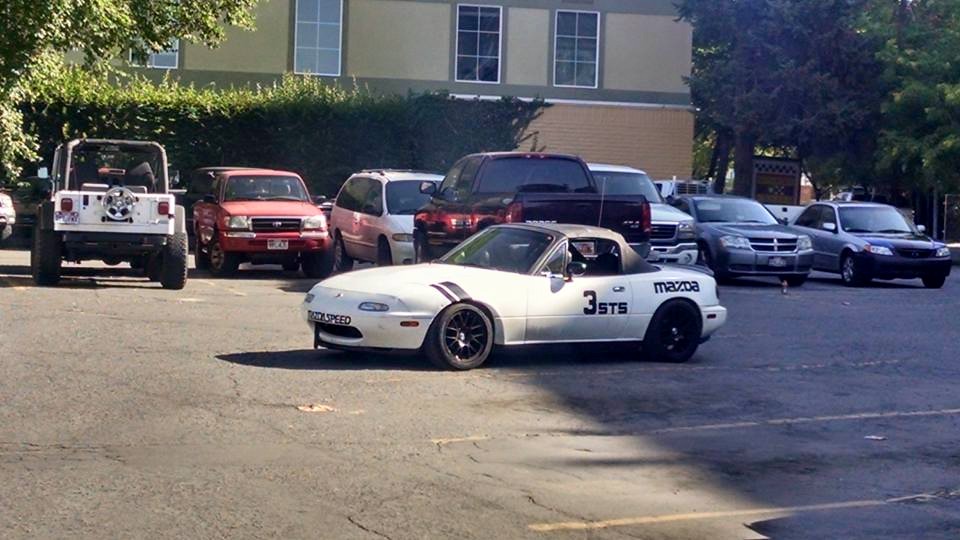
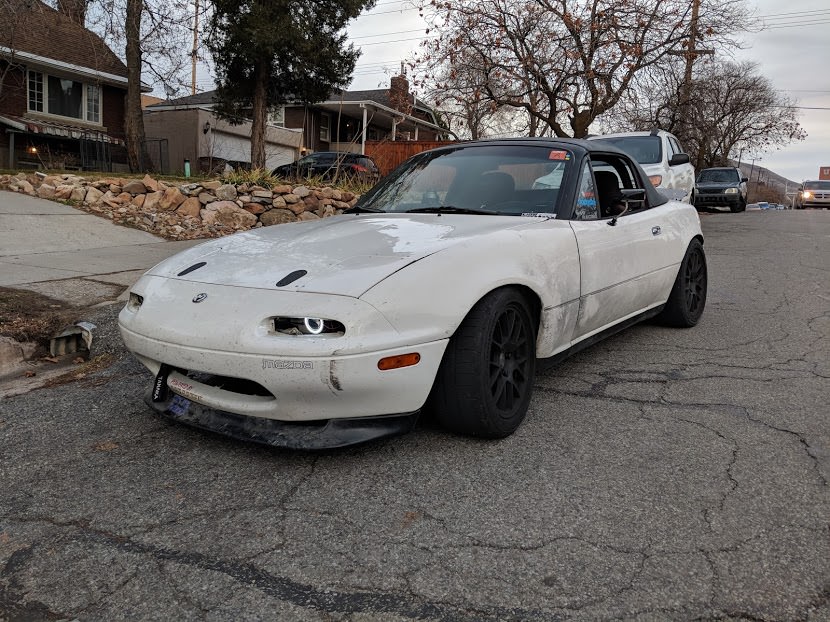
Here's the car as I bought it. A '93 base package with 193000 on the clock. Had maintenance records for the last 15 years. Only add-on was a weird aftermarket AC setup from the PO. Was in really clean shape for a Utah car, since we salt like hell here.
I just kept it to an r package lip and catching up on maintenance at first:
Picked up an aftermaket wheel for a bit more leg clearance:
Then I went to my first Autocross even and went down the rabbit hole.
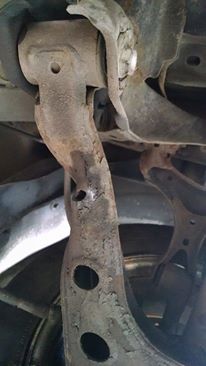
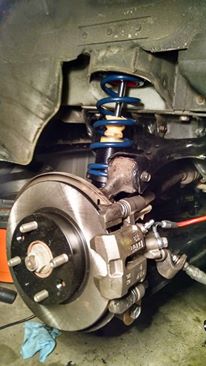
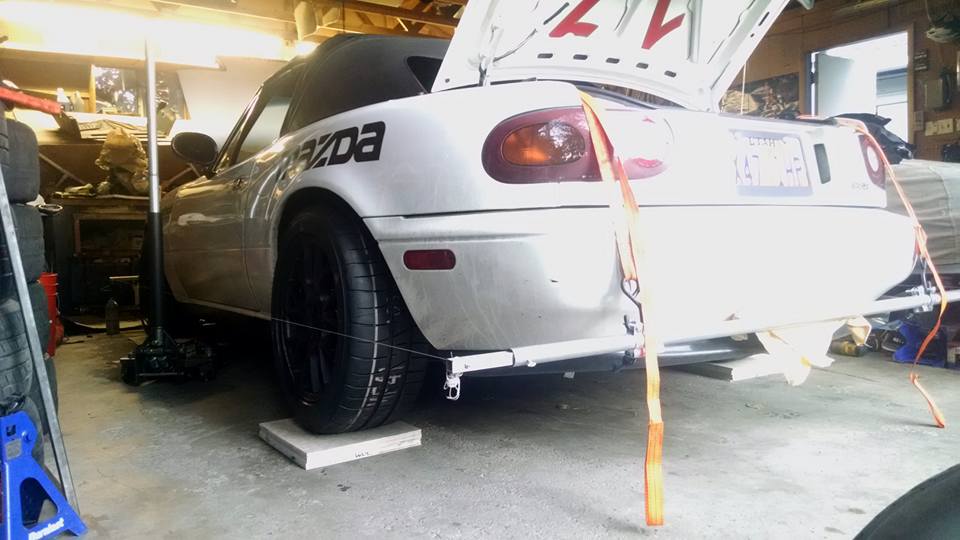
I raced the car for the rest of the season and decided to update my 20+ year old suspension. In the process I found that I'd somehow missed a pretty mangled control arm when I bought the car:
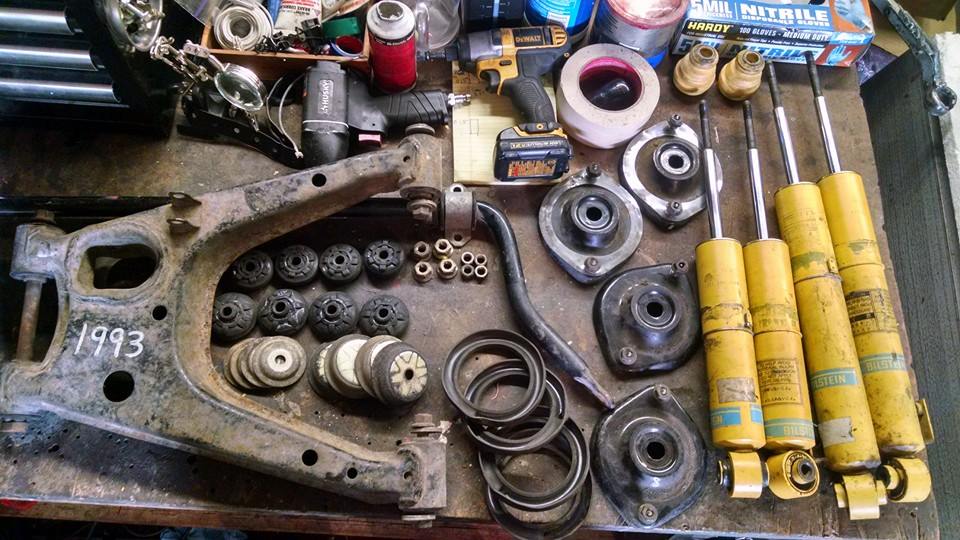
Picked up some Hard S Bilsteins and coilover sleeves.
I refreshed the brakes, added stainless lines and full ES poly bushings while I was in there.
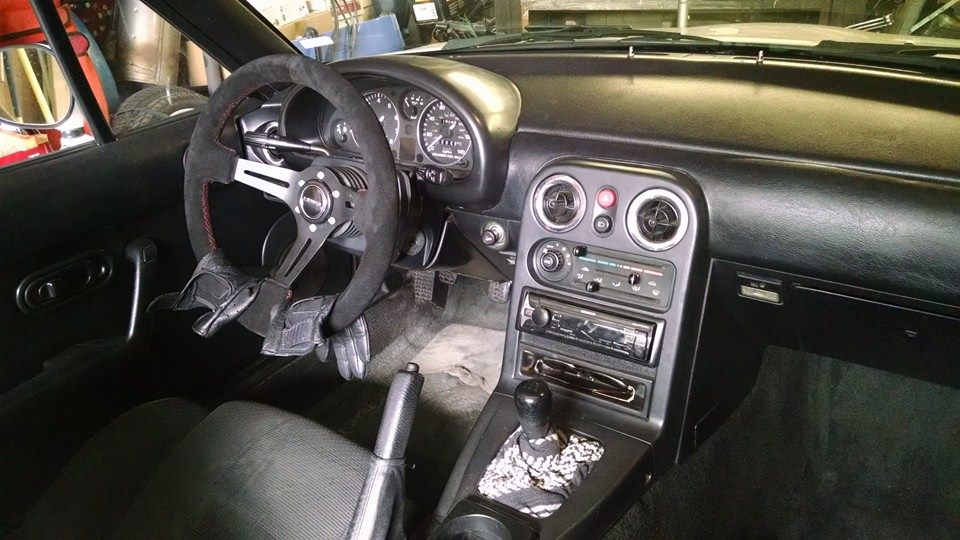
Shot of the old Mazda racing horn button I picked up.
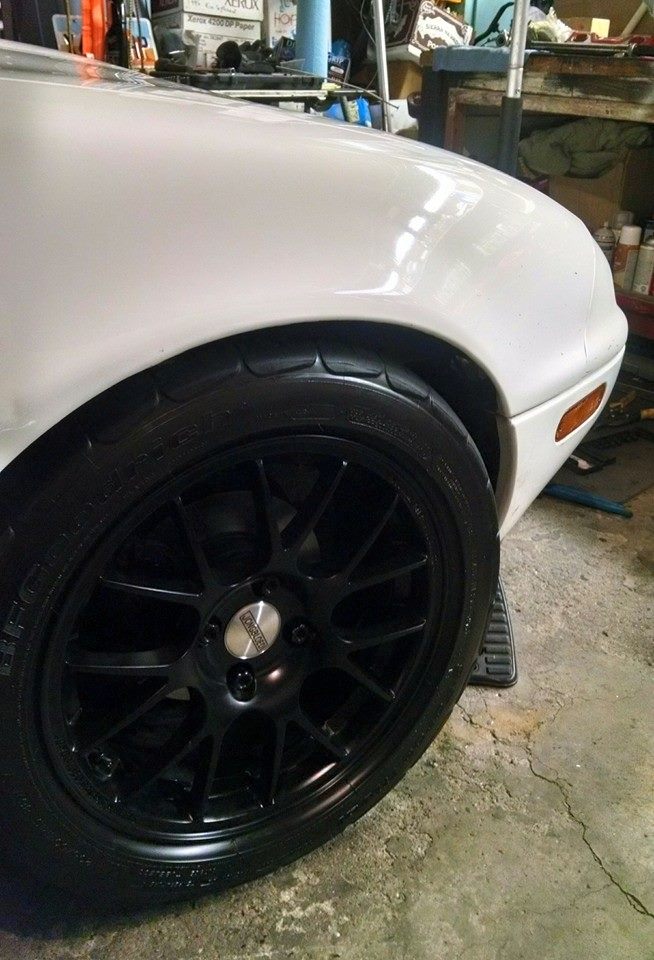
ET +25 15x7 Jongbloed wheels with 205/50/15 BFG Rivals:
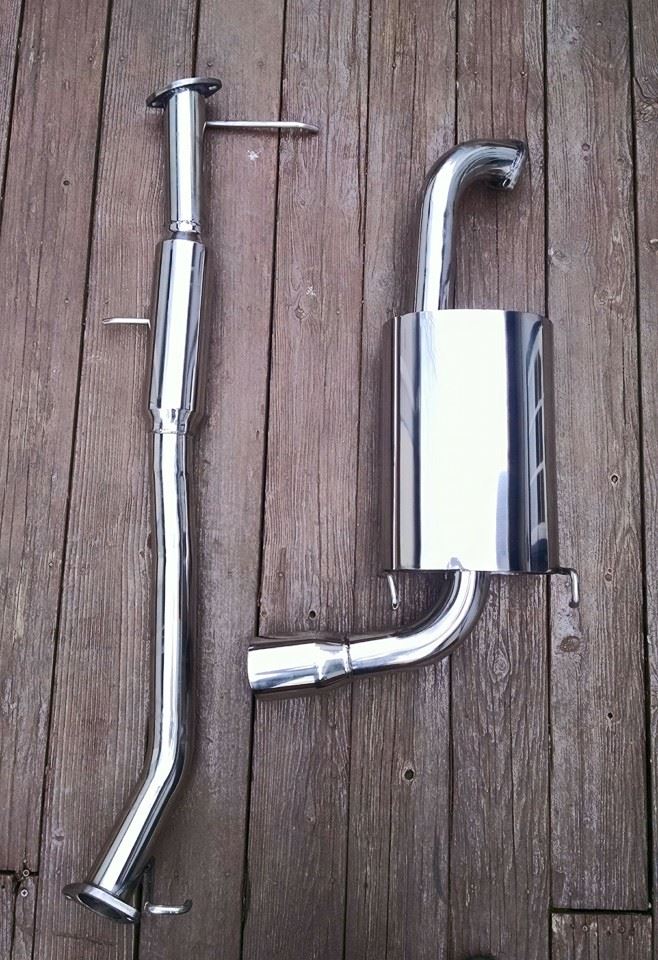
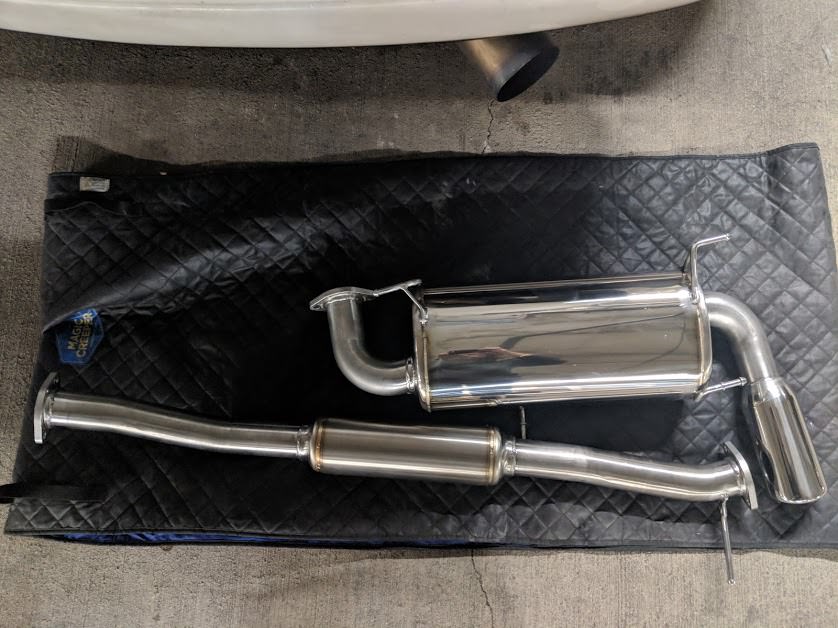
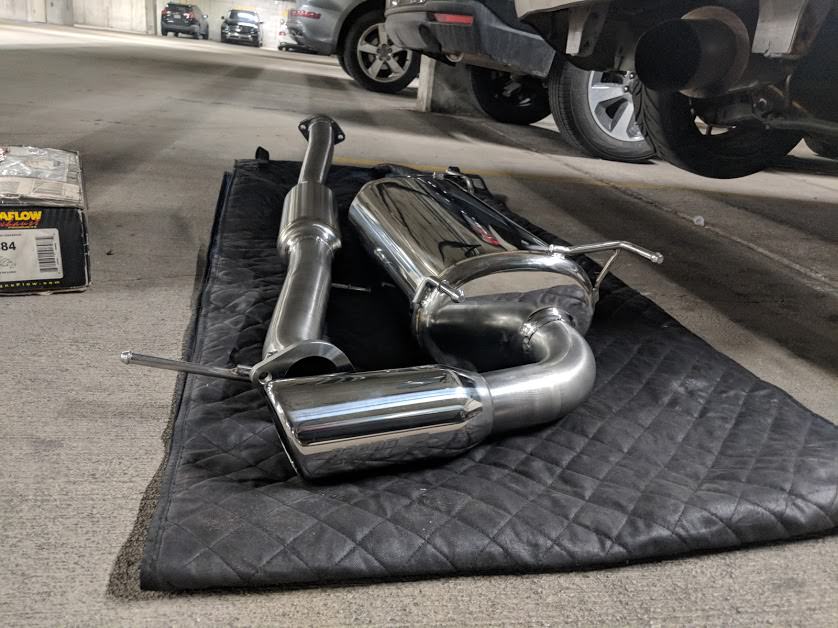
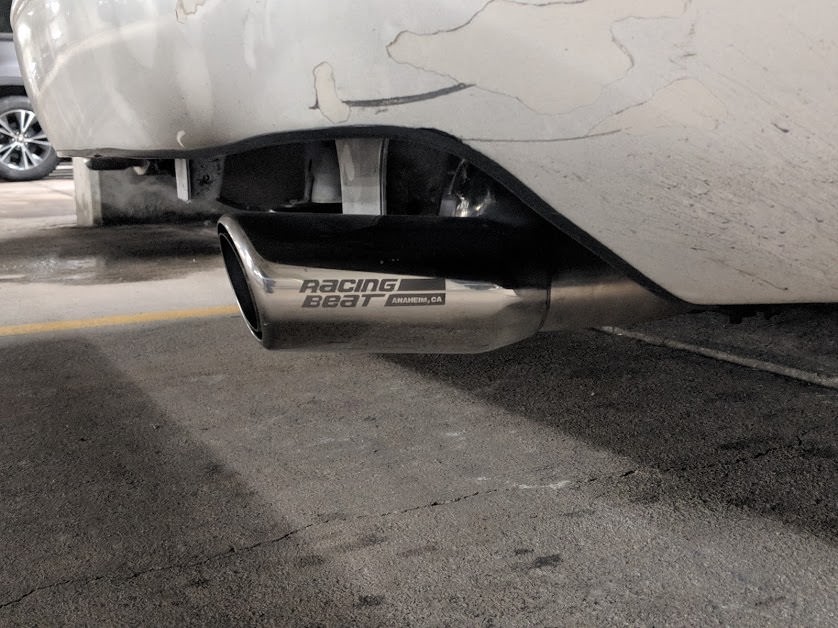
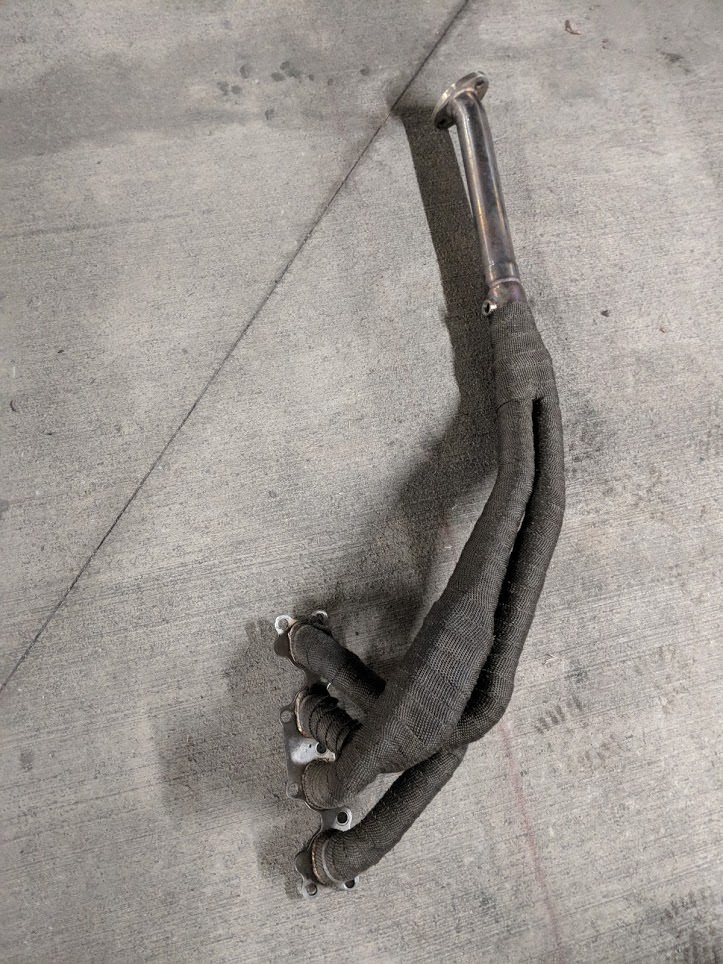
Yonaka catback:
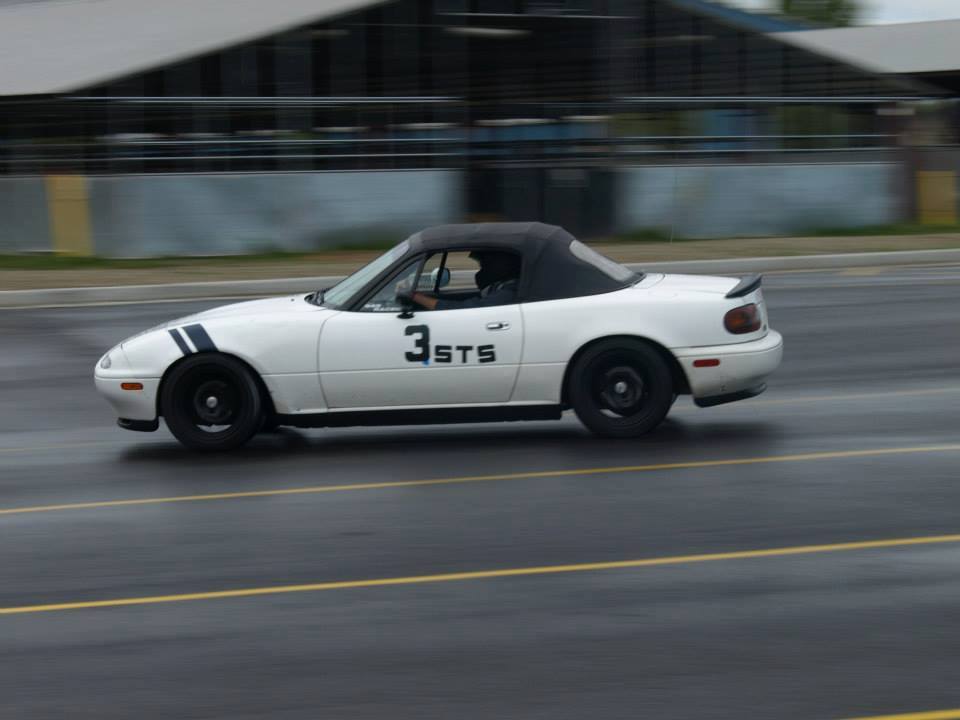
I made a string box alignment system to dial everything in and then finally got to drive it for a bit.
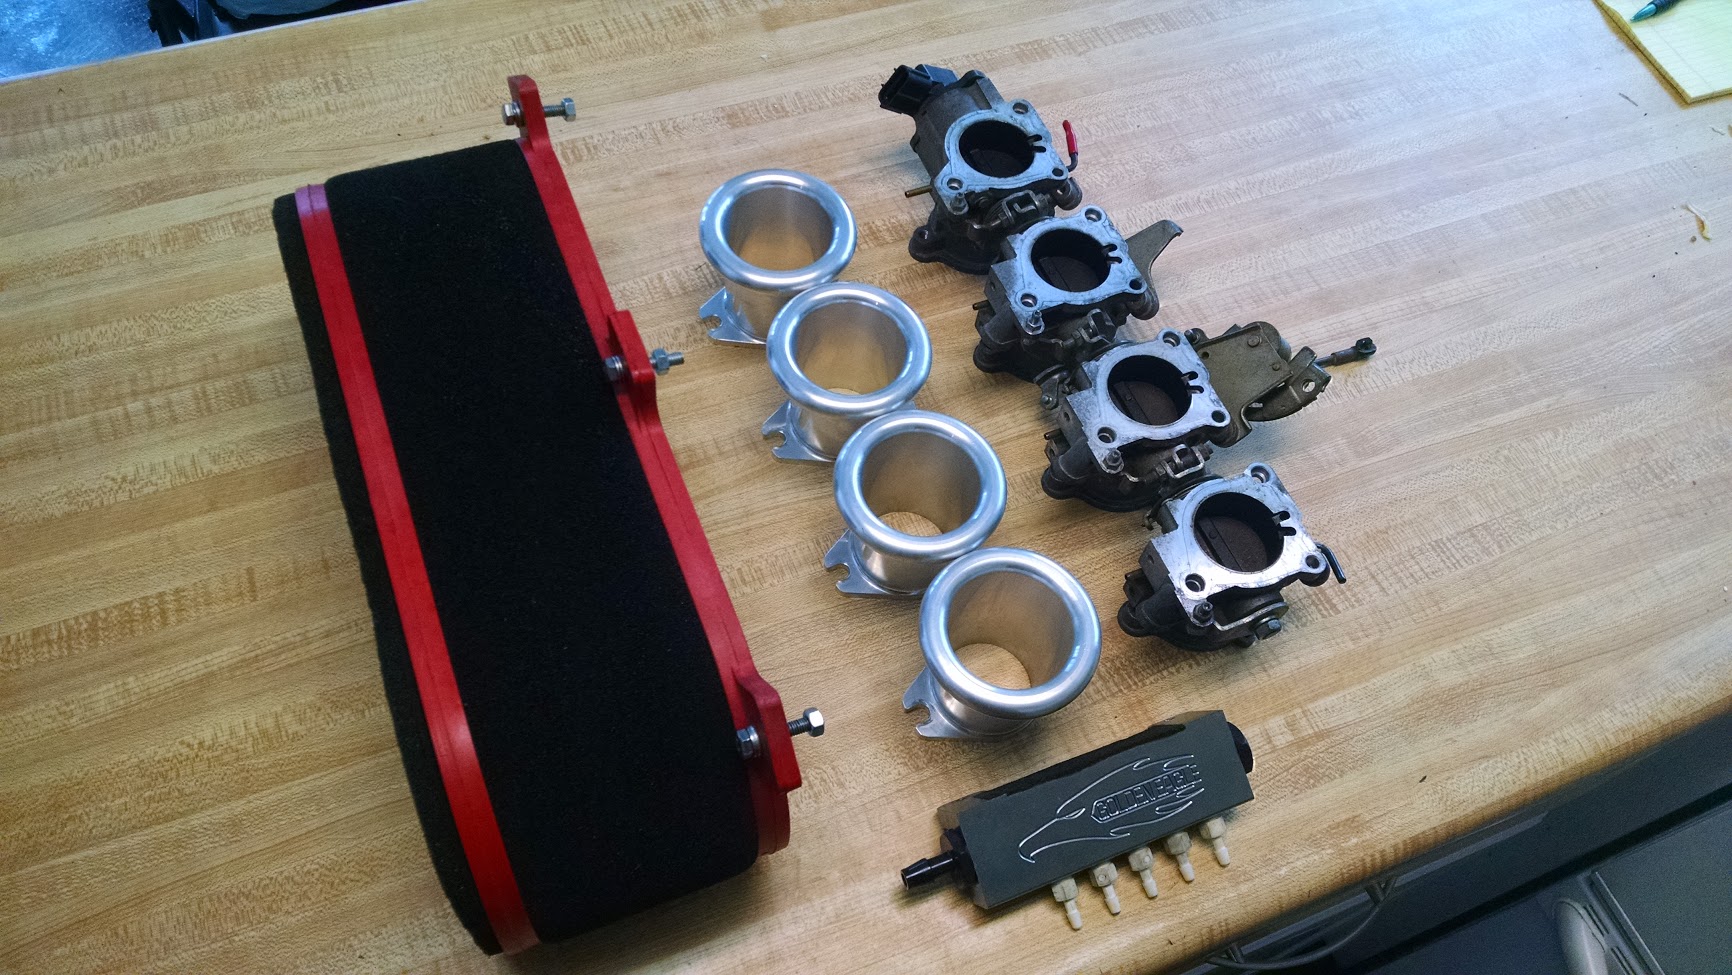
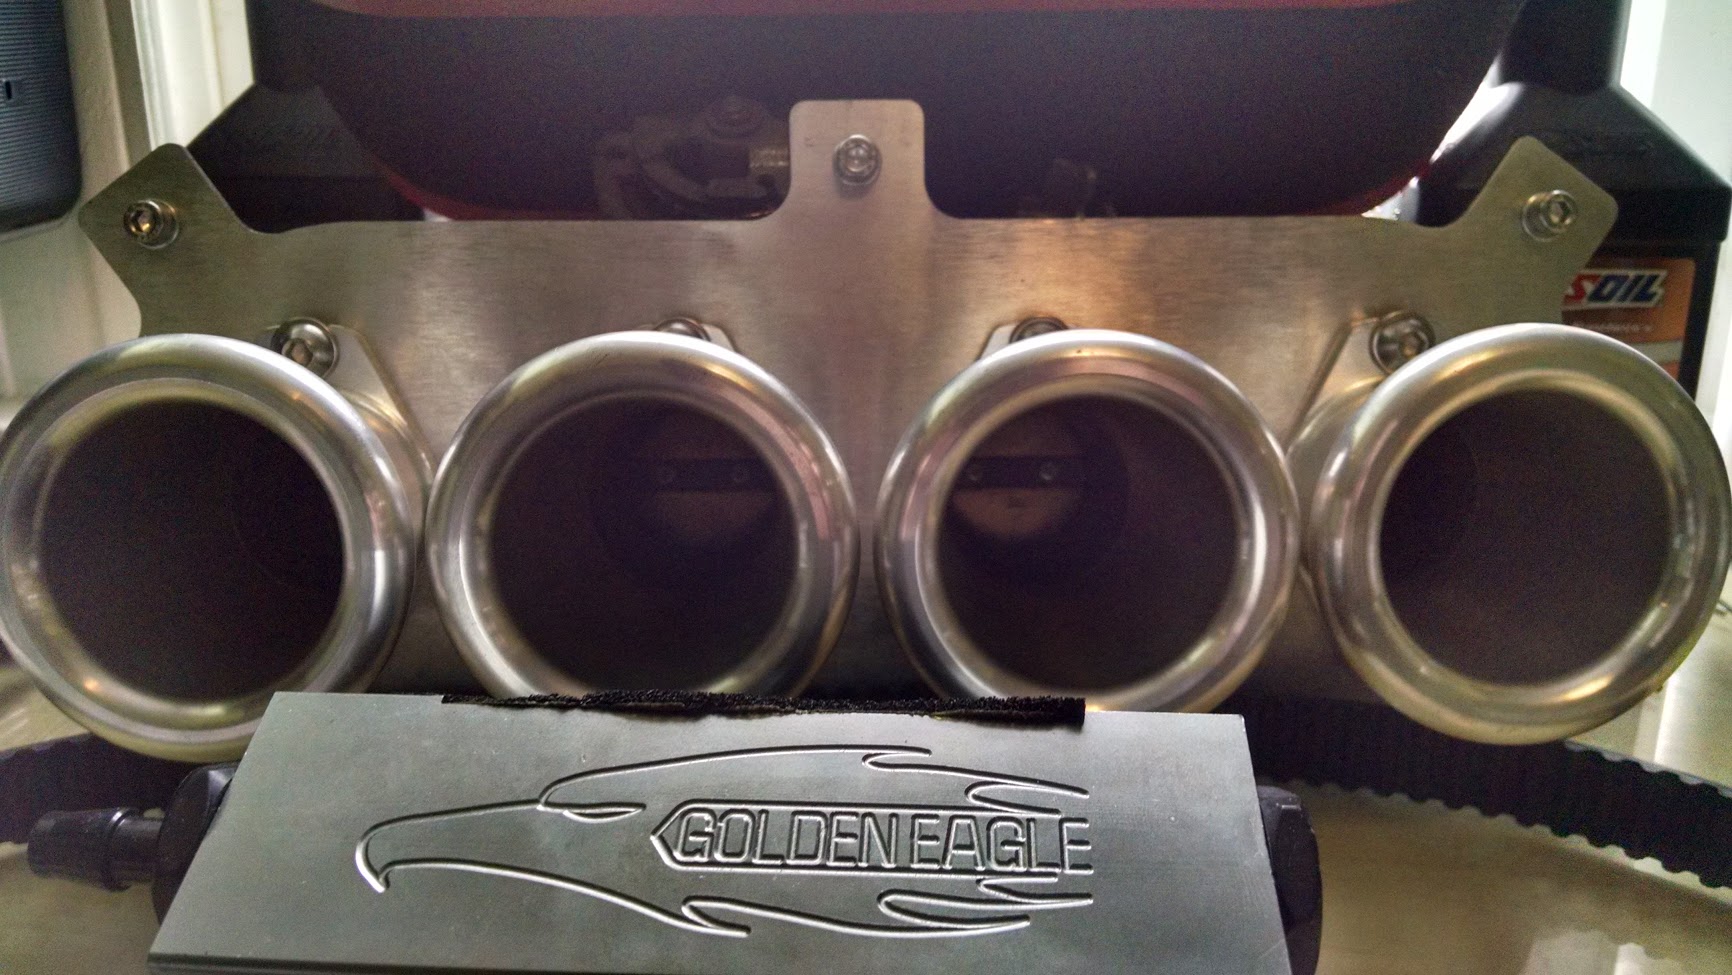
Winter came around and even though the car was great to drive in an STS setup, I got the itch to get building again. Before I purchased the car I'd been lurking on Miata turbo for a couple years just learning, but after autocrossing I realized an NA build would be much more suited to my driving. I stumbled across an ad for a set of AE101 ITBs and couldn't help myself.
Between this post and the previous there was a year or so gap, we're getting closer to caught up to current times now.
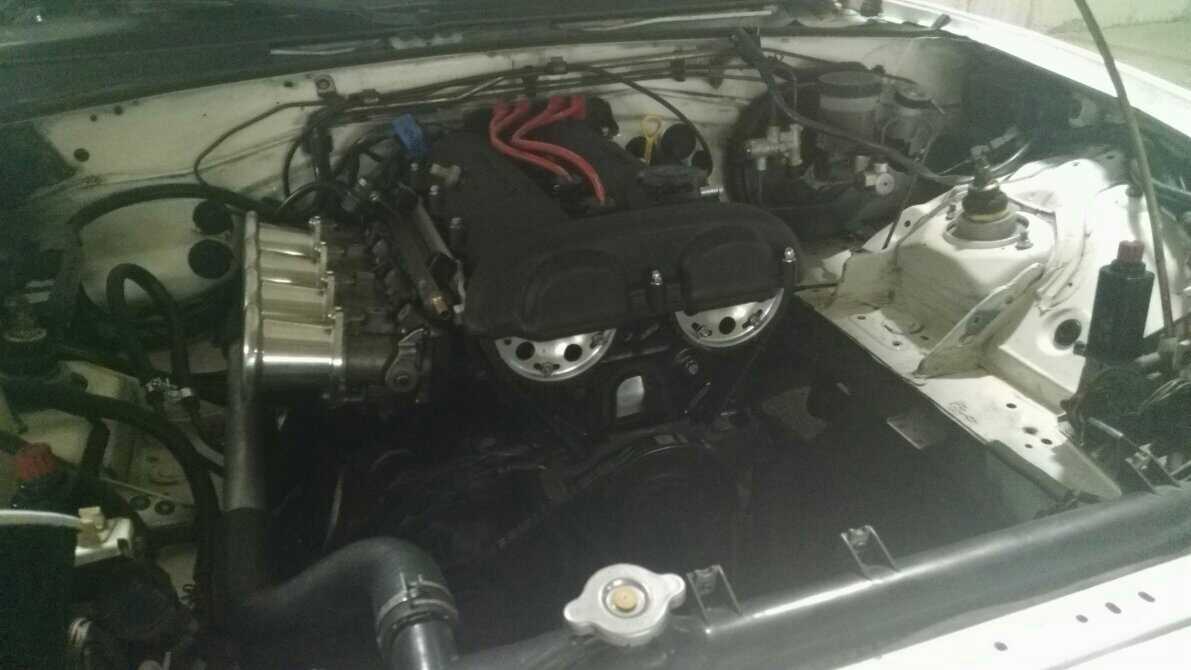
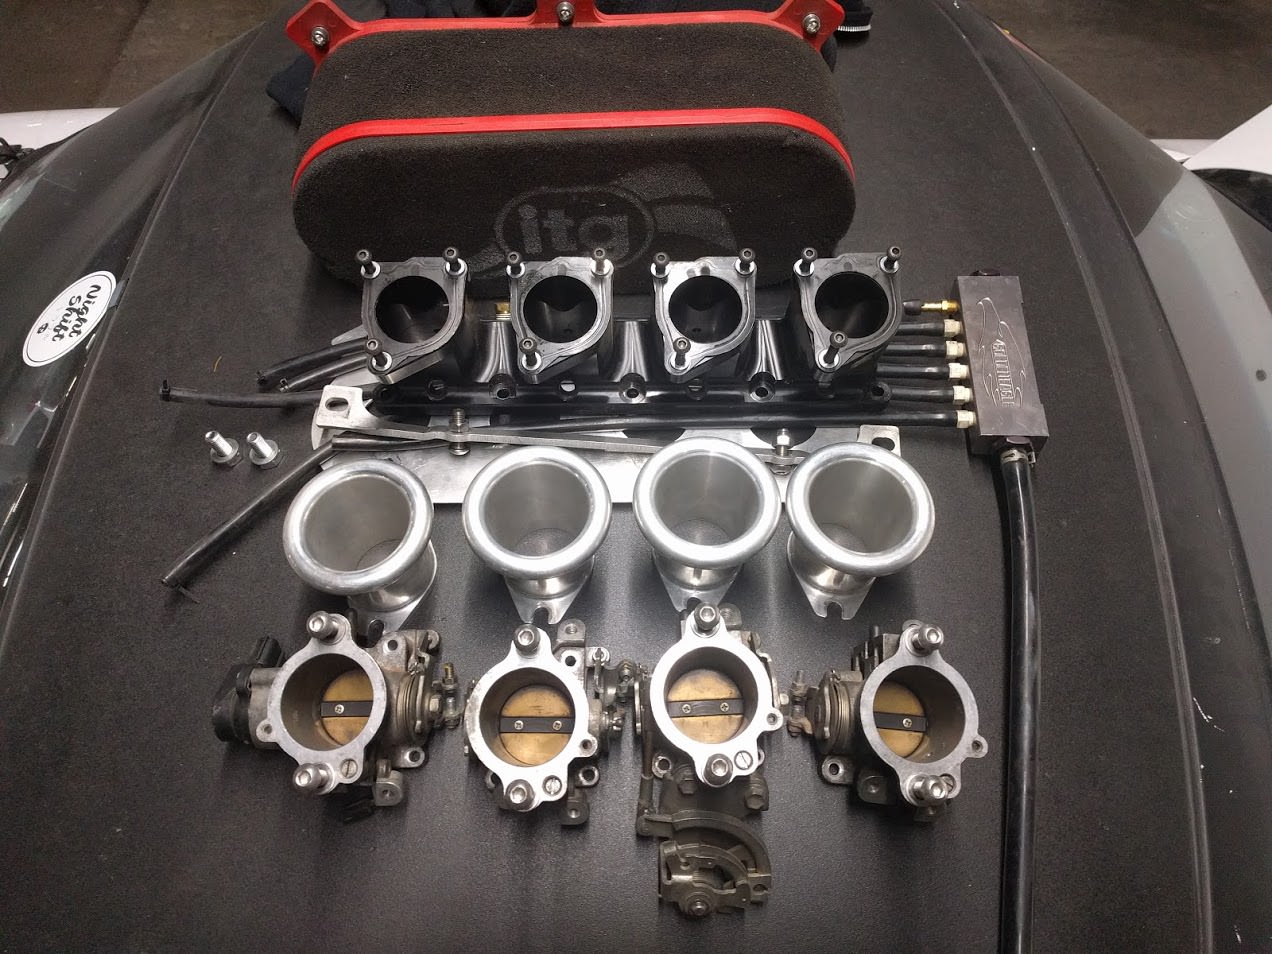
Goodbye ITBs . I'm gonna miss that sound.
This isn't a bad change though...
I loved the ITBs, but at the end of the day, this is a 1.6 with over 200K on the bottom end. I knew I'd want more power eventually so I started planning what route I wanted to go so I could start collecting parts.
As much as I'd love a K swap above all else, the cost is a bit out of reach. Turbos are fun, but I need something that will be predictable when getting on/off throttle full blast through a slalom, and not want to fall off of the engine. If I were to go turbo I'd want trackspeed ($$) and I'd need a 1.8 too...
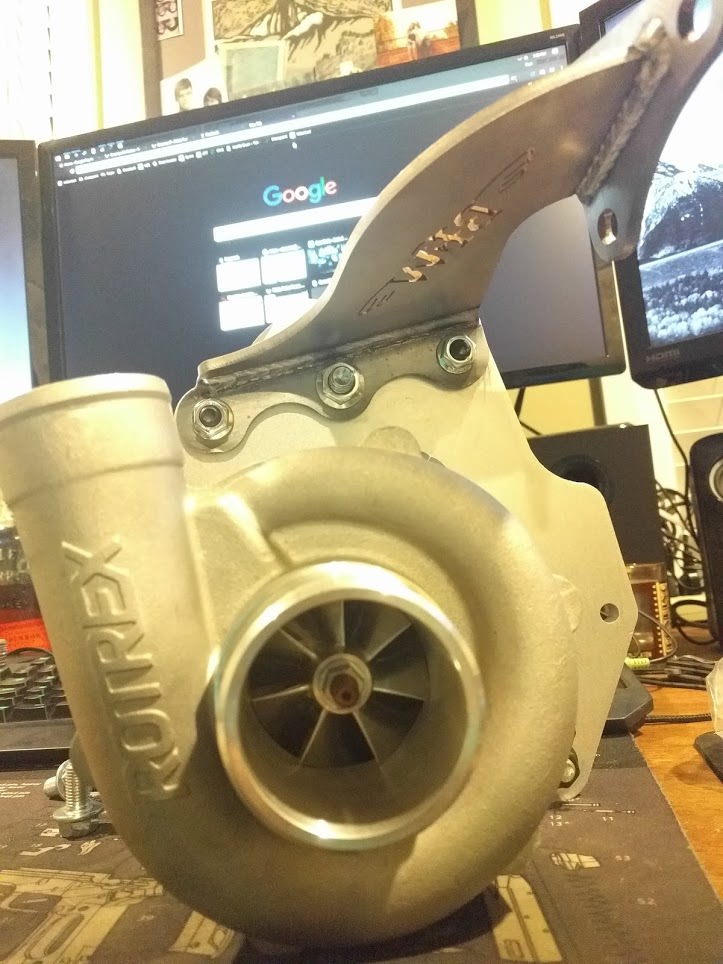
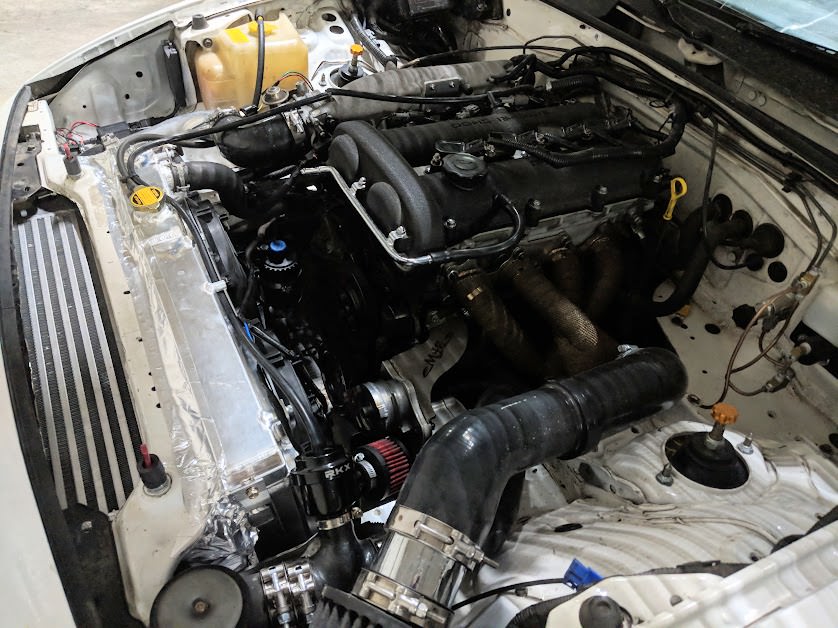
I eventually settled on a Rotrex. They don't make big power or torque figures, but seem to be reliable, are simple for a forced induction setup and and should run cool. Being predictable and responsive on/off throttle was also a big deciding factor. To make it even better, the whole Rotrex setup will transfer over to a 1.8 with the exact same parts.
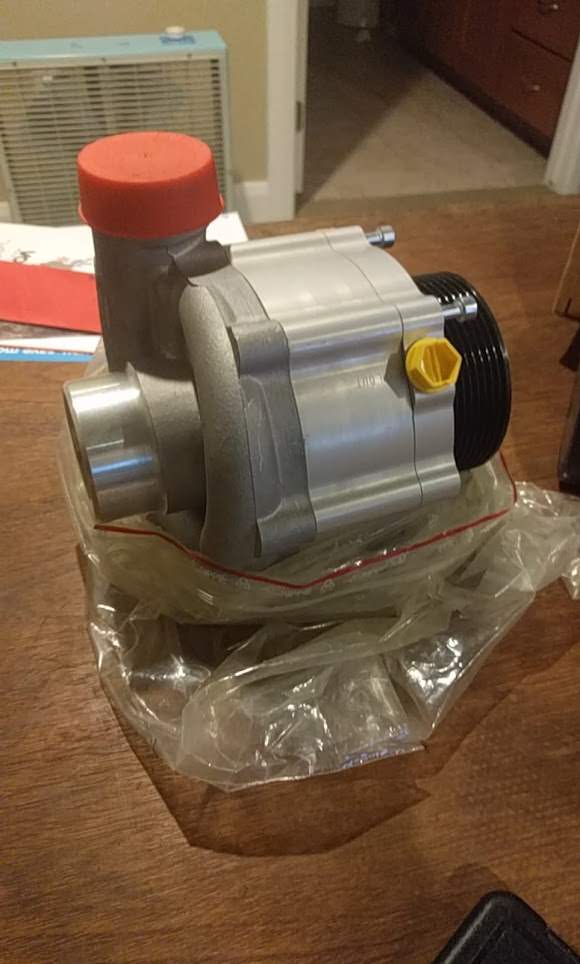
I was going to save for this long term, but just a week after deciding on this build a local ad came up for a new c30-74 for just over 50% off of retail, and I couldn't resist.
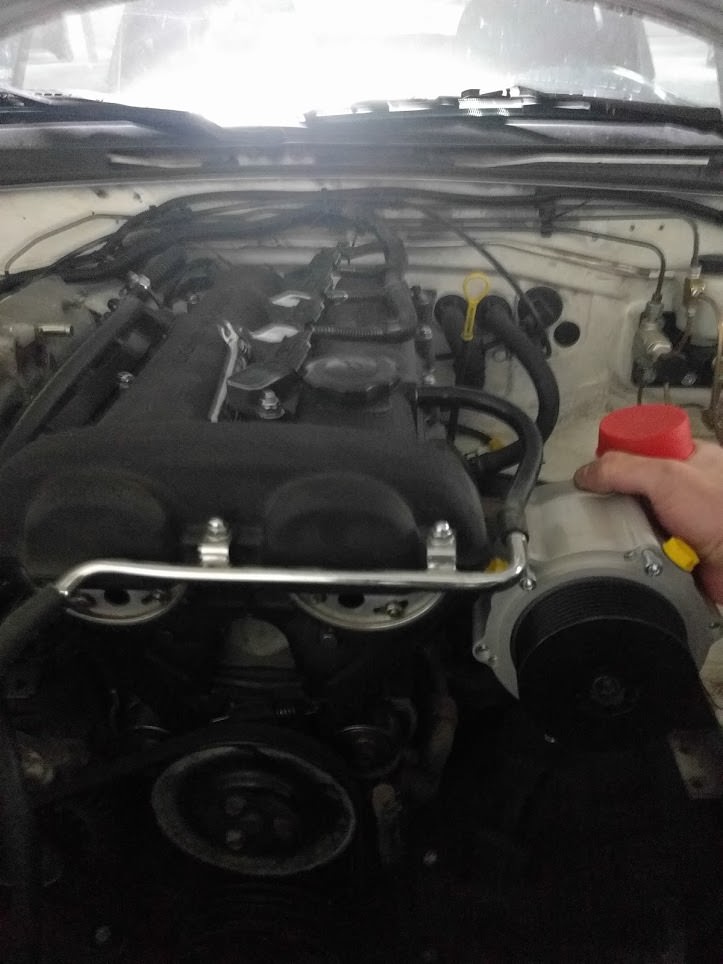
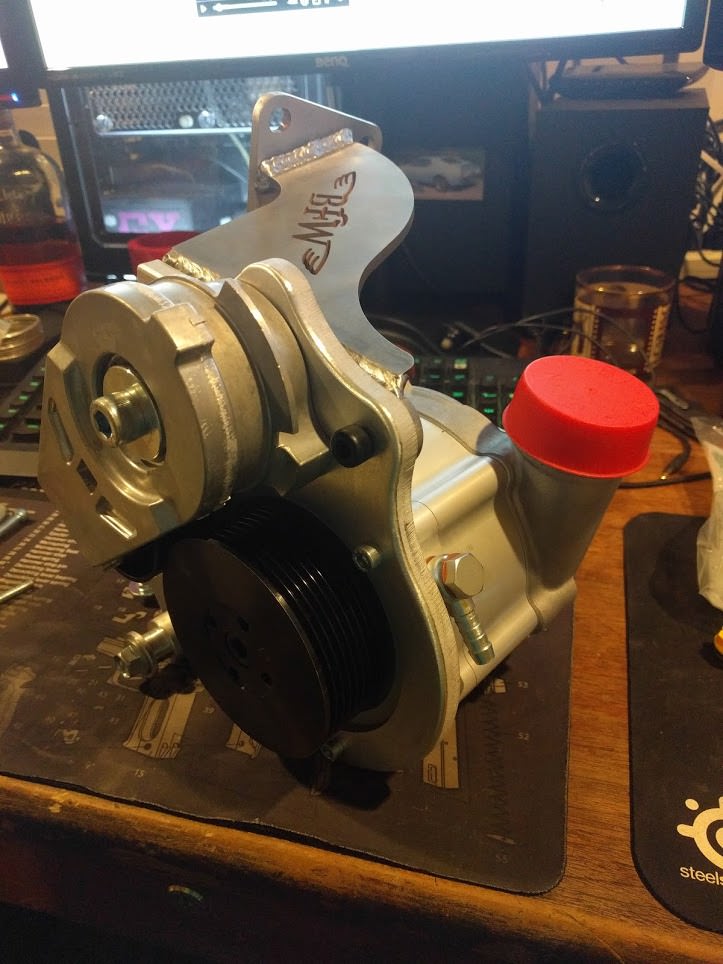
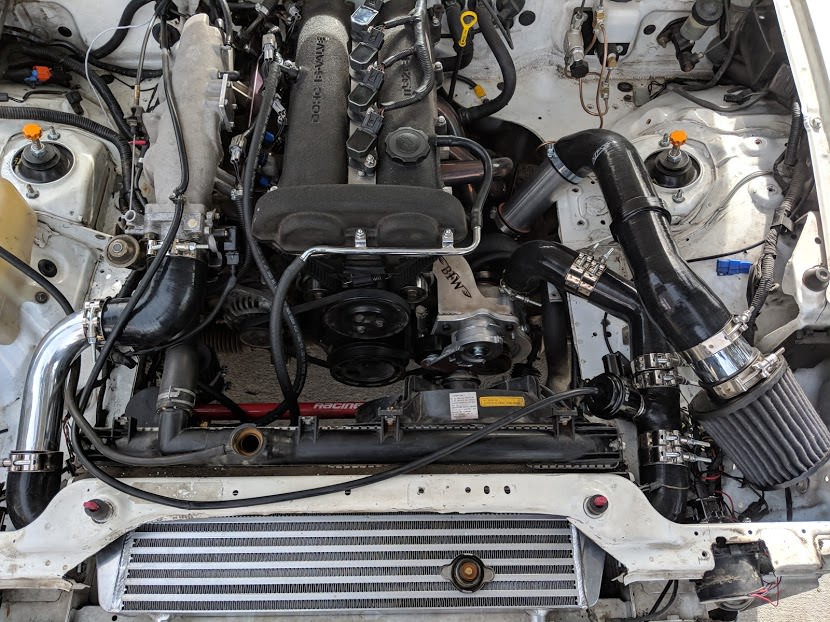
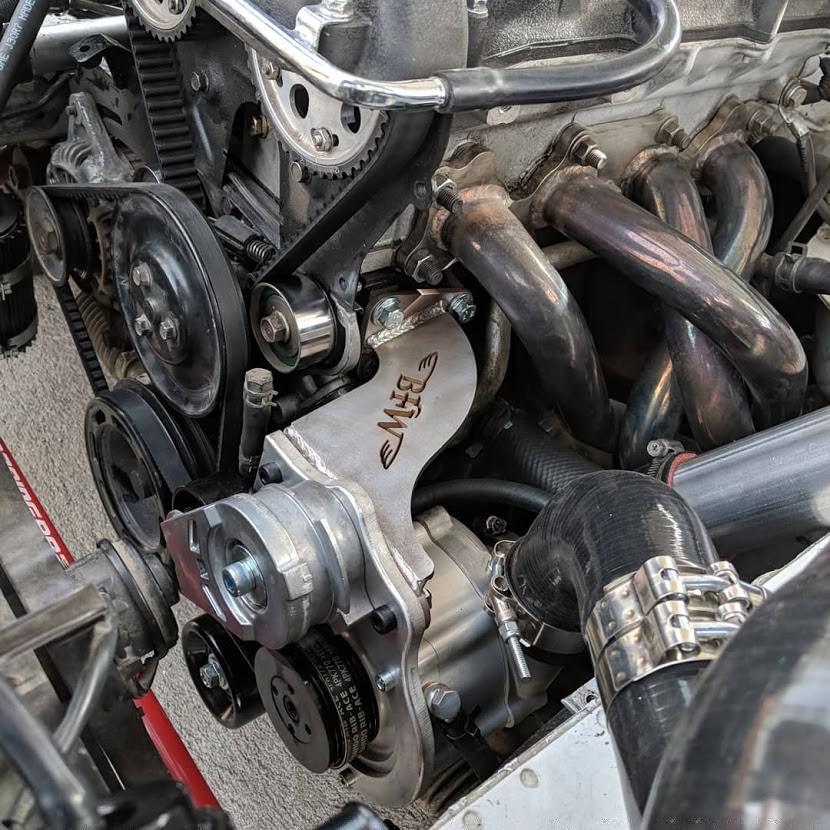
Even though I was initially planning on running a high mount bracket like a Kraftwerks or Track Dog, I saw Moti's low mount setup for creampuff and decided to send him a message. He agreed to make me a copy of his bracket and got it shipped out fast!
The bracket is really well made and bolted up perfectly. The mounting points are the same between 1.8 and 1.6.
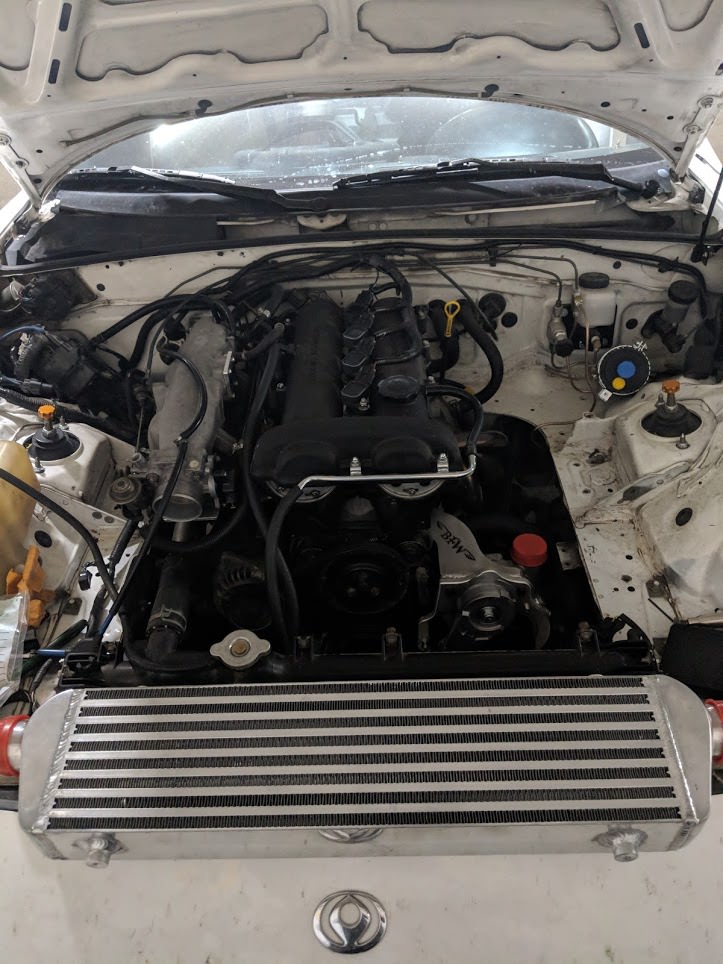
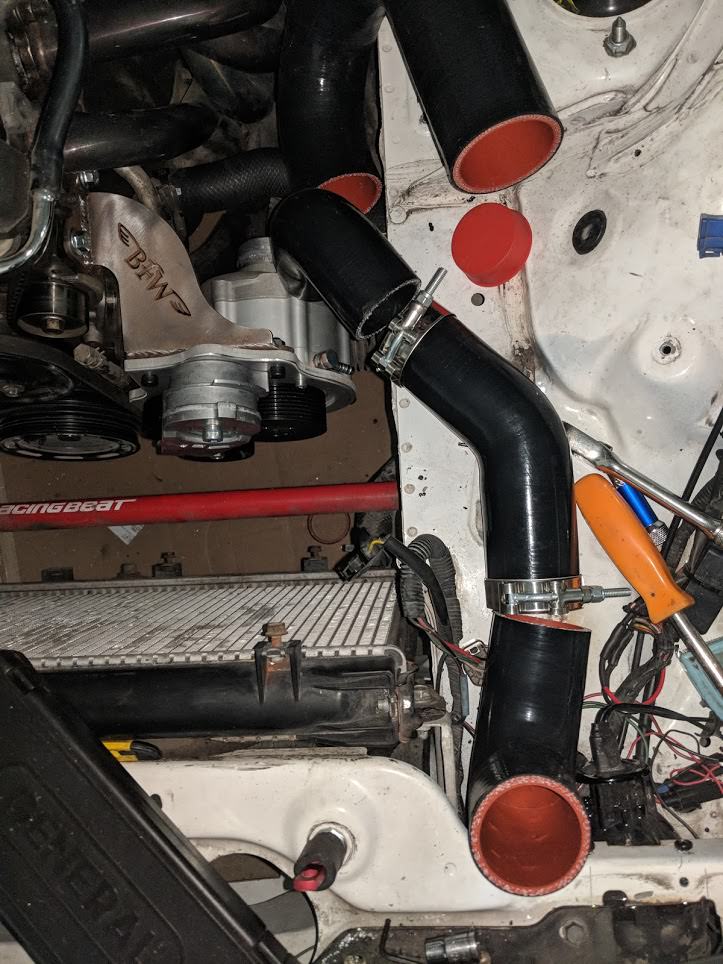
Once the supercharger was mounted I started mapping out my charge piping
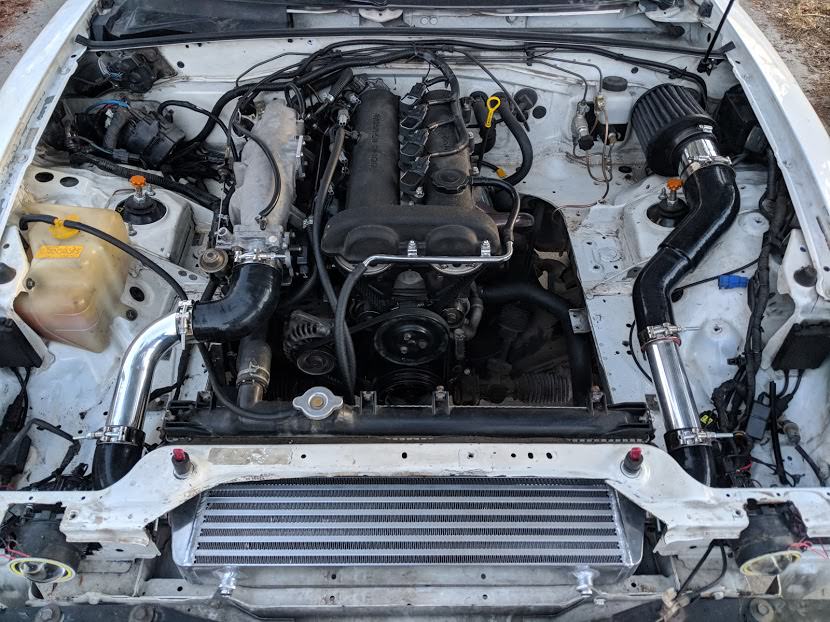
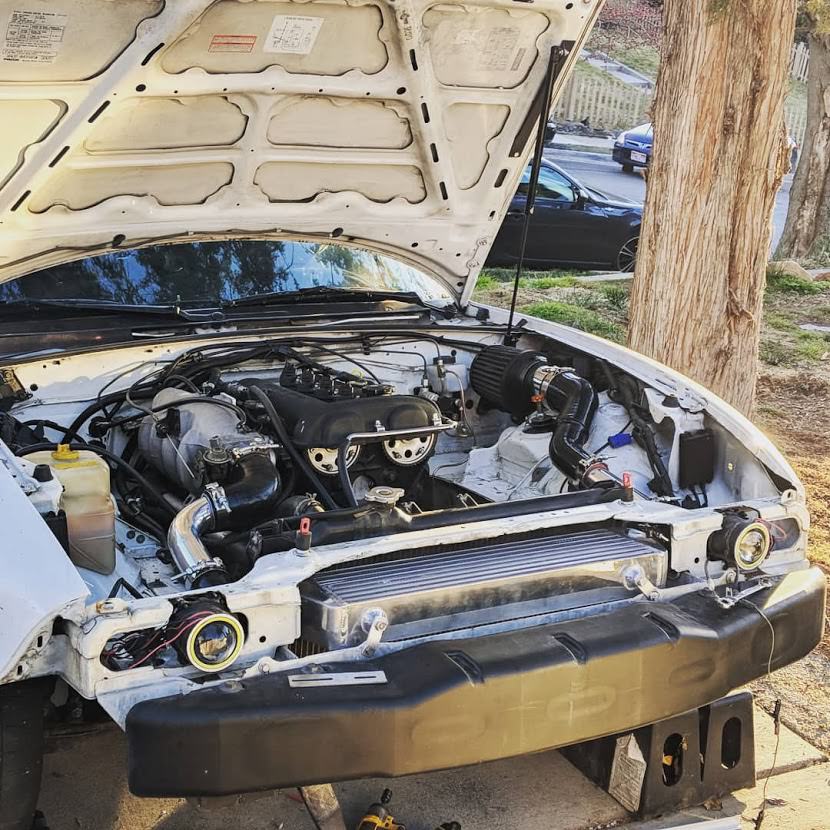
I decided to go with the v mount setup that I saw on Lincoln Logs' car.
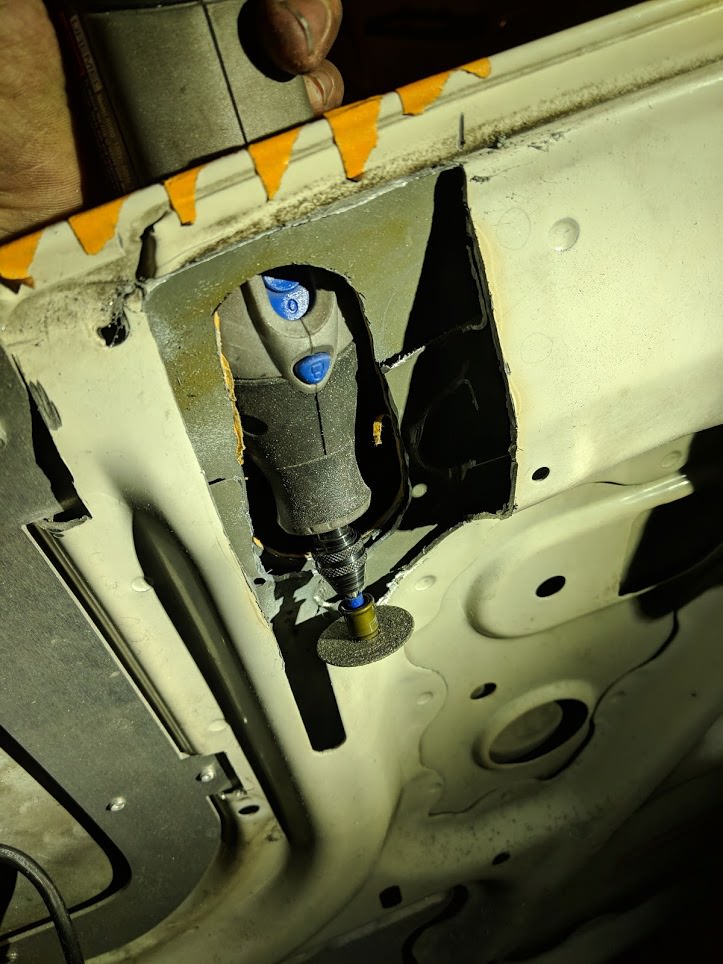
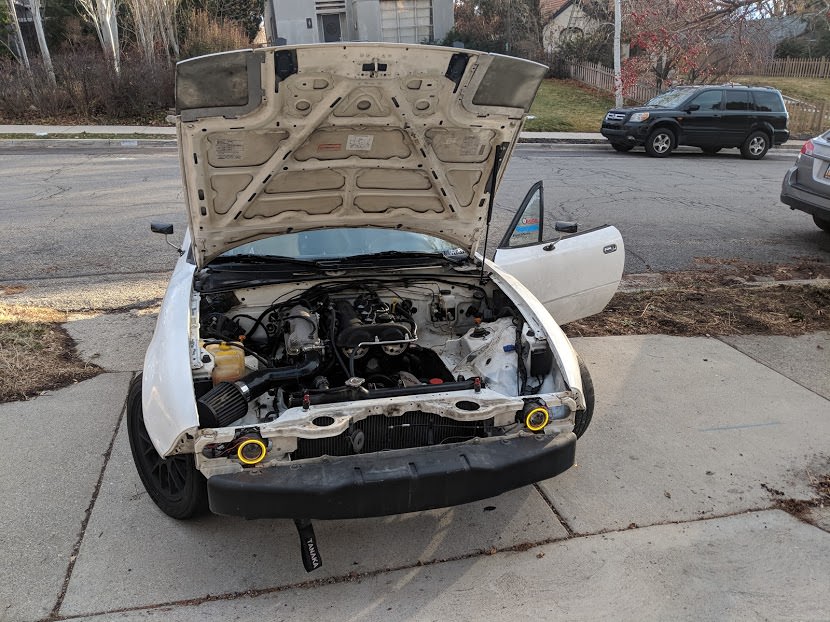
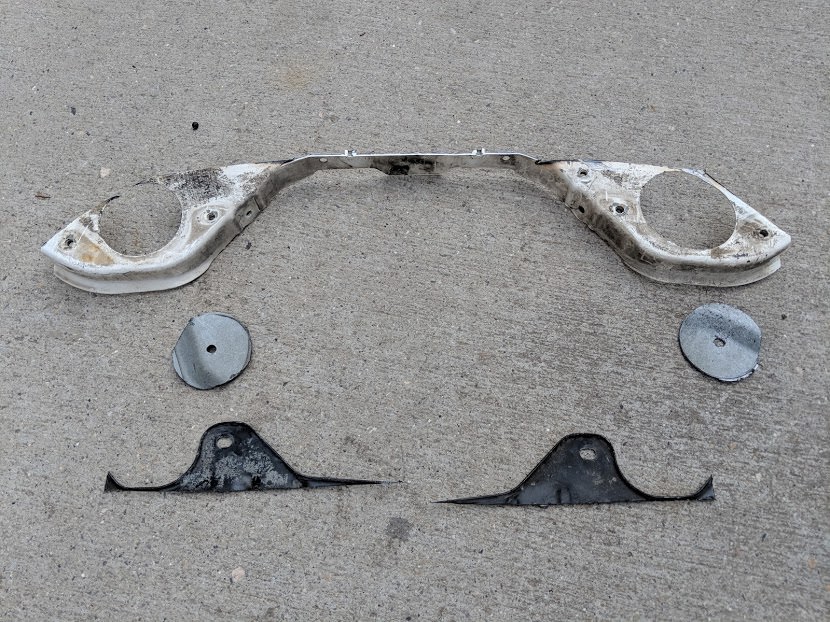
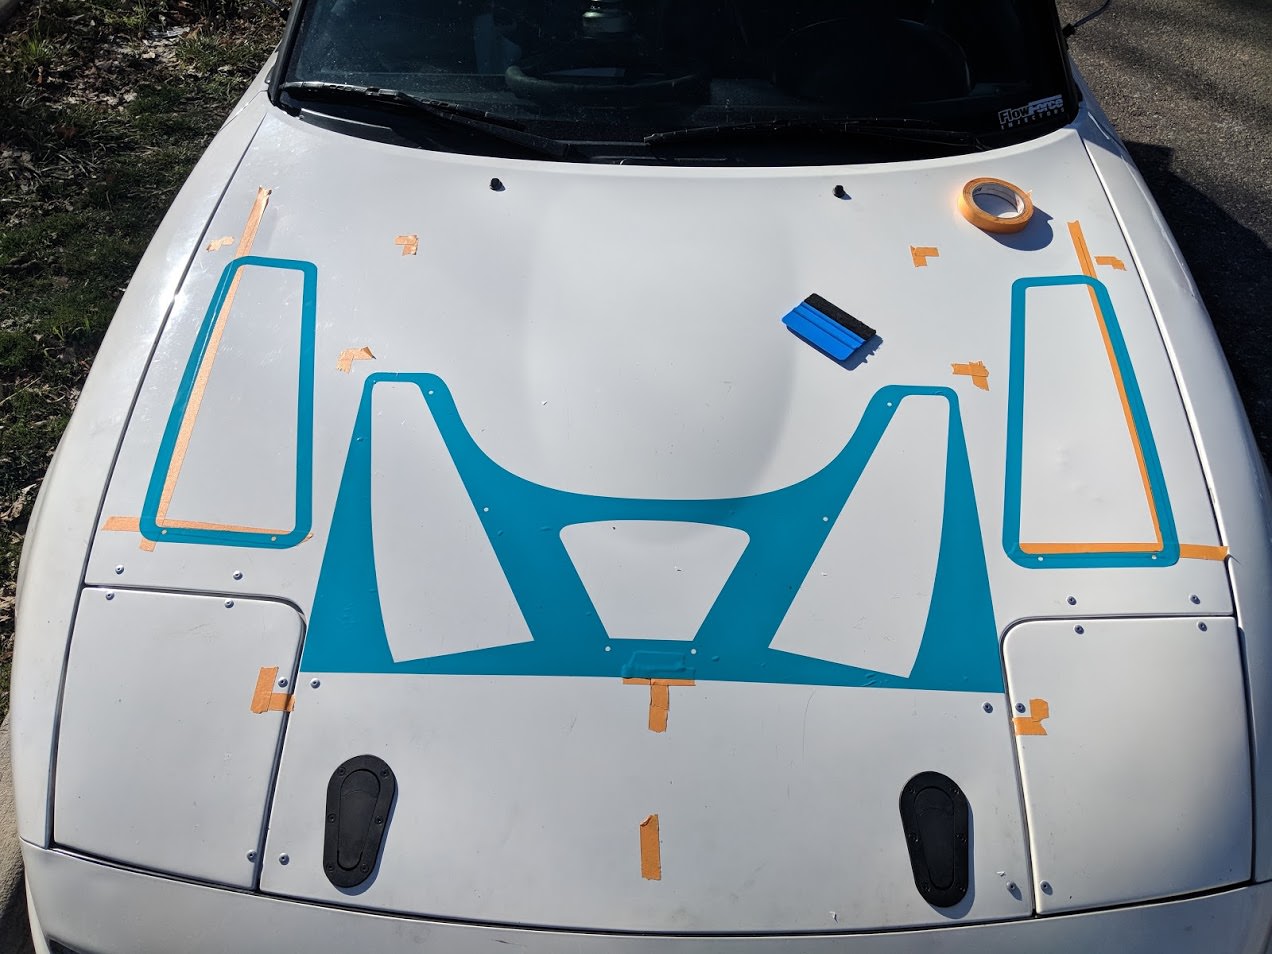
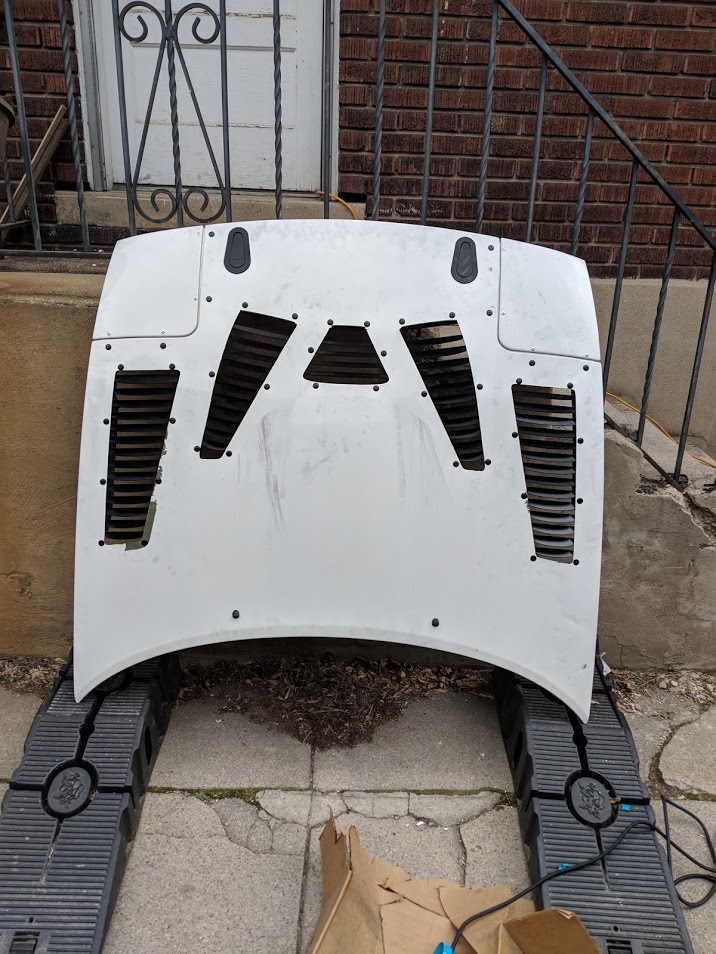
Since my intercooler is going to go where the factory hood latch is, I needed to install some aerocatches. I can't use power tools at my house (communal parking garage) so I packed up the hood and brought it to my buddies driveway.
Bonus - I get to hang out with his dog
(I got a new phone so photos should be a bit better)
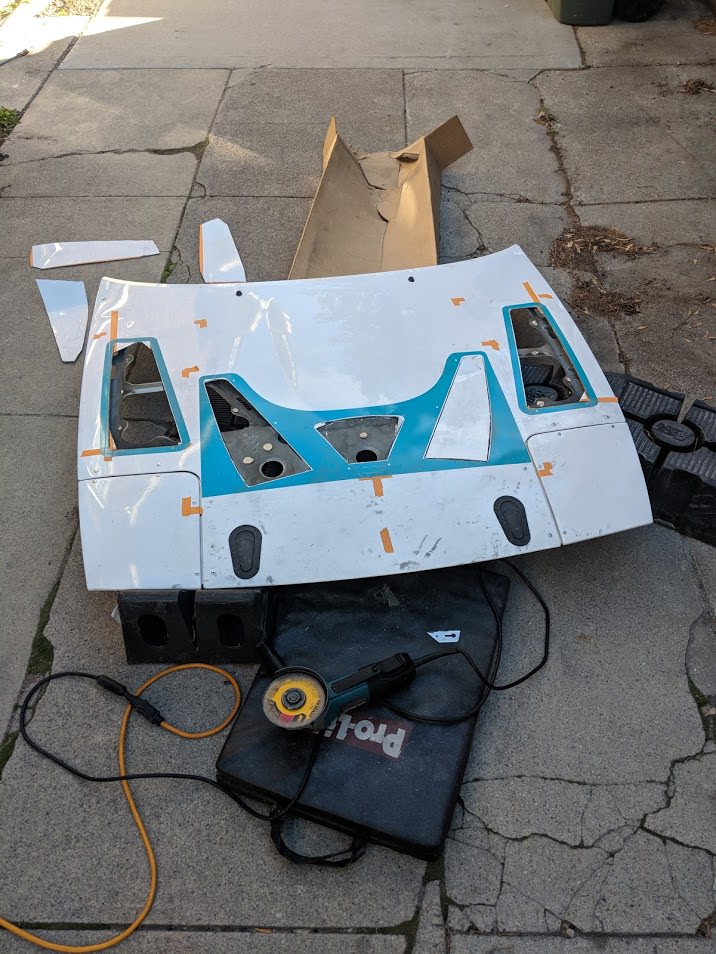
I did 95% of this with a angle grinder, but a couple of cuts were a bit too small for it.
Holy crap the radiator support is not straight. It took some bending to get the pins to go in the latches once I made them even on each side of the hood.
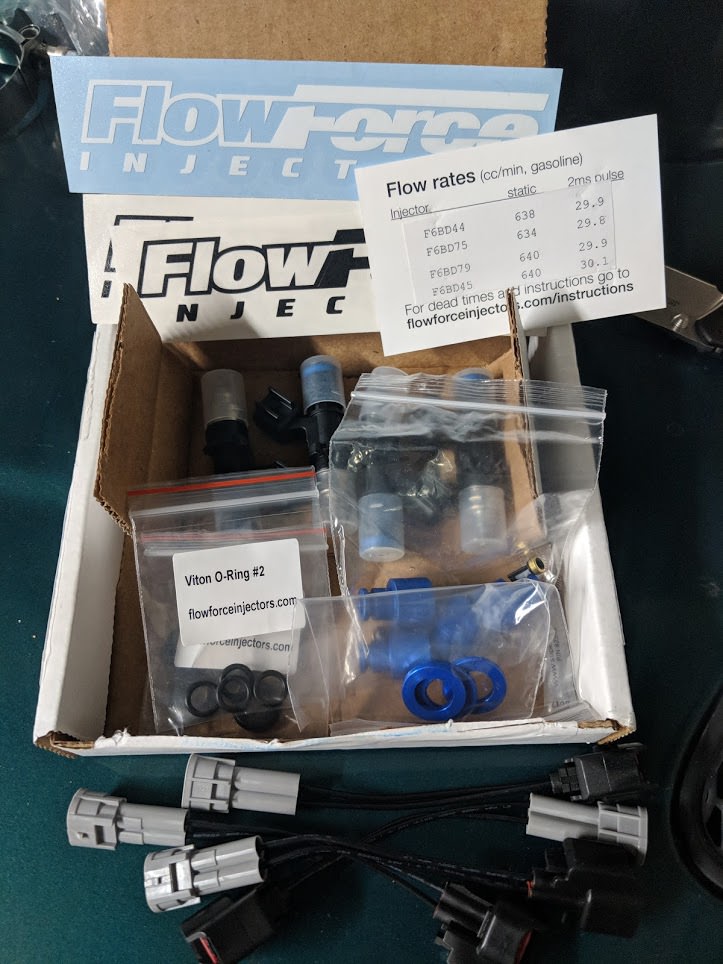
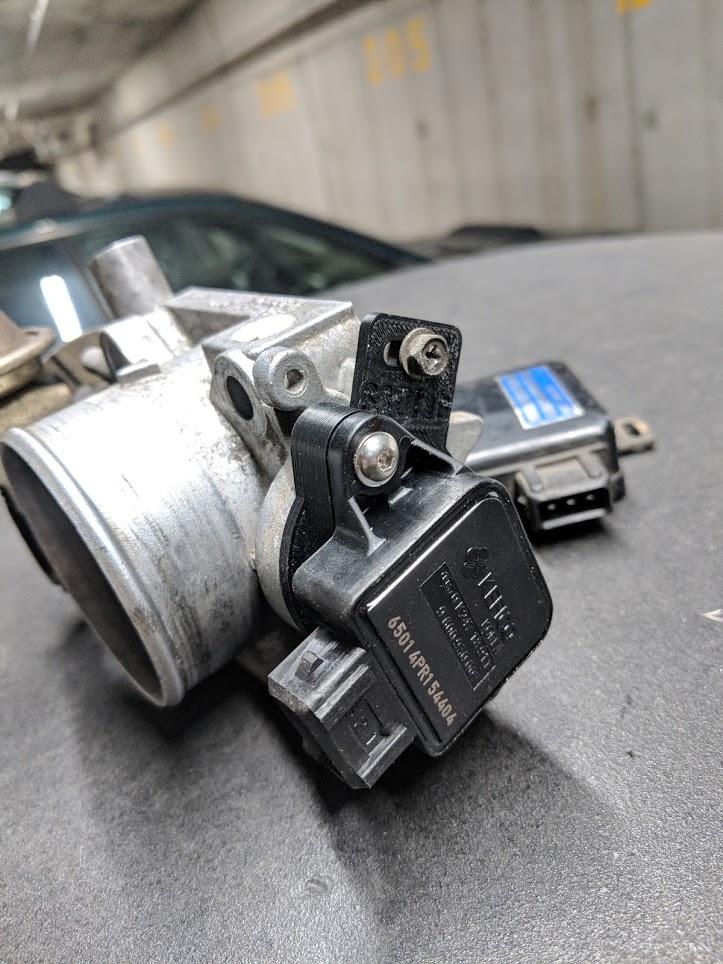
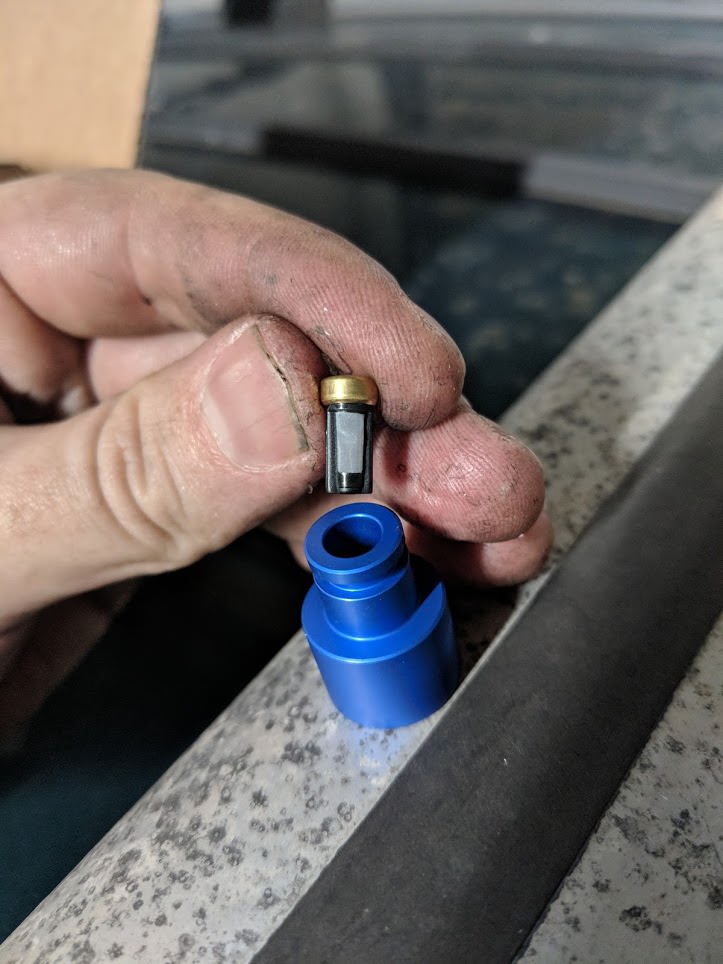
Now that that was taken care of I picked up a couple of engine bits. Flowforce injectors and a 3d printed adapter from hi_im_sean and a Kia TPS.
These injectors idle so nice...
Also, they come with the tiniest filters I've ever seen.
Now that fueling was updated I limped the car to my buddies place where it stayed for a couple days while I wrapped up the install.
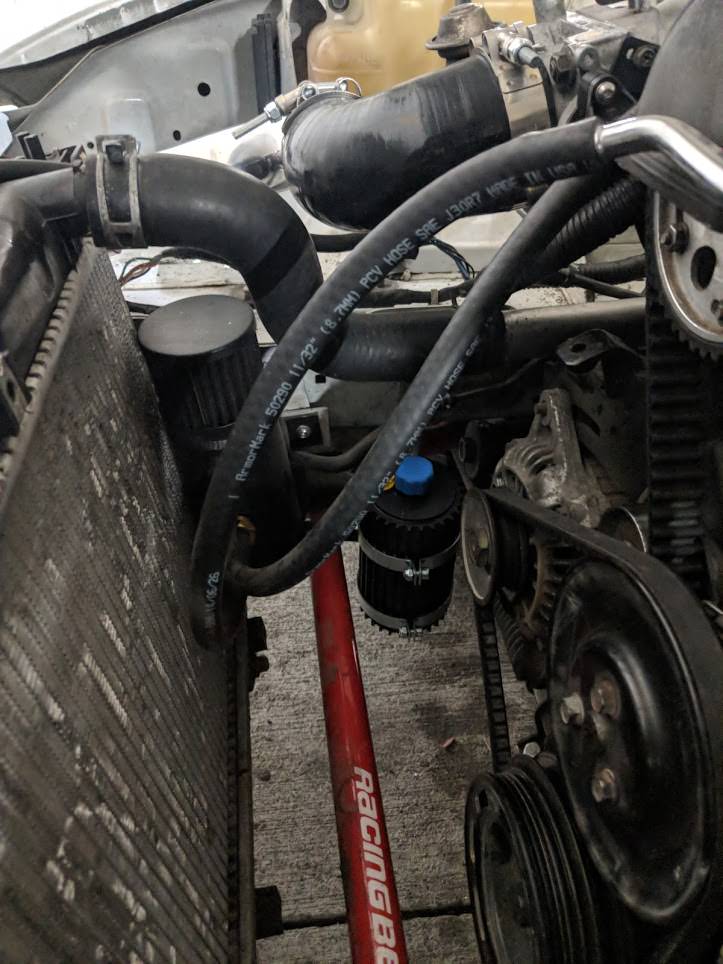
I mounted the rotrex oil can basically the only spot I could that kept the oil level below the supercharger shaft
Oil cooler mounted. I think I'm going to redo this a bit though...
Ghetto CAI to drive back and forth from friend's house for more cutting over the weekend...
This is all that had to come off for the V mount setup. Pretty minimal cutting.
I was temporarily interfooling while I picked up some parts.
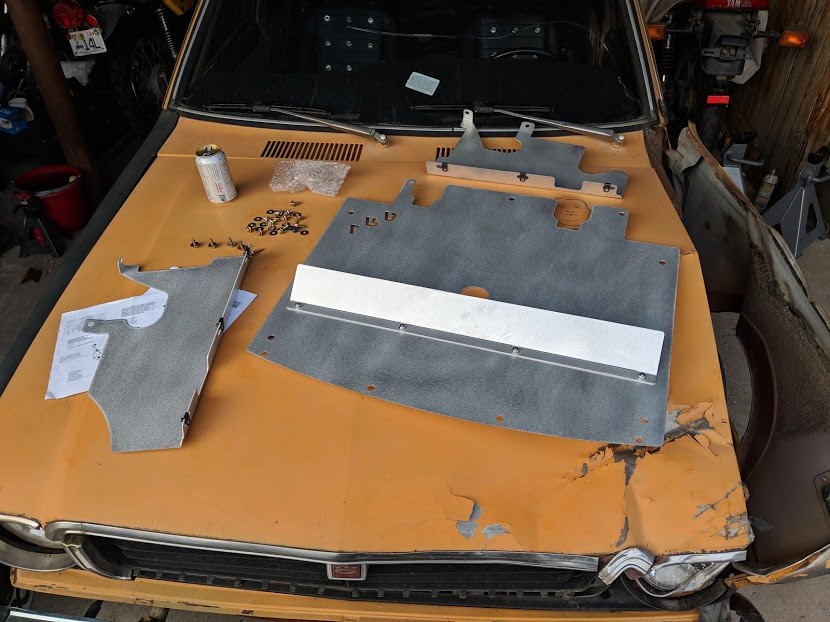
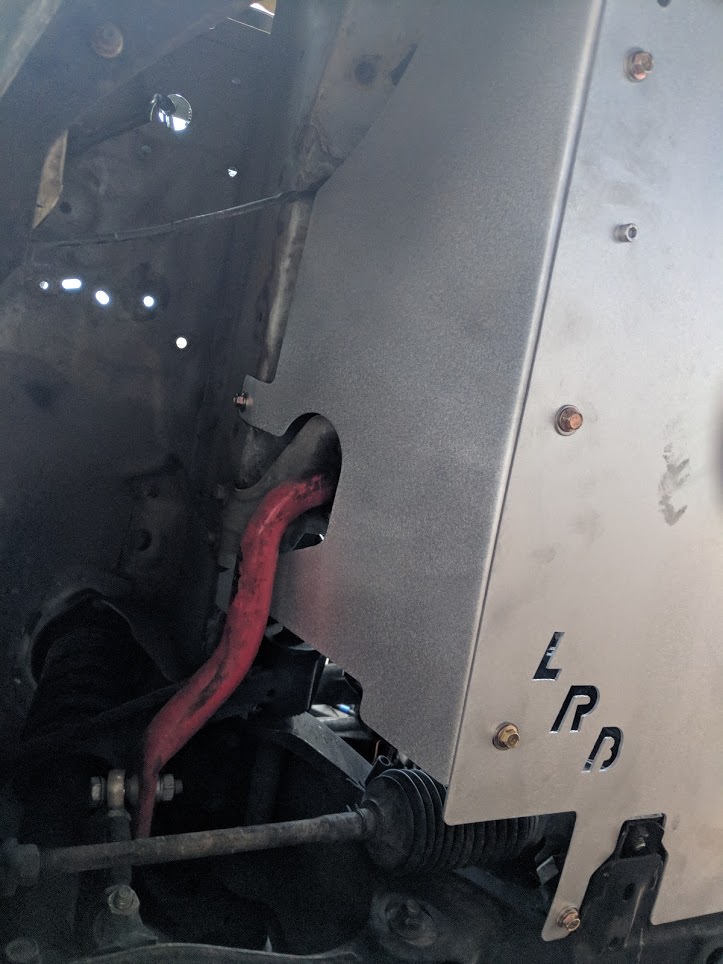
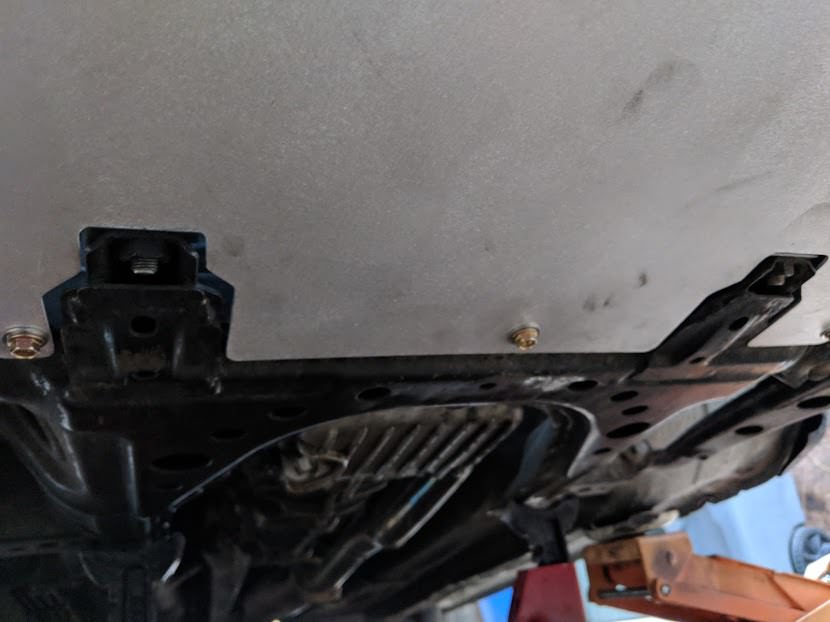
LRB undertray arrived. Nice piece of kit. I'm going to add a couple of extra panels of thin aluminum and some weather stripping to make all of the ducting as air tight as I can.
Here's some install process photos from the Singular louvers
The center template was easy to line up (9.5" from center of front edge of hood), but the sides didn't have measurements listed. If anyone wants to replicate my setup I put the front edge of the 4th & 5th vents (inside edge of the template) 3" from the hood edge where the popup is cut out, and 2.8" from the left and right sides of the hood.
Cut the top layer first... then cut the backside with some margin to fit the vents. An angle grinder with a cutting wheel is the tool of choice for 90% of the work. I used a flap sanding wheel to clean up the corners and finish the edges a bit better.
I picked up some large head black rivets off of amazon, and I'm really happy with the way they turned out. Unfortunately the paint they used on white NAs is especially awful. The vinyl template actually peeled paint off of the hood in a couple of places. I'll respray eventually, but this is fine for now while I work out more aero on the car.
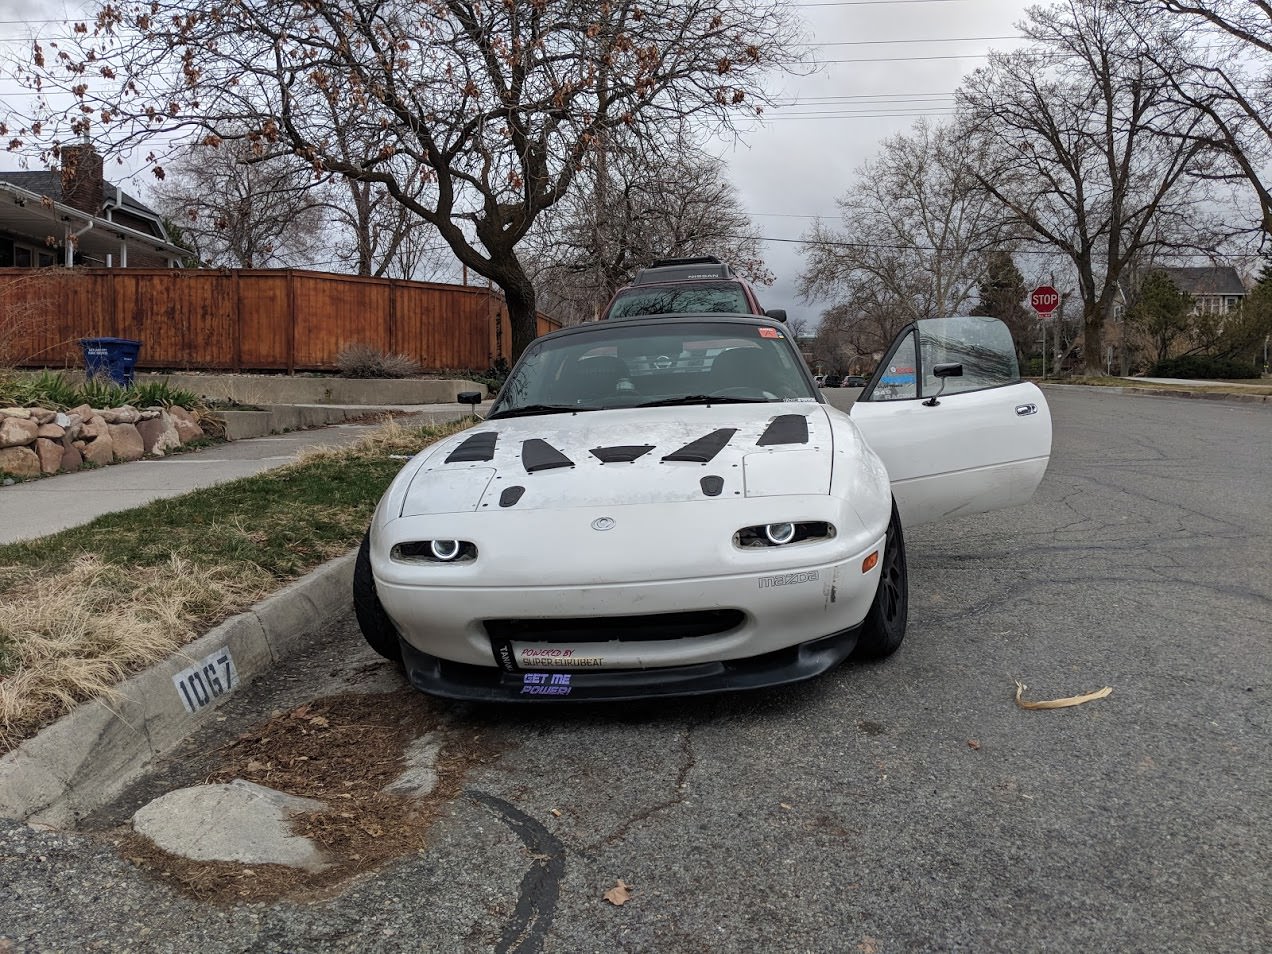
Lookin' mean!
When I park the car you can feel heat just pouring out of the vents
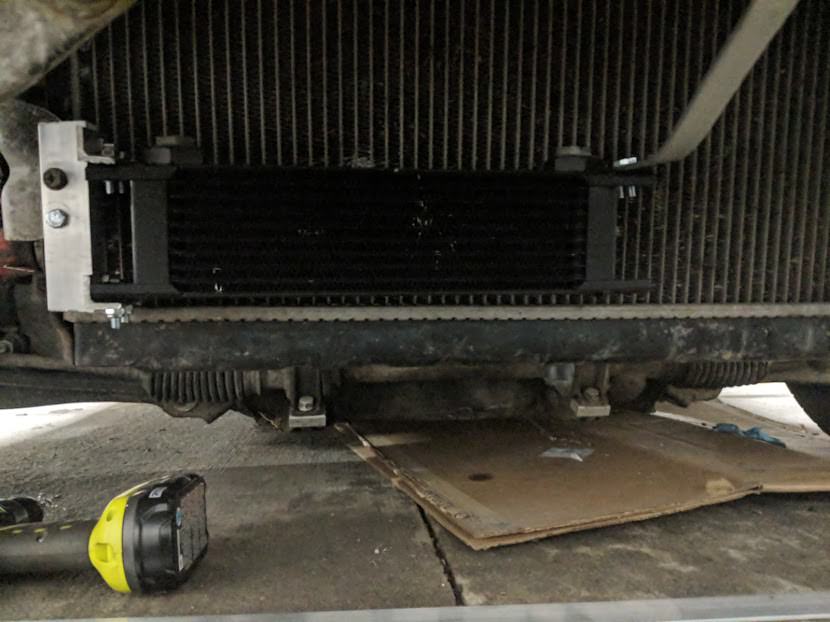
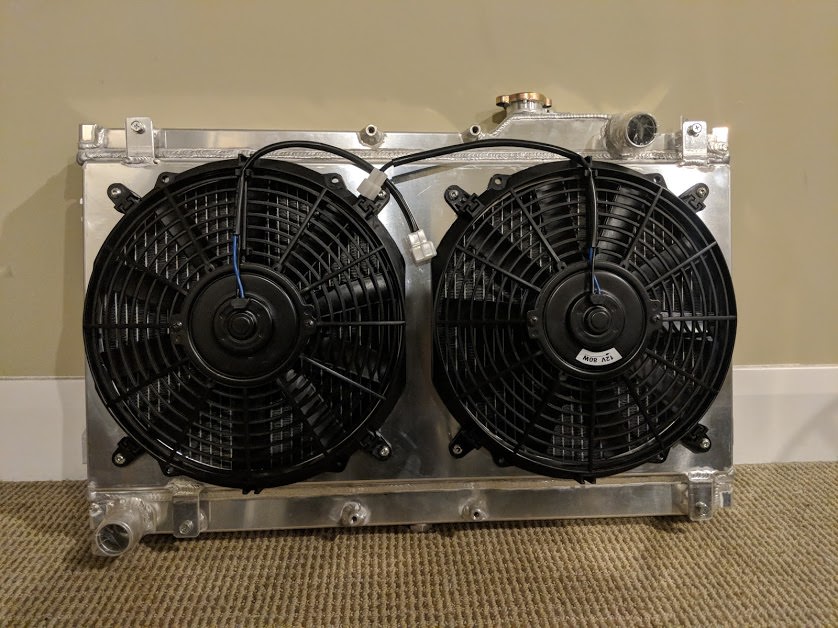
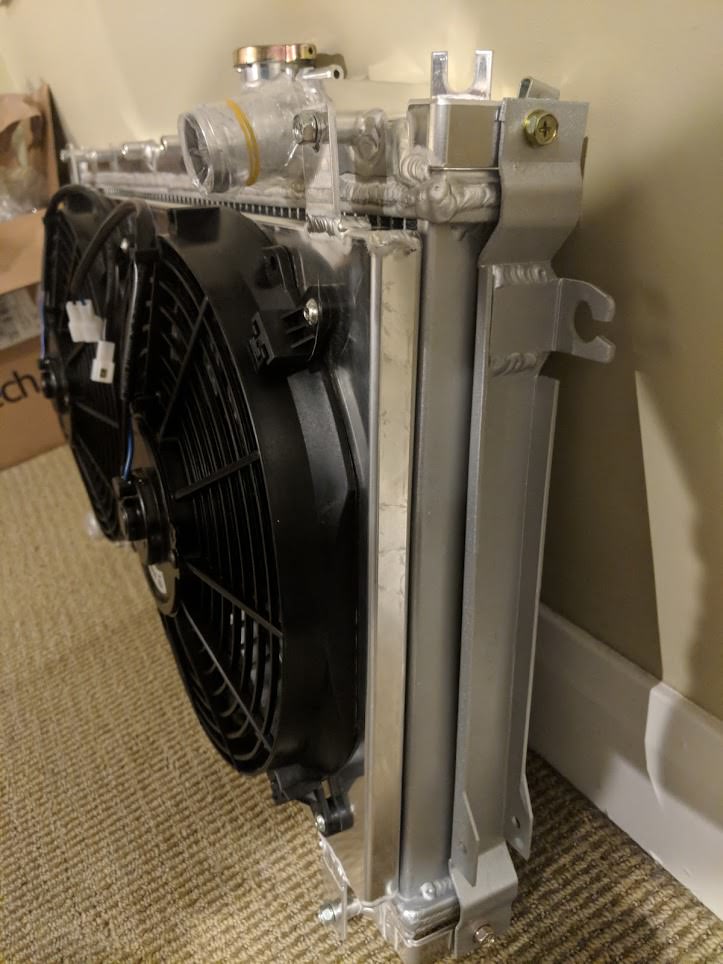
To counter balance the nice exhaust, I ordered a stupidly cheap ($180 shipped!) radiator, shroud and fan kit from "Speed Daddy" on Ebay. If it's crap I can replace it with something nicer. That all being said, even if the rest is junk, the shroud looks pretty nice and this should be better than a 100K stock radiator.
Since I'm moving right now, my buddy let me borrow his Dodge 50 (Mitsubishi re-badge). I would love to own a little Japanese truck like this at some point.
I took a quick clip of an onramp pull (shot with my phone jammed into my harness, so really it's just audio.) There was a guy going 25 around the corner on the onramp, hence my hesitation before I merged around him.
I've been struggling with troubleshooting rather high AITs under boost (35� ambient, 98� at redline/16PSI after a 3rd gear pull) over the last few days. I tried to tighten up the ducting to force more air through the intercooler, and I wrapped the header (metal intake pipe very close to exhaust, but no change.
I then parked the car outside and let it get dead cold and I was reading 58� in tunerstudio when it was actually 34� outside. Looks like I may have either a calibration issue or a bad sensor. I'd much rather have that than AITs 60�+ over ambient.
Hah! well ****. I don't know NASA classing very well, I'm honestly just enjoying building a quick dual purpose car. I'll read up on the rules again since it's been a while.
Originally Posted by Efini~FC3S
Also, I'm extremely curious how much who you're able to make at the wheels with this set-up.
Extremely
When is the dyno tune scheduled?
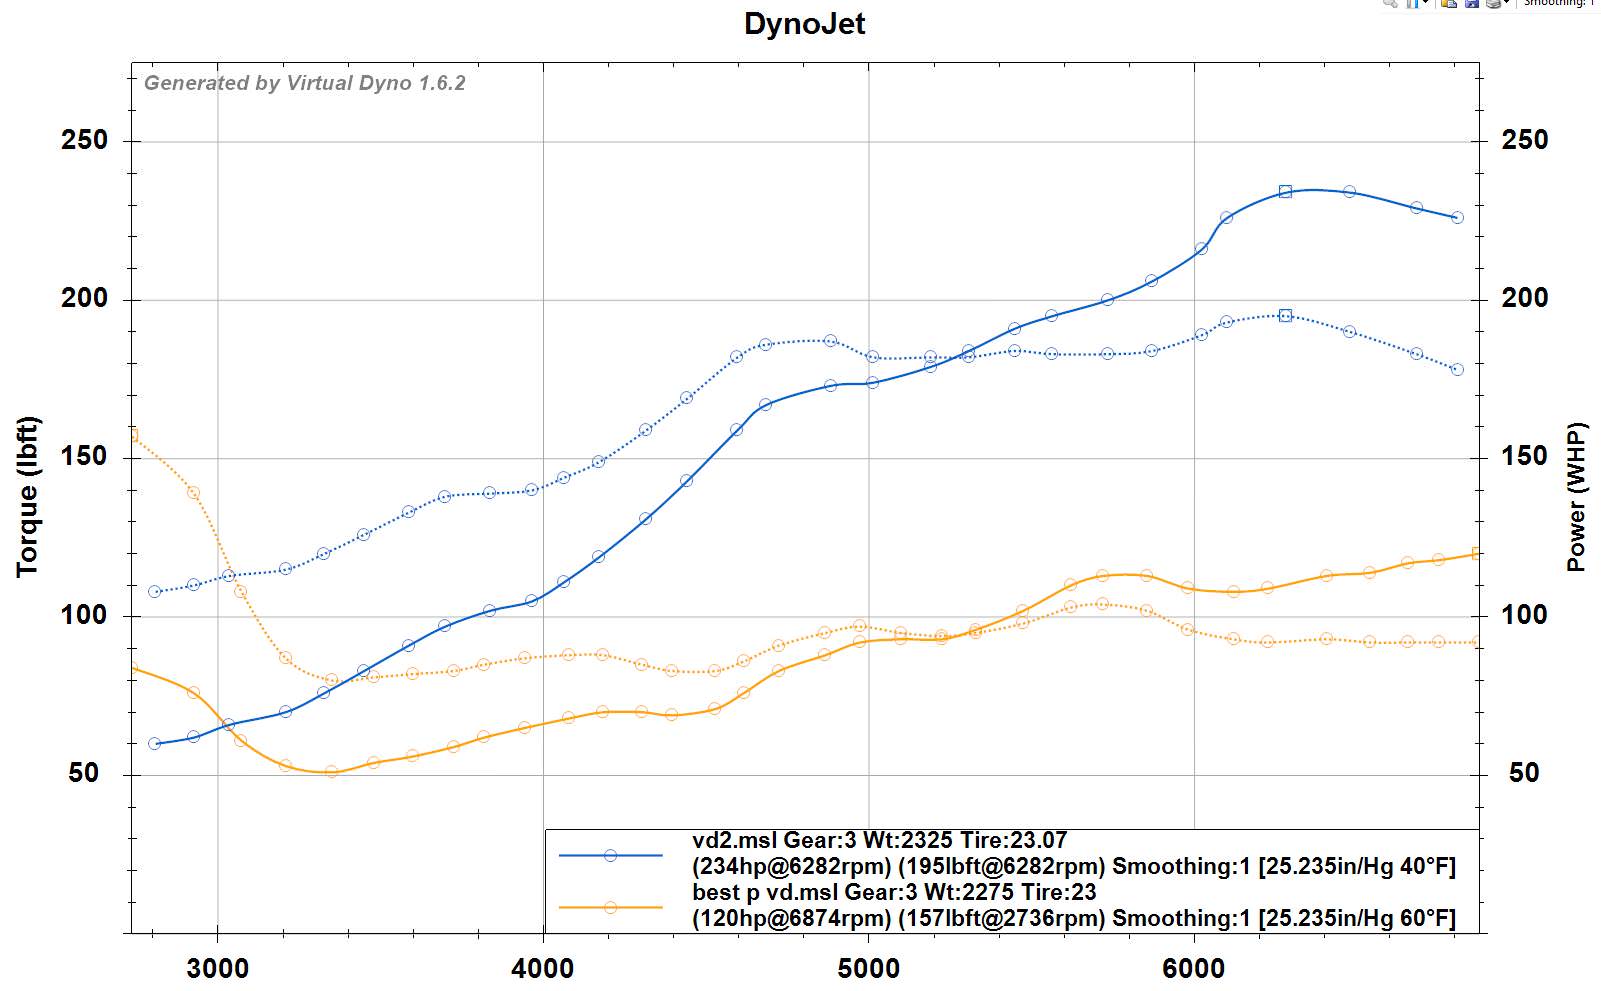
I'm currently making 234 at the wheels on pump gas with a street tune. Also note - this is a supercharger and I'm at 4200' of elevation, and it's a 1.6, so not optimal all around. I'll eventually move to a 1.8 when this engine goes... E85 should do wonders for this setup, but alas, no pumps around me.
The lower power line was my old ITB setup - 264/264 9mm lift cams, 10:9:1 compression, lightly ported head. All I did was pull of the ITBs, bolt on the Rotrex and adjust the cam gears for less overlap.
I believe the power drop at the top was due to a misfire from too large of a plug gap as there was a bit of hesitation before the soft limiter should have kicked in. (this has been resolved)
I'm pretty happy with the power under curve. I'm curious what's been left on the table I could pick up with a dyno tune, but I just moved into a new place with much higher rent and am pretty broke for now.
Aaaand I just killed my 4th wideband in 3 months. I'm so frustrated I don't even know what to try at this point.
-Started with an Innovate LC-2, first wired through the MS3 Basic power and ground wires. Setup ran fine for 2 years while the car was NA. Burnt up after SC install, but not surprised because the base map was stupid rich and wouldn't run at all at first.
-Sensor died after tune was squared up, so I figured it was just weakened buy running too rich. I installed a new sensor, died after 2-3 days
-Rewired LC-2 through a fused relay setup as directed in the LC-2 manual. Sensor lasted <500 miles
-Installed a AEM UEGO and it lasted less than 500 miles before the sensor died. It was wired to the wideband power/ground as labeled by Rev in his wiring instructions. It's currently reading full lean after the few seconds of warm up. Sometimes when I shift it will show another reading for a second, but it does not look accurate from what I've seen in my tune.
-All of the sensors died after the car was started in the cold (outdoors , instead of in garage) and did not sit running over 2 minutes to warm up.
-I have at no point "pre heated" the sensor by turning the wideband on and then starting the car later since this thermally shocks the sensor.
-Car runs 13.5:1 AFRs under moderate acceleration, 12:1 at WOT , which should not be rich enough to kill the sensor (as far as I know).
-When I shift the AFRs very briefly spike to 10:1, this happens with accel enrich off and does not change if I reduce fueling in the cells I pass through during the shift, so I tuned for smoothness rather than AFRs during shifting. Is this what is killing the sensors?
-Every time I have pulled a sensor it has been sooty. The car does burn a tiny bit of oil, but nothing like others I've seen on the forum.
I'm really desperate for help here. Has anyone had similar trouble and fixed it?
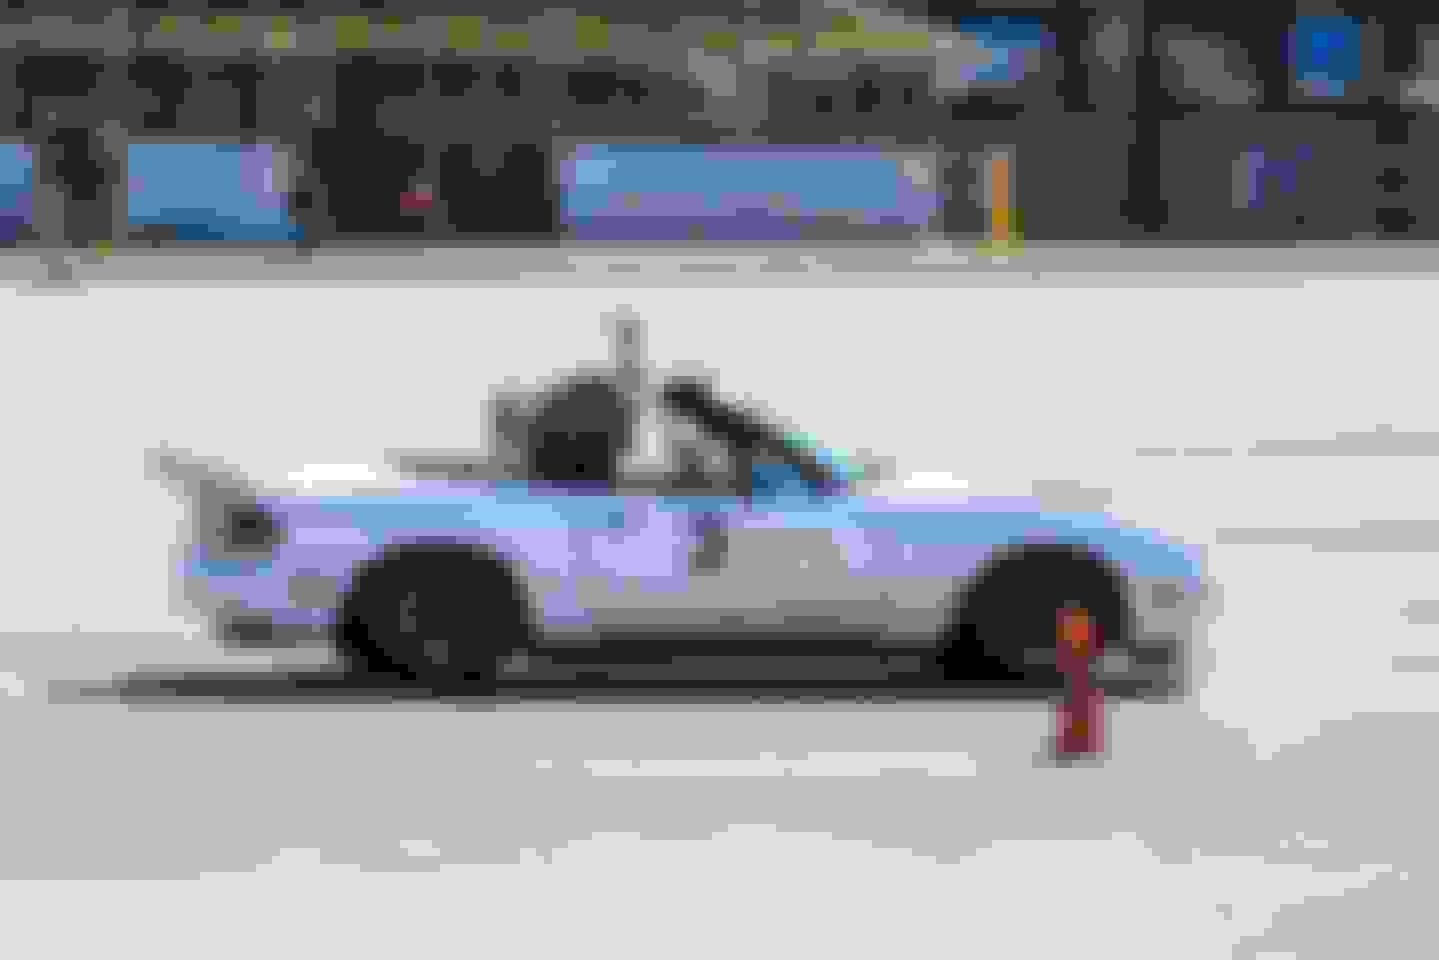
So I've just been ignoring the 02 issue for the last bit (tune is pretty dialed in on open loop even though it's not optimal) and got to just go out and enjoy the car for a bit at our region's first autox. My gopro died so I don't have any video, but a local guy snagged a pretty nice pic of me rolling up to the finish.
Learning to drive a car with more power has been a trip. It's too easy to just floor it and then control the slide, I need to dial back the right foot so I can start driving fast again.
To do list after the race:
More ducting/larger intercooler to reduce IATs - weather said 56� and I hit 110� at the end of the run
Fix the goddamn O2 sensor killing weirdness
New alignment - I'm roasting all of first and second gear off the line even trying to modulate power, and I have some bad inside edge tire wear. Time for less camber
The goal is to get those tackled by the 31st so I can race on a slightly better setup
Long-ish term to-do:
BBFW roll bar
Aero - I caught air twice on this course, and it's not even our bumpiest lot. I'm going to try and order a 9 lives racing wing and make myself uprights, and a splitter/canards
Flares - I found a local guy who is willing to sell me his 15x10/245 rc-1 combo, but they are low offset, so no way they'll fit under stock panels
Living this build, looks like a load of fun. Interesting that you are burning out widebands, something is definitely not right. Are your logs showing overvolting or anything like that? My lc-1 is right before the cat, and I�ve been running it like a decade, even preheating it and I haven�t lost a sensor yet. I get Power from the radio harness, and ground the sensor at the factory location under the TB, and the heater ground is under the dash somewhere.
Living this build, looks like a load of fun. Interesting that you are burning out widebands, something is definitely not right. Are your logs showing overvolting or anything like that? My lc-1 is right before the cat, and I’ve been running it like a decade, even preheating it and I haven’t lost a sensor yet. I get Power from the radio harness, and ground the sensor at the factory location under the TB, and the heater ground is under the dash somewhere.
No overvolting in logs. still have no idea what's killing sensors. I really don't want to put a new one in until I figure it out, but I hate running blind/open loop all the time...
In the meantime I decided to tackle the alignment. Alignment before last I did myself, and I hated doing it. I went to a shop last time, but it looks like either the alignment slipped (weird that toe didn't slip if so) or they did a crap job.
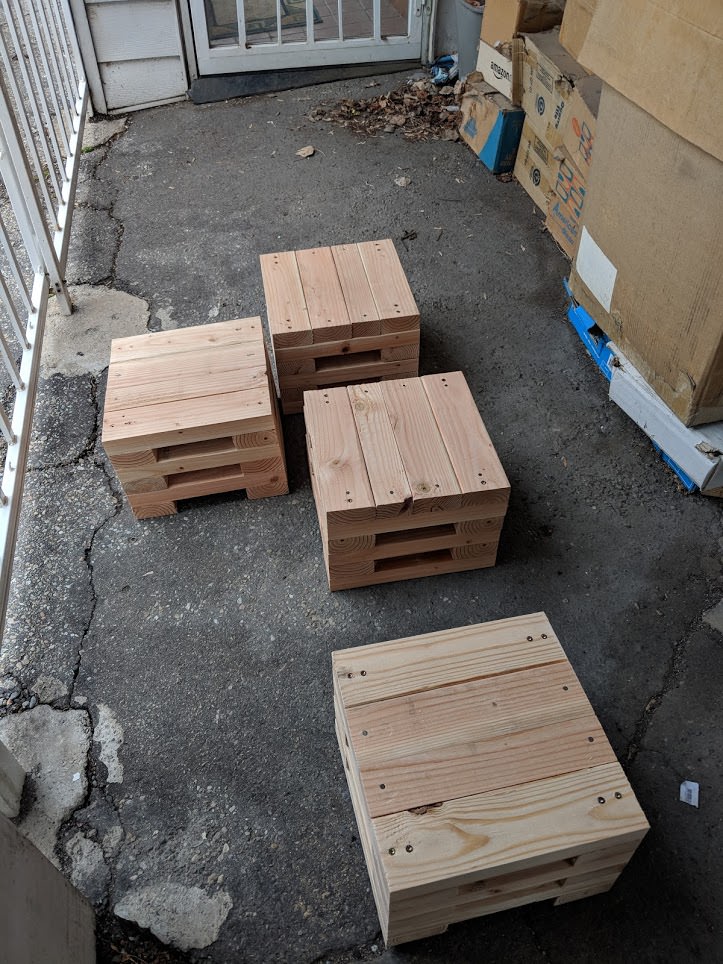
Since I don't trust the shop for now, I decided to try and make this a little easier on myself.
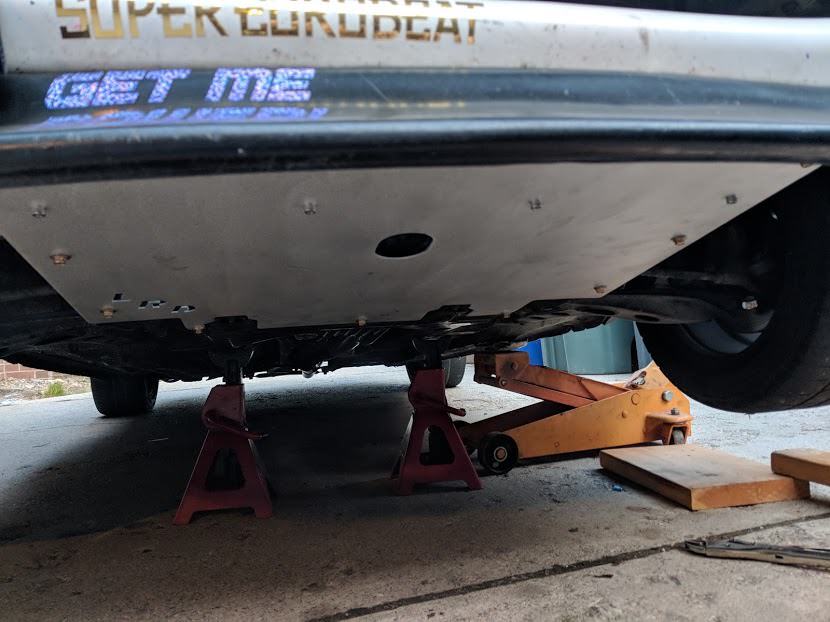
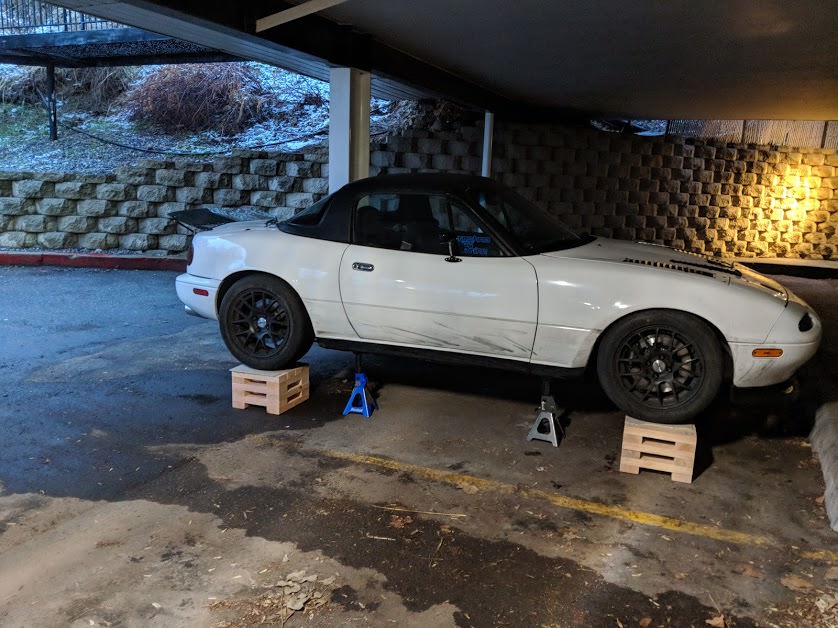
I made some 13"x13"x9" wheel blocks so I can get under the car while suspension is loaded. If I were to make these again, I would make them at least 16"x16" or even 18", since they would feel a lot safer.
Here's the car up on the stands. I have jack stands just under the the car, but barely not touching just in case something fails. The suspension is still carrying 100% of the load.
I have 12"x12"x1/8" flooring tiles under each wheel, they act as slip plates so you can turn the front wheels to measure caster, and so you don't have to roll/bounce the car to resettle after making camber/toe changes.
The other bonus is the tiles work great as shims to level the car. I put a bucket of water in the car, and then siphoned water into a clear plastic tube that was taped along a yardstick. As long as you do not move the bucket you can put the yardstick at the base of each tire and it will show you it's relative height. Just add tiles at each wheel until the car is level (when the water reads at same making on yardstick). I didn't take a photo of this part, but hopefully this pic makes sense if I don't. The water in the tube will be level with the water in the bucket...
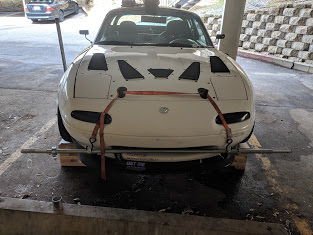
My alignment square is a piece of square aluminum tubing nested in a piece of conduit, one set at each end of the car. The aluminum is drilled for string at the same distances on each bar, and the conduit is tapped for a set screw so I can lock the aluminum bar in place when it is set square around the car. I square it up by making sure each bar is hanging level, and that the distance from the hubs to the string is equal on each side. Front and rear track width is not equal, so you only need to make sure that the FL and FR are the same distance to the hub, and that the RR and RL are the same.
With this string box you can check track and toe by measuring the distance between the rim and the string at each wheel.
you can use a normal digital level for camber and caster, but I picked up a fancy Joe's racing gauge to make caster measurements a bit easier.
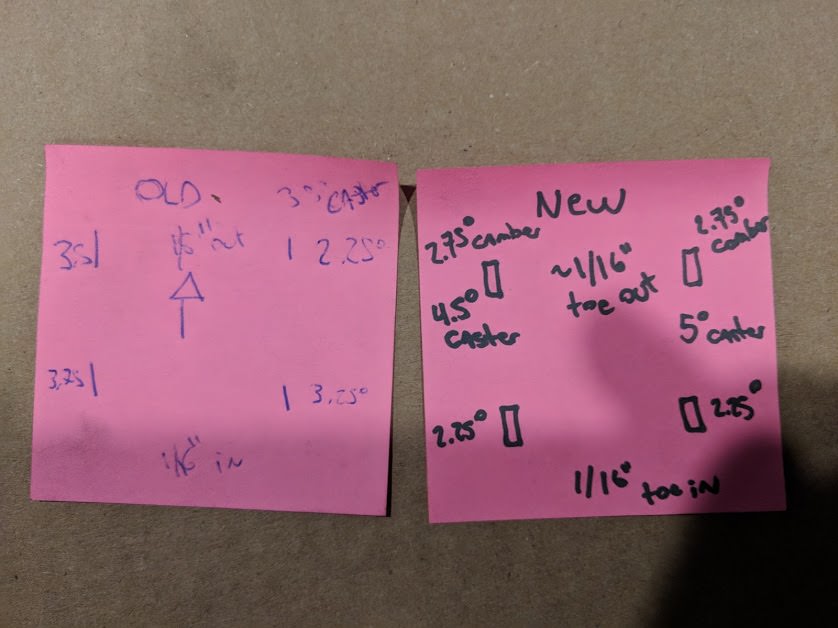
The results:
Either my subframe, or my front right control arm is bent. 2.75� of camber was my max on that corner so I based the rest of the specs around that. The car actually hooks in second gear now . This should also hopefully be a bit easier on tires, and not as understeer prone in steady state turns.
Well holy crap it's been 3 years. The car as been crazy reliable for street/autox with the exception of a couple near misses.
- TB shaft snapped but the plate screw was retained. Threw a new TB on and it's been fine since.
- I shorted the TPS wiring while replacing the harness for my VTPS (was losing connection intermittently) and it wiped my MS down to bootloader mode. Apparently when in bootloader mode your fuel injectors just stay wide open. I didn't realize what had happened so I tried to start to car. Engines don't like compressing pure gasoline. In a crazy stroke of fate, my upper starter bolt had previously fallen out, so when I tried to crank over the motor the starter gear cocked sideway and jammed into the flywheel, stopping it from cranking before too much damage was done. After fixing the TPS harness, reinstalling the starter, siphoning the gas out of the cylinders and flushing the oil it's back up and running as normal.
I'm heading to my first HPDE at the end of the month and I should hopefully finish the day in HPDE 2. I have a buddy that ran his first TT3 event last weekend and is already placing second in his 2GR swapped MR2, so I hope to build up to TT3 quickly and see how I can stack up.
Every time I rule out the Rotrex, someone comes along and posts a successful build... LOL.
How's the racing in northern Utah? We've never been to Miller, but want to, and we're considering northern Utah/ southern Idaho as a retirement location.... are there any other local tracks?
Every time I rule out the Rotrex, someone comes along and posts a successful build... LOL.
How's the racing in northern Utah? We've never been to Miller, but want to, and we're considering northern Utah/ southern Idaho as a retirement location.... are there any other local tracks?
Thanks! It's been a learning experience for sure.
Rotrex isn't gonna make big power or even be the fastest per HP, but it's just so damn simple and reliable to run. The car just works. I wish I'd done a c30-94 instead and pushed a bit more power just because I know the car would probably run just as well haha.
Unfortunately there are no other tracks up here than UMC (Miller). We have a autox club that may be a little small, but we have some real fast guys here in UT. Come heck it out some time if you can and we'll try and show you around.
Purchased a VVT motor and refreshing some things while I'm at it. It'll be getting new bearings and rings + a hone, want to keep things simple. More pics/parts to follow as I find motivation to tear into the car again.
Last edited by soot; 11-16-2021 at 06:27 PM.
Reason: formatting
 03-05-2018, 12:12 PM


 0
0

 )
)


 . This should also hopefully be a bit easier on tires, and not as understeer prone in steady state turns.