11's on the Motor, 9's on the Nitrous

 11-26-2013, 08:26 AM
#183
Elite Member

Thread Starter
iTrader: (2)

Join Date: Aug 2009
Location: Dover, FL
Posts: 3,143
Total Cats: 174
Thanks guys.
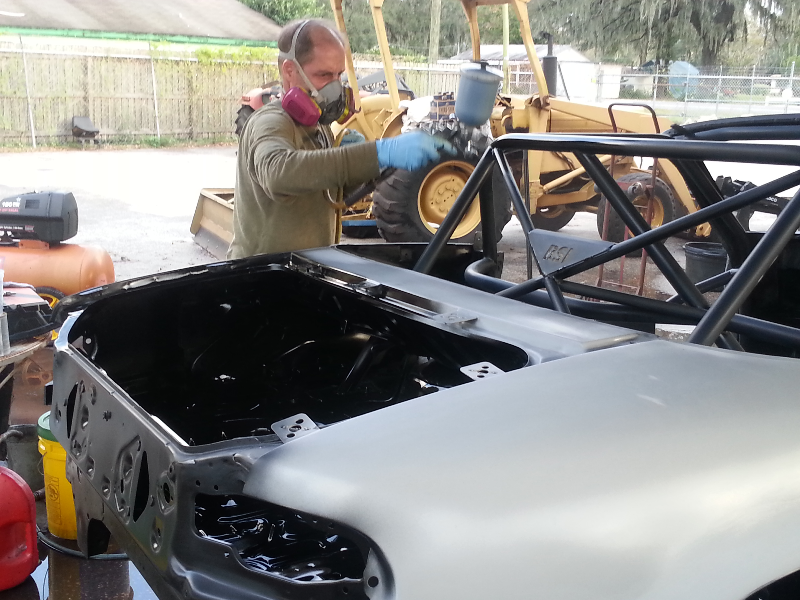
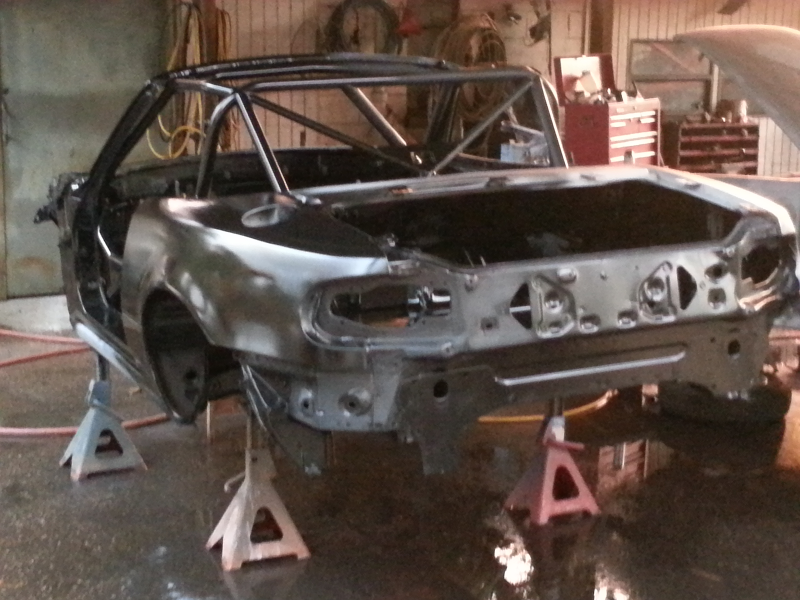
Spent a little time finish sanding and refining areas I know will be exposed. Looks like I will be juicing up with paint one more time before I can call it done.
Spent a little time finish sanding and refining areas I know will be exposed. Looks like I will be juicing up with paint one more time before I can call it done.

Reply
 0
0

0
 11-26-2013, 05:44 PM
#186
Elite Member
Thread Starter
iTrader: (2)
Join Date: Aug 2009
Location: Dover, FL
Posts: 3,143
Total Cats: 174
I have no idea. It is not likely to be weighed until more components go on. I can easily pick up one end off the jack stands, front or rear.
Reply
0
0
 12-02-2013, 06:59 AM
#193

Hey kids.. Just FYI, your boy Pinky has a paint booth (like, with *walls* and stuff) and a proper HVLP turbine setup (now Ant Free!) is only a four hour drive away. Mi Casa, Su Casa. Same goes for the Barbie Dream Shop; full machine and fabrication shop, every tool known to man besides a Water Jet (but I'm looking..) Trailer that **** up next time, we'll slap some paint on it.
Reply
4
4
12-02-2013, 11:45 AM
#194
Moderator

iTrader: (12)
Join Date: Nov 2008
Location: Tampa, Florida
Posts: 20,652
Total Cats: 3,011
That's a mighty neighborly offer! He is doing a little section at a time right now of interior and jambs. Sand, spray, sand, spray, sand, spray. Maybe he will take you up on that when he gets ready to lay down the exterior gloss.
Reply
0
0
12-02-2013, 04:46 PM
#195
Elite Member
Thread Starter
iTrader: (2)
Join Date: Aug 2009
Location: Dover, FL
Posts: 3,143
Total Cats: 174
Hey kids.. Just FYI, your boy Pinky has a paint booth (like, with *walls* and stuff) and a proper HVLP turbine setup (now Ant Free!) is only a four hour drive away. Mi Casa, Su Casa. Same goes for the Barbie Dream Shop; full machine and fabrication shop, every tool known to man besides a Water Jet (but I'm looking..) Trailer that **** up next time, we'll slap some paint on it.
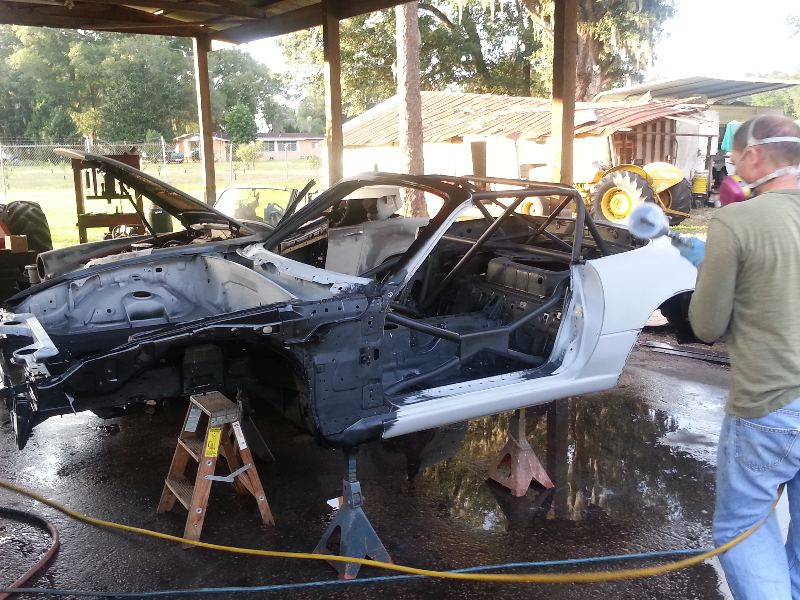
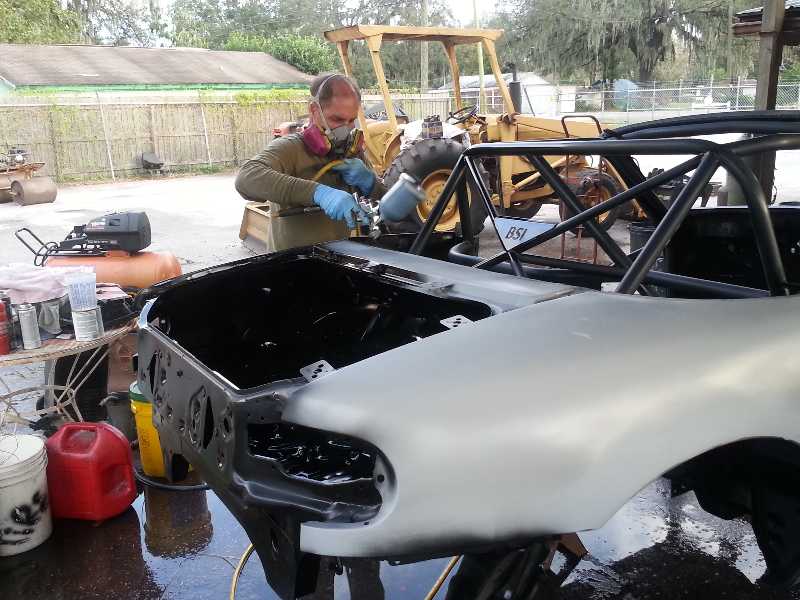
Like Steve has mentioned, I am kind of on a seek and destroy mission of crud, orange pill, you name it in areas that are visible to prying eyes. I am never quite sure what level of prep is needed to create the quality to my liking, so I keep pecking at it until I like what I see.
Today after looking at what I painted, I see areas that could use some improvement in both prep and painting technique. Luckily a friend dropped off a touch up gun, so I think doing the detail in all those hard to reach areas will go much better. The learning curve is steeper than I anticipated.
Reply
0
0
12-02-2013, 09:22 PM
#196
That is a mighty tempting offer. I would love to meet you and check out your collection.
Like Steve has mentioned, I am kind of on a seek and destroy mission of crud, orange pill, you name it in areas that are visible to prying eyes. I am never quite sure what level of prep is needed to create the quality to my liking, so I keep pecking at it until I like what I see.
Today after looking at what I painted, I see areas that could use some improvement in both prep and painting technique. Luckily a friend dropped off a touch up gun, so I think doing the detail in all those hard to reach areas will go much better. The learning curve is steeper than I anticipated.
Agreed.. It's definitely something you have to do for a while to get it right. But you're learning the right way, in the jambs and nooks instead of your hood, and it looks like you're doing nice work so far.
You're definitely welcome to come up and shoot your top coats here. Even the most careful prep and mindful technique can't save you from all of the bugs and **** that will, without fail, end up in your paint job if you shoot outside. It's a trek up here, but that travel time will save you days of rework, and hundreds in wasted materials. And take it from me, as documented in my "I hate ants" thread, nothing sucks more than nice fresh paint with **** in it. It's just ******* demoralizing.
Wherever you shoot it, a few tips I've picked up-
- get used to switching from a fan to a spot, and ALWAYS cut back your material feed when you do. A fan in tight spots will always run, and so will a hot (material feed still up) spot.
- if you sweat the edges, the middle takes care of itself. Resist the urge to just start walking out coats; edge your panels in first. You don't want to have to be fixing missed areas once the panel is wet and heavy.
- lighting is key. You should be able to see a lamp directly reflected in the area you're applying paint to at that moment. Set up portable lights or whatever you have to do, but it's crucial that you be able to see the paint going on the panel. Which leads me to....
- LOOK AT THE PAINT AS IT HITS THE PANEL. There is nothing else that matters. Be the ball Tommy, be the ball. Don't think about anything else, just watch the paint go on. Watch your overlap, watch your sheen, watch for wet areas, watch out for your overspray landing on flashed panels.. Your entire paint job is the 10 square inches in front of your gun, paint it really mindfully.
- don't spray base coat for shine, it ain't supposed to. Just lay on a few light coats right after each other.
- if you're going to **** up, it's going to be in the clear coat. Base coats are easy to see, clear is invisible, hence the need for reflective lighting. You'll have to get your head off to the side and really watch the panel gloss up to know when you're covered. It's tricky. Be careful to not leave dry areas; too much clear is a lot easier to fix than not enough.
- hang your hose over your shoulder, no linty clothes, wet the floor, tack everything off immediately before shooting. Like after you've filled your cup, tack it off right then.
Come up here and I'll gladly give you a hand.
Reply
4
4
12-02-2013, 10:04 PM
#197
Oh yeah, Pro Tip:
"Back Tape" your jambs.
Back Taping is a masking technique that minimizes the inevitable "tape line" that is the hallmark of sloppy paint jobs. Watch a dealer at the auction; one of the first things I'll do if I have a question about prior paint work is run my finger along the inside of the jamb. If it's been taped, there's a line.
With Back Taping you don't tape the line the way you normally would, but instead fold the tape back on itself, with the fold being your tape line. So, say you wanted to mask the trunk, you would put tape on the edge of your masking paper, drape the paper over the fender and attach the tape to the inside edge of the jamb, then fold the paper into the trunk... The result is that the paint tapers to an almost imperceptable line in the radius on the tape fold, instead against the (much thicker) cut edge of the tape. It's a good technique to use anywhere you want to minimize a taped line, other than taping out graphics or stripes. There just spring for the good green 3M Fineline stuff, and pull it as soon as the panel flashes.
Reply
4
4
12-02-2013, 10:14 PM
#198
Oh, and as long as I'm doling out advice.. DO NOT attempt to shoot silver or single stage matte black the first time you paint a car. (Or, obviously, candy coats or pearls, where even application is just as crucial.) For me at least, those are the two most challenging things to shoot. Silver is a pain in the *** to make it look even and not cloudy, and single stage matte colors will show bands and dusting in a heartbeat. Annnnnd, can't be fixed in the usual cut and buff process. You have to plan your attack, mix up way too much paint to have it ready to go, and refill quickly between panels (do NOT run out mid-panel.) It's a bitch, even using the slowest reducers and catalysts. (Forget shooting it on a hot day.)
And of course, prep prep prep. If it doesn't look perfect in primer, it won't even look decent in clear.
And of course, prep prep prep. If it doesn't look perfect in primer, it won't even look decent in clear.
Reply
3
3
12-02-2013, 10:28 PM
#199
Elite Member
Thread Starter
iTrader: (2)
Join Date: Aug 2009
Location: Dover, FL
Posts: 3,143
Total Cats: 174
Agreed.. It's definitely something you have to do for a while to get it right. But you're learning the right way, in the jambs and nooks instead of your hood, and it looks like you're doing nice work so far.
You're definitely welcome to come up and shoot your top coats here. Even the most careful prep and mindful technique can't save you from all of the bugs and **** that will, without fail, end up in your paint job if you shoot outside. It's a trek up here, but that travel time will save you days of rework, and hundreds in wasted materials. And take it from me, as documented in my "I hate ants" thread, nothing sucks more than nice fresh paint with **** in it. It's just ******* demoralizing.
Wherever you shoot it, a few tips I've picked up-
- get used to switching from a fan to a spot, and ALWAYS cut back your material feed when you do. A fan in tight spots will always run, and so will a hot (material feed still up) spot.
- if you sweat the edges, the middle takes care of itself. Resist the urge to just start walking out coats; edge your panels in first. You don't want to have to be fixing missed areas once the panel is wet and heavy.
- lighting is key. You should be able to see a lamp directly reflected in the area you're applying paint to at that moment. Set up portable lights or whatever you have to do, but it's crucial that you be able to see the paint going on the panel. Which leads me to....
- LOOK AT THE PAINT AS IT HITS THE PANEL. There is nothing else that matters. Be the ball Tommy, be the ball. Don't think about anything else, just watch the paint go on. Watch your overlap, watch your sheen, watch for wet areas, watch out for your overspray landing on flashed panels.. Your entire paint job is the 10 square inches in front of your gun, paint it really mindfully.
- don't spray base coat for shine, it ain't supposed to. Just lay on a few light coats right after each other.
- if you're going to **** up, it's going to be in the clear coat. Base coats are easy to see, clear is invisible, hence the need for reflective lighting. You'll have to get your head off to the side and really watch the panel gloss up to know when you're covered. It's tricky. Be careful to not leave dry areas; too much clear is a lot easier to fix than not enough.
- hang your hose over your shoulder, no linty clothes, wet the floor, tack everything off immediately before shooting. Like after you've filled your cup, tack it off right then.
Come up here and I'll gladly give you a hand.
Oh yeah, Pro Tip:
"Back Tape" your jambs.
Back Taping is a masking technique that minimizes the inevitable "tape line" that is the hallmark of sloppy paint jobs. Watch a dealer at the auction; one of the first things I'll do if I have a question about prior paint work is run my finger along the inside of the jamb. If it's been taped, there's a line.
With Back Taping you don't tape the line the way you normally would, but instead fold the tape back on itself, with the fold being your tape line. So, say you wanted to mask the trunk, you would put tape on the edge of your masking paper, drape the paper over the fender and attach the tape to the inside edge of the jamb, then fold the paper into the trunk... The result is that the paint tapers to an almost imperceptable line in the radius on the tape fold, instead against the (much thicker) cut edge of the tape. It's a good technique to use anywhere you want to minimize a taped line, other than taping out graphics or stripes. There just spring for the good green 3M Fineline stuff, and pull it as soon as the panel flashes.
"Back Tape" your jambs.
Back Taping is a masking technique that minimizes the inevitable "tape line" that is the hallmark of sloppy paint jobs. Watch a dealer at the auction; one of the first things I'll do if I have a question about prior paint work is run my finger along the inside of the jamb. If it's been taped, there's a line.
With Back Taping you don't tape the line the way you normally would, but instead fold the tape back on itself, with the fold being your tape line. So, say you wanted to mask the trunk, you would put tape on the edge of your masking paper, drape the paper over the fender and attach the tape to the inside edge of the jamb, then fold the paper into the trunk... The result is that the paint tapers to an almost imperceptable line in the radius on the tape fold, instead against the (much thicker) cut edge of the tape. It's a good technique to use anywhere you want to minimize a taped line, other than taping out graphics or stripes. There just spring for the good green 3M Fineline stuff, and pull it as soon as the panel flashes.
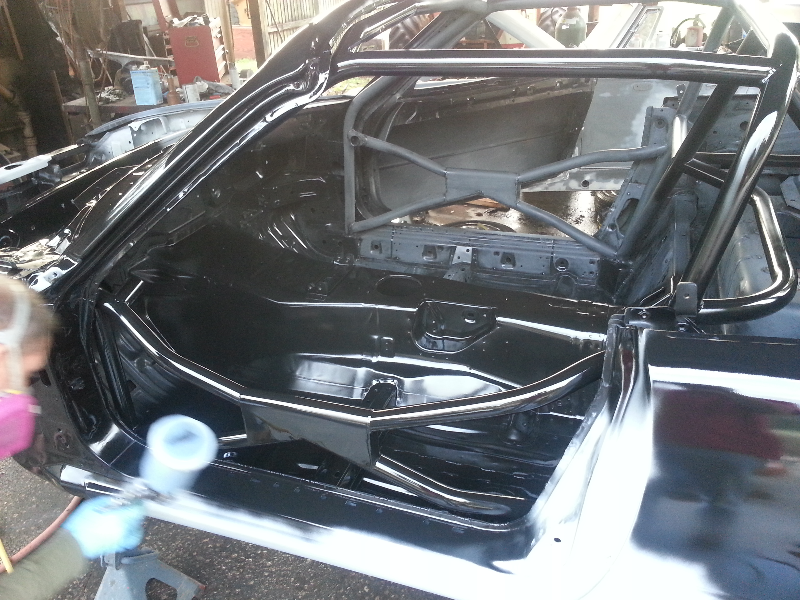
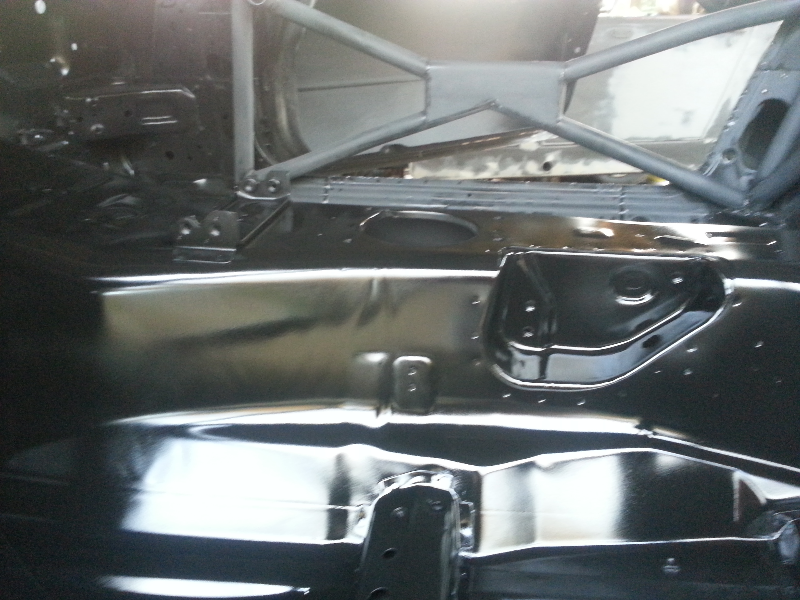
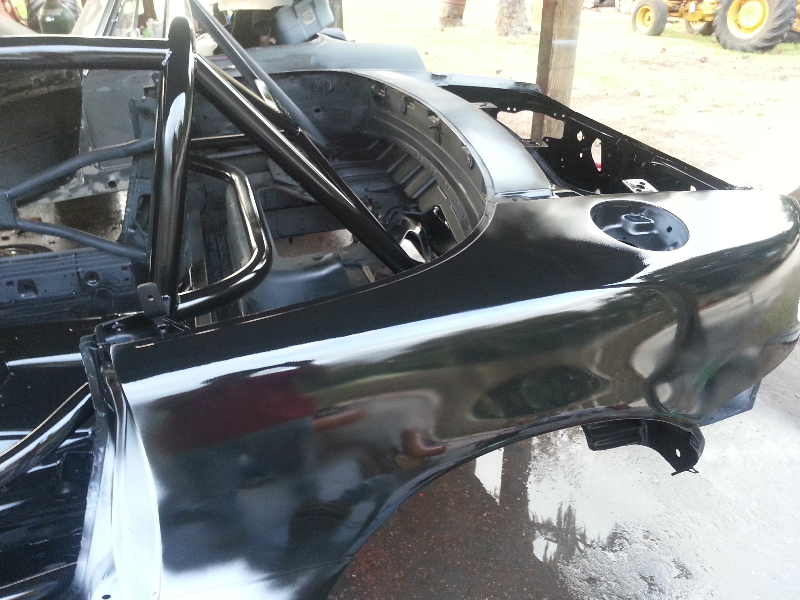
I feel like I am starting to get my mojo with this paint work. I worked on prepping the trunk for what I really think will be the very last time I shoot it. After yesterdays painting and todays prep, it is really starting to look clean. It will not be Concours d'Elegance perfect, but it is the trunk for crying out loud.
Reply
0
0
12-03-2013, 10:32 AM
#200
Elite Member
iTrader: (8)

Join Date: Dec 2008
Location: Kingston, Ontario
Posts: 2,910
Total Cats: 51
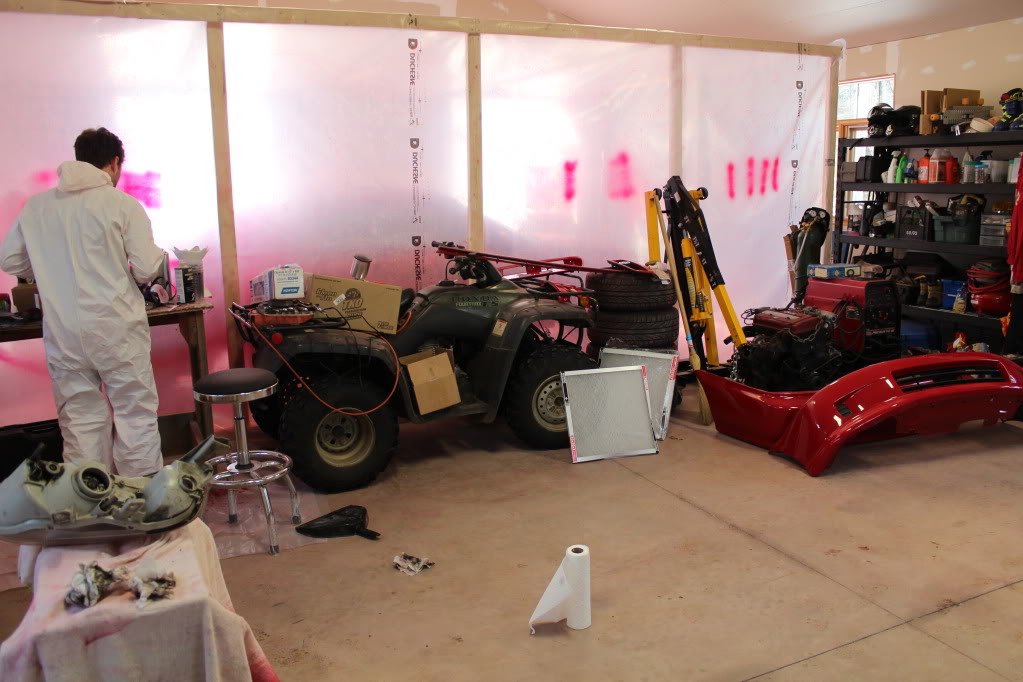
I agree with all that Pinky said. Im no pro, but setting up your fan is the single most important gun setup that you can do. your gun will shoot heavy edges or centre focused unless you set it up on a sacrefitial drop sheet (imo)
though the material feed I always setup with the gun dry. pull trigger all the way, screw in the limiter until it hits, then let off of the trigger and screw in half of a turn more. I dont sit on the limiter when I use a spot, so i dont worry about the limiter. Im sure it would make it more consistant, but i find i only need that kind of consistancy when I have the gun trimmed out to the full wide fan.
You can see in this pic how I sprayed the wall of my temporary booth to setup my fan in this pic...

Reply
1
1


