93' Miata stolen and flipped build thread

 04-07-2014, 12:08 AM
#2002
Elite Member

Join Date: Oct 2013
Location: Cedar City, UT
Posts: 2,764
Total Cats: 951
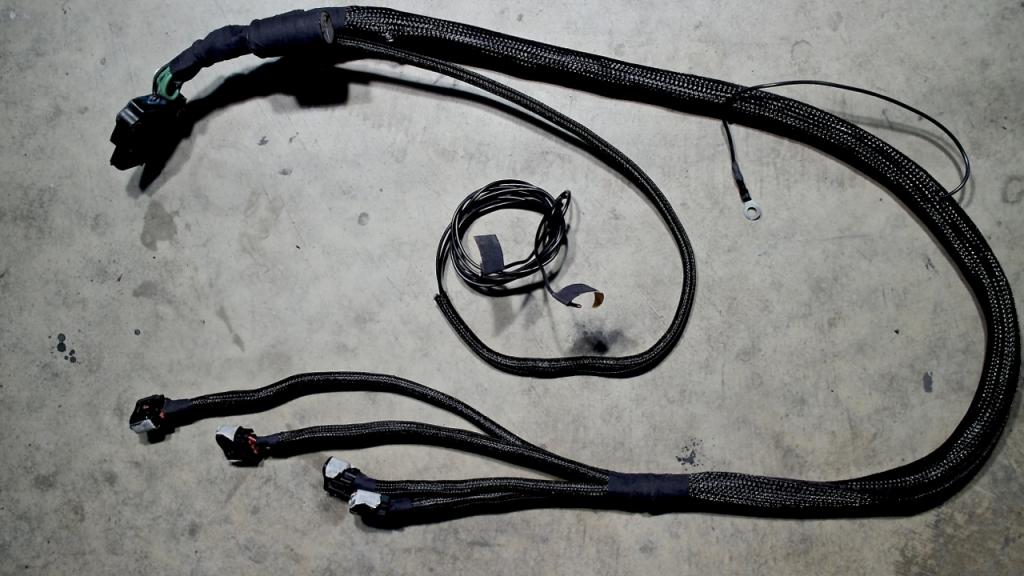
Little more done, COP harness finally wrapped up and finished. I had to fix it since I accidentally put igniter #3 wire on the wrong pin on the power unit. The 2 black wires are 2&4 that will go into the DB12 connector.


Reply
 2
2

2
 04-07-2014, 03:36 AM
#2004
Elite Member
Join Date: Oct 2013
Location: Cedar City, UT
Posts: 2,764
Total Cats: 951
===
It is no secret that I hate wiring, but the end result, when done right, is so satisfying.
Injector harness is all finished up, looks about 100x better than the original scary one. New connectors that don't fall off if you breathe on them is reassuring as well. Time to put it all back together again.
I'm not ashamed to admit this took me a while to make look nice. 2&4 injector wires have insulated spade disconnects on them so if I need to take the harness out I don't have to cut the wires.

Reply
2
2
04-07-2014, 08:04 AM
#2005
Elite Member
Join Date: Oct 2013
Location: Cedar City, UT
Posts: 2,764
Total Cats: 951
I got less done than I wanted to tonight. Had to modify several things to make it all work.
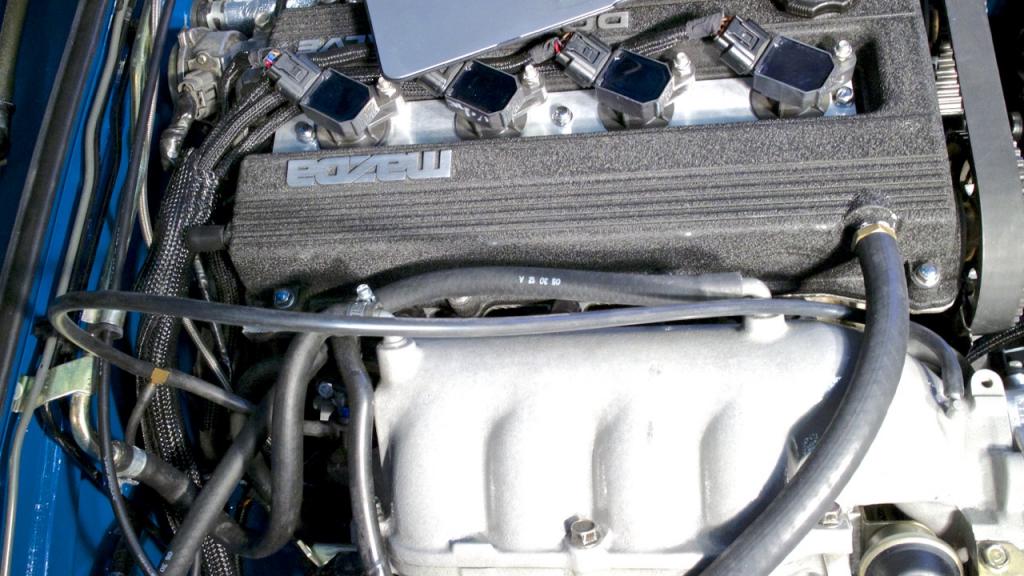
COPs installed. I forgot I bought the TSE bracket a long time ago, so that was a nice find! The only thing problem was that the bracket is designed for the stock VC and not the 323 one I have on my engine. So you have to cut off about an inch on the front of the engine to make the bracket fit.
Really well designed piece though. MUCH cleaner looking than the brackets that go over the COPs. The wiring just BARELY fit under the connectors, thank god.
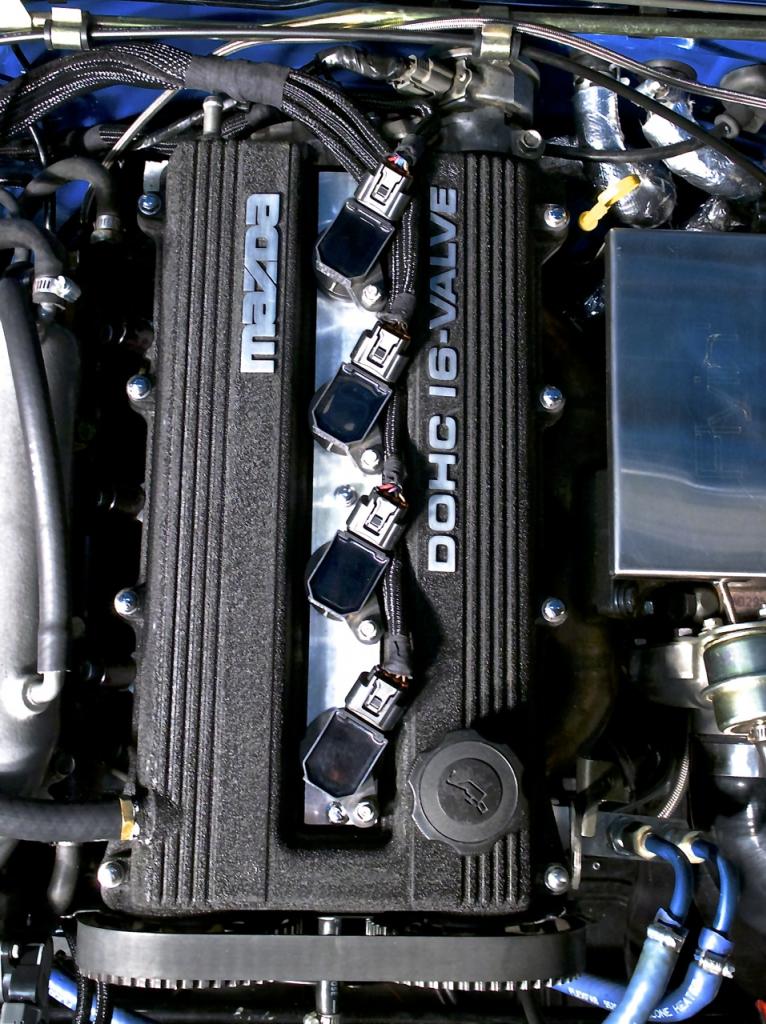
The new arrangement gave me a couple more crucial inches to hide all the bulk of the COP wiring under the fender. Thank god for the passenger firewall corner though. It is my unofficial hidey hole for all the wiring.

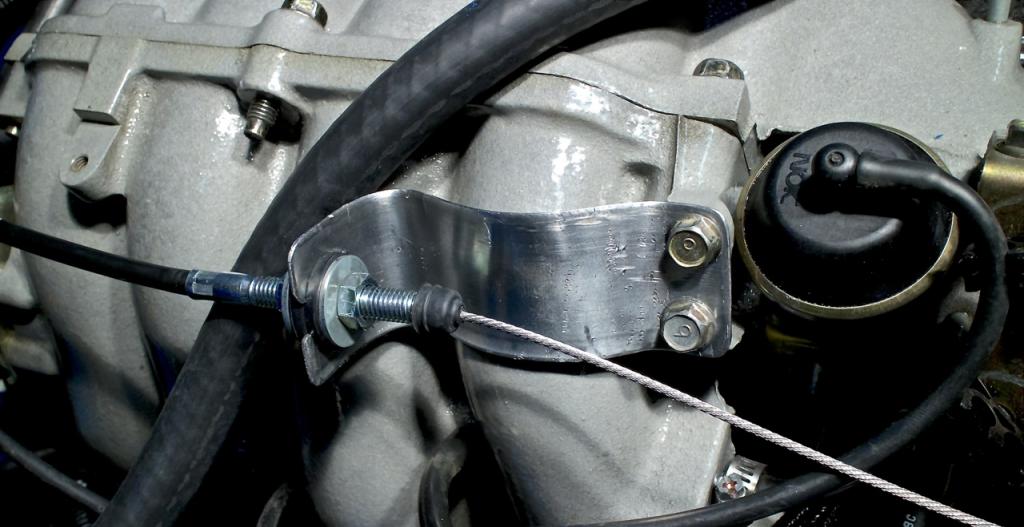
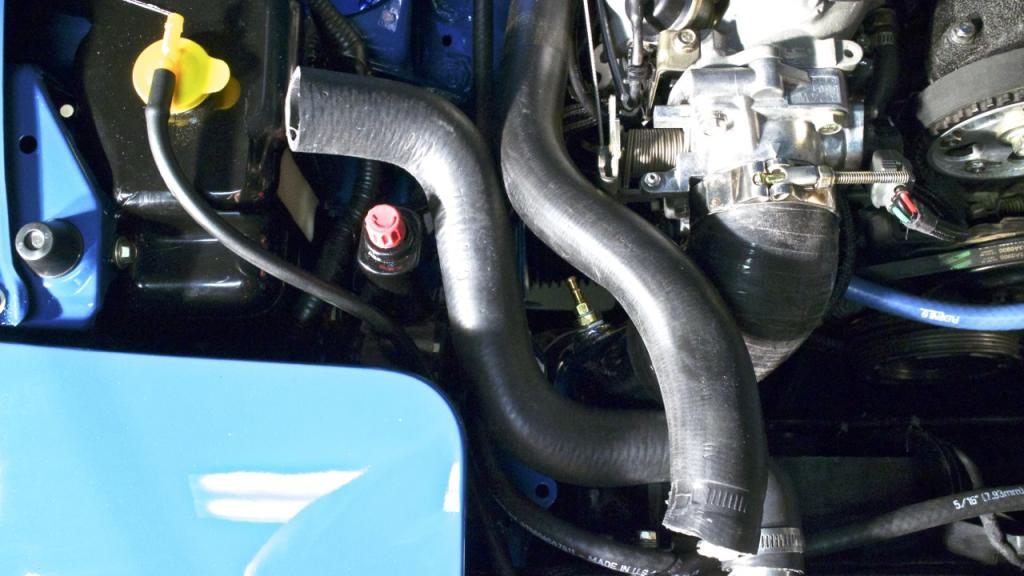
This is what took the bulk of my time. I believe I ordered the wrong throttle cable(1.6) so there was too much free-play in the gas pedal. So I was incredibly pissed because I thought I'd have to wait for a new cable. Then I remembered I had the bracket that I was going to make for the coolant lines sitting in my box of parts.
So after much bending to clear the IM hump, and making sure it was in line with the TB, and then drilling holes and filing the entry point of the cable, this is what I turned out. My metal work is much shittier than the plastic parts I've made. I'll probably get it powder-coated in the future since it is steel.
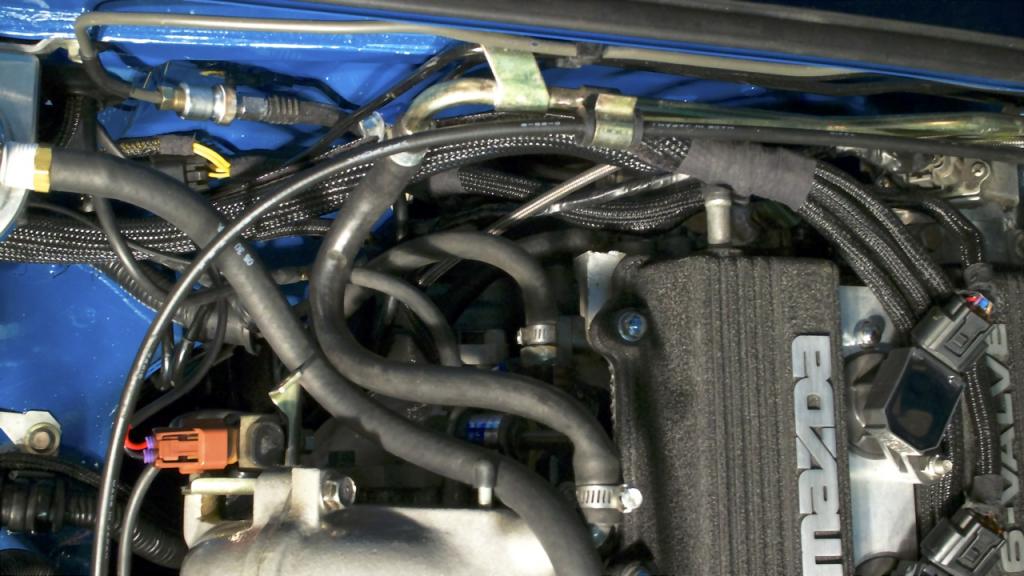
What air line goes to the hole on the back of the V.C.?
Also, as I've stated before, it is impossible to clean the cluster **** that is behind the engine. Saying that, I did make it much more organized than it was before.
COPs installed. I forgot I bought the TSE bracket a long time ago, so that was a nice find! The only thing problem was that the bracket is designed for the stock VC and not the 323 one I have on my engine. So you have to cut off about an inch on the front of the engine to make the bracket fit.
Really well designed piece though. MUCH cleaner looking than the brackets that go over the COPs. The wiring just BARELY fit under the connectors, thank god.

The new arrangement gave me a couple more crucial inches to hide all the bulk of the COP wiring under the fender. Thank god for the passenger firewall corner though. It is my unofficial hidey hole for all the wiring.

This is what took the bulk of my time. I believe I ordered the wrong throttle cable(1.6) so there was too much free-play in the gas pedal. So I was incredibly pissed because I thought I'd have to wait for a new cable. Then I remembered I had the bracket that I was going to make for the coolant lines sitting in my box of parts.
So after much bending to clear the IM hump, and making sure it was in line with the TB, and then drilling holes and filing the entry point of the cable, this is what I turned out. My metal work is much shittier than the plastic parts I've made. I'll probably get it powder-coated in the future since it is steel.

What air line goes to the hole on the back of the V.C.?
Also, as I've stated before, it is impossible to clean the cluster **** that is behind the engine. Saying that, I did make it much more organized than it was before.

Reply
3
3
04-07-2014, 09:09 AM
#2006
Cpt. Slow

iTrader: (25)
Join Date: Oct 2005
Location: Oregon City, OR
Posts: 14,179
Total Cats: 1,129
That's about as clean as mine looks, and I've had much longer to work on it. And it's a 1.6 with half as many wires and vacuum lines.
The intersection of coolant hose, vacuum lines, wiring, fuel lines, clutch line, and brake line is simply too much for that little area. At least it's concentrated on only one area.
The intersection of coolant hose, vacuum lines, wiring, fuel lines, clutch line, and brake line is simply too much for that little area. At least it's concentrated on only one area.
Reply
0
0
04-07-2014, 04:22 PM
#2008
Elite Member
Join Date: Oct 2013
Location: Cedar City, UT
Posts: 2,764
Total Cats: 951
OK I put a plug on the VC rear port.
Can you guys double check my vacuum routing for the FPR?
For the T'd connection I ran the vacuum off the front port right behind the TB.
And for the top port on the FPR I run to the return hard fuel line correct?
Can you guys double check my vacuum routing for the FPR?
For the T'd connection I ran the vacuum off the front port right behind the TB.

And for the top port on the FPR I run to the return hard fuel line correct?

Reply
2
2
 04-07-2014, 10:27 PM
#2010
Elite Member
Join Date: Oct 2013
Location: Cedar City, UT
Posts: 2,764
Total Cats: 951
It may look so but the bends add a lot of strength to it. If it does I'll remake it with thicker metal.
Had the bung for the IAT port on the charge pipe welded shut just going to pop it back on.
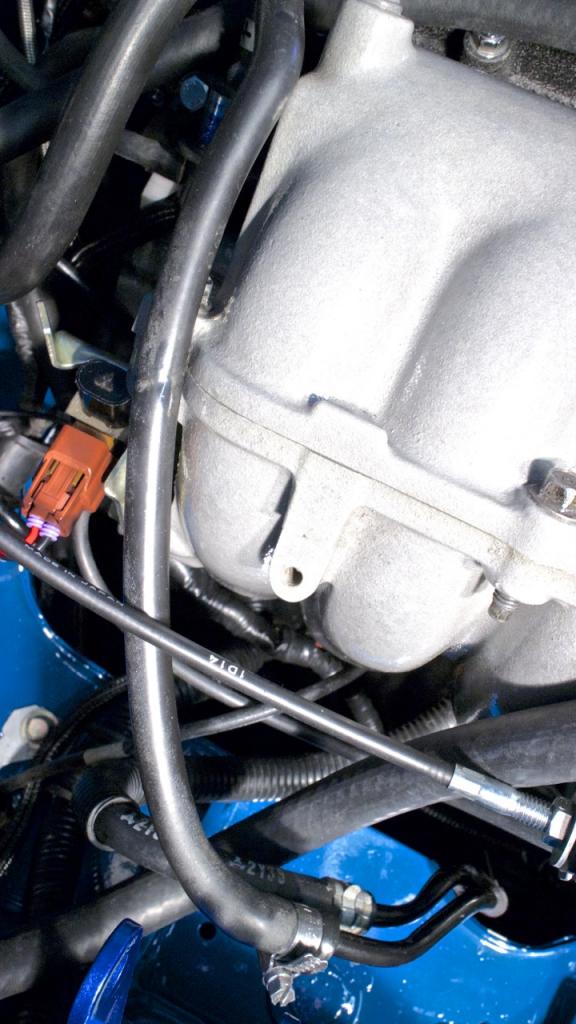
Still need to wire the db12, find the tach out source to tap into, and find the 2 knock sensors the original owner wired into the car
Had the bung for the IAT port on the charge pipe welded shut just going to pop it back on.
Still need to wire the db12, find the tach out source to tap into, and find the 2 knock sensors the original owner wired into the car
Reply
0
0
04-08-2014, 04:33 AM
#2011
Elite Member
Join Date: Oct 2013
Location: Cedar City, UT
Posts: 2,764
Total Cats: 951
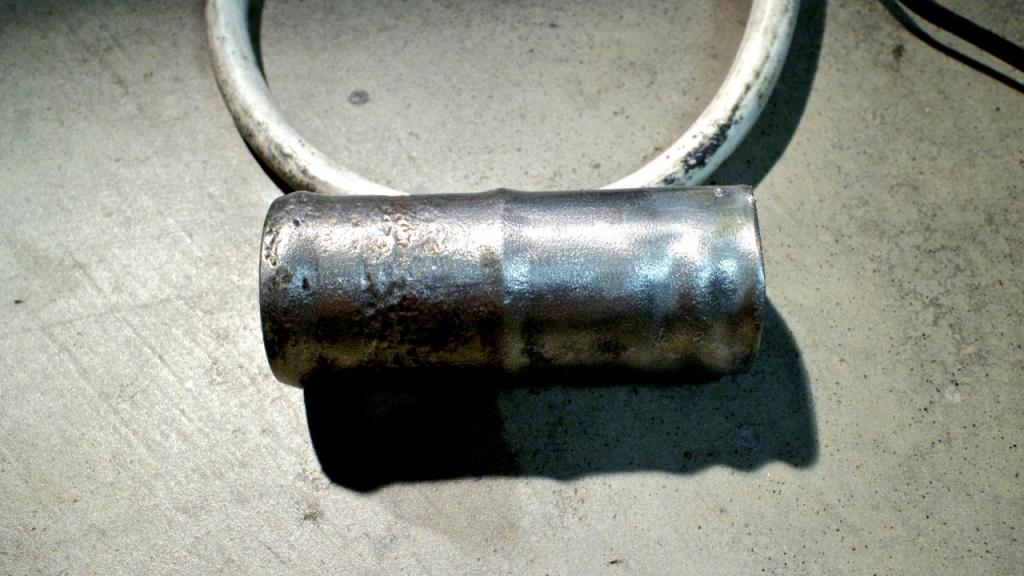
TB intercooler pipe all hooked up. What a bitch to get the clearances just right. No way in hell I could have done this with the Flyin' Miata adapter plate and 1.6 TB.
The air filter on the BOV is a little on the large side but it doesn't touch/rub on anything so who cares! The coolant reroute pipe I ordered worked perfect. As you can see in the picture it is still touching, but only just barely, there is no pressure on either pipe.
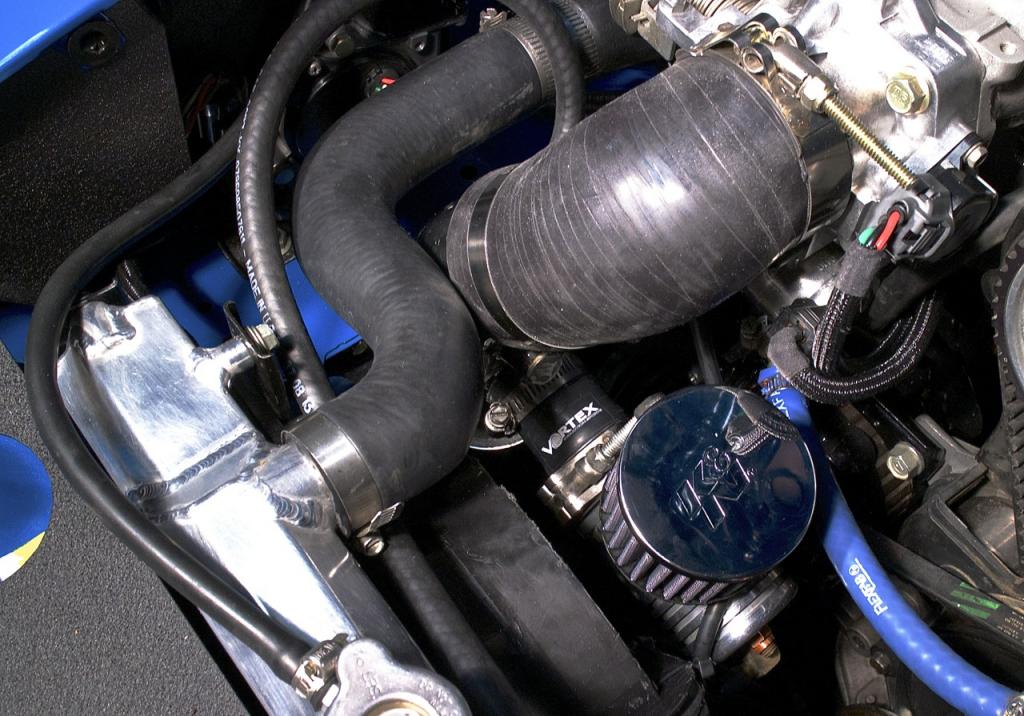
for those wondering you can buy this hose barb at vatozone for $3, you want 1 1/4".

the coolant lines prior to cutting
all joined up and merry

Thank. Christ. So glad that is done. All vacuum lines are hooked up. Only thing left is wiring up the knock sensor, db12 connector to MS, and to fill the radiator with coolant. Then I'm going to do several cranks to prime all the lines and the system before attempting to turn the motor over.
I haven't replaced the spark plugs since after the car was totaled I put new ones in the car to test if it would start, so I imagine they are still perfect after only taking the car around the block a couple times.
The air filter on the BOV is a little on the large side but it doesn't touch/rub on anything so who cares! The coolant reroute pipe I ordered worked perfect. As you can see in the picture it is still touching, but only just barely, there is no pressure on either pipe.


for those wondering you can buy this hose barb at vatozone for $3, you want 1 1/4".

the coolant lines prior to cutting

all joined up and merry

Thank. Christ. So glad that is done. All vacuum lines are hooked up. Only thing left is wiring up the knock sensor, db12 connector to MS, and to fill the radiator with coolant. Then I'm going to do several cranks to prime all the lines and the system before attempting to turn the motor over.
I haven't replaced the spark plugs since after the car was totaled I put new ones in the car to test if it would start, so I imagine they are still perfect after only taking the car around the block a couple times.
Reply
2
2


 04-08-2014, 08:18 AM
#2016
Elite Member
Join Date: Oct 2013
Location: Cedar City, UT
Posts: 2,764
Total Cats: 951
I've never removed the timing belt so timing hasn't been affected at all during this whole build. What you are probably seeing is the hose for the coolant line at the front of the block.
===
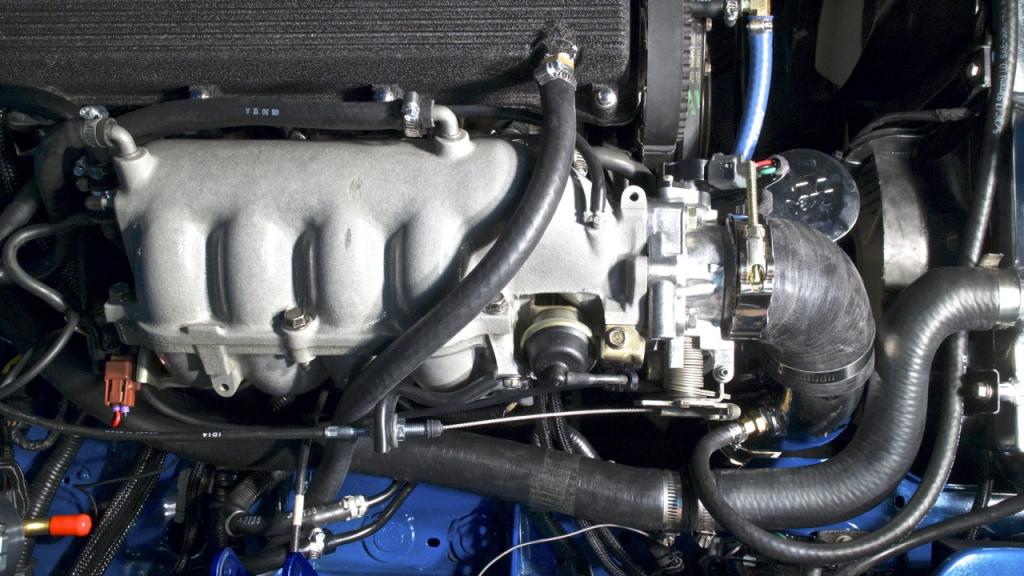
And before anyone else says anything about the plastic coupler I found that my lower radiator pipe from the stock car would fit so I cut a section off and put it on. Shouldn't be an issue now.
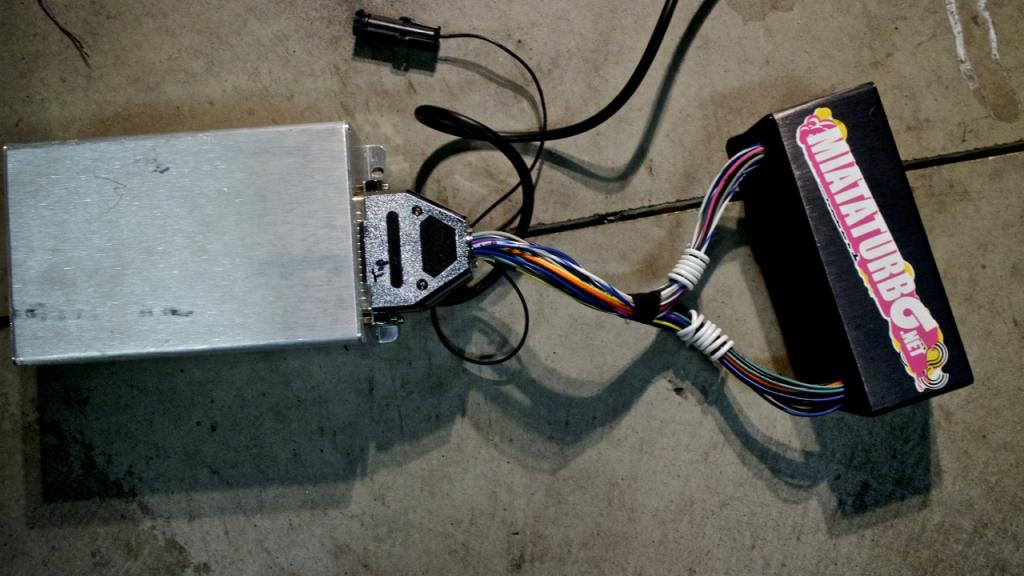
Also assembled my Megasquirt
On my way to Walmart to buy some distilled water to fill the radiator.
===
And before anyone else says anything about the plastic coupler I found that my lower radiator pipe from the stock car would fit so I cut a section off and put it on. Shouldn't be an issue now.

Also assembled my Megasquirt

On my way to Walmart to buy some distilled water to fill the radiator.
Reply
2
2
04-08-2014, 09:05 AM
#2017
Cpt. Slow
iTrader: (25)
Join Date: Oct 2005
Location: Oregon City, OR
Posts: 14,179
Total Cats: 1,129
Jeff, if you're interested I have an aluminum coupler with beaded ends I can send you.
Also, is there no way to clean this up? I feel like if you put a 90* piece on the valve cover you could run it to the firewall with the line from the intake manifold so it would be cleaner. And you could run the radiator line below the wiring loom and attach it to the old intake brace holes.

Just look how clean you can make it with a little work. It's only time, you can sleep tomorrow.
[IMG]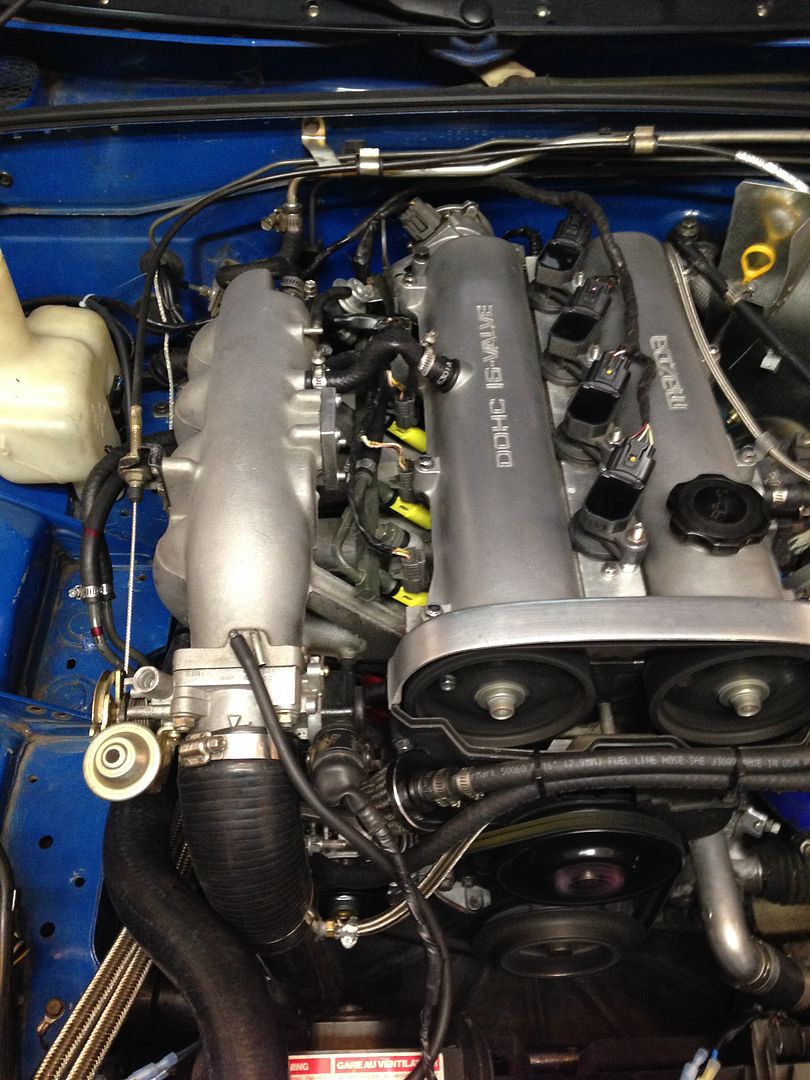 [/IMG]
Also, is there no way to clean this up? I feel like if you put a 90* piece on the valve cover you could run it to the firewall with the line from the intake manifold so it would be cleaner. And you could run the radiator line below the wiring loom and attach it to the old intake brace holes.
Just look how clean you can make it with a little work. It's only time, you can sleep tomorrow.
[IMG]
 [/IMG]
Reply
2
2
04-08-2014, 09:23 AM
#2019
Elite Member
Join Date: Oct 2013
Location: Cedar City, UT
Posts: 2,764
Total Cats: 951
God damnit Curly, I can't ignore my clutter after that spotless bay. The oil catch can line going over the IM was pretty lazy. I guess I could turn it 180 degrees and go down between the VC and IM and then route it down the firewall to the catch can.
How did you mount your coolant line? Not sure I have a bracket big enough to wrap around it.
Also, you were just being nice last time when you said my wiring/rear passenger area was cleaner than yours. Mine is a damn cluster bomb in comparison.
How did you mount your coolant line? Not sure I have a bracket big enough to wrap around it.
Also, you were just being nice last time when you said my wiring/rear passenger area was cleaner than yours. Mine is a damn cluster bomb in comparison.
Reply
0
0


