93' Miata stolen and flipped build thread
 11-09-2013, 02:37 PM
#262
Elite Member
iTrader: (13)

Join Date: Dec 2006
Location: Taos, New mexico
Posts: 6,598
Total Cats: 561
I agree with Curly, don't go for a tuck. A bit of clean routing goes a LONG way on these cars, this is how mine looks (ignore the temporary vac lines across the front of the engine)
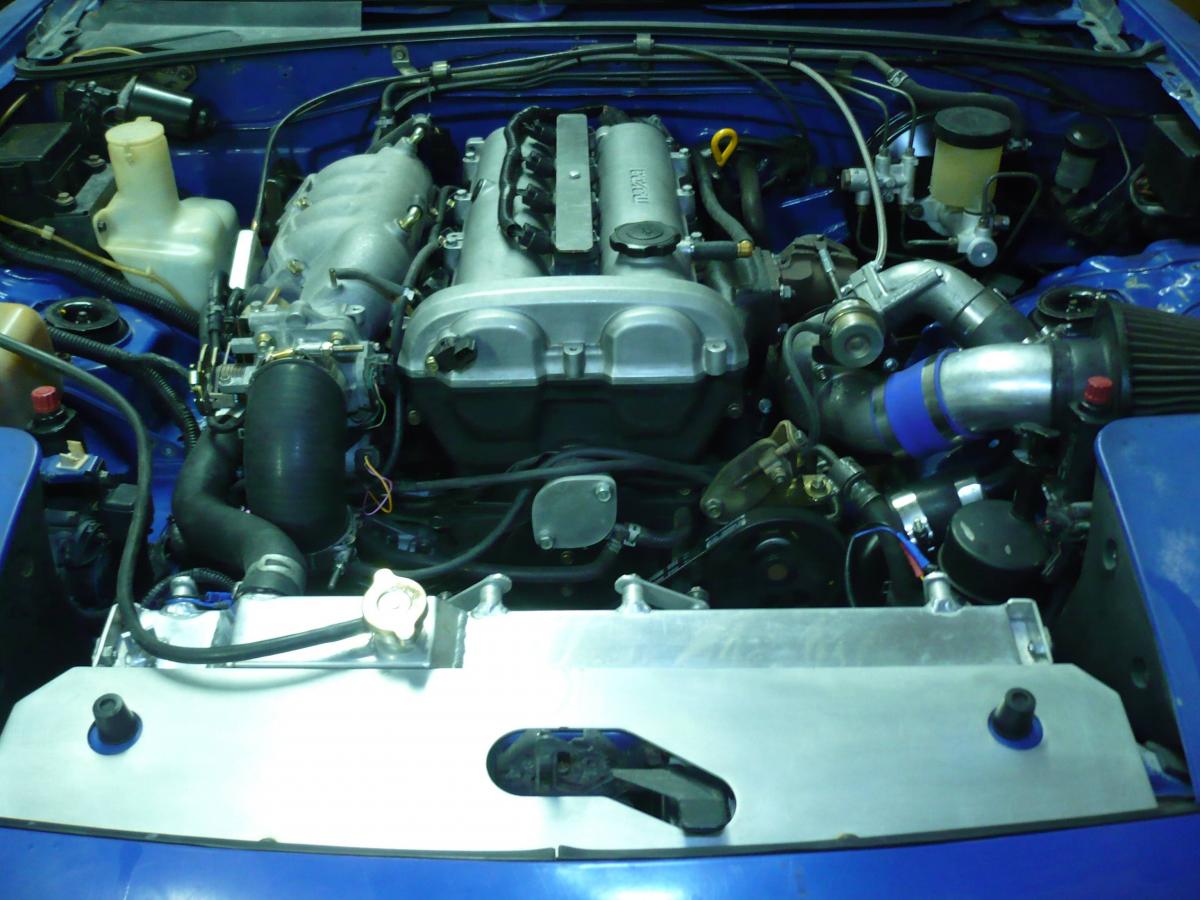
No tucking required, just a few minor things. Deleted charcoal canister (since you don't have emissions, do it!), routed some wires under the dr. headlight lid to hide them, tucked the diagnostics box, deleted some bracketry from the passenger side, etc.
Just small things that make sense. Full on wire tucks are just ricer and takes way too much time/effort IMO, unless you do something like Dem (i think) and a few others did and do a full custom quick disconnect harness, which is awesome.

Reply
 0
0

0
11-09-2013, 04:51 PM
#263
Elite Member

Join Date: Oct 2013
Location: Cedar City, UT
Posts: 2,764
Total Cats: 951
Nice title change Curly
Sorry if I'm a little picture happy, I always hated build threads that never took very many pictures.
Good thoughts on the wire tucks, I'll have to change my approach.
Right now I am trying to figure out a safe way to roll the shell into the drive way. Maybe bolt the subframe back on? Trying to avoid that since it will block some spots to clean.
Reply
0
0
 11-09-2013, 11:01 PM
#265
Elite Member
Join Date: Oct 2013
Location: Cedar City, UT
Posts: 2,764
Total Cats: 951
We were on the same train of thought on the movers dollys. Worked perfect. Wheeled it out to the driveway and then put it as high onto jack stands as I could safely(driveway has an incline) and went to town. Presoaked the car in 100% purple power and let it soak for 15 minutes then put the turbo nozzle on the power washer(it changes the blast to a cone letting you get a lot more surface area coverage).
20 years of grease and build up and flaky undercoating ripped right off. It also tore a lot of the overspray/sanding buildup out of the gaps. Some of the grease was really stubborn so I need to go at it again with my steam cleaner but it is almost ready for sanding and subsequently painting. I talked to my friend who owns a Maaco 5 hours North in Logan, UT and asked him if he knew anything about the Maaco down here. He said they were one of the few he would recommend going to for painting as long as I did the prepwork.
So hopefully a basecoat+clearcoat package from them will turn out good.
Think I should strip the paint besides just general sanding? As in strip it down to the sheet metal? Or just sand it till I remove the shitty single stage whatever-the-**** the previous owner sprayed on it. The new paint flaked off like crazy while I was pressure washing it, even though I turned down the pressure regulator to 1200 psi on the painted sections.
Drivers fender

Passenger fender

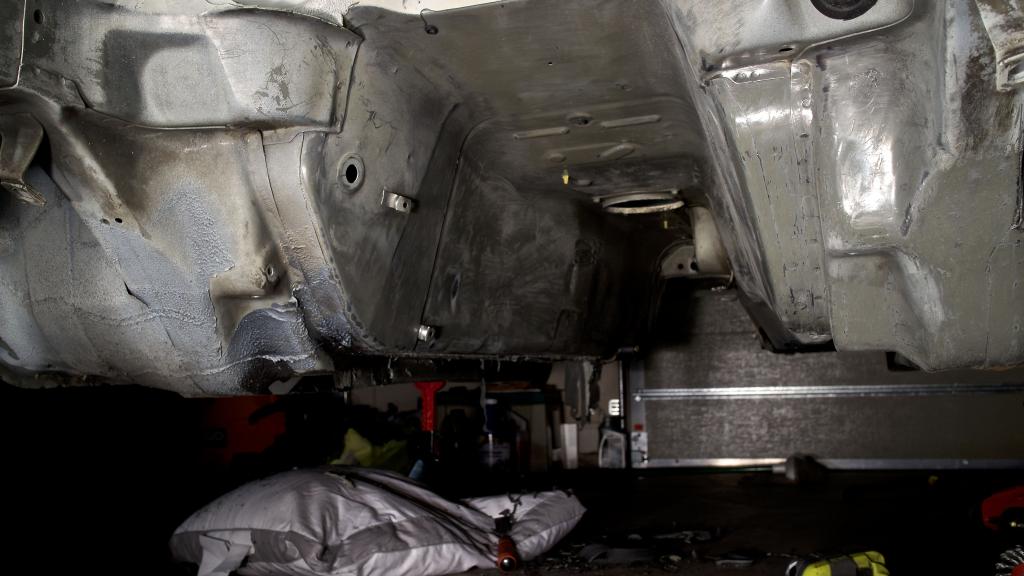
Transmission tunnel

Missing undercoating from the rails and transmission tunnel


Rear transmission tunnel

Gas tank area


The boot has a lot of rust where the battery tray was, I'm scared to sand it to see how bad it is.

Interior


I am baking the Valve Cover right now in Wrinkle Black.

Brake calipers and dust shields are sitting in degreaser at the moment then I plan on a quick lick of caliper paint just to clean them up.
I love weekends.
Reply
1
1
11-10-2013, 01:00 AM
#266
Supporting Vendor


iTrader: (1)
Join Date: Sep 2010
Location: Lake Forest, CA
Posts: 7,949
Total Cats: 1,003
If I worked 8 hours a day on this it would have taken me probably a solid month to do what you've done, if I could even manage it. You're insane.
I'm curious as can be to see how long it takes you to put it back together.
I'm curious as can be to see how long it takes you to put it back together.
Reply
0
0
11-10-2013, 01:48 AM
#268

Very clean, love it.
I thoroughly enjoy build threads like this when the car gets completely and utterly broken down and everything is cleaned, painted, etc. My car was a clean 2001 NB2 with not bad paint when I got it, and I still tore it down quite a bit, cleaned every single nook and cranny, and had the car re-sprayed. Now every time I drive it or work on it, its like a 2-3 year old car vs 10+
You'll be so happy you did this in the long run
Keep at it, don't cut corners anywhere, and make this thing showroom condition
Reply
0
0
11-10-2013, 03:43 AM
#269
Elite Member
Join Date: Oct 2013
Location: Cedar City, UT
Posts: 2,764
Total Cats: 951
Very clean, love it.
I thoroughly enjoy build threads like this when the car gets completely and utterly broken down and everything is cleaned, painted, etc. My car was a clean 2001 NB2 with not bad paint when I got it, and I still tore it down quite a bit, cleaned every single nook and cranny, and had the car re-sprayed. Now every time I drive it or work on it, its like a 2-3 year old car vs 10+
You'll be so happy you did this in the long run
Keep at it, don't cut corners anywhere, and make this thing showroom condition
I thoroughly enjoy build threads like this when the car gets completely and utterly broken down and everything is cleaned, painted, etc. My car was a clean 2001 NB2 with not bad paint when I got it, and I still tore it down quite a bit, cleaned every single nook and cranny, and had the car re-sprayed. Now every time I drive it or work on it, its like a 2-3 year old car vs 10+
You'll be so happy you did this in the long run
Keep at it, don't cut corners anywhere, and make this thing showroom condition
Assembly I hope won't kill me, it is easy to tear something apart, assembly is the hard part.
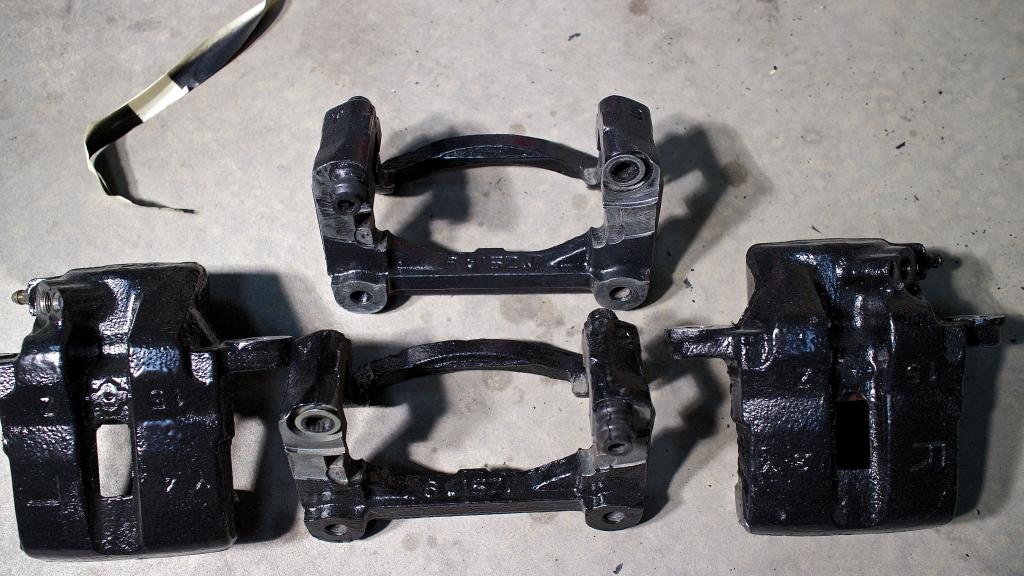
Cleaned the calipers, I don't know what I'd do with out a steam cleaner.

Painted them. I think the caliper paint I bought was old, it was pretty thick in the bottle. Oh well, it is just the calipers, I don't need the bling, just the protection.

Valve cover turned out great, nice tight wrinkle finish. Used a razor blade and 80/400/600/2000 grit to give the lettering a nice brushed look.

Reply
1
1
11-10-2013, 03:49 AM
#270
Elite Member
Join Date: Oct 2013
Location: Cedar City, UT
Posts: 2,764
Total Cats: 951
Any good thoughts on an undercoating? I don't like undercoating spray since it tends to absorb oil/dirt/grease and builds up, but at the same time it needs the protection.
I know people don't like it due to the weight, but truck bed coating keeps popping back in my head as a very good alternative.
I know people don't like it due to the weight, but truck bed coating keeps popping back in my head as a very good alternative.
Reply
0
0
11-10-2013, 08:45 AM
#271
Elite Member
Join Date: Oct 2013
Location: Cedar City, UT
Posts: 2,764
Total Cats: 951
I...can't...stop...must keep going.
Ok I actually took a nap, so it isn't as bad as it seems.
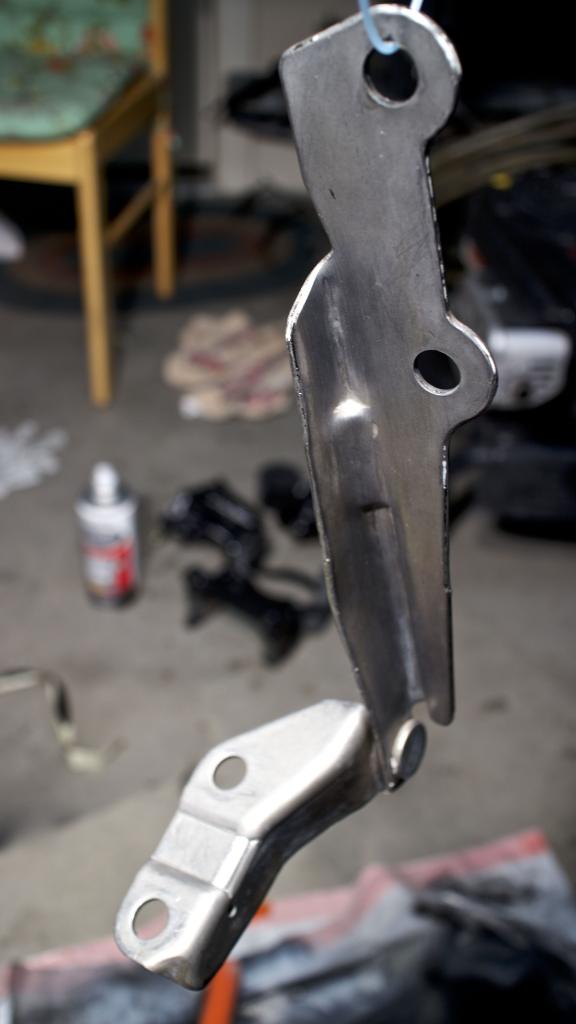
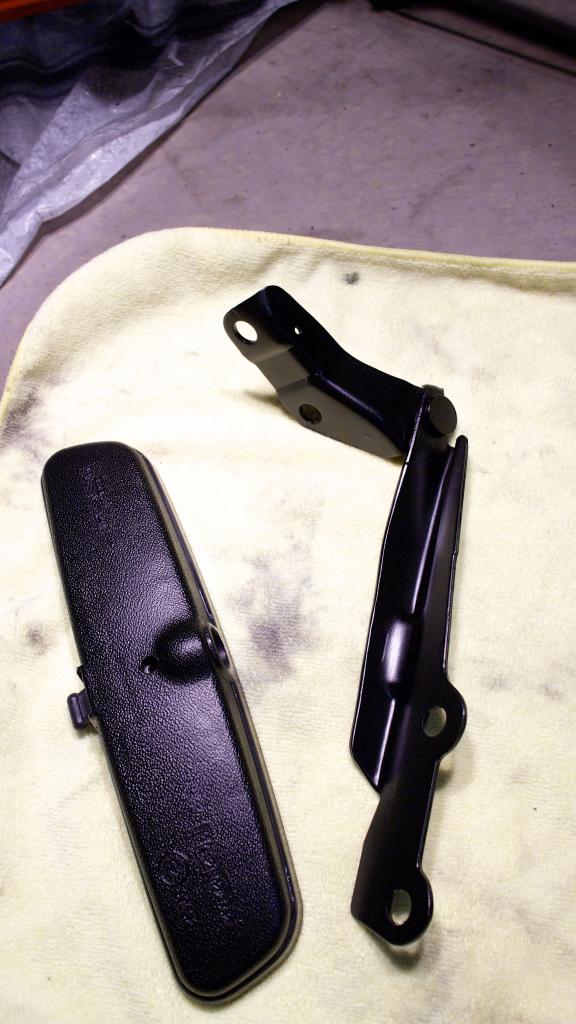
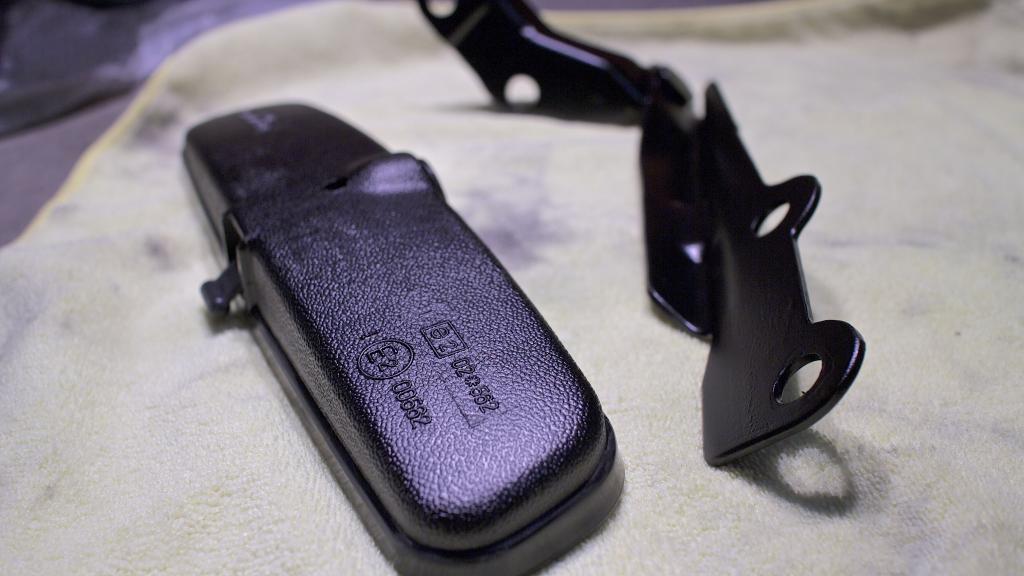
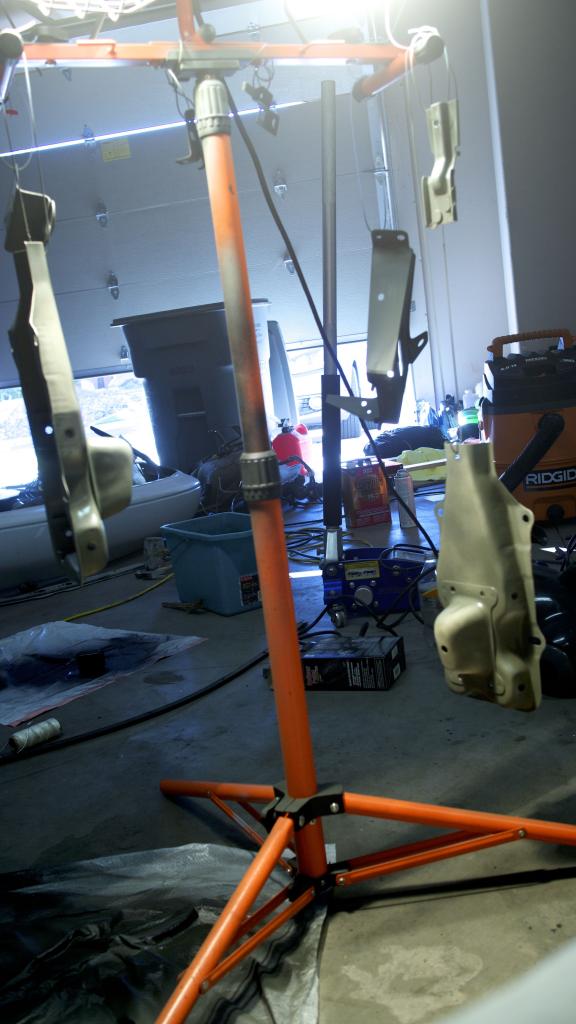
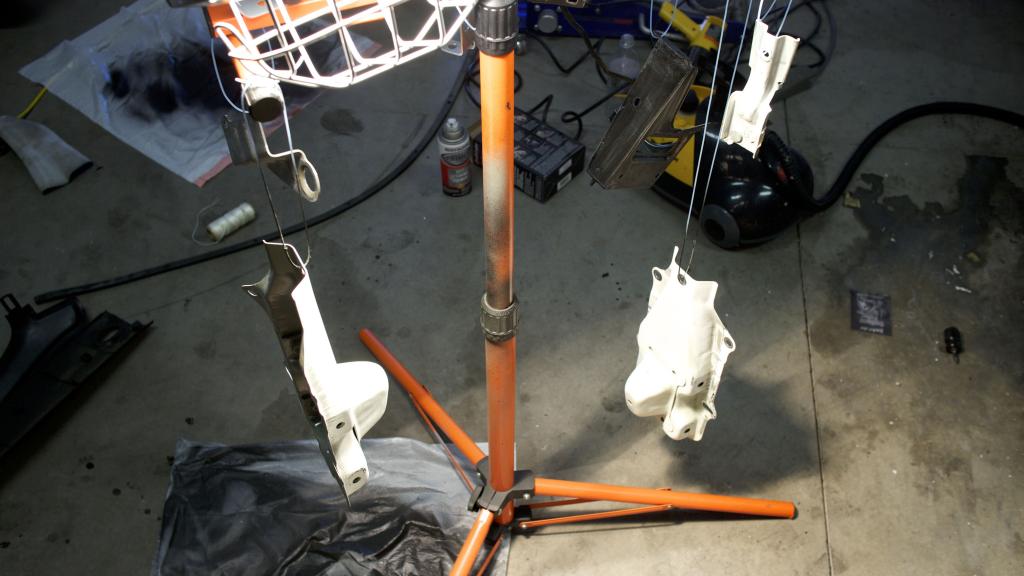
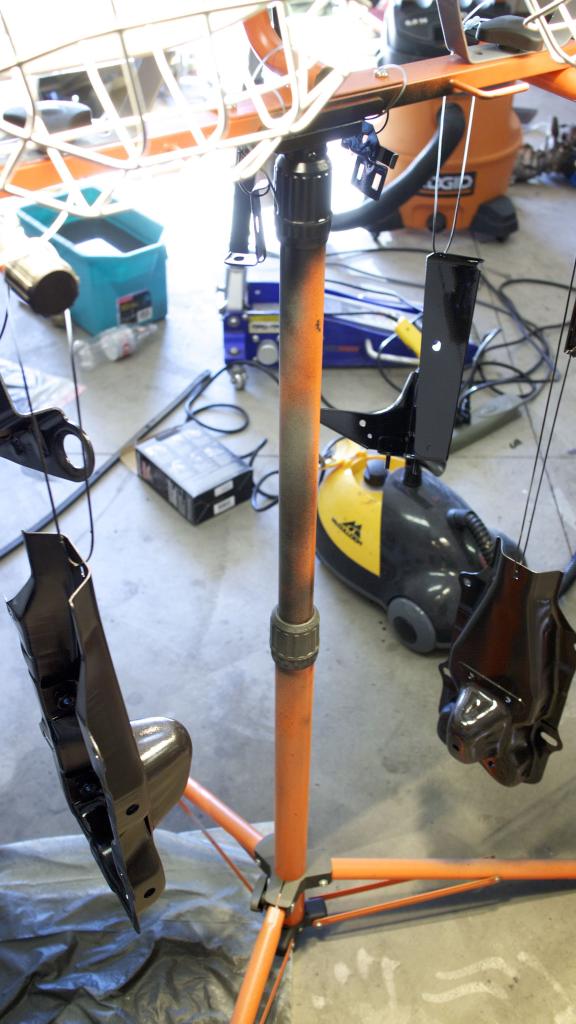
Playing around with interior & upholstery trim paint. It matches black abs plastic and satin black trim pieces perfectly. Painted the rearview mirror and the hood latches since both were pretty faded/chipped even after applying some Adams Super VRT to it. Stripped the hood latches, and lightly sanded the rear view mirror with a grey scuff pad. 2 layers of light etching primer and 4 layers of interior paint.
I think it turned out good!
Removed the throttle body. Going to spray some cleaner in it and replace the gasket.
Brakes are...acceptable
Going to attempt to replace the valve cover gasket. Bought some black high temp silicone gasket maker and an OEM Miata gasket(seems to fail the least from what I have read). Already cleaned the gasket surface and removed the old silicone gasket from the 6 corners.
Ok I actually took a nap, so it isn't as bad as it seems.
Playing around with interior & upholstery trim paint. It matches black abs plastic and satin black trim pieces perfectly. Painted the rearview mirror and the hood latches since both were pretty faded/chipped even after applying some Adams Super VRT to it. Stripped the hood latches, and lightly sanded the rear view mirror with a grey scuff pad. 2 layers of light etching primer and 4 layers of interior paint.
I think it turned out good!


Removed the throttle body. Going to spray some cleaner in it and replace the gasket.


Brakes are...acceptable

Going to attempt to replace the valve cover gasket. Bought some black high temp silicone gasket maker and an OEM Miata gasket(seems to fail the least from what I have read). Already cleaned the gasket surface and removed the old silicone gasket from the 6 corners.
Reply
0
0
11-10-2013, 08:53 AM
#272
Damn. Frame-off restoration of a Miata. In a day. This is like watching Overhaulin', except it's one sex-deprived insomniac doing all the work. LOL.
Is the windshield still in? You might want to remove that for your uber-paint job.
As for stripping vs. sanding, not sure. All the cars I ever painted were just sanded, but when I read about Ferrarris being restored, they strip. Stripper is nasty stuff though. Plus, how far do you go? There are lot of nooks and crannys that the factory got paint on by dunking the shell in a huge vat or something like that. If you get stripper into those areas and weaken the protection, not sure you'll be able to get it covered again. This is a theory, mind you. Maybe someone with experience stripping will speak up.
Aircraft are always stripped during repaints. The concern there is weight. Plus, aluminum offers a lot more natural corrosion resistance than steel.
I think bed liner would work great as an undercoating. OEM's would never do that . . . too expensive.
That chain-smoking "angry" old man would be in shock and shaking his head right about now. But he'll never have a car like this one.
Reply
1
1
11-10-2013, 09:09 AM
#274
Elite Member
Join Date: Oct 2013
Location: Cedar City, UT
Posts: 2,764
Total Cats: 951
Damn. Frame-off restoration of a Miata. In a day. This is like watching Overhaulin', except it's one sex-deprived insomniac doing all the work. LOL.
Is the windshield still in? You might want to remove that for your uber-paint job.
I think bed liner would work great as an undercoating. OEM's would never do that . . . too expensive.
Is the windshield still in? You might want to remove that for your uber-paint job.
I think bed liner would work great as an undercoating. OEM's would never do that . . . too expensive.


Yup I think you nailed my situation in a nutshell...
Windshield is still in, I heard you can remove the trim without pulling the glass? Not sure about that though. I just don't want to pay 40-60 bucks for him to remove it and then put it back in.
Going to buy some bedliner today. The paint on with a brush type. I hear it gets god damn every where if you use an aerosal. I hate taping **** up, takes almost as long as it does to paint.
I think you bring up good points I didn't consider with paint stripper. Plus with OEM paint it doesn't just scrape-right-off. After stripping the hood latches it took several applications to get off the factory primer...it didn't save me any time.
I think I'll just get several 6 inch disks to put on my orbital buffer and sand it down that way. I'm going to use the trunk lid from my old car since it already has holes drilled for the wing. Good time to paint the wing white as well. It looks good black but I want it to look nice and clean with no "race car" look to it. Even though it is as loud as one!


Reply
0
0
11-10-2013, 01:39 PM
#275
Elite Member
Join Date: Oct 2013
Location: Cedar City, UT
Posts: 2,764
Total Cats: 951
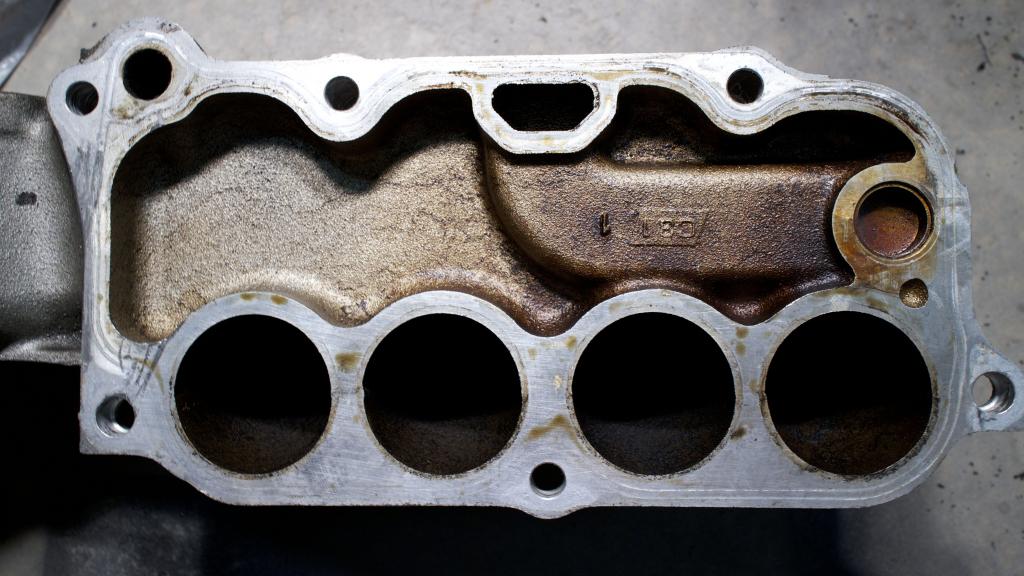
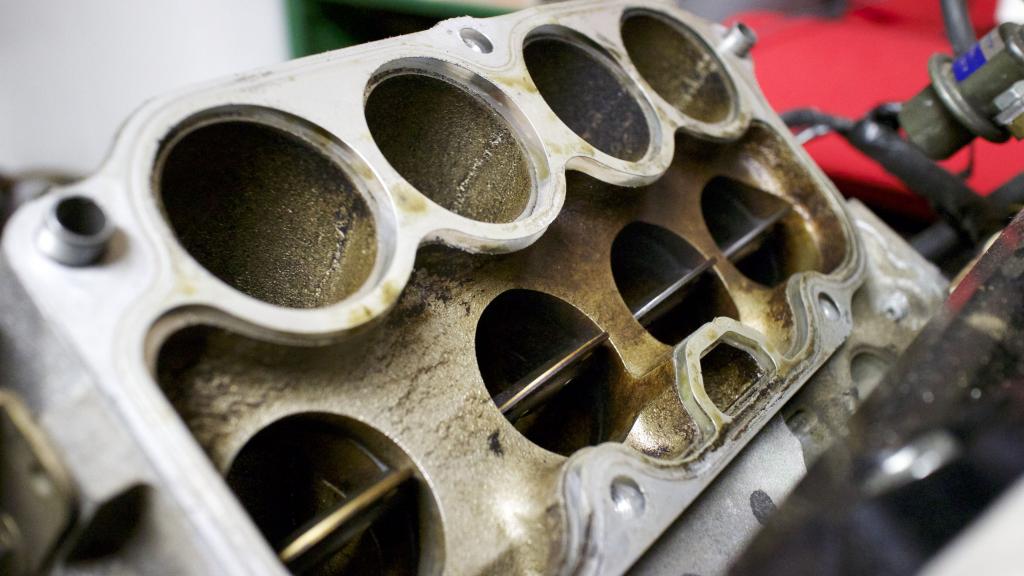
For someone who admittedly hates painting, I sure seem to be doing a lot of it. Sprayed out the intake manifold as well and got it mounted with a new gasket. Not sure if I got it all but I'm not worried about it.
When spraying out the manifold, wear proper protection, and I aint talking about no jimmy hat. Oddly enough my mask fits the Miataturbo theme pretty well!
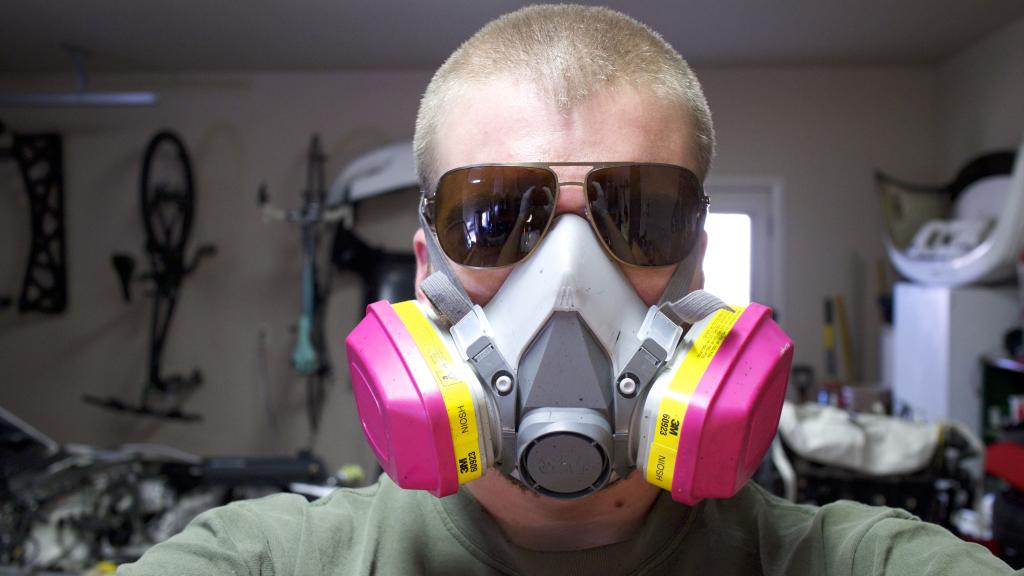
Roughed up cleaned/primed/enamel
Yes I need to clean up the garage.
When spraying out the manifold, wear proper protection, and I aint talking about no jimmy hat. Oddly enough my mask fits the Miataturbo theme pretty well!

Roughed up cleaned/primed/enamel


Yes I need to clean up the garage.
Reply
1
1
11-10-2013, 05:55 PM
#276
Elite Member
iTrader: (13)
Join Date: Dec 2006
Location: Taos, New mexico
Posts: 6,598
Total Cats: 561
Damn dude, doing work! Keep at it. This IS the time to do a color change if you want, so think long and hard about that. I personally really like the idea of audi grey, and you DID mention wishing you had found a mariner. BWM laguna seca blue , and that s2000 CR edition blue looks amazing as well.
Just putting it out there
Just putting it out there
Reply
0
0
 11-10-2013, 08:54 PM
#278
Elite Member
Join Date: Oct 2013
Location: Cedar City, UT
Posts: 2,764
Total Cats: 951
Damn dude, doing work! Keep at it. This IS the time to do a color change if you want, so think long and hard about that. I personally really like the idea of audi grey, and you DID mention wishing you had found a mariner. BWM laguna seca blue , and that s2000 CR edition blue looks amazing as well.
Just putting it out there
Just putting it out there
 Post your pictures. I just keep my camera within arms reach so I don't have an excuse to be lazy and not walk over to grab it.
No real update, body gave out on me and had to take a nap. Then I realized how ******* ungodly dirty my work space was and decided to deep clean the garage for a "fresh start". I don't know about you guys but when I work in a cluttered space that is covered in grime I get unconsciously pissed off and work a lot slower.


Also after the drive through a snow storm to CO and back, and weeks of neglect due to the Miata Sadness, I need to give my VW a quick maintenance detail, it was looking pretty rough; especially after power washing the Miata right next to it. Miata is a priority, but you can't ignore your garage and D.D.. I like to follow the "cleanliness is close to godliness" adage pretty closely...if that isn't obvious.

Oh I also forgot I started roughing up the transmission tunnel and wheel wells in preparation for truck bed lining it. Hopefully I can get two coats on before it gets too late. It takes about 2-4 hours for the first layer to cure before you can apply the second. I got Duplicolor since it tends to go on smoother than others. I didn't want a super bumpy surface. Plus I'm going to use a paint brush rather than a roller, which helps it not develop ridges. **** is expensive though!
Reply
1
1
 11-10-2013, 11:32 PM
#280
Elite Member
Join Date: Oct 2013
Location: Cedar City, UT
Posts: 2,764
Total Cats: 951
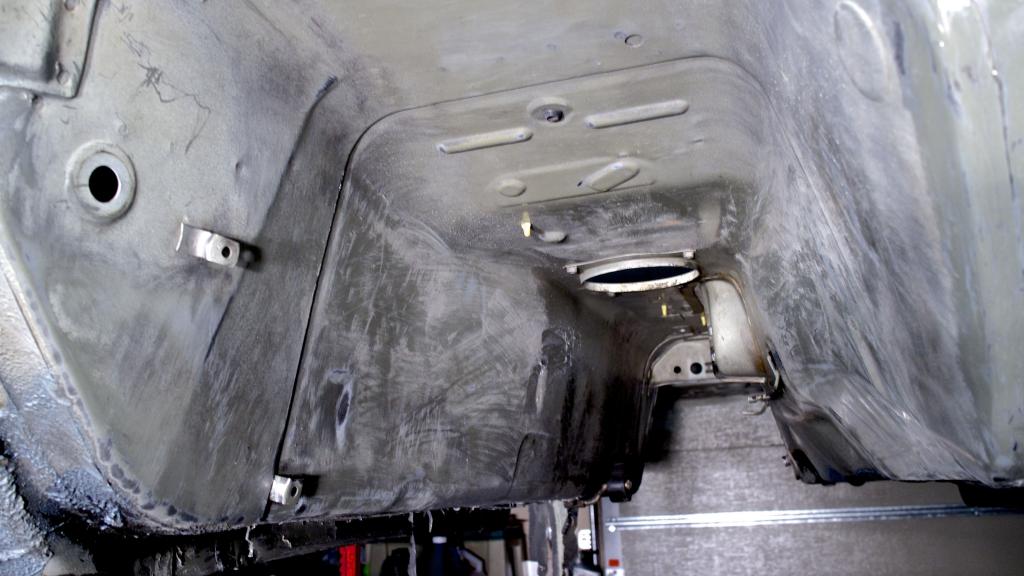
Getting there slowly...**** this ****. It would be easy if I wasn't on my back. Braided wired wheel rips apart anything leftover after I go to town with my chisel.
Right fender area almost done
Working on the frame rails
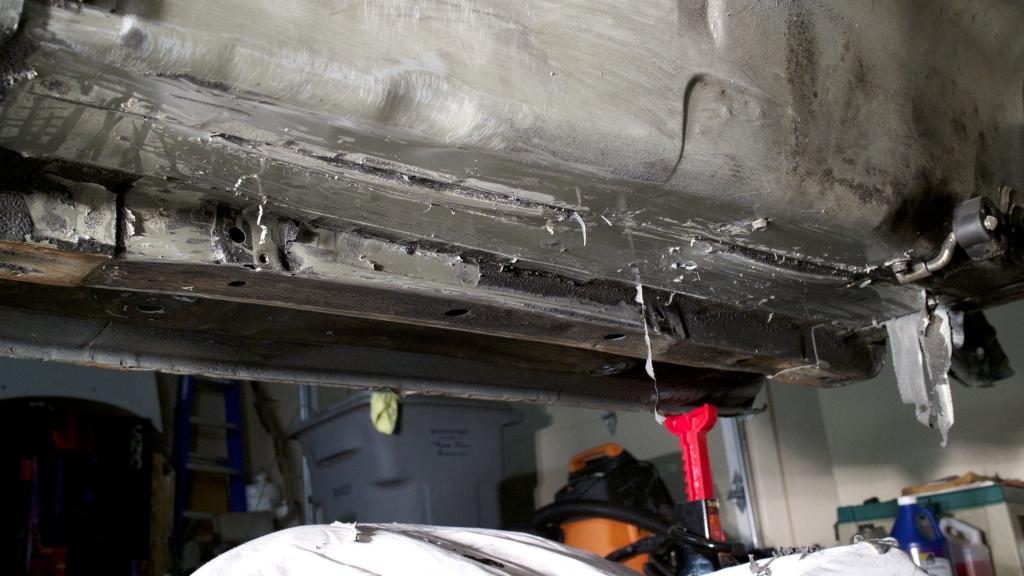
Transmission tunnel done
Right fender area almost done

Working on the frame rails

Transmission tunnel done

Reply
0
0


