93' Miata stolen and flipped build thread
 11-25-2013, 11:36 AM
#421
Newb

Join Date: Oct 2013
Location: Utah
Posts: 27
Total Cats: 4
While true, no super big hurry. You have a kick *** TDI if I recall...just one problem: it doesn't go sideways. By Jan you'll be in Snow and you'll want the thing indoors anyway so no neighborhood thugs get free ditch rides.

Reply
 0
0

0
11-25-2013, 12:10 PM
#422
Elite Member
iTrader: (13)

Join Date: Dec 2006
Location: Taos, New mexico
Posts: 6,603
Total Cats: 564
Amazing attention to detail, love it. I wouldn't pay $950 for a hardtop, especially one that you are going to paint anyways.
Should be able to find one with bad paint for ~700 or so.
Should be able to find one with bad paint for ~700 or so.
Reply
0
0
11-25-2013, 12:35 PM
#423
Elite Member

Join Date: Oct 2013
Location: Cedar City, UT
Posts: 2,764
Total Cats: 951
After I mount the brakes and wheels I'm going to roughly sand the bottom of the subframes and give the a quick lick of paint. Small scratches and dings that should be covered with paint.
Then I'm painting the steering rack
Cutting the rear bumper in half and cutting holes in the front bumper to remove a little weight.
Then clean the carpets and dye them black.
Then when my brother comes down I'm going to attack the wiring issues and get that sorted. Hopefully after that point no more work will need to be done besides painting the interior and laying down the coolmat product I bought for the driver interior and transmission tunnel heat wrap. When I bought the coolmat I also got a down pipe 25" 2600� downpipe 1/2 sleeve. I didn't want to buy downpipe wrap so this should make it so the downpipe doesn't get destroyed. Also need to put some reflective tape on the lines and master cylinders and modify the cheap turbo heat shield I bought from atpturbo to extend a little farther to cover the downpipe.
So a lot of work still need to be done when I put it like that. My right foot was literally baking on the drive home so I went a little overboard on heat proofing.
Reply
0
0
11-25-2013, 01:19 PM
#424
Elite Member
Join Date: Oct 2013
Location: Cedar City, UT
Posts: 2,764
Total Cats: 951
Anybody on this forum live in or around Sacramento California to pick up a hardtop for me? There is one for a great price but wouldn't be able to pick it up for a while.
I, as always, spoke to soon.
I, as always, spoke to soon.
Reply
0
0
11-26-2013, 12:45 AM
#425
Elite Member
Join Date: Oct 2013
Location: Cedar City, UT
Posts: 2,764
Total Cats: 951
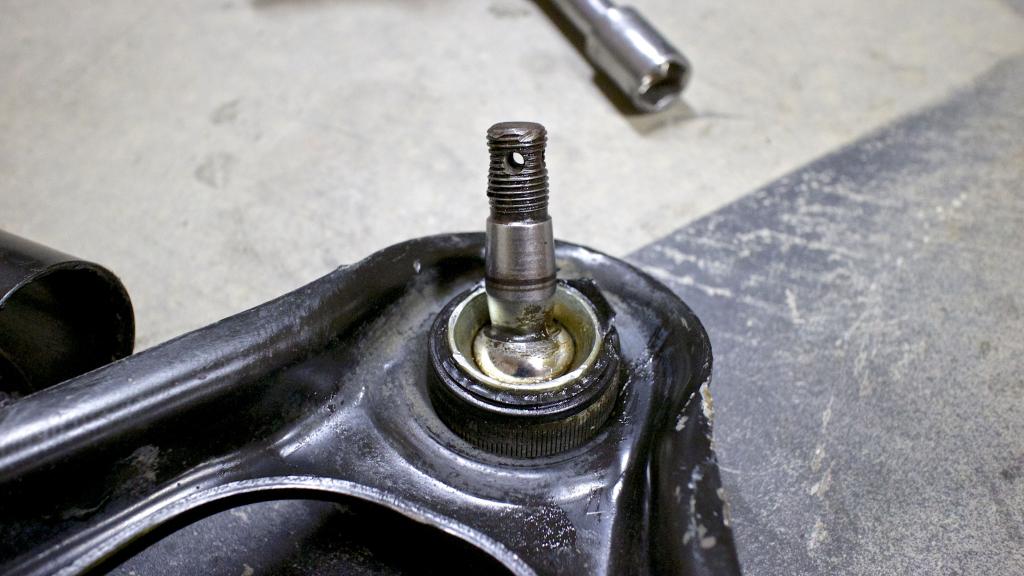
How does one replace the boot and/or the whole ball joint on the front lower control arm?
I noticed it was torn right in half while I was inspecting the boots and decided to replace it. I have the entire front subframe torn apart and all the bushings out but this is something I don't want to try before I can get the correct information....which I can't seem to find.
I noticed it was torn right in half while I was inspecting the boots and decided to replace it. I have the entire front subframe torn apart and all the bushings out but this is something I don't want to try before I can get the correct information....which I can't seem to find.

Reply
0
0
 11-26-2013, 04:39 AM
#427
Elite Member
Join Date: Oct 2013
Location: Cedar City, UT
Posts: 2,764
Total Cats: 951
Ok I'm an idiot, they are the front upper control arm ball joints.
In this picture you can see what I'm asking. The two ball joints are completely different. One had a removable rubber boot, while the other(that was torn) had a permanent boot.
Removable on the left, torn permanent on the right
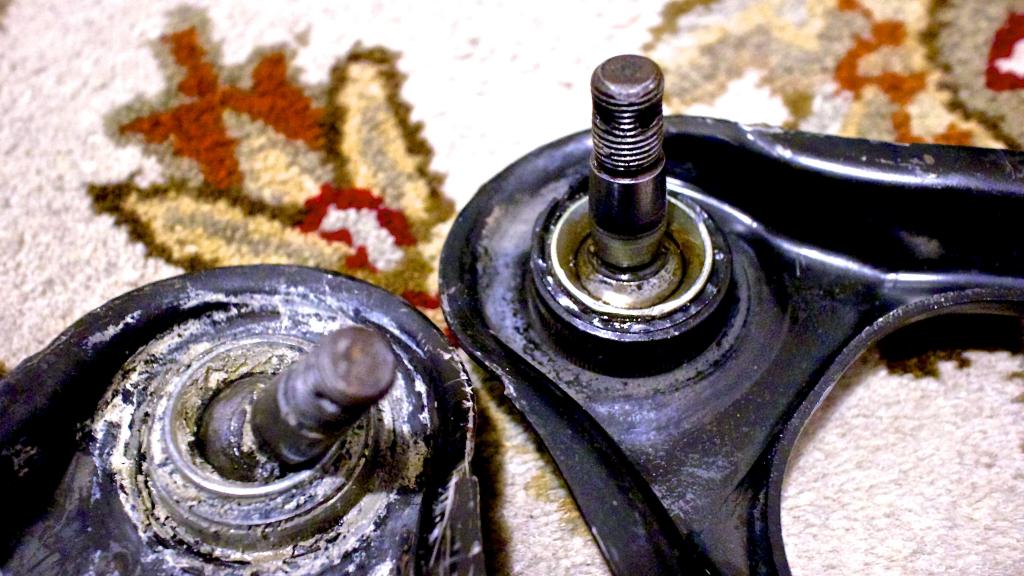
In this picture you can see what I'm asking. The two ball joints are completely different. One had a removable rubber boot, while the other(that was torn) had a permanent boot.
Removable on the left, torn permanent on the right

Reply
0
0
11-26-2013, 01:36 PM
#428
Cpt. Slow

iTrader: (25)
Join Date: Oct 2005
Location: Oregon City, OR
Posts: 14,181
Total Cats: 1,131
I know you can replace and repack the joints, but I've never done it myself.
SEAL,DUST-BALL JOINT (H266-28-448) - $7.67 - H26628448
How you get it on there and repack and everything, I'm not sure. I'm pretty sure you need to buy a brand new arm to truly replace it.
SEAL,DUST-BALL JOINT (H266-28-448) - $7.67 - H26628448
How you get it on there and repack and everything, I'm not sure. I'm pretty sure you need to buy a brand new arm to truly replace it.
Reply
1
1
11-26-2013, 01:41 PM
#429
Elite Member
iTrader: (13)
Join Date: Dec 2006
Location: Taos, New mexico
Posts: 6,603
Total Cats: 564
AFAIK to replace those you either:
1) buy oem replacement control arms.
2) buy these: V8 Roadsters adjustable/rebuildable front upper control arm ball joints - MiataRoadster - High-performance customer service...and parts for Roadsters
I may be wrong though, if anyone knows any other alternatives I'm all ears.
1) buy oem replacement control arms.
2) buy these: V8 Roadsters adjustable/rebuildable front upper control arm ball joints - MiataRoadster - High-performance customer service...and parts for Roadsters
I may be wrong though, if anyone knows any other alternatives I'm all ears.
Reply
1
1
11-26-2013, 02:09 PM
#430

I've replaced all my ball joint and tie rod end dust boots. They tear, fact of life. As long as the joint is still tight and offers some resistance to being turned, you can repack and move on. Basically:
1. Clean out the old grease (as best you can).
2. Repack the ball joint with new grease (again, as best you can).
3. Go to HP or Lowe's racing department and buy PVC plumbing parts that snuggly fit the boot -- you will use these to press the boot on the joint.
4. Pack grease into the new boot.
5. Place boot over joint with your PVC press tool. Insert into vice and carefully press the new boot onto the joint until it's seated.
6. Done.
Note that the lower ball joint and tie rod ends are individually replaceable. The upper ball joint is integral to the upper control arm. Like Fire said, one of the benefits of the V8 roadster control arm is that the upper ball joint can be replaced.
Reply
3
3
11-26-2013, 02:17 PM
#431
Elite Member
Join Date: Oct 2013
Location: Cedar City, UT
Posts: 2,764
Total Cats: 951
Thanks guys I've got some replacements on the way.
Is it possible to powder coat the upper without damaging the ball joint? I think I have hit my limit on wire wheel grinding and want to just send it to my powdercoater along with the Lowers/subframe.
Is it possible to powder coat the upper without damaging the ball joint? I think I have hit my limit on wire wheel grinding and want to just send it to my powdercoater along with the Lowers/subframe.
Reply
0
0
11-26-2013, 03:40 PM
#433
Elite Member
iTrader: (13)
Join Date: Dec 2006
Location: Taos, New mexico
Posts: 6,603
Total Cats: 564
"splines on housing match stock Mazda control arms for easy replacement"
You can press out the OE ball joint and run these replacements instead of buying new control arms. Pretty neat.
Reply
0
0
11-28-2013, 01:22 AM
#434
Elite Member
Join Date: Oct 2013
Location: Cedar City, UT
Posts: 2,764
Total Cats: 951
Well this is a "you should have checked this when you paid for it moment".
I received my TSE studs and even after telling the machine shop the length of the studs they didn't drill nearly deep enough. I'm not sure if that is because there wasn't enough material to use or not. I'm disappointed but I'm not going to waste my time sending it to another machine shape to fix it. More time and money down the hole.
I'm just going to measure the depth of each hole and cute the studs accordingly. Diamond edged cut off wheel should make short work of it followed by cleaning the burrs and filing it flat. Jeez I wish people would do their work correctly.
Reply
0
0

 12-01-2013, 04:22 AM
#438
Elite Member
Join Date: Oct 2013
Location: Cedar City, UT
Posts: 2,764
Total Cats: 951
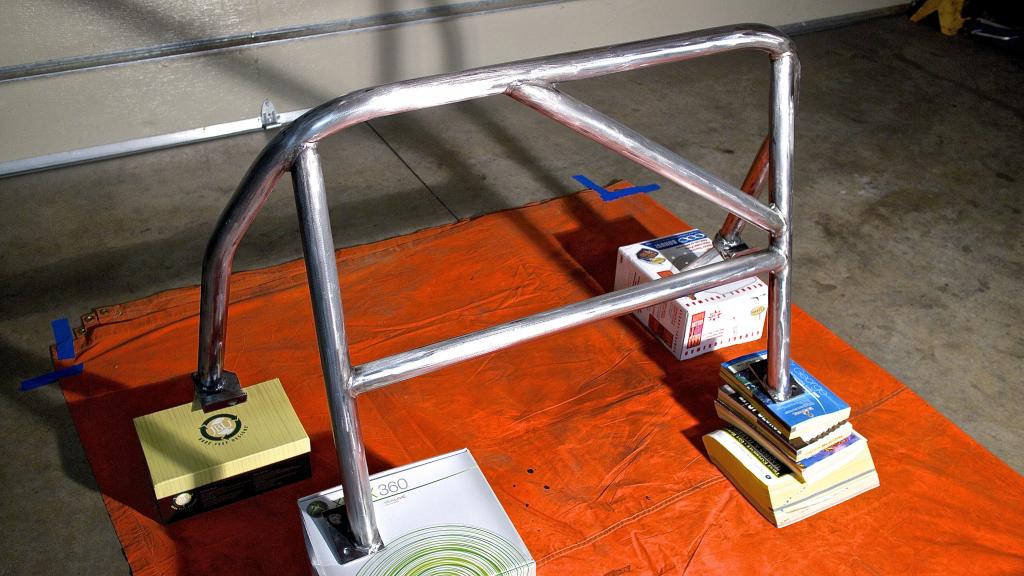
Bethania Garage won't contact me back in regards to replacing my roll bar so for the price of shipping my old bar, I picked up the same model as mine from a fellow in Vegas. Paint was **** on it though, lots of wear and scratches etc. etc..
Stripped it with my new angle grinder(should have bought one ages ago) and sanded out any imperfections. Followed up with some VHT chassis & roll bar paint(I love this stuff)
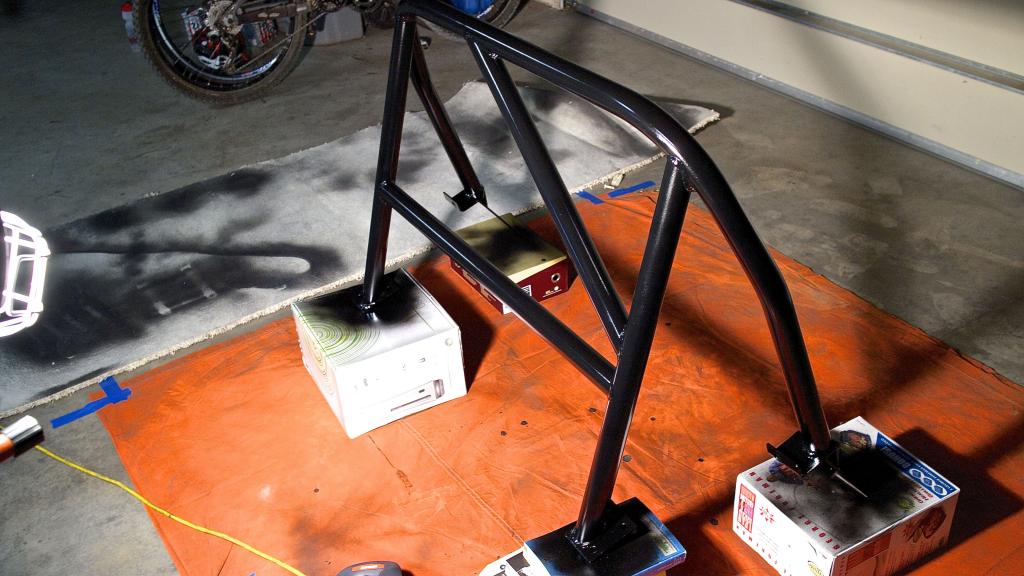
Anyone recommend a good vendor for roll bar padding? Does TSE or 949Racing sell them?
Stripped it with my new angle grinder(should have bought one ages ago) and sanded out any imperfections. Followed up with some VHT chassis & roll bar paint(I love this stuff)


Anyone recommend a good vendor for roll bar padding? Does TSE or 949Racing sell them?
Reply
0
0
12-01-2013, 11:32 AM
#439
Obviously, BG has nice padding and covers that custom fit their bars. If you are just after padding material, most of the race equipment sites have it . . . SafeRacer, UltraShield, etc.
Reply
0
0


