93' Miata stolen and flipped build thread
 02-13-2014, 04:47 PM
#1181
Elite Member

Join Date: Oct 2013
Location: Cedar City, UT
Posts: 2,764
Total Cats: 951


Thanks Richy!
I just got a couple quotes for redoing the steering wheel...ouch...cheaper just to get a new damn wheel at what they were quoting me.
Also just got a quote for $250 to paint the hardtop from the same guys that did my car.

Reply
 0
0

0
02-13-2014, 05:23 PM
#1182

Have you considered a Wheelskins cover? Super nice quality and it lasts and lasts. I've had one on my car for 11 years and it still looks new.
Link:
http://wheelskins.com/
Link:
http://wheelskins.com/
Reply
0
0
02-13-2014, 09:53 PM
#1183
Junior Member

Join Date: Mar 2012
Posts: 323
Total Cats: 23
It's Mike, but I won't hold that to you.
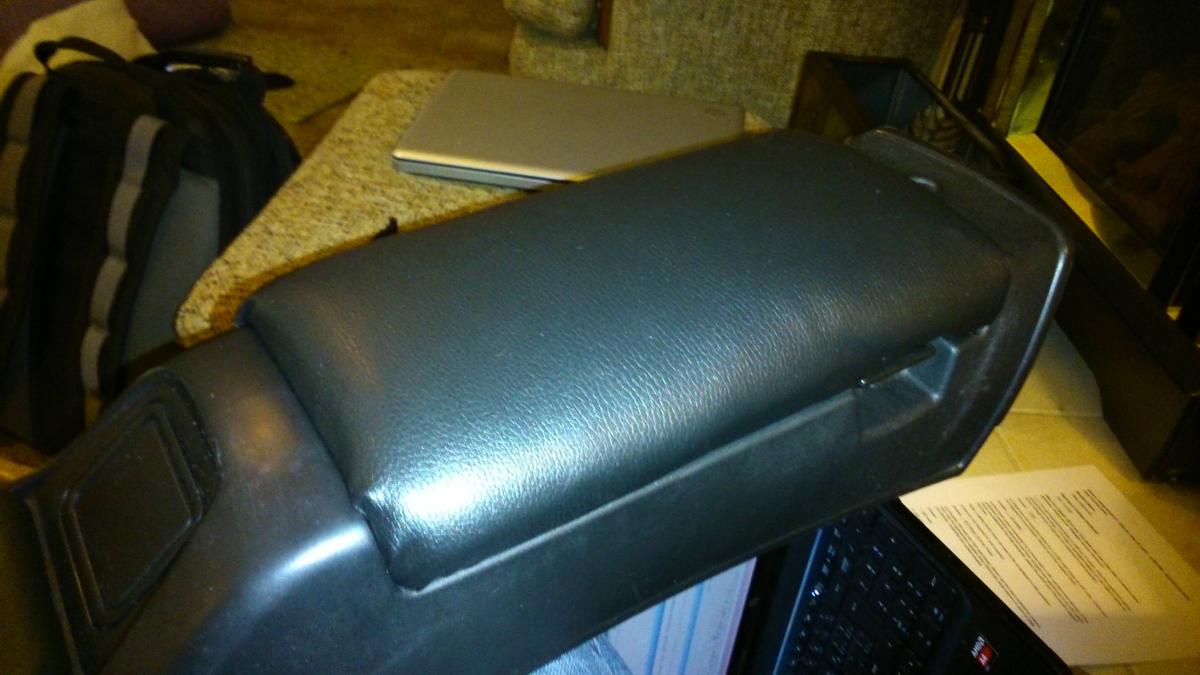
So, after thinking about how my arm rest looked even worse than yours did, I decided to go ahead and do my own.
Here's how mine turned out. Pretty snug opening and closing, but worth it for the comfort.
Edit. Realized you meant Adam at ReLimiter. My bad, I get called Adam all the time.
 Of course Adam has a solution!
So, after thinking about how my arm rest looked even worse than yours did, I decided to go ahead and do my own.
Here's how mine turned out. Pretty snug opening and closing, but worth it for the comfort.
Edit. Realized you meant Adam at ReLimiter. My bad, I get called Adam all the time.
Reply
0
0
02-14-2014, 01:22 AM
#1184
Elite Member
Join Date: Oct 2013
Location: Cedar City, UT
Posts: 2,764
Total Cats: 951
Have you considered a Wheelskins cover? Super nice quality and it lasts and lasts. I've had one on my car for 11 years and it still looks new.
Link:
Wheelskins - The World's Finest Genuine Leather Motoring Accessories, Steering Wheel Covers, Driving Gloves and Shift Boots
Link:
Wheelskins - The World's Finest Genuine Leather Motoring Accessories, Steering Wheel Covers, Driving Gloves and Shift Boots
It's Mike, but I won't hold that to you.
So, after thinking about how my arm rest looked even worse than yours did, I decided to go ahead and do my own.
Here's how mine turned out. Pretty snug opening and closing, but worth it for the comfort.
Edit. Realized you meant Adam at ReLimiter. My bad, I get called Adam all the time.
So, after thinking about how my arm rest looked even worse than yours did, I decided to go ahead and do my own.
Here's how mine turned out. Pretty snug opening and closing, but worth it for the comfort.
Edit. Realized you meant Adam at ReLimiter. My bad, I get called Adam all the time.
Didn't do much more work since I was hanging out with my pops, but I did do a deep clean of the garage since it was getting pretty messy. So I wheeled the car into the driveway and got some better shots right at sunset so no direct reflections or stupid halogen lighting.
The car is so light without the engine in I could pull it up the slope with one hand. Love it. Anytime I move my Jetta I feel like I am going to pull a muscle.
I frikin' love how mechanically raw looking it looks without the fenders and bumper on. Amazing how these headlights completely change the front end of the car imho.
I am so damn happy with how this car is evolving. just a picture to show how much has changed.


Oh man this blue looks good in the daylight, and the wheels were such the right choice. So so glad I didn't go with silver or gunmetal.


Reply
4
4


 02-14-2014, 11:32 AM
#1191
Elite Member
Join Date: Oct 2013
Location: Cedar City, UT
Posts: 2,764
Total Cats: 951

I still have a lot of issues to address with the wiring that Zaphod and Brain are going to help me with.
I'd say a couple weeks. Mostly due to the fact that I need to order some connectors and misc electrical components to rewire the COP harness and a couple other fixes.
Reply
0
0
 02-14-2014, 12:03 PM
#1193
Elite Member
Join Date: Oct 2013
Location: Cedar City, UT
Posts: 2,764
Total Cats: 951

Must be hard to own a Miata in Illinois and not be able to drive it during the winter. Everyone always thinks Utah gets crazy winters but we don't get anything compared to the Eastern United States. It's almost over dude!
I would think my pace of rebuilding an entire car in 5 months shows contrary to your thoughts of me being patient!
It probably only seems that way due to my problems with hyper-focus when I do something. I get so absorbed into what I do that I don't notice how much time I spend doing something. I will start a project and all of a sudden 6 hours have gone by and the sun is coming up.
I just want to thank my father for allowing me to take over his garage and giving me the ability to do the work this fast. When I first started this I was going to rent a big storage unit and do all the work in that since I don't have a garage yet.
Hopefully by the time I finish the car I can find a decent place with a 2 car garage so I don't have to commute 45 minutes one way, each time I want to work on the car.
I have racked up over 5,000 miles on my Jetta in just traveling back and forth from Cedar City to St. George just to work on the car. Over 8,000 miles combined in 5 months. Thank god for 45 mpg highway and 80 MPH Utah speed limits.
Reply
0
0
02-14-2014, 12:39 PM
#1194
Elite Member

Join Date: Mar 2006
Location: Schwarzenberg, Germany
Posts: 1,553
Total Cats: 101
Just wait for the hard part of body panels comming...
I just attched the hood, front fenders, and front bumper and this **** is driving me craaaaaaaaazy.... There is no way in hell this is going to line up on all of the edges...
This will be interesting to see, when you do that...with your attention to detail.
I just attched the hood, front fenders, and front bumper and this **** is driving me craaaaaaaaazy.... There is no way in hell this is going to line up on all of the edges...
This will be interesting to see, when you do that...with your attention to detail.
Reply
0
0
02-14-2014, 12:46 PM
#1195
Elite Member
Join Date: Oct 2013
Location: Cedar City, UT
Posts: 2,764
Total Cats: 951
Just wait for the hard part of body panels comming...
I just attched the hood, front fenders, and front bumper and this **** is driving me craaaaaaaaazy.... There is no way in hell this is going to line up on all of the edges...
This will be interesting to see, when you do that...with your attention to detail.
I just attched the hood, front fenders, and front bumper and this **** is driving me craaaaaaaaazy.... There is no way in hell this is going to line up on all of the edges...
This will be interesting to see, when you do that...with your attention to detail.
I still need to tweak the doors a little better to get them to not move up a 1/4" when they shut completely.
Man I wish I had an extra pair of hands sometimes. Working with jacks only helps so much.
Reply
0
0
02-14-2014, 10:58 PM
#1196
Elite Member
Join Date: Oct 2013
Location: Cedar City, UT
Posts: 2,764
Total Cats: 951
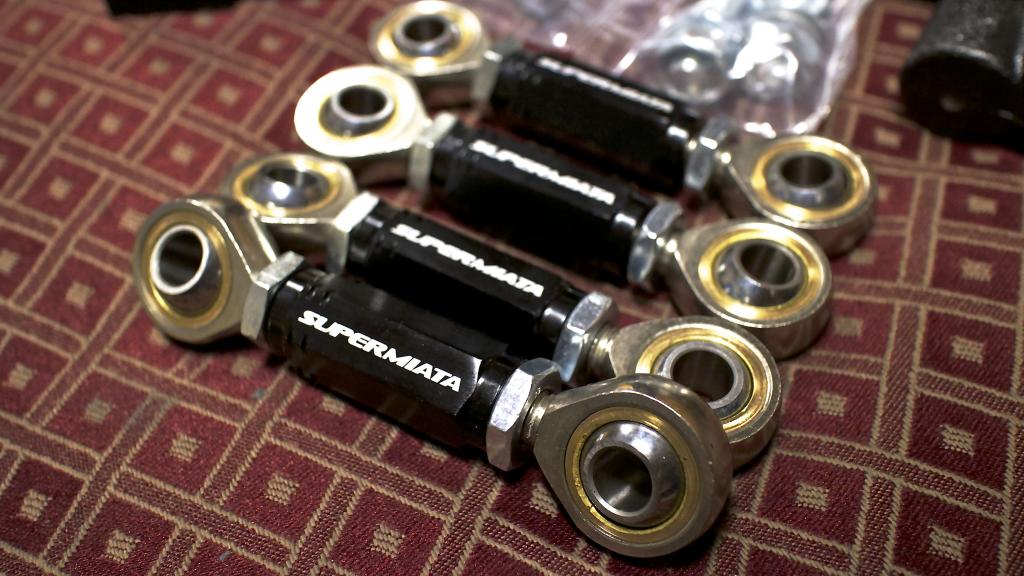
949 Racing care package....Emelio make some good stuff, or carries some good stuff I should say.
949 Racing adjustable endlinks
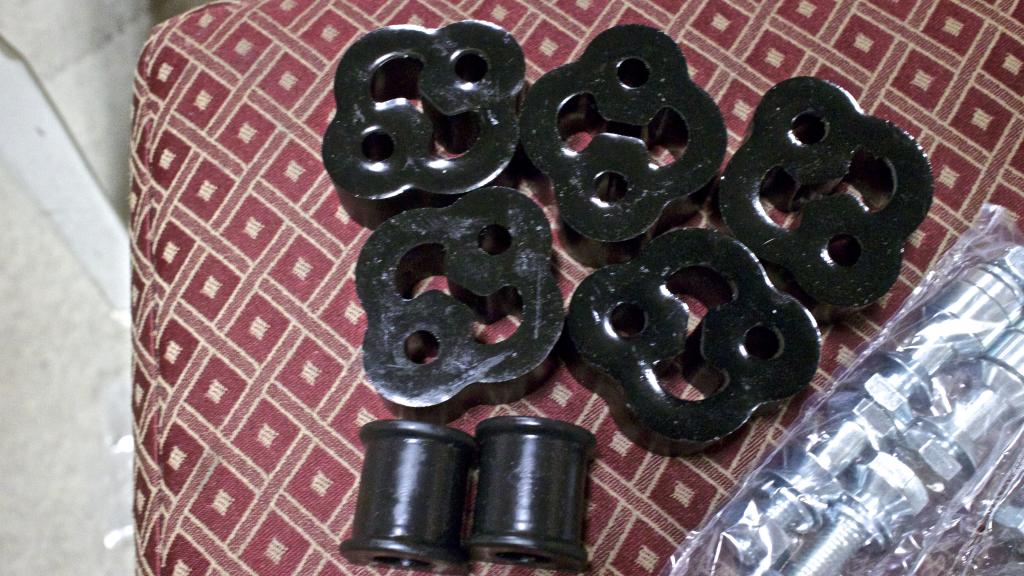
Poly exhaust hangers and poly rear sway bar bushings(one was rubber). The old rubber ones literally fell apart in my hands
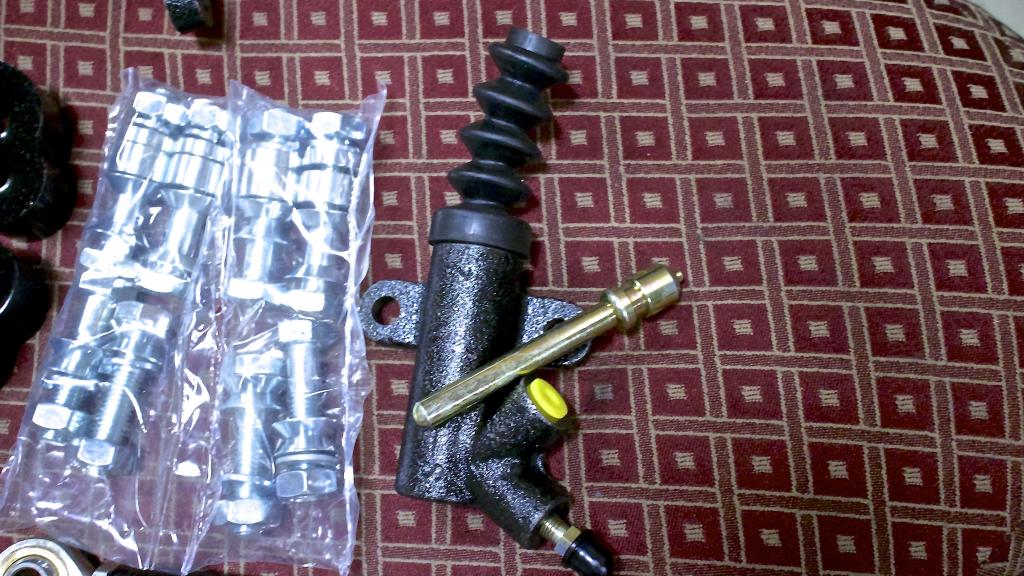
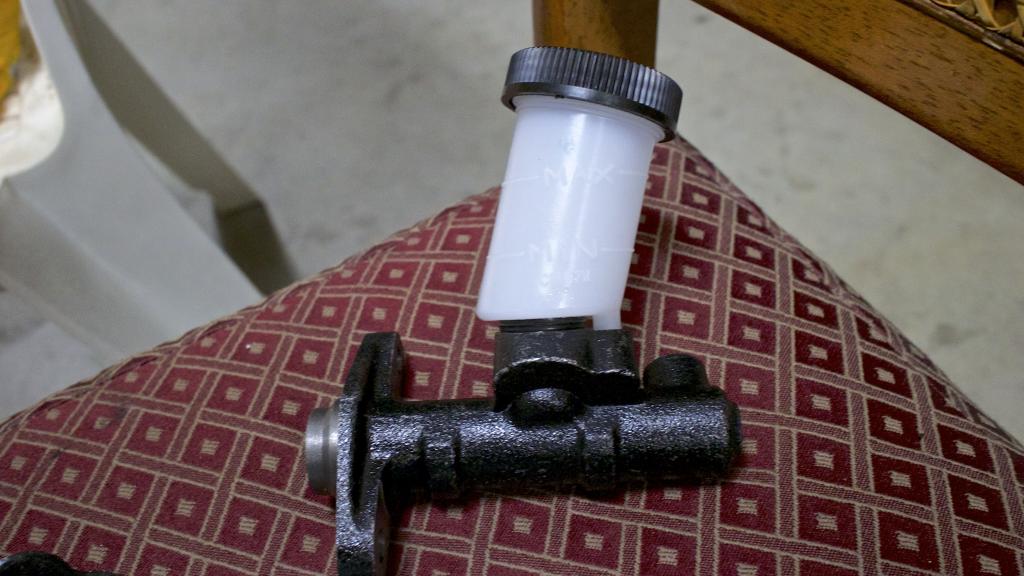
New master and slave cylinder
949 Racing adjustable endlinks

Poly exhaust hangers and poly rear sway bar bushings(one was rubber). The old rubber ones literally fell apart in my hands

New master and slave cylinder


Last edited by Jeffbucc; 02-21-2014 at 08:16 AM.
Reply
1
1
02-15-2014, 12:08 AM
#1197
Elite Member

Join Date: Jul 2007
Location: Houston, TX
Posts: 3,202
Total Cats: 146
It's Mike, but I won't hold that to you.
So, after thinking about how my arm rest looked even worse than yours did, I decided to go ahead and do my own.
Here's how mine turned out. Pretty snug opening and closing, but worth it for the comfort.
Edit. Realized you meant Adam at ReLimiter. My bad, I get called Adam all the time.
So, after thinking about how my arm rest looked even worse than yours did, I decided to go ahead and do my own.
Here's how mine turned out. Pretty snug opening and closing, but worth it for the comfort.
Edit. Realized you meant Adam at ReLimiter. My bad, I get called Adam all the time.

Reply
0
0
02-15-2014, 06:27 AM
#1198
Elite Member
Join Date: Oct 2013
Location: Cedar City, UT
Posts: 2,764
Total Cats: 951
Last of the engine cleaning is done. Might wire brush the oil pan a little tomorrow but we'll see.
Took a lot of sanding to take the rust off.

passenger side painted


turbo side

Intercooler end pipes painted and a really really thin spritz of paint on the fins so it'll still work properly.

dashboard plate buffed and the rubber seals removed, denastified, and conditioned. Put new sealant on the back of them so they won't be hanging off the plate anymore. Hands were greasy hence the finger prints all over.

Going to get all the parts on the engine block that I can before I drop it in tomorrow.
Reply
2
2

 02-15-2014, 11:53 AM
#1200
Elite Member
Join Date: Oct 2013
Location: Cedar City, UT
Posts: 2,764
Total Cats: 951
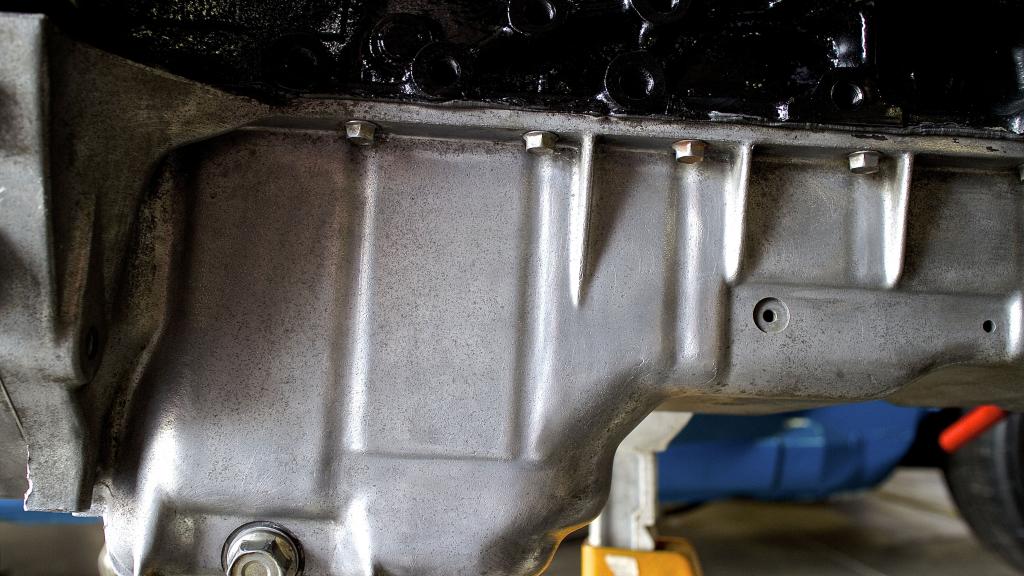
Ain't that just predictable? My wire wheel for my drill is shot so I need to go pick up a new one before I finish.
PRO TIP: Dip your wire wheel in your tub of aluminum polish before your start...holy ****, it literally cuts the time in 1/2 for getting rid of the oxidation.
The center bit of the pan, in this picture, was about 30 seconds of a soft wire wheel on my drill.
Also started cleaning up the rain rail trim a little bit.
What it looked like when I started and the end result. I've been using 1Z Einszett Deep Plastic Cleaner instead of degreaser since the degreaser has been far to damaging lately on the plastic. It works just as well and doesn't discolors the plastic or rubber.
The rubber on the right is still untreated with rubber conditioner
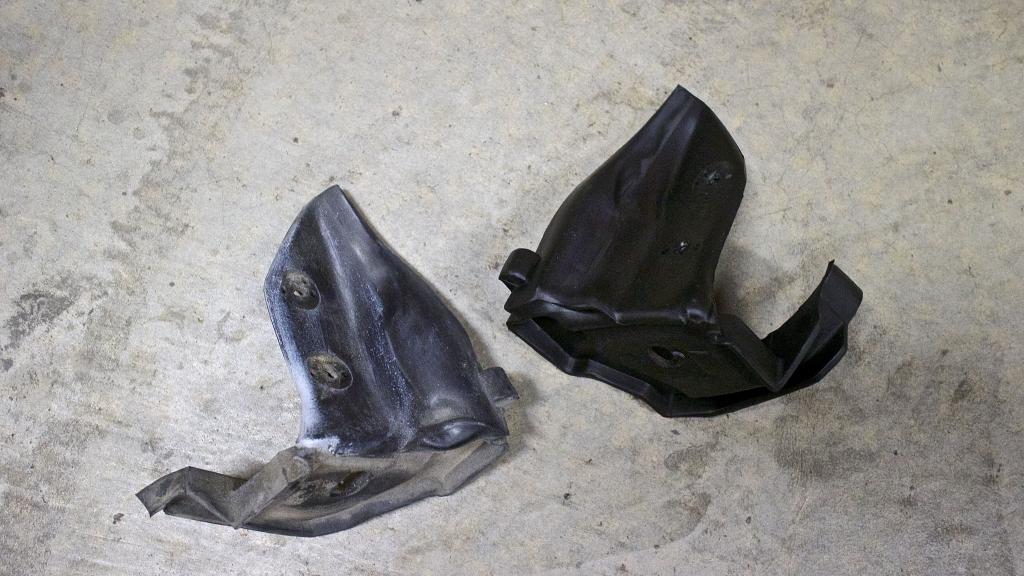
Conditioned
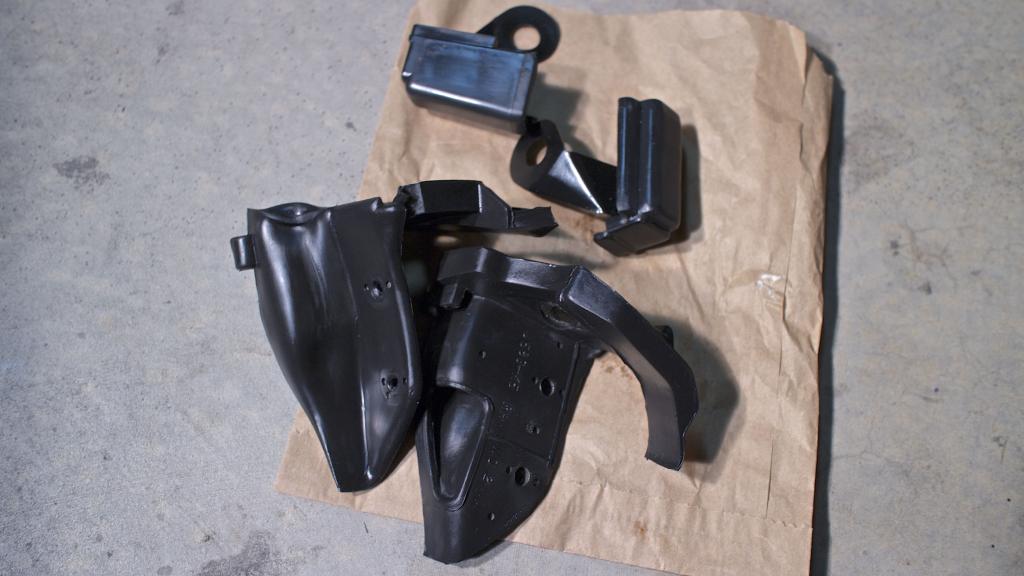
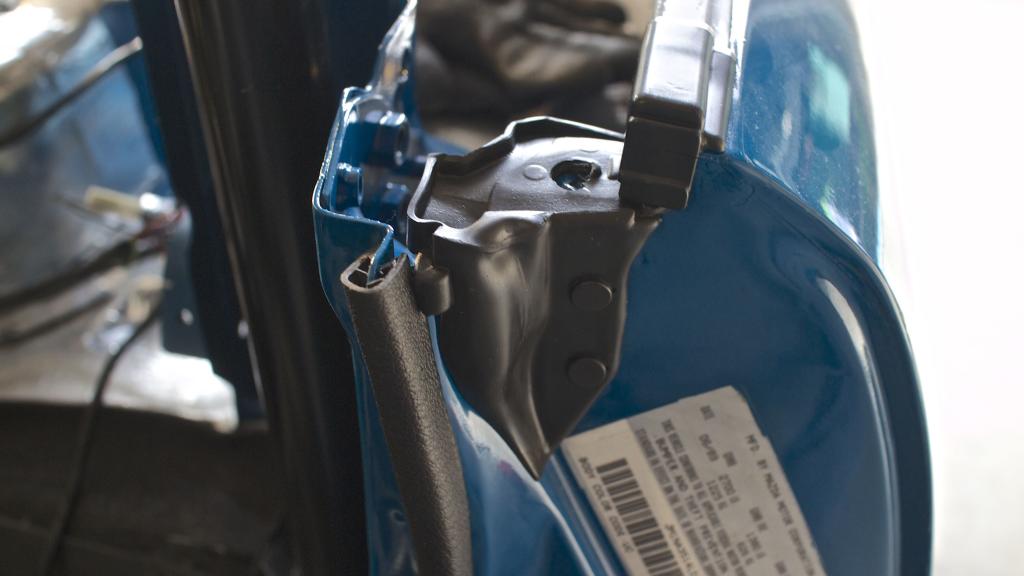
Repainted these brackets which look like they go in the same place as the rain rail trim but I can't find a diagram with them in it or figure out a way to make them fit! Anyone know where they go?
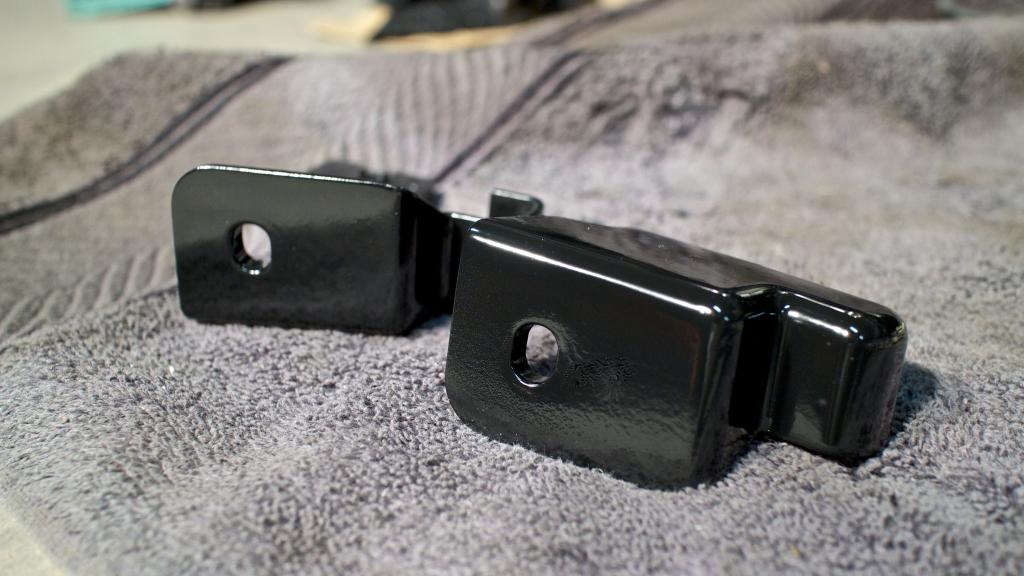
Trim installed
PRO TIP: Dip your wire wheel in your tub of aluminum polish before your start...holy ****, it literally cuts the time in 1/2 for getting rid of the oxidation.
The center bit of the pan, in this picture, was about 30 seconds of a soft wire wheel on my drill.

Also started cleaning up the rain rail trim a little bit.
What it looked like when I started and the end result. I've been using 1Z Einszett Deep Plastic Cleaner instead of degreaser since the degreaser has been far to damaging lately on the plastic. It works just as well and doesn't discolors the plastic or rubber.
The rubber on the right is still untreated with rubber conditioner

Conditioned

Repainted these brackets which look like they go in the same place as the rain rail trim but I can't find a diagram with them in it or figure out a way to make them fit! Anyone know where they go?

Trim installed

Reply
2
2


