Ace's Dual Duty LS1 Build
 02-27-2017, 11:49 AM
#61

thank you!
__________________
OG Racing
Your Source For Motorsports Safety Equipment
WWW.OGRACING.COM
800.934.9112
703.430.3303
info@ogracing.com
OG Racing
Your Source For Motorsports Safety Equipment
WWW.OGRACING.COM
800.934.9112
703.430.3303
info@ogracing.com

Reply
 0
0

0
03-06-2017, 07:34 PM
#62
Senior Member
Thread Starter
iTrader: (1)

Join Date: Dec 2010
Location: Farmington Hills, MI
Posts: 1,218
Total Cats: 175
Working my way through the fuel system. I've got the regulator mounted, supply and return from tank to regulator, and just need one fitting to come in to finish the main supply line. I'm putting the flex fuel sensor on the supply side since it can take a while for the fuel in tank to reach the injectors when the regulator is at the tank. These sensors can support well over 500 hp on the supply side, since it is 3/8" straight through. This is mounted to the shock tower, then I have a Jiffy-Tite dry-break on the short line that runs from the flex fuel sensor to the fuel rail.
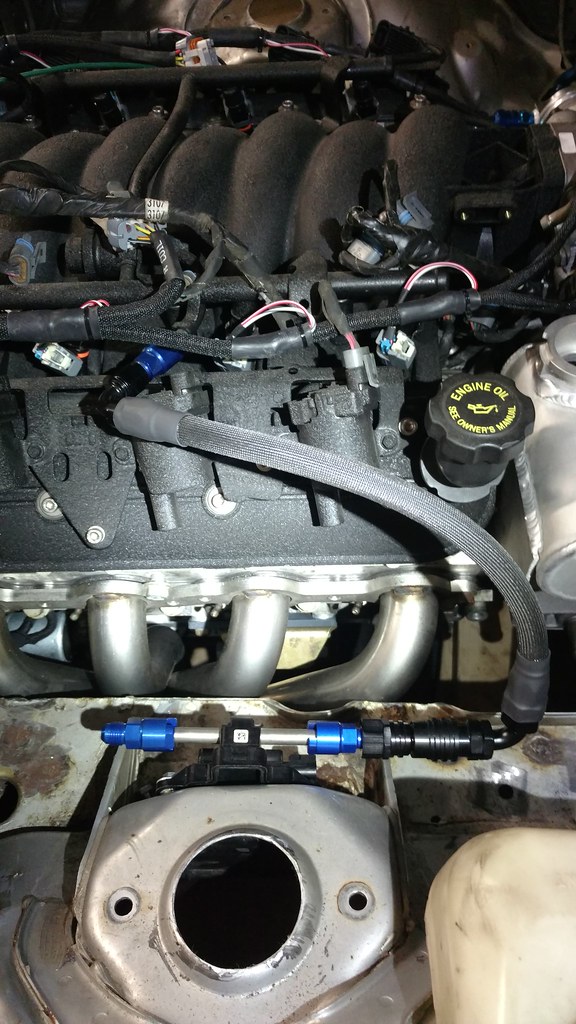
The oil filter is mounted and lines run from the oil pan to the filter housing. Now I just need to mount the oil cooler and run the lines from the sandwich plate to the cooler.
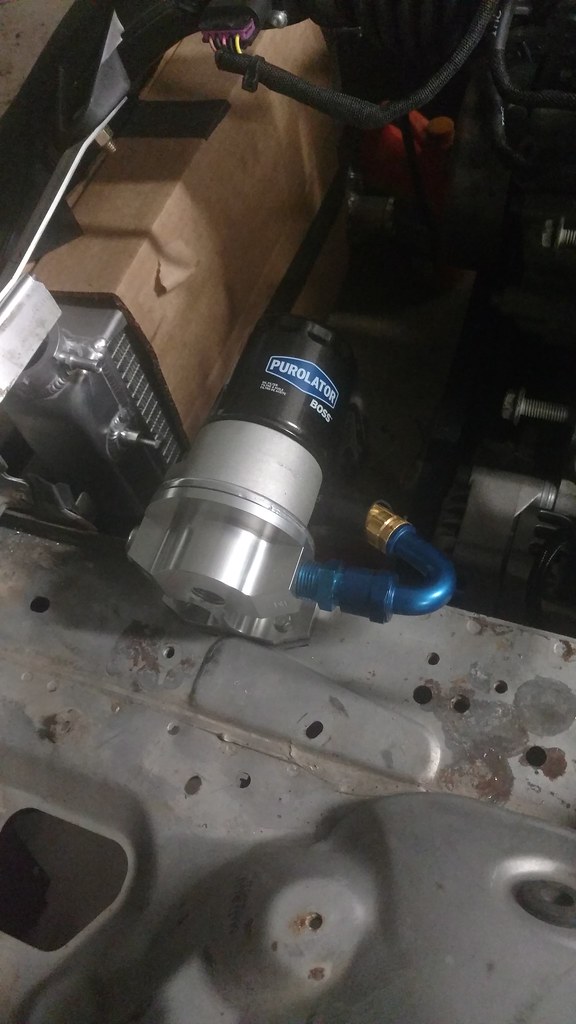
To show why there's tight space with the FM oil pan and long tube headers, here's a shot of the lines. There is just barely enough room between the lines and the pan/block, and just barely enough between the lines and header. The header will be wrapped, and the lines will be covered in heat insulation, so I'm not concerned about that.

The oil filter is mounted and lines run from the oil pan to the filter housing. Now I just need to mount the oil cooler and run the lines from the sandwich plate to the cooler.
To show why there's tight space with the FM oil pan and long tube headers, here's a shot of the lines. There is just barely enough room between the lines and the pan/block, and just barely enough between the lines and header. The header will be wrapped, and the lines will be covered in heat insulation, so I'm not concerned about that.
Reply
0
0
05-12-2017, 08:32 AM
#63
Senior Member
Thread Starter
iTrader: (1)
Join Date: Dec 2010
Location: Farmington Hills, MI
Posts: 1,218
Total Cats: 175
Long time no post! I've been busy with work, Lemons, family, staying inside when it's cold, etc but am finally back on the right track.
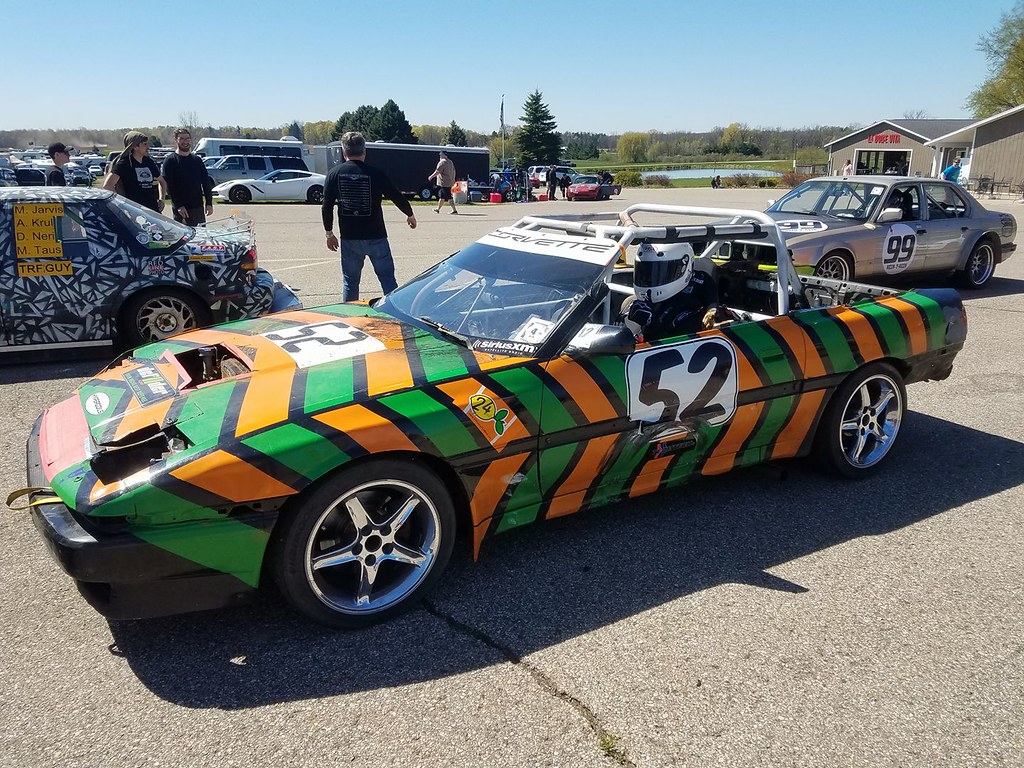
My roommate bought a 1989 Supra that was built by someone in our company and has been floating around different people at the company for the past 8 years. We raced at Gingerman in April and ended up 32 out of 80. Not too bad since it was our first time wheel-to-wheel, and we spent just about 2 hours not driving. We took 45 minutes to remake the exhaust that flew off in the infield, and an hour on a penalty due to the 3 other drivers being ***-hats.
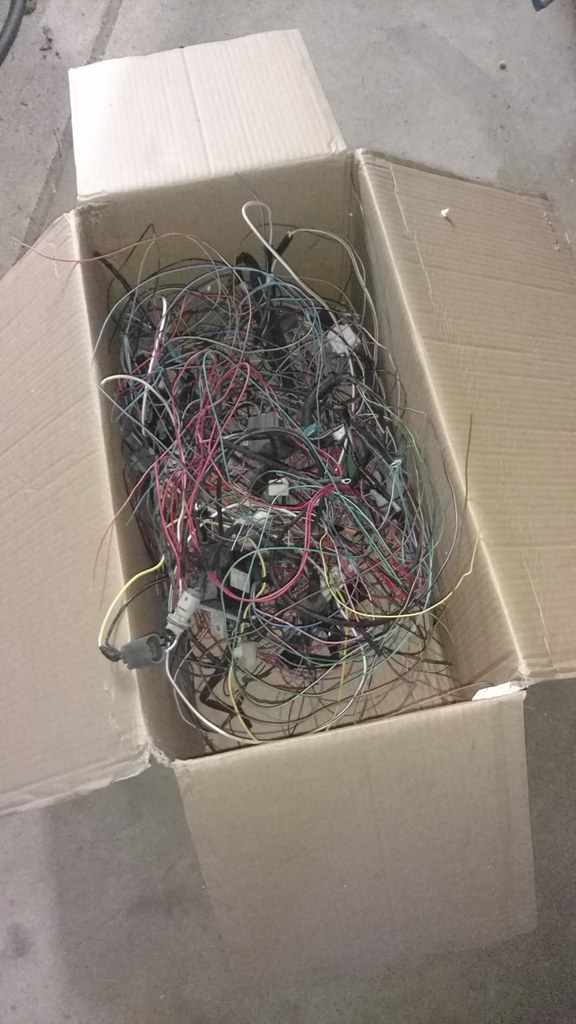
Now back to working on the Miata. I'm tackling the wiring harness this week, and have it almost ready to merge with the LS Megasquirt harness. I'm deleting a lot of stuff, all audio, power door locks, air bags, rear defrost, side markers, all emissions, fuel tank pressure control, A/C, heat, blower motor, fog lights, etc, basically anything not necessary. I've been using the factory service wiring diagram the whole way, so I can get pinouts on the large connectors to know what I need and what I don't. Then follow the wires I don't need all through the harness to trim it out. Now I need to get my transmission tunnel gussets welded up so I can paint the floor and start final assembly of the interior.
My roommate bought a 1989 Supra that was built by someone in our company and has been floating around different people at the company for the past 8 years. We raced at Gingerman in April and ended up 32 out of 80. Not too bad since it was our first time wheel-to-wheel, and we spent just about 2 hours not driving. We took 45 minutes to remake the exhaust that flew off in the infield, and an hour on a penalty due to the 3 other drivers being ***-hats.
Now back to working on the Miata. I'm tackling the wiring harness this week, and have it almost ready to merge with the LS Megasquirt harness. I'm deleting a lot of stuff, all audio, power door locks, air bags, rear defrost, side markers, all emissions, fuel tank pressure control, A/C, heat, blower motor, fog lights, etc, basically anything not necessary. I've been using the factory service wiring diagram the whole way, so I can get pinouts on the large connectors to know what I need and what I don't. Then follow the wires I don't need all through the harness to trim it out. Now I need to get my transmission tunnel gussets welded up so I can paint the floor and start final assembly of the interior.
Reply
0
0
05-12-2017, 02:25 PM
#66
Elite Member

Join Date: Sep 2015
Location: Seattle, WA
Posts: 1,651
Total Cats: 884
Yeah ours was built by one guy who kinda knew what he was doing (me), and about four others that didn't. They wired our killswitch wrong so that a resistor was seeing a continuous 60A, I'm surprised it lasted more than an hour before the wiring caught fire 
Reply
0
0
05-25-2017, 02:34 PM
#67
Senior Member
Thread Starter
iTrader: (1)
Join Date: Dec 2010
Location: Farmington Hills, MI
Posts: 1,218
Total Cats: 175
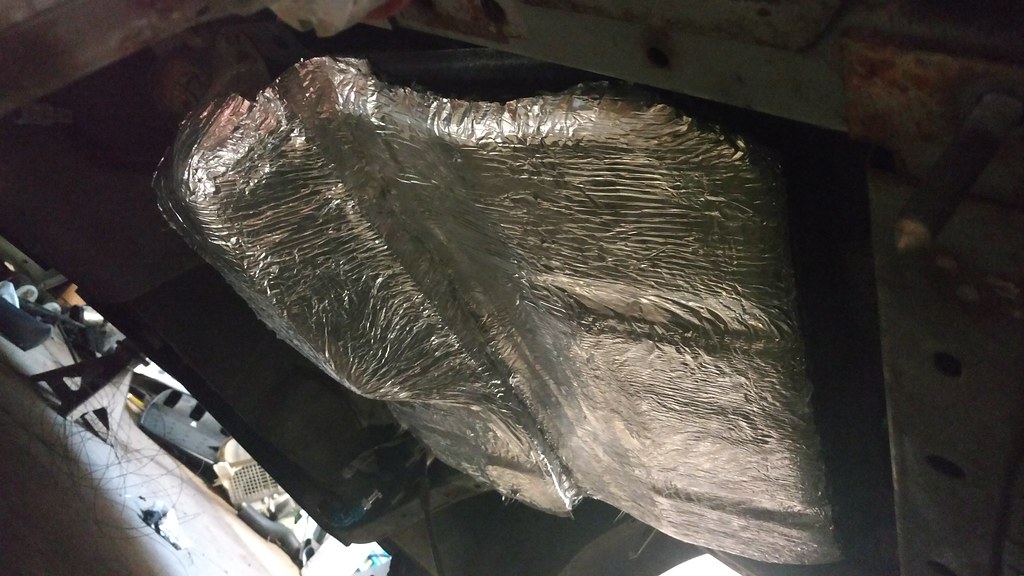
Lined my gas tank with Lowes duct insulation. I'm trying to eliminate the worry of gas tank pressure as a lot of people have dealt with. Keeping heat away from the tank should help a lot with that. Then I'll have the stock EVAP lines running to the top of the fill hose, and another line through a 4 psi check valve to a Land Rover Discovery charcoal canister.
The adhesive is pretty thick, it's more like adhesive putty than it is tape. Which is nice, because you can form it to the curves and still have the adhesive sealing all of what you are attaching it to. I degreased it with brake clean, then used 3m spray adhesive as well. A trick is to run a bead silicone along the edges to keep them from peeling, and to keep water from seeping into the adhesive.
I'll be using this on the transmission tunnel as well. I'll have the exhaust pipes wrapped as well, so it won't be direct exhaust pipe to insulation.
Reply
0
0
05-26-2017, 11:41 AM
#68
side pipes fix all. 
__________________
OG Racing
Your Source For Motorsports Safety Equipment
WWW.OGRACING.COM
800.934.9112
703.430.3303
info@ogracing.com
OG Racing
Your Source For Motorsports Safety Equipment
WWW.OGRACING.COM
800.934.9112
703.430.3303
info@ogracing.com
Reply
0
0
06-05-2017, 10:22 PM
#71
Senior Member
Thread Starter
iTrader: (1)
Join Date: Dec 2010
Location: Farmington Hills, MI
Posts: 1,218
Total Cats: 175
I don't think I've posted about diff stuff yet. I originally wanted a CTS diff, but the RX7 Turbo II started to sound attractive. I want to use a short ratio to aid with the race clutch. I want to make 1st gear basically a crawling gear, then 2nd through 6th as the usable driving gears. The TII diff is a 4.10, it's relatively cheap, fits in the stock Miata mounts, can use stock TII axles, and is a decent clutch pack.
I ended up snagging up Danny George's TII diff, already mounted in subframe (the pinion needs a custom mount), with DSS axles, aluminum driveshaft, control arms, uprights, and hubs. All assembled, ready to go! But the best part is.... it has an OS Giken! For those that don't know, it's an adjustable Salisbury style clutch pack diff, that uses like 28 friction plates. Everything I've heard about this diff is that it feels like pure magic, and puts any other LSD to shame. It cost a pretty penny (compared to a TII setup with stock parts) but it wasn't any more expensive than if I would've used a V8roadster or Monster Miata setup. Plus OS Giken >>> torsen, CTS clutch pack, TII clutch pack, Ferd torsen or locker, etc. The big kicker for me was the convenience factor. I picked the pallet up from the freight center during my lunch break, started working on the car at 6pm, and had the rear end all back together in under 2 hours.
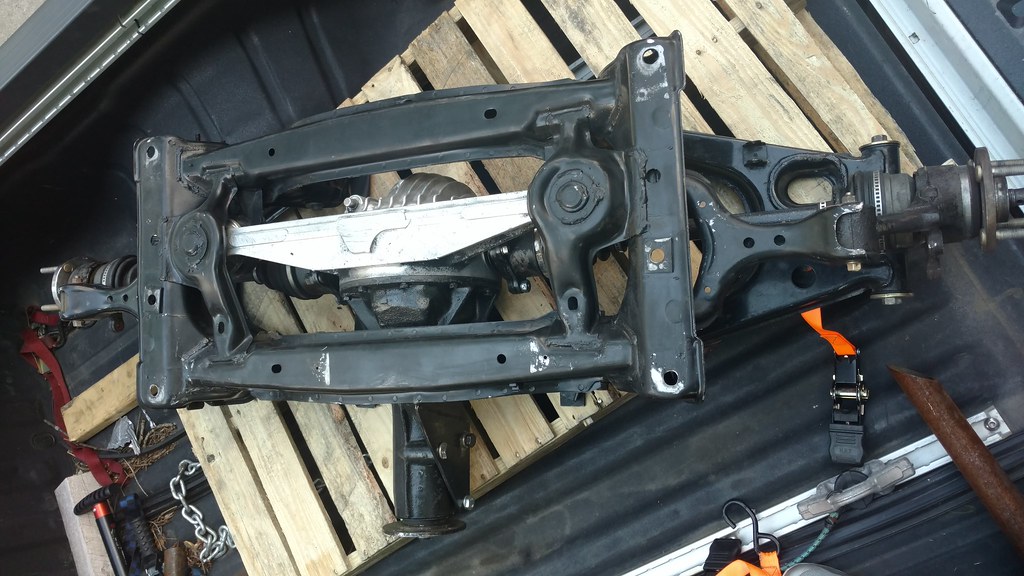


Cue super crappy potato picture

I ended up snagging up Danny George's TII diff, already mounted in subframe (the pinion needs a custom mount), with DSS axles, aluminum driveshaft, control arms, uprights, and hubs. All assembled, ready to go! But the best part is.... it has an OS Giken! For those that don't know, it's an adjustable Salisbury style clutch pack diff, that uses like 28 friction plates. Everything I've heard about this diff is that it feels like pure magic, and puts any other LSD to shame. It cost a pretty penny (compared to a TII setup with stock parts) but it wasn't any more expensive than if I would've used a V8roadster or Monster Miata setup. Plus OS Giken >>> torsen, CTS clutch pack, TII clutch pack, Ferd torsen or locker, etc. The big kicker for me was the convenience factor. I picked the pallet up from the freight center during my lunch break, started working on the car at 6pm, and had the rear end all back together in under 2 hours.
Cue super crappy potato picture
Reply
1
1
12-03-2017, 06:15 PM
#72
Senior Member
Thread Starter
iTrader: (1)
Join Date: Dec 2010
Location: Farmington Hills, MI
Posts: 1,218
Total Cats: 175
Another long break from the project. I basically spent the summer mountain biking, ChumpCar racing, and just relaxing. It's a big project, and I got a little burnt out from working so much on it. Getting behind the wheel of a buddy's 350 whp Miata was some good motivation to get back into it.
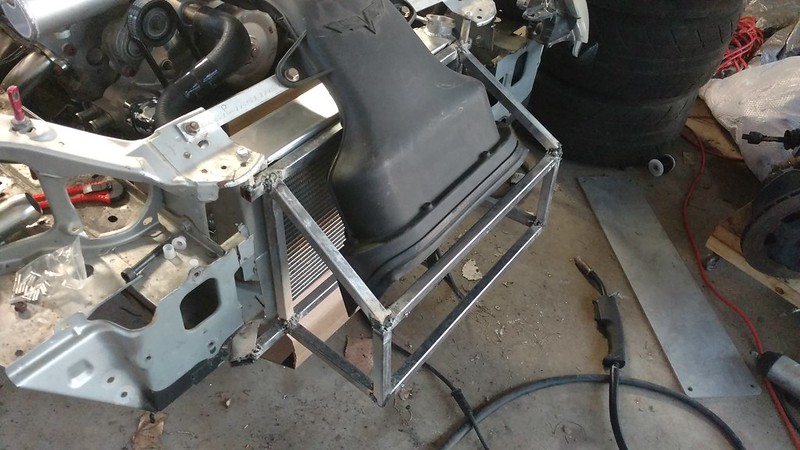
I decided to expand on my lower radiator mounts, that way pulling 6 bolts will allow removal of the radiator, fan, ducting, bumper, and intake all in one piece. That'll leave a large open gap that's wide enough to drop the subframe/engine/trans assembly down onto a dolly and wheel it out the front. I got the frame for the ducting done today, just need to finish welding it (it's got crappy flux core tacks right now, I'll bring it to work and TIG it), then rivet aluminum panels around it.
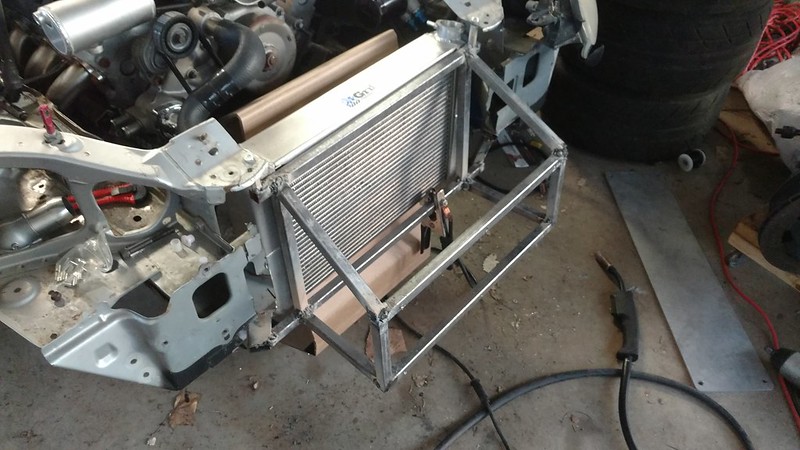
Showing placement of the intake. I'll cut the wings off at the bottom of it, I think after that there'll be enough air flow around it to the radiator. I can't imagine IAT's will be much over a few degrees above ambient!
I decided to expand on my lower radiator mounts, that way pulling 6 bolts will allow removal of the radiator, fan, ducting, bumper, and intake all in one piece. That'll leave a large open gap that's wide enough to drop the subframe/engine/trans assembly down onto a dolly and wheel it out the front. I got the frame for the ducting done today, just need to finish welding it (it's got crappy flux core tacks right now, I'll bring it to work and TIG it), then rivet aluminum panels around it.
Showing placement of the intake. I'll cut the wings off at the bottom of it, I think after that there'll be enough air flow around it to the radiator. I can't imagine IAT's will be much over a few degrees above ambient!
Reply
0
0
 01-29-2018, 05:04 PM
#75
Senior Member
Thread Starter
iTrader: (1)
Join Date: Dec 2010
Location: Farmington Hills, MI
Posts: 1,218
Total Cats: 175
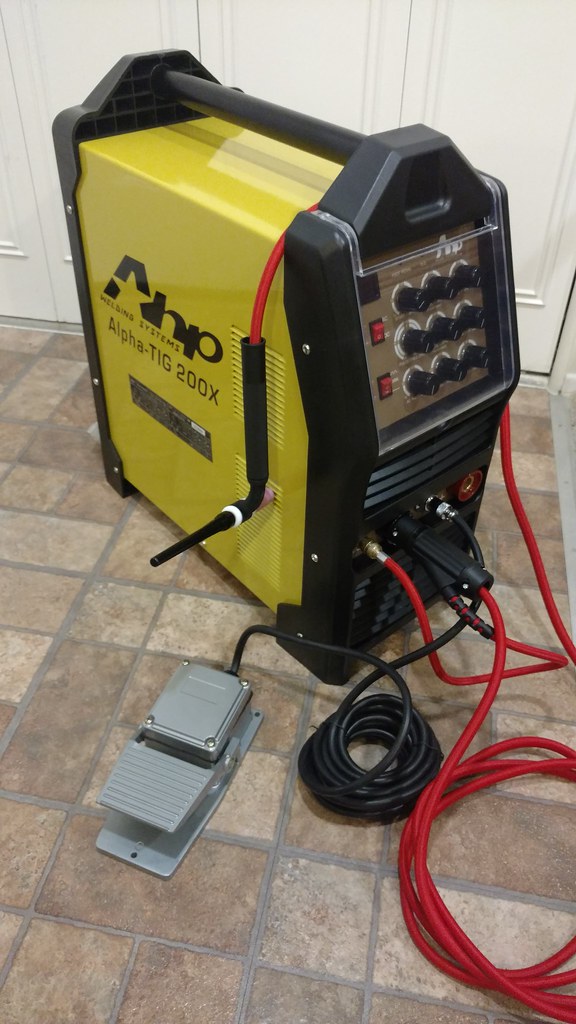
I ended up picking up a TIG welder a few weeks ago. It's an AlphaTig 200X, very well liked by other here and it turns out a few guys at work have one as well. It's about the cheapest way to get a TIG with DC and AC, as well as high frequency settings. 2018 model also has a flex head torch!
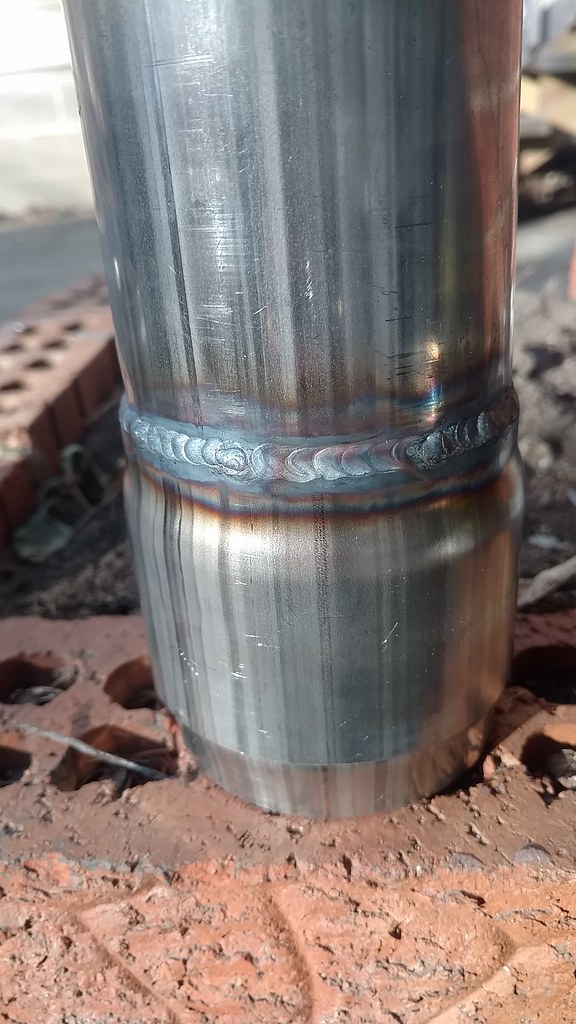
First welds came out pretty good. I haven't TIG welded for a few months and I also don't have a good table setup yet, so this wasn't bad considering what I was working with. I also haven't got a back purging setup yet, so this is with solar flux.
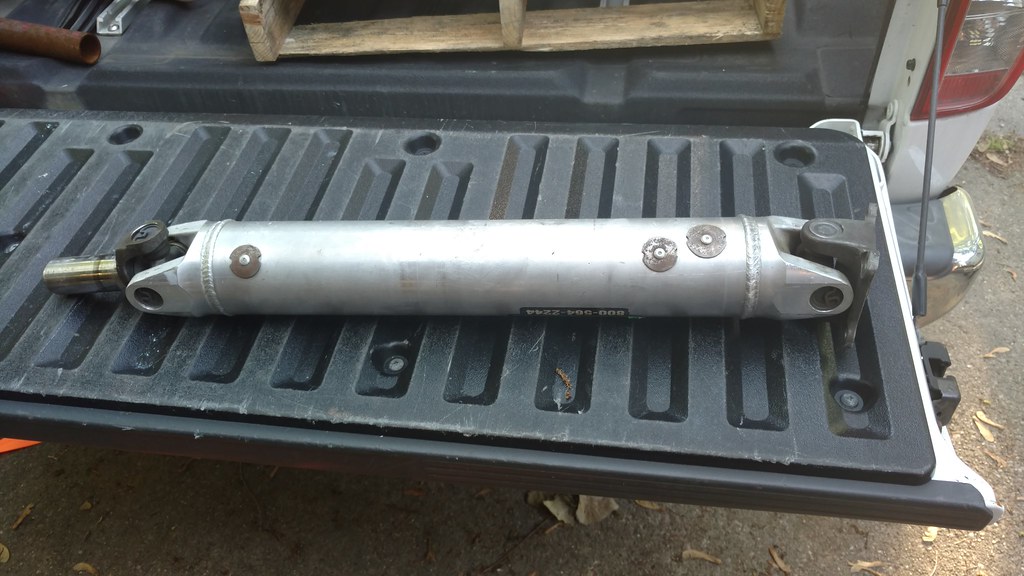
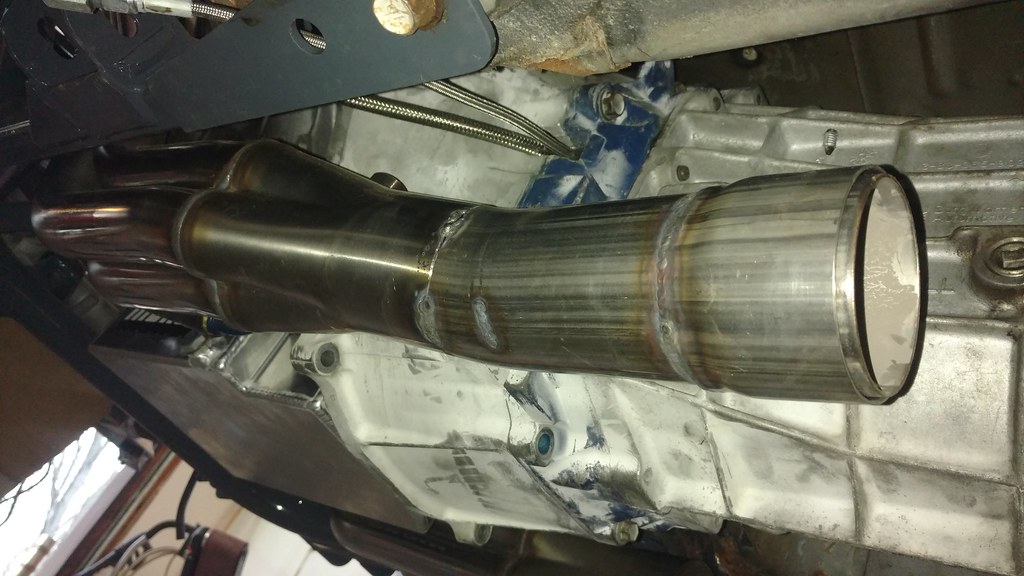
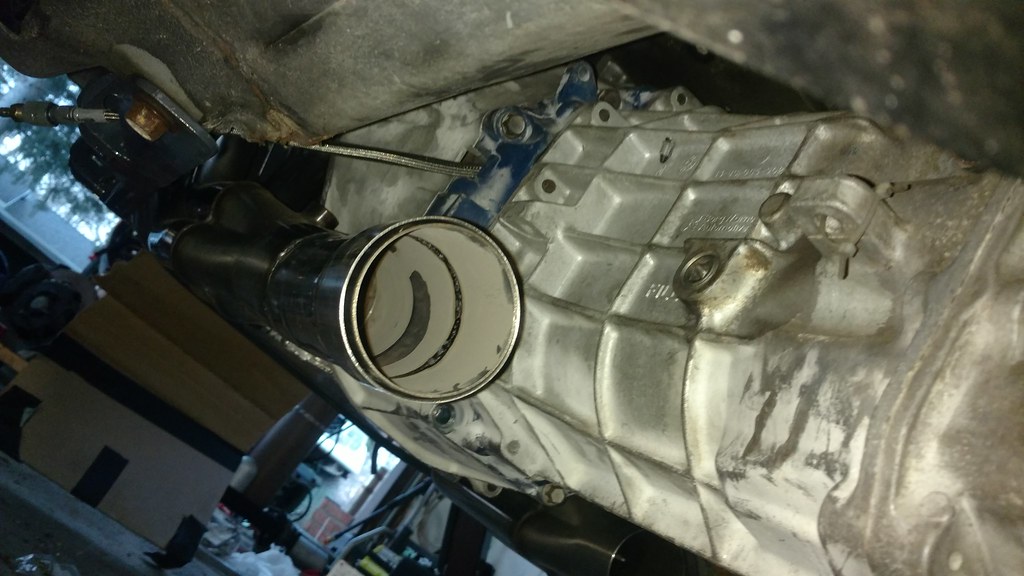
I'm finishing up the header connections now. The V8roadsters don't have any connections on the end of the header, just a 3" tube, and they recommend using a slip joint with a pipe clamp. I'm not a fan of pipe clamps, so my next thought was V-band. This is the lowest point on the car, and a V-band would be very easy to rip off on a bump. Slip joint with springs was the next option, but this is a street car and from what I've read slip joints often need the exhaust to warm up and expand before it'll fully seal. So I ended up going with Burns Stainless double slip joints. They come with a section that's slightly expanded tube that will fit over the 3" header outlet, then another slightly larger piece that welds to the header. So you can see in the picture that there are two tubes, and there is a piece that fits nicely in between that will get welded to the downstream exhaust. I could've just welded the slip joint right to the header outlet (instead of having the extra tube on it), but the header outlets are not parallel. That means that if the exhaust tubes go to an X-pipe, they would need a flex joint in between to remove. Instead, I added a bend to make the header outlets parallel. Excuse the little 1" bit of random weld on the tube. I was welding under the car holding the tube with one hand, and I have a passive welding helmet, so I basically can't see what I'm doing when I initiate the weld... I just run the tungsten along until I feel the crevice where the tubes meet then lift off and start. I felt something and went with it, turns out it was not the joint.
First welds came out pretty good. I haven't TIG welded for a few months and I also don't have a good table setup yet, so this wasn't bad considering what I was working with. I also haven't got a back purging setup yet, so this is with solar flux.
I'm finishing up the header connections now. The V8roadsters don't have any connections on the end of the header, just a 3" tube, and they recommend using a slip joint with a pipe clamp. I'm not a fan of pipe clamps, so my next thought was V-band. This is the lowest point on the car, and a V-band would be very easy to rip off on a bump. Slip joint with springs was the next option, but this is a street car and from what I've read slip joints often need the exhaust to warm up and expand before it'll fully seal. So I ended up going with Burns Stainless double slip joints. They come with a section that's slightly expanded tube that will fit over the 3" header outlet, then another slightly larger piece that welds to the header. So you can see in the picture that there are two tubes, and there is a piece that fits nicely in between that will get welded to the downstream exhaust. I could've just welded the slip joint right to the header outlet (instead of having the extra tube on it), but the header outlets are not parallel. That means that if the exhaust tubes go to an X-pipe, they would need a flex joint in between to remove. Instead, I added a bend to make the header outlets parallel. Excuse the little 1" bit of random weld on the tube. I was welding under the car holding the tube with one hand, and I have a passive welding helmet, so I basically can't see what I'm doing when I initiate the weld... I just run the tungsten along until I feel the crevice where the tubes meet then lift off and start. I felt something and went with it, turns out it was not the joint.
Reply
1
1

Thread
Thread Starter
Forum
Replies
Last Post


