build thread (TII drivetrain swap, built motor, cage, widebody, blah blah)
 09-03-2008, 10:19 PM
#121
Senior Member
Thread Starter
iTrader: (9)

Join Date: Jun 2007
Location: NH
Posts: 1,013
Total Cats: 21
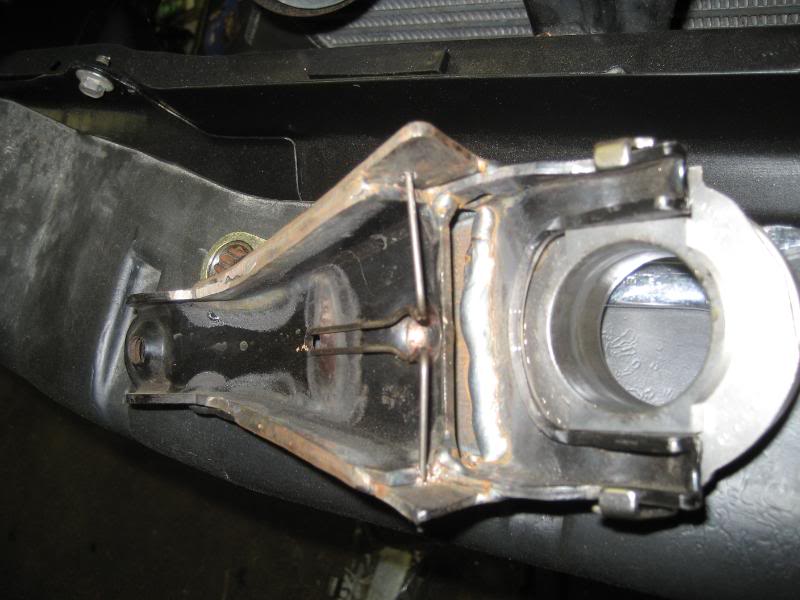
I still have to elongate the 2 holes for the retention spring, clean up the welds a bit more, and of course paint it, but you get the idea. I thought about this for a long time, and I think this is going to work out great- It certainly will be strong enough that's for sure. This weekend I'm going to start really putting things back together now. Right now the last bit of fab work is going to be the exhaust, which i need everything basically back in the car so I know how much room I have to play with. I'm hoping to stuff a 3" turbo-back in there somehow.

Reply
 0
0

0
 09-03-2008, 11:30 PM
#123
Elite Member
iTrader: (13)

Join Date: Dec 2006
Location: Taos, New mexico
Posts: 6,603
Total Cats: 564
MightyMouse, I hate to call you out, but have you sent my fuel pump yet? Its been well over a month( I paid you for it on 07-14-2008 ), and I've reminded you several times.
Reply
0
0
 09-04-2008, 10:02 AM
#126
Senior Member
Thread Starter
iTrader: (9)
Join Date: Jun 2007
Location: NH
Posts: 1,013
Total Cats: 21
Here's a question off on a side tangent. For my oil return line, I have some -10an fittings and a length of steel braided hose with a plastic "hose" inside instead of rubber "hose". Would this be alright to use, or should I get one with rubber inside? I got the hose free so if I have to buy one it's not a big deal.
Reply
0
0
 09-17-2008, 11:29 AM
#129
Senior Member
Thread Starter
iTrader: (9)
Join Date: Jun 2007
Location: NH
Posts: 1,013
Total Cats: 21
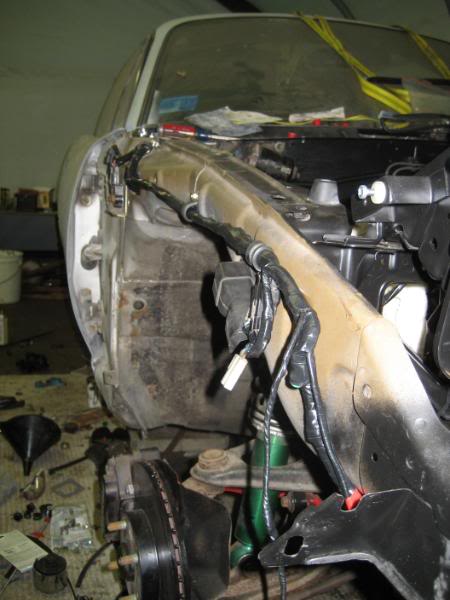
I started a mild wire tuck. I'm not 100% impressed with how it came out, but it'll stay for now. Eventually I'm going to go back and hide everything (hard lines included).
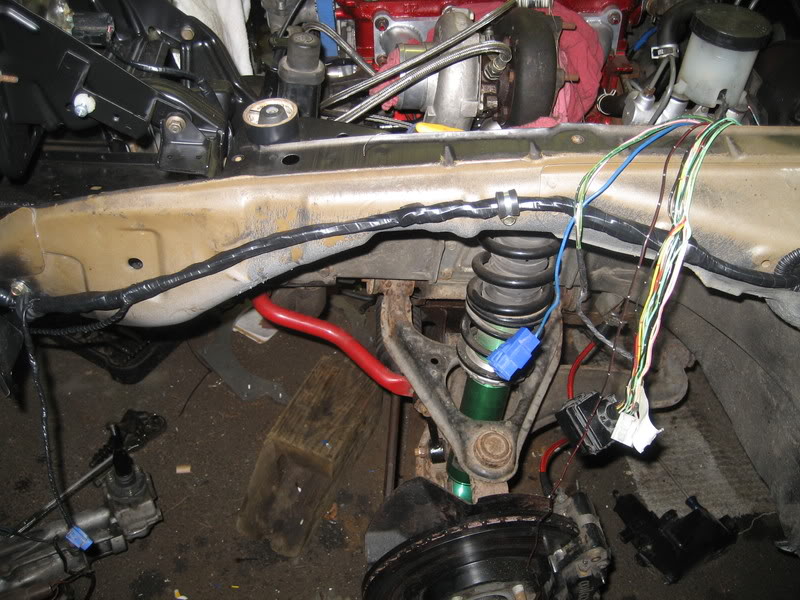
Here's the passenger side:
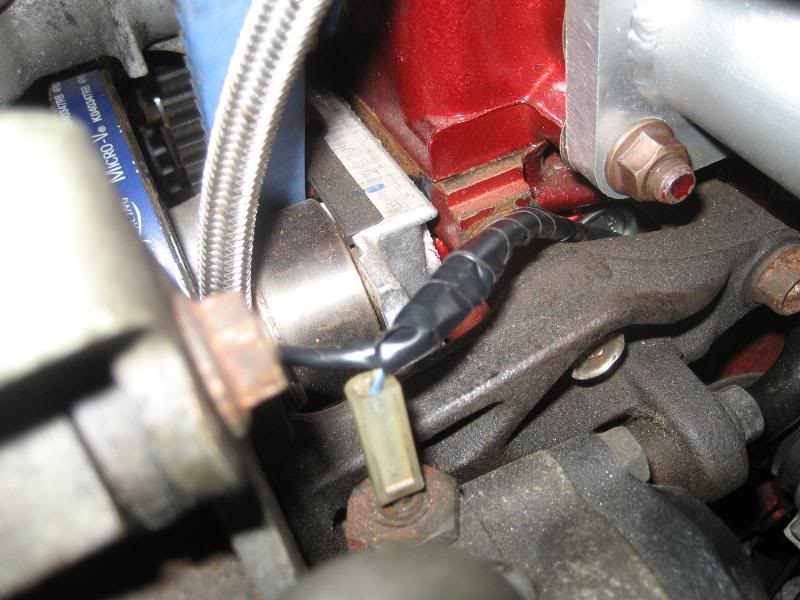
I'm going to run the fan, power steering pump, and t-stat temp sensor wires through here. This is the initial fit.


they'll go down here between the block and ps bracket, and follow the lower rad hose
driver's side
I forgot to take more pics of the wiring, I finished up at 3:30 am so I was a little tired.
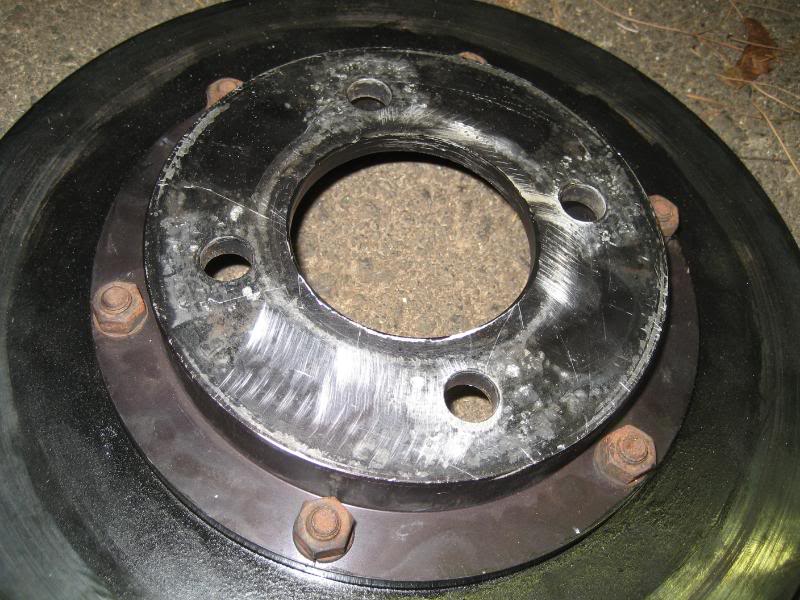
Got the rear rotors back from the machine shop
I had to make a cut to the dust shield for the calipers to fit with the new brackets.
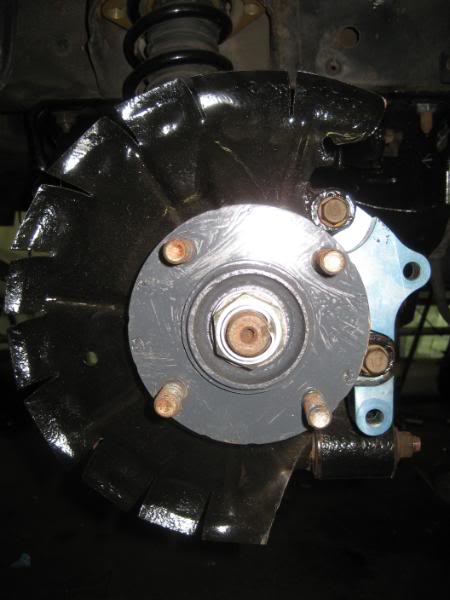
Then I installed my calipers. (old ones were a little iffy so I just got new ones. Better safe than sorry.
pass side
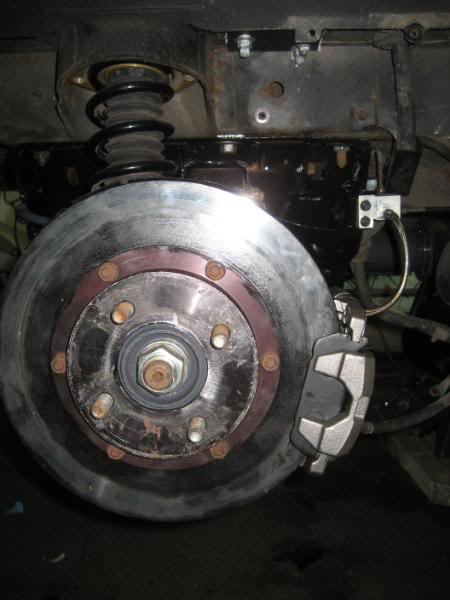
and the bling bling driver's side (no idea why this one is gold)
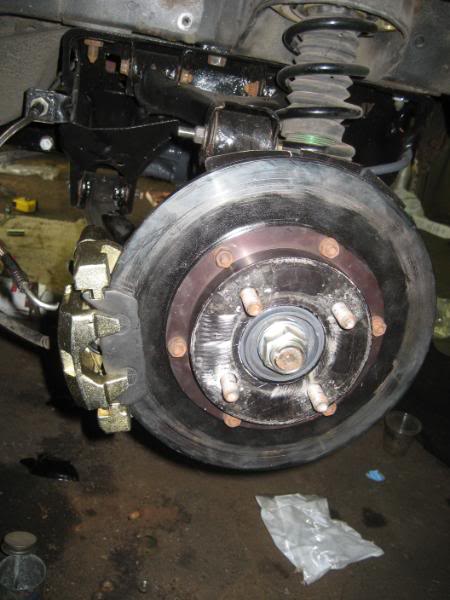
I'm using porterfield r4s pads all around.
Next, I installed the new clutch fork. and slave cylinder
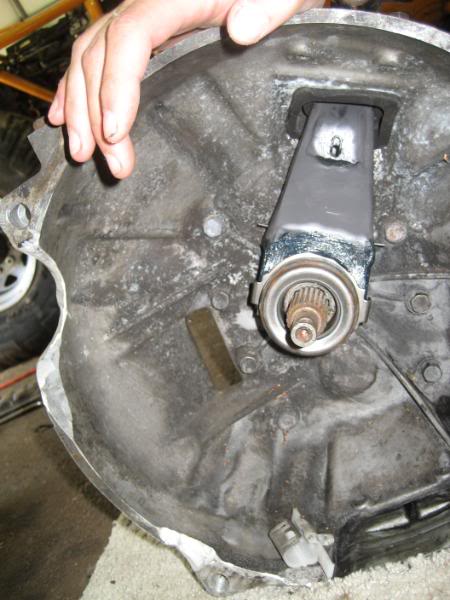
Then I fought with the tranny and finally got it in and bolted down.
Here's the passenger side:
I'm going to run the fan, power steering pump, and t-stat temp sensor wires through here. This is the initial fit.
they'll go down here between the block and ps bracket, and follow the lower rad hose
driver's side
I forgot to take more pics of the wiring, I finished up at 3:30 am so I was a little tired.
Got the rear rotors back from the machine shop
I had to make a cut to the dust shield for the calipers to fit with the new brackets.
Then I installed my calipers. (old ones were a little iffy so I just got new ones. Better safe than sorry.
pass side
and the bling bling driver's side (no idea why this one is gold)
I'm using porterfield r4s pads all around.
Next, I installed the new clutch fork. and slave cylinder
Then I fought with the tranny and finally got it in and bolted down.
Reply
0
0
09-17-2008, 11:30 AM
#130
Senior Member
Thread Starter
iTrader: (9)
Join Date: Jun 2007
Location: NH
Posts: 1,013
Total Cats: 21
then I installed the fuel injectors, dual feed fuel rail, fuel lines, injector wiring harness, and intake manifold. I'm not 100% sure where I'm going to mount the section of fuel rail holding the fpr yet
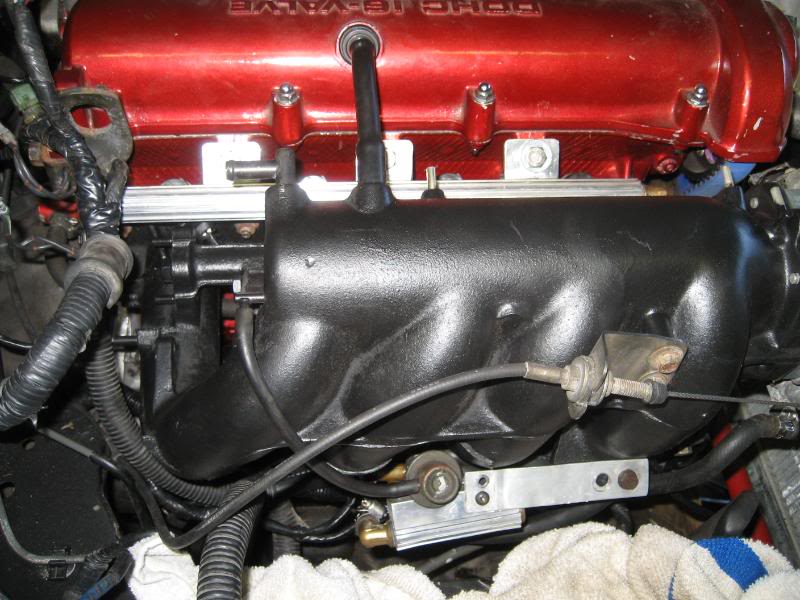
More to come this weekend.
More to come this weekend.
Reply
0
0
09-17-2008, 02:36 PM
#131
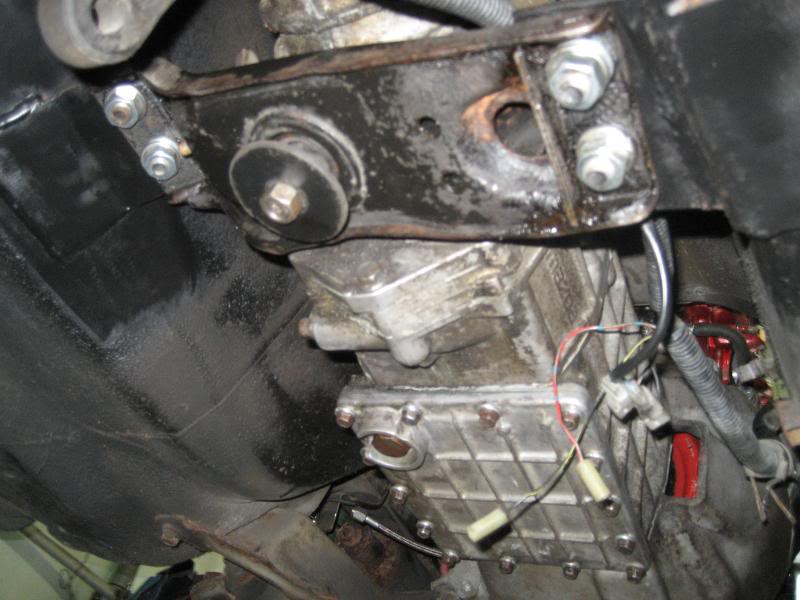
Did you consider putting any kind of bushing material between the diff housing and your mounting plate that's mounted to the subframe? I'd think it would be advantageous to reducing any driveline noise/vibration tranferring to the chassis since the mounting plate is the connection between the diff and the subframe (which is bolted directly to the chassis).
Reply
0
0
09-17-2008, 03:59 PM
#132
Senior Member
Thread Starter
iTrader: (9)
Join Date: Jun 2007
Location: NH
Posts: 1,013
Total Cats: 21
Did you consider putting any kind of bushing material between the diff housing and your mounting plate that's mounted to the subframe? I'd think it would be advantageous to reducing any driveline noise/vibration tranferring to the chassis since the mounting plate is the connection between the diff and the subframe (which is bolted directly to the chassis).
I did think about it, but no I didn't put anything in. I'm going to try it out and if it needs to be changed, I can enlarge the holes and put in some bushings or whatever. That's something that can be done after it's running though.
Reply
0
0
01-14-2009, 11:00 AM
#133
Senior Member
Thread Starter
iTrader: (9)
Join Date: Jun 2007
Location: NH
Posts: 1,013
Total Cats: 21
Nothing new to report on the car just yet, but I thought I'd give an update anyways. I got 2nd and 3rd degree burns on my right hand on New Year's Eve from a big firework exploding accidentially in my hand (long story, no I didn't light it, and no I don't feel like typing it all out ) so I can't do the things I would like to be able to. Ive been taking it easy for a while to let it heal, but I just went last night and picked up the bumpers and fenders and a couple other misc. pieces that I'm going to prep and paint. I'm going nuts from not doing anything productive anymore. I figure I should be able to do this with only 1 hand (i'm left handed so at least I have that going for me). I am planning on starting tongiht after work, so hopefully I will have more to report.
Reply
0
0
02-02-2009, 07:09 PM
#136
Senior Member
Thread Starter
iTrader: (9)
Join Date: Jun 2007
Location: NH
Posts: 1,013
Total Cats: 21
Very small update:
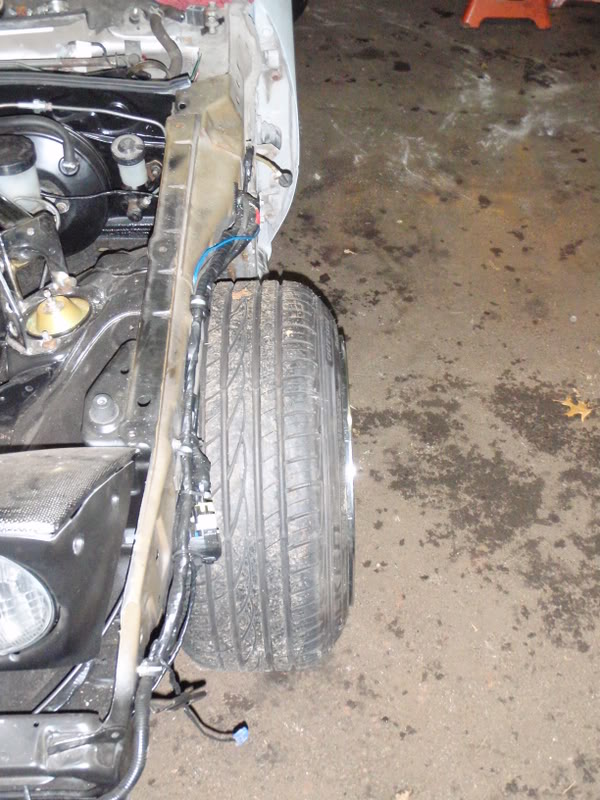
The car is back on the ground, after being on jack stands for over a year! It will be going right back up on them once I am finished with the lift/axles for my jeep though #-o . I had to move it to make room for my jeep in the garage. I did take a few pics though. This will most likely end up being the ride height. It's a little hard to see without fenders, bumpers, etc., but damn does it look good! Please hold all of the "your tires are too small" comments. Yes I know they are too small and they will be replaced, but not for the time being. When my bank account stops getting beaten I'll replace them.
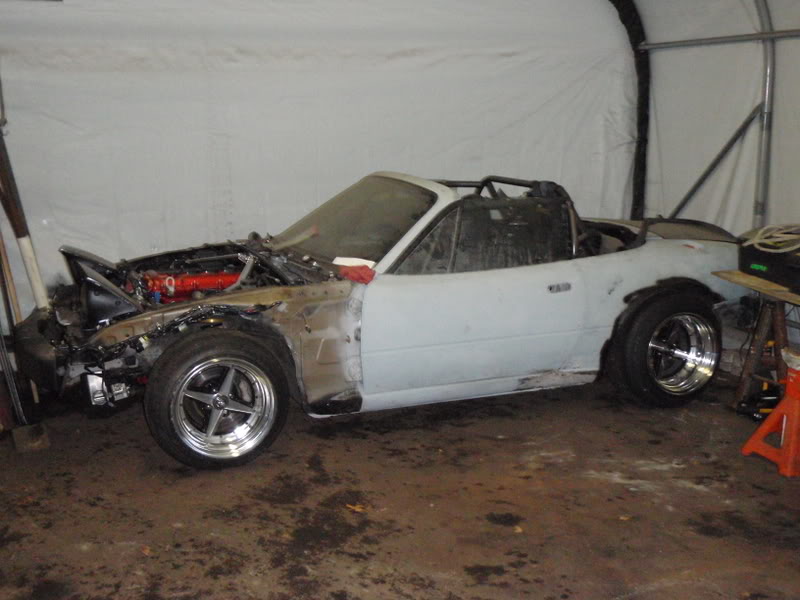
I fell in love with it all over again seeing it for the first time on the ground with the wheels on it.
Here's a shot showing how wide the rims are
The car is back on the ground, after being on jack stands for over a year! It will be going right back up on them once I am finished with the lift/axles for my jeep though #-o . I had to move it to make room for my jeep in the garage. I did take a few pics though. This will most likely end up being the ride height. It's a little hard to see without fenders, bumpers, etc., but damn does it look good! Please hold all of the "your tires are too small" comments. Yes I know they are too small and they will be replaced, but not for the time being. When my bank account stops getting beaten I'll replace them.
I fell in love with it all over again seeing it for the first time on the ground with the wheels on it.
Here's a shot showing how wide the rims are
Reply
0
0
 02-02-2009, 08:42 PM
#139
Senior Member
Thread Starter
iTrader: (9)
Join Date: Jun 2007
Location: NH
Posts: 1,013
Total Cats: 21
What do you want to know? I didn't tuck the main harness for the engine/fuse box, just haven't got around to it. I might just leave them there for now and concentrate on getting the car running once I'm done working on my jeep.
Reply
0
0
02-03-2009, 12:07 AM
#140
Elite Member

iTrader: (3)

Join Date: Apr 2008
Location: Outside Portland Maine
Posts: 2,023
Total Cats: 19
I just read this whole thread. Amazing build, I can't wait to see the end result!
High hp Miata with Fender Flares (Love fender flares), done without cutting corners is something I would like to do someday.
High hp Miata with Fender Flares (Love fender flares), done without cutting corners is something I would like to do someday.
Reply
0
0


