Building a blonde young beefcake wearing nothing but skimpy shorts named Rocky

 07-20-2012, 07:21 PM
#562
Senior Member
Thread Starter
iTrader: (7)

Join Date: Sep 2009
Location: Royal Oak Michigan
Posts: 754
Total Cats: 68
I'd like to think that it's a decision about how much power I WANT. But truth is I'm likely going to start destroying other parts of the car with this type of powe... I'm betting my differential explodes first.

Reply
 0
0

0
07-20-2012, 09:01 PM
#564
Elite Member
iTrader: (2)

Join Date: Jan 2007
Location: Los Angeles, CA
Posts: 8,682
Total Cats: 130
Not sure if I'd rock a .63 for 400+
You'll most likely get there with it, but I'm thinking it will be on the verge of choking up and/or building lotsa pressure up top.
This is where the turbo ***** should chime in: JUST HOW MUCH does the .63 flow
*edit: if fae made 400 on a log and .63 71 then you're set. question is: what if you want to go higher after?
For 400hp, gt3076 is -just- big enough. 3071 really isnt. I hit 398hp with a .82 housing and a begi s5 log at 26psi. That was with a lot of dyno tuning on a generous dyno. Realistically, I was prob somewhere around 330-350. Miatas with 3071s just dont make 400hp. JayL broke 400hp with a LOT of tuning with his 3076 and meth and a tubular.
I really enjoyed the 3071 but do not expect to be the fastest kid on the block. You wont be. The 3071 was a very fun turbo and quite streetable. You will enjoy your 3076, but i recommend valvesprings so you can rev to 8000rpm+. It makes a big difference in driveability.
Unfortunately, if you want north of 450 or 500hp, you will need a bigass turbo. Gt35 or GT40 sized. Yes, i have seen eliminators plots and i think he had a warm fuzzy social worker dyno. Yes I have seen other 500hp miata plots too, and tey were running gt35 or bigger. There is a reason I chose "theworldsbiggestturbo" o break 500hp.
Regarding AR, go for the biggest turbine housing possible. Backpressure is bad. Makes you sacrifice timing. Sacrificing timing and retarding it eventually means burnt valves, carbon buildup, and detonation. .63 is wayyyy too small for 400hp unless you run race gas or e85. If you do run that fuel, then have fun cheating. I will too when I dyno

And
Best of luck. You are obviously better than me at everything car wrenching but beware for the angle of the mountain of ALLOFIT gets ever steeper the higher you go.
Reply
1
1
07-23-2012, 09:30 AM
#565
Senior Member
Thread Starter
iTrader: (7)
Join Date: Sep 2009
Location: Royal Oak Michigan
Posts: 754
Total Cats: 68
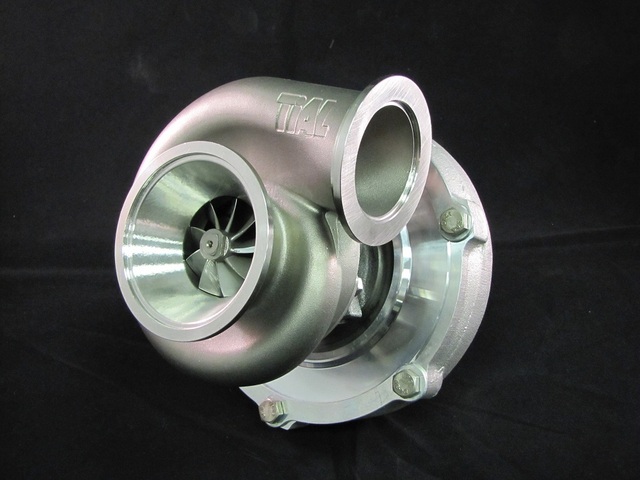
This weekend I was able to make some progress on the engine bay. Since I’ve got some down time while I wait for BEGi to finish my exhaust manifold. I ended up with the .63 TiAL vband housing. The turbo should be able to make what I’m looking for with this housing on E85 with the other supporting items being installed.
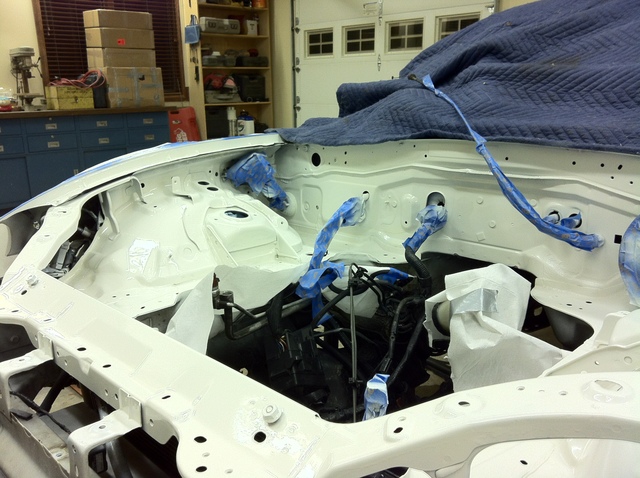
I’ve basically decided to move forward with spraying the entire engine bay to support the theory that I’m better than Fae at everything.
I went through and removed all of the things. Brake lines, clutch line, fuse box, brackets hardware and just about everything else you could remove from the bay. Any rough areas I hit with a rust removal pad on my angle grinder.
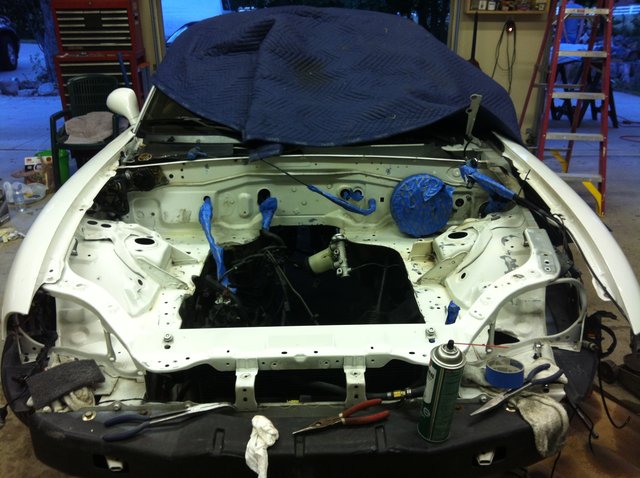
From there I covered the exposed metal with some SEM self etching primer to ensure the paint would hold.
I filled up my touch up spray gun and set it to a pretty narrow spray pattern to hit the tight spots. Got through my first layer of base coat and called it a night. With another coat of base and some clear this engine bay is going to look extremely legitimate. A nice new home for my shiny BEGi parts. I feel like I’m a car **** producer.
Order from Deatsch Werks came in – Everything was packaged nicely and looks top notch. The injectors came with a flow testing sheet that showed results within accurate within .06% of each other. Also included is the fuel pressure correction and the voltage correction table. That should make setting up my Adaptronic for these new injectors fairly easy.

Pretty new parts. I’ll get these dropped in this week when I bolt up my BEGi intake manifold.


I’ve basically decided to move forward with spraying the entire engine bay to support the theory that I’m better than Fae at everything.
I went through and removed all of the things. Brake lines, clutch line, fuse box, brackets hardware and just about everything else you could remove from the bay. Any rough areas I hit with a rust removal pad on my angle grinder.

From there I covered the exposed metal with some SEM self etching primer to ensure the paint would hold.

I filled up my touch up spray gun and set it to a pretty narrow spray pattern to hit the tight spots. Got through my first layer of base coat and called it a night. With another coat of base and some clear this engine bay is going to look extremely legitimate. A nice new home for my shiny BEGi parts. I feel like I’m a car **** producer.

Order from Deatsch Werks came in – Everything was packaged nicely and looks top notch. The injectors came with a flow testing sheet that showed results within accurate within .06% of each other. Also included is the fuel pressure correction and the voltage correction table. That should make setting up my Adaptronic for these new injectors fairly easy.

Pretty new parts. I’ll get these dropped in this week when I bolt up my BEGi intake manifold.

Last edited by miatauser123; 07-23-2012 at 09:54 AM.
Reply
0
0
07-23-2012, 10:21 AM
#567
Junior Member

Join Date: Mar 2010
Location: Norway
Posts: 189
Total Cats: 0
This weekend I was able to make some progress on the engine bay. Since I�ve got some down time while I wait for BEGi to finish my exhaust manifold. I ended up with the .63 TiAL vband housing. The turbo should be able to make what I�m looking for with this housing on E85 with the other supporting items being installed.
Reply
0
0
 07-24-2012, 10:17 AM
#569
Senior Member
Thread Starter
iTrader: (7)
Join Date: Sep 2009
Location: Royal Oak Michigan
Posts: 754
Total Cats: 68
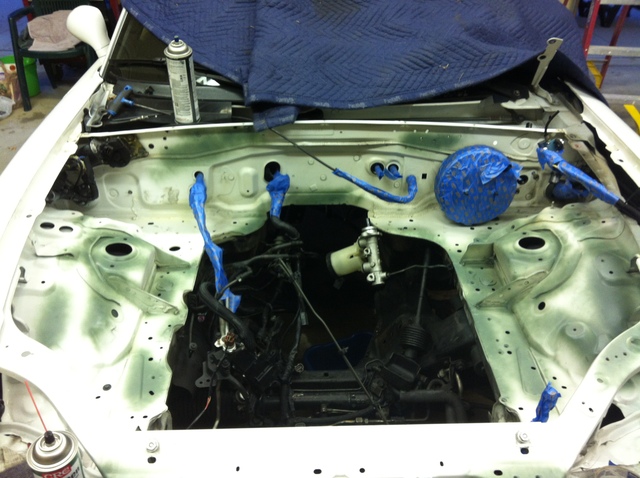
Last night I was able to get the rest of the base coat down and spray the clear - This engine bay is going to be some serious car ****.
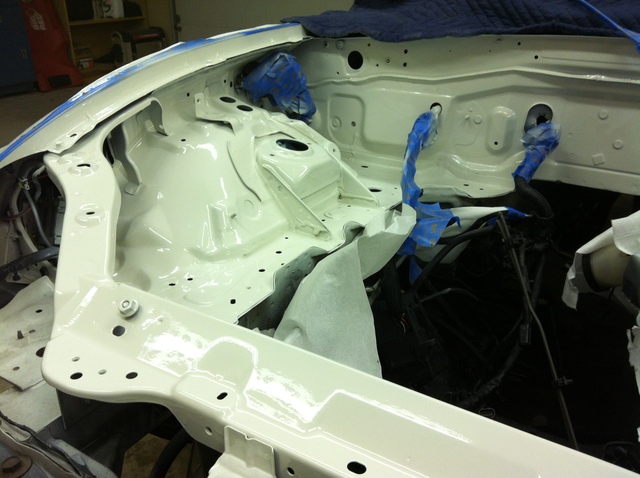
Still waiting on some parts that have been ordered:


Still waiting on some parts that have been ordered:
- BEGi S6 VBAND Manifold
- Boundary Engineering Oil Pump
- BEGi VBAND Downpipe
- Misc AN lines - AN Coolant Setup for the GT30R
Reply
0
0
07-24-2012, 09:24 PM
#570
Newb

Join Date: Jun 2011
Location: Auckland, New Zealand
Posts: 18
Total Cats: -2
I just read this entire build it took me 2 days while at work and I have to say

You are amazing!! makes me proud to own a white NB and at the same time makes me extremely embarrassed about the condition of her
You are amazing!! makes me proud to own a white NB and at the same time makes me extremely embarrassed about the condition of her
Reply
0
0
 07-25-2012, 01:20 AM
#572
Senior Member
Thread Starter
iTrader: (7)
Join Date: Sep 2009
Location: Royal Oak Michigan
Posts: 754
Total Cats: 68
The same night I repaired an Evo door for a friend of mine. It was a bit caved in an wrinkled but I was able to get it looking half decent for a garage spray job.


Last edited by miatauser123; 07-25-2012 at 10:56 AM.
Reply
0
0
07-25-2012, 01:24 AM
#573
Senior Member
Thread Starter
iTrader: (7)
Join Date: Sep 2009
Location: Royal Oak Michigan
Posts: 754
Total Cats: 68
Some new parts came in today. I decided to go with the Mishimoto Oil Cooler kit - It's simple and the hard parts are tough to mess up.
The oil cooler kit might just end up getting used with my Setrab oil cooler core but pricing out the -10AN line alone I couldn't beat my cost on it. The -10AN lines look premo though.
The sandwich plate is not thermostat equipped but I figure between the factory cooling/heating jacket around the filter housing and the fact that I'm running a rather small core, I won't have oil tempatures on the low side.
The catch can will see some modification before it's installed. I basically bought it just because of the size and it looks nice. Prior to installation I'll tap out a hole in the top and install a good sized breateher filter. My plan is to run my 2 -8AN lines from my valve cover into the existing ports on the catch can and the breather filter will be my atmospheric vent.
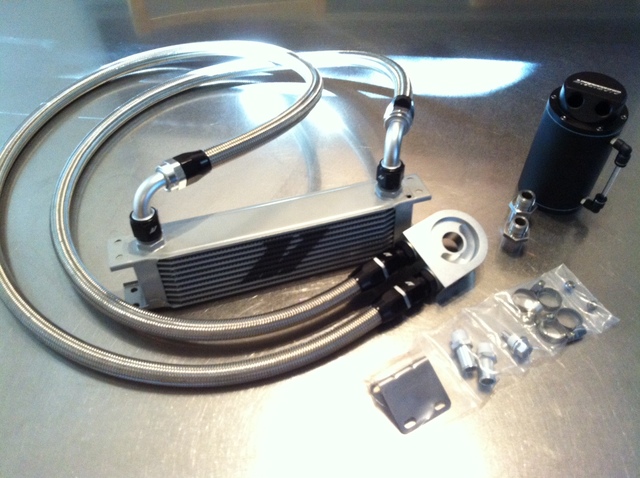
This is just for the eye candy- By the way - Not sure if any of you cats are on instagram but my user name is "Modulation".

Last edited by miatauser123; 07-25-2012 at 01:37 AM.
Reply
0
0

 08-03-2012, 09:34 AM
#575
Senior Member
Thread Starter
iTrader: (7)
Join Date: Sep 2009
Location: Royal Oak Michigan
Posts: 754
Total Cats: 68
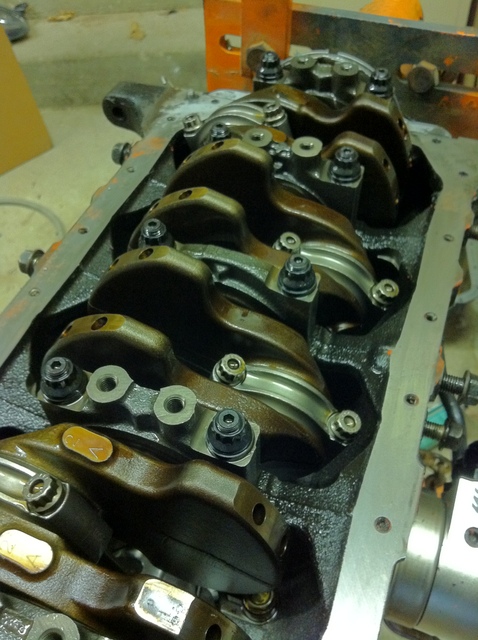
Got the new oil pump in from BE. Looks very well prepared when you pull it out of the package. Didn't use a gasket, just Permatex Black RTV.
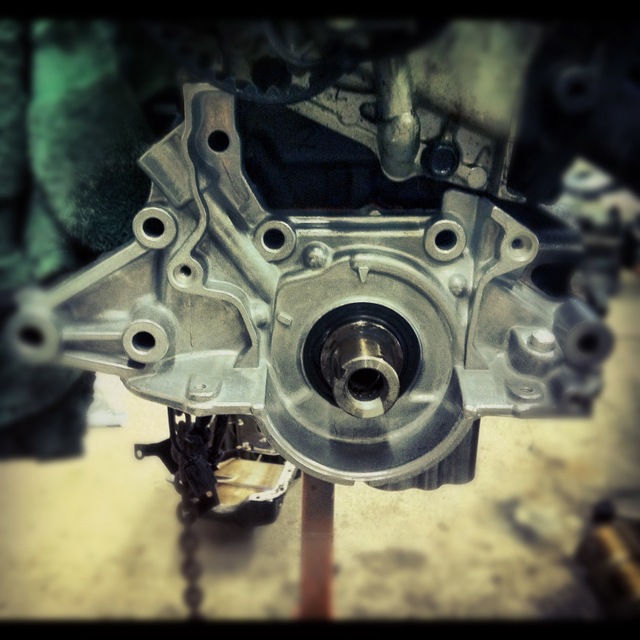
The new intake piping is just a mock up at this point while BEGi is fabricating the manifold. It's some big stuff though. 4 inch directly from the turbo, to a 4 inch elbow and then it reduces down to 3 inch. I'm working on a way to run the filter through to the bumper. I'd much rather pick up ambient air.
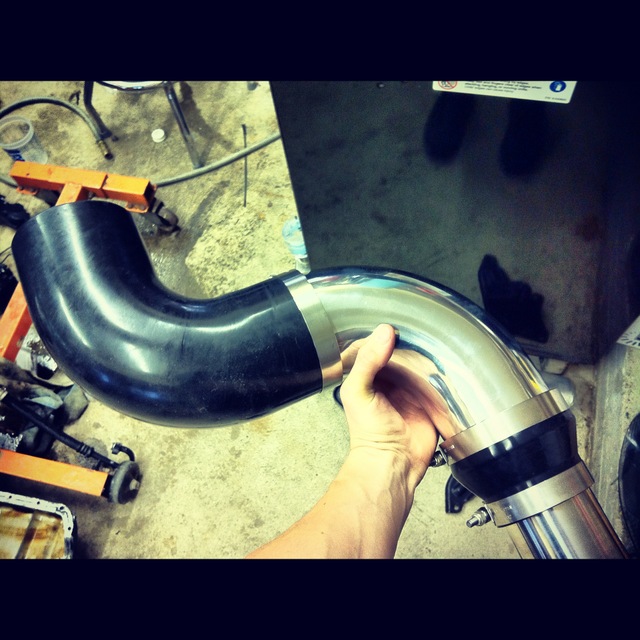

The new intake piping is just a mock up at this point while BEGi is fabricating the manifold. It's some big stuff though. 4 inch directly from the turbo, to a 4 inch elbow and then it reduces down to 3 inch. I'm working on a way to run the filter through to the bumper. I'd much rather pick up ambient air.

Reply
0
0
 08-06-2012, 09:33 AM
#579
Senior Member
Thread Starter
iTrader: (7)
Join Date: Sep 2009
Location: Royal Oak Michigan
Posts: 754
Total Cats: 68
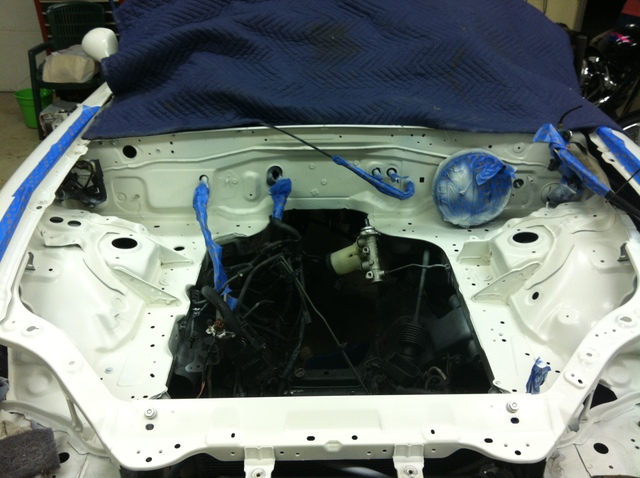
Now that I�ve got the pump mounted, which required the removal of everything; I could assess the source of my small leak, my oil pan. The two rubber gaskets on each end looked to be pretty beat up. It�s likely I over tightened the pan the first time around.
Next was time to take care of the brake and clutch system. There are lines running all over the place that are poorly routed for a turbo being mounted in the engine bay. Specifically the one that runs within inches of the turbo hot side (Drivers side front).
I first re-painted the brake booster:
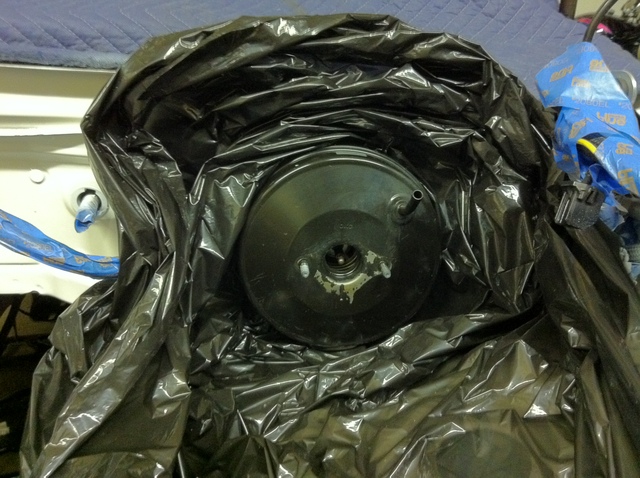
It was coming together like candy:
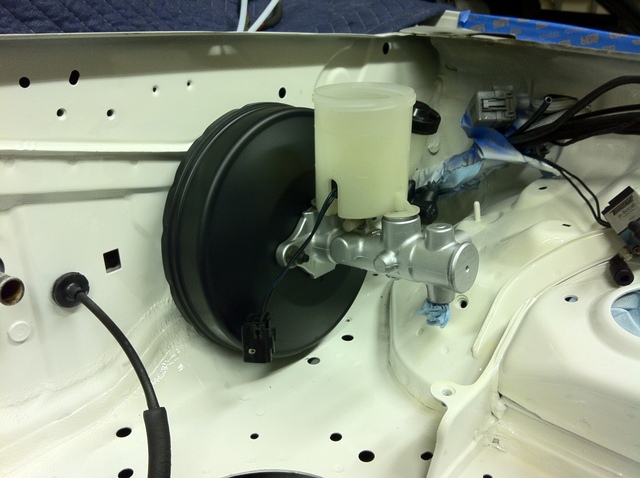
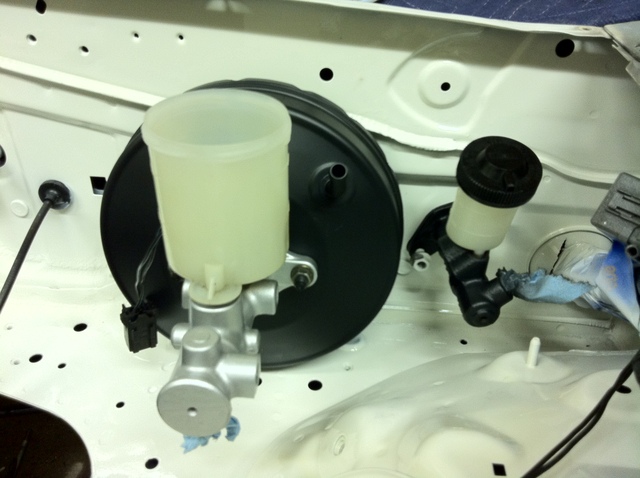
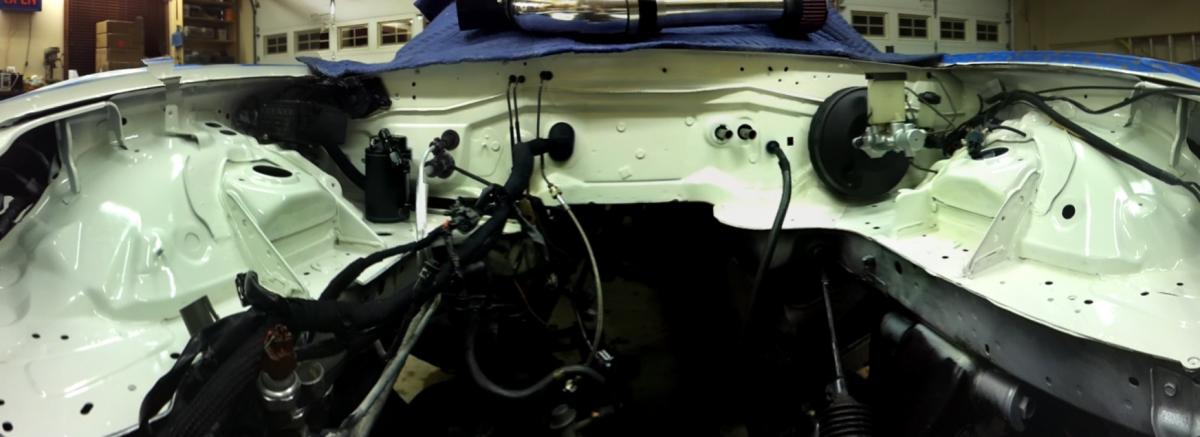
I re-routed the brake bias thing behind the cowl along with both the brake lines and the clutch line all behind the cowl (all done with rubber grommets). Then I ran the driver�s side front brake directly through the inside of the fender to avoid the heat.

Next was time to take care of the brake and clutch system. There are lines running all over the place that are poorly routed for a turbo being mounted in the engine bay. Specifically the one that runs within inches of the turbo hot side (Drivers side front).
I first re-painted the brake booster:

It was coming together like candy:


I re-routed the brake bias thing behind the cowl along with both the brake lines and the clutch line all behind the cowl (all done with rubber grommets). Then I ran the driver�s side front brake directly through the inside of the fender to avoid the heat.

Reply
0
0


