Building a blonde young beefcake wearing nothing but skimpy shorts named Rocky
 09-05-2012, 03:46 PM
#701
Senior Member
Thread Starter
iTrader: (7)

Join Date: Sep 2009
Location: Royal Oak Michigan
Posts: 754
Total Cats: 68
Right - There is "Man stuff" or reasonable and smart. The way I look at it� Sure.. I could dump 5-6K making my Miata drive line more drag strip reliable. Or maybe I could spend that money on a complete and mechanically sound, track prepped shifter cart and half a season worth of tires and amazingly good times... Maybe..

Reply
 0
0

0
 09-05-2012, 04:18 PM
#703
Senior Member
Thread Starter
iTrader: (7)
Join Date: Sep 2009
Location: Royal Oak Michigan
Posts: 754
Total Cats: 68
Some of the best times I've had with the car have been on a road course though. Smash most cars in the turns and smash the rest of them on the straights. It's a real kick when 5-6 owners of modified Corvettes wonder over to the car after the first session. They usually all say the same thing.. "What the %$# is in that thing?"
Reply
0
0
09-05-2012, 04:47 PM
#704
Right - There is "Man stuff" or reasonable and smart. The way I look at it� Sure.. I could dump 5-6K making my Miata drive line more drag strip reliable. Or maybe I could spend that money on a complete and mechanically sound, track prepped shifter cart and half a season worth of tires and amazingly good times... Maybe..

Reply
0
0
09-07-2012, 11:31 AM
#705
Senior Member
Thread Starter
iTrader: (7)
Join Date: Sep 2009
Location: Royal Oak Michigan
Posts: 754
Total Cats: 68
So I've decided that waiting for a diff housing only to break it again was not really in the list of things I'd like to do. Ultimately I’d like to swap the Cobra rear end but that can happen over the winter.
I have not seen anyone repair a diff housing before and it's probably for a couple of good reasons:
1. They are cheap to replace.
2. It's cast aluminum rendering it rather weak and difficult to repair
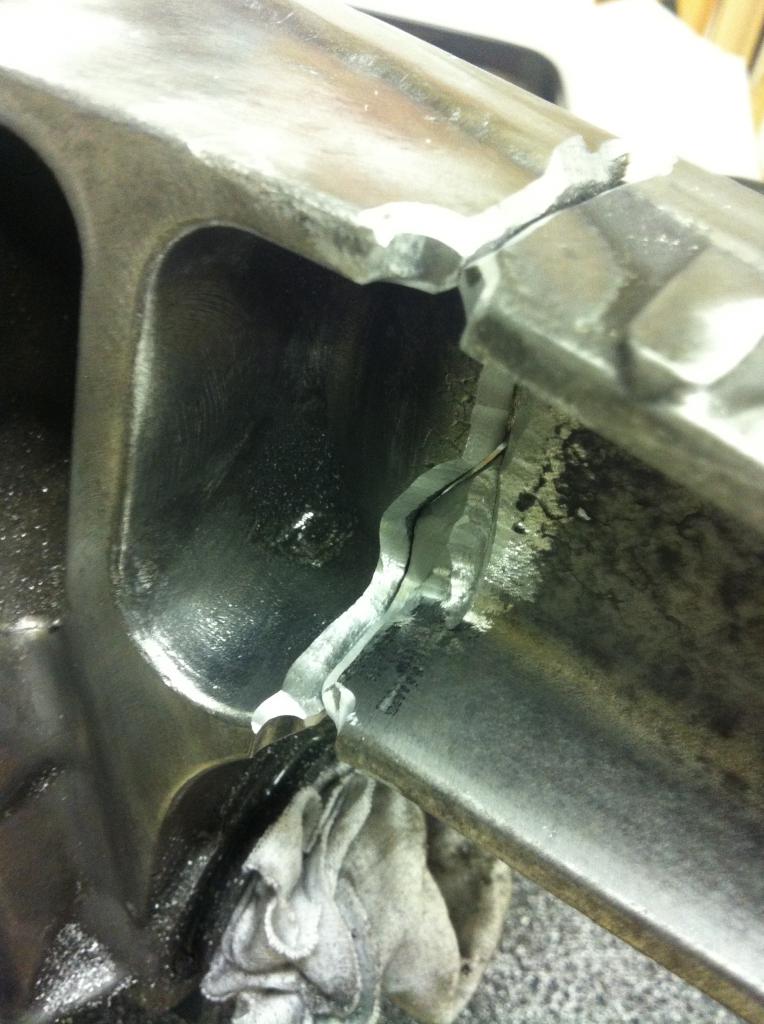
So I shall repair. I started by simply cleaning up the area with a gasket removal bit.
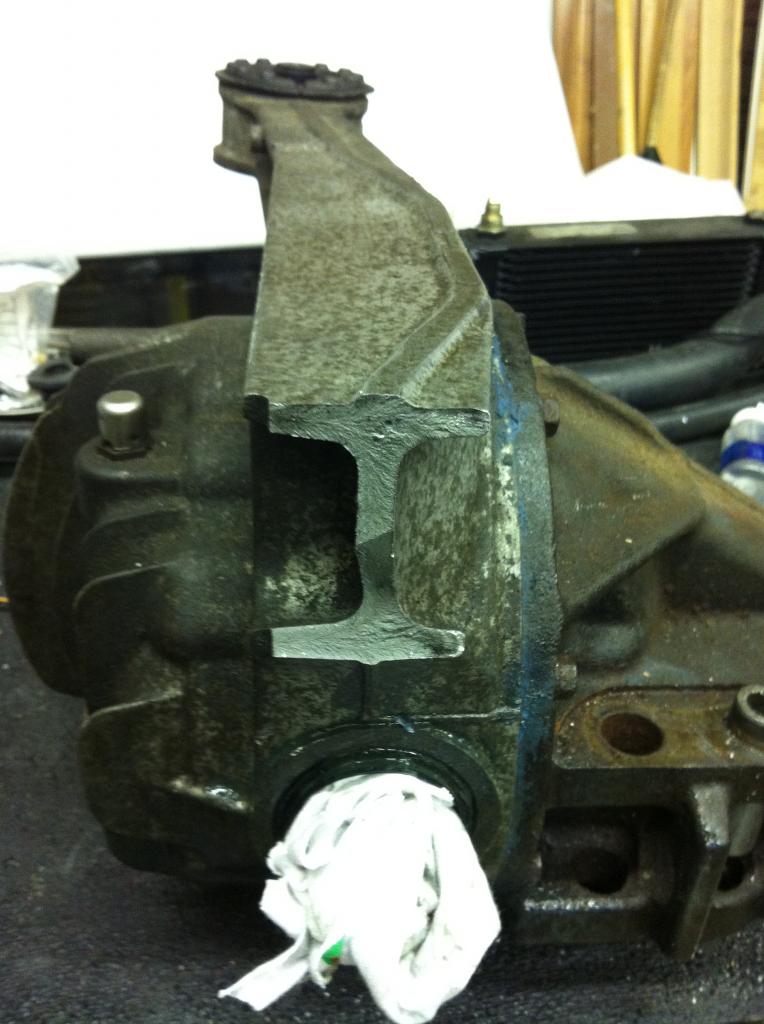
Since this is 100% structural I used a grinding bit to bevel into the material for the best weld penetration.
There was also a hairline crack that I dug into for repair.
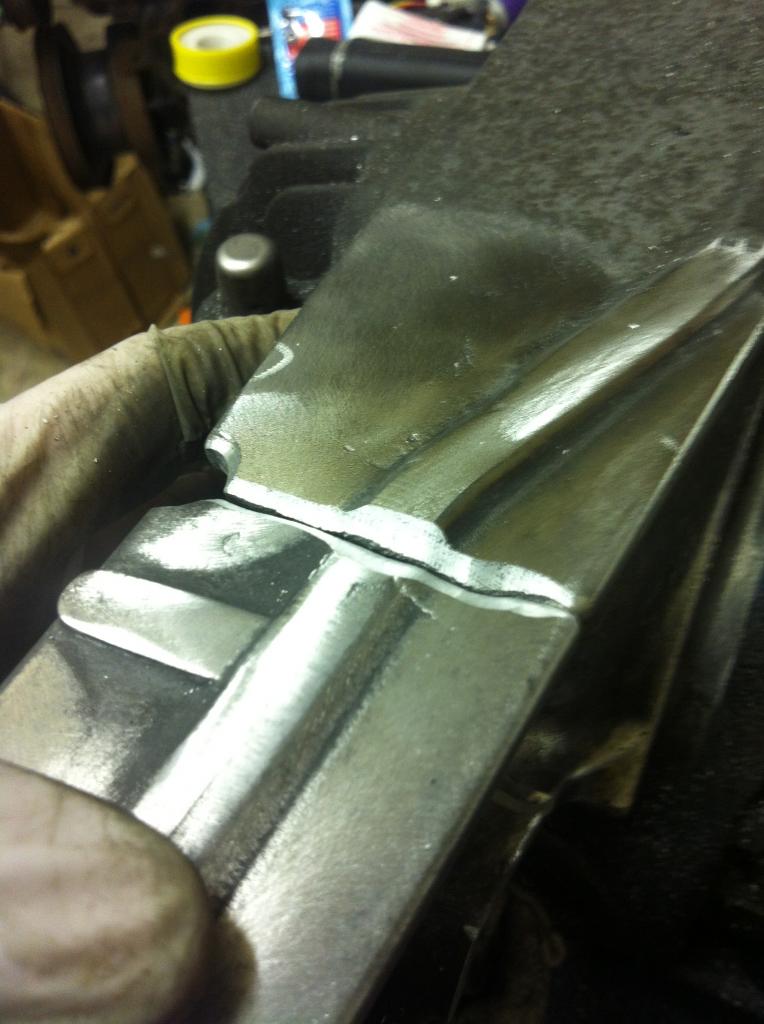
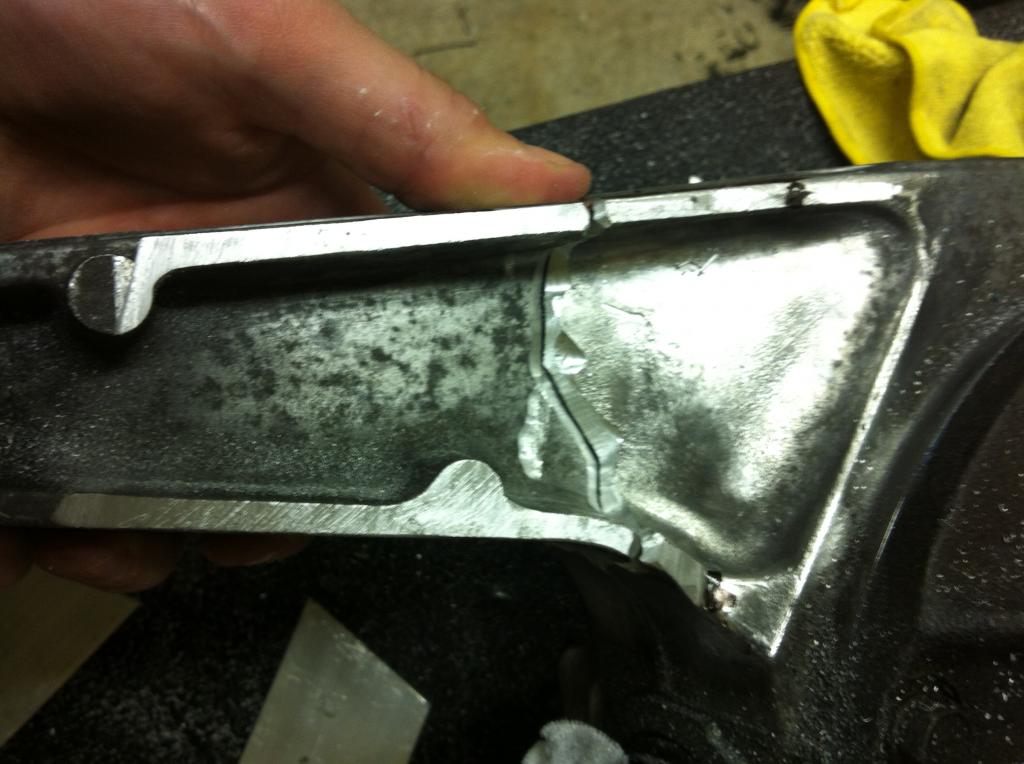
To strengthen the structure I’ve picked up aluminum plate to box in the I beam structure. This should leave the assembly stronger than before. You can see to begin; I’ve taken a flat file to create a flat mating surface for the new metal.
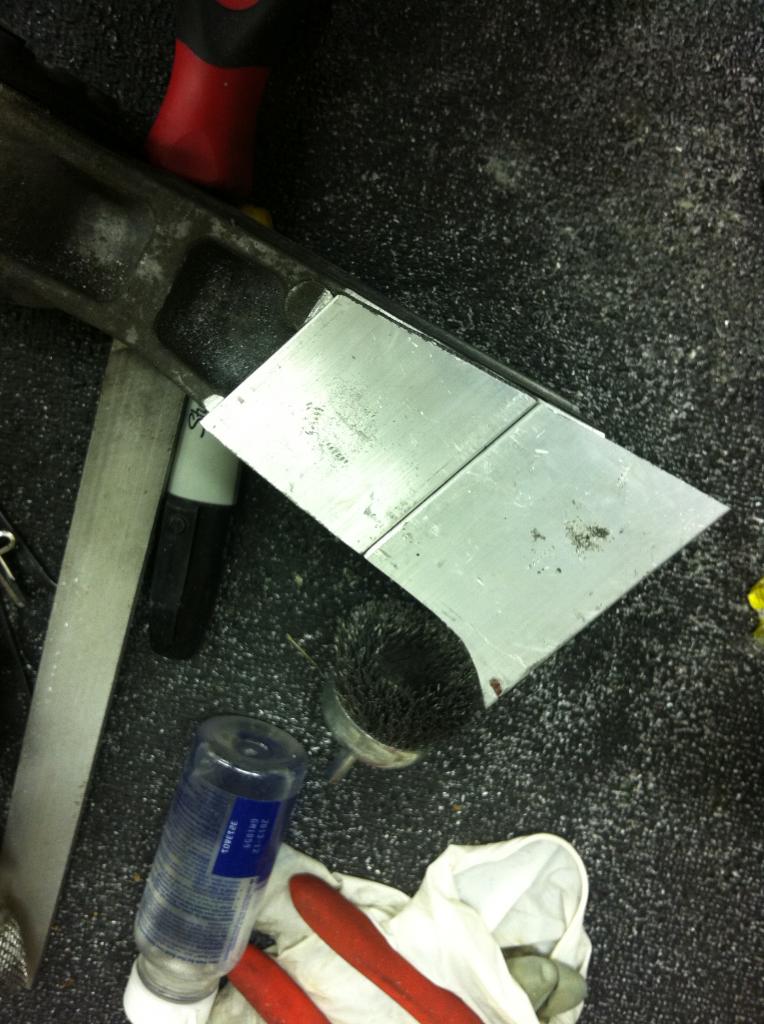
I’ll bring it to my guy tonight to have it welded up.
With that set aside, I tightened down my fuel rail and wanted to check my fuel system for leaks. I still needed to complete the return line by removing it from the “evap” canister thing and running it to the return tube on the tank.
This is a bit hard to explain but the smaller “return” line I’ve used was put in place for the EVAP system, meaning it does not go to the return on the fuel tank. Instead it goes to a charcoal canister for filtering. So it must be disconnected and run to the fuel tank as a return line.
I’ve created this illustration to show exactly how the routing ended up. Where is my +1 naow. I didn't make this for me guys
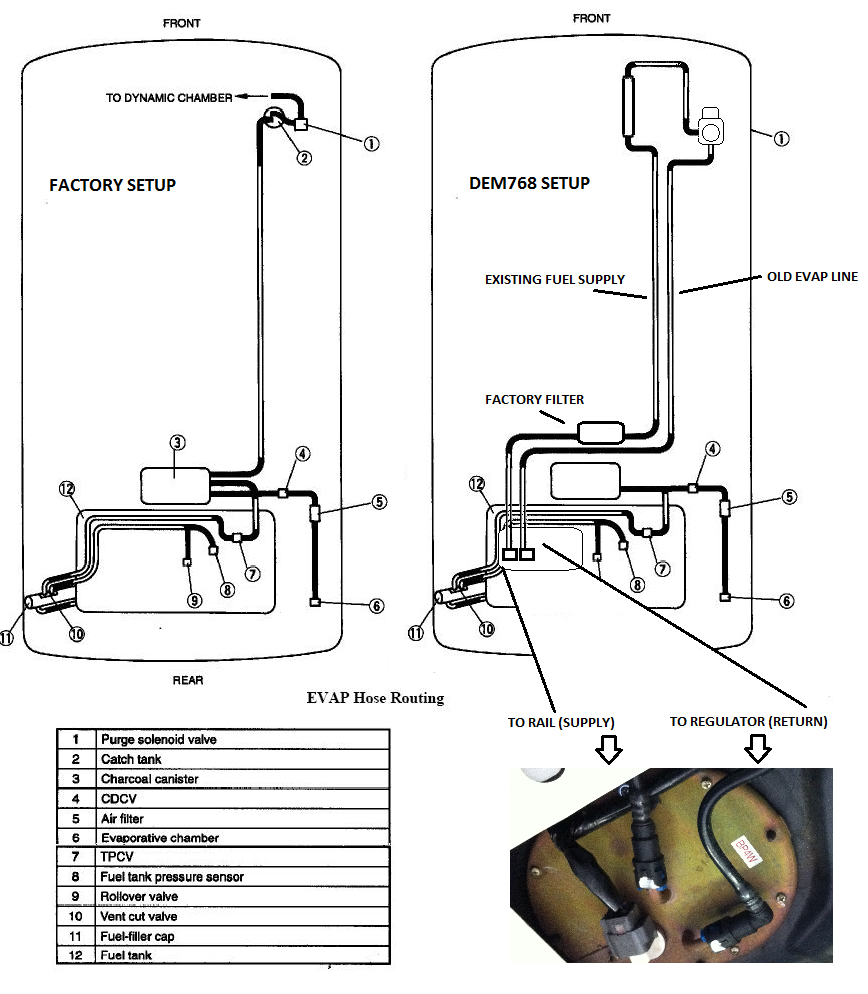
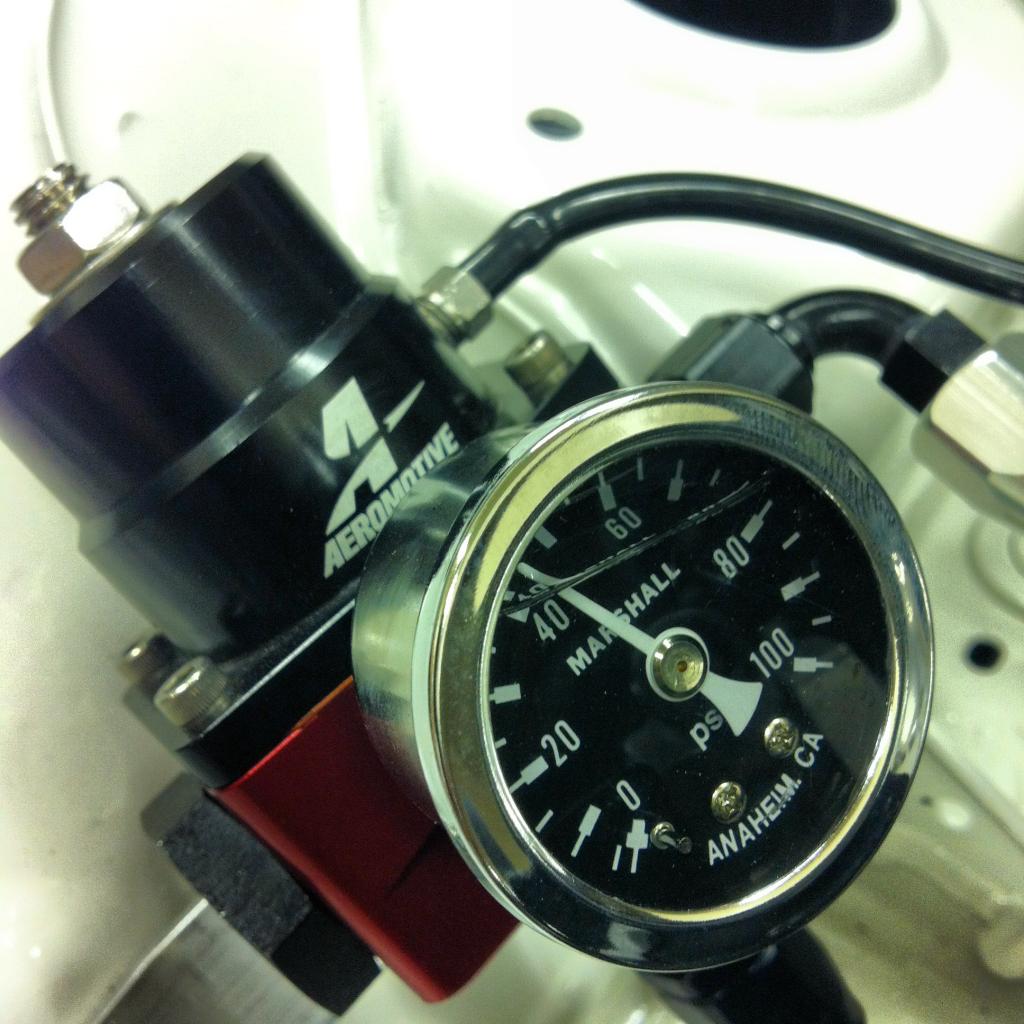
And bam – We’ve got fuel.
I have not seen anyone repair a diff housing before and it's probably for a couple of good reasons:
1. They are cheap to replace.
2. It's cast aluminum rendering it rather weak and difficult to repair
So I shall repair. I started by simply cleaning up the area with a gasket removal bit.
Since this is 100% structural I used a grinding bit to bevel into the material for the best weld penetration.
There was also a hairline crack that I dug into for repair.
To strengthen the structure I’ve picked up aluminum plate to box in the I beam structure. This should leave the assembly stronger than before. You can see to begin; I’ve taken a flat file to create a flat mating surface for the new metal.
I’ll bring it to my guy tonight to have it welded up.
With that set aside, I tightened down my fuel rail and wanted to check my fuel system for leaks. I still needed to complete the return line by removing it from the “evap” canister thing and running it to the return tube on the tank.
This is a bit hard to explain but the smaller “return” line I’ve used was put in place for the EVAP system, meaning it does not go to the return on the fuel tank. Instead it goes to a charcoal canister for filtering. So it must be disconnected and run to the fuel tank as a return line.
I’ve created this illustration to show exactly how the routing ended up. Where is my +1 naow. I didn't make this for me guys
And bam – We’ve got fuel.
Last edited by miatauser123; 09-07-2012 at 11:46 AM.
Reply
4
4


 09-07-2012, 12:52 PM
#708
Senior Member
Thread Starter
iTrader: (7)
Join Date: Sep 2009
Location: Royal Oak Michigan
Posts: 754
Total Cats: 68
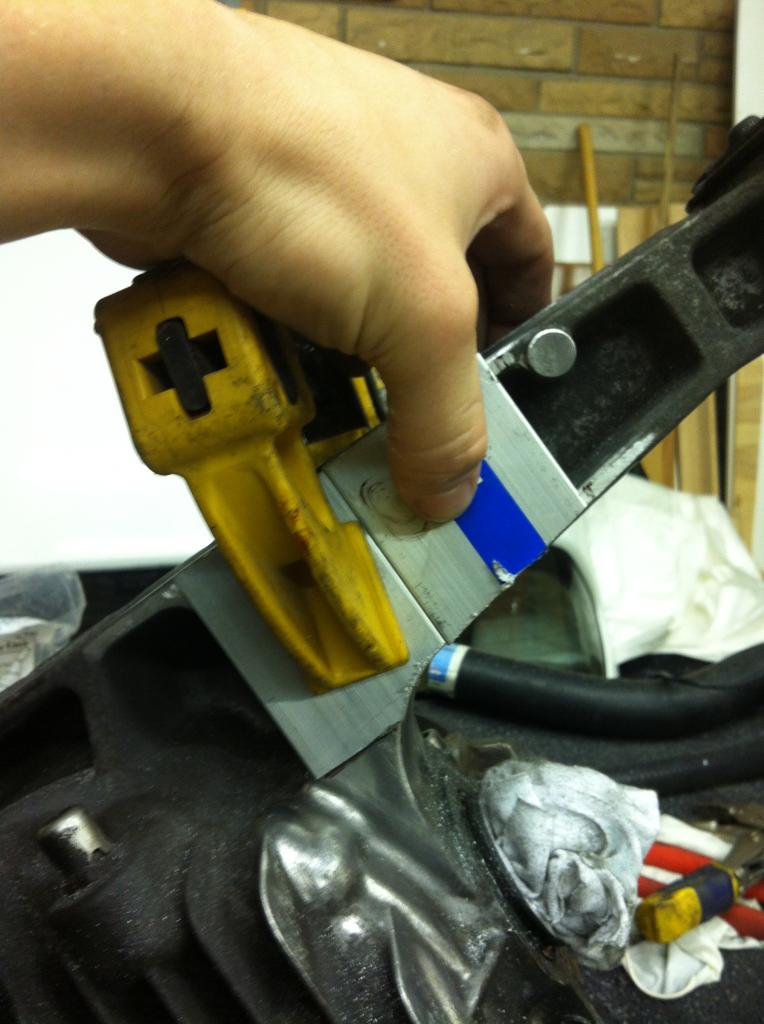
I've also considered boxing in the other side.
Reply
0
0
 09-07-2012, 05:16 PM
#711
Elite Member
iTrader: (37)

Join Date: Apr 2010
Location: Very NorCal
Posts: 10,441
Total Cats: 1,899
I'm glad to see I'm not the only one who had to modify their M-Tuned fuel rail to get it to fit. 
About the fuel system... So you ended up with these adapters?
Russell Line Adapter 5/16 to -6 AN 644113 x1
Russell Line Adapter 1/4 to -6 AN 641303 x1
also:
I'm sure there is more to it than just hooking the return side of the regulator to the vapor port and bypassing the carbon canister. Any chance you have some pictures of this procedure and routing around the canister? I'm retarded and do better with pictures, plus I like knowing what I'm getting into.
I love visiting this thread, it akes me feel that much better about my mess. You have an impossibly clean NB, me likes! Keep up the good work!
About the fuel system... So you ended up with these adapters?
Russell Line Adapter 5/16 to -6 AN 644113 x1
Russell Line Adapter 1/4 to -6 AN 641303 x1
also:
With that set aside, I tightened down my fuel rail and wanted to check my fuel system for leaks. I still needed to complete the return line by removing it from the �evap� canister thing and running it to the return tube on the tank.
This is a bit hard to explain but the smaller �return� line I�ve used was put in place for the EVAP system, meaning it does not go to the return on the fuel tank. Instead it goes to a charcoal canister for filtering. So it must be disconnected and run to the fuel tank as a return line.
I�ve created this illustration to show exactly how the routing ended up. Where is my +1 naow. I didn't make this for me guys
And bam � We�ve got fuel.
I love visiting this thread, it akes me feel that much better about my mess.
You have an impossibly clean NB, me likes! Keep up the good work!
Reply
0
0


