Building a blonde young beefcake wearing nothing but skimpy shorts named Rocky
 09-08-2011, 03:51 PM
#1
Senior Member
Thread Starter
iTrader: (7)

Join Date: Sep 2009
Location: Royal Oak Michigan
Posts: 754
Total Cats: 68
Hello All,
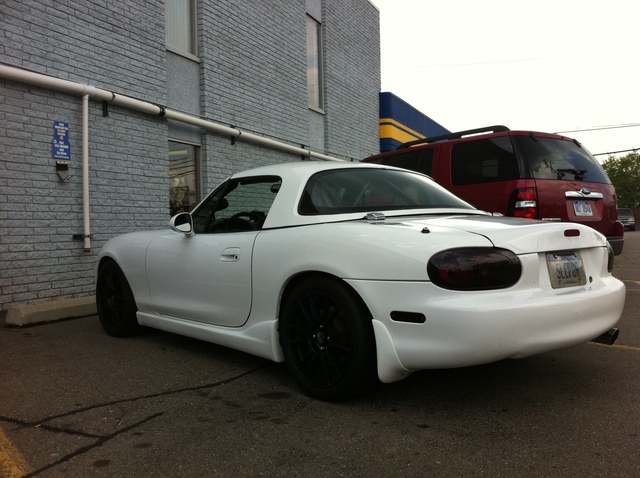
Picked up a 2002, recently sold a 91 Supercharged. I'm picky about my work and try to make the right moves with my stuff. I hope you enjoy.
Equipment:
2002 Miata LS White, black and tan interior
Corbeau FX1 Pro Suede Drivers Seat
OZ Superleggera 16
Tein S-Tech Springs, KYB Shocks
Performance:
BEGI S4 System with upgraded intercooler and GT2860RS option (Disco Potato)
AEM Water/Meth Progressive from 4-13 LBS (Not tuned as of now)
ACT Clutch on my third 5 speed trans
LSD Poly Differential bushings
FM turbo exhaust with high flow cat Poly exhaust hangers
AEM WB
TurboSmart E-Boost2 Controller
XEDE Piggy back
RC 550 injectors
Walbro 190 HP Fuel Pump
Upgraded radiator - Coolant Reroute
Marshall - Boost, Oil Pressure, Oil Temp gauges
Roll bar - Hard dog
I'm sure I'm missing things..

Last edited by miatauser123; 09-09-2011 at 08:55 AM.

Reply
 1
1

1
09-08-2011, 03:53 PM
#2
Senior Member
Thread Starter
iTrader: (7)
Join Date: Sep 2009
Location: Royal Oak Michigan
Posts: 754
Total Cats: 68
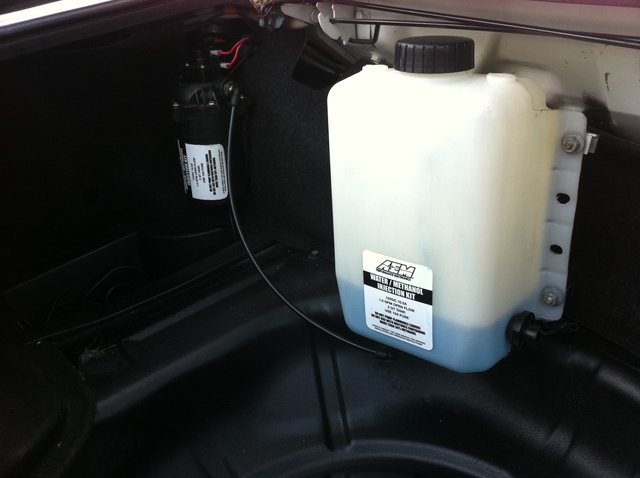
AEM Meth/Water Install:
I decided to run the pump and the tank in the trunk. I pride my engine bay too much to be cluttering it up with another tank and a bunch of wires.
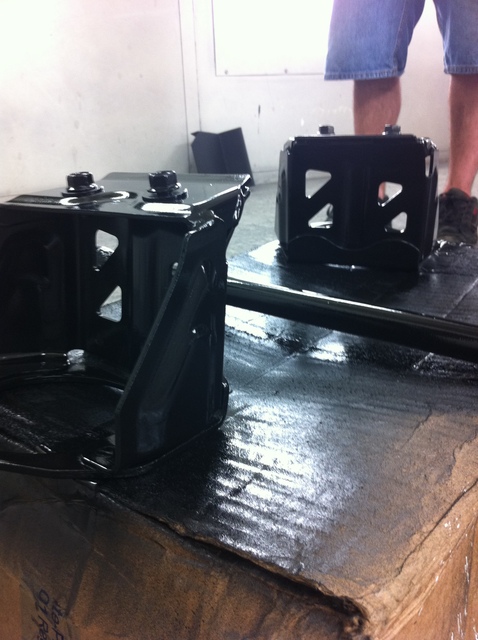
Time to cover up my gorilla welding.
I think it came out decently.
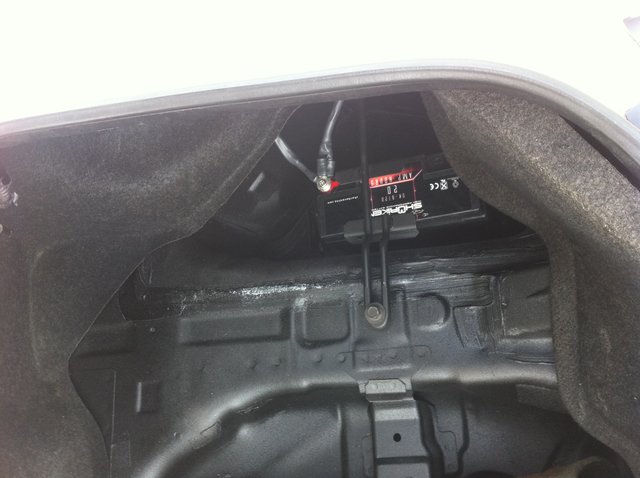
Lightweight Battery installation:
Old mount was obviously too large. I didn't want to rice it up with some rigged up stuff though.
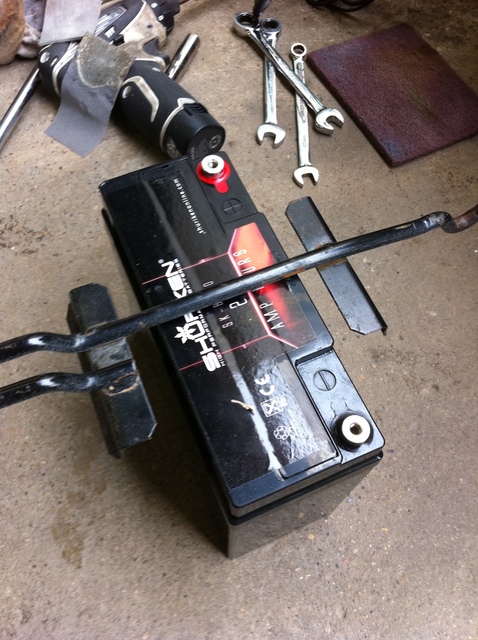
So I chopped the grip off and re-welded it to fit the new battery.
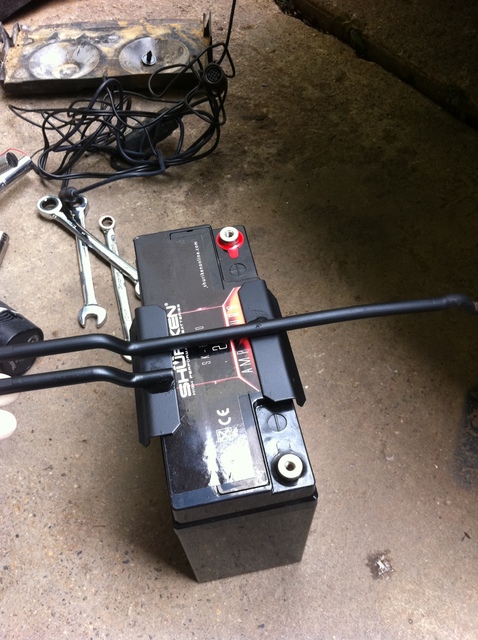
A little black paint, some new terminals and shrink wrap, and we're in business. Just can't leave my radio on as long when the car is off.
I decided to run the pump and the tank in the trunk. I pride my engine bay too much to be cluttering it up with another tank and a bunch of wires.


Time to cover up my gorilla welding.

I think it came out decently.

Lightweight Battery installation:
Old mount was obviously too large. I didn't want to rice it up with some rigged up stuff though.

So I chopped the grip off and re-welded it to fit the new battery.

A little black paint, some new terminals and shrink wrap, and we're in business. Just can't leave my radio on as long when the car is off.

Reply
1
1
09-08-2011, 03:55 PM
#3
Senior Member
Thread Starter
iTrader: (7)
Join Date: Sep 2009
Location: Royal Oak Michigan
Posts: 754
Total Cats: 68
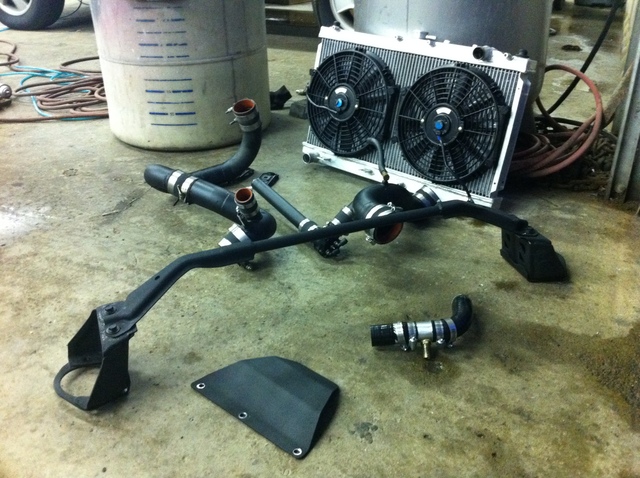
Radiator and fan installation:
We had a heat wave come through and the car started to overheat under some moderate beating-the-****-out-of-her driving. I didn't see any reason to dump 5 hundo on brand name aluminum when I was just looking for a little upgrade, so I ordered this guy off of eBay. Nice product, direct fit, and it absolutely did the trick. Threw some Mishimoto silicone on it. Product Link
Good looking radiator if you ask me. It's got a simple job. Good welds, factory mounting points.
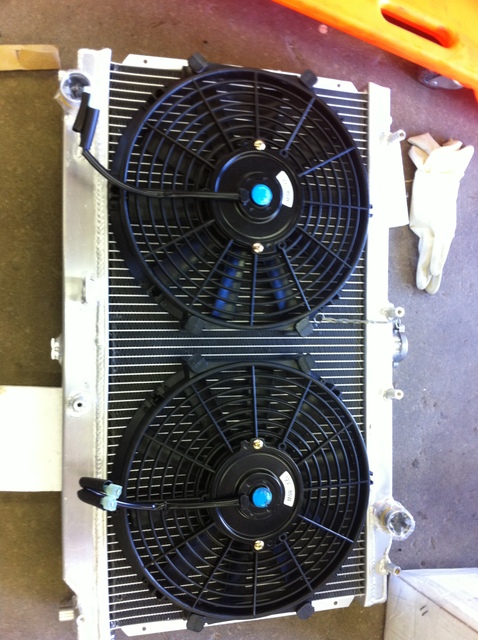
Slid in with minimal fuss, looks good to me.
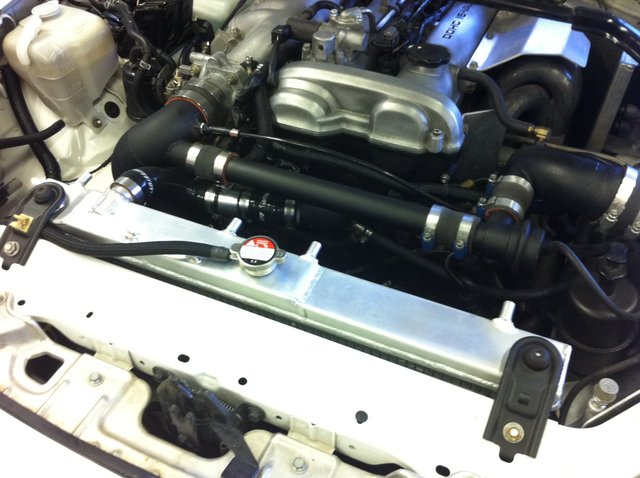
The slim fans made up for the additional size of the radiator. Mishimoto silicone was designed for the stock coolant route.. so that took some manipulating. Nothing to fuss about though.

Reply
1
1
09-08-2011, 03:56 PM
#4
Senior Member
Thread Starter
iTrader: (7)
Join Date: Sep 2009
Location: Royal Oak Michigan
Posts: 754
Total Cats: 68
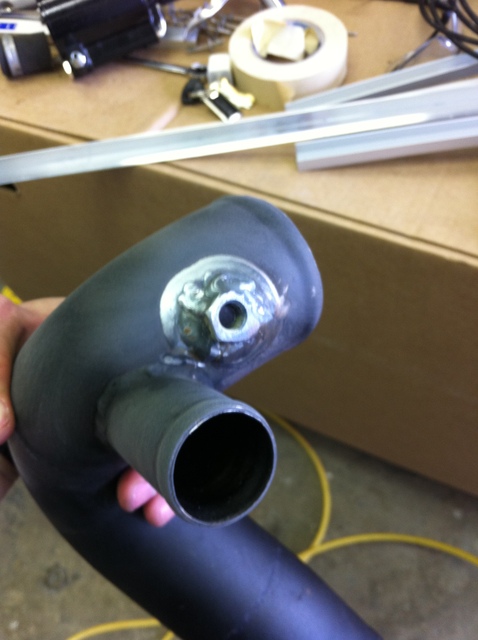
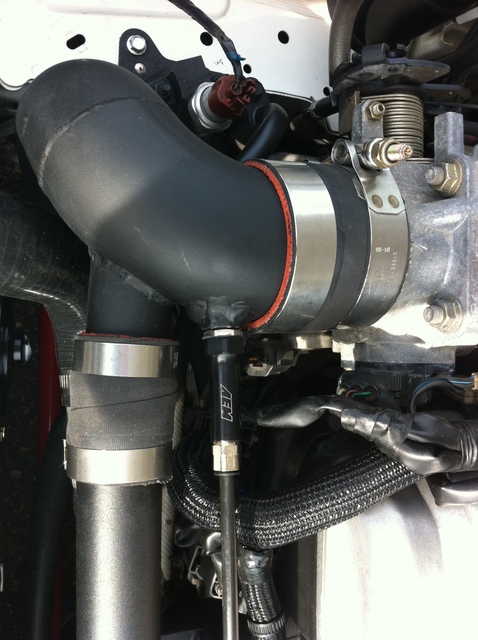
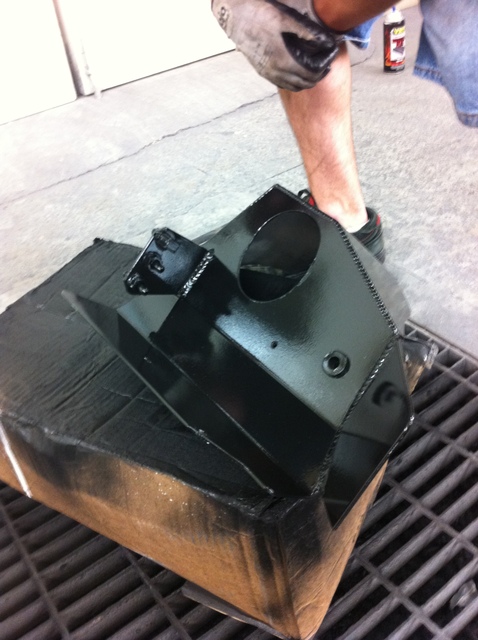
You could call this a bump in the road. Or a hugefuckingholeinmyturbo. Turns out all of the recent tuning i've been required to do is not because of elevation change, or change in the weather... or the gas I pump.. or anything else but this big *** hole. Unmetered air. A whole lot of it. My guess is that to maintain 10-11 LBS at the manifold, this turbo has likely been producing over 35PSI.. 24 of which have been flowing out of this hole. This is the cause of my turbo lag too. Good thing I didn't order that custom plate..(TRBO LAG)

Welded her up and shes good as new. Can't wait to see what I've been missing out on. Best part is- I've still been wrecking people
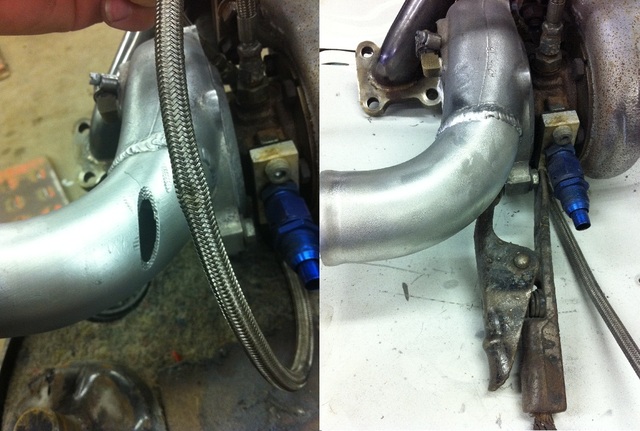
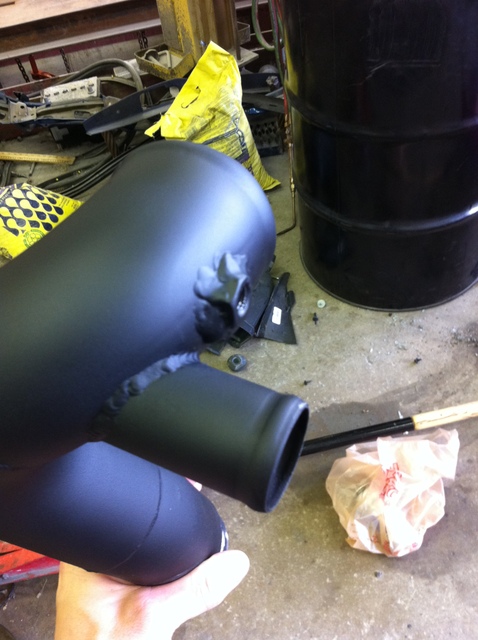
I'm not a patient man, but I'm not the type to rig some bullshit up. During reassembly, I noticed I was missing the gasket from turbo to down-pipe. I called dealerships for cars that came with a similar gasket, I called friends of mine who had turbo setups in the past.. nothing. Sadlife.
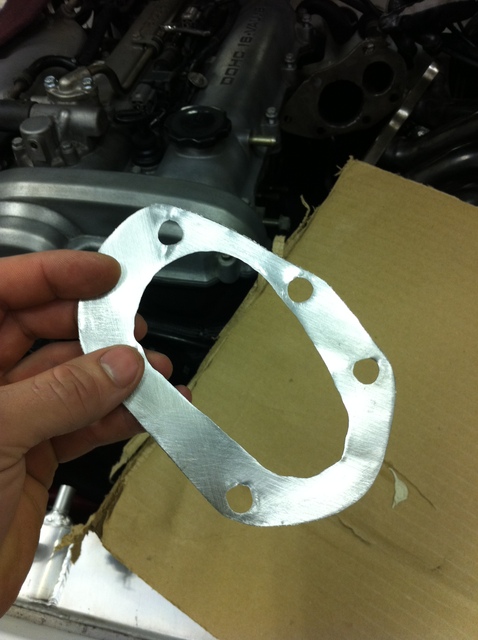
Being the crafty type- I went to ACE hardware and picked up a sheet of aluminum. Rather thick but soft a soft metal. I traced out my DP and started to cut the aluminum. After i had the shape cut I took a block sander with some 600 grit sandpaper and blocked it flat. Perfectly flat.
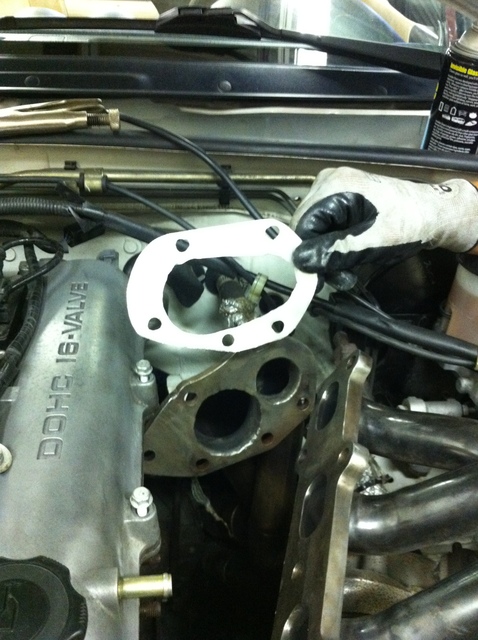
Didn't come out too bad! I hope this will do the job because it's a bitch to remove the DP on the BEGi setup. At one point, I was required to cut a 13mm open ended wrench in half. I went and bought a duralast wrench because I couldn't bare the thought of taking a cut off wheel to my precious snap on
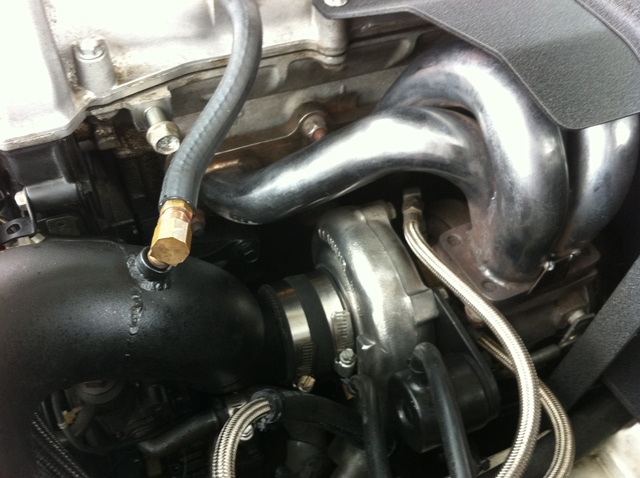
There we have it. As you can see, I've wrapped the stainless lines with rubber hose this time around just to be safe.

Welded her up and shes good as new. Can't wait to see what I've been missing out on. Best part is- I've still been wrecking people

I'm not a patient man, but I'm not the type to rig some bullshit up. During reassembly, I noticed I was missing the gasket from turbo to down-pipe. I called dealerships for cars that came with a similar gasket, I called friends of mine who had turbo setups in the past.. nothing. Sadlife.
Being the crafty type- I went to ACE hardware and picked up a sheet of aluminum. Rather thick but soft a soft metal. I traced out my DP and started to cut the aluminum. After i had the shape cut I took a block sander with some 600 grit sandpaper and blocked it flat. Perfectly flat.

Didn't come out too bad! I hope this will do the job because it's a bitch to remove the DP on the BEGi setup. At one point, I was required to cut a 13mm open ended wrench in half. I went and bought a duralast wrench because I couldn't bare the thought of taking a cut off wheel to my precious snap on

There we have it. As you can see, I've wrapped the stainless lines with rubber hose this time around just to be safe.

Reply
1
1
09-08-2011, 03:57 PM
#5
Senior Member
Thread Starter
iTrader: (7)
Join Date: Sep 2009
Location: Royal Oak Michigan
Posts: 754
Total Cats: 68
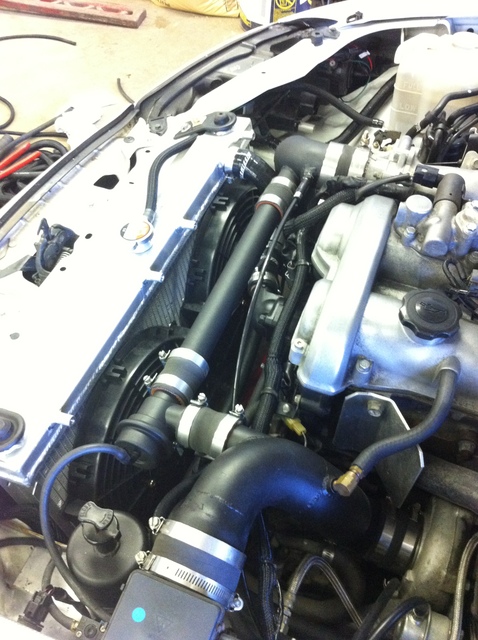
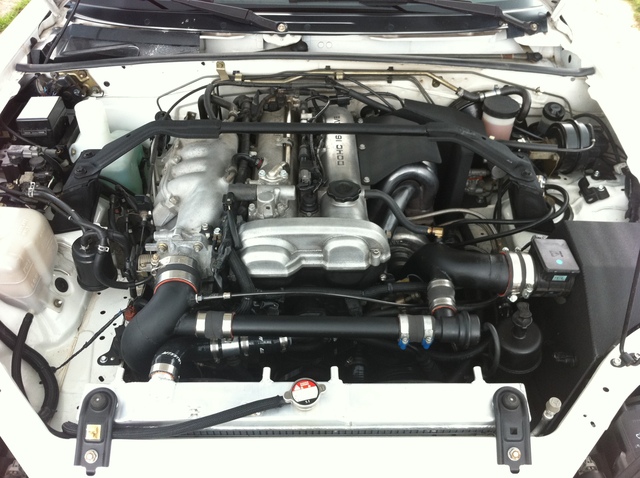
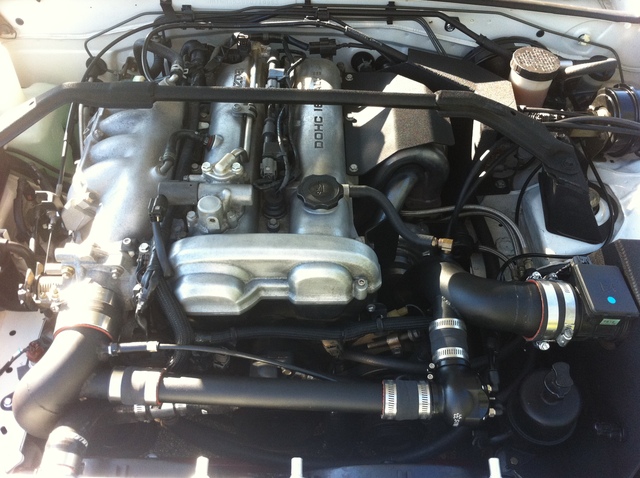
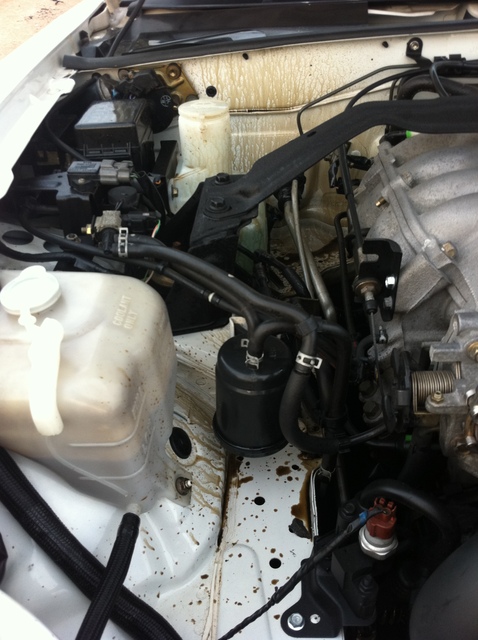
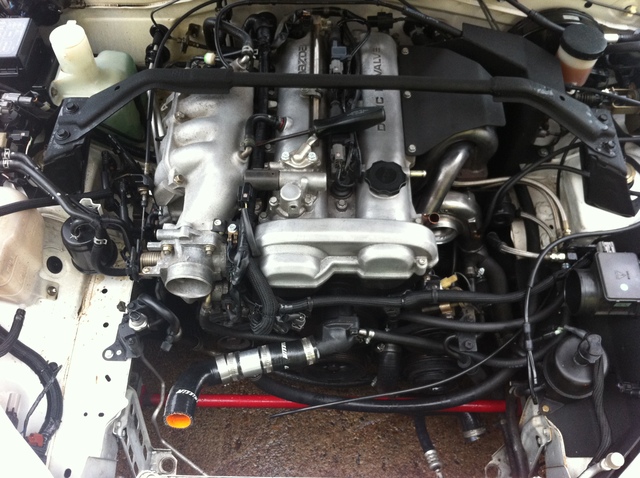
The engine bay was a little trashy looking before and definitely not my style:
BEFORE
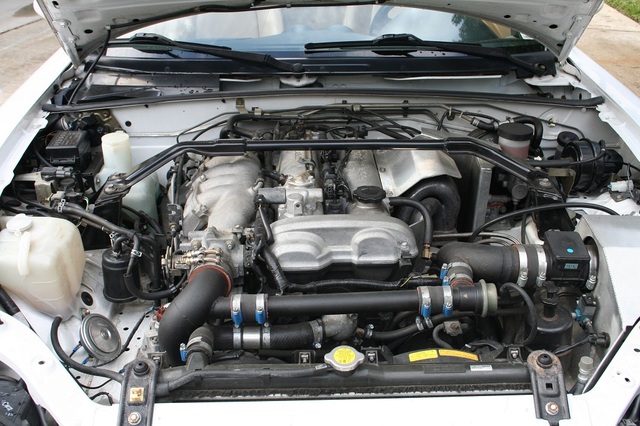
AFTER
-I used degreaser to hit the spots with buildup, scuff pads on the oxidized aluminum, wire wheel on the stainless, and nylon woven loom to clean up some wires. I took brackets off from small to large and coated them with a durable paint.
I used VHT Wrinkle black to hit all of my heat shields. Aluminum looks good no doubt, but not when I actually have to use the car. It's way to hard to maintain and I like the OEM look of the Wrinkle Black.
The VHT goes on with a bit of a sheen and then I baked it in the booth. Comes out like JDM wrinkle valve covers
Came together nicely in my opinion.
BEFORE

AFTER
-I used degreaser to hit the spots with buildup, scuff pads on the oxidized aluminum, wire wheel on the stainless, and nylon woven loom to clean up some wires. I took brackets off from small to large and coated them with a durable paint.
I used VHT Wrinkle black to hit all of my heat shields. Aluminum looks good no doubt, but not when I actually have to use the car. It's way to hard to maintain and I like the OEM look of the Wrinkle Black.

The VHT goes on with a bit of a sheen and then I baked it in the booth. Comes out like JDM wrinkle valve covers

Came together nicely in my opinion.

Reply
2
2
 09-08-2011, 03:58 PM
#7
Senior Member
Thread Starter
iTrader: (7)
Join Date: Sep 2009
Location: Royal Oak Michigan
Posts: 754
Total Cats: 68
It's time for a fuel pump. Old one might be tired, or reached it's limitations (those of which I don't know). I went with the Walbro 255 High Pressure version. It should suit my needs and it's not known to be loud. I purchased the install kit with it, although the only thing I used from the install kit was the filter and the isolator. The whole project took me maybe 35 minutes while taking pictures for you guys.
Pump is accessible from the rear deck inside the car. I lifted the carpet, removed the plate and BAM! Fuel pump assembly.
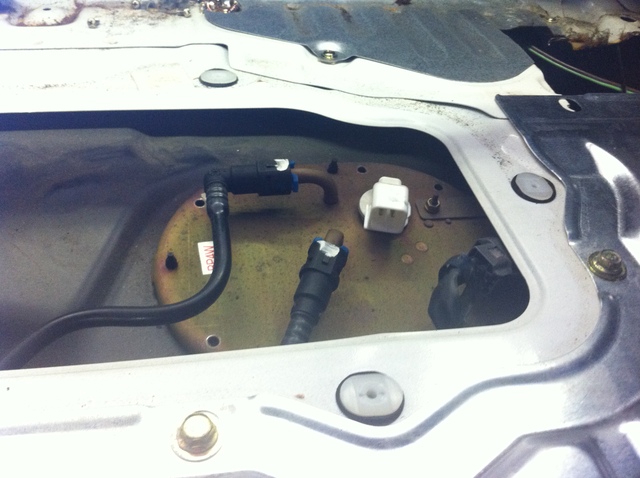
To avoid the smell of fuel in my car for weeks to come, i've decided to protect the area from spillage..
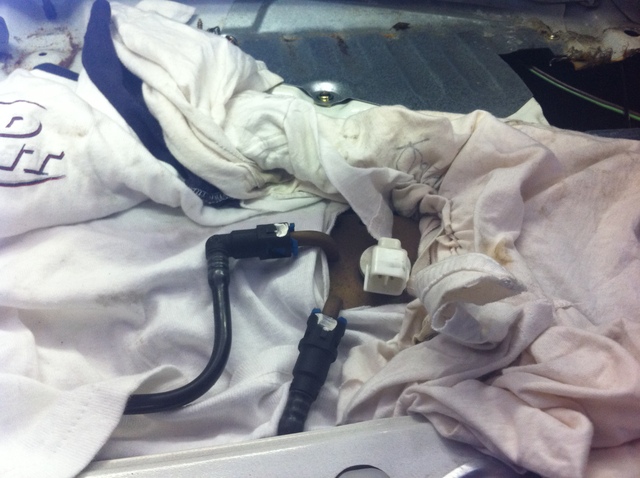
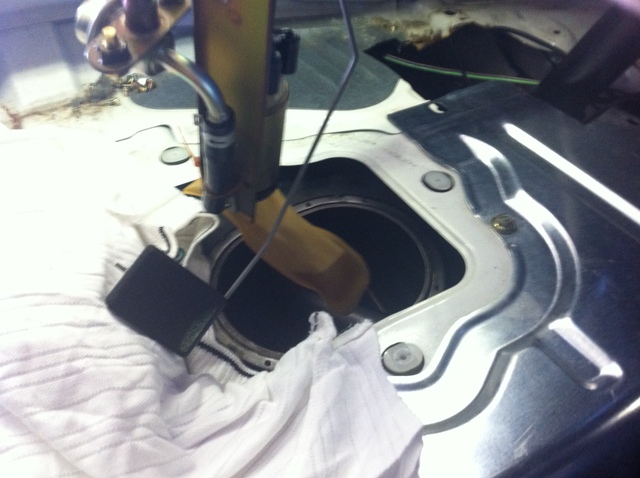
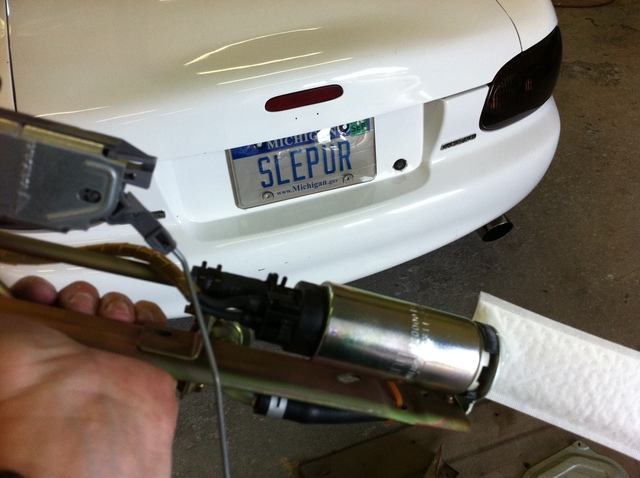
Disconnected my lines, pulled them to the side with the rag and unbolted my fuel assembly. She's ready to come up.

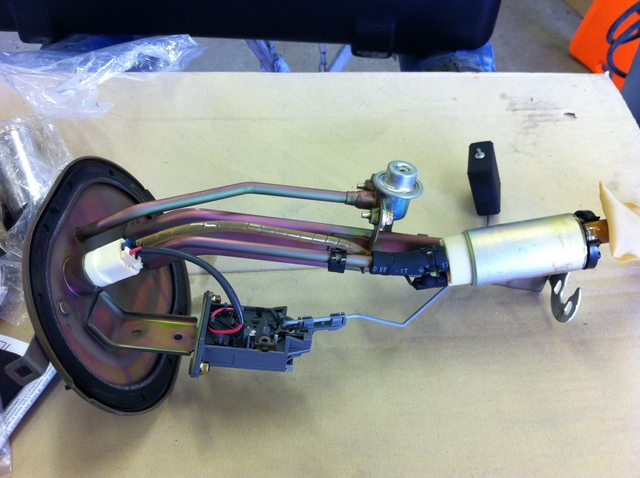
Came out quite easily - Remember to let the filter bag drain. It does this slowly but it's better than dripping fuel all over your carpet
She's out.. Looks.. like a fuel pump.
New - Old
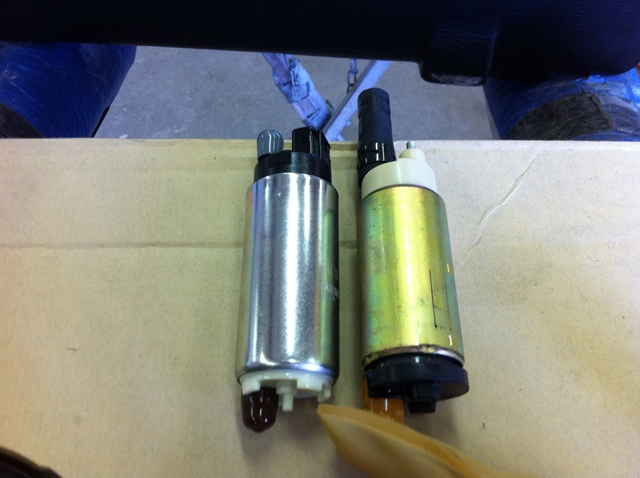
The stock connectors were not compatible with my new pump.. The new pump had a couple of male spades inside of a proprietary looking connector.
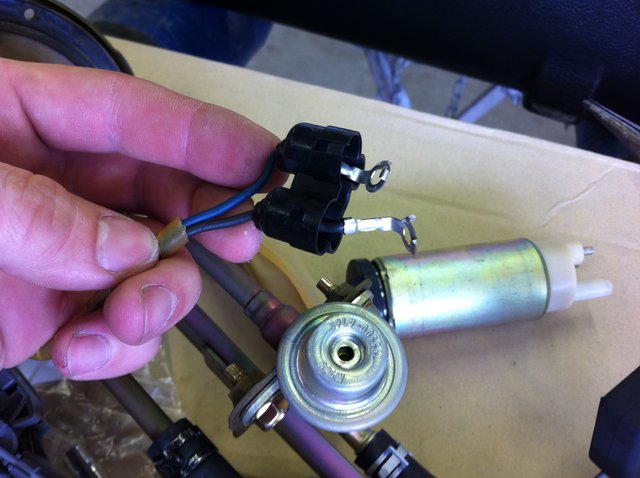
Chopped those off and used female spades, with a little heat shrink tubing. (Don't use a lighter to shrink btw)
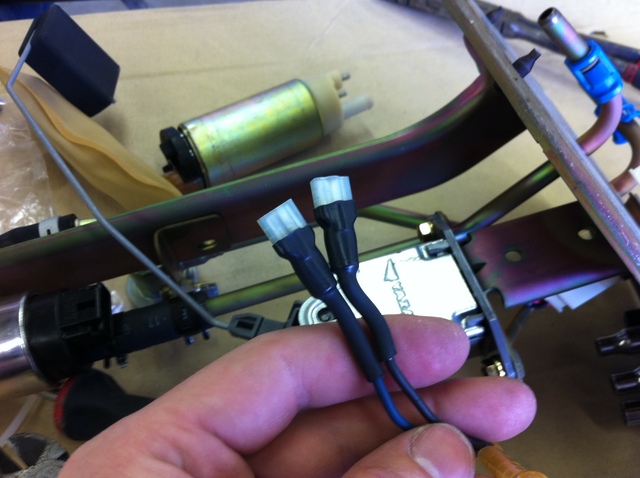
New pump installed and on it's way back to the car.
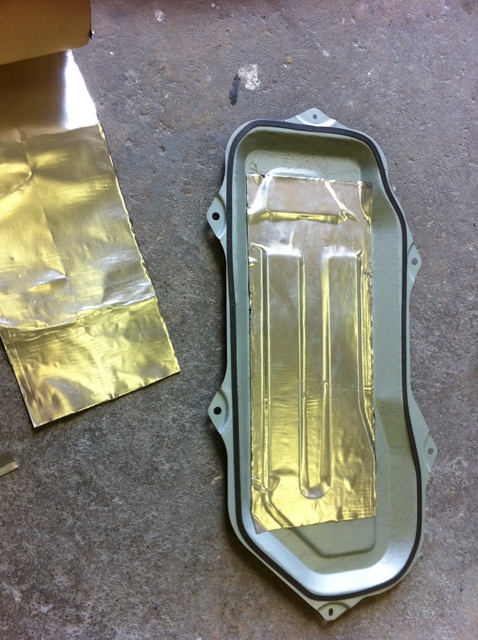
Decided to touch up the bottom and top of the plate with some noise dampening material. Just in case it's louder.
Slapped it back together, cycled the key a couple of times to clear any air and prime the fuel system... she started right up.
Pump is accessible from the rear deck inside the car. I lifted the carpet, removed the plate and BAM! Fuel pump assembly.

To avoid the smell of fuel in my car for weeks to come, i've decided to protect the area from spillage..

Disconnected my lines, pulled them to the side with the rag and unbolted my fuel assembly. She's ready to come up.

Came out quite easily - Remember to let the filter bag drain. It does this slowly but it's better than dripping fuel all over your carpet

She's out.. Looks.. like a fuel pump.

New - Old

The stock connectors were not compatible with my new pump.. The new pump had a couple of male spades inside of a proprietary looking connector.

Chopped those off and used female spades, with a little heat shrink tubing. (Don't use a lighter to shrink btw)

New pump installed and on it's way back to the car.

Decided to touch up the bottom and top of the plate with some noise dampening material. Just in case it's louder.

Slapped it back together, cycled the key a couple of times to clear any air and prime the fuel system... she started right up.
Reply
1
1
09-08-2011, 03:58 PM
#8
Senior Member
Thread Starter
iTrader: (7)
Join Date: Sep 2009
Location: Royal Oak Michigan
Posts: 754
Total Cats: 68
So before I start tuning for methanol injection, I'd like to make sure the damn thing is doing what I expect it to. Quite possibly the best solution for this is the AEM Monitor system.
AEM Water Methanol FAILSAFE device - AEM part # 30-3020 MSRP 263.83
This was my choice because I'm using the AEM progressive meth system. I want to control when it comes on and I want to know how much is spraying during my power-band.
Comfortable Keyboard not included.
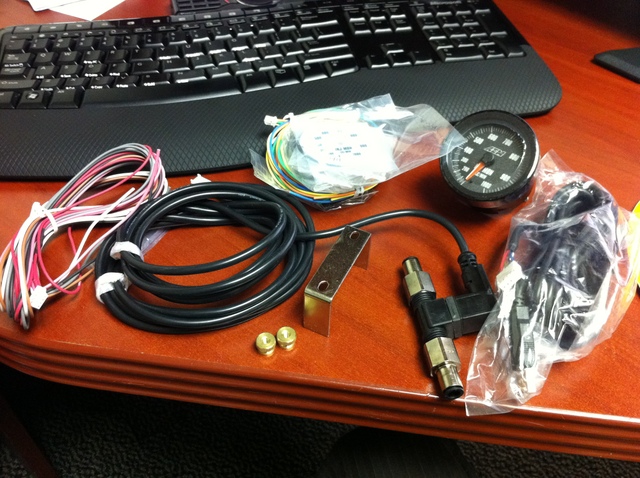
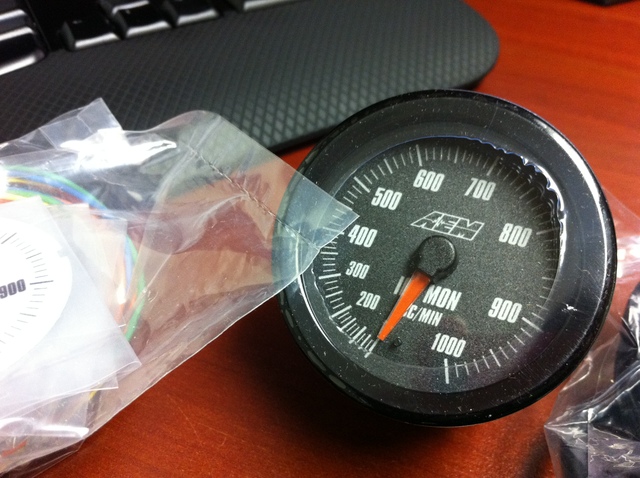
Looks good on my desk, let's see how it looks in my car.
Wiring:
Constant power
Ignition power
Ground
Fail communication wire to my meth controller
Pump signal wire
Illumination
Harness to flow sensor
USB cable for communication to laptop software
If you've followed my thread so far, you'd know that I ran my pump and tank from the back of the car. This allowed me to simply tap the meth line under my carpet instead of installing it in the bay. This is a major plus for me for a couple of reasons - I like my engine bay clean, I don't have to run another wire through my firewall and the sensor is not exposed to harsh engine bay conditions.
I have absolutely run out of places for gauges and I really dislike the idea of removing a vent for a gauge but I had to sacrifice for now. I'll miss my 25% less upper dash air conditioning.
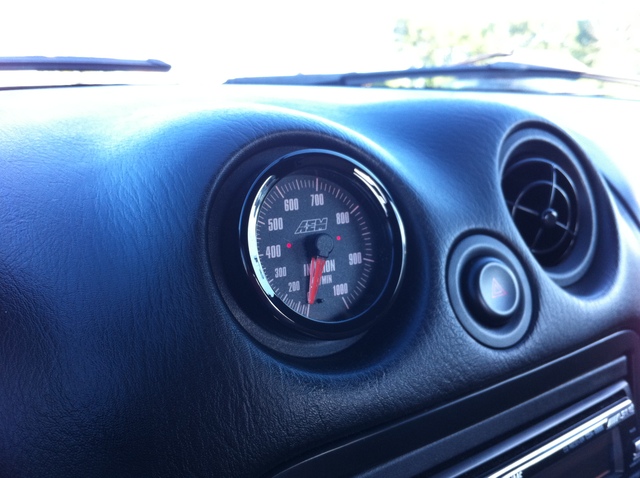
Gauge looks great. The software allows you to control the gauge color, needle intensity, warning method (needle flashing, backlight flashing, or both and how fast they flash). Pretty cool.
So the software is designed to monitor your system in working order, then set parameters in which it will send you a warning. The gauge harness also has a couple of output wires to trigger different functions - Warning lights, Map changes, Sound your horn, lock your doors.. whatever. It's two wires with controllable polarity good job AEM.
As you begin to drive, you will see your injection properties in yellow dots. To the right you will see a loading bar. Once you drive hit boost enough times it will go to the 100% mark and you can click "Auto Set Limits". This will create warning limits based on how the system has behaved under working conditions. It's always been a little too tight for my liking and will trigger all the time, but maybe that's due to how little I drove it under normal conditions before setting it. So I set mine manually.
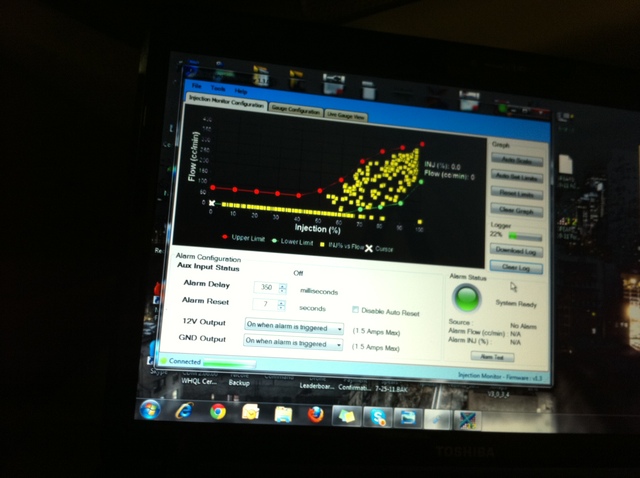
With my setup, it will start spraying before the monitor will register anything. I think this is due to the fact that I'm really not running much methanol.
After running through a tank of meth and refilling it, I could not get it to spray again. This is very likely due to the orientation of my pump. I mounted it right side up, next to my tank. The inlet of the tank should be lower than the outlet of the fluid tank. I might have a bum pump but I'll flip it over before I draw any conclusions. GOOD THING I INSTALLED THIS SYSTEM BEFORE TUNING
AEM Water Methanol FAILSAFE device - AEM part # 30-3020 MSRP 263.83
This was my choice because I'm using the AEM progressive meth system. I want to control when it comes on and I want to know how much is spraying during my power-band.
Comfortable Keyboard not included.


Looks good on my desk, let's see how it looks in my car.
Wiring:
Constant power
Ignition power
Ground
Fail communication wire to my meth controller
Pump signal wire
Illumination
Harness to flow sensor
USB cable for communication to laptop software
If you've followed my thread so far, you'd know that I ran my pump and tank from the back of the car. This allowed me to simply tap the meth line under my carpet instead of installing it in the bay. This is a major plus for me for a couple of reasons - I like my engine bay clean, I don't have to run another wire through my firewall and the sensor is not exposed to harsh engine bay conditions.
I have absolutely run out of places for gauges and I really dislike the idea of removing a vent for a gauge but I had to sacrifice for now. I'll miss my 25% less upper dash air conditioning.

Gauge looks great. The software allows you to control the gauge color, needle intensity, warning method (needle flashing, backlight flashing, or both and how fast they flash). Pretty cool.

So the software is designed to monitor your system in working order, then set parameters in which it will send you a warning. The gauge harness also has a couple of output wires to trigger different functions - Warning lights, Map changes, Sound your horn, lock your doors.. whatever. It's two wires with controllable polarity good job AEM.
As you begin to drive, you will see your injection properties in yellow dots. To the right you will see a loading bar. Once you drive hit boost enough times it will go to the 100% mark and you can click "Auto Set Limits". This will create warning limits based on how the system has behaved under working conditions. It's always been a little too tight for my liking and will trigger all the time, but maybe that's due to how little I drove it under normal conditions before setting it. So I set mine manually.

With my setup, it will start spraying before the monitor will register anything. I think this is due to the fact that I'm really not running much methanol.
After running through a tank of meth and refilling it, I could not get it to spray again. This is very likely due to the orientation of my pump. I mounted it right side up, next to my tank. The inlet of the tank should be lower than the outlet of the fluid tank. I might have a bum pump but I'll flip it over before I draw any conclusions. GOOD THING I INSTALLED THIS SYSTEM BEFORE TUNING
Reply
0
0
09-08-2011, 03:59 PM
#9
Senior Member
Thread Starter
iTrader: (7)
Join Date: Sep 2009
Location: Royal Oak Michigan
Posts: 754
Total Cats: 68
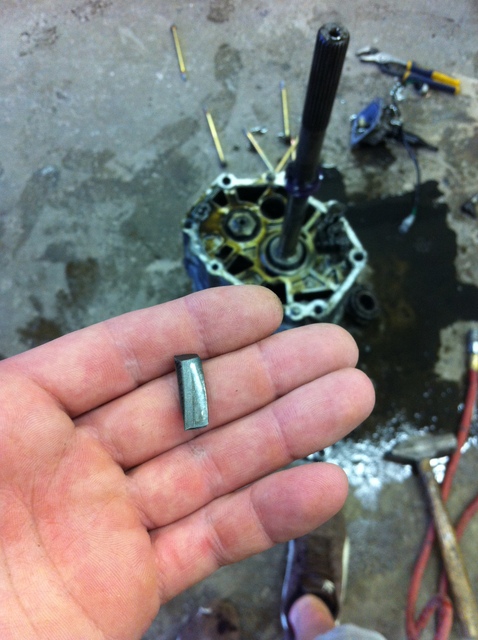
A couple of weeks back I was doing some tuning.. (on my car with a huge hole in my turbo) I came around the corner just down the street from my house and slammed it into second gear. I heard an odd noise which I immediately assumed was rod knock. I shut it down and coasted into my driveway... it made a noise until I put the clutch to the floor then it stopped... Engine sounded perfectly healthy. Clutch exploded? Maybe. I rocked the car back in reverse and it made a noise and felt like it bound up when the noise happened so I parked it. Pulled the trans and the clutch looked good...
Pulled the trans apart an found this guy.. Poor transmission.. it only had 45k on it. The 5 speed has a known reliability issue above 250 horse. I'm lucky it has lasted this long.
Picked up another trans, what better use for the daily leather seats?

Threw the trans in and she was back on the road.
Pulled the trans apart an found this guy.. Poor transmission.. it only had 45k on it. The 5 speed has a known reliability issue above 250 horse. I'm lucky it has lasted this long.

Picked up another trans, what better use for the daily leather seats?

Threw the trans in and she was back on the road.
Last edited by miatauser123; 09-08-2011 at 04:19 PM.
Reply
1
1
09-08-2011, 03:59 PM
#10
Senior Member
Thread Starter
iTrader: (7)
Join Date: Sep 2009
Location: Royal Oak Michigan
Posts: 754
Total Cats: 68
Today's weight reduction:
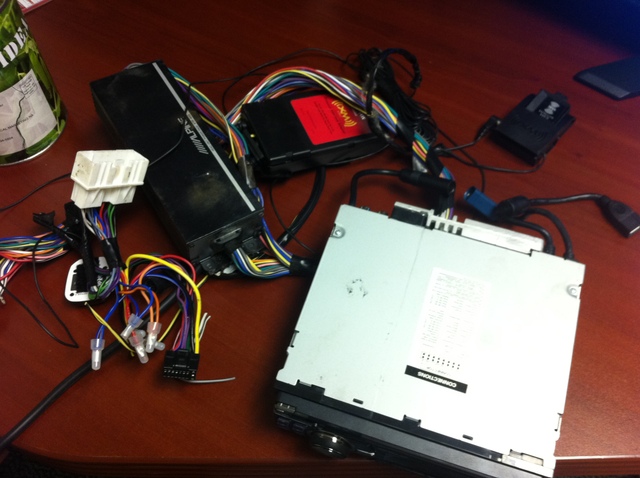
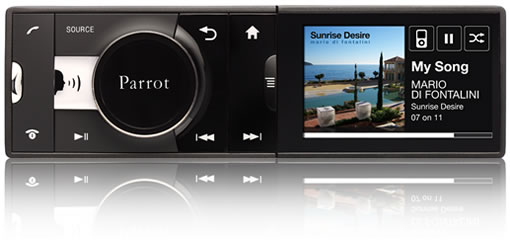
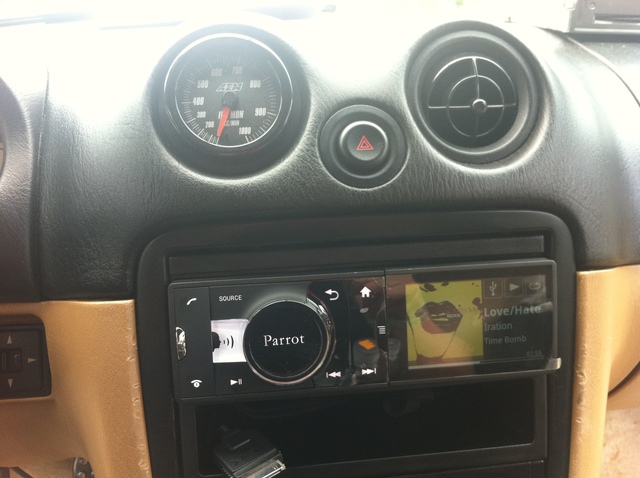
An alpine CDA-9886 with a head unit power pack. Sounded alright but I happen to work for the company that has just produced the first Android Based head unit. ...Internet connectivity, applications, Google Maps + GPS antenna, 4xUSB, 55x4 output.. It's a very nice piece.
Slapped it in real quick and it looks good Quite an upgrade in sound quality too! Seems like it's got a better range of sound.
Bosch valve leaking. Leaking bad. Anything else trying to slow down my spool time? Damn. Picking up a new valve today.
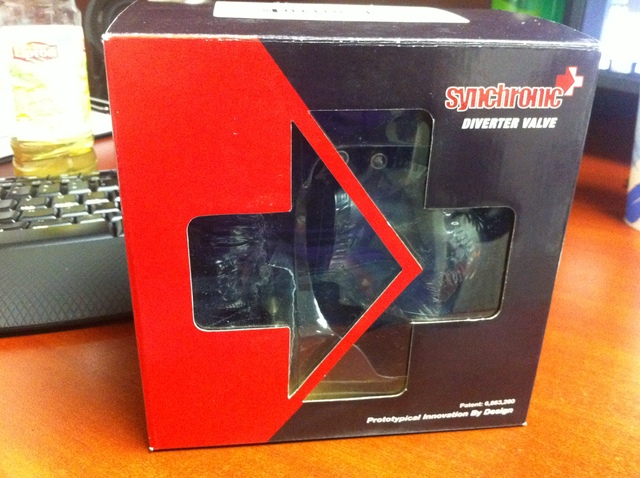
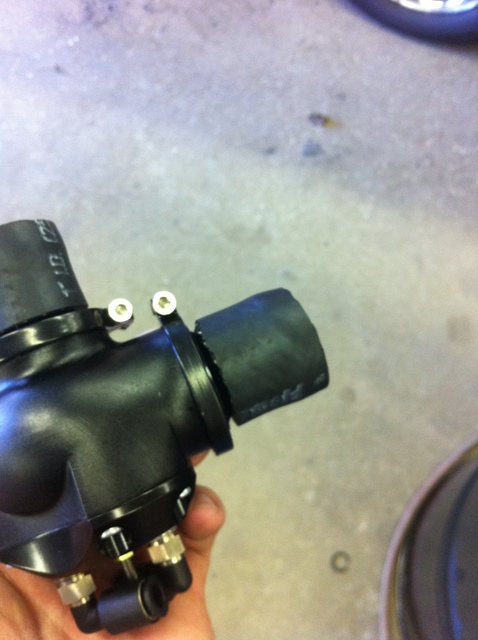
New Valve acquired:
Synapse Engineering
Synchronic DV Replacement Kit for Bosch BPV
Manufacturer: Porsche
Product ID: DV001A.010
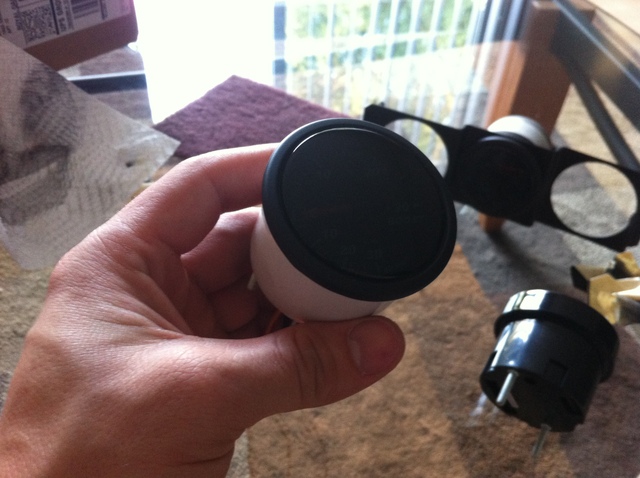
You might call this the not-*******-around solution to diverter valves.
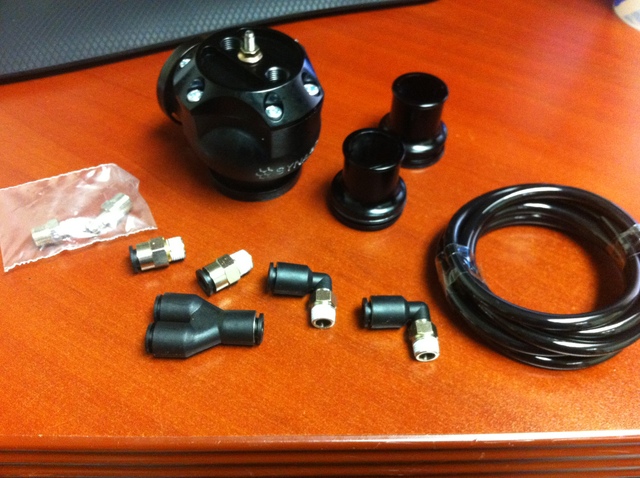
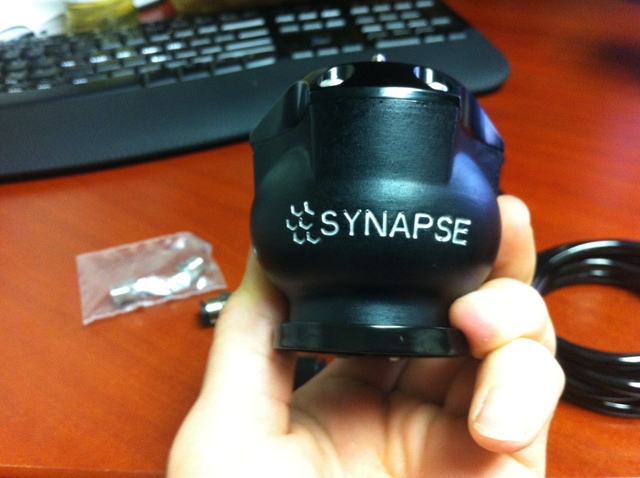
First thoughts:
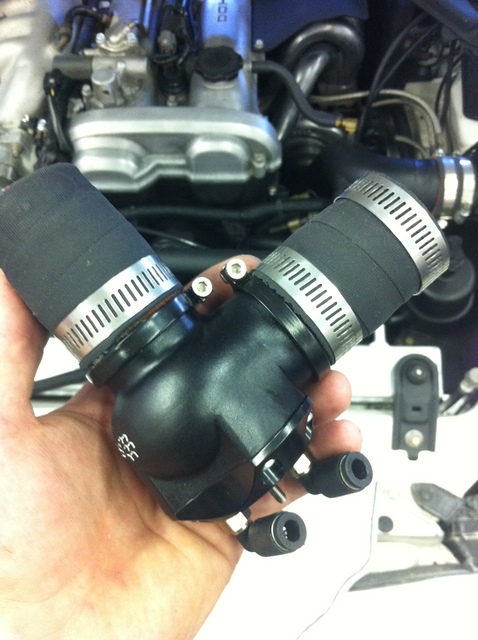
Awesome construction, nice and small. DEATH TO THE DIAPHRAGM! Its a piston actuator! Comes with hard vacuum lines and quick connect fittings. Also includes threaded nipples for traditional vacuum lines. Some type of miniature v band looking inlet and outlet pieces, should be a direct replacement for the busted Bosch I'm running now. I'll install after work and get you fools some pictures.

An alpine CDA-9886 with a head unit power pack. Sounded alright but I happen to work for the company that has just produced the first Android Based head unit. ...Internet connectivity, applications, Google Maps + GPS antenna, 4xUSB, 55x4 output.. It's a very nice piece.

Slapped it in real quick and it looks good
Quite an upgrade in sound quality too! Seems like it's got a better range of sound. 
Bosch valve leaking. Leaking bad. Anything else trying to slow down my spool time? Damn. Picking up a new valve today.
New Valve acquired:
Synapse Engineering
Synchronic DV Replacement Kit for Bosch BPV
Manufacturer: Porsche
Product ID: DV001A.010
You might call this the not-*******-around solution to diverter valves.


First thoughts:
Awesome construction, nice and small. DEATH TO THE DIAPHRAGM! Its a piston actuator! Comes with hard vacuum lines and quick connect fittings. Also includes threaded nipples for traditional vacuum lines. Some type of miniature v band looking inlet and outlet pieces, should be a direct replacement for the busted Bosch I'm running now. I'll install after work and get you fools some pictures.
Reply
1
1
09-08-2011, 04:00 PM
#11
Senior Member
Thread Starter
iTrader: (7)
Join Date: Sep 2009
Location: Royal Oak Michigan
Posts: 754
Total Cats: 68
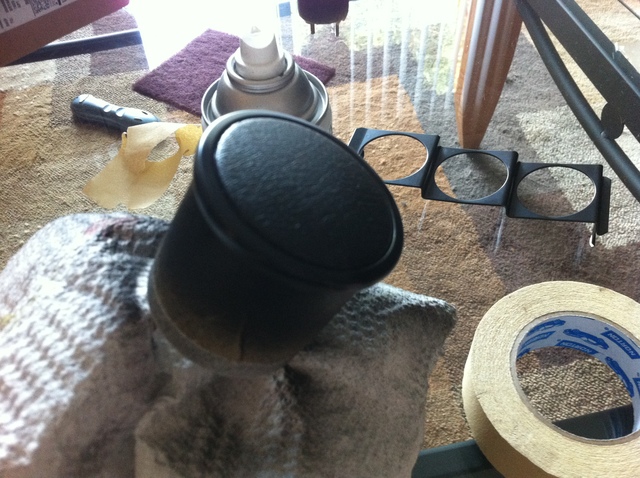
Here is my busted *** Bosch.
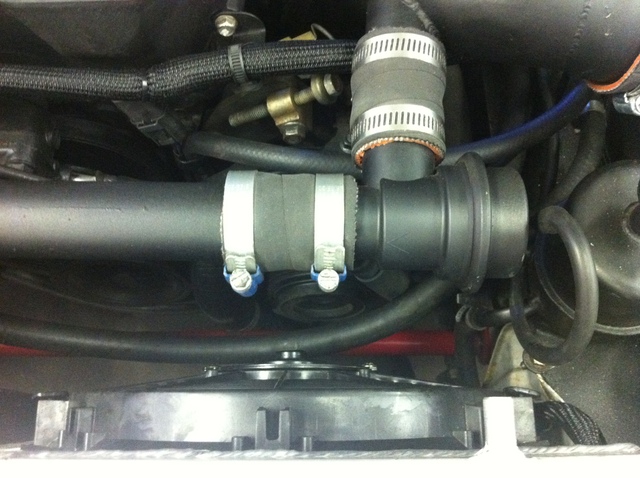
So the project was immediately off to a start that brought me to an auto parts store. The inlet and outlet sizes of my Bosch valve were different than my Synapse.
I shot down the street and picked up 1" rubber hose to void the gap and it worked out perfectly. The 1" fit very firmly and my previous couplers fit very firmly over those. Problem solved.
The vacuum fittings are beautiful.

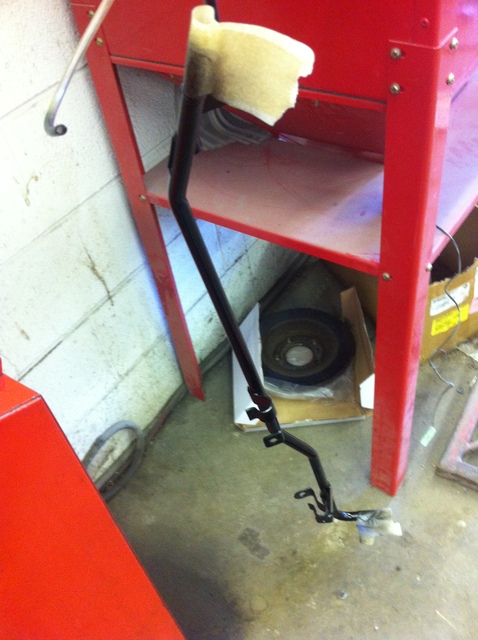
While I was under the hood I noticed the hard vacuum line running across the firewall was particularly ugly. The factory finish had oxidized and I didn't want to look at it anymore. I pulled it off and began to scuff it.
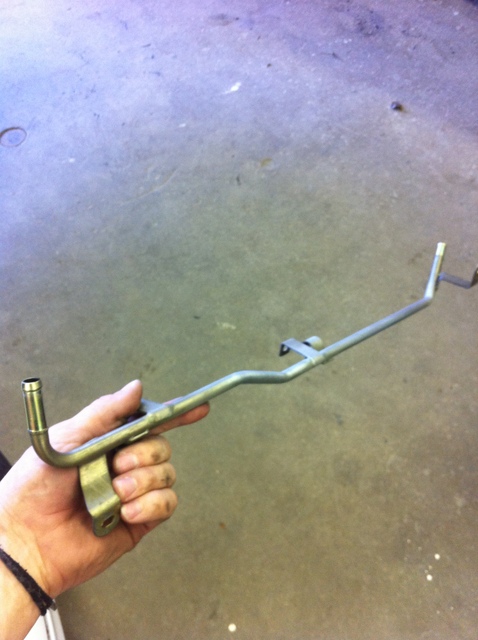
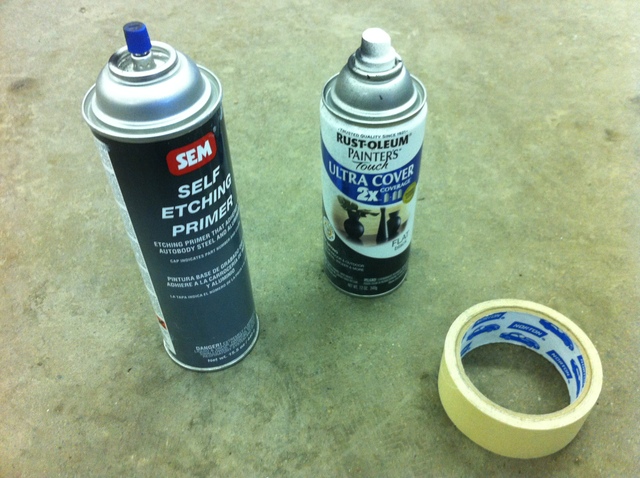
The usual suspects helped me with this one. Etching primer for metal and some durable flat black paint. I taped the ends to avoid the paint heating up and acting as a lubricant to my vacuum lines.
Installed vacuum line:
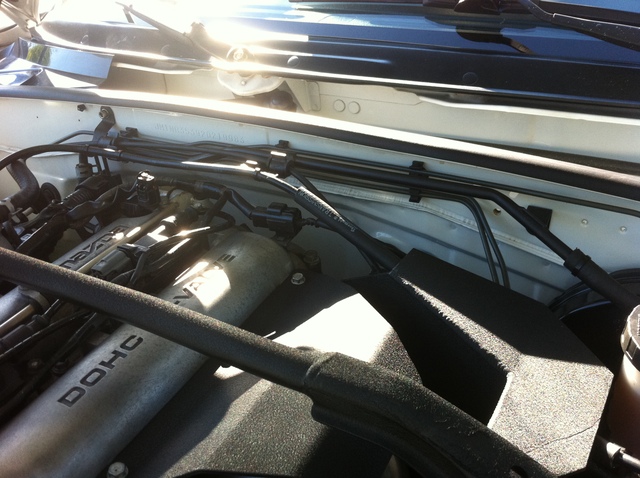
Quick up the skirt shot:
Review:
Fuckingexcellent. Nice firm release, no flutter with stock settings, sounds similar to the forge atmospheric valve (Which I happen to like). Clean sound and good performance. Quite enough to keep my customized license plate legitimate. During the installation I ran into a vacuum distribution block that had been leaking so I repaired it as well. Now the car starts with a nice firm -18 -19 on my vacuum gauge.

So the project was immediately off to a start that brought me to an auto parts store. The inlet and outlet sizes of my Bosch valve were different than my Synapse.

I shot down the street and picked up 1" rubber hose to void the gap and it worked out perfectly. The 1" fit very firmly and my previous couplers fit very firmly over those. Problem solved.

The vacuum fittings are beautiful.

While I was under the hood I noticed the hard vacuum line running across the firewall was particularly ugly. The factory finish had oxidized and I didn't want to look at it anymore. I pulled it off and began to scuff it.

The usual suspects helped me with this one. Etching primer for metal and some durable flat black paint. I taped the ends to avoid the paint heating up and acting as a lubricant to my vacuum lines.


Installed vacuum line:

Quick up the skirt shot:

Review:
Fuckingexcellent. Nice firm release, no flutter with stock settings, sounds similar to the forge atmospheric valve (Which I happen to like). Clean sound and good performance. Quite enough to keep my customized license plate legitimate. During the installation I ran into a vacuum distribution block that had been leaking so I repaired it as well. Now the car starts with a nice firm -18 -19 on my vacuum gauge.
Reply
1
1
09-08-2011, 04:01 PM
#12
Senior Member
Thread Starter
iTrader: (7)
Join Date: Sep 2009
Location: Royal Oak Michigan
Posts: 754
Total Cats: 68
So I was having some issues with unpredictable performance and an odd idle at times. My first thought was ignition. When I purchased the car from Texas I flew my brother out to drive it back for me, and I mailed new BKR7E plugs to the previous owner to toss in the car for me. BKR7E is one step colder than the stock plug and is the plug of choice for the boosted Miata guys.
The first plug I pulled looked awful for only having 5k on it. Looked like it had been run very rich for a period of time.
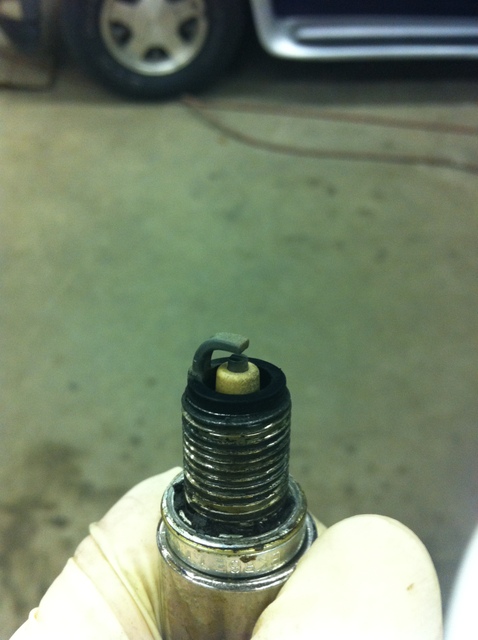
Second plug was the same, and when I tried to remove the third plug, the socket wouldn't drop down? After inspection it looked like the rubber grip from the socket that was used to remove the plug previously had stayed with the installed spark plug... Not sure why the hell you'd leave it on the plug or how the coil boot made decent contact with that on there but either way.. its half assed work.
The fourth plug brought up another issue.. I noticed it say BKR6E on the side.. That futhermucker didn't install the plugs I had sent him. After tossing in the new set, she stated right up and idled like a champ. Drivability was smoother and performance under boost was consistent.
Reply
0
0
09-08-2011, 04:01 PM
#13
Senior Member
Thread Starter
iTrader: (7)
Join Date: Sep 2009
Location: Royal Oak Michigan
Posts: 754
Total Cats: 68
After staring at the car for a couple of hours with some buddies we realized it's missing a mean stance from the rear wheels. It's very close but a subtle offset would do the trick.
I ordered 7MM hub centric wheel spacers and tossed them on. I don't ever recommend someone trying to correct any more than 8MM of offset without changing wheels. It's not usually the right way to go about it. But I'm comfortable with 7MM.
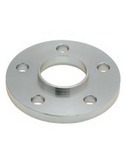
I'd have to say, this definitely did the trick. Much more aggressive *** end now.
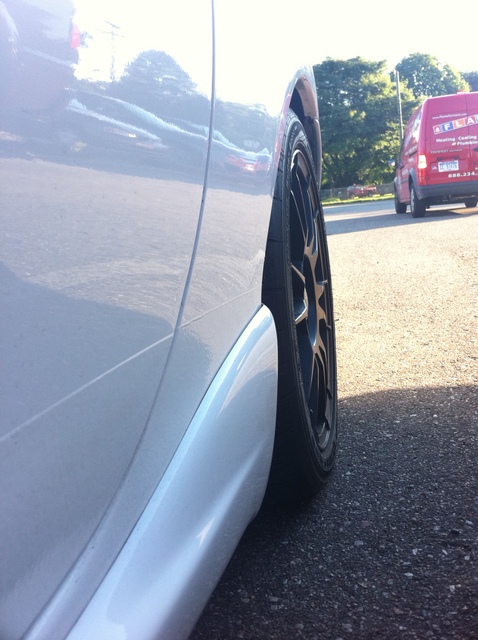

Reply
0
0
09-08-2011, 04:01 PM
#14
Senior Member
Thread Starter
iTrader: (7)
Join Date: Sep 2009
Location: Royal Oak Michigan
Posts: 754
Total Cats: 68
Went out and had a buddy drive my car next to us.. First time I've seen it driving. The bitch looks real good.
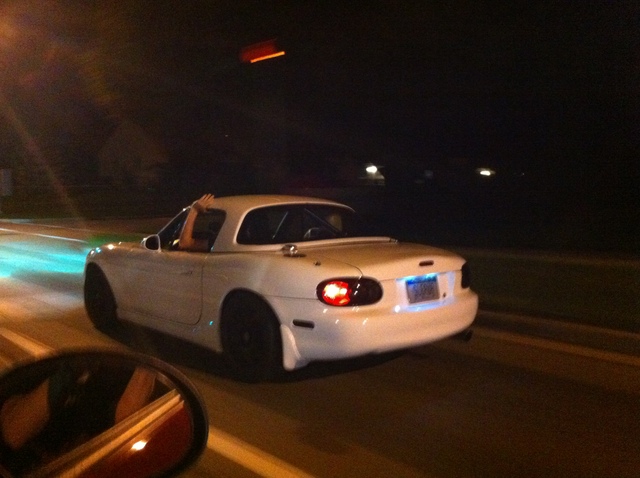
Video.. quick but fun.

Video.. quick but fun.
Last edited by miatauser123; 09-08-2011 at 04:21 PM.
Reply
1
1
09-08-2011, 04:02 PM
#15
Senior Member
Thread Starter
iTrader: (7)
Join Date: Sep 2009
Location: Royal Oak Michigan
Posts: 754
Total Cats: 68
Tuning tonight for meth. I have a knock sensor on the car but I don't trust it and I can't monitor it's feedback. So I've decided to go the Det Can route.
Detonation Cans are used to listen to the physical knock of an engine. Known to be extremely reliable and it's been said that knock sensors will almost never beat the human ear when it comes to knock detection. You can make your own very easily and the performance is incredible.
Required:
- Ear protection headphones
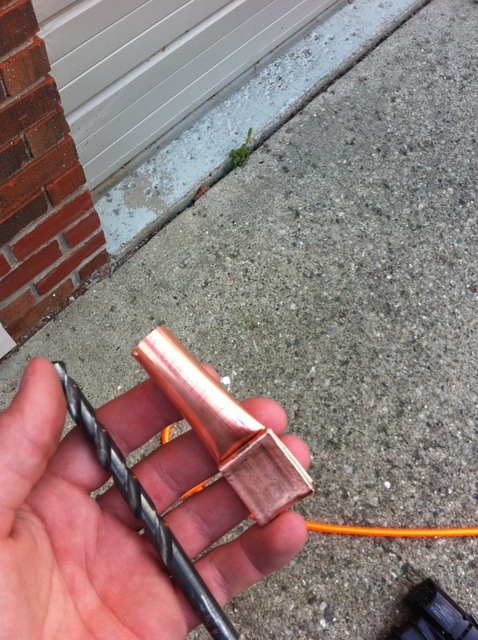
- Copper pipe
- PVC air compressor hose
I ended up spending around 40 bucks but you can do it cheaper. I started with the copper pipe, the idea is to attach one end to the engine block somewhere and the other to the air compressor hose. I flattened the end with a hammer and made a couple of folds to drill through.
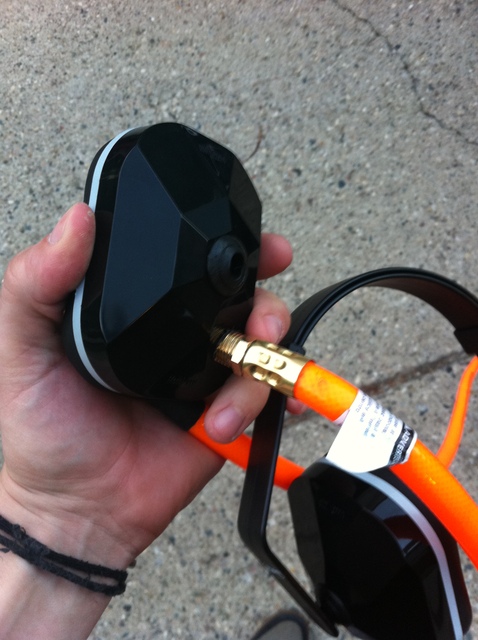
Then you've got to run the other end into the headset. My headset was ABS plastic and had a foam insert that was easy to remove. I drilled to a slightly smaller size than my air line fitting and it threaded into the plastic.
How cool will I look when I'm tuning?!
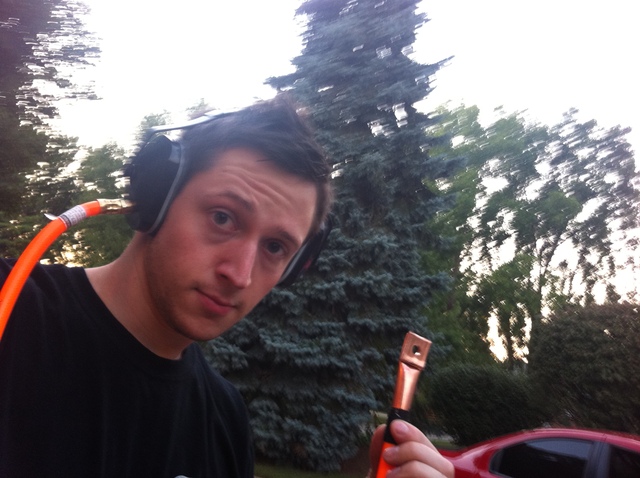
The other end is attached to the engine.
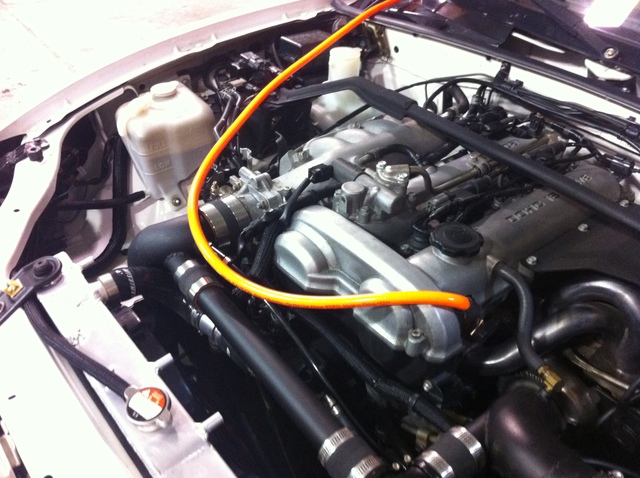
They worked great! You can hear the engine internals extremely well. It was too hot for my taste last night so I decided to push the project off to another day but I did advance the timing under boost by 2 degrees without hearing any knock so that's promising. Bring on the power.
Detonation Cans are used to listen to the physical knock of an engine. Known to be extremely reliable and it's been said that knock sensors will almost never beat the human ear when it comes to knock detection. You can make your own very easily and the performance is incredible.
Required:
- Ear protection headphones
- Copper pipe
- PVC air compressor hose
I ended up spending around 40 bucks but you can do it cheaper. I started with the copper pipe, the idea is to attach one end to the engine block somewhere and the other to the air compressor hose. I flattened the end with a hammer and made a couple of folds to drill through.

Then you've got to run the other end into the headset. My headset was ABS plastic and had a foam insert that was easy to remove. I drilled to a slightly smaller size than my air line fitting and it threaded into the plastic.

How cool will I look when I'm tuning?!

The other end is attached to the engine.

They worked great! You can hear the engine internals extremely well. It was too hot for my taste last night so I decided to push the project off to another day but I did advance the timing under boost by 2 degrees without hearing any knock so that's promising. Bring on the power.
Reply
1
1
09-08-2011, 04:17 PM
#16
Senior Member
Thread Starter
iTrader: (7)
Join Date: Sep 2009
Location: Royal Oak Michigan
Posts: 754
Total Cats: 68
Well I took a buddy of mine to the airport on Sunday and she didn't make it home.. I was cruising at about 70 and the bottom end took a ****. Blew something right through my oil pan. I pulled off and called a tow truck.
It wasn't tuned for the meth yet but I had recently added more fuel under the high boost areas. The cause of the failure is likely just the limitations of the stock block. Most people don't make this much power on a stock block and it lasts them long. I had a safe tune with no knock and strong fuel, it was just too much boost for the little 1.8.
So I sit, listen to some good jams and wait for a tow truck.

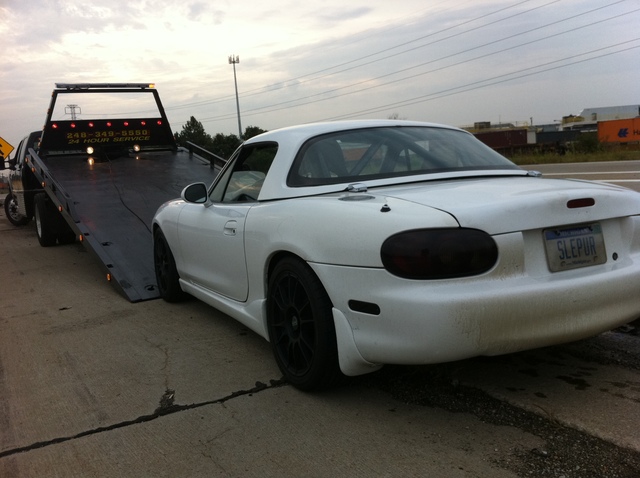
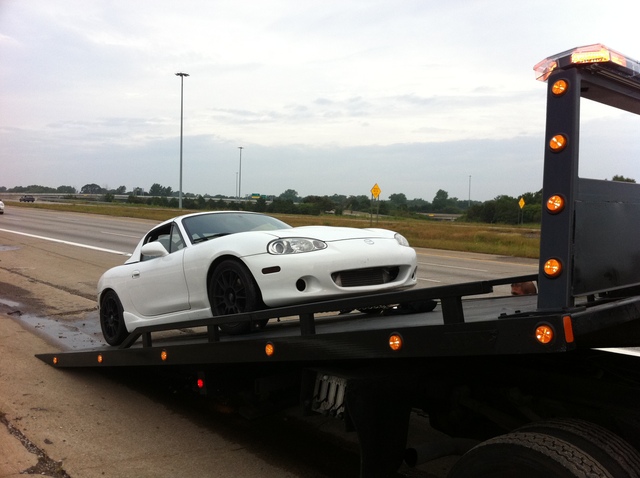

I was waiting for this day, and I thank the little bitch for making it through most of the summer, providing me with good times. Forged internals, stand alone ECU and about 22 LBS of boost will do me well for next summer.
It wasn't tuned for the meth yet but I had recently added more fuel under the high boost areas. The cause of the failure is likely just the limitations of the stock block. Most people don't make this much power on a stock block and it lasts them long. I had a safe tune with no knock and strong fuel, it was just too much boost for the little 1.8.


So I sit, listen to some good jams and wait for a tow truck.


I was waiting for this day, and I thank the little bitch for making it through most of the summer, providing me with good times. Forged internals, stand alone ECU and about 22 LBS of boost will do me well for next summer.
Reply
0
0
09-08-2011, 04:18 PM
#17
Senior Member
Thread Starter
iTrader: (7)
Join Date: Sep 2009
Location: Royal Oak Michigan
Posts: 754
Total Cats: 68
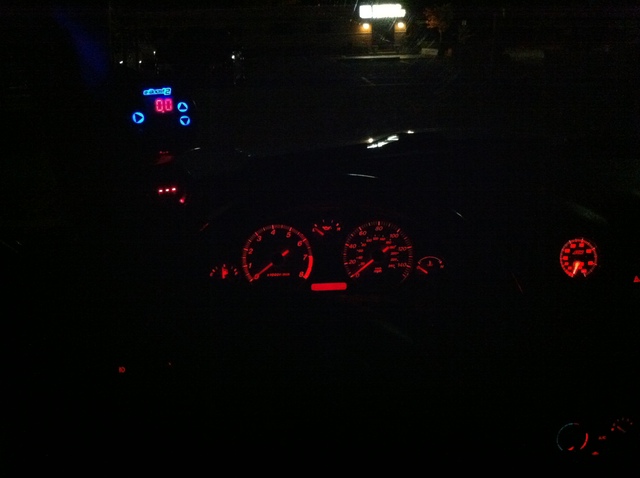
Now that I've got some down time to work on the little things that bug me... The meth gauge in the vent is killing me. Don't like it. So I ordered the single din radio mount for the gauges. I'll move the meth gauge here and finally install my Oil pressure, and analog boost gauge here.
The rings were silver and matched nothing so I went to my usual can of flat black and got to work.

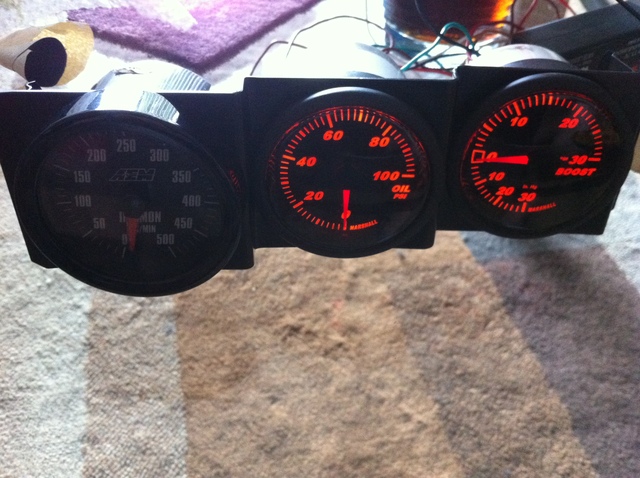
Looks much better if you ask me. The AEM gauge lights up the red/amber to match my factory gauges and dash lighting. The only ugly *** gauge I have left is my TurboSmart eBoost2
The rings were silver and matched nothing so I went to my usual can of flat black and got to work.


Looks much better if you ask me. The AEM gauge lights up the red/amber to match my factory gauges and dash lighting. The only ugly *** gauge I have left is my TurboSmart eBoost2
Reply
0
0
09-09-2011, 09:38 AM
#18
Senior Member
Thread Starter
iTrader: (7)
Join Date: Sep 2009
Location: Royal Oak Michigan
Posts: 754
Total Cats: 68
Made my way up and checked out the car last night... Started to remove a couple of small items here and there to see if I could get a good look at the carnage for you guys.
It feels a bit like spending a year on a puzzle and the feeling you get when it's time to COMPLETELY-****-IT-UP and put it back into the box.
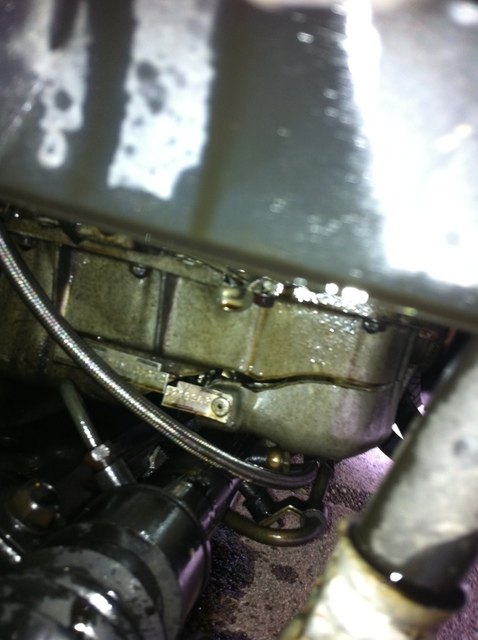
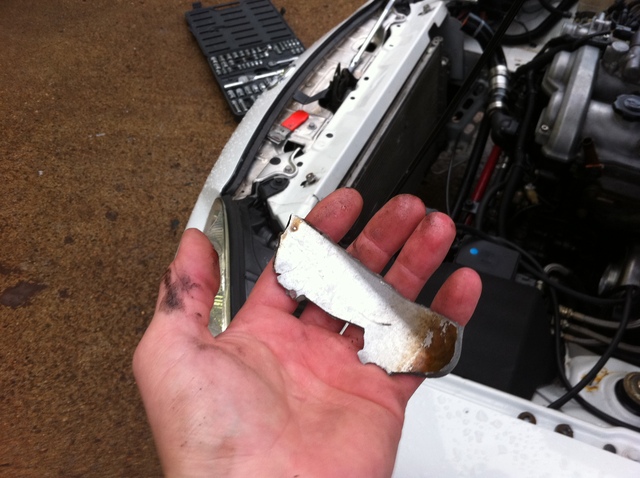
Ooo a little piece of my oil pan eh?
Mmmm a little hole in my engine eh? (Passenger side)
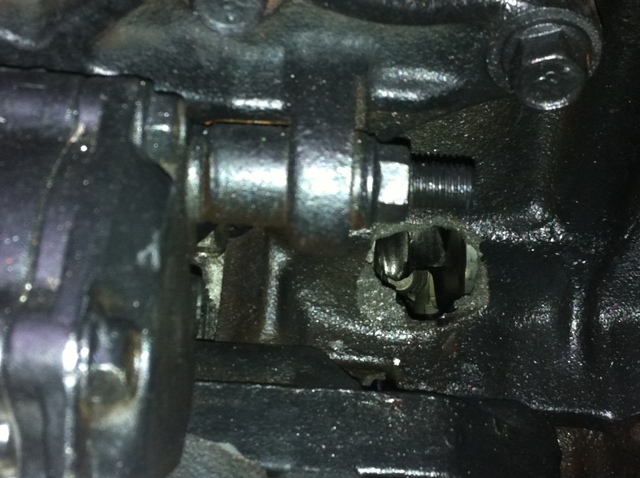
Another hole in my engine... eh? (Drivers side)
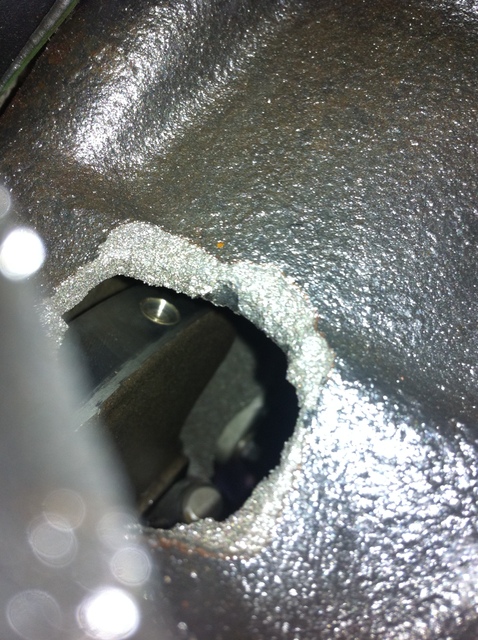
And yes, I can shine a flashlight in one side of my block and it comes out the other
It feels a bit like spending a year on a puzzle and the feeling you get when it's time to COMPLETELY-****-IT-UP and put it back into the box.


Ooo a little piece of my oil pan eh?

Mmmm a little hole in my engine eh? (Passenger side)

Another hole in my engine... eh? (Drivers side)

And yes, I can shine a flashlight in one side of my block and it comes out the other
Reply
1
1


