Fireindc's attempt to build a decent miata. (the search for more torque).
 05-08-2013, 04:37 PM
#61

Move the bung for the IAT probe to the other side.
Secure the coolant hose to the IC pipe so that they don't move relative to each other. I couple of zipties will do it cheap and cheerful. A couple of large Adel clamps (you know, the rubber-padded metal clamps) would be a more permanent solution. You can get large Adel clamps from Aircraft Spruce and Specialty.
Add snakeskin (that expandable nylon mesh stuff) to the coolant hose so that any rubbing doesn't impact the hose.

Reply
 0
0

0
05-08-2013, 05:10 PM
#62
Elite Member
Thread Starter
iTrader: (13)

Join Date: Dec 2006
Location: Taos, New mexico
Posts: 6,599
Total Cats: 561
Very similar to what I was thinking, thanks Rick. I was thinking a spare piece of silicone in between the two as a buffer, but your idea sounds good as well. Got a 90 deg coupler on order, this one actually:
Reply
0
0
05-08-2013, 05:53 PM
#63

Nice progress man! Glad to see a motor stuffed back in the bay 
And I can vouch for the lack of damage done by heat wrap, at least in a dry climate. I'm running Fireindc's old downpipe, and when I got it I stripped off the wrap to see what it looked like underneath. Only some surface rust, no major pitting or anything remotely close to eating through. IIRC it had been wrapped for years.
And I can vouch for the lack of damage done by heat wrap, at least in a dry climate. I'm running Fireindc's old downpipe, and when I got it I stripped off the wrap to see what it looked like underneath. Only some surface rust, no major pitting or anything remotely close to eating through. IIRC it had been wrapped for years.
Reply
1
1
05-08-2013, 05:59 PM
#64
Elite Member
Thread Starter
iTrader: (13)
Join Date: Dec 2006
Location: Taos, New mexico
Posts: 6,599
Total Cats: 561
Nice progress man! Glad to see a motor stuffed back in the bay
And I can vouch for the lack of damage done by heat wrap, at least in a dry climate. I'm running Fireindc's old downpipe, and when I got it I stripped off the wrap to see what it looked like underneath. Only some surface rust, no major pitting or anything remotely close to eating through. IIRC it had been wrapped for years.
And I can vouch for the lack of damage done by heat wrap, at least in a dry climate. I'm running Fireindc's old downpipe, and when I got it I stripped off the wrap to see what it looked like underneath. Only some surface rust, no major pitting or anything remotely close to eating through. IIRC it had been wrapped for years.
Yip, I bought that from Vashthestampeed IIRC, and it was wrapped when i bought it. Who knows what that crazy guy did to it before me!

Reply
0
0
05-09-2013, 10:37 AM
#65
Thanks Matthew, constant progress but nothing is happening too extremely fast. I've been so damn busy, but man do I want to drive a miata again.
Yip, I bought that from Vashthestampeed IIRC, and it was wrapped when i bought it. Who knows what that crazy guy did to it before me!
Yip, I bought that from Vashthestampeed IIRC, and it was wrapped when i bought it. Who knows what that crazy guy did to it before me!
And damn, that dp gets around lol
Reply
0
0
05-09-2013, 11:26 AM
#67
Elite Member
Thread Starter
iTrader: (13)
Join Date: Dec 2006
Location: Taos, New mexico
Posts: 6,599
Total Cats: 561
I was planning on cutting the end that connects to the TB short so that the 90 is right off the TB. This will certainly give me more clearance than the metal 90 bend I have now, hopefully it is enough.
If it's not enough, the only other option I see is changing up the coolant hose. I've got some ideas and would do something similar to what revlimiter did on his install.
If it's not enough, the only other option I see is changing up the coolant hose. I've got some ideas and would do something similar to what revlimiter did on his install.
Reply
0
0
05-10-2013, 01:56 PM
#69
Elite Member
Thread Starter
iTrader: (13)
Join Date: Dec 2006
Location: Taos, New mexico
Posts: 6,599
Total Cats: 561
Hotside IC routing mock-up. Looks like it will work perfectly without much modification of my existing pipes. Awesome! And it will be easy to fab up a wastegate bracket with it clocked at this angle, AND the intake lines up in a great spot. Anyone see any problems with this?
Reply
0
0
05-11-2013, 02:00 PM
#70
Elite Member
Thread Starter
iTrader: (13)
Join Date: Dec 2006
Location: Taos, New mexico
Posts: 6,599
Total Cats: 561
Hotside piping in place, this is how it's going to be. Clamps are not secured yet or anything just in case I need to pull it apart, but this is the final positioning of the pipe.
It's hard to tell exactly how it's routed in these pics, but its a standard around the rad setup. No rubbing on anything at all.
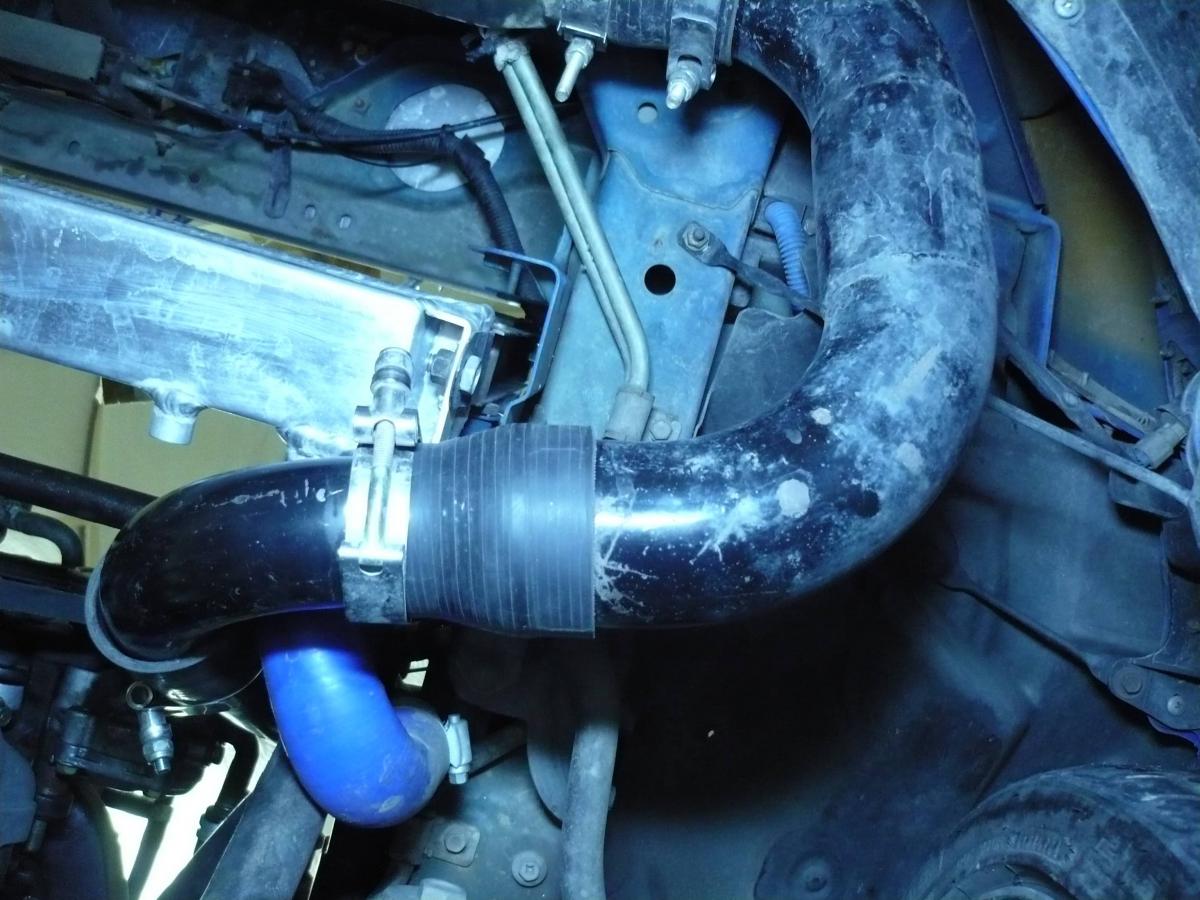
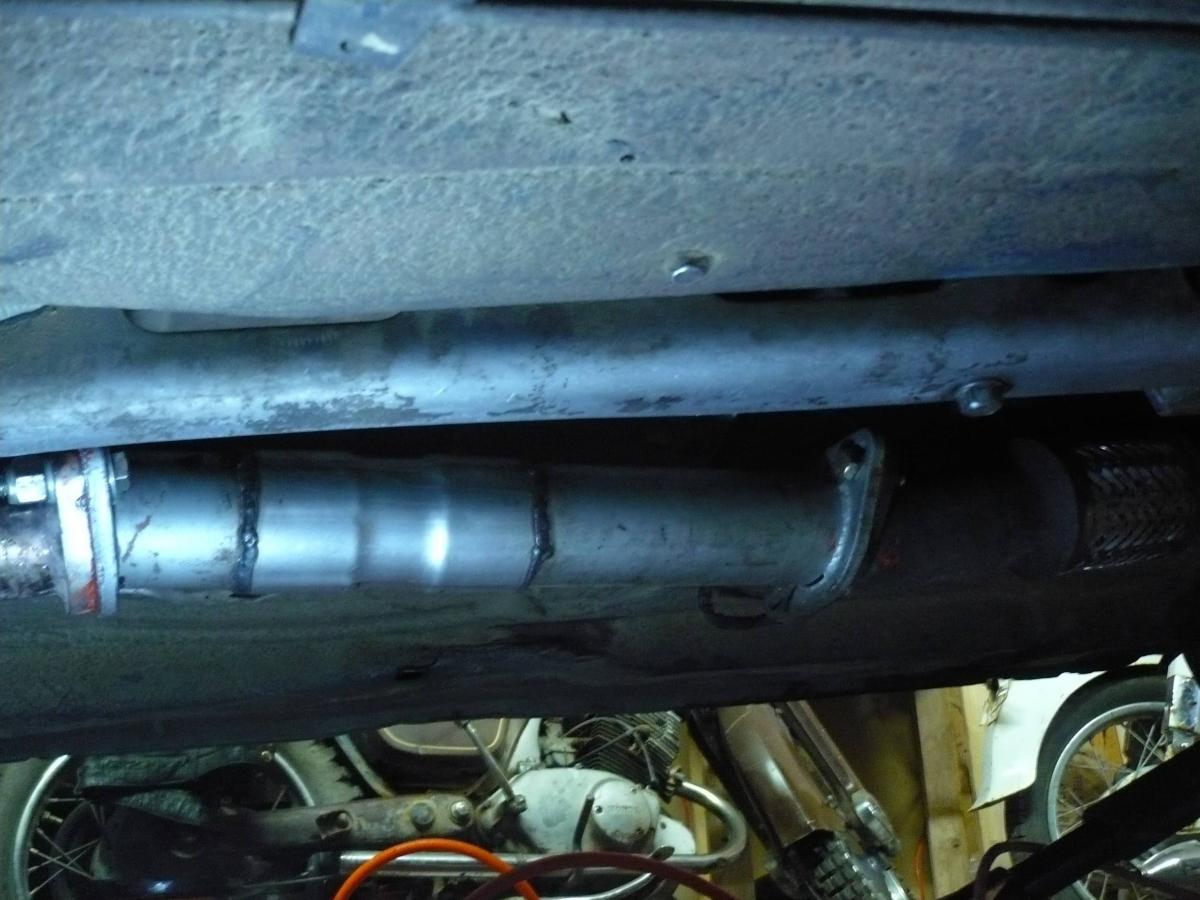
Test pipe in place, exhaust hooks up perfectly. Well almost perfectly, I had to bend a hanger, but it works beautifully with no rubbing or anything. Note that the ID of that test pipe is 2.5" all the way through, even the added part. The way he added the extra 1.5" makes it look like the pipe is "choked" down in the middle, but it isn't. 100% smooth flow.
Wastegate bracket modified and it mounts perfect. I am going to extend the arm for the wastegate and make it "adjustable" by threading the arm and using a threaded collar.
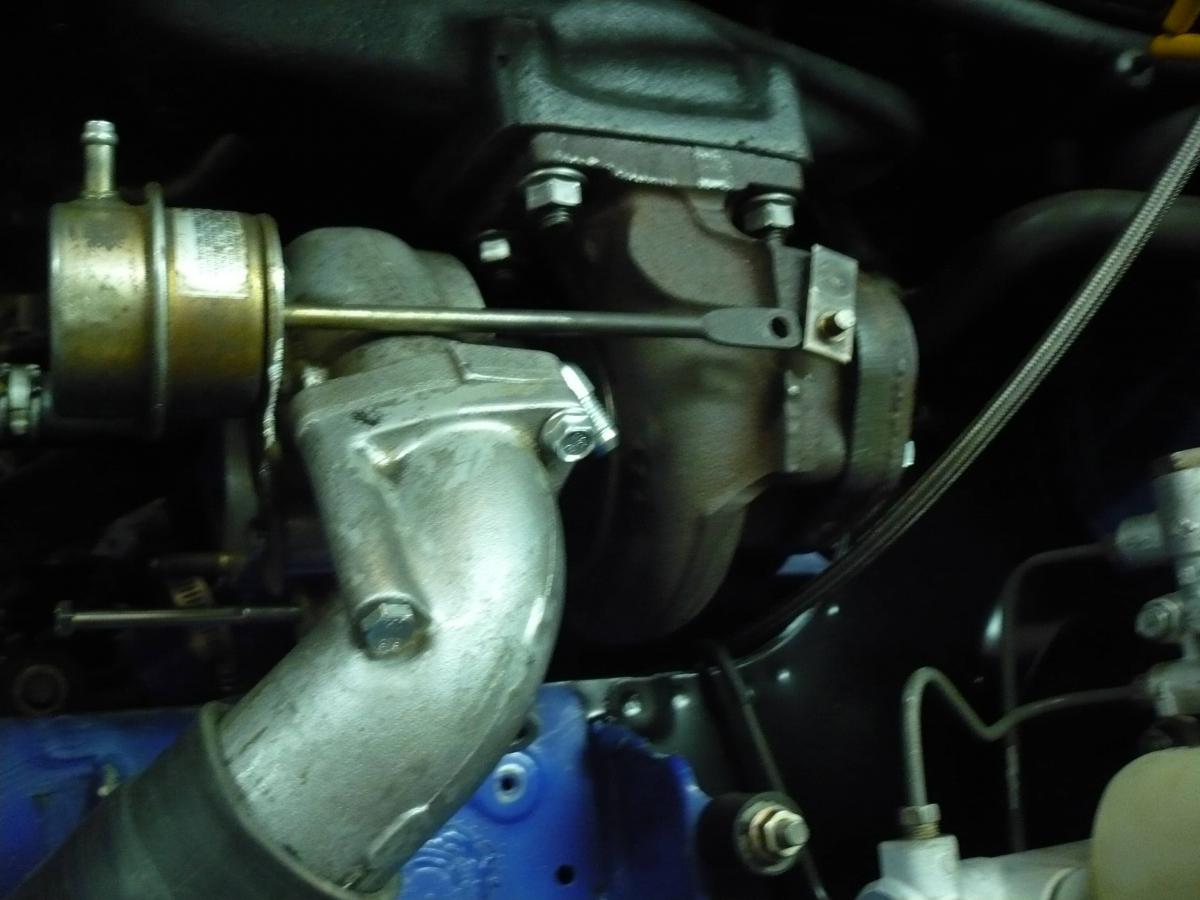
It's hard to tell exactly how it's routed in these pics, but its a standard around the rad setup. No rubbing on anything at all.
Test pipe in place, exhaust hooks up perfectly. Well almost perfectly, I had to bend a hanger, but it works beautifully with no rubbing or anything. Note that the ID of that test pipe is 2.5" all the way through, even the added part. The way he added the extra 1.5" makes it look like the pipe is "choked" down in the middle, but it isn't. 100% smooth flow.
Wastegate bracket modified and it mounts perfect. I am going to extend the arm for the wastegate and make it "adjustable" by threading the arm and using a threaded collar.
Reply
0
0
05-12-2013, 08:51 AM
#71
Cpt. Slow

iTrader: (25)
Join Date: Oct 2005
Location: Oregon City, OR
Posts: 14,179
Total Cats: 1,129
Man, you really make some sacrifices when you retain the power steering. Looks pretty good, although the racer in me really wants you to eliminate the first two couplers with a single 90* unit to eliminate some hardware and such. Well, actually, I want you to get rid of the power steering, but I realize that's not everyone's cup of tea.
Reply
0
0
05-12-2013, 07:18 PM
#73
Elite Member
Thread Starter
iTrader: (13)
Join Date: Dec 2006
Location: Taos, New mexico
Posts: 6,599
Total Cats: 561
Even if it would work, too late to turn back now. Spent a lot of time getting my intake fabbed up, and the wastegate bracket working exactly how I like it. I'm stoked on it.
I'm no engineer, but I'm satisfied with it. And the amount of couplings is the same I had on my old setup, they NEVER let loose even at spikes to 17+psi. I use t-bolt clamps and hair spray on all the joints.
Reply
0
0
05-12-2013, 08:29 PM
#74
Elite Member
Thread Starter
iTrader: (13)
Join Date: Dec 2006
Location: Taos, New mexico
Posts: 6,599
Total Cats: 561
Alrighty, updates.
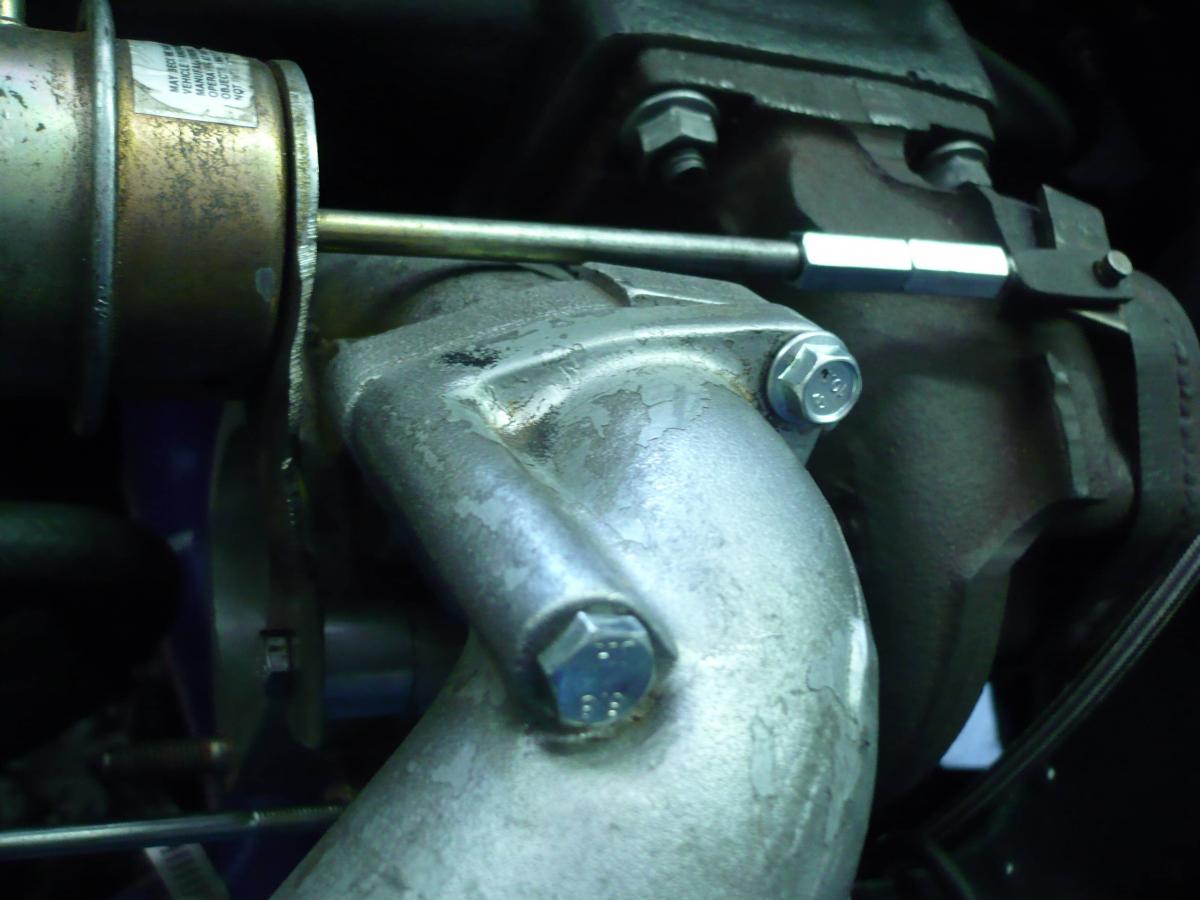
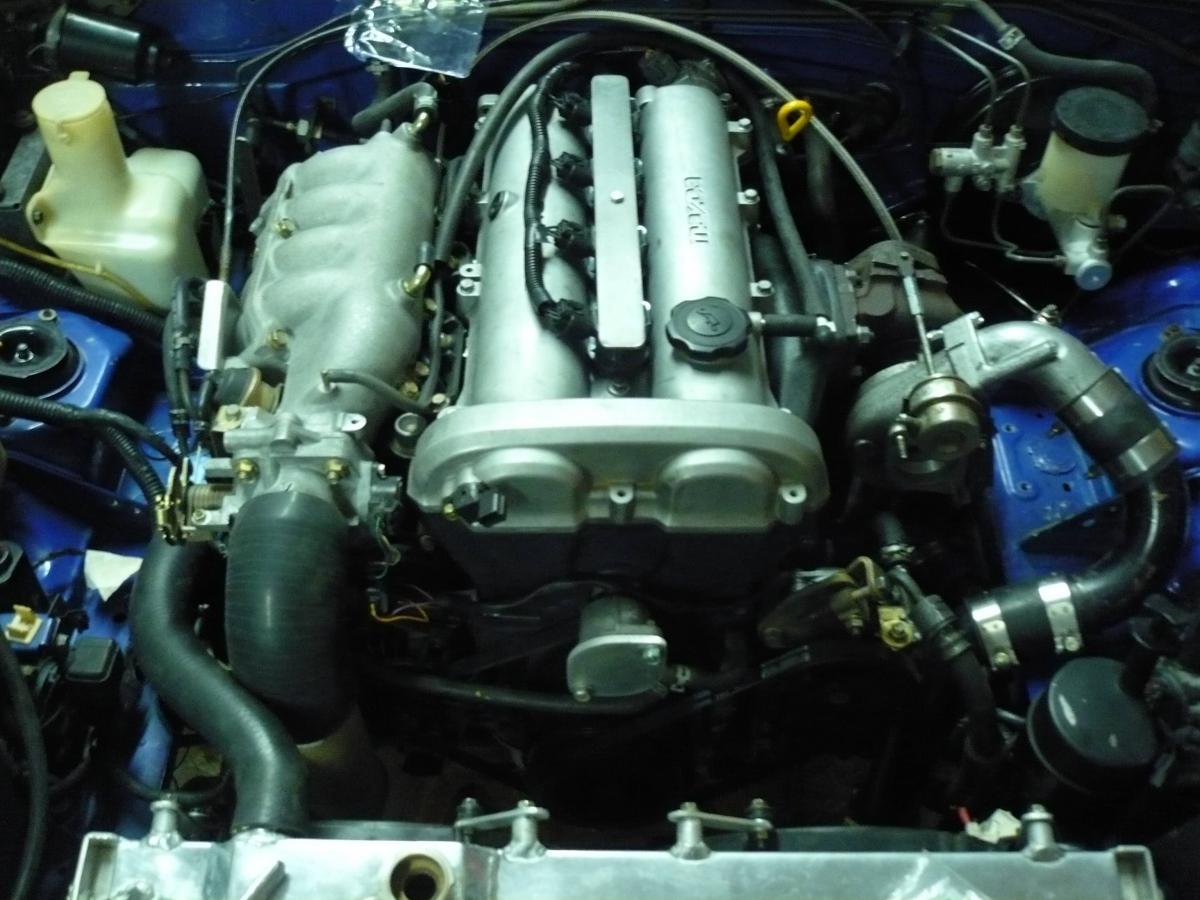
Got my wastegate bracket completed. The wastegate is now adjustable, I set it up with just about 1 turn of tension on the spring to start for now, plenty of adjustment both ways though at this point. Very satisfied with how this turned out compared to other bulkier wastegate relocations.
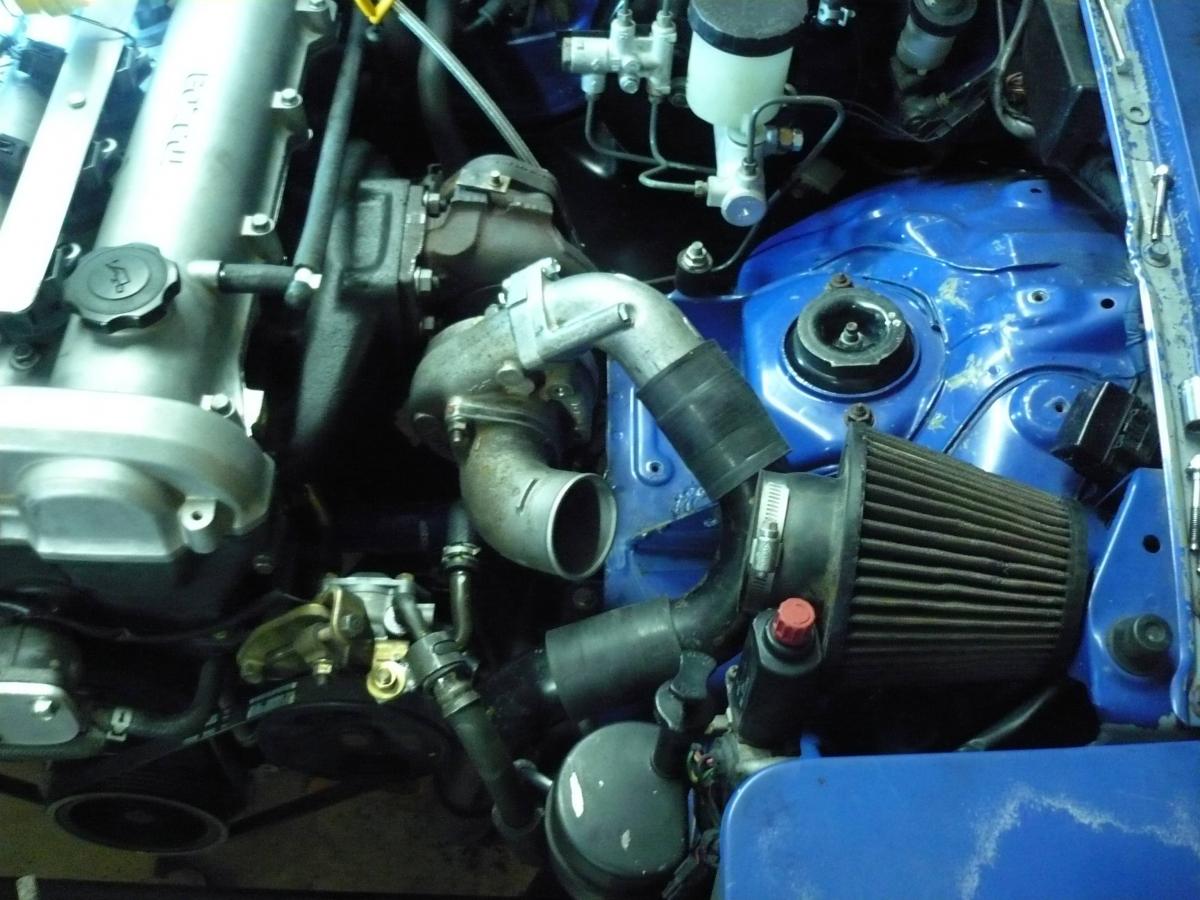
Next I went ahead and fabbed up my intake. Comes PERFECTLY behind the headlight lid. Perhaps I should think about the NACA intake lid, or something for cold air intake? Hmm. I love how this turned out, it's hard to tell in the pictures but nothing makes contact at all, except the filter itself where its kind of wedged in.
Finally I went ahead and fabbed up some fan bracketry for my radiator. Those zip tie things don't belong on your moms previa, let alone a performance vehicle. Used aluminum stock for maximum lightness.
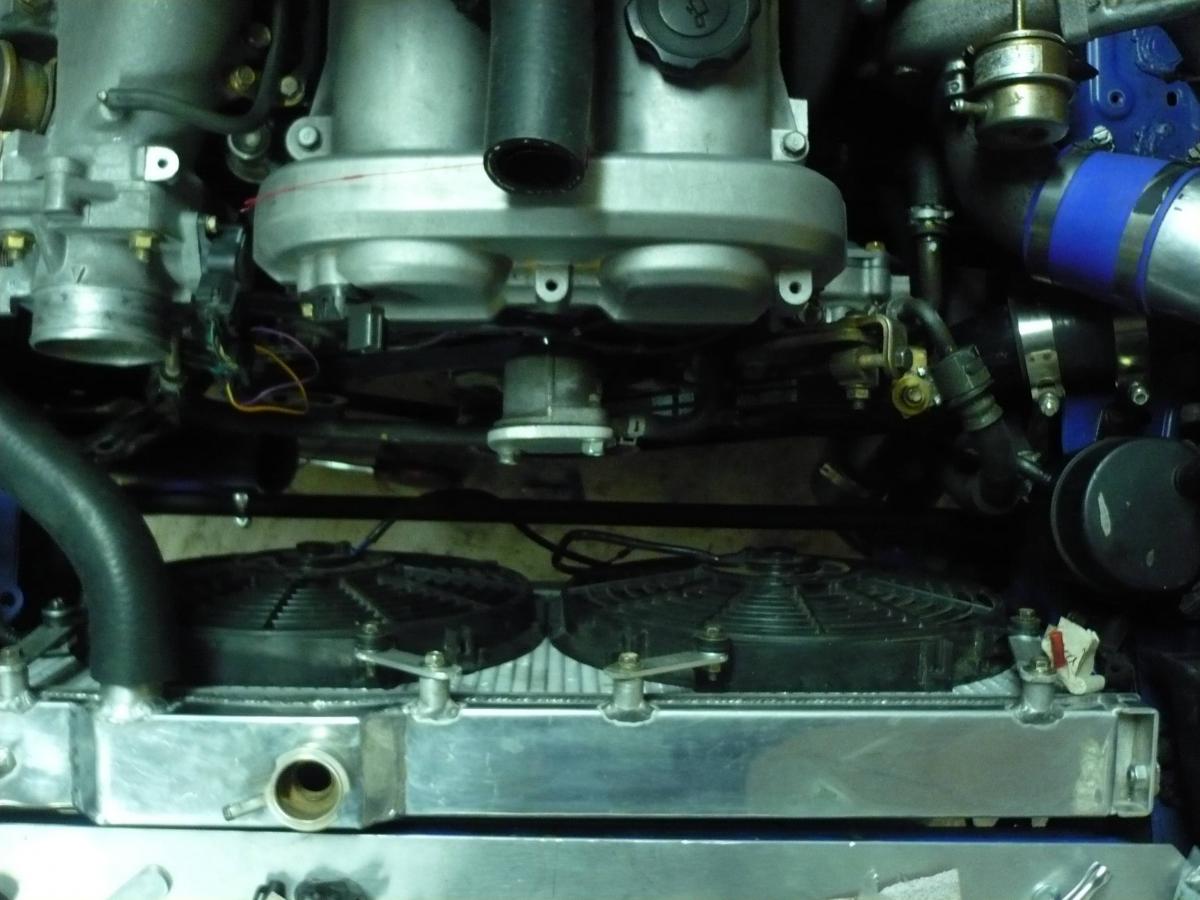
Now I'm waiting for my 90deg silicone pipe to get here to complete the coldside of things..
Got my wastegate bracket completed. The wastegate is now adjustable, I set it up with just about 1 turn of tension on the spring to start for now, plenty of adjustment both ways though at this point. Very satisfied with how this turned out compared to other bulkier wastegate relocations.
Next I went ahead and fabbed up my intake. Comes PERFECTLY behind the headlight lid. Perhaps I should think about the NACA intake lid, or something for cold air intake? Hmm. I love how this turned out, it's hard to tell in the pictures but nothing makes contact at all, except the filter itself where its kind of wedged in.
Finally I went ahead and fabbed up some fan bracketry for my radiator. Those zip tie things don't belong on your moms previa, let alone a performance vehicle. Used aluminum stock for maximum lightness.
Now I'm waiting for my 90deg silicone pipe to get here to complete the coldside of things..
Reply
0
0
05-12-2013, 09:10 PM
#75
Cpt. Slow
iTrader: (25)
Join Date: Oct 2005
Location: Oregon City, OR
Posts: 14,179
Total Cats: 1,129
Man that waste gate is close to the compressor housing. Have you put some compressed air to it to make sure it doesn't rub anywhere? That bracket looks pitiful, but if it works, it works. See my build thread for a cheap and easy way to make a rock solid bracket.
Reply
0
0
05-13-2013, 12:27 AM
#76
Elite Member
Thread Starter
iTrader: (13)
Join Date: Dec 2006
Location: Taos, New mexico
Posts: 6,599
Total Cats: 561
It's the OEM bracket, I just took off a tiny bit of metal. It's really strong, no way it's going to flex or anything under normal use. I saw your thread, nice bracket but I really am satisfied with this. You might think it's pitiful, and I might think yours is over engineered
 Seriously though, I can easily revise it if I need to - but for now it looks OEM when you glance at it.
Edit: didn't mean this in a mean way, but the oem bracket is stamped steel and stamped in such a manner that it has "creases" in it. It's not like a flat piece of metal that is going to bend easily.
Last edited by Fireindc; 05-13-2013 at 04:10 PM.
Reply
0
0
05-13-2013, 06:02 PM
#77
Elite Member
Thread Starter
iTrader: (13)
Join Date: Dec 2006
Location: Taos, New mexico
Posts: 6,599
Total Cats: 561
So, for my IAT re-location I'm thinking about drilling/tapping the intercooler for it. I figured I could just drill/tap it and jb weld it in like I did my oil pan. Any thoughts? What thread diameter/pitch is the IAT bung?
Reply
0
0
 05-14-2013, 05:47 PM
#80
Elite Member
Thread Starter
iTrader: (13)
Join Date: Dec 2006
Location: Taos, New mexico
Posts: 6,599
Total Cats: 561
2 quick updates.
1) sorry for calling your WG bracket over engineered Curly, you were right. I've put air to the WG to watch it actuate and it moves a little bit, probably 2-3mm. The WG is fully opened though and I'm sure it will still be fine. I'm likely going to reinforce it with steel flat stock I have laying around and grab the 2nd OEM wastegate mounting hole.
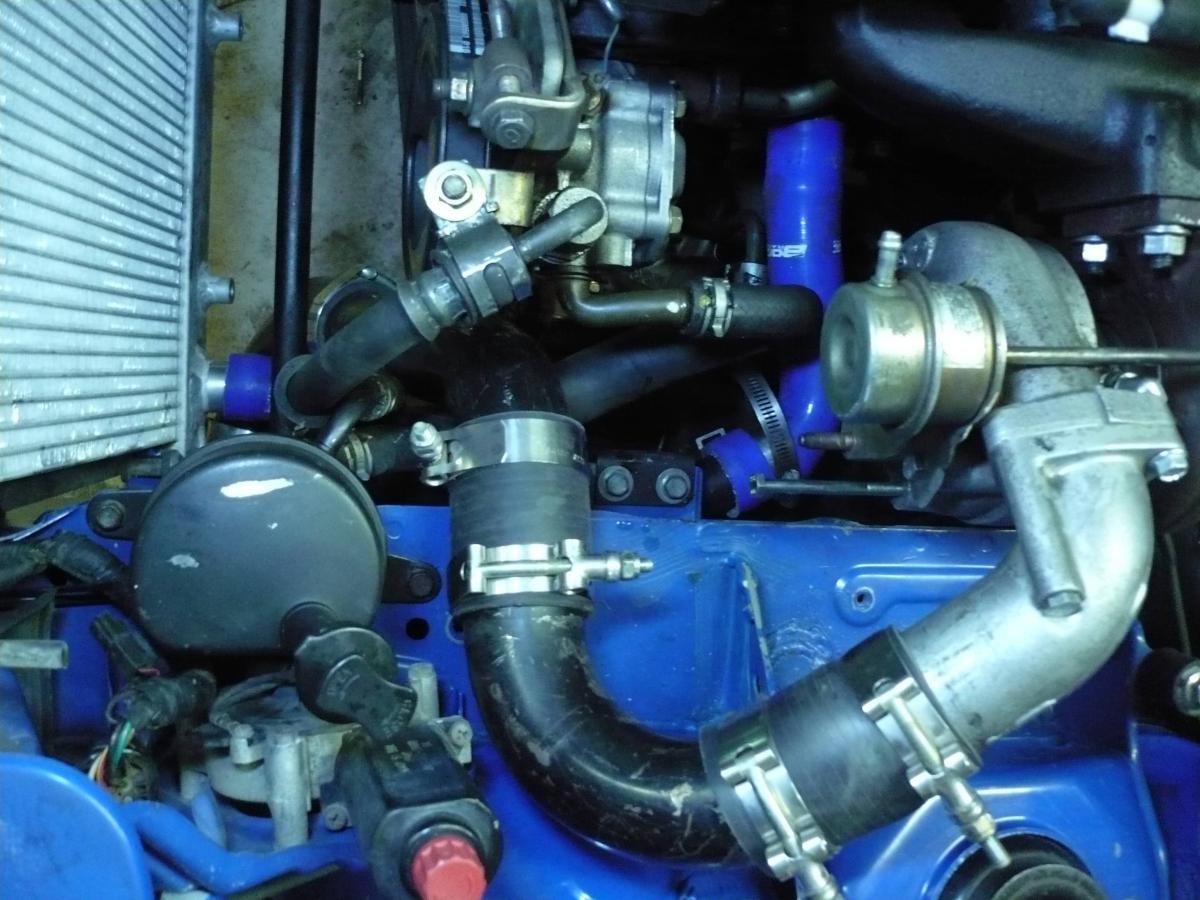
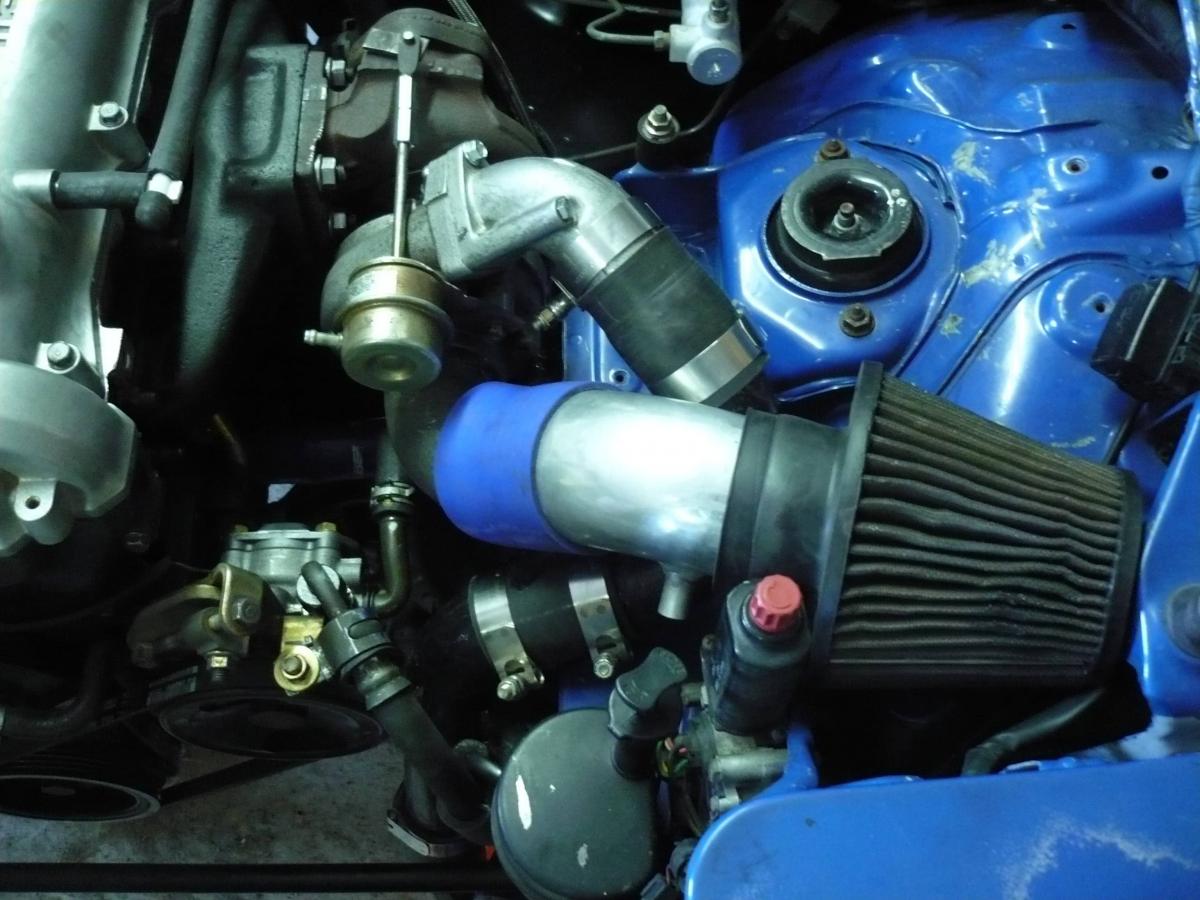
2) got my silicone 90 in and it works beautifully, look here:
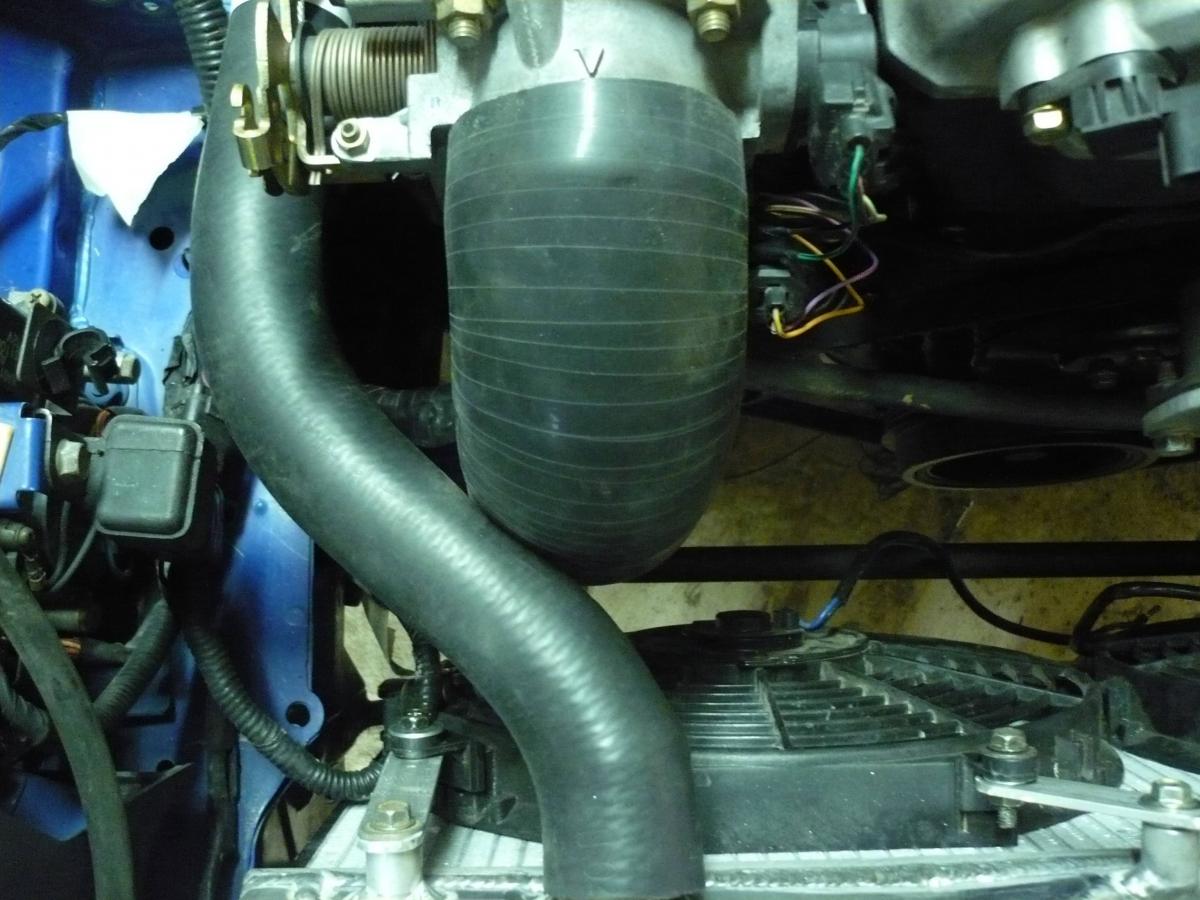
Yes, they are touching. However they really are not conflicting that much and I'm certain it will be fine as long as I put some "snakeskin" around the hose like was recommended earlier. I MAY get another hose and re-do the reroute if it annoys me, but it really doesn't look bad and I highly doubt there would be any issues at all from their slight rubbing. What would you guys do?
note that the cardboard tube is not being used as a charge pipe, it's just for mockup
Next is to pick up some 2.5" pipe, get my BOV flange welded onto it, drill and tap the IC for the IAT sensor.
1) sorry for calling your WG bracket over engineered Curly, you were right. I've put air to the WG to watch it actuate and it moves a little bit, probably 2-3mm. The WG is fully opened though and I'm sure it will still be fine. I'm likely going to reinforce it with steel flat stock I have laying around and grab the 2nd OEM wastegate mounting hole.
2) got my silicone 90 in and it works beautifully, look here:
Yes, they are touching. However they really are not conflicting that much and I'm certain it will be fine as long as I put some "snakeskin" around the hose like was recommended earlier. I MAY get another hose and re-do the reroute if it annoys me, but it really doesn't look bad and I highly doubt there would be any issues at all from their slight rubbing. What would you guys do?
note that the cardboard tube is not being used as a charge pipe, it's just for mockup
Next is to pick up some 2.5" pipe, get my BOV flange welded onto it, drill and tap the IC for the IAT sensor.
Reply
0
0


