Gross.


 07-29-2015, 10:25 AM
#725
Catching up...
Well... i made it.
Depowered the MSM rack and added Miataroadster Delrin Bushings. Because i'm an NVH Hero.
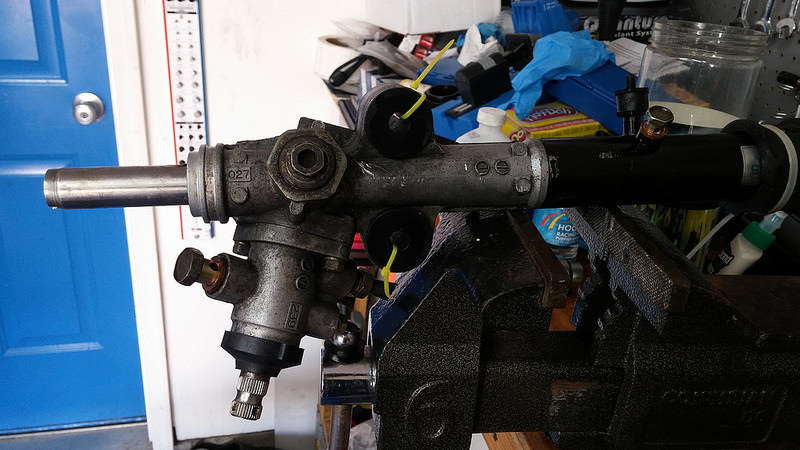 Depowering MSM steering rack and Miataroadster delrin bushings by concealer404, on Flickr
New PPF hardware, axle, wipers, and a silly amp interface thing i didn't get around to installing.
 20150715_184419 by concealer404, on Flickr
New-to-me spindles. Came off an 03 so i don't have to do silly modifications to the shields to fit over sport brakes. Bonus!
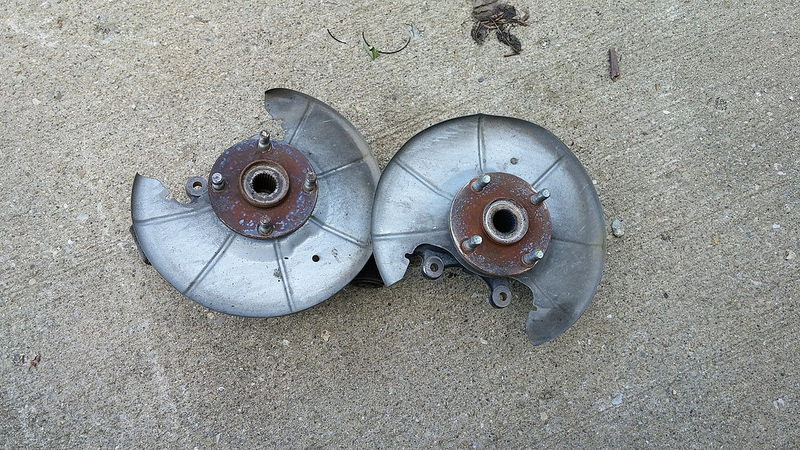 20150716_105249 by concealer404, on Flickr
Mechanic Kitty approves. (Stray we feed.)
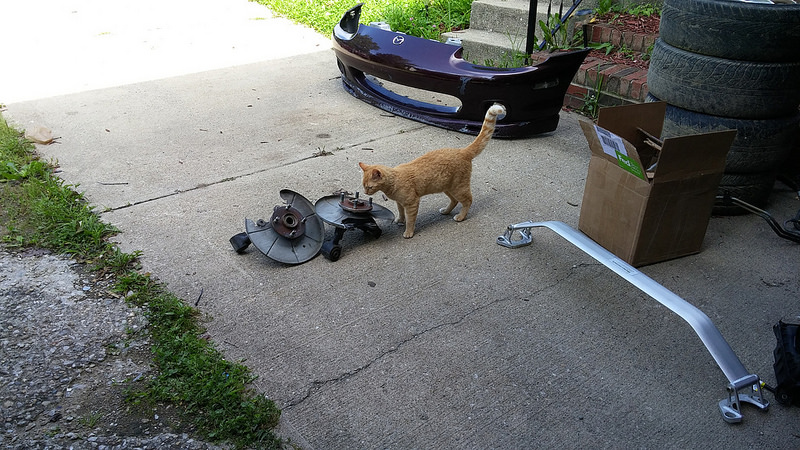 20150716_105424 by concealer404, on Flickr
You're not being helpful, cat.
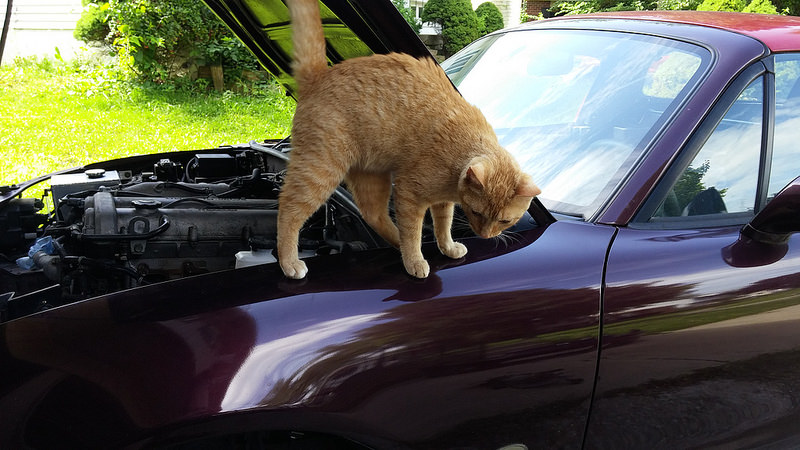 20150716_105621 by concealer404, on Flickr
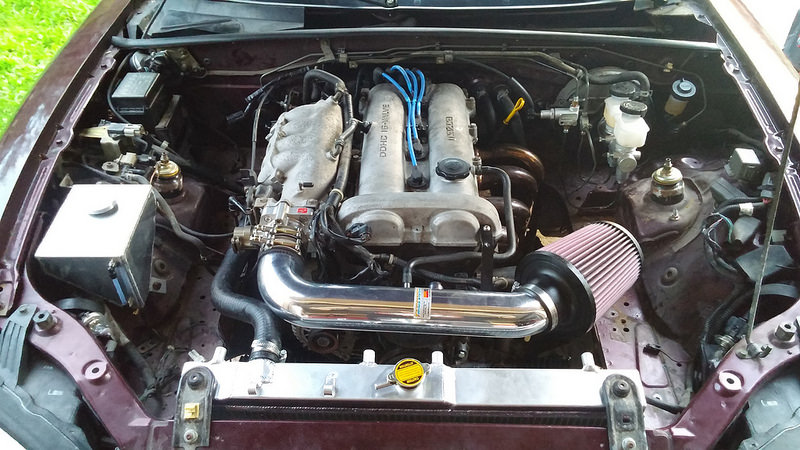
Step 1 of re-route, remove valve cover and be very pleasantly surprised by the state of the motor. Me gusta.
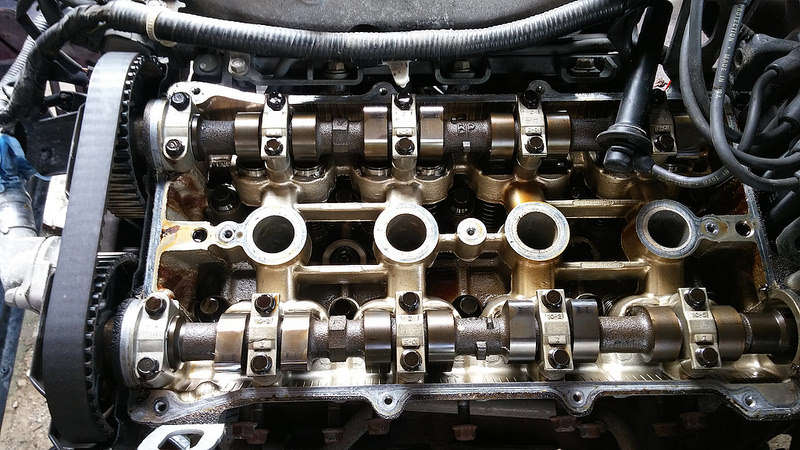 20150716_113543 by concealer404, on Flickr
Step 2: Remove THIS ******* thing.
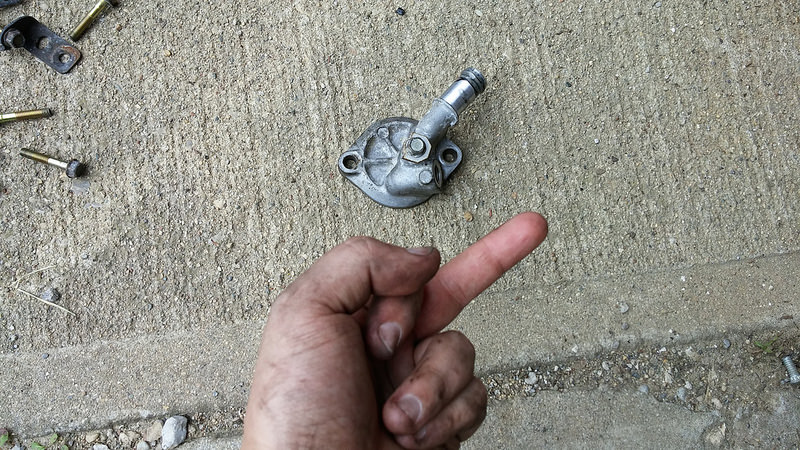 20150716_130033 by concealer404, on Flickr
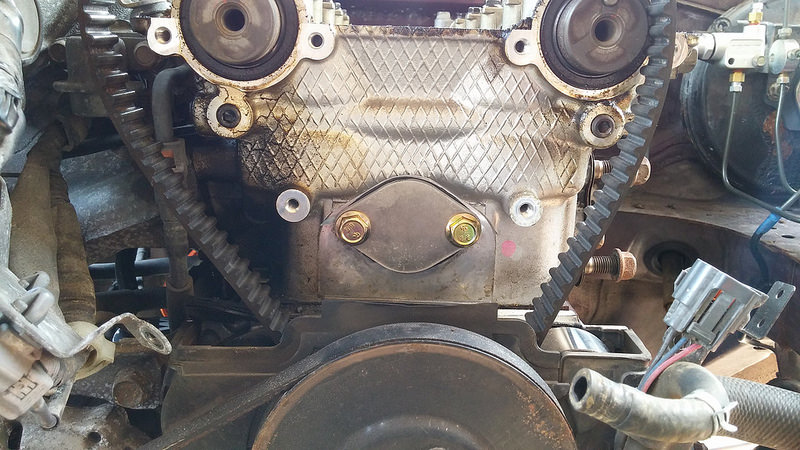
Step 3: Assemble this thing with a new Stant Superstat. I did 180F. I think that may have been a mistake. More on this later.
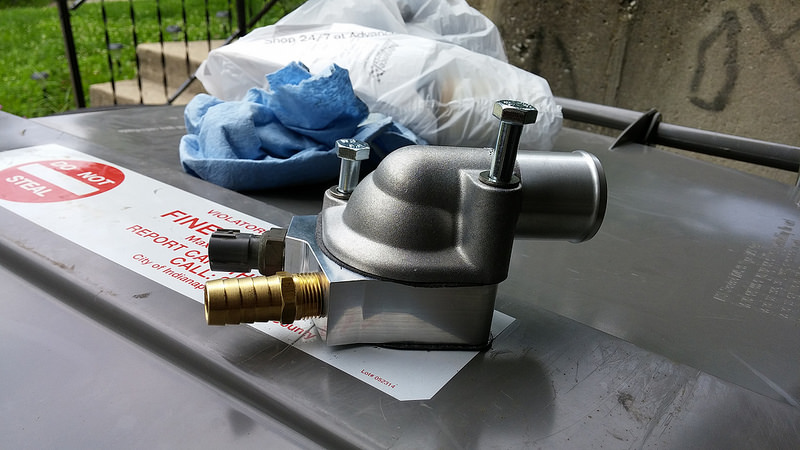 20150716_134758 by concealer404, on Flickr
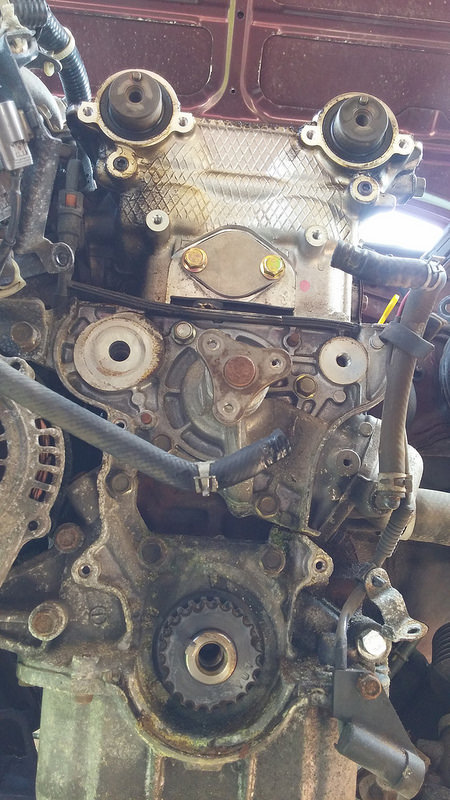
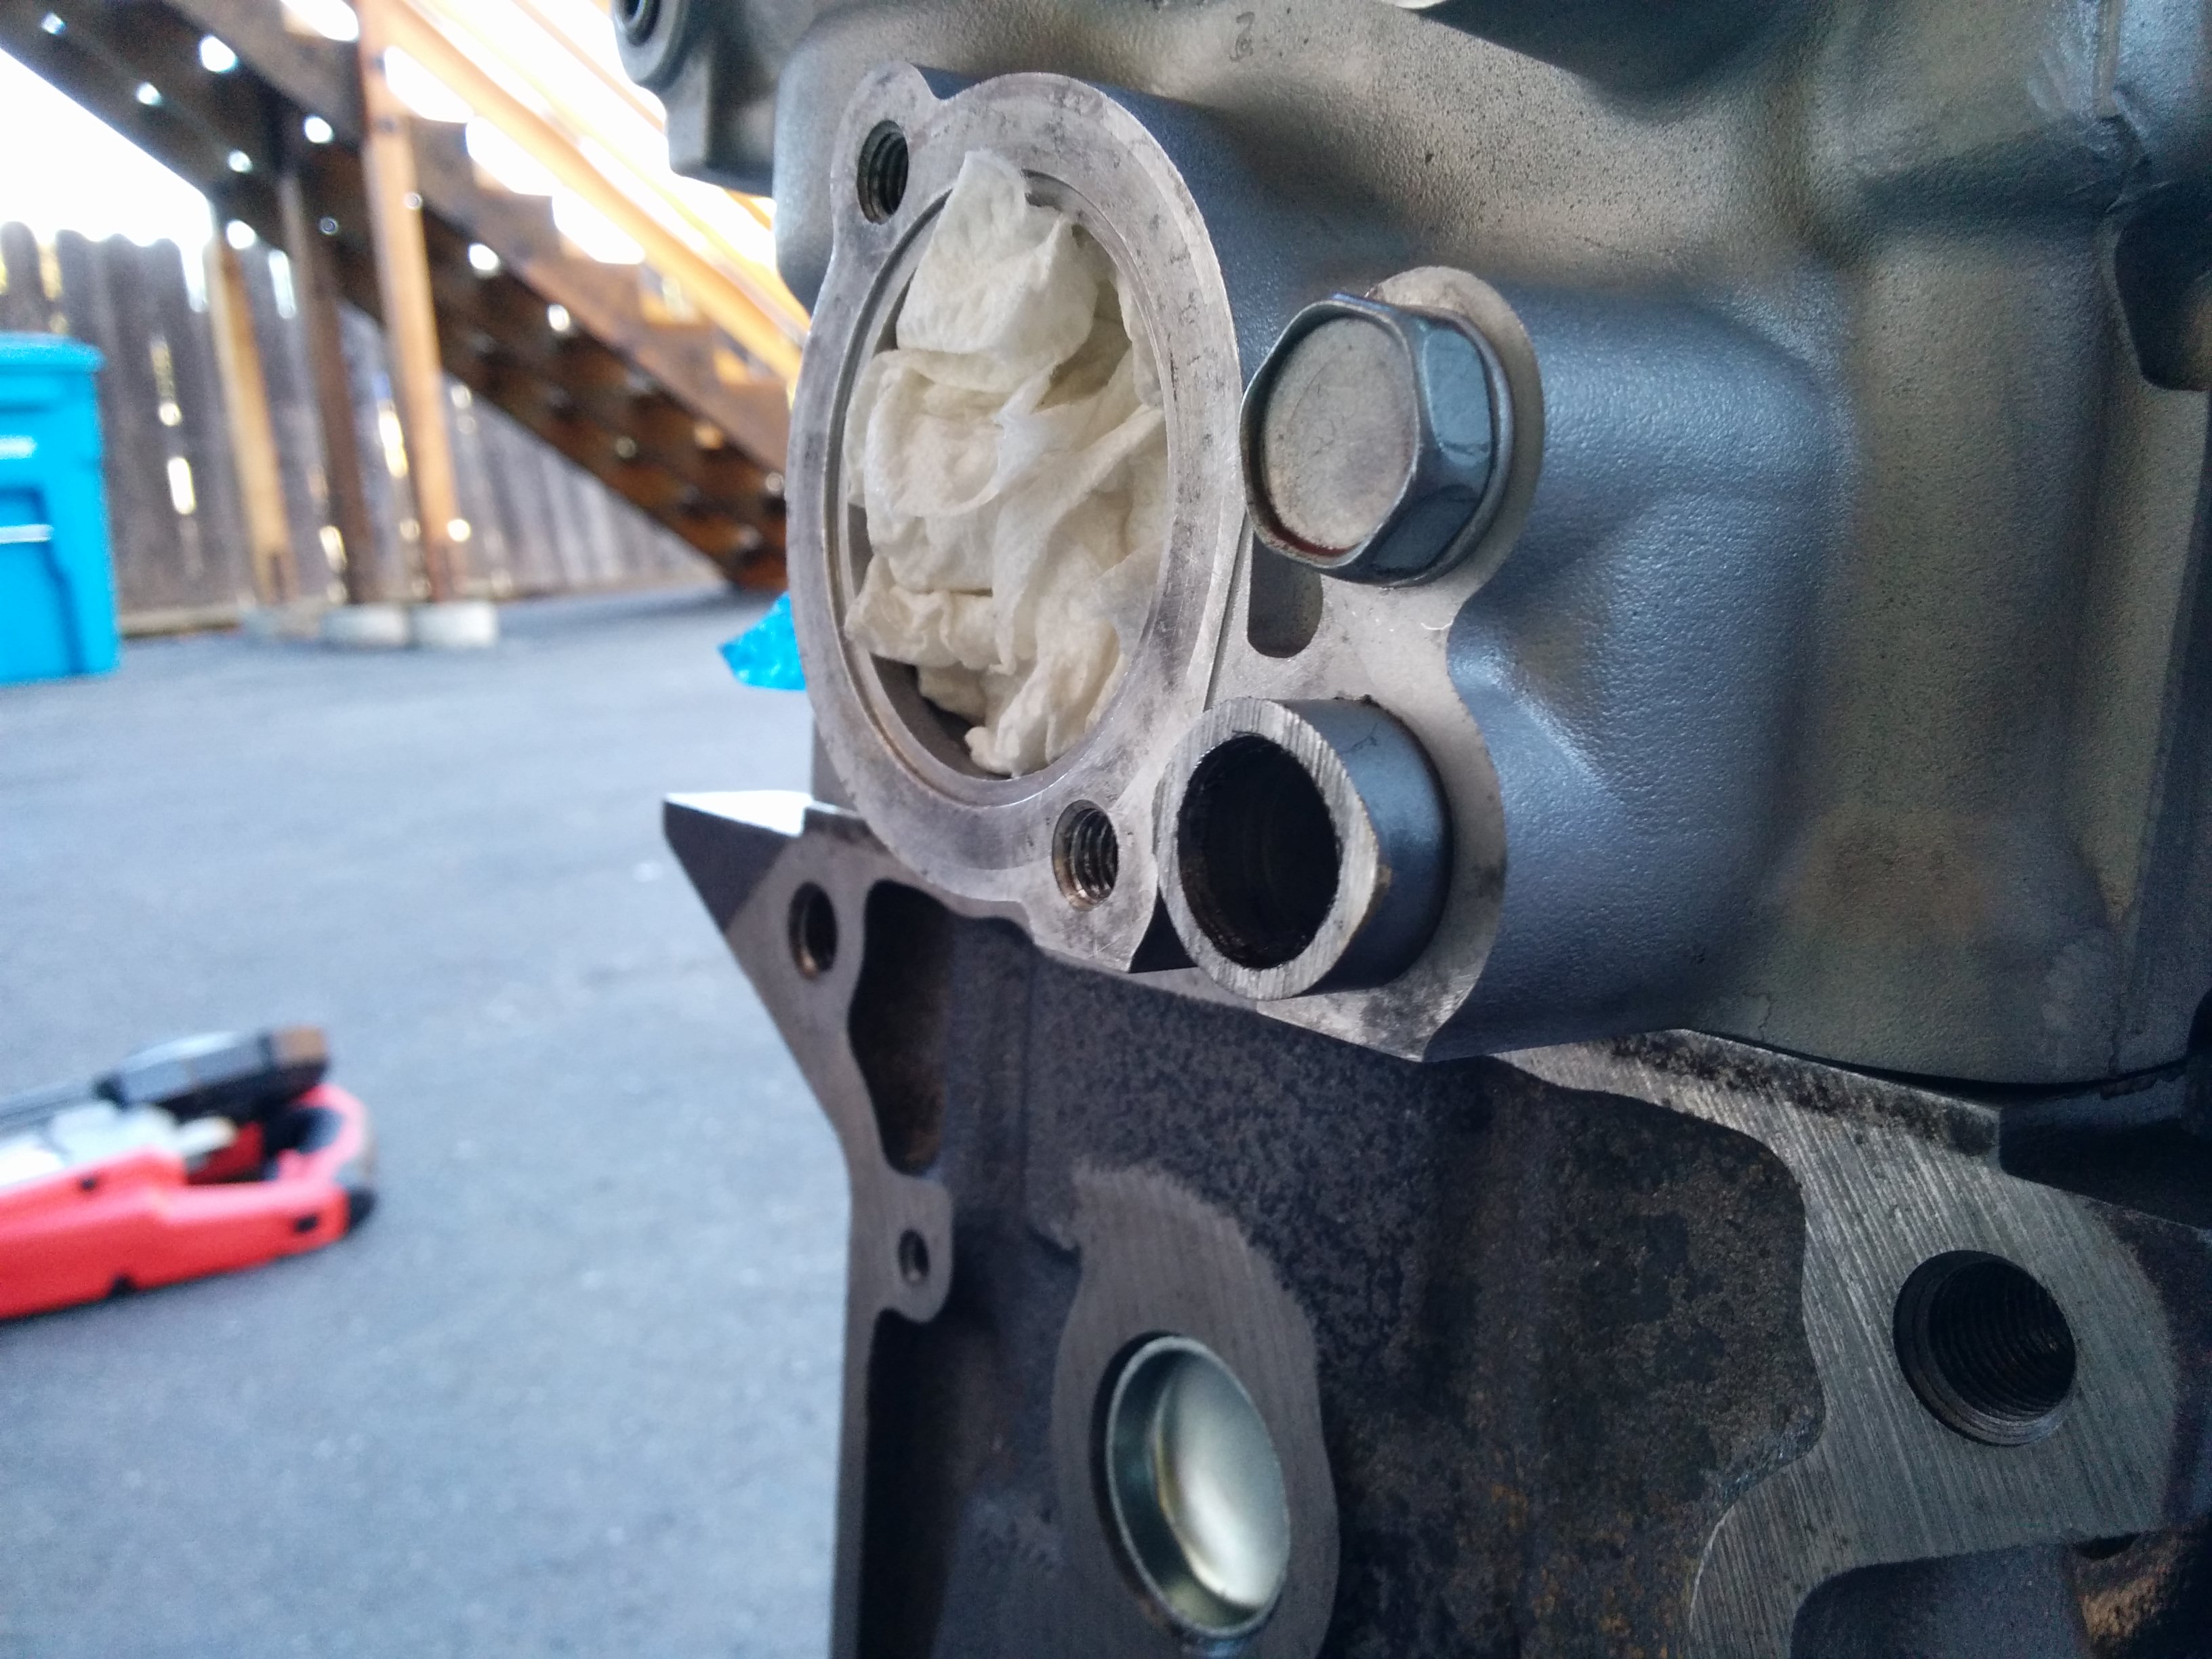
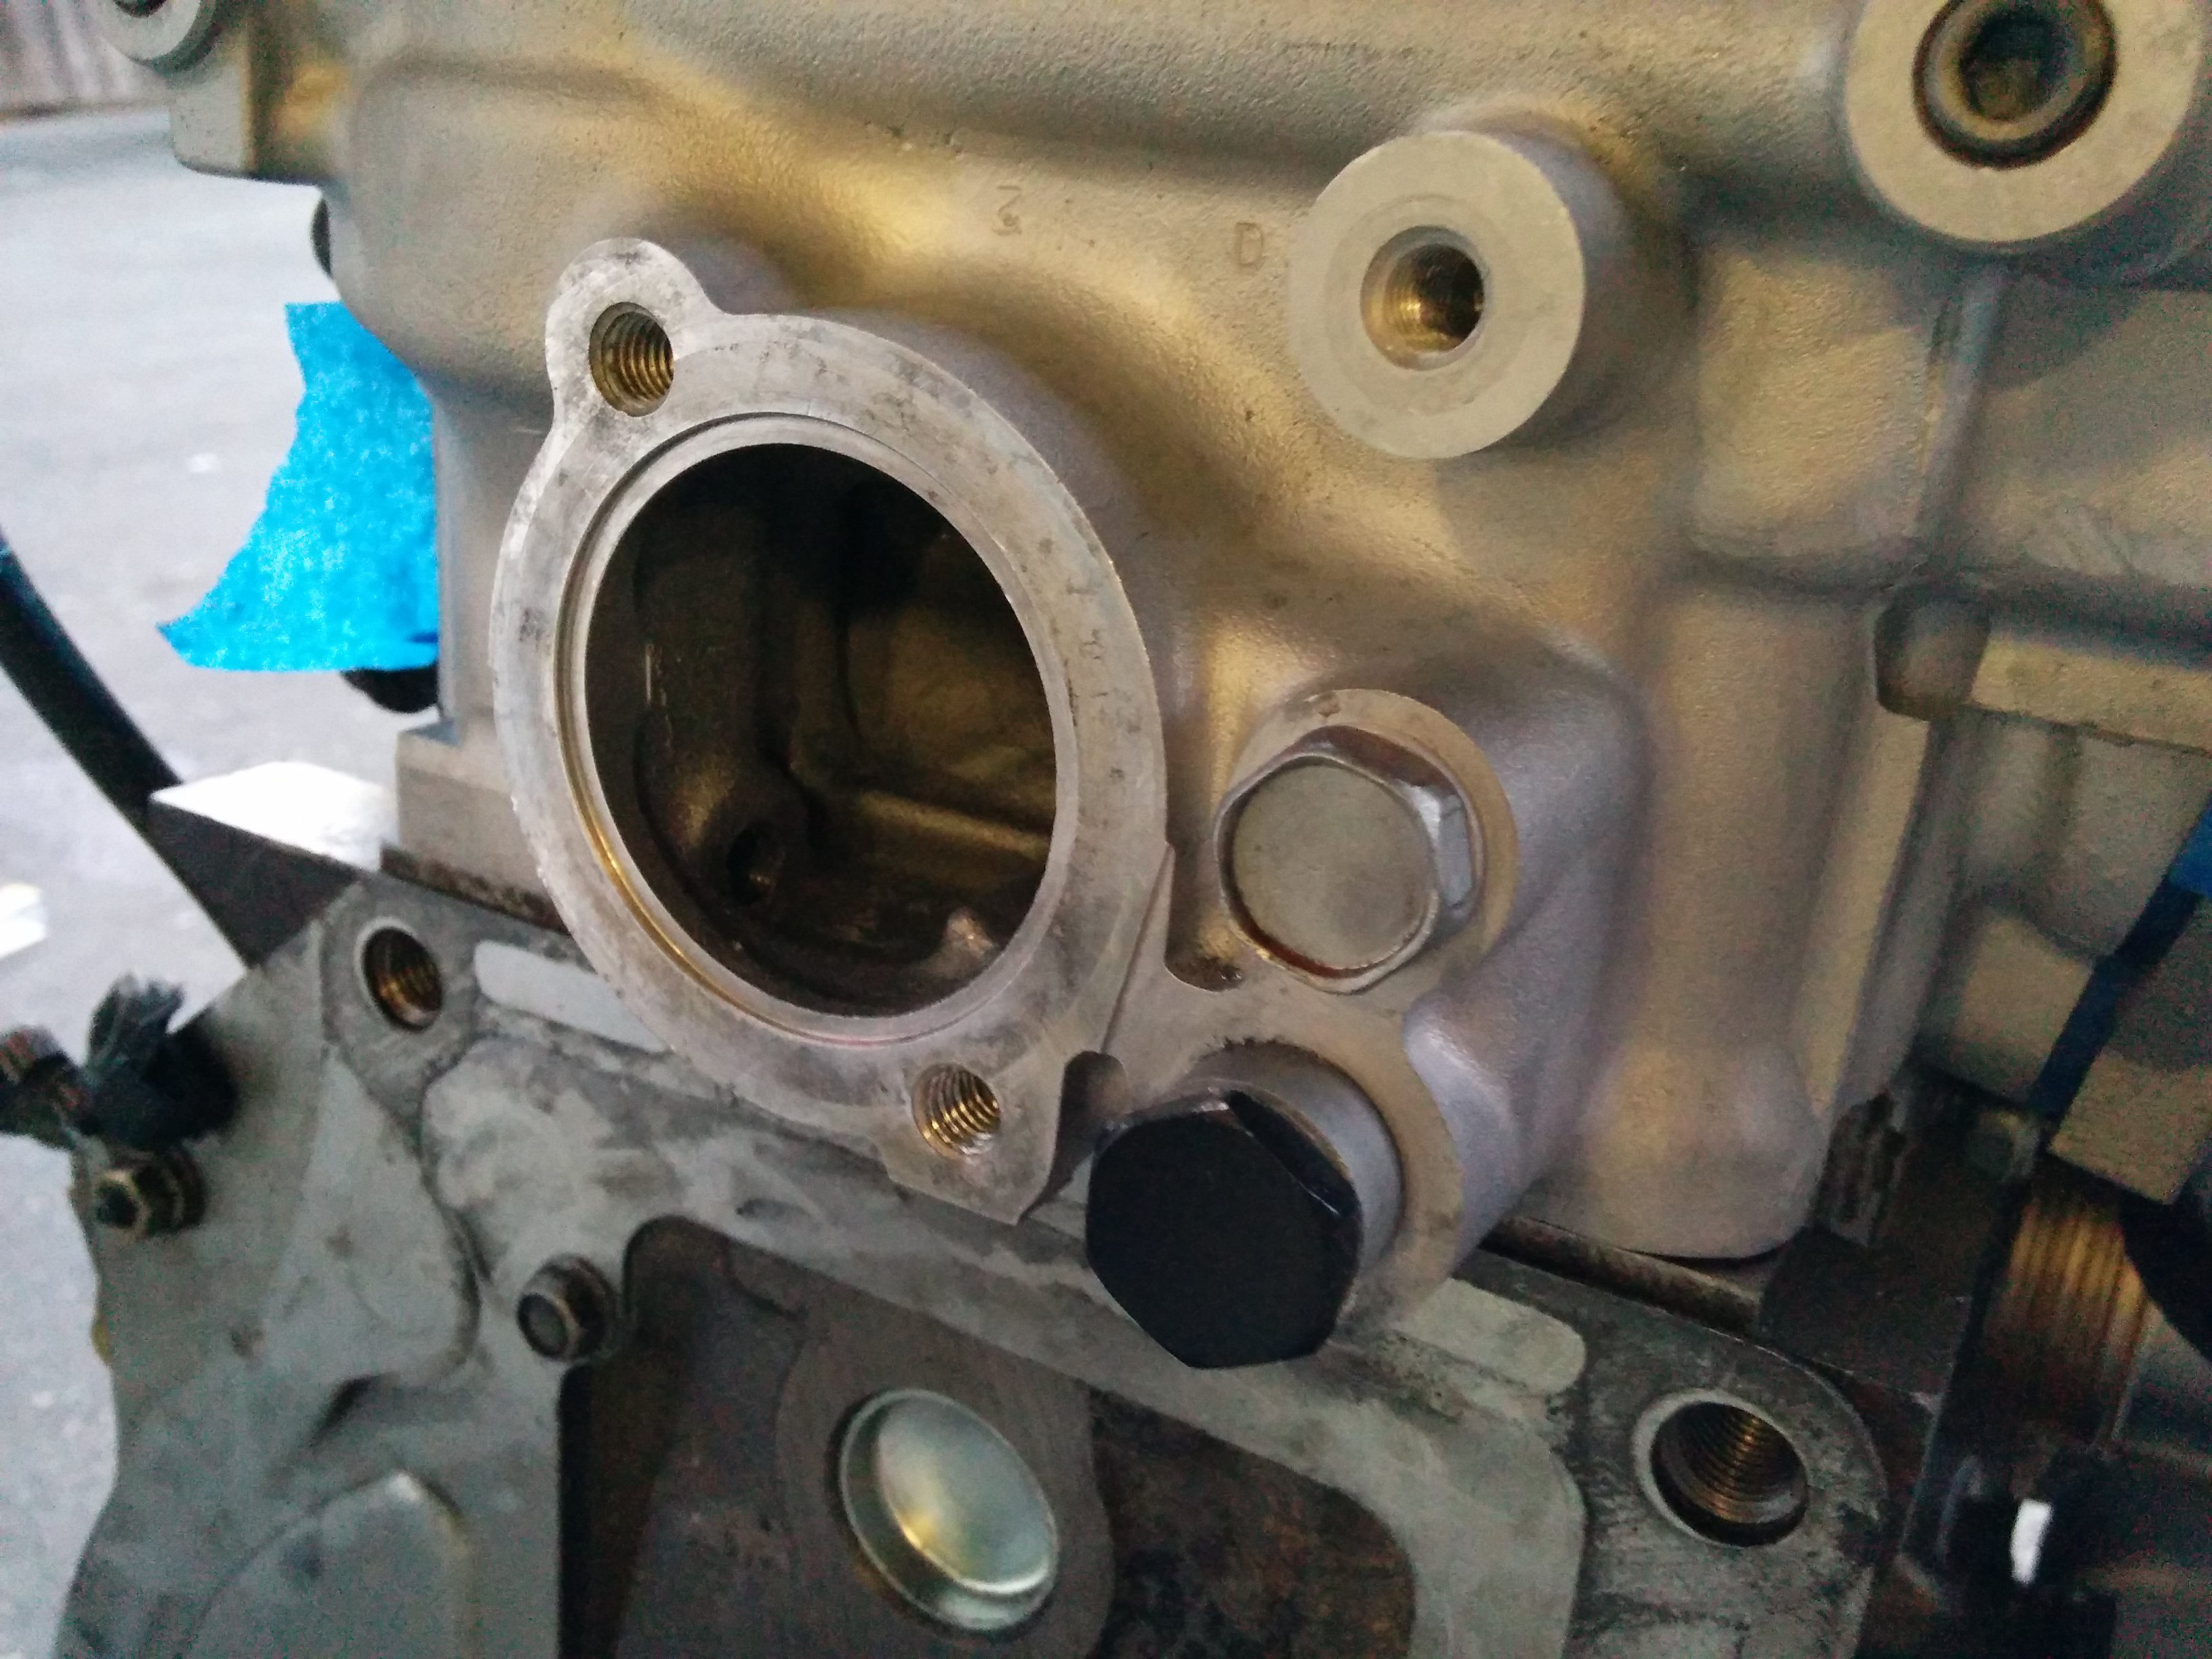
Step 4: Realize that most of the gasket had been left on this stupid face. Drown your rage in alcohol.
 20150716_151445 by concealer404, on Flickr
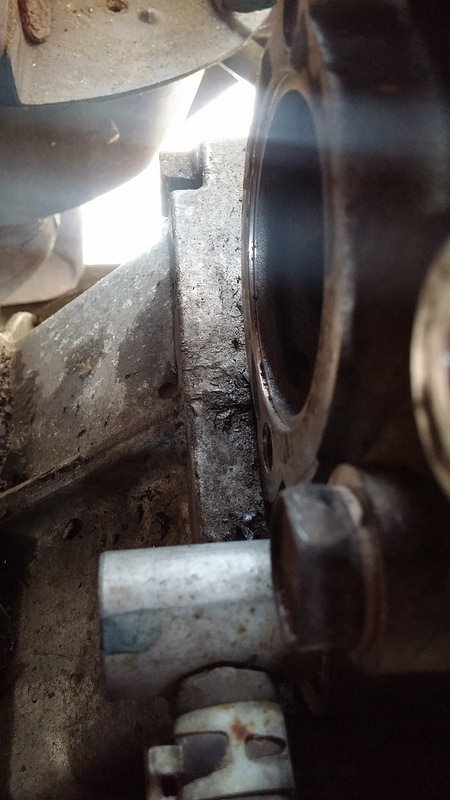
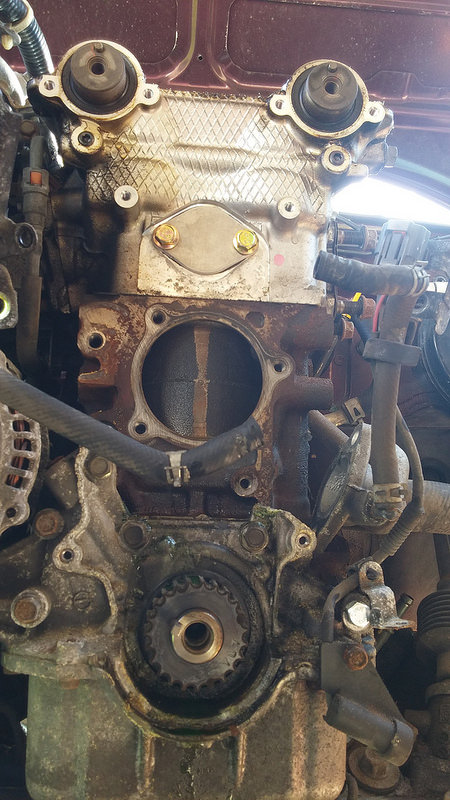
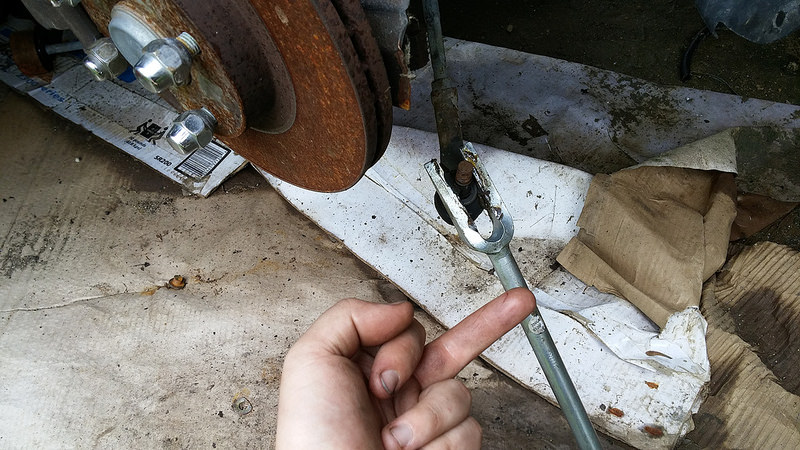
Step 5: Install, and realize that your spacer is a couple mm too thin and getting a hose past that line nipple thing on the head is ******* impossible. Rage enough to get the hose past enough, then install your clamp on there ****-eyed and hope you got it tight enough, realizing that this is not an acceptable solution for track work, so rage again that you paid money for this and gave away your old spacer.
Resulting question: How far can i shave down that nipple?
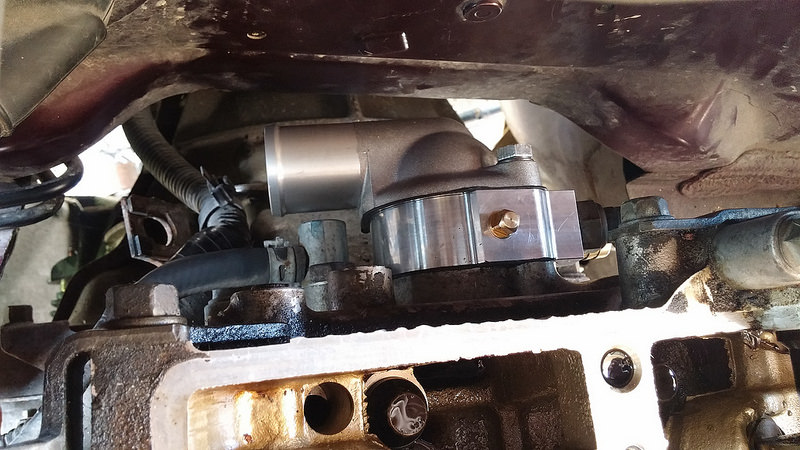 20150716_153051 by concealer404, on Flickr
Well... i made it.
Depowered the MSM rack and added Miataroadster Delrin Bushings. Because i'm an NVH Hero.
Depowering MSM steering rack and Miataroadster delrin bushings by concealer404, on FlickrNew PPF hardware, axle, wipers, and a silly amp interface thing i didn't get around to installing.
20150715_184419 by concealer404, on FlickrNew-to-me spindles. Came off an 03 so i don't have to do silly modifications to the shields to fit over sport brakes. Bonus!
20150716_105249 by concealer404, on FlickrMechanic Kitty approves. (Stray we feed.)
20150716_105424 by concealer404, on FlickrYou're not being helpful, cat.
20150716_105621 by concealer404, on FlickrStep 1 of re-route, remove valve cover and be very pleasantly surprised by the state of the motor. Me gusta.
20150716_113543 by concealer404, on FlickrStep 2: Remove THIS ******* thing.
20150716_130033 by concealer404, on FlickrStep 3: Assemble this thing with a new Stant Superstat. I did 180F. I think that may have been a mistake. More on this later.
20150716_134758 by concealer404, on FlickrStep 4: Realize that most of the gasket had been left on this stupid face. Drown your rage in alcohol.
20150716_151445 by concealer404, on FlickrStep 5: Install, and realize that your spacer is a couple mm too thin and getting a hose past that line nipple thing on the head is ******* impossible. Rage enough to get the hose past enough, then install your clamp on there ****-eyed and hope you got it tight enough, realizing that this is not an acceptable solution for track work, so rage again that you paid money for this and gave away your old spacer.
Resulting question: How far can i shave down that nipple?
20150716_153051 by concealer404, on Flickr

Reply
 0
0

0
07-29-2015, 10:26 AM
#726
Took a break from annoying things to remove EGR. This was much easy.
 20150716_154736 by concealer404, on Flickr
Back to the re-route. Realize that to remove the water neck, you have to pretty much do a timing belt job that i was trying to avoid, anyways. Rage some more.
 20150716_161452 by concealer404, on Flickr
Remove that **** and pound a plug in.
 20150716_162228 by concealer404, on Flickr
Cover your ****.
 20150716_162524 by concealer404, on Flickr
Realize your water pump is leaking. Rage more.
 20150716_165307 by concealer404, on Flickr
Remove it and throw that crap in the trash.
 20150716_180203 by concealer404, on Flickr
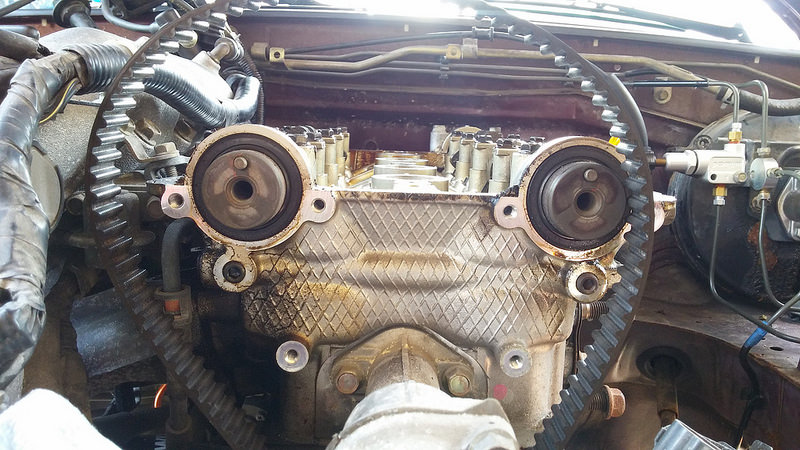
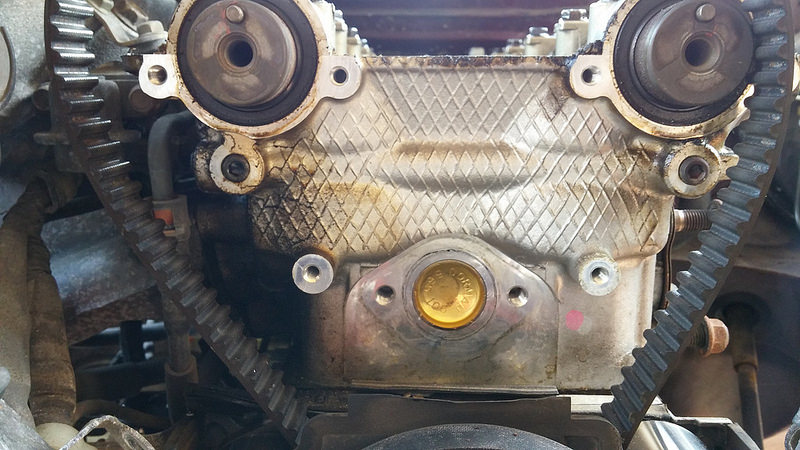
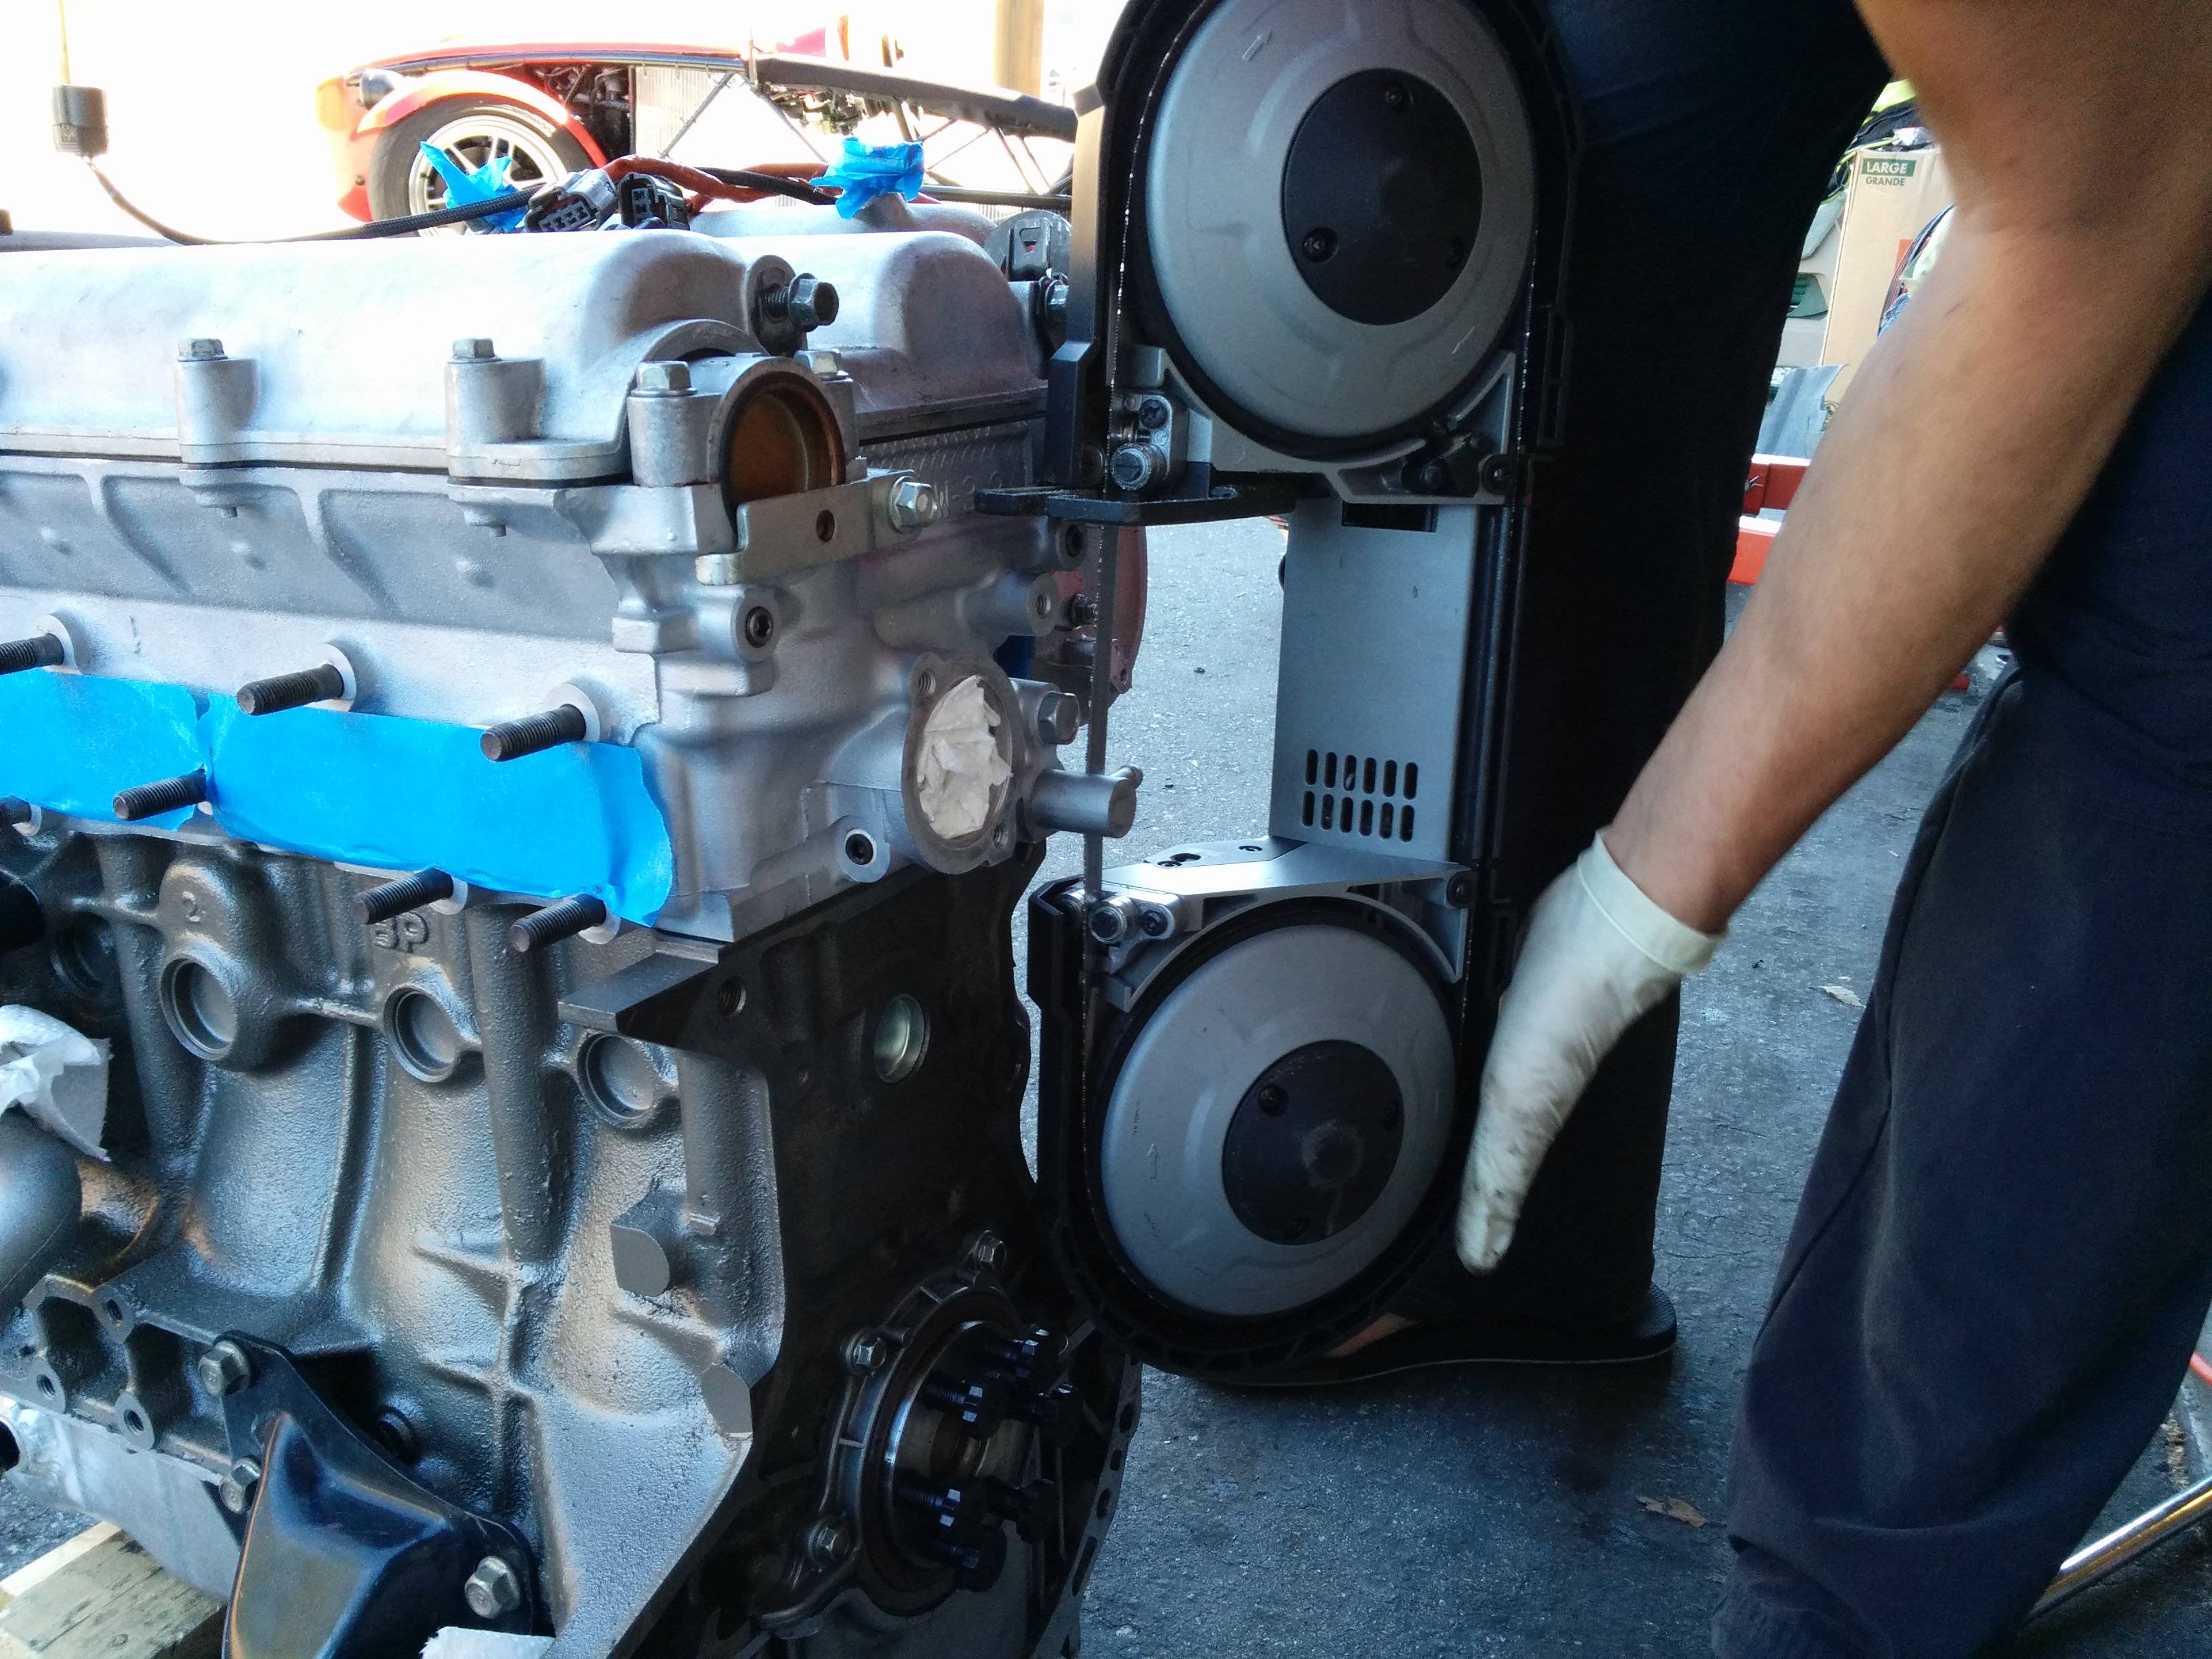
Get angry and bang out the water pump and timing belt in 15 minutes.
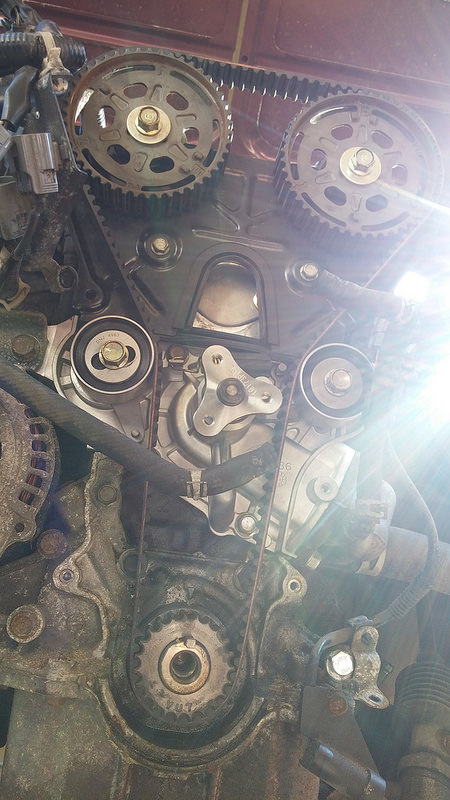 20150716_185647 by concealer404, on Flickr
Make your top hats fit. Later realize that you put the longer ones up front like a moron.
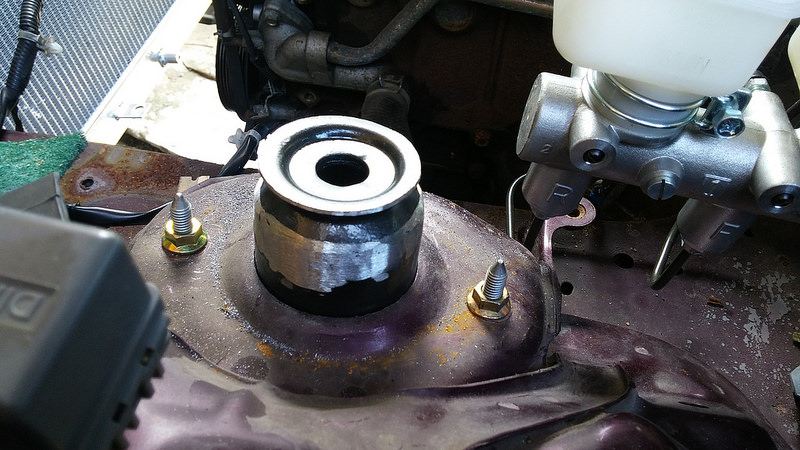 20150717_112749 by concealer404, on Flickr
This **** is broken, so do something about it.
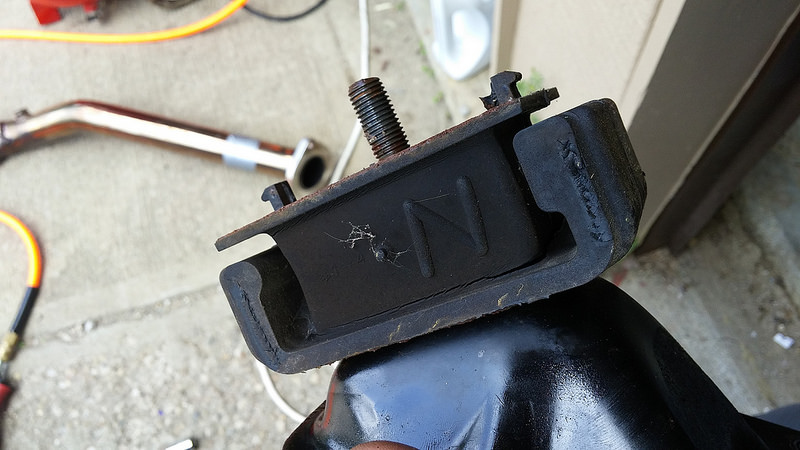 20150717_124722 by concealer404, on Flickr
Did something about it.
 20150717_130246 by concealer404, on Flickr
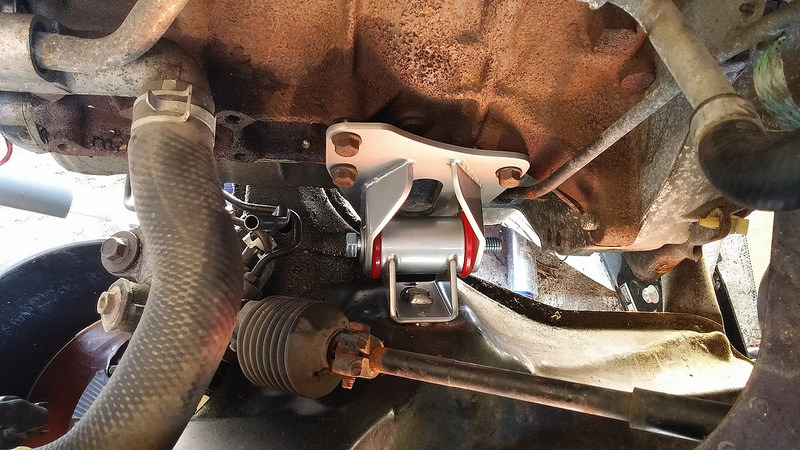
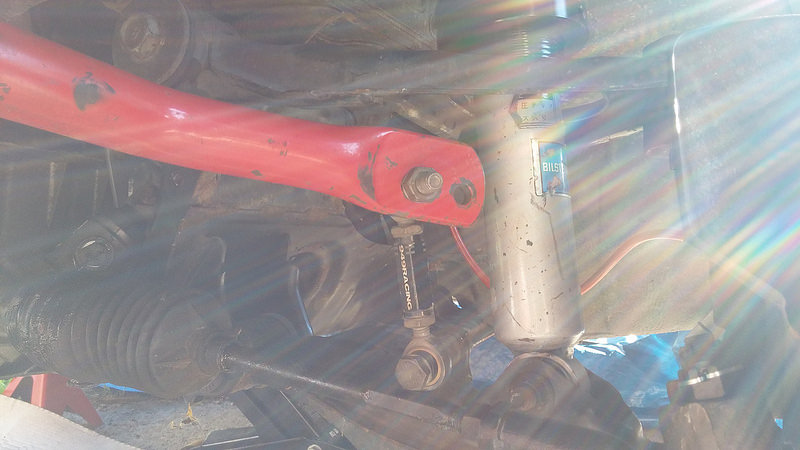
Marvel at how legit your suspension looks.
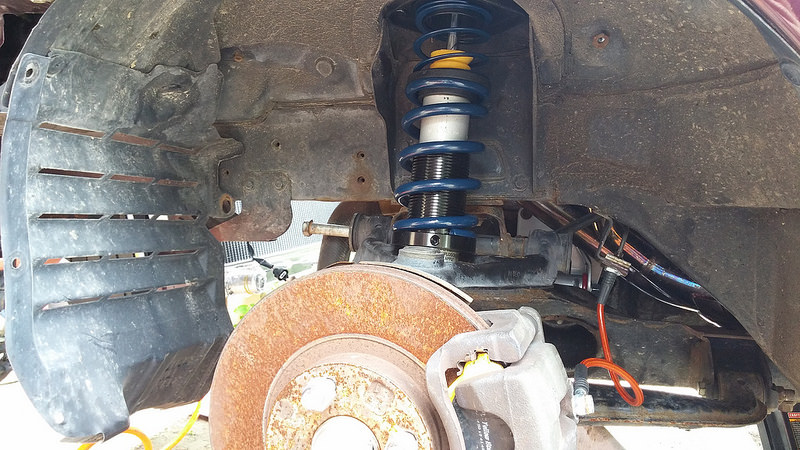 20150717_145803 by concealer404, on Flickr
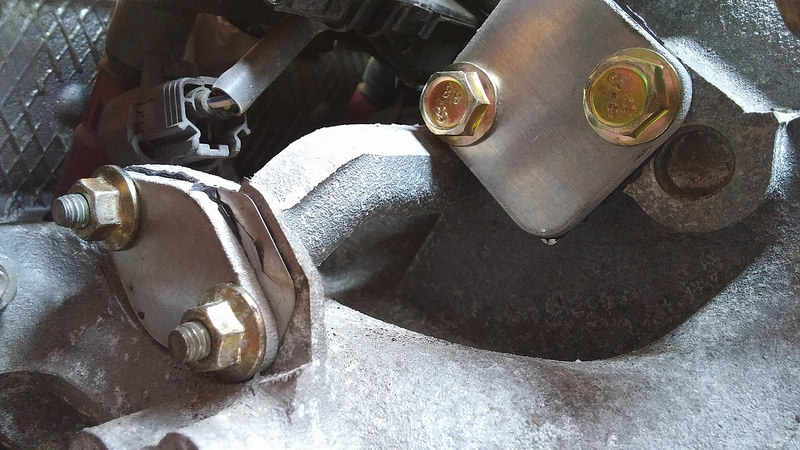
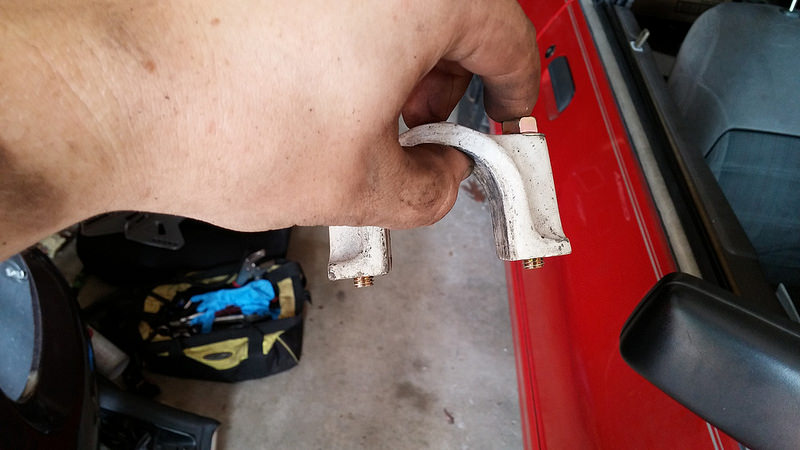
Install your new/old PPF hardware and rejoice that it's not jank.
 20150718_115922 by concealer404, on Flickr
20150716_154736 by concealer404, on FlickrBack to the re-route. Realize that to remove the water neck, you have to pretty much do a timing belt job that i was trying to avoid, anyways. Rage some more.
20150716_161452 by concealer404, on FlickrRemove that **** and pound a plug in.
20150716_162228 by concealer404, on FlickrCover your ****.
20150716_162524 by concealer404, on FlickrRealize your water pump is leaking. Rage more.
20150716_165307 by concealer404, on FlickrRemove it and throw that crap in the trash.
20150716_180203 by concealer404, on FlickrGet angry and bang out the water pump and timing belt in 15 minutes.
20150716_185647 by concealer404, on FlickrMake your top hats fit. Later realize that you put the longer ones up front like a moron.
20150717_112749 by concealer404, on FlickrThis **** is broken, so do something about it.
20150717_124722 by concealer404, on FlickrDid something about it.
20150717_130246 by concealer404, on FlickrMarvel at how legit your suspension looks.
20150717_145803 by concealer404, on FlickrInstall your new/old PPF hardware and rejoice that it's not jank.
20150718_115922 by concealer404, on Flickr
Reply
0
0
07-29-2015, 10:27 AM
#727
Do a magic trick without snap ring pliers, instead choosing to jam a pick into your thumb.
Abra...
 20150718_121515 by concealer404, on Flickr
CADABRA
 20150718_122128 by concealer404, on Flickr
Some idiot put 100w bulbs in this at some point. Too lazy to replace right now, so i just closed up the prongs a little and lights work again.
 20150719_113339 by concealer404, on Flickr
After spending a couple hours trying to get the tie rods out the right way, give up and mess up your favorite pickle fork with a sledgehammer.
 20150719_115157 by concealer404, on Flickr
Repeat on the other side.
 20150719_115437 by concealer404, on Flickr
Exhaust doesn't fit bumper too well. Oh well, it'll self clearance by melting.
 20150719_160753 by concealer404, on Flickr
Racing Beat's own hardware for the front sway bar block/brace kit doesn't even fit their own ****, so that's cool.
 20150719_162500 by concealer404, on Flickr
Install 1.25" swaybar anyways, because YOLO if the subframe tears.
 20150719_184303 by concealer404, on Flickr
Race car ****.
 20150719_210522 by concealer404, on Flickr
Install seats and harnesses. Have a bad time.
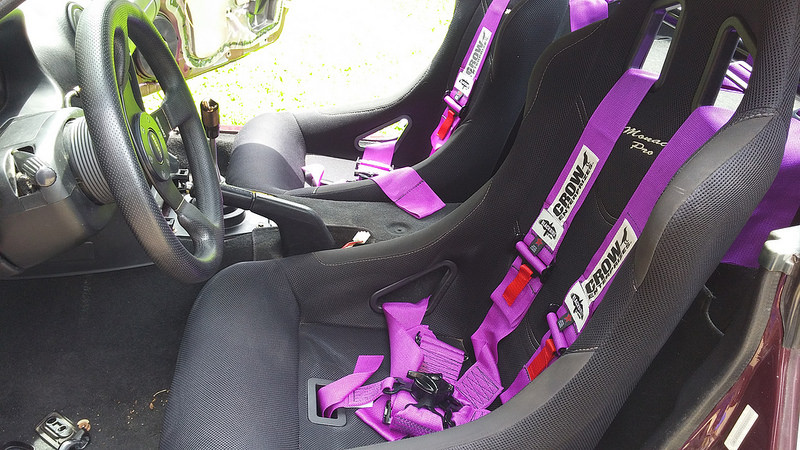 20150720_135903 by concealer404, on Flickr
Put it on the ground, consider drinking a beer, decide to attempt to get it out of the driveway first.
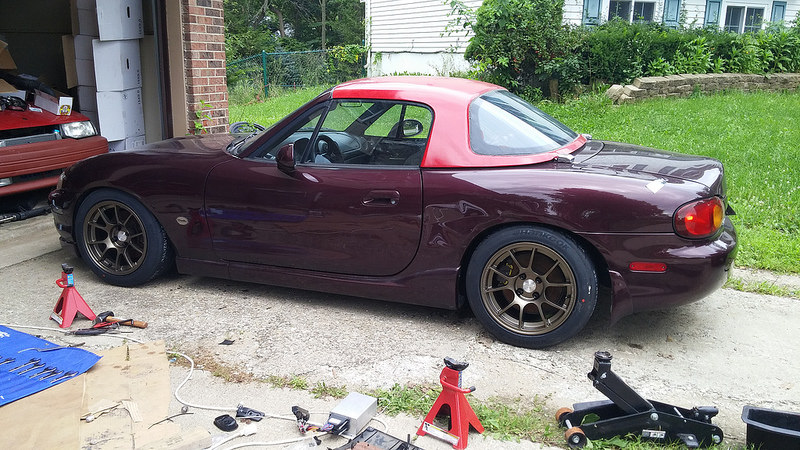 20150720_174529 by concealer404, on Flickr
Made it!
 20150720_175423 by concealer404, on Flickr
Abra...
20150718_121515 by concealer404, on FlickrCADABRA
20150718_122128 by concealer404, on FlickrSome idiot put 100w bulbs in this at some point. Too lazy to replace right now, so i just closed up the prongs a little and lights work again.
20150719_113339 by concealer404, on FlickrAfter spending a couple hours trying to get the tie rods out the right way, give up and mess up your favorite pickle fork with a sledgehammer.
20150719_115157 by concealer404, on FlickrRepeat on the other side.
20150719_115437 by concealer404, on FlickrExhaust doesn't fit bumper too well. Oh well, it'll self clearance by melting.
20150719_160753 by concealer404, on FlickrRacing Beat's own hardware for the front sway bar block/brace kit doesn't even fit their own ****, so that's cool.
20150719_162500 by concealer404, on FlickrInstall 1.25" swaybar anyways, because YOLO if the subframe tears.
20150719_184303 by concealer404, on FlickrRace car ****.
20150719_210522 by concealer404, on FlickrInstall seats and harnesses. Have a bad time.
20150720_135903 by concealer404, on FlickrPut it on the ground, consider drinking a beer, decide to attempt to get it out of the driveway first.
20150720_174529 by concealer404, on FlickrMade it!
20150720_175423 by concealer404, on Flickr
Reply
0
0
07-29-2015, 10:27 AM
#728
Baby's first sticker.
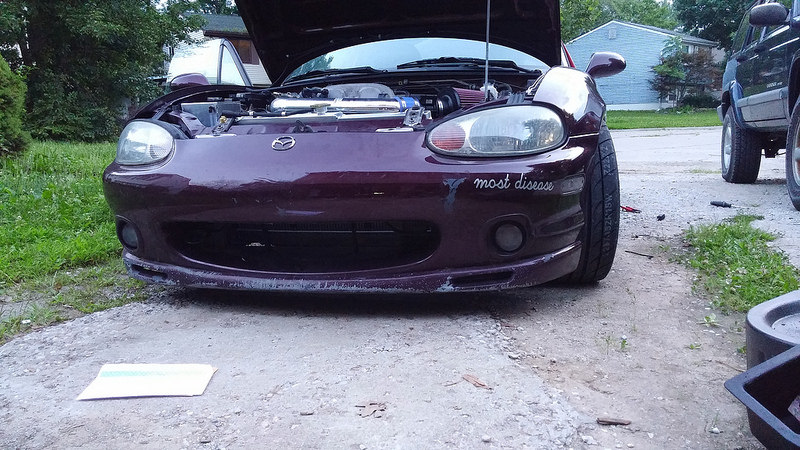 20150720_210939 by concealer404, on Flickr
Bezel with things. Doesn't fit. Needs improvements, but we'll get there.
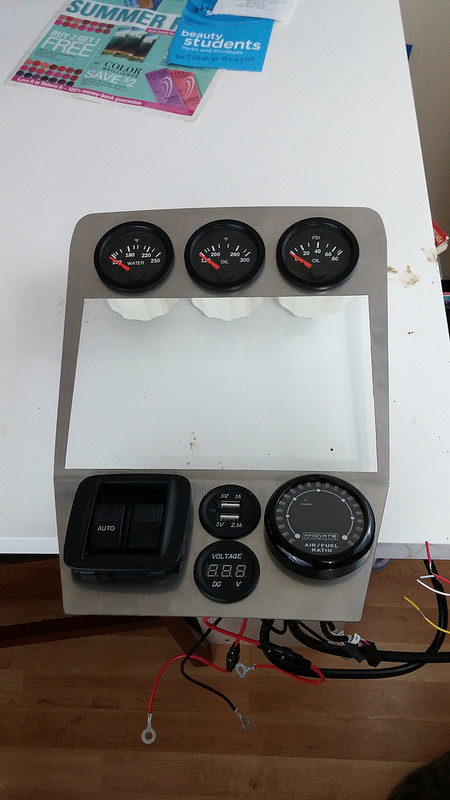 20150720_215036 by concealer404, on Flickr
Plastidip the top because the red is just too much to handle. Came out like crap, but it's not red.
 20150721_160414 by concealer404, on Flickr
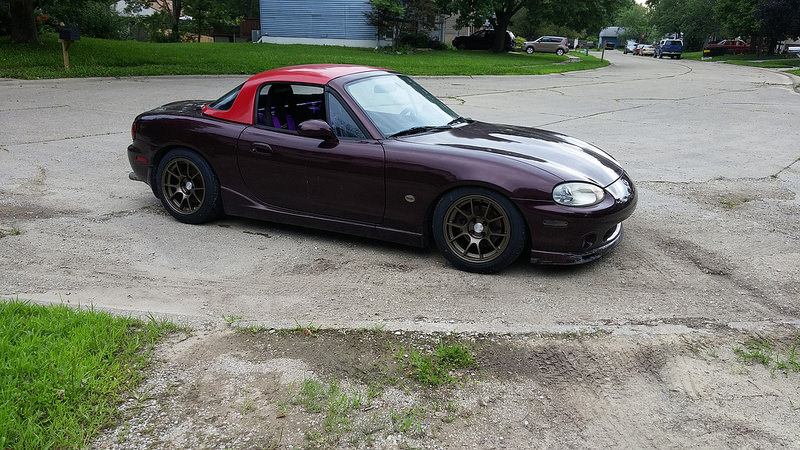
Drive on highway, hate life.
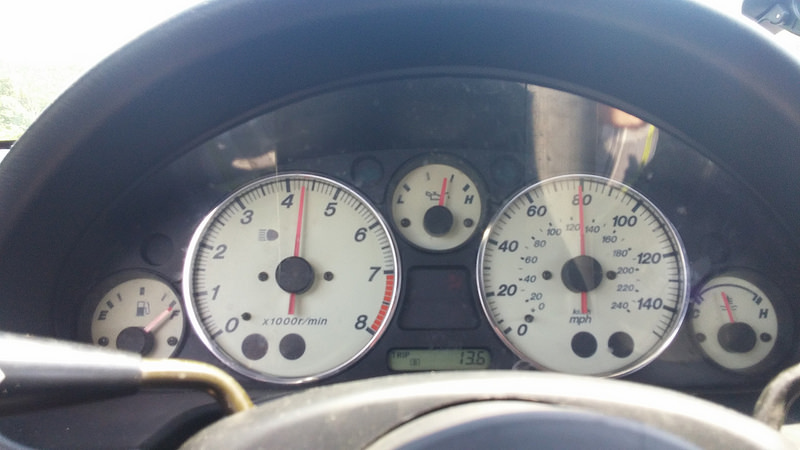 20150722_142902 by concealer404, on Flickr
20150720_210939 by concealer404, on FlickrBezel with things. Doesn't fit. Needs improvements, but we'll get there.
20150720_215036 by concealer404, on FlickrPlastidip the top because the red is just too much to handle. Came out like crap, but it's not red.
20150721_160414 by concealer404, on FlickrDrive on highway, hate life.
20150722_142902 by concealer404, on Flickr
Reply
0
0
07-29-2015, 10:29 AM
#729
At this point, Gchambers helped me out with an alignment, despite the car being a bad combination of too low with too much droop travel to get on his platforms. Saved my ***, as the alignment was REALLY bad up front. We lucked out on the rear being ok, so after driving a total of 40 miles on this thing since January, i figured it would be ok to drive down to MATG on Wednesday morning.
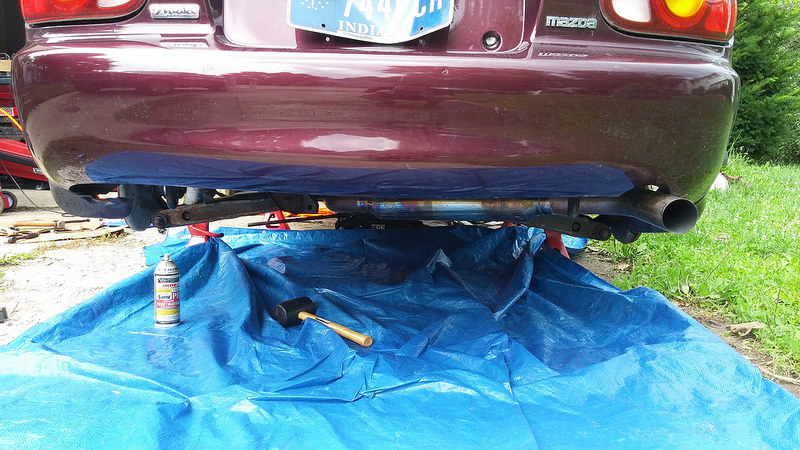
I got the brakes to work on the way there by dragging them at 80mph for about 10 miles until i saw smoke. Let them cool, and i had stopping power! Found out the next morning that i only had front brakes, as there was nothing but air in the rear lines because my wife apparently didn't have the leg strength to push past the front brakes with the monster master cylinder i have. Bled brakes in the rain on Thursday night, **** was cash. Proceeded to spit a bunch of the pad clips out over the weekend, so now my brakes rattle a lot, but they stop well.
Meeting people in Knoxvegas for pizza.
 20150722_200444 by concealer404, on Flickr
Rained on Thursday, so spent the day drinking at the cabin and taking pictures of my car in the rain from the porch.
 20150723_180559 by concealer404, on Flickr
Ran the Dragon Hillclimb route a couple times, pic at the top.
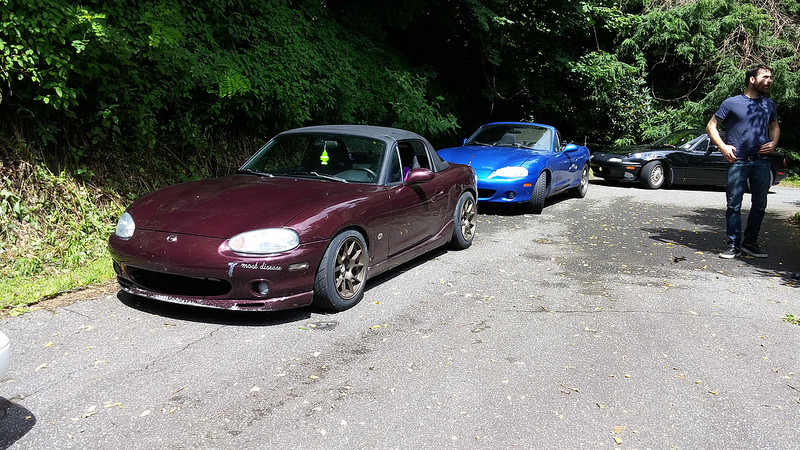 20150724_112444 by concealer404, on Flickr
View from the overlook.
 20150724_113441 by concealer404, on Flickr
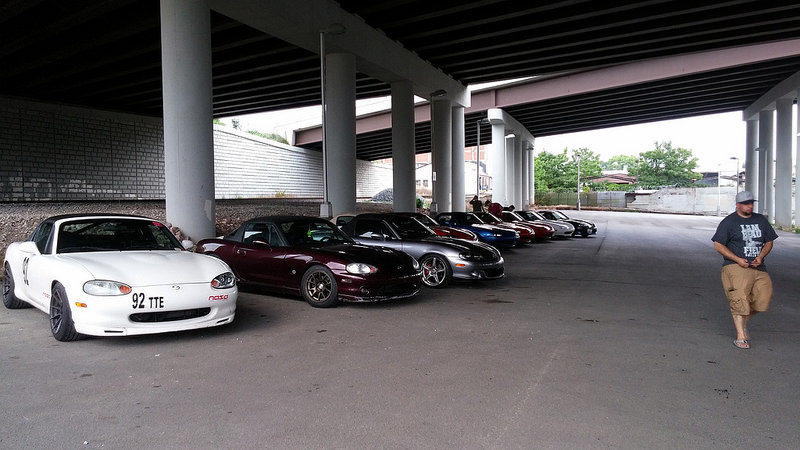
At Crossroads General store after the A&W run.
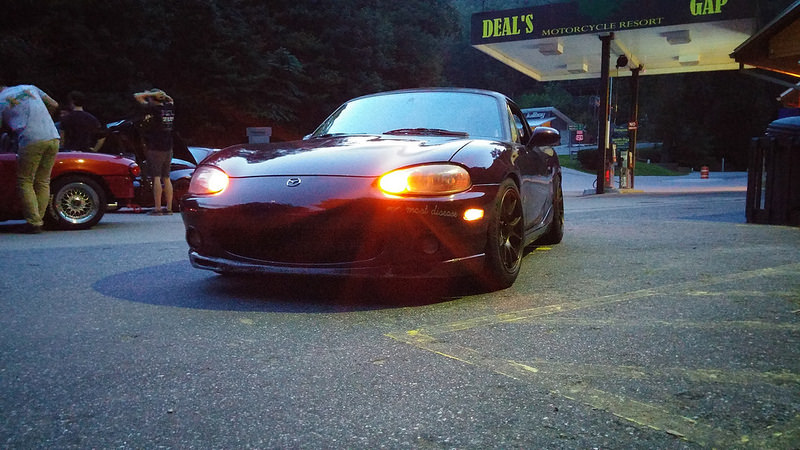 20150724_210741 by concealer404, on Flickr
Saw this cool Sentra parked with the Miatas.
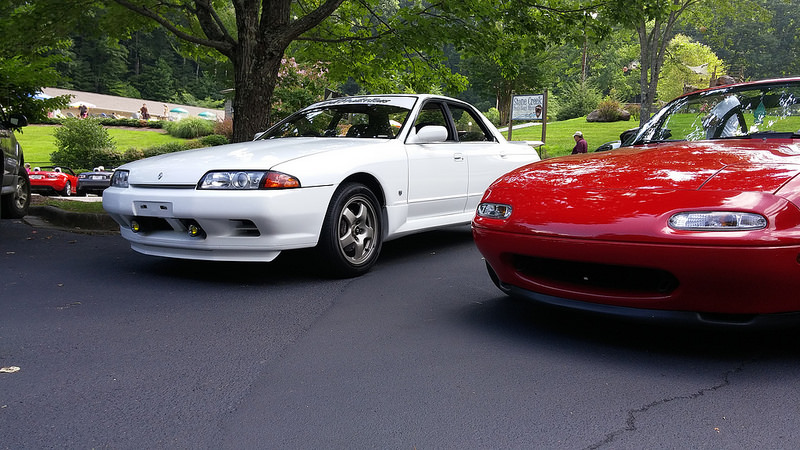 20150725_114413 by concealer404, on Flickr
Met a dude with a Raptor Jesus tattoo.
 20150726_012434 by concealer404, on Flickr
Then drove home.
The car is fast, reliable, loud, hot, uncomfortable, and doesn't give a **** about anything. It's exactly what i wanted.
Had vteckiller2000 drive past us a couple times on the hillclimb route just to see how loud it was outside the car.
I got the brakes to work on the way there by dragging them at 80mph for about 10 miles until i saw smoke. Let them cool, and i had stopping power! Found out the next morning that i only had front brakes, as there was nothing but air in the rear lines because my wife apparently didn't have the leg strength to push past the front brakes with the monster master cylinder i have. Bled brakes in the rain on Thursday night, **** was cash. Proceeded to spit a bunch of the pad clips out over the weekend, so now my brakes rattle a lot, but they stop well.
Meeting people in Knoxvegas for pizza.
20150722_200444 by concealer404, on FlickrRained on Thursday, so spent the day drinking at the cabin and taking pictures of my car in the rain from the porch.
20150723_180559 by concealer404, on FlickrRan the Dragon Hillclimb route a couple times, pic at the top.
20150724_112444 by concealer404, on FlickrView from the overlook.
20150724_113441 by concealer404, on FlickrAt Crossroads General store after the A&W run.
20150724_210741 by concealer404, on FlickrSaw this cool Sentra parked with the Miatas.
20150725_114413 by concealer404, on FlickrMet a dude with a Raptor Jesus tattoo.
20150726_012434 by concealer404, on FlickrThen drove home.
The car is fast, reliable, loud, hot, uncomfortable, and doesn't give a **** about anything. It's exactly what i wanted.
Had vteckiller2000 drive past us a couple times on the hillclimb route just to see how loud it was outside the car.
Reply
0
0
07-29-2015, 11:21 AM
#736
Elite Member
iTrader: (37)

Join Date: Apr 2010
Location: Very NorCal
Posts: 10,441
Total Cats: 1,899
Yeah, good ******* luck with that.
3/8NPT will fit, but you are going to have to drill baby drill. You'll have to ask Gesso what size drill be he ended up purchasing.
It runs from the back of the head > oil warmer > throttle body > front water neck. I eliminated all these things, because what does Mazda know about engine design?!
3/8NPT will fit, but you are going to have to drill baby drill. You'll have to ask Gesso what size drill be he ended up purchasing.
It runs from the back of the head > oil warmer > throttle body > front water neck. I eliminated all these things, because what does Mazda know about engine design?!
Reply
0
0
07-29-2015, 11:21 AM
#737
SadFab CEO

iTrader: (3)
Join Date: Sep 2012
Location: your mom's house phoenix, AZ
Posts: 4,560
Total Cats: 1,142
To answer your other question, you might be able to grind 20, maybe 30 thou off the end of that nipple before you get into trouble  . So basically not at all.
3/8" NPT bit is 9/16". You can just look these things up...
http://www.engineershandbook.com/Tables/npttap.htm
. So basically not at all.3/8" NPT bit is 9/16". You can just look these things up...
http://www.engineershandbook.com/Tables/npttap.htm
Reply
0
0
07-29-2015, 11:24 AM
#739
Elite Member
iTrader: (37)
Join Date: Apr 2010
Location: Very NorCal
Posts: 10,441
Total Cats: 1,899
Well yes, obviously 
Yes, do this. Buying used worked well for me, and I have a thread documenting all the parts and sources for the install. Be sure to ditch the supplied mid steel coil spring that comes with the kit and buy the SS one I listed in the M-Tuned service parts thread.
Yes, do this. Buying used worked well for me, and I have a thread documenting all the parts and sources for the install. Be sure to ditch the supplied mid steel coil spring that comes with the kit and buy the SS one I listed in the M-Tuned service parts thread.
Reply
0
0


