Ace's Dual Duty LS1 Build
 07-17-2016, 10:01 PM
#1
Senior Member
Thread Starter
iTrader: (1)

Join Date: Dec 2010
Location: Farmington Hills, MI
Posts: 1,218
Total Cats: 175
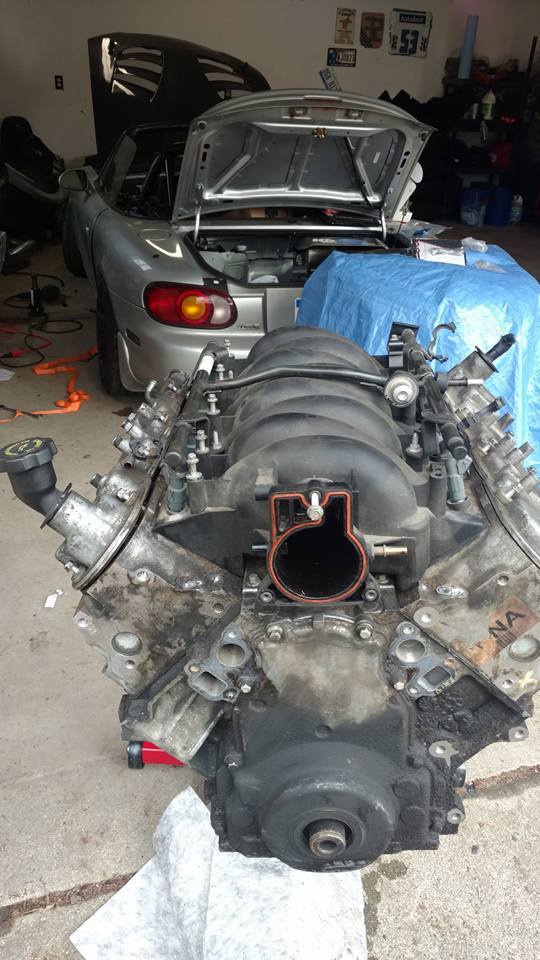
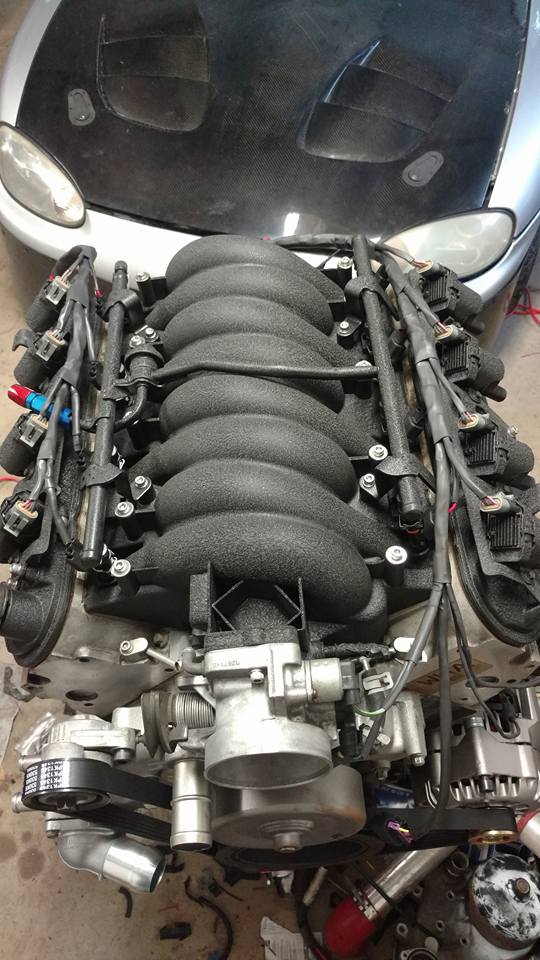
I've abandoned my previous turbo build thread. All of it's content is obsolete now and would just derail from the main point of this build thread, my LS1 swap. Engine and trans is a full dropout from a 1999 or 2000 Camaro, so LS1 and T56. My extremely hopeful timeline is to tear the car down in mid August, then have my first drive before the big snow comes. This test drive may not have a full exhaust, hood/bumper on, all accessories working, etc, but I just want to prove the swap out so I can spend the winter making it nice and tidy. To make this possible, I'm doing as much as I can now, while driving the Miata through the summer. So the engine wiring harness will be complete before I touch the car, I have a rear sub-frame that I can modify for the diff, and I'll try to do as much preparation as possible. I already have a buyer for my engine and trans, and I'm sure the torsen and Megasquirt won't be hard to sell. This will be a daily driver through the summer months, but will also be a track day car. At first the engine will be a pretty stock LS1, only upgrade is an LS6 intake and PCV system. It has the older 853 heads. I will drive the car for a year with the stock-ish engine, and then plan something more intense. I'm not sure if I'll just do a cam, valvetrain mods, and a DIY head port, or if I want to get more serious. I do have a spare LS1 block and access to cheap internals, but we'll see.
Engine:
Driveline:
Engine Management/Gauges:
Current chassis modifications:


The engine harness is basically done. I tore apart the factory harness, re-spliced all the coil and injector wires since I'm not using the big coil connectors, and shrink wrapped the whole thing. I may try to Raychem boot the whole thing at some point, but that could get extremely costly, and not all the connectors are set up well for a boot.
Engine:
- LS1 from a '99-'00 Camaro
- V8r subframe
- Ported oil pump
- FM oil pan
- Remote filter with oil cooler
- Sanderson headers (picked up for super cheap, will plan for V8r longtubes in the future)
- 2.5" dual exhaust, similar design to FM
- DW300, Corvette filter/regulator
- LS6 intake
- 60 lb/hr EV14 injectors
- CTS-V accessories
- LS7 intake and MAF
- D585 coils
Driveline:
- T56
- Cheap second hand BF transmission mount to modify for V8r positioning
- Getrag G80 3.42
- V8r stage 2 driveline kit
Engine Management/Gauges:
- MS3pro
- Dual Innovate MTX-L's
- Racepak IQ3s display
- Radio delete tablet for full Tunerstudio
- Flex fuel sensor for full blended 93-E85
- Dual VSS input for traction control with 0-5V potentiometer for TC setting
Current chassis modifications:
- Revalved MSM Bilsteins, 550/400 springs, FCM bump stops, custom extended top hats
- 15" Kirkey Road Race Intermediate
- HDHCHTDDM2 roll bar
- A bunch of other stuff that doesn't really matter


The engine harness is basically done. I tore apart the factory harness, re-spliced all the coil and injector wires since I'm not using the big coil connectors, and shrink wrapped the whole thing. I may try to Raychem boot the whole thing at some point, but that could get extremely costly, and not all the connectors are set up well for a boot.

Reply
 0
0

0

 08-23-2016, 06:35 PM
#4
Senior Member
Thread Starter
iTrader: (1)
Join Date: Dec 2010
Location: Farmington Hills, MI
Posts: 1,218
Total Cats: 175
Finally getting around to starting the swap! I had quite a busy summer going to races, beer festivals, and camping trips with friends.
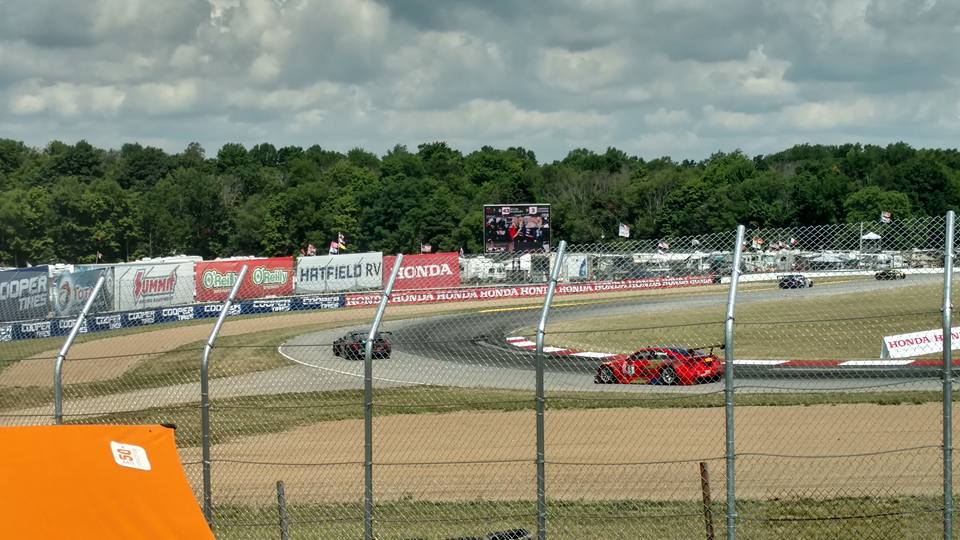
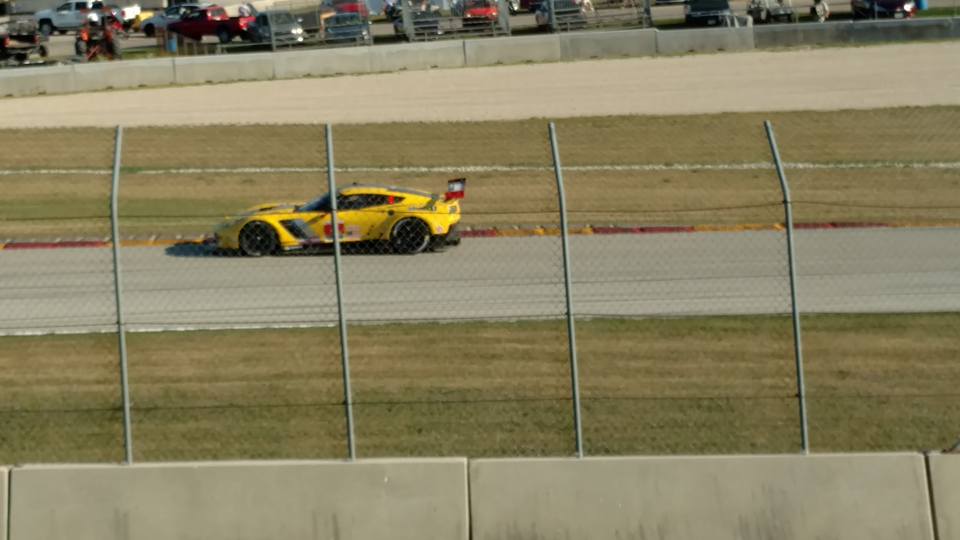
I work at Pratt & Miller, so I can't turn down a good Corvette or Cadillac race. Cooper won the Cadillac race we went to at Mid Ohio, and Milner/Gavin won the Corvette race at Road America.
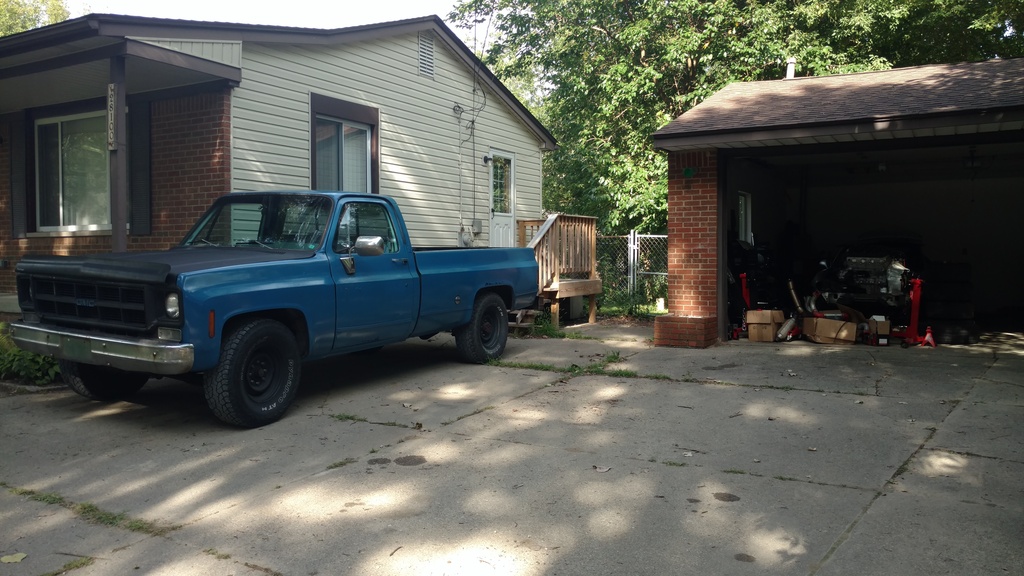
I also just picked up a new daily. Some may not look at this as a true daily, but it's badass. 1978 Chevy C20, 350 V8, TH400, 14 bolt rear end. It was maintenance prepped for a 2000 mile road trip across the east coast by my friend, so it's in pretty darn good mechanical condition.
Now on to what this swap is about, time to start tearing down!

So far I have sold the engine, transmission, Megasquirt (selling my MS3x since I picked up an MS3pro), diff package, MR short shifter, and injectors. This stuff is selling like hot cakes!
I work at Pratt & Miller, so I can't turn down a good Corvette or Cadillac race. Cooper won the Cadillac race we went to at Mid Ohio, and Milner/Gavin won the Corvette race at Road America.


I also just picked up a new daily. Some may not look at this as a true daily, but it's badass. 1978 Chevy C20, 350 V8, TH400, 14 bolt rear end. It was maintenance prepped for a 2000 mile road trip across the east coast by my friend, so it's in pretty darn good mechanical condition.

Now on to what this swap is about, time to start tearing down!
So far I have sold the engine, transmission, Megasquirt (selling my MS3x since I picked up an MS3pro), diff package, MR short shifter, and injectors. This stuff is selling like hot cakes!
Reply
0
0
08-31-2016, 09:33 PM
#6
Senior Member
Thread Starter
iTrader: (1)
Join Date: Dec 2010
Location: Farmington Hills, MI
Posts: 1,218
Total Cats: 175
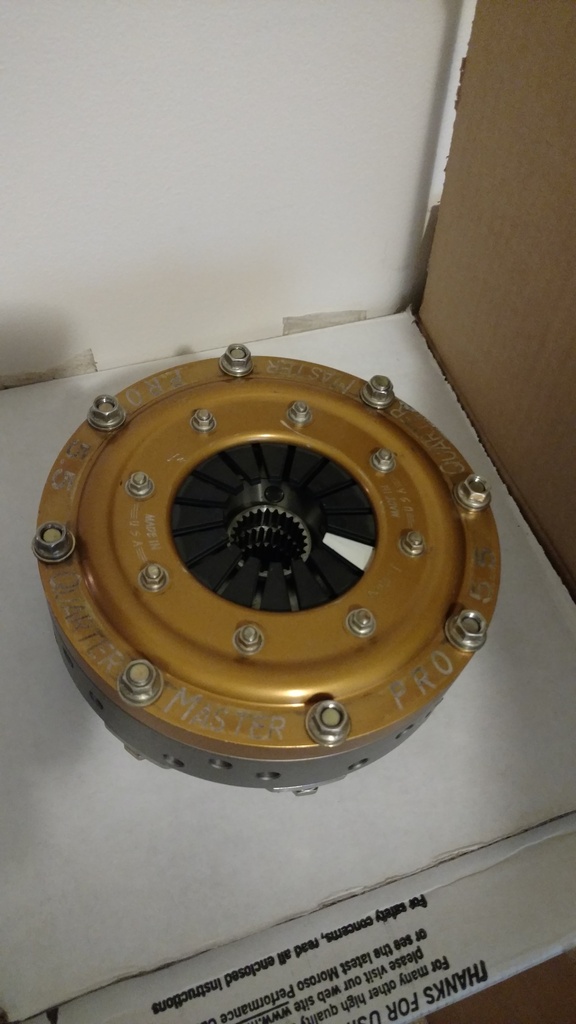
This may be quite over board, but we'll see. I picked up a Quartermaster Pro 5.5 triple disc clutch for pretty cheap! This thing is crazy light, 13.5 lbs including clutch and flywheel but not including the auto flex plate it bolts to. It's brand new and I have a rebuild kit for it. It is a metallic clutch, so that will be interesting, but it sounds like I have a connection to get organic discs for it if need be. I certainly don't need the 900 ft-lb rating of the clutch, I'm more so interested in the low moment of inertia. I chose the triple disc solely to have more distributed heat capacity, which is my main concern of driving a 5.5" clutch on the street.

Reply
0
0
09-01-2016, 12:19 AM
#7
Elite Member

Join Date: Sep 2015
Location: Seattle, WA
Posts: 1,651
Total Cats: 884
I almost went with a tilton 7.5 but decided against it due to the fact that it'll be going on the street from time to time. Interested to see how this turns out, might be pretty knarly
Reply
0
0
09-10-2016, 09:41 PM
#8
Senior Member
Thread Starter
iTrader: (1)
Join Date: Dec 2010
Location: Farmington Hills, MI
Posts: 1,218
Total Cats: 175
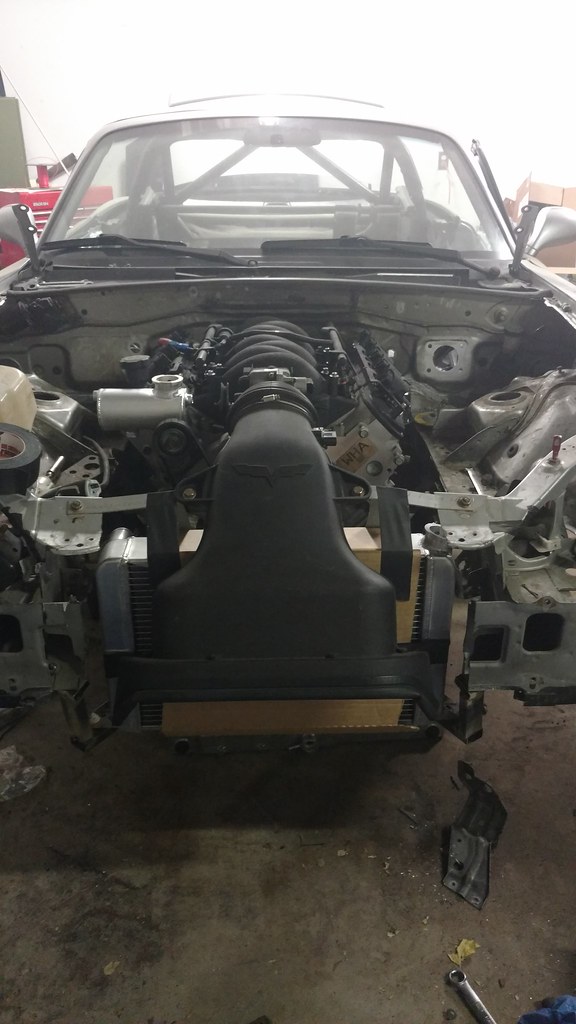
I've got the engine bay ready for a test fit, and it sounds like the subframe still has a week or more until I get it.
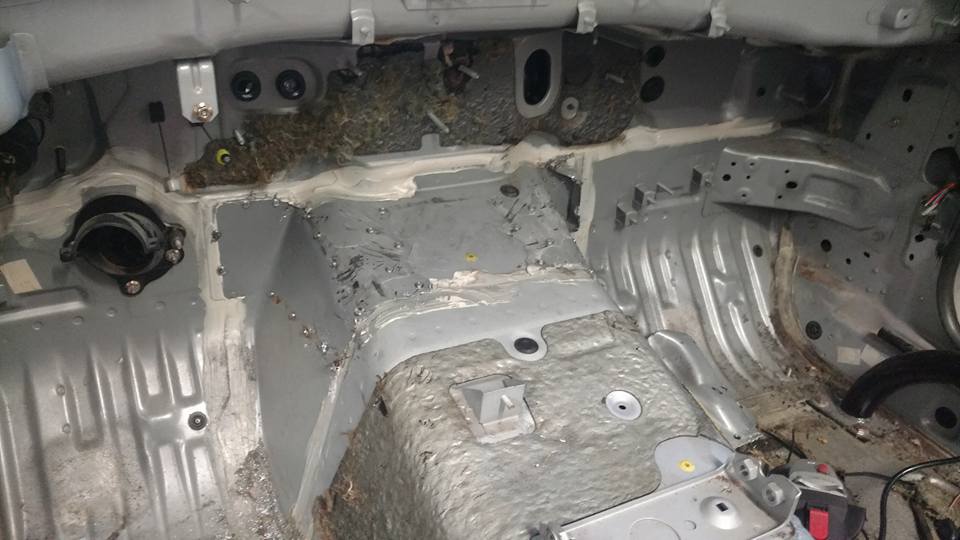
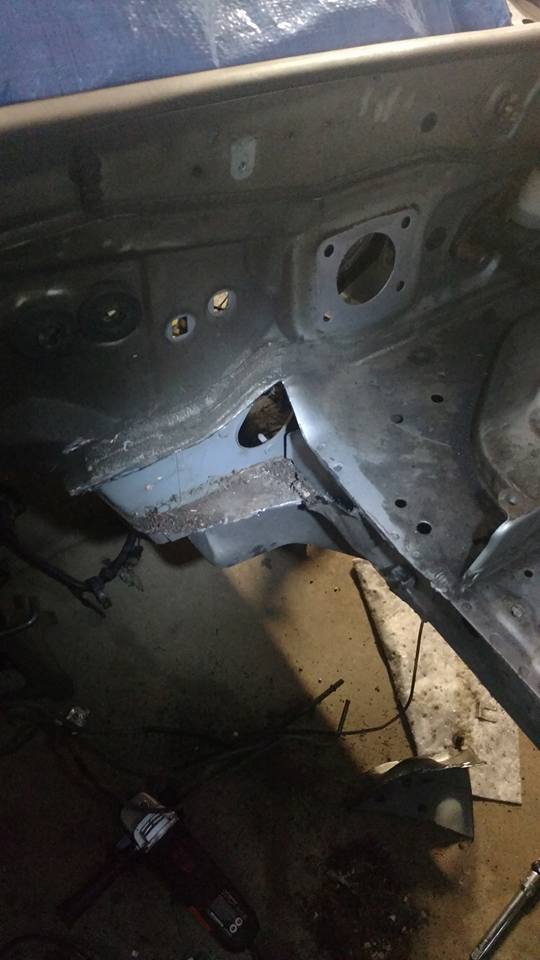
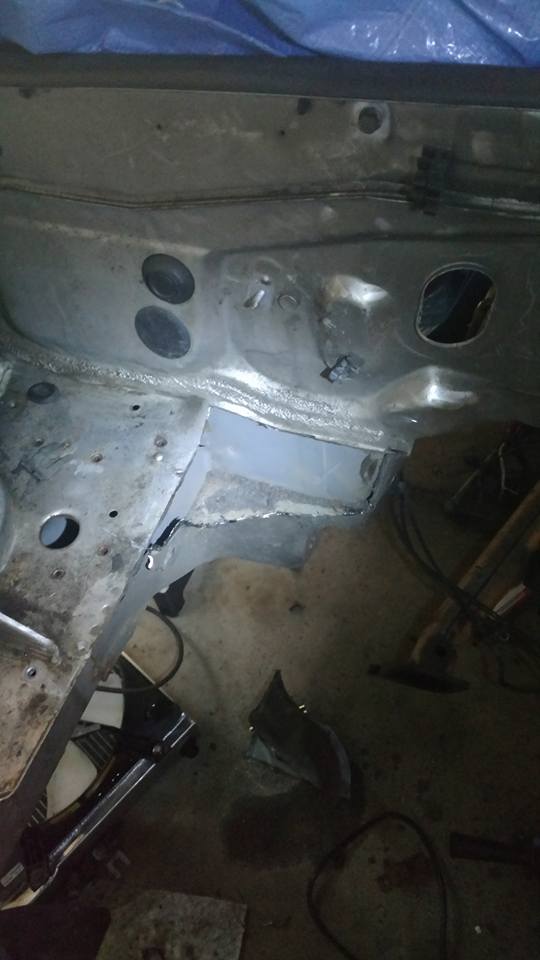
Here's a good shot to show the before and after of trans tunnel modifications.


Here's a good shot to show the before and after of trans tunnel modifications.

Reply
0
0


 09-14-2016, 01:27 PM
#12
Senior Member
Thread Starter
iTrader: (1)
Join Date: Dec 2010
Location: Farmington Hills, MI
Posts: 1,218
Total Cats: 175
It is moving along way quicker than expected. I can't believe I'm ready already for a test fit since I haven't even been working on it for 2 weeks. I put about 2-3 hours per night, then most of the weekends.
Reply
0
0
 09-14-2016, 10:48 PM
#15
Senior Member
Thread Starter
iTrader: (1)
Join Date: Dec 2010
Location: Farmington Hills, MI
Posts: 1,218
Total Cats: 175
No power steering. I didn't have the slightest urge to want it before the V8, and I can't imagine the extra weight will make it bad enough for me to reconsider. Maybe if I go to 245's or something, but I'll be on 225 RS3's for now.
Reply
0
0
11-11-2016, 09:52 PM
#16
Senior Member
Thread Starter
iTrader: (1)
Join Date: Dec 2010
Location: Farmington Hills, MI
Posts: 1,218
Total Cats: 175
I had a few weeks of being busy and such, but I'm back to making progress. I'm trying to get everything mounted in the engine bay so I can pull the motor, weld everything up, and paint the bay.
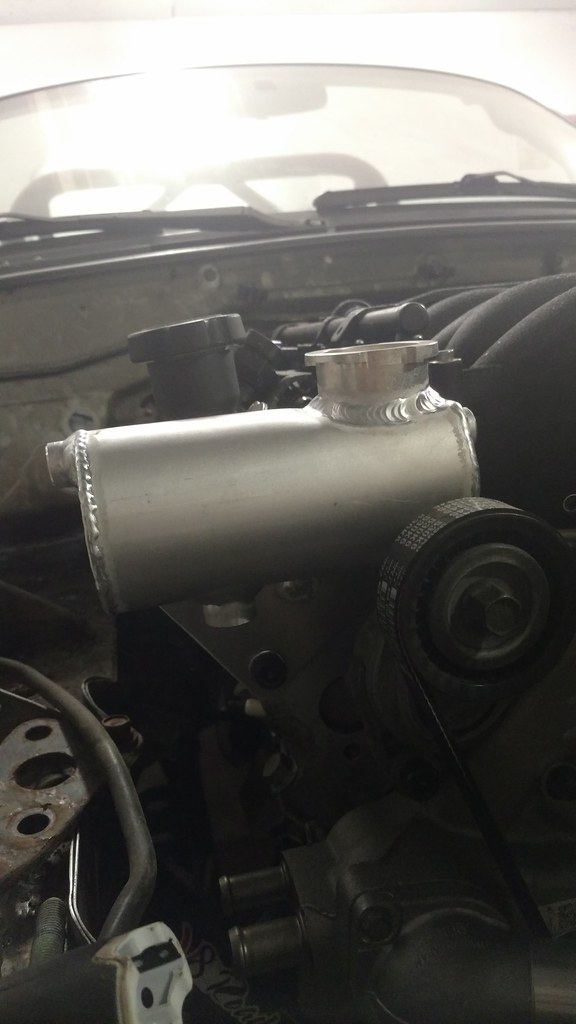
I picked up a Howe expansion tank and welded a bracket to fit it to the front of the head. Since I'm not keeping heat, I'll just run the bottom of the tank to one of the heater core outlets on the water pump. Then I'll use the factory coolant overflow tank, and will probably paint that.
IMG_20161111_210207005 by Adam Watson, on Flickr
Then I picked up a Griffin Scirocco radiator off summit. It's small (22"x13"x3"), but it doens't look too small in person when comparing to the stock radiator. I wanted a small one to package as tightly to the LS7 intake as possible while maintaning ground clearance, and leaving room for a powerful fan. I got an early 90's Taurus fan, which is one hell of a fan. It's the perfect width for the radiator, but a little tall, but I'll deal with that with some aluminum sheet to cover the gaps. It was $85 brand new, and is a 2 speed fan. 2500 cfm on low and 4500 cfm on high. It uses a hell of a lot of current (~40 amps on high!), so I'm going to PWM it with Megasquirt. That will allow me to get some good control over maintaining the fan speed necessary to cool the motor, rather than just full fan speed until thermostat temp, then nothing until the coolant warms up again. This will save a lot of electrical power. I've got the lower mounts tacked and mostly welded, and the upper will be very simple.
IMG_20161111_210154216 by Adam Watson, on Flickr
Reply
1
1
11-12-2016, 10:00 PM
#17
Senior Member
Thread Starter
iTrader: (1)
Join Date: Dec 2010
Location: Farmington Hills, MI
Posts: 1,218
Total Cats: 175
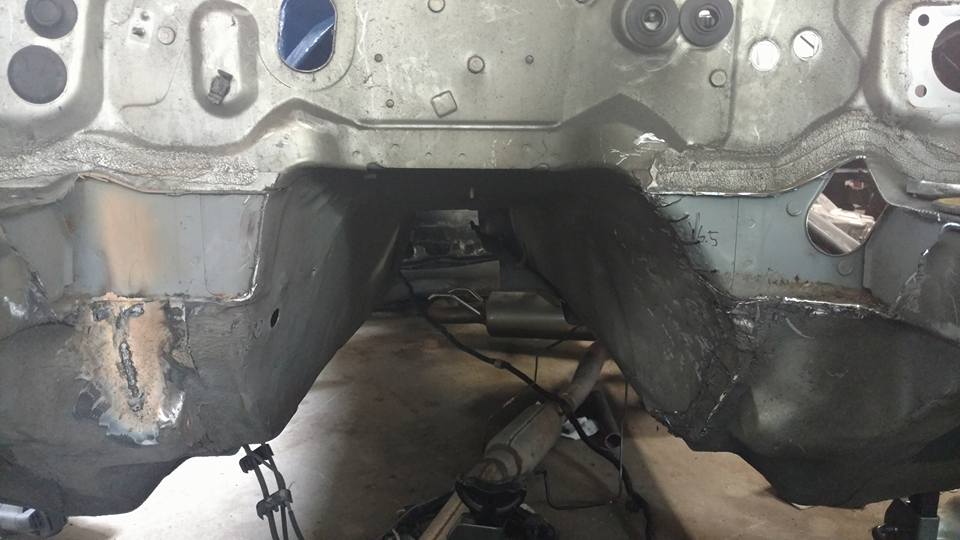
I pulled the motor out, got it out of the garage to pressure wash the engine bay, and weld up the transmission tunnel. Hopefully I'll get around to seam sealing the bay tomorrow so I can prepare for paint.
I took some dimensions off the radio area, so I can make a panel to package everything neatly. I won't have a radio, HVAC, or airbag controls anymore, so I have the whole panel to work with. I'll have a dual boot tablet (windows or android), switch panel with main power, starting button, and fuel pump cutoff, wideband, traction control ****, USB bulkheads for Megasquirt and Racepak connection, and a USB power supply.

Dash Panel CAD by Adam Watson, on Flickr
I took some dimensions off the radio area, so I can make a panel to package everything neatly. I won't have a radio, HVAC, or airbag controls anymore, so I have the whole panel to work with. I'll have a dual boot tablet (windows or android), switch panel with main power, starting button, and fuel pump cutoff, wideband, traction control ****, USB bulkheads for Megasquirt and Racepak connection, and a USB power supply.
Dash Panel CAD by Adam Watson, on Flickr
Reply
0
0
 11-13-2016, 07:01 PM
#19
Senior Member
Thread Starter
iTrader: (1)
Join Date: Dec 2010
Location: Farmington Hills, MI
Posts: 1,218
Total Cats: 175
Here's some of the work on the transmission tunnel. I still need to weld back up the gussets on the interior, but I ran out of welding wire right as I finished the engine bay side. This was done with a Harbor Freight 110V flux core that was converted to DC electrode negative. I was using Lincoln wire until I ran out, then tried the Harbor Freight wire that I took out once I got the welder. Surprisingly the HF wire seemed to weld better. It ran better beads and had less spatter. I'm still getting used to the whole wire feed welder, I've primarily TIG'd up until now.
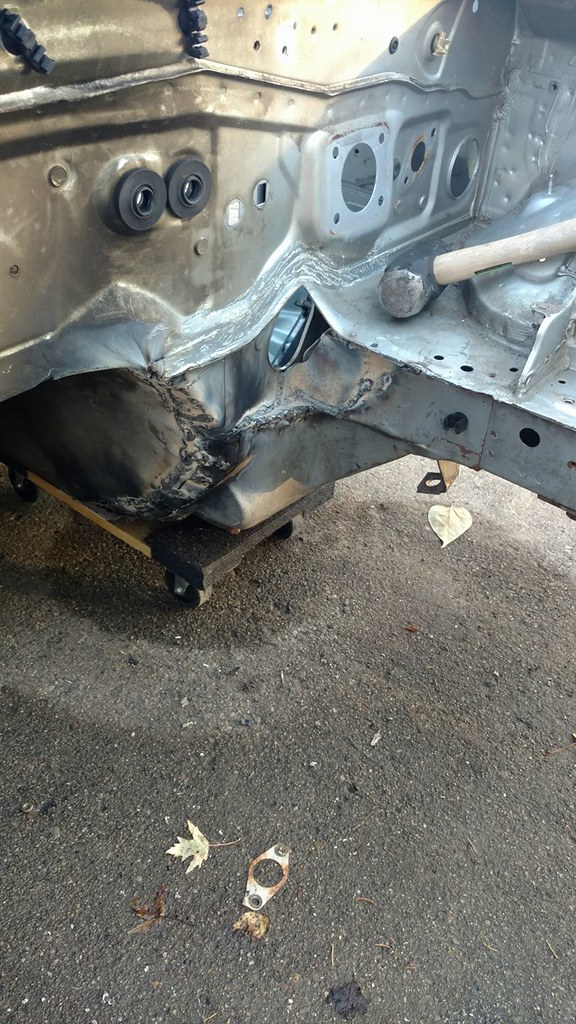
15000609_10154830642463115_325344414800891114_o by Adam Watson, on Flickr
Now that the engine is back on the stand, I got the oil pan pretty much done. I just need to pick up a new gasket tomorrow. I checked the oil pan to pickup clearance, and dialed it in with a washer. The pickup is at a slight angle, and the low side of the pickup measured to 0.160", the high side measured 0.190" and therefore the middle was 0.175" without a gasket. The oil pan gasket measures to 0.110" so that makes the range of clearances 0.270"-0.300". The spec is 0.250"-0.375" so I think I'm good.
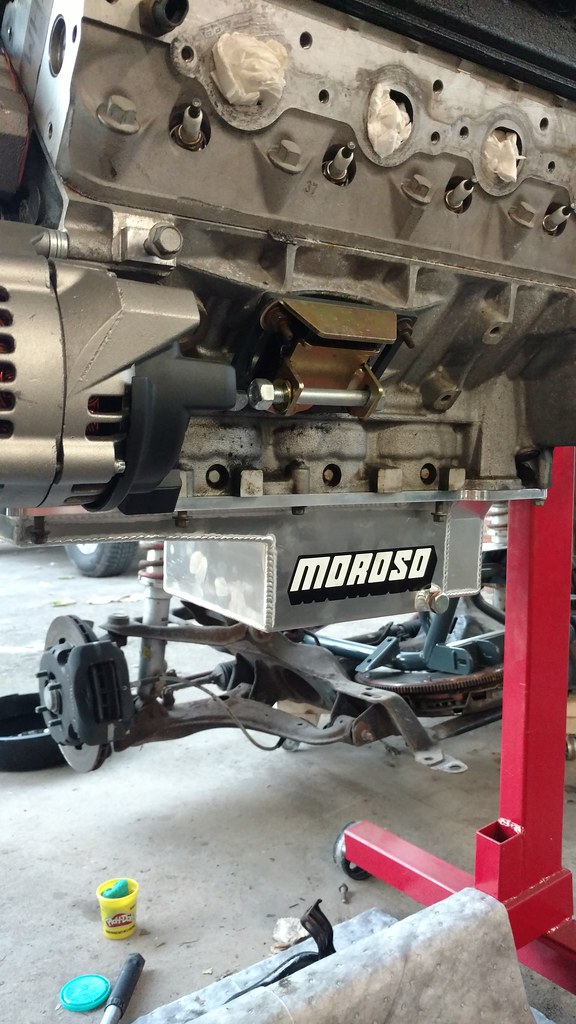
IMG_20161113_170630722 by Adam Watson, on Flickr
15000609_10154830642463115_325344414800891114_o by Adam Watson, on Flickr
Now that the engine is back on the stand, I got the oil pan pretty much done. I just need to pick up a new gasket tomorrow. I checked the oil pan to pickup clearance, and dialed it in with a washer. The pickup is at a slight angle, and the low side of the pickup measured to 0.160", the high side measured 0.190" and therefore the middle was 0.175" without a gasket. The oil pan gasket measures to 0.110" so that makes the range of clearances 0.270"-0.300". The spec is 0.250"-0.375" so I think I'm good.
IMG_20161113_170630722 by Adam Watson, on Flickr
Reply
0
0
12-04-2016, 11:21 PM
#20
Senior Member
Thread Starter
iTrader: (1)
Join Date: Dec 2010
Location: Farmington Hills, MI
Posts: 1,218
Total Cats: 175
Current updates are mostly receiving parts. I've been pretty busy with work, traveling, holidays, etc, but I took advantage of Black Friday and picked up some wicked cool parts.
First up is an MS3pro with LSx plug and play harness. I already had a good portion of my engine harness done, but I got scared of making my own harness from scratch. I made a few mistakes on a friends MS3x, which was easy to correct with a through-hole PCB and patch harness, but if I screwed anything up with a fully heat-shrunk harness to the MS3pro, I'd be SOL. So I took the safe route and picked up the plug and play harness. It's nice because it also has a nice fuse box with it, so you really just need power and ground for the engine to run. A lot of people are questioning my choice to go standalone, so here are the main reasons. I like to tinker, so I like to do my own tuning, and I've been using Megasquirt and Tunerstudio for 4 years now. So I feel a lot more comfortable with that rather than learning HPT. MS3pro also has a lot of really nice features that make it above and beyond the old Megasquirts, so it's not like I'm running an ECU that's "worse" than the stock ECU. I also get features such as flex fuel, traction control, push-button start, PWM outputs, etc. I'll be posting up my control box in the near future, I'm using a jbperf CAN-EGT+, which is an expansion board with 4 EGT inputs, 4 ADC's, a bunch of PWM inputs and outputs, serial wideband connection, and I'm going to be mounting both this board, the MS3pro, and 2 14point7 SLC-OEM wideband controllers in a single project box. So it'll basically be a plastic enclosure with 3 35-pin ampseal connectors (2 for MS3pro, and 1 for all the jumpers I'll run from the expansion board and wideband controllers).
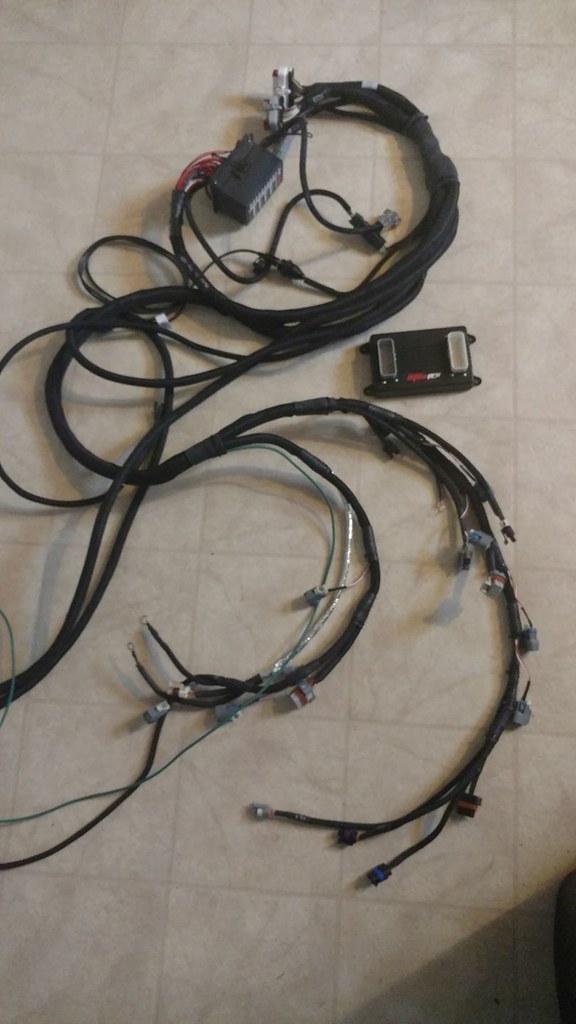
15252748_10154876695933115_23731628287024646_o by Adam Watson, on Flickr
Next up are a set of V8r Kooks long tube headers. These really are beautiful. It's almost a shame to sandblast them and coat them, but I believe that's the route I want to take. I haven't 100% figured out what the rest of the exhaust is going to be, but I know it will be an x-pipe and dual magnaflows. I've been talking to a few exhaust guru's, and it sounds like it may be worth running 3" piping past the x-pipe, since the headers don't have a diameter reduction close enough to the collector to make it worth reducing to 2.5" immediately after the header. The current plan is to run slip joints with springs right from the headers, then another set of slip joints before the mufflers, unless anyone has a good argument against that.
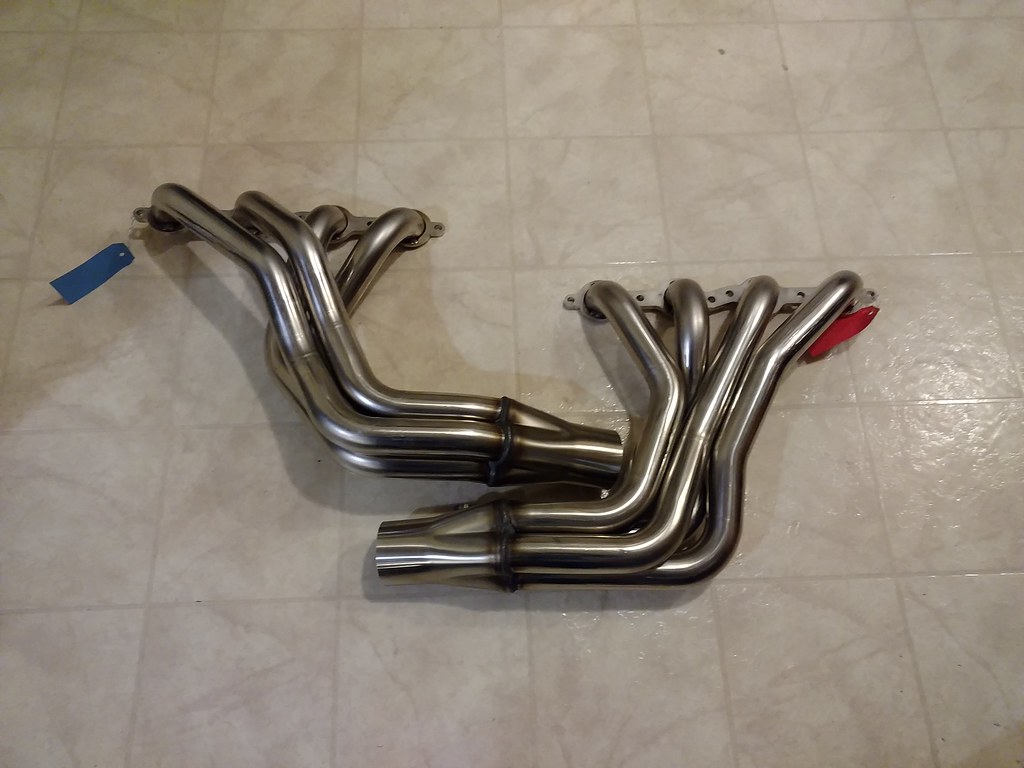
IMG_20161204_223214 by Adam Watson, on Flickr
First up is an MS3pro with LSx plug and play harness. I already had a good portion of my engine harness done, but I got scared of making my own harness from scratch. I made a few mistakes on a friends MS3x, which was easy to correct with a through-hole PCB and patch harness, but if I screwed anything up with a fully heat-shrunk harness to the MS3pro, I'd be SOL. So I took the safe route and picked up the plug and play harness. It's nice because it also has a nice fuse box with it, so you really just need power and ground for the engine to run. A lot of people are questioning my choice to go standalone, so here are the main reasons. I like to tinker, so I like to do my own tuning, and I've been using Megasquirt and Tunerstudio for 4 years now. So I feel a lot more comfortable with that rather than learning HPT. MS3pro also has a lot of really nice features that make it above and beyond the old Megasquirts, so it's not like I'm running an ECU that's "worse" than the stock ECU. I also get features such as flex fuel, traction control, push-button start, PWM outputs, etc. I'll be posting up my control box in the near future, I'm using a jbperf CAN-EGT+, which is an expansion board with 4 EGT inputs, 4 ADC's, a bunch of PWM inputs and outputs, serial wideband connection, and I'm going to be mounting both this board, the MS3pro, and 2 14point7 SLC-OEM wideband controllers in a single project box. So it'll basically be a plastic enclosure with 3 35-pin ampseal connectors (2 for MS3pro, and 1 for all the jumpers I'll run from the expansion board and wideband controllers).
15252748_10154876695933115_23731628287024646_o by Adam Watson, on Flickr
Next up are a set of V8r Kooks long tube headers. These really are beautiful. It's almost a shame to sandblast them and coat them, but I believe that's the route I want to take. I haven't 100% figured out what the rest of the exhaust is going to be, but I know it will be an x-pipe and dual magnaflows. I've been talking to a few exhaust guru's, and it sounds like it may be worth running 3" piping past the x-pipe, since the headers don't have a diameter reduction close enough to the collector to make it worth reducing to 2.5" immediately after the header. The current plan is to run slip joints with springs right from the headers, then another set of slip joints before the mufflers, unless anyone has a good argument against that.
IMG_20161204_223214 by Adam Watson, on Flickr
Reply
0
0


