Ian's 99 build thread


 01-26-2017, 12:38 AM
#782
Elite Member

Thread Starter
Join Date: Mar 2007
Location: Santa Clara, CA
Posts: 5,165
Total Cats: 855
I don't think so. My 2863 lags less than a stock MSM, and yet he didn't mention lag at all when he did one of those. Of course, my car goes from making about the same torque as an MSM to making a ton more, so perhaps the difference between on-boost and off-boost is just more obvious?
--Ian
--Ian

Reply
 0
0

0
01-26-2017, 01:47 AM
#784
Newb

Join Date: Sep 2014
Posts: 21
Total Cats: 5
I think a lot of people mean "boost threshold" when they say "lag". Having driven Ian's green machine a few times, it doesn't have much lag. If you're at 5K and you step on it, the power's just THERE. According to datalogs MAP lags the throttle by about 0.2 seconds as long as you keep the motor wound up.
It's definitely a different experience than the GT2560 (previous build), which would spool decently at 2000 and be ready to party any time over 2500. That old setup was a hoot on the street.
The new setup is much more track-oriented. The GTX2863R doesn't make full boost until about 4000 RPM. If you put your foot down at 2500 in 6th gear you'll wallow around as the thing lazily winds it's way up to 140kPa, gradually climbing with RPMs... and then right around 4000 it goes asymptotic. By 4500 the throttle response is split-second. The cure is simple: shift more. And if you do, it's very responsive.
I'm curious how the R&T driver was shifting. Actually, we might be able to find out. Ian, do you have datalogs from his run?
It's definitely a different experience than the GT2560 (previous build), which would spool decently at 2000 and be ready to party any time over 2500. That old setup was a hoot on the street.
The new setup is much more track-oriented. The GTX2863R doesn't make full boost until about 4000 RPM. If you put your foot down at 2500 in 6th gear you'll wallow around as the thing lazily winds it's way up to 140kPa, gradually climbing with RPMs... and then right around 4000 it goes asymptotic. By 4500 the throttle response is split-second. The cure is simple: shift more.
And if you do, it's very responsive.I'm curious how the R&T driver was shifting. Actually, we might be able to find out. Ian, do you have datalogs from his run?

Reply
0
0
 01-26-2017, 02:26 AM
#788
Elite Member
Thread Starter
Join Date: Mar 2007
Location: Santa Clara, CA
Posts: 5,165
Total Cats: 855
:-)
I have, on a number of occasions, questioned whether the 2863R was the right choice vs an EFR. On paper, the smaller EFR (6758, I think?) compressor map overlays almost directly onto the 2863R's, suggesting that they're capable of the same power. Dyno charts suggest the EFR spools a lot better, which certainly would be nice to have.
At the time that I made the 2863R purchase, Andrew's kit was in pre-order state, and I think it was almost a year from then before the first manifolds started getting delivered. Had the throttle body screw thing happened a year later, I'd probably have a TSE kit now, but at the time the FM2R was available, on-the-shelf, and ready to ship, and that won out.
Thinking about it some more, I think Sam's comparison to the 930 reflects the fact that today's OEMs are using turbos in a very different way to how it used to be. Today's turbos are used mostly to make small engines behave like diesels -- undersized turbos, spool up low, low-end torque petering out as it climbs over 5000. It lets OEMs improve fuel economy by putting smaller engines in cars and using the turbo to make up the torque needed for use in traffic and the like. This is as compared to using a turbo to double or triple the amount of power a given engine makes, which necessitates a much larger turbo and a boost threshold RPM that's around halfway to redline.
After replacing Peggy's Odyssey with the CX-9, we currently own 5 turbocharged vehicles. Of those, the Miata falls in the middle as far as lag goes -- the CX-9 is insta-spool, with the S6 only a small way behind it. The Miata comes next, followed by the FD. Finally there's the truck, which doesn't really get to full boost from a standstill until about halfway through second gear...
--Ian
Reply
0
0
01-26-2017, 02:52 AM
#789
SADFab Destructive Testing Engineer

iTrader: (5)
Join Date: Apr 2014
Location: Beaverton, USA
Posts: 18,642
Total Cats: 1,866
It's crazy how many new cars make more torque than horsepower. Was looking at some tuned fiesta STS. Made like 50 ft/lbs more than HP. Because the TQ just **** the bed before 5k
Reply
0
0
02-26-2017, 12:24 AM
#791
Elite Member
Thread Starter
Join Date: Mar 2007
Location: Santa Clara, CA
Posts: 5,165
Total Cats: 855
Worked on my rotary compression tester project today -- got the arduino working with the new sensor and spitting out CSV data. I decided to test it on the Miata rather than on the FD because it's a lot easier to access the spark plugs.
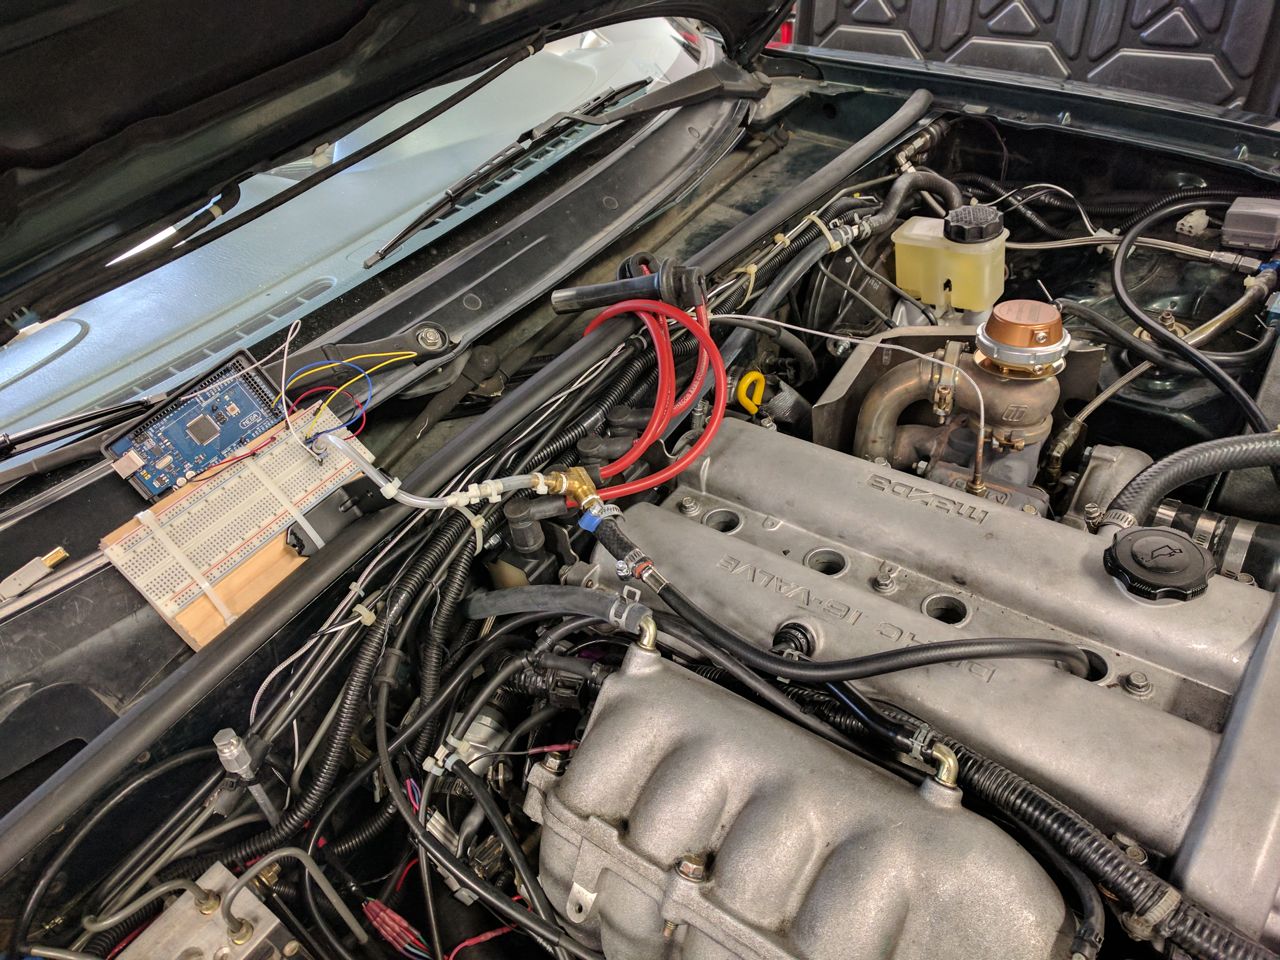
Looks like it works.
--Ian
Looks like it works.
--Ian
Reply
0
0
 02-26-2017, 08:20 PM
#794
Elite Member
iTrader: (1)

Join Date: Apr 2014
Location: SF Bay Area, CA
Posts: 3,075
Total Cats: 551
Pretty cool!
Your engine bay looks so much nicer than mine. Just the way I like it. To quote NigelT when I sent him a picture of my engine bay once, "I can't see anything, just black hoses everywhere."
How does that oil feed work?
Your engine bay looks so much nicer than mine. Just the way I like it. To quote NigelT when I sent him a picture of my engine bay once, "I can't see anything, just black hoses everywhere."
How does that oil feed work?
Reply
0
0
02-26-2017, 11:06 PM
#795
Elite Member
Thread Starter
Join Date: Mar 2007
Location: Santa Clara, CA
Posts: 5,165
Total Cats: 855
Yeah, as a friend of mine says, "I'm allergic to fire".
The turbo oil feed is a standard FM setup (tee off the pressure sensor under the intake), but I have a tee sitting over on the passenger fender with a dead-end line going to an aftermarket oil pressure sender that's hard-mounted on the firewall. Anything other than hard-mounting on the firewall and the sensors get fried -- this is the 4th or 5th one I've had in the car.
--Ian
Reply
1
1

 02-27-2017, 04:19 PM
#797
Elite Member
Thread Starter
Join Date: Mar 2007
Location: Santa Clara, CA
Posts: 5,165
Total Cats: 855
So, for reference, here are the hoses/wires/etc that are visible in that shot that aren't factory:
- the compression testing rig (obviously)
- aluminum line & spray nozzle for the fire system that curly noticed
- black wire looping around at bottom left of photo is the fuel pressure sensor wiring
- the 3 plastic-loomed bundles crossing to the ABS pump are the ABS sensors that I added
- the bundled heat-shink butt-splice connectors next to the ABS pump are the wiring for the LS coils
- LS coil connector is visible next to them
- black and white wires zip tied to the brake lines is the boost control solenoid
- There are a few extra vacuum hoses & tees in there to feed things like the FPR & pulse damper
- braided stainless EGT sender wire
- oil line for the turbo w/ oil pressure sensor
- M-tuned coolant reroute thermostat is visible behind a bunch of wires
And that's it, really. I think come of the apparent mess comes from the fact that I had to delete the factory brake booster line that previously supported & cleaned up a lot of the stuff crossing behind the motor, because it didn't fit with the FM LS coil bracket.
--Ian
Reply
1
1
04-02-2017, 01:55 AM
#798
Elite Member
Thread Starter
Join Date: Mar 2007
Location: Santa Clara, CA
Posts: 5,165
Total Cats: 855
Man, I haven't posted to this thread in ages. Not much actual Miata stuff to talk about, been doing other things. Some of them have made occasional appearances in this thread though, or are at least peripherally related, so WTF I'll post them now. Off topic? Maybe, but it's my thread so I don't care. In no particular order.
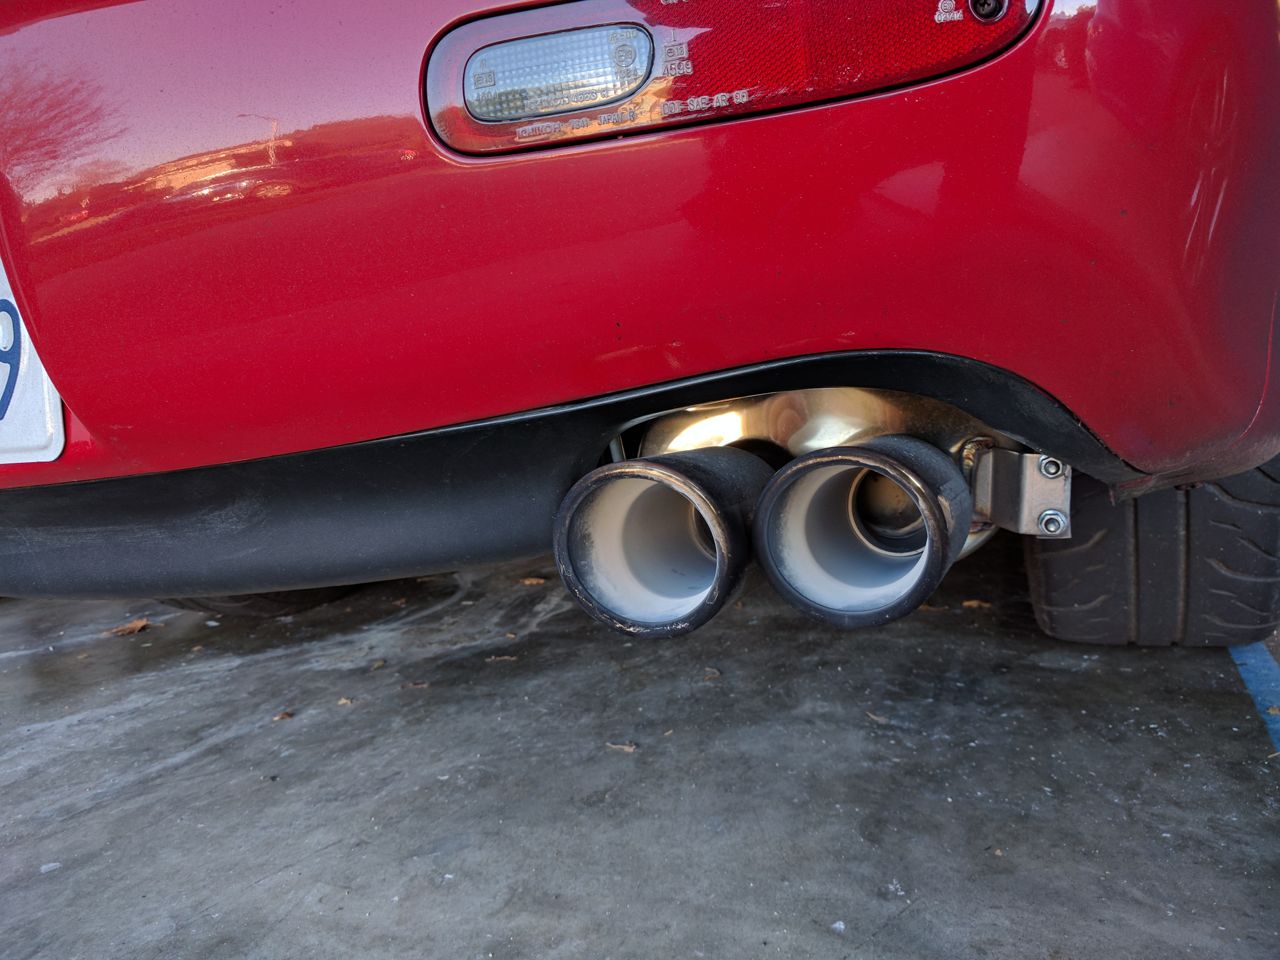
Took the FD for a drive in the hills:
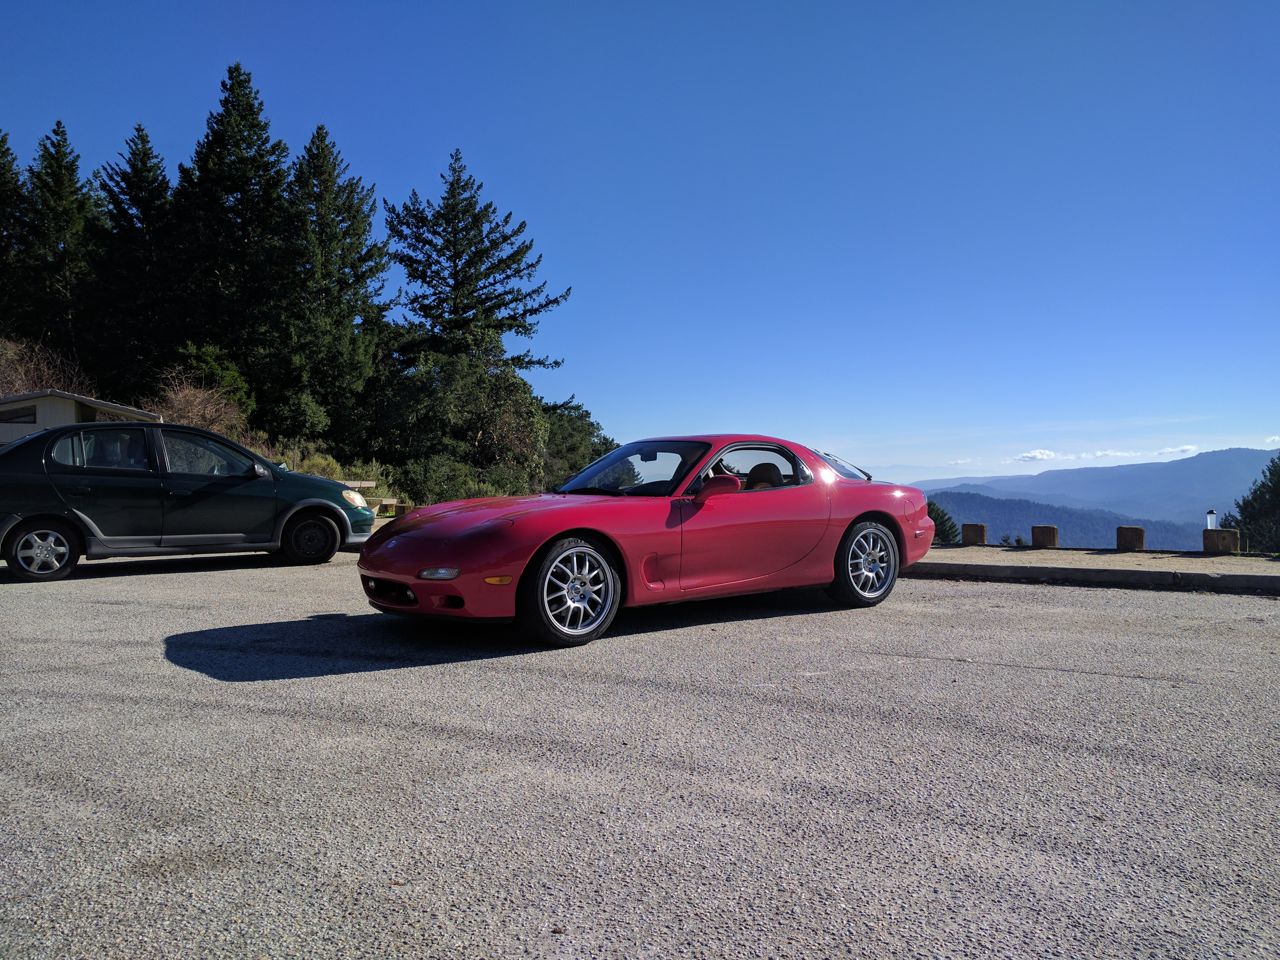
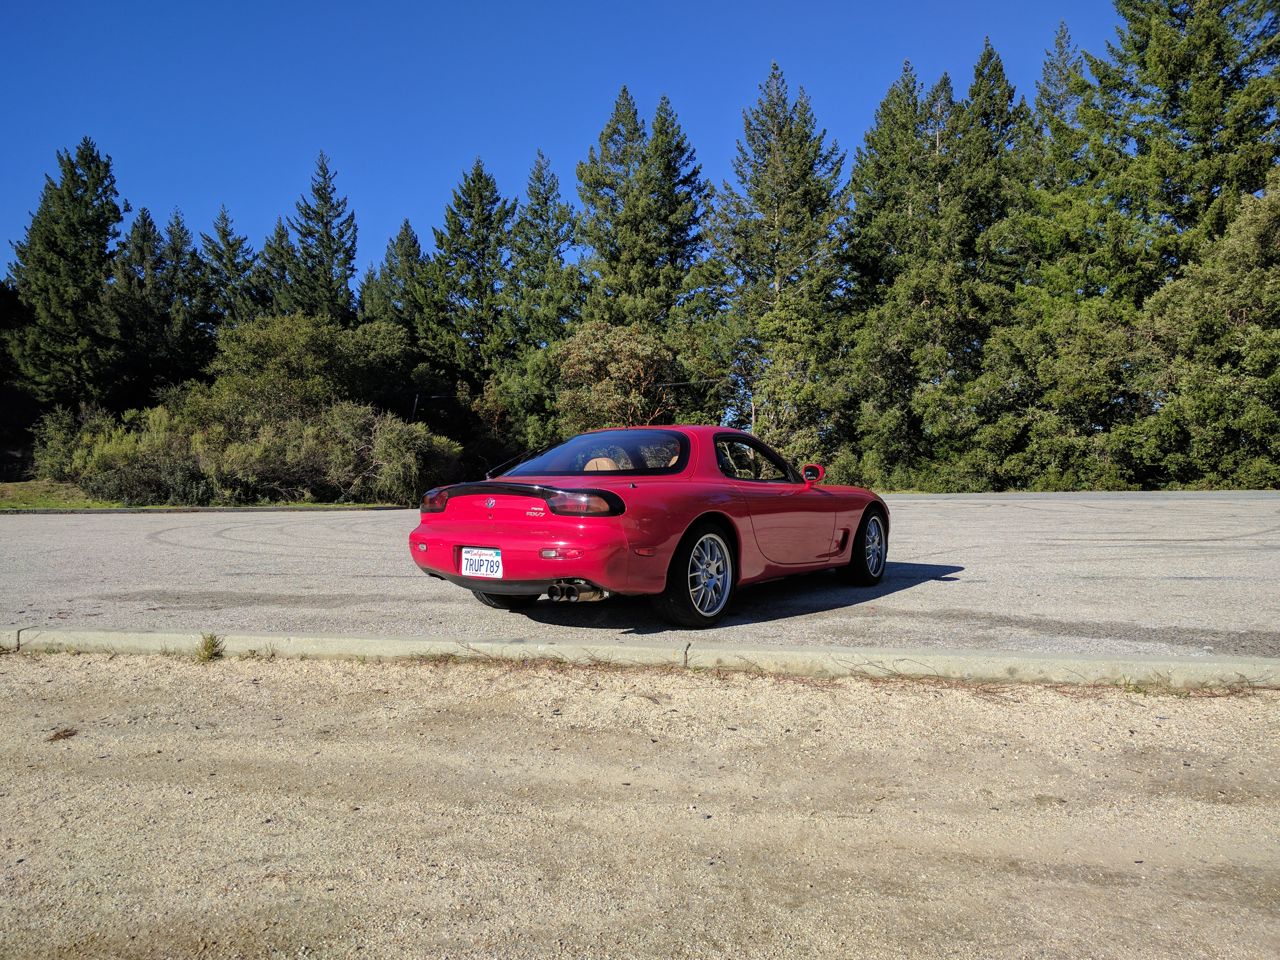
Rotary exhausts get warm! This was black soot when I left, ash when I got back!
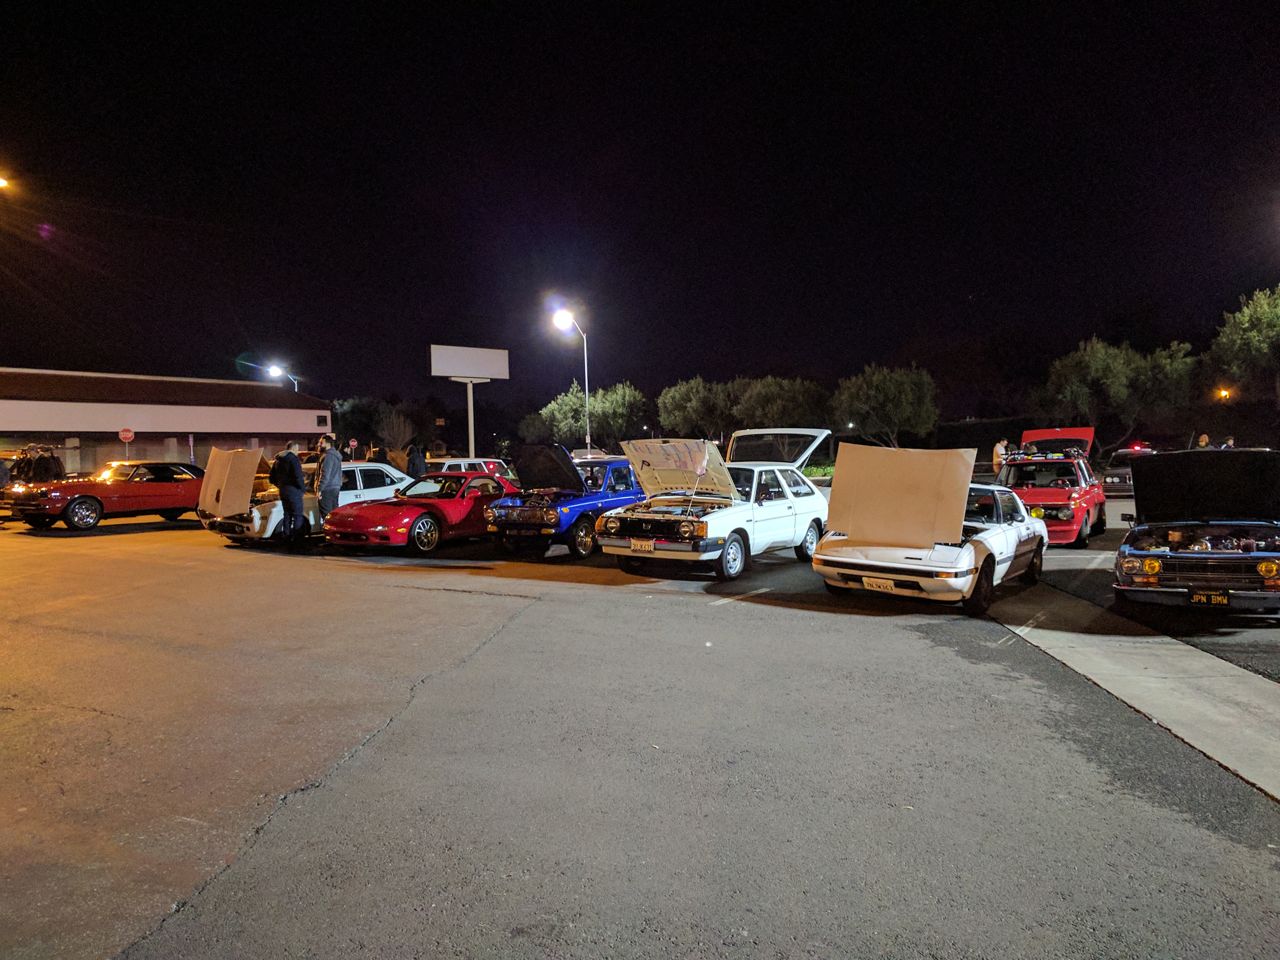
Took the FD to a local classic import car meet. 25 years old is "classic", right? Parked in the rotary section, next to an RX-2, an FB, and an old Toyota of some kind with a 13b swap:
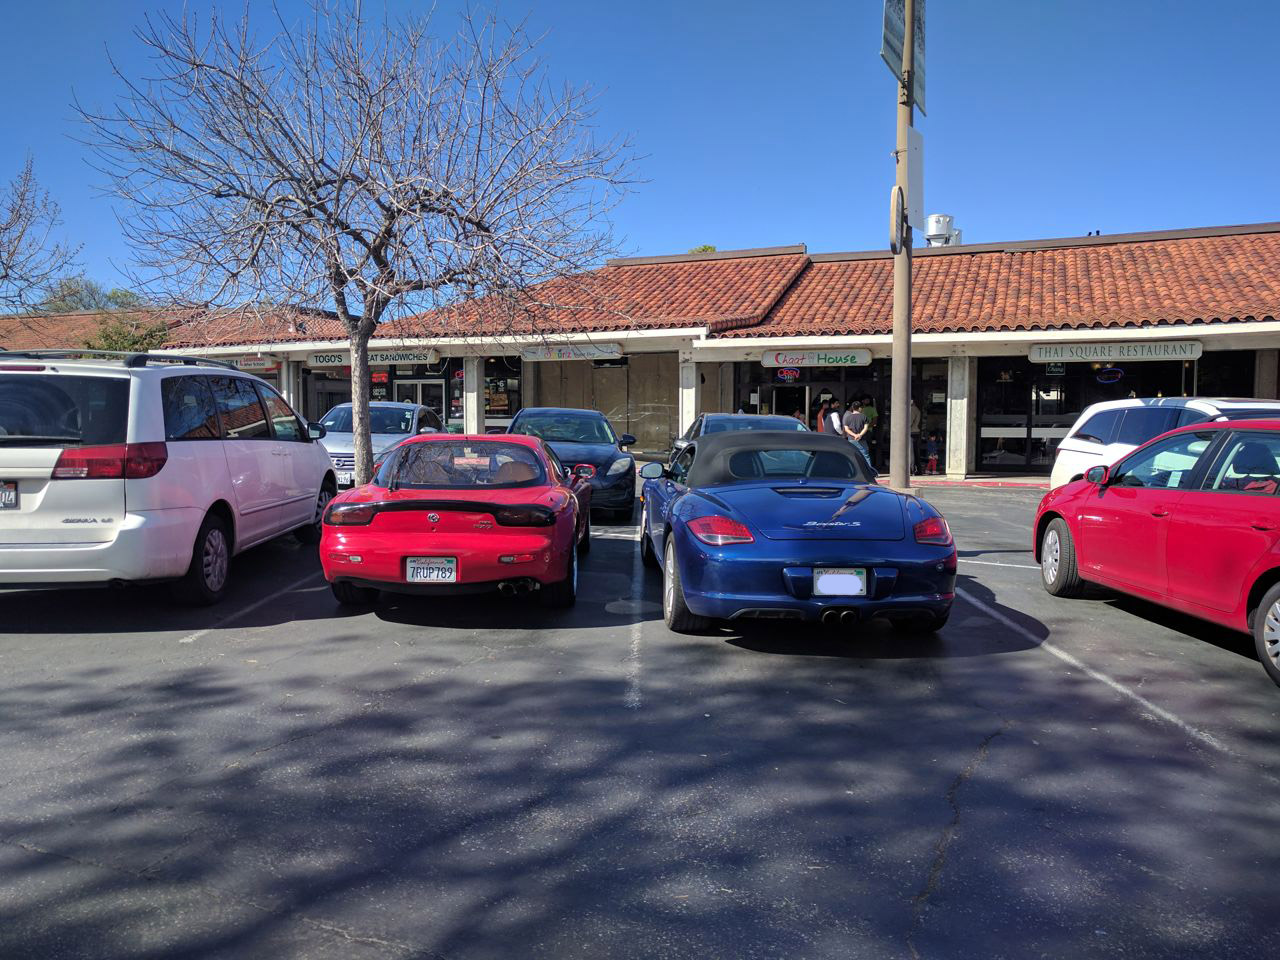
How do you make a Boxster S look big? Park an FD next to it. This is JasonC's Porsche.
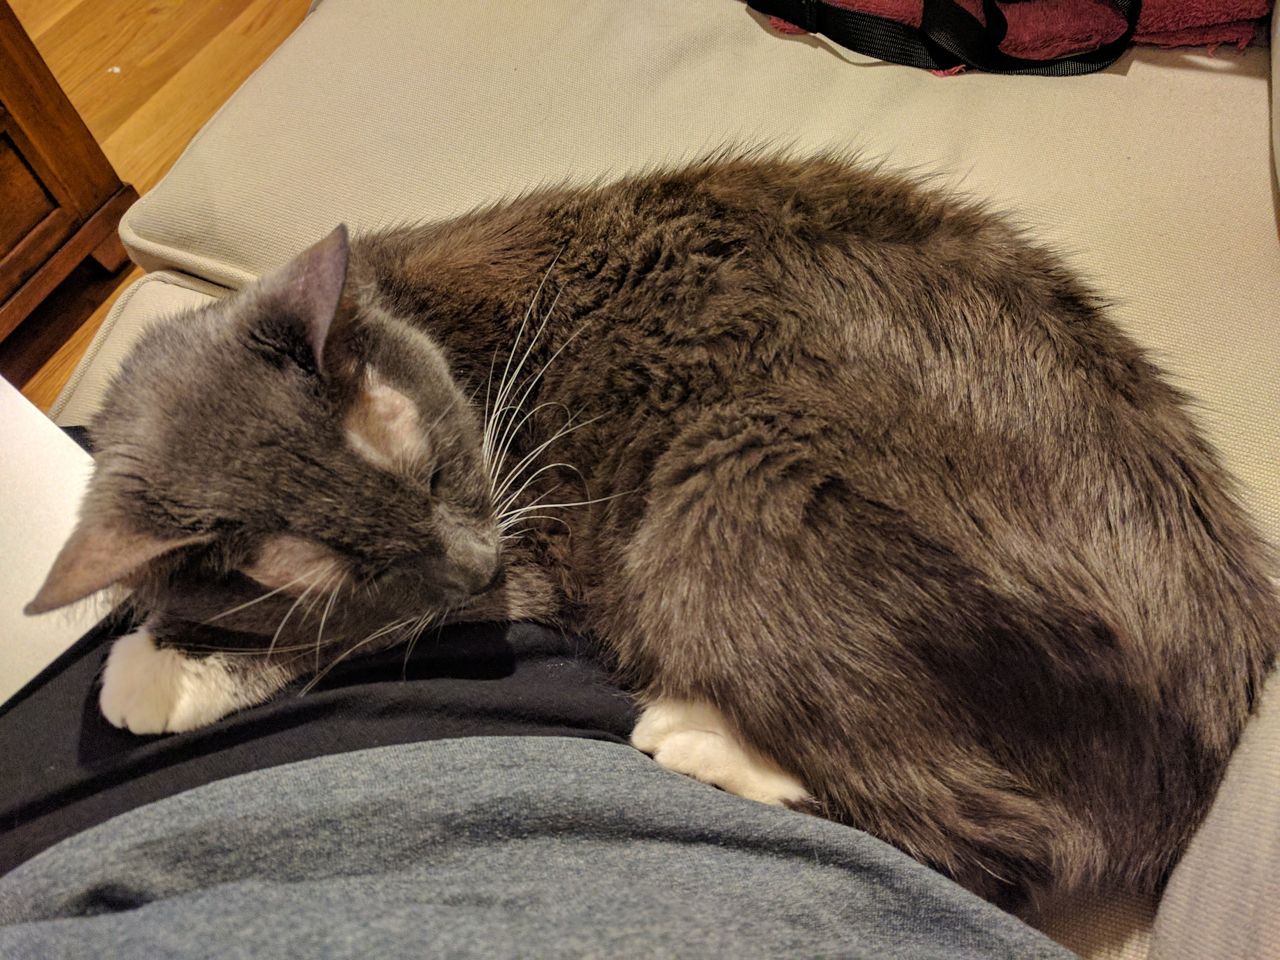
Obligatory cat photo. Smoke will be 17 this year!
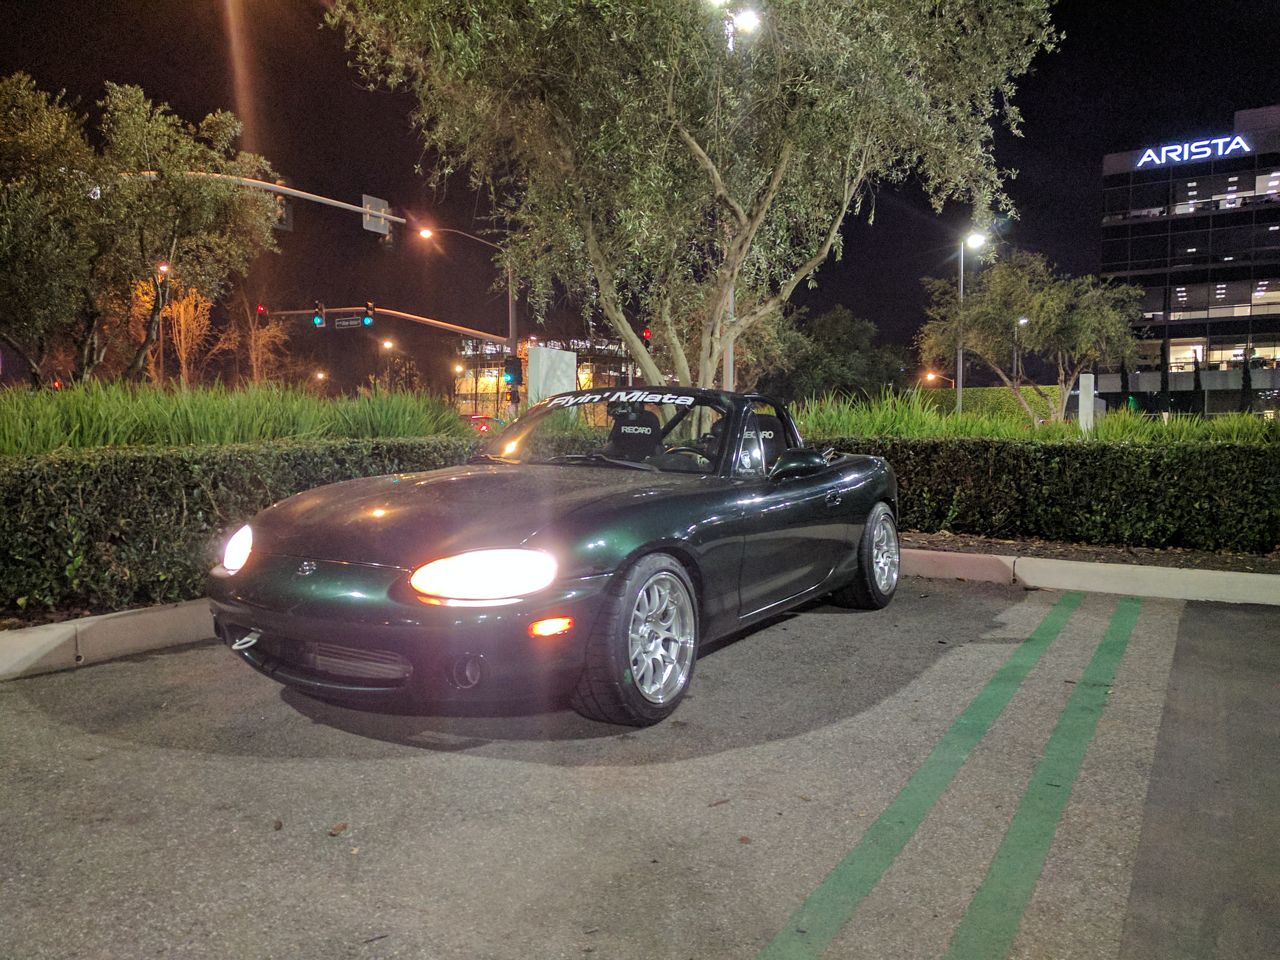
Hey, it's a Miata photo!
--Ian
In no particular order.Took the FD for a drive in the hills:
Rotary exhausts get warm! This was black soot when I left, ash when I got back!
Took the FD to a local classic import car meet. 25 years old is "classic", right? Parked in the rotary section, next to an RX-2, an FB, and an old Toyota of some kind with a 13b swap:
How do you make a Boxster S look big? Park an FD next to it. This is JasonC's Porsche.
Obligatory cat photo. Smoke will be 17 this year!
Hey, it's a Miata photo!
--Ian
Reply
0
0
04-02-2017, 02:14 AM
#800
Elite Member
Thread Starter
Join Date: Mar 2007
Location: Santa Clara, CA
Posts: 5,165
Total Cats: 855
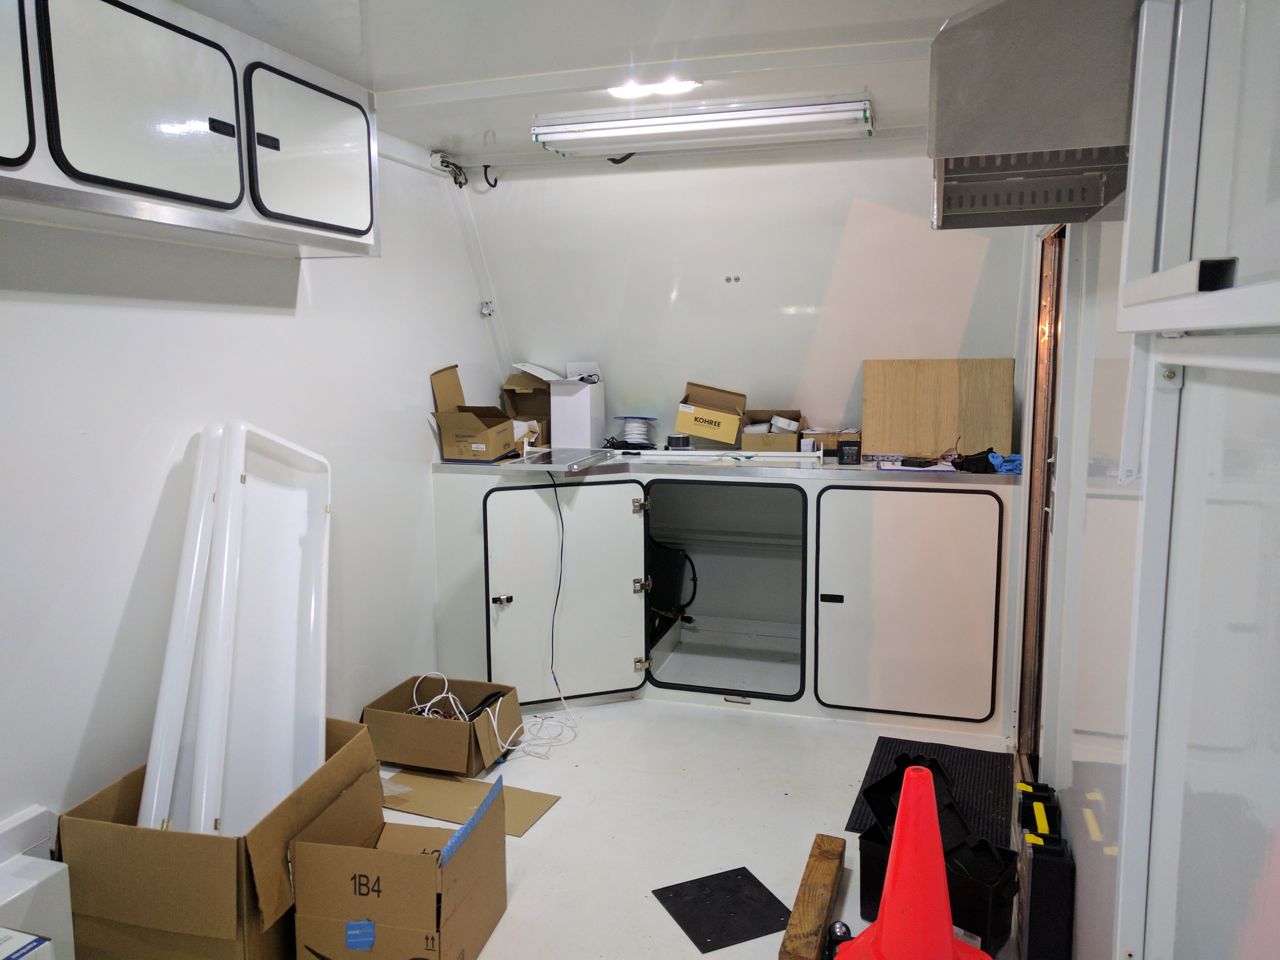
A lot of what I've been spending project time on lately is retrofitting stuff on the new trailer, so here's a few photos of that.
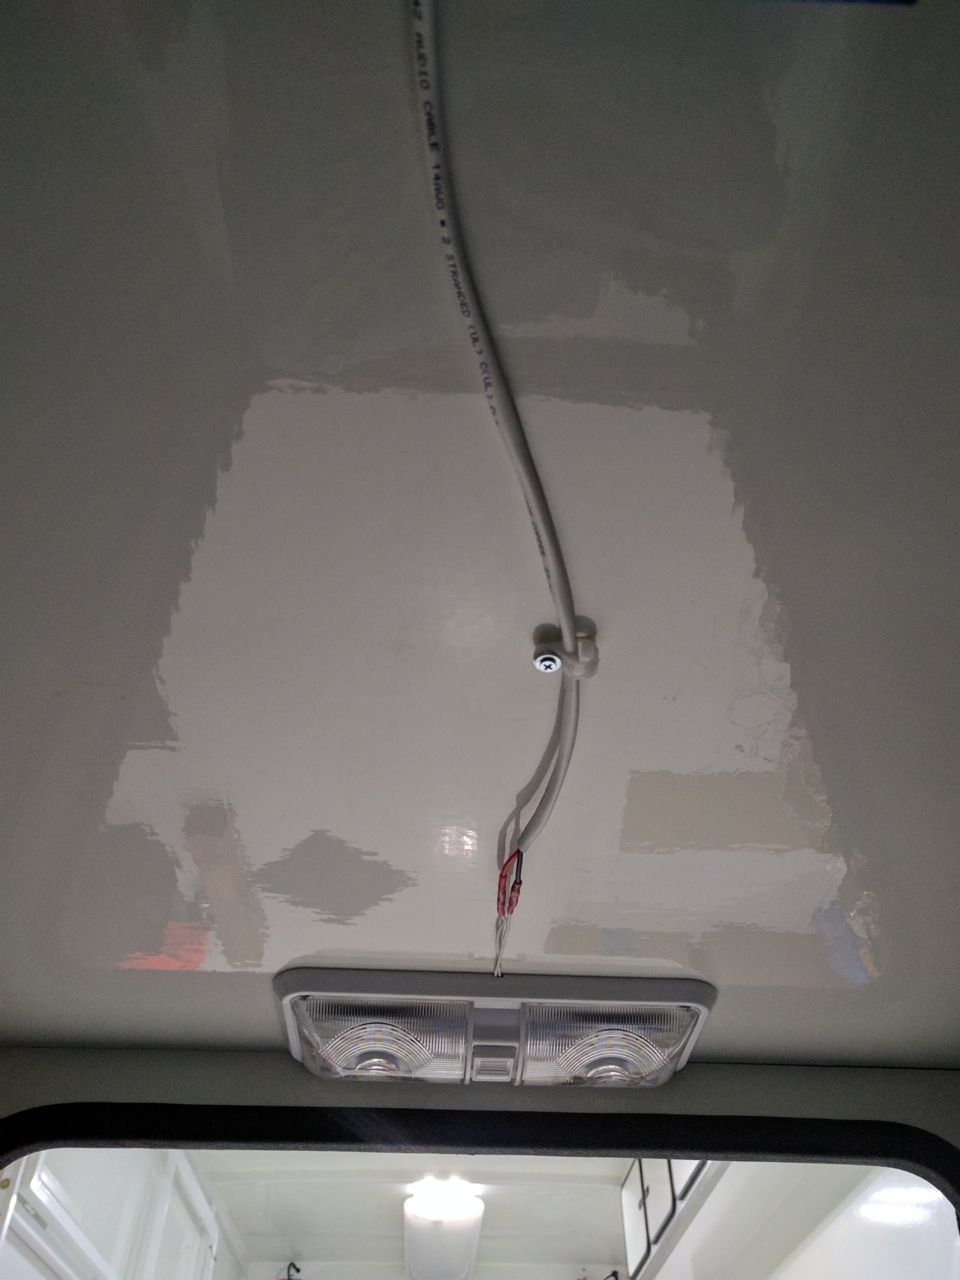
Replaced the incandescent bulbs in the 12v RV lights with LEDs. WAY brighter.
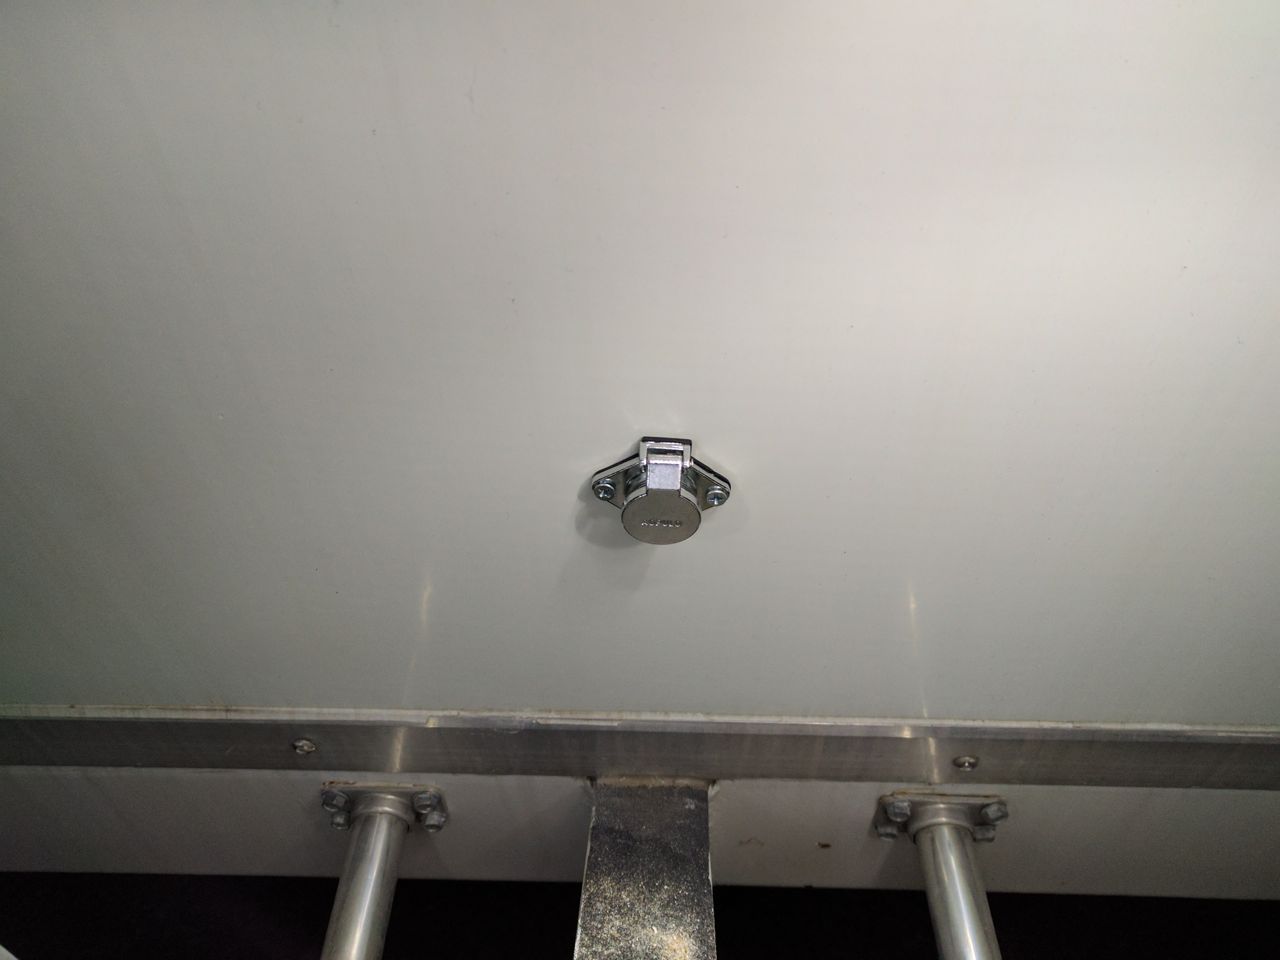
Put a light inside the cabinet:
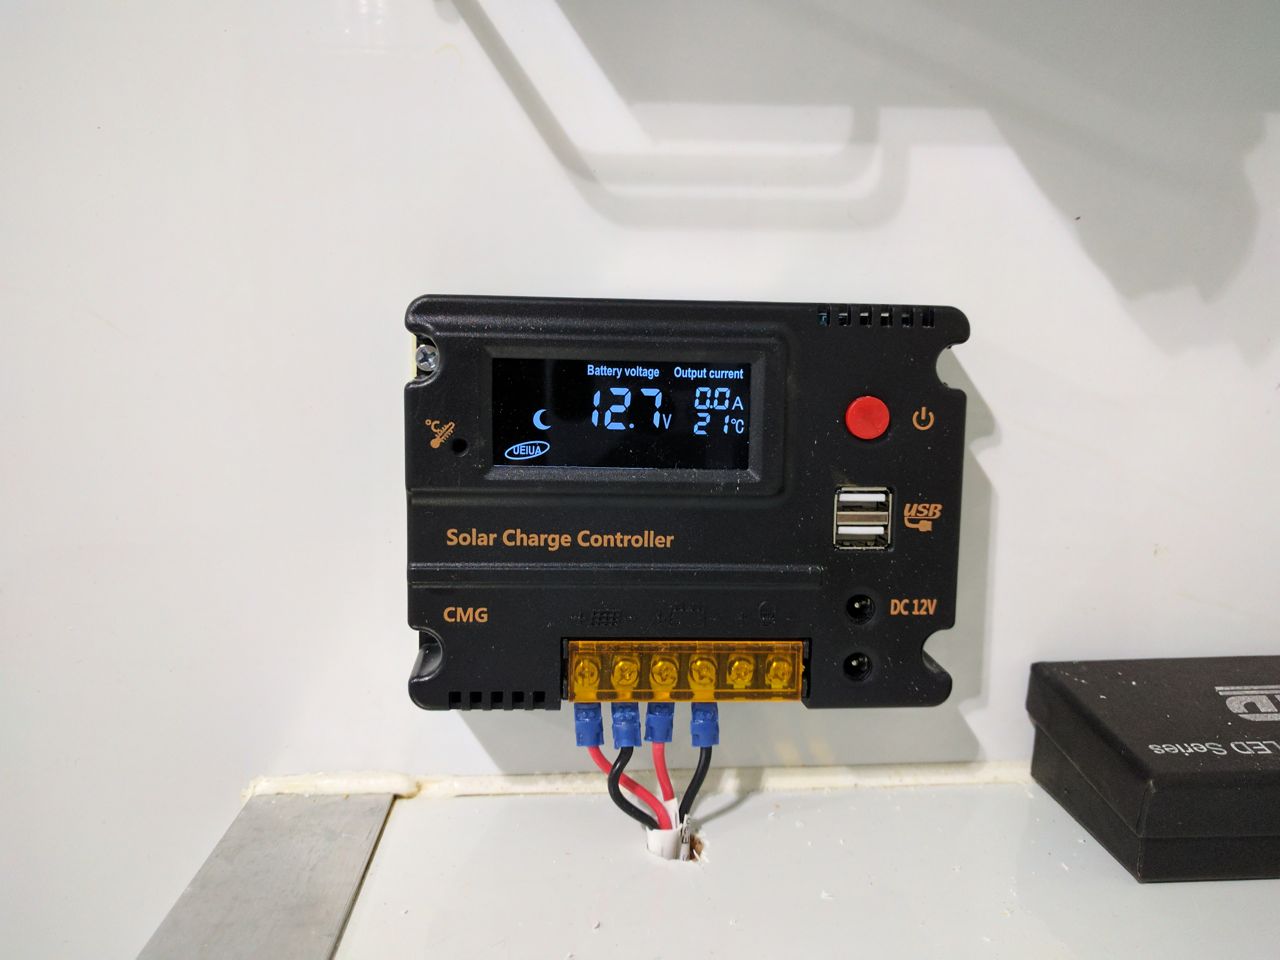
Got a solar panel for the roof to keep the batteries topped up. This is only 25 watts, it's not intended to charge them up all the way, just to keep them up if the trailer sits for a while so that I don't need to hook up a battery tender.

Solar panel needs a charge controller:
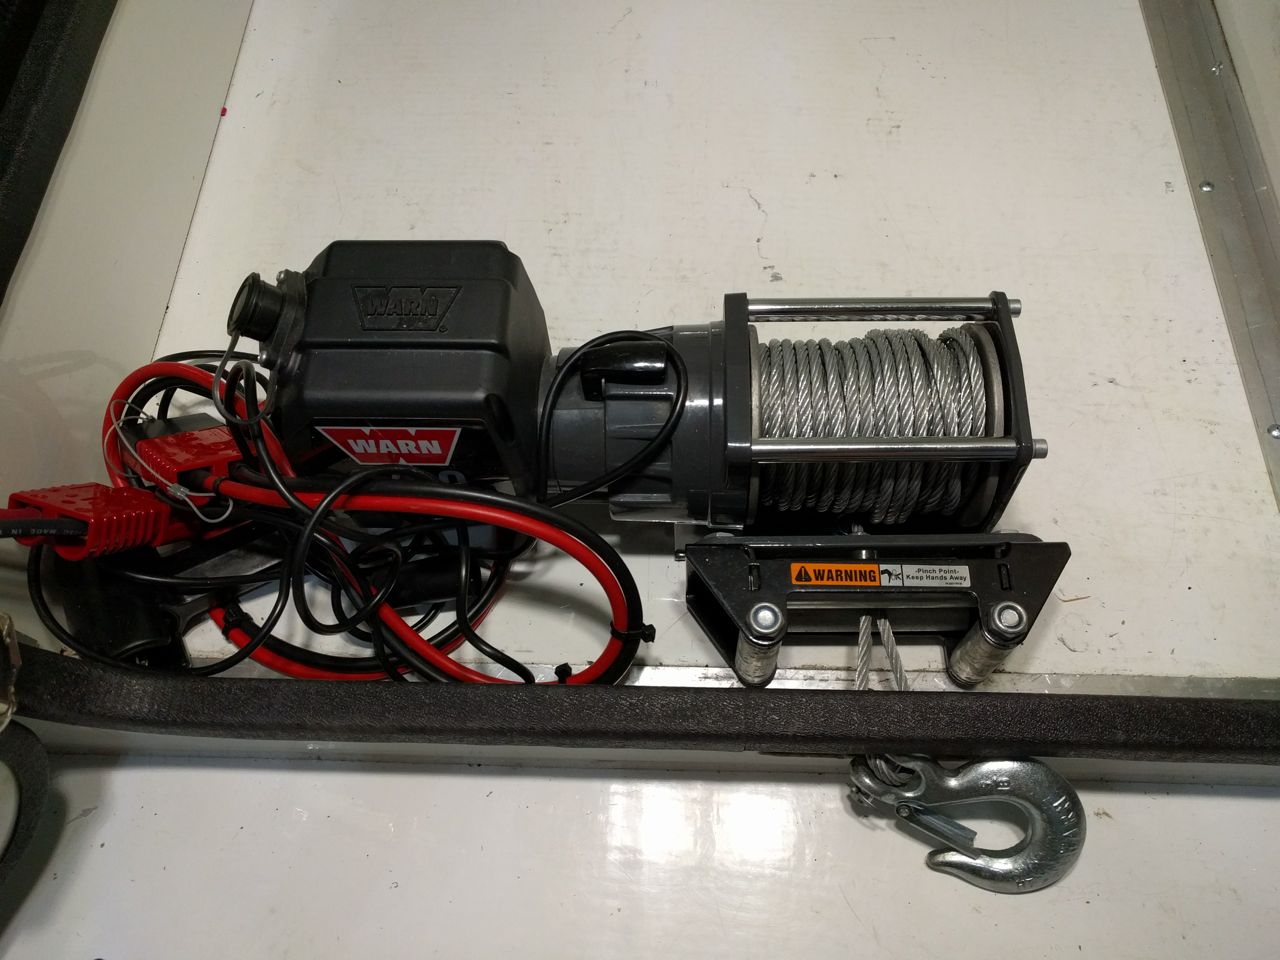
Mounted a wench in the trailer. Er... WINCH. Mounted a WINCH in the trailer.
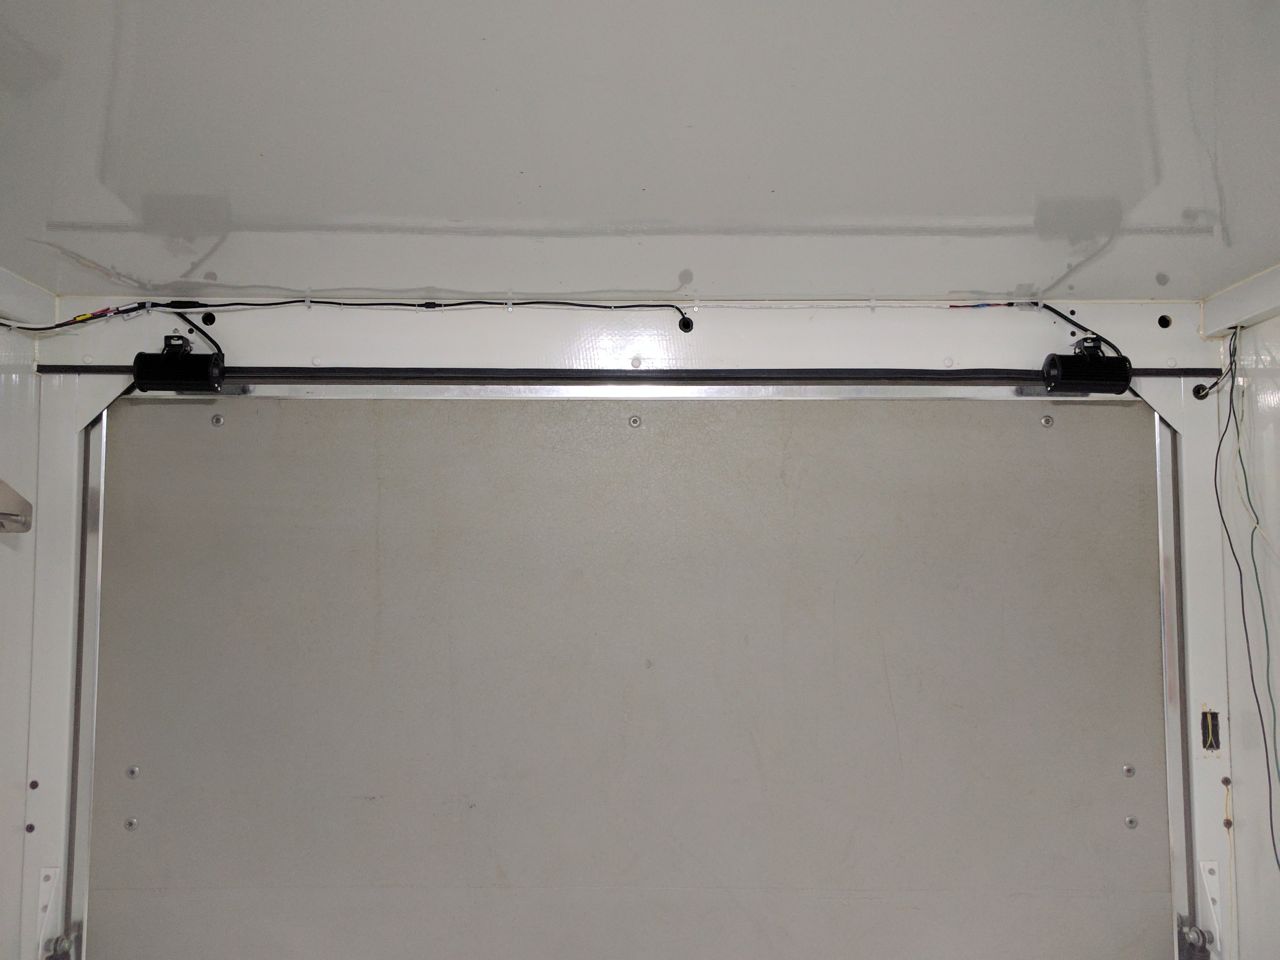
Ripped out the fluorescent lights as well as the halogen loading lights. Replaced the halogens with some LED floodlights. Haven't finished ripping out all of the solid core wire for the AC lights, though. I thought about reusing it for the DC lights, but since I'm still keeping *some* AC circuits (outlets, plugged into the inverter), I decided running 12v DC over what looks like AC wiring was a bad idea, so out it came.
Solar panel goes on the roof, so it needs brackets. The aluminum frame it's mounted in didn't have any mounting holes, so I decided to buy a rivnut tool and try them out. OH MY GOD, WHERE HAVE YOU BEEN ALL MY LIFE. I love this tool.

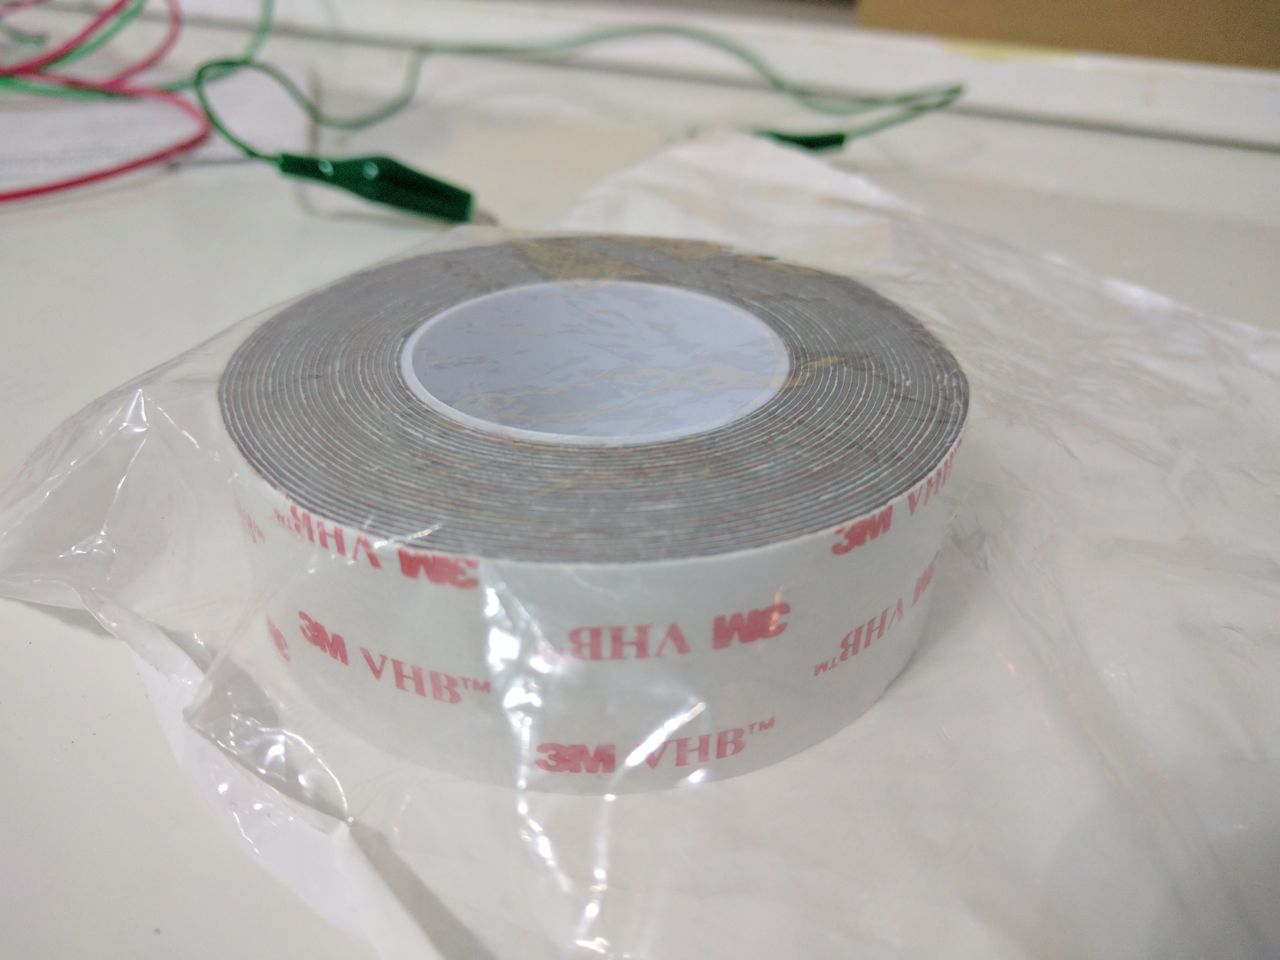
The brackets are bolted to the panel and taped to the roof. Yes, taped, with 3M "very high bond" tape. This stuff is amazing.
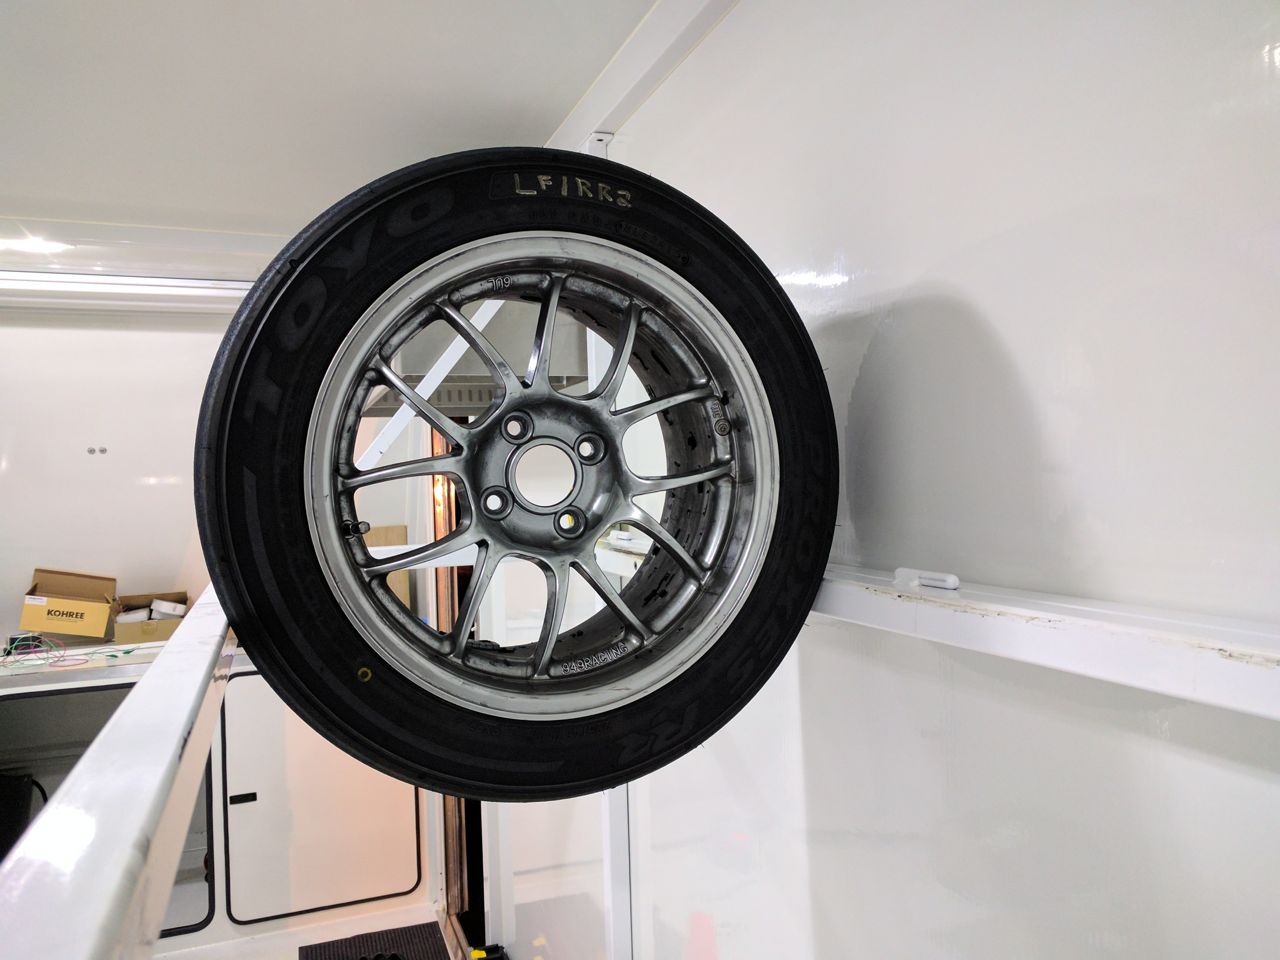
Test-fit a Miata tire on the tire rack in the trailer. Hm, it almost falls through, I guess dirt track sprint cars use tires a bit bigger (that's what the previous owner of the trailer used it for). I'll probably need to run another tube down the inside of the tire rack to make sure it's secure.
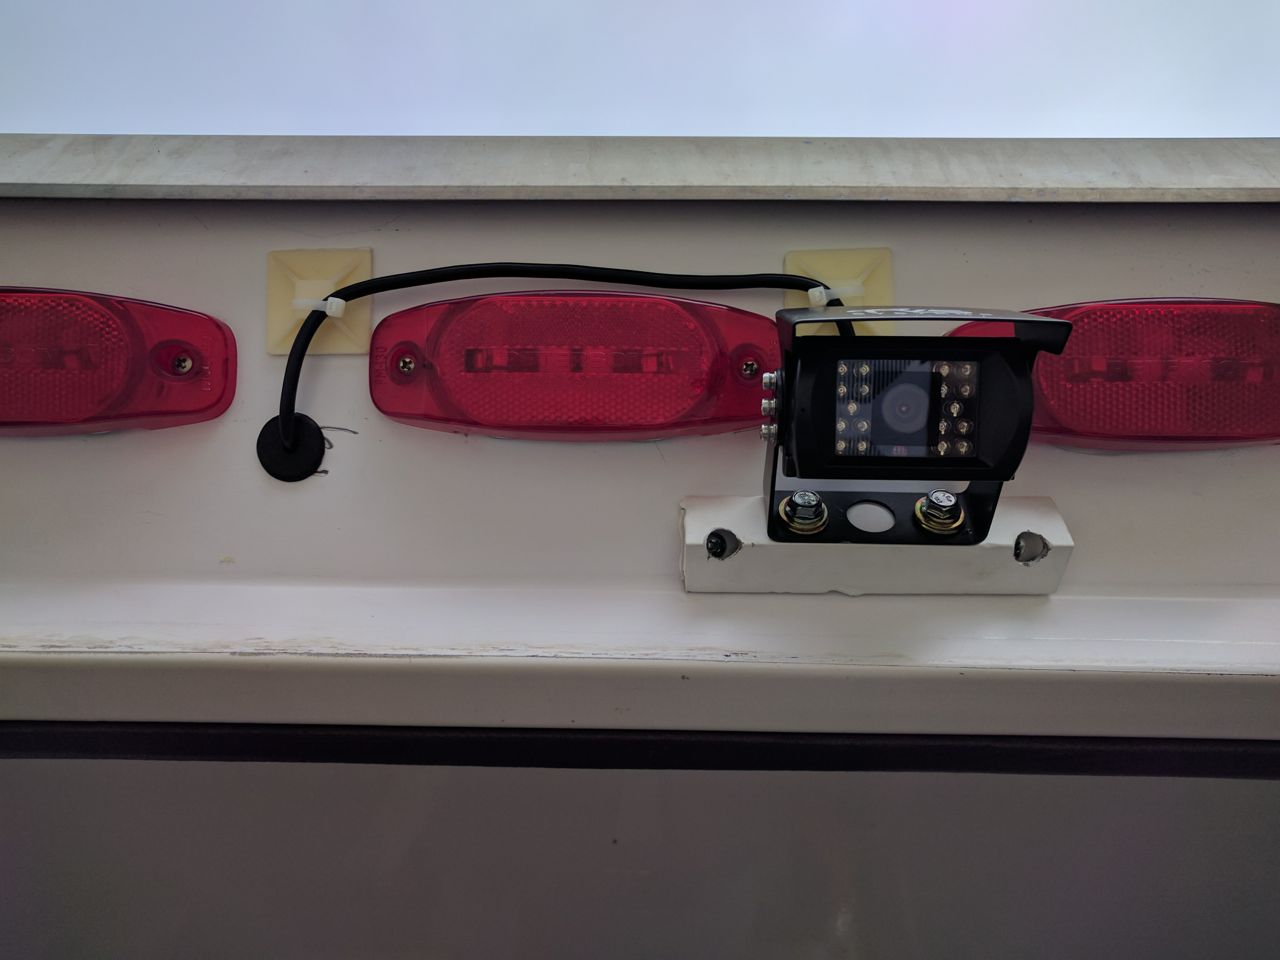
I also picked up a Rear View Safety 4-camera trailer backup camera. It's similar to the one Emilio posted video from in the "tow vehicle" thread, but I went with wired cameras rather than wireless ones. The wireless ones are hugely more expensive, and since you have to run power to them anyway, I figured it wasn't a big deal. The kit has 2 backup cameras and 2 side cameras, all of which go to a head unit that goes up front and has various split screen modes you can cycle through. They're just NTSC cameras, which is kind of disappointing, but should be good enough for getting the trailer into the side yard without knocking the gas meter over or putting a hole in the fence.
Rear camera on the trailer. I had to make a bracket adapter for it, because the brackets they come with are not designed to mount on a 45 degree angle surface.
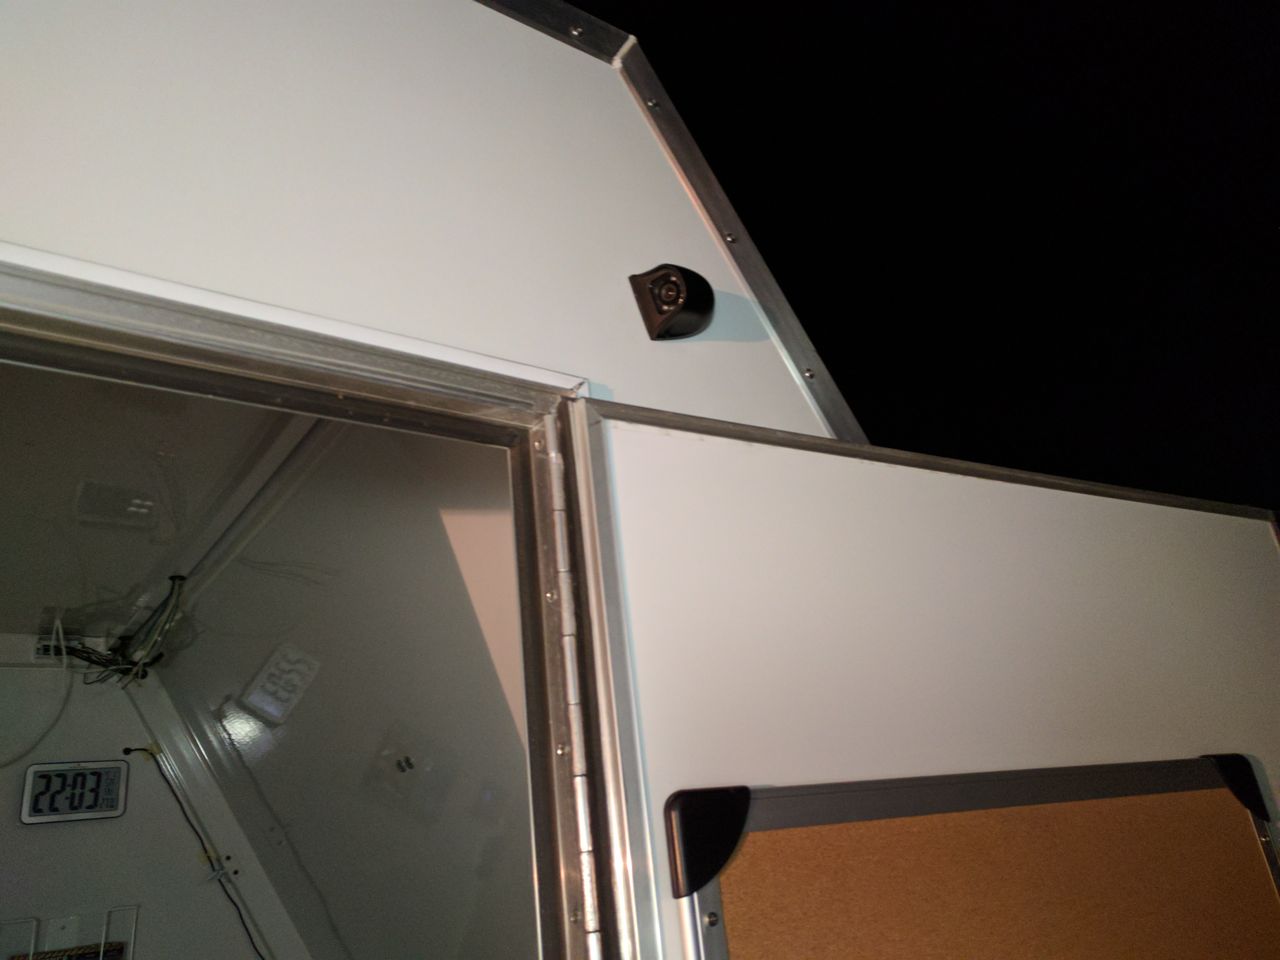
One side camera:
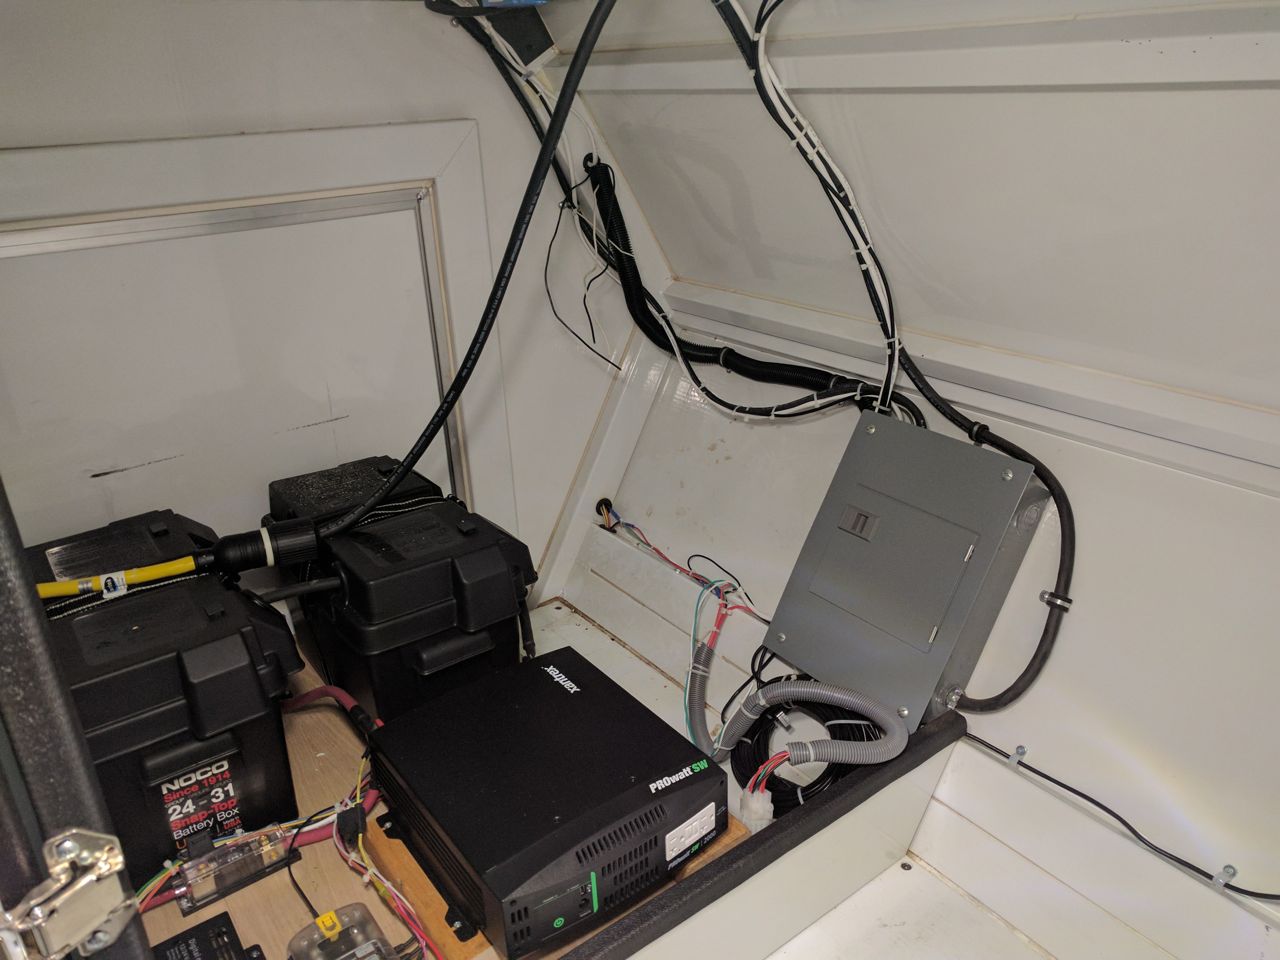
The wiring in the cabinet is complete:
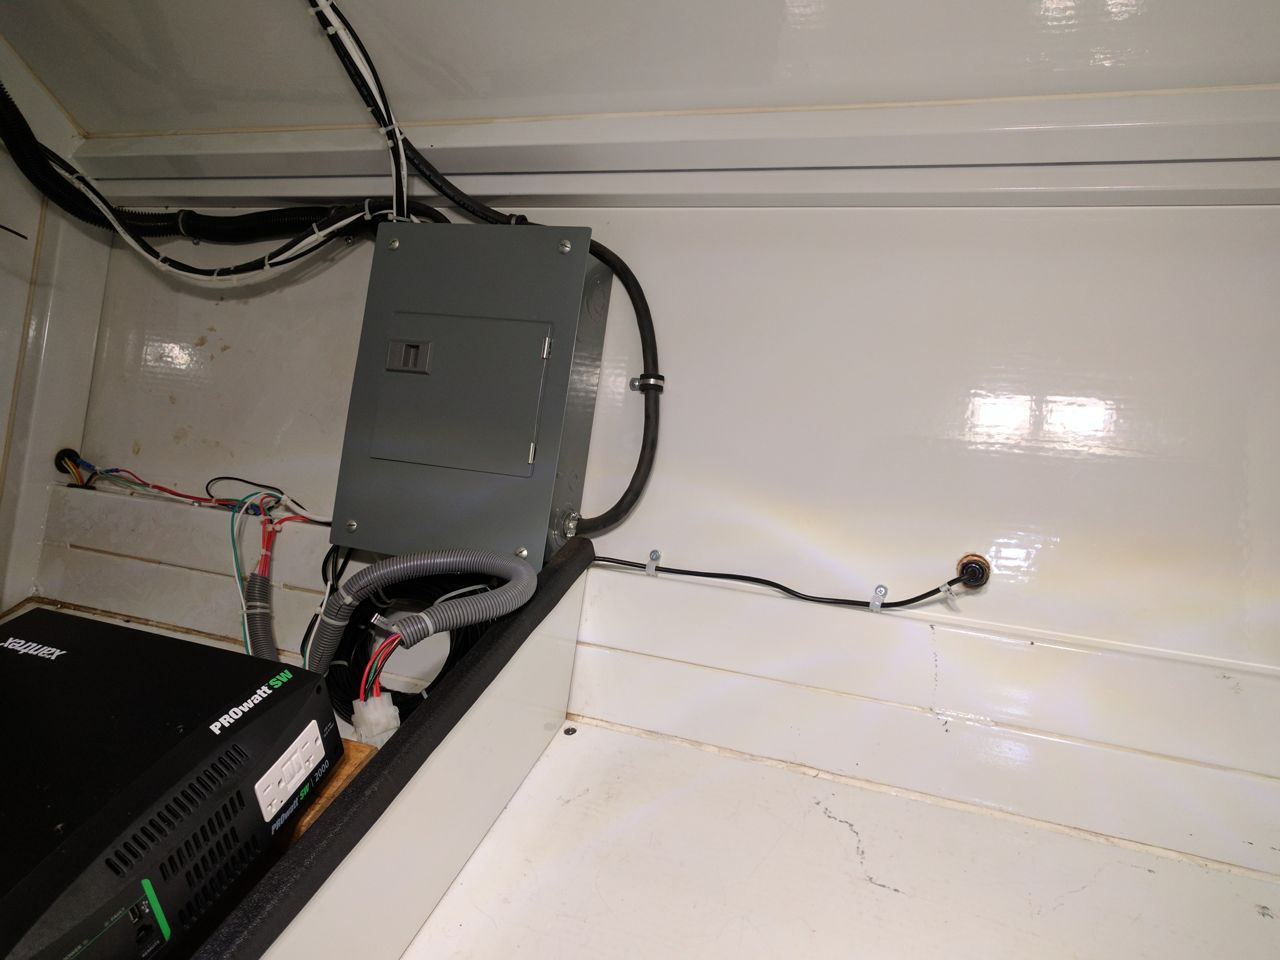
The base 4-camera RVS system is designed for RVs or busses or something. They have a trailer kit for it as well, which gives you three more harnesses -- two that are "hydra" harnesses and connect 3 cameras to one plug, then a curly-cue cable that is designed to go between the truck and trailer. Here's the trailer-side hydra harness.
And on the front of the trailer:
The backup camera system is all done on the trailer side, but I haven't got the truck side complete yet. I hung the camera and harness adapter on the bumper and started running the cables under the truck. (Did that today, no photos though because it's dark outside). Haven't figured out how to get them into the cab yet -- the hole in the boot for the main harness that I ran the amp power through is too small to fit four of these enormous weatherproof camera cable ends through, and there aren't any obvious other places to do it. I may need to drill a new hole somewhere.
--Ian
Replaced the incandescent bulbs in the 12v RV lights with LEDs. WAY brighter.
Put a light inside the cabinet:
Got a solar panel for the roof to keep the batteries topped up. This is only 25 watts, it's not intended to charge them up all the way, just to keep them up if the trailer sits for a while so that I don't need to hook up a battery tender.
Solar panel needs a charge controller:
Mounted a wench in the trailer. Er... WINCH. Mounted a WINCH in the trailer.
Ripped out the fluorescent lights as well as the halogen loading lights. Replaced the halogens with some LED floodlights. Haven't finished ripping out all of the solid core wire for the AC lights, though. I thought about reusing it for the DC lights, but since I'm still keeping *some* AC circuits (outlets, plugged into the inverter), I decided running 12v DC over what looks like AC wiring was a bad idea, so out it came.
Solar panel goes on the roof, so it needs brackets. The aluminum frame it's mounted in didn't have any mounting holes, so I decided to buy a rivnut tool and try them out. OH MY GOD, WHERE HAVE YOU BEEN ALL MY LIFE. I love this tool.
The brackets are bolted to the panel and taped to the roof. Yes, taped, with 3M "very high bond" tape. This stuff is amazing.
Test-fit a Miata tire on the tire rack in the trailer. Hm, it almost falls through, I guess dirt track sprint cars use tires a bit bigger (that's what the previous owner of the trailer used it for). I'll probably need to run another tube down the inside of the tire rack to make sure it's secure.
I also picked up a Rear View Safety 4-camera trailer backup camera. It's similar to the one Emilio posted video from in the "tow vehicle" thread, but I went with wired cameras rather than wireless ones. The wireless ones are hugely more expensive, and since you have to run power to them anyway, I figured it wasn't a big deal. The kit has 2 backup cameras and 2 side cameras, all of which go to a head unit that goes up front and has various split screen modes you can cycle through. They're just NTSC cameras, which is kind of disappointing, but should be good enough for getting the trailer into the side yard without knocking the gas meter over or putting a hole in the fence.
Rear camera on the trailer. I had to make a bracket adapter for it, because the brackets they come with are not designed to mount on a 45 degree angle surface.
One side camera:
The wiring in the cabinet is complete:
The base 4-camera RVS system is designed for RVs or busses or something. They have a trailer kit for it as well, which gives you three more harnesses -- two that are "hydra" harnesses and connect 3 cameras to one plug, then a curly-cue cable that is designed to go between the truck and trailer. Here's the trailer-side hydra harness.
And on the front of the trailer:
The backup camera system is all done on the trailer side, but I haven't got the truck side complete yet. I hung the camera and harness adapter on the bumper and started running the cables under the truck. (Did that today, no photos though because it's dark outside). Haven't figured out how to get them into the cab yet -- the hole in the boot for the main harness that I ran the amp power through is too small to fit four of these enormous weatherproof camera cable ends through, and there aren't any obvious other places to do it. I may need to drill a new hole somewhere.
--Ian
Reply
1
1


