Build Threads Building a motor? Post the progress here.

Inglarīs 2001 Sport

Thread Tools
 
Search this Thread
 
Old 04-14-2011, 07:55 AM
  #121  
Junior Member
Thread Starter
 
inglar's Avatar
 
Join Date: Mar 2010
Location: Norway
Posts: 189
Total Cats: 0
Default

Itīs going in the engine compartement. Will have it done by today so no pictures for some hours.
inglar is offline  
Old 04-14-2011, 08:29 AM
  #122  
Elite Member
iTrader: (4)
 
hornetball's Avatar
 
Join Date: Mar 2008
Location: Granbury, TX
Posts: 6,301
Total Cats: 696
Default

Originally Posted by inglar
Itīs going in the engine compartement. Will have it done by today so no pictures for some hours.
Are you sure you don't to donate it to a museum as an example of how to weld Aluminum?

hornetball is offline  
Old 04-14-2011, 08:49 AM
  #123  
Junior Member
 
arildh's Avatar
 
Join Date: Sep 2008
Posts: 60
Total Cats: 4
Default

Originally Posted by inglar
Started on something new as well. Guess what
Toyota MR-S EHPS bracket ?
My solution got more drama and fancy washers:
arildh is offline  
Old 04-14-2011, 09:08 AM
  #124  
Junior Member
Thread Starter
 
inglar's Avatar
 
Join Date: Mar 2010
Location: Norway
Posts: 189
Total Cats: 0
Default

Originally Posted by hornetball
Are you sure you don't to donate it to a museum as an example of how to weld Aluminum?

I must say that I am very pleased with the welding. The guy who is welding for me really know how to weld aluminium

Last edited by inglar; 04-15-2011 at 08:12 PM.
inglar is offline  
Old 04-14-2011, 09:11 AM
  #125  
Junior Member
Thread Starter
 
inglar's Avatar
 
Join Date: Mar 2010
Location: Norway
Posts: 189
Total Cats: 0
Default

Originally Posted by arildh
Toyota MR-S EHPS bracket ?
My solution got more drama and fancy washers:
10 points to Arildh. But I should deduct some point since he knows what parts Iīm using hehe
inglar is offline  
Old 04-14-2011, 09:14 AM
  #126  
Senior Member
iTrader: (4)
 
dgmorr's Avatar
 
Join Date: Nov 2009
Location: Toronto, ON
Posts: 1,446
Total Cats: 6
Default

Electric PS? You fancy huh! I was actually thinking (more like wishing) about doing something similar.
dgmorr is offline  
Old 04-14-2011, 09:27 AM
  #127  
Junior Member
Thread Starter
 
inglar's Avatar
 
Join Date: Mar 2010
Location: Norway
Posts: 189
Total Cats: 0
Default

Originally Posted by dgmorr
Electric PS? You fancy huh! I was actually thinking (more like wishing) about doing something similar.
Had to choose between original PS og a nice turbo setup. The choice was rather easy hehe. Spesialy when there is electrical Ps like the one from a toyota. Put it where you like. Conect some new longer hoses and power. Then youīr ready to go. Look at this page: http://www.diyelectriccar.com/forums...power+steering
inglar is offline  
Old 04-14-2011, 09:51 AM
  #128  
Elite Member
iTrader: (2)
 
Faeflora's Avatar
 
Join Date: Jan 2007
Location: Los Angeles, CA
Posts: 8,682
Total Cats: 130
Default

Injector solution:

Take the blue top hat and lube the hell out of the inside of it. I used oil.

Put the hat on the injector and press. The lube will let the hat "pop" onto the injector all the way.

Bolt the rail down as usual with no extra spacers and it should work. Pressure test by key on and pump will prime and look for leaks.
Faeflora is offline  
Old 04-14-2011, 10:33 AM
  #129  
Junior Member
Thread Starter
 
inglar's Avatar
 
Join Date: Mar 2010
Location: Norway
Posts: 189
Total Cats: 0
Default

Originally Posted by Faeflora
Injector solution:

Take the blue top hat and lube the hell out of the inside of it. I used oil.

Put the hat on the injector and press. The lube will let the hat "pop" onto the injector all the way.

Bolt the rail down as usual with no extra spacers and it should work. Pressure test by key on and pump will prime and look for leaks.
Will try to put some oil on it and apply some more preassure than I used yesterday.
inglar is offline  
Old 04-14-2011, 10:48 AM
  #130  
Supporting Vendor
iTrader: (3)
 
emilio700's Avatar
 
Join Date: May 2005
Posts: 7,325
Total Cats: 2,377
Default

Originally Posted by Faeflora
Injector solution:

Take the blue top hat and lube the hell out of the inside of it. I used oil.

Put the hat on the injector and press. The lube will let the hat "pop" onto the injector all the way.

Bolt the rail down as usual with no extra spacers and it should work. Pressure test by key on and pump will prime and look for leaks.
Yup. I usually use a little fuel but oil works too. Excess fuel is more easily cleaned up with a spray of isopropyl alcohol.
__________________


www.facebook.com/SuperMiata

949RACING.COM Home of the 6UL wheel

.31 SNR
emilio700 is offline  
Old 04-15-2011, 04:26 AM
  #131  
Junior Member
Thread Starter
 
inglar's Avatar
 
Join Date: Mar 2010
Location: Norway
Posts: 189
Total Cats: 0
Default

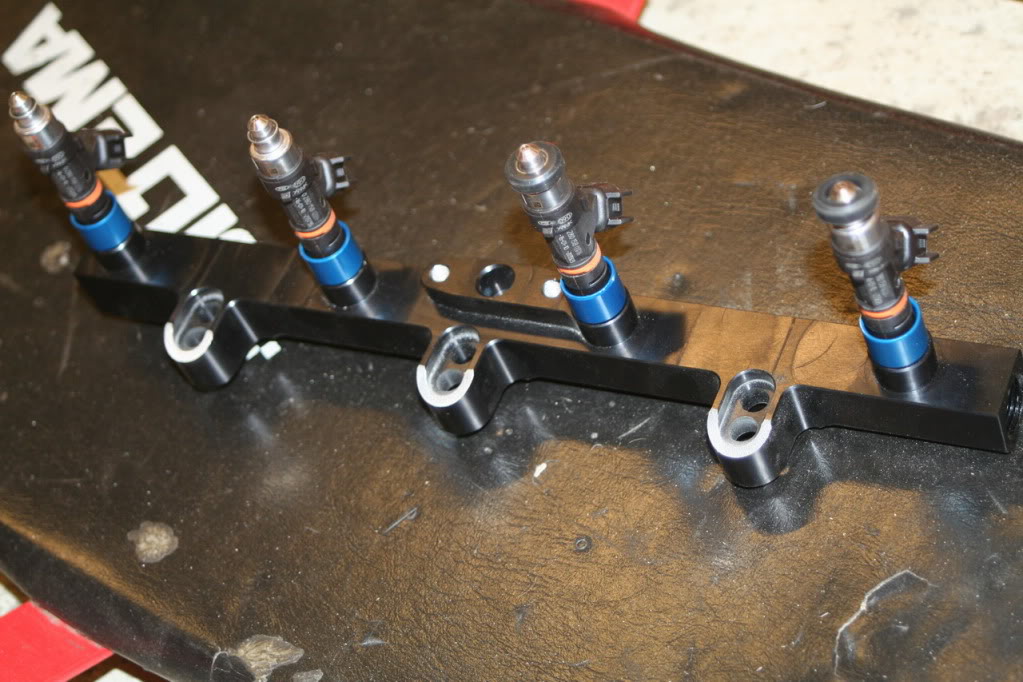
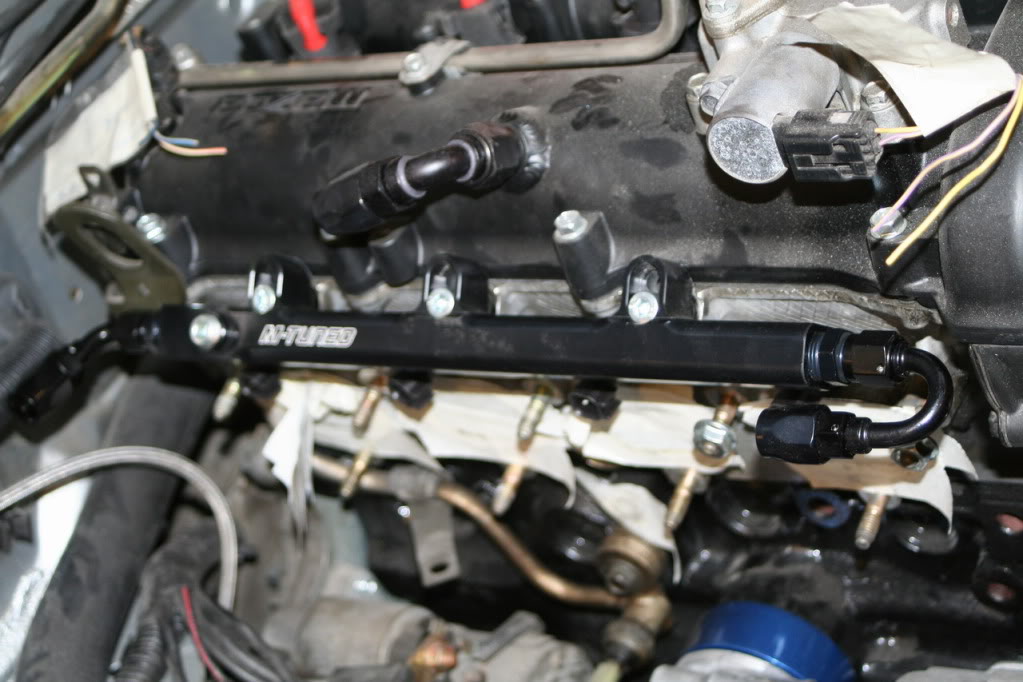
Managed to leave the camera at the workshop yesterday. Found the reason for the trouble with the fuel rail. The injectors was pressed all the way in, but the "mounting eyes" needed some trimming. Used the inner holes so I had to trim the ends a bit so it didnīt hit the top cover. And will change to 10mm longer bolts. Didnt get enough turns on the bolts to feel safe.

Will post some pictures when I remember the camera
inglar is offline  
Old 04-15-2011, 08:15 PM
  #132  
Junior Member
Thread Starter
 
inglar's Avatar
 
Join Date: Mar 2010
Location: Norway
Posts: 189
Total Cats: 0
Default

And now, picture time


Injectors and fuel rail.

Name:  dyser1.jpg
Views: 662
Size:  123.4 KB

Name:  dyser2.jpg
Views: 684
Size:  101.0 KB


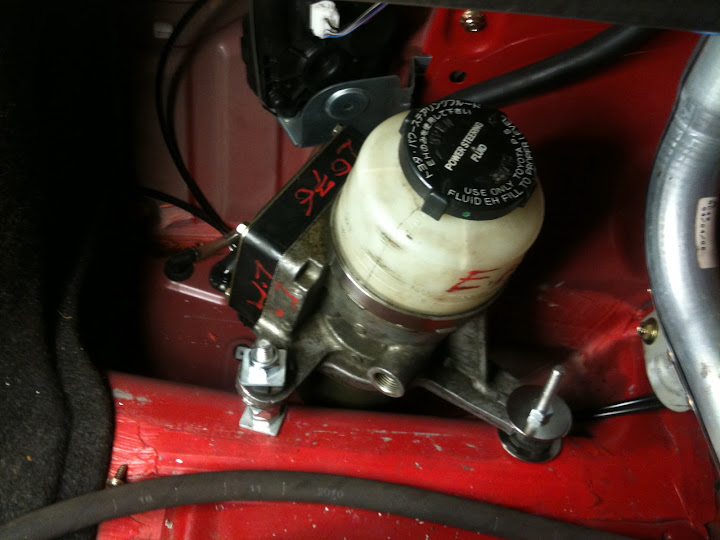
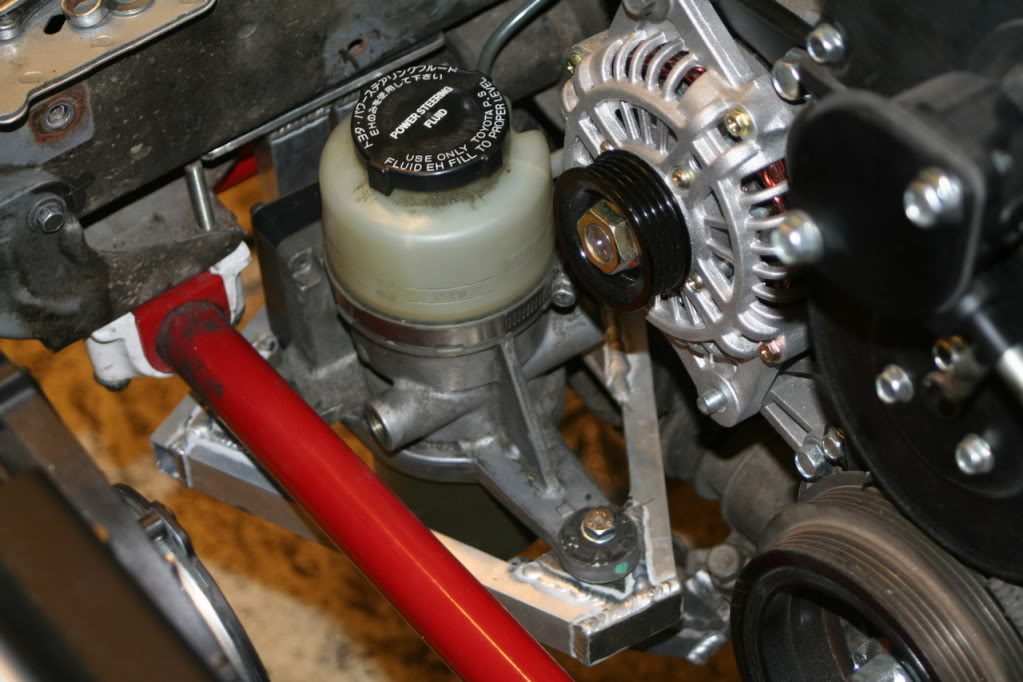
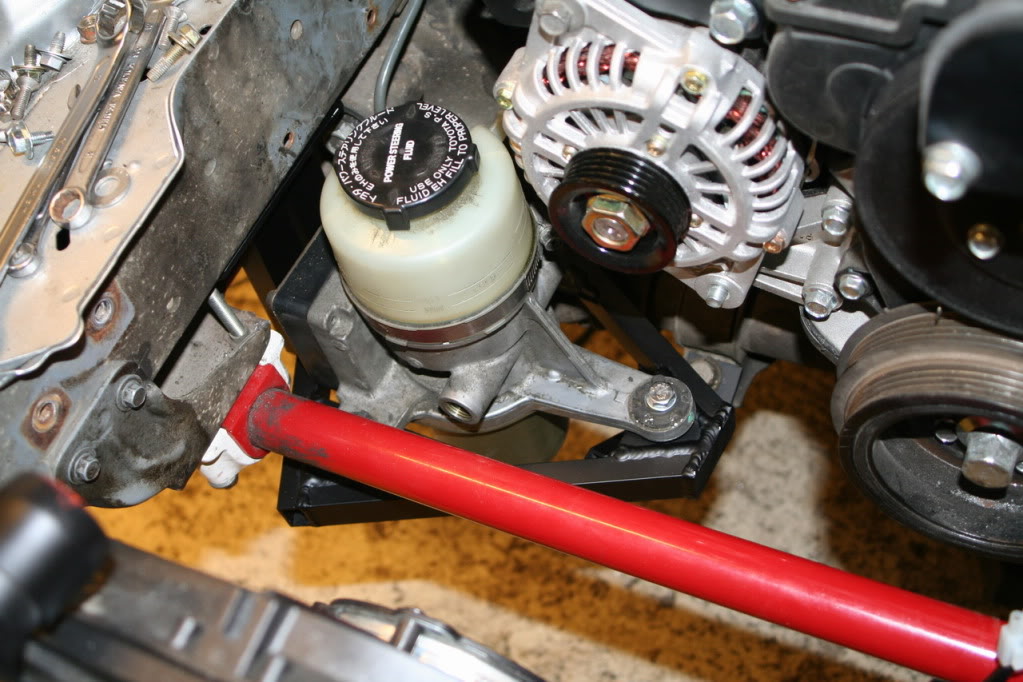
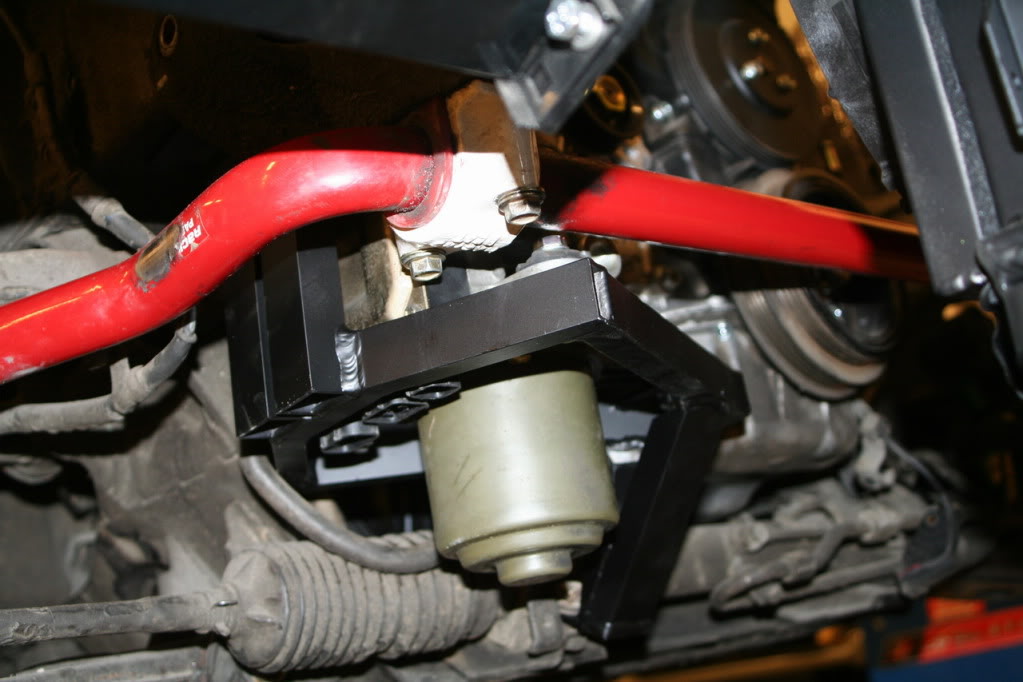
Finished mounting the PS bracket. Just need some bigger washers to hold down the PS.

Name:  servo4.jpg
Views: 673
Size:  104.7 KB

Name:  servo6.jpg
Views: 632
Size:  137.5 KB

Name:  servo7.jpg
Views: 672
Size:  89.5 KB
inglar is offline  
Old 04-15-2011, 10:08 PM
  #133  
Supporting Vendor
iTrader: (3)
 
emilio700's Avatar
 
Join Date: May 2005
Posts: 7,325
Total Cats: 2,377
Default

Originally Posted by inglar
And now, picture time

Injectors and fuel rail.

Finished mounting the PS bracket. Just need some bigger washers to hold down the PS.
Did you leave out the three plastic insulators?

__________________


www.facebook.com/SuperMiata

949RACING.COM Home of the 6UL wheel

.31 SNR
emilio700 is offline  
Old 04-15-2011, 10:48 PM
  #134  
y8s
2 Props,3 Dildos,& 1 Cat
iTrader: (8)
 
y8s's Avatar
 
Join Date: Jun 2005
Location: Fake Virginia
Posts: 19,338
Total Cats: 573
Default

Originally Posted by emilio700
Did you leave out the three plastic insulators?

https://www.miataturbo.net/showpost....&postcount=108

doesnt look like it
y8s is offline  
Old 04-16-2011, 03:35 AM
  #135  
Junior Member
Thread Starter
 
inglar's Avatar
 
Join Date: Mar 2010
Location: Norway
Posts: 189
Total Cats: 0
Default

Originally Posted by emilio700
Did you leave out the three plastic insulators?

Nope. Iīm using those three plastic spacers.
inglar is offline  
Old 04-18-2011, 05:44 PM
  #136  
Junior Member
Thread Starter
 
inglar's Avatar
 
Join Date: Mar 2010
Location: Norway
Posts: 189
Total Cats: 0
Default

If it doesnt fit, make it fit.

Name:  IMG_1143.jpg
Views: 566
Size:  73.1 KB


And there the OsGiken is in

Name:  IMG_1144.jpg
Views: 590
Size:  78.1 KB
inglar is offline  
Old 04-18-2011, 06:59 PM
  #137  
Elite Member
iTrader: (2)
 
Faeflora's Avatar
 
Join Date: Jan 2007
Location: Los Angeles, CA
Posts: 8,682
Total Cats: 130
Default

What didnt' fit?
Faeflora is offline  
Old 04-18-2011, 07:06 PM
  #138  
Junior Member
Thread Starter
 
inglar's Avatar
 
Join Date: Mar 2010
Location: Norway
Posts: 189
Total Cats: 0
Default

Everything fit just fine, just kidding
inglar is offline  
Old 04-19-2011, 10:26 AM
  #139  
Senior Member
iTrader: (12)
 
absRTP's Avatar
 
Join Date: Sep 2009
Location: -
Posts: 516
Total Cats: 0
Default

Subscribed!!!
absRTP is offline  
Old 04-19-2011, 05:15 PM
  #140  
Junior Member
Thread Starter
 
inglar's Avatar
 
Join Date: Mar 2010
Location: Norway
Posts: 189
Total Cats: 0
Default

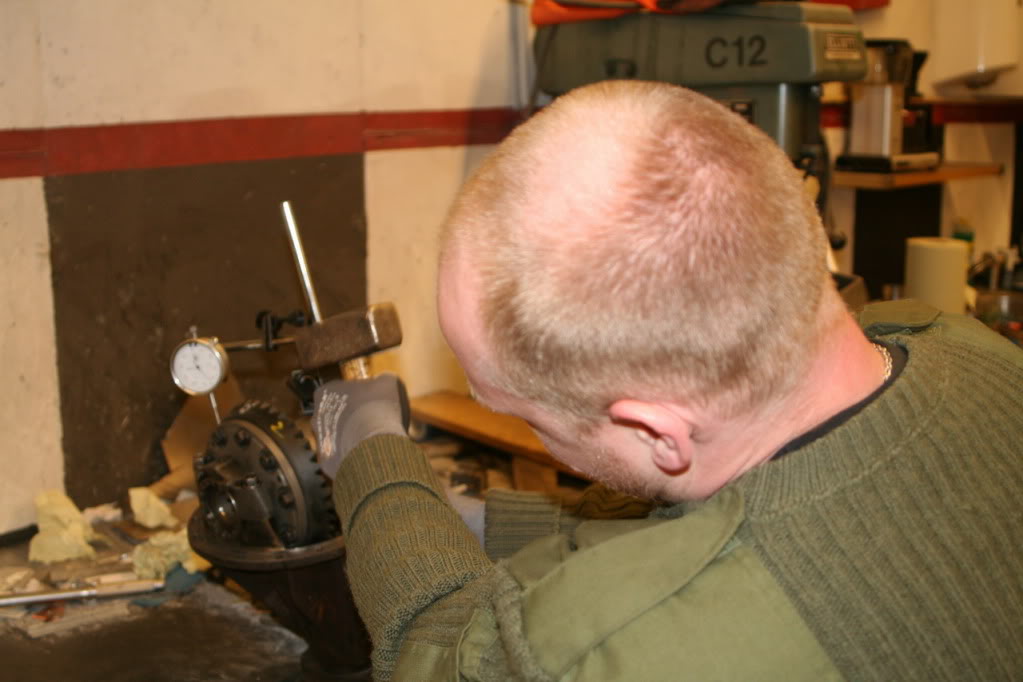
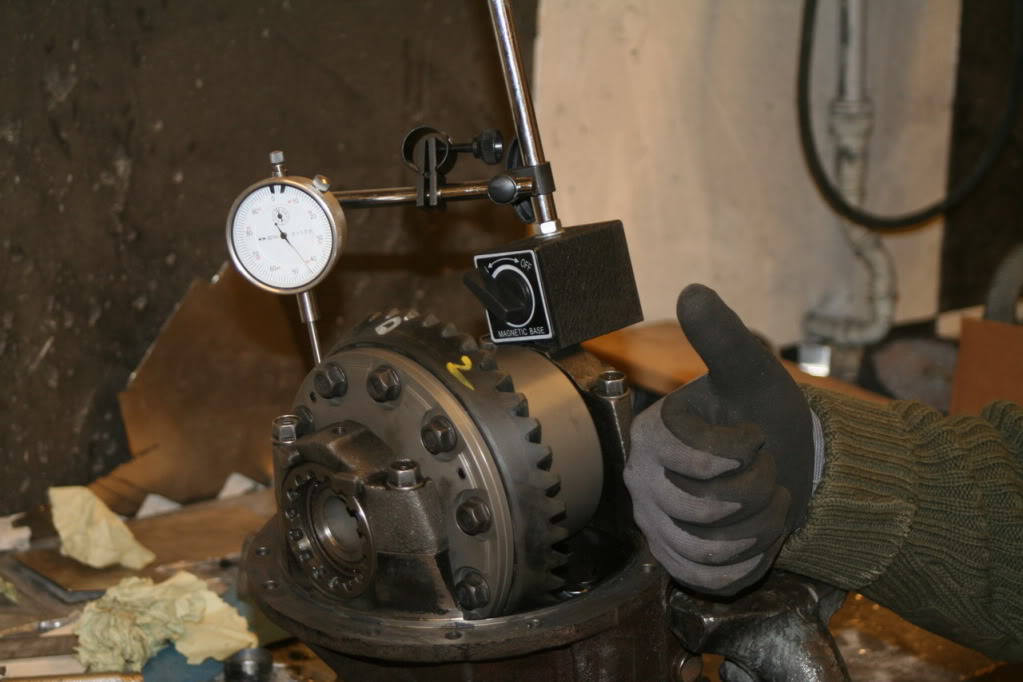
The diff is back in the car now. Used the new pinion spacer. Didnīt bather to chack with the old one. Happy with the help I got from hf-mx5t. have never tried this before so it is great to get help from someone who has done this before. A lot of adjustment before the diff was finished. If you are planning to do this, buy a micromeeter (or what it is called in english )
inglar is offline  


Quick Reply: Inglarīs 2001 Sport


All times are GMT -4. The time now is 02:40 AM.