JCH13's 1991 Every-Color Turbo - Budget+DIY Build
 06-04-2014, 09:08 AM
#22
Junior Member
Thread Starter

Join Date: Nov 2010
Location: NH
Posts: 64
Total Cats: -2
Brace for big update.
Got the head back from the engine shop after a valve job and steam cleaning:
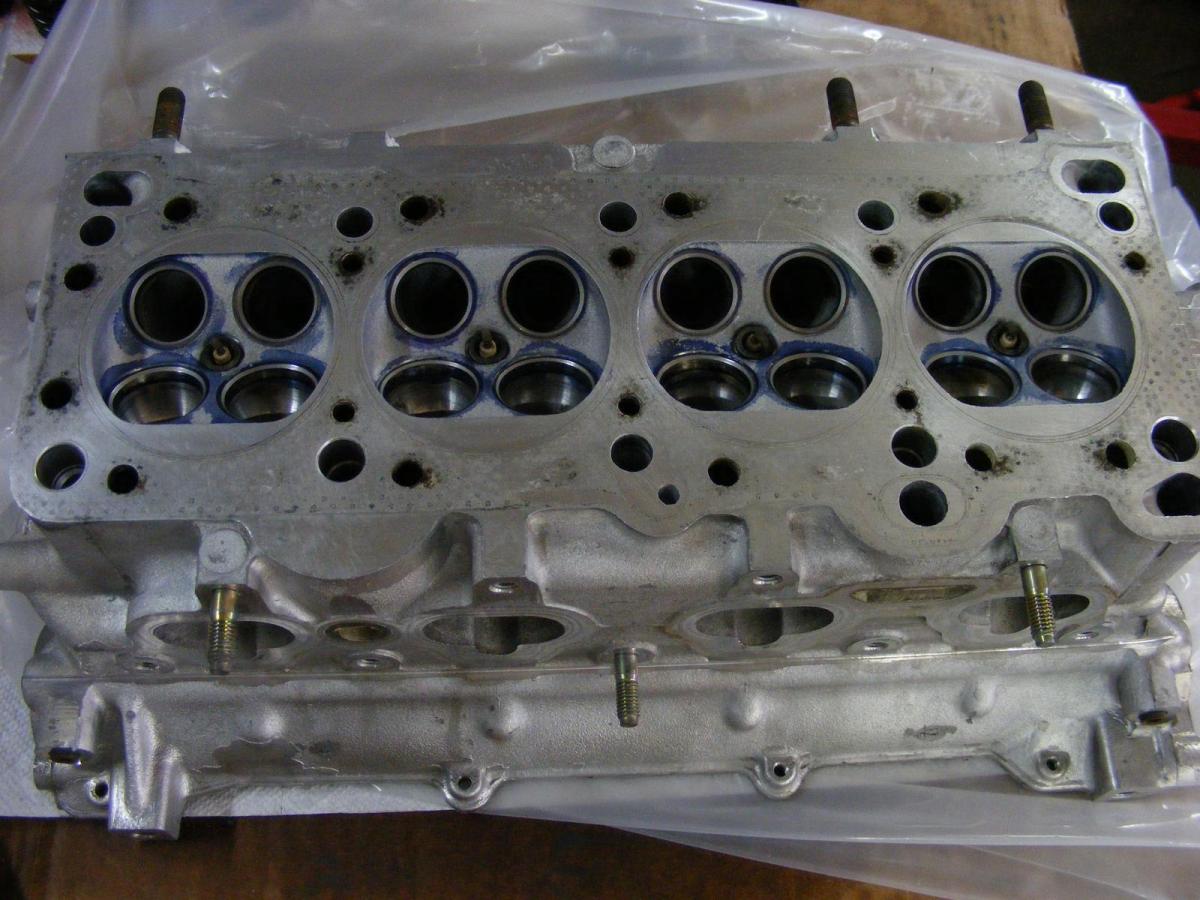
In prepping the head and the block for a new head gasket I was reading up on how people clean off the gasket surfaces. I didn't like a lot of what I read. Many people suggested using sandpaper, scotchbrite, and other abrasives. The thought of even a small bit of those abrasives getting into the oil sump gave me nightmares. So, after a bit of thought, I decided to use a razor blade to clean off any large chunks of old gasket, and steel wool with a little bit of ATF to clean off everything else. Steel is not going to be the most abrasive material in the engine (especially non-hardened steel in steel wool) and it will be collected by the drain plug magnet if it does get into the engine.
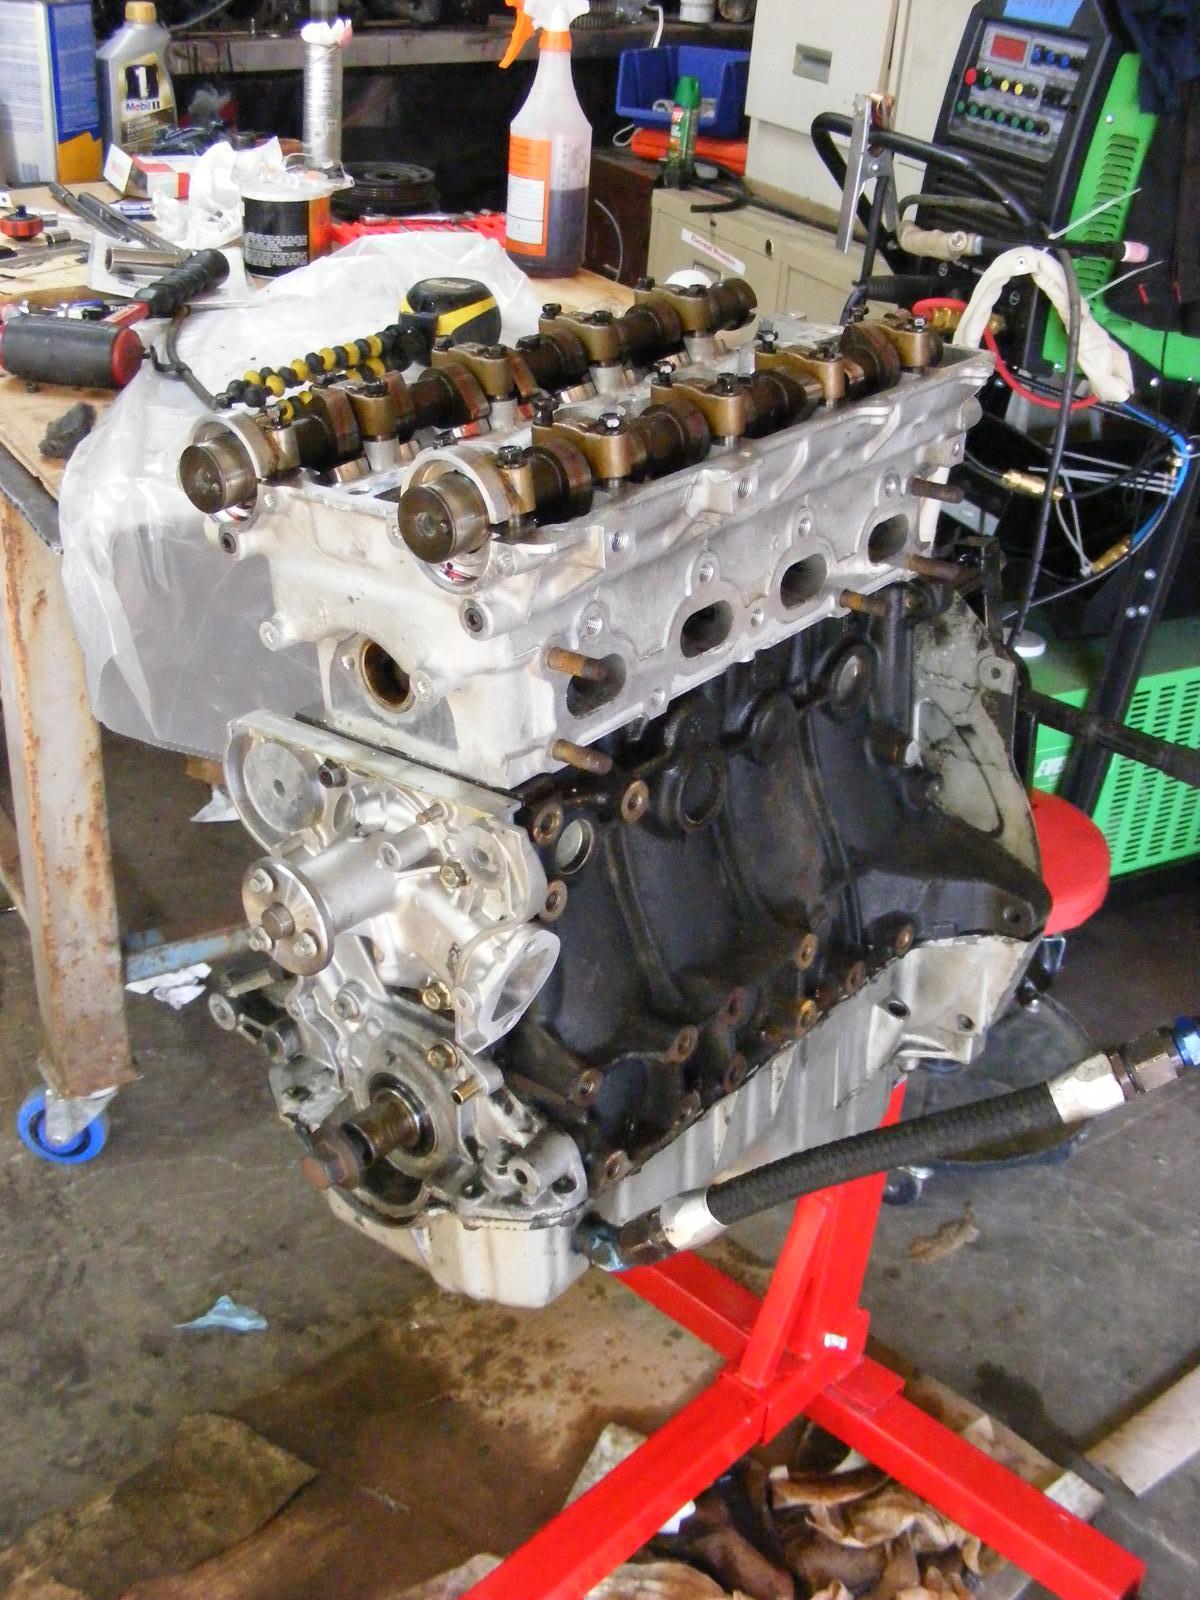
I then bolted the head back onto the block using a new HG and the stock head bolts. I ran up the torque in 4 steps. First, finger tight, then 20ft-lbs, 40ft-lbs, and finally 60ft-lbs. With AMSOIL assembly oil on every surface it went together without any issues at all.
Then I began re-assembling the engine.
Cams, HLAs, and a new water pump.
Rear main seal installed with a FM rear main installer tool.
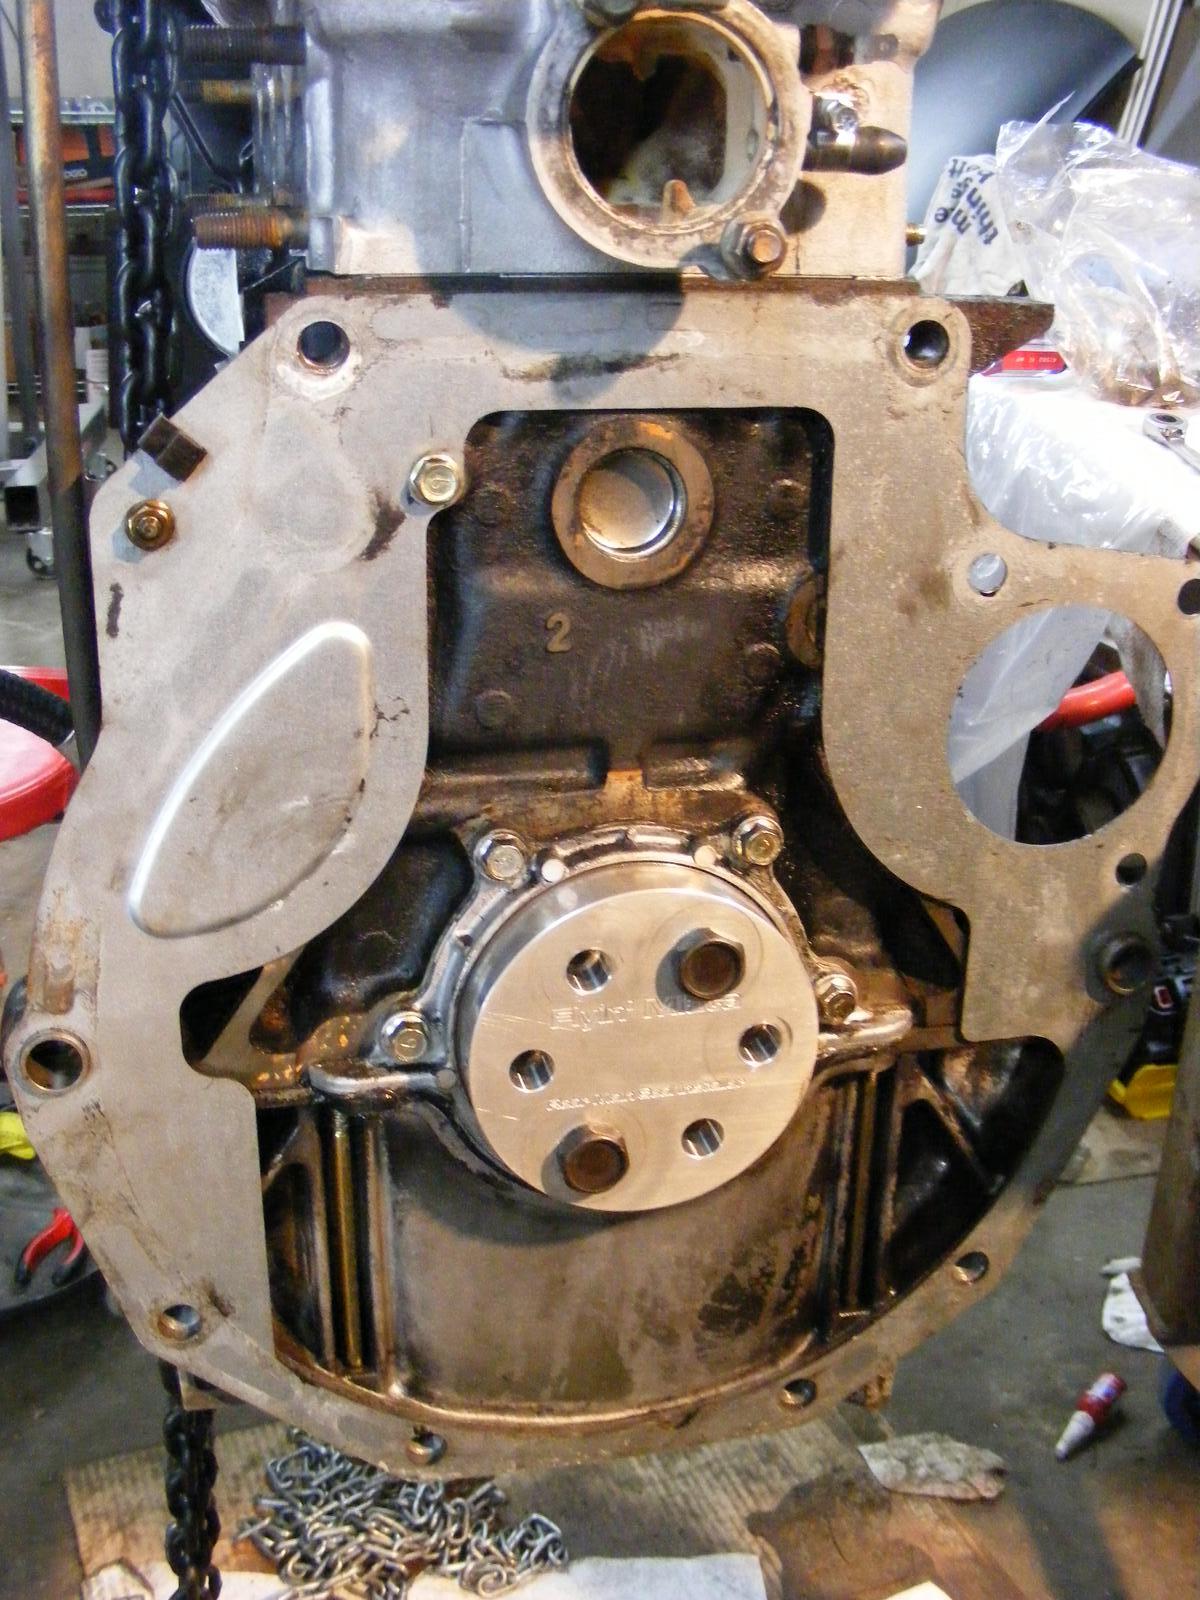
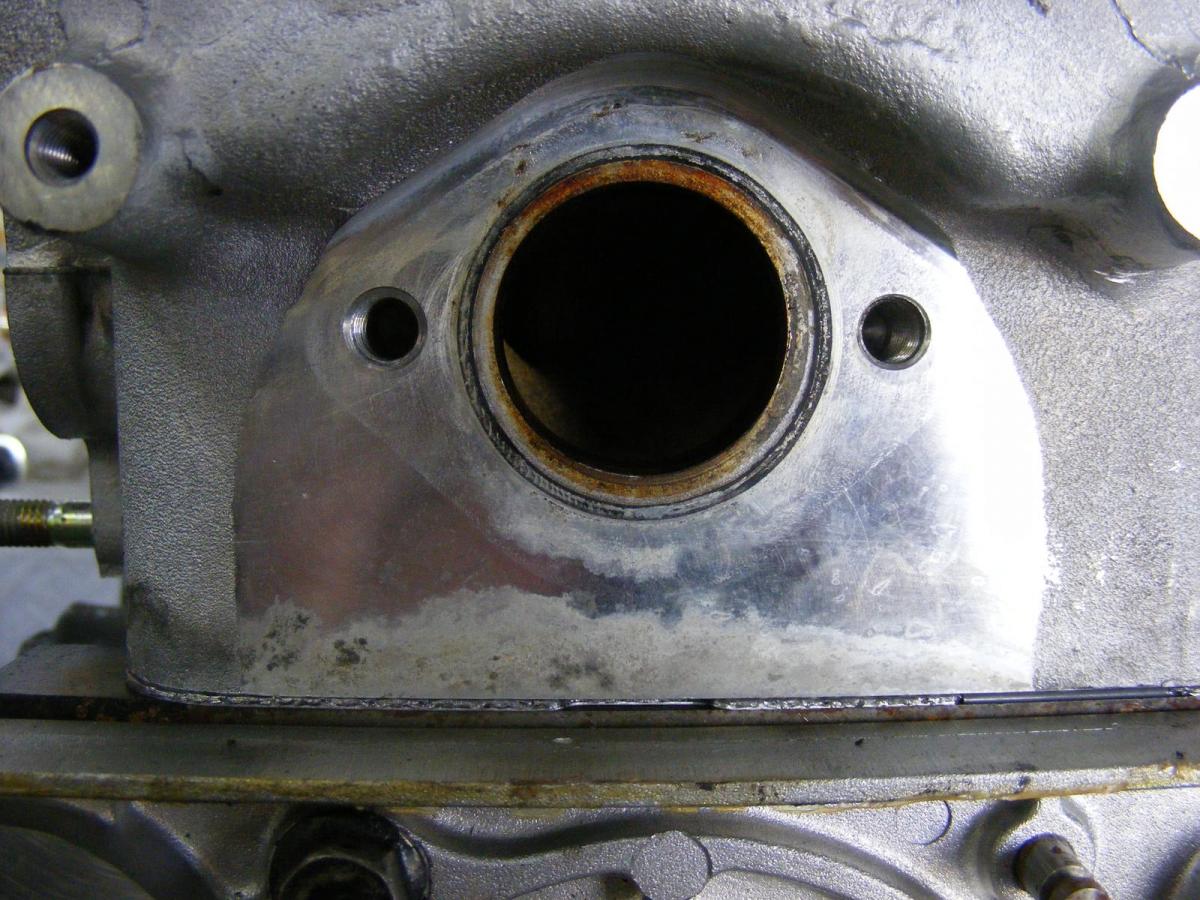
At this point I decided to make a custom part for the coolant re-route modification. The reroute deletes the front thermostat housing, which also contains the fan switch sender. So, I made a plate that mounts the fan switch directly to the block, where the thermostat neck used to be. Right here:
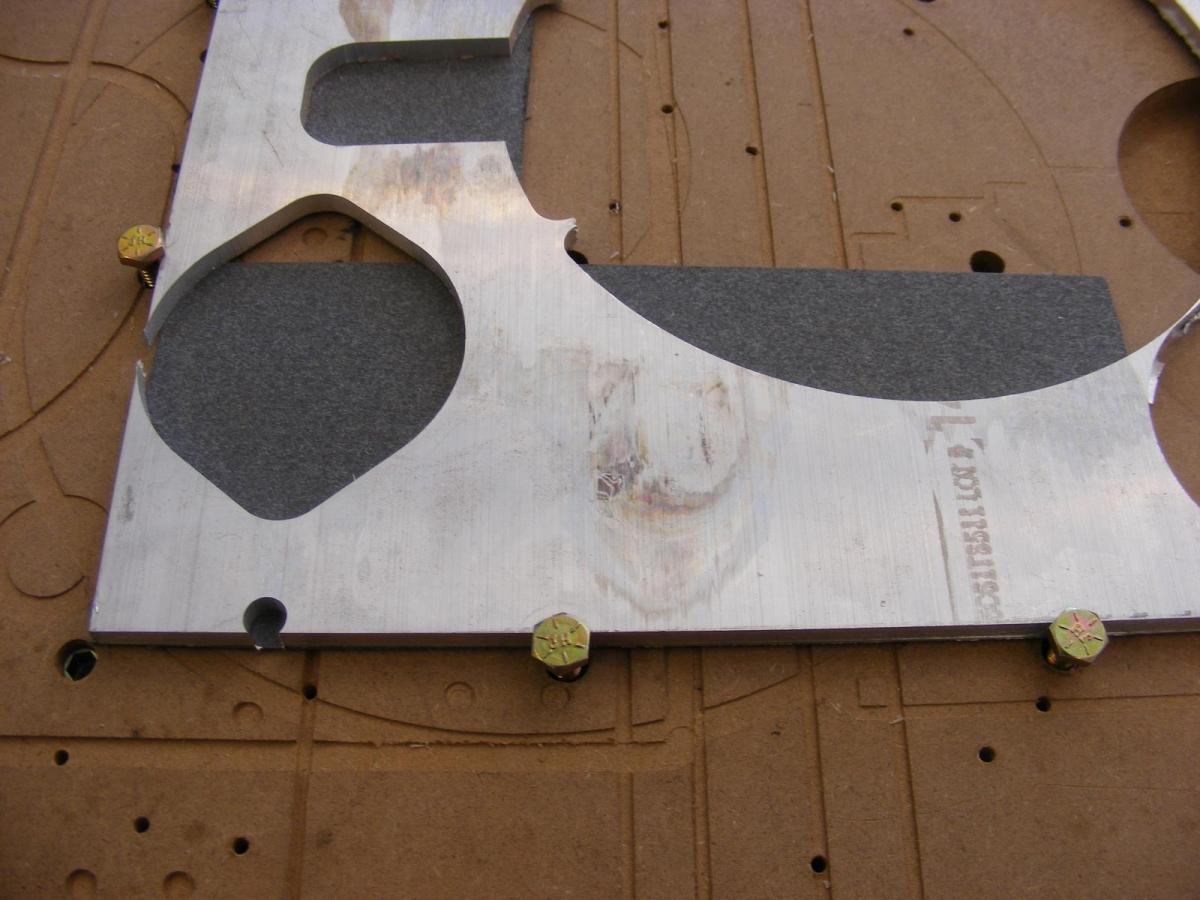
As I went about making the part on my CNC router I realized that no gasket exists that will work for this. At least none that I knew of. So, I sandwiched some gasket stock behind the aluminum I made the plate out of.
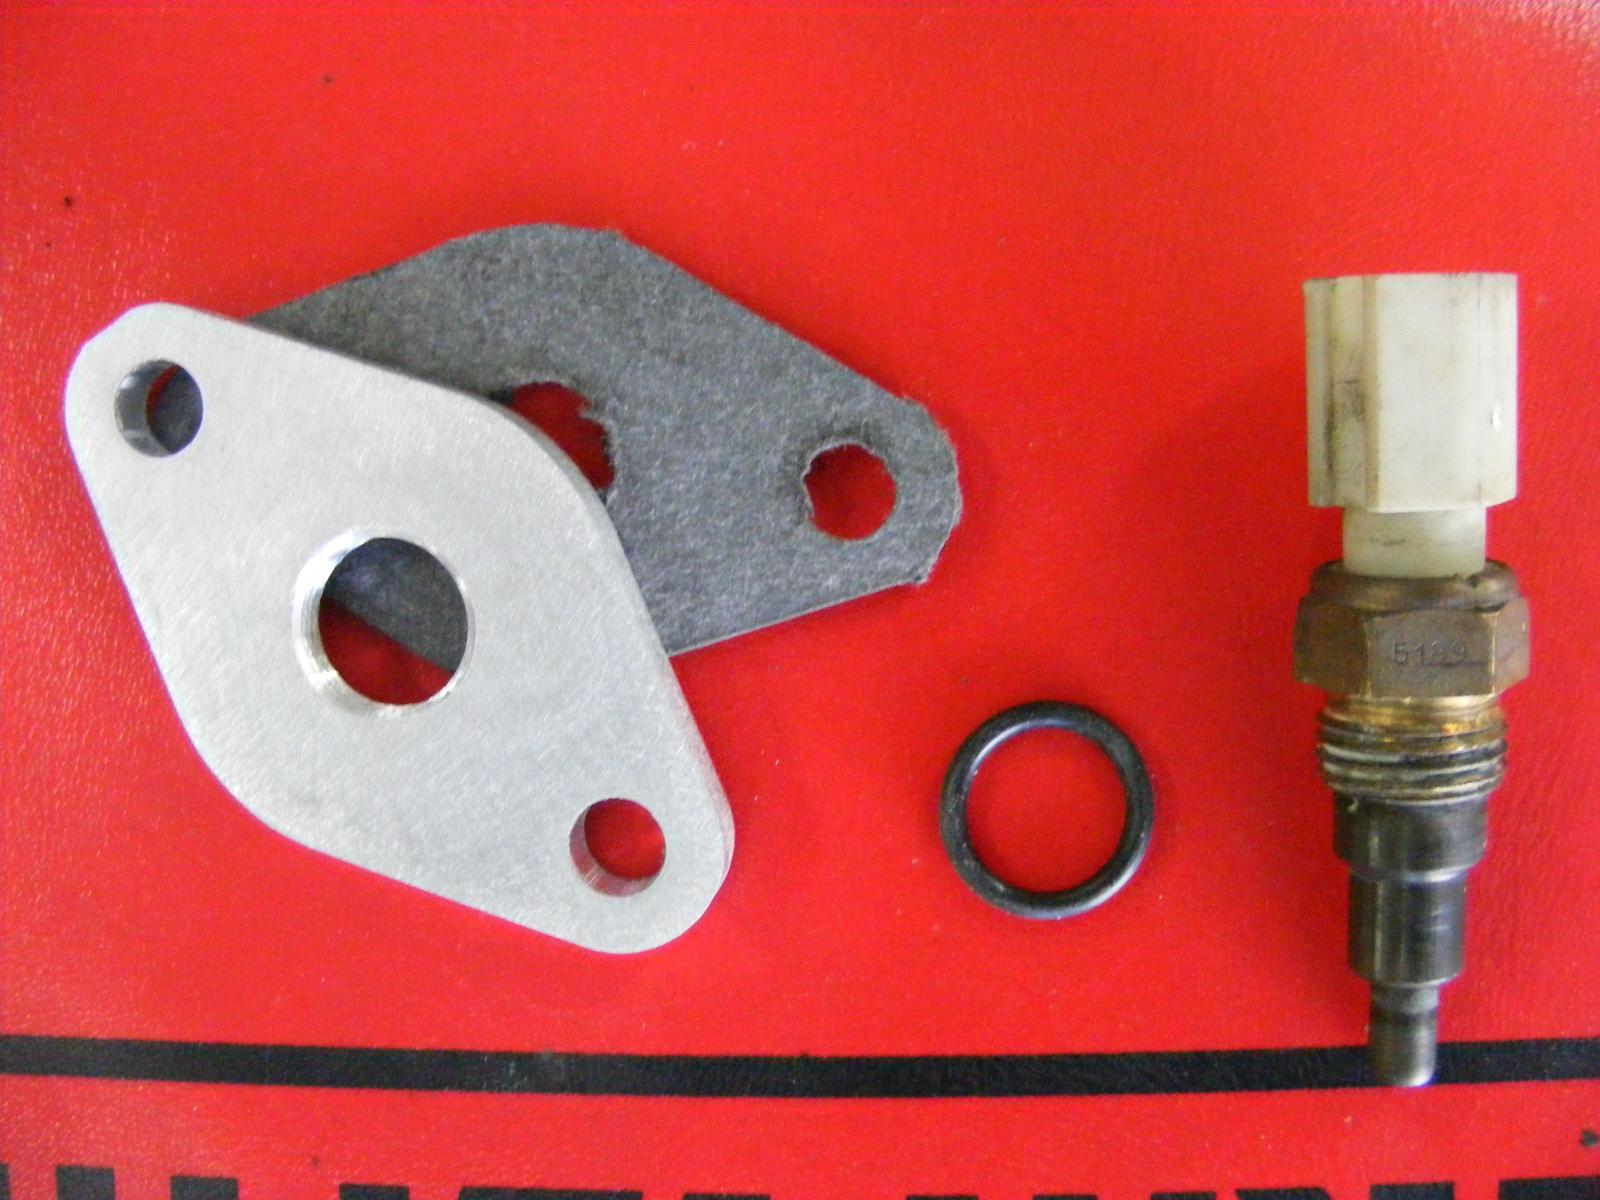
And cut out a gasket at the same time the plate was cut. Hooray! Here is the plate (tapped and w/ counter-sink for an o-ring), gasket (before cleaning it up a little), new o-ring, and fan switch sender. I smoothed the plate's surfaces with 100grit sandpaper in a DA sander.
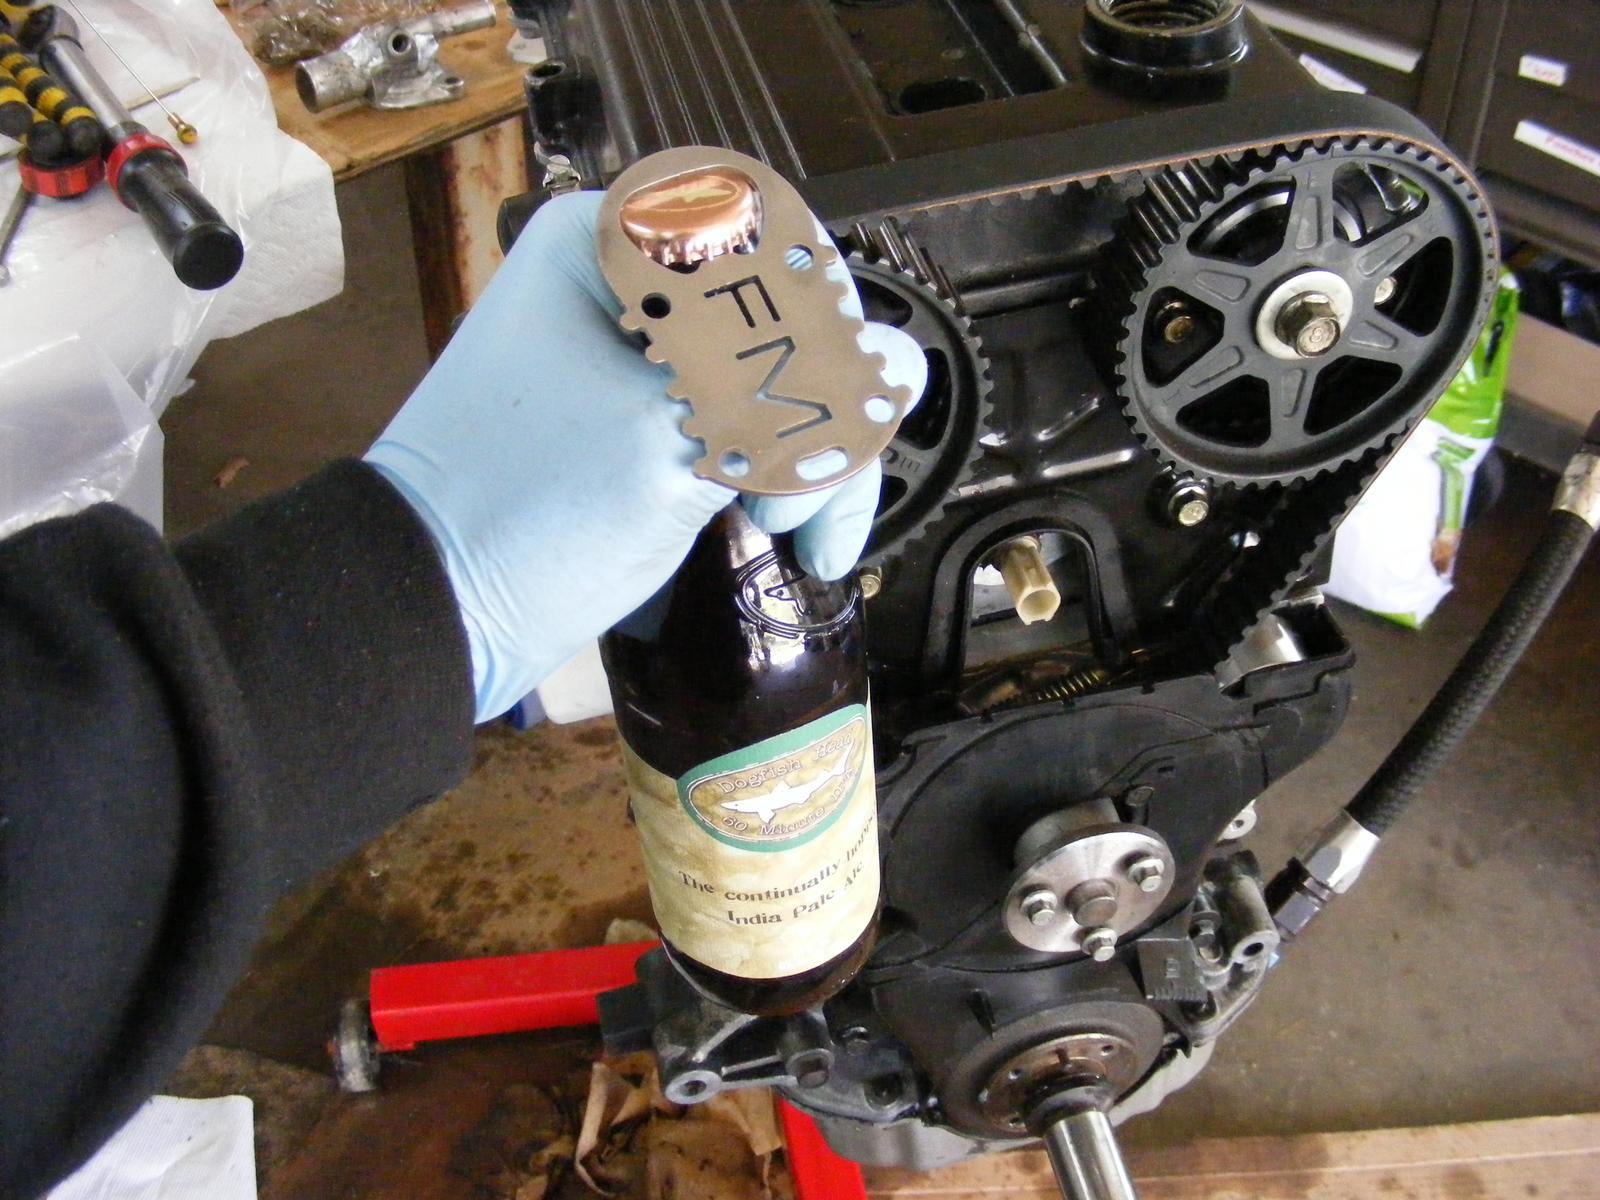
I got liberal with the RTV when installing it, I was a little worried about leaks. Here is the plate installed with the cam pulleys, FM cam pulley tool, timing belt, crank timing pulley, and FM crank pulley tool all on the engine.
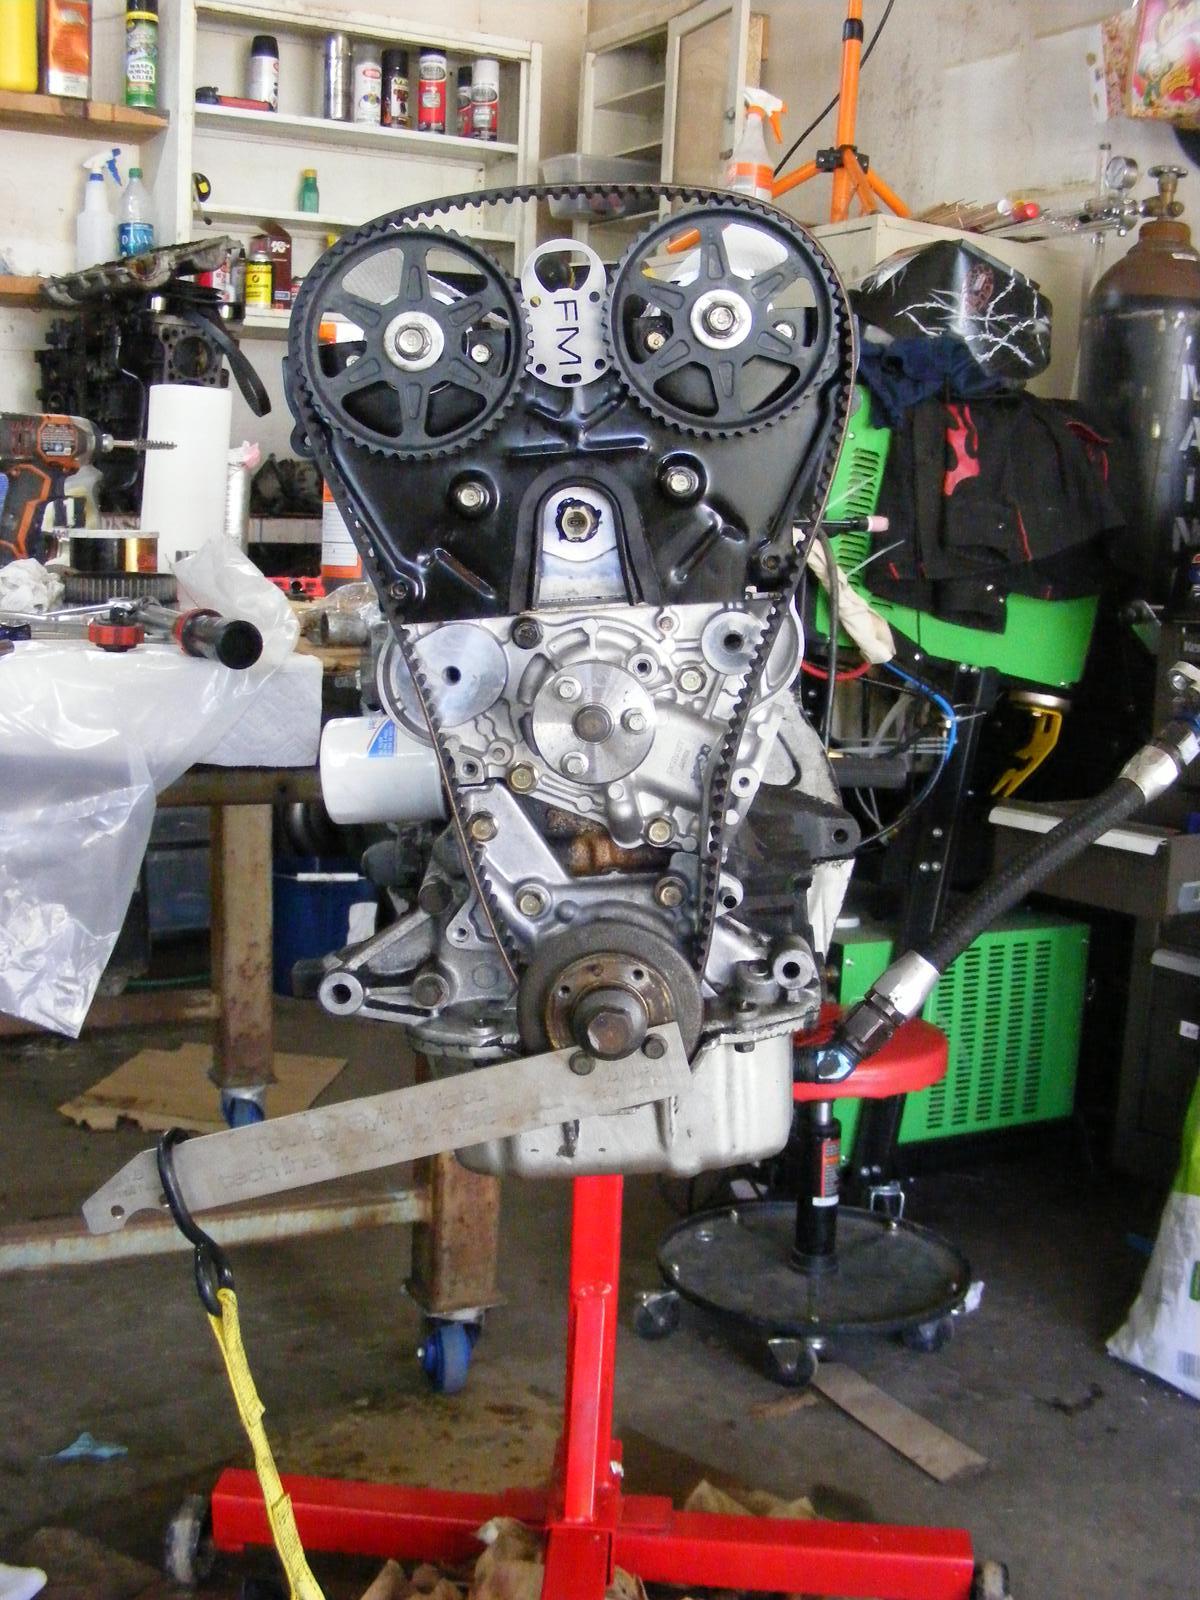
With all of the front timing bits, covers, pulleys, etc installed, time for an adult beverage! The handy FM pulley tool has a bottle opener built in. Genius.
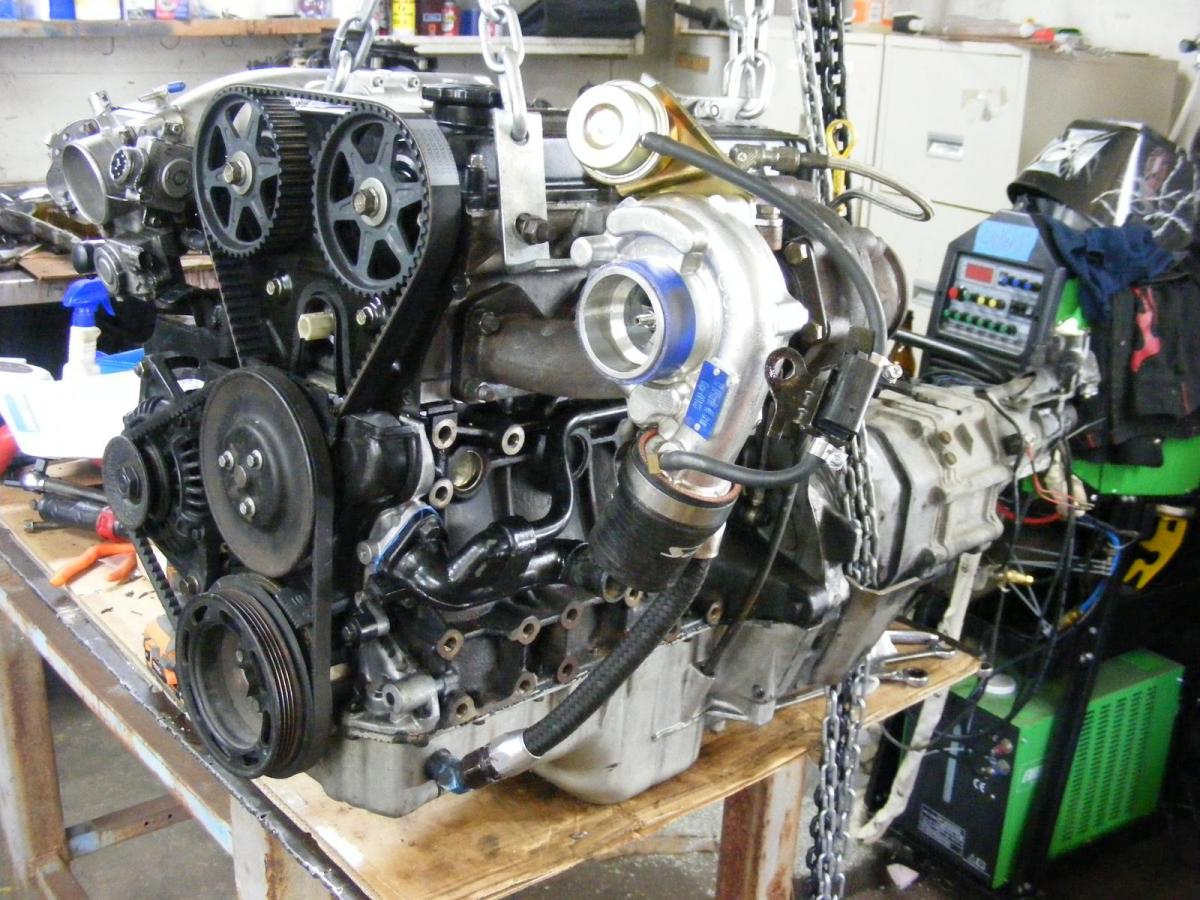
Continuing to dress the engine...
Got the head back from the engine shop after a valve job and steam cleaning:
In prepping the head and the block for a new head gasket I was reading up on how people clean off the gasket surfaces. I didn't like a lot of what I read. Many people suggested using sandpaper, scotchbrite, and other abrasives. The thought of even a small bit of those abrasives getting into the oil sump gave me nightmares. So, after a bit of thought, I decided to use a razor blade to clean off any large chunks of old gasket, and steel wool with a little bit of ATF to clean off everything else. Steel is not going to be the most abrasive material in the engine (especially non-hardened steel in steel wool) and it will be collected by the drain plug magnet if it does get into the engine.
I then bolted the head back onto the block using a new HG and the stock head bolts. I ran up the torque in 4 steps. First, finger tight, then 20ft-lbs, 40ft-lbs, and finally 60ft-lbs. With AMSOIL assembly oil on every surface it went together without any issues at all.
Then I began re-assembling the engine.
Cams, HLAs, and a new water pump.
Rear main seal installed with a FM rear main installer tool.
At this point I decided to make a custom part for the coolant re-route modification. The reroute deletes the front thermostat housing, which also contains the fan switch sender. So, I made a plate that mounts the fan switch directly to the block, where the thermostat neck used to be. Right here:
As I went about making the part on my CNC router I realized that no gasket exists that will work for this. At least none that I knew of. So, I sandwiched some gasket stock behind the aluminum I made the plate out of.
And cut out a gasket at the same time the plate was cut. Hooray! Here is the plate (tapped and w/ counter-sink for an o-ring), gasket (before cleaning it up a little), new o-ring, and fan switch sender. I smoothed the plate's surfaces with 100grit sandpaper in a DA sander.
I got liberal with the RTV when installing it, I was a little worried about leaks. Here is the plate installed with the cam pulleys, FM cam pulley tool, timing belt, crank timing pulley, and FM crank pulley tool all on the engine.
With all of the front timing bits, covers, pulleys, etc installed, time for an adult beverage! The handy FM pulley tool has a bottle opener built in. Genius.
Continuing to dress the engine...

Reply
 0
0

0
06-04-2014, 09:09 AM
#23
Junior Member
Thread Starter
Join Date: Nov 2010
Location: NH
Posts: 64
Total Cats: -2
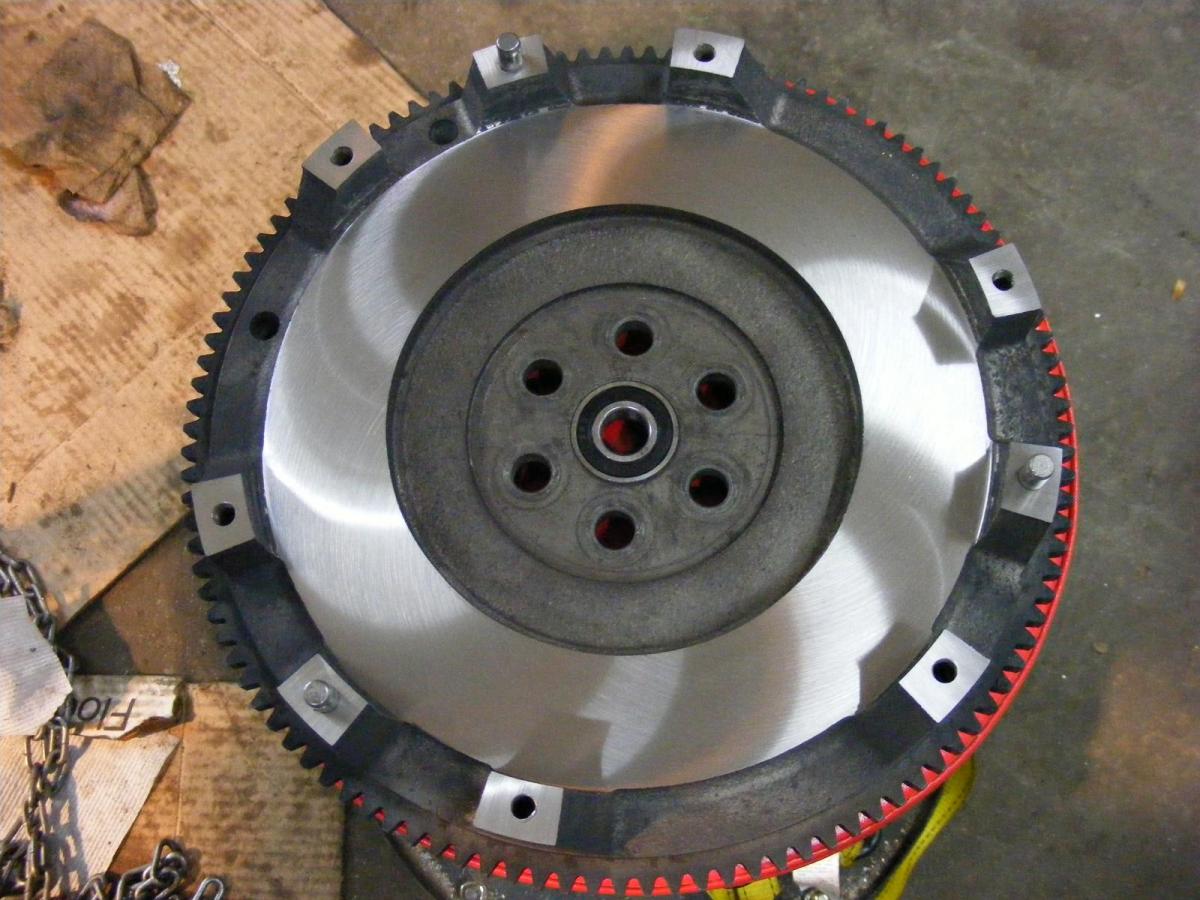
Resurfaced 1.8L flywheel with new pilot bearing.
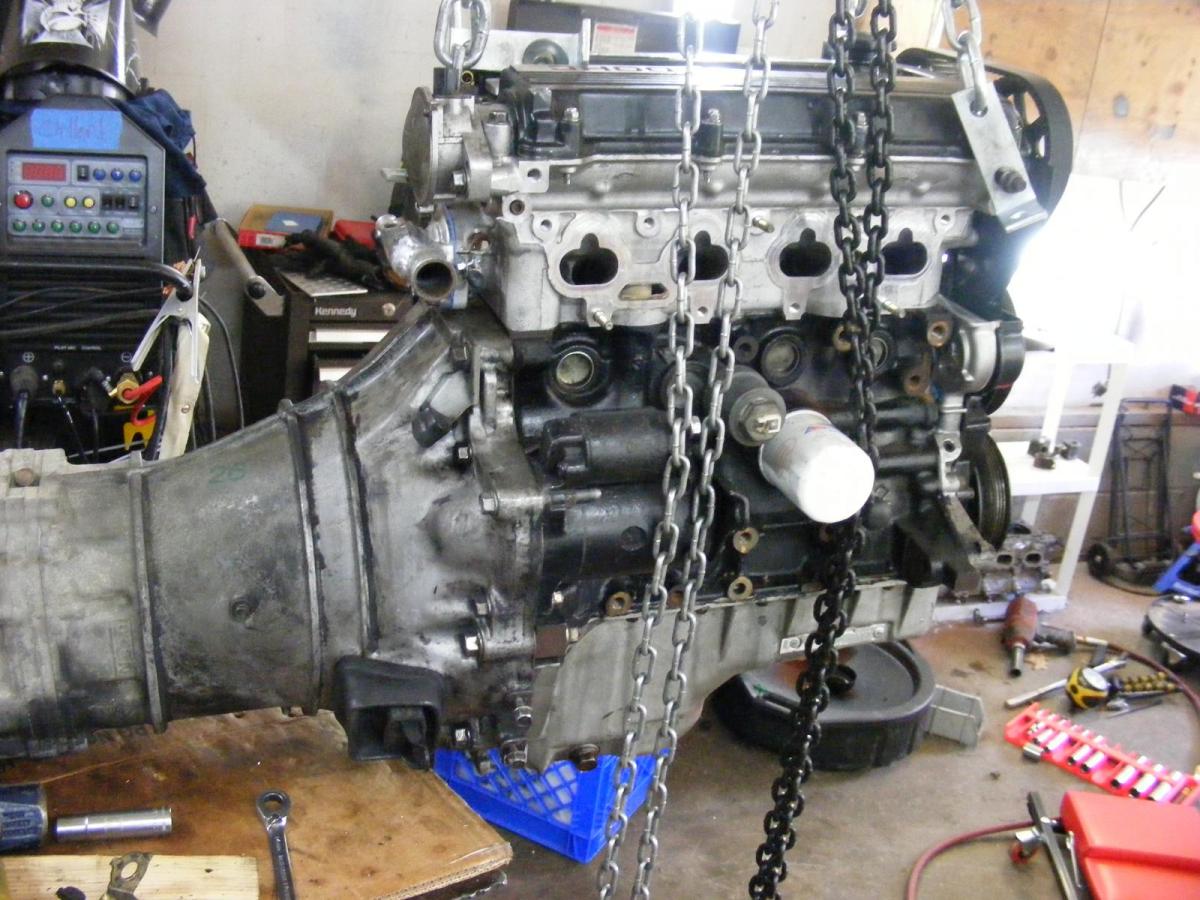
I put the engine on my overhead chain hoist and mounted the clutch, new throwout bearing, and the transmission after it got new front oil seals and a new tailshaft seal.
Intake on...
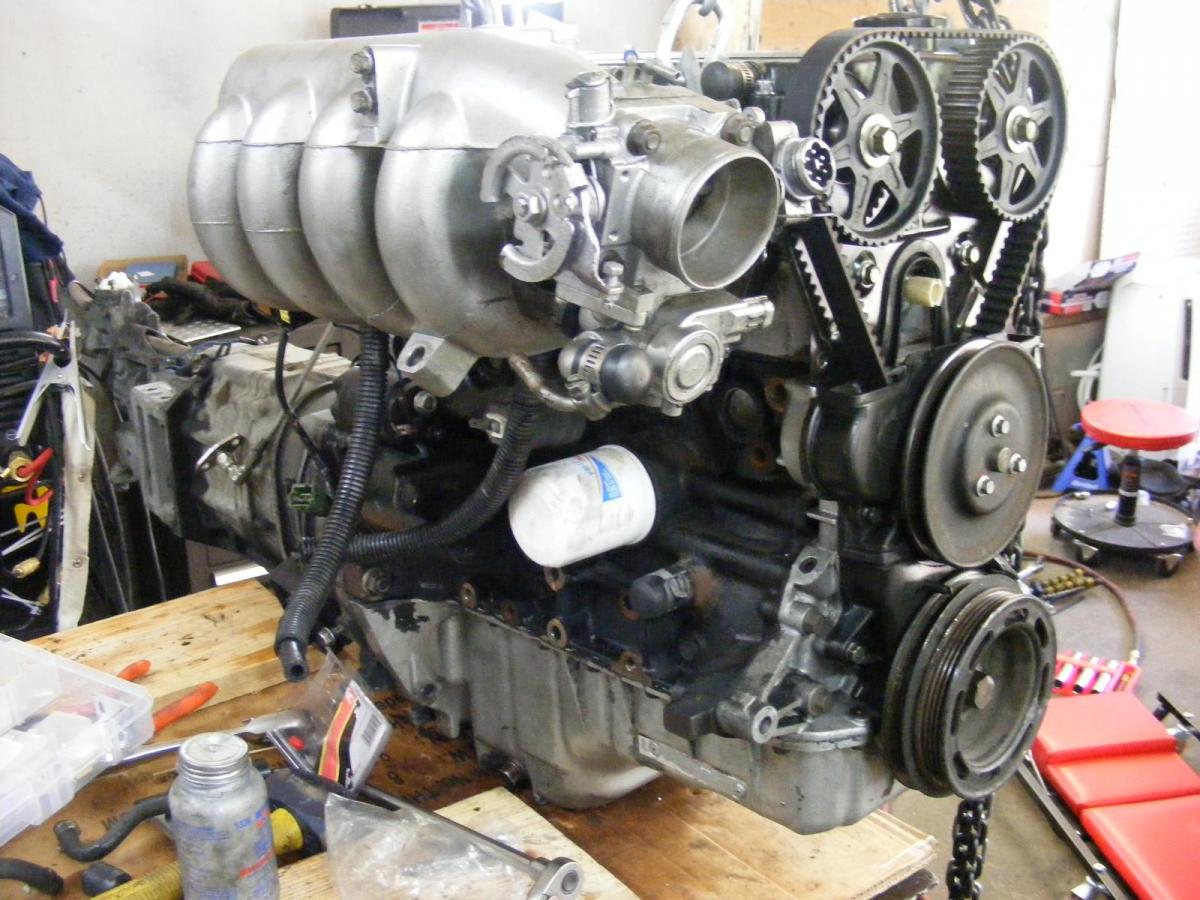
Turbo and manifold on...
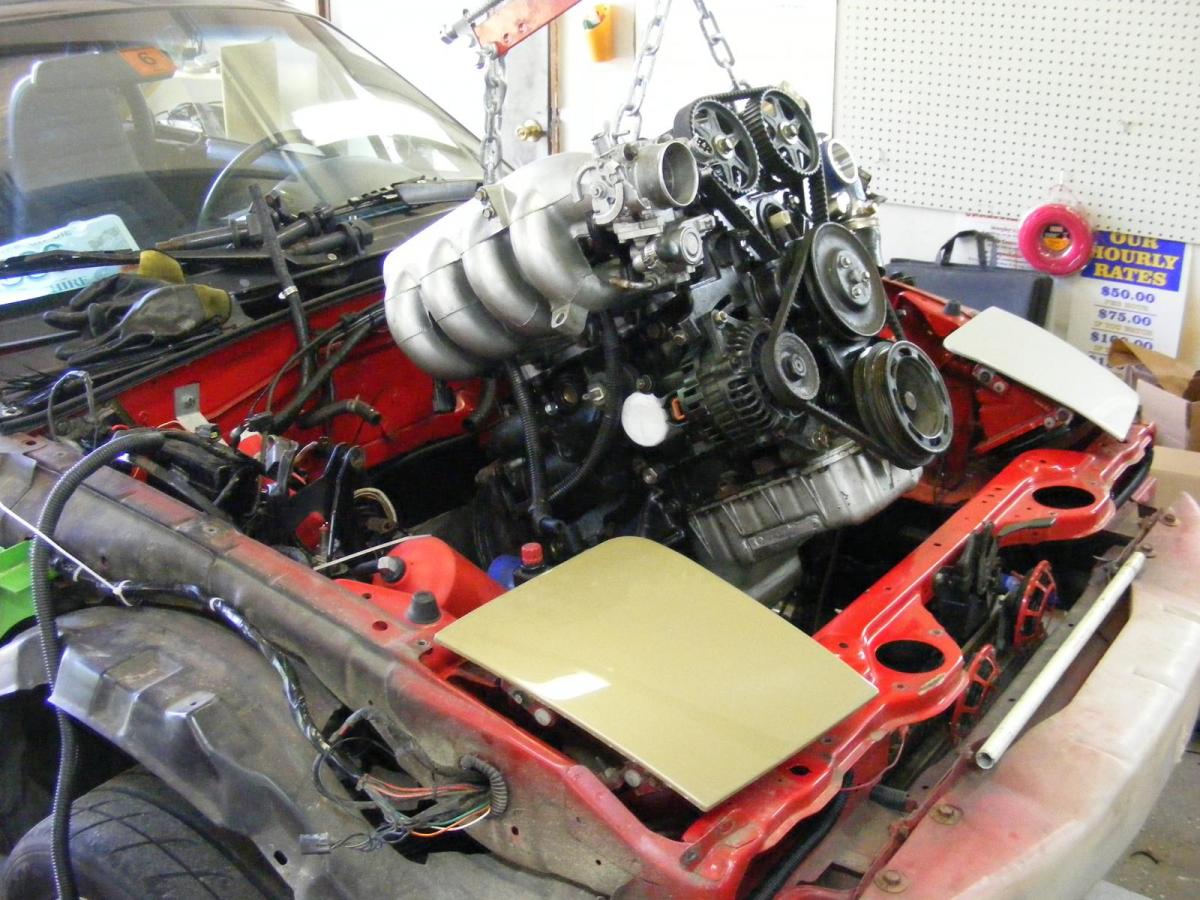
Dropping the engine and transmission back into the car.
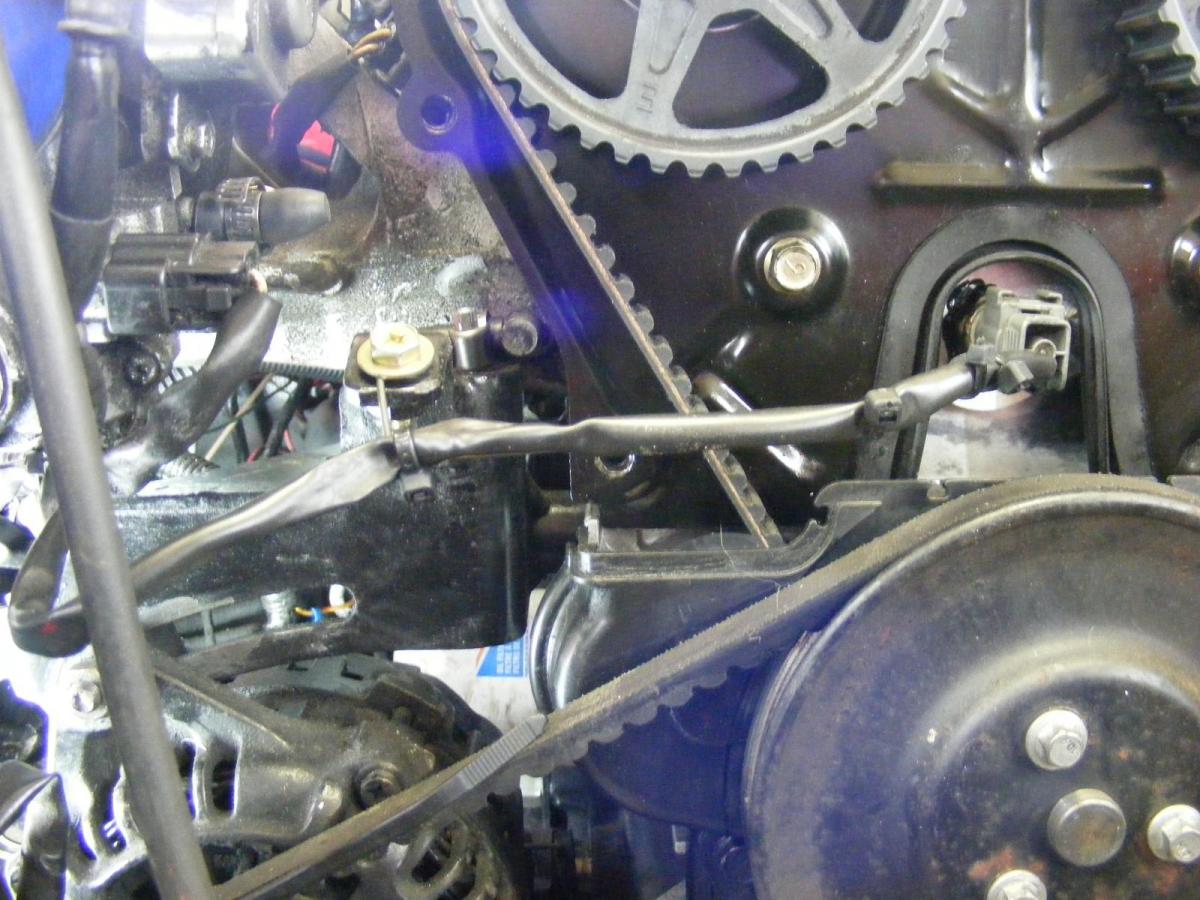
I used a bit of belt welding wire (SS) sandwiched under an extra bolt head to keep the fan switch wire clear of the timing belt.
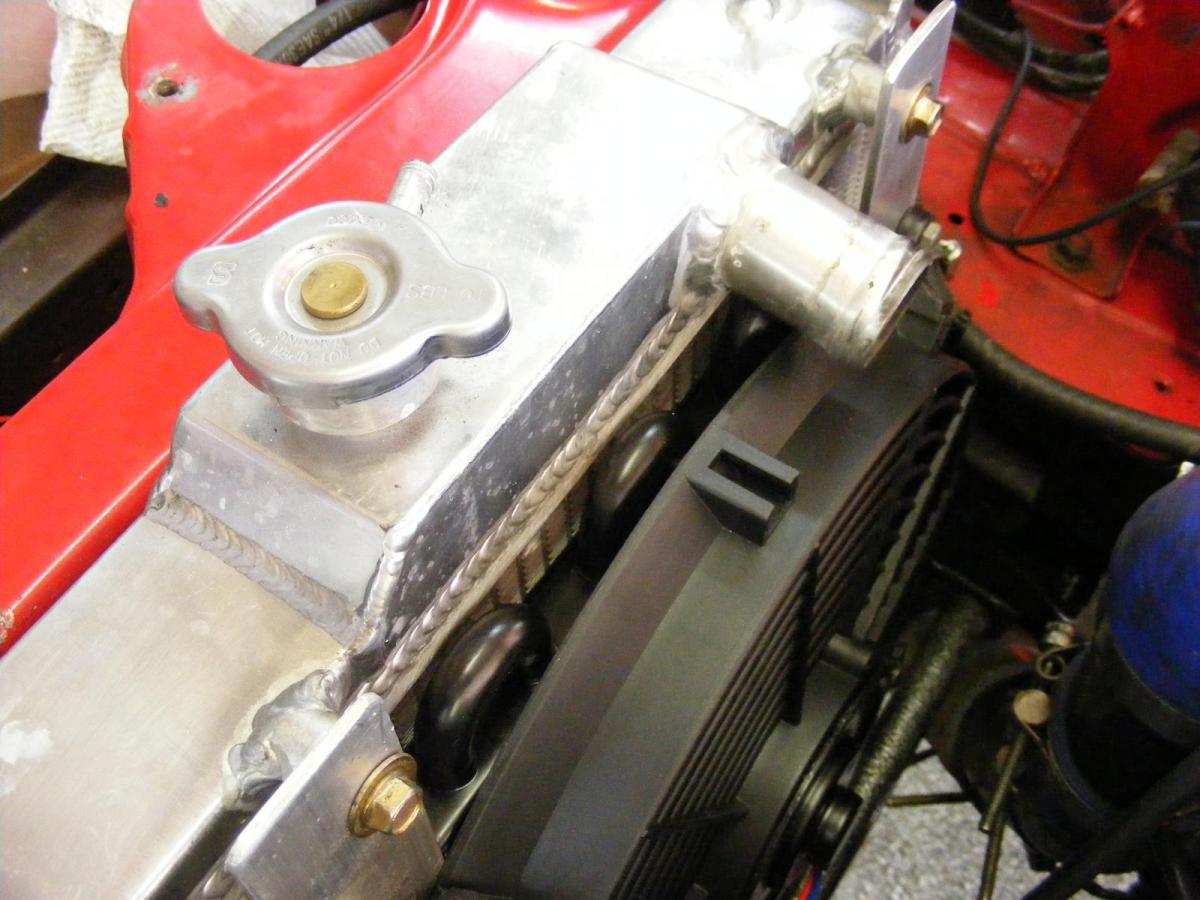
I re-did my oil cooler setup to use a narrower, taller, core mounted behind the coolant radiator and in front of a much slimmer fan. I like this setup a lot more than my previous setup, which was nearly inaccessible without removing body work.
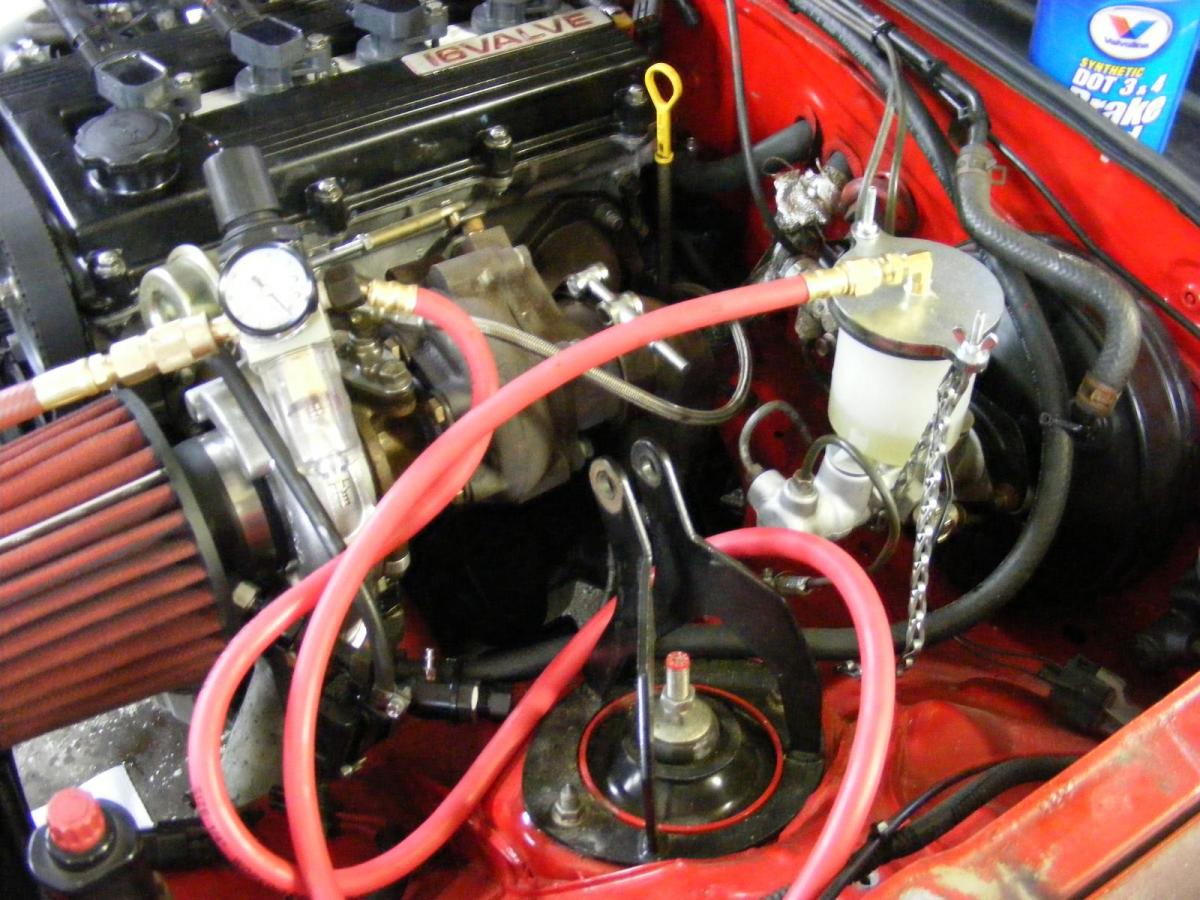
I also installed R4-S brake pads and flushed the brake lines. This handy little device that I assembled made life awesome. It regulates my shop air to ~3psi and applies that to the brake reservoir, making flushing the brake system a snap. I did all four sets of pads and flushed the whole system in around an hour by myself, including adjusting the e-brake.
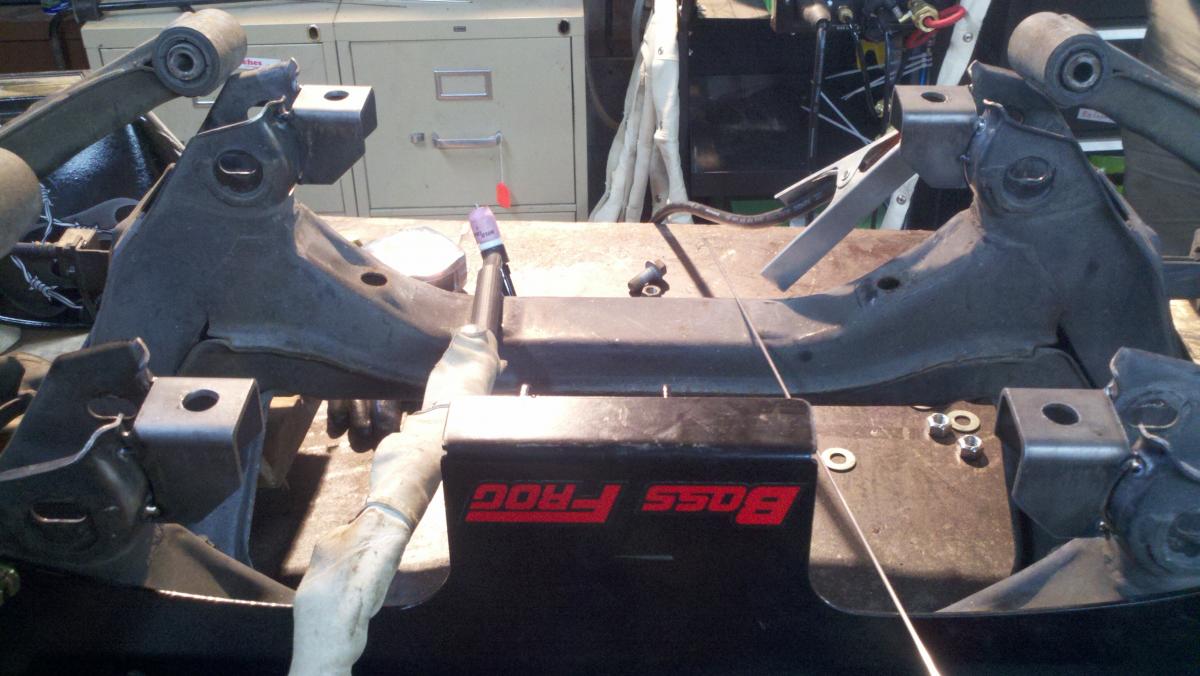
Other details that aren't captured in picture form: I installed frog arm chassis braces, used AMSOIL MTL in the transmission, filled the cooling system with just distilled water (I am planning on flushing it in a week or two), filled up with 4.5qts of 5W30 synthetic engine oil (planning on changing oil and filter as soon as the clutch is broken in, using 5w-40 AMSOIL synthetic), and finished the coolant re-route with all home-made parts aside from the Cadillac radiator hose.
Engine fired first crank!
Last night I took the car for a test drive. No leaks of any sort (holy crap!), fans kicked on with the temp gauge just below the half-way point, and everything seems to be working as intended. *phew*
I put the engine on my overhead chain hoist and mounted the clutch, new throwout bearing, and the transmission after it got new front oil seals and a new tailshaft seal.
Intake on...
Turbo and manifold on...
Dropping the engine and transmission back into the car.
I used a bit of belt welding wire (SS) sandwiched under an extra bolt head to keep the fan switch wire clear of the timing belt.
I re-did my oil cooler setup to use a narrower, taller, core mounted behind the coolant radiator and in front of a much slimmer fan. I like this setup a lot more than my previous setup, which was nearly inaccessible without removing body work.
I also installed R4-S brake pads and flushed the brake lines. This handy little device that I assembled made life awesome. It regulates my shop air to ~3psi and applies that to the brake reservoir, making flushing the brake system a snap. I did all four sets of pads and flushed the whole system in around an hour by myself, including adjusting the e-brake.
Other details that aren't captured in picture form: I installed frog arm chassis braces, used AMSOIL MTL in the transmission, filled the cooling system with just distilled water (I am planning on flushing it in a week or two), filled up with 4.5qts of 5W30 synthetic engine oil (planning on changing oil and filter as soon as the clutch is broken in, using 5w-40 AMSOIL synthetic), and finished the coolant re-route with all home-made parts aside from the Cadillac radiator hose.
Engine fired first crank!
Last night I took the car for a test drive. No leaks of any sort (holy crap!), fans kicked on with the temp gauge just below the half-way point, and everything seems to be working as intended. *phew*
Reply
0
0
06-04-2014, 11:01 AM
#24
Junior Member
Thread Starter
Join Date: Nov 2010
Location: NH
Posts: 64
Total Cats: -2
I've already got a request from a user on another forum to make another fan sender plate. So, please shoot me a PM if you (anyone) would like one as well. It'll be easiest for me to setup and cut several at a time.
Reply
0
0
07-09-2014, 11:23 AM
#25
Junior Member
Thread Starter
Join Date: Nov 2010
Location: NH
Posts: 64
Total Cats: -2
Finally done with the 600mi clutch break-in period. Longest 600 miles of my life!
Absolutely love the FM clutch.
Frog-arm braces are awesome. Coupled with my FM frame rails the chassis is considerably stiffer and more responsive to turning inputs.
The new(ish) engine runs great. Limited blow-by, decent fuel economy (est. 27-30mpg), and it starts very easily. No leaks resulting from my first-ever head gasket attempt (with stock head bolts no less!)
My DIY coolant bypass works well, the engine stays nice and cool. However, without the thermostat downstream of the heater core I have to run a gear lower than normal in some situations to get adequate heater core circulation.
Disconnecting the RSB is, as many already know, awesome. It's not nearly so tail-happy. I can mat 1st gear in sharp turns without immediately sliding out (i.e. turning from a stop sign onto a 55mph highway). Very happy about that.
Now she gets to sit in my garage for the next 2+ weeks while I get married and go on my honeymoon. Hopefully I'll get a chance to autox later in the season...
Reply
0
0

 08-24-2014, 03:06 PM
#28
Junior Member
Thread Starter
Join Date: Nov 2010
Location: NH
Posts: 64
Total Cats: -2
That's for the great insight... 
The PO hacked the wiring up quite a bit (it was a GRM car). I have fixed up stuff as I've come across it (so many vampire clips removed), and put a new MS pigtail on the wiring harness, but haven't found anything that might explain this.
I followed the COP conversion instructions precisely and everything fired and ran fine after diagnosing and fixing a cold solder joint in the MS (which the PO assembled). Maybe I need to check inside the MS some more...
I have a bit more experience in wiring than your average person (if you want I can post my wiring resume). I'm not saying I didn't make a mistake, that is possible, but I did take a reasonable amount of time and care to do the COP wiring.
Reply
0
0

Thread
Thread Starter
Forum
Replies
Last Post
Frank_and_Beans
Supercharger Discussion
13
09-12-2016 08:17 PM
russian
Miata parts for sale/trade
6
10-08-2015 03:01 PM


