When you click on links to various merchants on this site and make a purchase, this can result in this site earning a commission. Affiliate programs and affiliations include, but are not limited to, the eBay Partner Network.
Edit: I meant to ask how much you were able to extend with what length bump stop?
I'm not sure, they have been in the car for years. I'll take a picture later this week and post it. We fitted a spherical bearing on the mounting point.
That sounds fancy!
Only asked to try and gather some more data points for the forum.
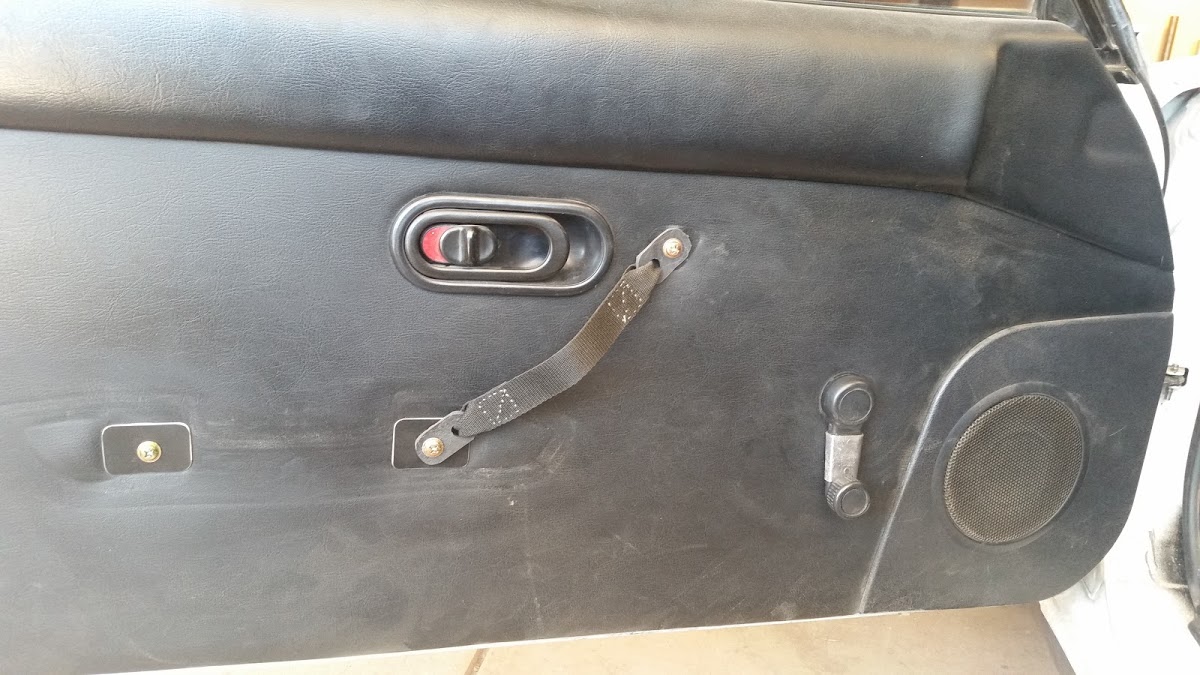
In other news.... I have door pulls and an operating window crank handle that clears my door bars. Not sure how I went 6 months without these capabilities...
If you look closely at the window crank you can see my medieval fabrication complete with hand formed rivets.
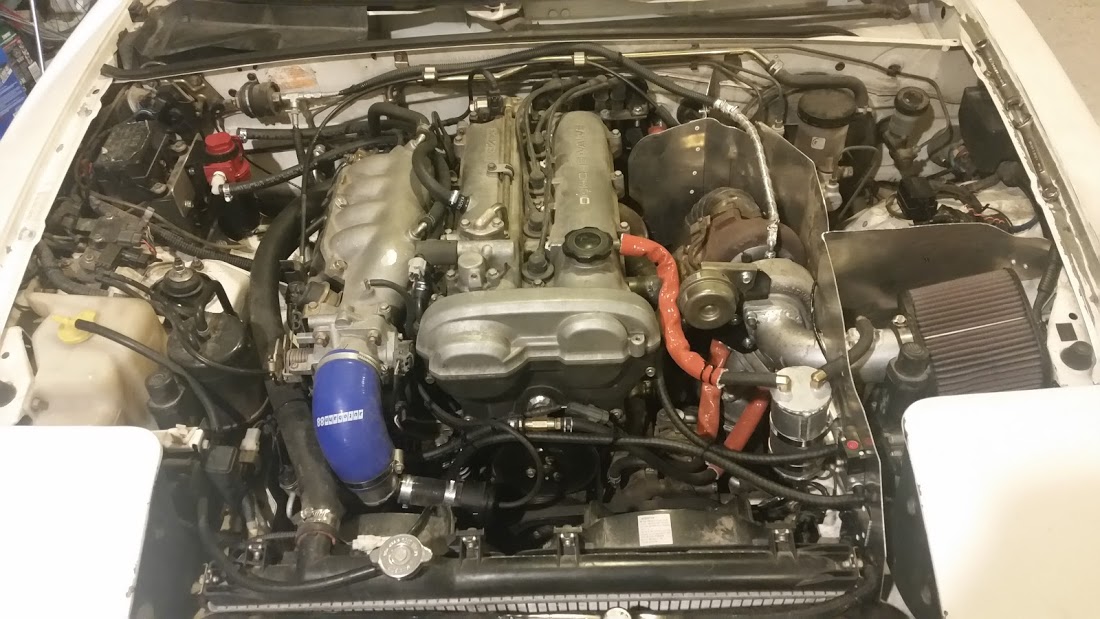
I've been tinkering with the car and have wrapped up some small jobs:
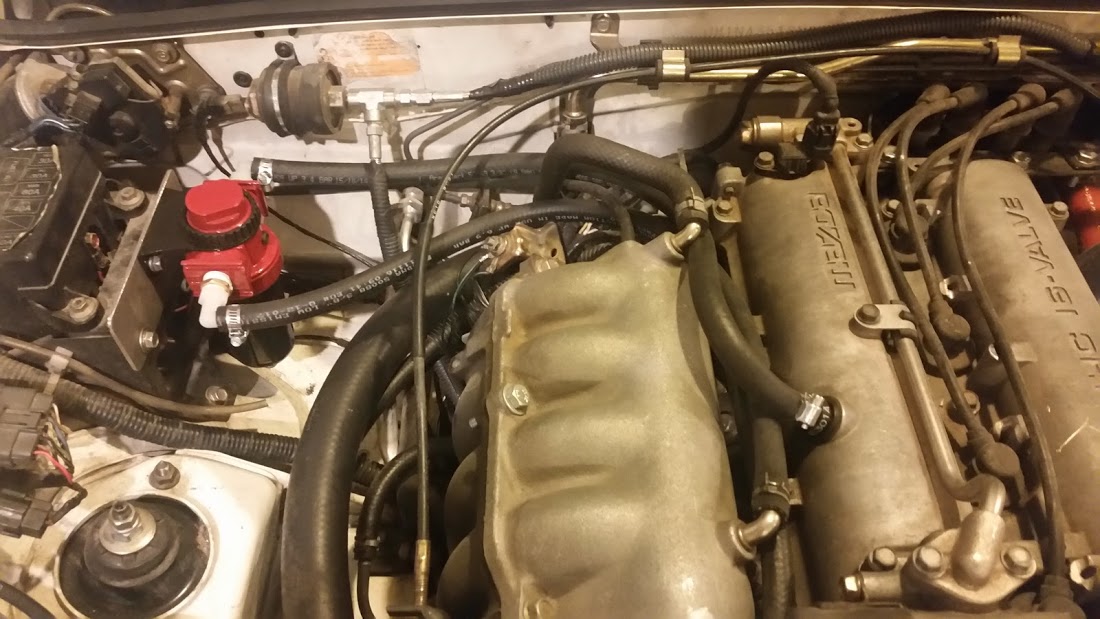
--Oil temp sensor is in the pan and now being read by the MS
--Added the knocksense module to the ms3 board (pricey but real nice integration into TS)
--Air box
--Boost solenoid (PID loop software is... interesting...)
--pcv system catch can (sears air/oil separator)
--breather catch can (custom 2 way)
Most of these things are working well. I'm afraid to push the timing to see if I can log a knock event, but its nice to see things look quiet.
I haven't had much time with the boost solenoid. The overboost protection works. The "setup mode" works. The pid loop may have been programmed by someone without a controls background.
Why on earth is there a slider thing and who programmed the P coefficient backwards? Anyway it still overshoots with PID at 100,0,0.
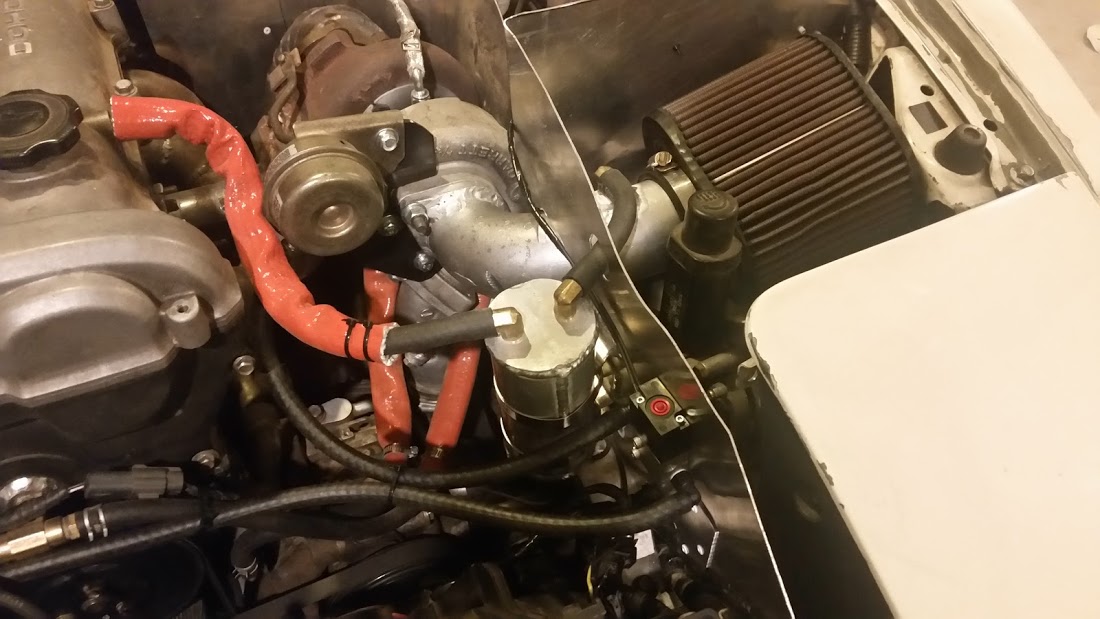
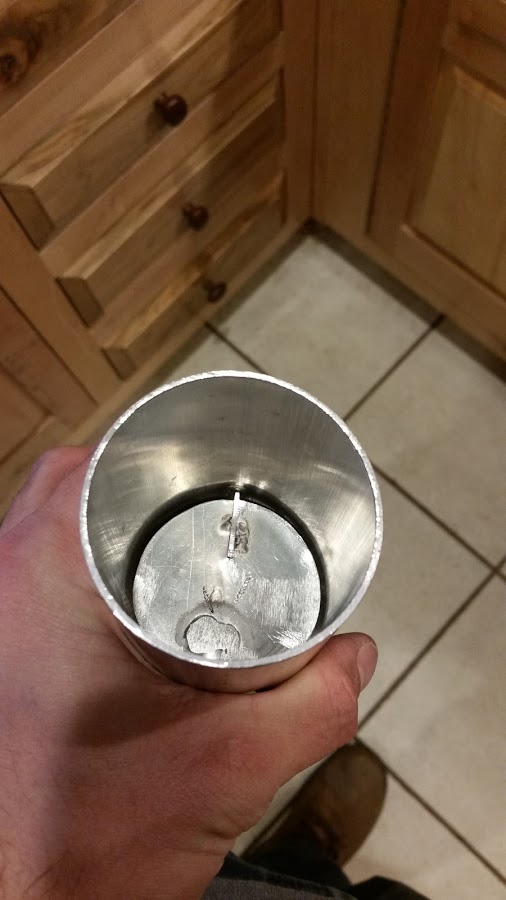
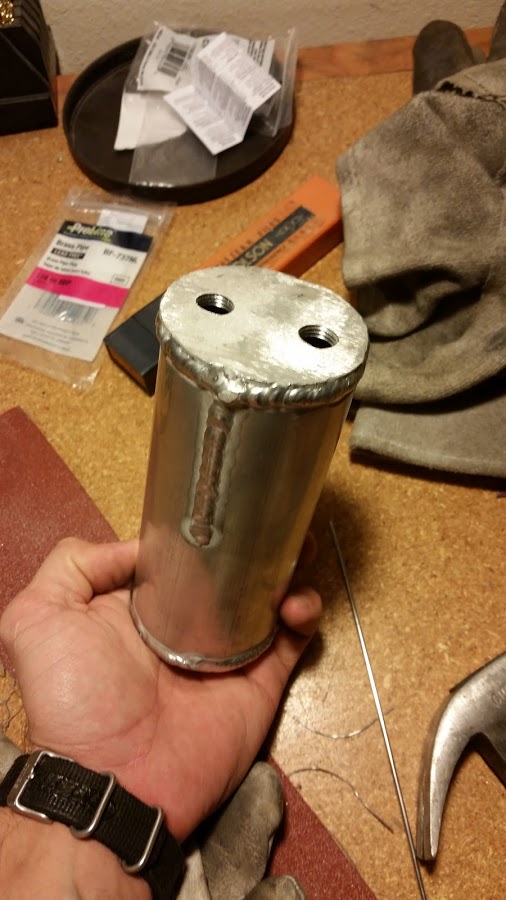
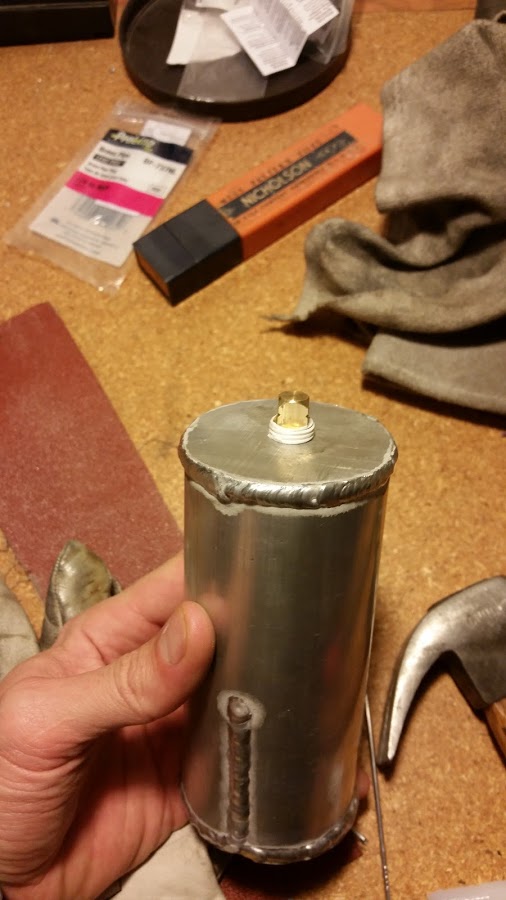
Engine bay with some catch can details
Catch can details. We'll see how this works. The idea is that it will catch oil while venting boost blowby and not suck it in while drawing in fresh air while in vacuum.
I should start by pointing out that my fluid dynamics knowledge comes from boating.
The theory is that the first plate will push the oily air onto the sidewall; the sidewall will collect oil. The second plate just makes the sidewall contact bigger. Whatever is left then gets mixed into the stainless scrubbie material
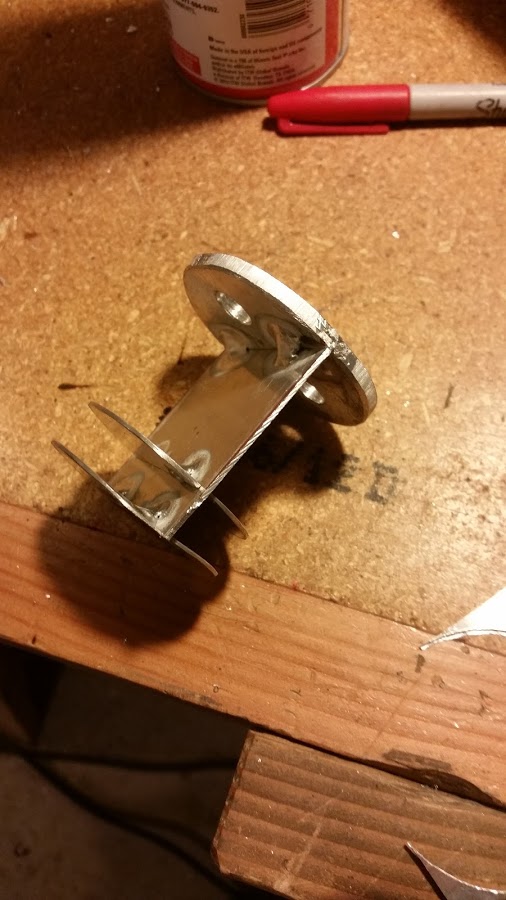
Really I had this aluminum laying around and needed to finish off an argon tank
A little blob welding. I meant to put in a little divider but I think it will be fine without it.
Some miata updates!
My daughter was born in early June and all things car related slowed down.
I decided that now that I'm a Dad, I need to be able to build a shelter. I've always planned on building a large shop at my property, but I decided to start small and build a shed for now.
In the mountains if you want to build something, first you dig (its a touch rocky)
Trying to use all the same techniques that I'll use on the shop. Top course has rebar and concrete to make a bond beam.
Just need to make doors and add trim. I only fell off the roof once while doing the shingles!
Onto miata!
With the heat of the summer the car started losing an injector intermittently and the ignition wouldn't push past about 150kpa.
The injector issue was stupid... I mixed up my auto spec heat shrink tubing with my home electronics crap... So when the engine bay would get really hot, the wire wrap would turn to goo and my #4 injector would short out.
The ignition was just old. It was the original na6 setup with 230kmiles.
Anyway took a weekend away from the shed and got my snazzy new supermiata radiator installed along with a stock nb2 ignition setup that I got a good deal on from that head 18psi parted out. And most importantly I got the ac clutch replaced. hah
Somewhere along the line a hardtop appeared. I had to grind out the inside a bit to get it to fit with my roll bar...
I finally got out to the track yesterday. Going to try and figure out this youtube thing. Video on the way.
I'll just start at the fun part hah! Cold tires.. haven't been to the track since April... I just didn't stop the way I remembered.
This was my first try at getting video, its kind of washed out, but hey its a $35 camera. Also the rearview mirror is in the way; going to try a lower mount next time.
I'm still only a second faster than my best lap without the turbo... I am on bald tires so we'll see how it does next month with a new set.
There was a pro in a c6 zo6 that ran a 1:27 lap. First person I've seen get below 1:30. He said the track record is around a 1:24 in some random open wheel high hp thing.
I'm at 1:36 flat more or less.
Does anyone else host pictures through google? I used to just use the picasaweb crap but it's now gone... I hosted those last couple of posts with picasaweb's replacement and it worked at first but after a couple of days something happened with the links?
Anyway I used the new site image uploader and it appears to work. Not sure how to resize the pictures but at least they're there.
BTabor sold his Miata and got an S2000 so i doubt that he will be in the forum much, here is a photo of what he had on his car and what i have on mine
Nice shed BTW
^^^^ Those tophats are rad! Maybe I'll tinker with something like that once I get my machine shop put together.
Progress has been a little slow on the car but I'm still fiddling around.
I did finish my shed Miata parts storage to the max.
And I found what was causing the bad smell in my wife's car. :(
On the miata I've been tinkering with getting it painted mostly one color and adding some minor aero for track days.
I took in some advice this weekend and tried moving my seat closer and keeping my hands fixed on the wheel.
I ended up dropping over a second and ran a 1:34.8. I'm really getting thrown around in the car though, so I'll be on the hunt for seats/harnesses over the winter.
Aero! This stupid thing netted me an extra 8mph in our back straight! This was my first foray into any form of body work... bondo smells bad and 24ga metal is hard to weld onto miata mystery meat metal.
I'd love to run into some forum members at the track! Are you subscribed to the sandia raceway mailing list?
The day was $50 and there were 4 total cars there. Not a bad way to spend half a Sunday!
I'll have some video up in the next few days.
Did some car things recently. Had a blast at our local track back in Feb.
This new steering wheel thing is awesome. So much more space for my knees.
This is on the wastegate (7psi)
Ran consistent low 1:34's. That's close to a 1.5s drop from my last outing... Only changed my steering wheel and lowered the boost. Still need to work on the driver.
After some ups shenanigans and my package being delivered a few miles from my house, I received my new seat! I think its going to fit...
I'm going to use the stock sliders with heavy modification... The goal is for the seat to be on the floorpan when adjusted all the way back.
My take on this was to remove the rear hump, hammer the floorpan down and weld in a 16g steel sheet. I'm not quite done yet, but it does seem to be pretty solid.
I reused the captive nuts from the old seat mounts.
The front area took a beating so I also reinforced it, this time with 20g steel.
I should be able to make the June 3-4 SWMS track day up there. I would love to check out your Cobra seat! That is the exact brand I have been looking at. I also want to experience a mild turbo car on track, if you will take me as a passenger. The only other turbo car I have been in is 99mx5's 300+ whp EFR powered beast, but I can't afford to do anything like that anytime soon.
I watched the most recent vid. To me, you are turning in too early on nearly every turn. You need to be trying to "clip" every corner. You seem to be trying to hug the inside curve and follow it, rather than angling it off and going straight across. Try a bit later entry than you are used to and see if that picks you up any time.
I watched the most recent vid. To me, you are turning in too early on nearly every turn. You need to be trying to "clip" every corner. You seem to be trying to hug the inside curve and follow it, rather than angling it off and going straight across. Try a bit later entry than you are used to and see if that picks you up any time.
Indeed, I'll try a later apex and see how it goes.
I've finished the seat installation! As planned, the seat just barely contacts the floor when adjusted all the way back.
Now I just need to conjure up a harness bar.
The bracket ended up being a little on the complicated side. Pictures are... meh
I decided to install the metal sleeve bushings that SadFab graciously sold once upon a time for pennies.
I mean there are machined washers in the kit that I think someone (sean?) actually turned; Crazy...
Anyway that went well as their kit is awesome, but then I needed to get the car aligned... it was Friday and I was watching my kiddo, and I had planned on a track day Sunday.
So one thing led to another and I ended up here... It actually worked out great, but I discovered that on my driver side rear I cant get less than 2 degrees of camber and on my passenger front I can't get more than 2.2...
There are various plumb bobs attached to hard points on the subframe to mark the centerline of the car; these get used to build the reference string lines.
I spaced setting the ride height and can probably get to 2.5/2 f/r camber if I tinker with that.
AAAAnnddd then this happened.... So much for my track day bro :(
Drilled, parted and hand chamfered 440c SS round stock. But yea its hard to get those below $250 and still make it worth our time. And actually tommy did that group buy set.

 03-28-2016, 11:49 AM


 0
0