Scaxx builds an E46
 06-21-2016, 03:19 AM
#281
Elite Member

Thread Starter
Join Date: Sep 2015
Location: Seattle, WA
Posts: 1,651
Total Cats: 884
Had a pretty bad week this week but I did get some stuff done on the car at least. Pretty sure my money situation's got me down cause I'm not a big fan of having almost no money in my band account. Anyway, I decided to not go to the autox this weekend because I was gonna do a bunch of welding on sunday. I have two exhausts that I'm building, one for the e36 and one for a 240, I'll have another 240 as well as a gen III supra coming up soon. I also have a set of steel wheels I'm repairing for the dude with the 02, he's always got some weird rare *** wheels coming through his garage. Whatever, I'm rambling. Anyway, I need the money so I decided to dedicate the day to welding for people and not go. The awesome part was, the morning of, my welder decided to stop working. So I couldn't weld and I couldn't go to the autox, I basically got fucked. Luckily the welder's under warranty so I don't have to pay for the fix but it still puts me down and out for a little bit. But away for mopey shitty news.
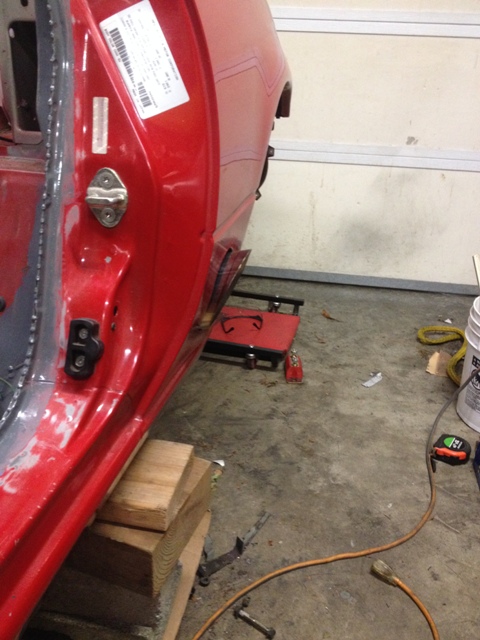
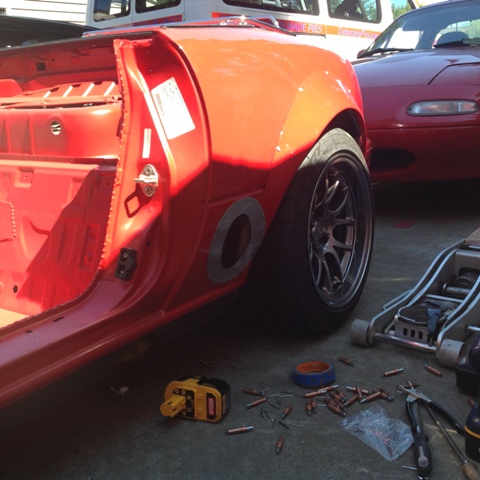
I started off by finishing the tip of my exhaust so that it's nice and flush with the body panel, or not flush but more parallel. Just realized this is an early picture and I fixed the angle (you can see the sharpie mark where I cut next), I'll get another one, but you get the idea.
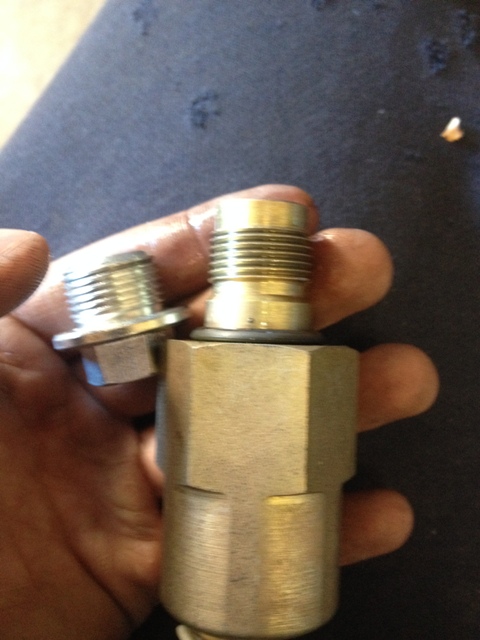
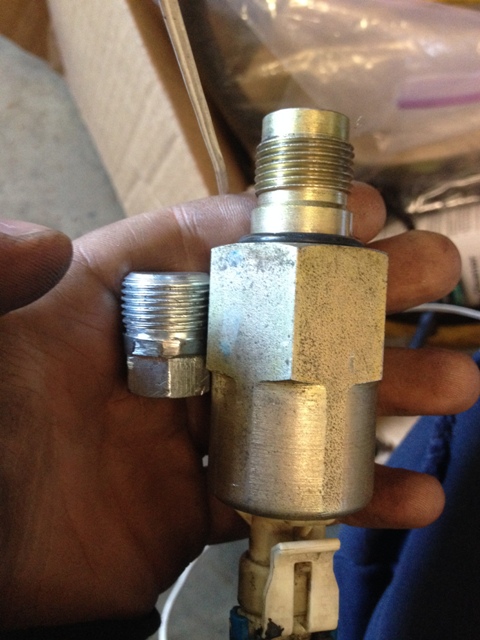
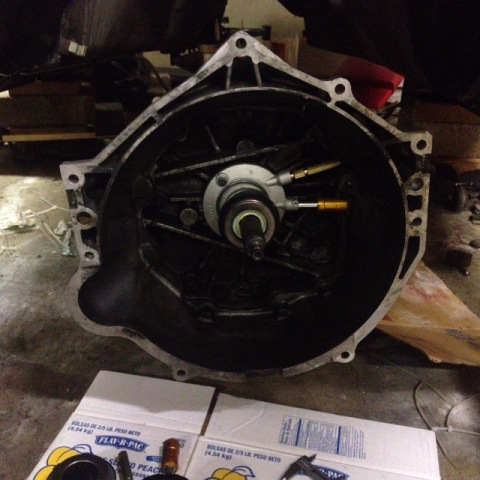
Then I decided to fix my skipshift and replace it with a drain plug, I saved .6lb with the plug and the thread size for the skipshift solenoid is m20x1.5
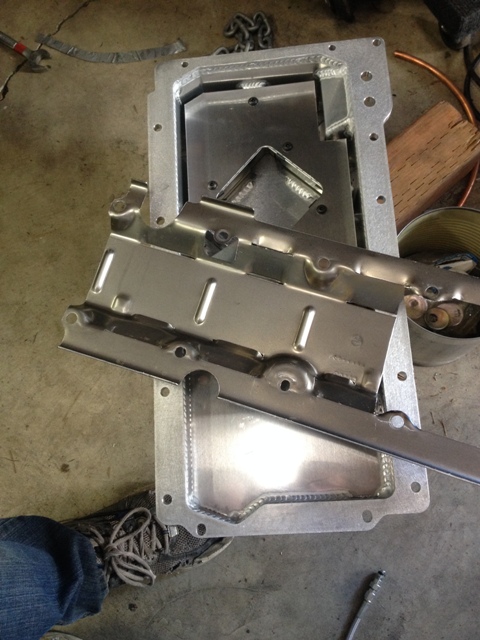
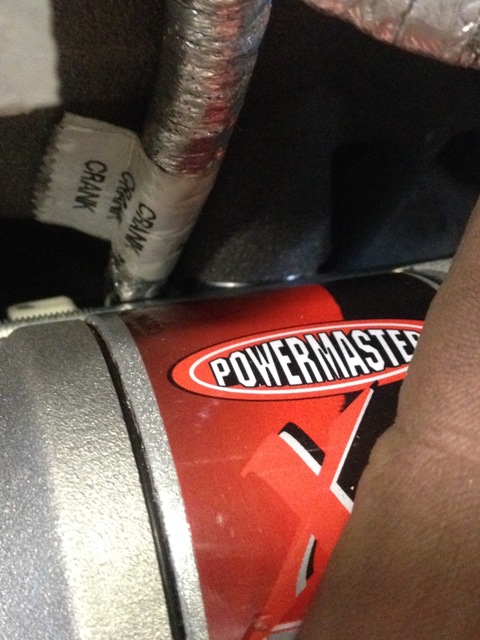
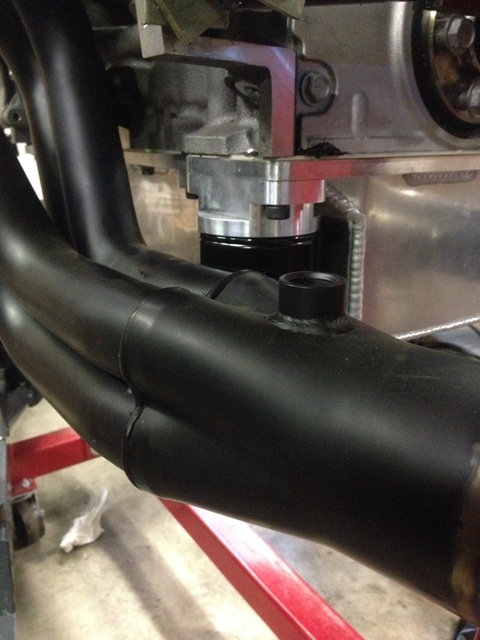
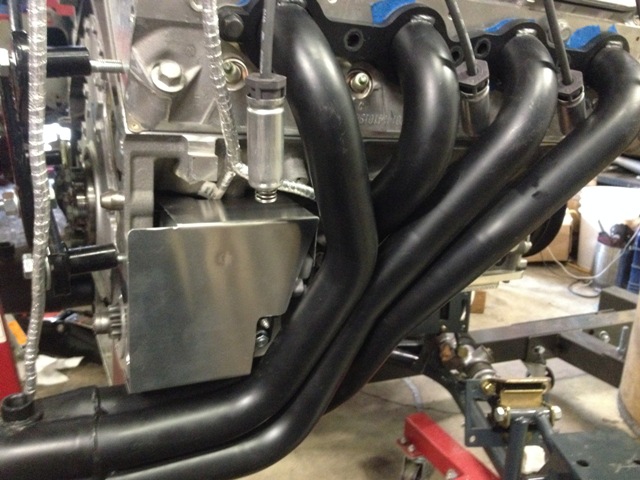
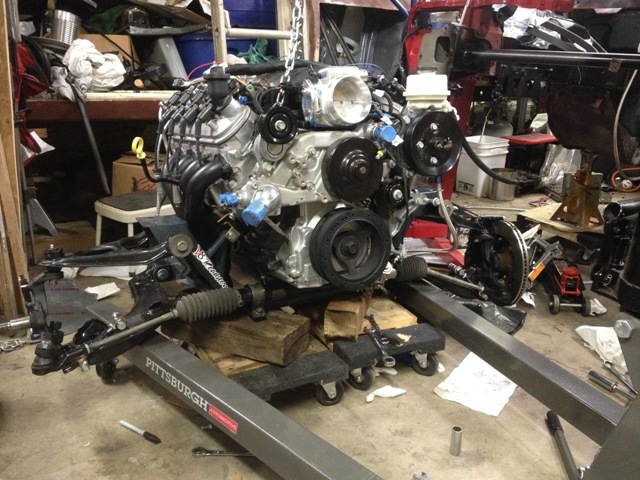
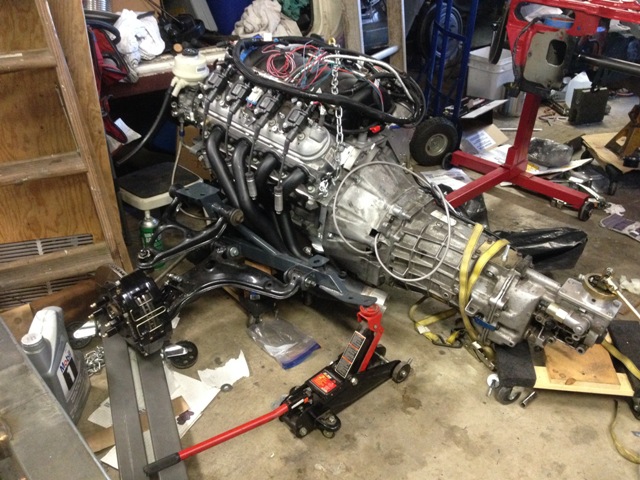
Today I cleaned out my oil pan by putting it in our commercial dishwasher and then checked clearance on the pickup tube as well as torqued everything down. I also checked clearance on the starter to header. The header comes within .040" of a bolt, it's really tight in there. I had to clock it maybe 10 degrees to get it to clear the block (second starter picture) but I really like the starter and I'm gonna make a nice heatshield for it. Last but not least I threw the oil filter on. The engine is basically ready to go in the car at this point but there's still lots of other stuff to do while the engine is out. I'll be sending my alternator off soon and I need to figure out how the **** to get the power steering restrictor in cause that bitch won't budge.


I started off by finishing the tip of my exhaust so that it's nice and flush with the body panel, or not flush but more parallel. Just realized this is an early picture and I fixed the angle (you can see the sharpie mark where I cut next), I'll get another one, but you get the idea.

Then I decided to fix my skipshift and replace it with a drain plug, I saved .6lb with the plug and the thread size for the skipshift solenoid is m20x1.5


Today I cleaned out my oil pan by putting it in our commercial dishwasher and then checked clearance on the pickup tube as well as torqued everything down. I also checked clearance on the starter to header. The header comes within .040" of a bolt, it's really tight in there. I had to clock it maybe 10 degrees to get it to clear the block (second starter picture) but I really like the starter and I'm gonna make a nice heatshield for it. Last but not least I threw the oil filter on. The engine is basically ready to go in the car at this point but there's still lots of other stuff to do while the engine is out. I'll be sending my alternator off soon and I need to figure out how the **** to get the power steering restrictor in cause that bitch won't budge.


Reply
 2
2

2
06-22-2016, 08:00 AM
#282
Junior Member

Join Date: Sep 2014
Location: Canton, GA
Posts: 153
Total Cats: -84
I ******* love reading the updates on this thread. Awesome progress, sorry for the lows though, unfortunately there is always something.
Starter clearance is nuts, but hey it fits!
Maybe make a heat sheild for that oil filter too? Seems rather close to the primaries. The exhaust tip looks good.
Starter clearance is nuts, but hey it fits!
Maybe make a heat sheild for that oil filter too? Seems rather close to the primaries. The exhaust tip looks good.
Reply
0
0
06-22-2016, 01:16 PM
#283
Elite Member
Thread Starter
Join Date: Sep 2015
Location: Seattle, WA
Posts: 1,651
Total Cats: 884
NBoost, thanks man! And yeah the starter clearance is crazy tight, I think that picture's a little deceiving as far as the oil filter, I'll grab a picture later, but it did cross my mind.
Got a bit of stuff done yesterday. I took my welder in for repair, not sure when it'll be done but cross your fingers that it's soon! Also called FM and asked them how the hell they get this restrictor into the power steering pump, apparently you can pull the pulley off with a pulley puller, didn't even realize that existed so I'll grab one from the local auto parts store for the day today or tomorrow. I also called Mechman Alternators and he said he'd had a perfect self-exciting regulator for the ctsv alternator, goodbye GM bullshit, hello easy wiring! Cost $65 for the alternator and him to do it and then about 45 in shipping both ways, but hey, it's cheaper than a new alternator!
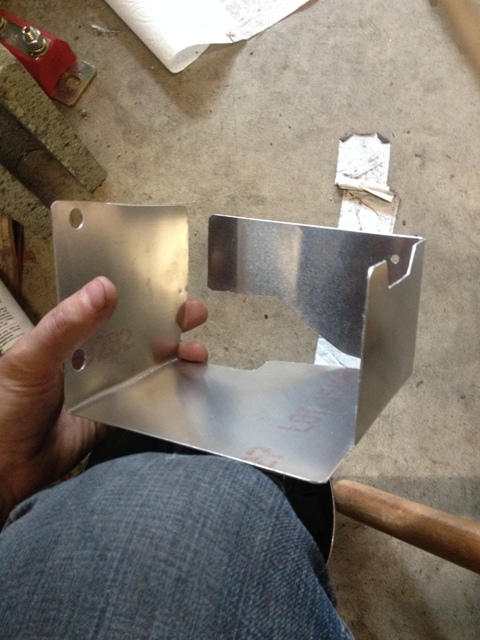
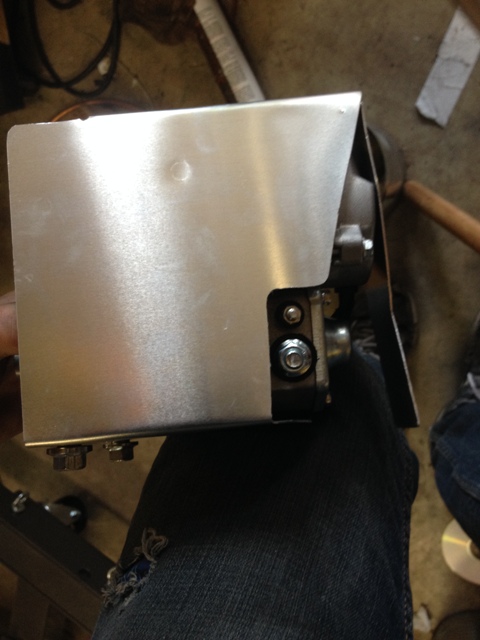
After that, I got home and started work on my heat shield for the starter, took a long time to finally get the design right and I actually ended up having to make a little bigger of a relief for the crank sensor wiring after these pictures but I like the way it turned out. It's secured in three places and is nice and sturdy. I made it out of a sheet of .040" aluminum that I bought specifically for heat shields on this project. I also cut a relief for the wiring because on of the other v8 guys had his starter blanket/heatshield short the terminals. Unless I get in an accident and drive the headers into the heat shield there's no way that'll happen, and if it does I've got bigger issues. My girlfriend came over last night and we installed some headlights I had gotten her for her foxbody a while back. They look a ton better and god damn that car sounds good, makes me excited for the first fire up.
Got a bit of stuff done yesterday. I took my welder in for repair, not sure when it'll be done but cross your fingers that it's soon! Also called FM and asked them how the hell they get this restrictor into the power steering pump, apparently you can pull the pulley off with a pulley puller, didn't even realize that existed so I'll grab one from the local auto parts store for the day today or tomorrow. I also called Mechman Alternators and he said he'd had a perfect self-exciting regulator for the ctsv alternator, goodbye GM bullshit, hello easy wiring! Cost $65 for the alternator and him to do it and then about 45 in shipping both ways, but hey, it's cheaper than a new alternator!
After that, I got home and started work on my heat shield for the starter, took a long time to finally get the design right and I actually ended up having to make a little bigger of a relief for the crank sensor wiring after these pictures but I like the way it turned out. It's secured in three places and is nice and sturdy. I made it out of a sheet of .040" aluminum that I bought specifically for heat shields on this project. I also cut a relief for the wiring because on of the other v8 guys had his starter blanket/heatshield short the terminals. Unless I get in an accident and drive the headers into the heat shield there's no way that'll happen, and if it does I've got bigger issues. My girlfriend came over last night and we installed some headlights I had gotten her for her foxbody a while back. They look a ton better and god damn that car sounds good, makes me excited for the first fire up.


Reply
1
1
06-24-2016, 03:04 AM
#284
Elite Member
Thread Starter
Join Date: Sep 2015
Location: Seattle, WA
Posts: 1,651
Total Cats: 884
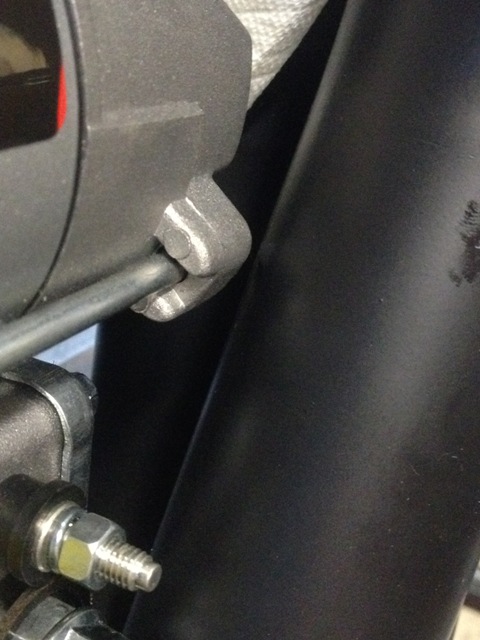
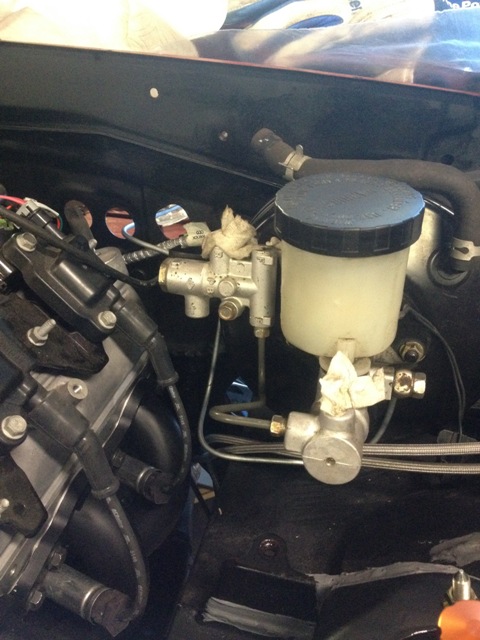
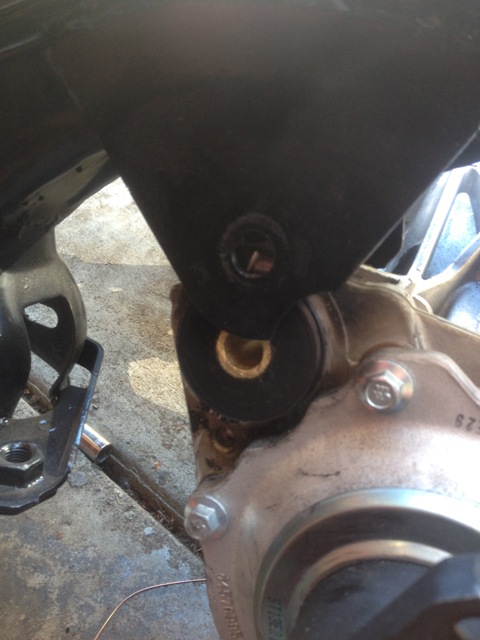
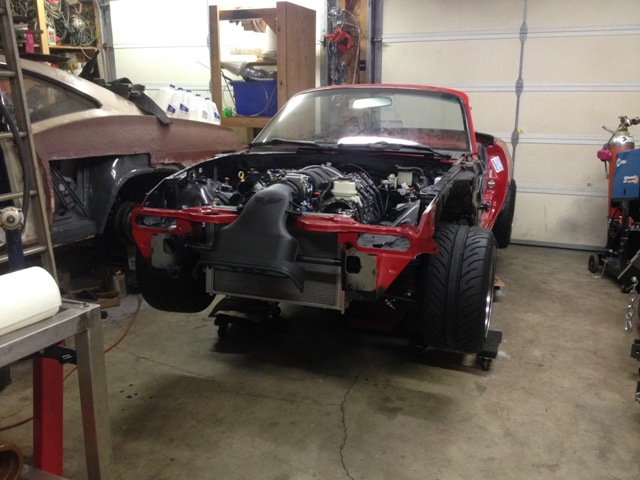
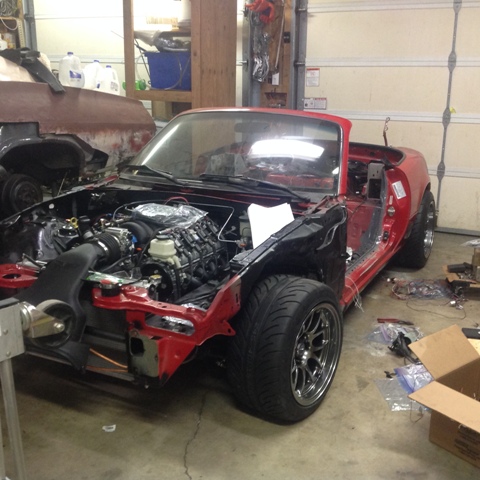
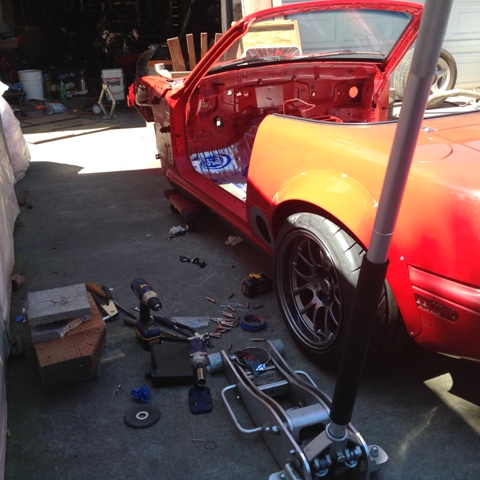
Yesterday I finally got the power steering restrictor in, also tack welded the new balljoints in and then threw some paint on them. Played around with my spare intake a bit trying to find a good place to put the iat sensor that looks stock and I think I came up with something. Got the engine back off the stand today as well as getting the rear wheel bearings and hubs pressed into the knuckles. I haven't mocked up the rear brakes yet so I did that as well. Hoping to get the engine back in within the next week and start some of the finishing details as well as really getting into the wiring.
I've also decided I'm gonna go ahead and shoot for vr1's which means I need flares for the rear. Since I already have nice paint I figure I might as well buy the flares before I paint the rest of the car and that way I can paint the flares when I do the engine bay and interior. It won't be a perfect match but it'll be close and honestly if someone wants to judge the paint they can **** right off. Currently thinking of getting a set of carbonmiata's flares since AK seems to be running his business worse by the day.
Anyway, pictures

Powersteering restrictor


Reply
0
0
06-28-2016, 12:59 PM
#285
Elite Member
Thread Starter
Join Date: Sep 2015
Location: Seattle, WA
Posts: 1,651
Total Cats: 884
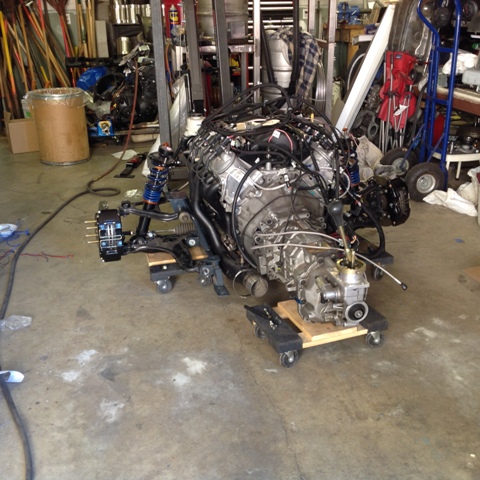
Got my motor mount heat shields done, well I know the passenger side is done, the driver side may still need some trimming to clear the steering shaft boot, we'll see, though. Then I got the flywheel and clutch on. Gonna melt the **** out of my driver's side knock sensor pigtail cause the best clearance I could get on it was about 3mm from the primaries. Also got the slave line as well as speed bleeder on after I measured the clearance between the slave and pressure plate (important with the touchy t56 slave). Put the engine back in the car and started running brake lines into the interior for the proportioning valve. Gonna run it in the middle of my dash so it's easy to get to. Order flares for the rear from carbon miata, Marc said they'd take about two weeks to make and a week to ship so I should see them right in time for paint. I got the longer style and I'm really hoping they don't get too close to the exhaust but we'll see when they get here, may need to do some trimming.
Really got fucked on this whole welder situation. It's basically how I'm making my money currently and I called Central yesterday and they told me they don't even look at them for two weeks. I understand being behind schedule but ******* tell people that. Really ******* frustrated because I have two guys who are waiting for me to finish their exhausts and I can't. Not only do I not have money, I feel ******* horrible because they're both just sitting around waiting for me to get my **** together.
Anyway, enough bitching for today, just had to get that off my chest. Here's some pictures


Reply
1
1
07-11-2016, 06:03 PM
#286
Elite Member
Thread Starter
Join Date: Sep 2015
Location: Seattle, WA
Posts: 1,651
Total Cats: 884
Wow, it's been almost two weeks since my last post. Got my welder back and immediately started welding stuff on the guy's cars. Also been pretty busy with schoolwork which kinda sucks. Probably won't hit my July deadline for having the car done, but it will be finished when it gets finished, I'm close now. I have Vr-1's coming in the mail, they'll be here on Wednesday and I also order a bit of electrical stuff. From here on out, all I have left to buy is the small stuff that pops up and some aerocatch hood pins. Oh, I got my alternator back too, no word on the fender flares yet but I'm guessing they'll ship in the next week or so. On Thursday I'm going to the machine shop to finally finish my bushing for the rear diff and then I can fully assemble the rear end for the last time. Also got a u-shaped hose to delete the heater core lines, it hardly fit between the frame but I trimmed it a little and it fits well now. Other than that I got an O2 plug for one of the headers and a four-way rotary switch that I'll be putting in the dash for the windshield wipers. That's about it as far as updates, not really a whole lot more progress as of right now.
Reply
0
0
07-23-2016, 08:33 PM
#287
Elite Member
Thread Starter
Join Date: Sep 2015
Location: Seattle, WA
Posts: 1,651
Total Cats: 884
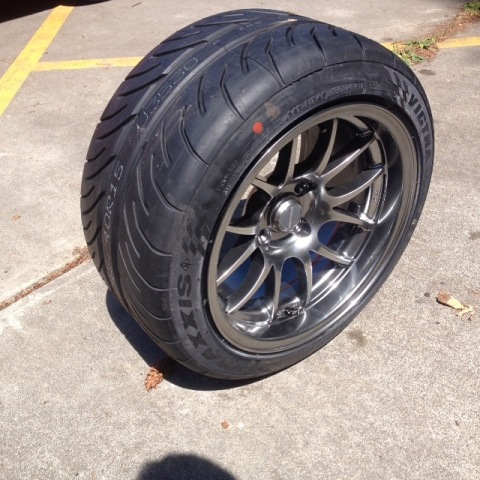
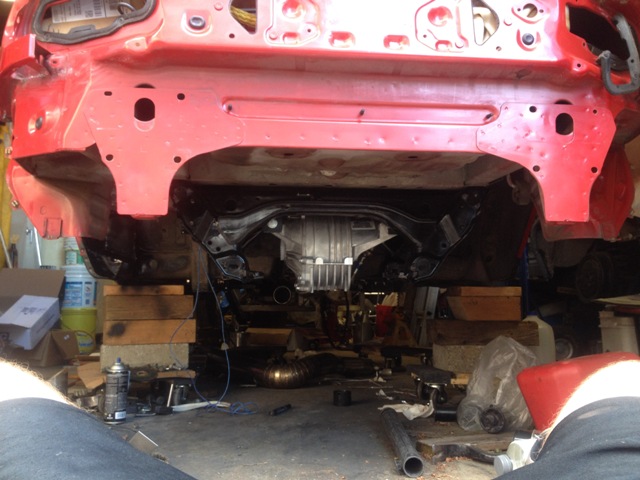
Busy busy is the theme. I'm finishing up my history class this week which will be a relief. however my other classes have been sucking up a decent amount of time, I've been trying to spend a bit more time with my girlfriend and some of my welding jobs have eaten into Miata time. I also have another project going with a group of engineering students from Seattle University and Seattle Pacific University that I'll tell you guys about. That said, I've been making my way through some of the stuff on the Miata. I got my tires last week and mounted them, they look pretty bad ***. I also got the rest of my electrical components. I still may need a relay or two but for the most part, I'm done buying stuff. I then went up to my school and finished my Delrin bushing, I had to machine a brass piece for the middle of it. The bushing was ******* perfect, I popped it in the freezer for 10 minutes or so since it was about .003" too large (on purpose) and it slid perfectly in. The brass was also a really tight fit, basically, it went as well as it could have so I was very happy about that. I then assembled the rear end with suspension and brakes and mounted that.
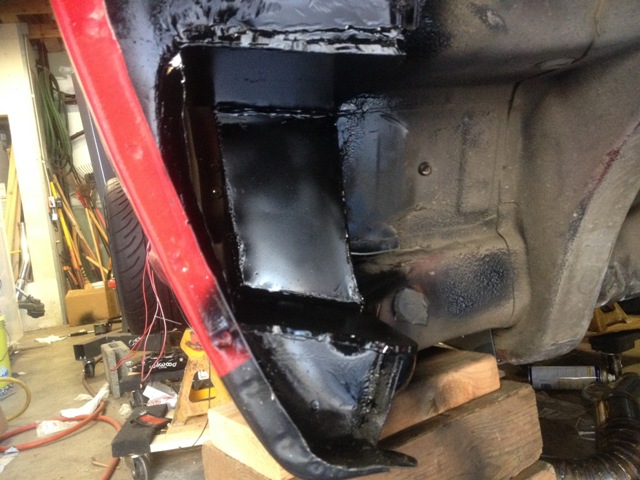
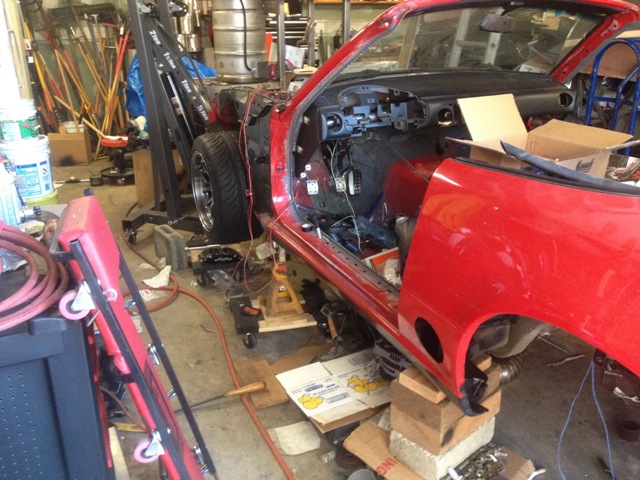
My girlfriend and I took a three-day vacation to the east side of our state to just have some quality time together and it was a really great few days, nice and relaxing and we really needed it. The night before I wanted to work in the garage but I wasn't sure what to do so I started cleaning stuff, started at about 12:00 and finished at about 3:30. The garage is a lot cleaner where I work though which is really nice, I also cleaned up the Miata since it had **** all over it. Pictures and explanations:
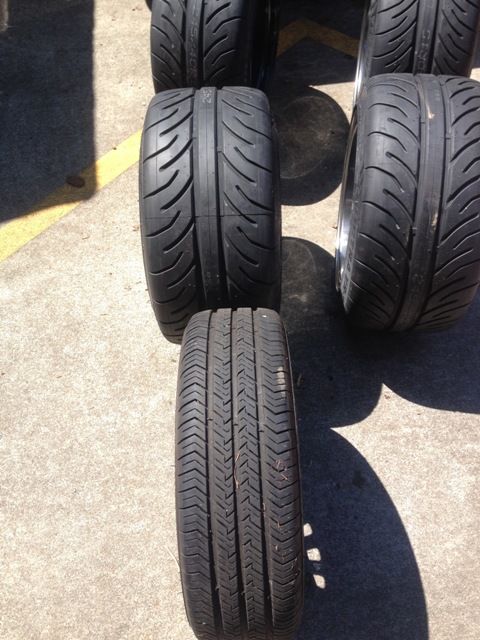
Yummy Vr-1s
Compared to brad's daily tires
Delrin Bushing going in
Rear end back in
boxed the structure back in as best as I could
wheels/tires on the front of the car
Wheels and tires on one side of the car
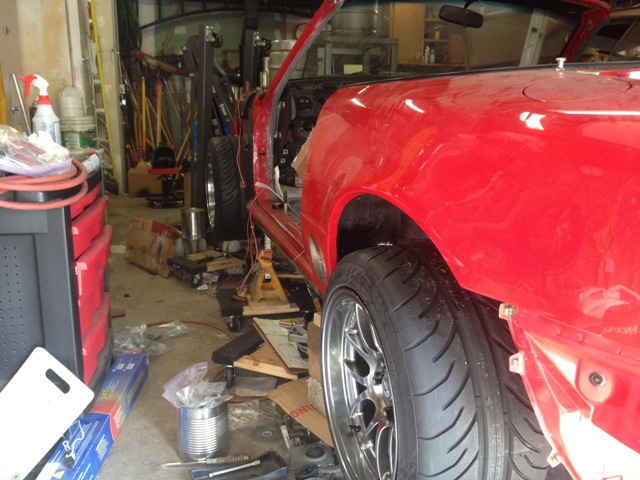
The garage is just slightly cleaner and wheels/tires/brakes on all four corners
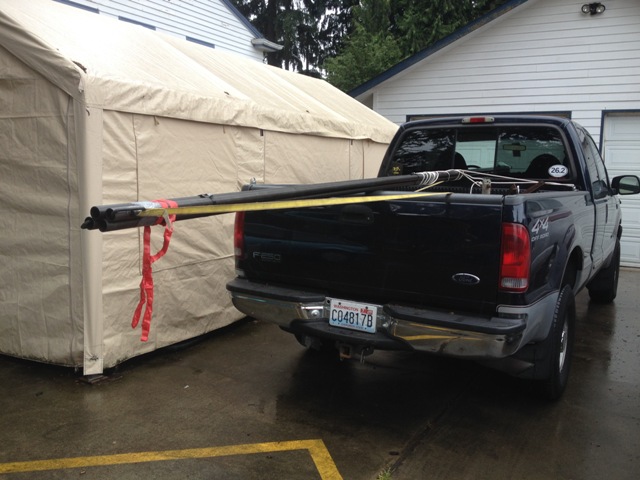
So here's my other project, I didn't tell you guys about it because I wasn't sure if people would actually follow through. One of my good friend's dad's told her that if she wanted to have his old Audi 90 she could as long as it got raced, she couldn't have it as a daily. So she talked to one of my other friends who now goes to school with her and they started talking about making a lemons team. Since we literally got the car for free, we figured why not? Obviously, the safety equipment is the expensive part in Lemons but we actually had a person donate $1800. Really sad story of how he came into the money, I'm sure he'd trade the money back in a second to not have to go through what he went through but he wanted to support the team and said he couldn't contribute mechanically or as a driver so the best he could do was donate some money. Really nice guy and obviously the money helps a ton. We have a team of six drivers now and are currently prepping the car for the race at the end of august. Her boyfriend had a tubing bender for his car and he taught me how to use it as best as he could, so I'll be building the cage for the car while everyone else does the maintenance and other stuff. It's a little scary but I won't be cutting any corners and if I **** up a bend then we're just gonna have to buy more tube. We did allow for about an extra 30 feet of tube for me to **** up, hopefully, we won't go over that. Anyway, that's the other project that's been sucking some of my time/money but I really think it'll be a great experience. Here's the tube loaded into our truck, pretty sure they thought I was retarded by the time I left but whatever, that **** didn't move an inch on the whole 40-mile drive through some shitty *** streets.
My girlfriend and I took a three-day vacation to the east side of our state to just have some quality time together and it was a really great few days, nice and relaxing and we really needed it. The night before I wanted to work in the garage but I wasn't sure what to do so I started cleaning stuff, started at about 12:00 and finished at about 3:30. The garage is a lot cleaner where I work though which is really nice, I also cleaned up the Miata since it had **** all over it. Pictures and explanations:
Yummy Vr-1s

Compared to brad's daily tires

Delrin Bushing going in

Rear end back in

boxed the structure back in as best as I could

wheels/tires on the front of the car

Wheels and tires on one side of the car

The garage is just slightly cleaner and wheels/tires/brakes on all four corners

So here's my other project, I didn't tell you guys about it because I wasn't sure if people would actually follow through. One of my good friend's dad's told her that if she wanted to have his old Audi 90 she could as long as it got raced, she couldn't have it as a daily. So she talked to one of my other friends who now goes to school with her and they started talking about making a lemons team. Since we literally got the car for free, we figured why not? Obviously, the safety equipment is the expensive part in Lemons but we actually had a person donate $1800. Really sad story of how he came into the money, I'm sure he'd trade the money back in a second to not have to go through what he went through but he wanted to support the team and said he couldn't contribute mechanically or as a driver so the best he could do was donate some money. Really nice guy and obviously the money helps a ton. We have a team of six drivers now and are currently prepping the car for the race at the end of august. Her boyfriend had a tubing bender for his car and he taught me how to use it as best as he could, so I'll be building the cage for the car while everyone else does the maintenance and other stuff. It's a little scary but I won't be cutting any corners and if I **** up a bend then we're just gonna have to buy more tube. We did allow for about an extra 30 feet of tube for me to **** up, hopefully, we won't go over that. Anyway, that's the other project that's been sucking some of my time/money but I really think it'll be a great experience. Here's the tube loaded into our truck, pretty sure they thought I was retarded by the time I left but whatever, that **** didn't move an inch on the whole 40-mile drive through some shitty *** streets.

Reply
0
0
07-25-2016, 01:19 AM
#289
Junior Member

Join Date: Jul 2016
Location: Bay Area
Posts: 355
Total Cats: 33
Dude the exhaust work! Holy ****, great work. I'll bet it's going to be loud as hell.
I love the finishing touches you are doing. The boxing in of the side exhaust was pretty damn cool. Nice attention to detail throughout the car, and nice job on the door seam welding.
I love the finishing touches you are doing. The boxing in of the side exhaust was pretty damn cool. Nice attention to detail throughout the car, and nice job on the door seam welding.
Reply
0
0
08-02-2016, 09:44 PM
#290
Elite Member
Thread Starter
Join Date: Sep 2015
Location: Seattle, WA
Posts: 1,651
Total Cats: 884
Thanks Astral, to me it's all the small details that make the car so I'm trying to do as many correctly as I can. And yeah, the exhaust will probably be a bit loud haha
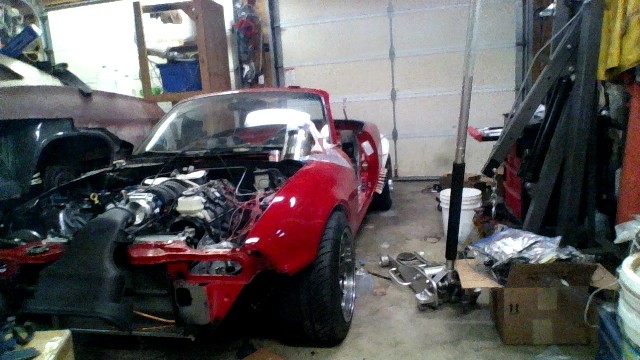
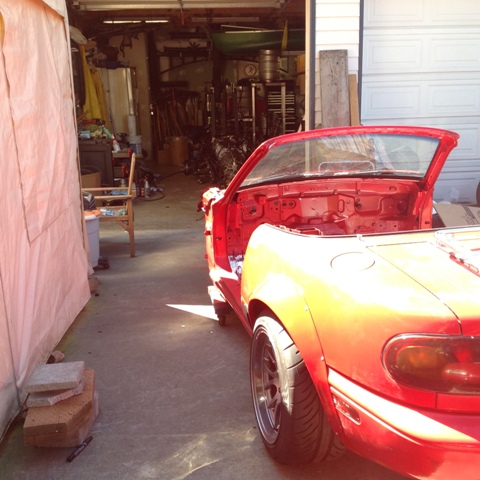
Alright, update time. The car is on the ground, ride height is at about 4.6". It's quite a lot lower than I'm used to with brad. Most of the wiring is finished up, I just need grounds throughout the car. I don't have headlights currently but I will be adding them in the future once my money situation is better. Also got the flares yesterday, I wish they were just a touch smaller but they will do the trick nicely. They'll need some work to fit just right but they look decent and should end up helping with the tire to car clearance. I am a little worried on how close they run to the exhaust but I'll address that in the next week. Put a lot of time into the wiring this week, I wanted to shorten all the wires, the first reason is that it's much less cluttered which means fewer problems, the second is that it's lighter, and the third is that it just looks much better without wires running every which way. Ended up pulling quite a bit of wiring out, there's very minimal wiring in the car now. It's not necessarily as advanced as it was before but it's easier and fewer wires running everywhere, now let's just hope I hooked everything up correctly. I was able to use different colored wires for each circuit which makes it pretty easy to trace the wires as well, hopefully, I shouldn't have many problems but if I do, hopefully, they're easy to trace.
As for progress on the lemon, I finished the bends for the cage yesterday. I'm doing a halo design for it and it's turning out quite well, it hugs the body very well and should protect all of us in the case of an accident, but let's hope that it doesn't come down to that. I also split my leg open pretty well yesterday, went to the doctor and they said it's gonna heal slowly but if I don't wanna get stitches then I don't have to, it's about 3/16" wide and 3" long, had a piece of metal I had just cut swing down and catch my calf. So that was fun. I may also have a solution to my money problem pretty soon, we'll see if it goes through. If it does, work on the car will be stalled but I'll come back to it in much better shape (money wise) and less stress.
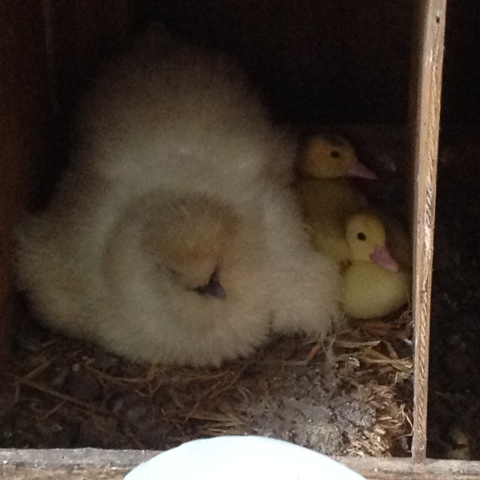
We also got baby ducks and put them under one of our hens who was sitting, gotta say they're pretty adorable.
On the ground:
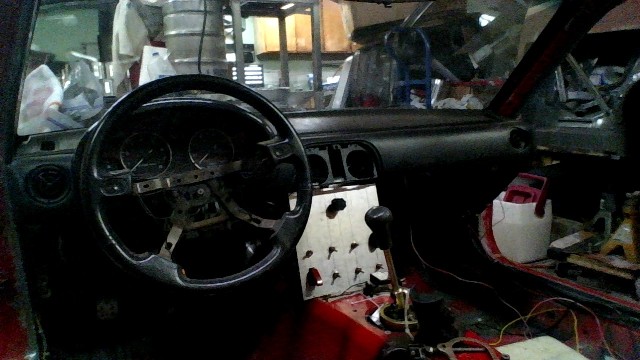
Wiring and switch panel, wiring isn't fully mounted yet
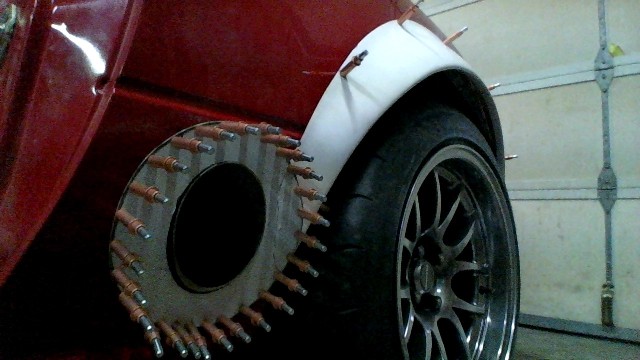
Rear Flares
A little close to the exhaust
Baby ducks
Alright, update time. The car is on the ground, ride height is at about 4.6". It's quite a lot lower than I'm used to with brad. Most of the wiring is finished up, I just need grounds throughout the car. I don't have headlights currently but I will be adding them in the future once my money situation is better. Also got the flares yesterday, I wish they were just a touch smaller but they will do the trick nicely. They'll need some work to fit just right but they look decent and should end up helping with the tire to car clearance. I am a little worried on how close they run to the exhaust but I'll address that in the next week. Put a lot of time into the wiring this week, I wanted to shorten all the wires, the first reason is that it's much less cluttered which means fewer problems, the second is that it's lighter, and the third is that it just looks much better without wires running every which way. Ended up pulling quite a bit of wiring out, there's very minimal wiring in the car now. It's not necessarily as advanced as it was before but it's easier and fewer wires running everywhere, now let's just hope I hooked everything up correctly. I was able to use different colored wires for each circuit which makes it pretty easy to trace the wires as well, hopefully, I shouldn't have many problems but if I do, hopefully, they're easy to trace.
As for progress on the lemon, I finished the bends for the cage yesterday. I'm doing a halo design for it and it's turning out quite well, it hugs the body very well and should protect all of us in the case of an accident, but let's hope that it doesn't come down to that. I also split my leg open pretty well yesterday, went to the doctor and they said it's gonna heal slowly but if I don't wanna get stitches then I don't have to, it's about 3/16" wide and 3" long, had a piece of metal I had just cut swing down and catch my calf. So that was fun. I may also have a solution to my money problem pretty soon, we'll see if it goes through. If it does, work on the car will be stalled but I'll come back to it in much better shape (money wise) and less stress.
We also got baby ducks and put them under one of our hens who was sitting, gotta say they're pretty adorable.
On the ground:

Wiring and switch panel, wiring isn't fully mounted yet

Rear Flares

A little close to the exhaust

Baby ducks

Last edited by Scaxx; 08-03-2016 at 01:47 AM.
Reply
0
0
08-05-2016, 01:34 PM
#291
Elite Member
Thread Starter
Join Date: Sep 2015
Location: Seattle, WA
Posts: 1,651
Total Cats: 884
Looks like I'm retarded, measured the height from the frame rails not the pinch rails, it's much lower now. Also got a chance to test all my wiring yesterday and apparently I did everything right. All my lights work, my windshield wipers work, hell, even my fans work. So that's nice, I'm mounting all the wiring today to figure out exactly where it needs to go and then I need to start working on the flares. Also, the rear part of my exhaust hangs lower than I would have liked, should have mounted it higher. I'll try to get some pictures today. I'd really like to see how much wiring I took out of the car, there's honestly just about nothing left.
Reply
1
1
08-08-2016, 11:01 AM
#292
Elite Member
Thread Starter
Join Date: Sep 2015
Location: Seattle, WA
Posts: 1,651
Total Cats: 884
I was able to get away with just smacking the **** out of a couple of my exhaust hangers with a 5lb sledge to get the exhaust a little higher. All the wiring is mounted in the interior and I only need to mount my starter wires in the engine bay, other than that everything is mounted in there as well. Also built a throttle cable bracket, ran into some problems with my gas pedal and clarance to the trans tunnel at WOT but I was able to fix it. Cut my driver side quarter panel for the flare and then smacked the inner part up to match the upper part. I need to grab my mig from the lemons garage to weld it but I'm hoping to get the flares mounted in the next day or so. Also started the beauty ring for the exhaust last night, it's a little big but I think it'll come out decently nice, we'll see. It will have to go up on the flare though which I'm hoping doesn't look to weird but it'll hopefully keep the paint from getting to destroyed right there. Once the flares and beauty ring are mounted then the front end comes back out to prepare for paint. Other than oil and torquing all the bolts around the suspension, I believe the car is ready to run but I want to have a finished product the first time I take it out, or at least as finished as it can get right now.
Reply
1
1
08-09-2016, 12:00 PM
#294
Elite Member
Thread Starter
Join Date: Sep 2015
Location: Seattle, WA
Posts: 1,651
Total Cats: 884
Car is pretty much ready to roll, I need to order a couple small parts, but nothing too serious. Really sucks I can't take picture on my phone right now, I guess my laptop has a webcam, I could snap a couple pictures on that. Got the flares on yesterday, went pretty well, only a small amount of trimming was needed on the actual flares. Also got the beauty ring done. Everything is currently held on by clekos and once I paint the flares, they'll get riveted on. The beauty ring ended up going up the flare but it doesn't look out of place like that so I'm pretty happy with it. Gonna start disassembling and sanding the interior/engine bay today. Really hoping to get paint it painted by the end of the weekend, we'll see.
Reply
1
1
08-09-2016, 07:36 PM
#295
Elite Member
Thread Starter
Join Date: Sep 2015
Location: Seattle, WA
Posts: 1,651
Total Cats: 884
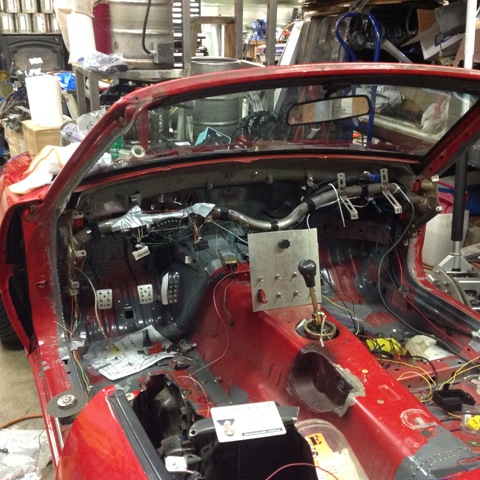
I can feel the push to finish now. Got the engine out earlier and started roughing the interior as well as smoothing the edges between the POR and stock paint. Just finished a chunk of my hw and I need to go work on the lemon in an hour or so but I'm going to try to get the car primered by tonight. Gonna load up on redbull and try to just bust it out. I need to leave 24 hours between when I primer it and when I actually paint it so that'll give me some time to work on a couple other things that need to get finished as well as giving me time to set up a mini paint booth. I'm still gonna have some stuff to finish right after I finish paint but it'll just be small, starting to get excited. Oh I also took some pics today with the laptop webcam, they're shitty quality but I'll try to upload them later, the harness almost looks like I knew what I was doing. Pretty happy with it.
Reply
2
2
08-16-2016, 07:36 PM
#296
Elite Member
Thread Starter
Join Date: Sep 2015
Location: Seattle, WA
Posts: 1,651
Total Cats: 884
Lol at "load up on redbull", I ended up finishing primer-ing the car at 8am that morning, I guess I got it done at least.
Been really busy trying to get the car on the road but also buttoning up the final details. Paint took me a little longer than I thought but I'm happy with the results, theirs some imperfections in places and it's by no means a proffessional job but I learned a lot doing it and I'm happy with the outcome so that's kinda what counts. Been doing a lot of little things the lst couple days like riveting on the flares, extending a couple wires, put some heat mat stuff under the car as well as in the interior in the hopes that I don't melt my shoes, a couple small lines needed to be added. Basically all the stuff that drags a build out but isn't really that noticeable on the outside. Need to finish some schoolwork so I won't get then engine in until probably tonight. Also helping my girlfriend put a cobra irs into her foxbody so we'll probably work on that a little bit tonight as well. I'm hoping to start the car either tomorrow evening or thursday evening (my buddy has work until 5:30 and he's my co-pilot). Gonna work my *** off tonight to try to get basically everything in the car so that tomorrow it's wrapping up some of the final details. My longtime bestfriend gets back from field training on Friday so the goal is to have it done before he gets home so I can take him for a ride in it.
The shitty pictures are from my laptop webcam, apologies.
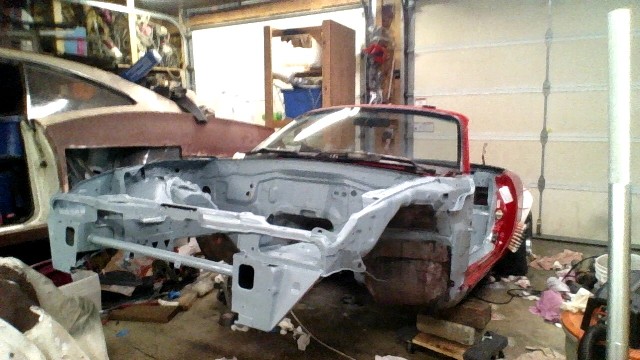
Car before I started primer-ing last week
All the clekos!
Interior mostly put together
How the harness I built ended up coming out
Primered
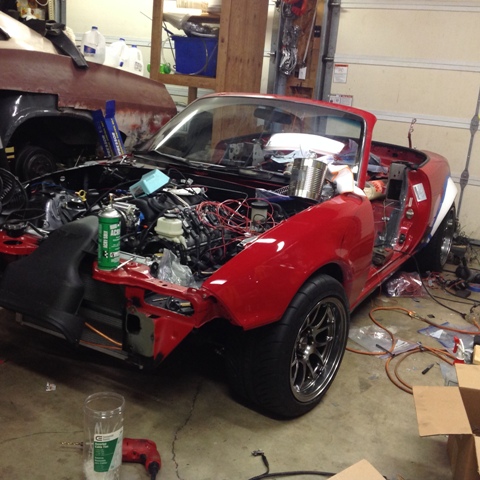
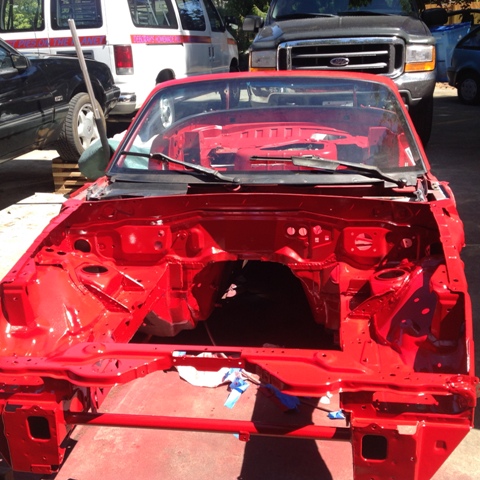
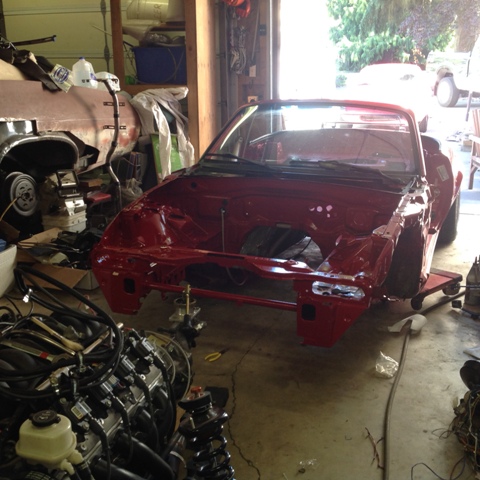
It's red again!
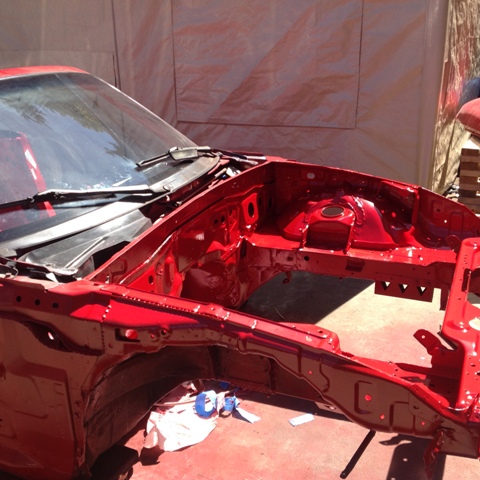
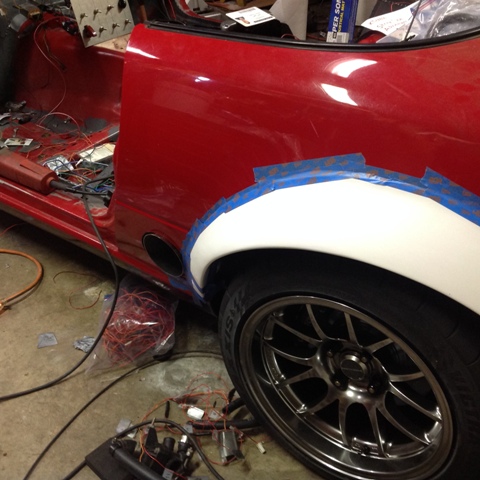
Painted the flares as well. Also didn't clear the interior, it's more of a matte finish.
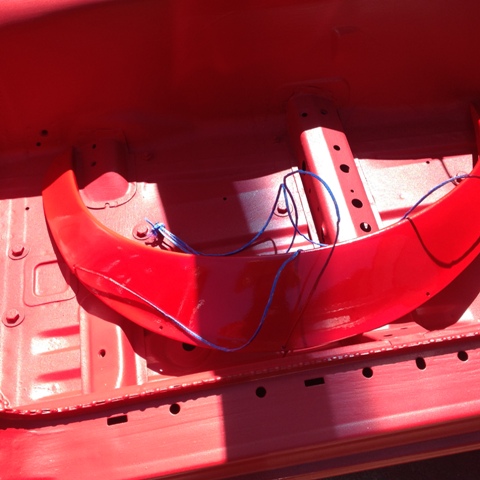

Beauty ring and flares riveted on
Engine all ready to go in
Just waiting
Miata's back in the garage
Been really busy trying to get the car on the road but also buttoning up the final details. Paint took me a little longer than I thought but I'm happy with the results, theirs some imperfections in places and it's by no means a proffessional job but I learned a lot doing it and I'm happy with the outcome so that's kinda what counts. Been doing a lot of little things the lst couple days like riveting on the flares, extending a couple wires, put some heat mat stuff under the car as well as in the interior in the hopes that I don't melt my shoes, a couple small lines needed to be added. Basically all the stuff that drags a build out but isn't really that noticeable on the outside. Need to finish some schoolwork so I won't get then engine in until probably tonight. Also helping my girlfriend put a cobra irs into her foxbody so we'll probably work on that a little bit tonight as well. I'm hoping to start the car either tomorrow evening or thursday evening (my buddy has work until 5:30 and he's my co-pilot). Gonna work my *** off tonight to try to get basically everything in the car so that tomorrow it's wrapping up some of the final details. My longtime bestfriend gets back from field training on Friday so the goal is to have it done before he gets home so I can take him for a ride in it.
The shitty pictures are from my laptop webcam, apologies.
Car before I started primer-ing last week

All the clekos!

Interior mostly put together

How the harness I built ended up coming out

Primered

It's red again!


Painted the flares as well. Also didn't clear the interior, it's more of a matte finish.


Beauty ring and flares riveted on


Engine all ready to go in

Just waiting

Miata's back in the garage

Reply
1
1
 08-16-2016, 08:25 PM
#299
Elite Member
Thread Starter
Join Date: Sep 2015
Location: Seattle, WA
Posts: 1,651
Total Cats: 884
Takes me about 3 hours to disassemble the whole front end, wiring, and exhaust, should only take 4 or 5 to put all that back together haha, I know it's a lot but at this point, I know the car pretty much inside and out. I guess now we get to take bets on whether I'll get it done or not 
Reply
0
0
08-16-2016, 09:25 PM
#300
Supporting Vendor

iTrader: (1)
Join Date: Sep 2010
Location: Lake Forest, CA
Posts: 7,947
Total Cats: 1,002
I hate to say I'd bet against you but... I'd bet against you, unless you are working on it all day every day.
I'd happily lose that bet.
good luck man, can't wait to see this thing humming.
Edit: Miatas at MRLS? lol
I'd happily lose that bet.
good luck man, can't wait to see this thing humming.
Edit: Miatas at MRLS? lol
Reply
0
0


