MatosMiata's build, turning a booger into something worth looking at


 03-01-2016, 10:10 PM
#23
Junior Member
Thread Starter

Join Date: Jan 2012
Location: Miami
Posts: 316
Total Cats: 3
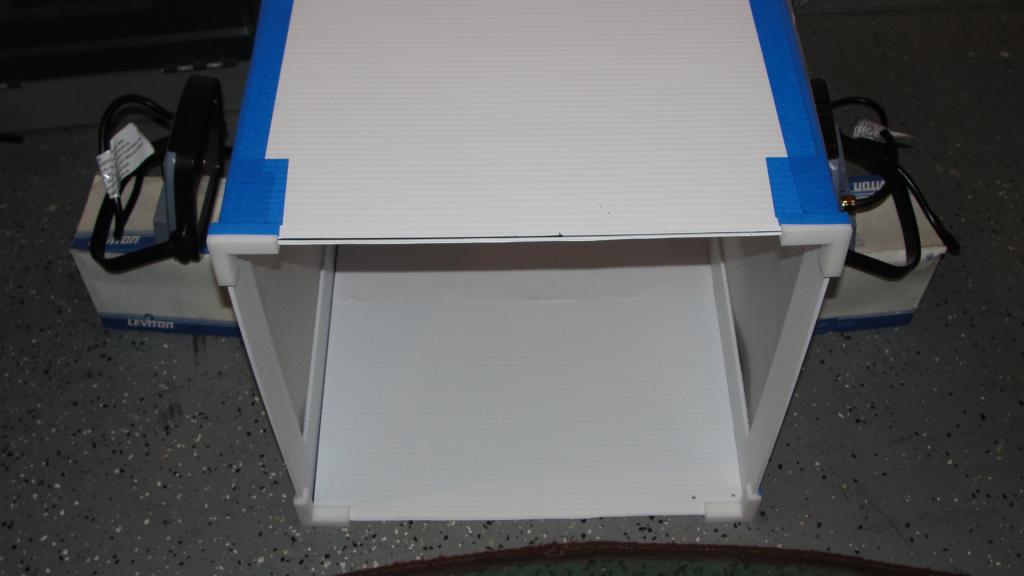
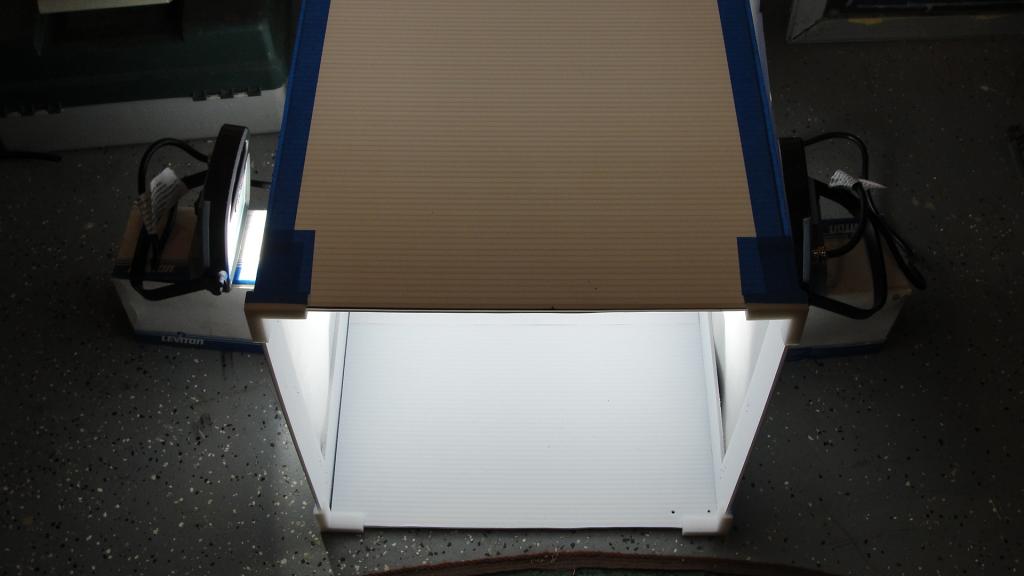
Tried my hand at making a light box. Still needs some modifications (like a better backdrop), but it works decently. Incandescents would probably give a better spread of light too.


Reply
 0
0

0


 03-01-2016, 10:11 PM
#25
Junior Member
Thread Starter
Join Date: Jan 2012
Location: Miami
Posts: 316
Total Cats: 3
Now I just need to make matching shift ***** and e-brake handles and I can have colored accents for my interior. I definitely need to get some green door pull straps to match my Rasta colored Personal Steering wheel. I'll have pictures of some green shift ***** in a sec.
Reply
0
0
03-01-2016, 10:12 PM
#26
Junior Member
Thread Starter
Join Date: Jan 2012
Location: Miami
Posts: 316
Total Cats: 3
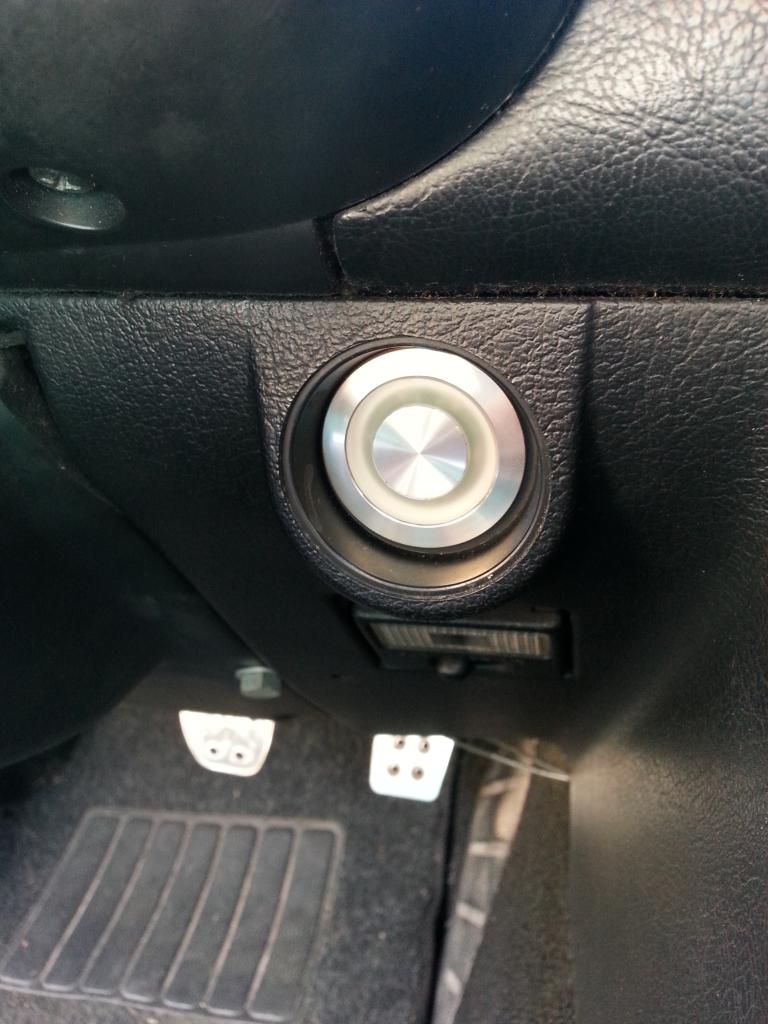
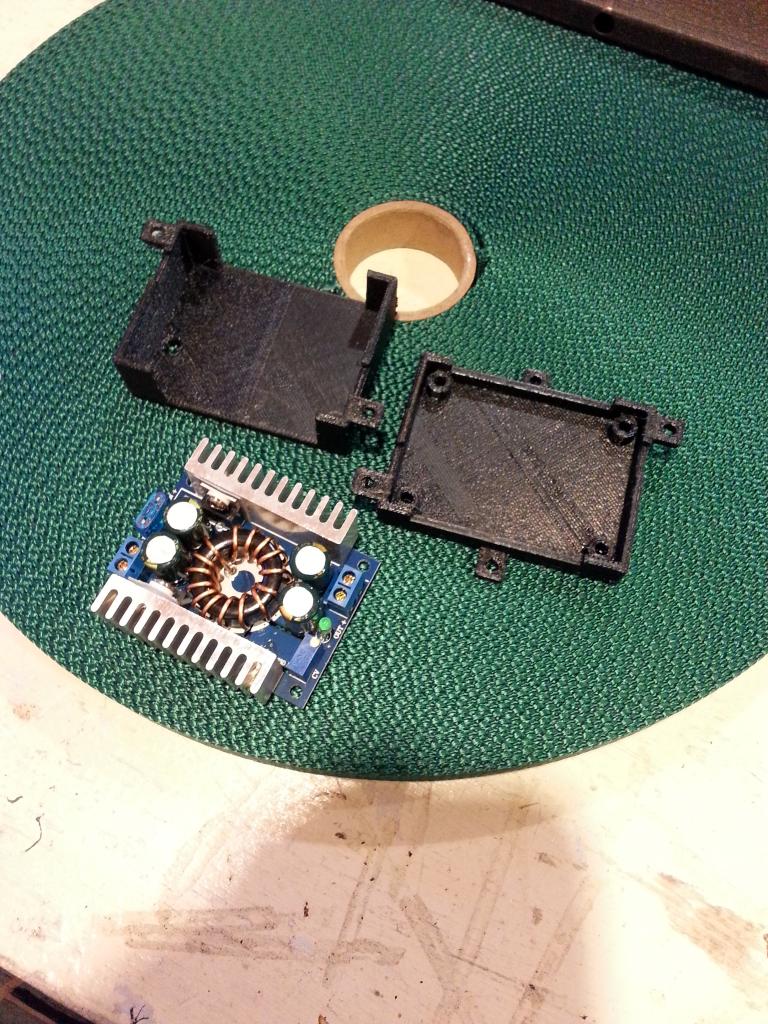
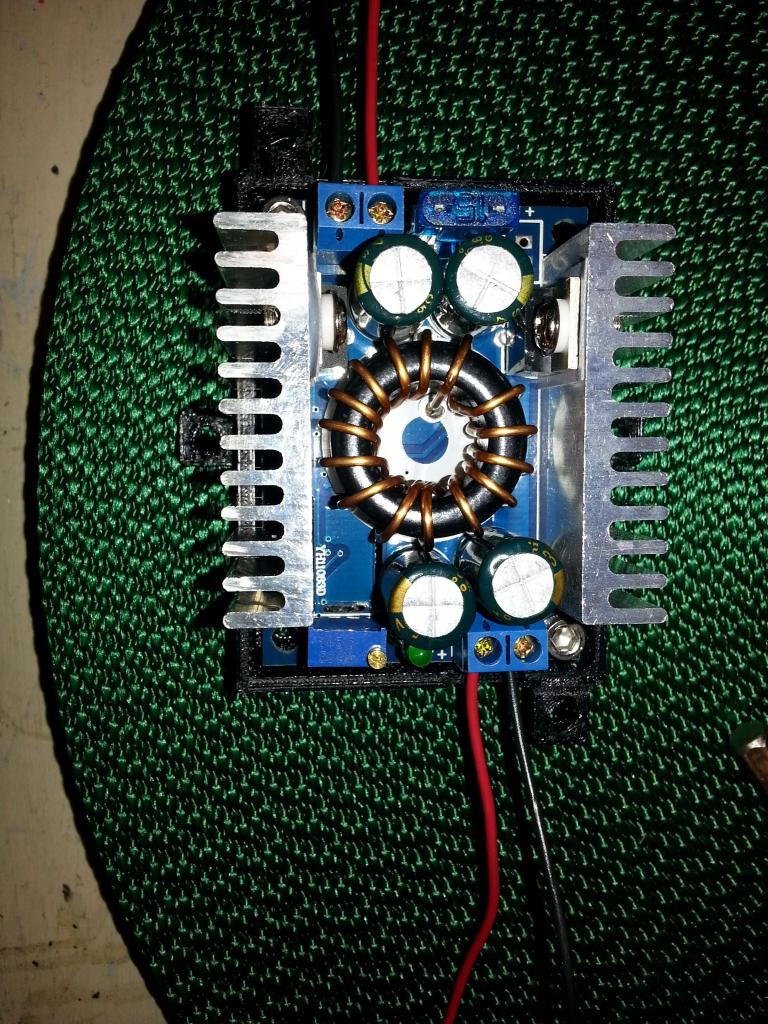
I forgot to mention that I added a push button start a few months back using Revlimiter's guide. I started with a smaller button and eventually upgraded to this vandal proof elevator button. Unfortunately, the LEDs in it run off 24V so I need to install a 12 to 24 VDC converter in order to make it light up when I push the button.

Reply
0
0
03-01-2016, 10:13 PM
#27
Junior Member
Thread Starter
Join Date: Jan 2012
Location: Miami
Posts: 316
Total Cats: 3
One of the things that's most annoying when driving my Miata is that my left leg will push up against the arm rest from time to time. It will start to hurt after a while. Due to that, I decided to make new arm rests that won't bother my leg. Here are some terrible cell phone pictures of the first prototype. I widened the design a bit afterwards, mostly to fully cover the square cutouts under the arm rest.
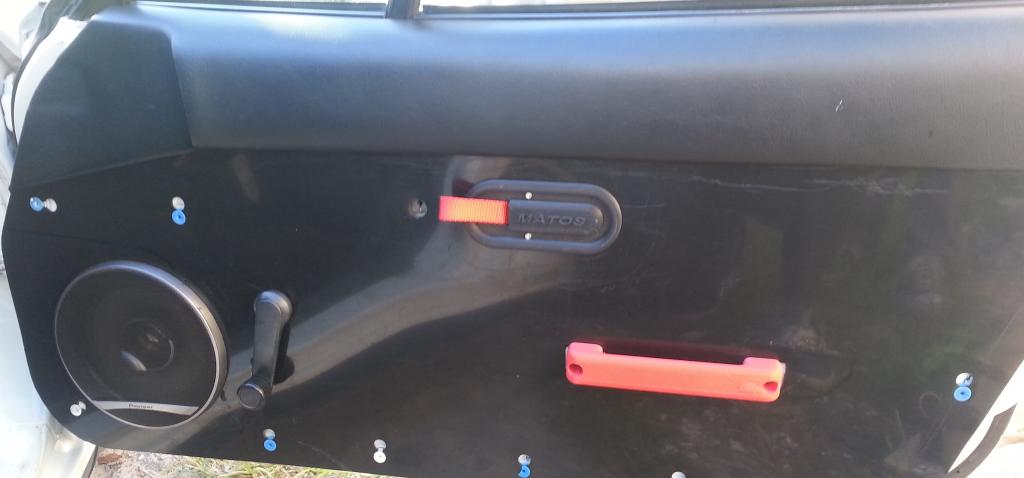
It's got great clearance for my leg, being shorter than the factory piece and only sticking out ~1" from the door panel as opposed to the ~2.5" of the factory piece
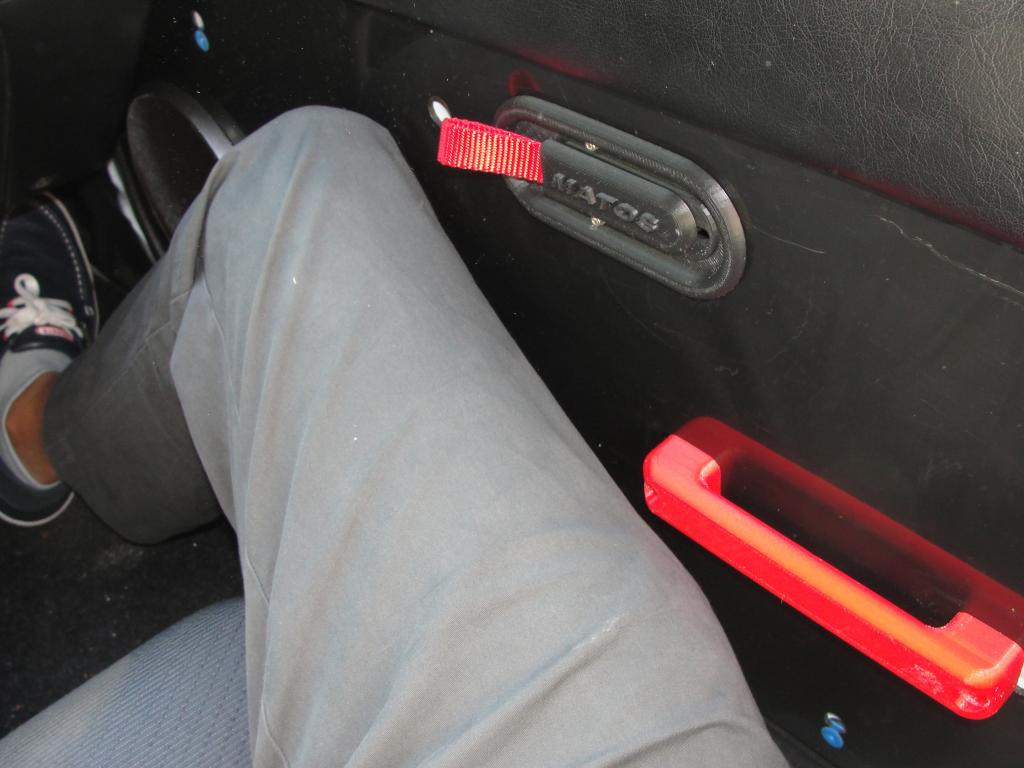
It's not much of an arm rest anymore, it's mostly a hold for me to be able to close the door easily, although I can put my arm there if necessary. I'm currently making two of the newer design, so we'll see how it does as an arm rest once I put one on the driver's side door.
Reply
0
0
03-01-2016, 10:14 PM
#28
Junior Member
Thread Starter
Join Date: Jan 2012
Location: Miami
Posts: 316
Total Cats: 3
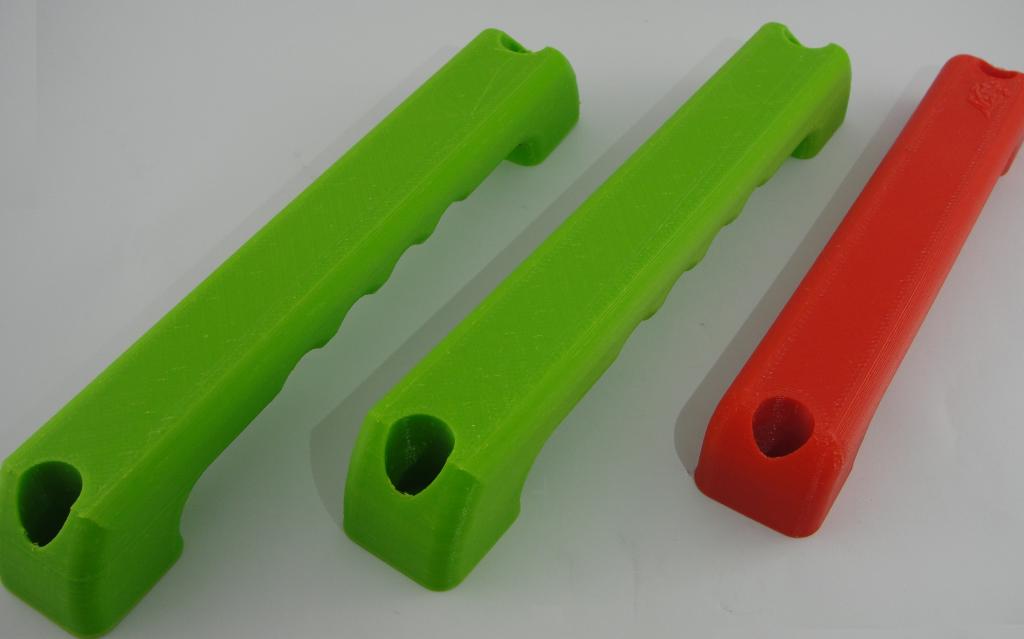
My friend with the AE86 loved the new door pulls/arm rests so he requested a set for his AE86. We got the design done quickly and I got both pieces built. He wants his interior to have a black and green theme, so I made his in green. He also asked for finger cutouts for his thicker fingers. I don't really stick my hand through to pull mine, but he wanted the ability, so his pieces got finger cutouts.
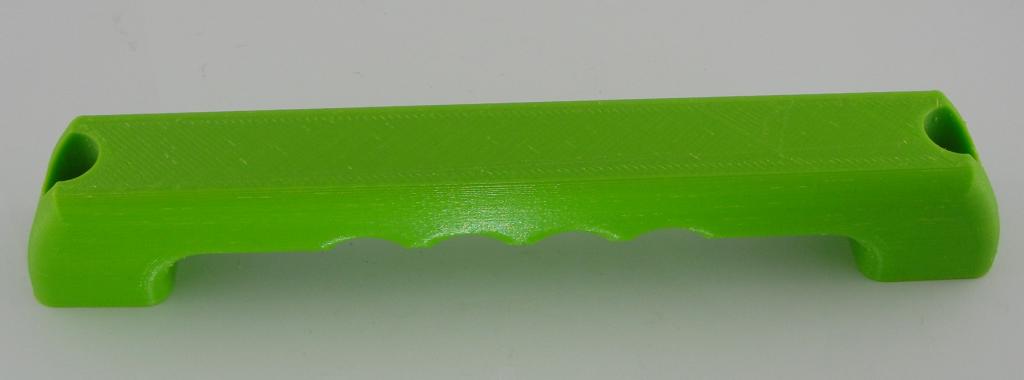
Here they are next to the original Miata one, they are longer and stick out more (AE86 has more interior room)

Here they are next to the original Miata one, they are longer and stick out more (AE86 has more interior room)

Reply
0
0


 03-01-2016, 10:16 PM
#33
Junior Member
Thread Starter
Join Date: Jan 2012
Location: Miami
Posts: 316
Total Cats: 3
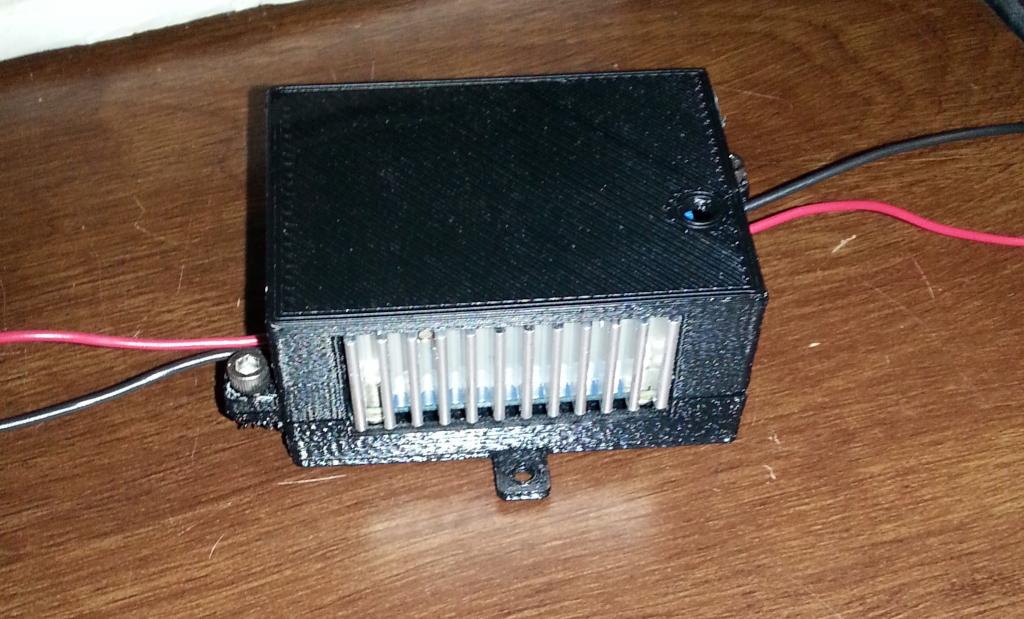
Of course, me being me, I couldn't just leave well enough alone. I had to go design and build an enclosure for my new circuit...because...engineer all of the things rofl! I went to all this trouble to get a Master's in Mechanical Engineering, may as well use some part of my engineering knowledge every chance I get 


Reply
0
0
03-01-2016, 10:17 PM
#34
Junior Member
Thread Starter
Join Date: Jan 2012
Location: Miami
Posts: 316
Total Cats: 3
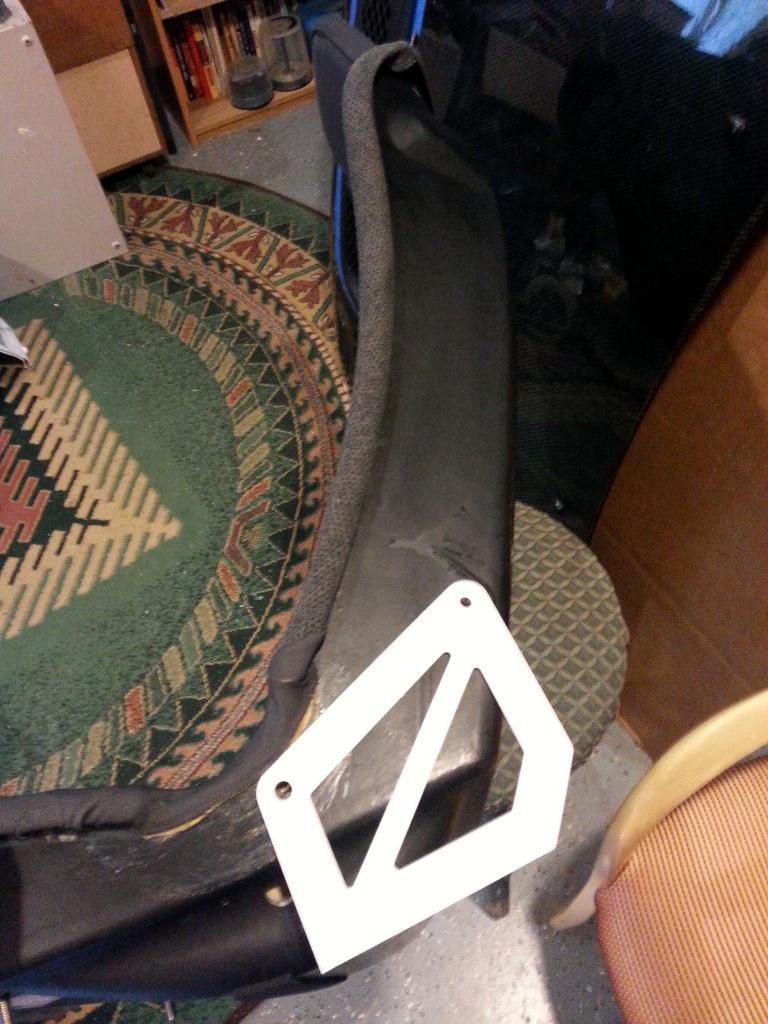
One of the things I've been working on lately is getting my Elise seat mounted. After much reading and some quick measurements, I made a bracket design for the seat. Here's a test piece I made from plastic:
I also took out my driver's side seat and removed the seat rails. They had a fair bit of rust, so they got rust removal followed by rust proof paint.
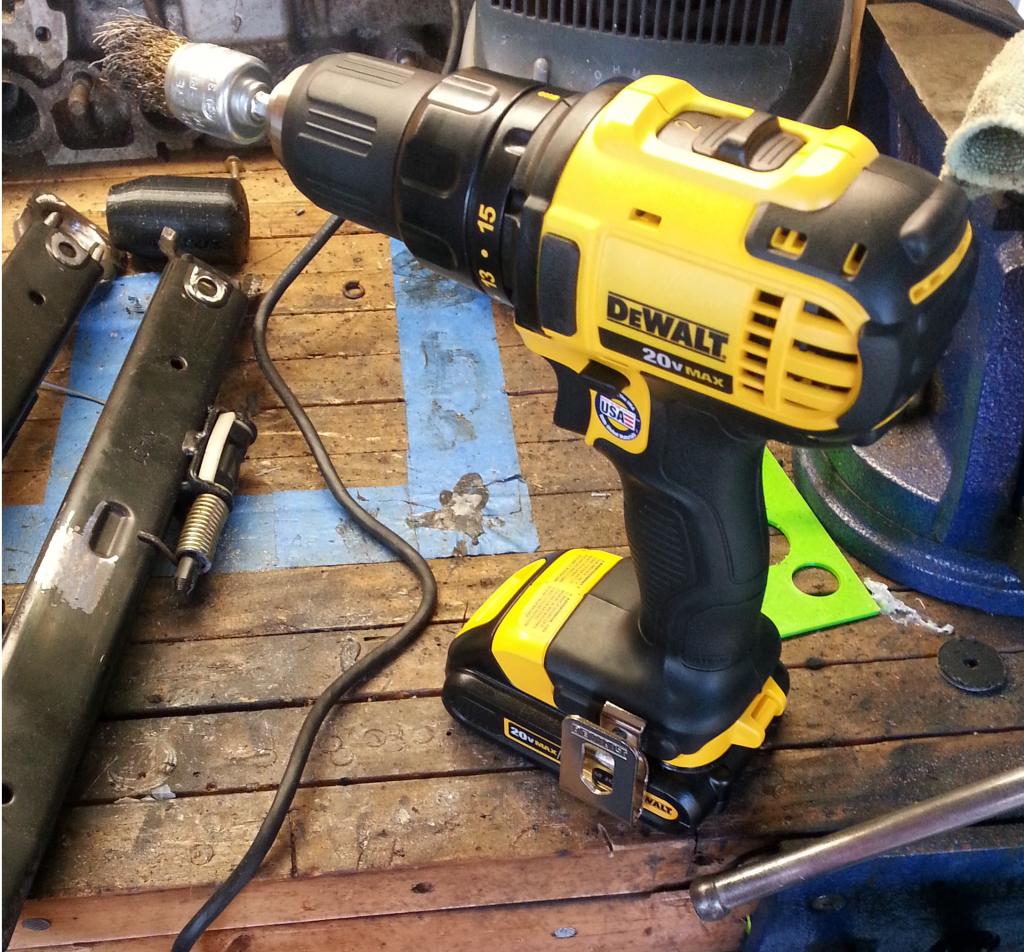
This gave me the opportunity to use one of my new toys
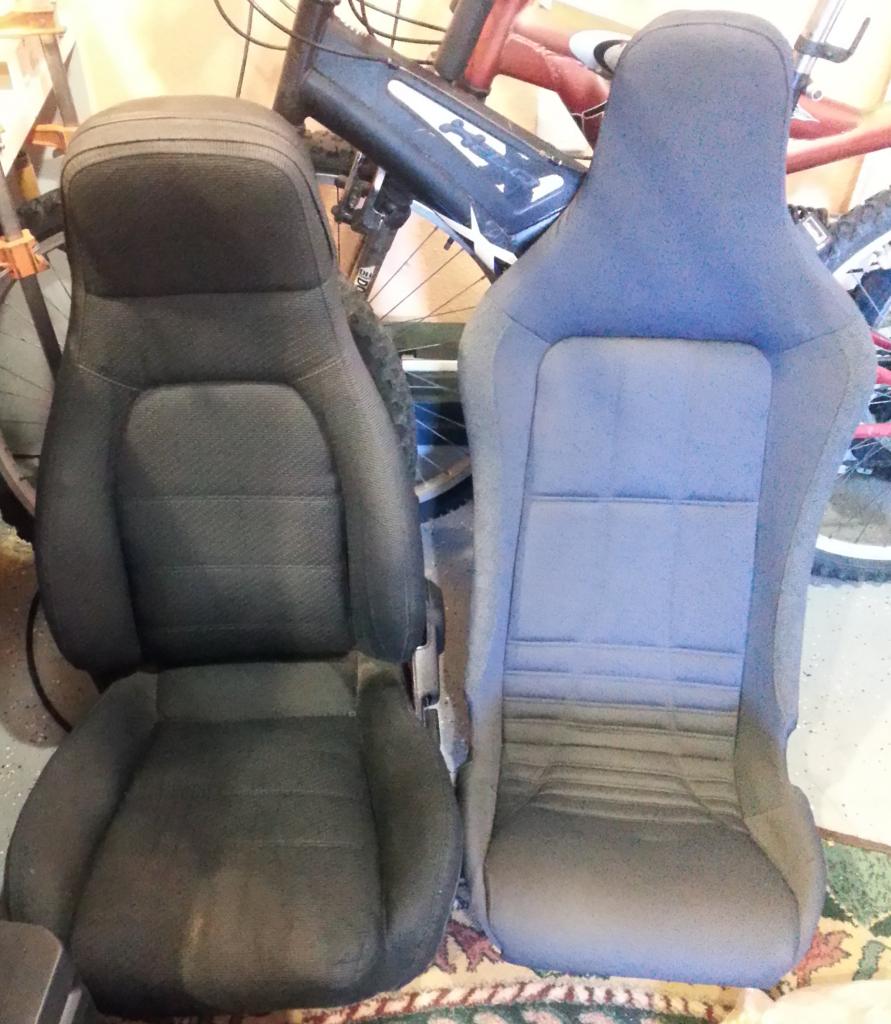
Here's a shot of the Elise seat next to the factory Miata one:

I also took out my driver's side seat and removed the seat rails. They had a fair bit of rust, so they got rust removal followed by rust proof paint.
This gave me the opportunity to use one of my new toys

Here's a shot of the Elise seat next to the factory Miata one:

Reply
0
0
03-01-2016, 10:18 PM
#35
Junior Member
Thread Starter
Join Date: Jan 2012
Location: Miami
Posts: 316
Total Cats: 3
The other Miata project which has been taking up my time is the installation of the 12-24VDC converter. I wasn't satisfied with simply installing it, I had to completely rework my radio bezel and do some rust cleanup while I was at it. More details on the radio bezel to come later:
I can't believe I didn't fix this earlier
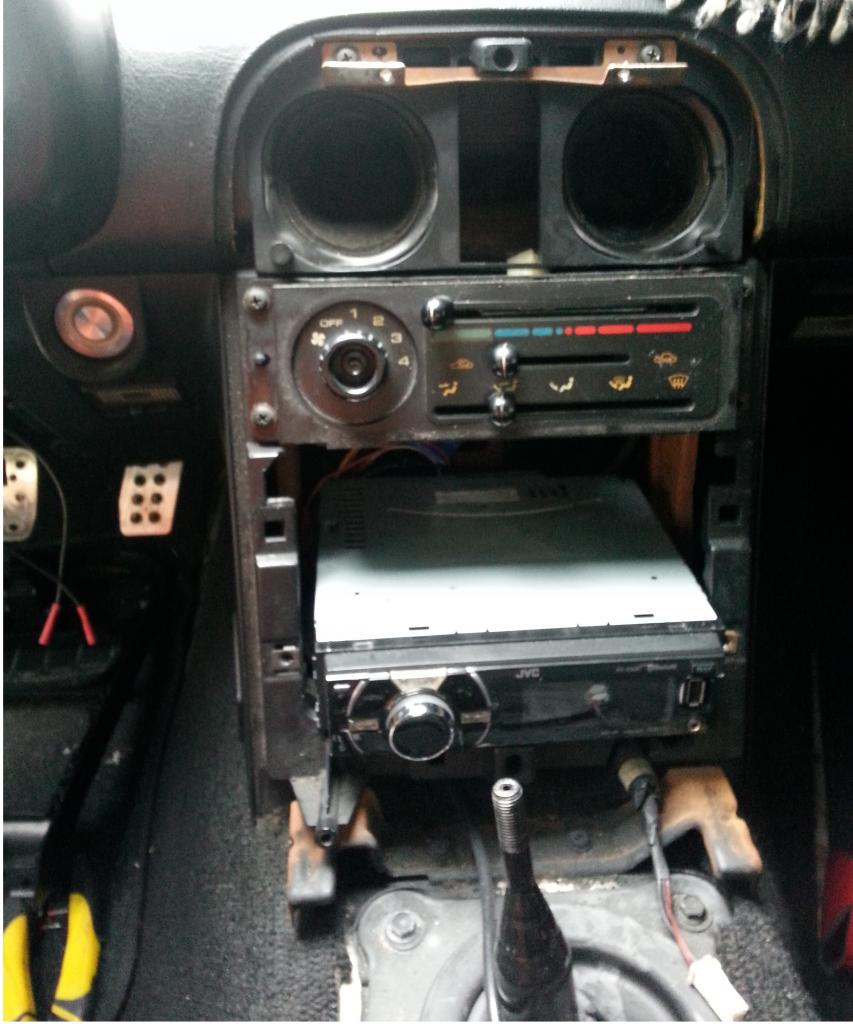
Already looking much better with that rust gone
I can't believe I didn't fix this earlier

Already looking much better with that rust gone

Reply
0
0
03-01-2016, 10:18 PM
#36
Junior Member
Thread Starter
Join Date: Jan 2012
Location: Miami
Posts: 316
Total Cats: 3
I removed the rust from the lower bracket on the center console and painted it
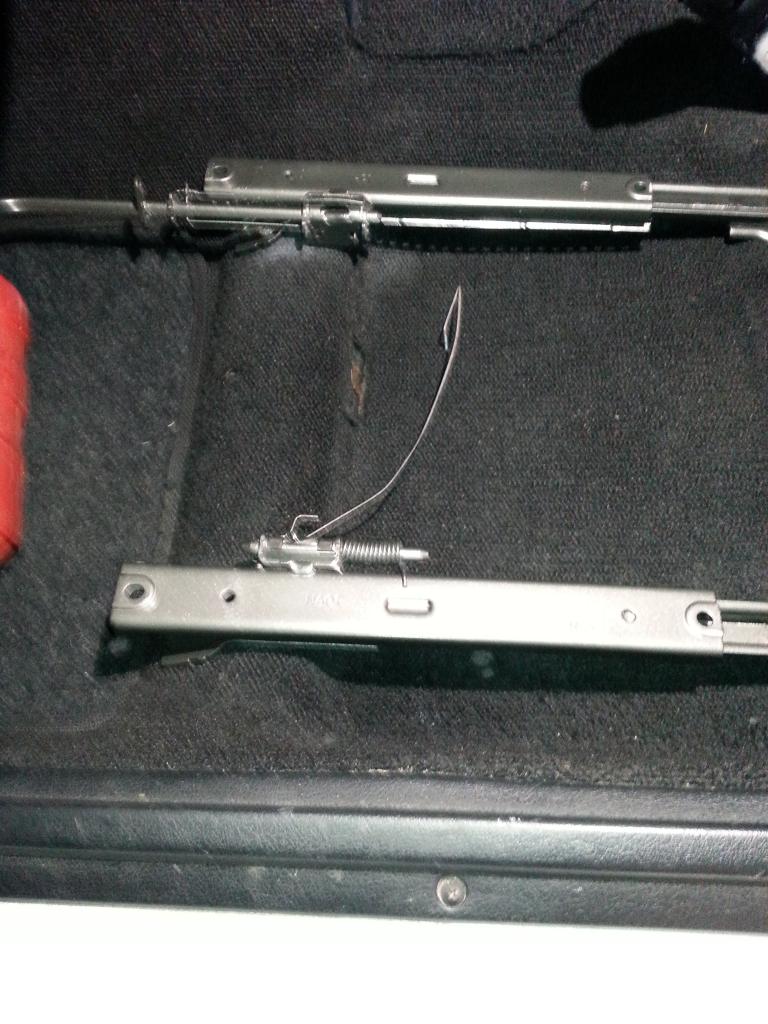
Then I put in the newly painted seat rails
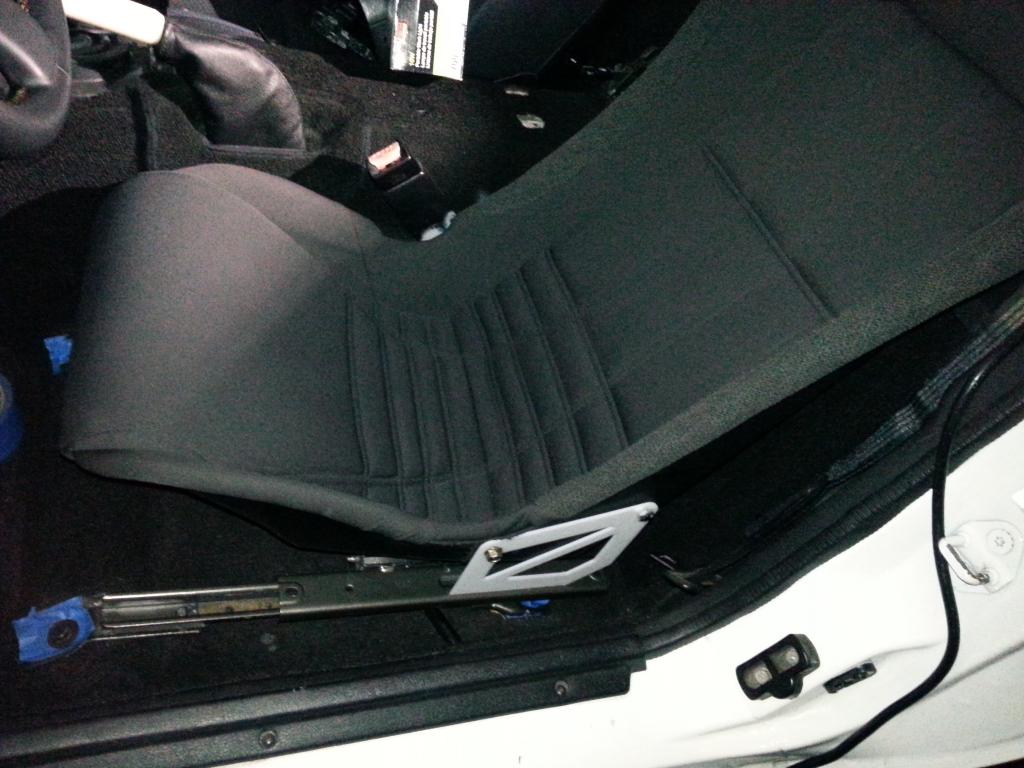
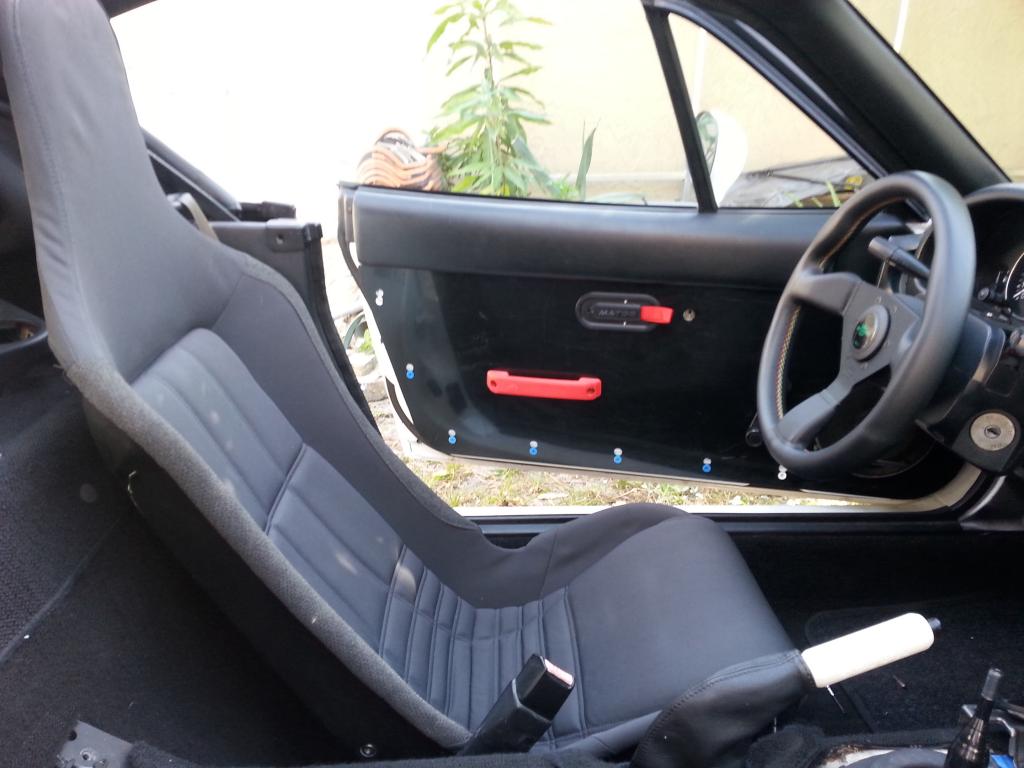
Followed by a quick test fit of the Elise seat
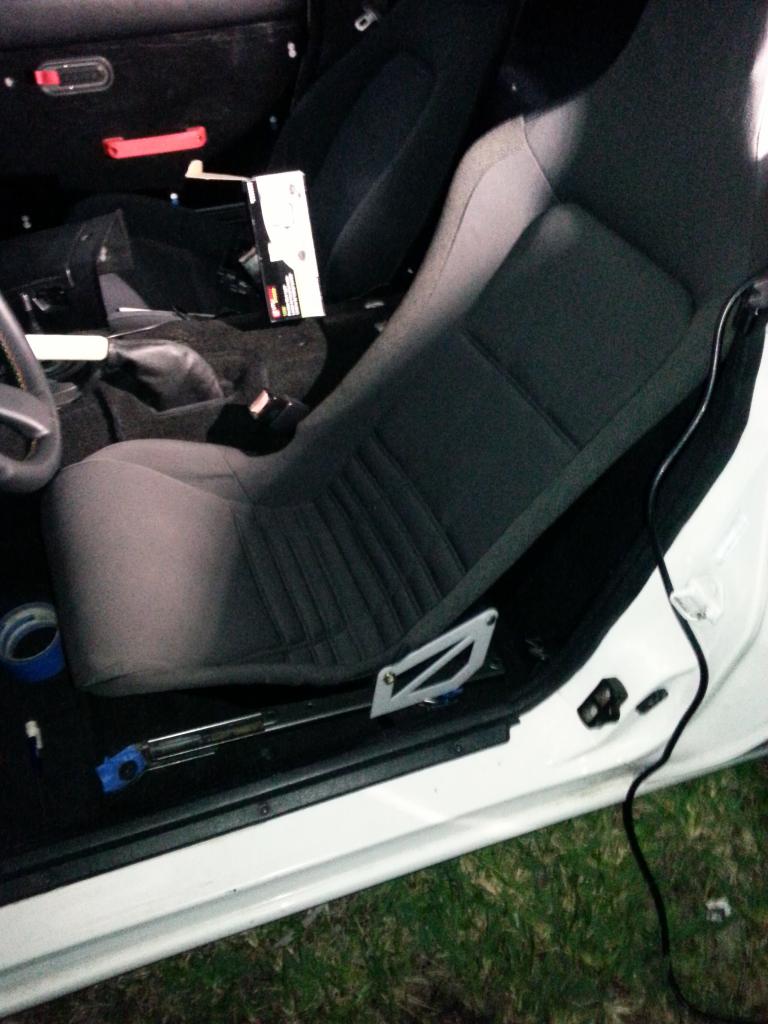
I'm going to have to do some adjustment to get the seat back parallel to the back wall. I can already see that these will allow me to sit lower than stock, mainly because the Elise seat is so much thinner.

Then I put in the newly painted seat rails

Followed by a quick test fit of the Elise seat

I'm going to have to do some adjustment to get the seat back parallel to the back wall. I can already see that these will allow me to sit lower than stock, mainly because the Elise seat is so much thinner.

Reply
0
0
03-01-2016, 10:19 PM
#37
Junior Member
Thread Starter
Join Date: Jan 2012
Location: Miami
Posts: 316
Total Cats: 3
In order to make the cross bar for the Elise, I bought a 1" square tube from Lowe's. I cut that down so it was just long enough to sit flush with the outer wall of each seat rail
I then welded some 0.25" thick steel plate on each end in order to raise the top of the bar to 1.25" as per the information I got from Revlimiter's site
Basically, one small piece about 1"x 1.75" is enough for each side
I decided that the best way to place the Elise seat would be to position the cross bar for the front bolts first
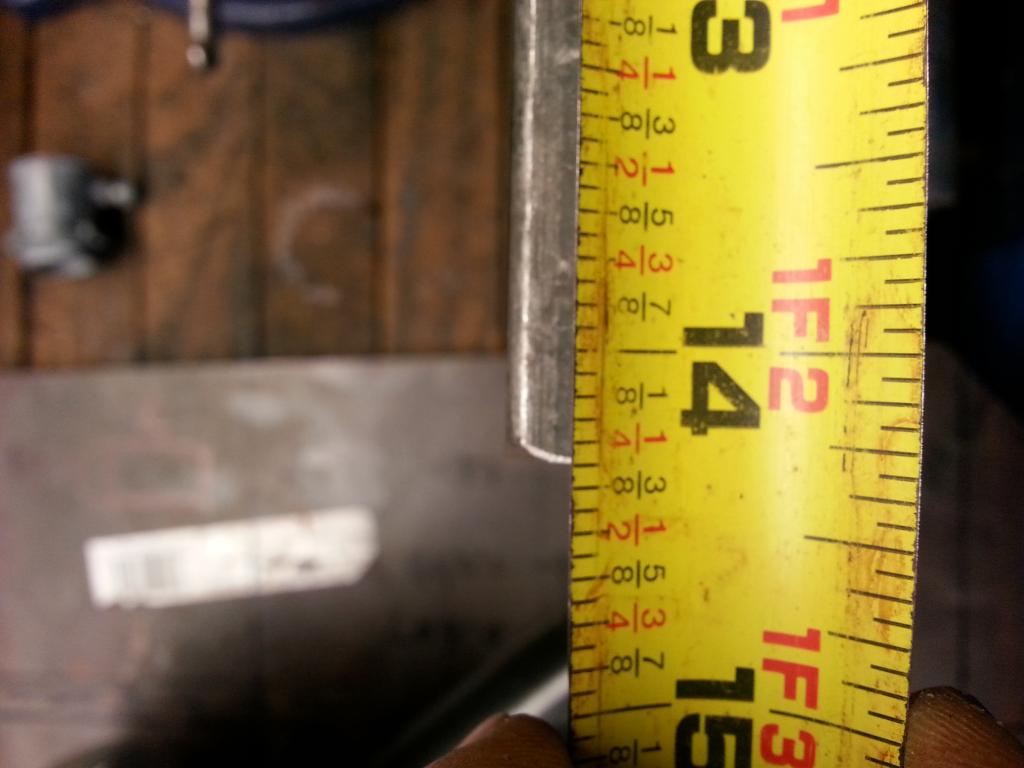
I did a quick test fit to see where the bolts will meet the bar, so I can drill the holes
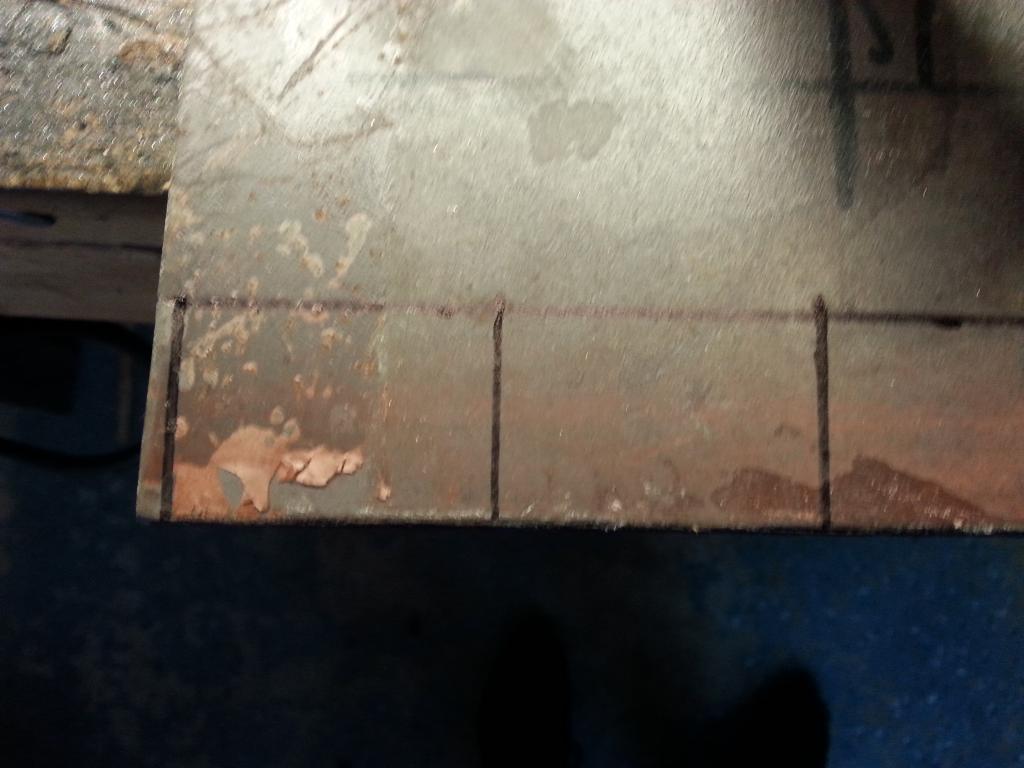
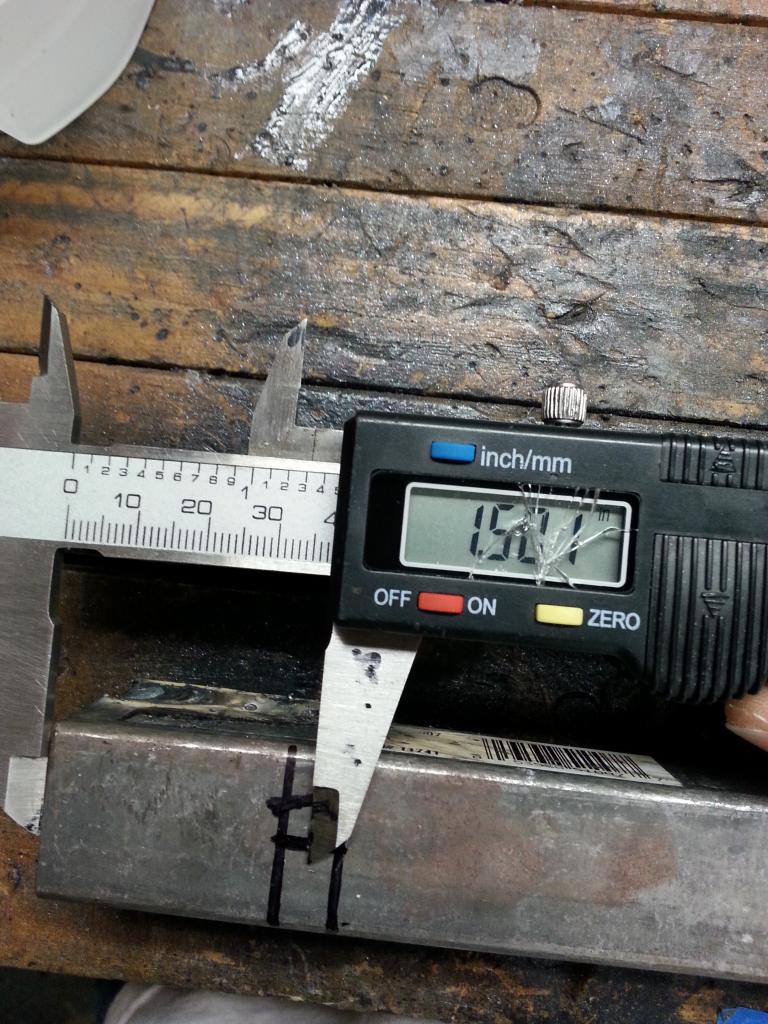
With that done, I marked and drilled the holes. I provided a measurement for reference, but if you do this, I suggest you test fit and double check (never mind the cracked caliper screen, I left it in the student machine shop back when I was doing my Master's and some undergrad clowns dropped it...)
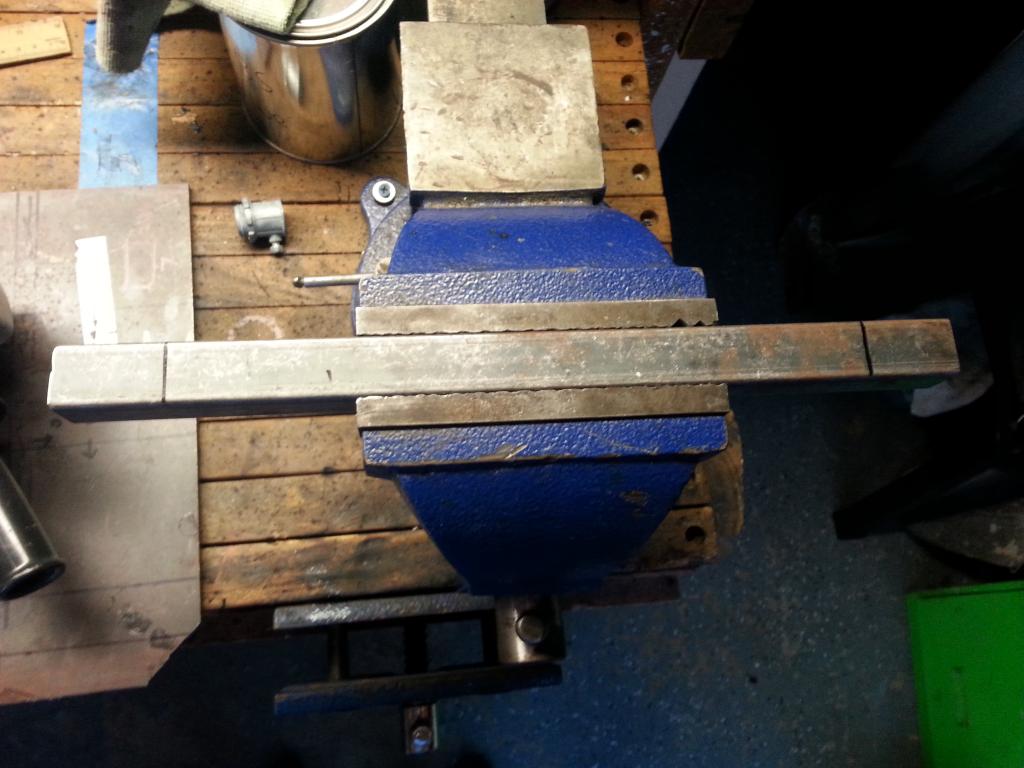
Then I held the bar to the rails using wood clamps and tack welded the bar to them
I used this old aluminum lamp as a shield to keep weld spatter from damaging all of my interior. If you can, I suggest removing the carpet before this step. Also, remove all the paint on the rails within a 1" radius of your weld or else it will incinerate and release noxious fumes

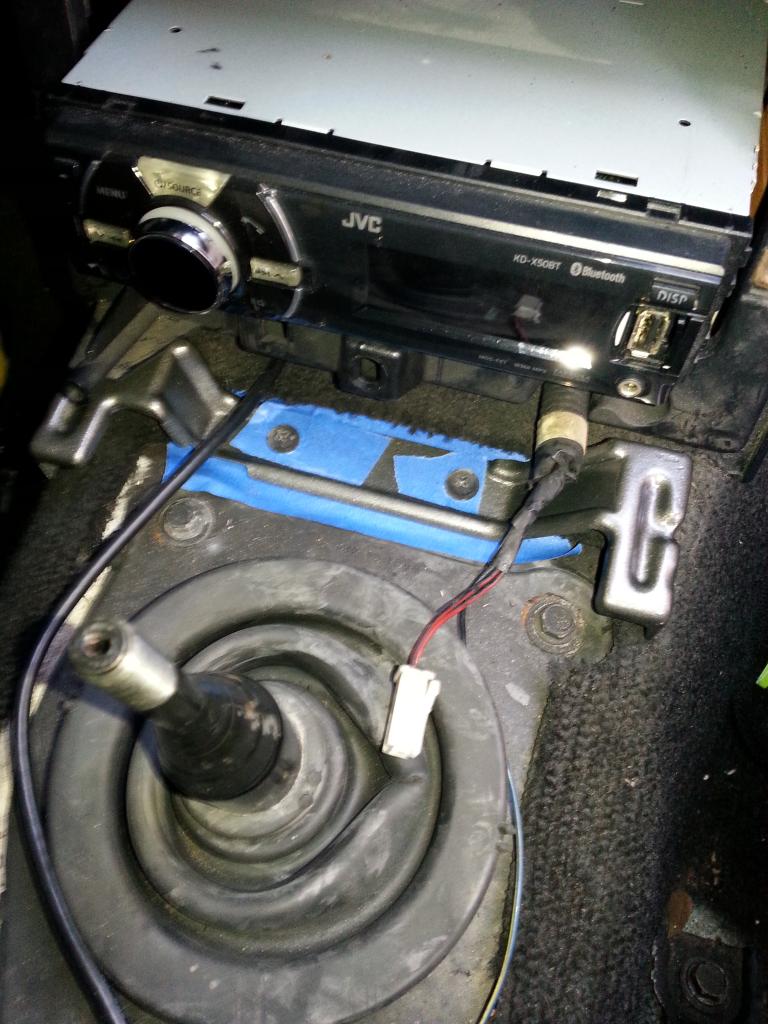
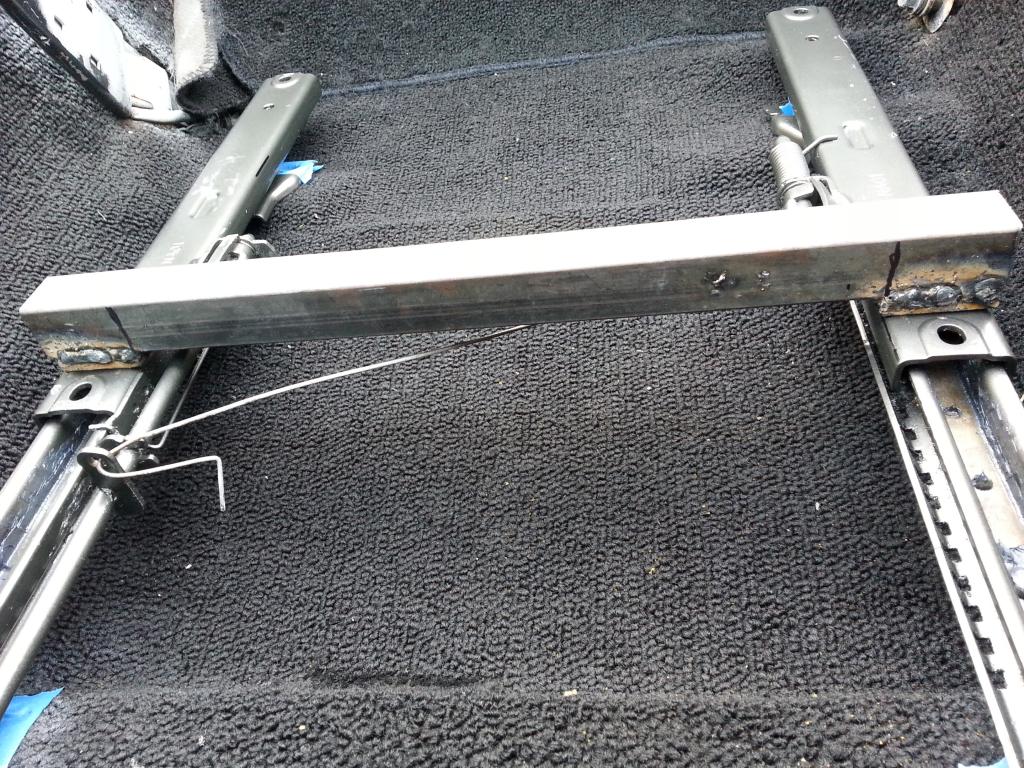
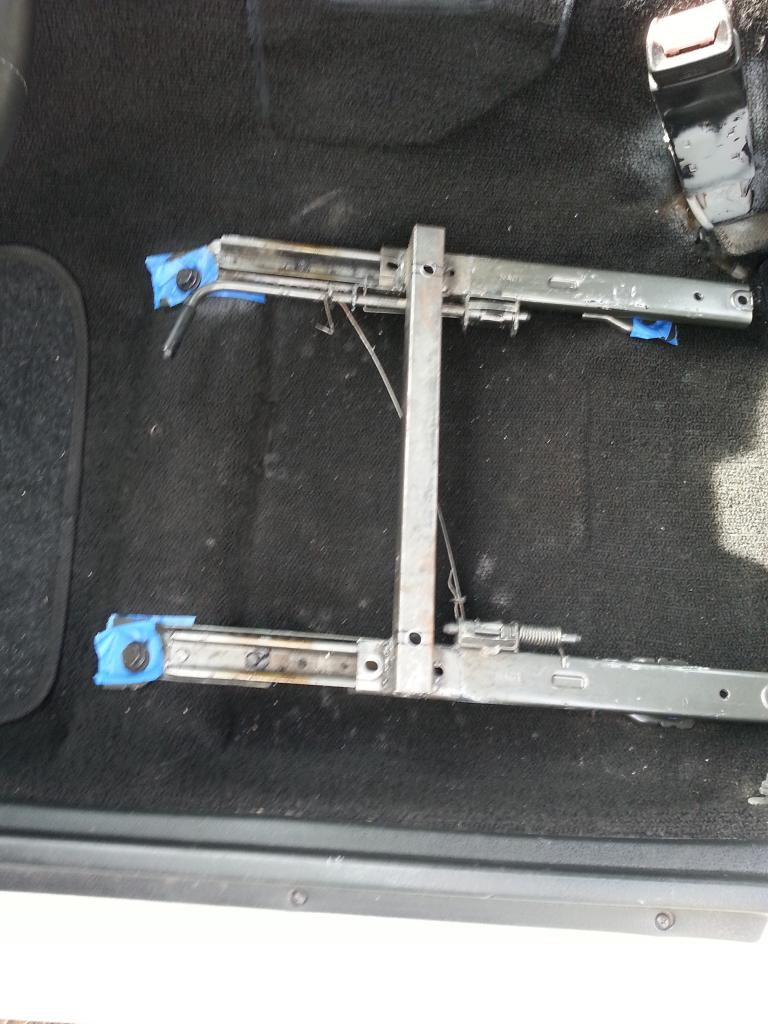
From there, I took the rail assembly out and ran some weld beads to attach the bar to the rails permanently. Welds came out a bit ugly, I should have prepped better in order to get pretty welds, but I got plenty of penetration and they are very solid. The picture makes the welds on the sides look a lot bigger and uglier than they are lol.
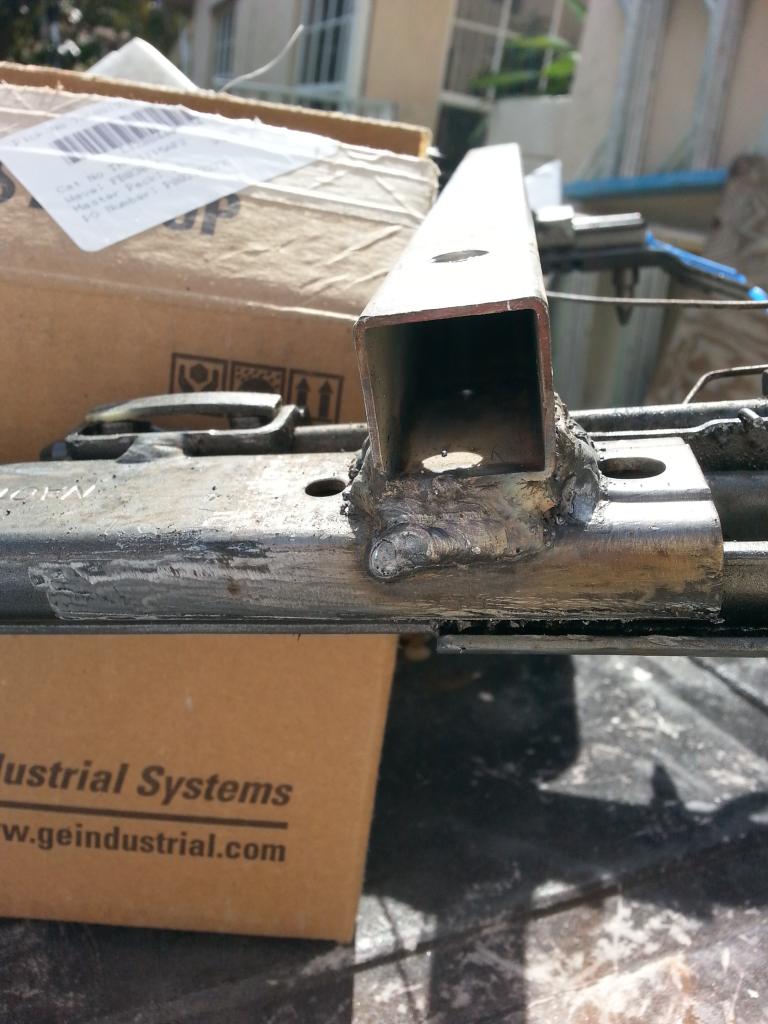

I then welded some 0.25" thick steel plate on each end in order to raise the top of the bar to 1.25" as per the information I got from Revlimiter's site

Basically, one small piece about 1"x 1.75" is enough for each side

I decided that the best way to place the Elise seat would be to position the cross bar for the front bolts first

I did a quick test fit to see where the bolts will meet the bar, so I can drill the holes

With that done, I marked and drilled the holes. I provided a measurement for reference, but if you do this, I suggest you test fit and double check (never mind the cracked caliper screen, I left it in the student machine shop back when I was doing my Master's and some undergrad clowns dropped it...)

Then I held the bar to the rails using wood clamps and tack welded the bar to them

I used this old aluminum lamp as a shield to keep weld spatter from damaging all of my interior. If you can, I suggest removing the carpet before this step. Also, remove all the paint on the rails within a 1" radius of your weld or else it will incinerate and release noxious fumes

From there, I took the rail assembly out and ran some weld beads to attach the bar to the rails permanently. Welds came out a bit ugly, I should have prepped better in order to get pretty welds, but I got plenty of penetration and they are very solid. The picture makes the welds on the sides look a lot bigger and uglier than they are lol.

Reply
0
0
03-01-2016, 10:20 PM
#38
Junior Member
Thread Starter
Join Date: Jan 2012
Location: Miami
Posts: 316
Total Cats: 3
I finally got my radio bezel to where I wanted it! Only took three iterations rofl. I started with the idea of having a piece of Lexan in front of a logo and two holes, one for my cigarette lighter and one for a switch.
Somehow, someway, dust made it under the Lexan and I couldn't get rid of it without scratching the surface

I decided that the risk of easily scratching the surface should be eliminated in general, so I painted it like this
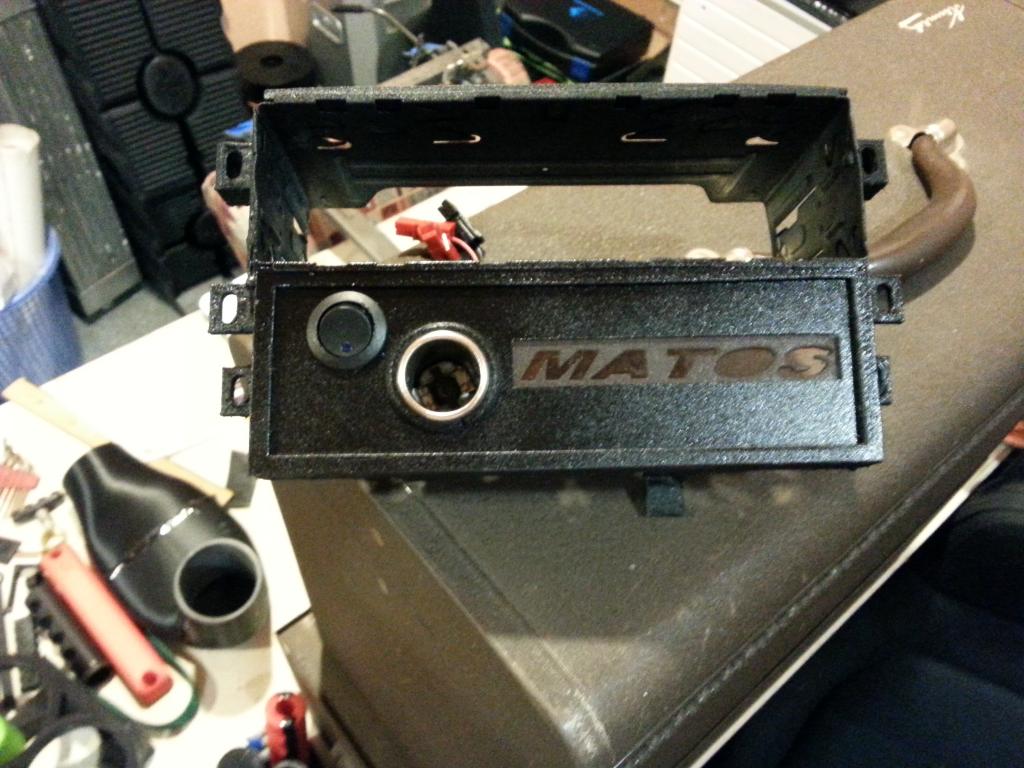
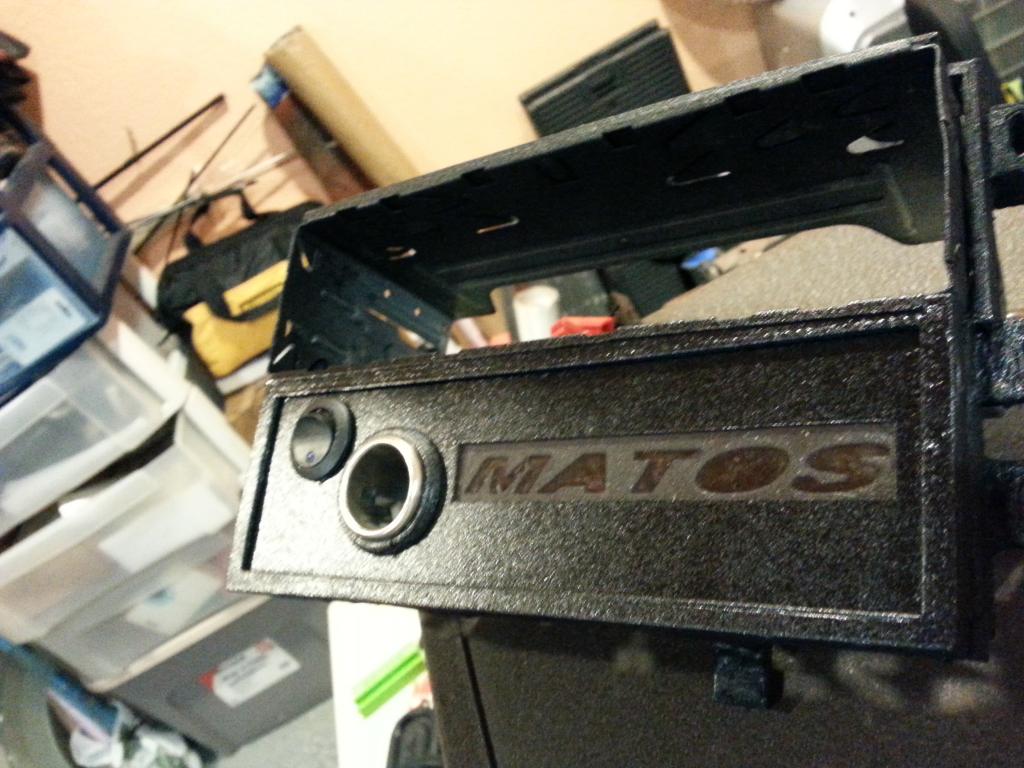
These horrible pictures cannot do it justice, it looks much better in person. The switch allows me to turn the cigarette lighter and the 12-24VDC converter on and off. I plan to get some LEDs or an electroluminescent sheet behind the letters, such that they glow.
Reply
0
0
03-01-2016, 10:21 PM
#39
Junior Member
Thread Starter
Join Date: Jan 2012
Location: Miami
Posts: 316
Total Cats: 3
In order to make the radio bezel easy to remove whenever needed, I used Anderson Power Pole connectors on the wires for the switch and cigarette lighter. I had some left over from a robot I built for my Master's thesis.
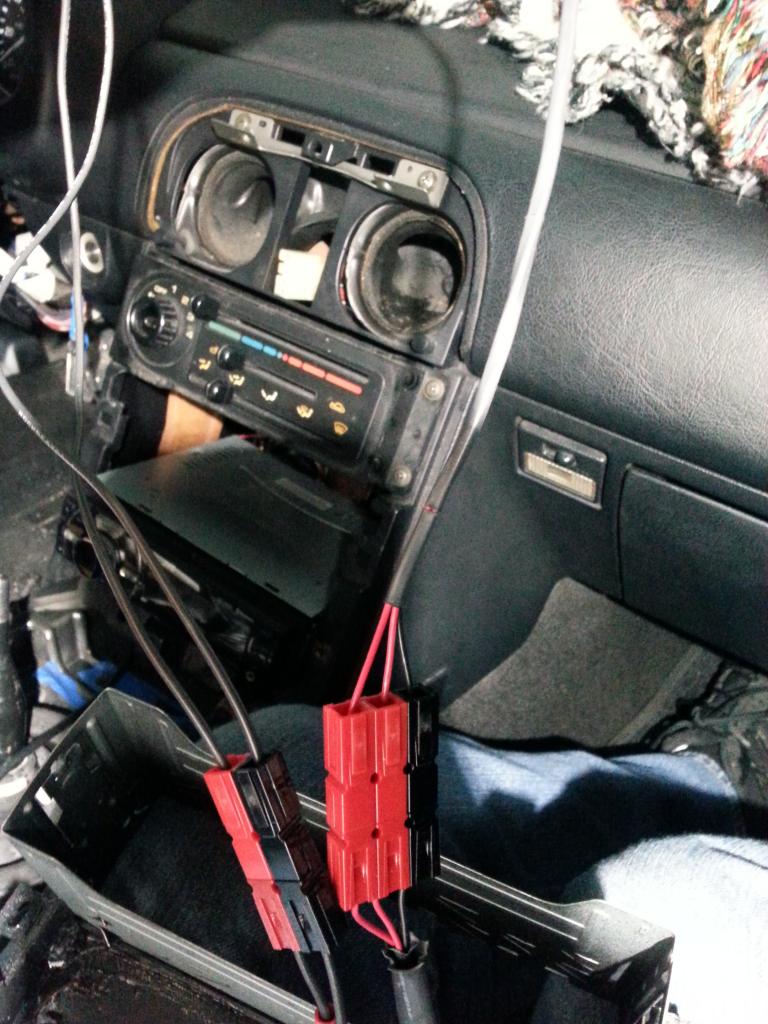
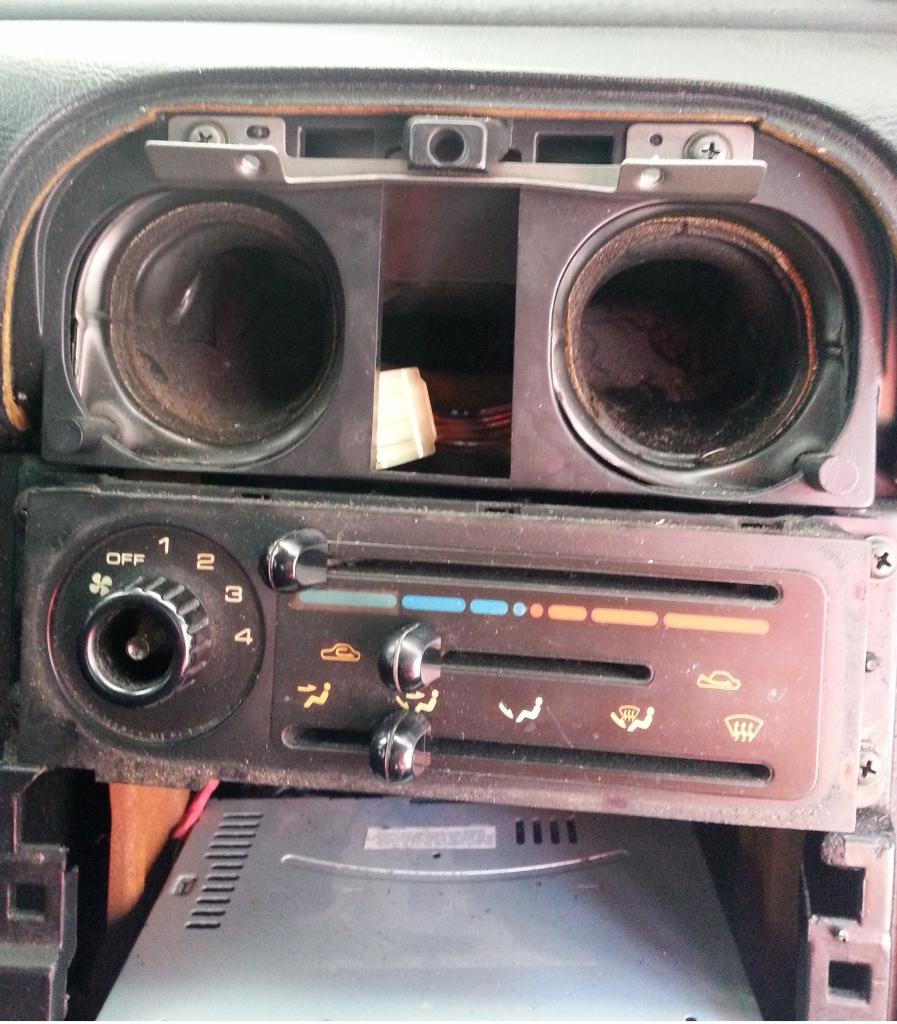
While trying to install the bezel, I noticed that there was yet another metal bracket that needed rust removal. This one was attached to the back of the tombstone, between the two eyeball vents. So... the bezel is not in yet as I took that bracket out. I polished and painted the bracket to ensure the rust will not return.
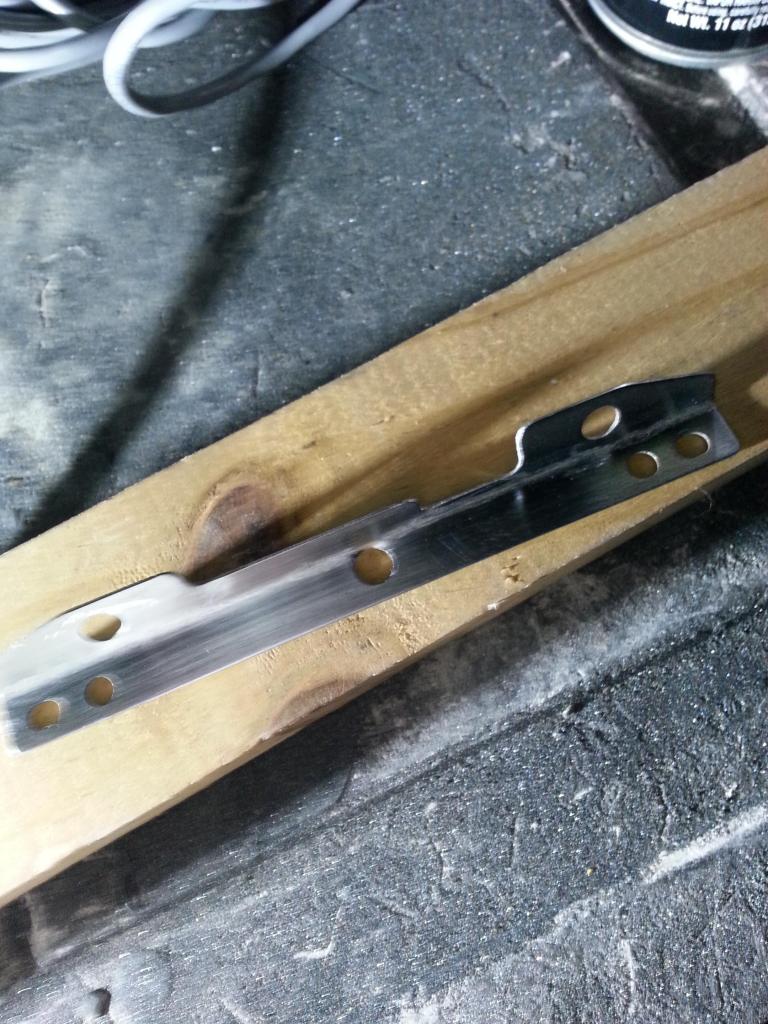

While trying to install the bezel, I noticed that there was yet another metal bracket that needed rust removal. This one was attached to the back of the tombstone, between the two eyeball vents. So... the bezel is not in yet as I took that bracket out. I polished and painted the bracket to ensure the rust will not return.

Reply
0
0
03-01-2016, 10:21 PM
#40
Junior Member
Thread Starter
Join Date: Jan 2012
Location: Miami
Posts: 316
Total Cats: 3
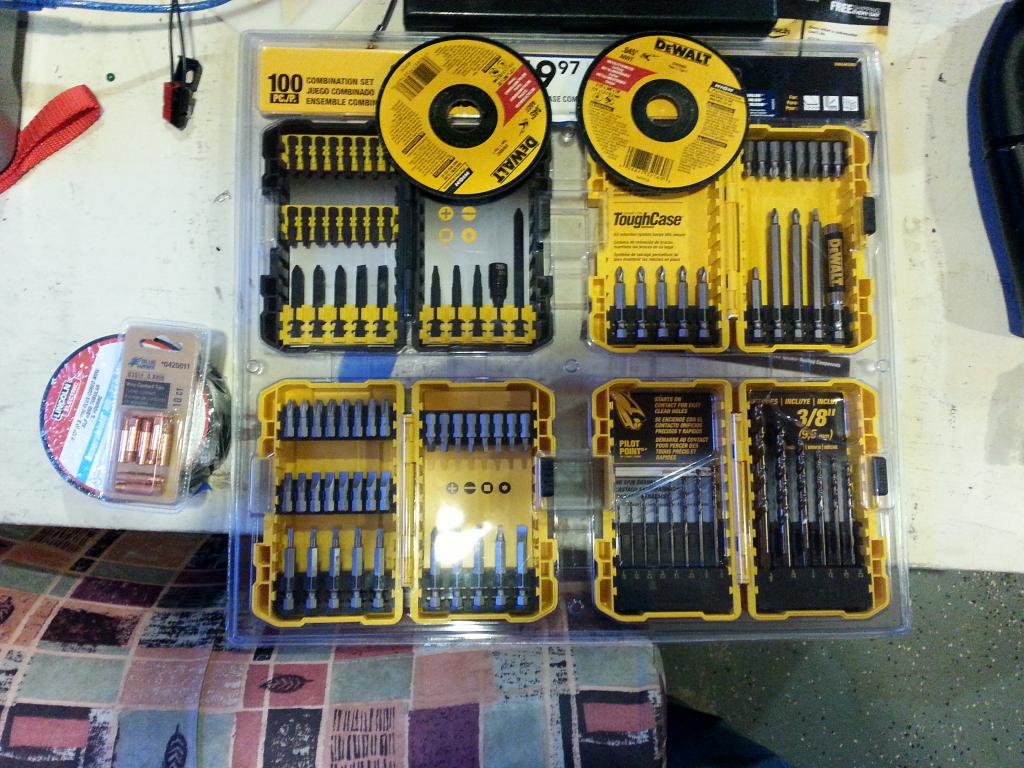
Getting back to the Elise seat, I headed off to Lowe's earlier today in order to get some cut off wheels, welding wire, and tips I needed to get the seat mounted. I ended up seeing this nice Dewalt set on sale, so I bought it. Now I have a bunch of accessories for my drills

Reply
0
0


