Project Little Cousin - 91' NA White
 07-21-2014, 09:11 AM
#1
Junior Member
Thread Starter

Join Date: May 2014
Location: North St Paul, MN
Posts: 397
Total Cats: 25
Well I guess it is time to start a build thread.
Back Story: I had a built 09 WRX that I purchased new. I realized it was not a good idea to keep dumping money into a car that I DD in Minnesota winters... rust is a bitch. LINK to FS Ad/Mods on WRX My cousin has owned a 92 Blue NA for about 14 years now. I was living with him when he picked up the car and have always had a special place in my heart for the NA Miata. Granted his is the cleanest NA I have ever seen in my life. Well this spring I sold the WRX to get myself into the NA game. I picked up a 05 LGT Limited for my DD. With the left over money I picked up a very clean 91' White NA. The PO was a friend that helps us with driving schools at the local track. He used the car to race AutoX Nationals. He had his heart set on a BRZ so he put the NA up for sale. Prior to him it was a one owner garage queen. I was happy to pick up a clean car from someone who I know takes care of their cars (he has a few). Additional money from the sale of the WRX went to purchased some of the parts off of my cousin's current build on his turbo NA. His current setup is 14 years in the making and I believe this is his 4th engine build. He is currently building a Turbo LS for his 92' so all of his 1.6 parts are useless. We plan to swap his goodies in over the next few months from his 92' to my 91' while we tear down for his car for the V8 setup. He has some great parts, but instead of spoiling the fun of what I will be adding... I will just update this thread as we wrench away.
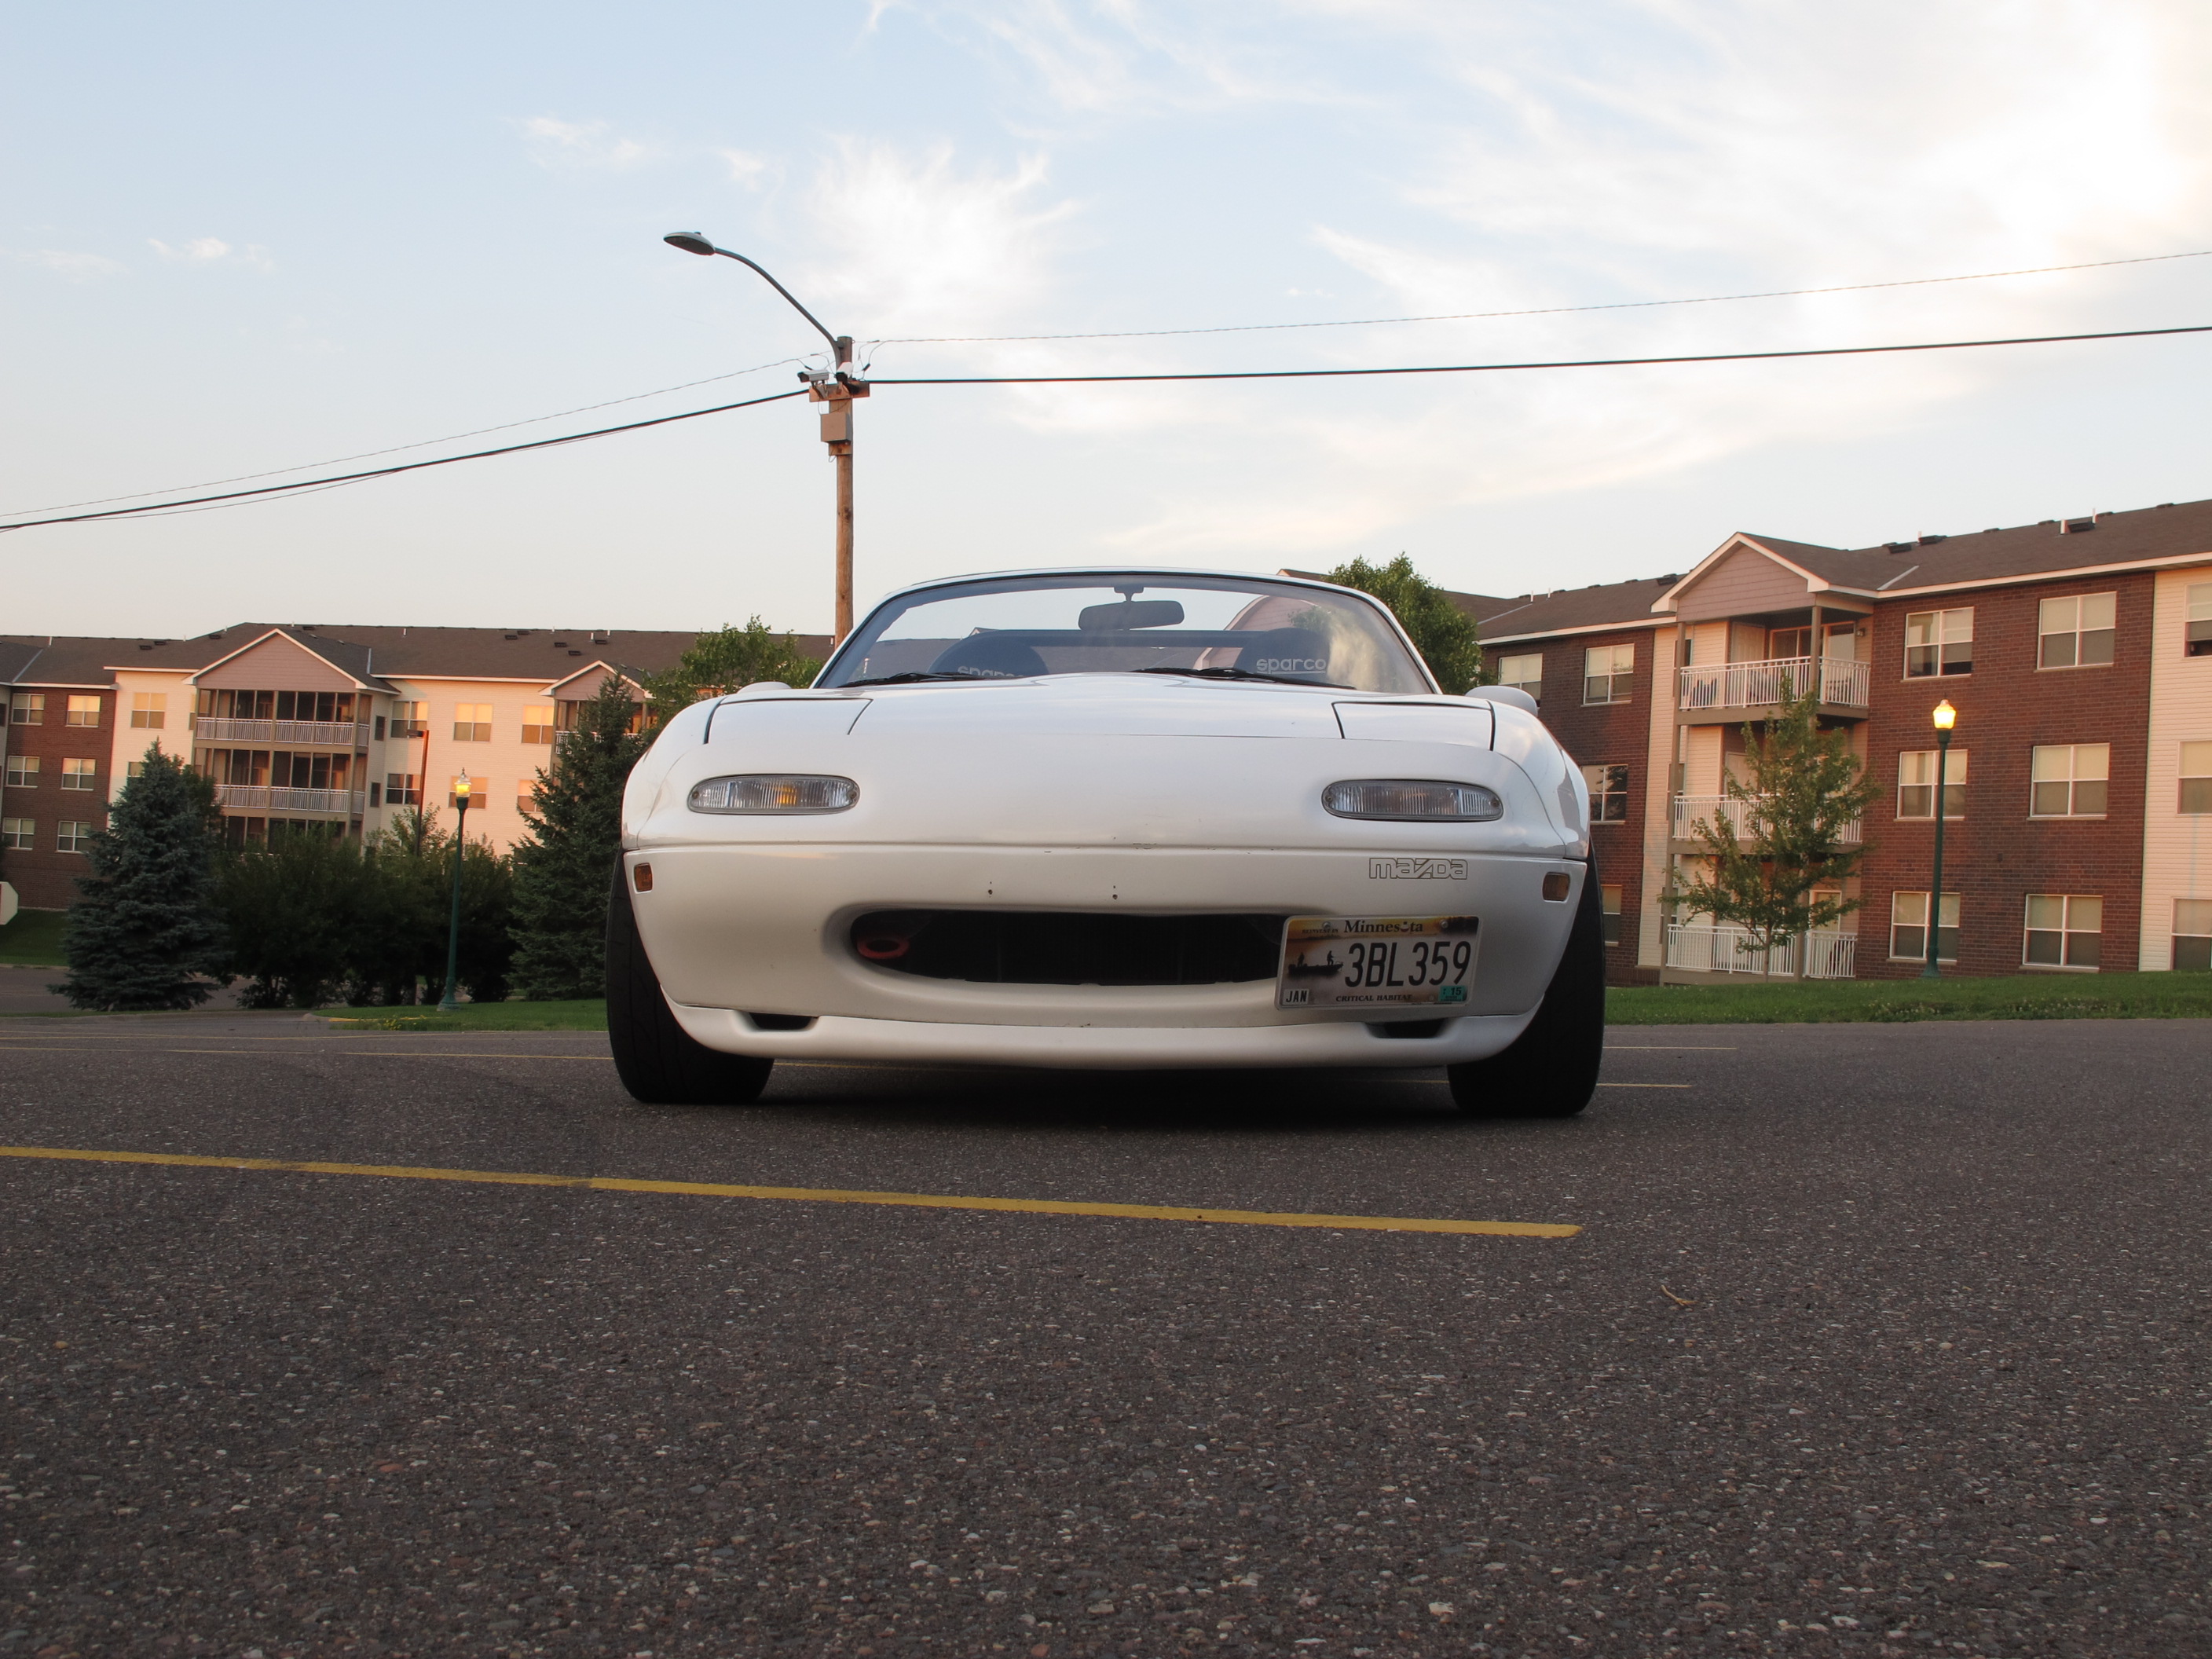
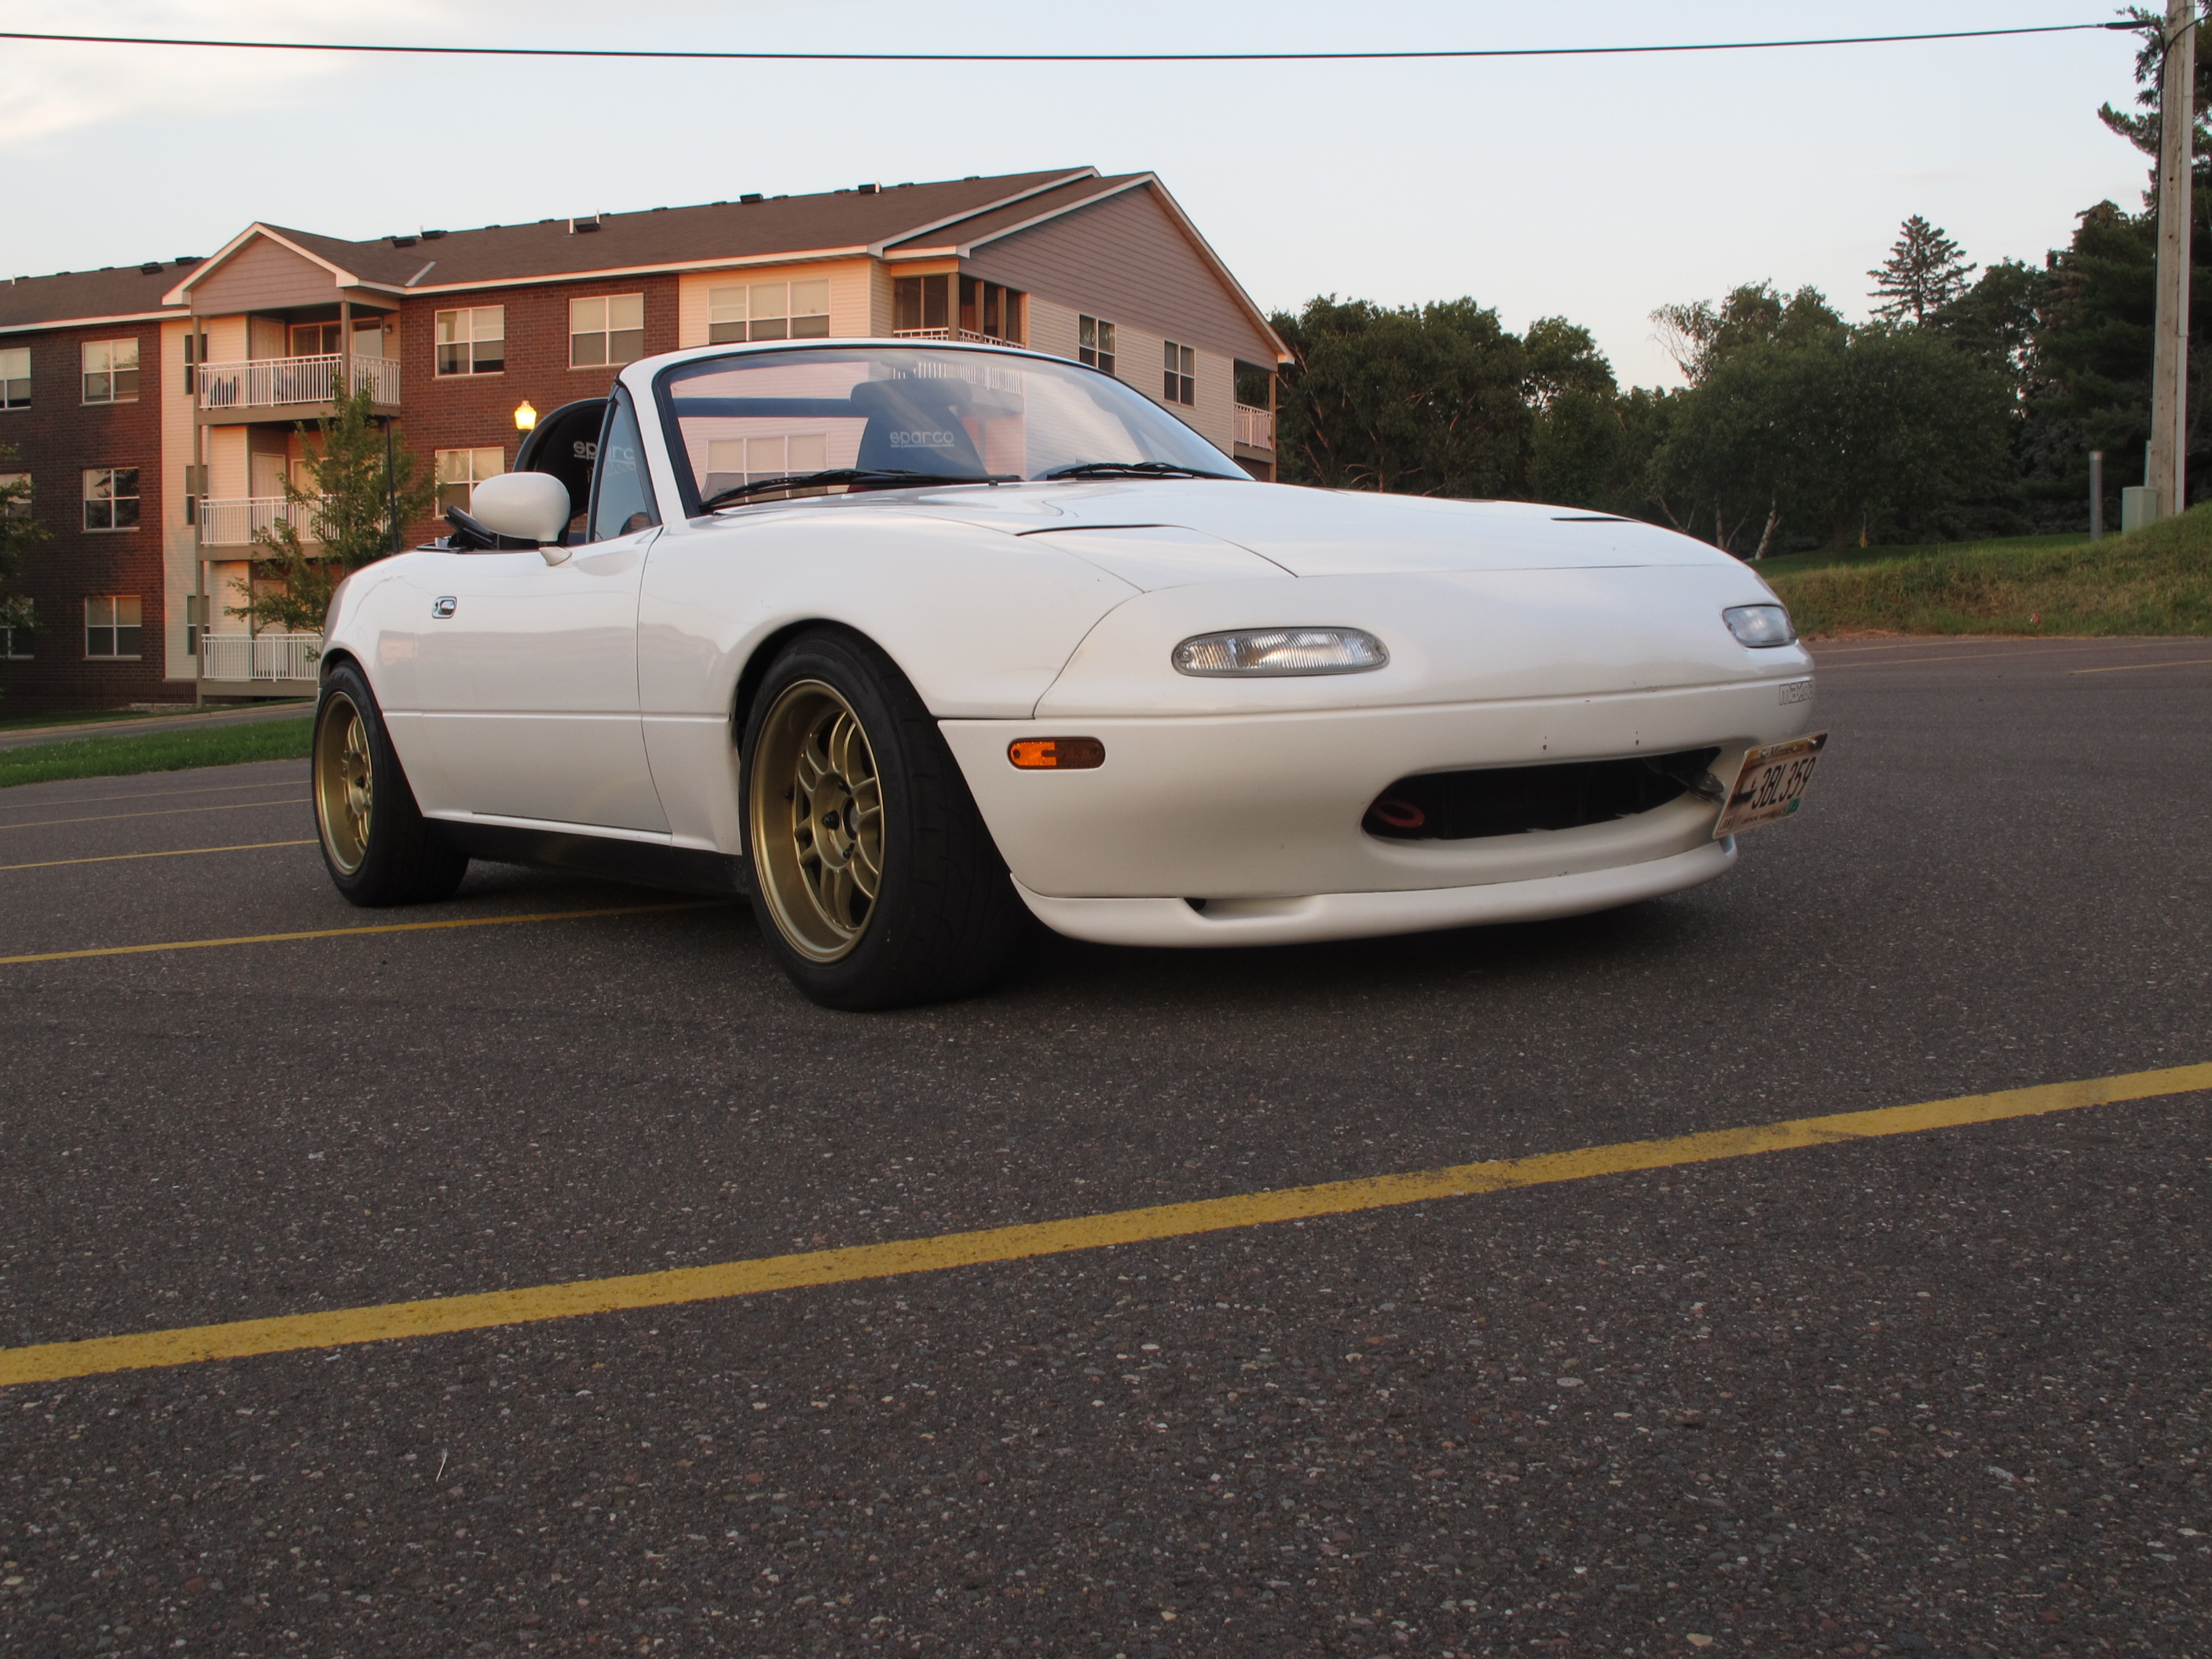
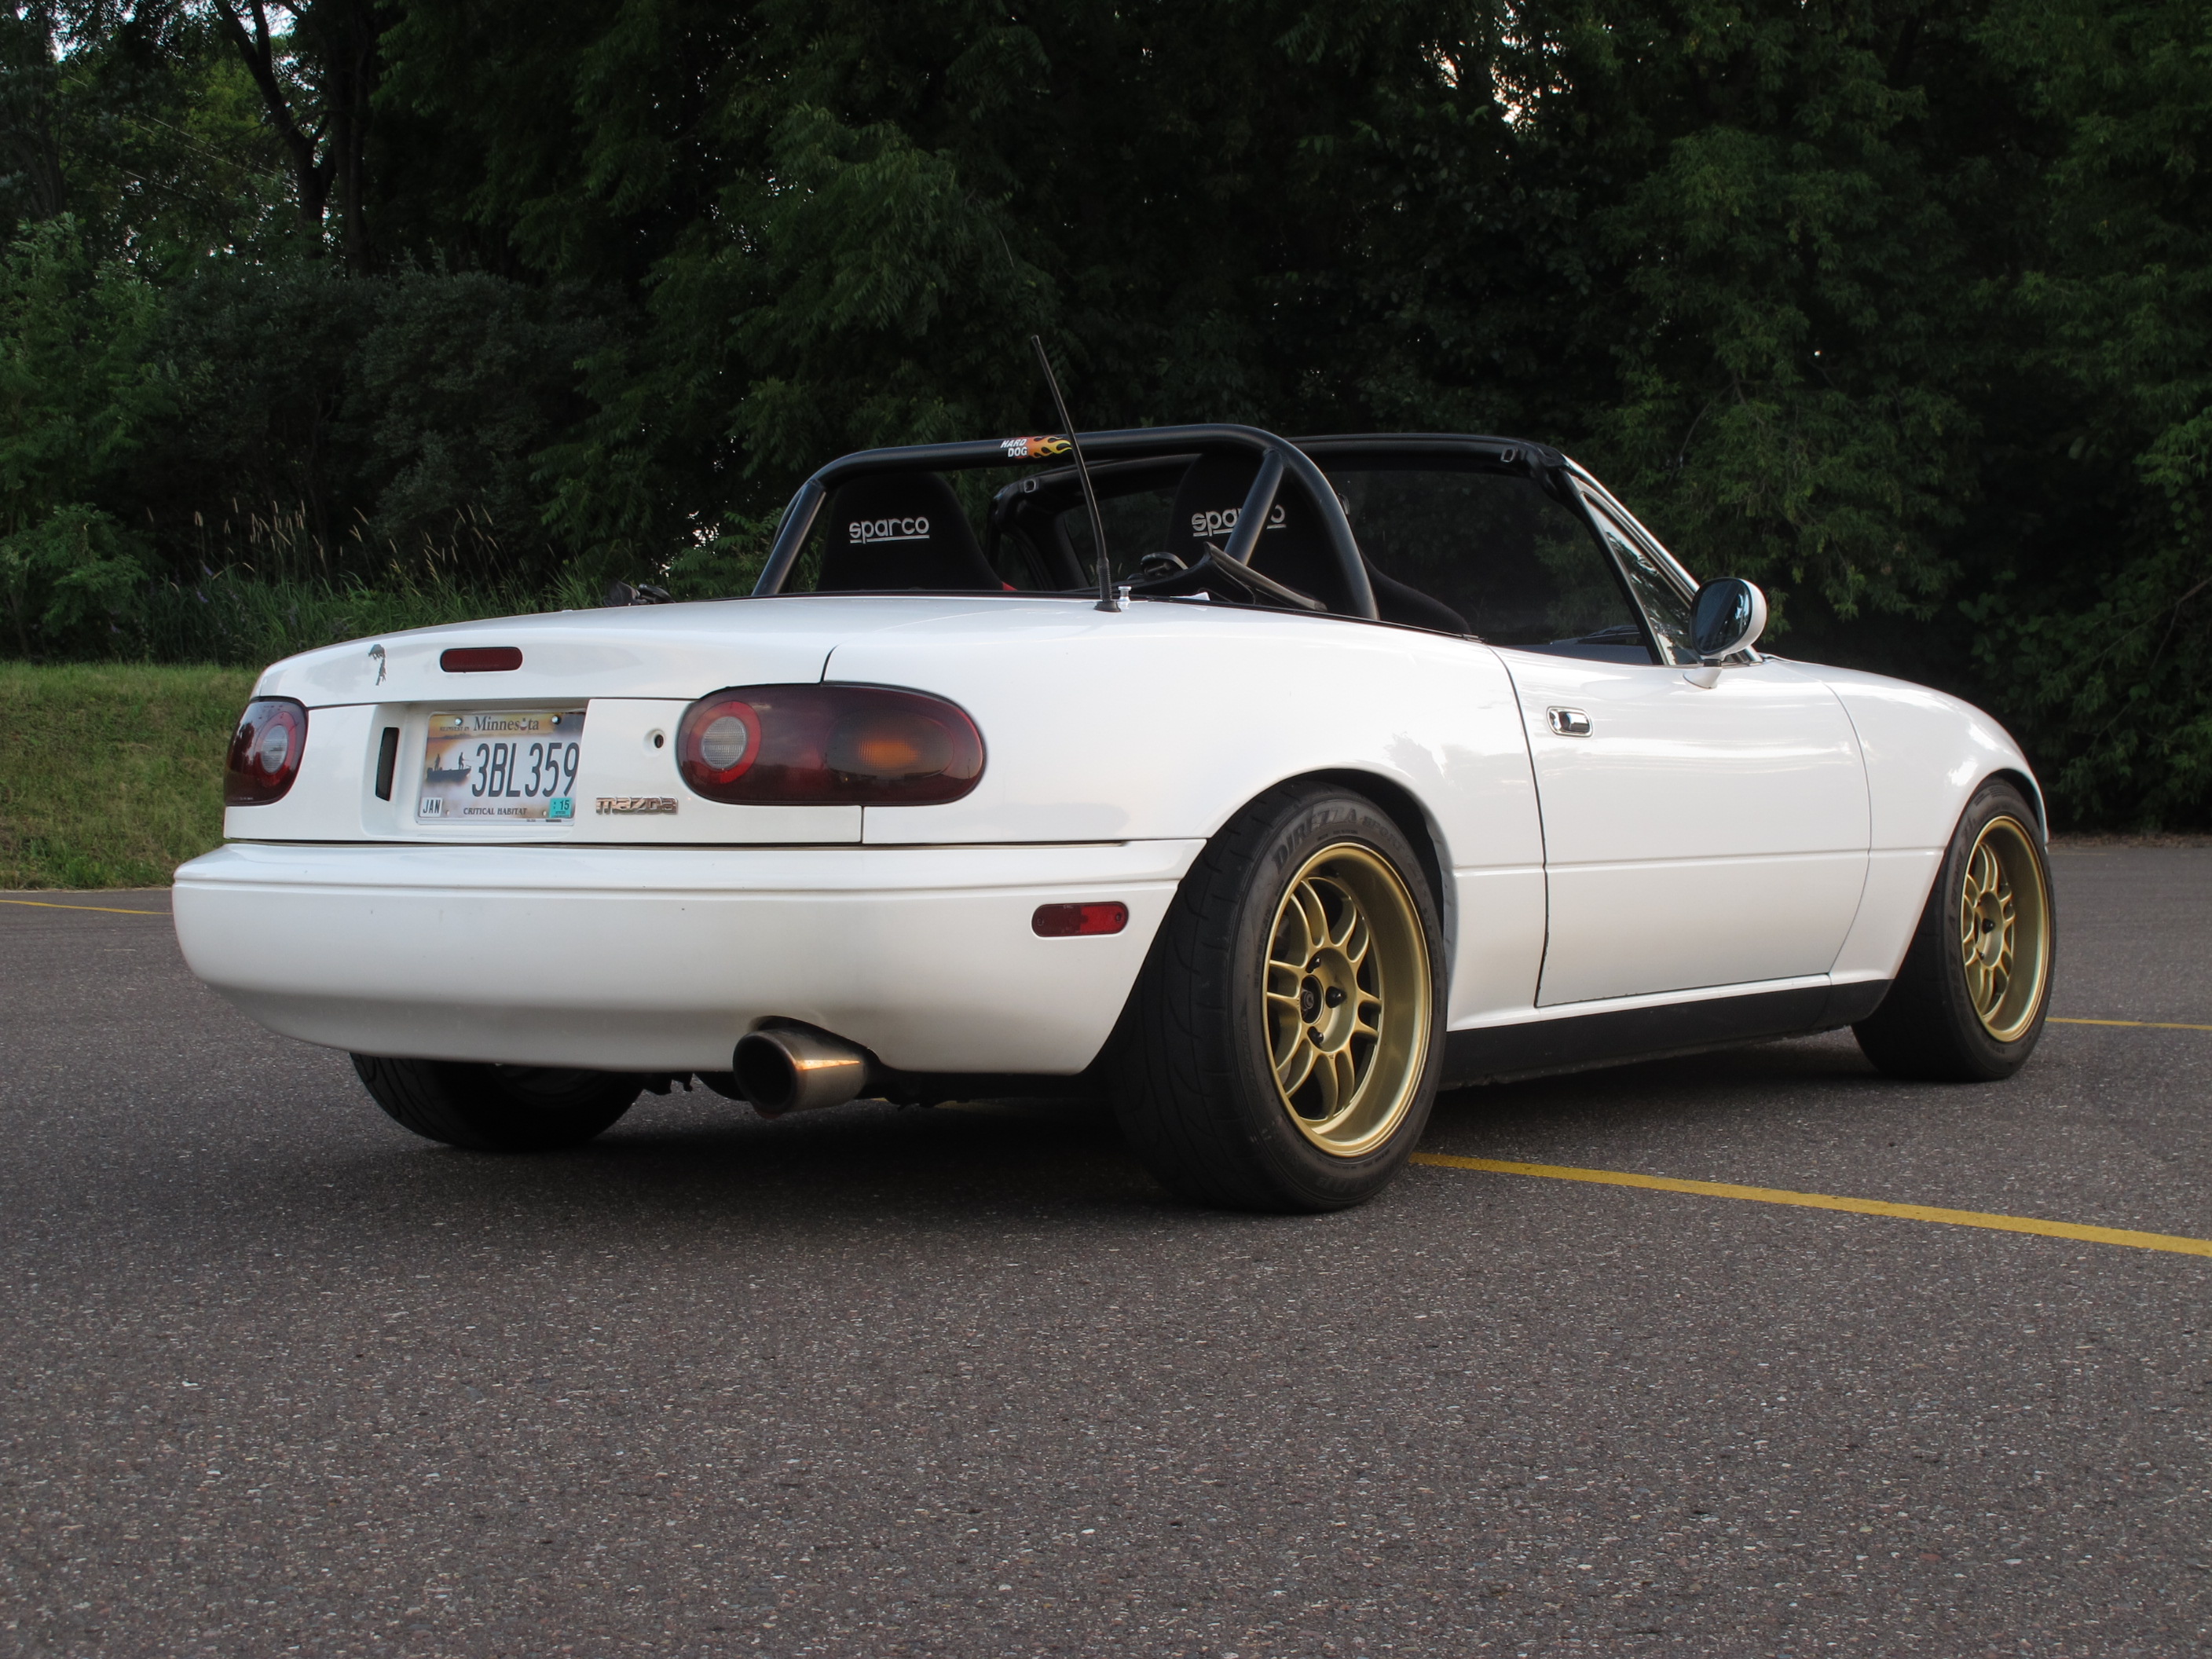
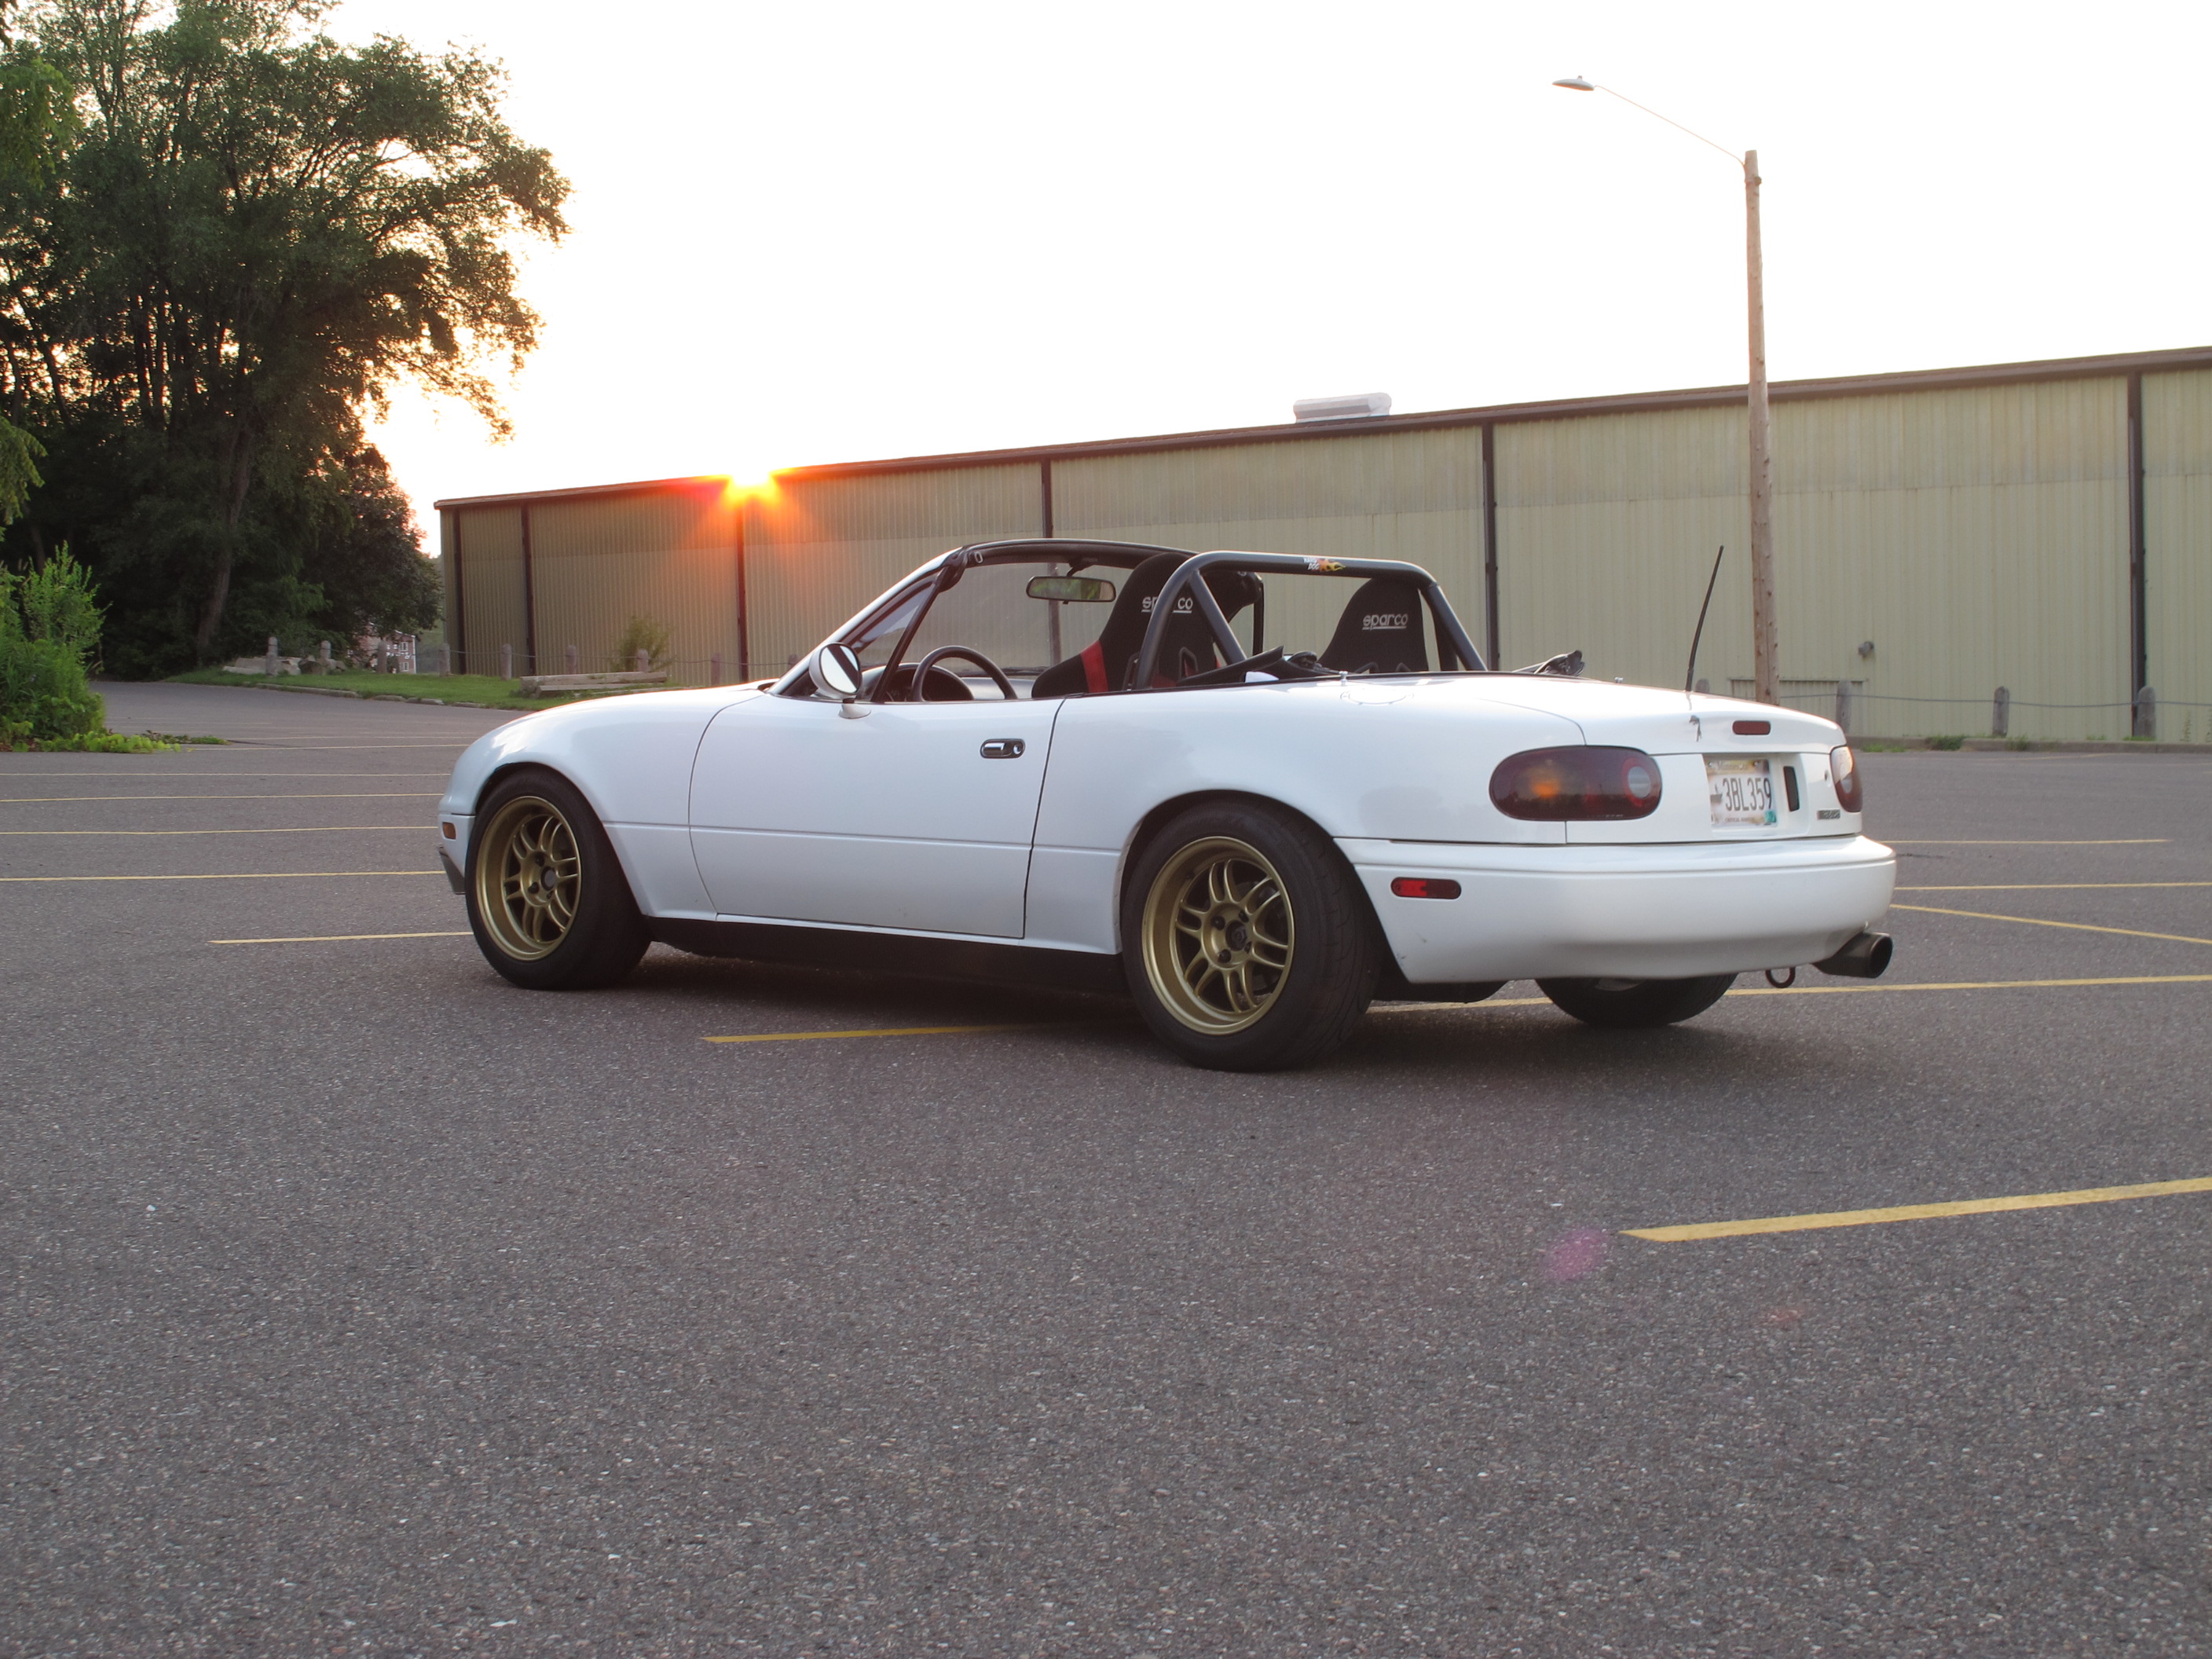
As she sits currently.
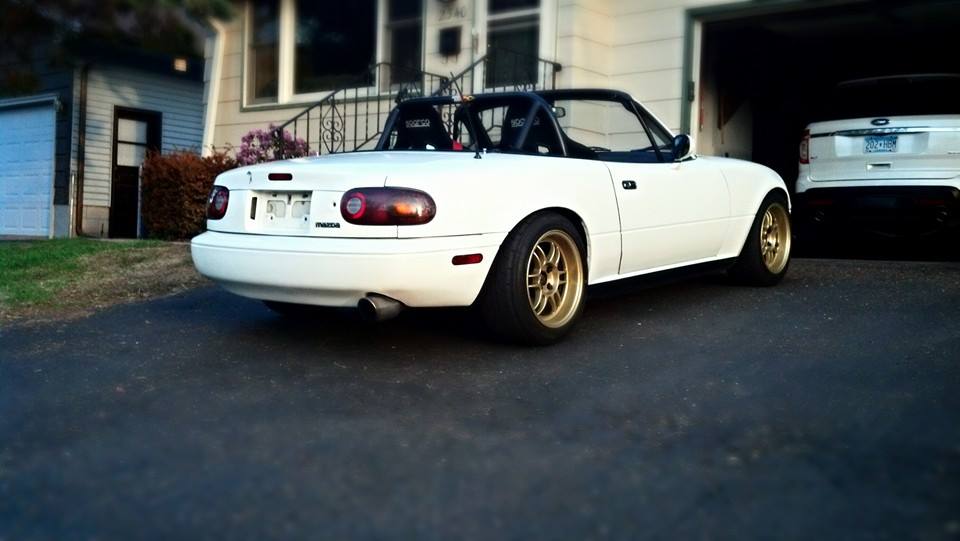
1991 Miata B Package Clean title, no accidents, no rust
Engine:
Stock - Purchased with car (5/18/2014)
Koyo 55mm radiator - Purchased with car (5/18/2014)
Transmission:
Mazdaspeed 6 speed transmission 30k miles - Purchased with car (5/18/2014)
Stainless steel clutch lines - Purchased with car (5/18/2014)
VlSD rear diff - Purchased with car (5/18/2014)
Suspension:
Tein Street advance coil overs with NB Tophats - Purchased with car (5/18/2014)
Racing beat hollow front sway bar - Purchased with car (5/18/2014)
Energy Suspension Master Bushing kit Rear - Purchased with car (5/18/2014)
Energy Suspension Master Bushing kit Rear Diff (Not Installed Yet) - Purchased with car (5/18/2014)
Energy Suspension Master Bushing kit Front (Not Installed Yet) - Purchased with car (5/18/2014)
Brakes:
Stainless steel brake lines - Purchased with car (5/18/2014)
Hawk hp plus front pads - Purchased with car (5/18/2014)
DTC 30 rears - Purchased with car (5/18/2014)
Exhaust:
Jackson racing cat-back exhaust - Purchased with car (5/18/2014)
Exterior:
Harddog roll bar - Purchased with car (5/18/2014)
Konig wide open 15x8 wheels - Purchased with car (5/18/2014)
Dunlop Star spec 205-50-15 (Currently Mounted) - Purchased with car (5/18/2014)
Nitto NT01 tires 225-45-15 (Track Only) - Purchased with car (5/18/2014)
Miata OEM R package front lip - Purchased with car (5/18/2014)
Miata OEM R package front lip painted white - (7/21/2014)
Driver's Side Mirror replaced/fixed - (6/18/2014)
Interior:
Sparco pro2000 seats - Purchased with car (5/18/2014)
Drivers Seat 6 Point Harness - Purchased with car (5/18/2014)
Water Temp Gauge - Purchased with car (5/18/2014)
Other:
Removed AC
Removed Power steering
Removed Cruise control
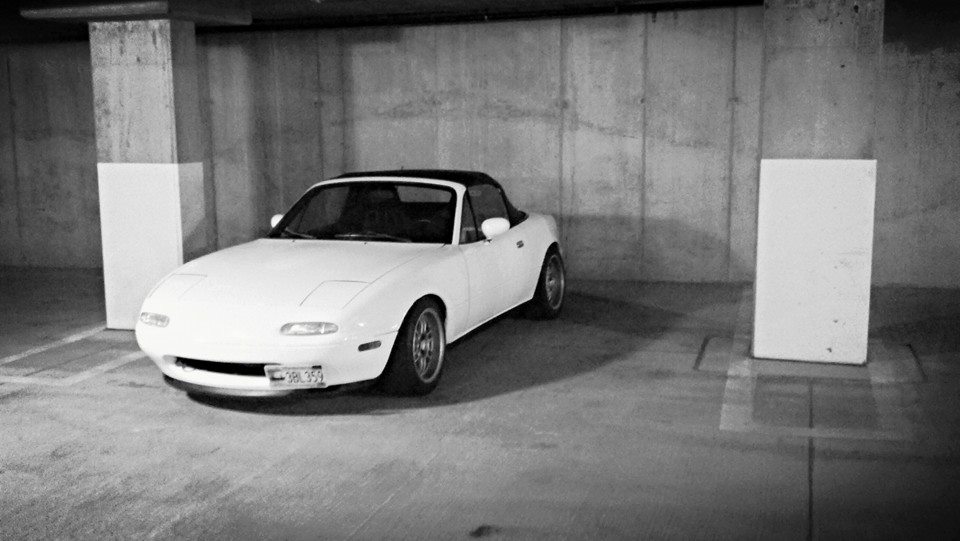
And one crappy cell phone pic of my epic parking spot at work.
Back Story: I had a built 09 WRX that I purchased new. I realized it was not a good idea to keep dumping money into a car that I DD in Minnesota winters... rust is a bitch. LINK to FS Ad/Mods on WRX My cousin has owned a 92 Blue NA for about 14 years now. I was living with him when he picked up the car and have always had a special place in my heart for the NA Miata. Granted his is the cleanest NA I have ever seen in my life. Well this spring I sold the WRX to get myself into the NA game. I picked up a 05 LGT Limited for my DD. With the left over money I picked up a very clean 91' White NA. The PO was a friend that helps us with driving schools at the local track. He used the car to race AutoX Nationals. He had his heart set on a BRZ so he put the NA up for sale. Prior to him it was a one owner garage queen. I was happy to pick up a clean car from someone who I know takes care of their cars (he has a few). Additional money from the sale of the WRX went to purchased some of the parts off of my cousin's current build on his turbo NA. His current setup is 14 years in the making and I believe this is his 4th engine build. He is currently building a Turbo LS for his 92' so all of his 1.6 parts are useless. We plan to swap his goodies in over the next few months from his 92' to my 91' while we tear down for his car for the V8 setup. He has some great parts, but instead of spoiling the fun of what I will be adding... I will just update this thread as we wrench away.
As she sits currently.

1991 Miata B Package Clean title, no accidents, no rust
Engine:
Stock - Purchased with car (5/18/2014)
Koyo 55mm radiator - Purchased with car (5/18/2014)
Transmission:
Mazdaspeed 6 speed transmission 30k miles - Purchased with car (5/18/2014)
Stainless steel clutch lines - Purchased with car (5/18/2014)
VlSD rear diff - Purchased with car (5/18/2014)
Suspension:
Tein Street advance coil overs with NB Tophats - Purchased with car (5/18/2014)
Racing beat hollow front sway bar - Purchased with car (5/18/2014)
Energy Suspension Master Bushing kit Rear - Purchased with car (5/18/2014)
Energy Suspension Master Bushing kit Rear Diff (Not Installed Yet) - Purchased with car (5/18/2014)
Energy Suspension Master Bushing kit Front (Not Installed Yet) - Purchased with car (5/18/2014)
Brakes:
Stainless steel brake lines - Purchased with car (5/18/2014)
Hawk hp plus front pads - Purchased with car (5/18/2014)
DTC 30 rears - Purchased with car (5/18/2014)
Exhaust:
Jackson racing cat-back exhaust - Purchased with car (5/18/2014)
Exterior:
Harddog roll bar - Purchased with car (5/18/2014)
Konig wide open 15x8 wheels - Purchased with car (5/18/2014)
Dunlop Star spec 205-50-15 (Currently Mounted) - Purchased with car (5/18/2014)
Nitto NT01 tires 225-45-15 (Track Only) - Purchased with car (5/18/2014)
Miata OEM R package front lip - Purchased with car (5/18/2014)
Miata OEM R package front lip painted white - (7/21/2014)
Driver's Side Mirror replaced/fixed - (6/18/2014)
Interior:
Sparco pro2000 seats - Purchased with car (5/18/2014)
Drivers Seat 6 Point Harness - Purchased with car (5/18/2014)
Water Temp Gauge - Purchased with car (5/18/2014)
Other:
Removed AC
Removed Power steering
Removed Cruise control
And one crappy cell phone pic of my epic parking spot at work.

Last edited by ofspunk7; 07-12-2017 at 11:58 AM. Reason: updated

Reply
 0
0

0
07-21-2014, 03:42 PM
#2
Junior Member
Thread Starter
Join Date: May 2014
Location: North St Paul, MN
Posts: 397
Total Cats: 25
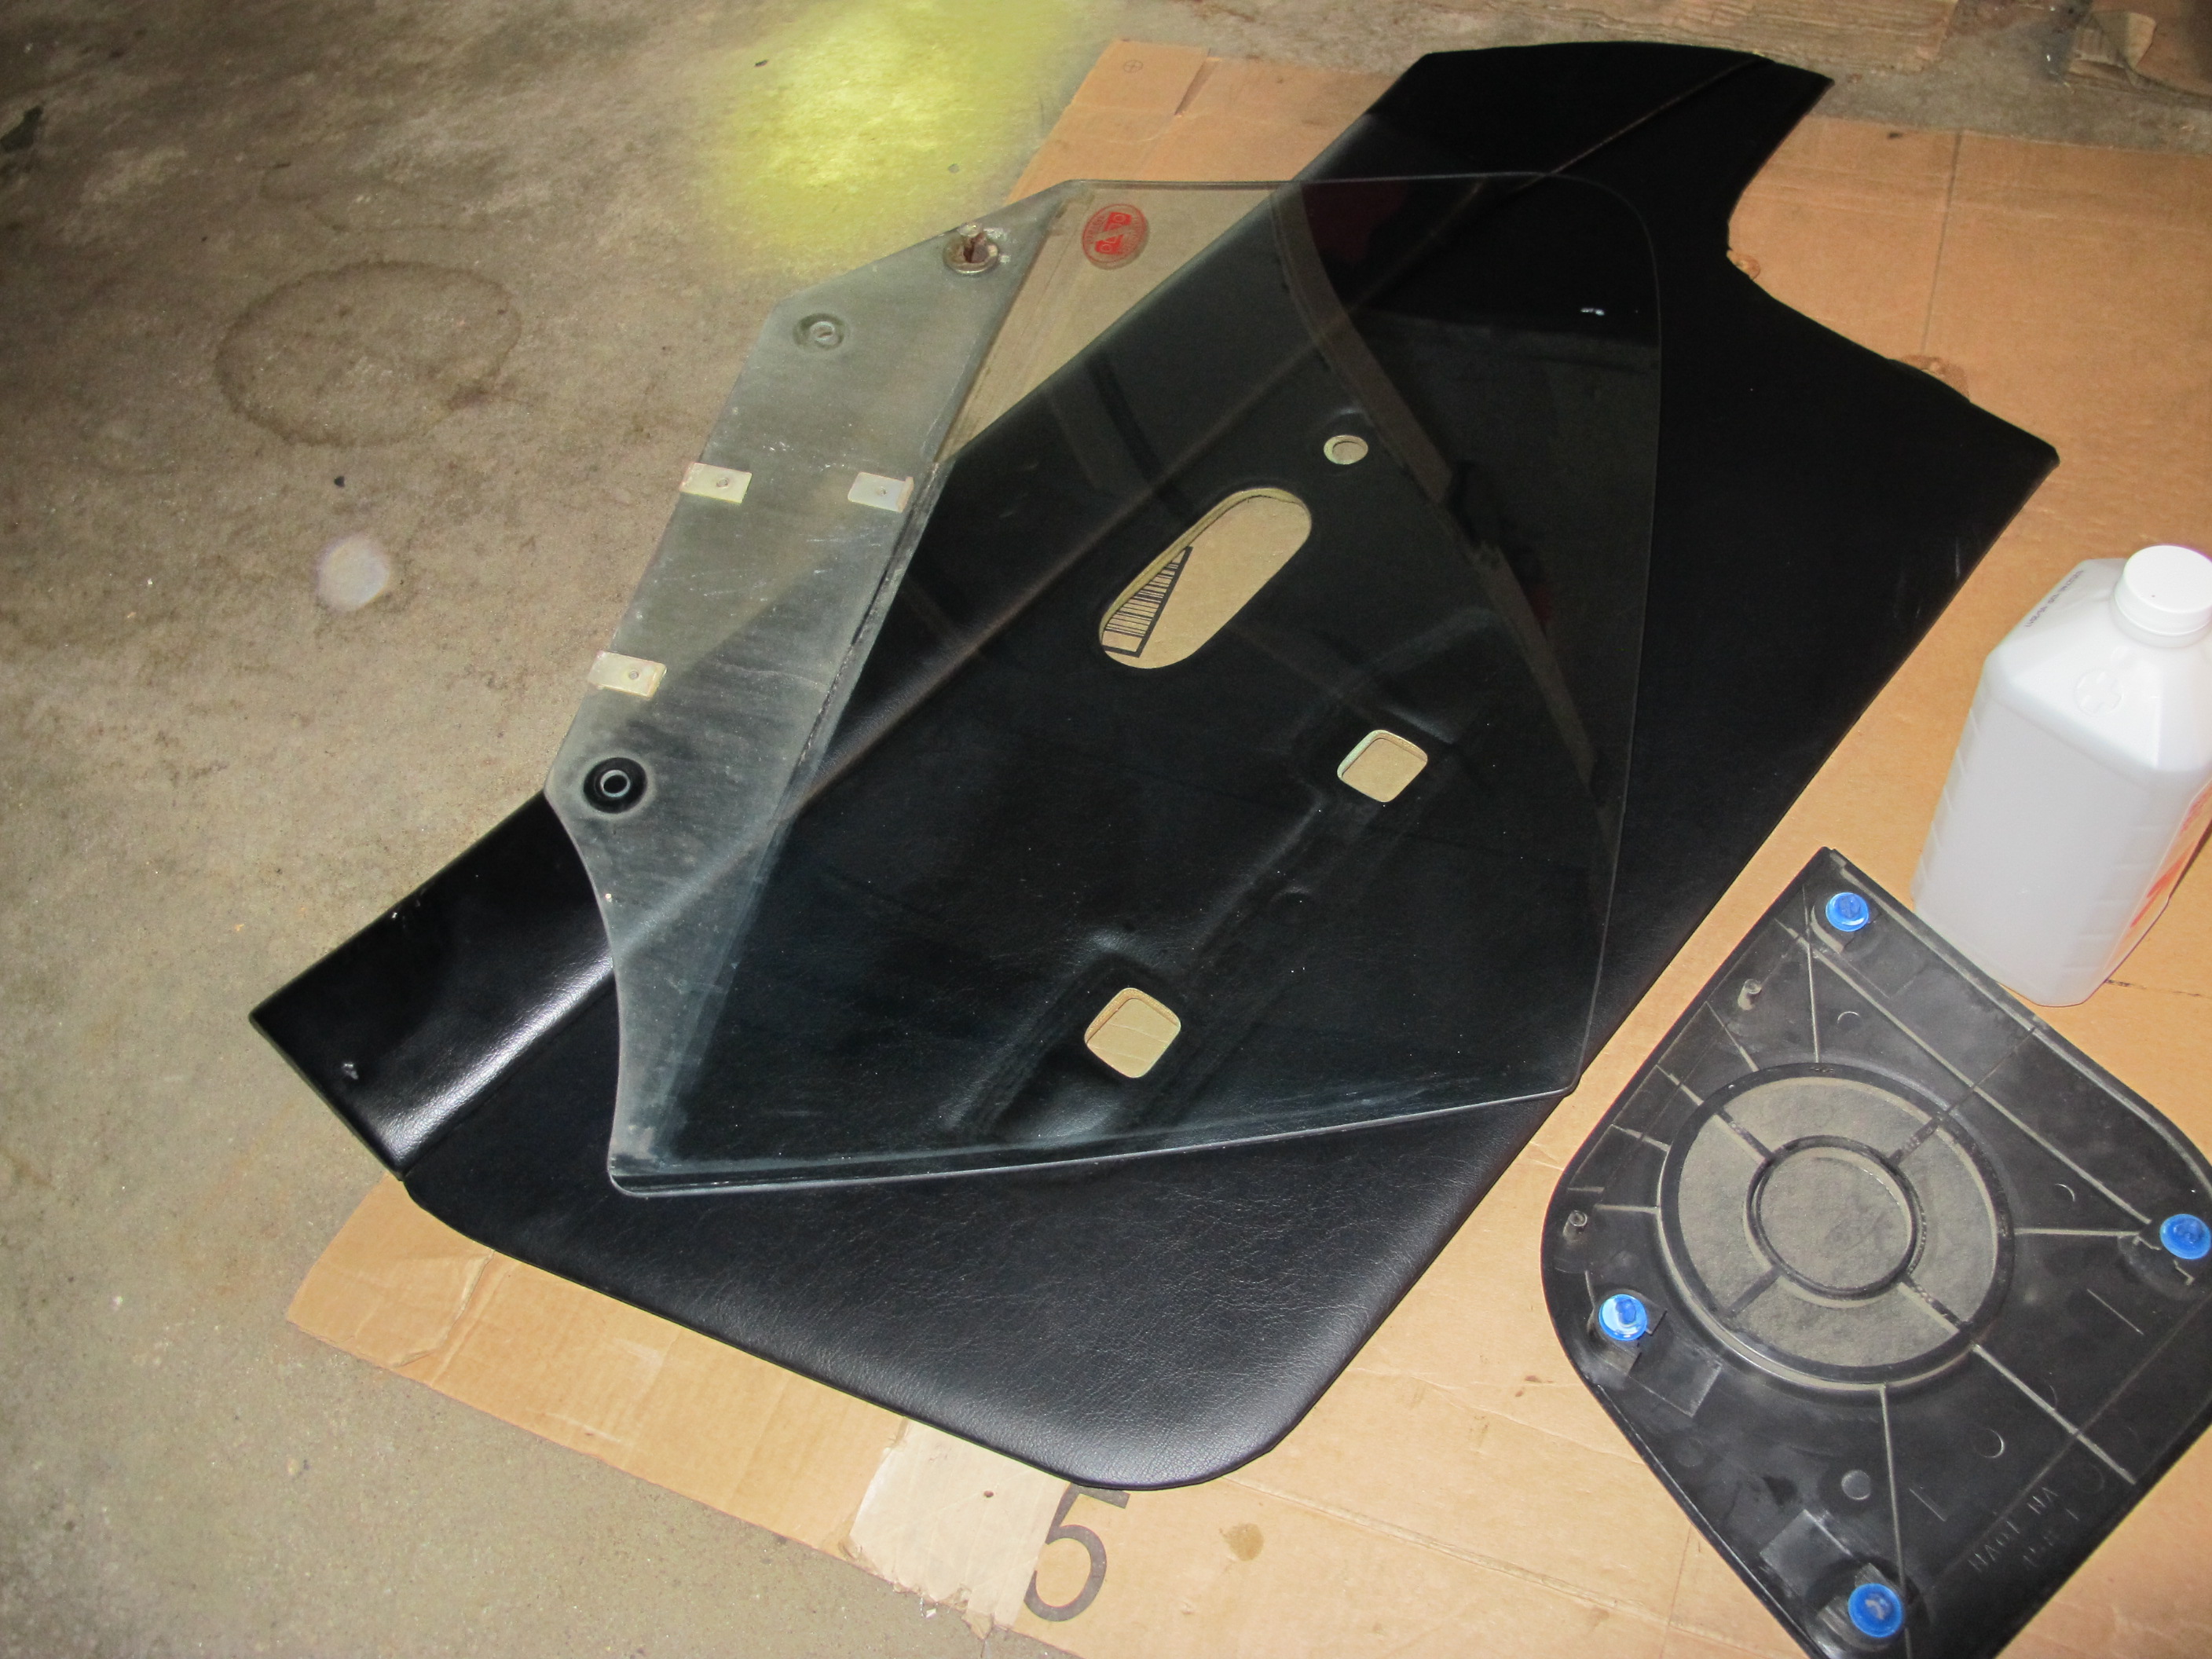
Well I had a little free time this weekend so I decided to pull my R Lip and repaint/dip it. The PO had it dipped black, the OEM color was red. Where the lip had scrapped the ground it was showing red. It was hard to see being so low to the ground, but I knew it was there. I had a can of white dip that was pretty full so I decided to try out a white lip seeing as how I already had the supplies.
I forgot to shoot a pic of it black and scrapped, but here is the red after some cleaning.
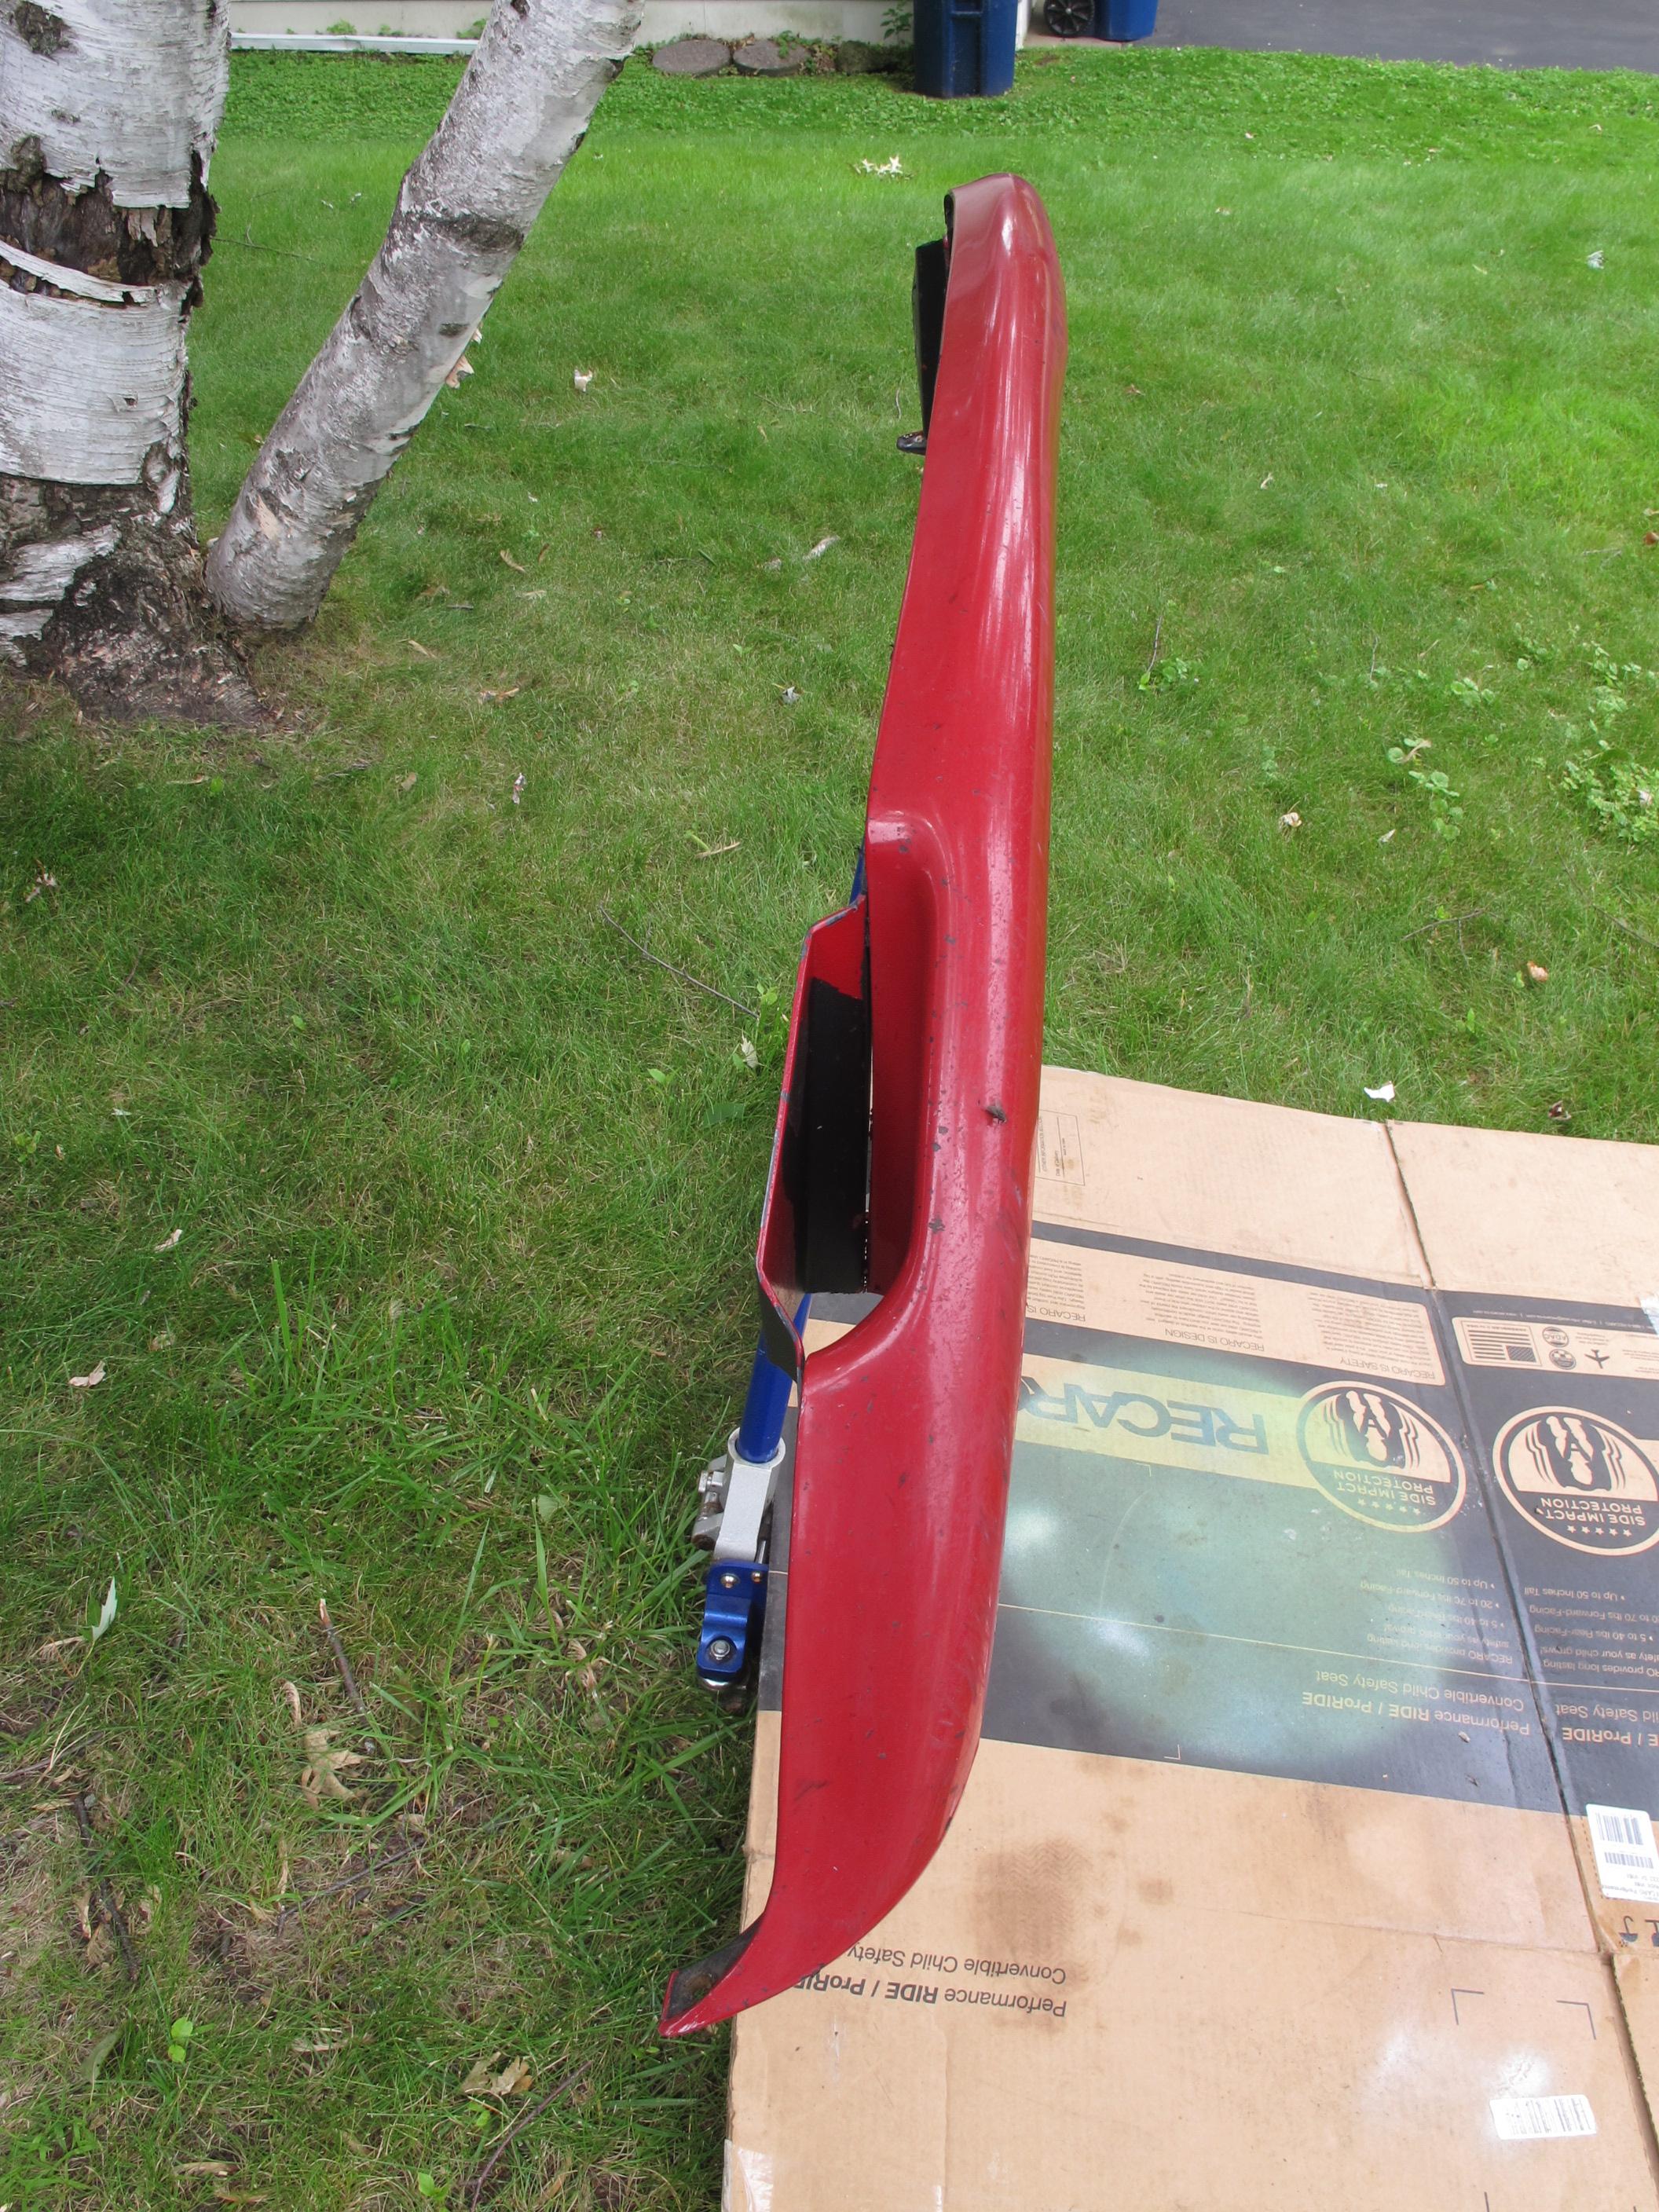
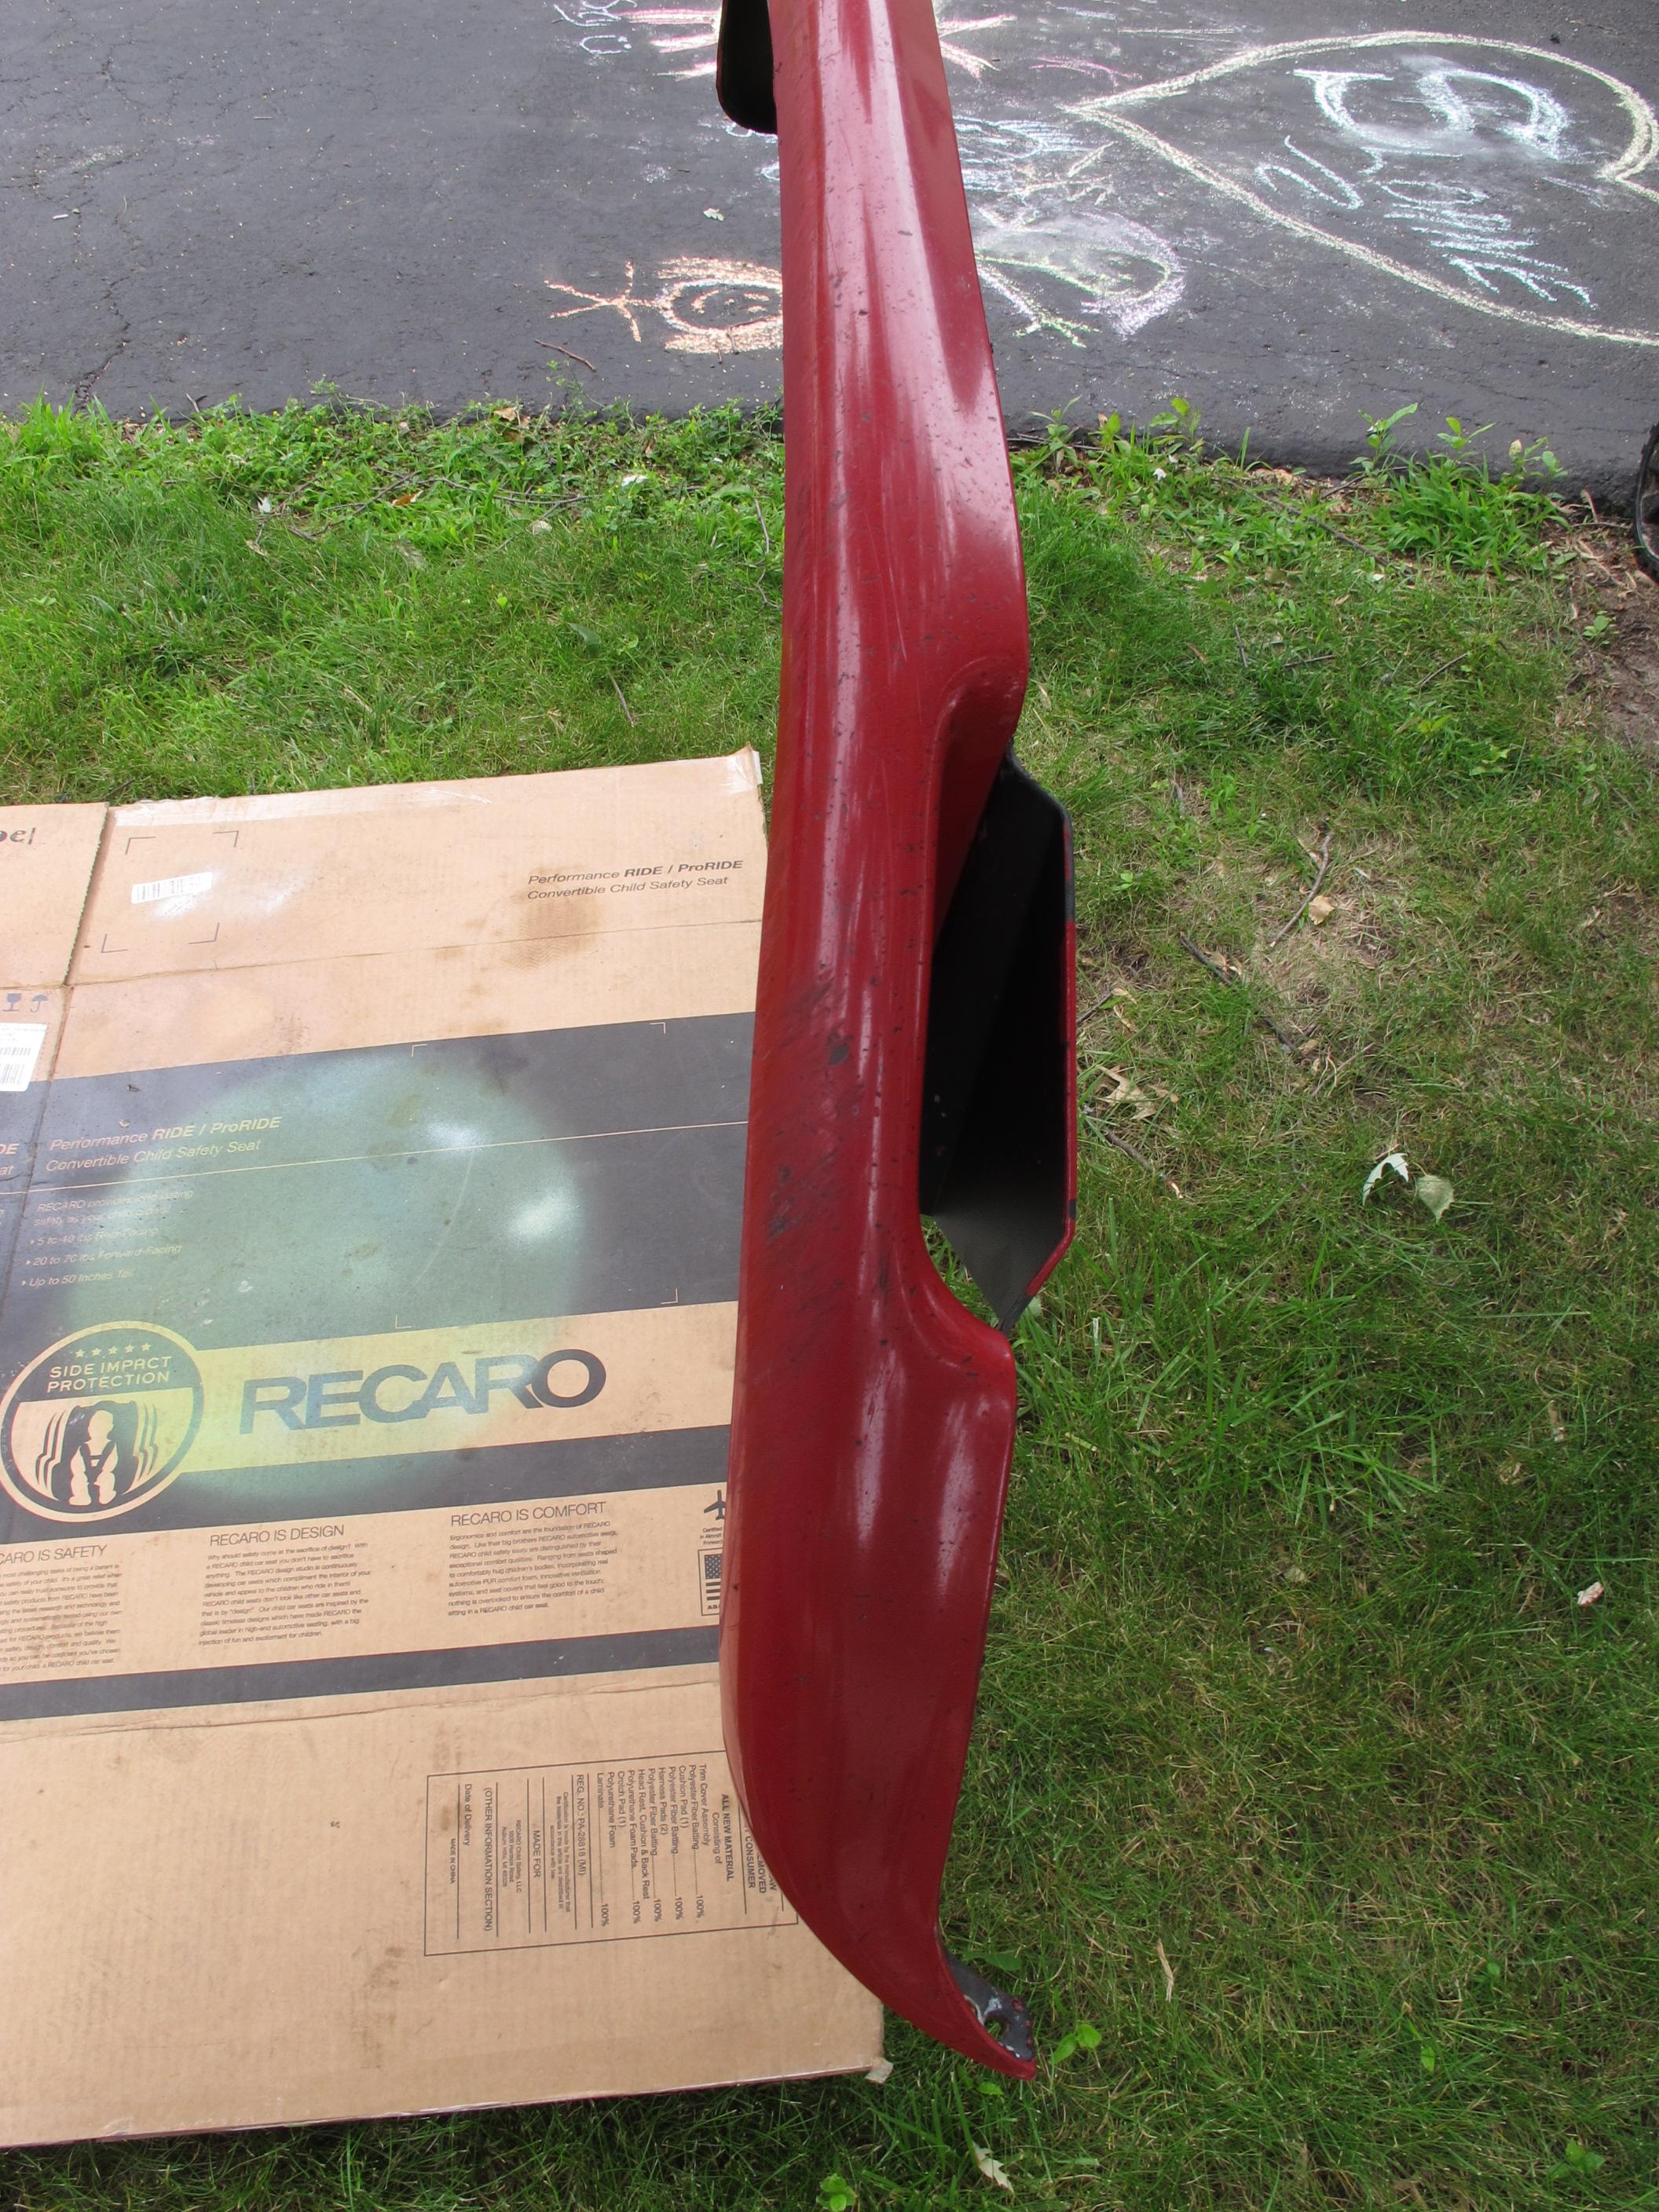
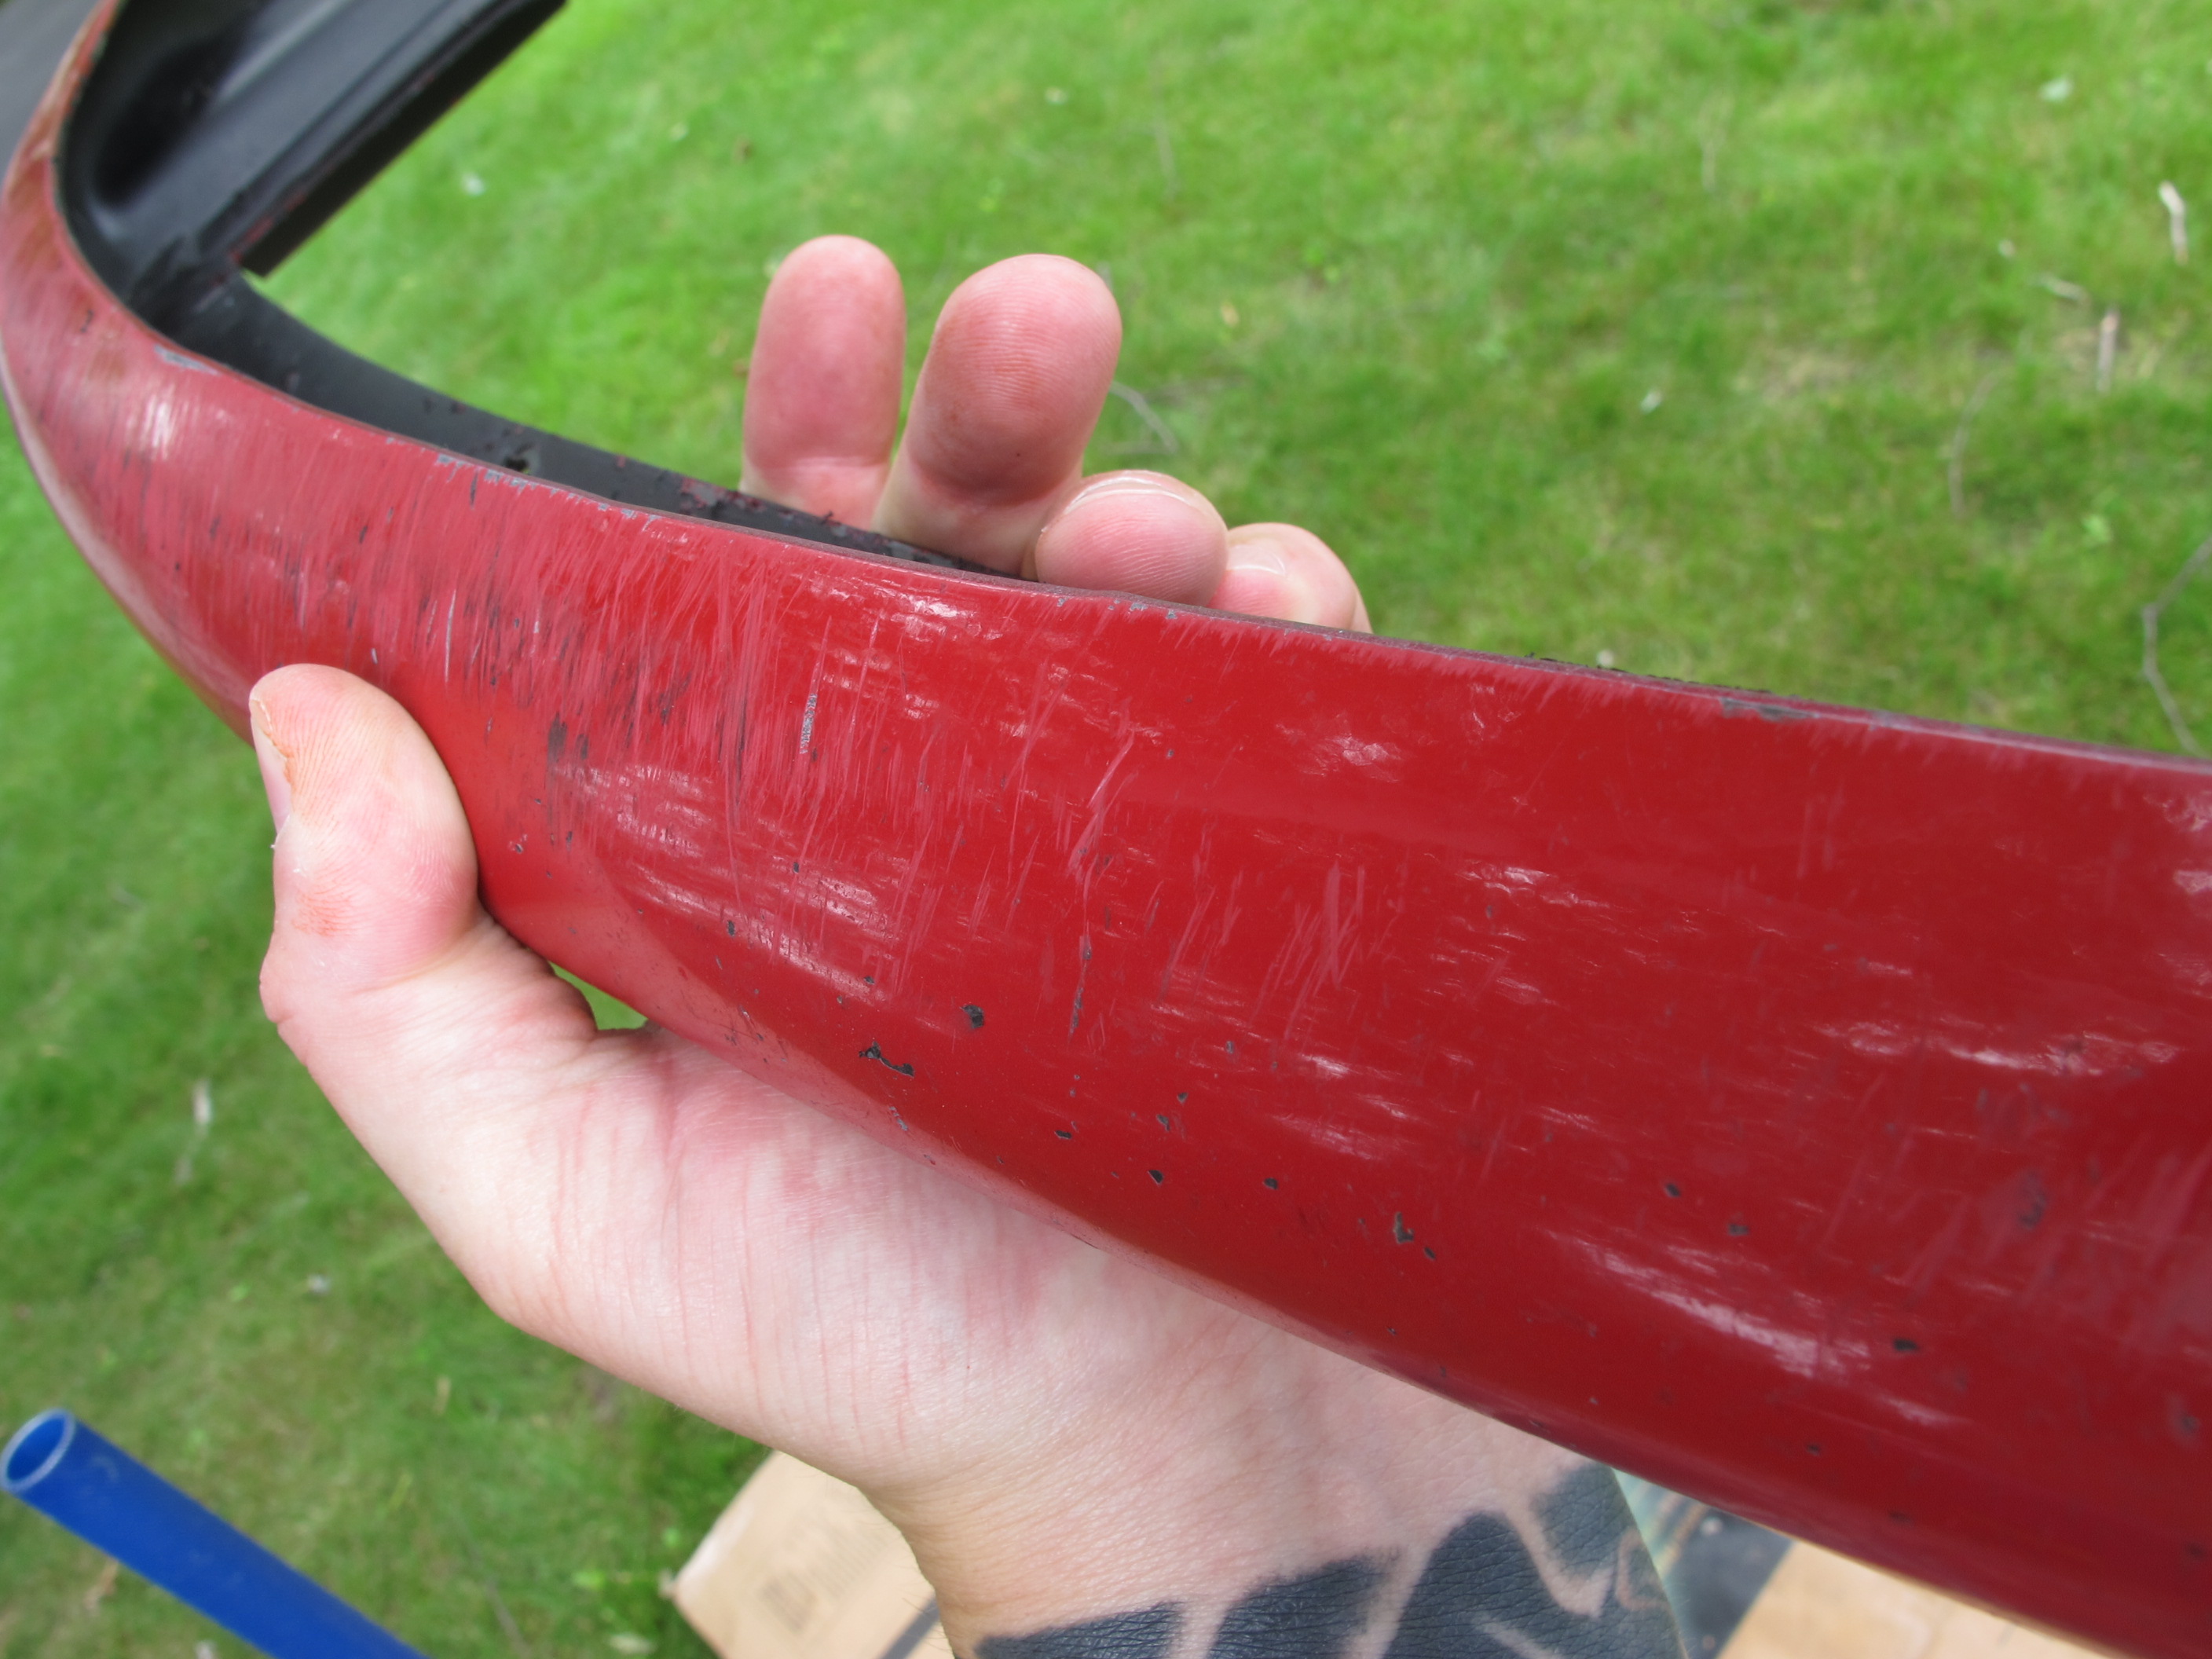
And here is the R Lip after a little more cleaning an a lot of light coats of dip. Sorry white tends to wash out and I am no pro @ photography.
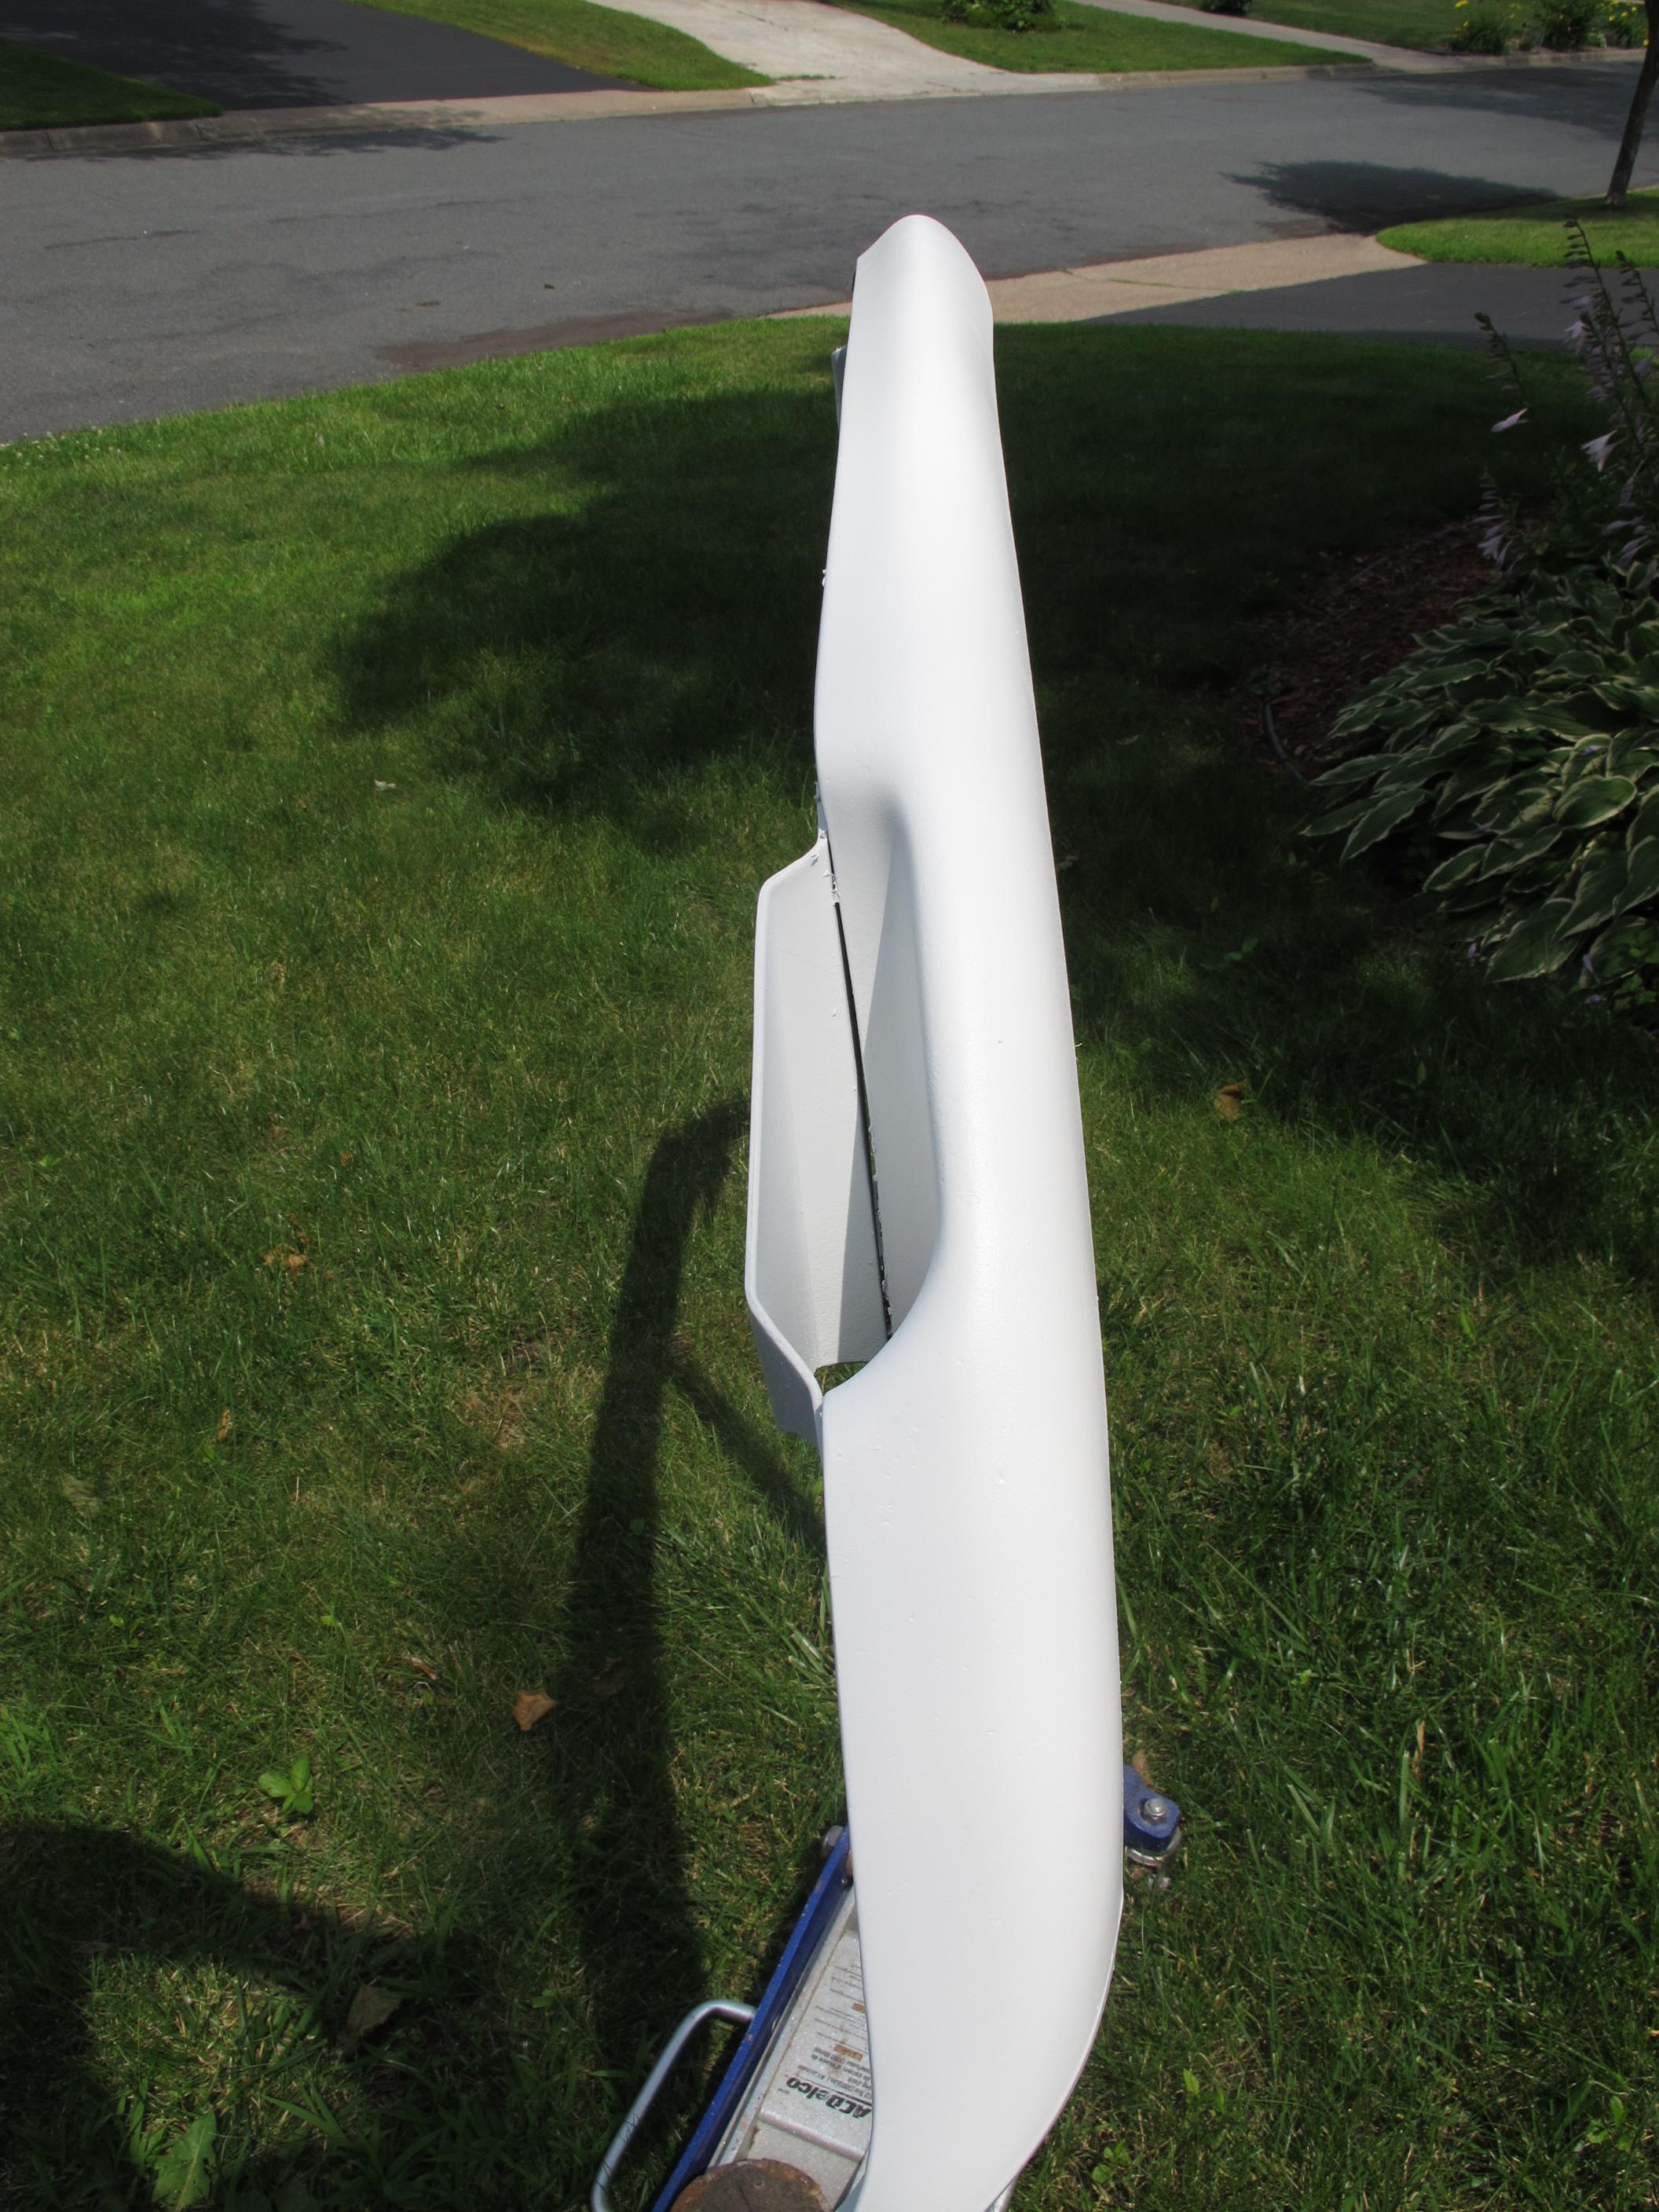
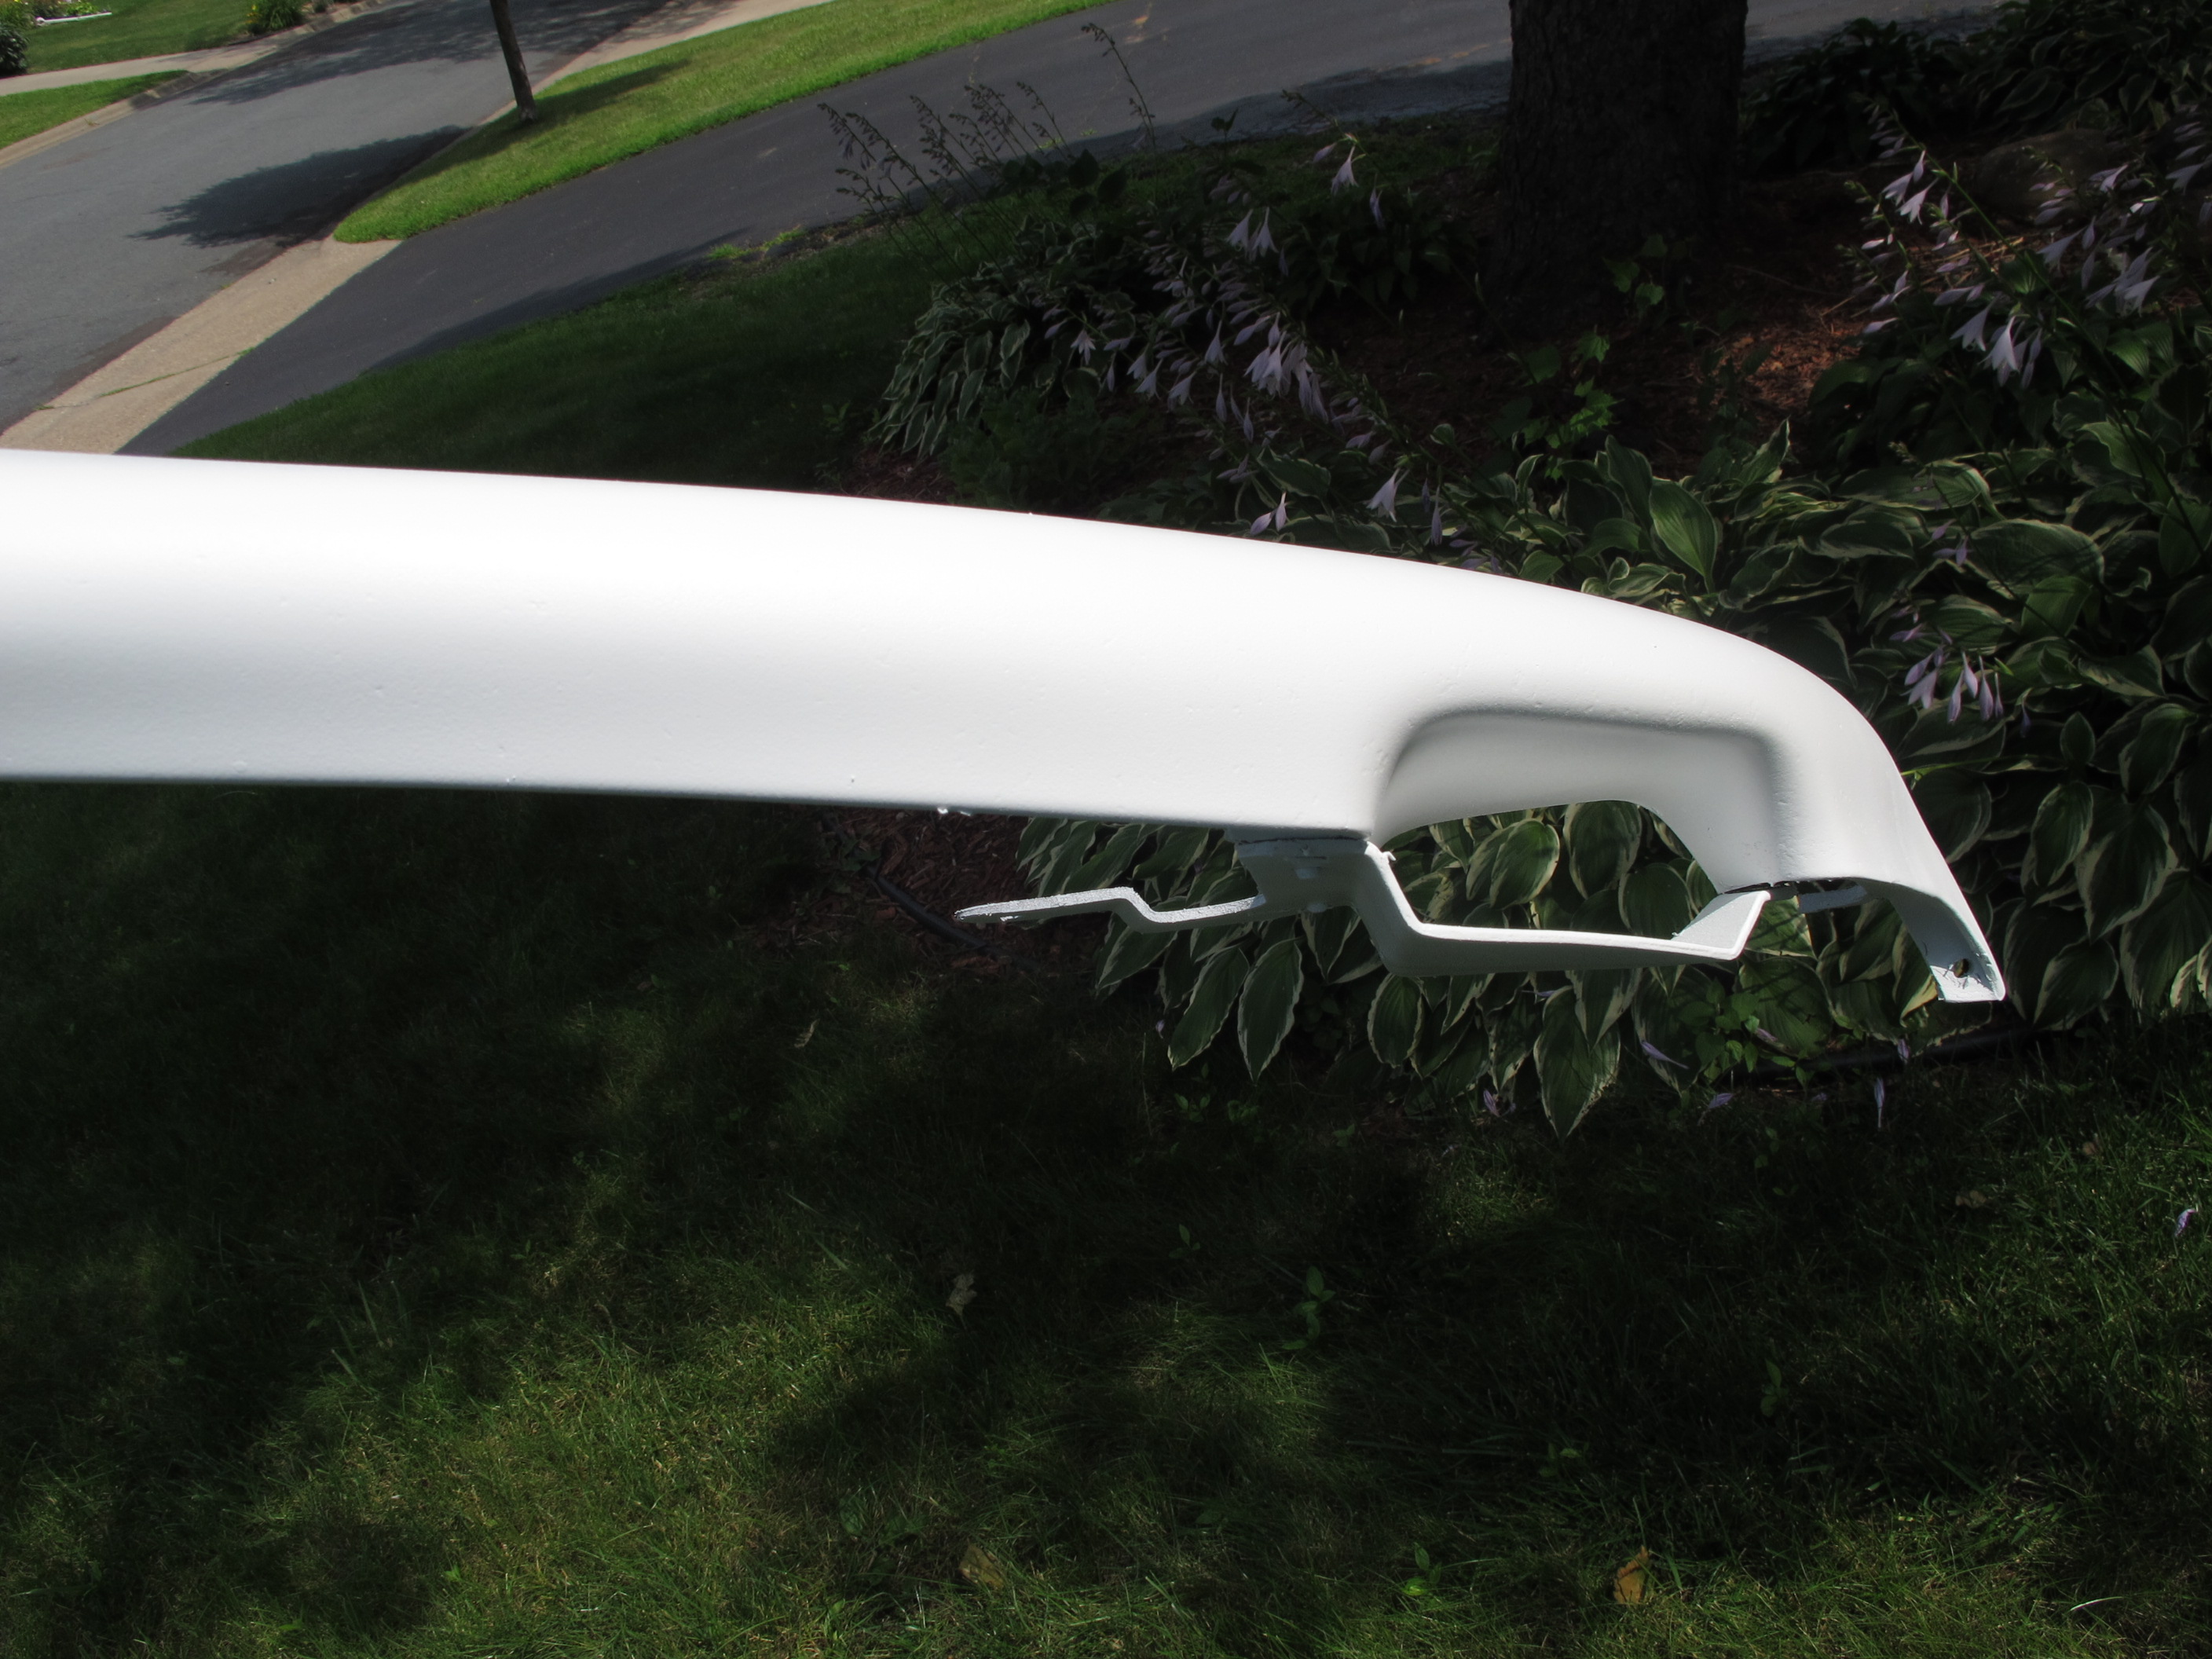
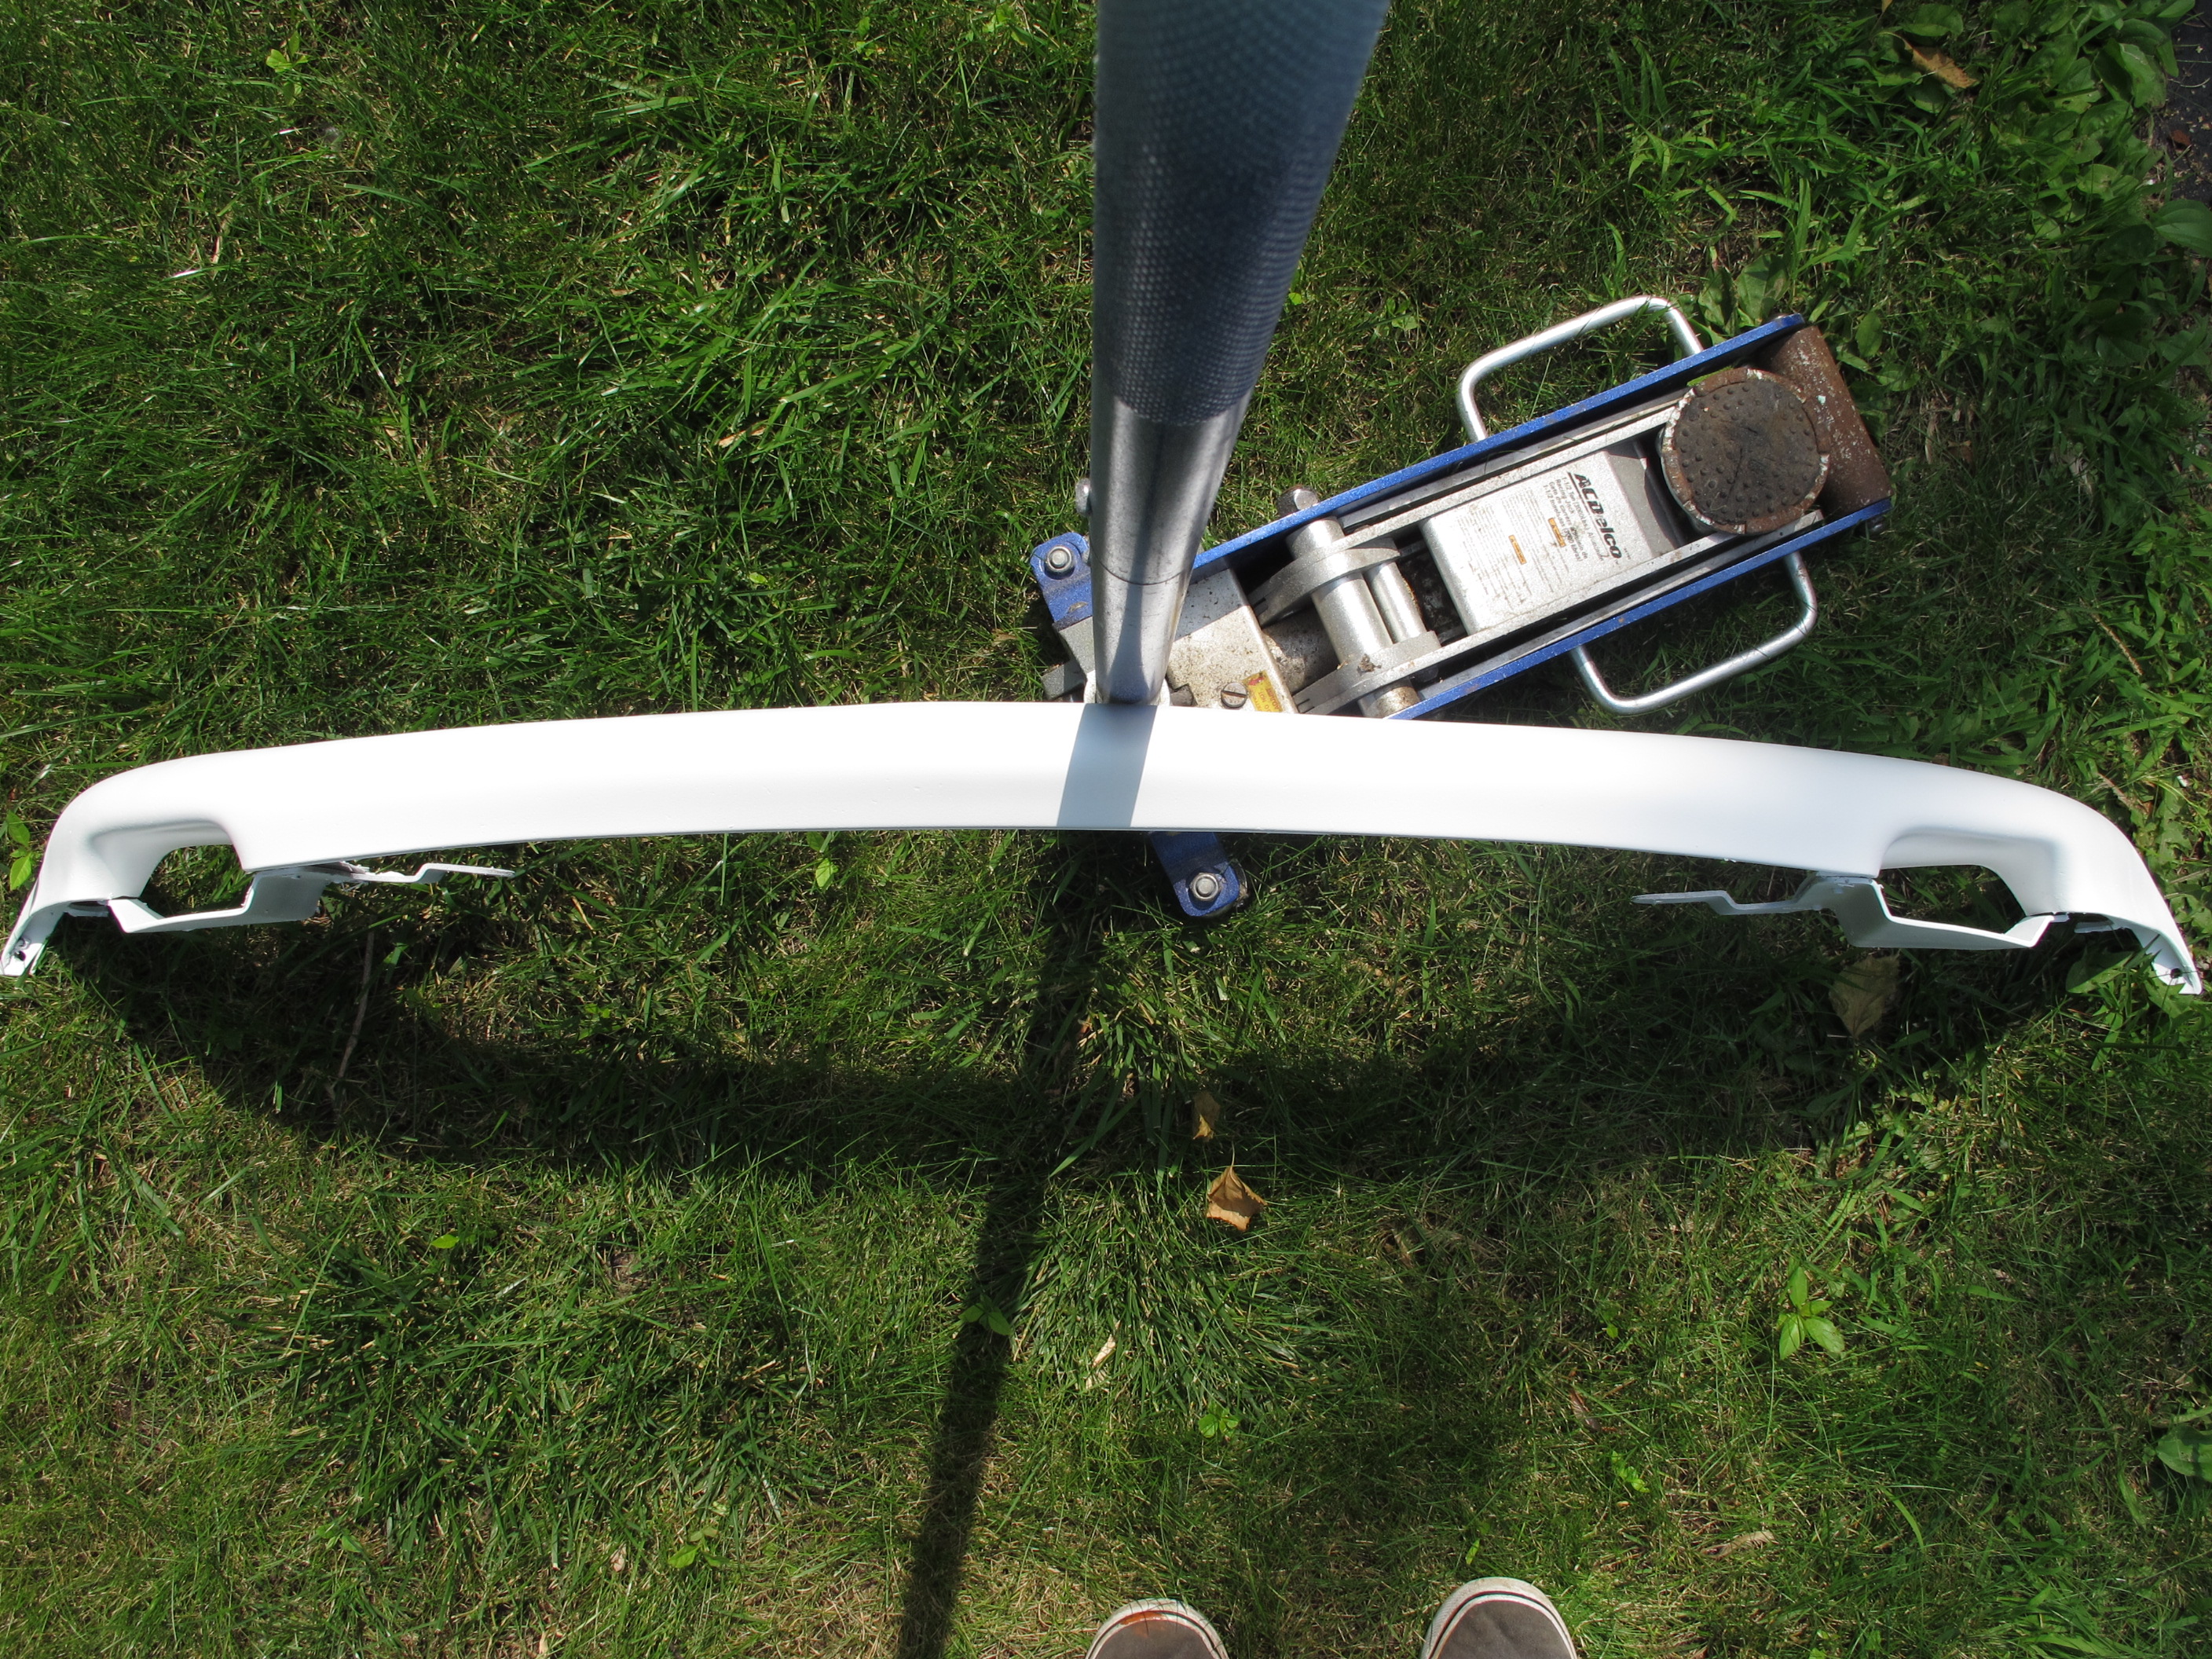
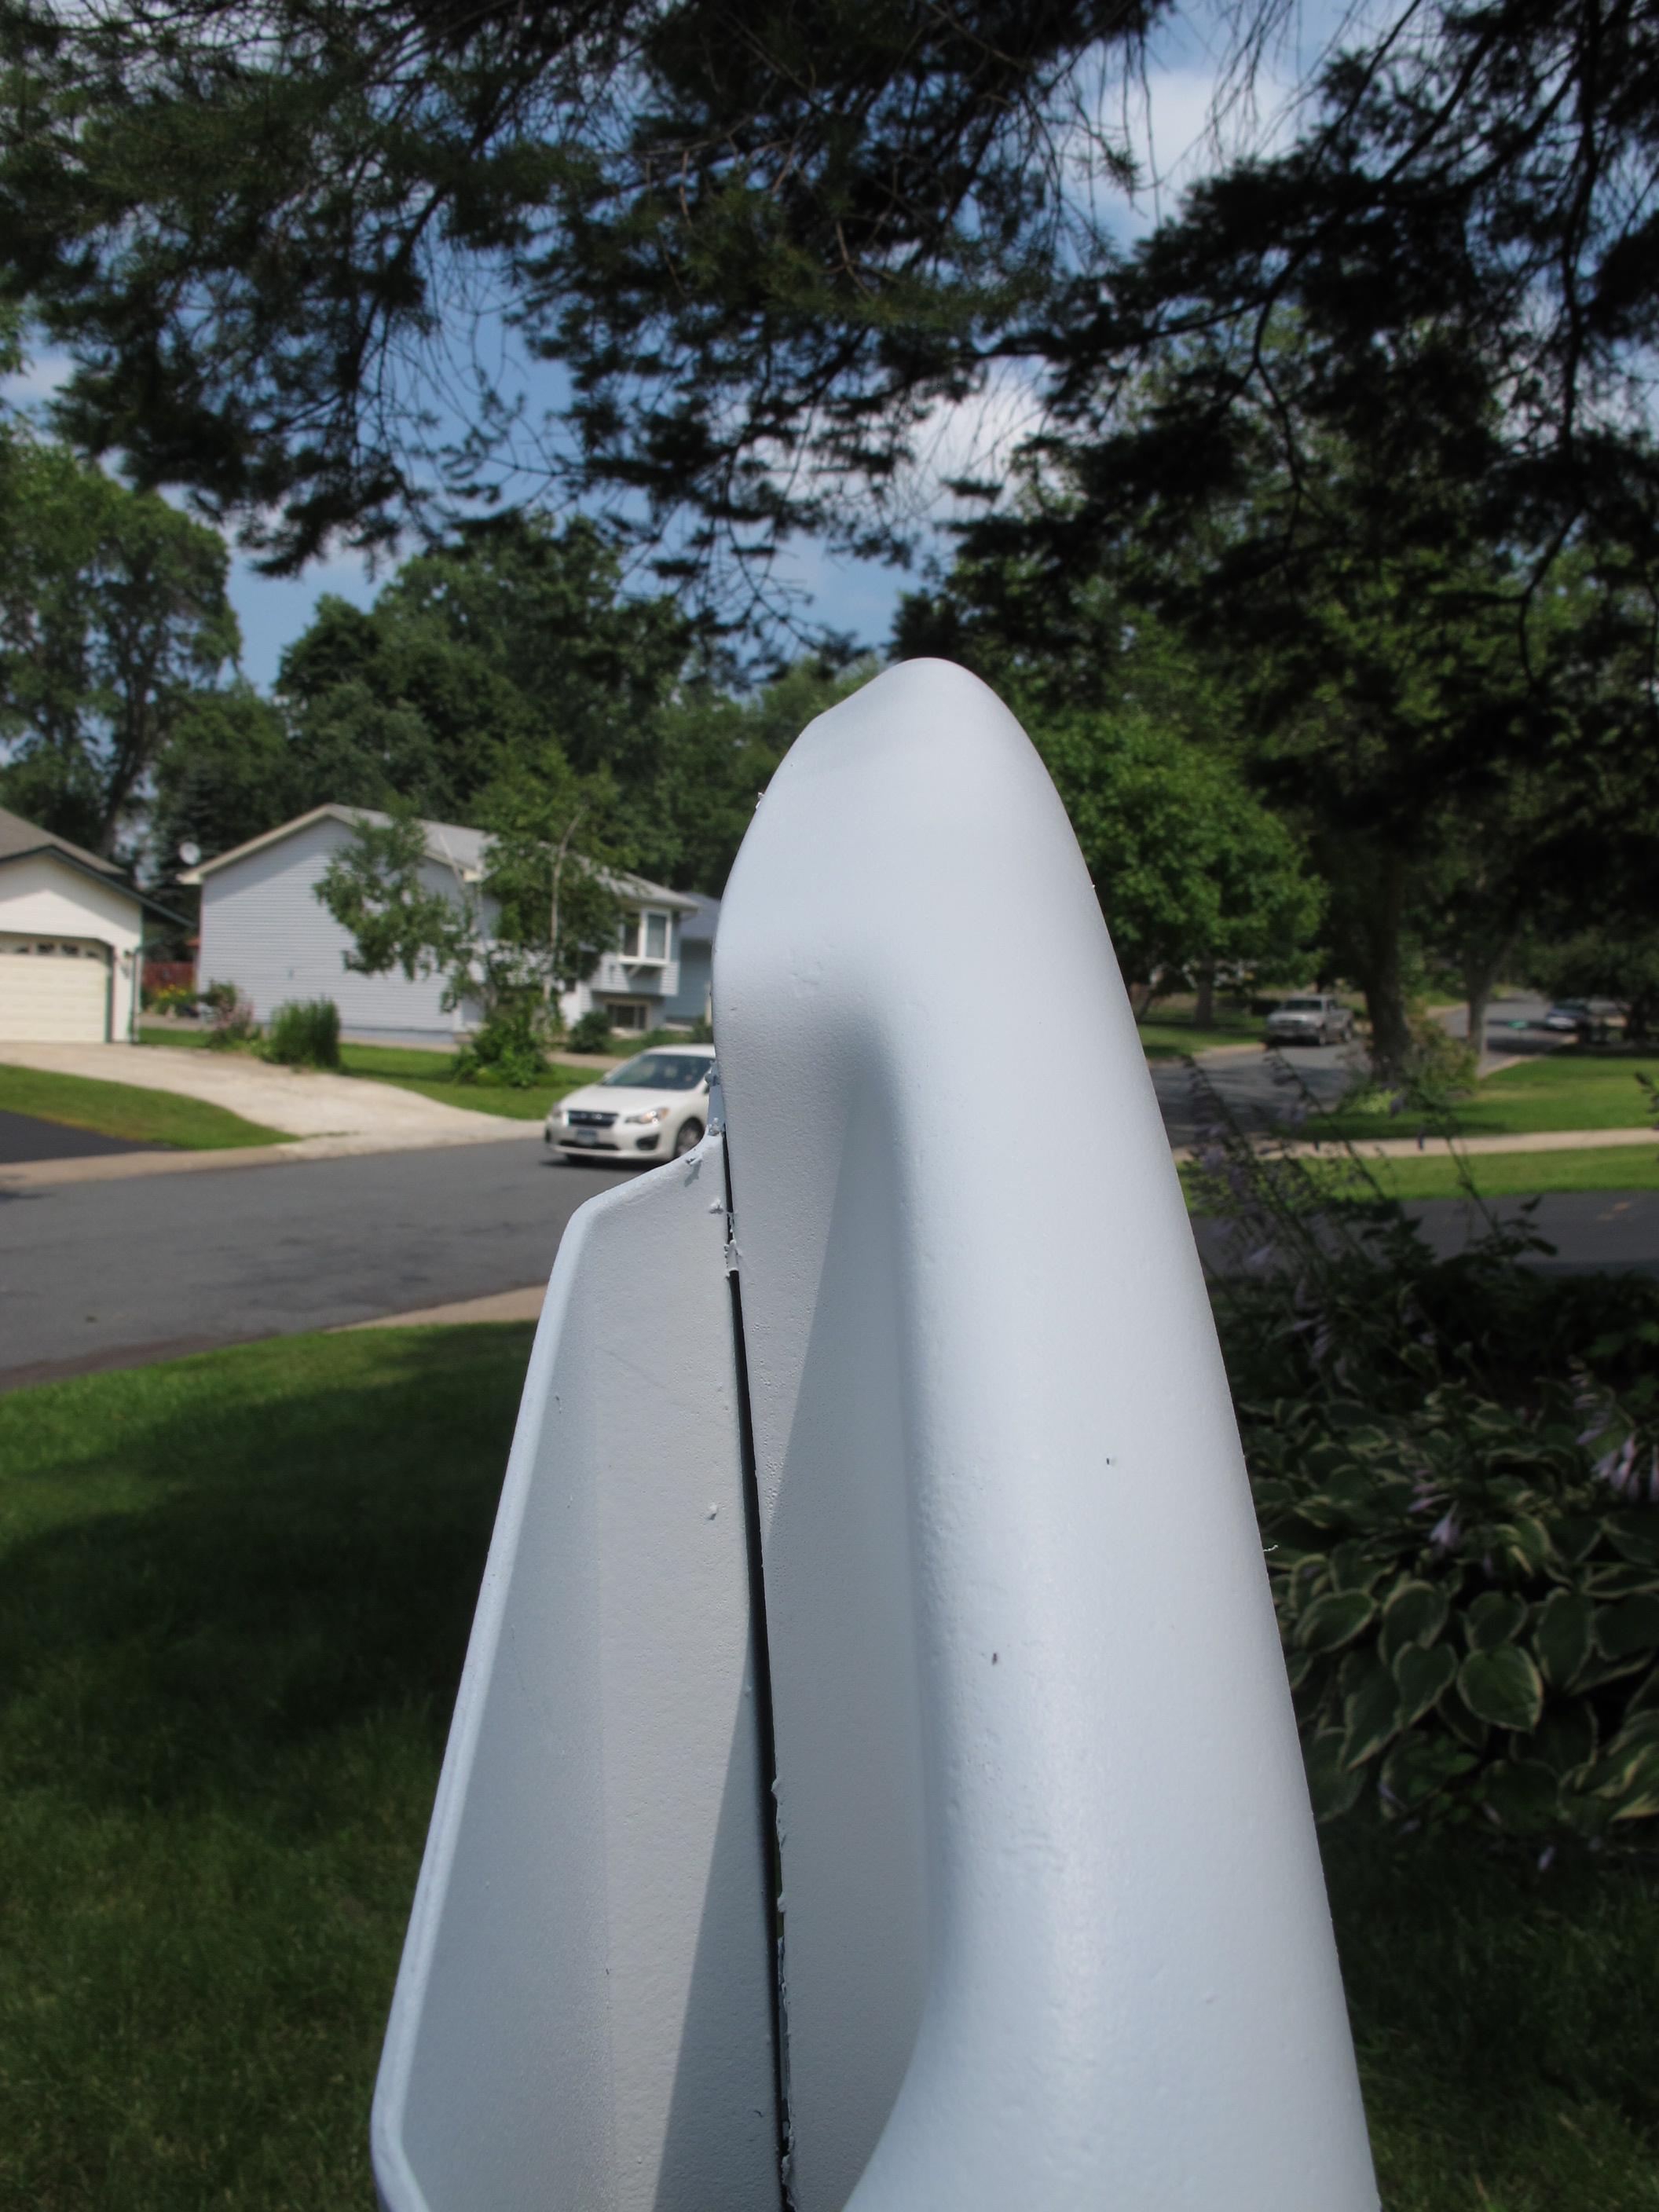
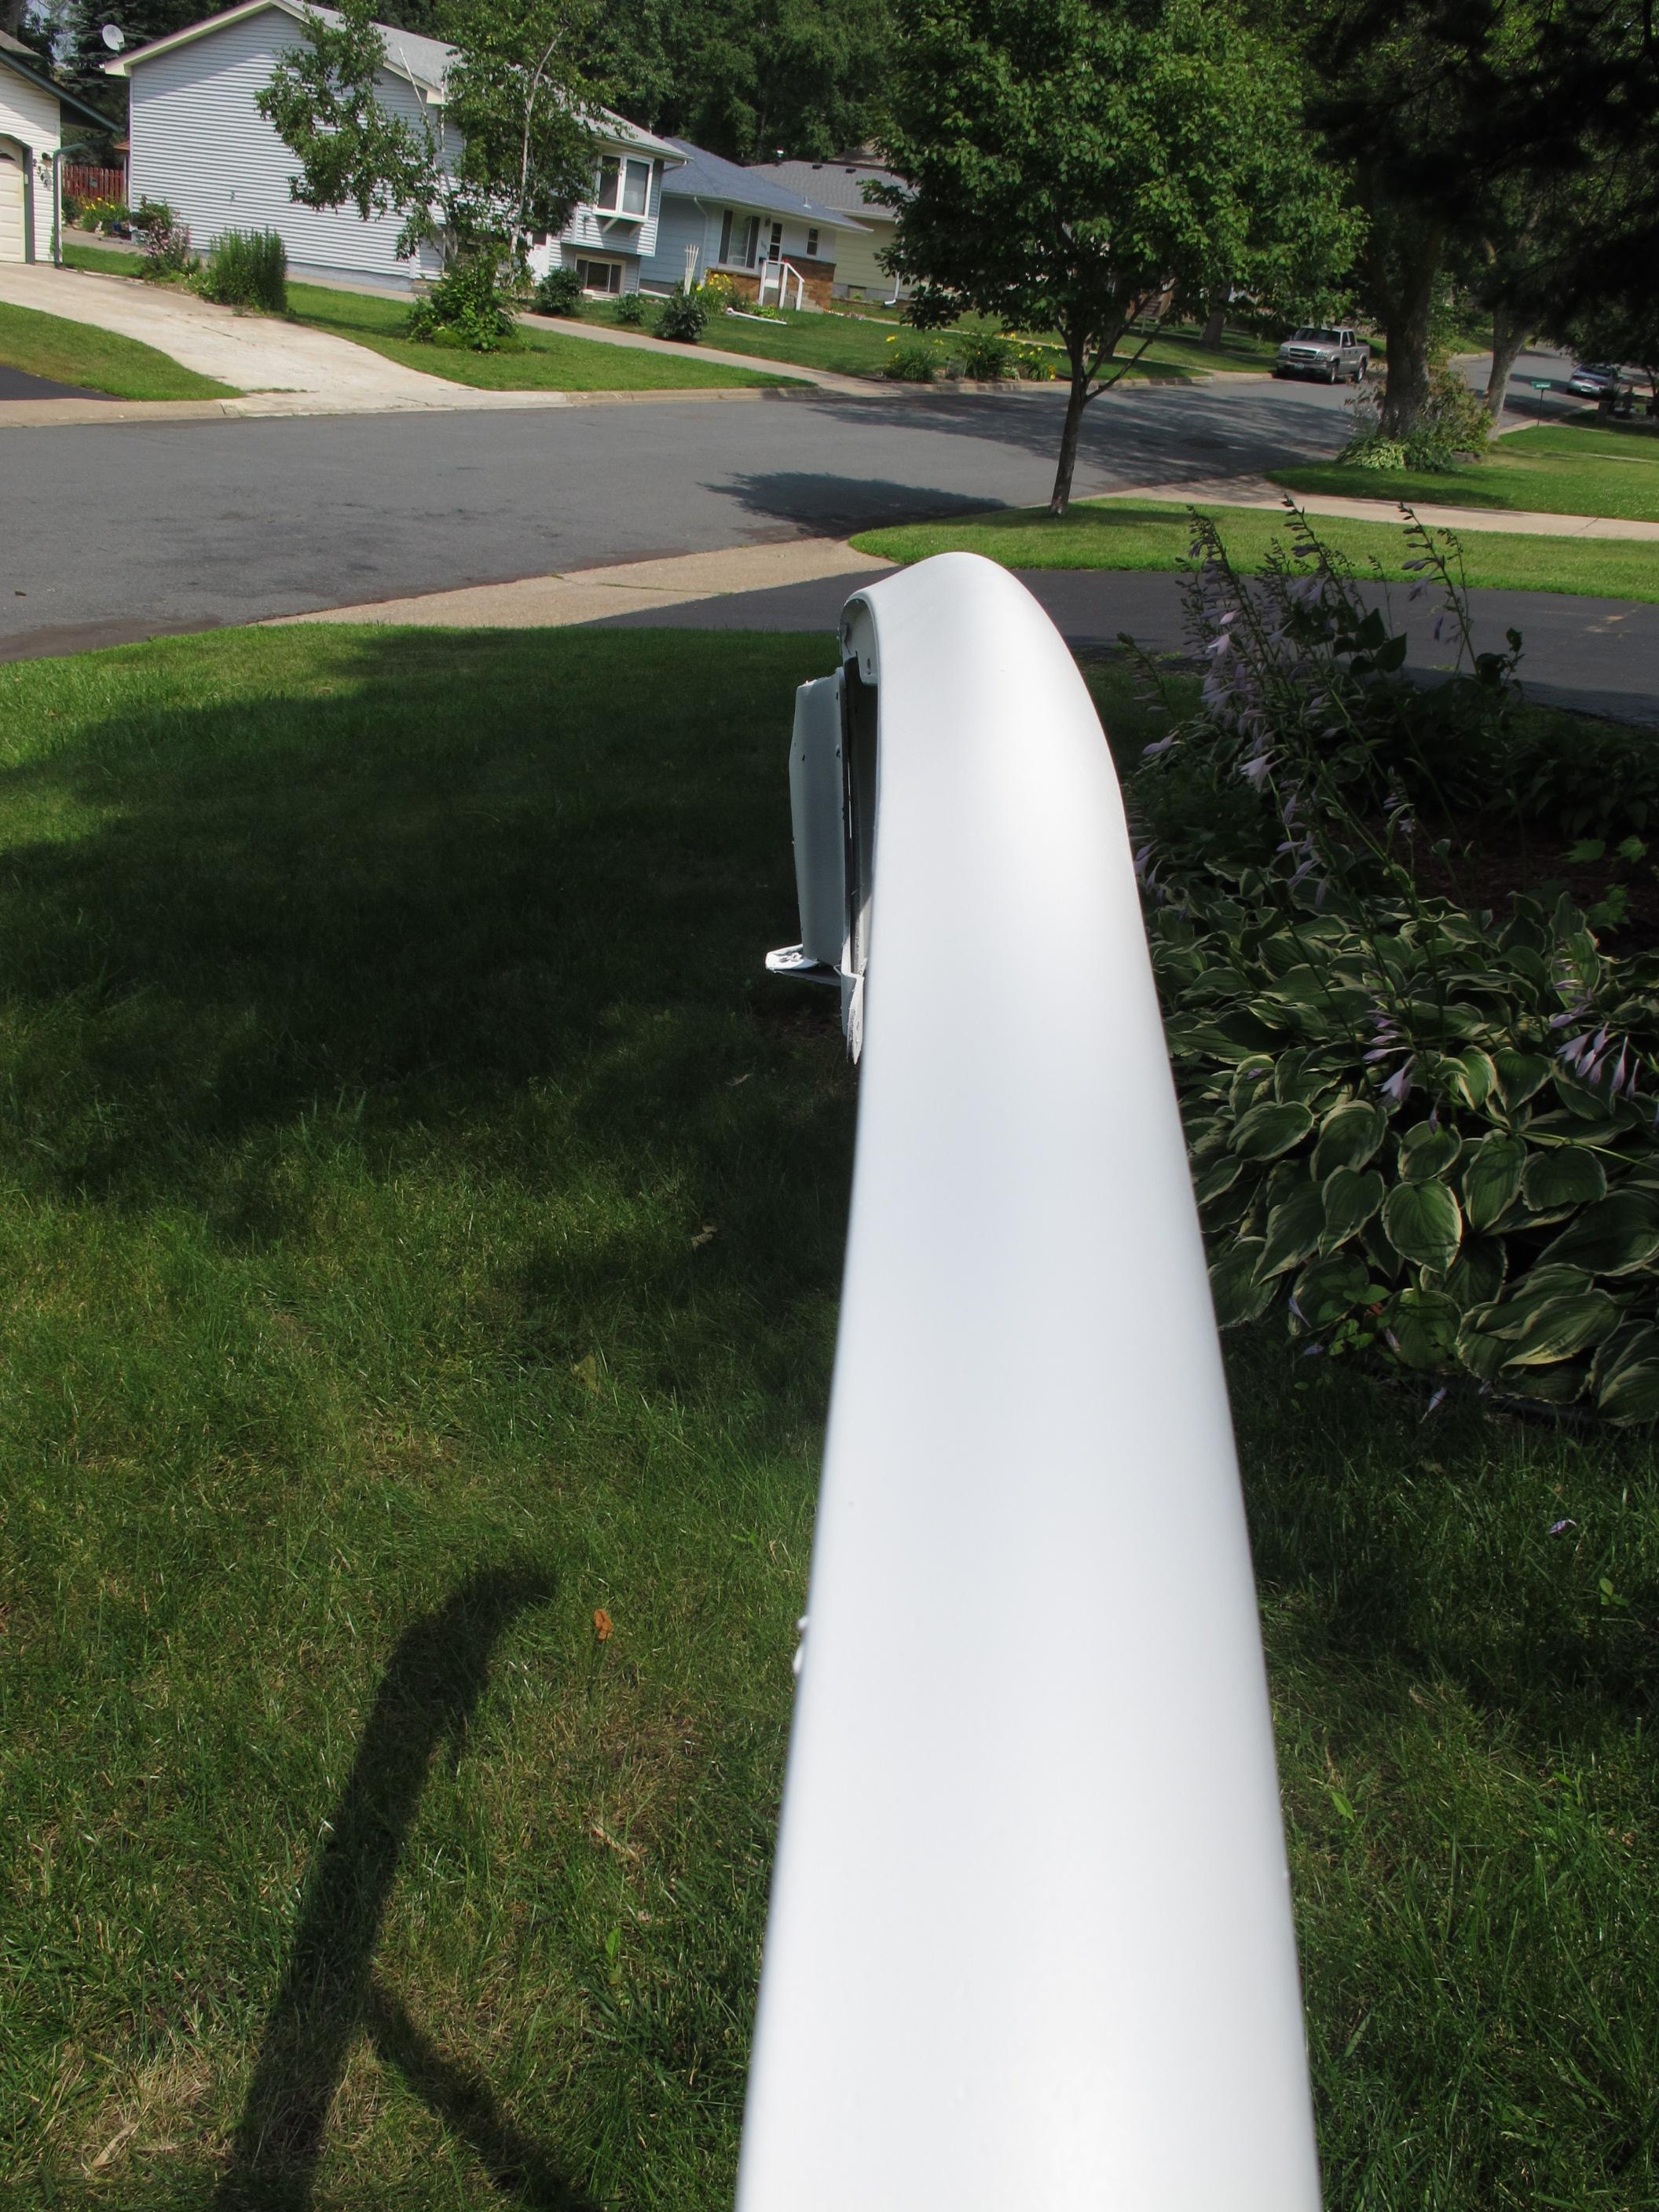
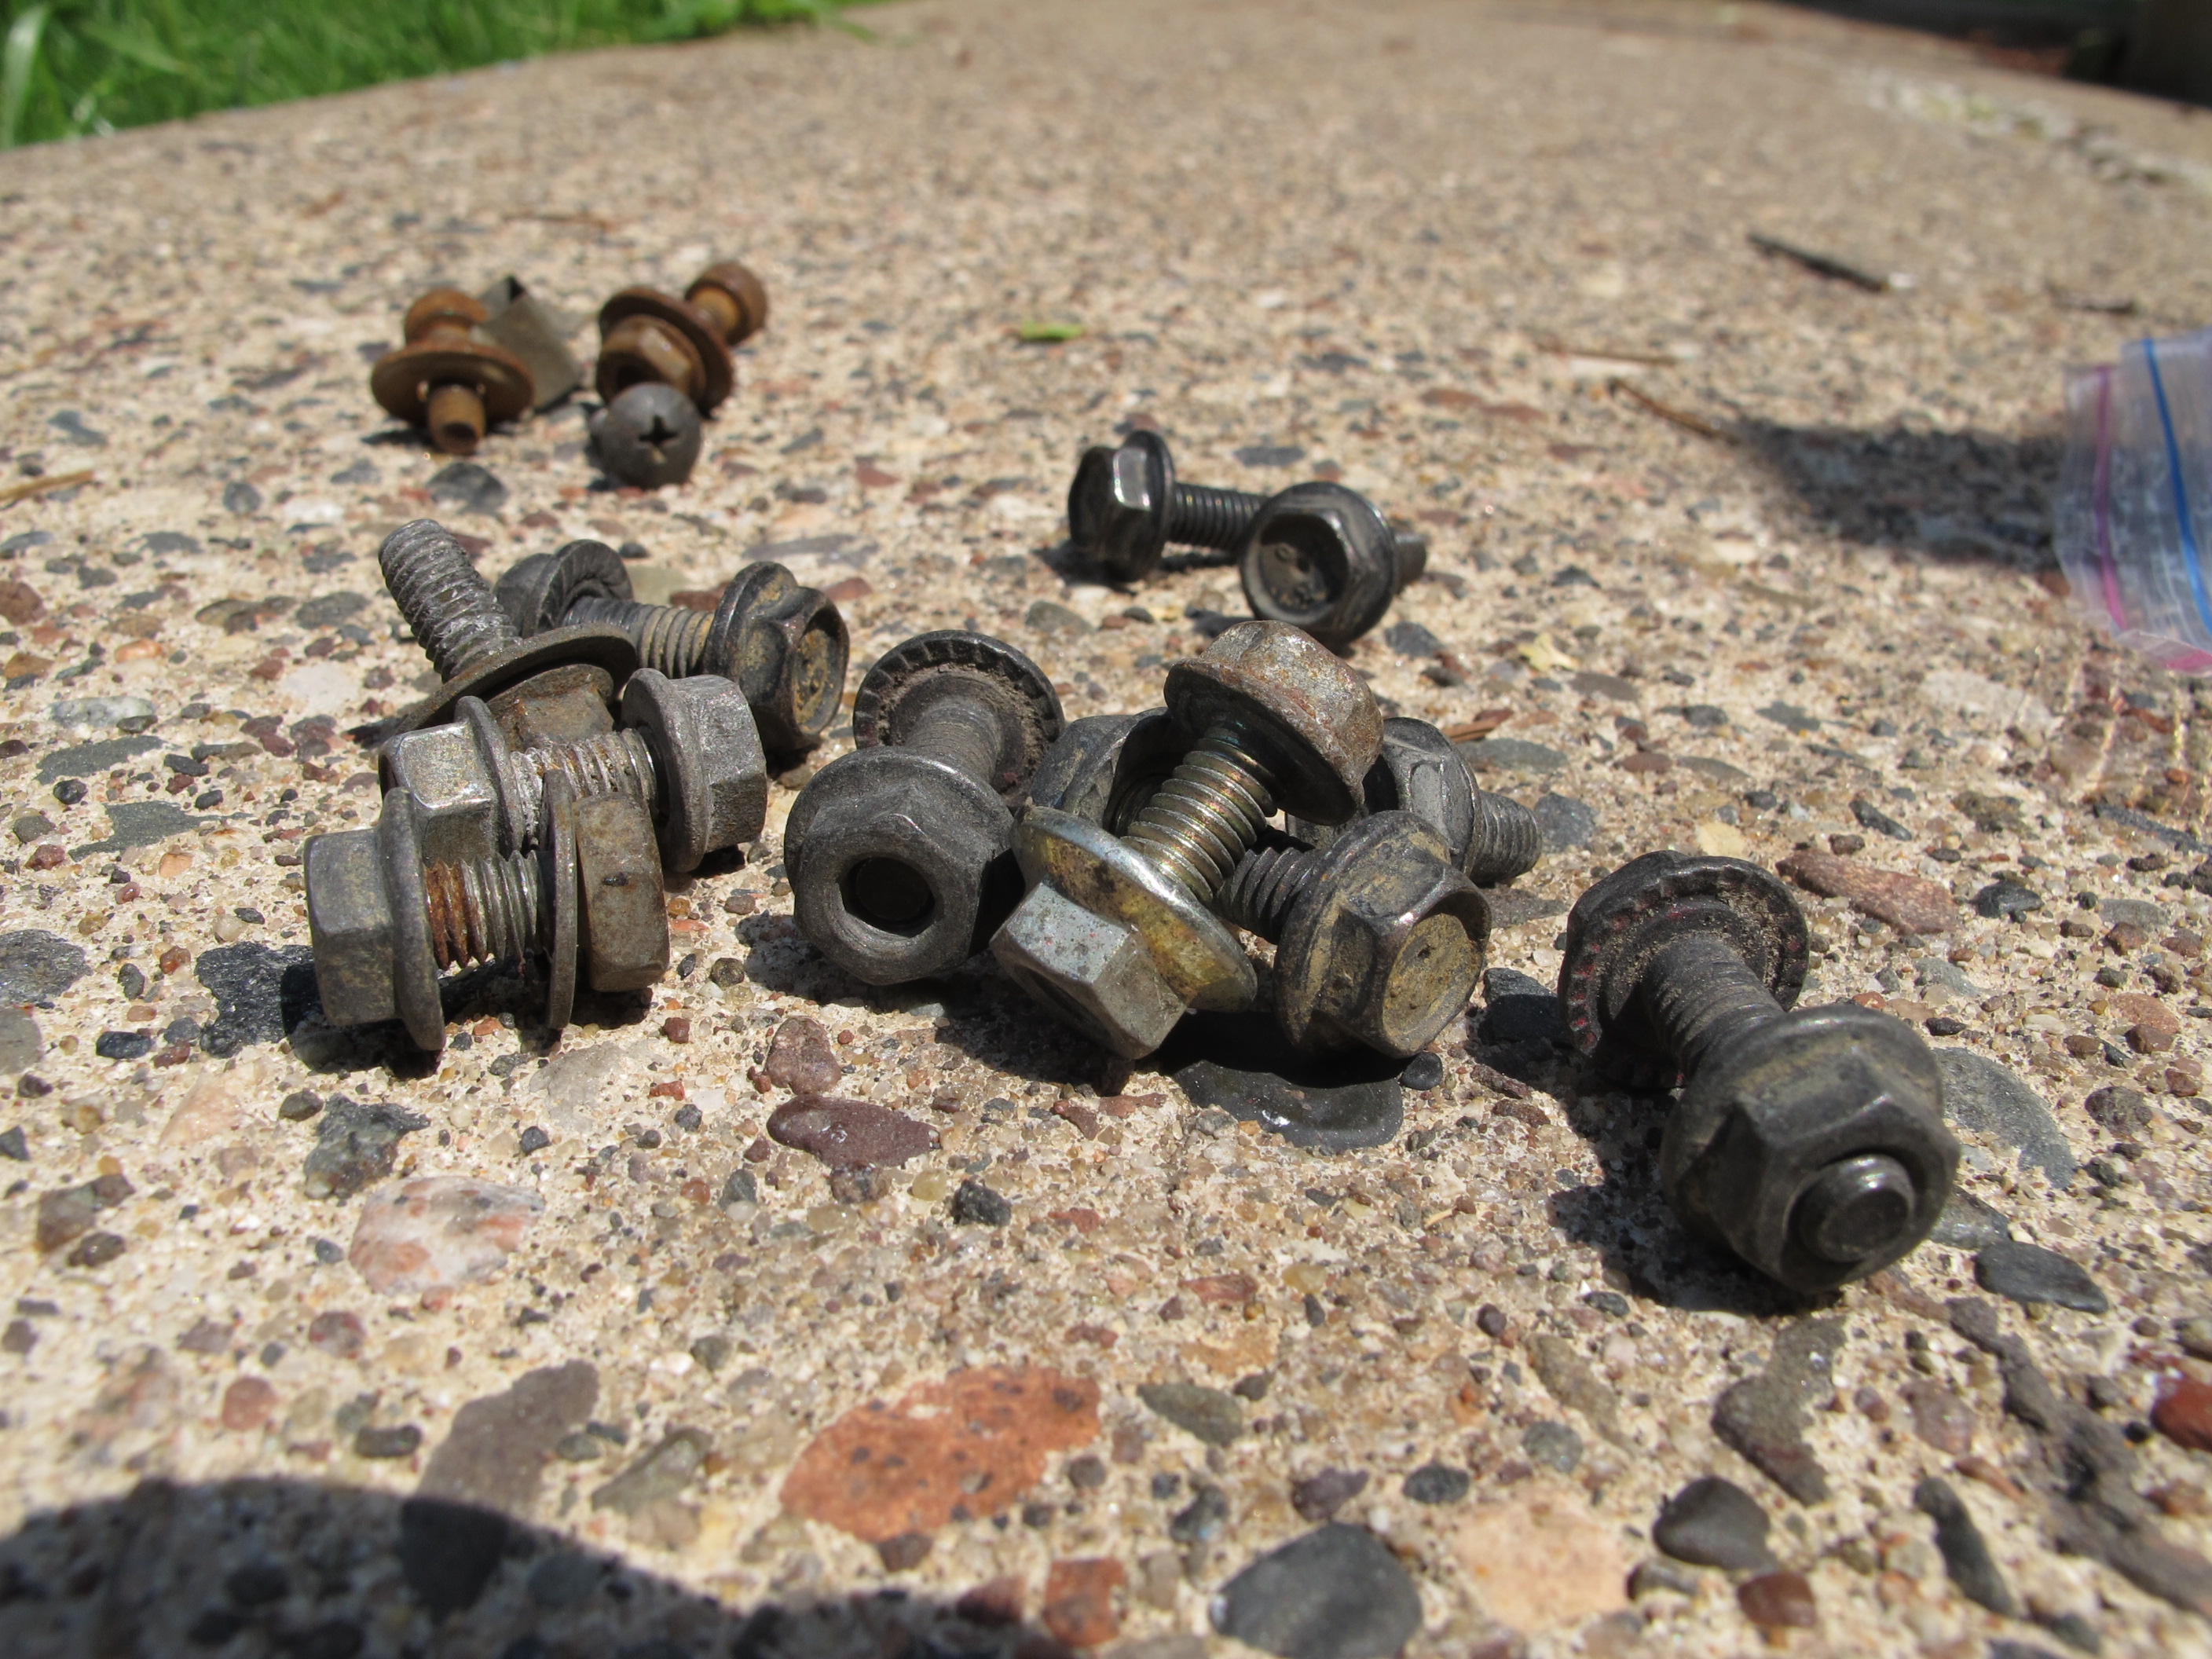
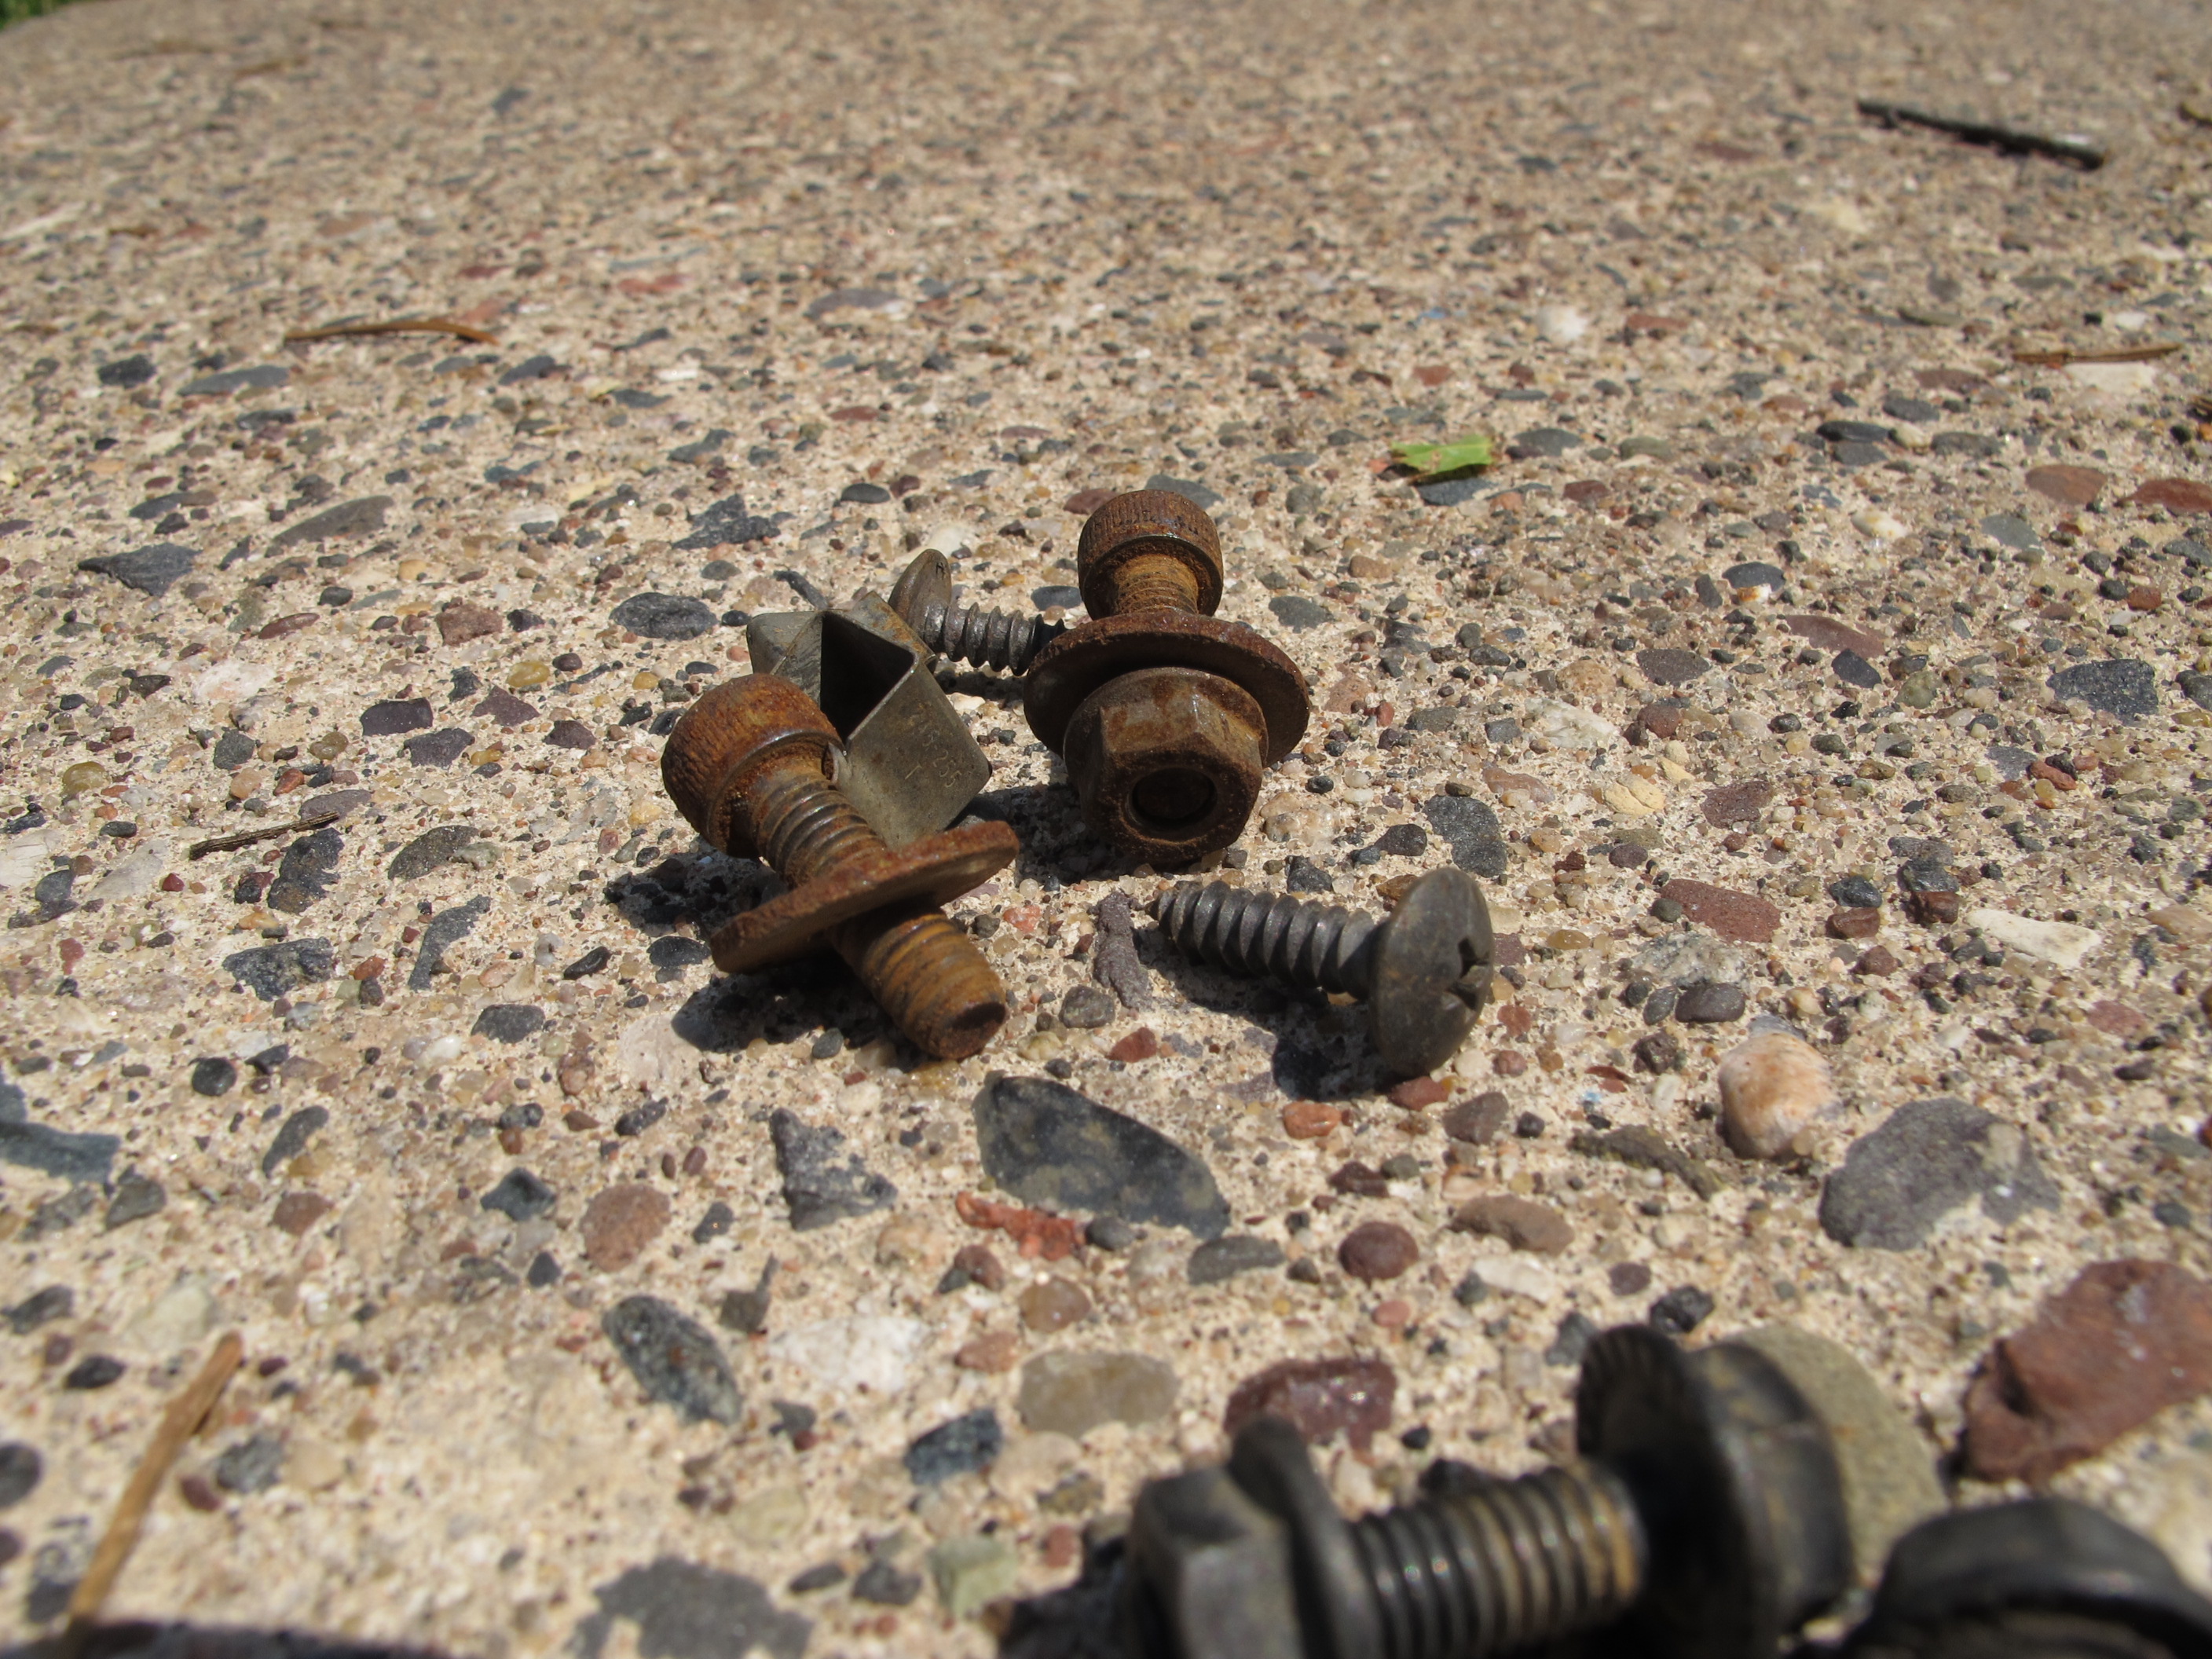
I was really not a fan of the hardware used (not stainless) and the condition of some of it. RUST?!?!?! I am torn on what to do. Order flange hex stainless bolts from fastenal online (none in stock) or just do stainless hex + washer setup from ACE Hardware. I will update with pics when I make up my mind. I really want flange stainless, but not sure if I want to pay $9 to ship them.
I forgot to shoot a pic of it black and scrapped, but here is the red after some cleaning.


And here is the R Lip after a little more cleaning an a lot of light coats of dip. Sorry white tends to wash out and I am no pro @ photography.


I was really not a fan of the hardware used (not stainless) and the condition of some of it. RUST?!?!?!
I am torn on what to do. Order flange hex stainless bolts from fastenal online (none in stock) or just do stainless hex + washer setup from ACE Hardware. I will update with pics when I make up my mind. I really want flange stainless, but not sure if I want to pay $9 to ship them.

Last edited by ofspunk7; 07-12-2017 at 12:04 PM.
Reply
0
0
07-22-2014, 05:39 PM
#3
Junior Member
Thread Starter
Join Date: May 2014
Location: North St Paul, MN
Posts: 397
Total Cats: 25
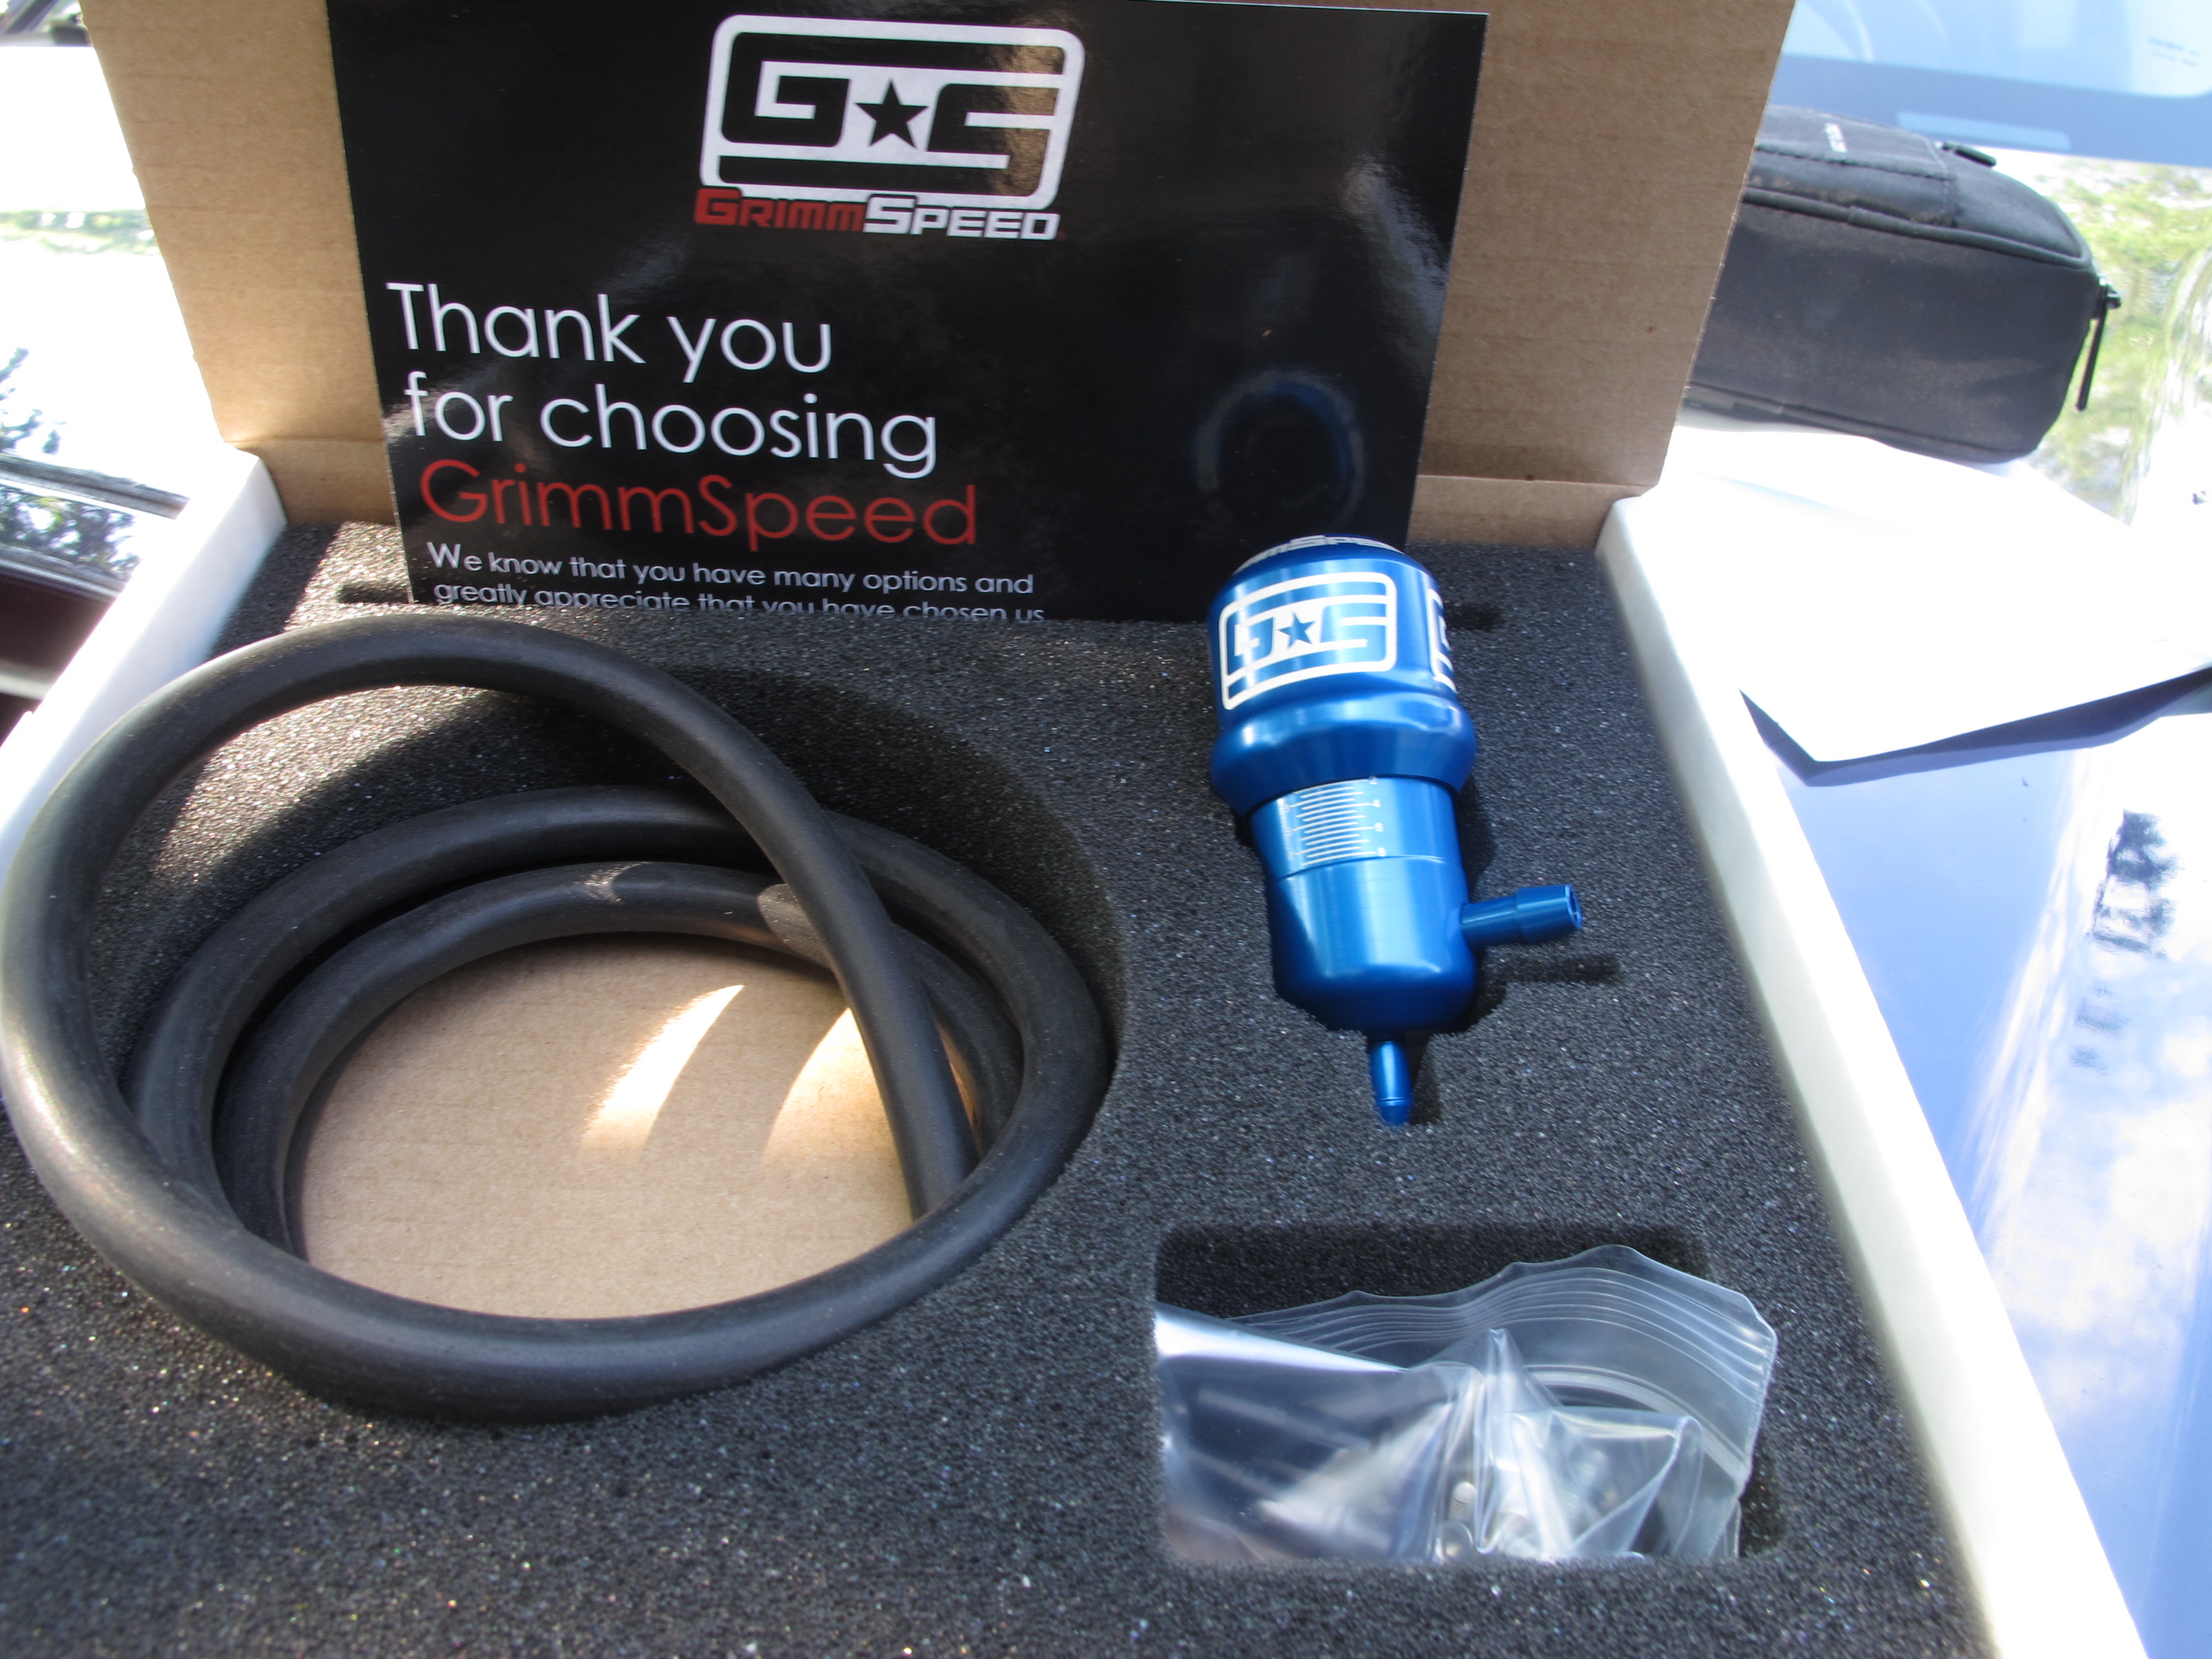
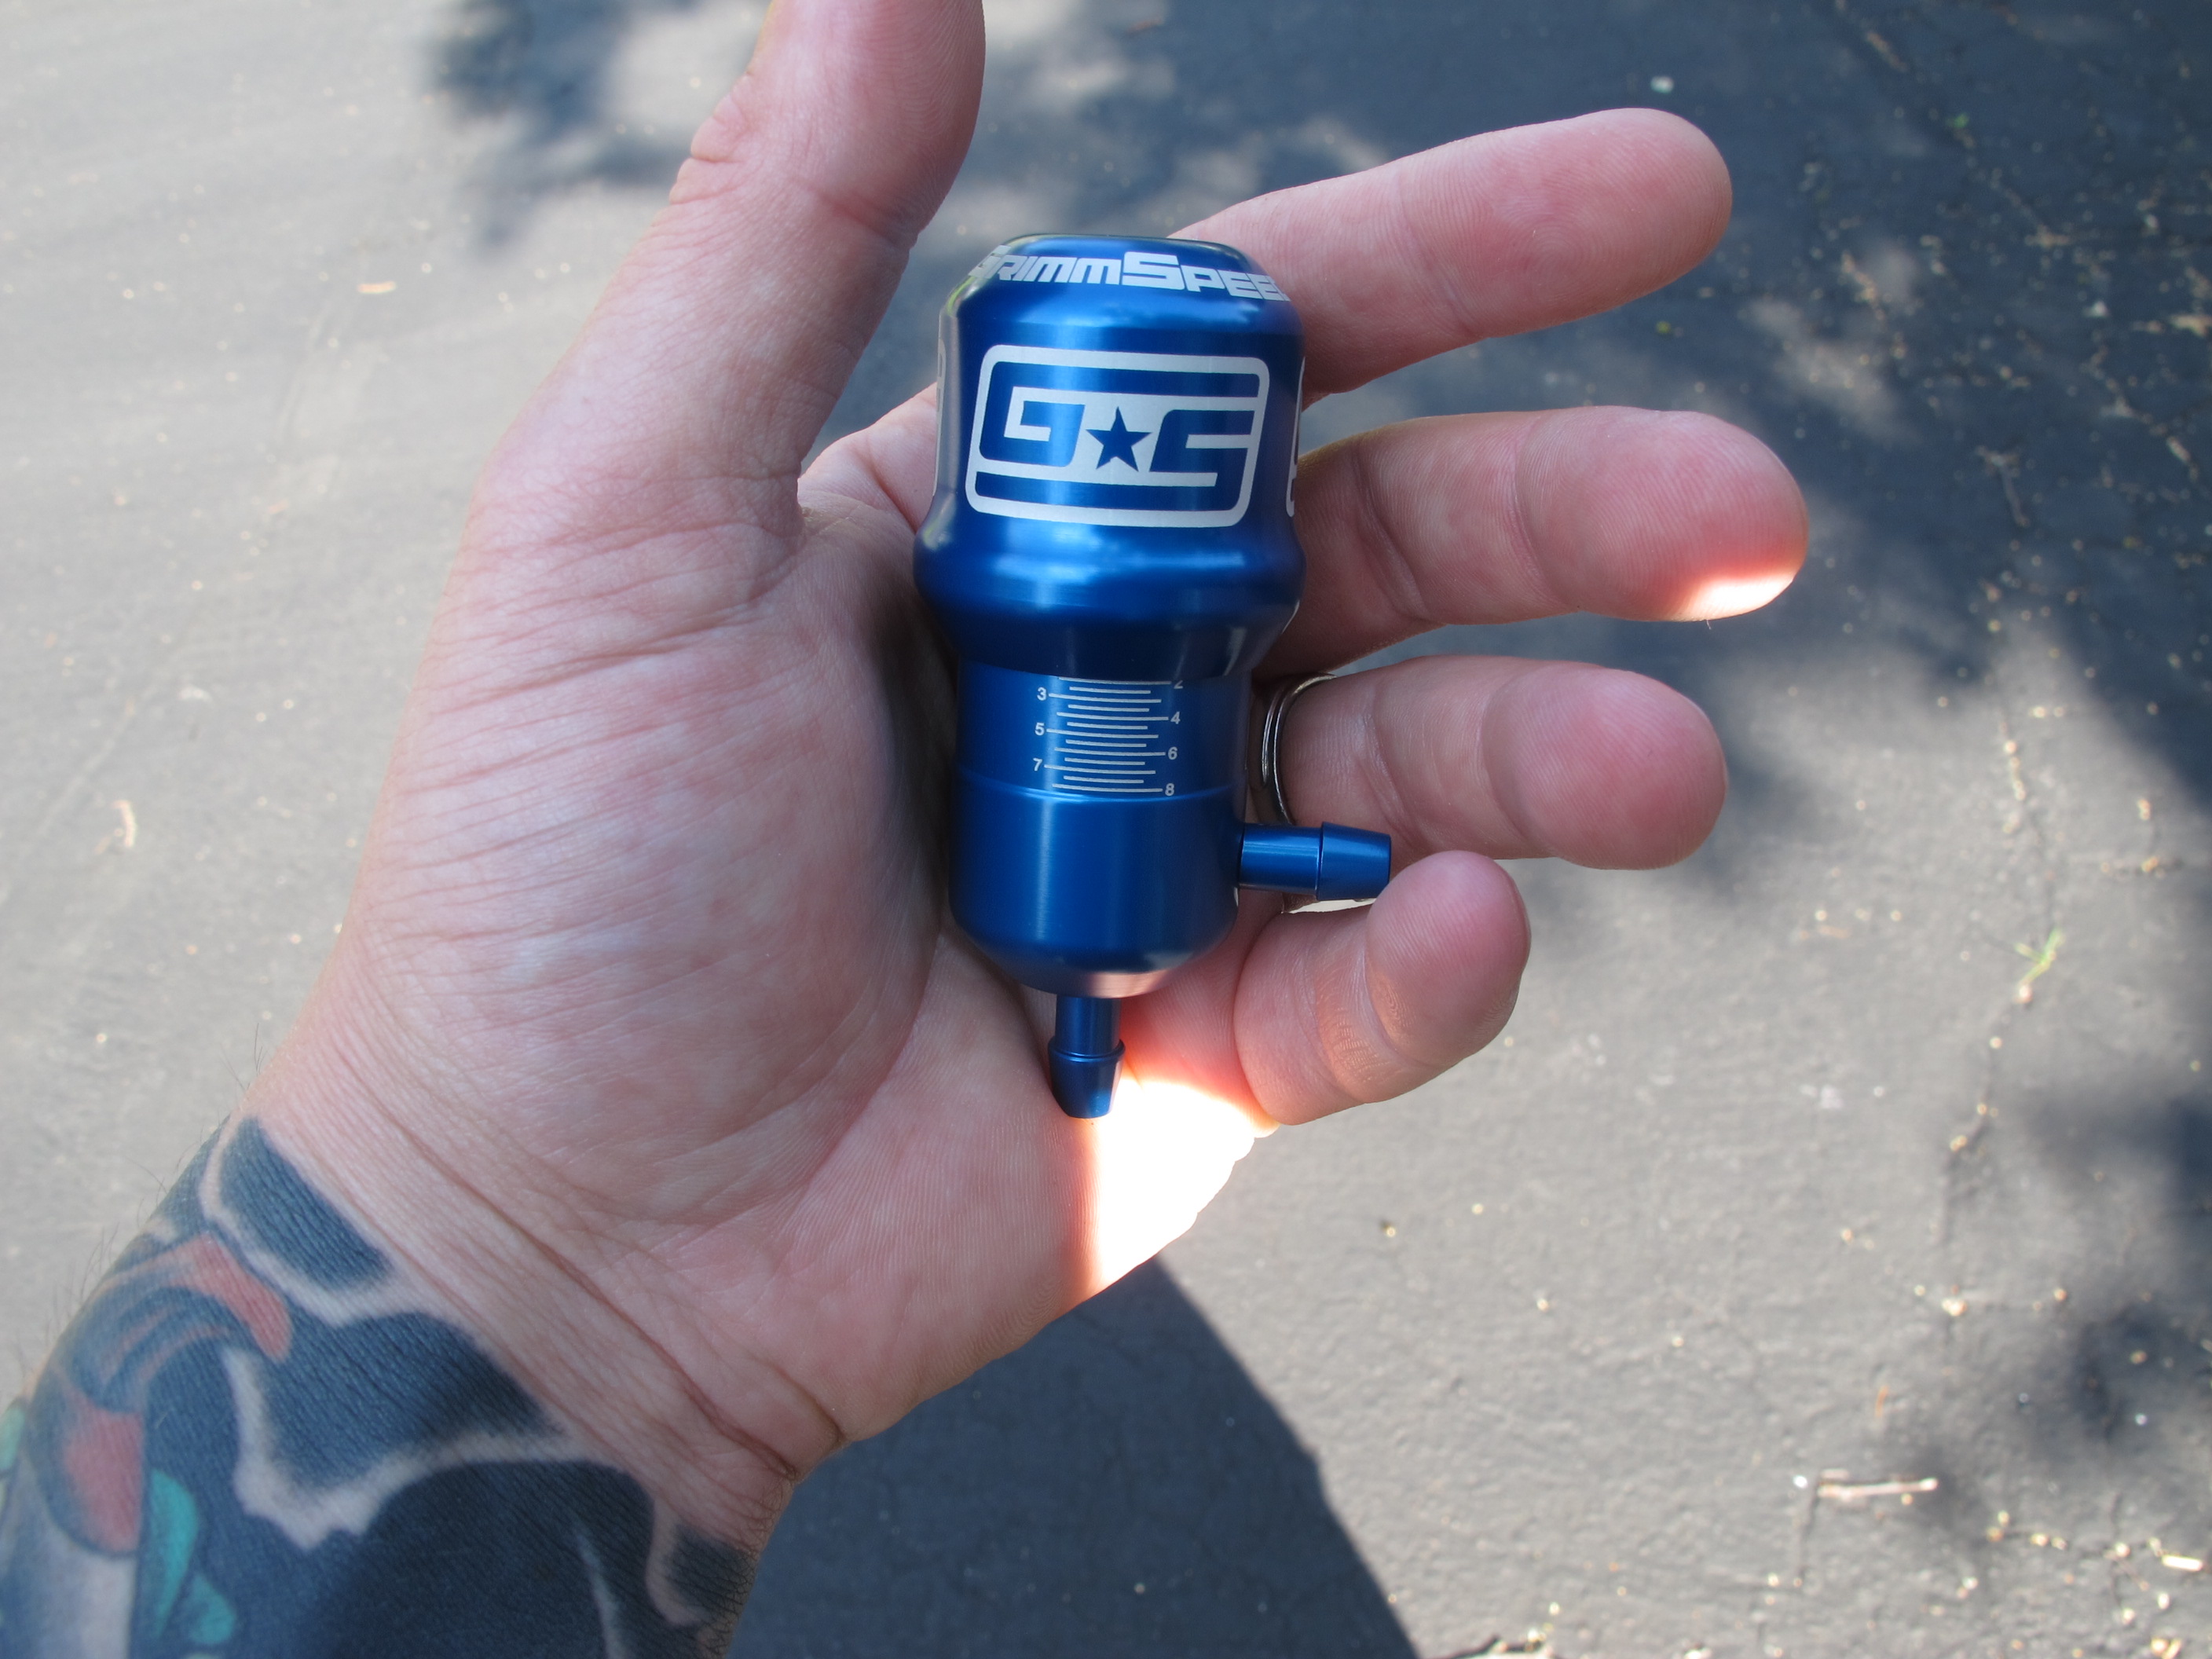
Stopped by GrimmSpeed on my way home from work and picked up this guy. I have always used their EBCS for my subies (LGT and WRX). It will be interesting to swap over to the MBC
[IMG]file:///C:\Users\erliend\AppData\Local\Temp\msohtmlclip1\0 1\clip_image001.png[/IMG]


[IMG]file:///C:\Users\erliend\AppData\Local\Temp\msohtmlclip1\0 1\clip_image001.png[/IMG]
Last edited by ofspunk7; 07-12-2017 at 12:13 PM.
Reply
0
0
07-22-2014, 09:59 PM
#4
Junior Member
Thread Starter
Join Date: May 2014
Location: North St Paul, MN
Posts: 397
Total Cats: 25
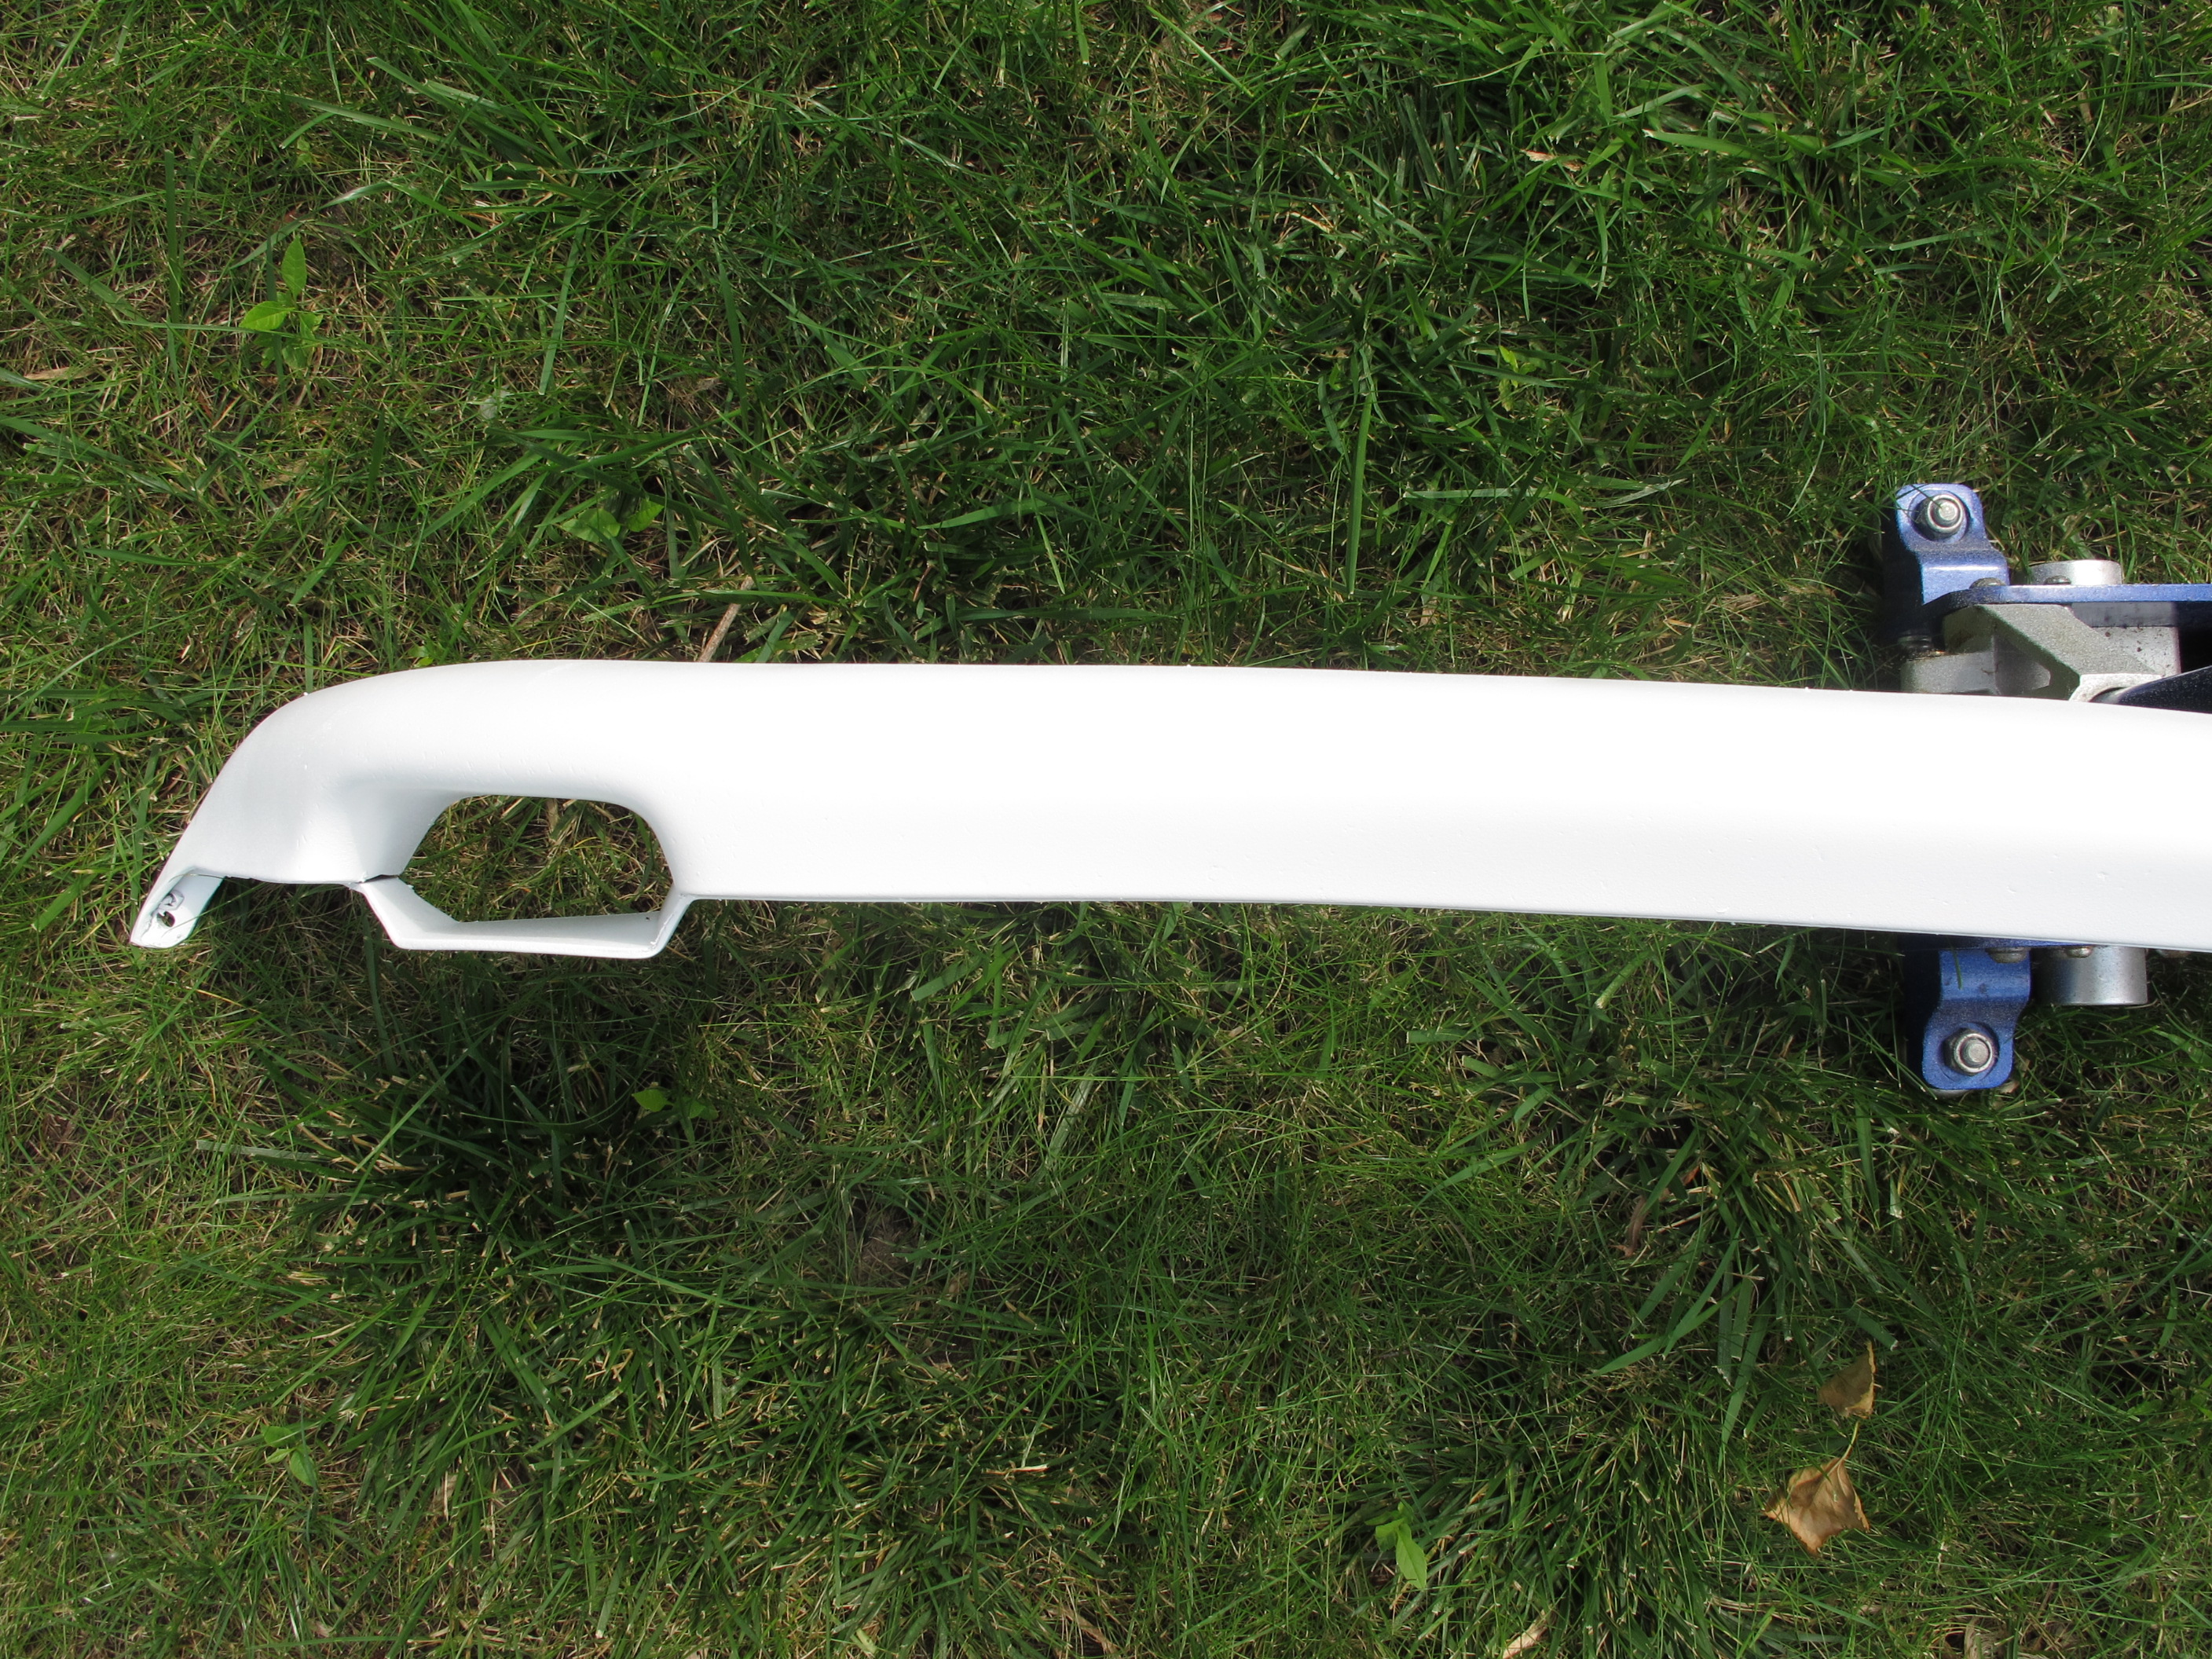
Ok picked up some stainless M6 bolts and 2 screws. Put the lip on, I am very happy with the white lip. Now I have to take care of the OEM bumper issues....
Oh I also picked up a gold MAZDA vinyl for the front bumper. I was missing mine.

Oh I also picked up a gold MAZDA vinyl for the front bumper. I was missing mine.


Last edited by ofspunk7; 07-12-2017 at 12:15 PM.
Reply
0
0
07-24-2014, 06:04 PM
#5
Junior Member
Thread Starter
Join Date: May 2014
Location: North St Paul, MN
Posts: 397
Total Cats: 25
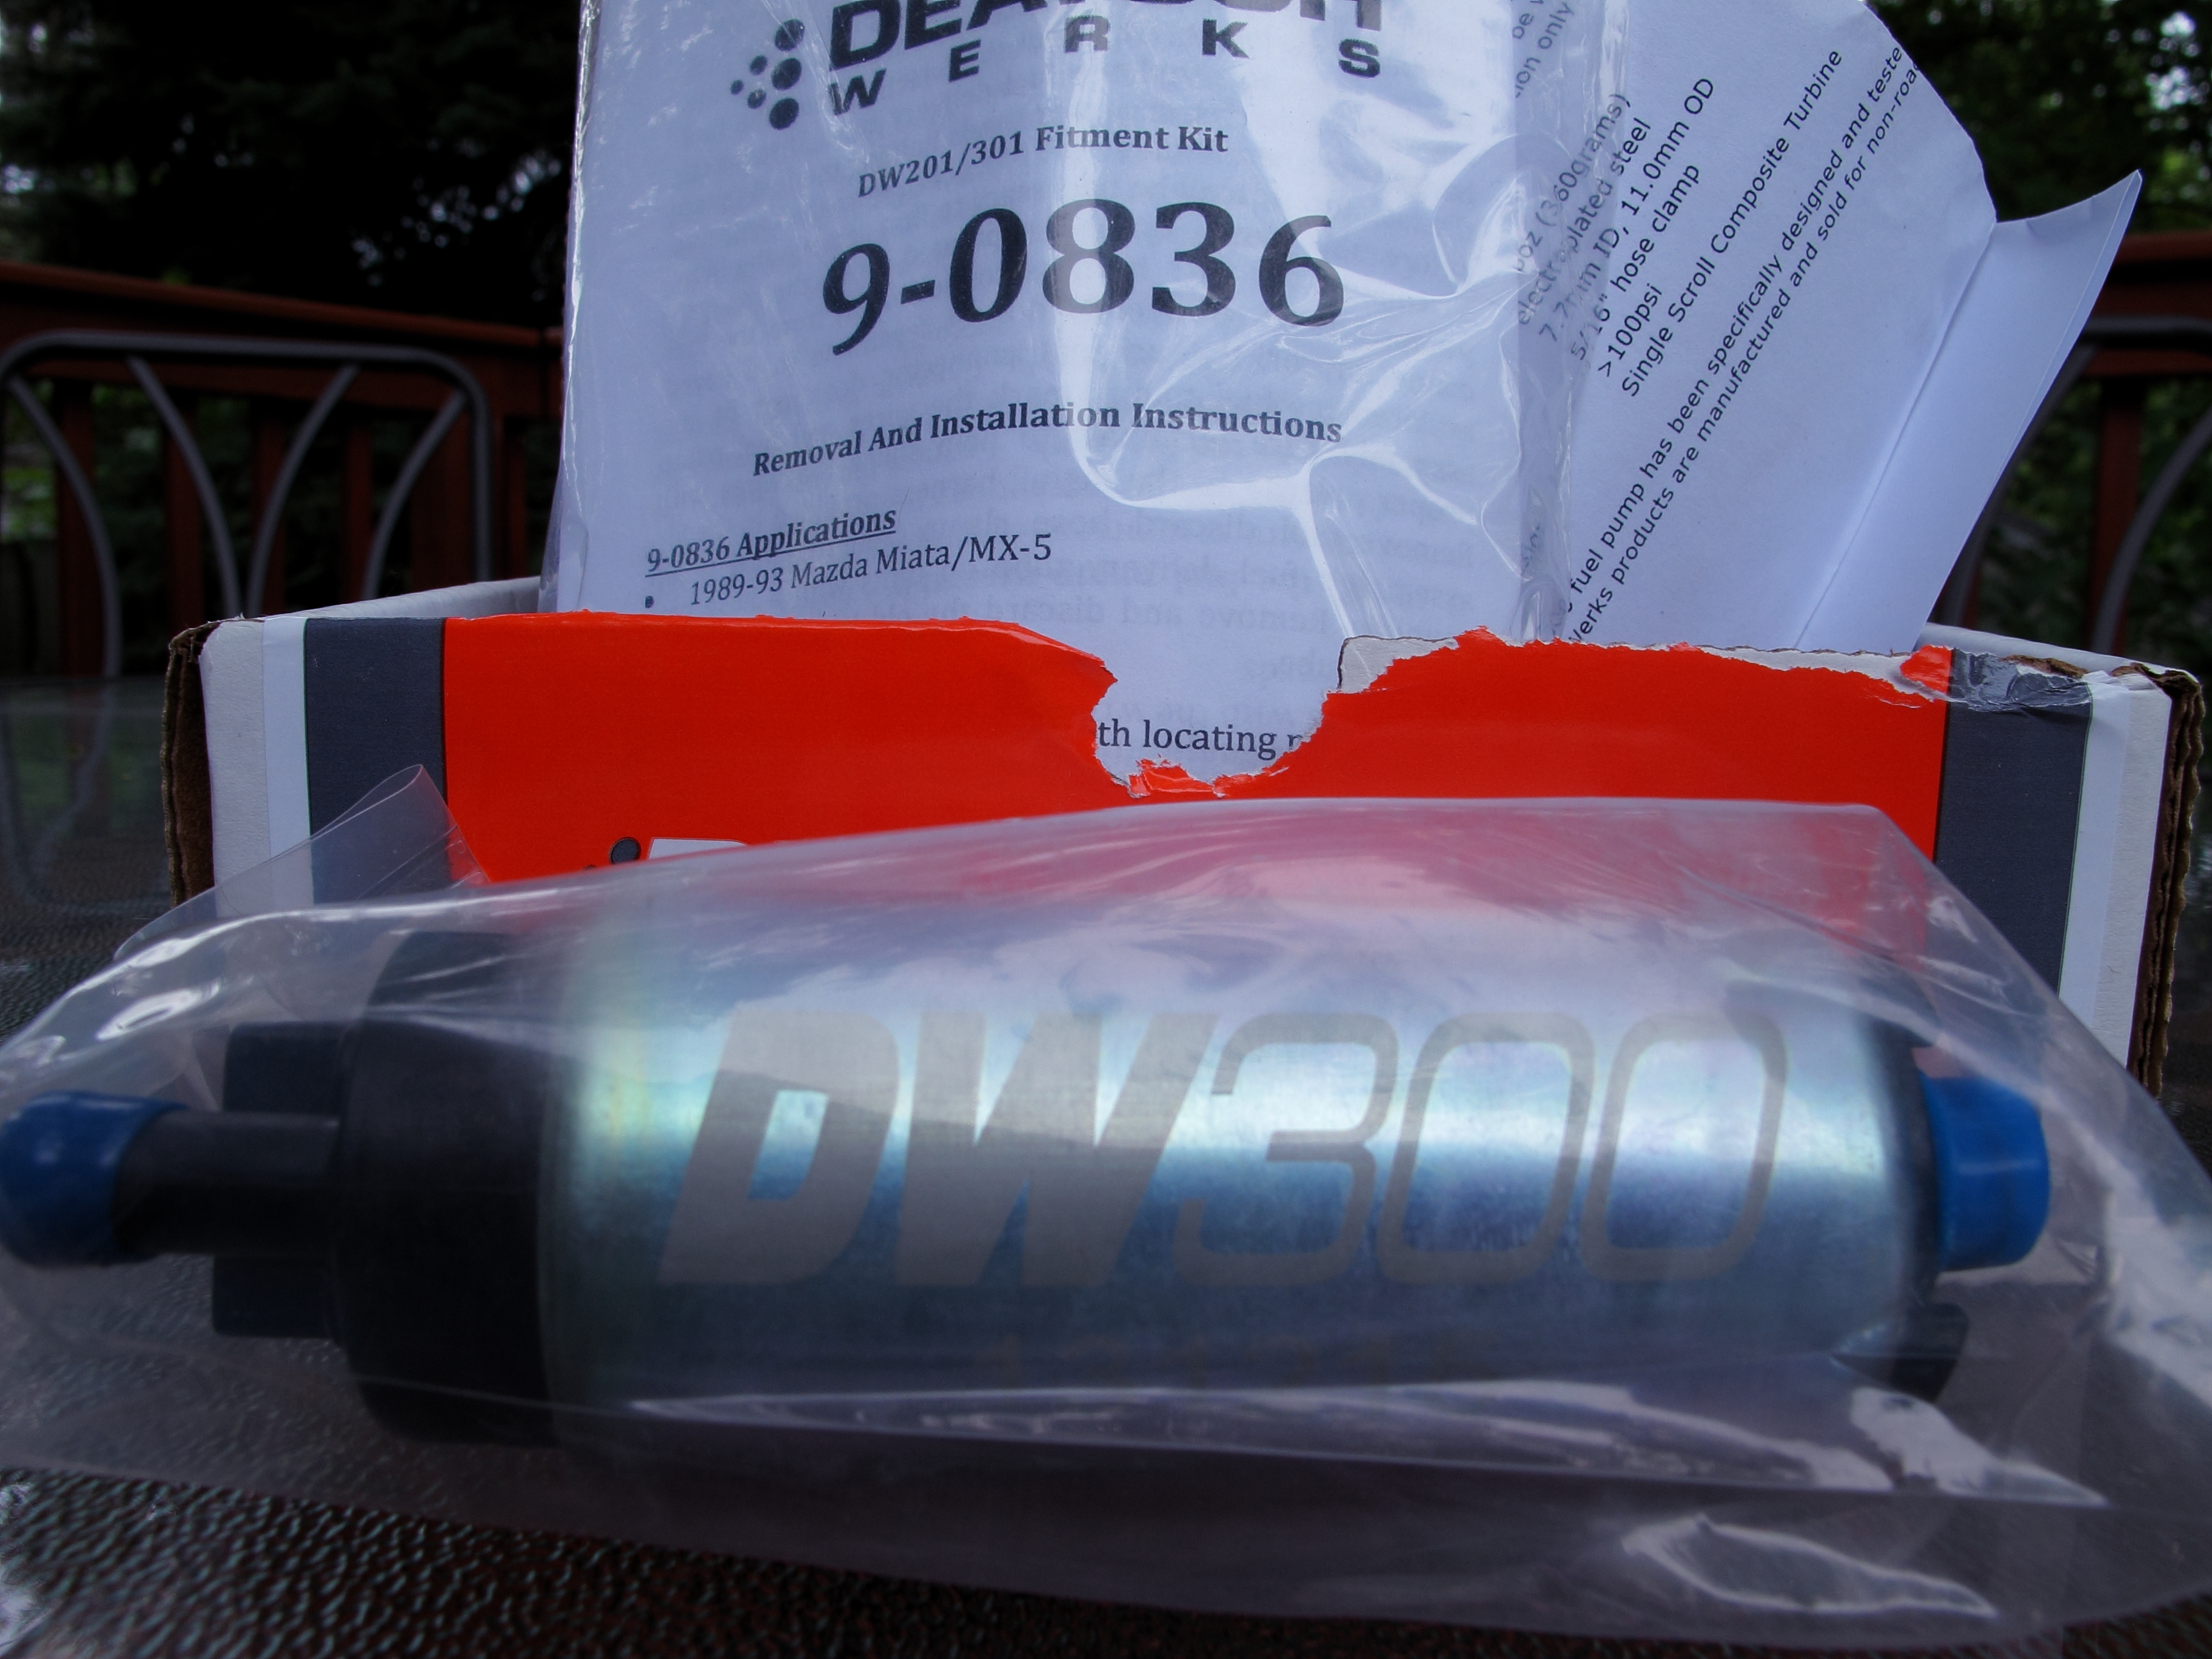
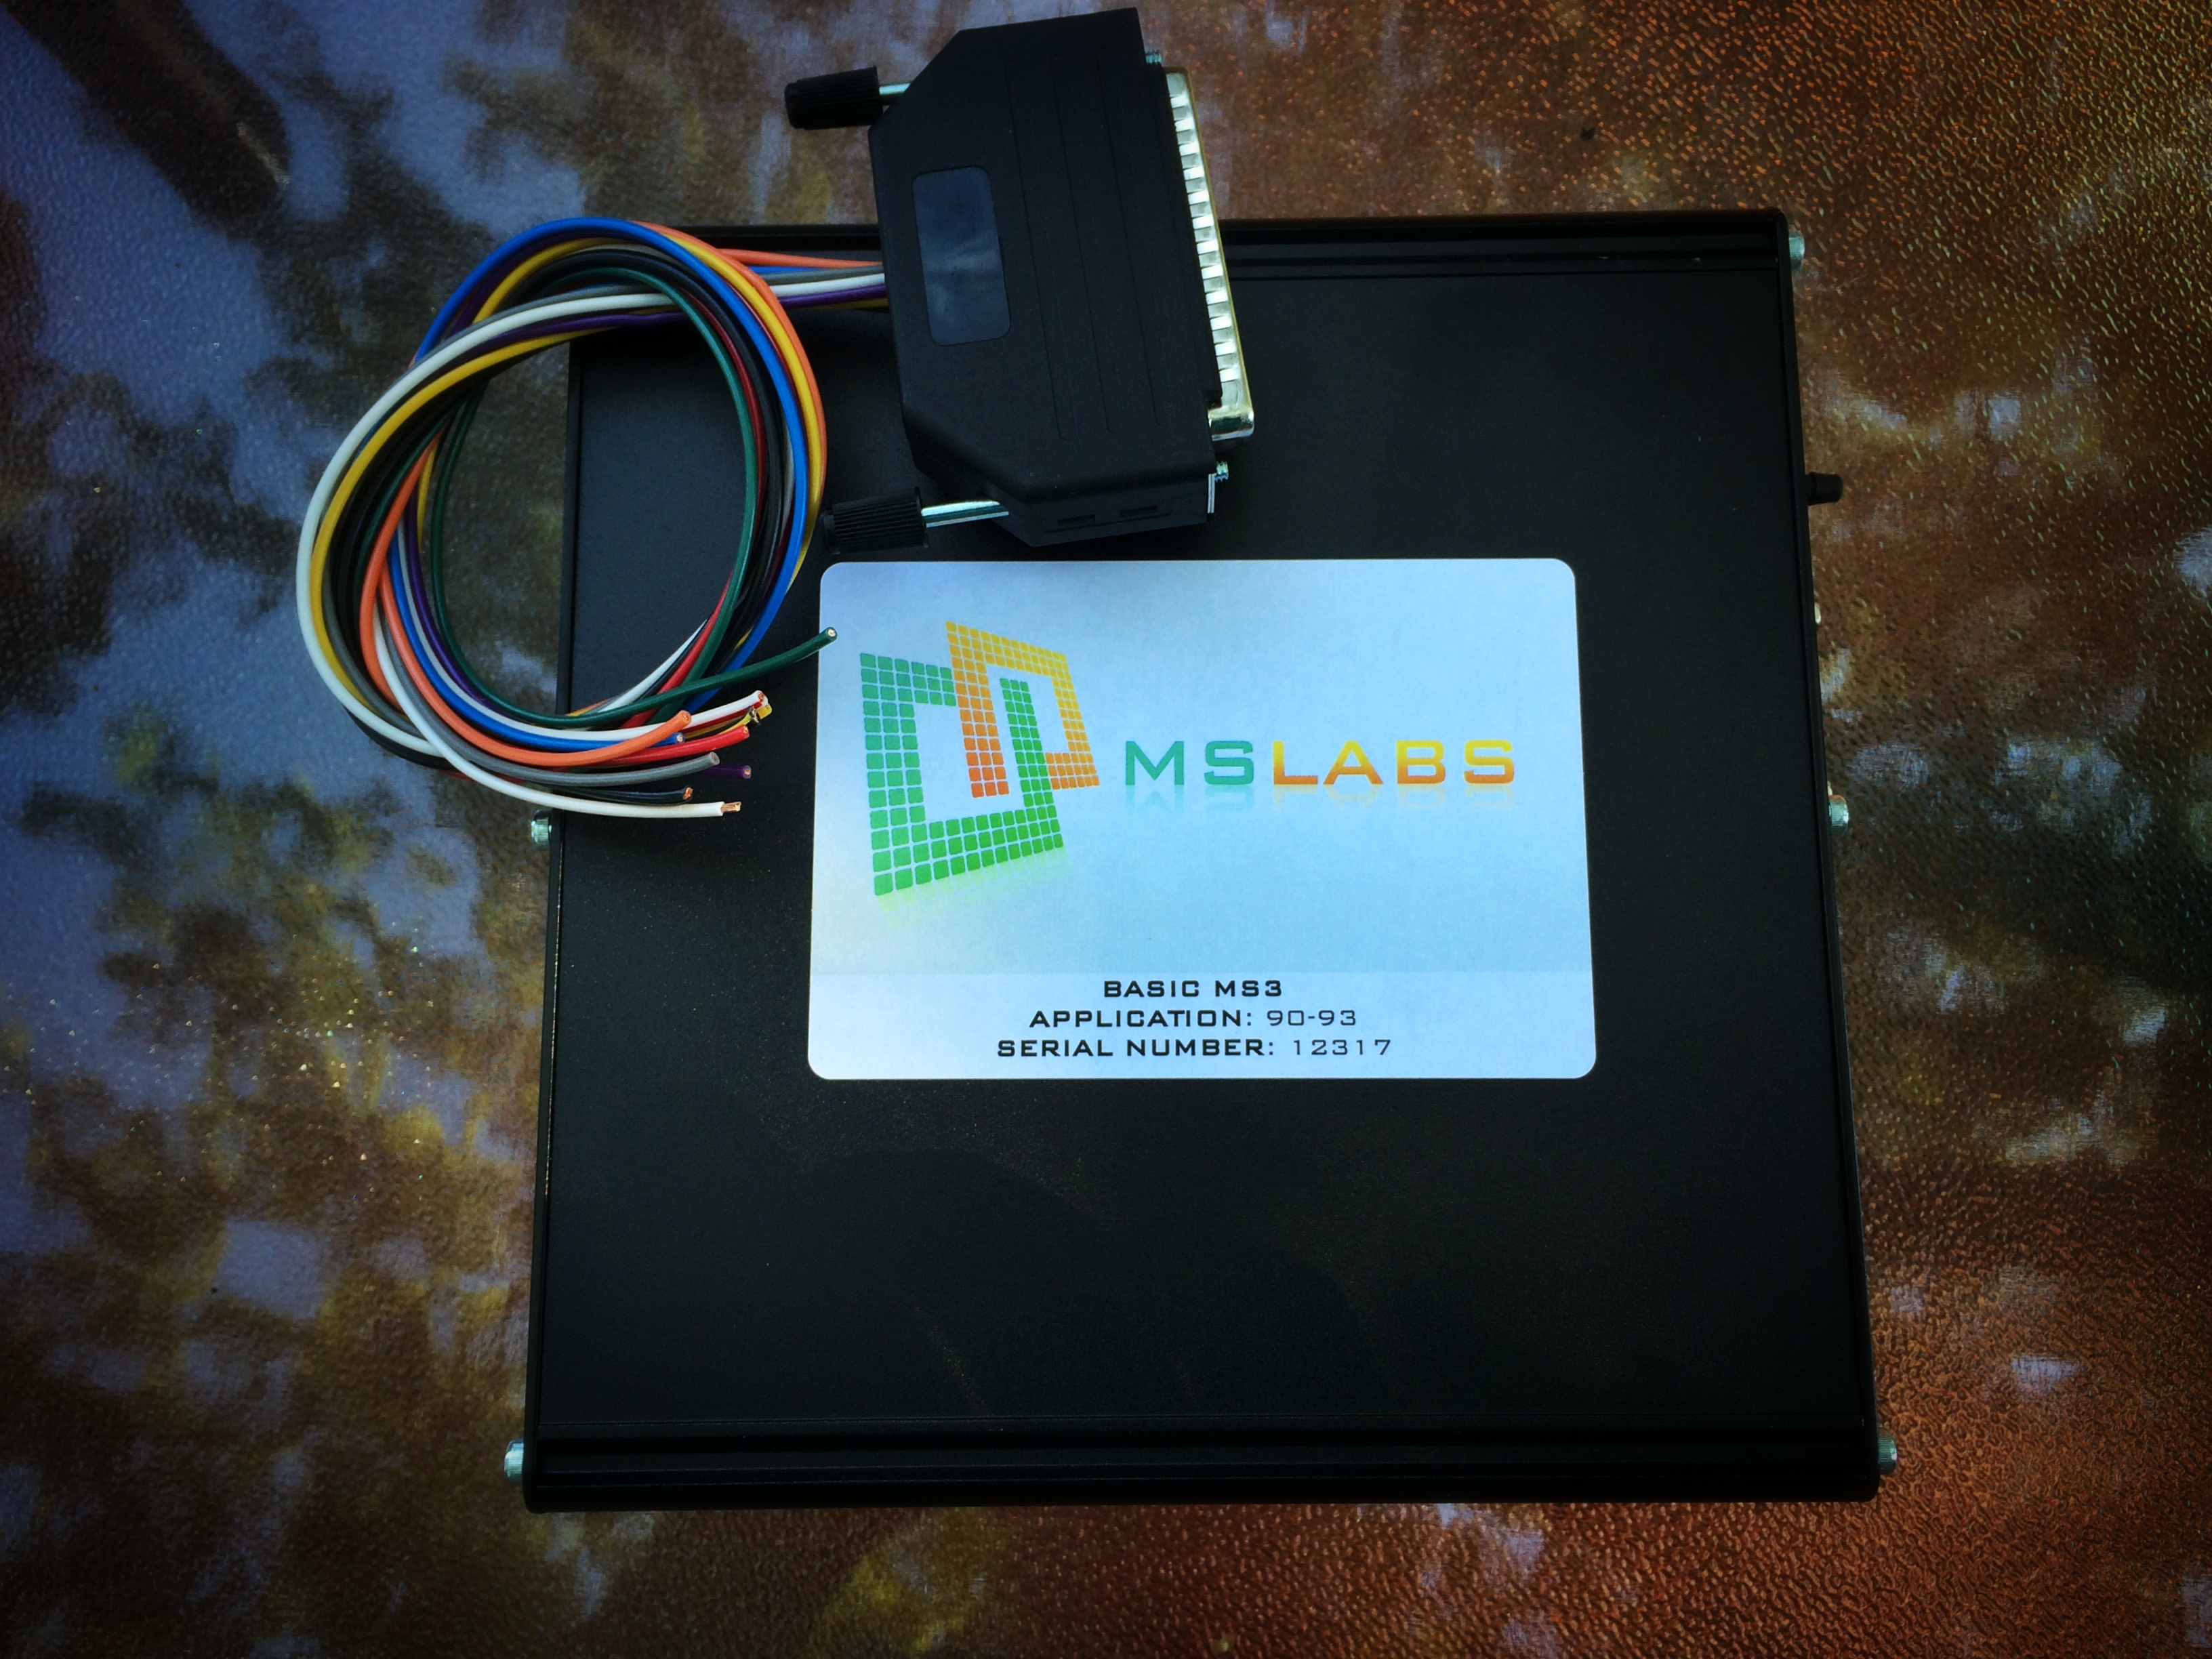
My MS3PNP is built and will be shipped soon. 
The final part that I had to order for the swap showed up at my buddies house today... he owns the Subie shop and I ordered through the vendor account. I called him when I was leaving work to ask if he got the FedEX, expecting to drop by on my way home. He asked if I was at home or work, I said work, he told me it had not come yet. I told him I would check the tracking when I got home to figure out the new ETA. When I got home I went to grab the mail and homeboy had slid the box into my mailbox. He knew I was sitting in traffic and he had a good hour to swing by my house and pull a fast one on me.... Ninja style.
The final part that I had to order for the swap showed up at my buddies house today... he owns the Subie shop and I ordered through the vendor account. I called him when I was leaving work to ask if he got the FedEX, expecting to drop by on my way home. He asked if I was at home or work, I said work, he told me it had not come yet. I told him I would check the tracking when I got home to figure out the new ETA. When I got home I went to grab the mail and homeboy had slid the box into my mailbox. He knew I was sitting in traffic and he had a good hour to swing by my house and pull a fast one on me.... Ninja style.


Last edited by ofspunk7; 07-12-2017 at 12:16 PM.
Reply
0
0
08-13-2014, 02:22 PM
#6
Junior Member
Thread Starter
Join Date: May 2014
Location: North St Paul, MN
Posts: 397
Total Cats: 25
Got a package from across the pond today. I am excited to see what this thing can do. The potential and things I have seen others do has me excited.

Last edited by ofspunk7; 07-12-2017 at 12:17 PM.
Reply
0
0
 08-15-2014, 10:07 AM
#8
Junior Member
Thread Starter
Join Date: May 2014
Location: North St Paul, MN
Posts: 397
Total Cats: 25
Interesting, I didn't realize MS3 had a boost controller. I still need to read up on the manual, I am not up to speed on what the MS3 can do. I wonder if there will be a benefit to running both. I picked up a MBC because that is what is currently on the engine setup we are swapping over in the next few weeks. I didn't even think to look into the differences between the MS1 he has and the MS3 I picked up for boost control.
Thanks for the heads up
Thanks for the heads up
Reply
0
0
 08-15-2014, 11:14 AM
#10
Junior Member
Thread Starter
Join Date: May 2014
Location: North St Paul, MN
Posts: 397
Total Cats: 25
That is a great question. I didn't really look into it. I took the pics and packed it back up. I figured I had a manual to read to educate myself on the MS3 unit. I will shoot a PM to Reverant to see why he tossed it in there.
Reverant Edit: "The wires are to wire-in accessories (wideband, EBC, switches) that don't go through the stock harness."
Reverant Edit: "The wires are to wire-in accessories (wideband, EBC, switches) that don't go through the stock harness."
Last edited by ofspunk7; 08-15-2014 at 01:39 PM.
Reply
0
0
08-26-2014, 08:32 PM
#11
Junior Member
Thread Starter
Join Date: May 2014
Location: North St Paul, MN
Posts: 397
Total Cats: 25
Well my cousin got married this past weekend, which means time to schedule some weekends for the swap. I am getting excited!
The new AEM Wideband with the 4.9 sensor just arrived today. Our vendor just got them in at the end of last week. I am pretty excited to have the final gauge that I wanted for the swap. I also still have funds left over for the dyno... lets hope nothing pops up during the swap to gobble up those funds.
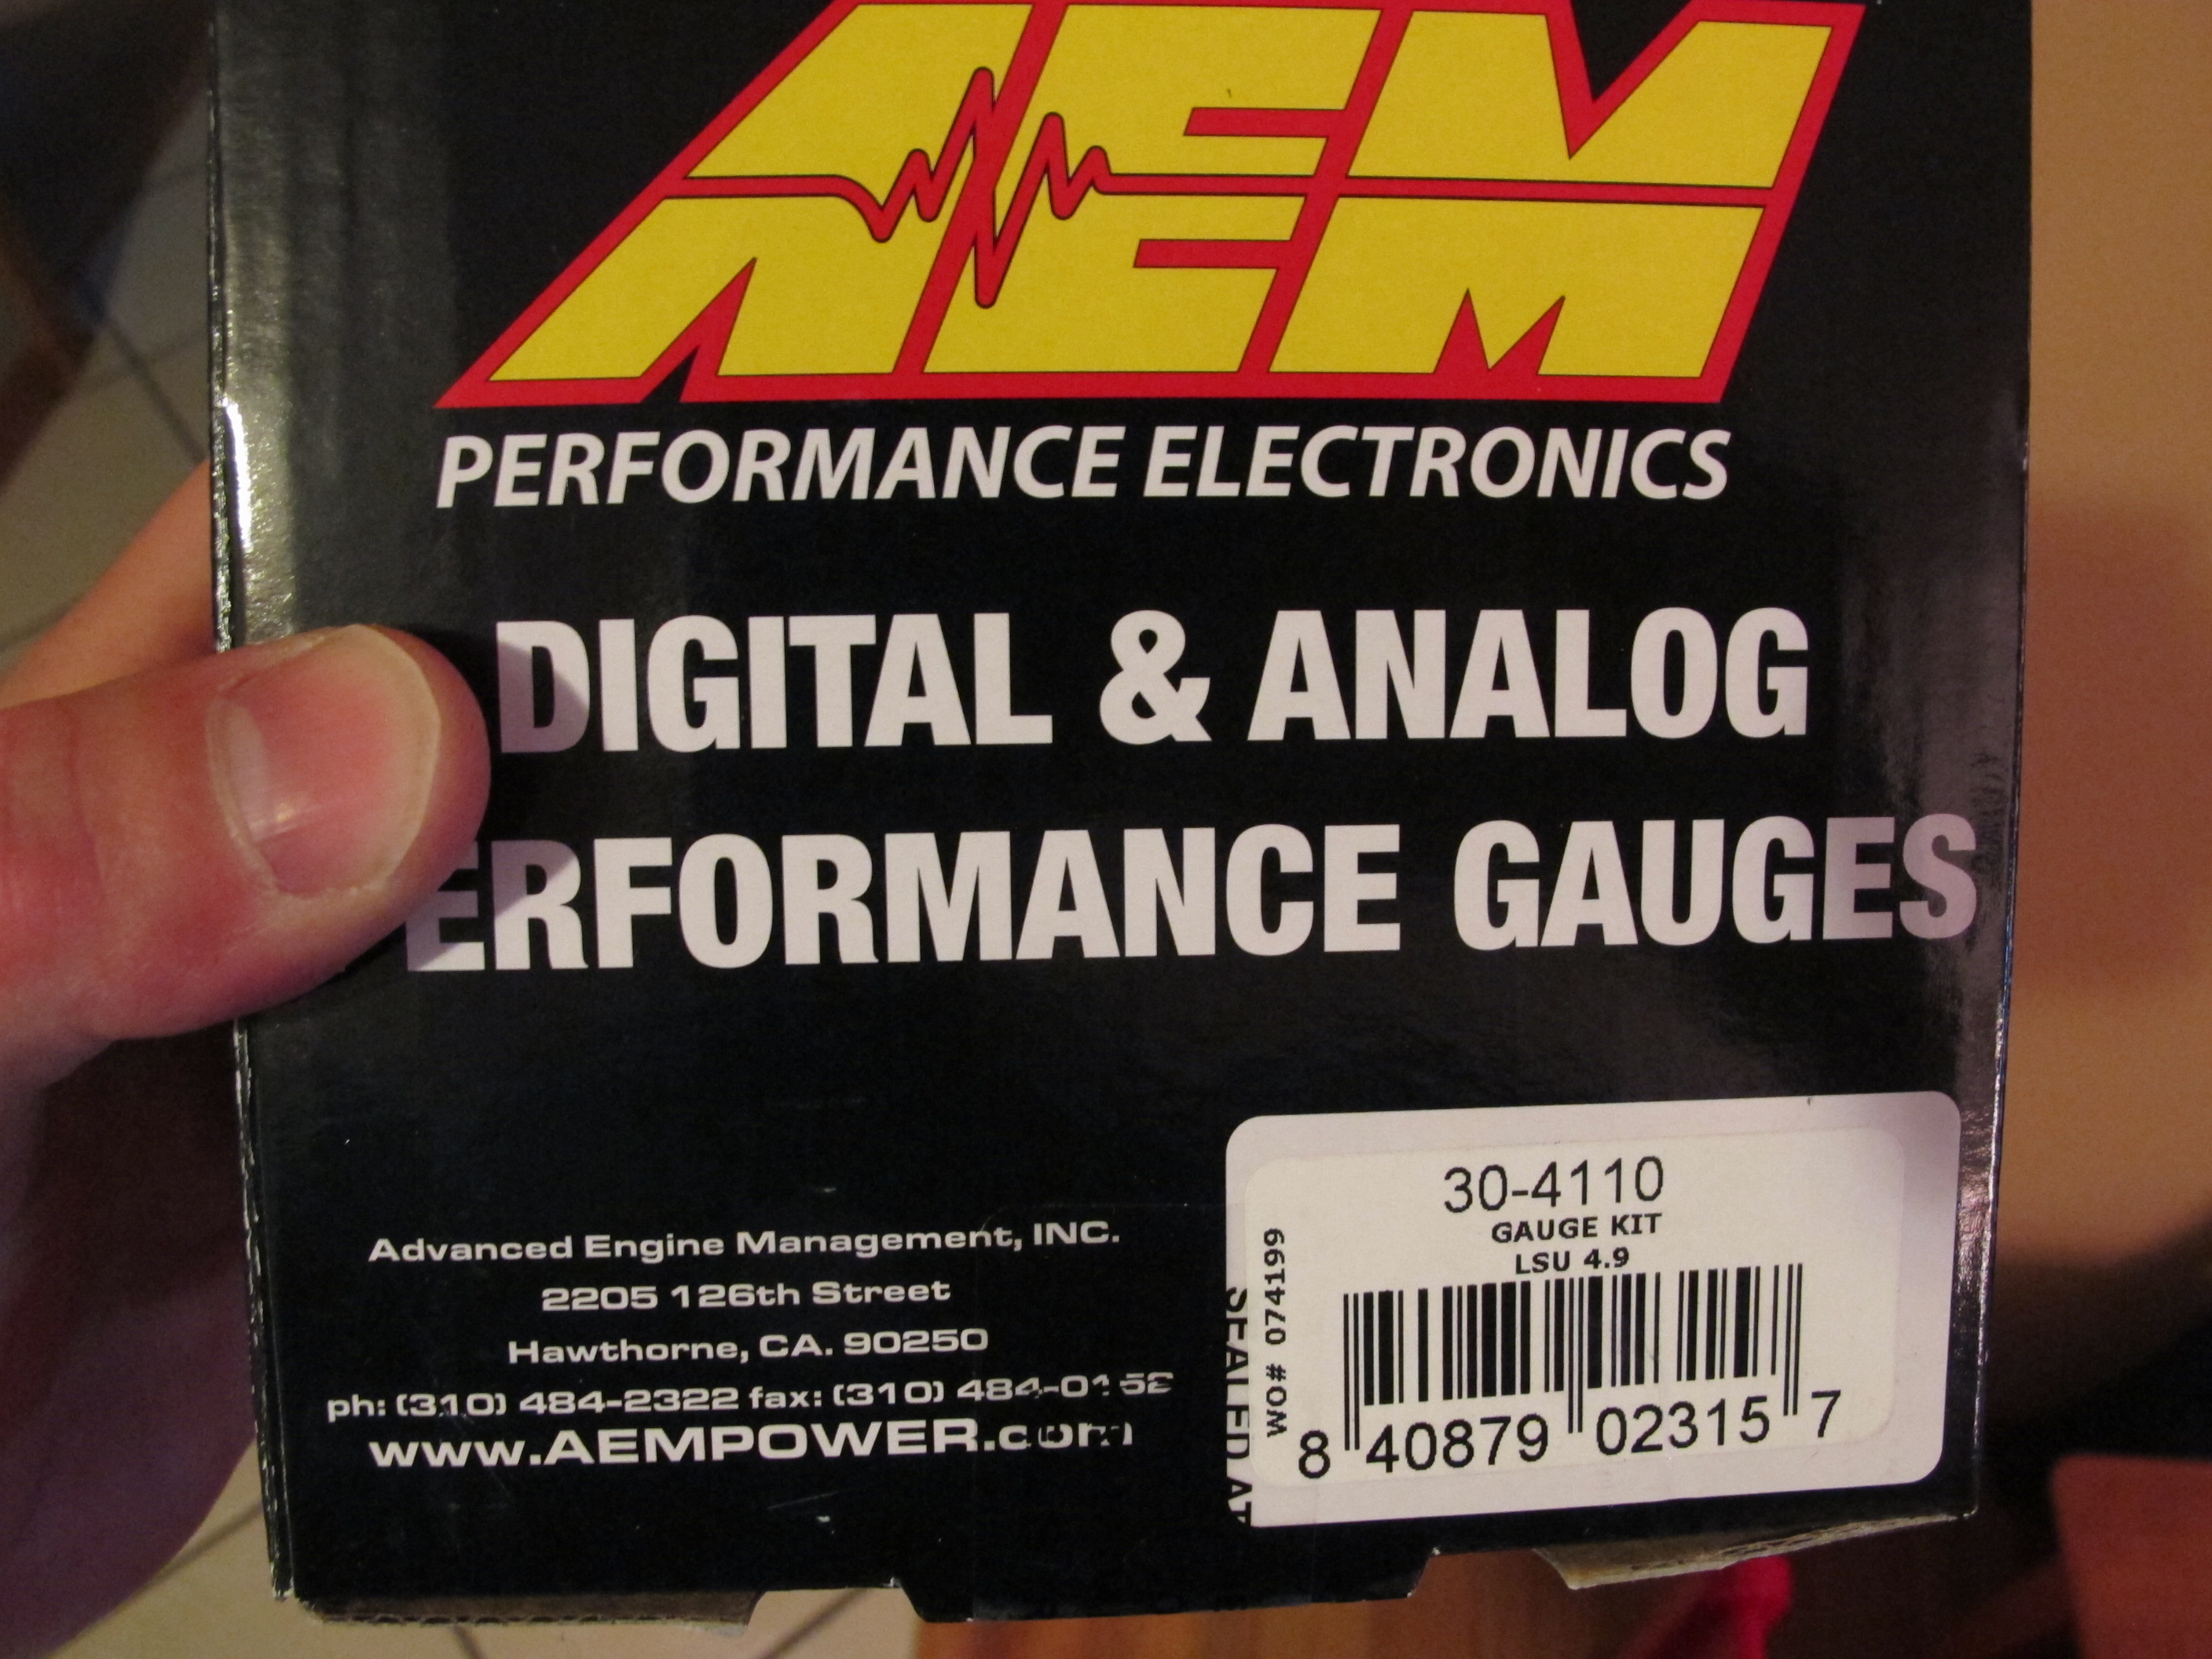
Inside of the box was ripped but the seal was still there so it must have been on the AEM side. The interior wires were wrapped differently than the 4.2 gauge that we installed on my WRX a few months back. I wonder why they changed their process? Also I should have taken a pic. I will remember when I start the install.
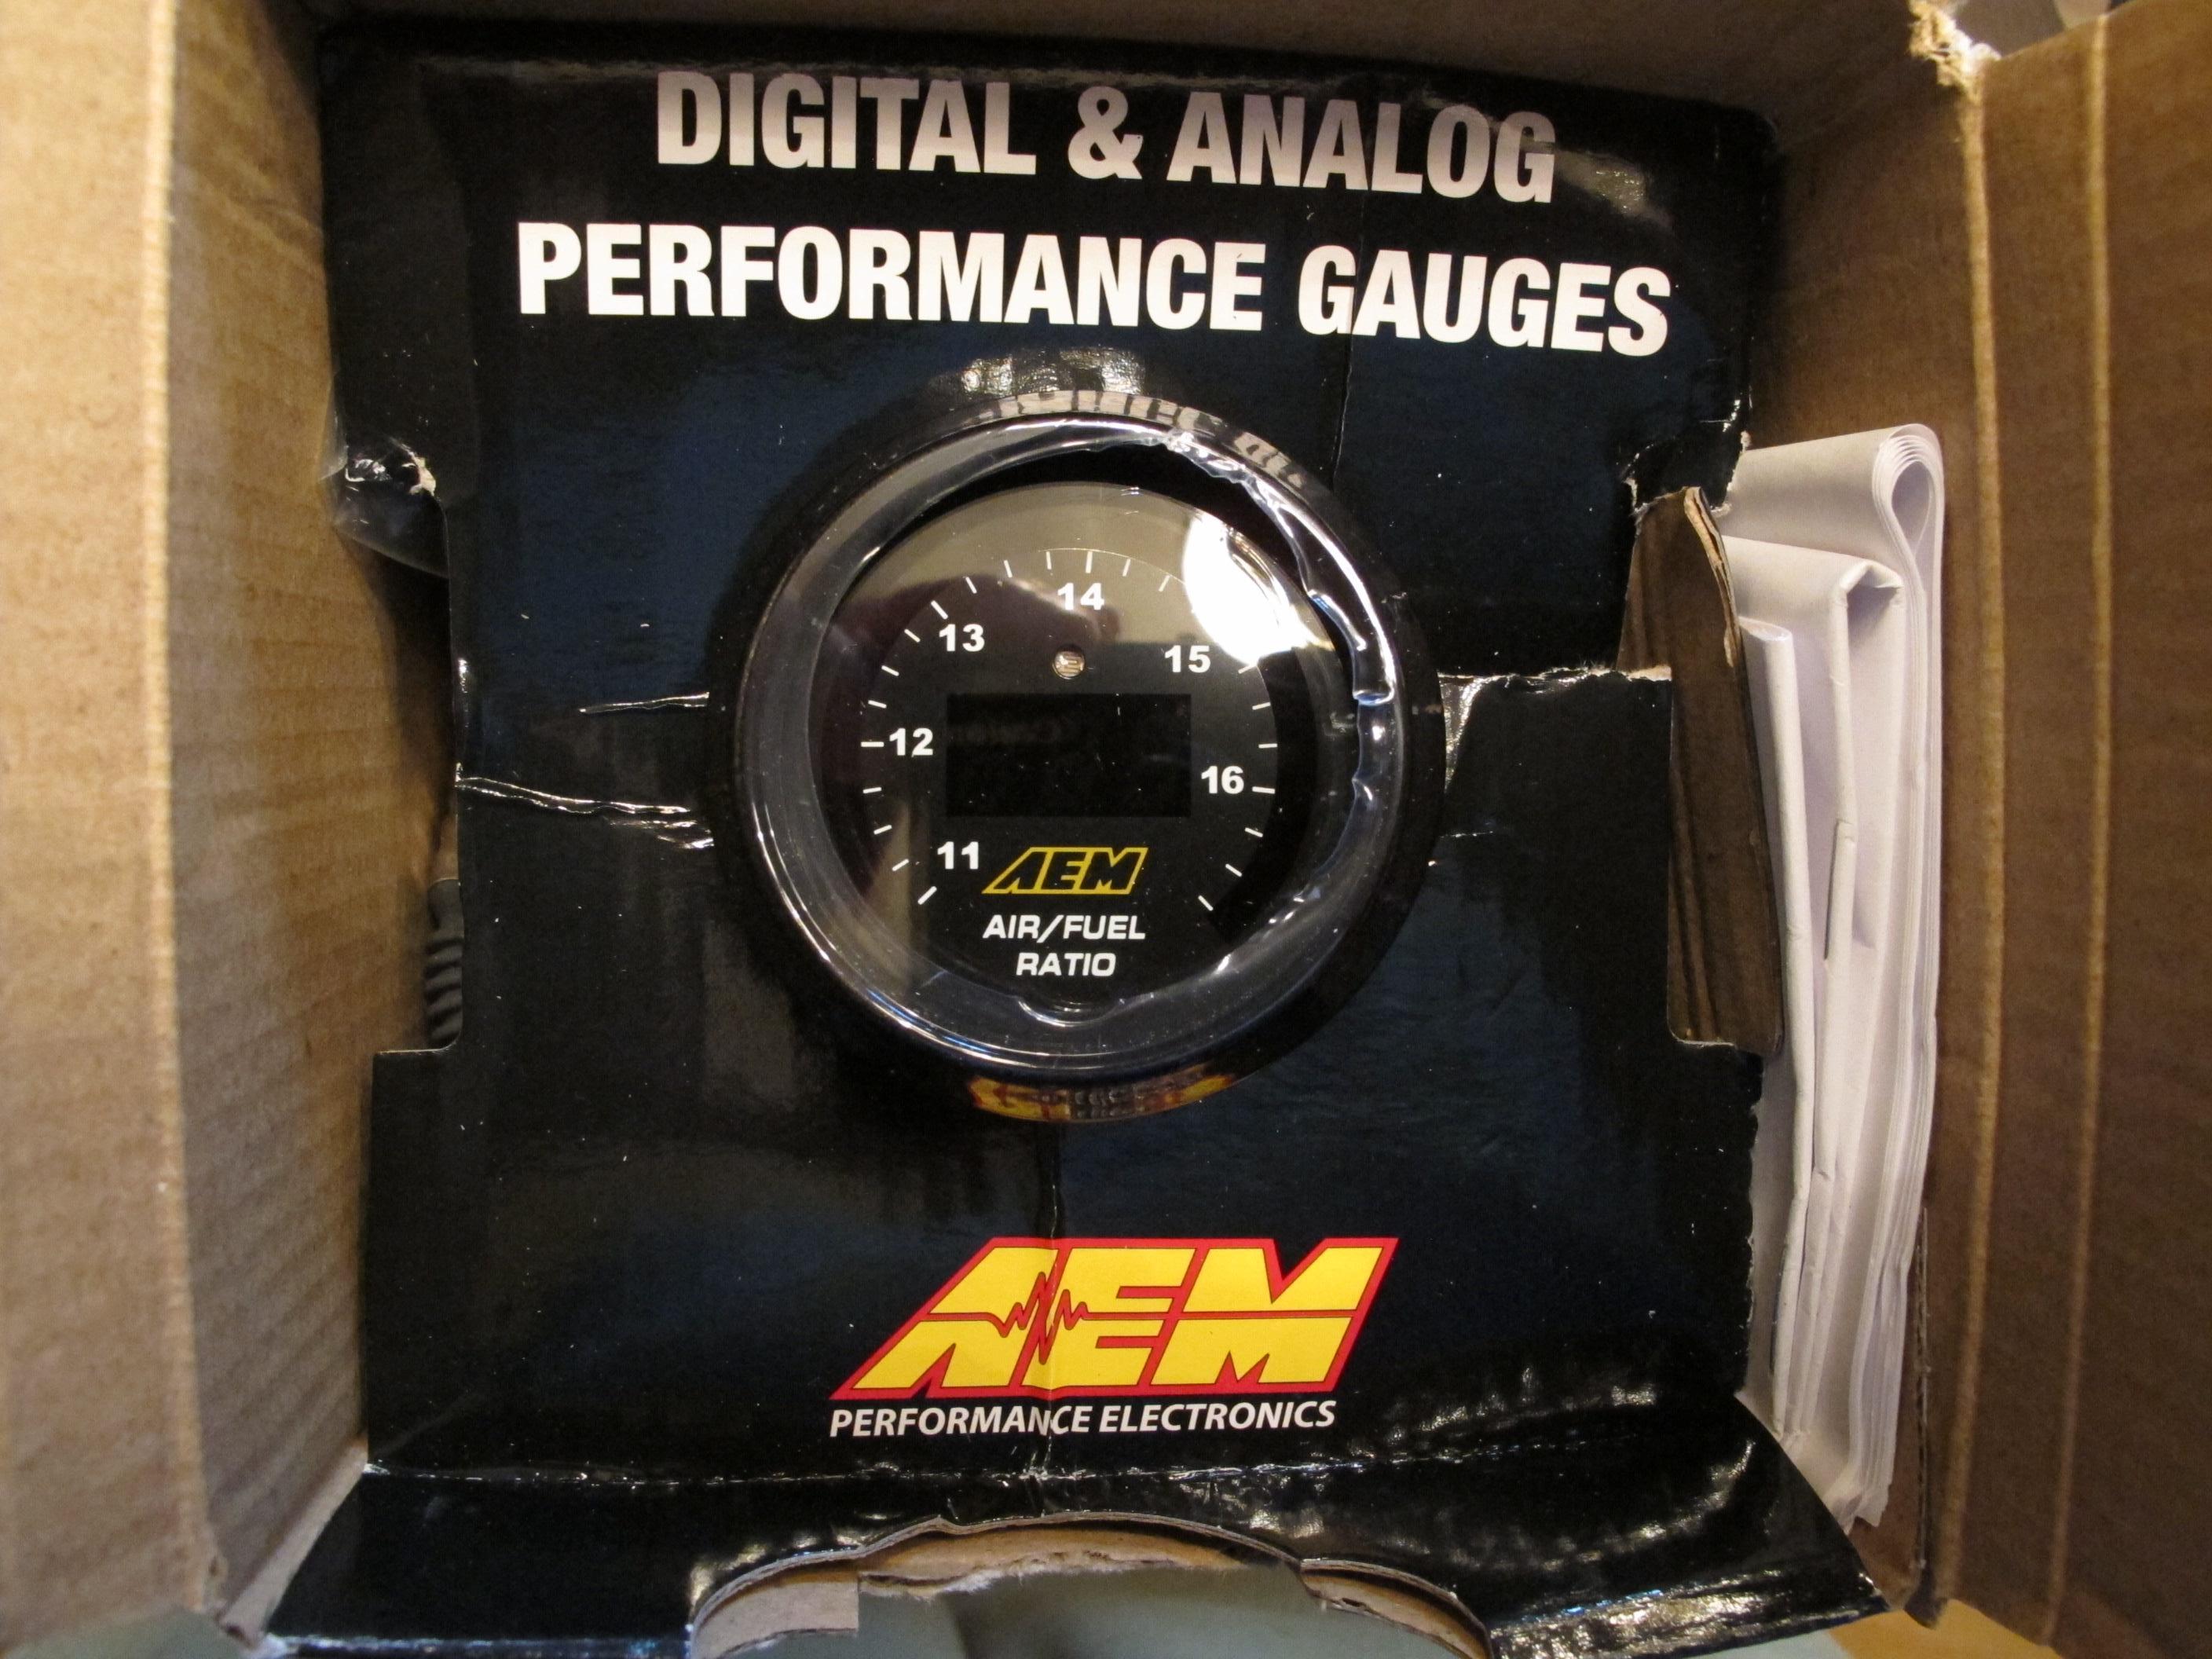

Last edited by ofspunk7; 07-12-2017 at 12:18 PM.
Reply
0
0
08-26-2014, 08:56 PM
#12
Junior Member
Thread Starter
Join Date: May 2014
Location: North St Paul, MN
Posts: 397
Total Cats: 25
I did also do a little side project the other weekend while I was on-call (and locked down to my pager and laptop).
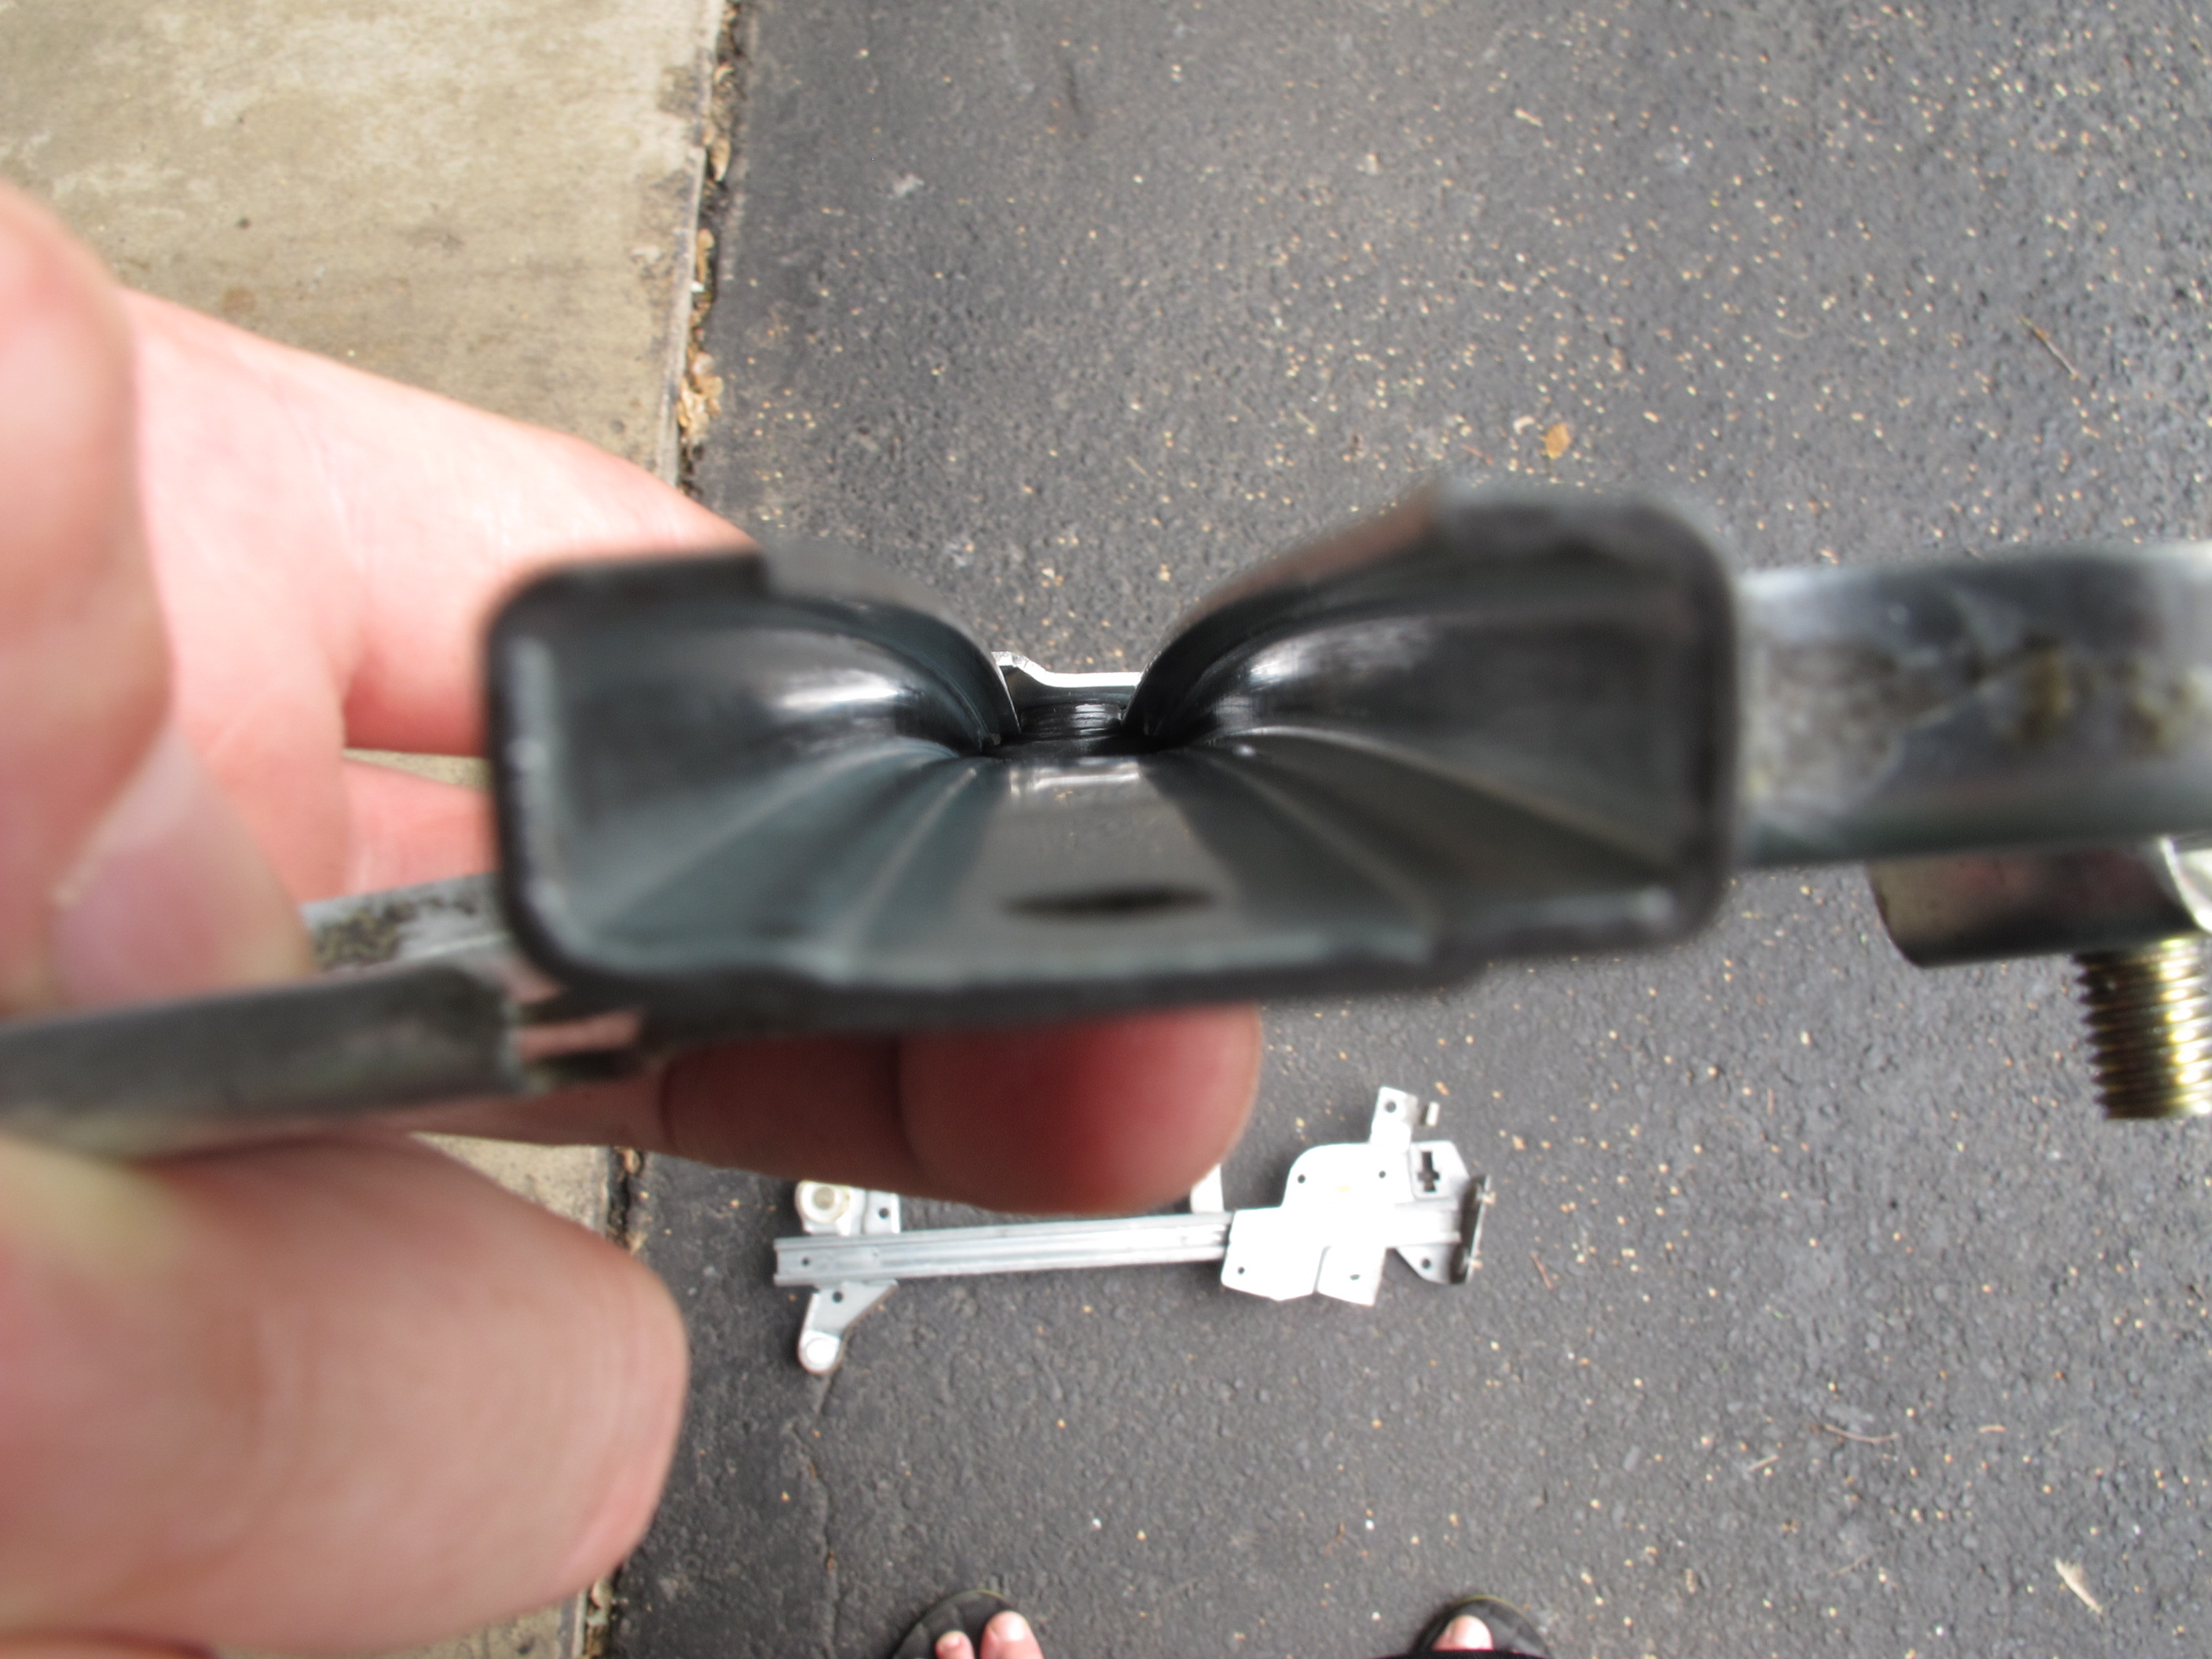
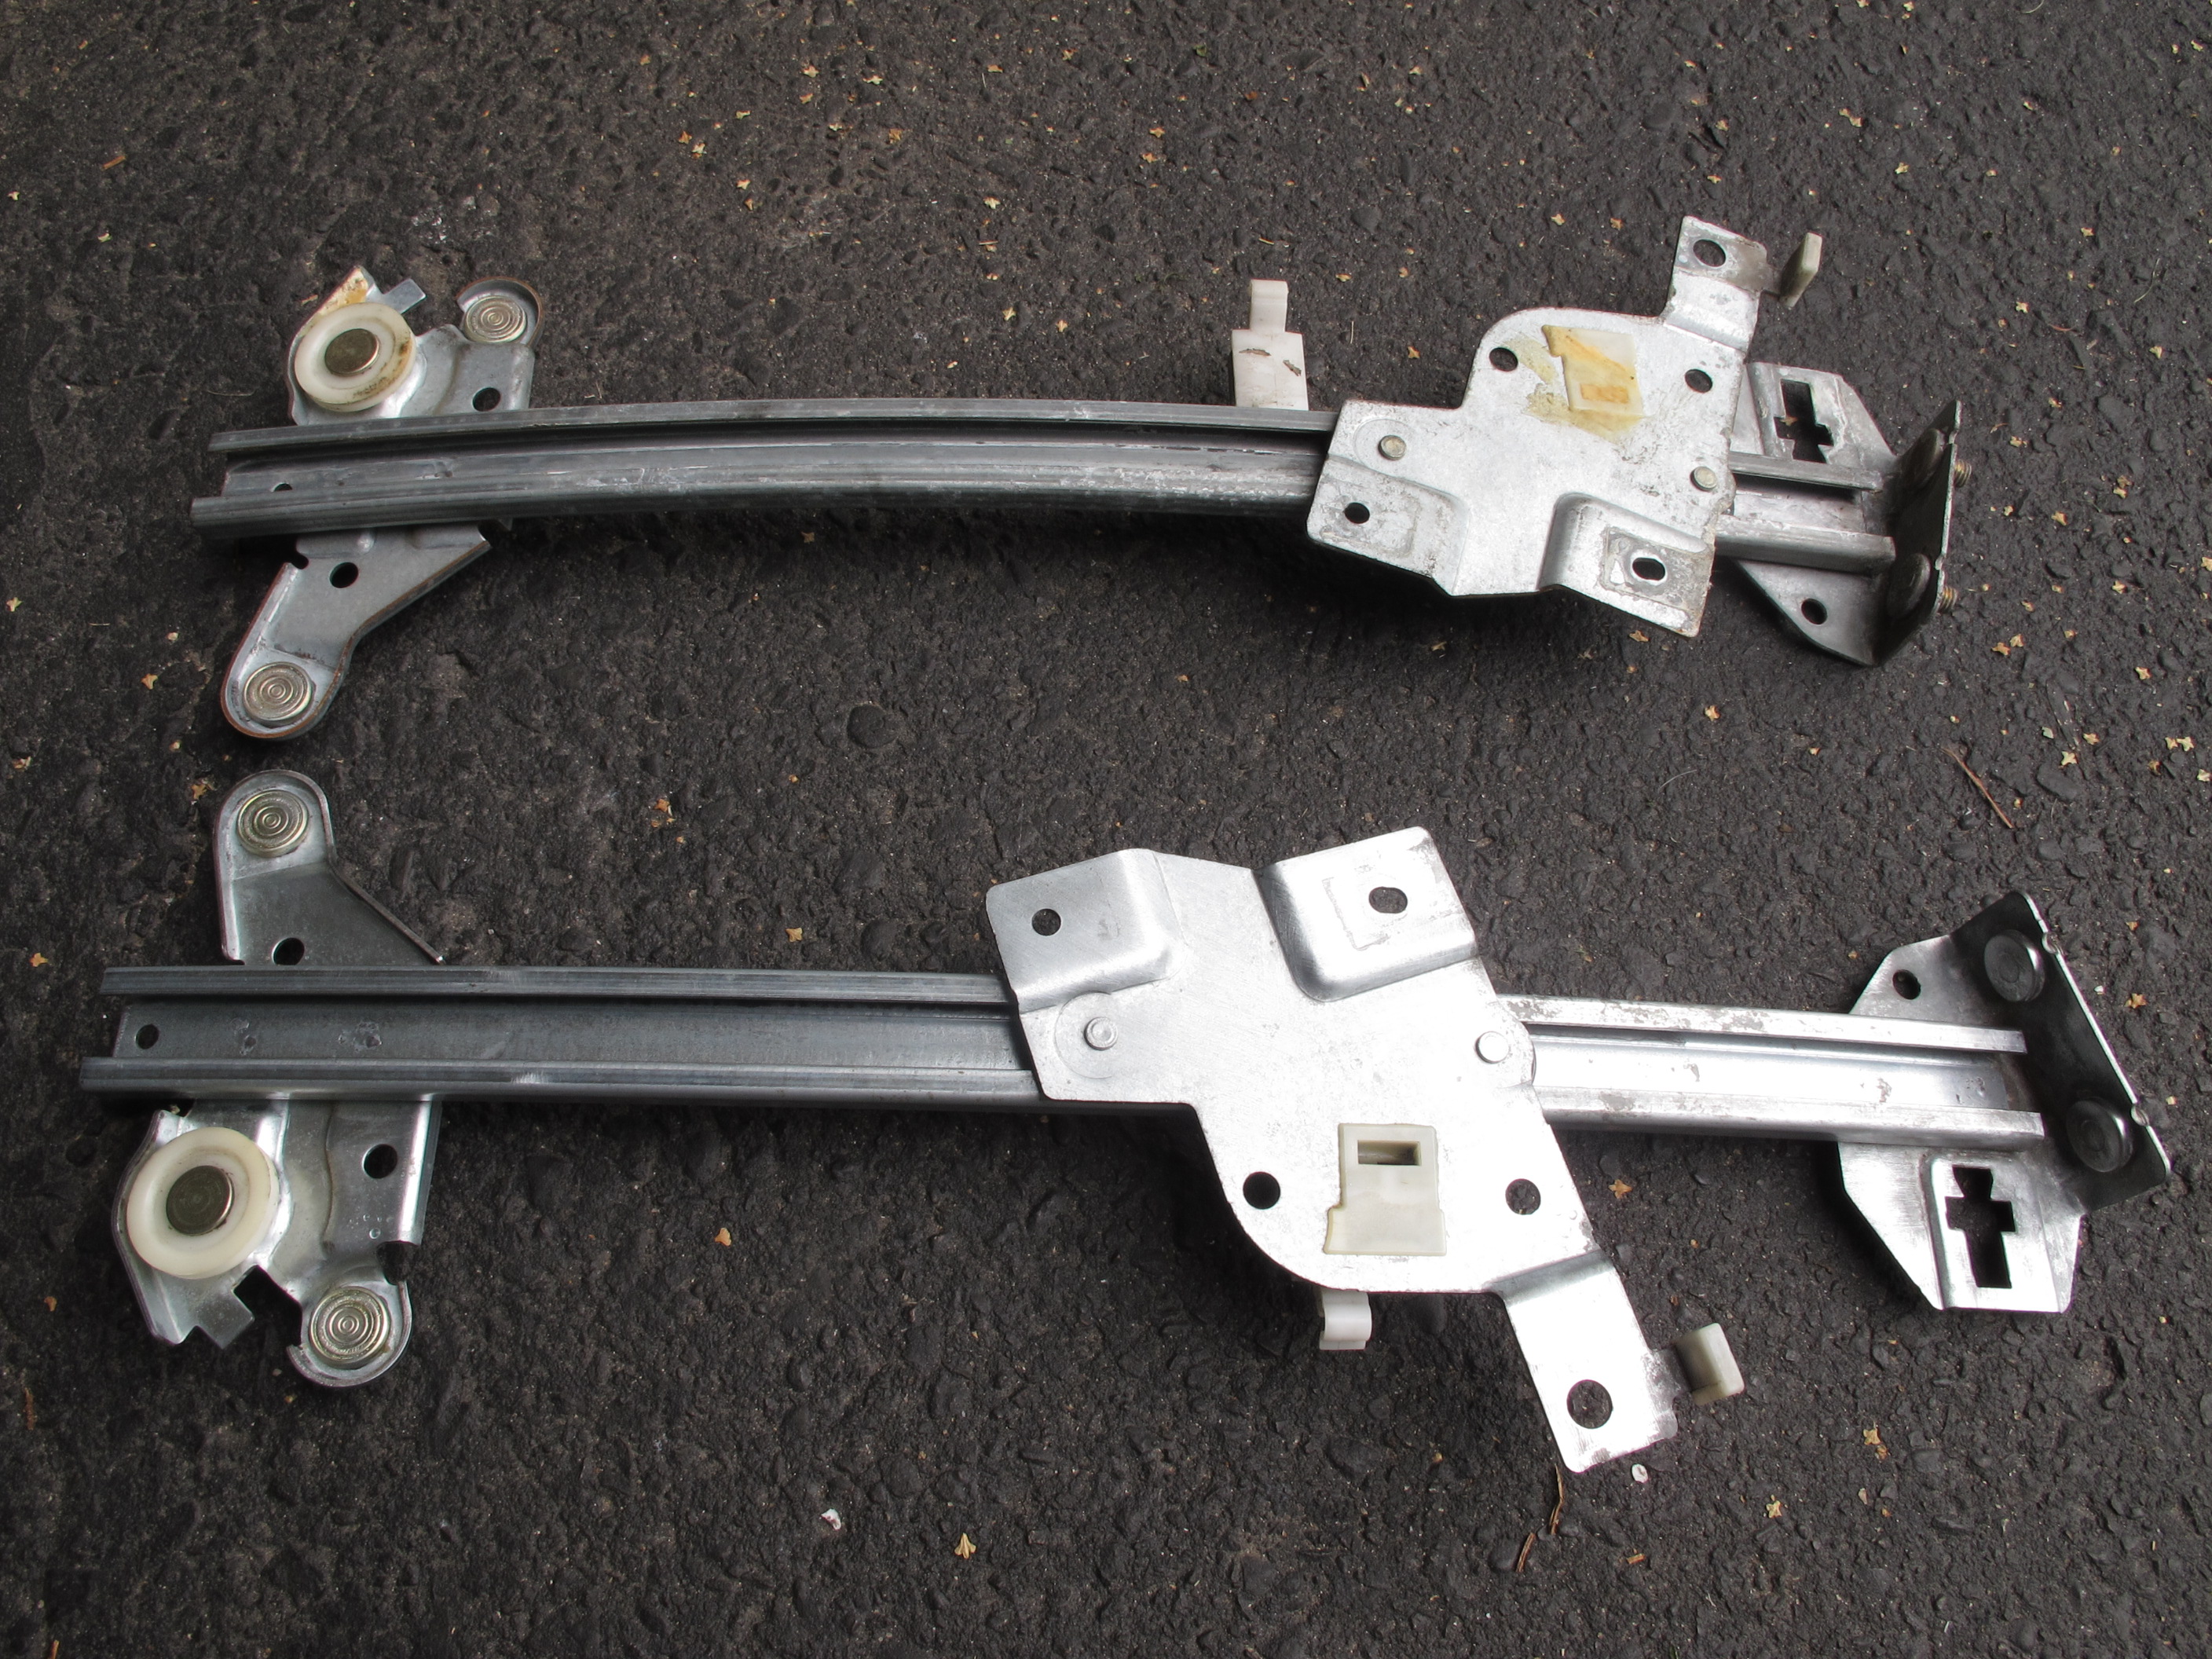
My windows were very slow when I acquired the car. I noticed they seemed to be getting worse as summer progressed. So I did some research and this is very common. Seeing as how my grease on the guides is 23 years old, I figured I should pull the guides and give them a little TLC.
First I noticed 23 years of dust that had never been cleaned.
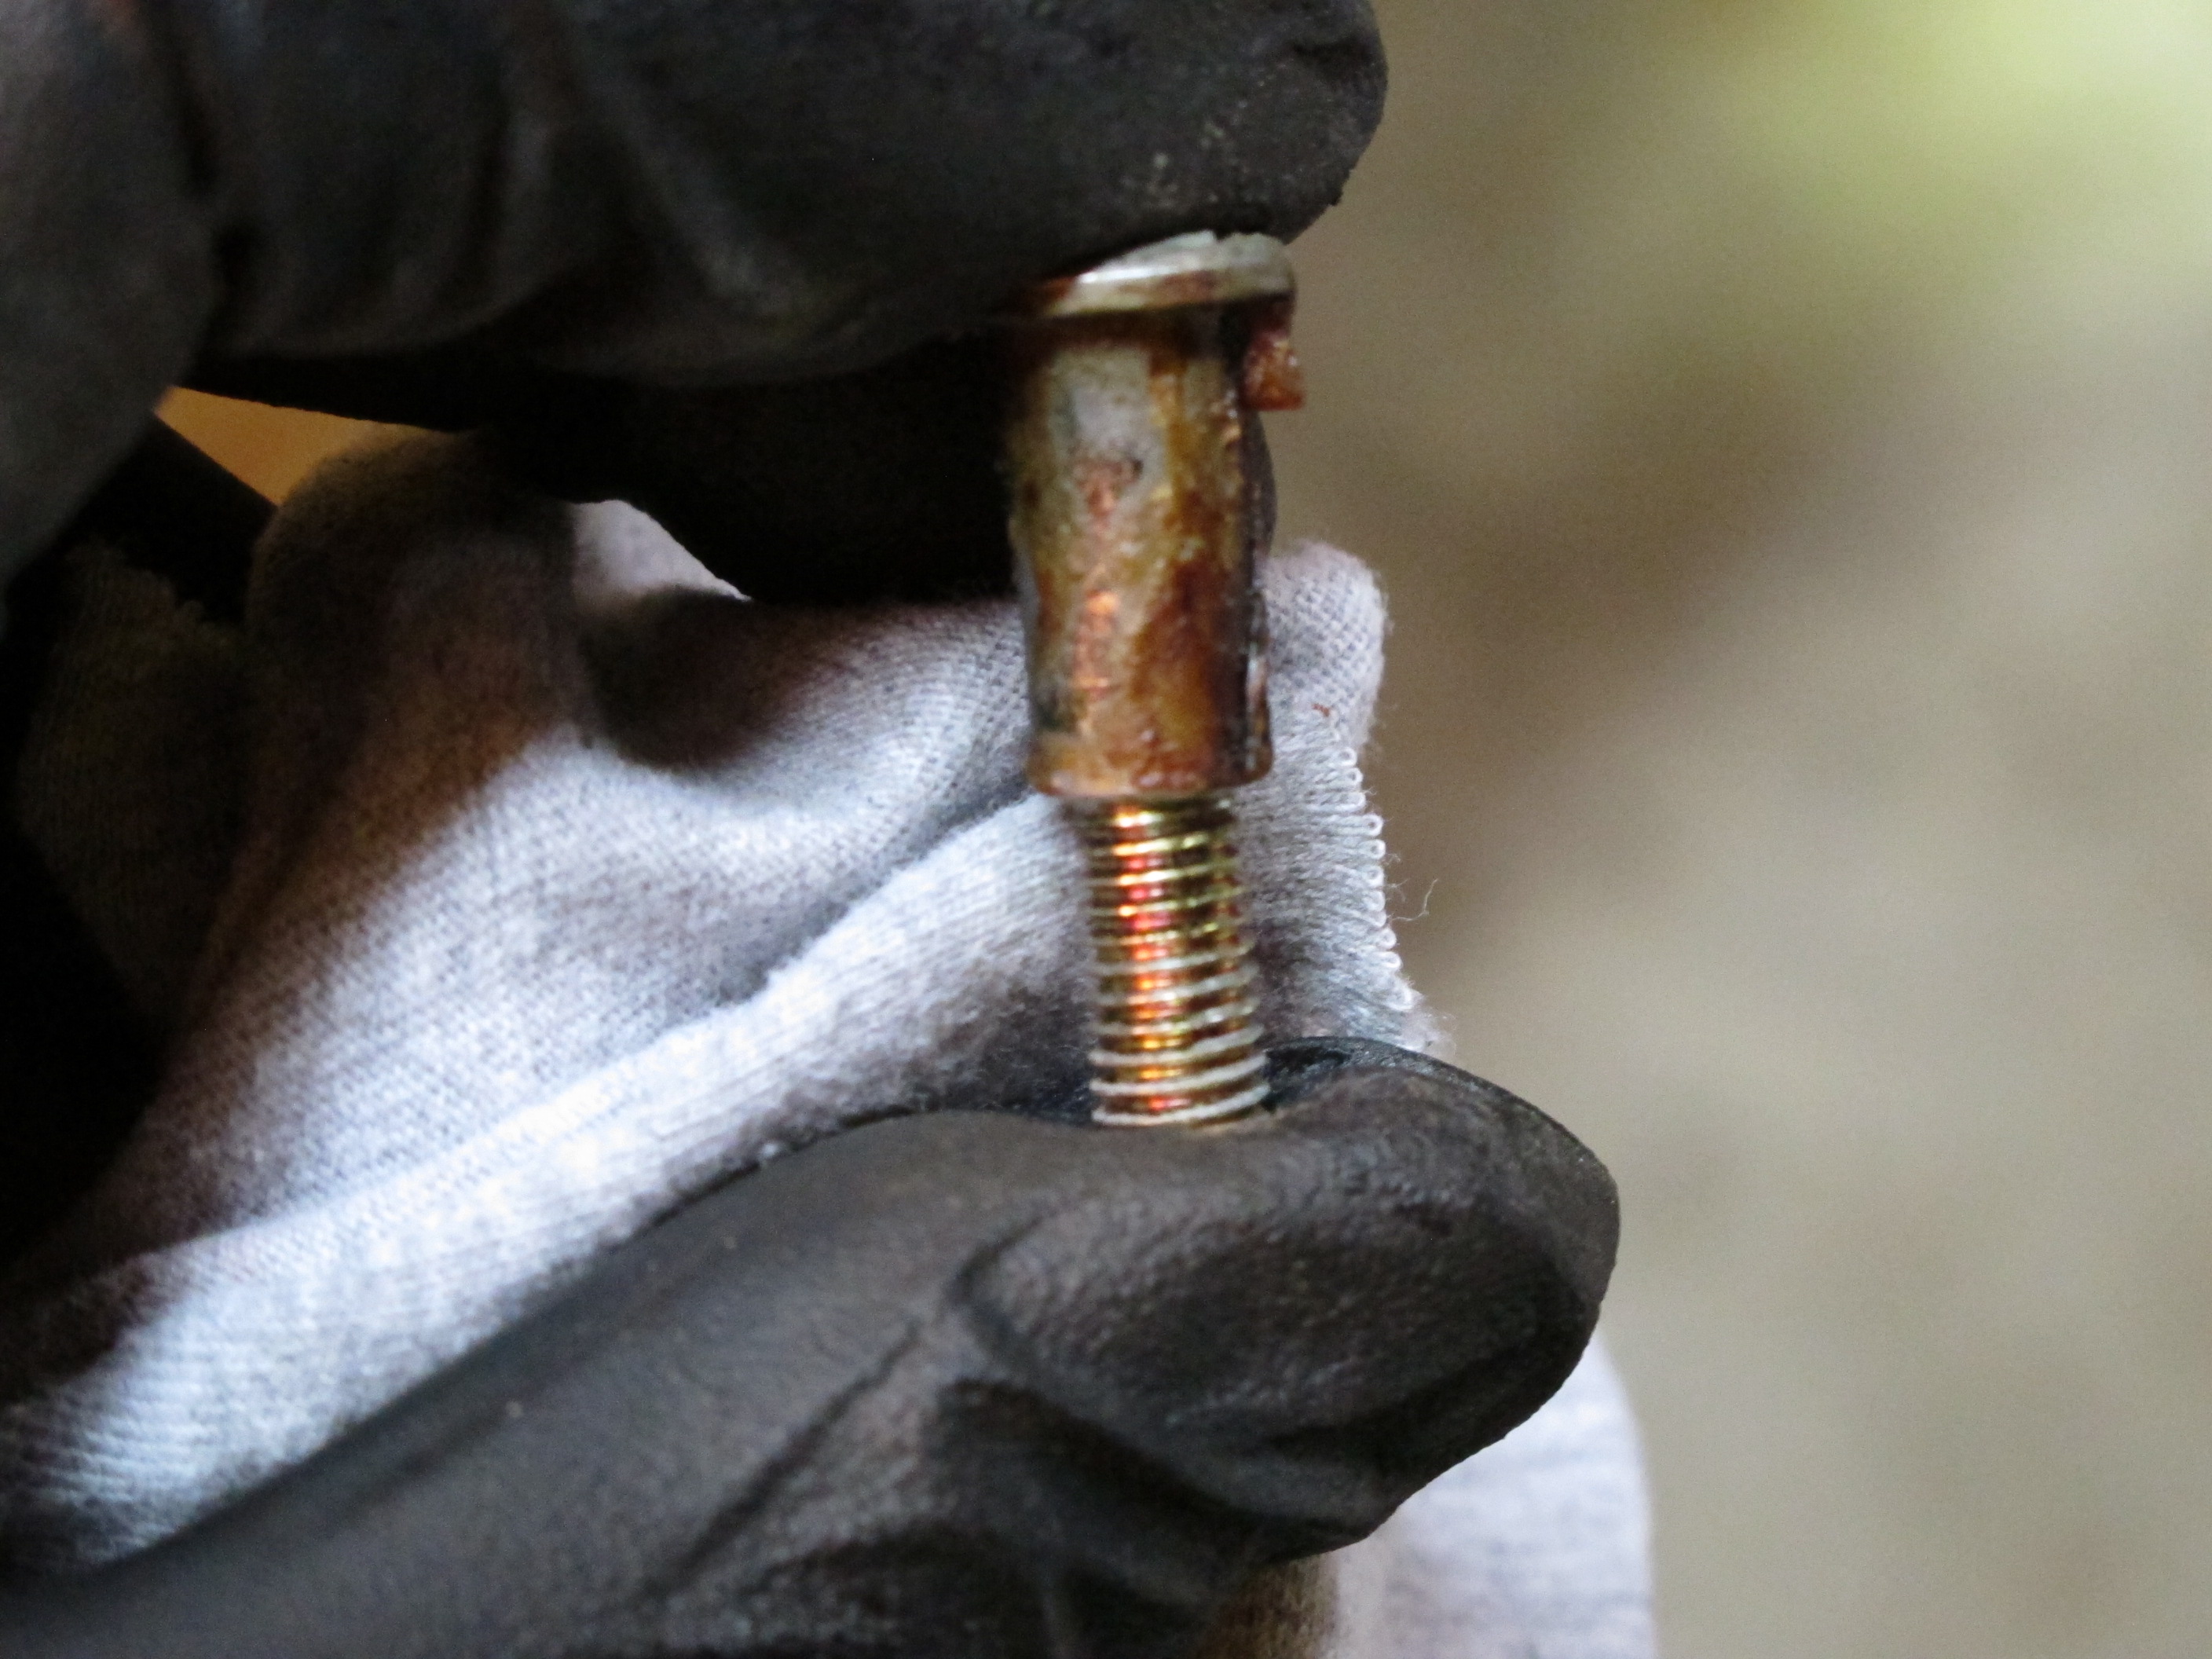
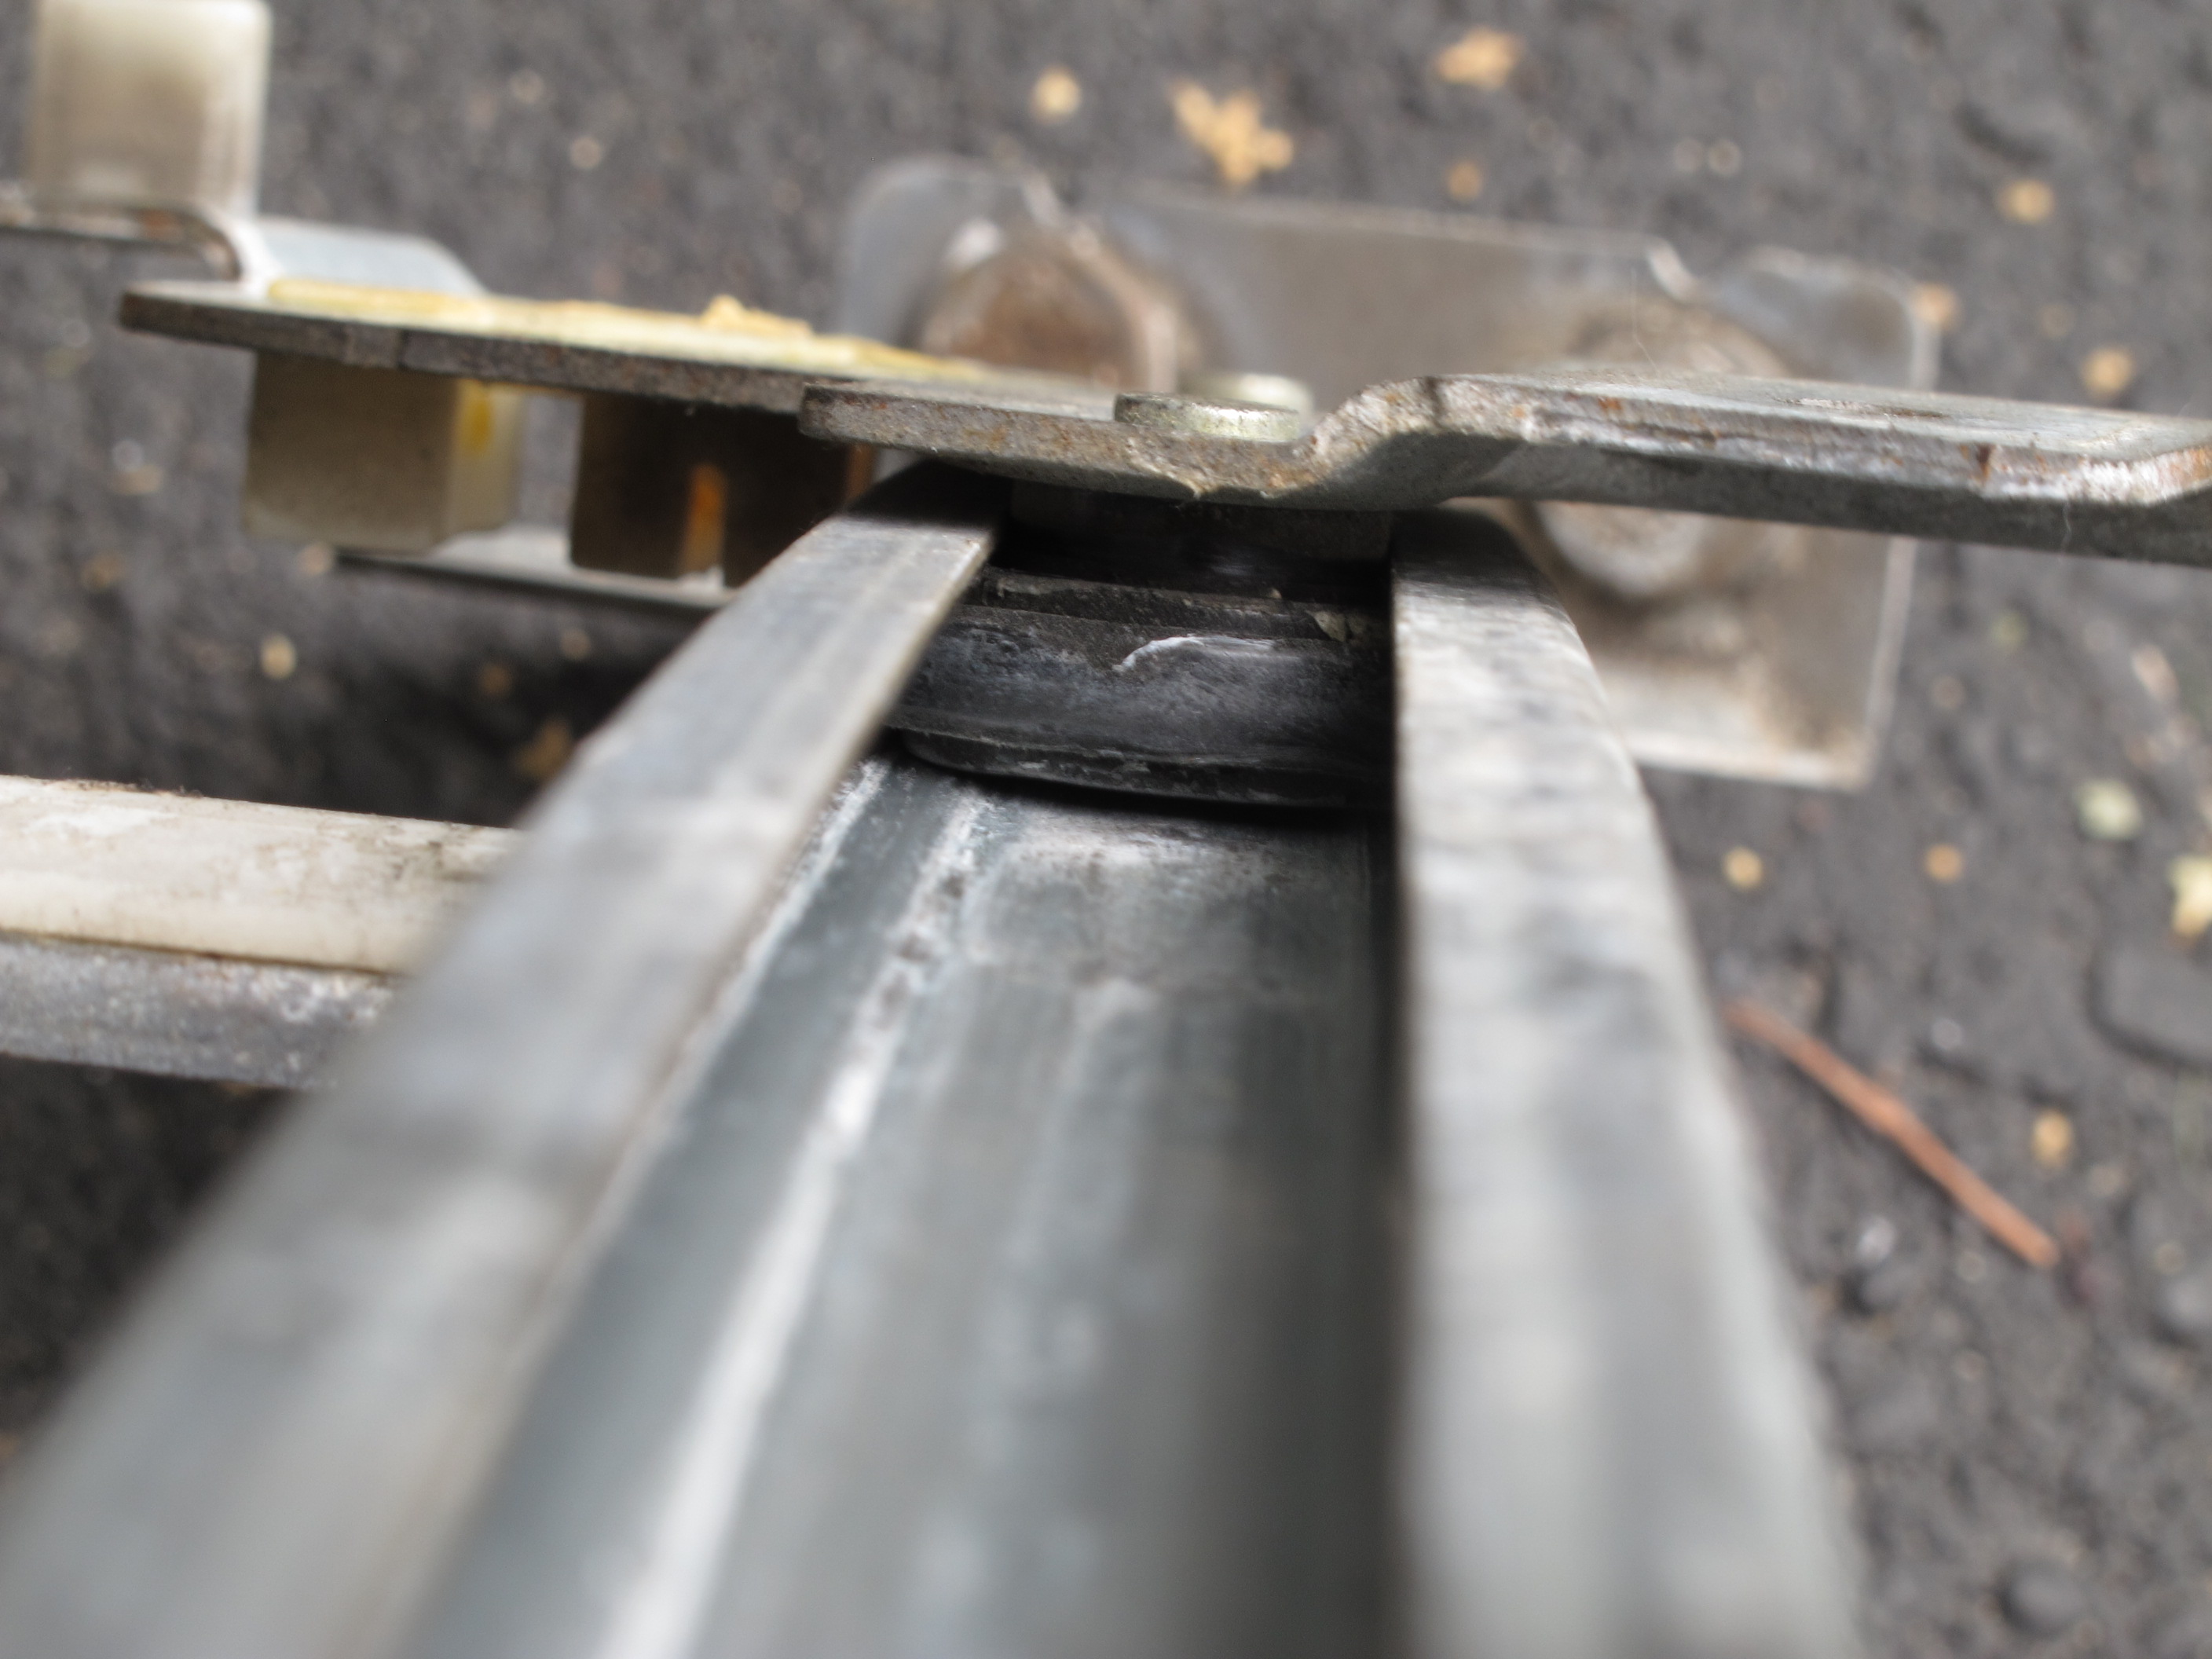
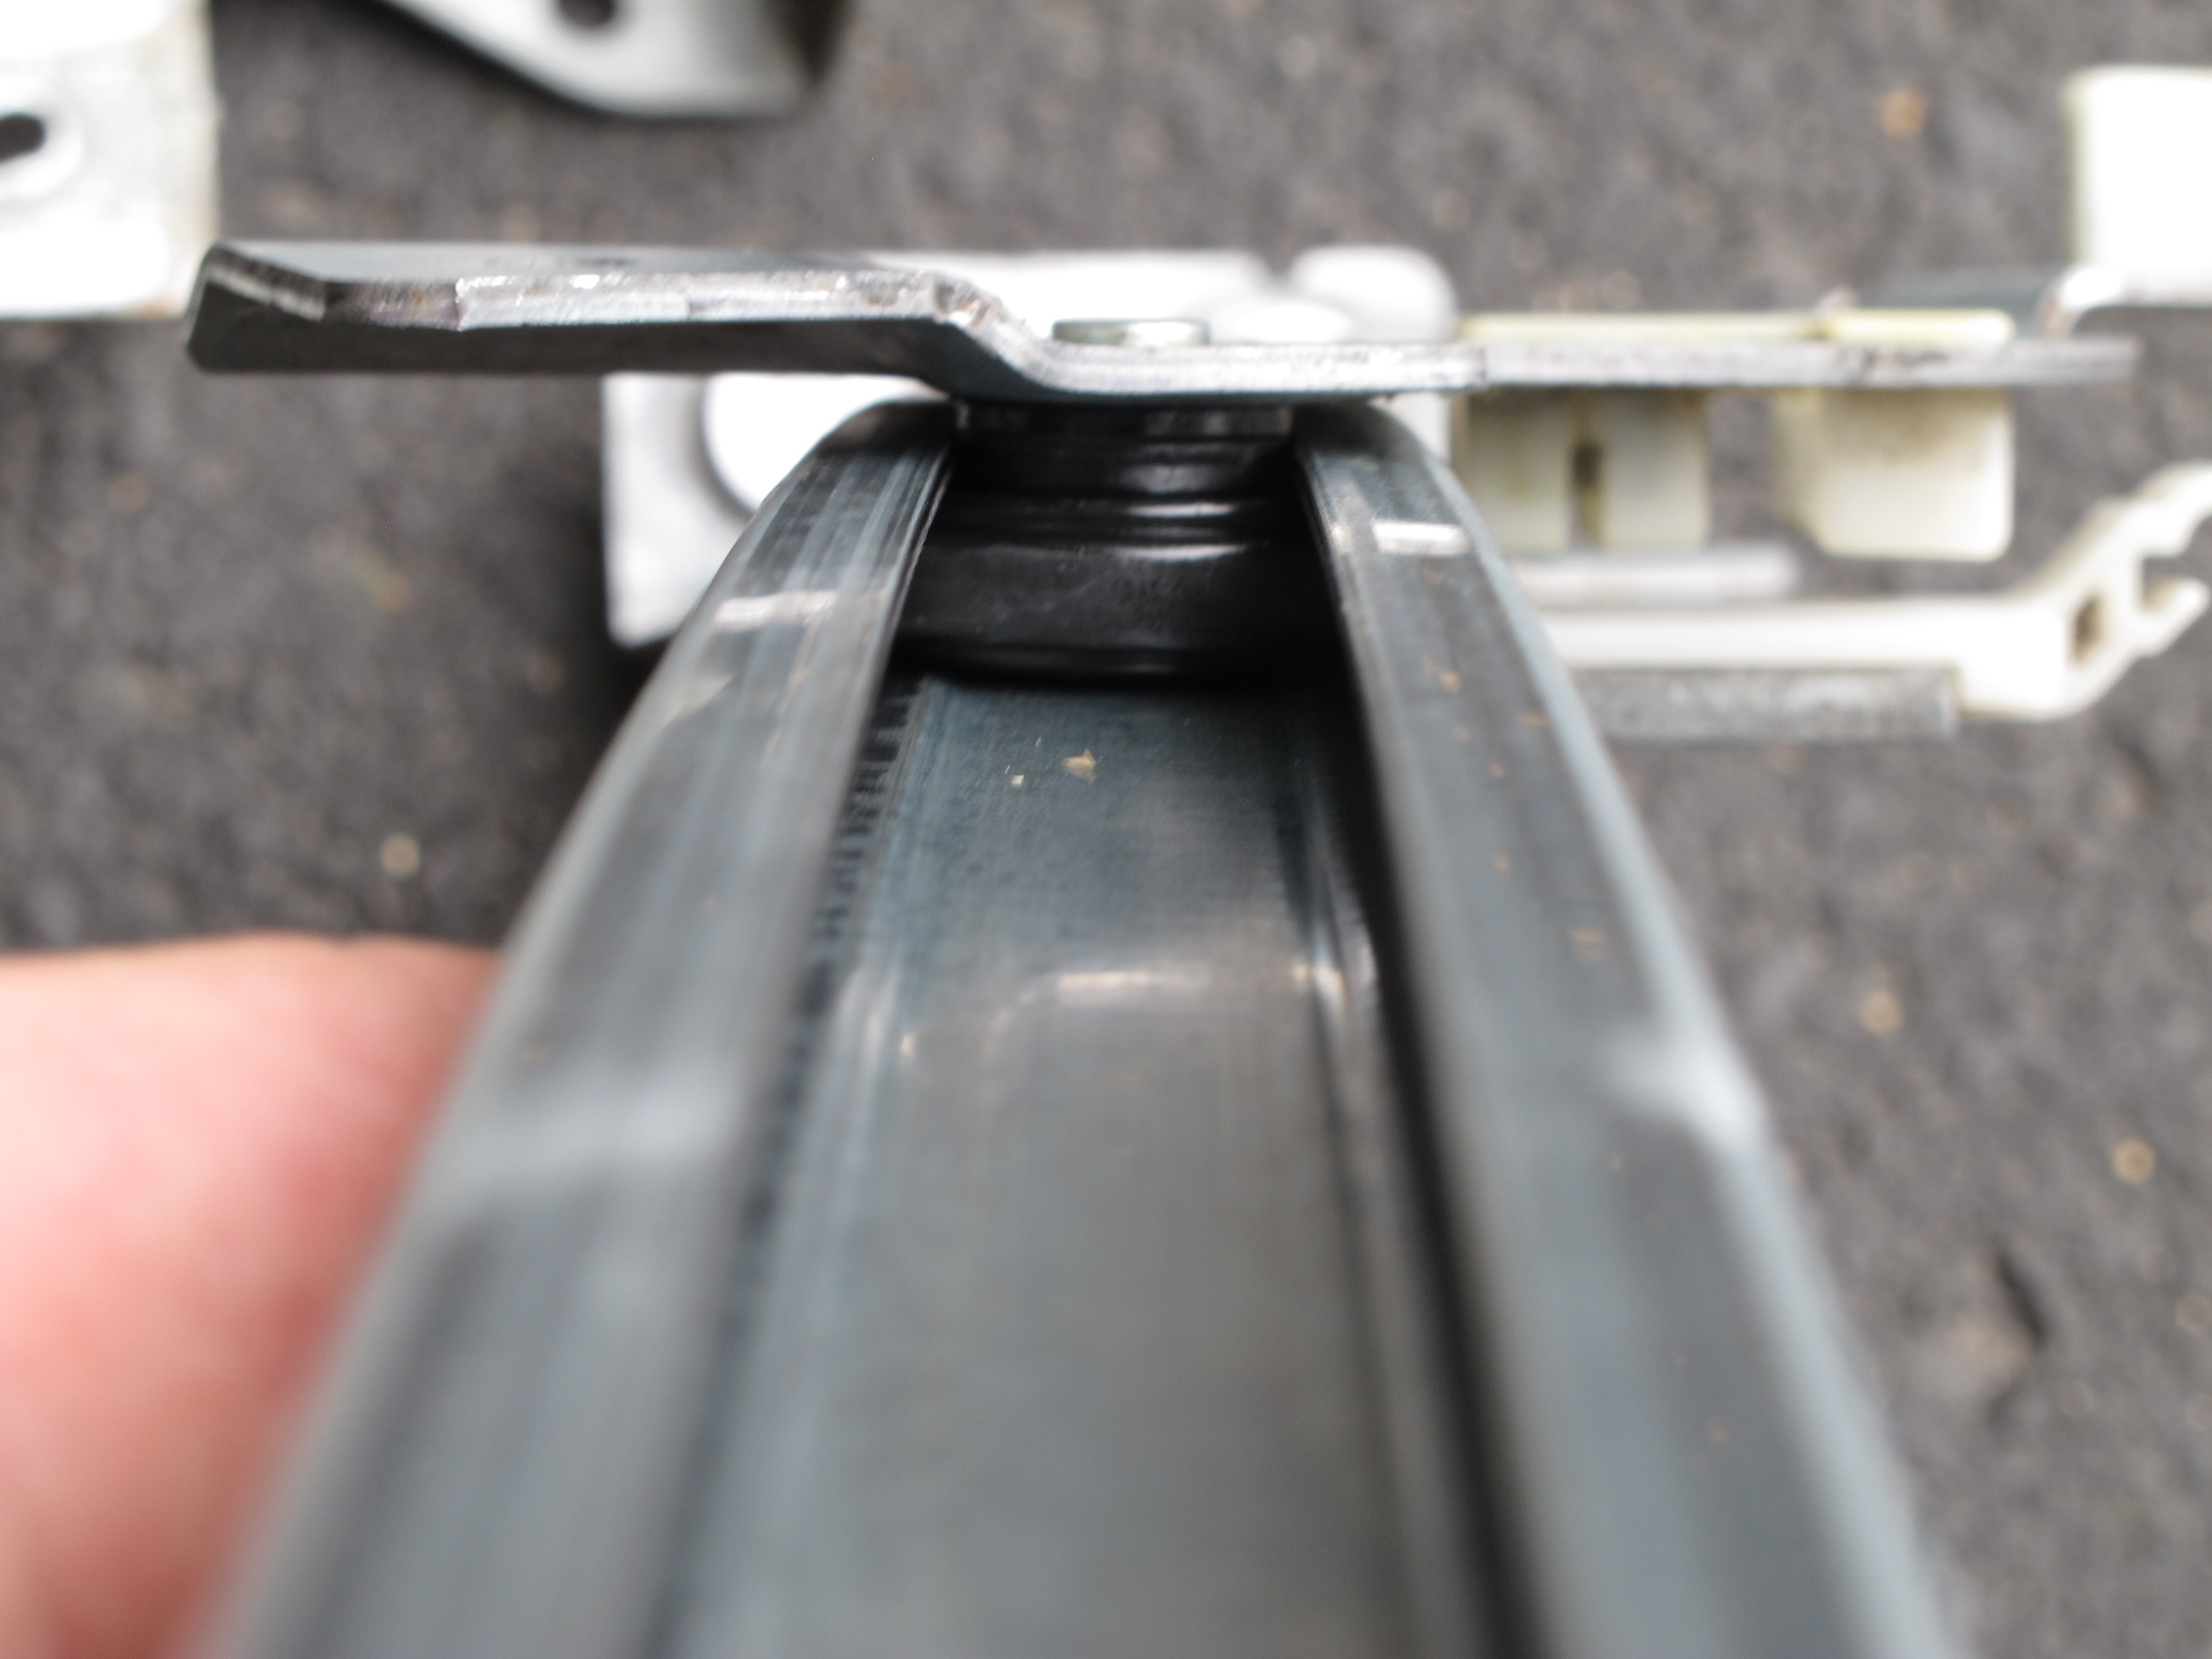
While taking off the window stops I ended up dropping the back nut/washer on both sides of the car. It was easy to grab after the window was out. You just need to have the right tools.
Here is how they go together.
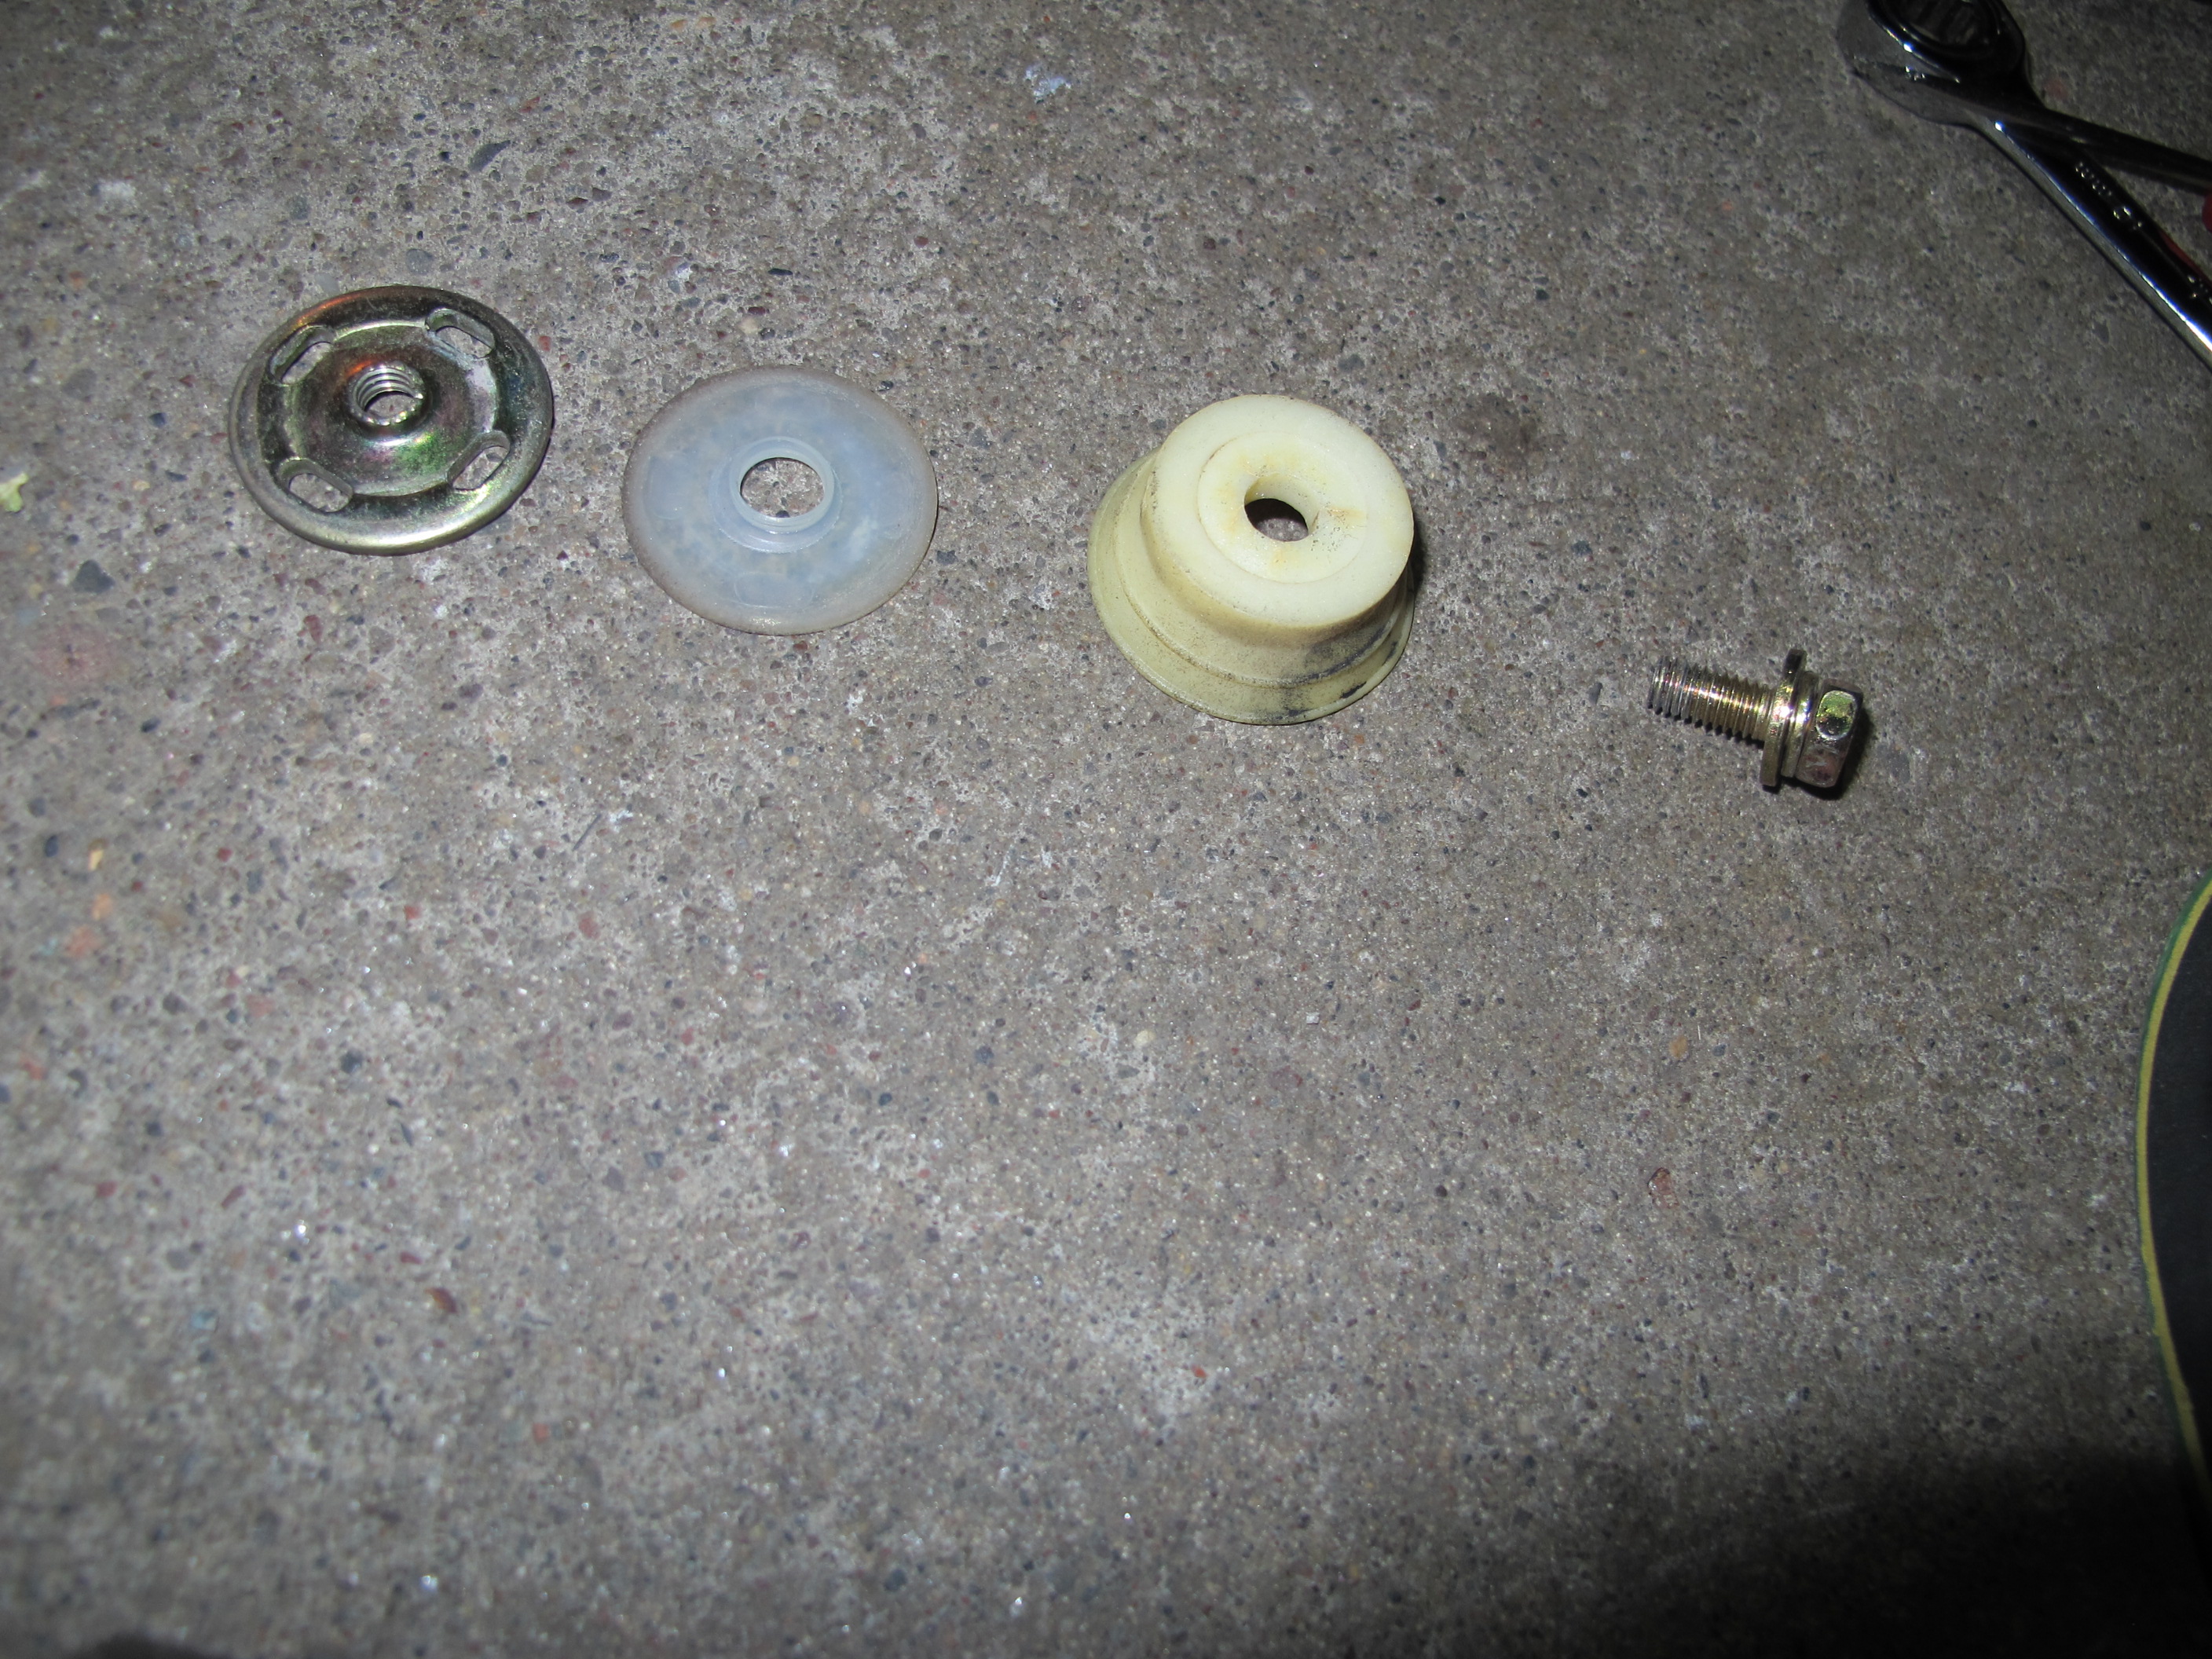
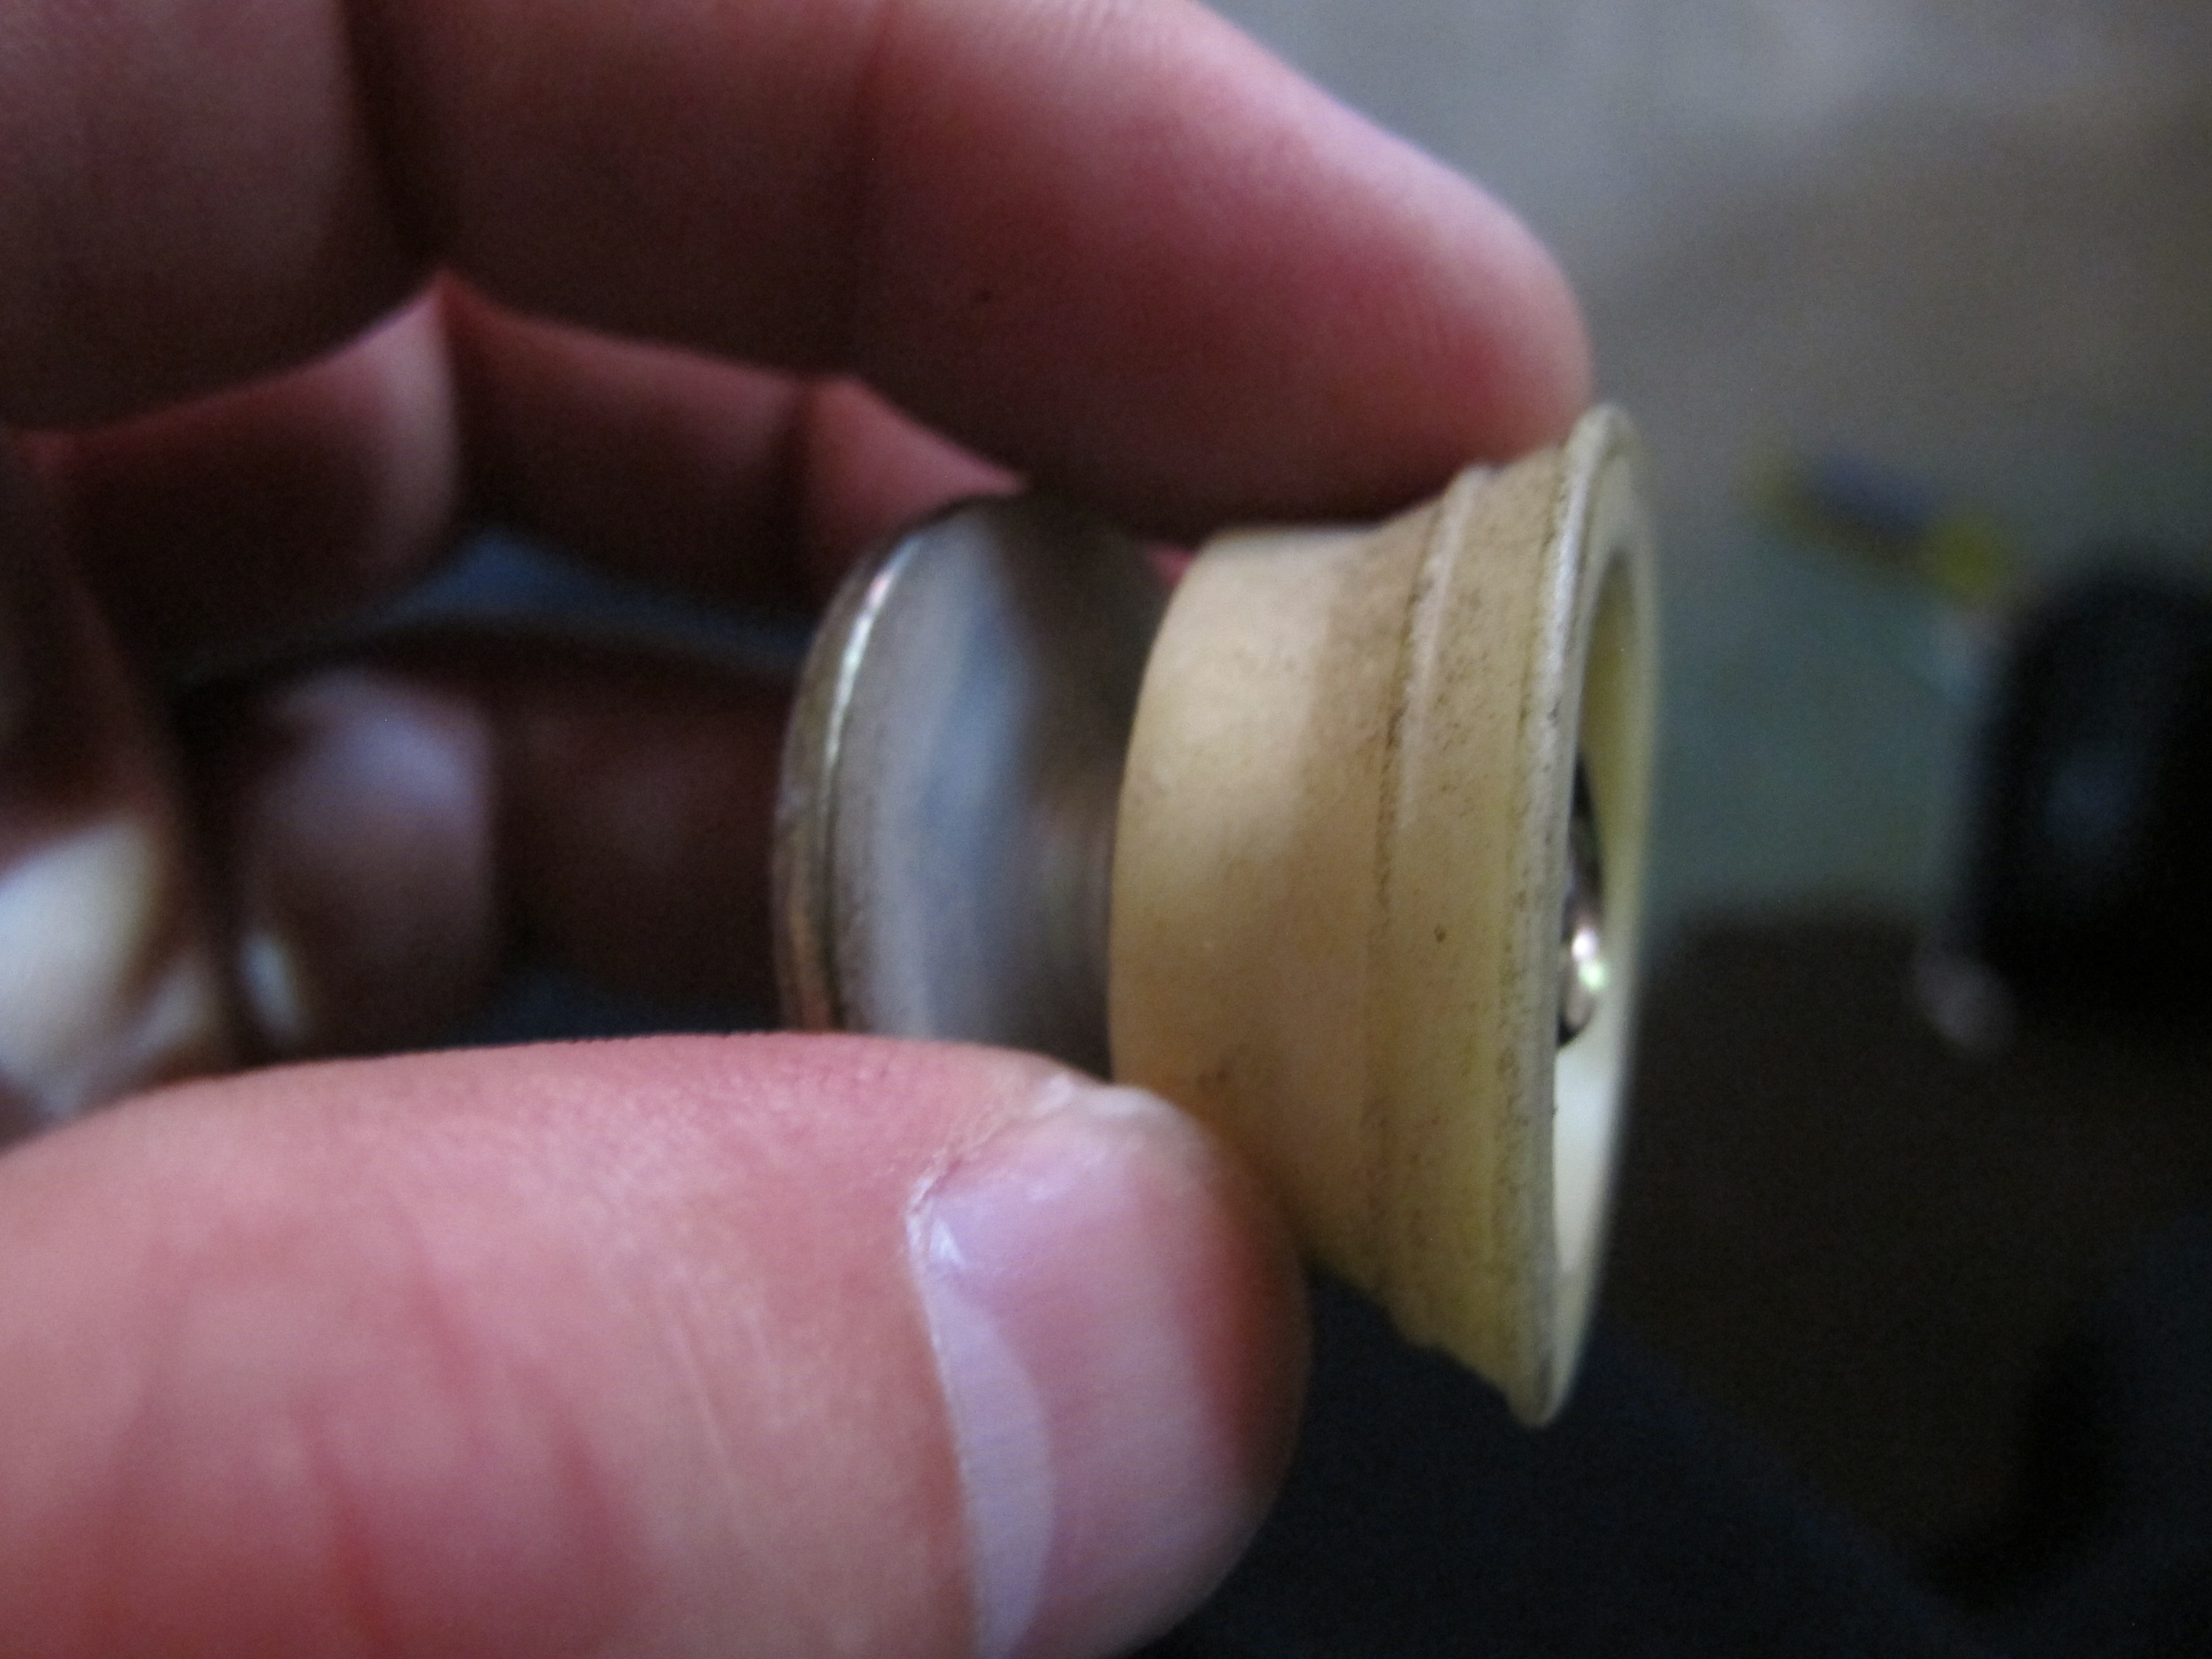
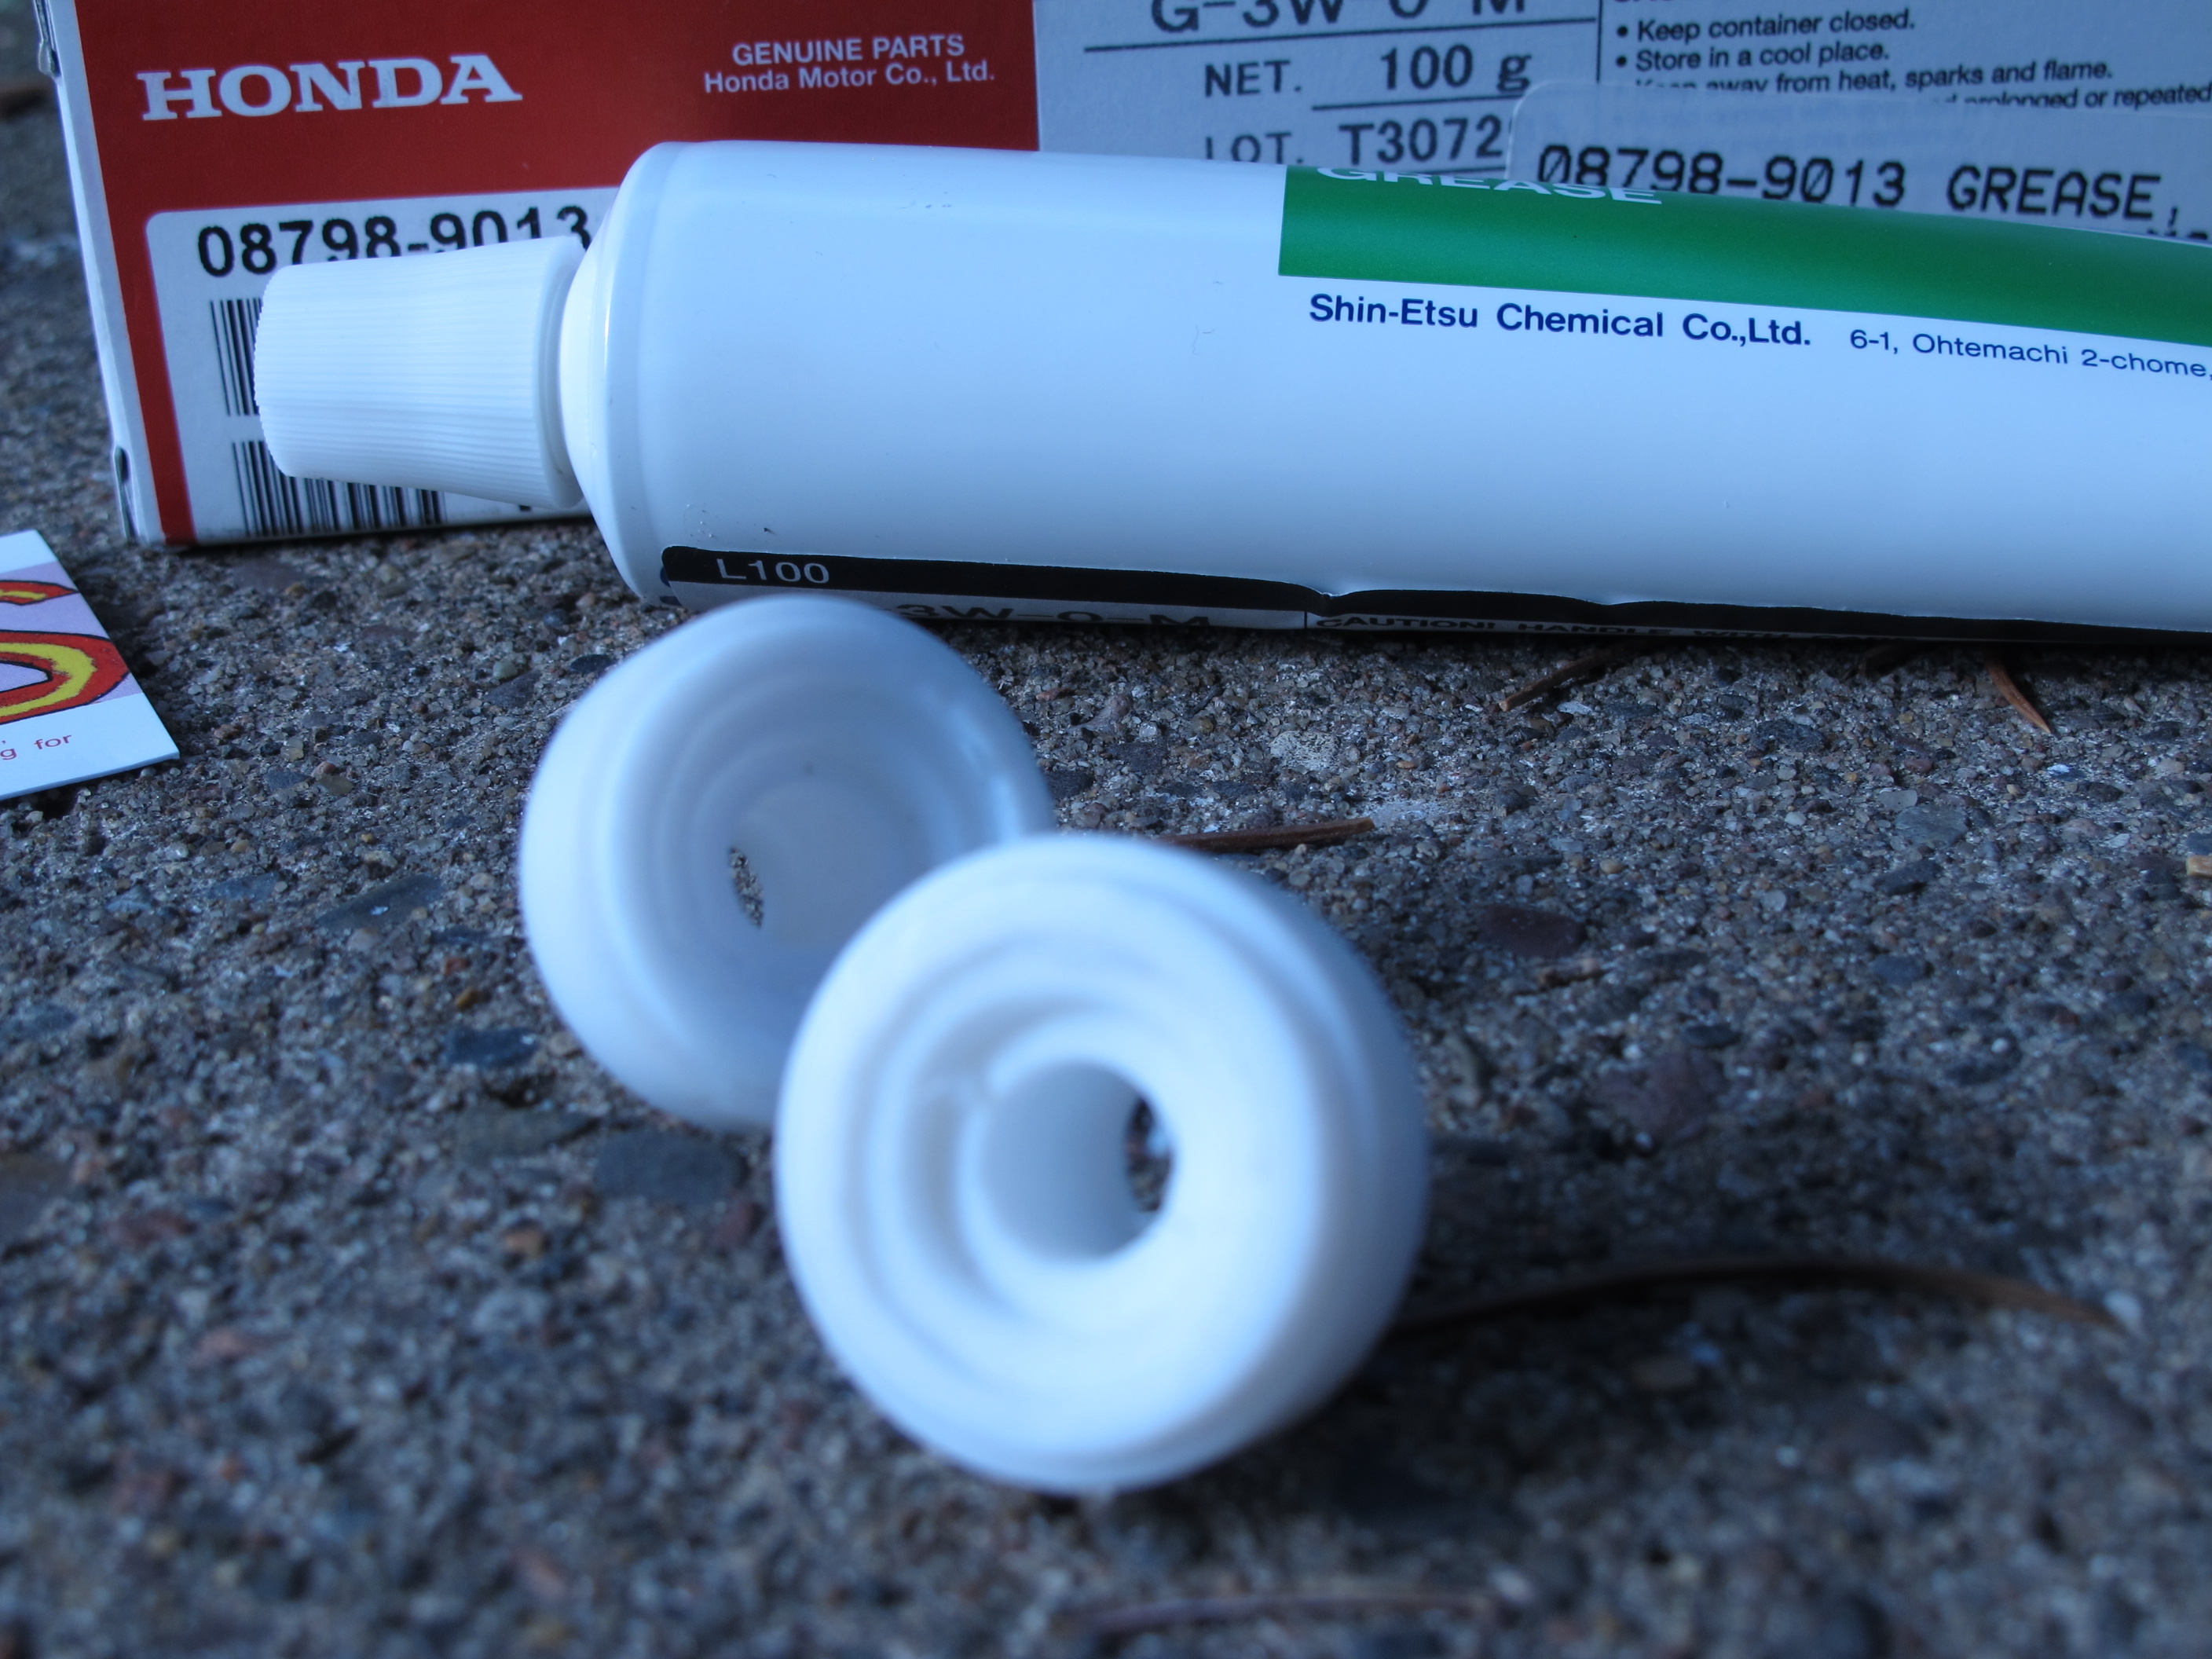
Here is my window guide on my driver's side. As you can see 23 years of ownership = ZERO nylon guide remaining on your bolt. I was shocked to find the nylon 100% missing on this side.
I was able to find it on the passenger side.... however, it was not on the bolt. Instead it was glued to the 23 year old grease below the bolt.

At this point I was very happy I took the time to look into this window speed issue.
Time to get all JEFF on these parts and do some cleaning. Lots of rubbing alcohol, brake cleaner, wire wheel and wire bush action on these parts. I also found (per one of the forum posts) that a ziptie is the ultimate cleaning tool for grease and window guides. It saved me a lot of time and worked really well!
Passenger Side

Driver's Side
Here is one of them after a little cleaning. I actually spent some more time on them after taking the pics.
Dirty Passenger's Side Regulator
Clean Driver's Side Regulator
Clean Driver's vs Dirty Passenger's
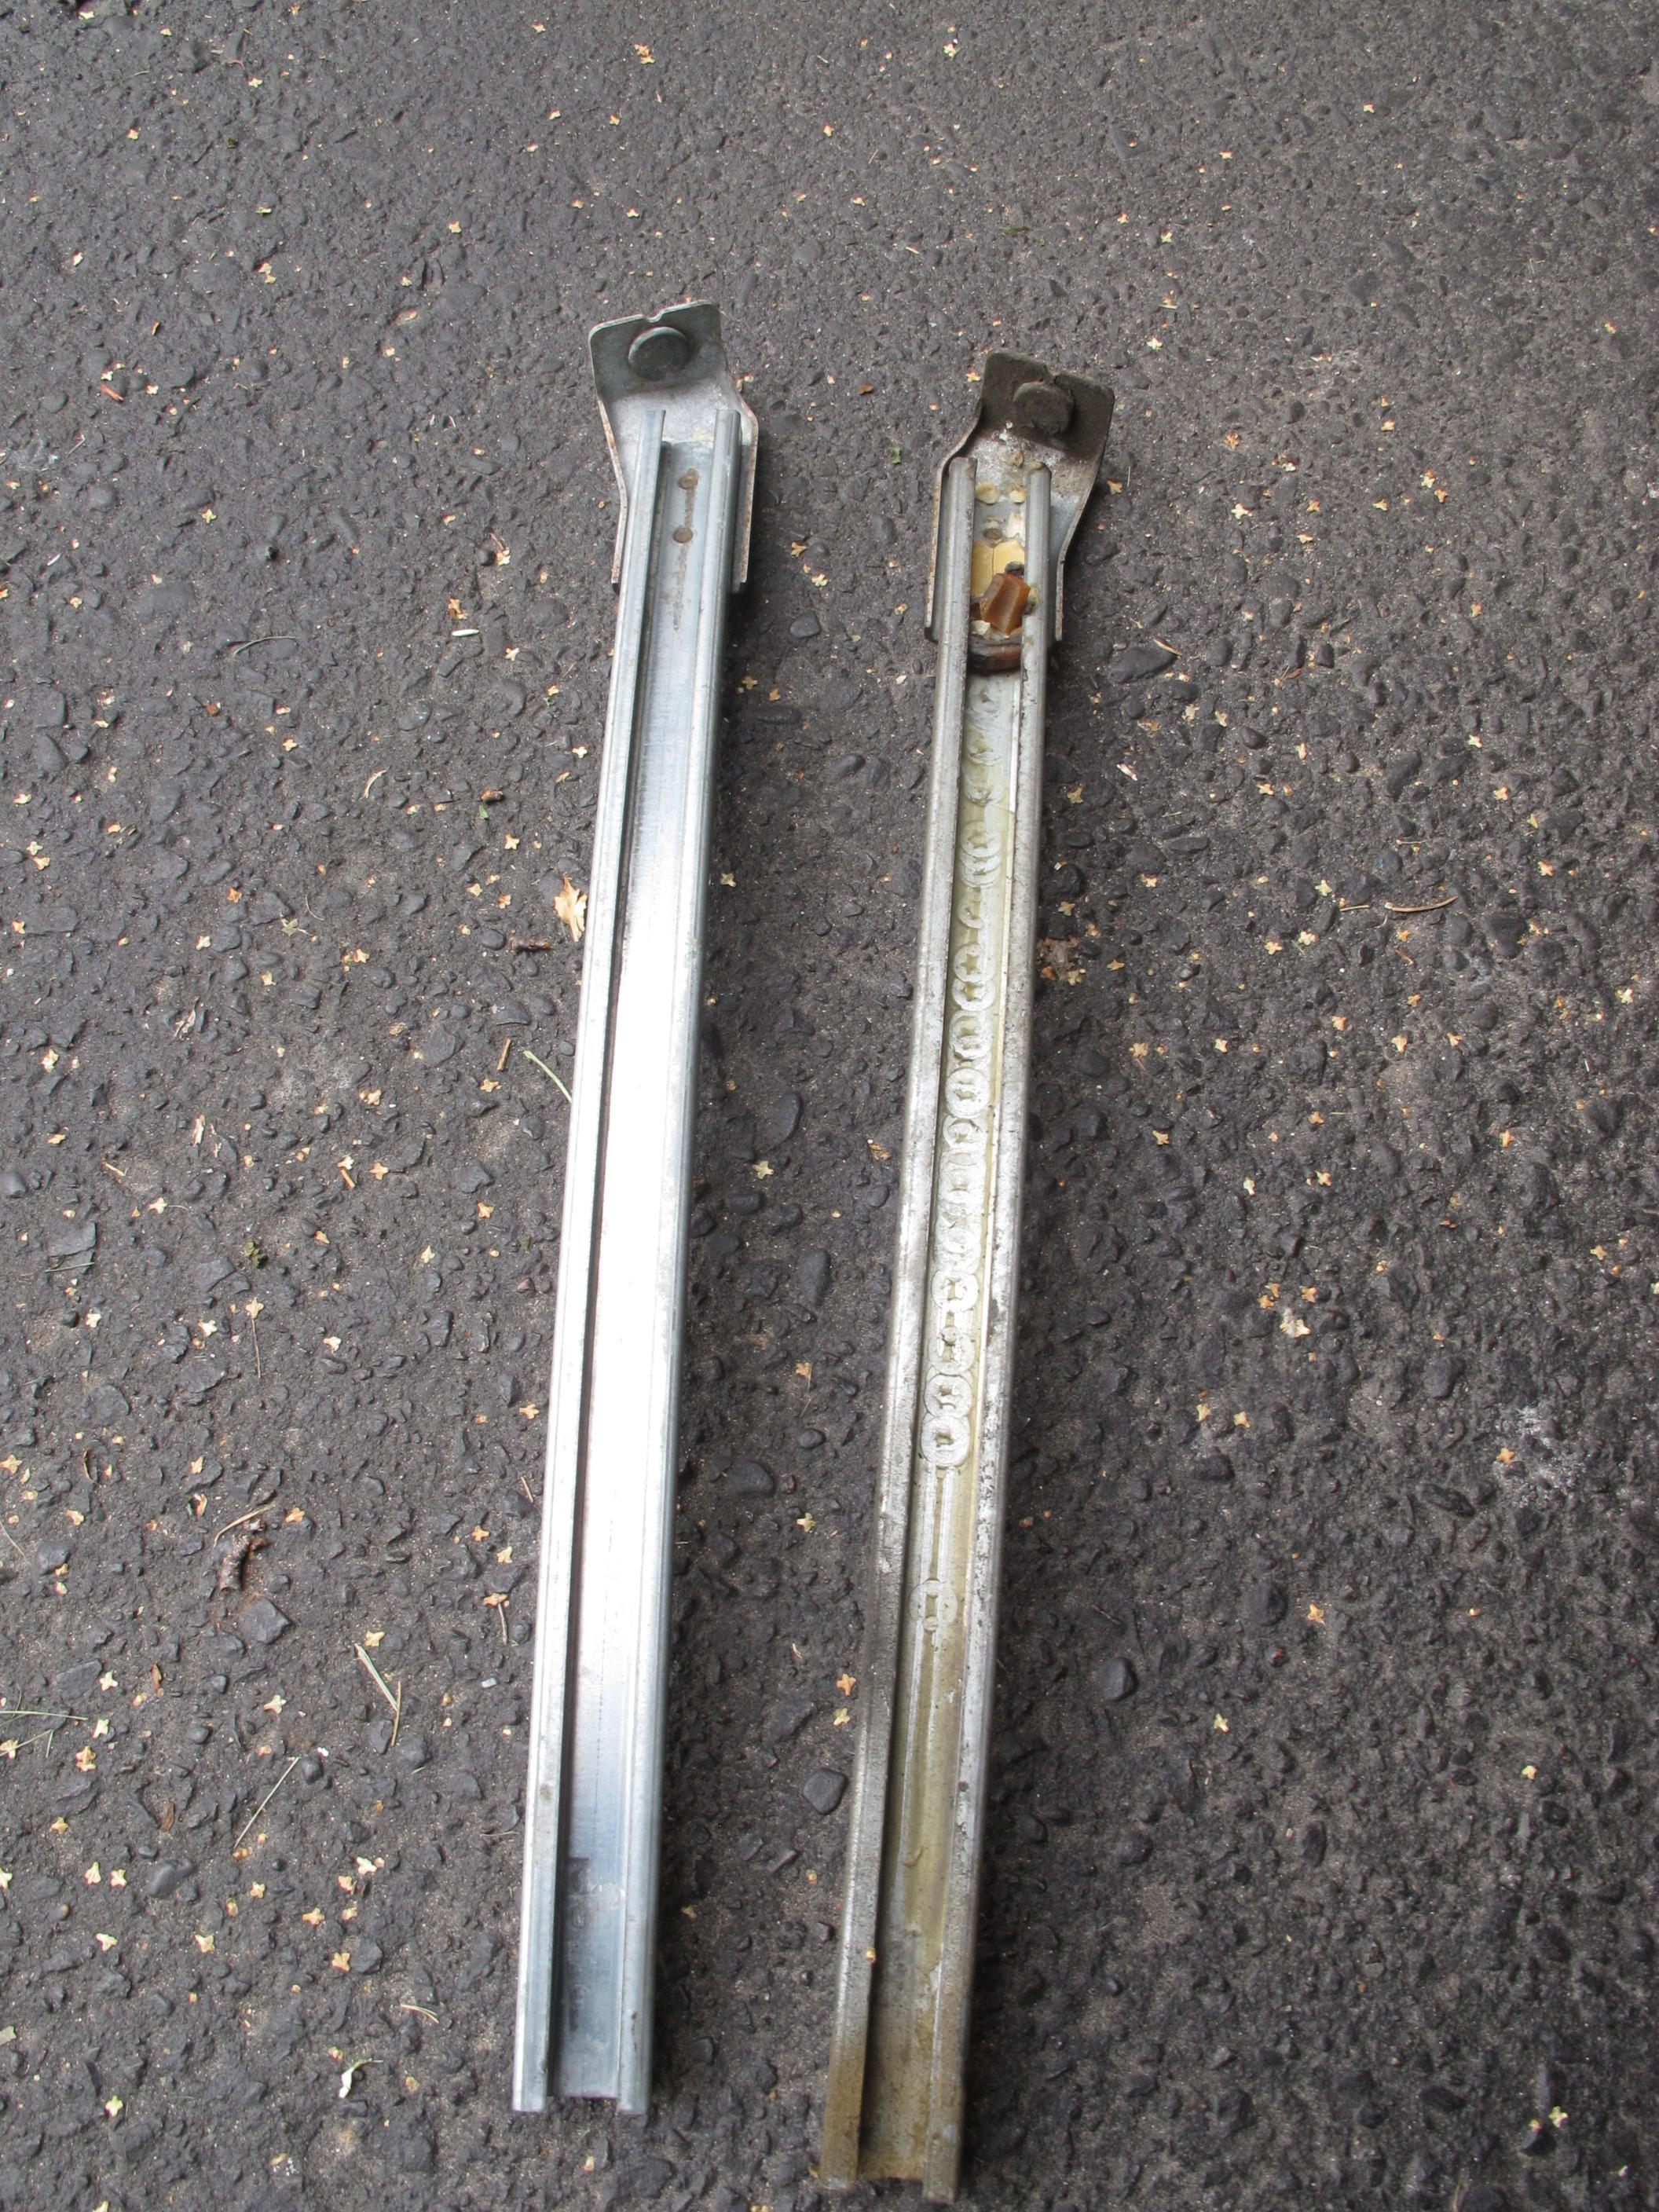
Clean Driver's Regulator vs Passenger's Regulator
After a ton of cleaning and finding out that I needed new guides... which allowed for more cleaning... I order some parts and got this stuff in the mail.
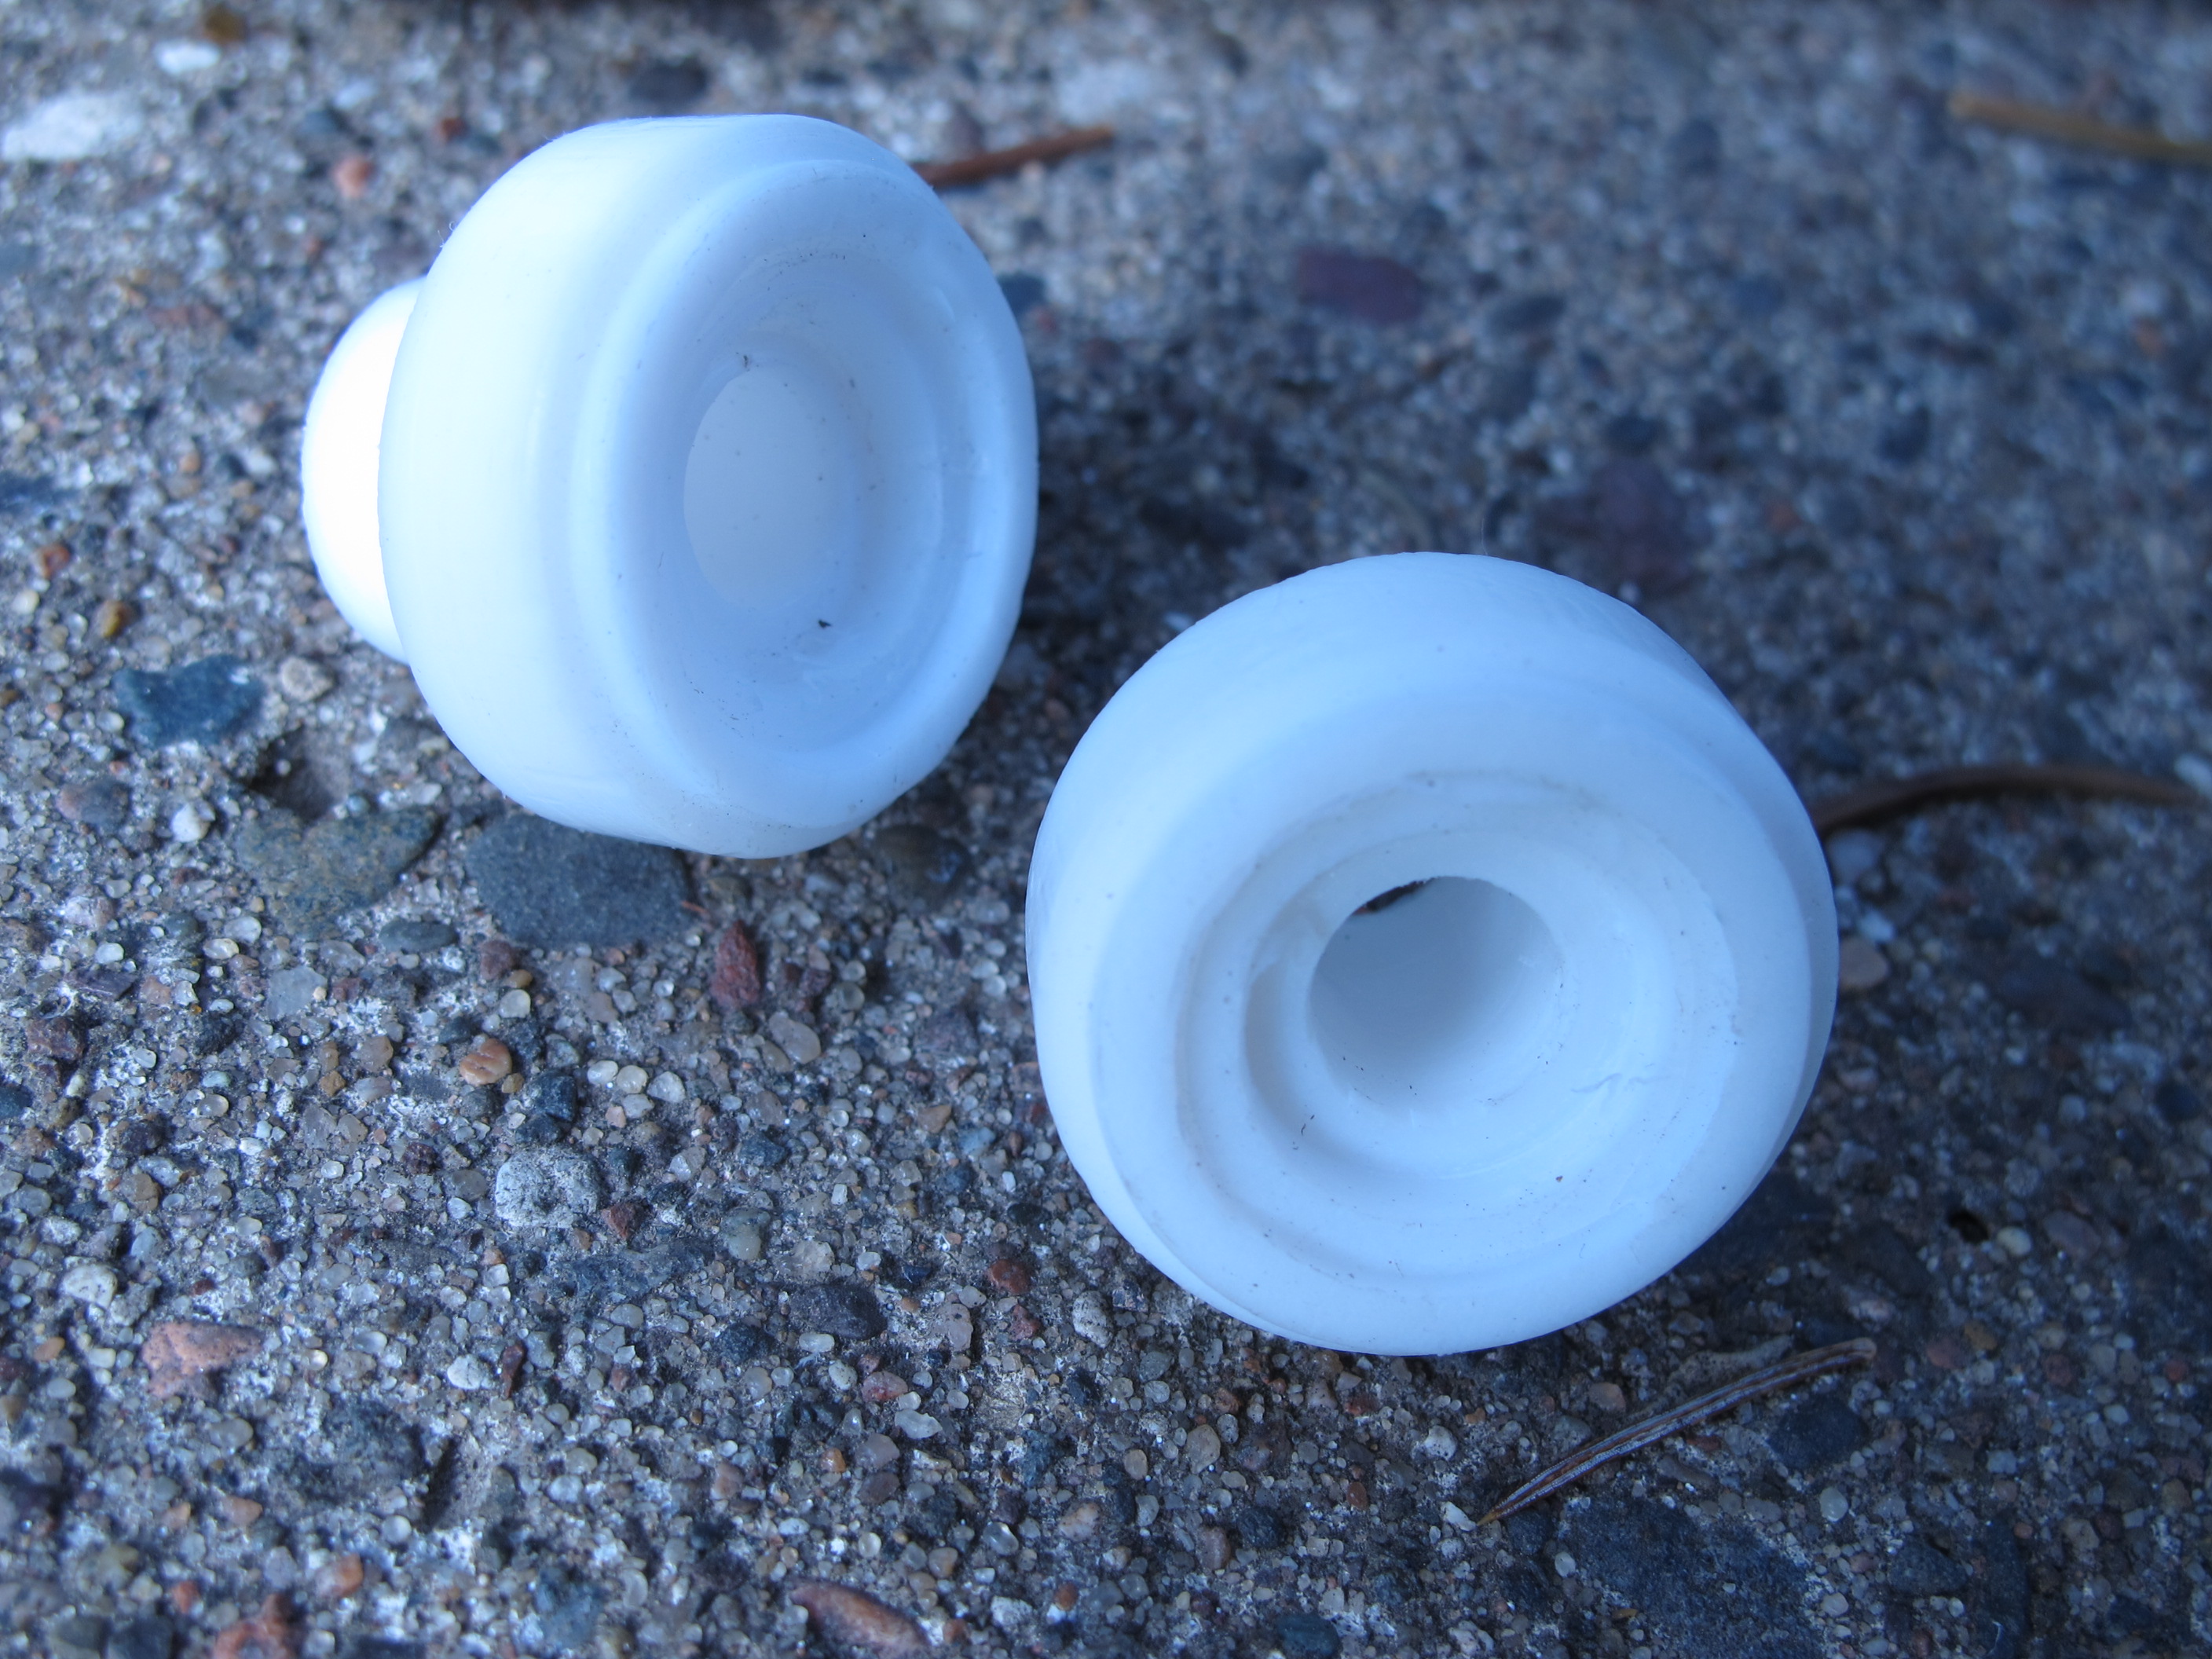
The guides are Teflon from a Miata.Net vendor (although I hear he is soon going to ebay sales only). If you need his contact info hit me up (or see the pic). It was $26 for only the guides shipped.
The grease is what the cool kids say are the BEE'S KNEES! I have a few friends that are Honda techs so I got the grease about $10 below retail. Which was still hella expensive.... but now I have enough for a very long time!

Overall the window are very quick. I bet they are 3 or 4 times faster than they were before. They seem like normal windows. However, I did notice after driving to work yesterday that the driver's side needs to be adjusted. There was a portion of the window that did not seat against the weather stripping on my soft top. I am not sure what I need to adjust, but I am going to start by loosening the regulator from the door and seeing how tweaking that goes. I believe if I tighten it down correctly this should help. Worst case I pull and adjust the window from the actual regulator. I am thinking this will happen tomorrow night. Tonight it is time to watch some Breaking Bad with the wife!
My windows were very slow when I acquired the car. I noticed they seemed to be getting worse as summer progressed. So I did some research and this is very common. Seeing as how my grease on the guides is 23 years old, I figured I should pull the guides and give them a little TLC.
First I noticed 23 years of dust that had never been cleaned.

While taking off the window stops I ended up dropping the back nut/washer on both sides of the car. It was easy to grab after the window was out. You just need to have the right tools.

Here is how they go together.


Here is my window guide on my driver's side. As you can see 23 years of ownership = ZERO nylon guide remaining on your bolt. I was shocked to find the nylon 100% missing on this side.

I was able to find it on the passenger side.... however, it was not on the bolt. Instead it was glued to the 23 year old grease below the bolt.


At this point I was very happy I took the time to look into this window speed issue.
Time to get all JEFF on these parts and do some cleaning. Lots of rubbing alcohol, brake cleaner, wire wheel and wire bush action on these parts. I also found (per one of the forum posts) that a ziptie is the ultimate cleaning tool for grease and window guides. It saved me a lot of time and worked really well!
Passenger Side

Driver's Side

Here is one of them after a little cleaning. I actually spent some more time on them after taking the pics.

Dirty Passenger's Side Regulator

Clean Driver's Side Regulator

Clean Driver's vs Dirty Passenger's

Clean Driver's Regulator vs Passenger's Regulator

After a ton of cleaning and finding out that I needed new guides... which allowed for more cleaning... I order some parts and got this stuff in the mail.
The guides are Teflon from a Miata.Net vendor (although I hear he is soon going to ebay sales only). If you need his contact info hit me up (or see the pic). It was $26 for only the guides shipped.
The grease is what the cool kids say are the BEE'S KNEES! I have a few friends that are Honda techs so I got the grease about $10 below retail. Which was still hella expensive.... but now I have enough for a very long time!


Overall the window are very quick. I bet they are 3 or 4 times faster than they were before. They seem like normal windows. However, I did notice after driving to work yesterday that the driver's side needs to be adjusted. There was a portion of the window that did not seat against the weather stripping on my soft top. I am not sure what I need to adjust, but I am going to start by loosening the regulator from the door and seeing how tweaking that goes. I believe if I tighten it down correctly this should help. Worst case I pull and adjust the window from the actual regulator. I am thinking this will happen tomorrow night. Tonight it is time to watch some Breaking Bad with the wife!
Last edited by ofspunk7; 07-12-2017 at 12:25 PM.
Reply
0
0
09-11-2014, 03:25 PM
#13
Junior Member
Thread Starter
Join Date: May 2014
Location: North St Paul, MN
Posts: 397
Total Cats: 25
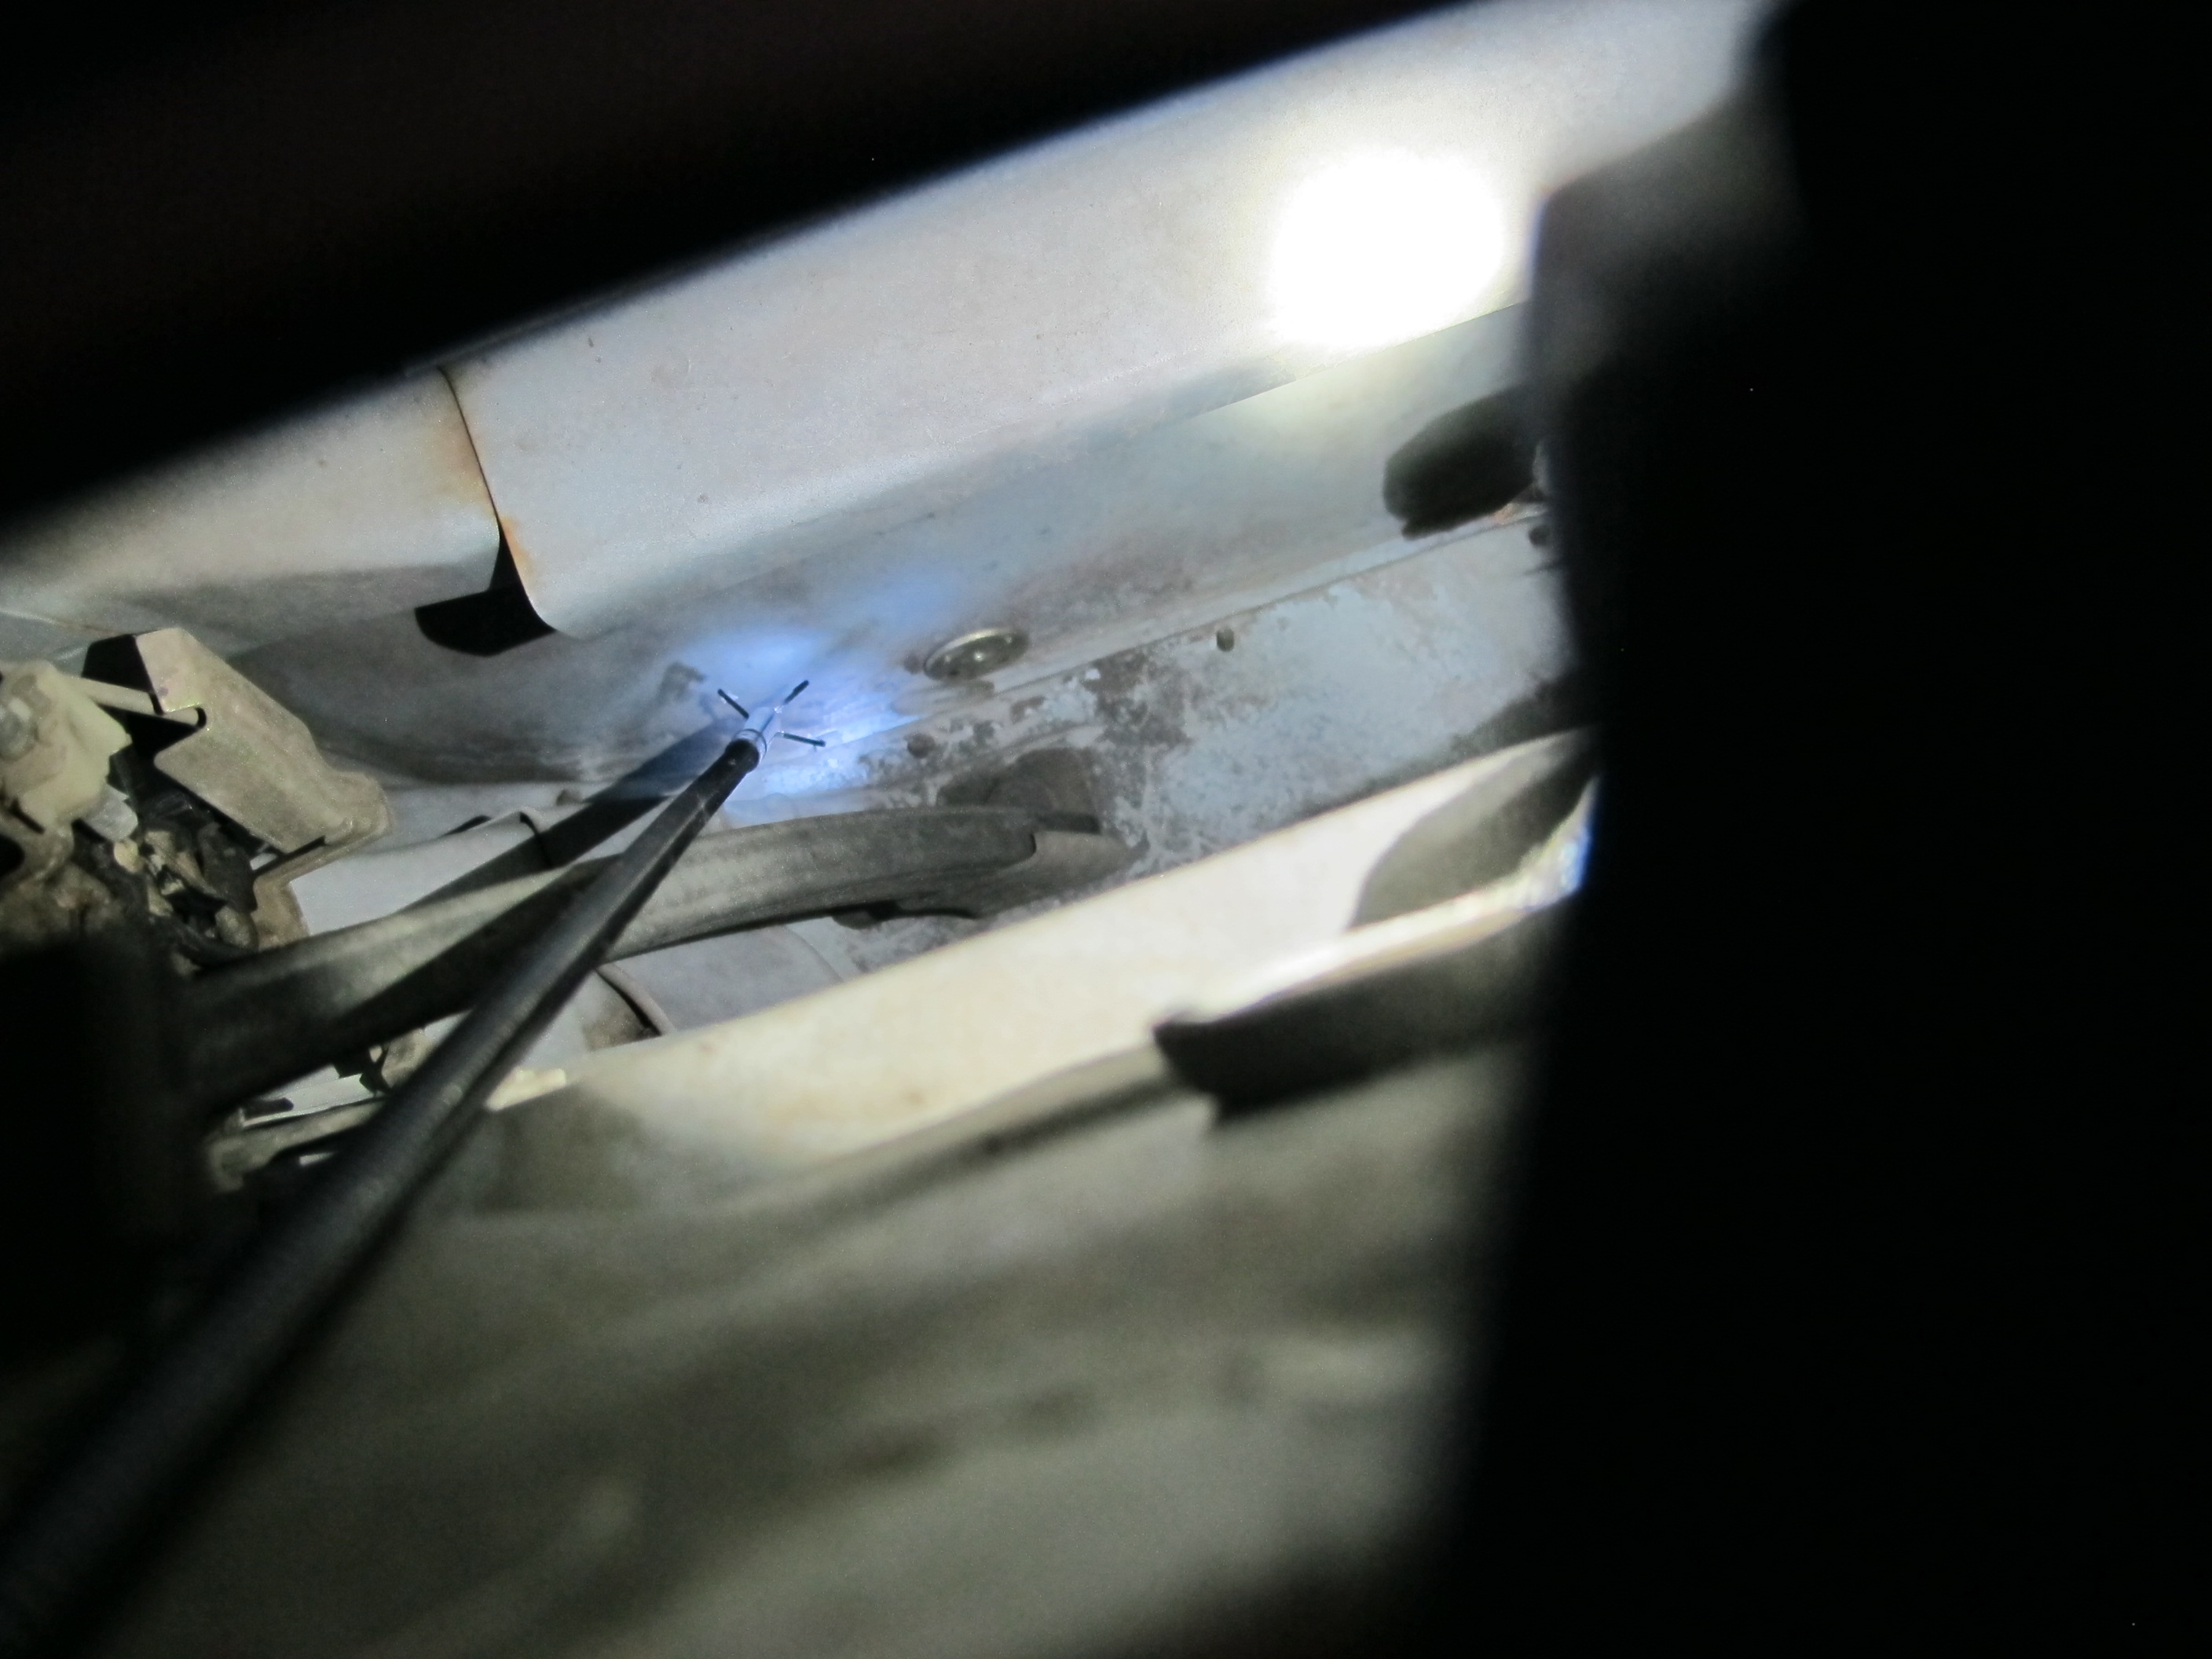
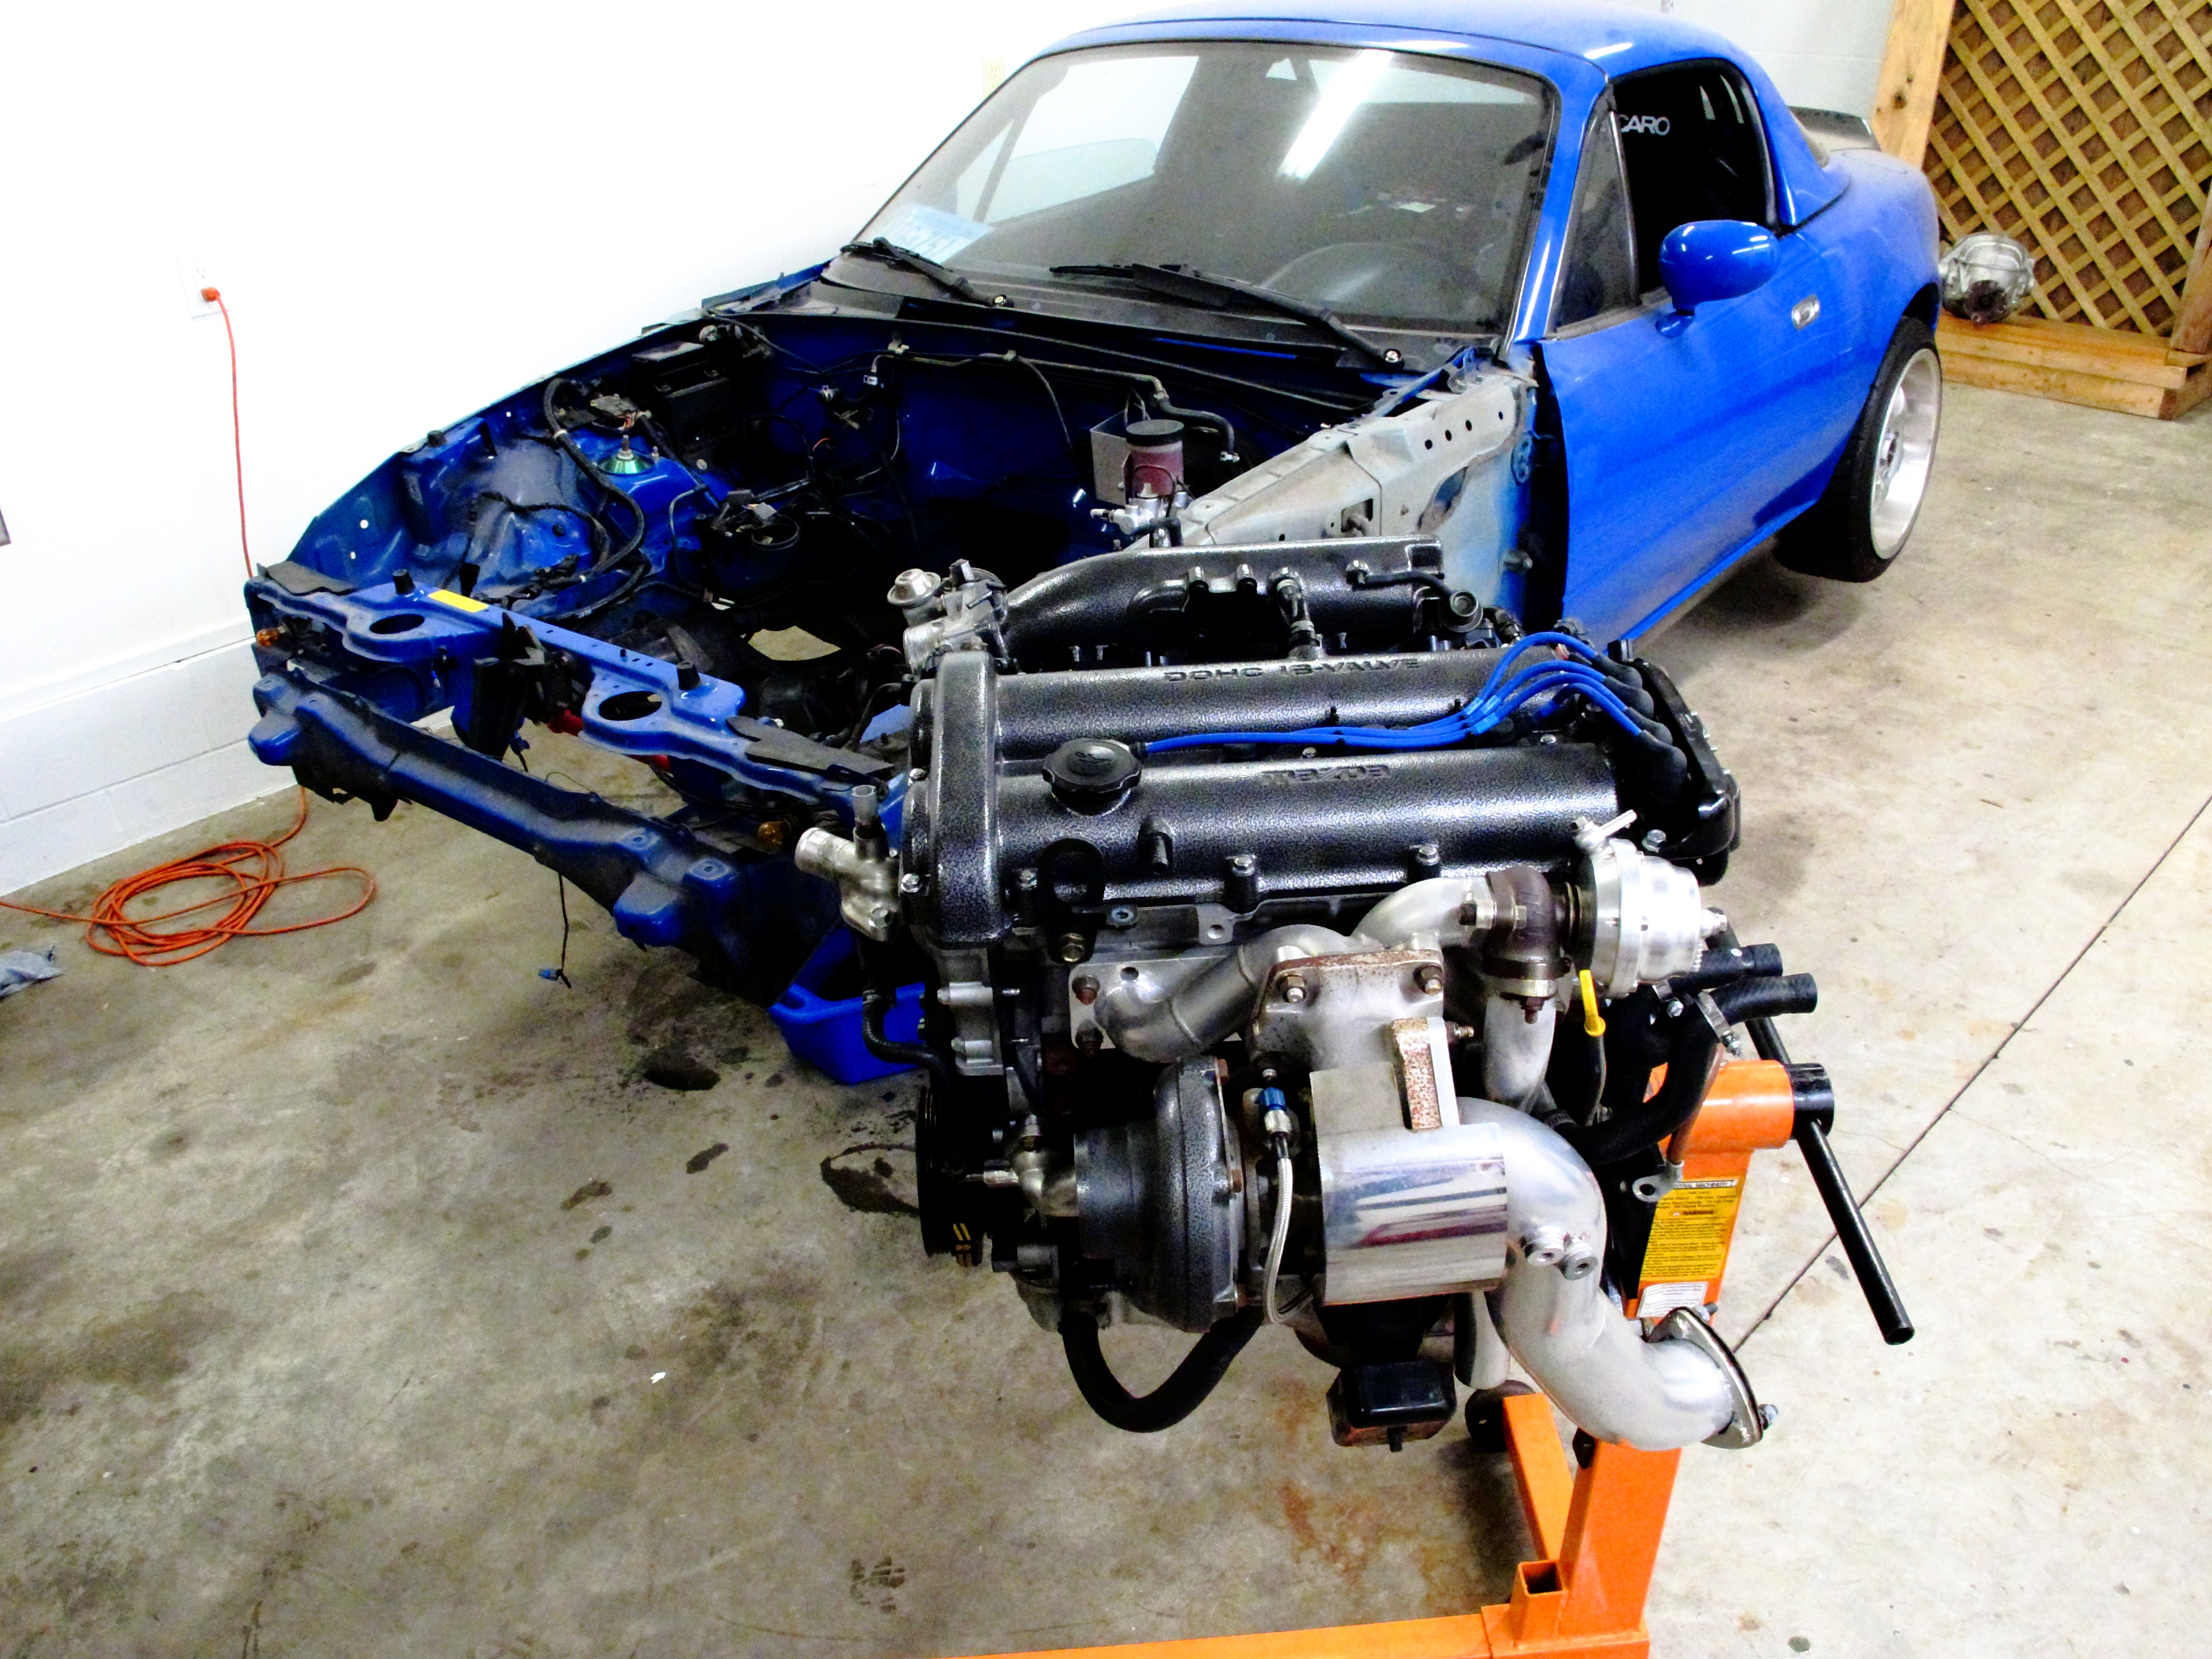
Last night we start the swap. I am very excited to start wrenching on this car. I expect the timeline to be...
- Pull Engine
- Swap Engine and Run for a few weeks N/A
- Swap Turbo setup + new parts
- Put turbo LS in blue car
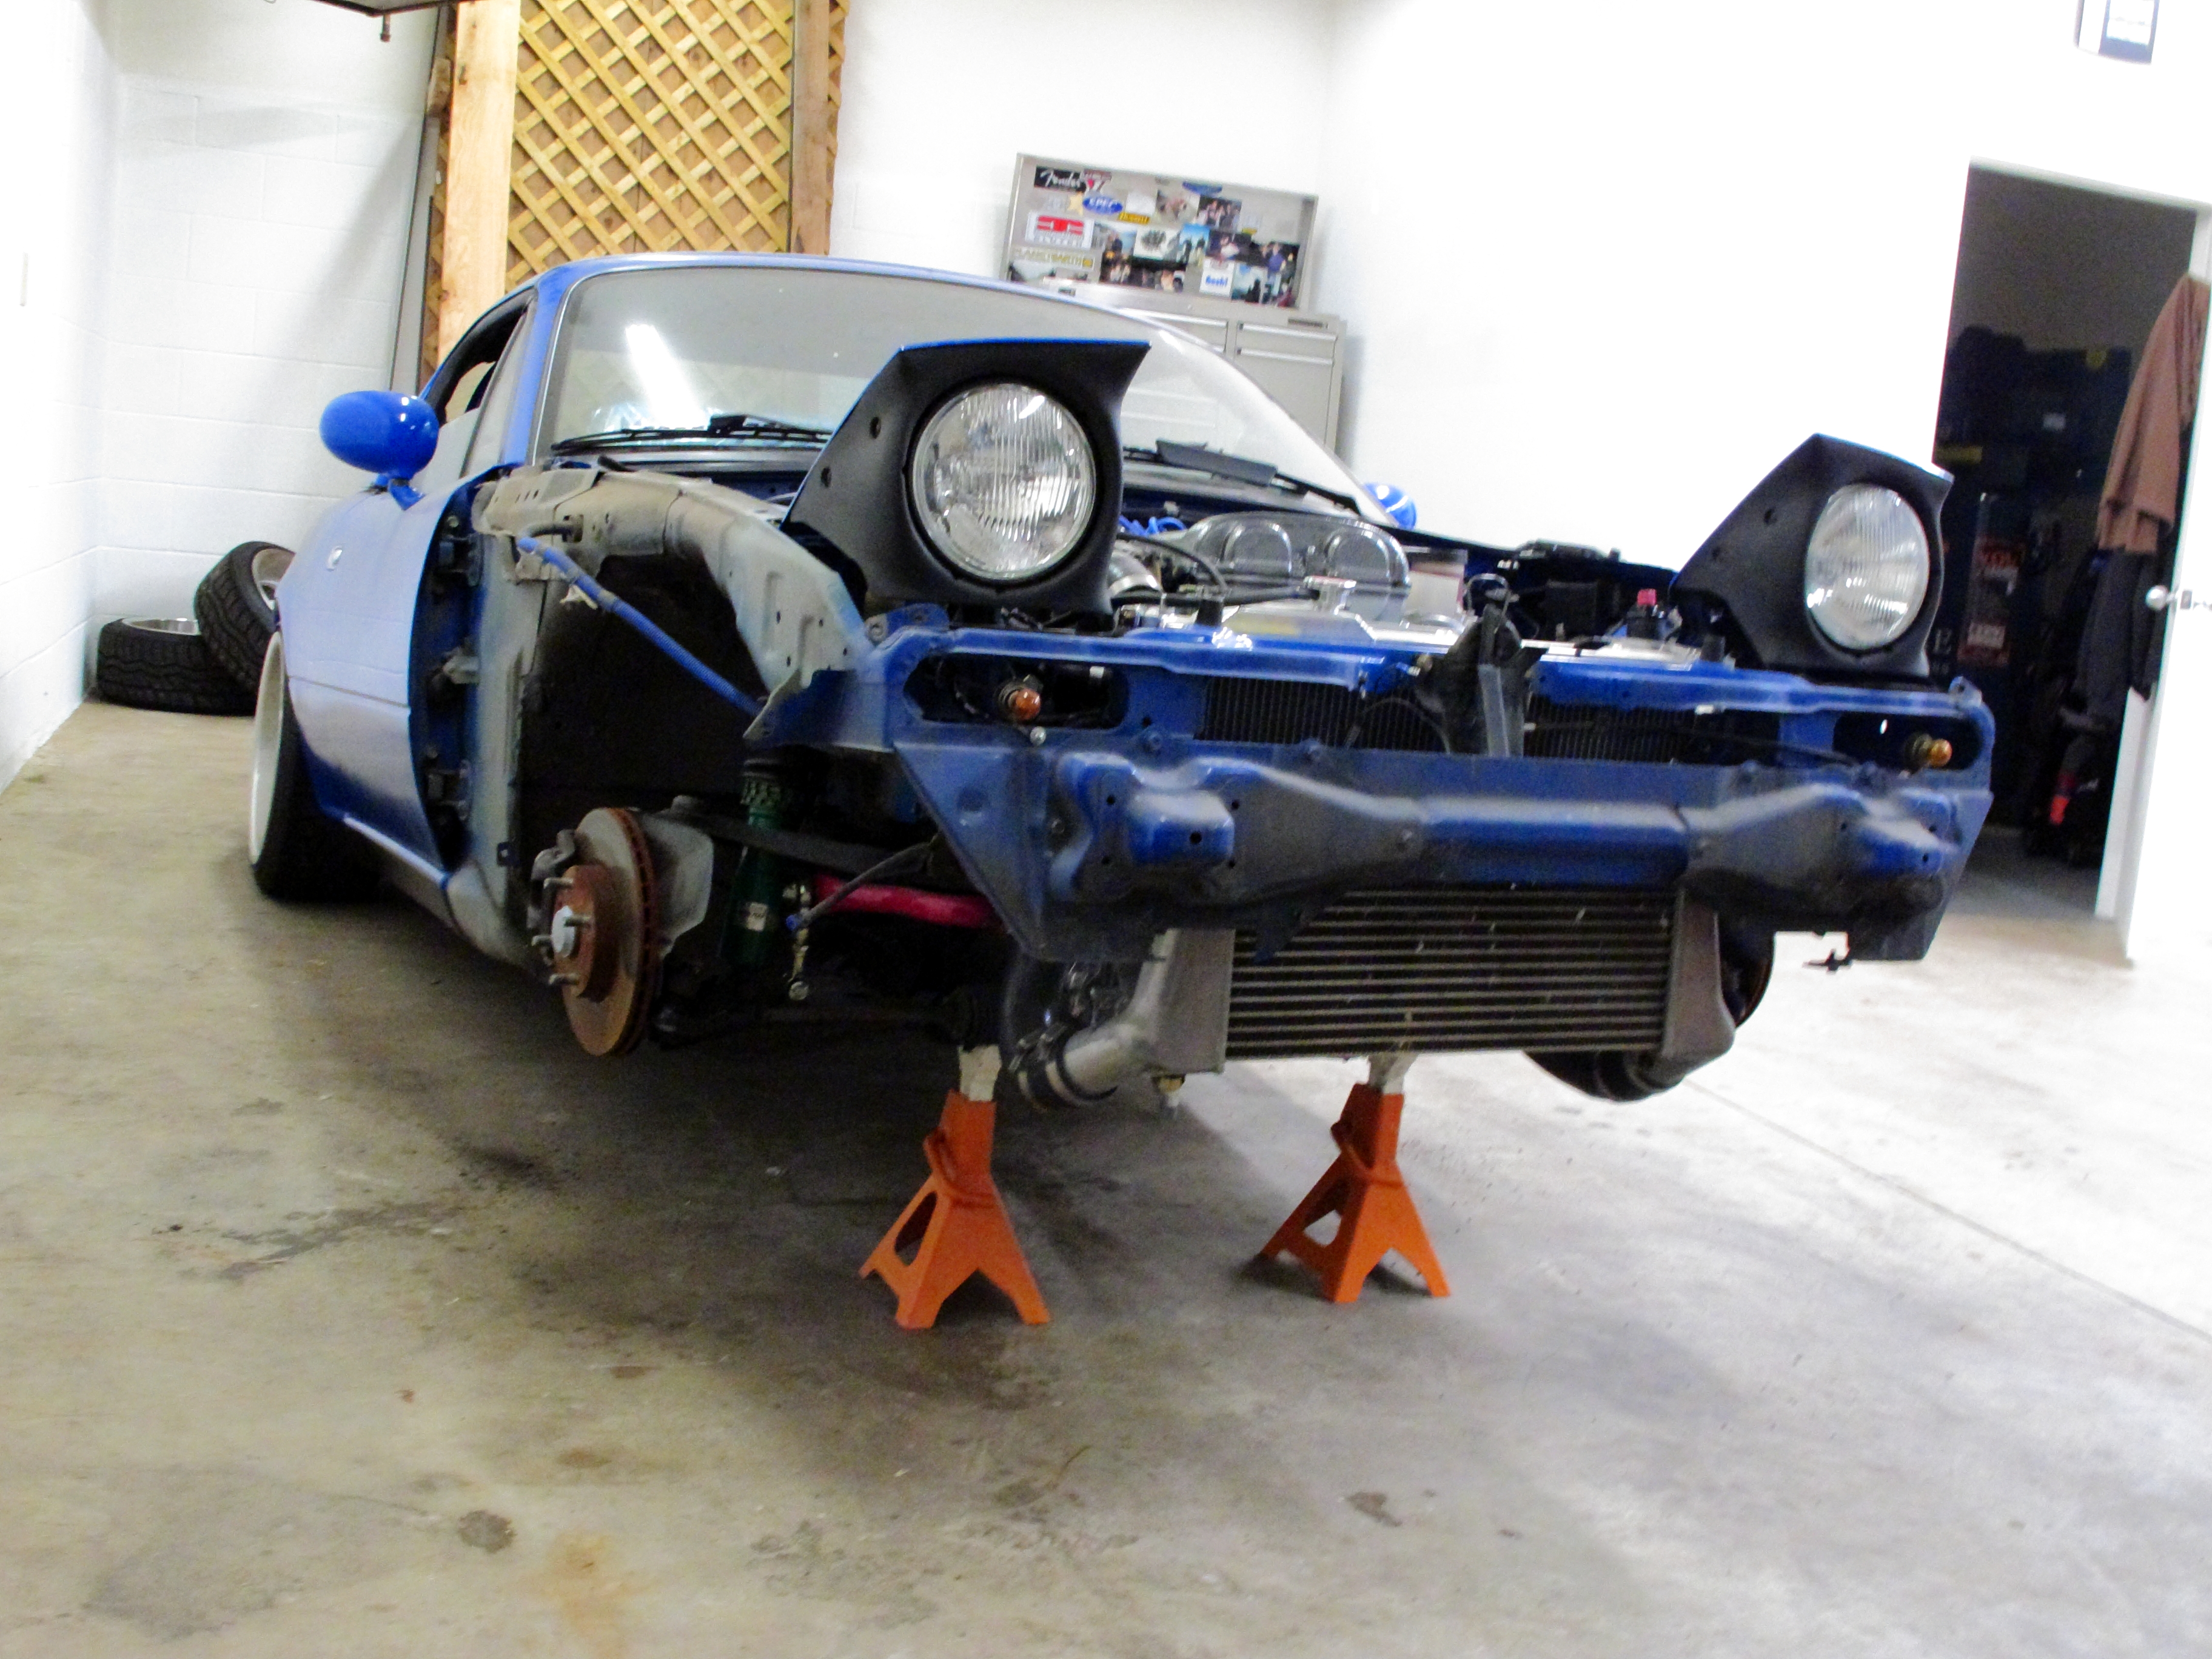
Blue 92' - my new motor setup.
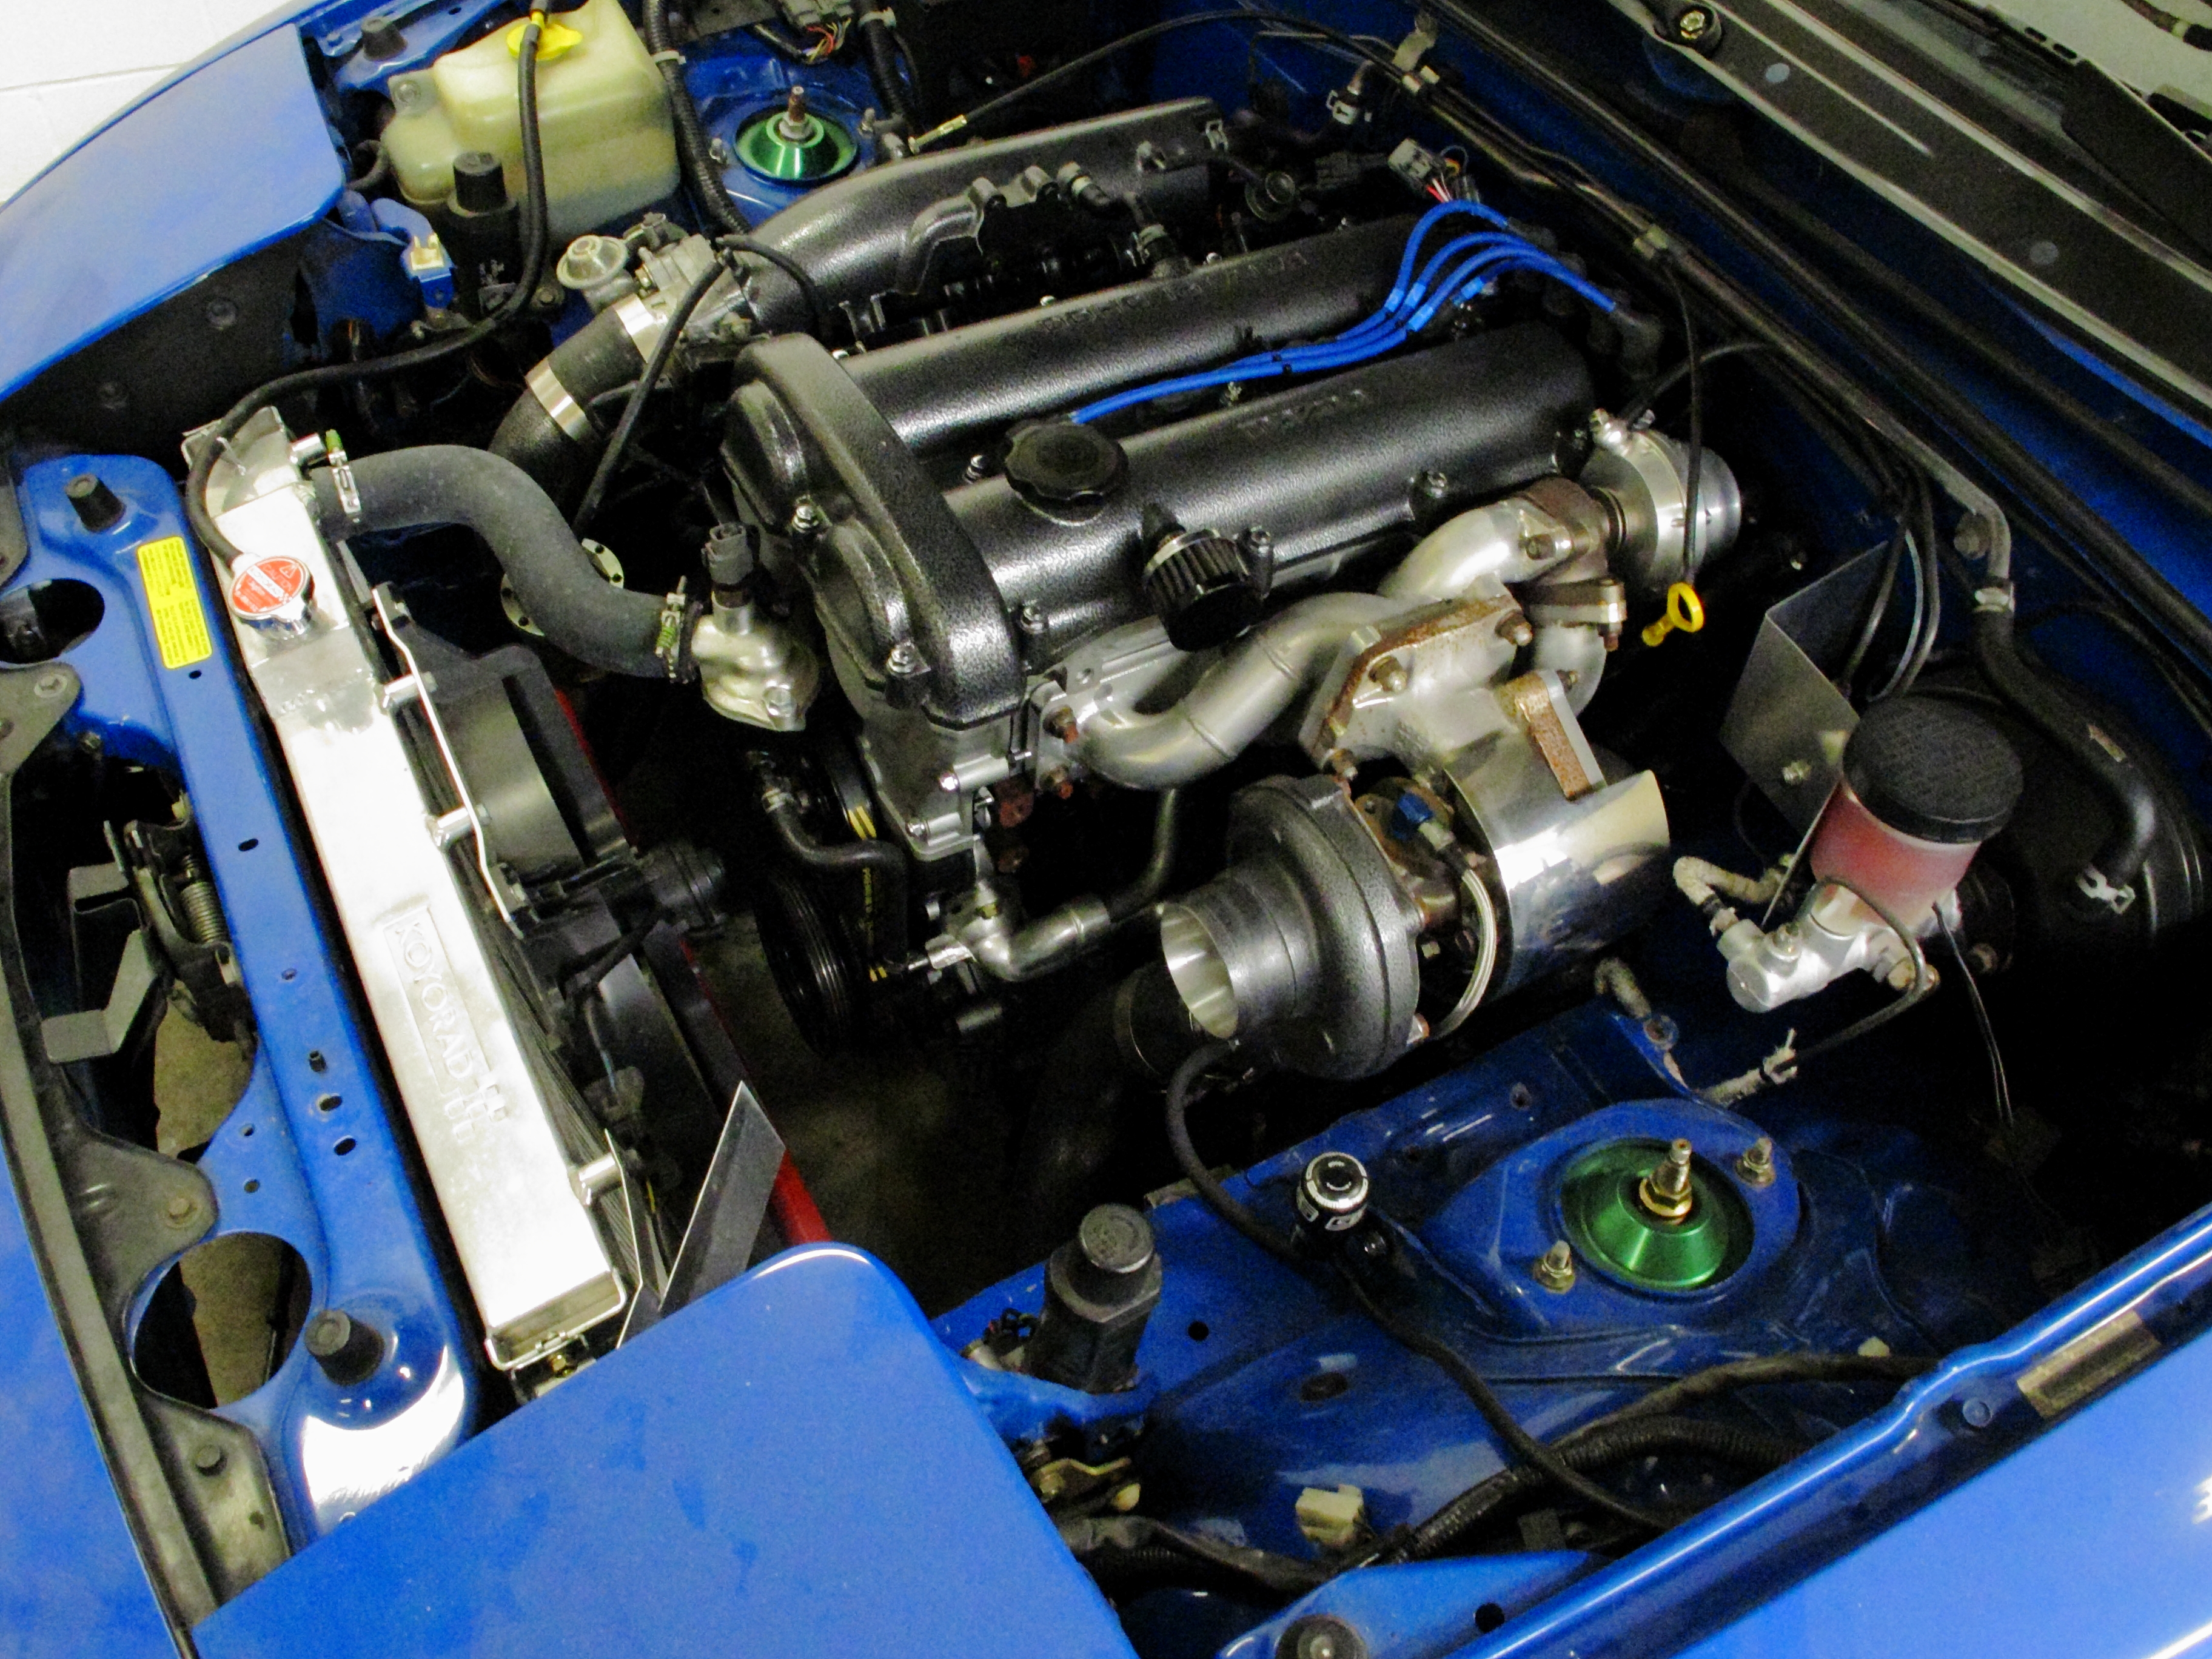
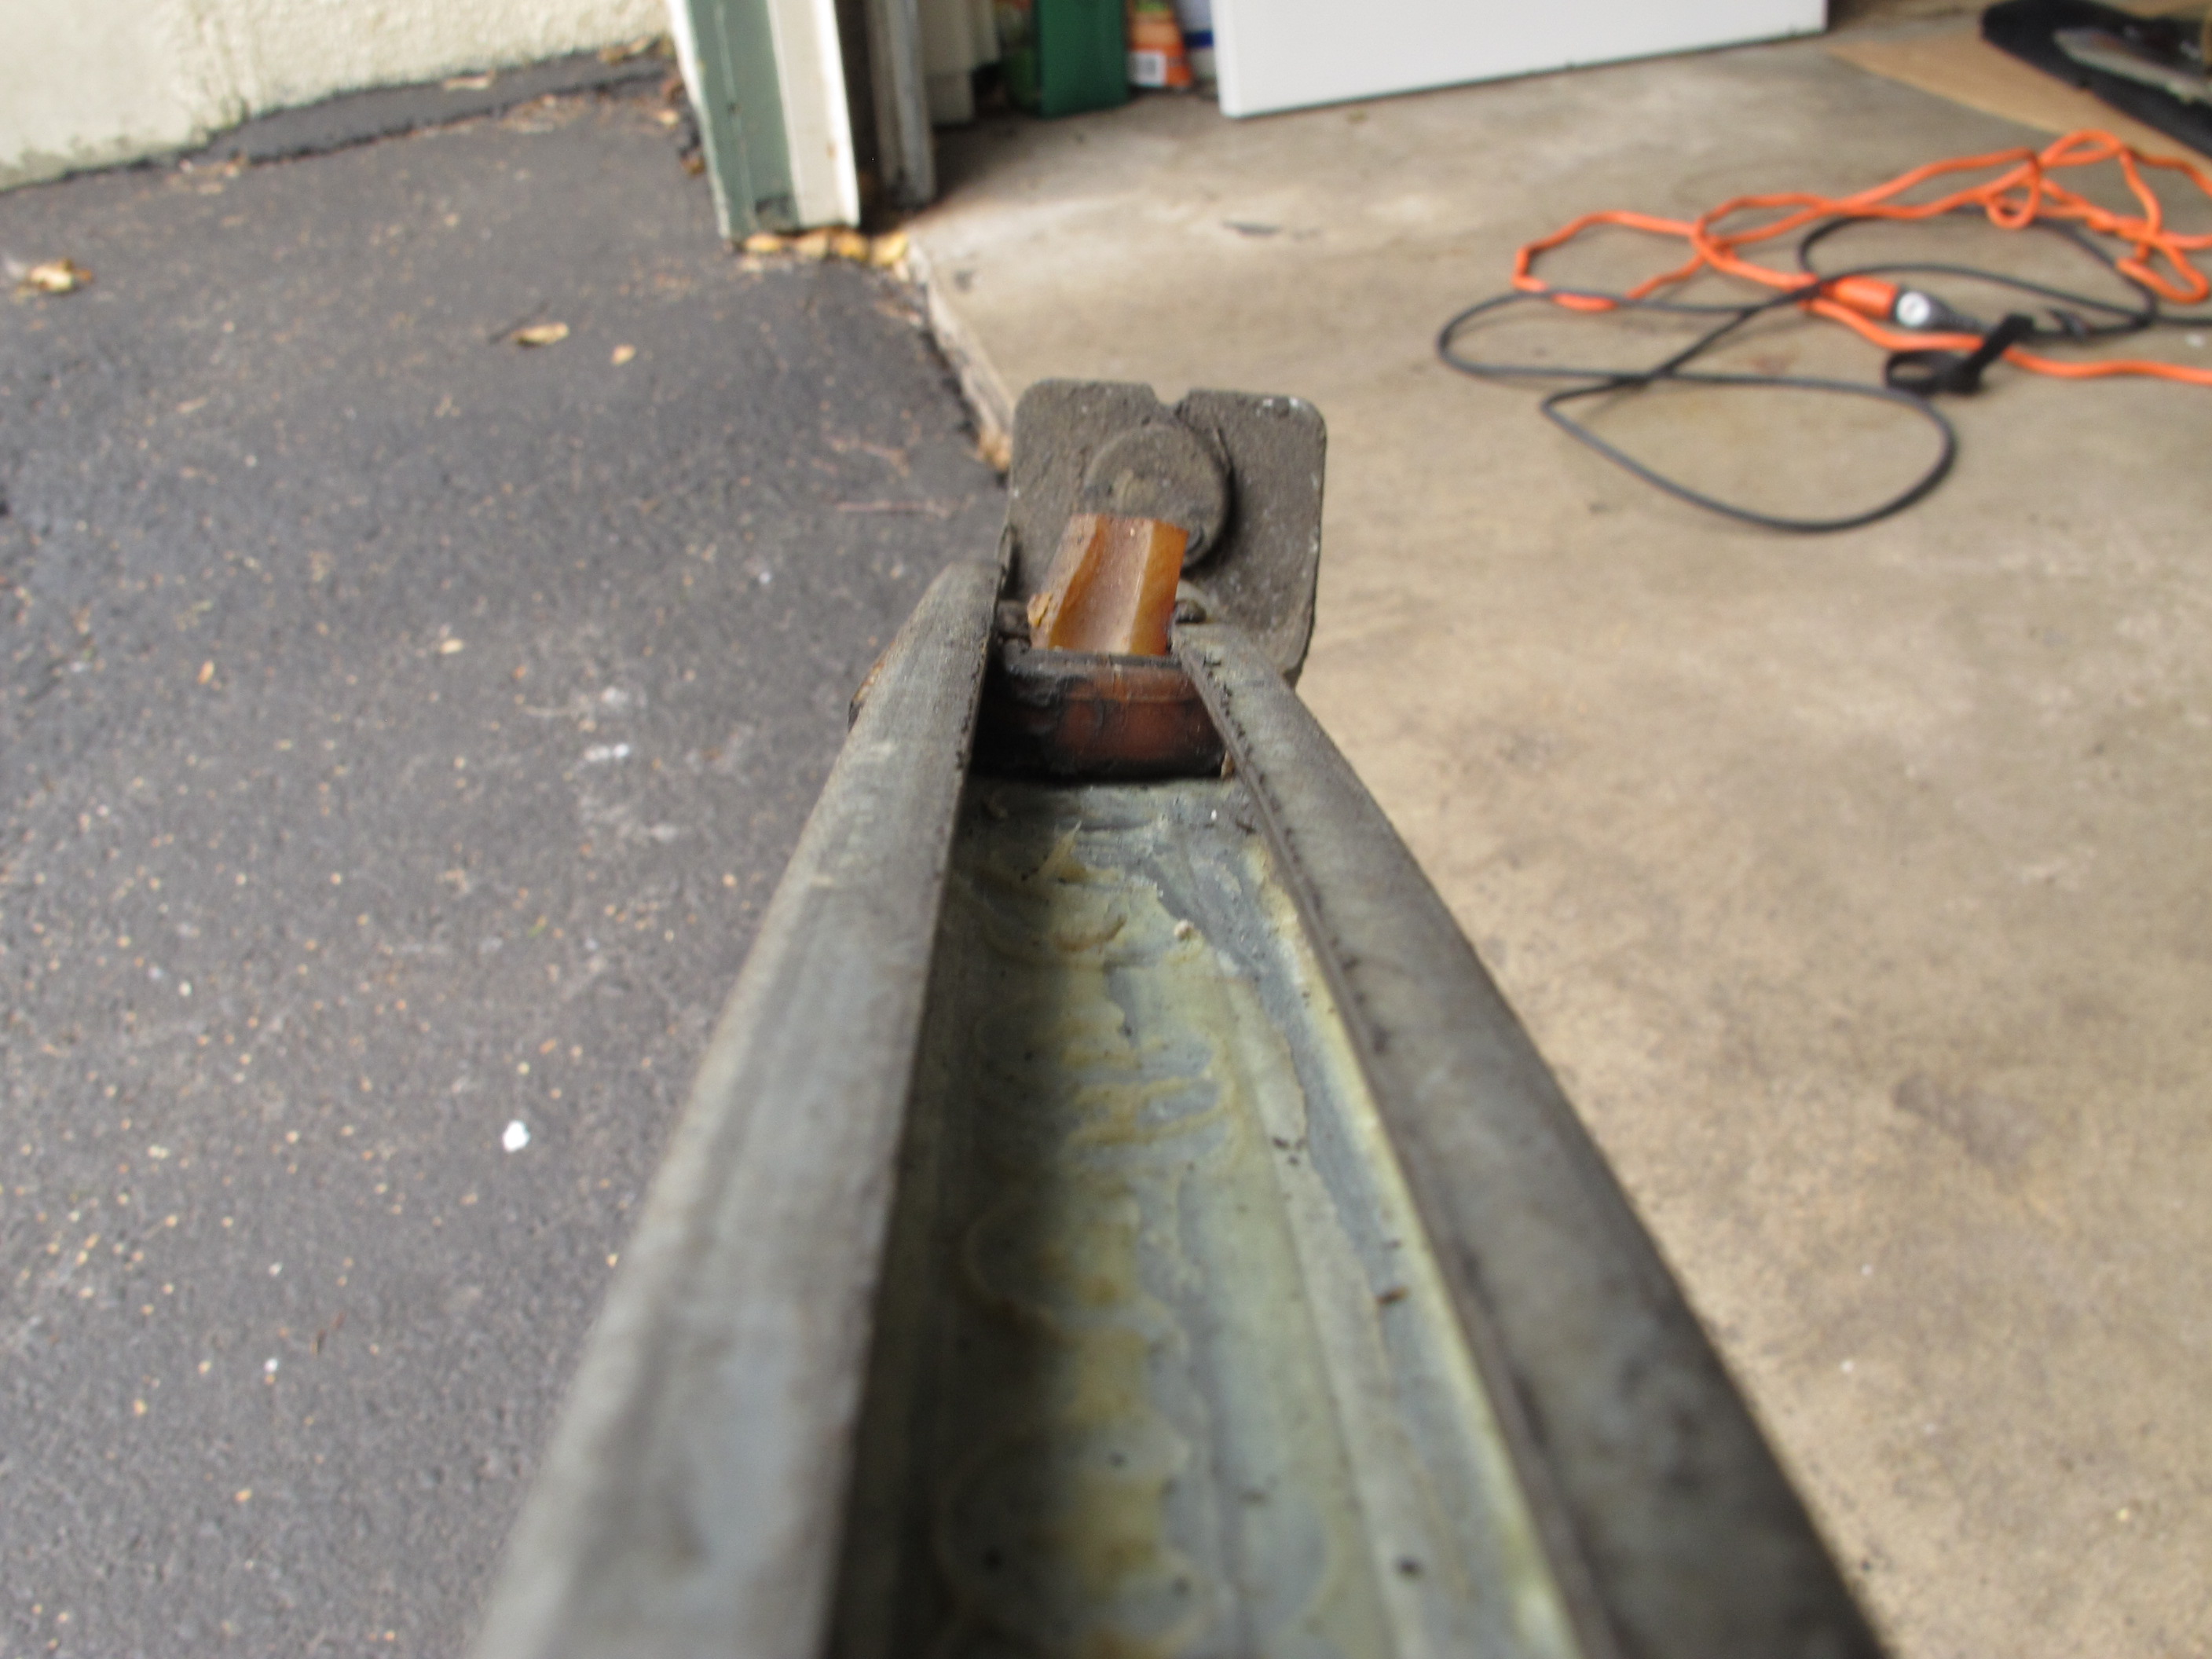
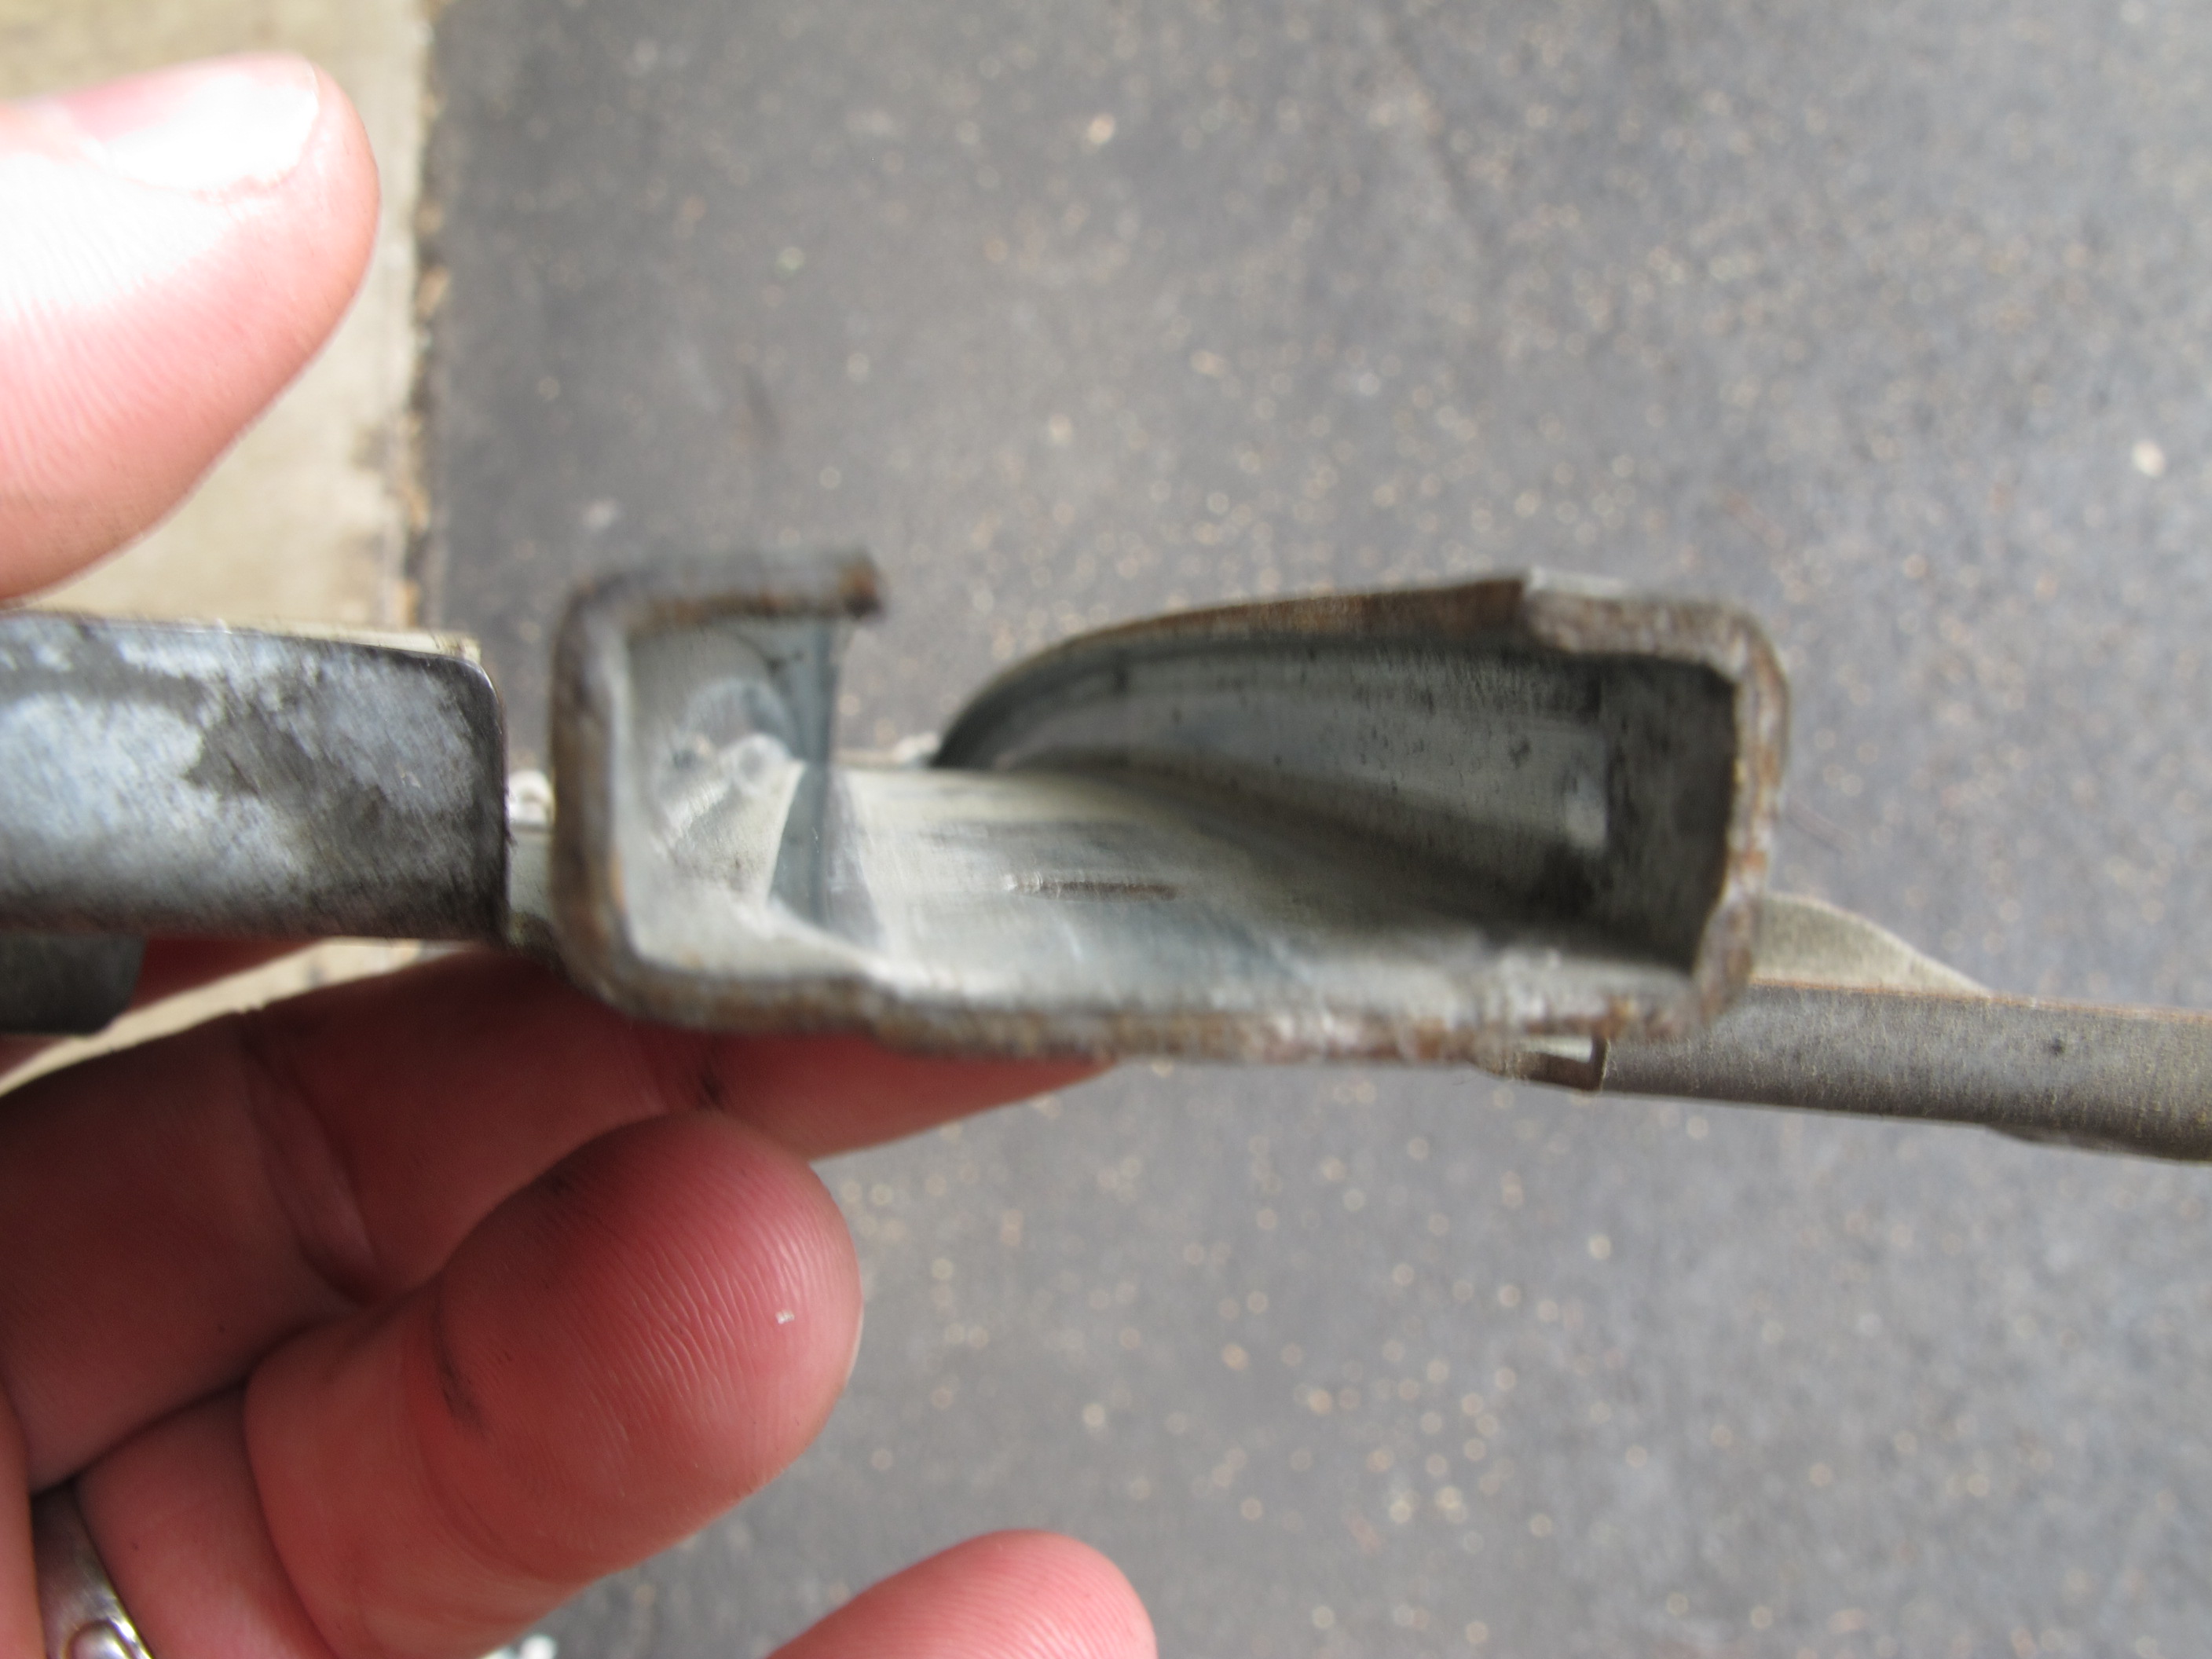
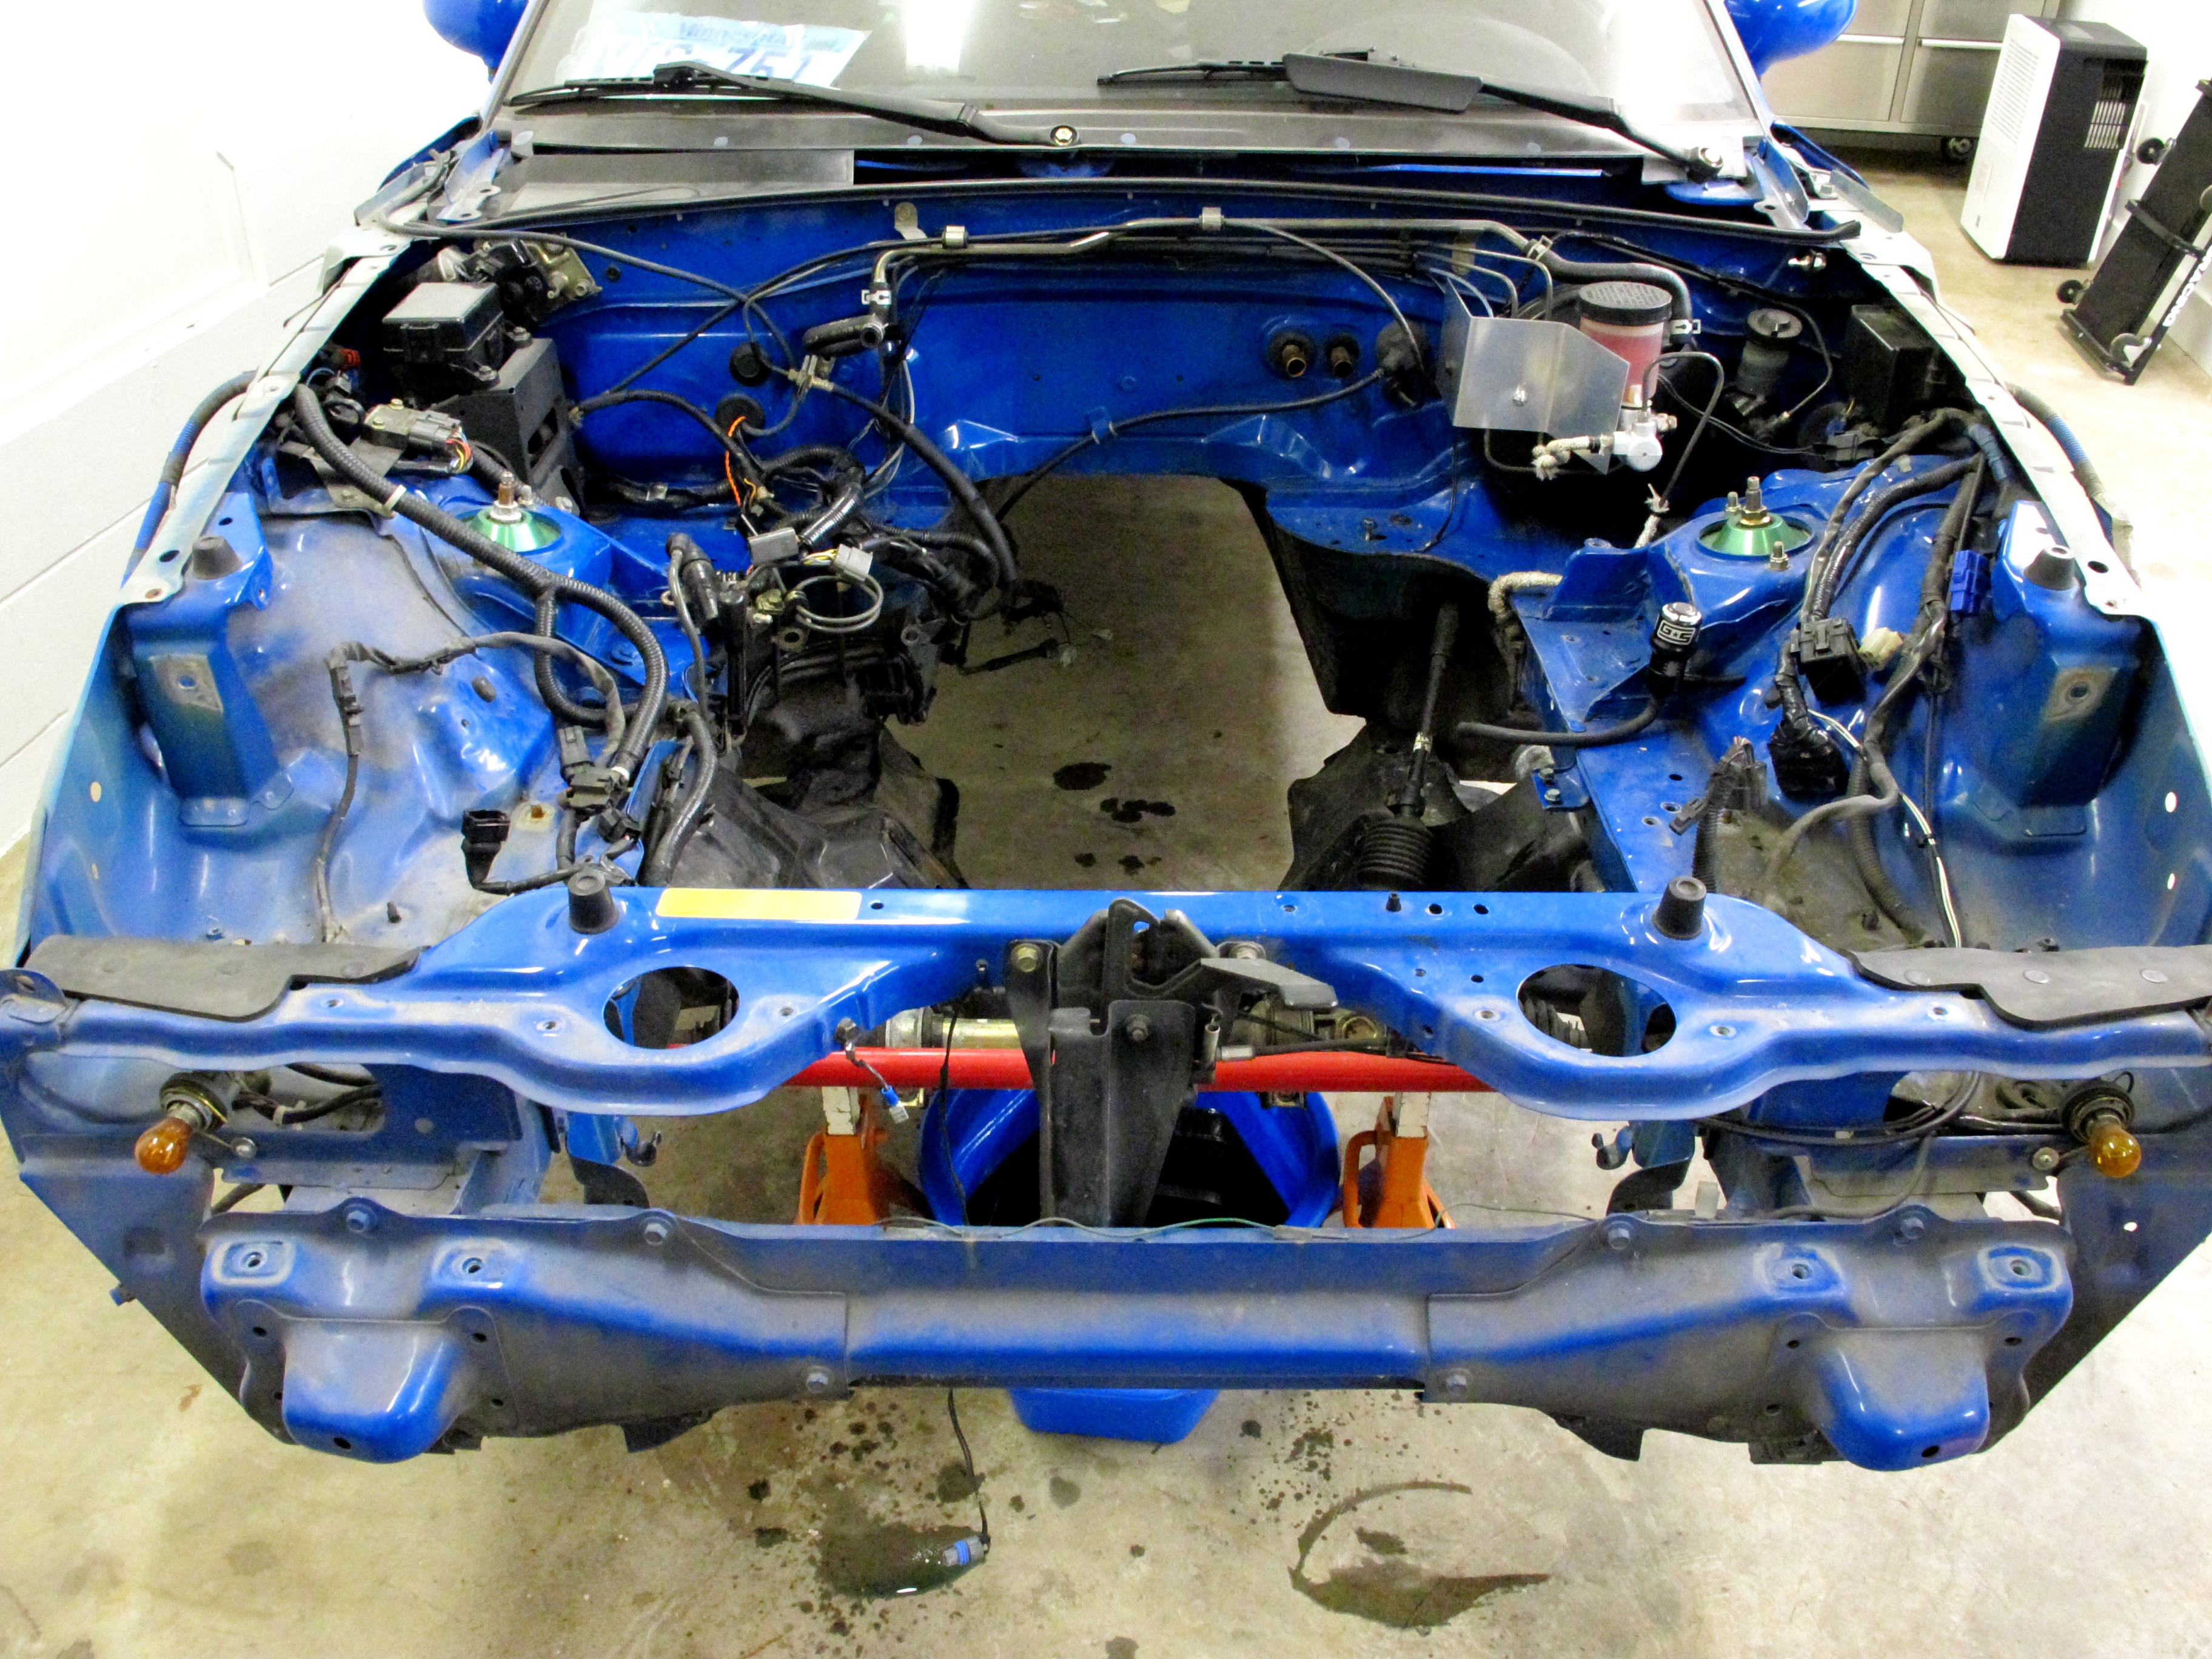
My cousin has had this car for 14+ years. Today we found a gift from the previous owner. This was the first time he has pulled the fenders to drop an engine. Mostly it was due to the space needed for the V8 conversion.
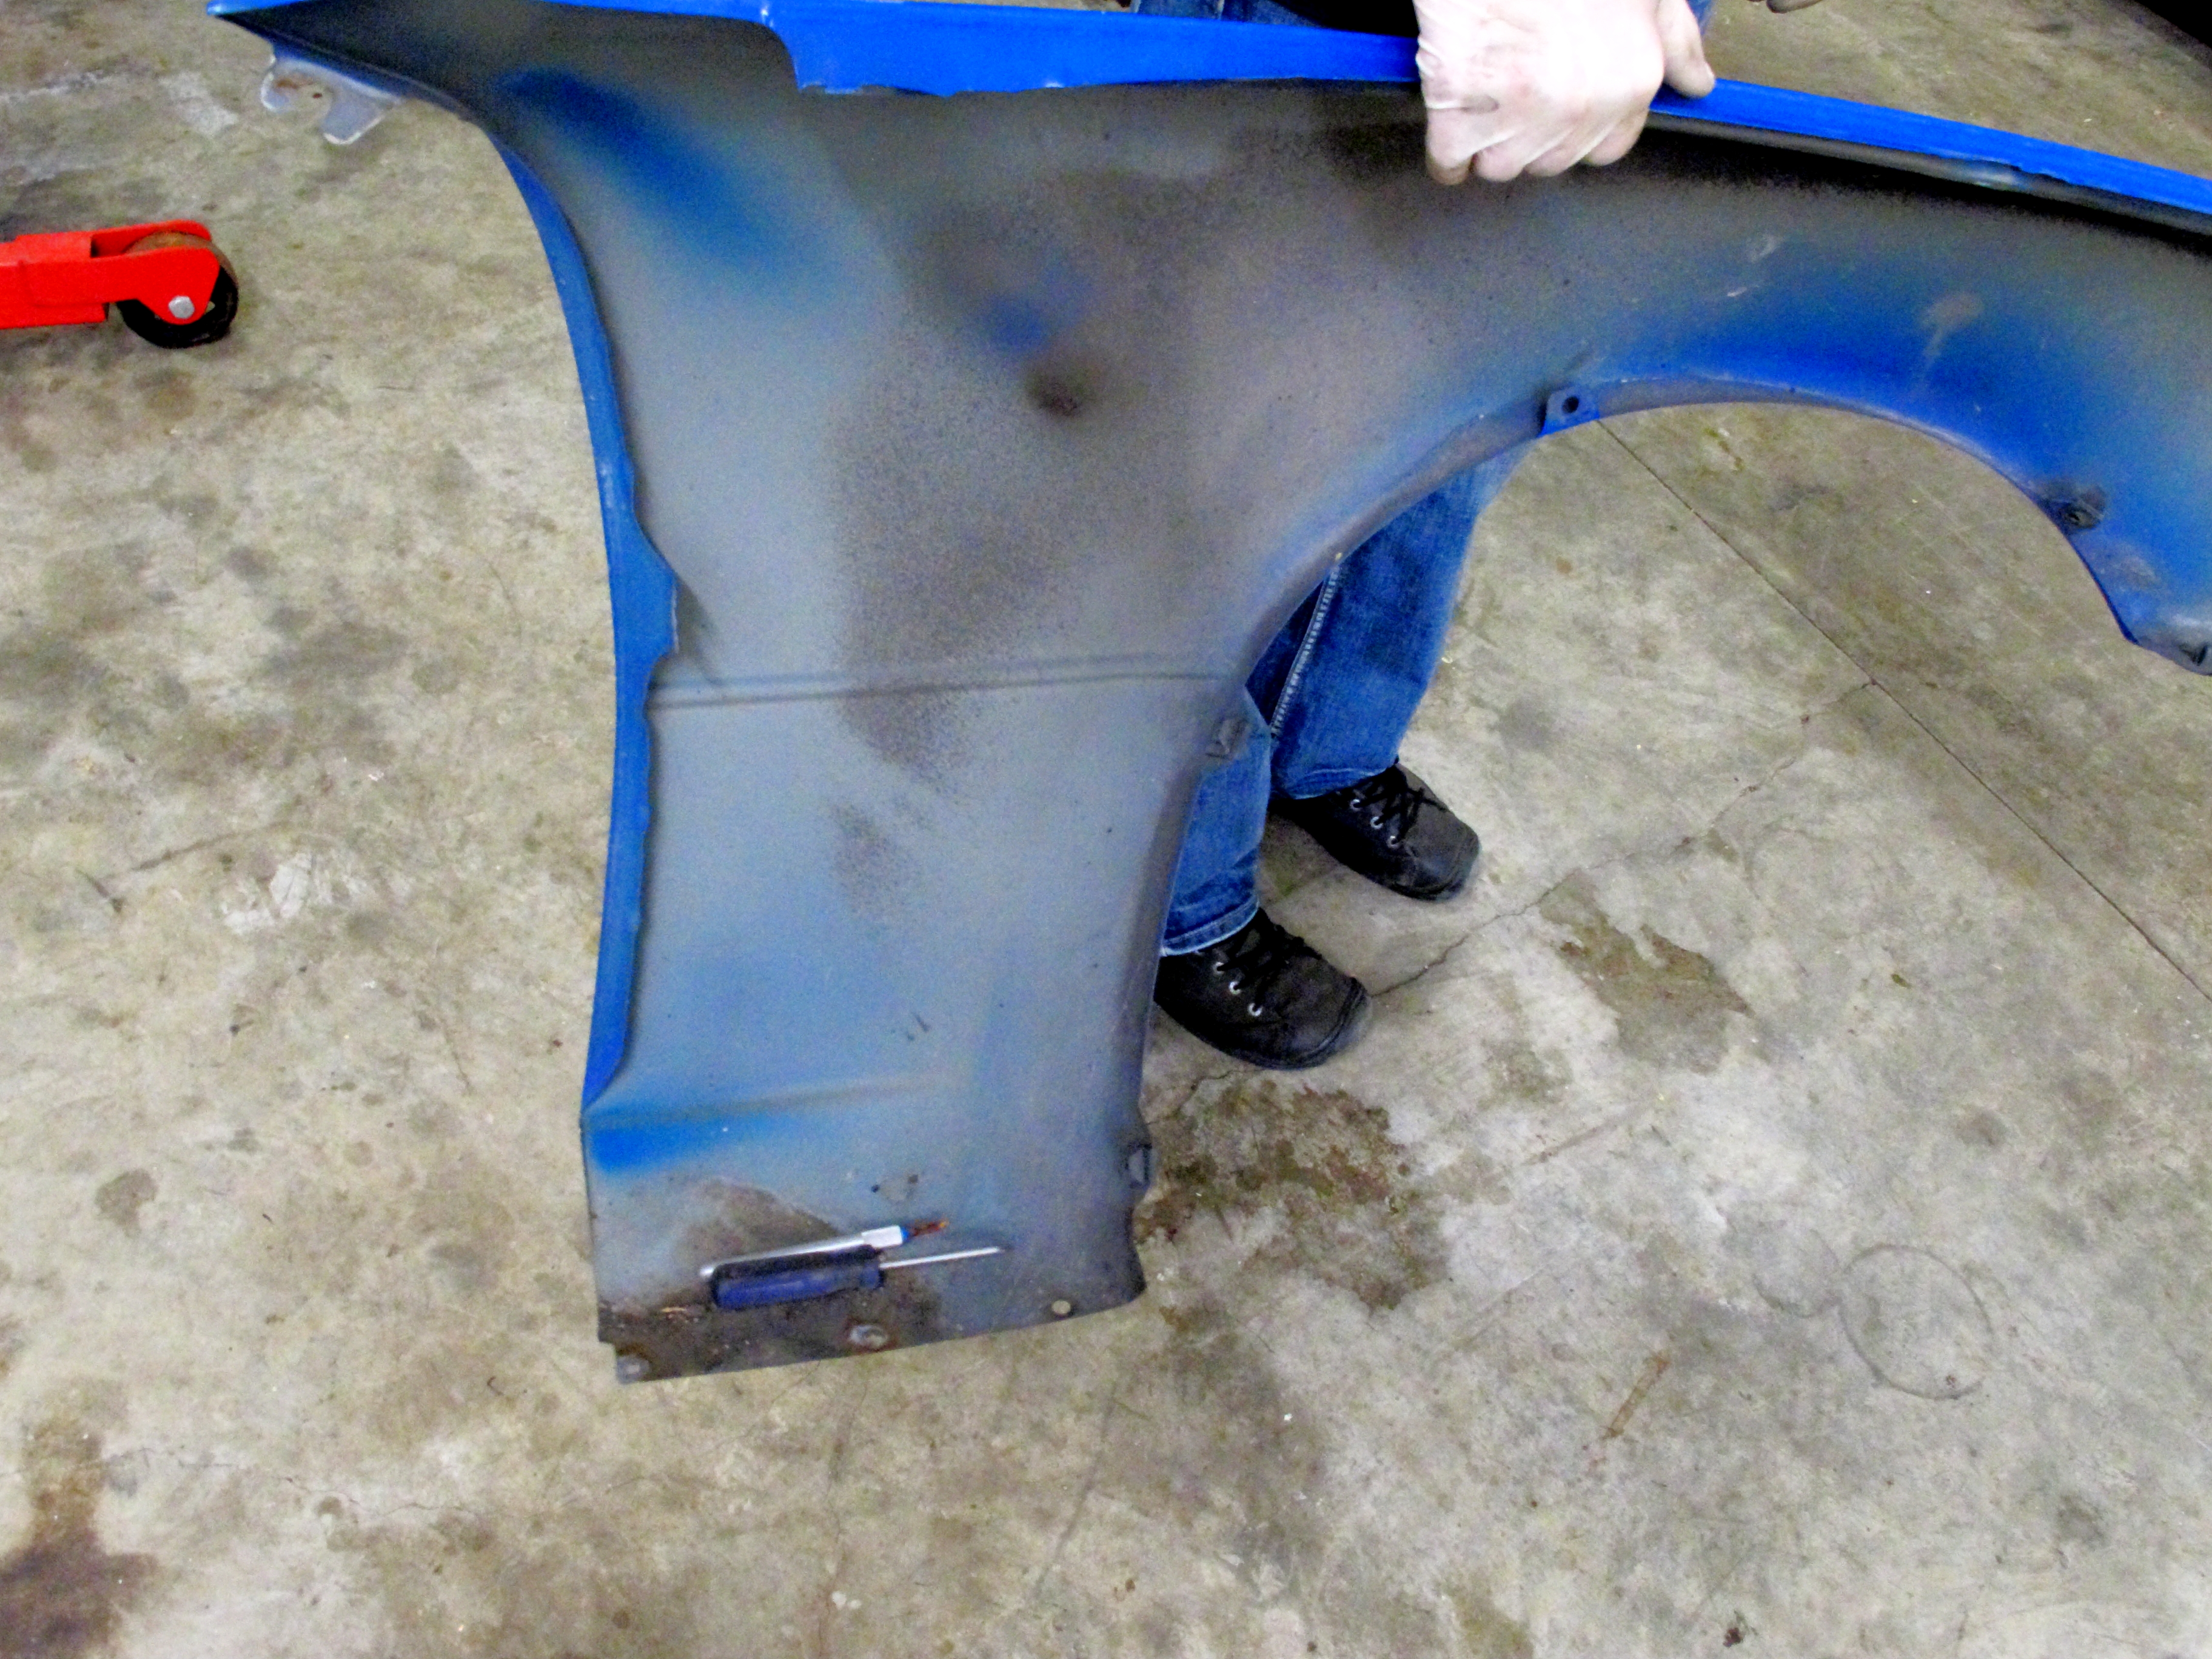
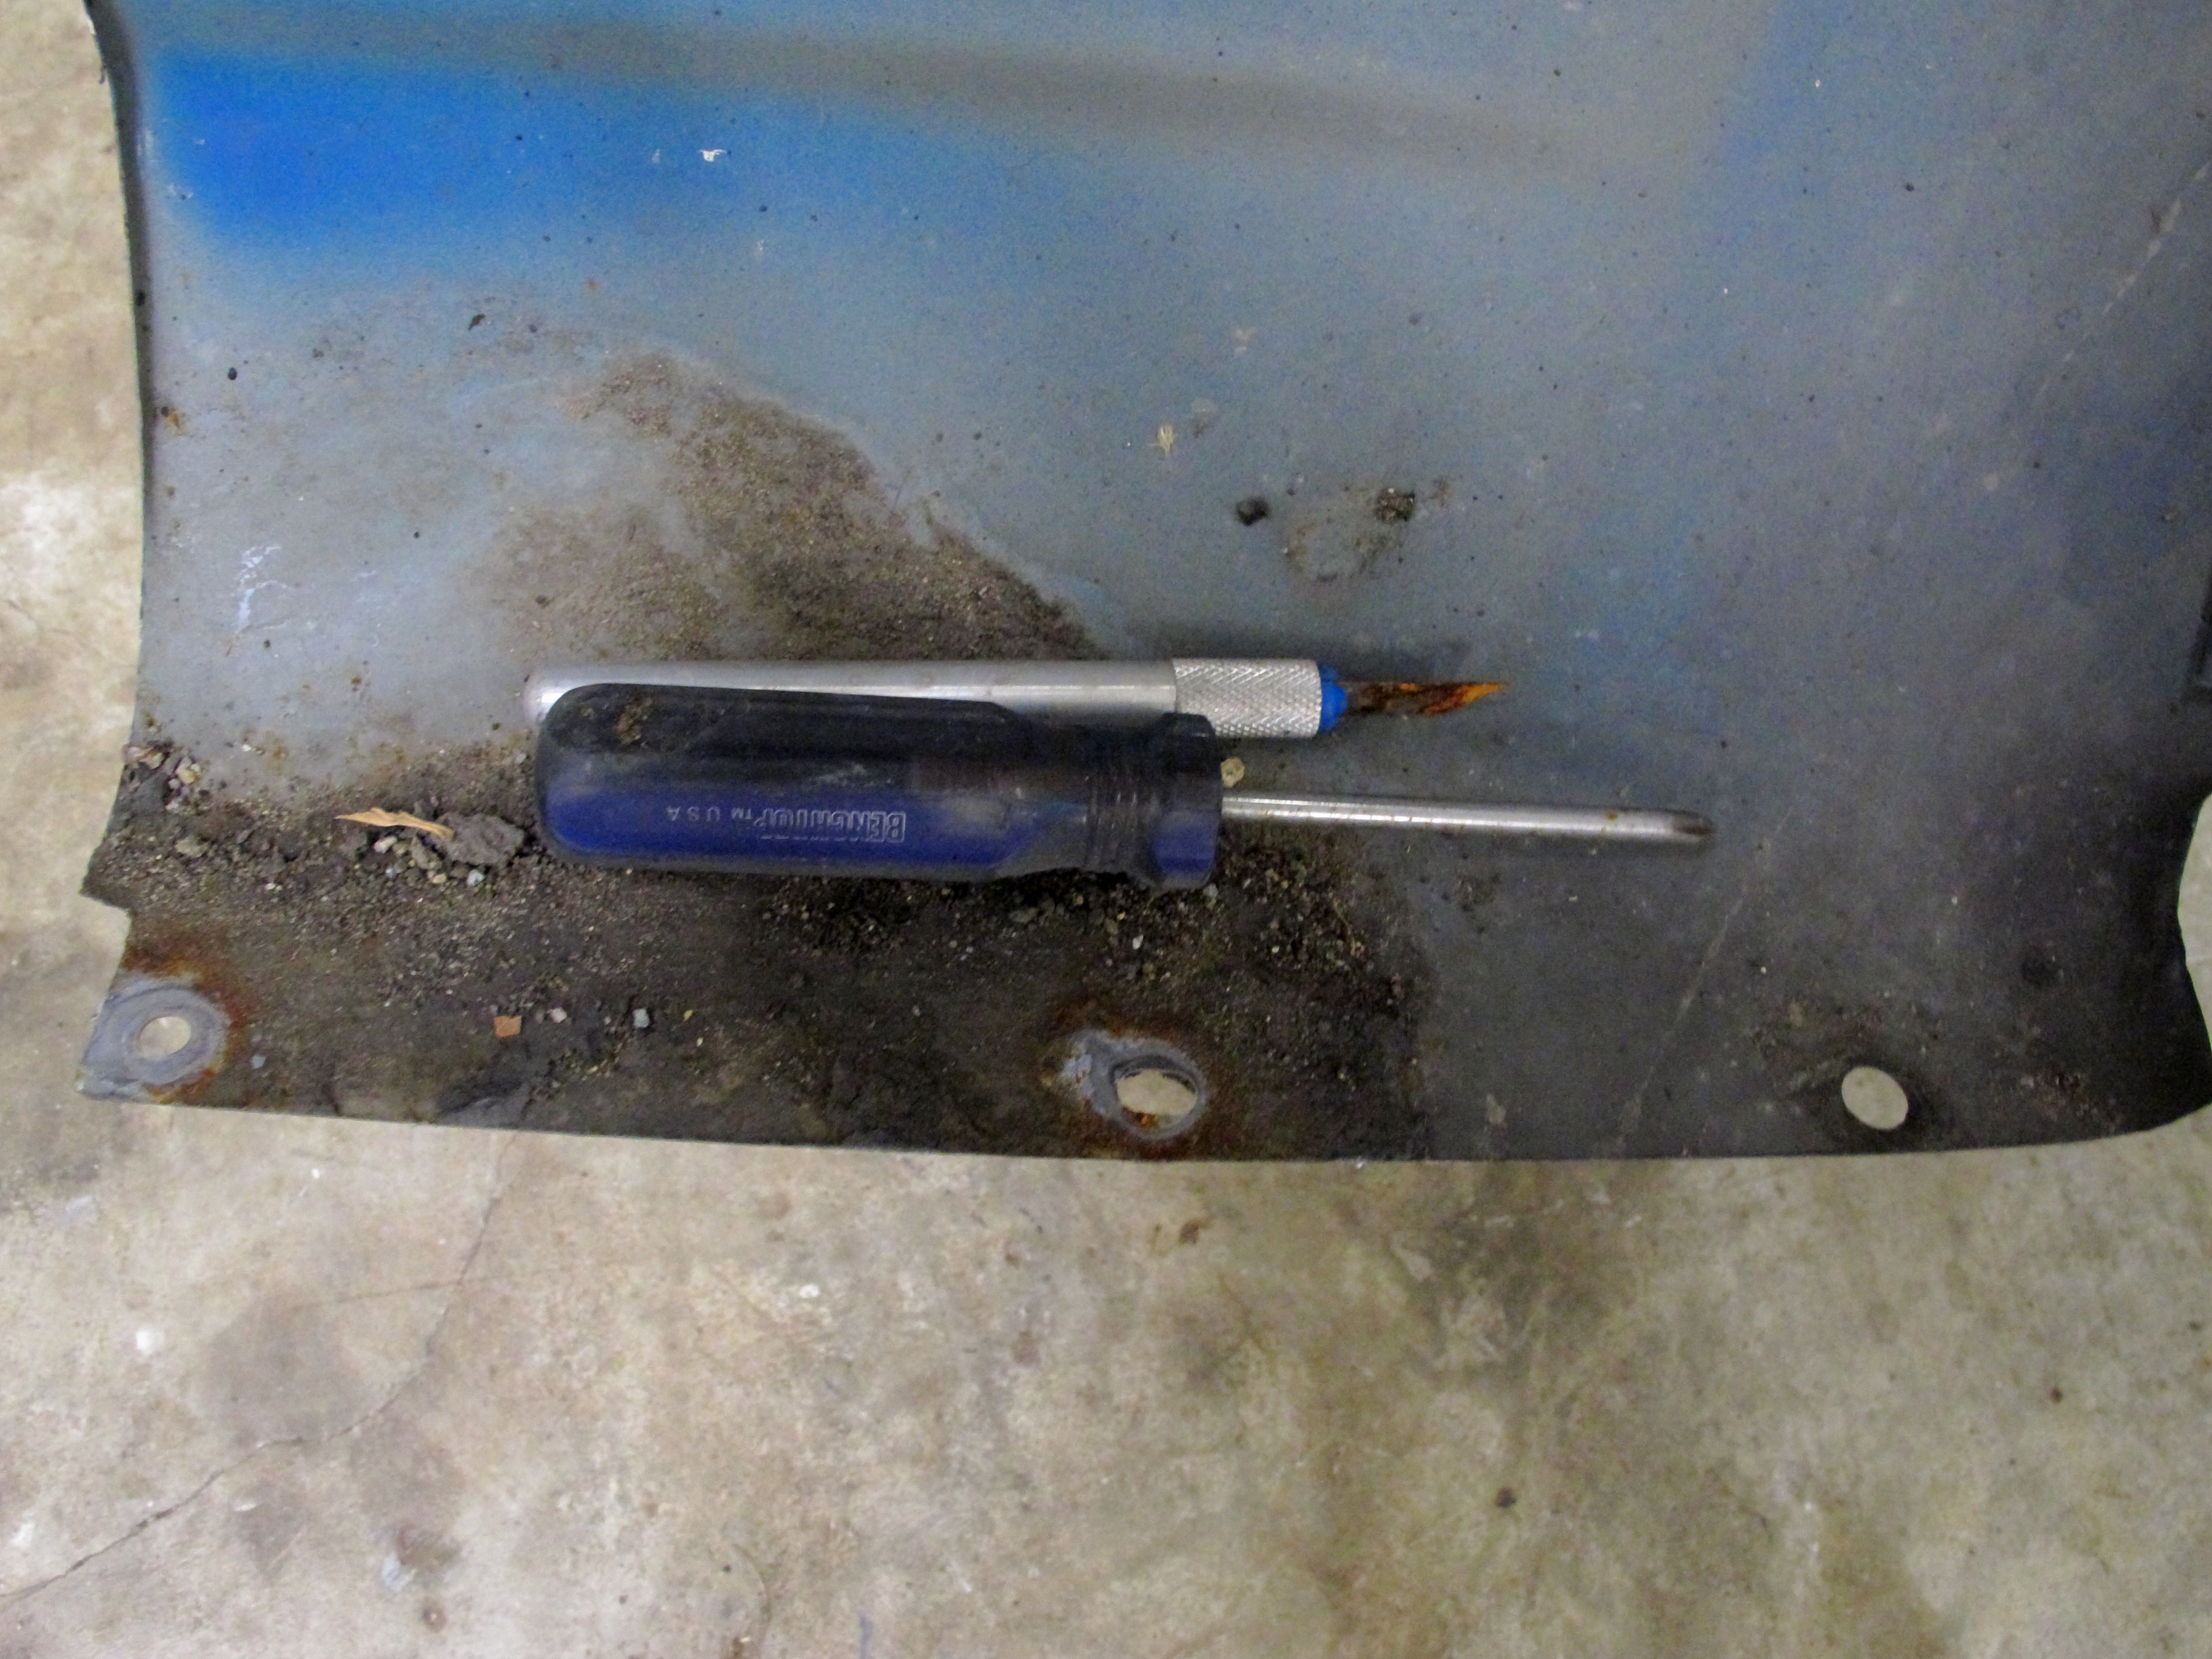
How would you like to have a rusty blade bumping about your rust free car?
Fenders off. I love how the jackstands look like buck teeth.
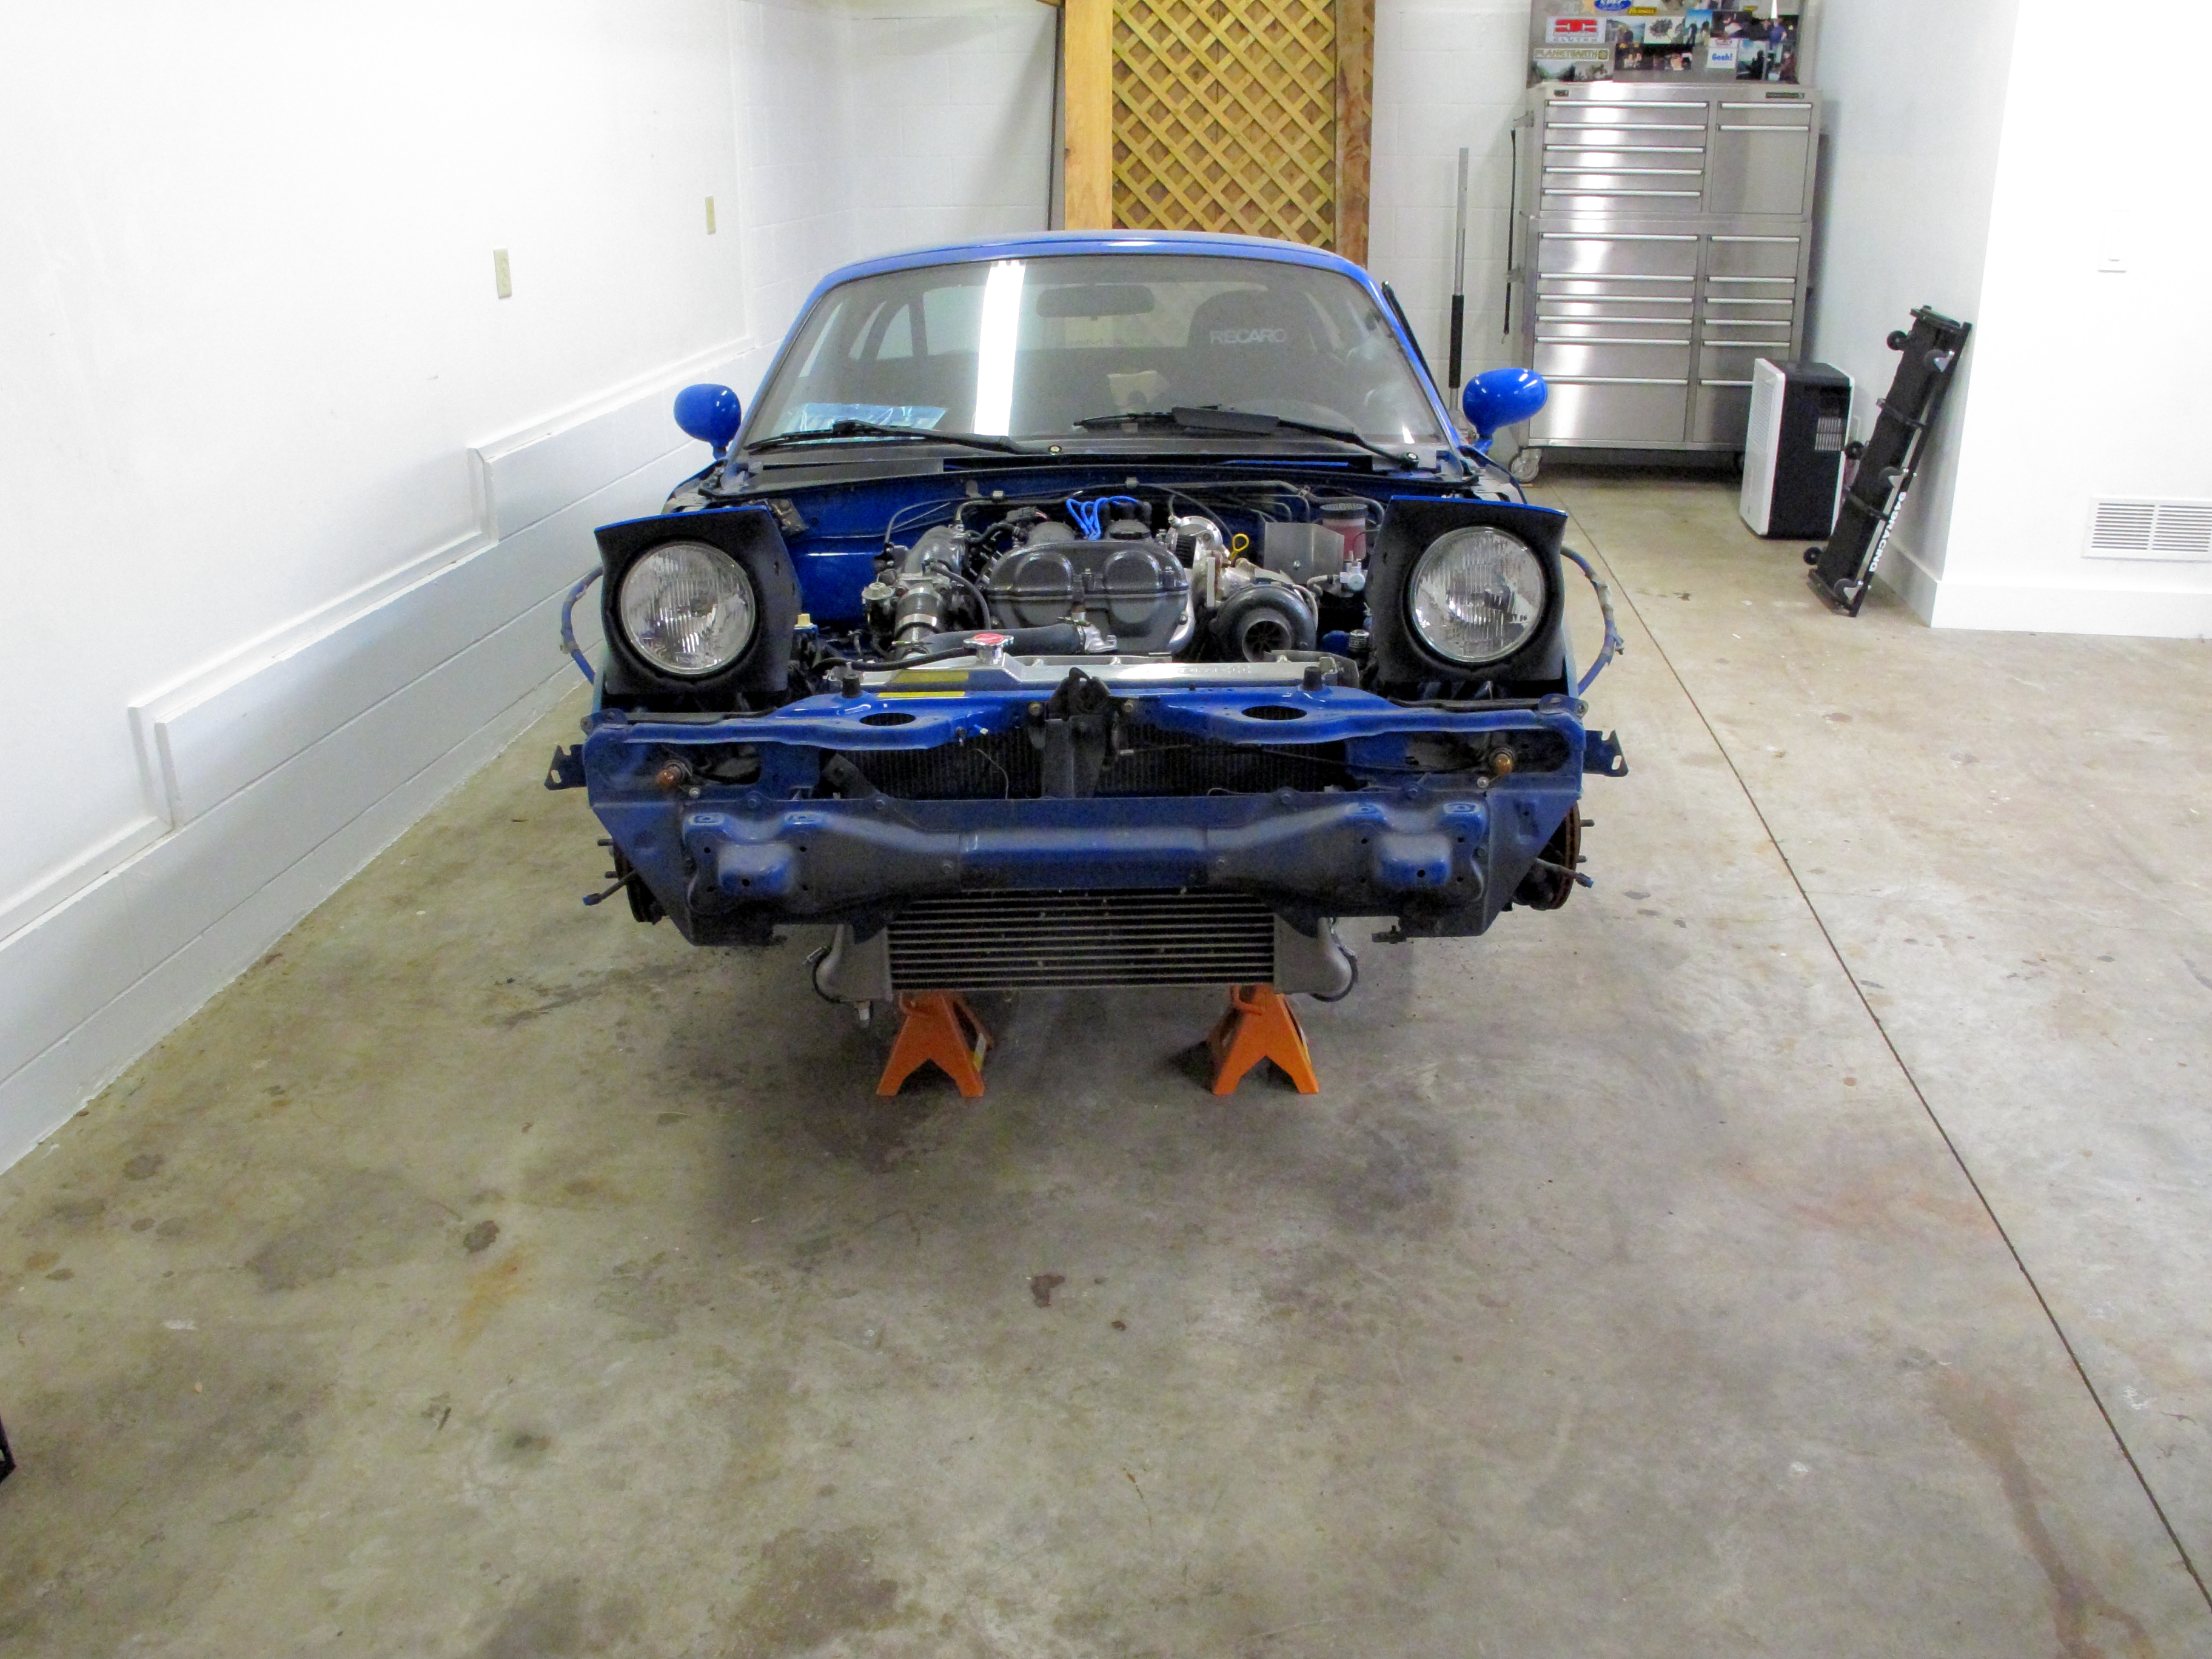
Headlights out and starting to pull hoses and connectors.
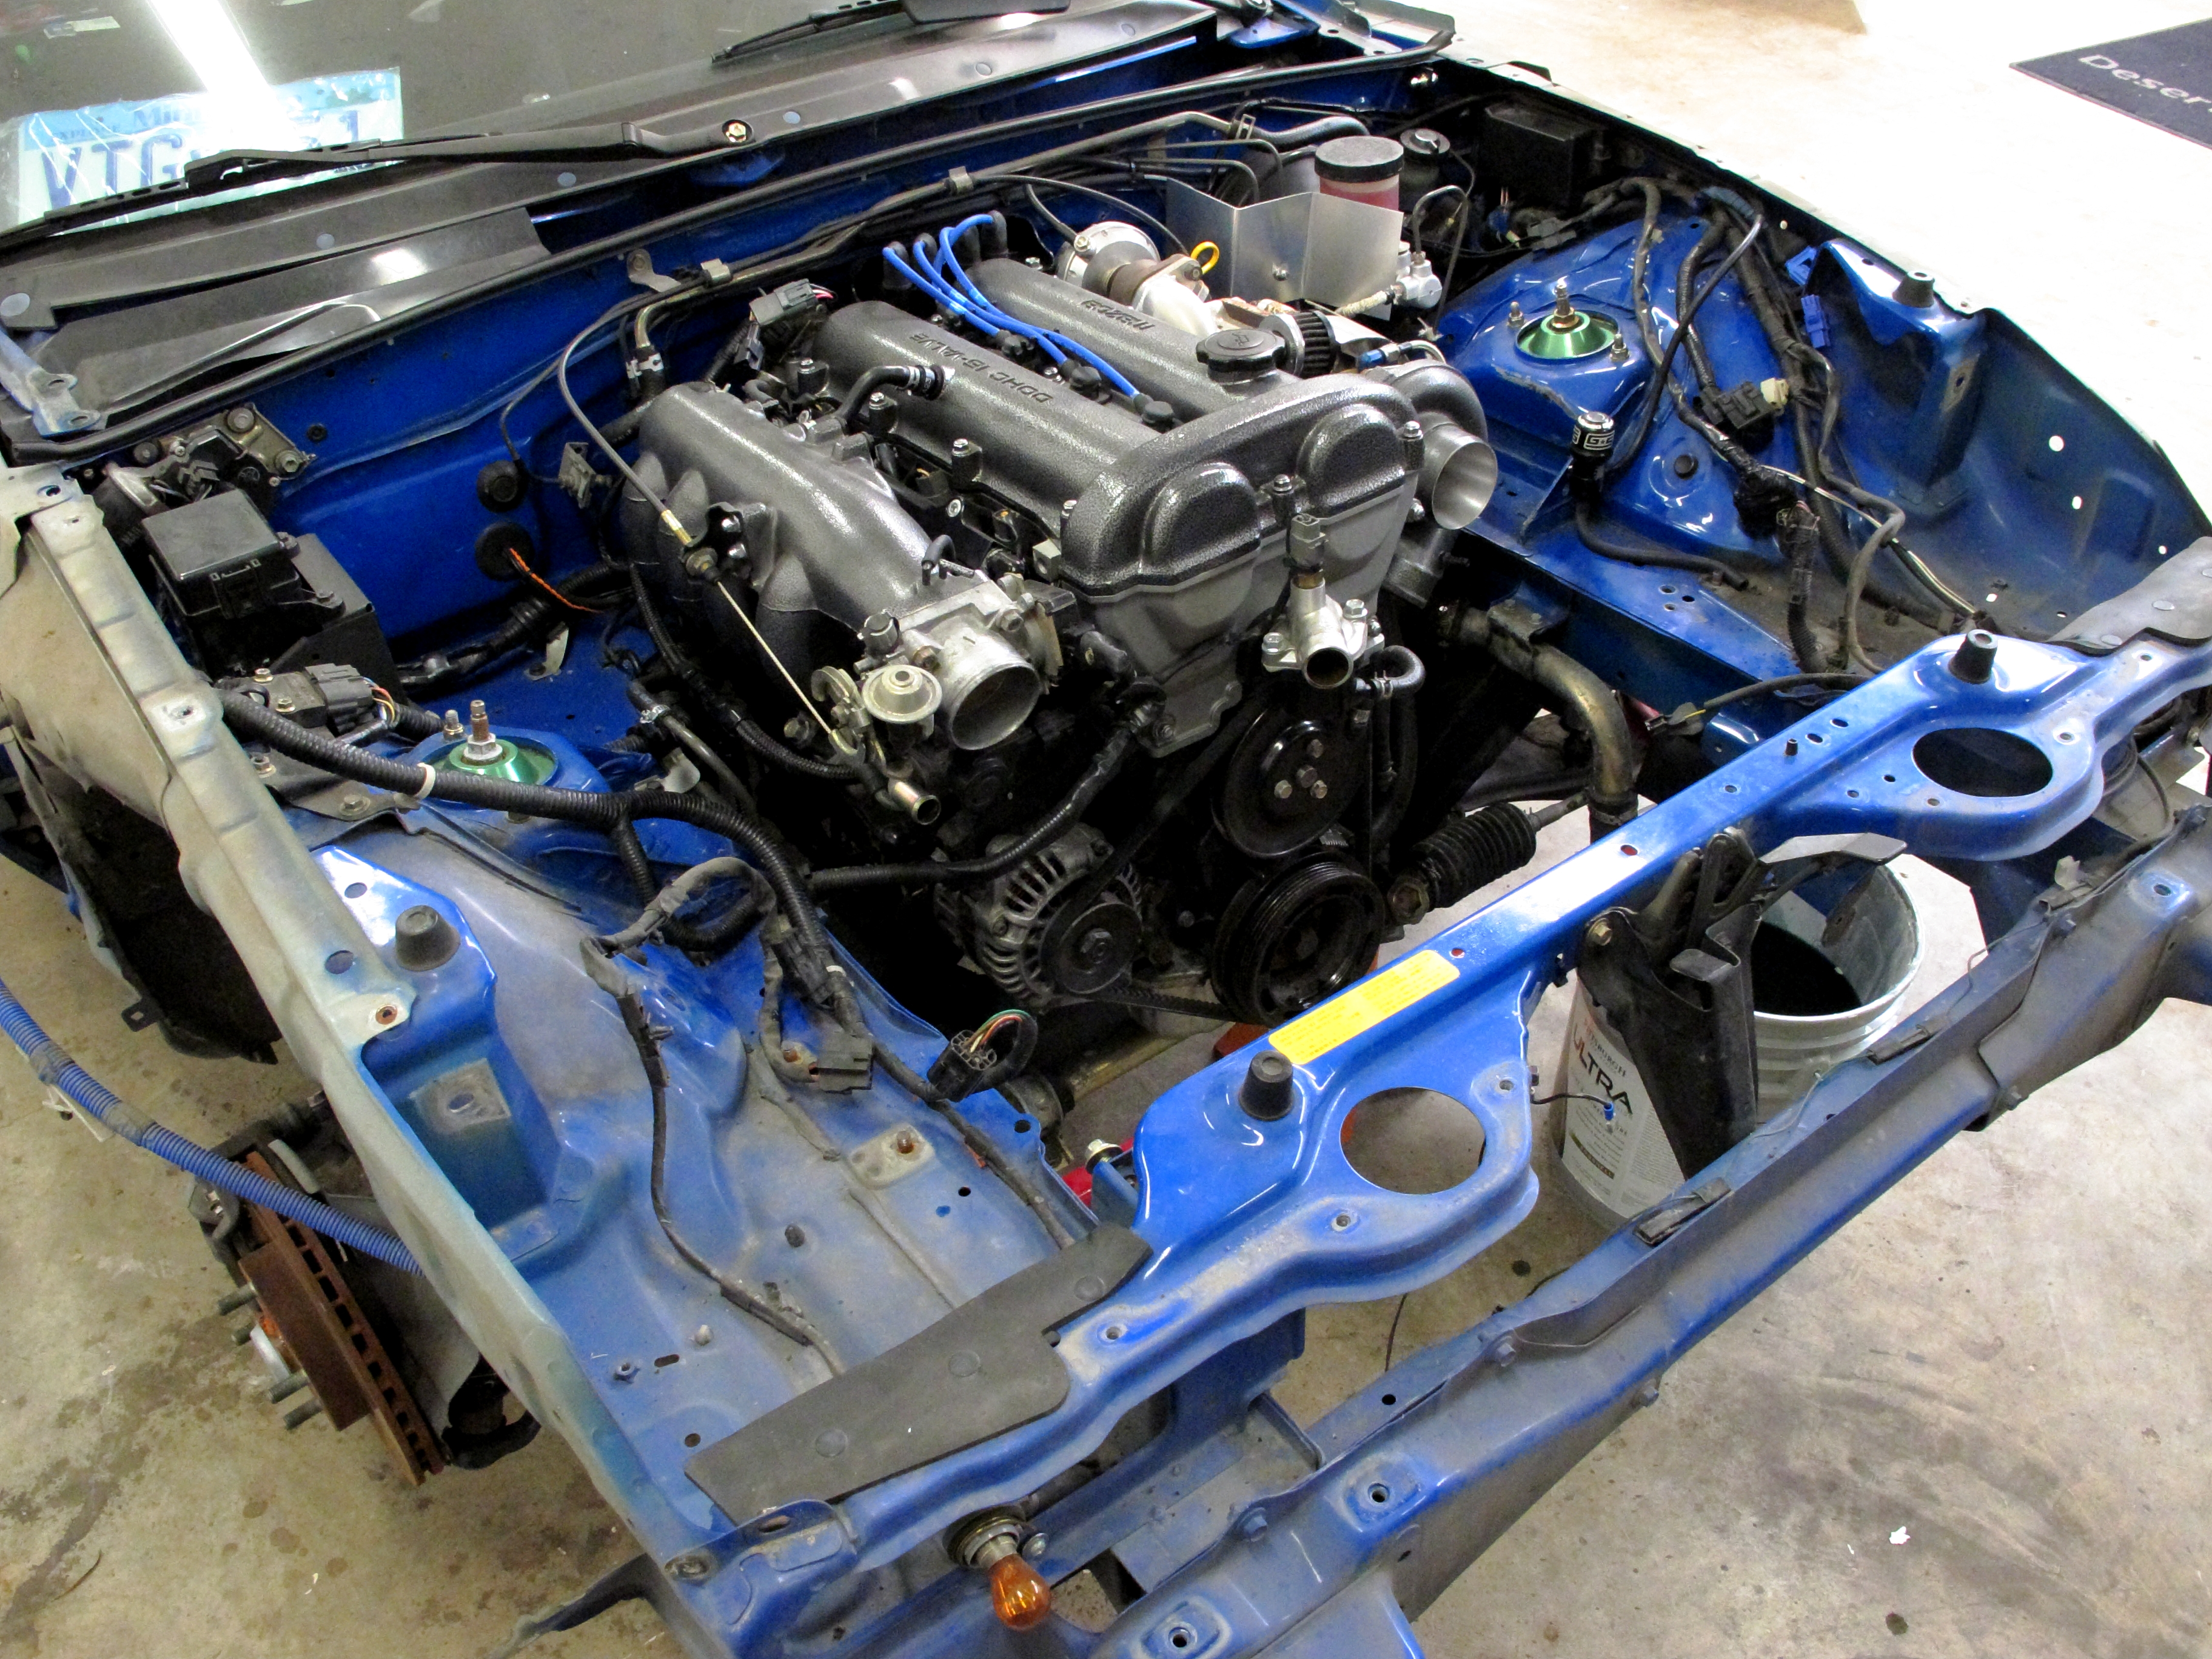
Do you even lift bro? We pulled the transmission out with the motor because it has to be replaced anyways. I did not buy the transmission because my MS 6MT is very low miles (40K) and just as strong as what he was running.
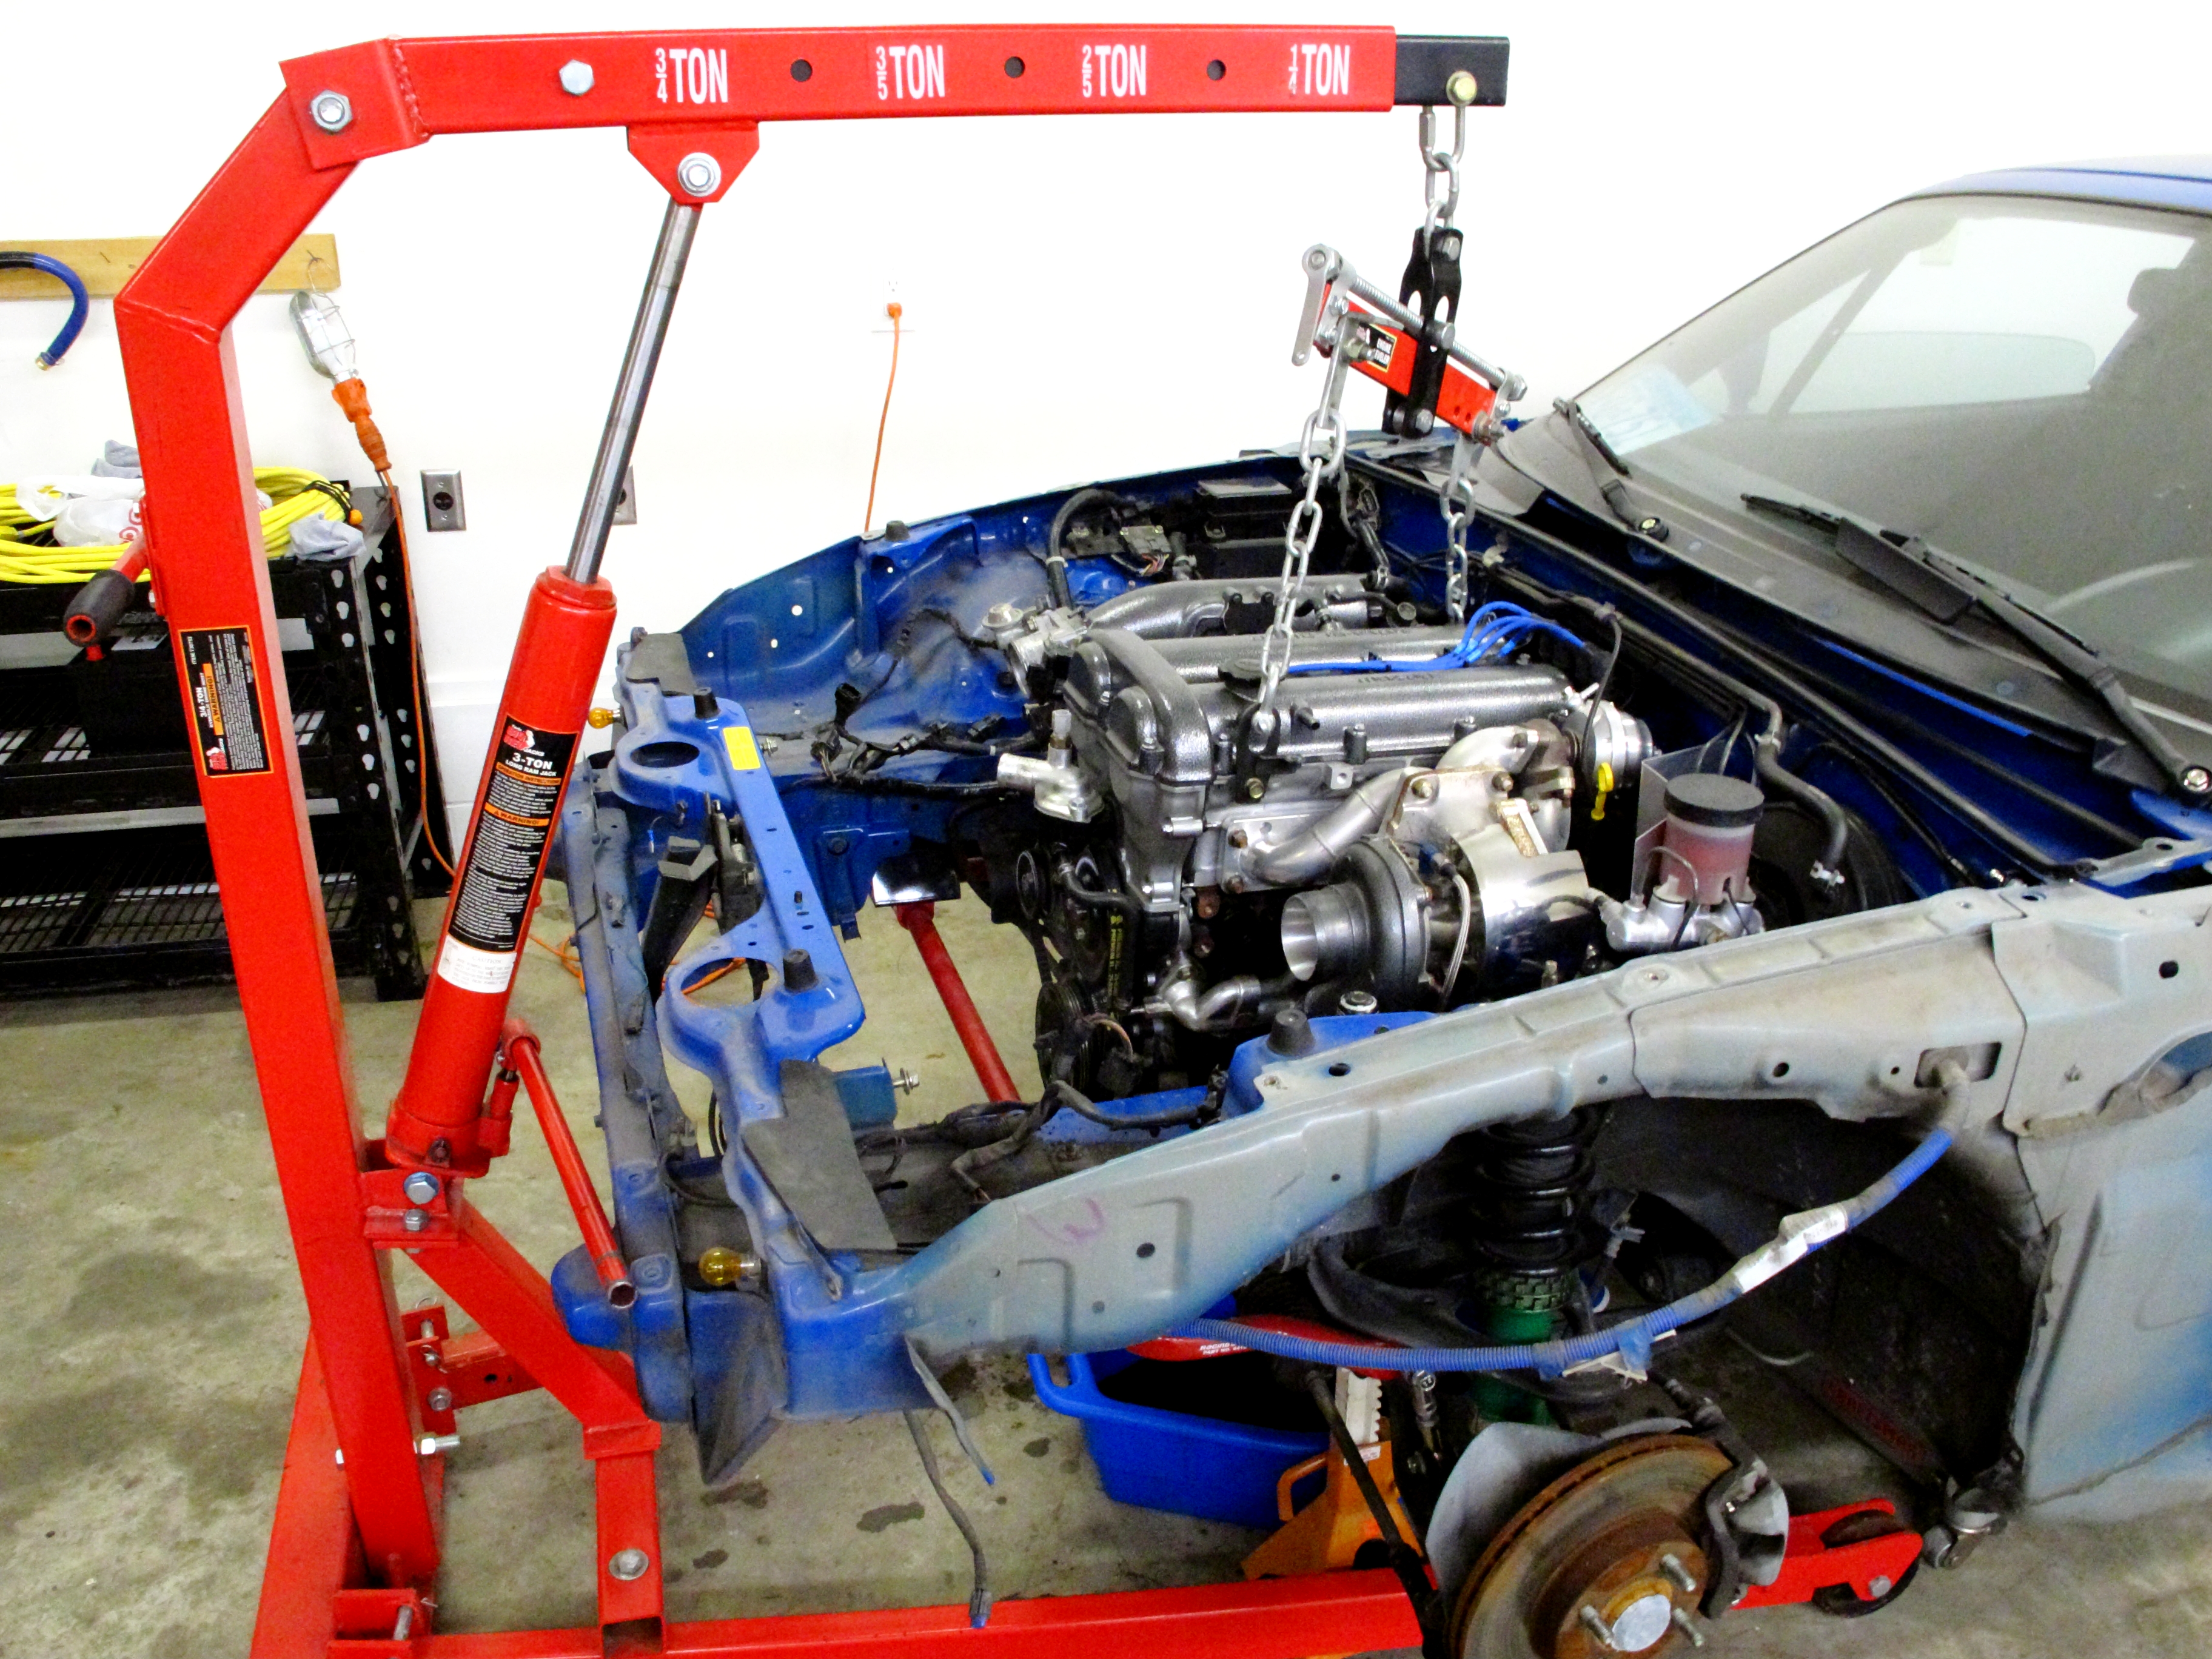
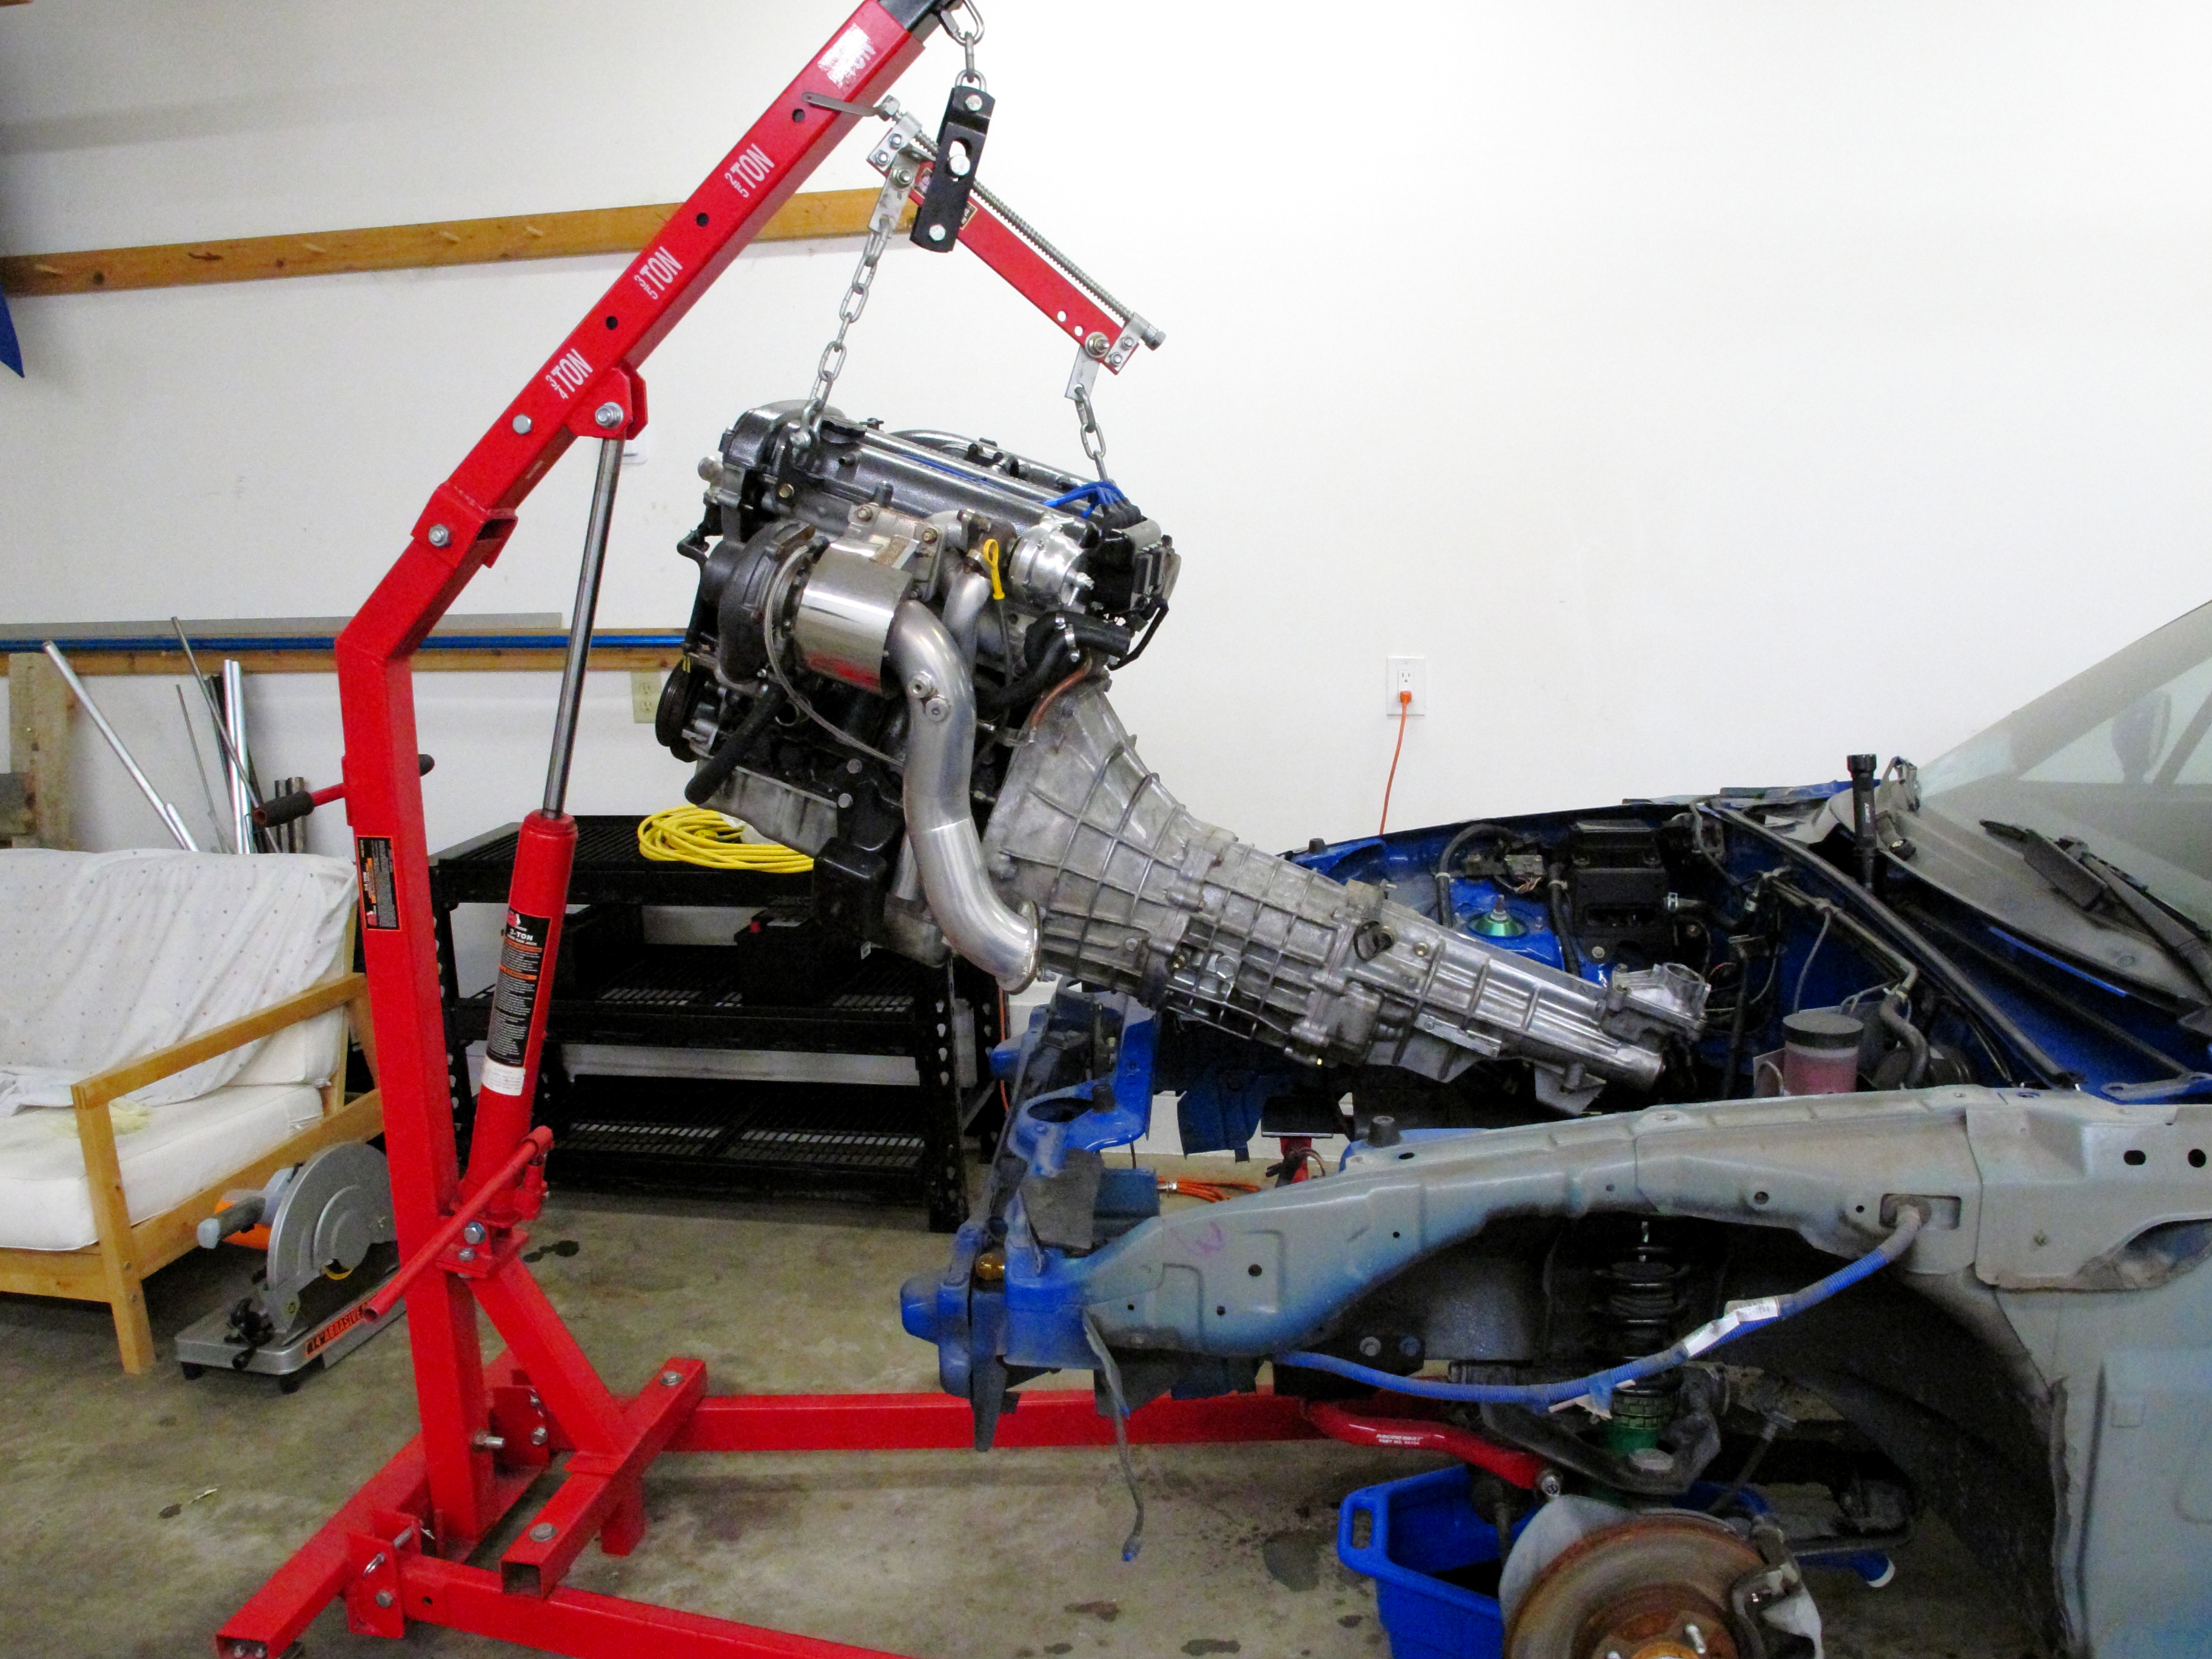
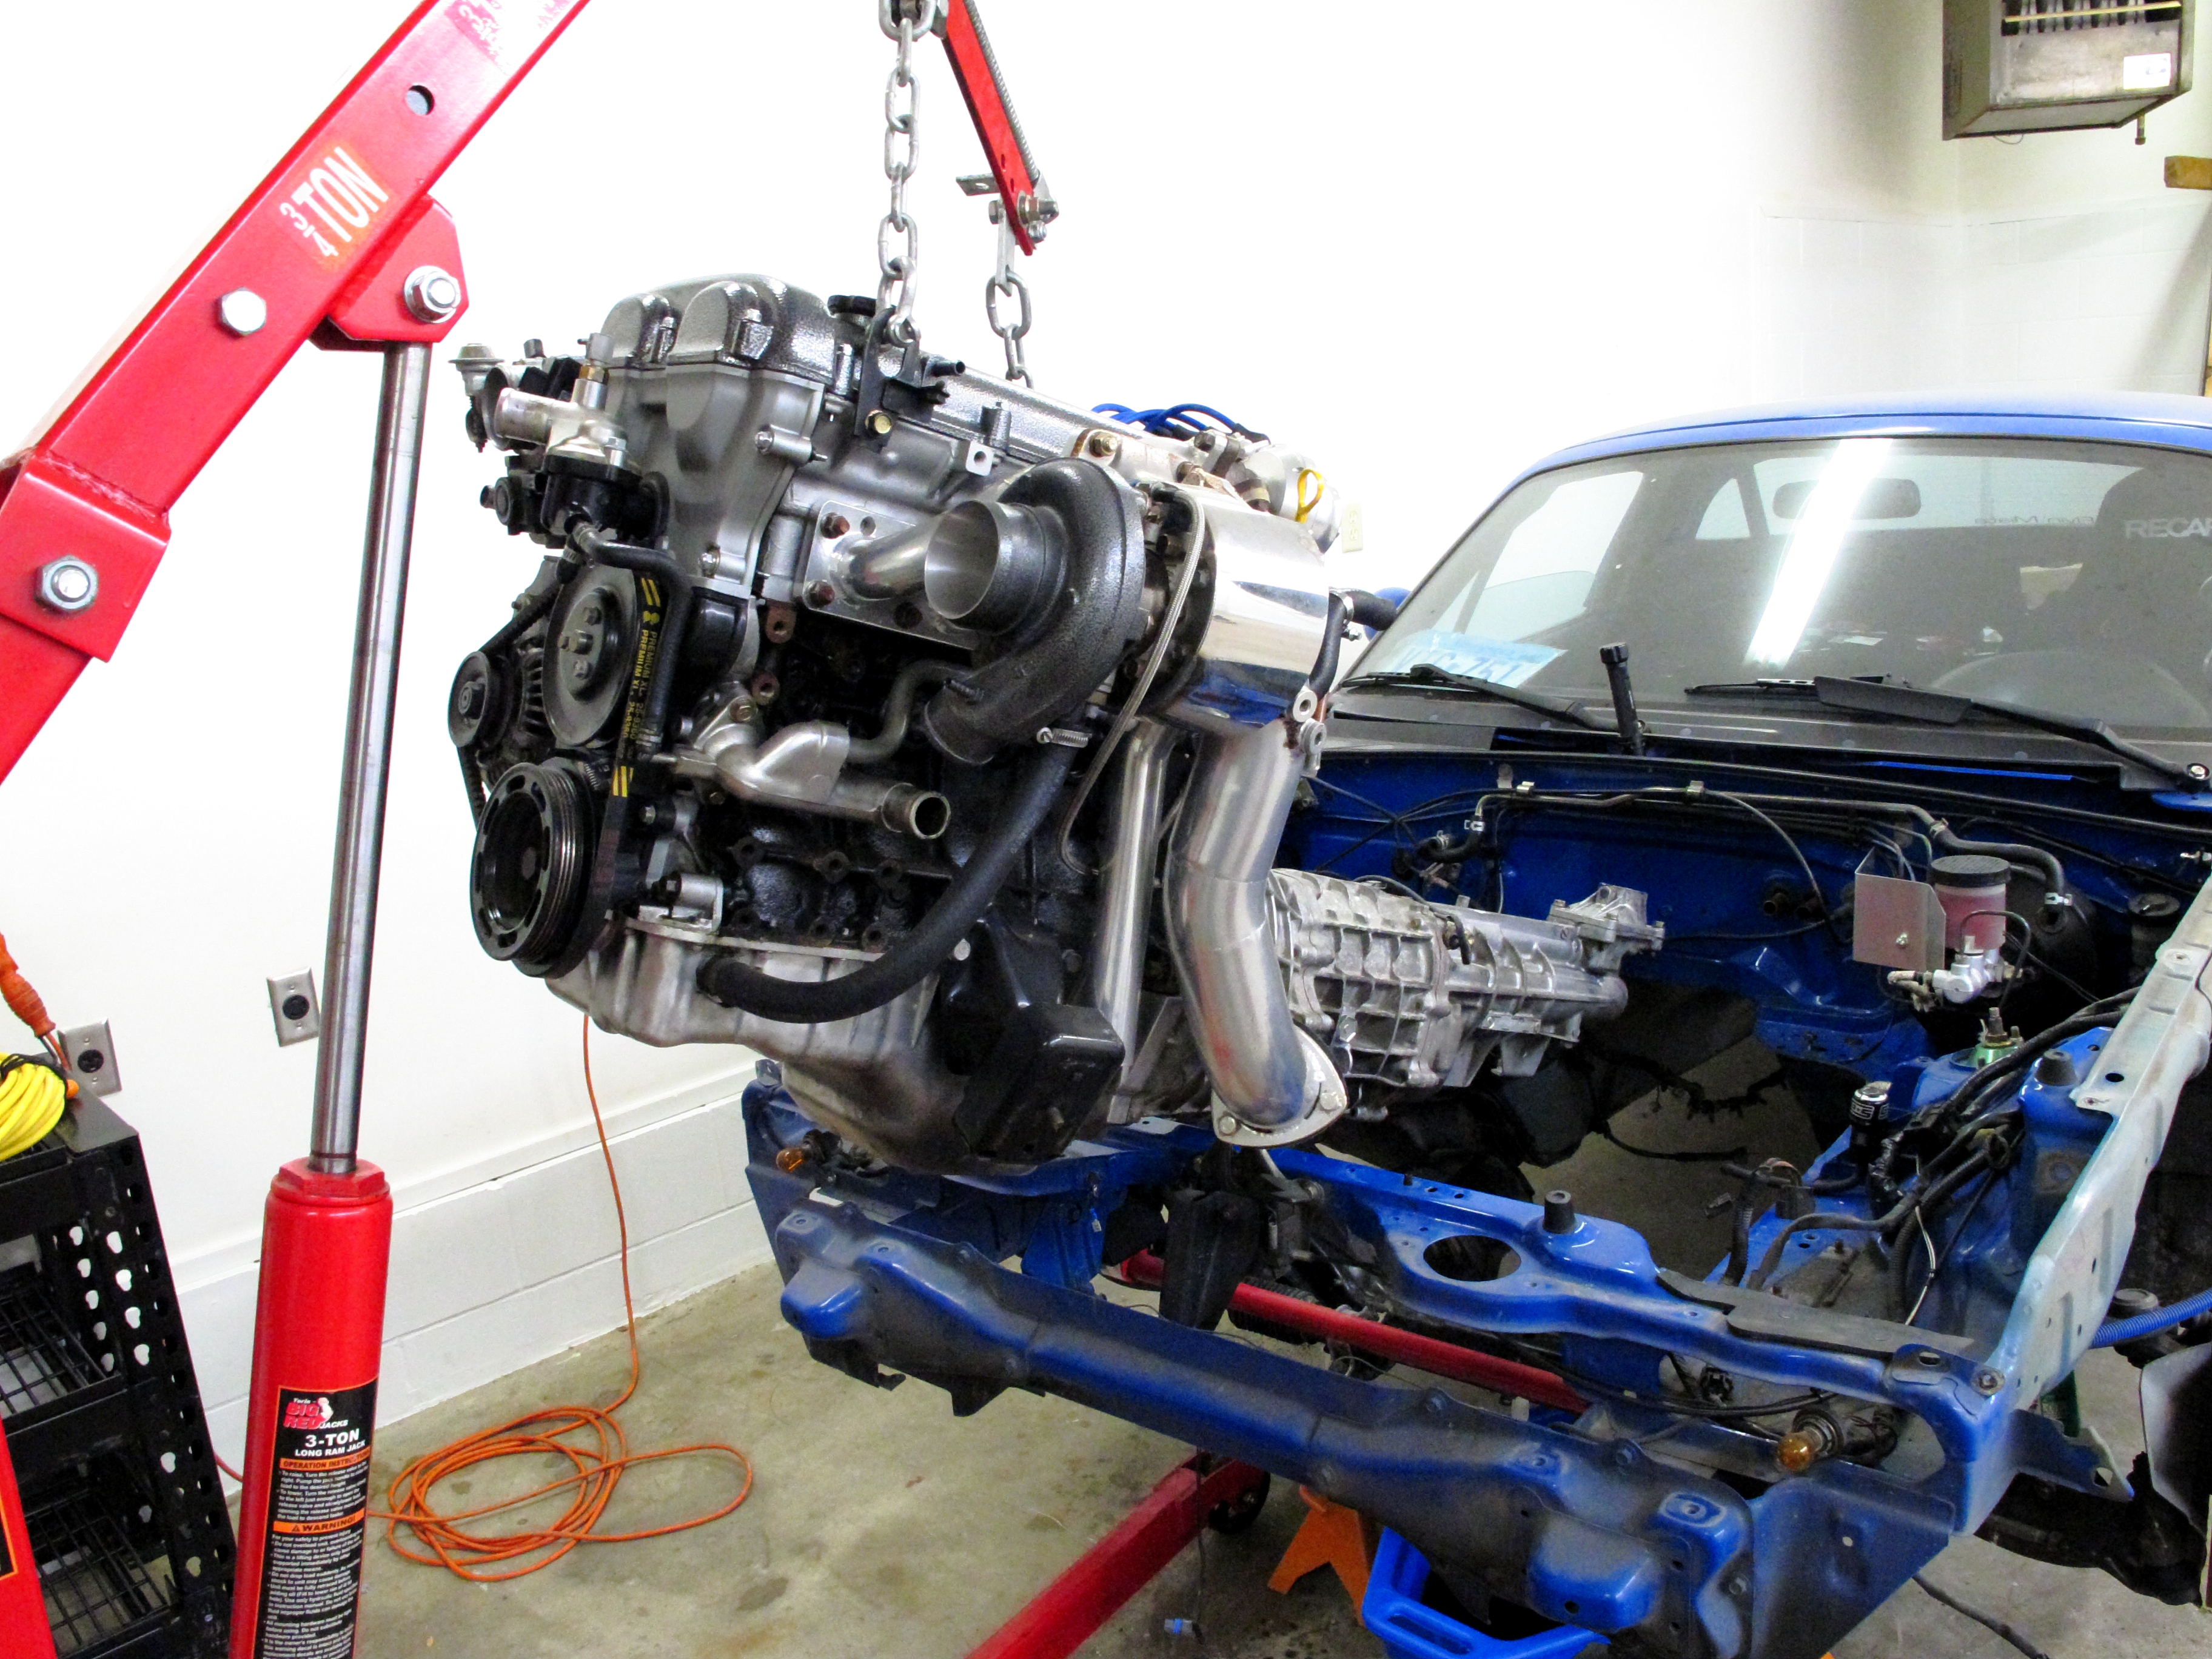
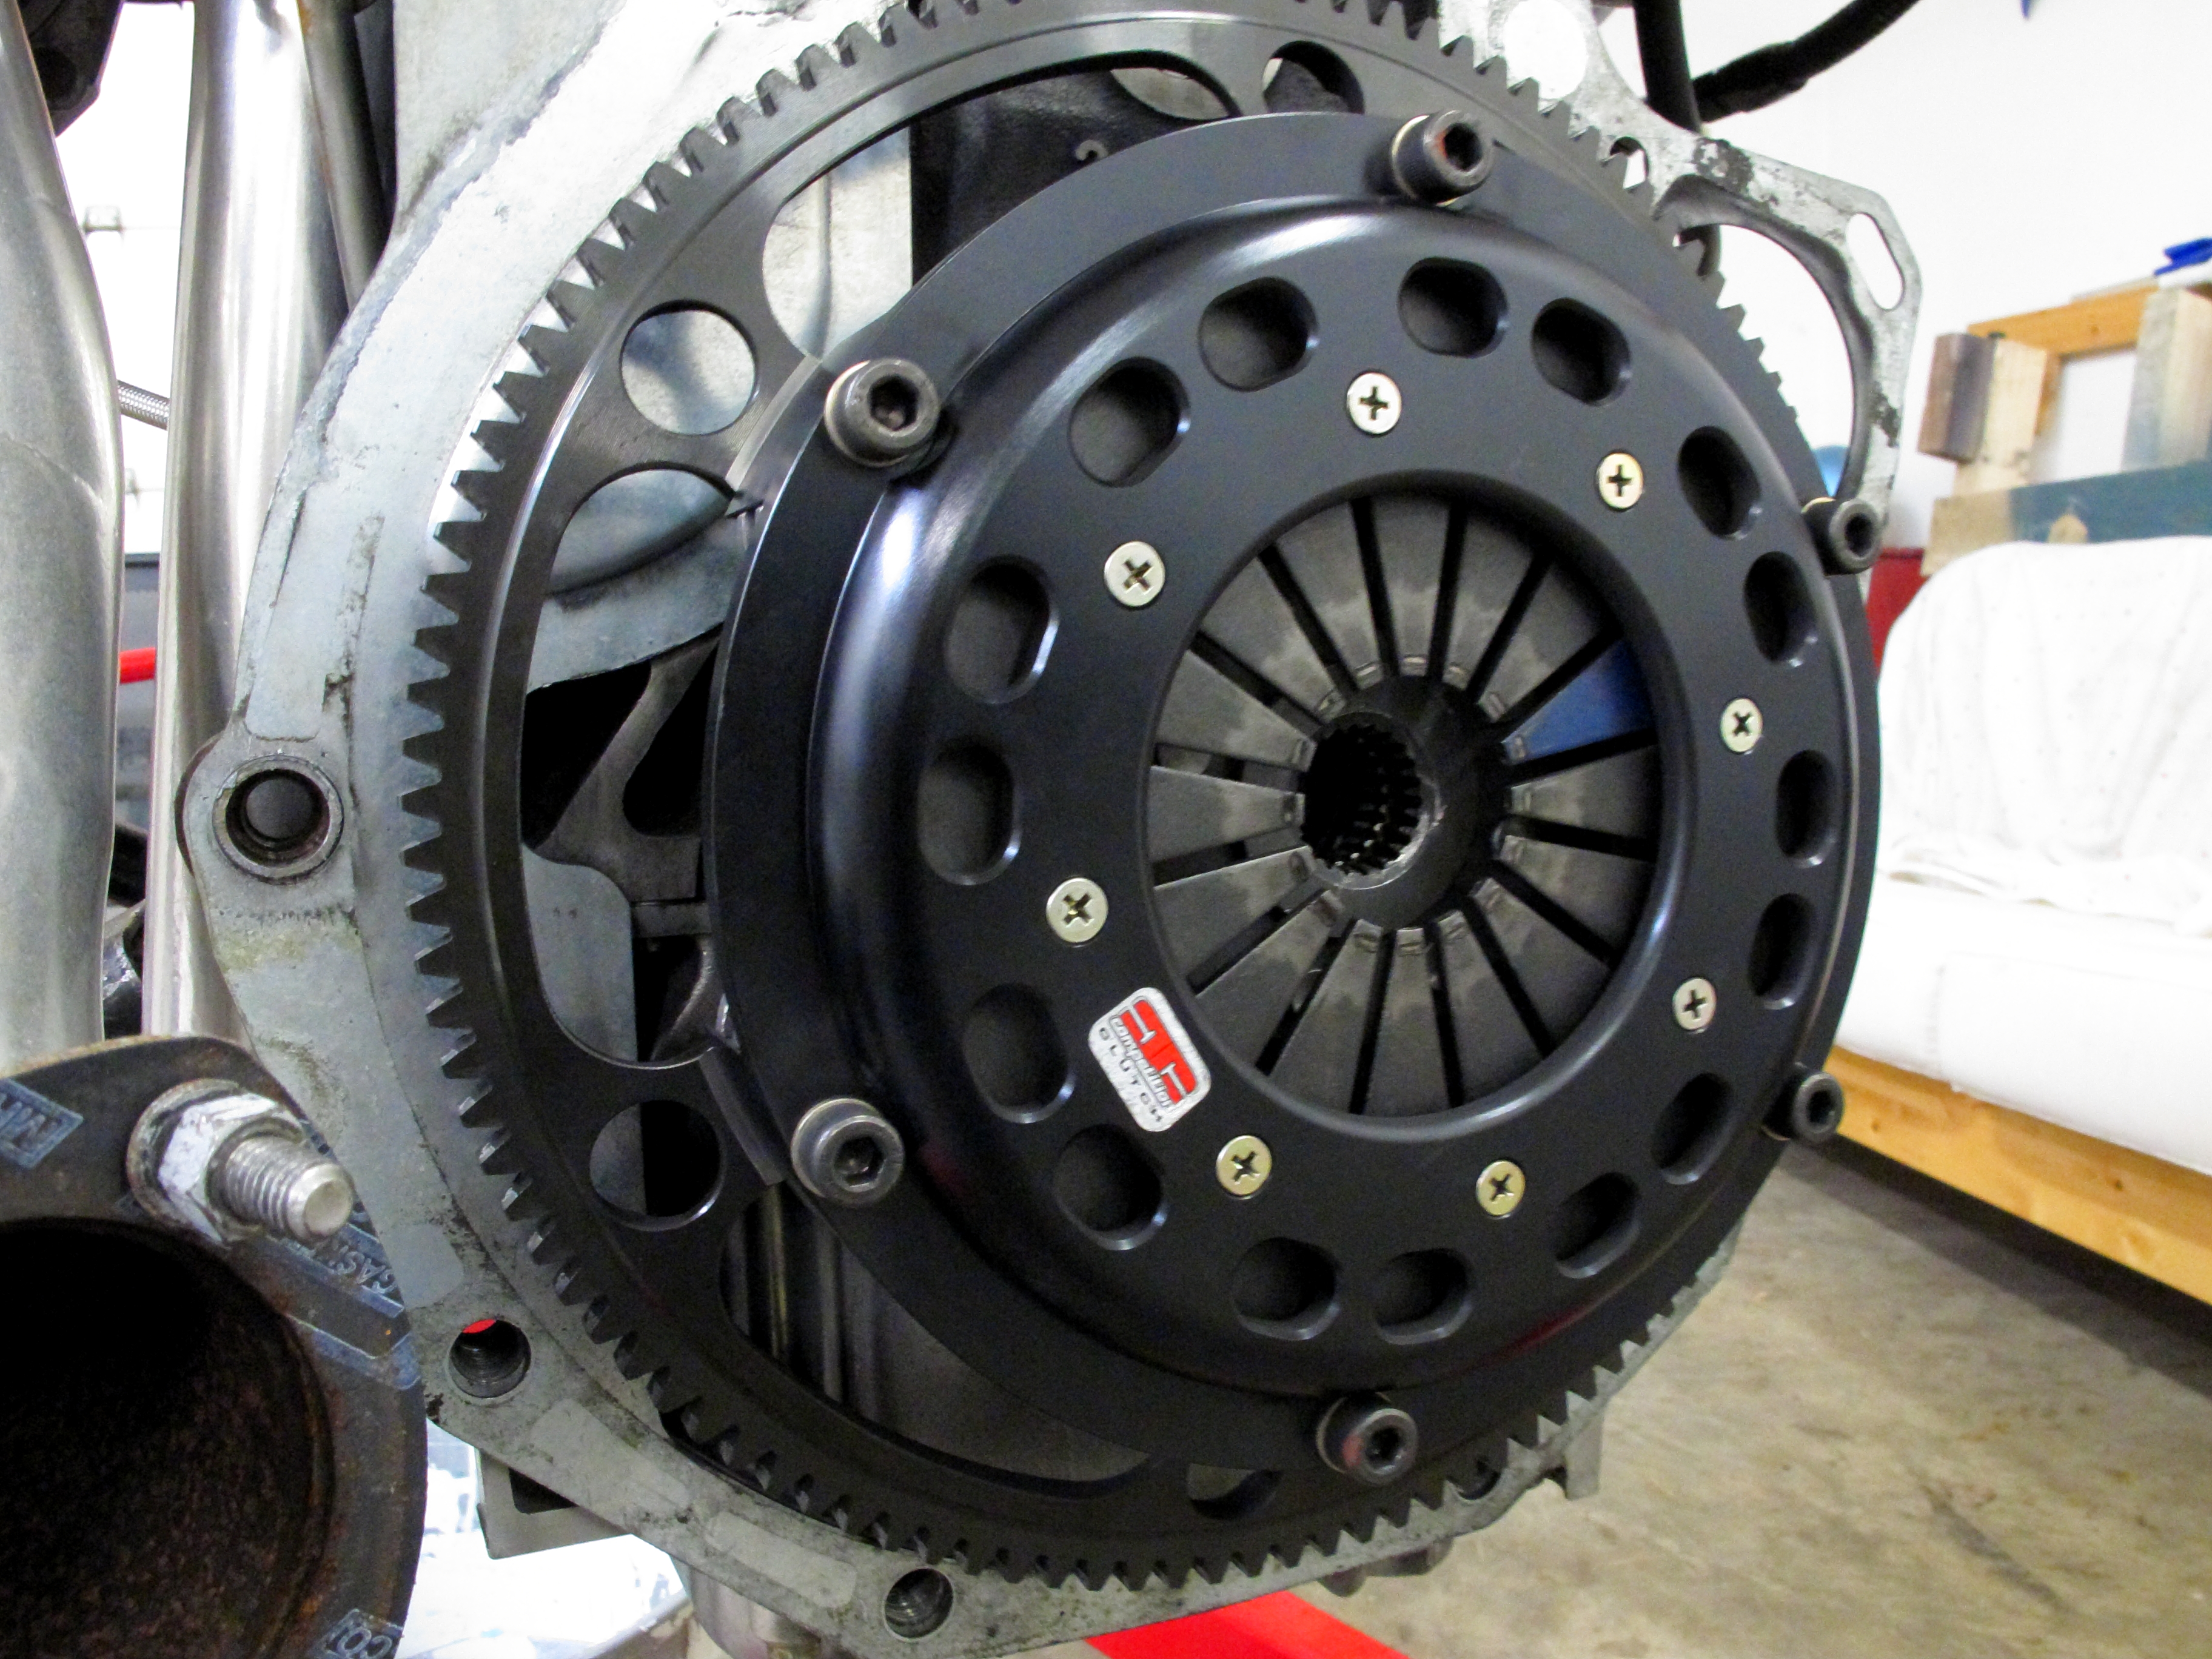
Now some engine and parts ****. I cannot wait to use this 949 clutch. It is pretty much brand new.
Also a huge fan of his power coating choices. Even the intercooler piping and turbo are coated the same.
- Pull Engine
- Swap Engine and Run for a few weeks N/A
- Swap Turbo setup + new parts
- Put turbo LS in blue car
Blue 92' - my new motor setup.

My cousin has had this car for 14+ years. Today we found a gift from the previous owner. This was the first time he has pulled the fenders to drop an engine. Mostly it was due to the space needed for the V8 conversion.

How would you like to have a rusty blade bumping about your rust free car?

Fenders off. I love how the jackstands look like buck teeth.


Headlights out and starting to pull hoses and connectors.

Do you even lift bro? We pulled the transmission out with the motor because it has to be replaced anyways. I did not buy the transmission because my MS 6MT is very low miles (40K) and just as strong as what he was running.


Now some engine and parts ****. I cannot wait to use this 949 clutch. It is pretty much brand new.

Also a huge fan of his power coating choices. Even the intercooler piping and turbo are coated the same.


Last edited by ofspunk7; 07-12-2017 at 12:30 PM.
Reply
1
1
 09-14-2014, 11:36 AM
#15
Elite Member
iTrader: (13)

Join Date: Dec 2006
Location: Taos, New mexico
Posts: 6,599
Total Cats: 561
Wow man, I'm genuinely impressed. Glad to see so much mazda love here, this is awesome.
What are the deets on the motor? Is it built? I would give you **** for the 1.6, but it looks like you came up on this whole setup and I wouldn't complain.
What are the deets on the motor? Is it built? I would give you **** for the 1.6, but it looks like you came up on this whole setup and I wouldn't complain.
Reply
1
1
09-14-2014, 11:46 AM
#16
Junior Member
Thread Starter
Join Date: May 2014
Location: North St Paul, MN
Posts: 397
Total Cats: 25
Thanks guys. I hope to only continue my cousin's quality and functionality with this build. It is easy to see how his car made me love the NA so much. I am glad i was at a point in my life to take advantage of these parts while he swaps to a turbo LS setup.
My new engine is....
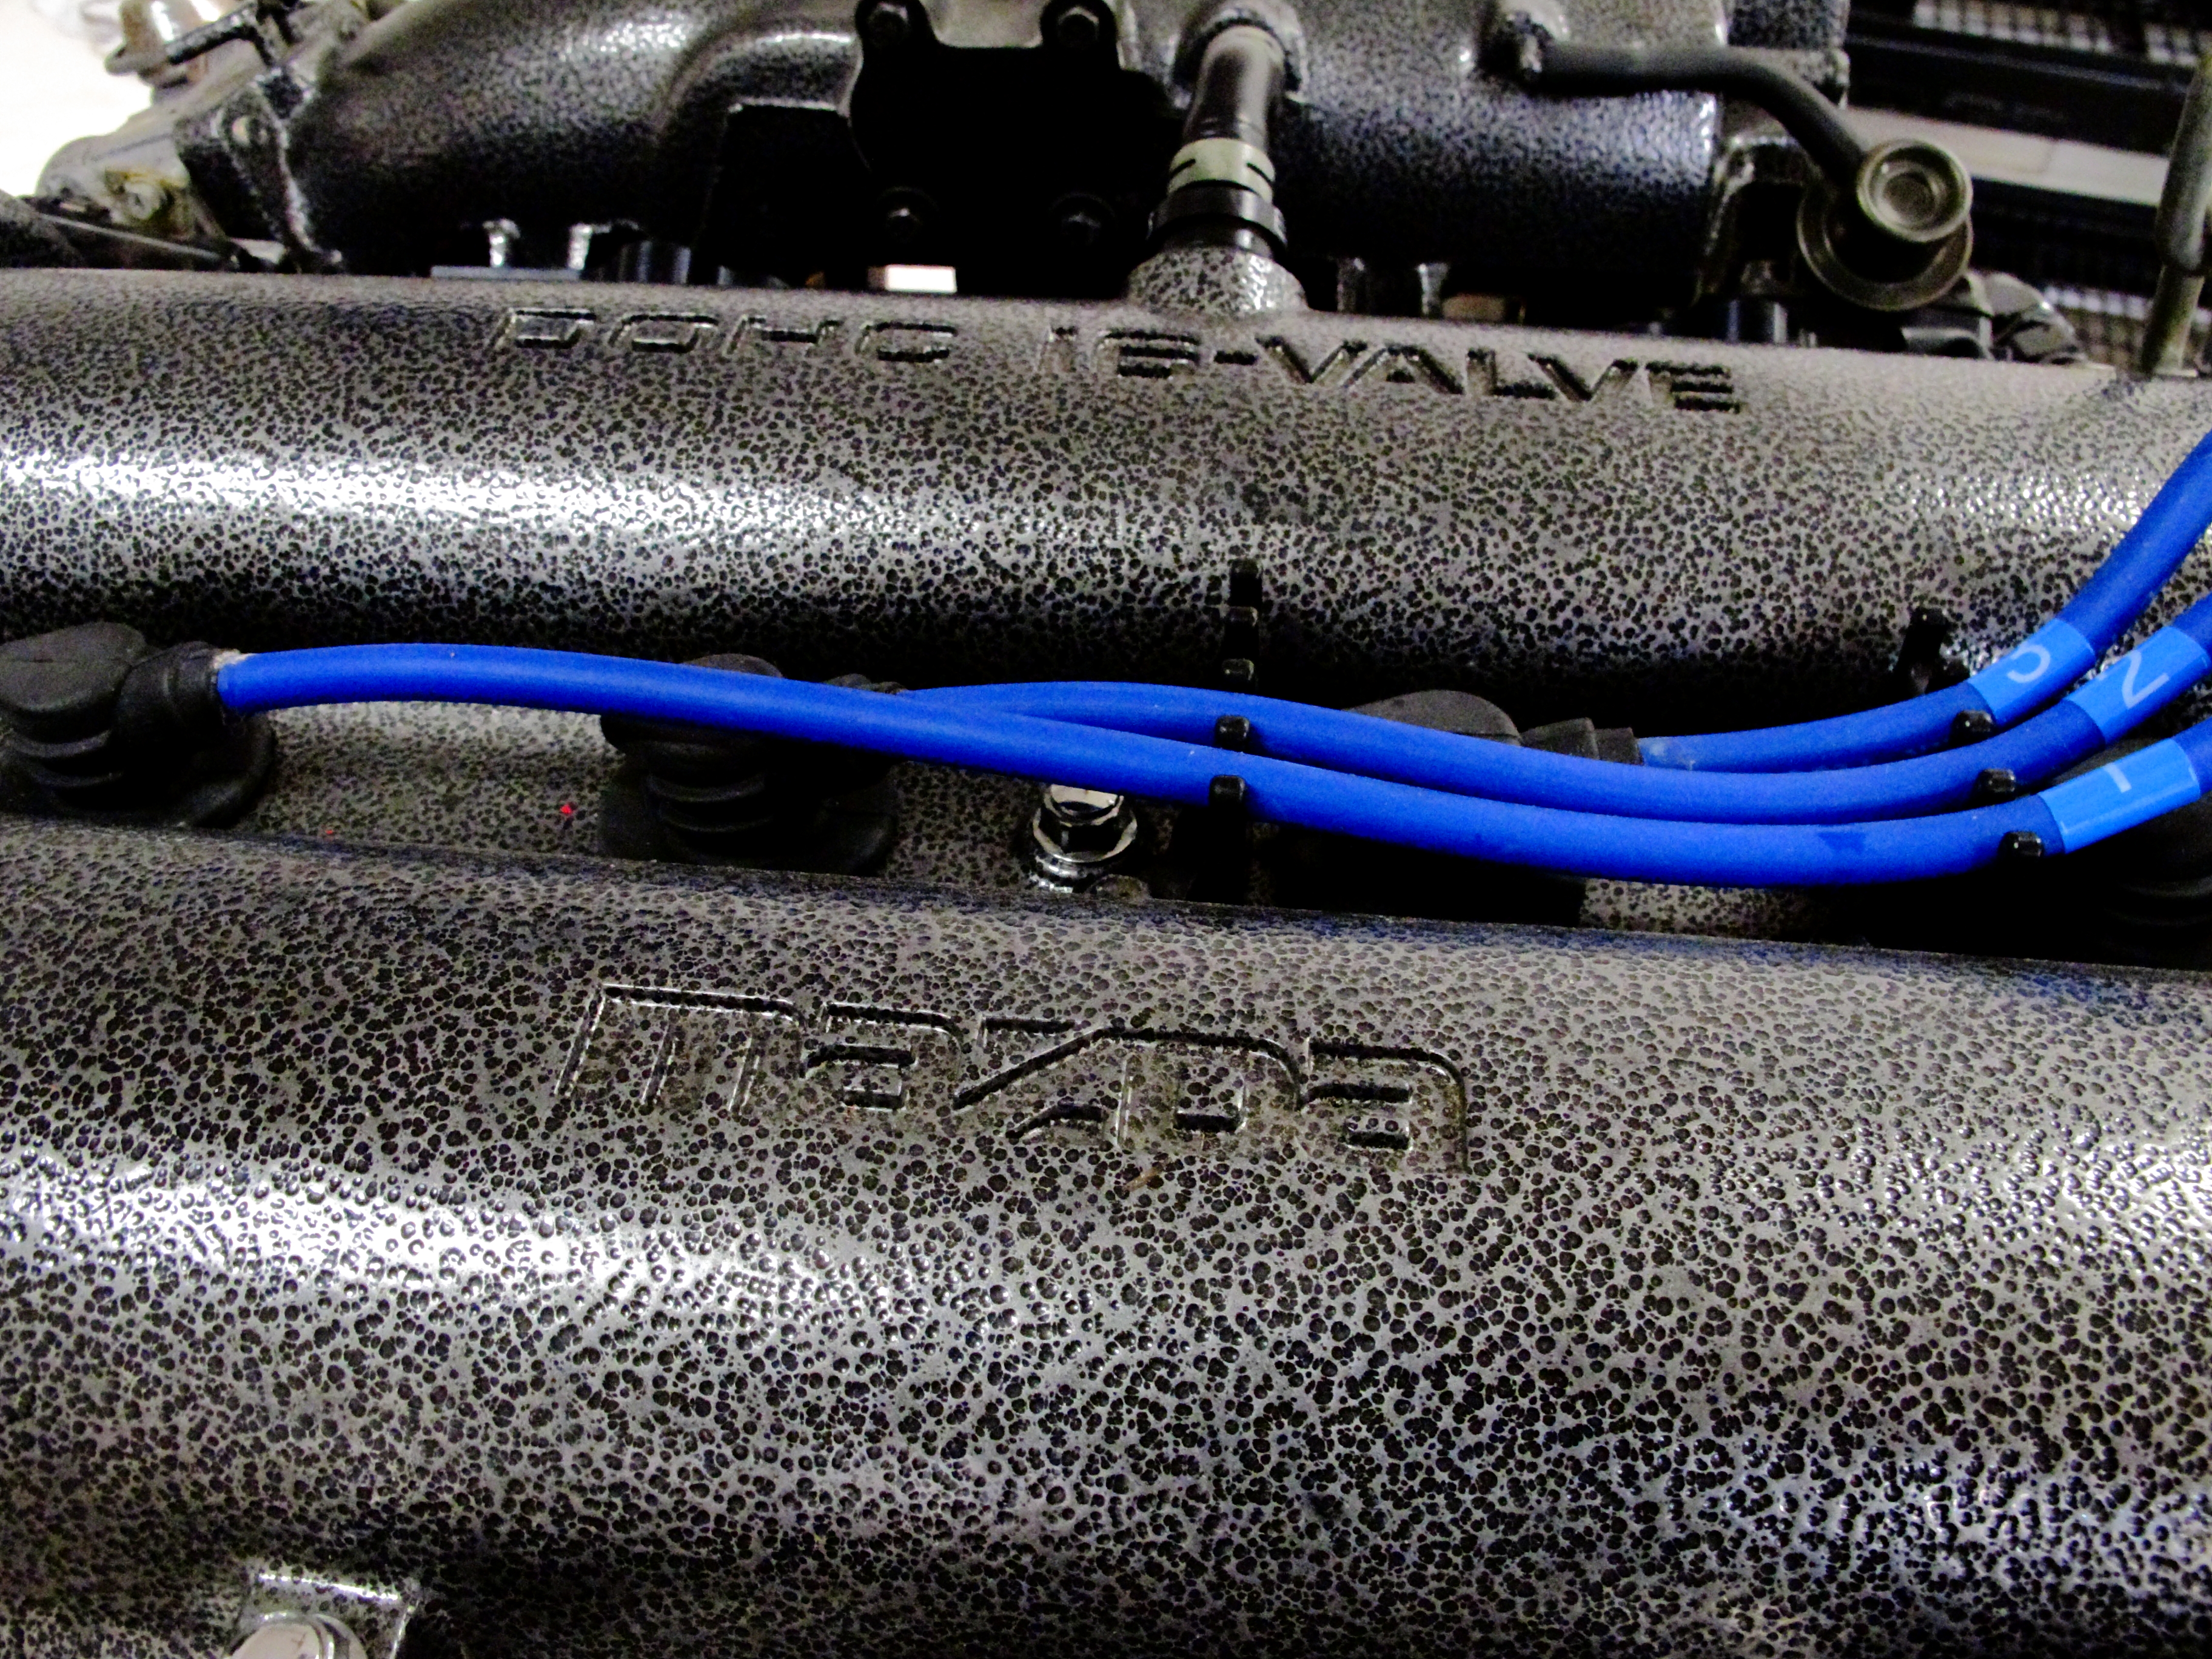
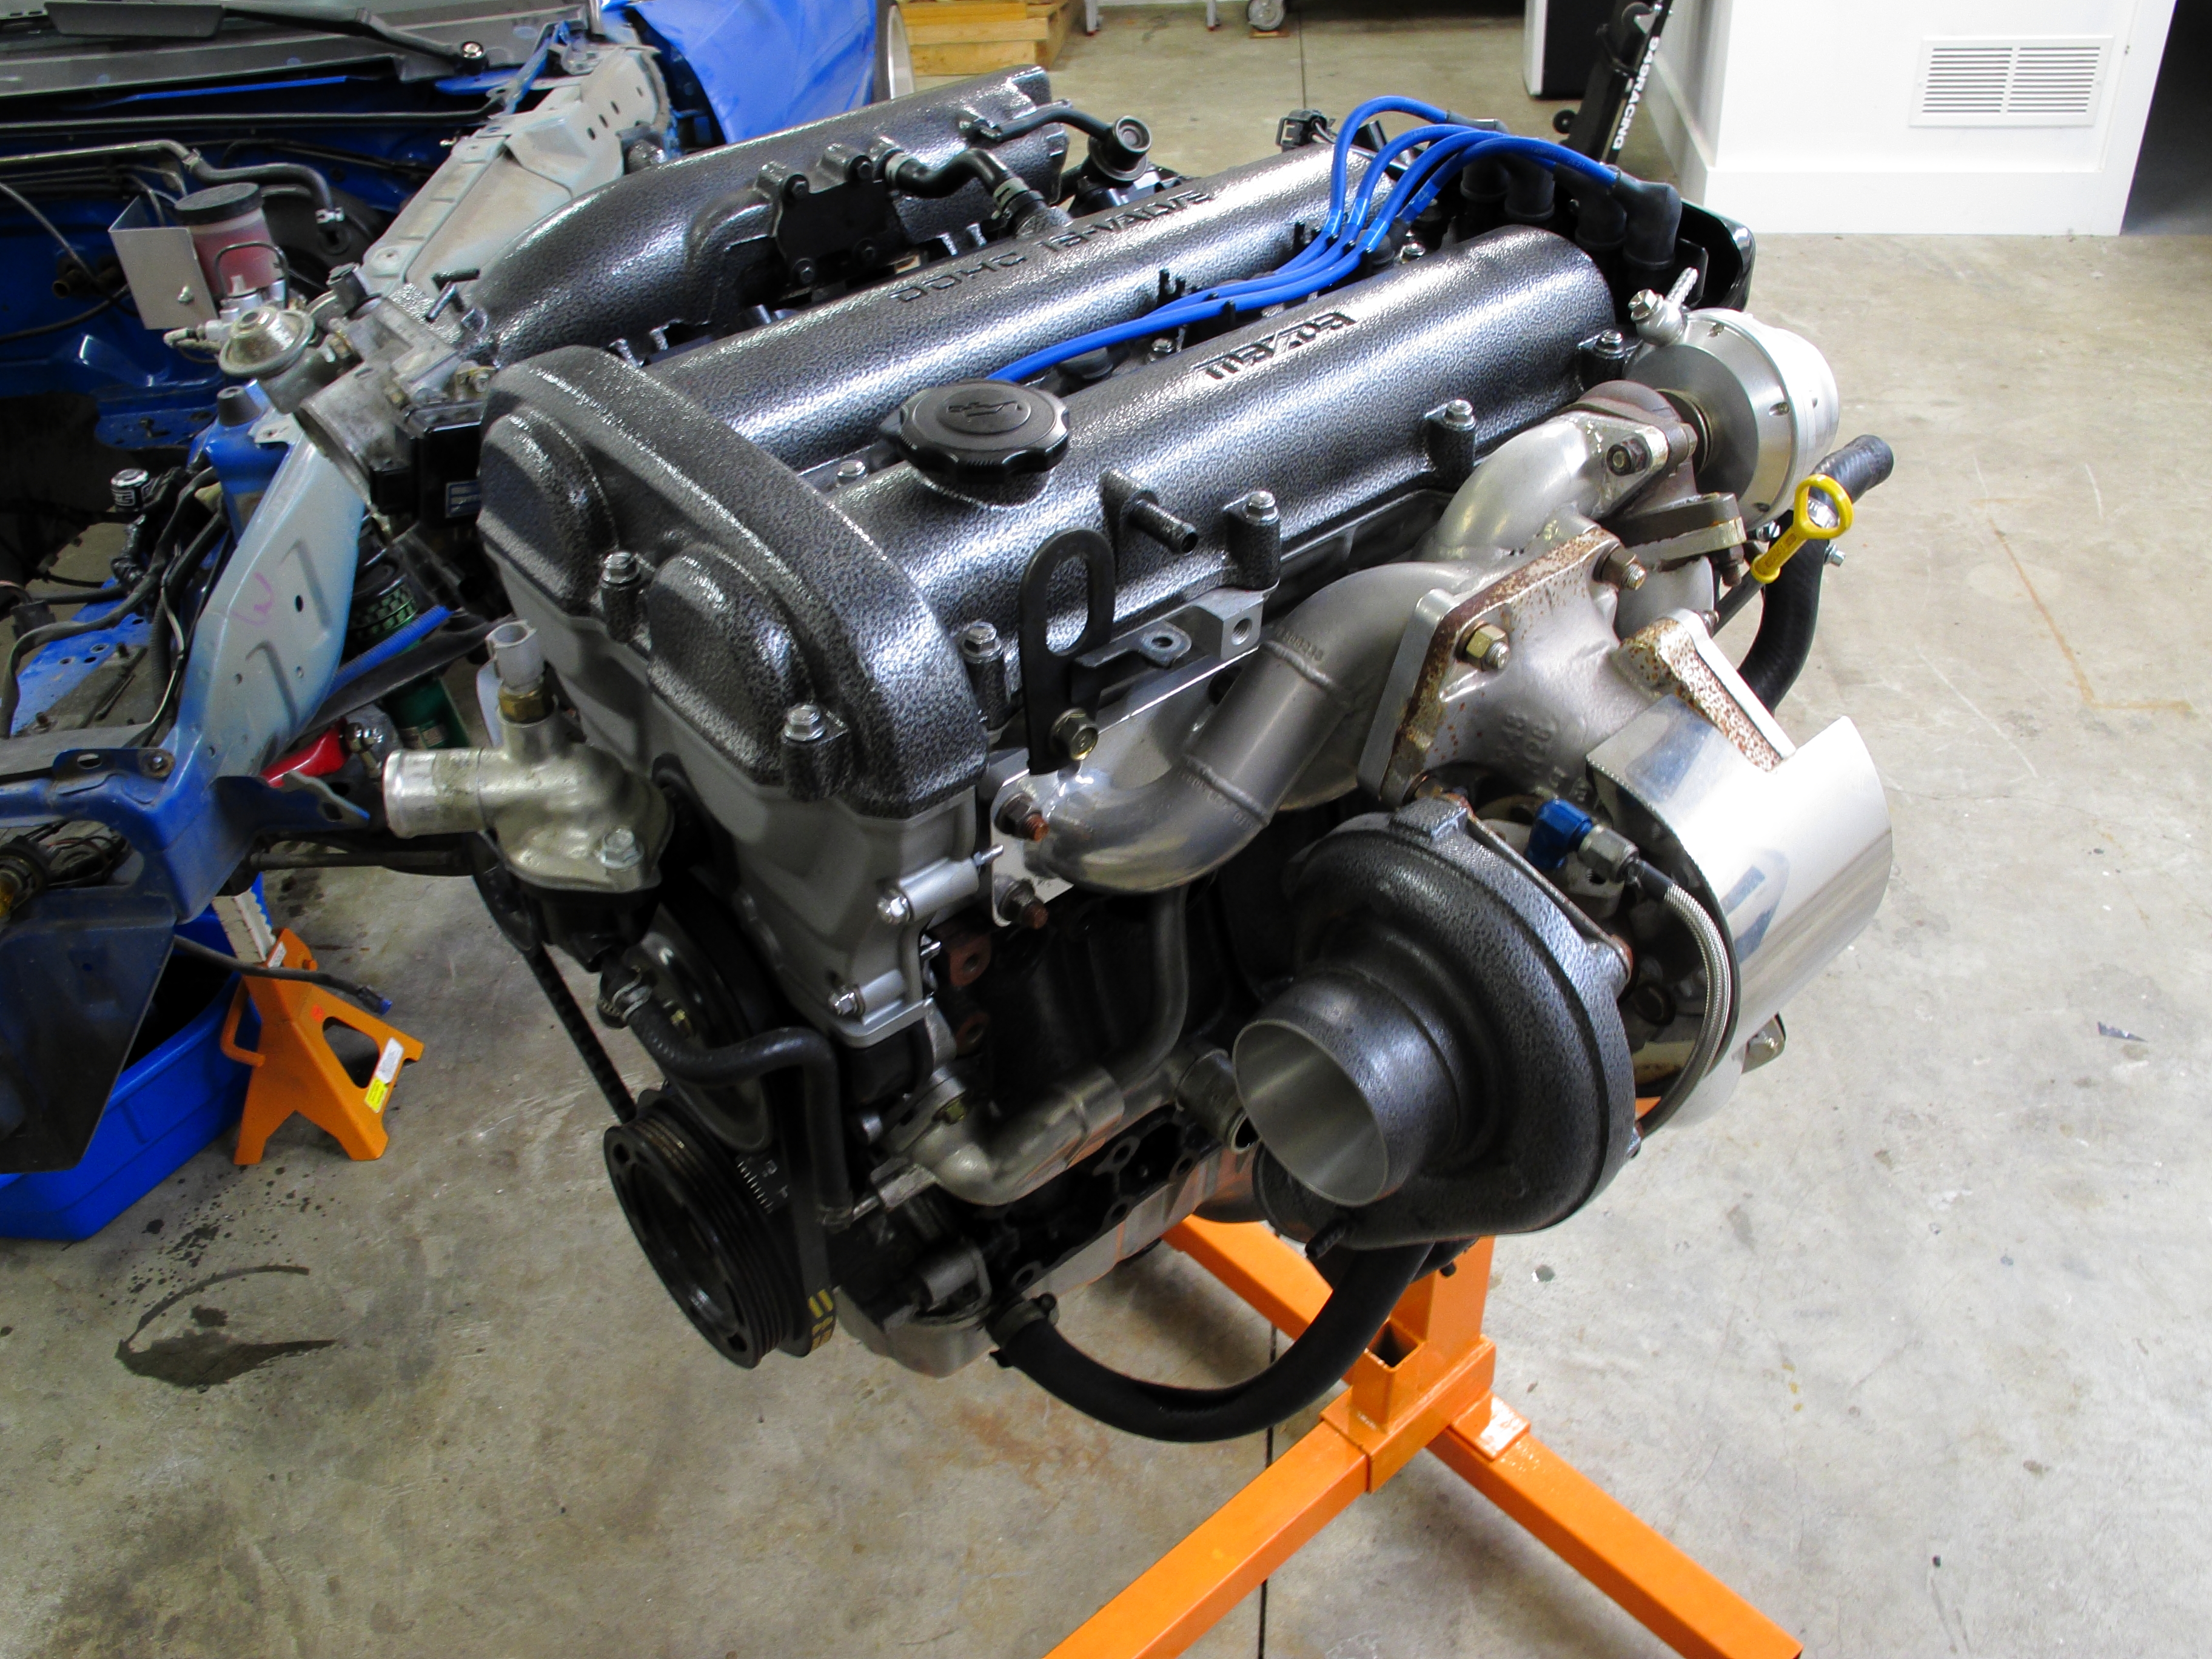
8.5:1 +1mm forged pistons/ rods, head + main studs.
The head is ported, gasket matched, some combustion chamber shaping.
T3/T4 57 trim .48 hot side, .60 cold side.
38mm wastegate
Not sure about the intercooler size. Its something like a 20"x9"x2.5" core.
There are lots of other goodies as well. I will take pics as we are swapping stuff over. I hope to pull my stock engine next week. We will see what his schedule allows.
My new engine is....
8.5:1 +1mm forged pistons/ rods, head + main studs.
The head is ported, gasket matched, some combustion chamber shaping.
T3/T4 57 trim .48 hot side, .60 cold side.
38mm wastegate
Not sure about the intercooler size. Its something like a 20"x9"x2.5" core.
There are lots of other goodies as well. I will take pics as we are swapping stuff over. I hope to pull my stock engine next week. We will see what his schedule allows.
Reply
1
1
09-14-2014, 12:24 PM
#17
Elite Member
iTrader: (13)
Join Date: Dec 2006
Location: Taos, New mexico
Posts: 6,599
Total Cats: 561
I just re-read this thread, and did not see mention of a torsen 1.8 swap (i could have missed it). With a built engine and a decent sized t3 turbo, you WILL need this, so make sure to budget accordingly!
Reply
1
1
09-14-2014, 01:20 PM
#18
Junior Member
Thread Starter
Join Date: May 2014
Location: North St Paul, MN
Posts: 397
Total Cats: 25
3.63 Torsen Diff, Axles, Driveshaft
4.3 Speedo Gear
949 Twin Disc Ceramic Clutch
Fidanza Flywheel
Mazdaspeed 6 speed transmission 30k miles
Reply
0
0


