Miata Drivetrain in a SAAB 96


 03-17-2013, 01:19 AM
#183
Elite Member
Thread Starter
iTrader: (46)
Join Date: Dec 2007
Location: Nebraska
Posts: 4,729
Total Cats: 166
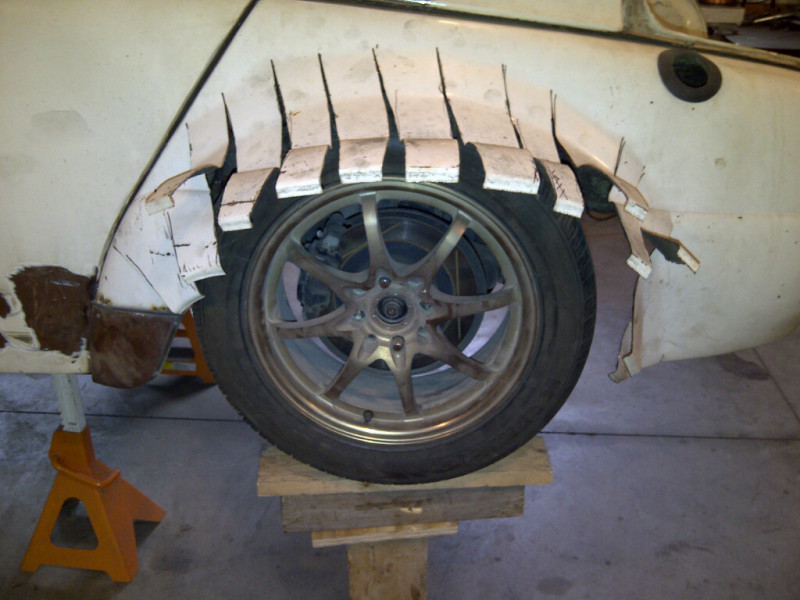
The sad thing is, I wasn't sure how it was going to come out as I had to flare it so far, so I cut up the "not as nice" fender in my stash in case I screwed up. Well, after investing six hours just to get to where it sits now, I'm too far in to start over. Oh, well.
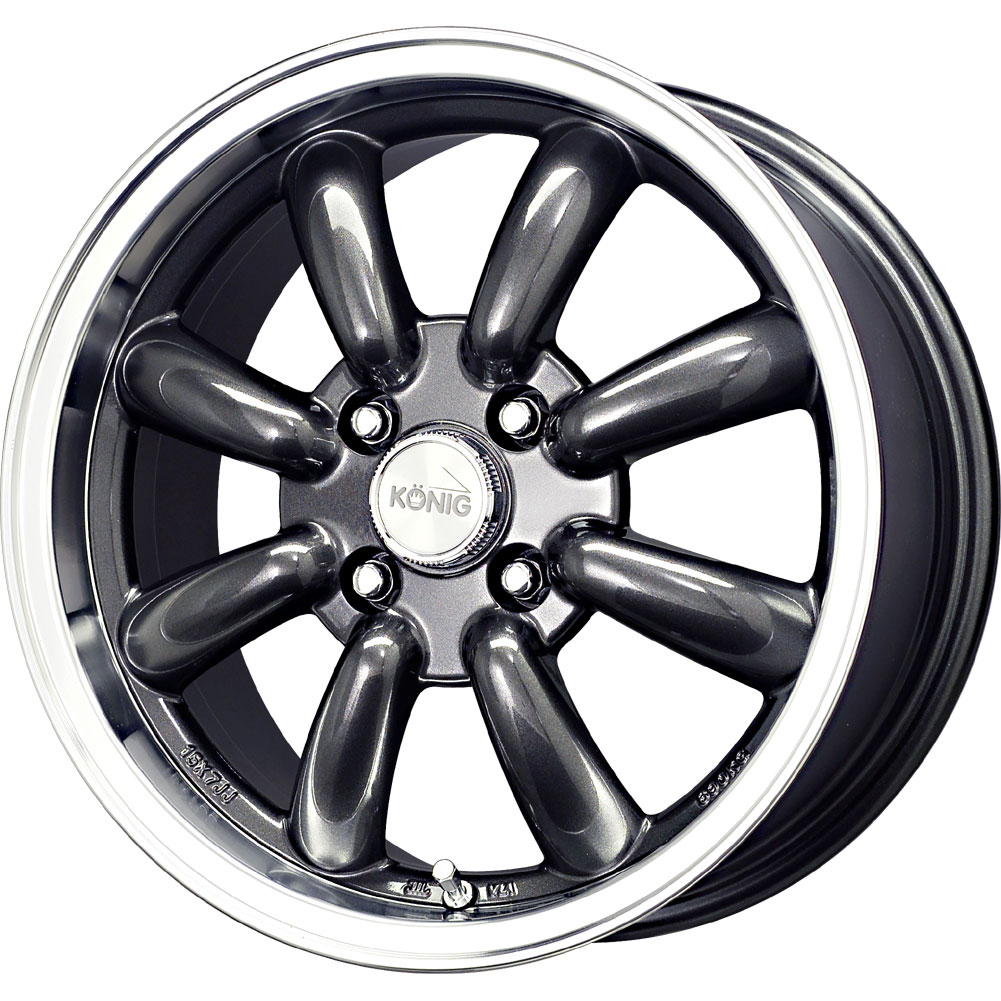
The other thing that makes me sad is there is no way it will fit 15x8's so I'll be stuck with 15x7 and 205s. The good thing is there are plenty of tires in that size and there are some Minilite-looking wheels for cheap for that period-correct look. They are only $105 to boot.
The other thing that makes me sad is there is no way it will fit 15x8's so I'll be stuck with 15x7 and 205s. The good thing is there are plenty of tires in that size and there are some Minilite-looking wheels for cheap for that period-correct look. They are only $105 to boot.

Reply
 0
0

0
 03-17-2013, 11:34 PM
#185
Elite Member
Thread Starter
iTrader: (46)
Join Date: Dec 2007
Location: Nebraska
Posts: 4,729
Total Cats: 166
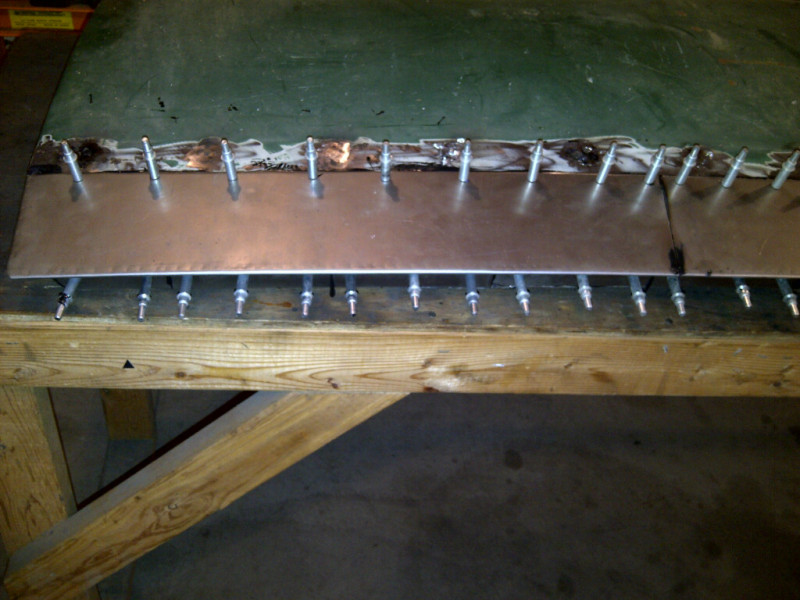
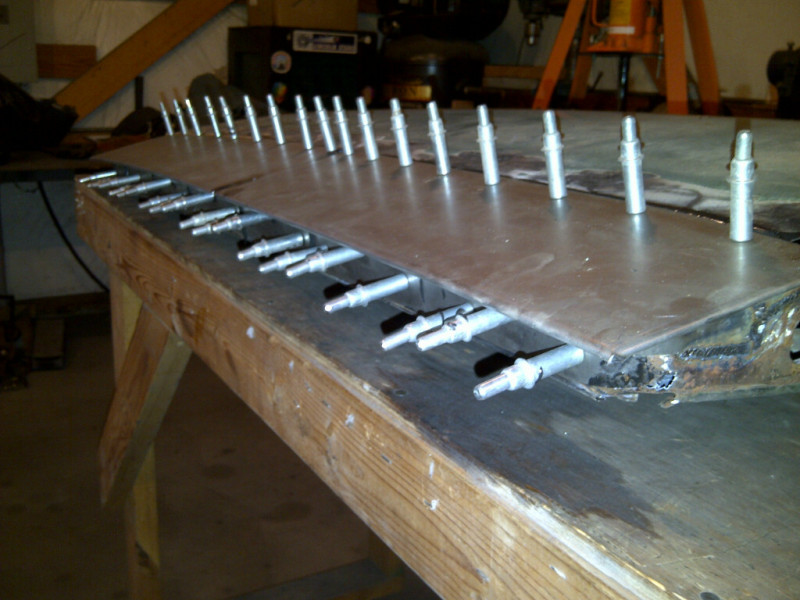
I just started cutting and pushing strips around until it looked good and cleared everything. No real science to it, just time.
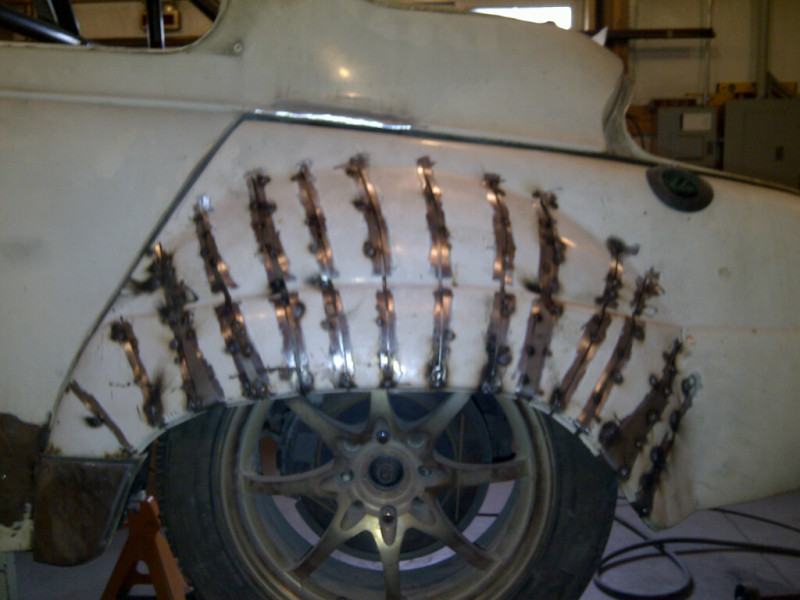
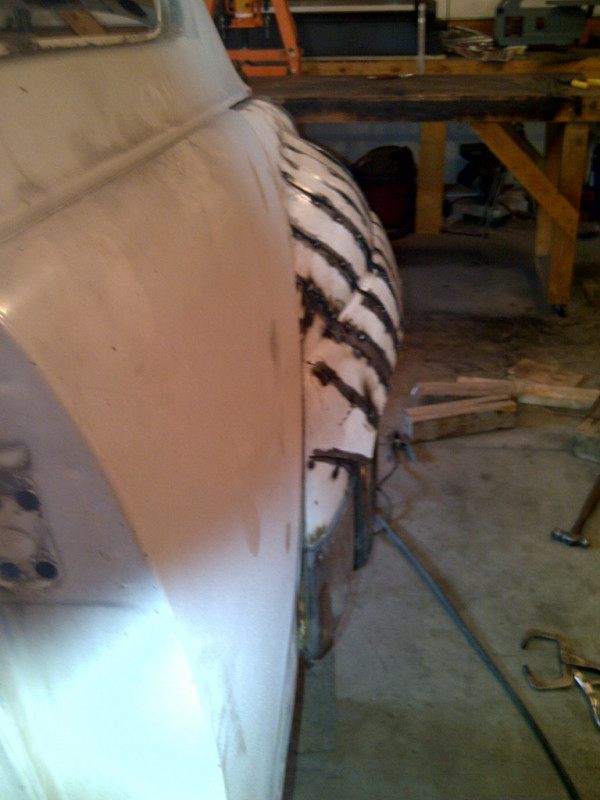
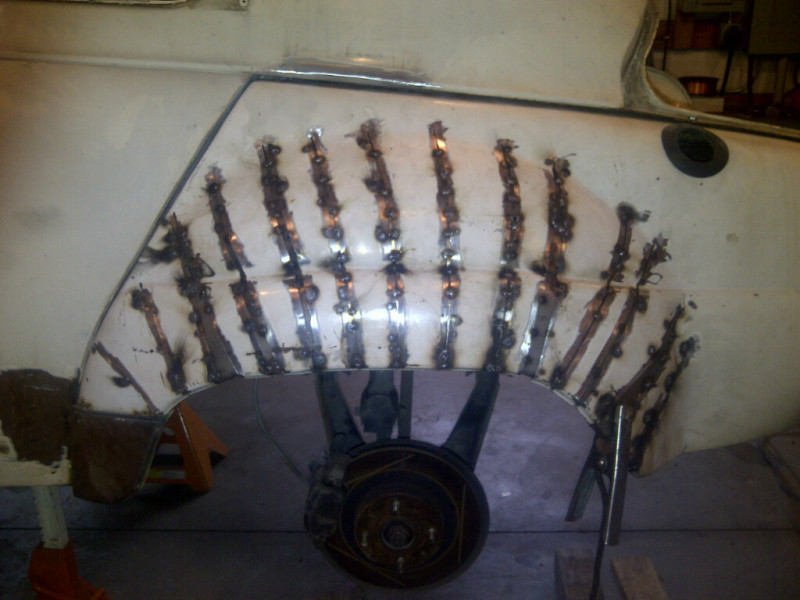
I then tacked up the fender lip and worked from the center out each way. When it was roughed in I took it off, tacked on the filler strips inside the fender on one side only so everything was still free to move. Then I mounted the fender again and started clamping and tacking. I made a set of 14" reach welding vice grips so I could start at the top, clamp the joints together and tacked from the top down.
I finished tacking the passenger side, finish welded the one side and started grinding. Sorry, no pics because I left me phone in the house.
After they are welded when I go to bodywork I think I'm going to lay a couple of layers of fiberglass over everything before body filler.
Reply
0
0

 03-31-2013, 11:41 PM
#187
Elite Member
Thread Starter
iTrader: (46)
Join Date: Dec 2007
Location: Nebraska
Posts: 4,729
Total Cats: 166
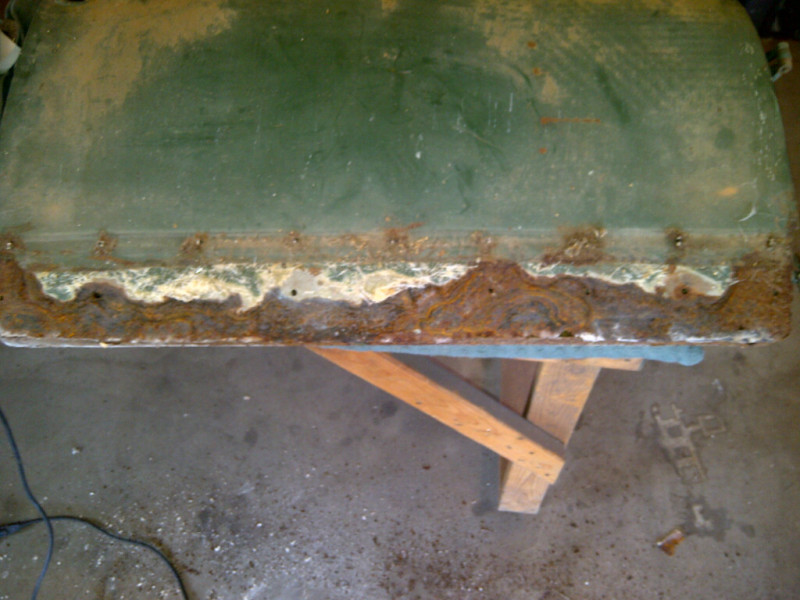
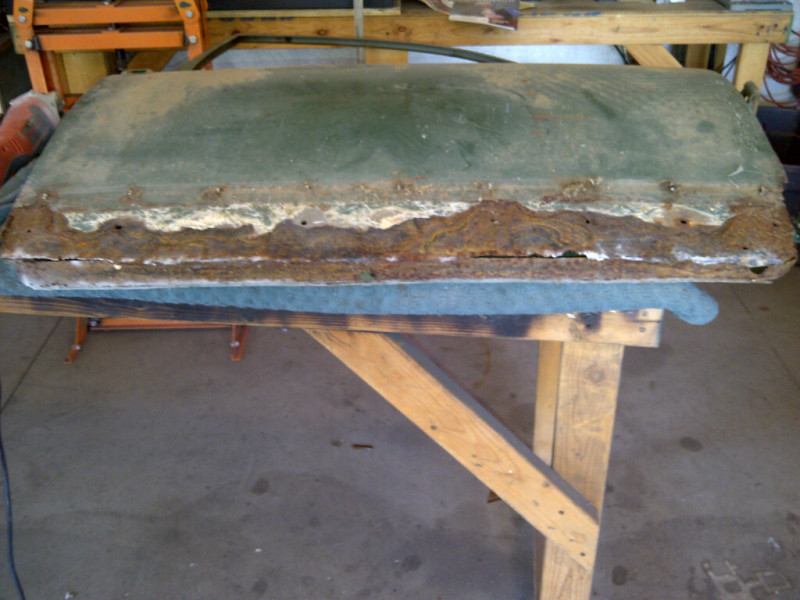
Started on doors yesterday. The two that were on the car originally were really bad. I picked the best two spares that I had to work on. Unfortunately, the first door had been "repaired" some time ago with a generous application of fiberglass which does a wonderful job of trapping water.
I cut out all of the damaged metal, fabbed up new lips to crimp the patch panels around and welded them in. No pics as the phone was in the house.
I them made new panels to bond into place. I used the 3M Panel Bond Adhesive which works extremely well. I didn't want to put that much weld into the door and have it warp the sheetmetal on me. I had used the Clecos before to hold the panels tight so I used them again. They work great right through the adhesive. When you remove them they self-clean. Plus, it lets me drill up the entire panel so it can all be glued up at once, flanges and skins. After clamping I crimped the edges. Looks factory. I have a small patch to weld in along one edge.
I had tackled the worse door first so this one will be a breeze.
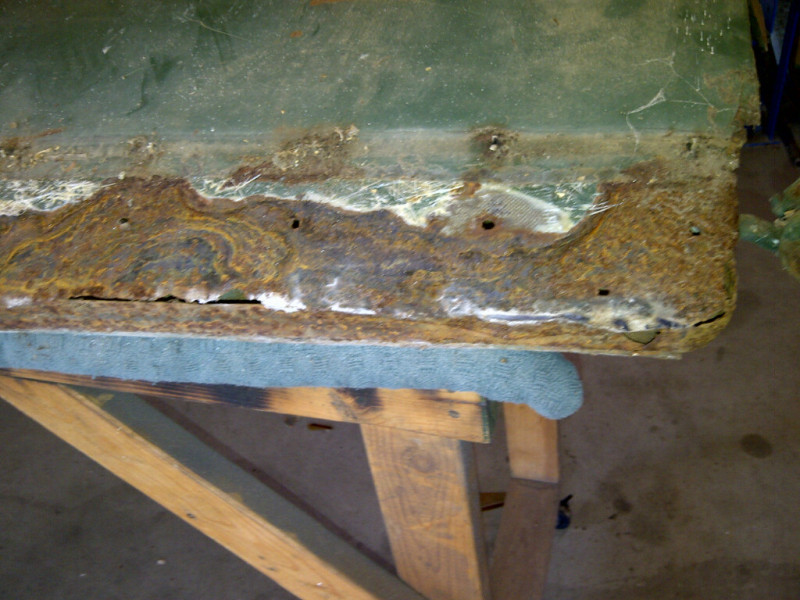
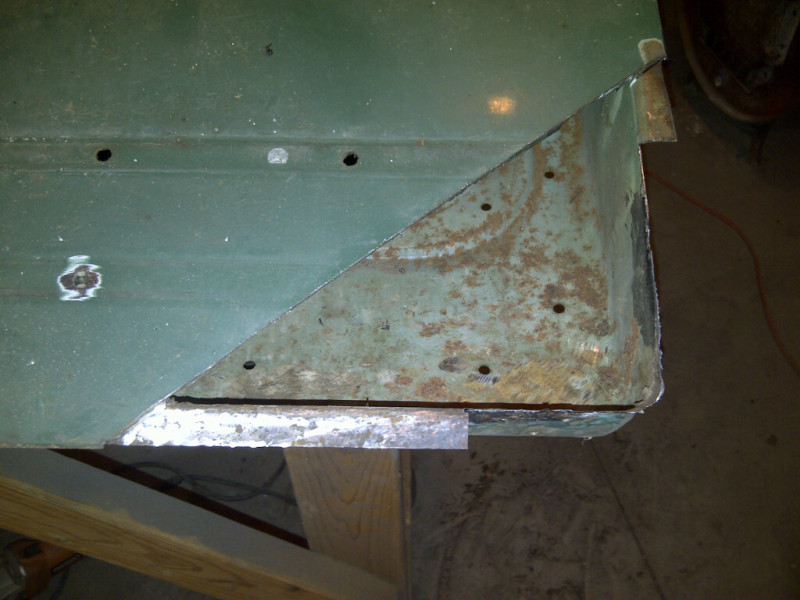
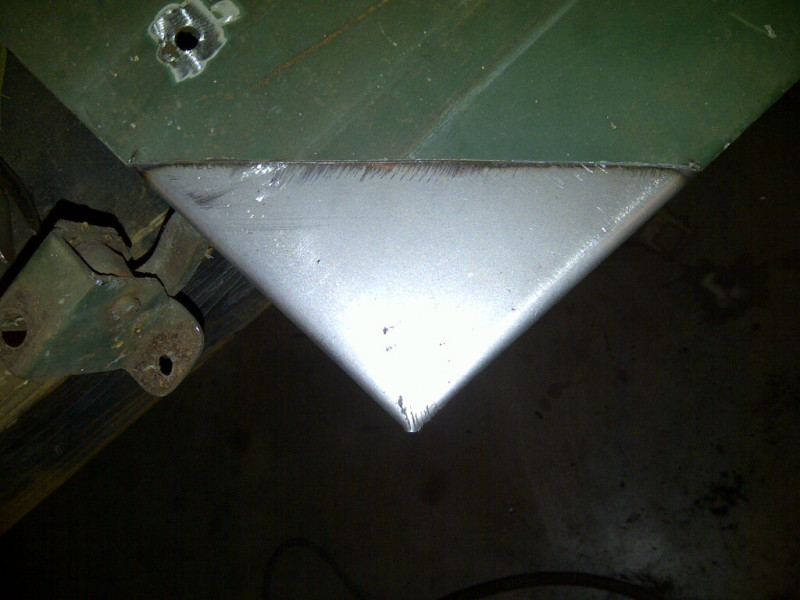
This corner is about 8" on a side. The opposite is only about 4". Here's the bad stuff cut out. Two small panel flanges and one small skin panel to fix. You can even see the holes where the trim was mounted aren't even rusted. The original doors had a quarter-sized hole around each trim mount hole.
I cut out all of the damaged metal, fabbed up new lips to crimp the patch panels around and welded them in. No pics as the phone was in the house.
I them made new panels to bond into place. I used the 3M Panel Bond Adhesive which works extremely well. I didn't want to put that much weld into the door and have it warp the sheetmetal on me. I had used the Clecos before to hold the panels tight so I used them again. They work great right through the adhesive. When you remove them they self-clean. Plus, it lets me drill up the entire panel so it can all be glued up at once, flanges and skins. After clamping I crimped the edges. Looks factory. I have a small patch to weld in along one edge.
I had tackled the worse door first so this one will be a breeze.
This corner is about 8" on a side. The opposite is only about 4". Here's the bad stuff cut out. Two small panel flanges and one small skin panel to fix. You can even see the holes where the trim was mounted aren't even rusted. The original doors had a quarter-sized hole around each trim mount hole.
Reply
0
0
04-01-2013, 11:52 PM
#188
Elite Member
Thread Starter
iTrader: (46)
Join Date: Dec 2007
Location: Nebraska
Posts: 4,729
Total Cats: 166
Got the patches fabbed for the other door tonight.
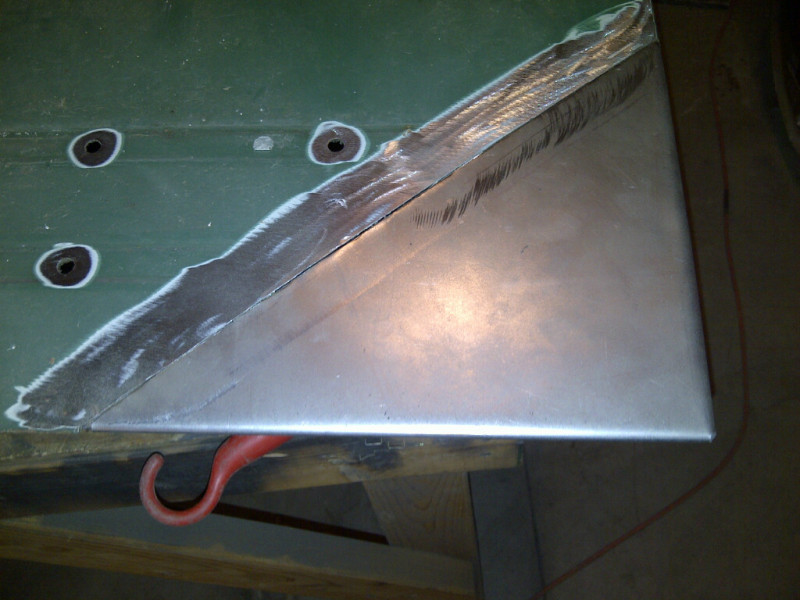
New flanges cut, formed and welded in.
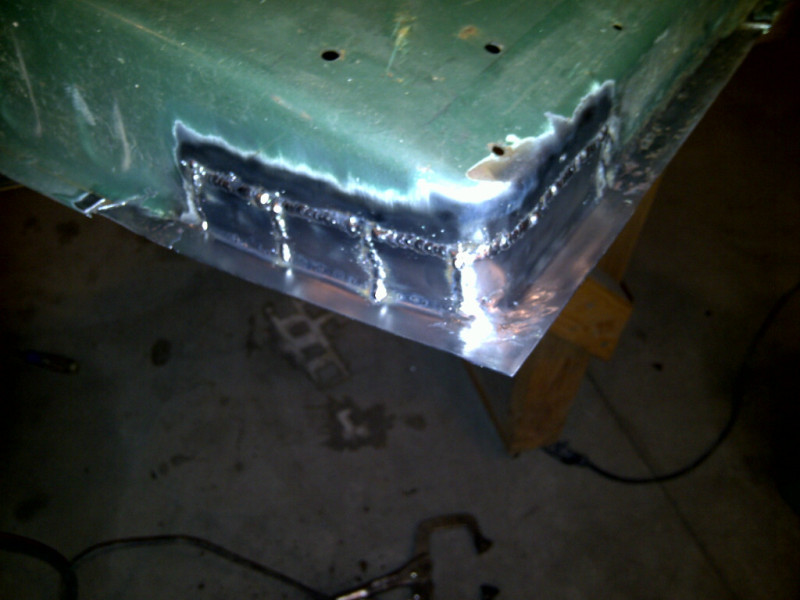
Patches cut and formed. These are smaller so they will be welded in.
4"x4" patch on inside corner
8"x10" patch for the outside corner
Once these are welded in I need to de-badge the trunk, fill in a couple more screw holes and it's off for sanblasting and primer.
New flanges cut, formed and welded in.
Patches cut and formed. These are smaller so they will be welded in.
4"x4" patch on inside corner
8"x10" patch for the outside corner
Once these are welded in I need to de-badge the trunk, fill in a couple more screw holes and it's off for sanblasting and primer.
Reply
0
0
04-02-2013, 05:26 AM
#189
Junior Member

Join Date: Nov 2008
Location: Omaha, NE
Posts: 54
Total Cats: 0
I love how you seem to look at something that looks like it needs a ton of loving, and tear into it to bring it back from the dead. awesome progress so far. definitely makes me want to try my hand at welding and metal working.
Reply
0
0
 04-07-2013, 12:23 AM
#191
Elite Member
Thread Starter
iTrader: (46)
Join Date: Dec 2007
Location: Nebraska
Posts: 4,729
Total Cats: 166
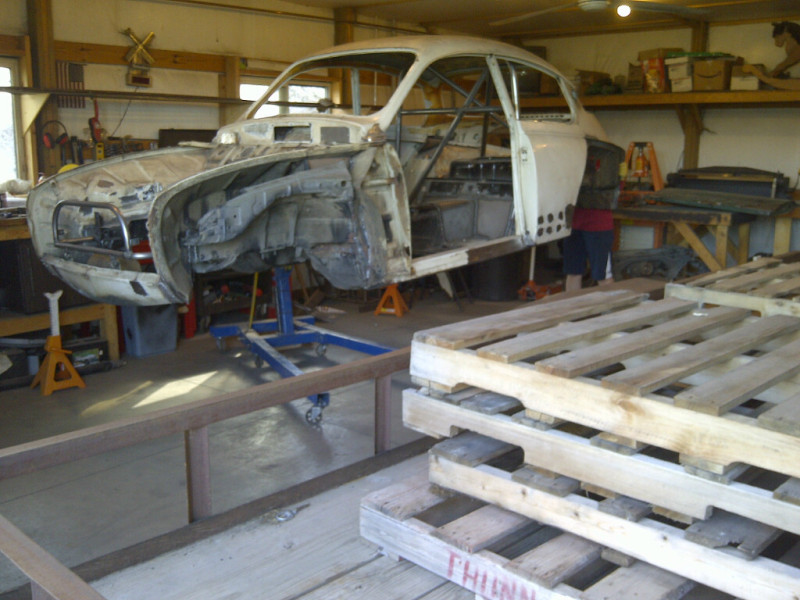
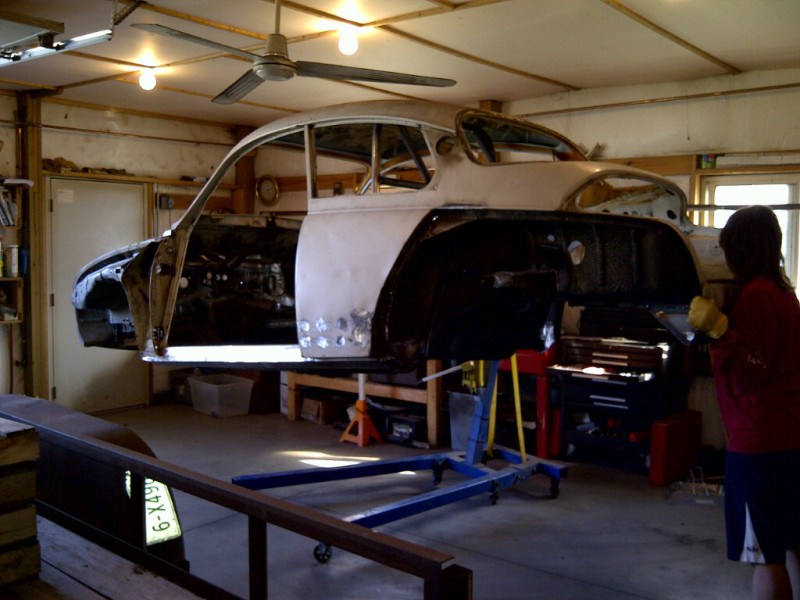
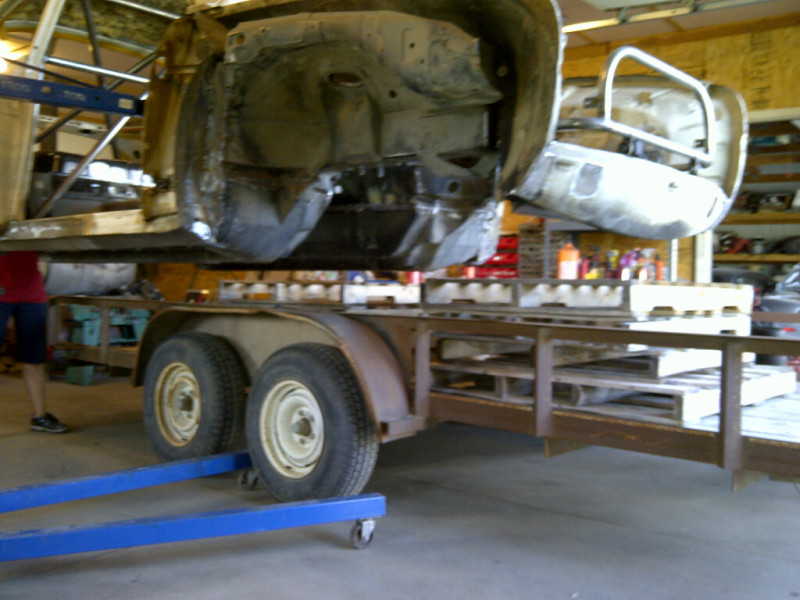
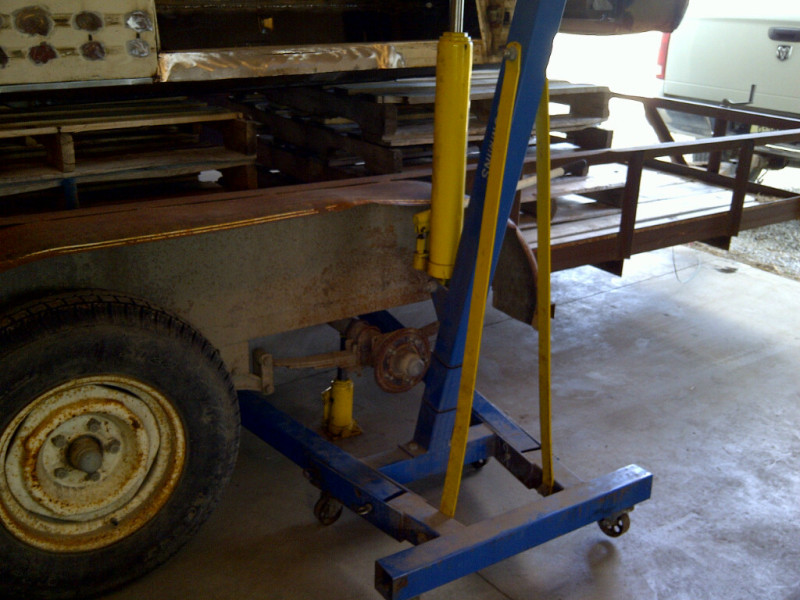
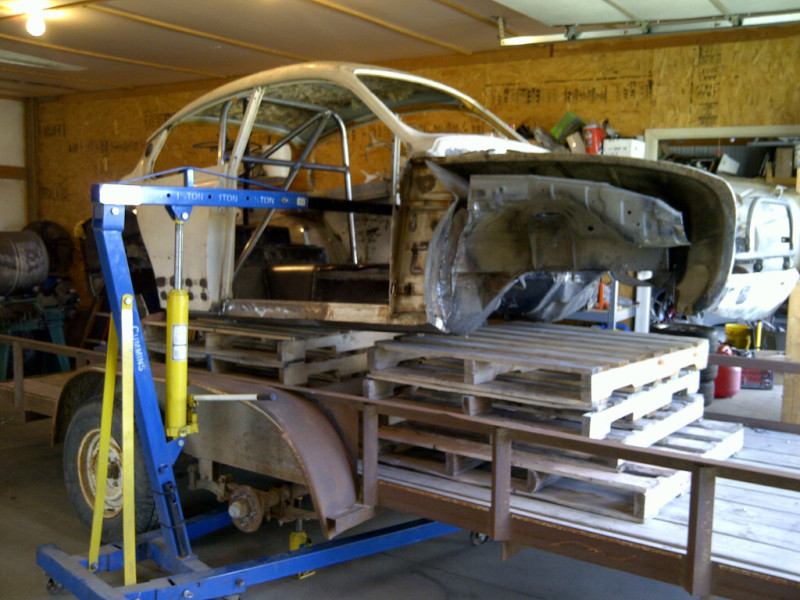
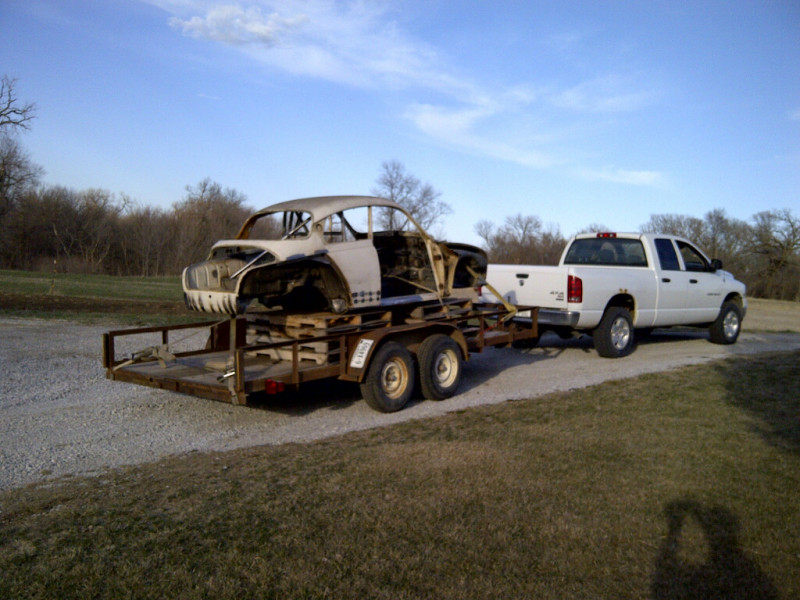
Heading to sandblasting. Loading went very easy. I weighted the front for balance. I ran a bar the length of the transmission tunnel and lifted it through the shifter hole. My wife had no problem keeping it balanced. I had to remove the tire to get close enough to set it in the center of the trailer. I set it on pallets so they will be able to easily pick it up with a forklift over the side rails.
Reply
0
0
04-07-2013, 11:27 PM
#192
Elite Member
Thread Starter
iTrader: (46)
Join Date: Dec 2007
Location: Nebraska
Posts: 4,729
Total Cats: 166
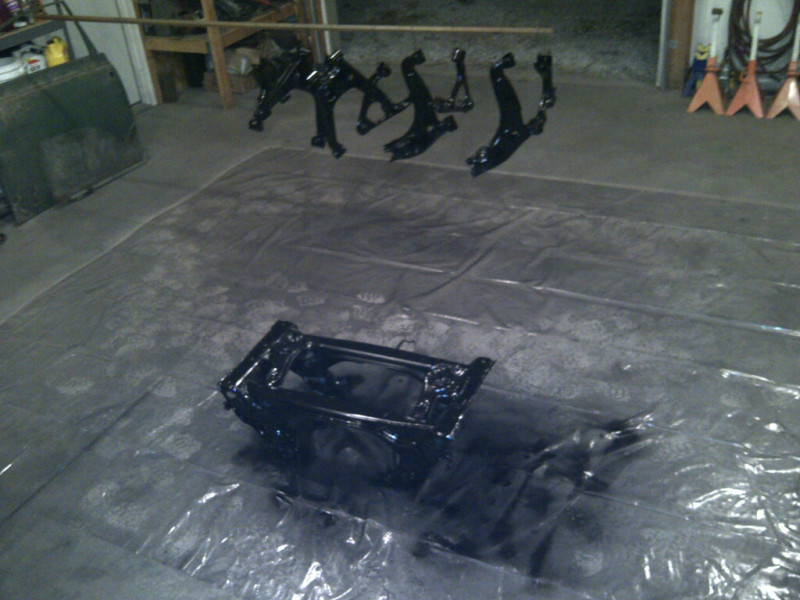
So now that the car is on the trailer waiting to go to sandblast and primer, I'm bored.
Went ahead and disassembled the front and rear suspension for Energy Suspension bushing install and said **** it-even a track car can be pretty. Sanded everything down and painted it. Ran short on paint so front subframe has to wait for tomorrow.
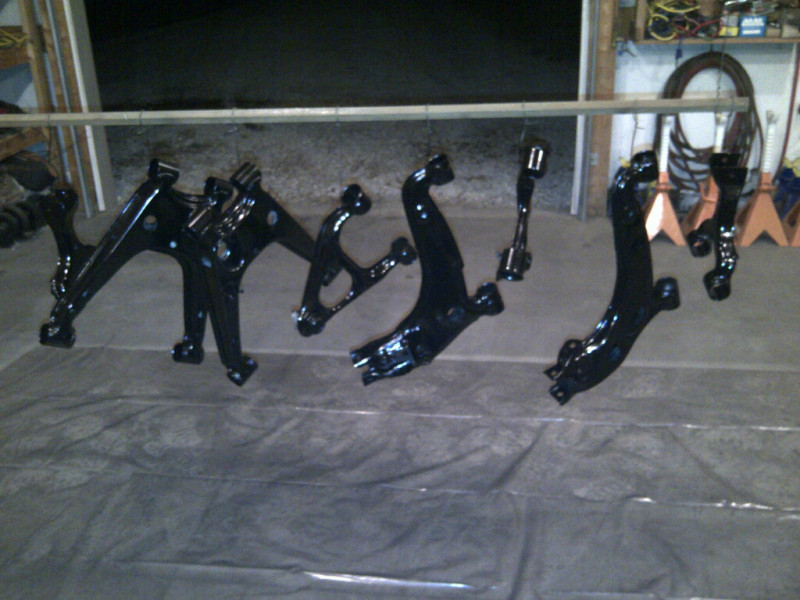
I got the full ES kit so it came with sway bar and diff mount bushings as well. There are several ways to remove the diff bushings. I've seen them torched out, beat out, and the ES suggested way is to press them out with a press. As I work alone I couldn't see myself balancing a diff on the press while holding the right size press tool to push on the bushing and running the jack handle.
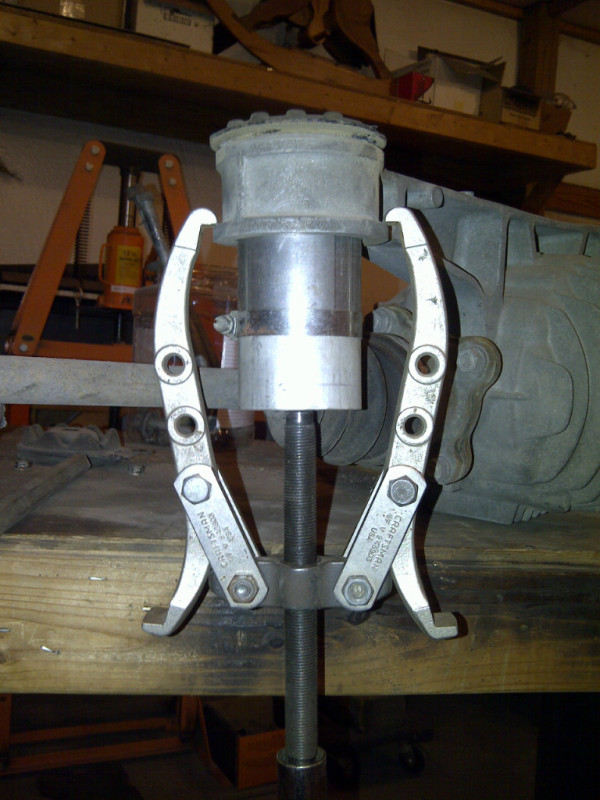
I came up with a new way and it worked perfectly. Take one piece of 2.5" exhaust tubing, hose clamp it to a section of 2.5" aluminum stock with a center drilled in it.
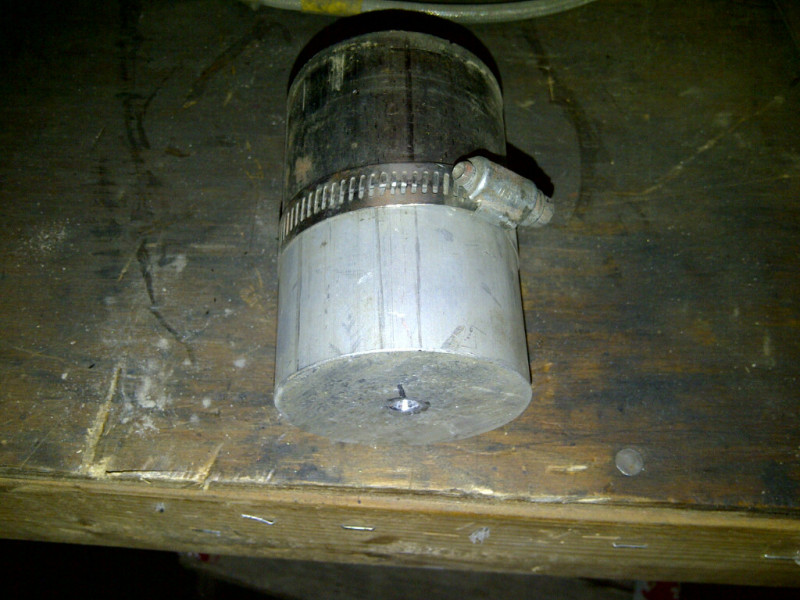
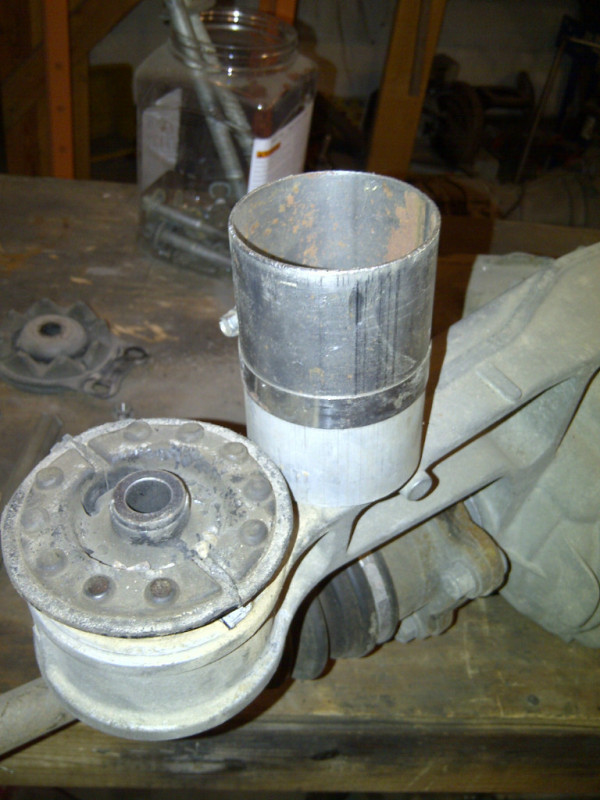
Get out your trusty bearing puller and ratchet and push it out. Easy peasy. Both removed in two minutes. No torch, no hammer and no need for six arms to hold it in the press. (Press in background looking sad and neglected.)
Went ahead and disassembled the front and rear suspension for Energy Suspension bushing install and said **** it-even a track car can be pretty. Sanded everything down and painted it. Ran short on paint so front subframe has to wait for tomorrow.
I got the full ES kit so it came with sway bar and diff mount bushings as well. There are several ways to remove the diff bushings. I've seen them torched out, beat out, and the ES suggested way is to press them out with a press. As I work alone I couldn't see myself balancing a diff on the press while holding the right size press tool to push on the bushing and running the jack handle.
I came up with a new way and it worked perfectly. Take one piece of 2.5" exhaust tubing, hose clamp it to a section of 2.5" aluminum stock with a center drilled in it.
Get out your trusty bearing puller and ratchet and push it out. Easy peasy. Both removed in two minutes. No torch, no hammer and no need for six arms to hold it in the press. (Press in background looking sad and neglected.)
Reply
0
0
04-10-2013, 05:51 PM
#193
Elite Member
Thread Starter
iTrader: (46)
Join Date: Dec 2007
Location: Nebraska
Posts: 4,729
Total Cats: 166
Just found out it will be three weeks before I get the car back from sandblasting and primer. I have some things to do - tap pan for oil return, build turbo manifold, install clutch and coolant reroute, etc but not three weeks' worth.
Reply
-1
-1
04-13-2013, 03:51 PM
#195

Maybe some more inspirational photos
Saab V4 Turbo Stig Z Special Racing 1979 V4 with turbo that raced in the 80s
The thread itself is around building a model if it.
The track seems to be somewhat near the one you will be using.
Another 96 floorpan swap http://www.uksaabs.co.uk/UKS/viewtopic.php?f=35&t=77886
Saab V4 Turbo Stig Z Special Racing 1979 V4 with turbo that raced in the 80s
The thread itself is around building a model if it.
The track seems to be somewhat near the one you will be using.
Another 96 floorpan swap http://www.uksaabs.co.uk/UKS/viewtopic.php?f=35&t=77886
Reply
0
0
 04-26-2013, 12:27 PM
#197
Elite Member
Thread Starter
iTrader: (46)
Join Date: Dec 2007
Location: Nebraska
Posts: 4,729
Total Cats: 166
Dropped the car off at the sandblaster this morning. Should be blasted and primed and ready to pick up sometime next week.
Got a lead from another SAAB guy doing a Miata swap on m.net for a windshield. I called him and he thinks he may have a used one but if not he brought in eight new ones this week from Sweden. They are $375. Either way I'm picking one up. He's only a couple hours from me.
Got a lead from another SAAB guy doing a Miata swap on m.net for a windshield. I called him and he thinks he may have a used one but if not he brought in eight new ones this week from Sweden. They are $375. Either way I'm picking one up. He's only a couple hours from me.
Reply
0
0
 04-27-2013, 11:15 PM
#199
Elite Member
Thread Starter
iTrader: (46)
Join Date: Dec 2007
Location: Nebraska
Posts: 4,729
Total Cats: 166
^I wish mine was a bull nose short windshield car like that.
Fun fact - the car above has a coefficient of drag of approximately .30. Tom is pretty confident that my car will NOT be the brick on the racetrack that I thought it would be. With a splitter and lowered he thinks it will be in the .30-.32 range.
Here's a vid about some old SAABs for sale from Tom Donney who I'm getting the windshield from. Skip the walkaround on the 9-3.
Reply
0
0


