My '91 Turbo track build - GeneSplicer

 02-27-2010, 05:33 PM
#22
Elite Member
Thread Starter
iTrader: (14)

Join Date: Sep 2009
Location: Birmingham, AL
Posts: 2,101
Total Cats: 180
The carpet looks good! I'll pull it out and bring it with me perhaps this week for ya.
On another note... I scored today!
Found a '83 RX7 at the local pull-a-part that still had the diff... which if my research is right, has the 3.909 ring and pinion set! Anyway, I was draining the the fluid when 2 guys came up wanting the LSD out of it. He helped me yank the axles and I will sell him the LSD unit out of it. So basically, scored the 3.9 R&P for $35!! What a good saturday!

Reply
 0
0

0
 03-10-2010, 05:41 PM
#25
Elite Member
Thread Starter
iTrader: (14)
Join Date: Sep 2009
Location: Birmingham, AL
Posts: 2,101
Total Cats: 180
Well, kinda took the day off yesterday to spend some time working on the miata. I was able to finish my 'mad' ducting and put on the front flares. Ordered some H&R 25mm spacers to fill the flares all round. Waiting on the OSG to come in but it looks like I'll have to pop in the open diff for now so I can dyno tune it sunday. 1st track weekend for me is the end of this month and didn't want to cut it close on the tune, especially if I need to replace/work on something the tuning shows.
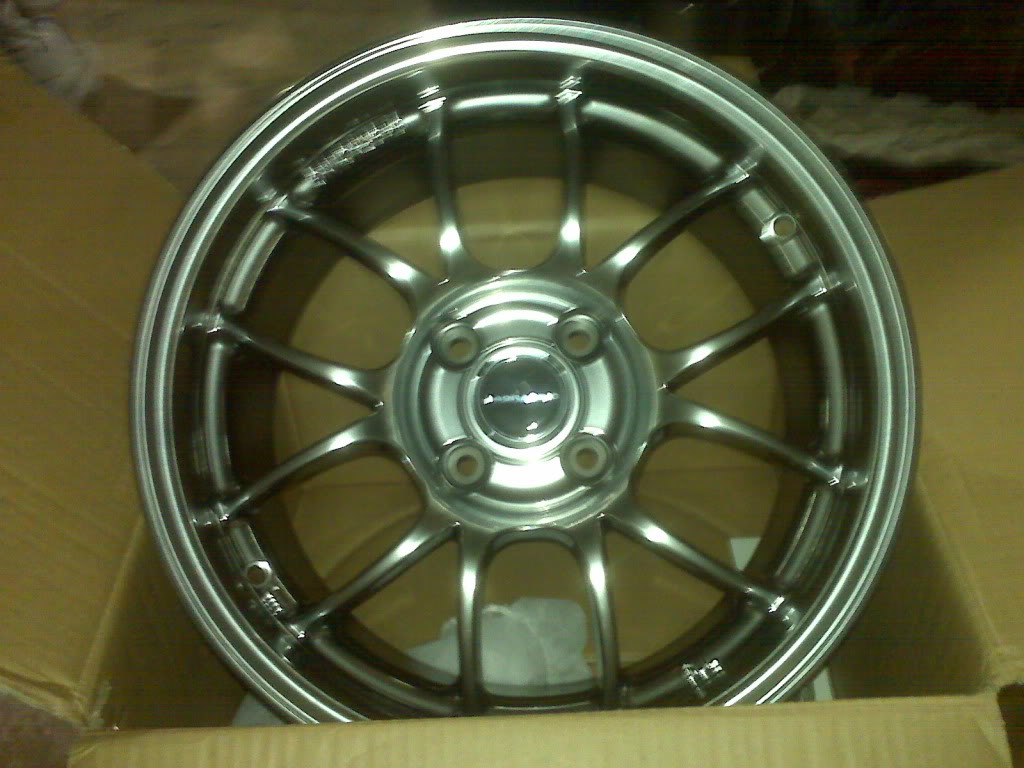
Got e-mail saying the 15x9 6ULs have shipped! Sweet! Now waiting on the RA1s and NT01s from onlinetire.com!
What I did yesterday -
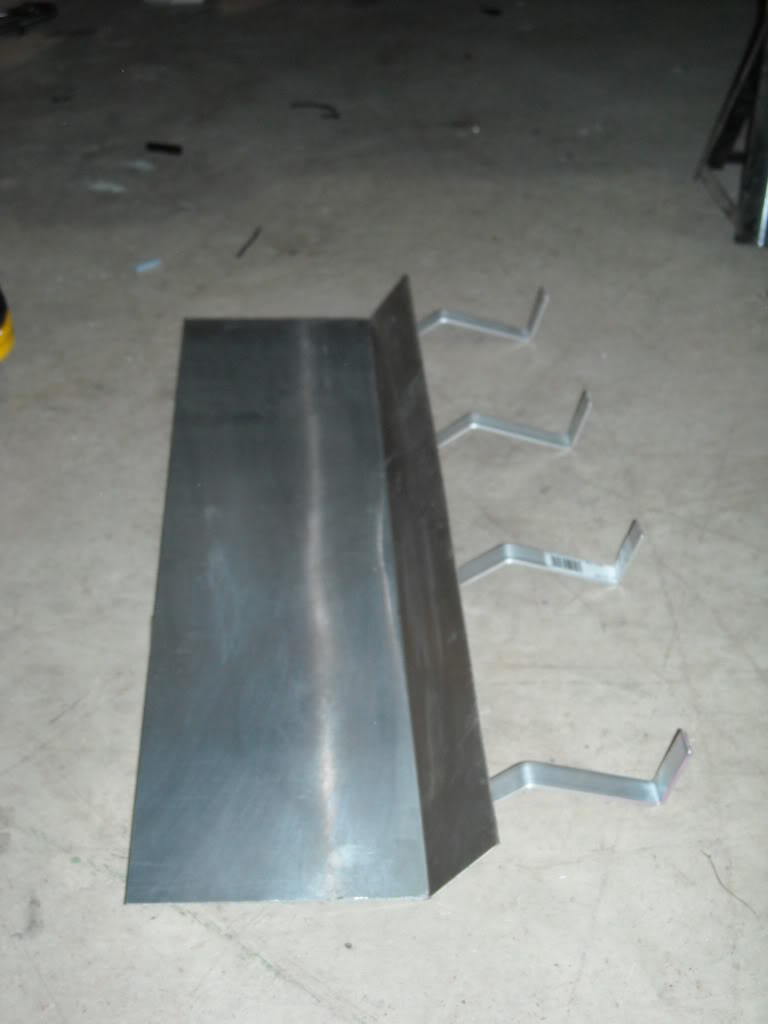
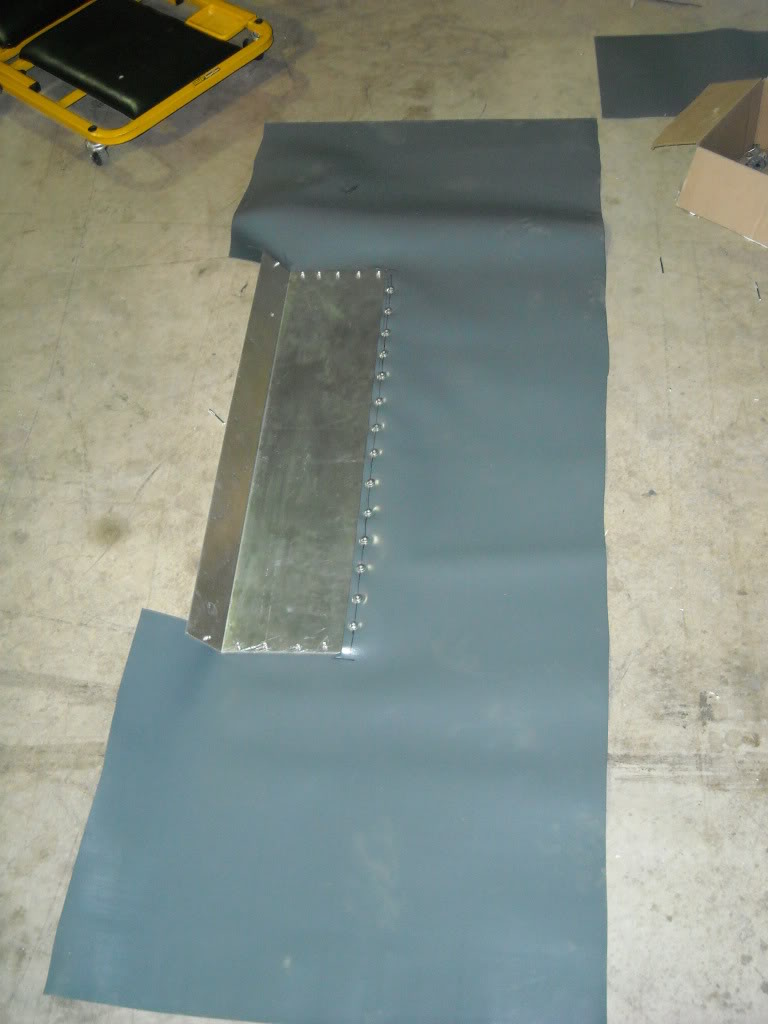
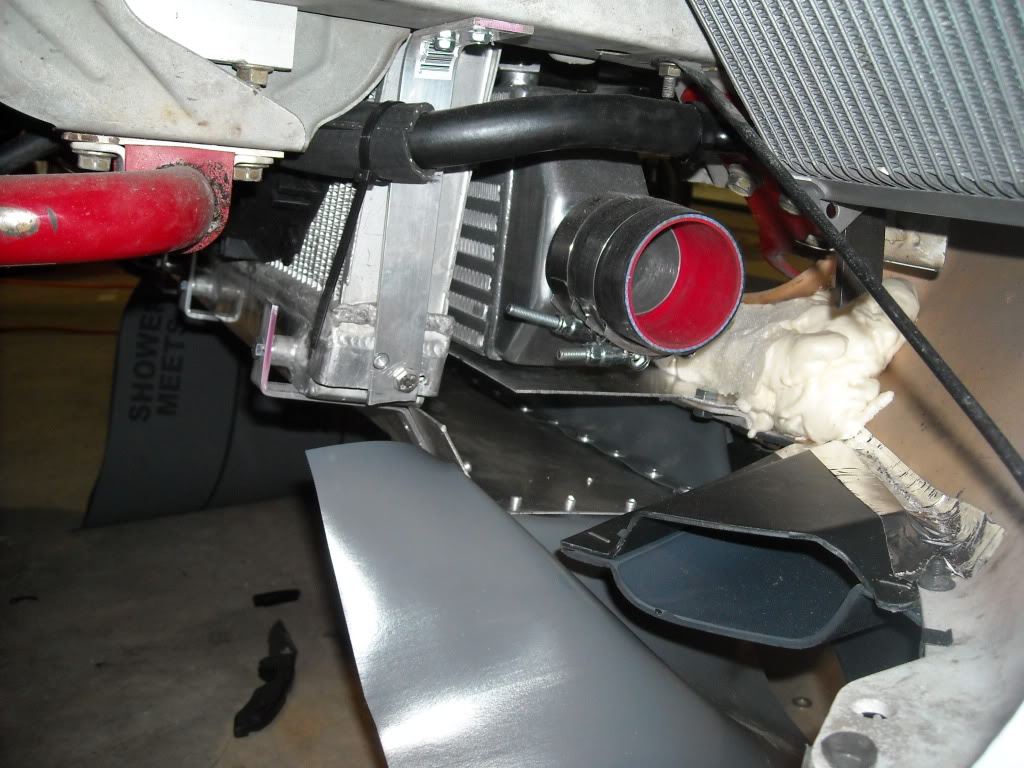
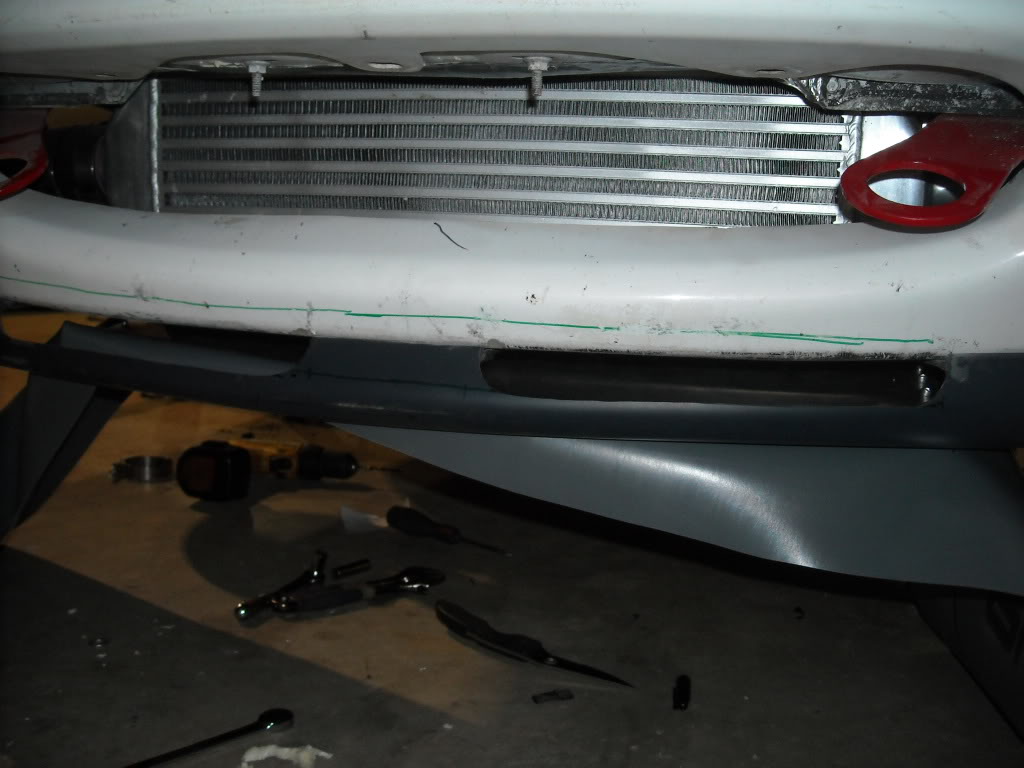
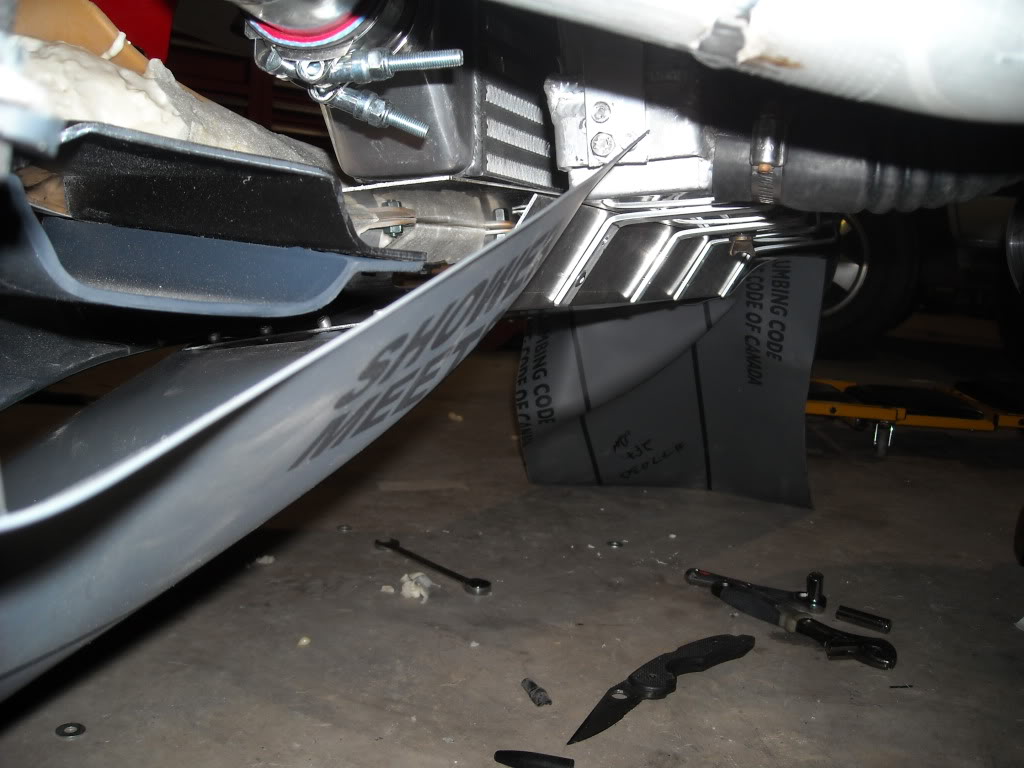
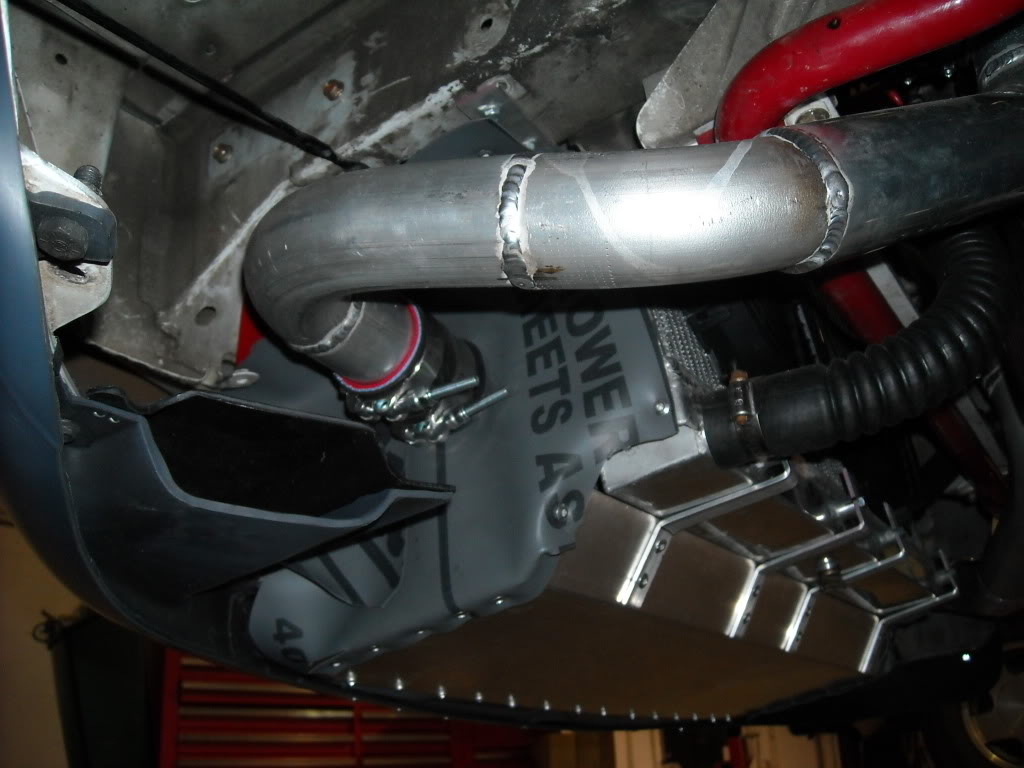
I cut the 2 holes in the OEM clip and ducted them straight to the radiator. I installed a "blocking" plate under the intercooler to insure any air entering the clip ducts will go to the radiator. I used ~50mil PVC shower/tub liner (couldn't find rubber) to block in the sides and also left about 4" between the radiator plate lip and the lip... hopefully this will help keep the plate from getting torn up should I ever hit the clip on a corner.
Intercooler blocker plate

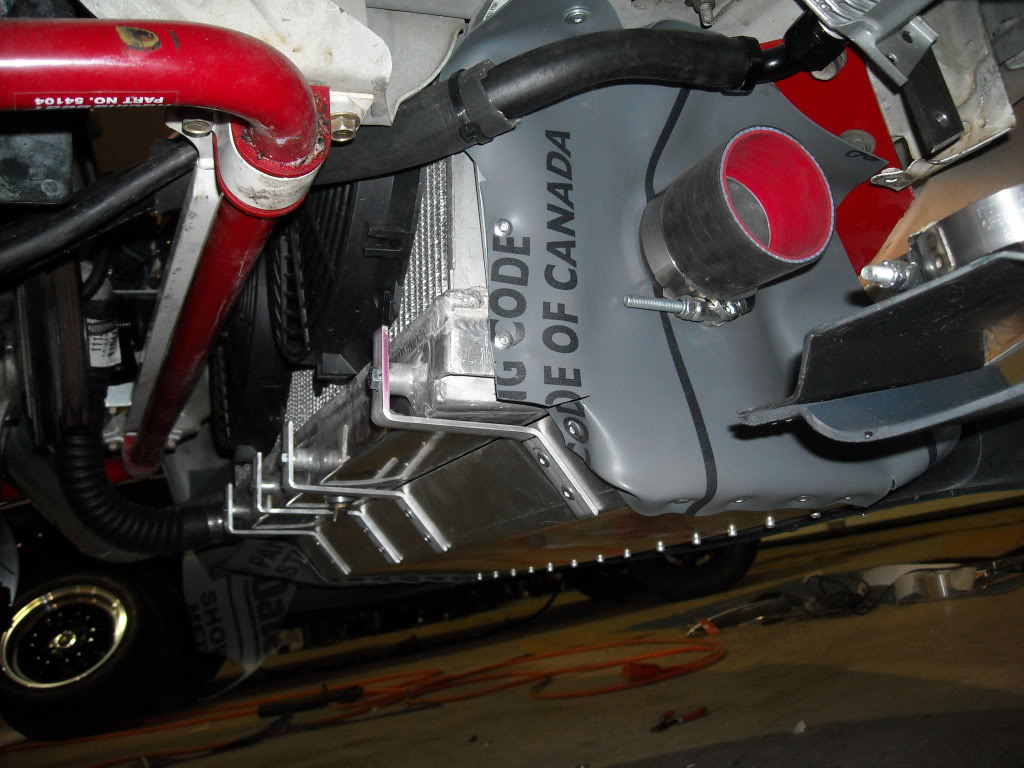
Radiator plate
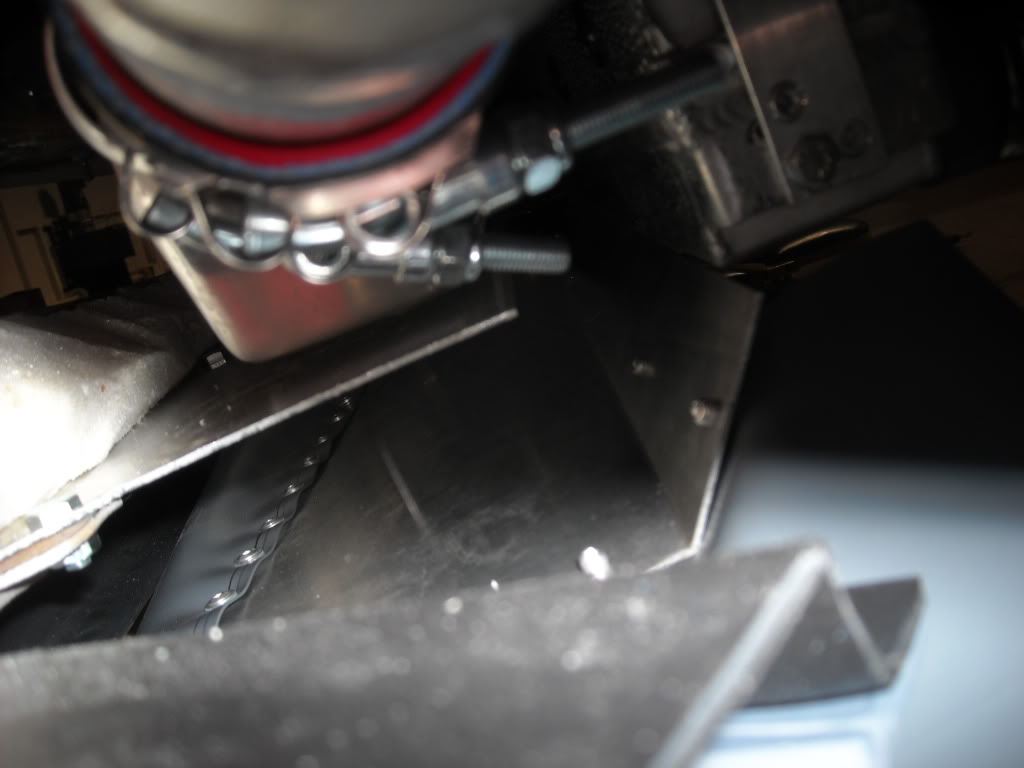
Riveting the plate to the PVC - after 50 rivets by hand, I'm buying and pneumatic riveter!
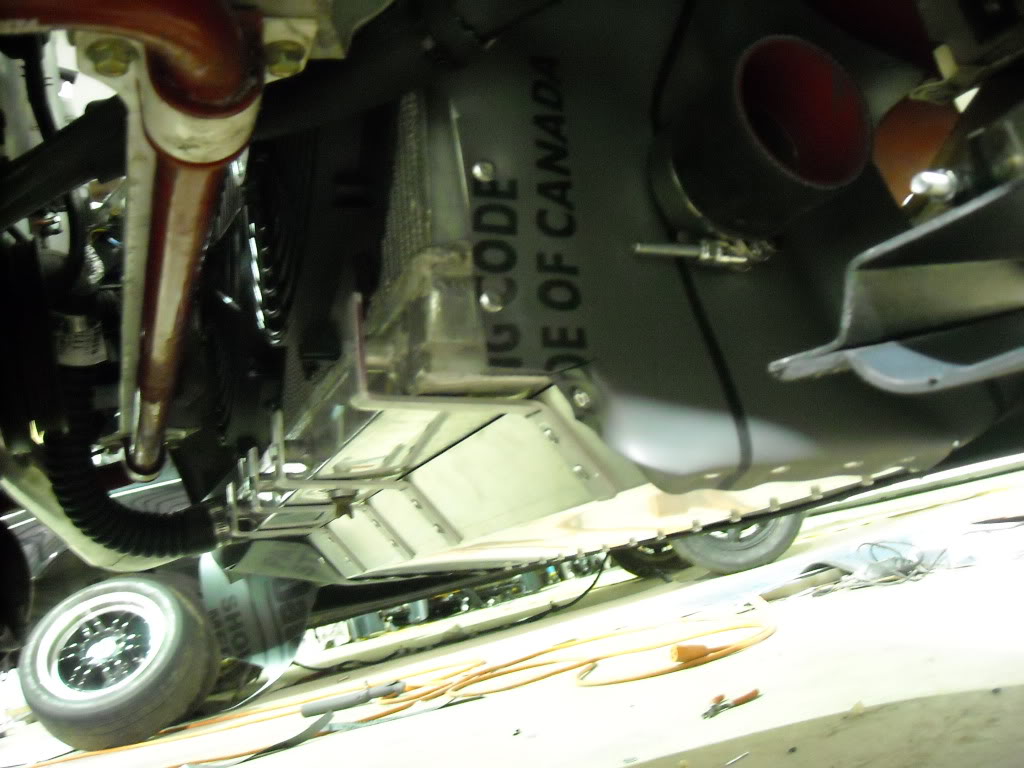
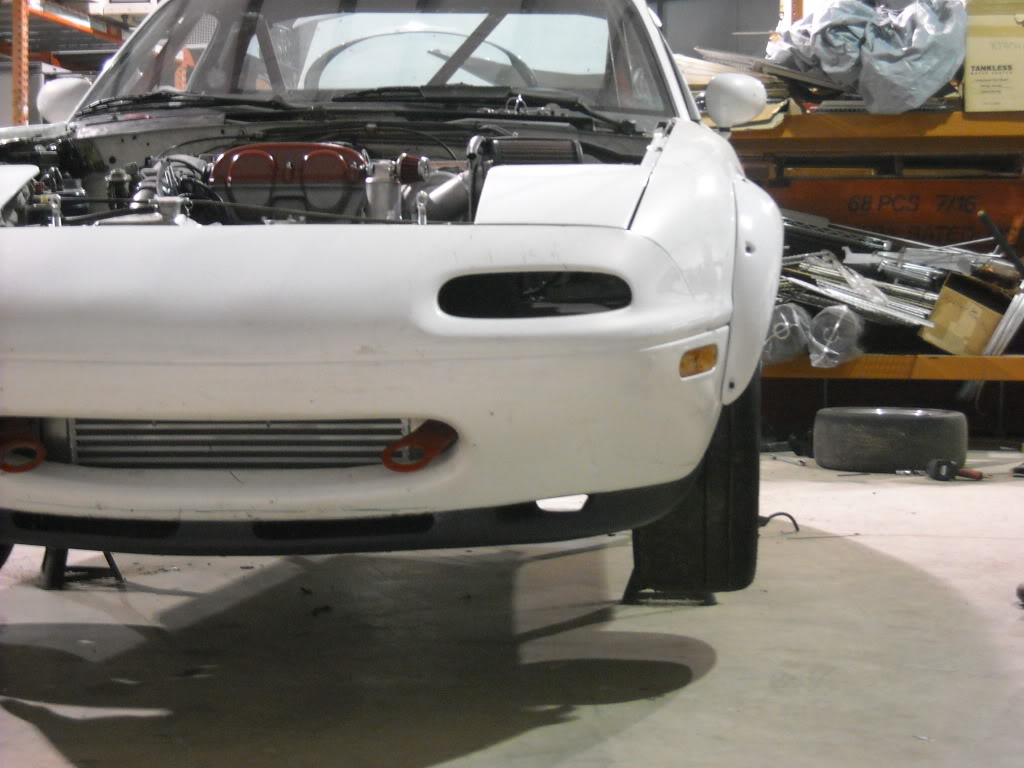
Fitments
Capping off the passenger side
Now, maybe after a big brake kit, I'll utilize the other side ducts and duct them to the front brakes... or I might now wait and just go ahead and do them!
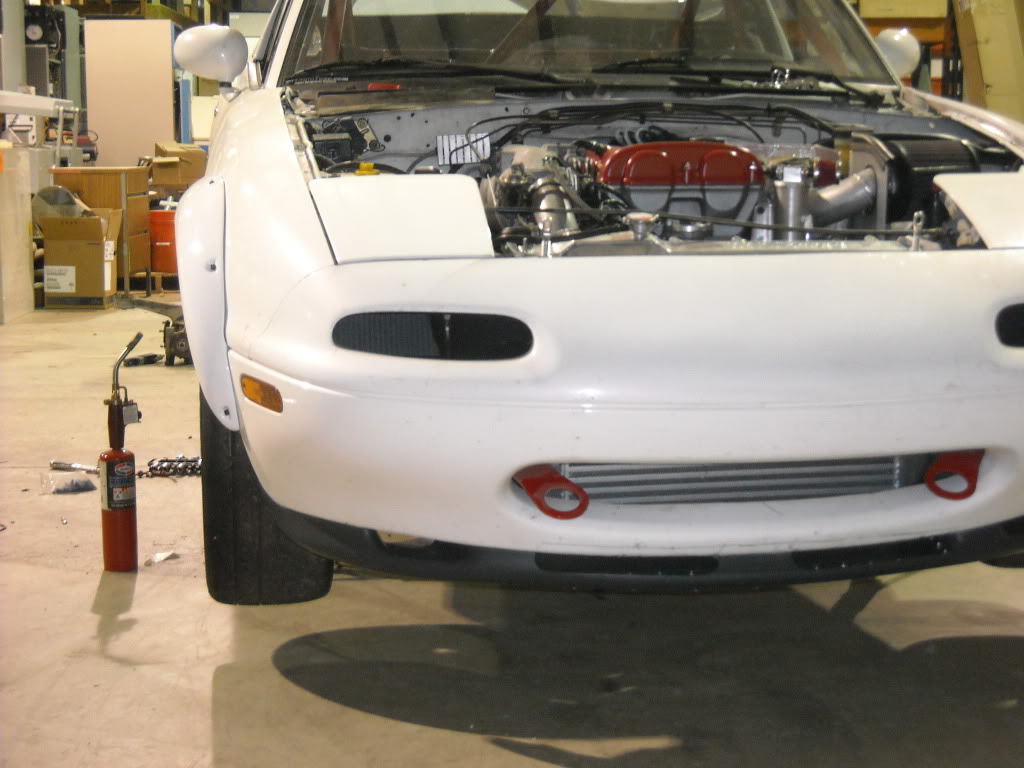
Driver's side
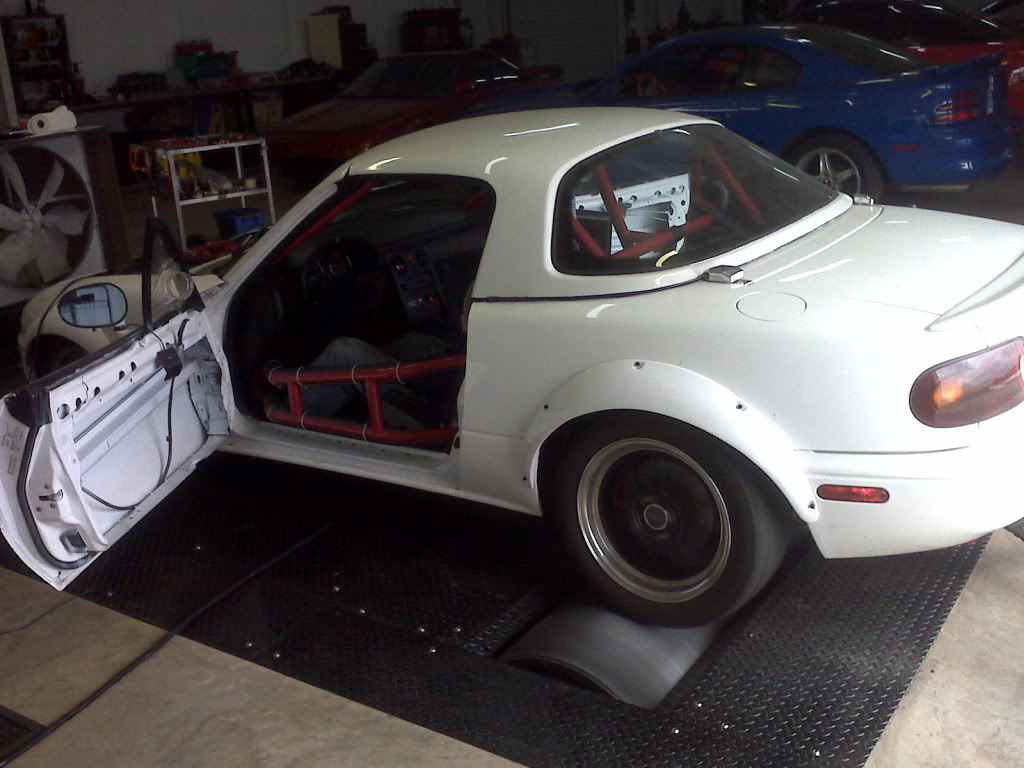
Front flares
Still working on hood. Took to someone who tig weld and the costs involved to clean it up and welding (5hrs easy he said) would be about the same as fiberglass ducted hood! I'm just gonna use some jbweld 4min epoxy with a backer plate and support the louvers from below (on the sides of the louvers) and use some fiber bondo and form in the top.
Got e-mail saying the 15x9 6ULs have shipped! Sweet! Now waiting on the RA1s and NT01s from onlinetire.com!
What I did yesterday -
I cut the 2 holes in the OEM clip and ducted them straight to the radiator. I installed a "blocking" plate under the intercooler to insure any air entering the clip ducts will go to the radiator. I used ~50mil PVC shower/tub liner (couldn't find rubber) to block in the sides and also left about 4" between the radiator plate lip and the lip... hopefully this will help keep the plate from getting torn up should I ever hit the clip on a corner.
Intercooler blocker plate
Radiator plate
Riveting the plate to the PVC - after 50 rivets by hand, I'm buying and pneumatic riveter!
Fitments
Capping off the passenger side
Now, maybe after a big brake kit, I'll utilize the other side ducts and duct them to the front brakes... or I might now wait and just go ahead and do them!
Driver's side
Front flares
Still working on hood. Took to someone who tig weld and the costs involved to clean it up and welding (5hrs easy he said) would be about the same as fiberglass ducted hood! I'm just gonna use some jbweld 4min epoxy with a backer plate and support the louvers from below (on the sides of the louvers) and use some fiber bondo and form in the top.
Reply
0
0
 zomg someone actually did a clean ducting install. I'm super impressed, that's going to work awesomely. Come to Ory-gone and do that to my car.
 03-11-2010, 08:51 PM
#27
Elite Member
Thread Starter
iTrader: (14)
Join Date: Sep 2009
Location: Birmingham, AL
Posts: 2,101
Total Cats: 180
Thanks man! Spent the day re-installing the open 1.8diff so I can dyno tune Sunday. I'll be pulling it back out to install the OSG once it comes in. I got schooled today in rear brakes 101. I went to install the Carbotechs but couldn't push the piston in far enough to get clearance between the pads to slip over the rotor. I thought they might be frozen since it came off a parts car that hadn't run in a while. So I put in in a press to push the piston in... no-go. I was starting to get pissed. I should've simply rotated the pison to see if it was seized. Finally decided to dig into it and found the allen stop screw thingy. Anyway, ajusted it and all working well. Any I finally dropped the car off the stands and noticed that I seriously need those wheel spacers to come in! The flares look like dumbo ears when not filled!
To be 'cool' in my adding a shift light in the top edge of cluster bezel, I failed to realize that when the steering wheel is on, it TOTALLY blocks the shift light. Crap.
To be 'cool' in my adding a shift light in the top edge of cluster bezel, I failed to realize that when the steering wheel is on, it TOTALLY blocks the shift light. Crap.
Reply
0
0
03-11-2010, 09:51 PM
#28
Thanks man! Spent the day re-installing the open 1.8diff so I can dyno tune Sunday. I'll be pulling it back out to install the OSG once it comes in. I got schooled today in rear brakes 101. I went to install the Carbotechs but couldn't push the piston in far enough to get clearance between the pads to slip over the rotor. I thought they might be frozen since it came off a parts car that hadn't run in a while. So I put in in a press to push the piston in... no-go. I was starting to get pissed. I should've simply rotated the pison to see if it was seized. Finally decided to dig into it and found the allen stop screw thingy. Anyway, ajusted it and all working well. Any I finally dropped the car off the stands and noticed that I seriously need those wheel spacers to come in! The flares look like dumbo ears when not filled!
To be 'cool' in my adding a shift light in the top edge of cluster bezel, I failed to realize that when the steering wheel is on, it TOTALLY blocks the shift light. Crap.
To be 'cool' in my adding a shift light in the top edge of cluster bezel, I failed to realize that when the steering wheel is on, it TOTALLY blocks the shift light. Crap.
Reply
0
0
03-12-2010, 06:21 AM
#29
Senior Member

Join Date: Dec 2004
Location: Brisbane, Australia
Posts: 1,278
Total Cats: 37
The ducting looks good but if you can keep it going all the way back (like the OEM splash tray) it will have lower pressure behind the radiator so the air will flow through more easily.
Nice project!
Nice project!
Reply
0
0
03-12-2010, 09:06 AM
#31
Tour de Franzia

iTrader: (6)
Join Date: Jun 2006
Location: Republic of Dallas
Posts: 29,085
Total Cats: 375
Yes, phenomenal ducting work. I spent a lot of time on mine with plastic and your's blows mine away. I also recommend a flat piece or possibly a splitter that extends to the steering rack.
Reply
0
0
03-14-2010, 08:40 AM
#32
Elite Member
Thread Starter
iTrader: (14)
Join Date: Sep 2009
Location: Birmingham, AL
Posts: 2,101
Total Cats: 180
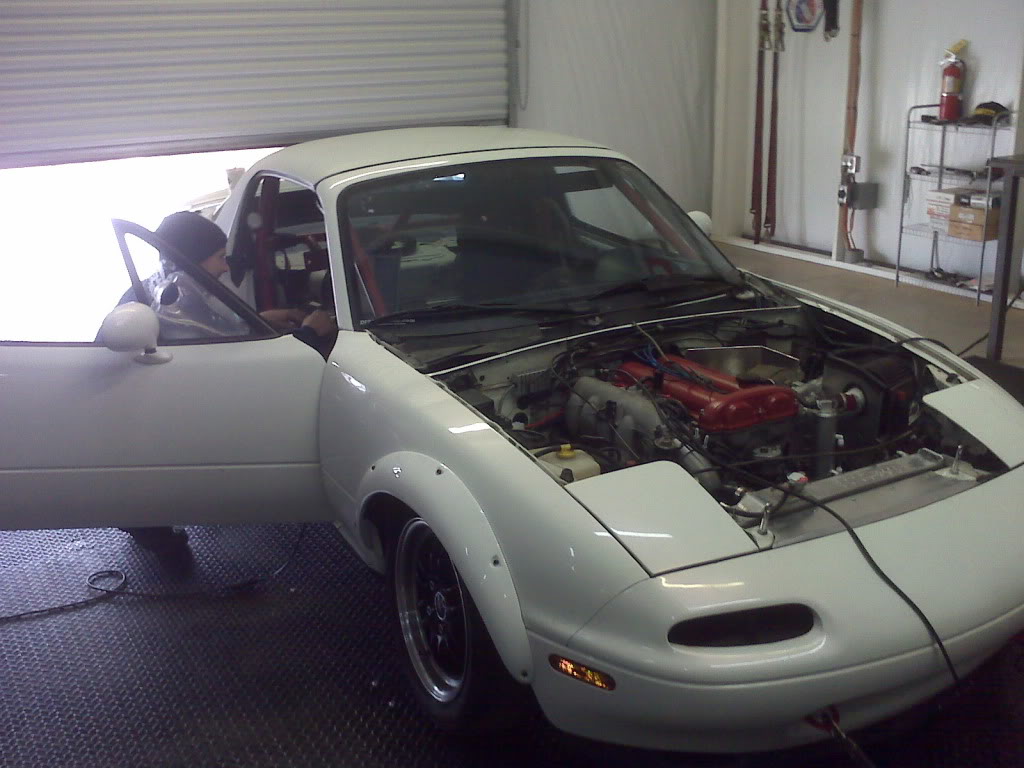
After working out some bugs, my tuner (Hux Racing) put down a 151 @ 6psi off the WG spring alone. So today we'll crank the boost up some. Hope to break the 200 barrier w/10-12psi. Had an issue with the LC-1, everytime you turned the car off and back on, it would recalibrate itself. And the sensor was ok... Weird. Luckily he had another module he installed and is working, so we'll return my LC-1 and get another for his inventory.
On 1 fan alone he was not able to keep the car above 180F at idle. I know that will change once I start pushing it, but I might have to put a new Tstat in (as mine has about 5 - 1/4" holes in it) or a control switch for the fans.
On 1 fan alone he was not able to keep the car above 180F at idle. I know that will change once I start pushing it, but I might have to put a new Tstat in (as mine has about 5 - 1/4" holes in it) or a control switch for the fans.
Reply
0
0
03-14-2010, 10:06 PM
#33
Elite Member
Thread Starter
iTrader: (14)
Join Date: Sep 2009
Location: Birmingham, AL
Posts: 2,101
Total Cats: 180
Pulled a 202whp and 189Tq at 10.5psi. Comes on strong at 3k and full boost by 4k. Had some issues withe the wastegate spring... too weak. It'd climb fine until the boost controller opend it slightly but the back pressure would open it too much causing a serious 5psi boost drop really quick. We got by the issue it by regulating a constant 8psi air pressure (from his air compressor) to the vented port of the WG... this in essence added 8lbs to the 7lb spring (although it acted more like 5-6lbs) and was able to control it for tuning at around 12lbs. It'd get to 12psi (BC setpoint) then slowly taper off, but the max whp was further up the rpm range when the boost dropped to 10.5 I'll be putting in a 10# spring this week and with a good steady 12/13psi I should see 220-225. Right now seems about 10whp per 1psi. Sounds great! I tool some vid with m,y hackberry but it doesn't sound great. Will get a better vid from Hux Racing sometime soon, as well as dyno plots. Other than that it did great and cooled like a SOB! I had to wire the fans in with the high temp switch to keep the running temps 180ish and with his blowers running, my fans never came on! Was about 55ish out.
Reply
0
0
 03-20-2010, 09:13 AM
#36
Elite Member
Thread Starter
iTrader: (14)
Join Date: Sep 2009
Location: Birmingham, AL
Posts: 2,101
Total Cats: 180
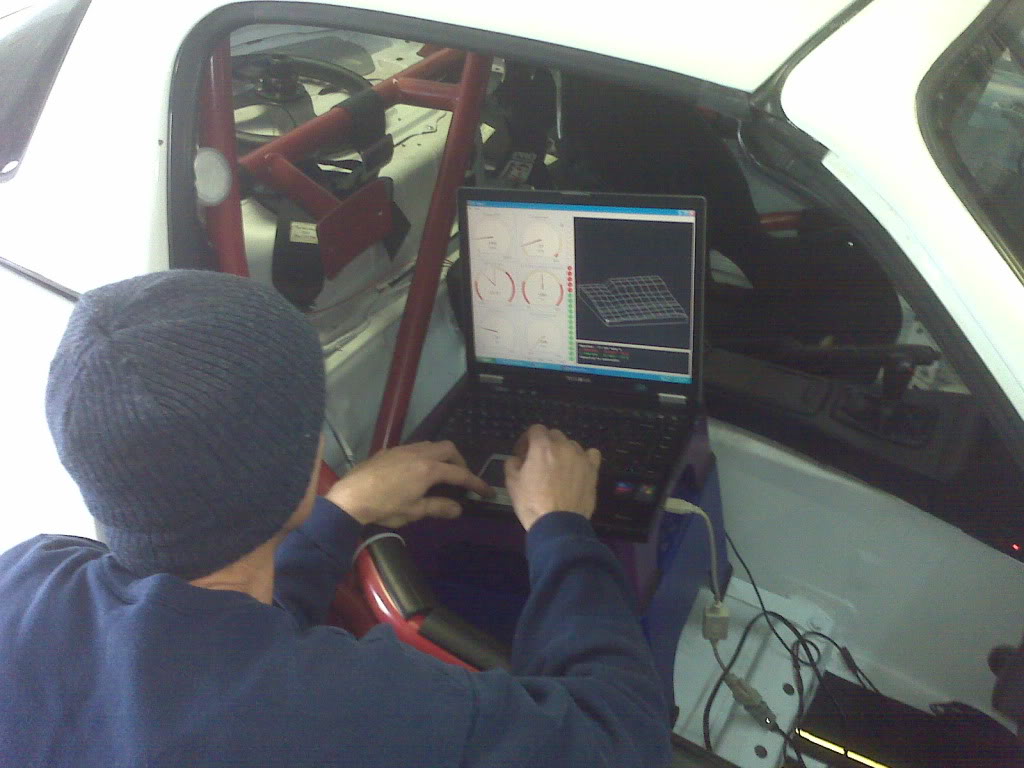
Pics of Sunday's Dyno tuning...
I did something really F'in stupid yesterday ... after getting the WG back in (put in a 10pd spring), seats, harnesses, and some electrical, I was itching to see what the butt dyno was like. So I pulled it out onto a nice straight (thank god) 2 lane Hwy. I made it about 1/2mile before I felt a shudder and then front drivers side lopped down. I F'in forgot to torque the lugs!!!!! I KNEW instantly what it was so I did not brake hard or make any fast movements. I was able to get it on the side with the rotor riding inside the wheel. I'm so F*in lucky the wheel didn't ride out and plant the front end on the pavement, SO lucky. After inspection, the lugs and rotor where fine, the cheap Drag rim I had got a little marred inside, but nothing serious. I'll probably order another. It could have been much much worse, so I'm thankful for what my stupidity did cause. AND LESSON LEARNED. I was doing so much at the same time, I simply forgot to tq them down. Guess this is the big man's warning for driving an unregistered car on public roads... I'll take some pics of damaged rim to remind me to always TQ bolts. I had visions of red RX7 wheels popping off, slamming it to the ground at an AX. I can only imagine what would have happened if I didn't have flares on.
On another note, after putting the rim back on and TQing it down, I made some parade passes and hoy ****!!! This will be an awesome car at the track! I was so pumped I was still shaking after I parked it! I can only imagine what 300+whp would be like!
I may have made my ducting too well! It was 75 out and I was pulling some hard accelerations. I didn't even have the fans running and the temp gauge was barely reading above the cold mark... guessing 140ish. I'll have to install a digital temp meter. But this is the South and I'll need everybit of cooling once the track temps hit 120!
Tuesday I got my 6ULs from Emilio, and the OSG will be here Monday!
The RA1s and NT01s will be here Tues, and my 1st track event is next Sat/Sun with PBOC. I'm so totally ready!!
I did something really F'in stupid yesterday
... after getting the WG back in (put in a 10pd spring), seats, harnesses, and some electrical, I was itching to see what the butt dyno was like. So I pulled it out onto a nice straight (thank god) 2 lane Hwy. I made it about 1/2mile before I felt a shudder and then front drivers side lopped down. I F'in forgot to torque the lugs!!!!! I KNEW instantly what it was so I did not brake hard or make any fast movements. I was able to get it on the side with the rotor riding inside the wheel. I'm so F*in lucky the wheel didn't ride out and plant the front end on the pavement, SO lucky. After inspection, the lugs and rotor where fine, the cheap Drag rim I had got a little marred inside, but nothing serious. I'll probably order another. It could have been much much worse, so I'm thankful for what my stupidity did cause. AND LESSON LEARNED. I was doing so much at the same time, I simply forgot to tq them down. Guess this is the big man's warning for driving an unregistered car on public roads... I'll take some pics of damaged rim to remind me to always TQ bolts. I had visions of red RX7 wheels popping off, slamming it to the ground at an AX. I can only imagine what would have happened if I didn't have flares on.On another note, after putting the rim back on and TQing it down, I made some parade passes and hoy ****!!! This will be an awesome car at the track! I was so pumped I was still shaking after I parked it! I can only imagine what 300+whp would be like!
I may have made my ducting too well! It was 75 out and I was pulling some hard accelerations. I didn't even have the fans running and the temp gauge was barely reading above the cold mark... guessing 140ish. I'll have to install a digital temp meter. But this is the South and I'll need everybit of cooling once the track temps hit 120!
Tuesday I got my 6ULs from Emilio, and the OSG will be here Monday!
The RA1s and NT01s will be here Tues, and my 1st track event is next Sat/Sun with PBOC. I'm so totally ready!!
Last edited by GeneSplicer; 03-20-2010 at 09:24 AM.
Reply
0
0
03-20-2010, 04:26 PM
#38
Elite Member
Thread Starter
iTrader: (14)
Join Date: Sep 2009
Location: Birmingham, AL
Posts: 2,101
Total Cats: 180
Well, tried the welding thing, but was going to take him more time to do it - like 4hrs prep and all... and for that cost I could have bought a vented hood! Anyway, I've JB welded the louvers for support, now just starting to form it up with good 'ole bondo. I hope it comes out decent, this ain't no show car, so I'm not worried about some blemishes, but I don't want it to look like *** either...
Reply
0
0
03-22-2010, 09:47 PM
#39
Elite Member
Thread Starter
iTrader: (14)
Join Date: Sep 2009
Location: Birmingham, AL
Posts: 2,101
Total Cats: 180
WHoo Hoo! Got the OSG today! Thanks Emilio! 
I'm getting good at yanking the diff out... 10 min I'm not as good as some of you are... so I gave the diff and housing to my mechanic to install the OSG, bearings & seals, and set the backlash for the 3.9 R&P once on/in. The H&R 25mm spacers also came in, torquing them on tomorrow. 1st track weekend is Sat/Sun at Barbers. Hoping for some great sunny weather. Will capture some video while I re-learn the car.
I'm getting good at yanking the diff out... 10 min I'm not as good as some of you are... so I gave the diff and housing to my mechanic to install the OSG, bearings & seals, and set the backlash for the 3.9 R&P once on/in. The H&R 25mm spacers also came in, torquing them on tomorrow. 1st track weekend is Sat/Sun at Barbers. Hoping for some great sunny weather. Will capture some video while I re-learn the car.
Reply
0
0
03-29-2010, 08:14 AM
#40
Elite Member
Thread Starter
iTrader: (14)
Join Date: Sep 2009
Location: Birmingham, AL
Posts: 2,101
Total Cats: 180
Holy CRAP!!! I'm in love with this car all over again! Had my first DE since turboing and it's AMAZING! My instructor (since first time with PBOC... who solo'd me after session 2) said I needed to be with the instructor/solo group as I was too fast for the novice/intermediate/advanced group.
I was aggrivated with the borrowed gopro as it kept turning itself off and giving me maybe 1-2min vids... except for 1 time and that wasn't my fastest session. I'll post some pics and that vid later when I have the time.
I was aggrivated with the borrowed gopro as it kept turning itself off and giving me maybe 1-2min vids... except for 1 time and that wasn't my fastest session. I'll post some pics and that vid later when I have the time.
Reply
0
0


