Nothing to see here, just project Sisyphus, move along
 04-25-2015, 11:00 PM
#1101
Elite Member
Thread Starter
iTrader: (37)

Join Date: Apr 2010
Location: Very NorCal
Posts: 10,441
Total Cats: 1,899
Sweet, thanks Hornet. If it gives me trouble I might hit it with the propane torch for a minute and see if that loosens it up at all.
The MSM mixing manifold I'm using has a giant nipple in it, possibly larger than the tap hole for 1/8 NPT and thus my worry.
The MSM mixing manifold I'm using has a giant nipple in it, possibly larger than the tap hole for 1/8 NPT and thus my worry.

Reply
 0
0

0
04-25-2015, 11:24 PM
#1102
Junior Member

Join Date: Dec 2014
Location: Boston, MA
Posts: 196
Total Cats: 14
Not that it matters now, but washers can only (theoretically) distribute load so far from the bottom of the bolt that goes through them. My guess is the ARP ones are larger than that size. But if for science you want to stick a pair of calipers on the unused ones I can see if I can run the numbers.
Reply
0
0
04-26-2015, 03:14 AM
#1103
Elite Member

Join Date: Mar 2007
Location: Santa Clara, CA
Posts: 5,165
Total Cats: 855
My 99 coils were misfiring at 15 psi, and that's when gapped pretty far down. The TSE/Toyota COPs fixed that problem, although I think you'd need to mill the MSM valve cover to get them to fit.
...wait, MSM valve cover? I thought you were putting a VVT head on this motor?
--Ian
Reply
0
0
04-26-2015, 06:33 AM
#1104

I've only done it on the regular mixing manifolds to get rid of the little 90 on the front. If that thing is really big (haven't ever seen the MSM mm), then my advice might be bad. For example, I don't know of anyone that has pulled the oil cooler 90 that is on the back of the 1.8 head without mangling. I have pulled the "cursed water plug" fitting on the back of the 1.6 head without any issue though -- again to install a pipe plug.
Hmmmmm. Hope I didn't mess you up.
If the fitting is straight, then try to insert a bolt or rod prior to putting pliers on it so you get a good grip and keep the fitting relatively straight/unmangled. That helps the fitting keep its strength so it can be pulled. Doesn't work on a 90 of course.
Last edited by hornetball; 04-26-2015 at 07:10 AM.
Reply
0
0
04-26-2015, 02:52 PM
#1105
Elite Member
Thread Starter
iTrader: (37)
Join Date: Apr 2010
Location: Very NorCal
Posts: 10,441
Total Cats: 1,899
Not that it matters now, but washers can only (theoretically) distribute load so far from the bottom of the bolt that goes through them. My guess is the ARP ones are larger than that size. But if for science you want to stick a pair of calipers on the unused ones I can see if I can run the numbers.
- 2x BP4W valve covers
- 3x BP4W coil packs
- 3x sets of GM LSx D2 Truck coils
- 2x sets Toyota COPs
- 1x set of FAB9 COPs
- ...plus the MSM stuff pictured
Lets just say I have problems, OK?

 It very well may get swapped for one of the 4W units, but for now, I like it.
The fitting comes out and turns a 90 to go vertical. The outside of the tube measures 0.040" so the hole is at least that size. The Internet claims a tap drill for M14x1.5 is 12.5mm, or for those of us who use non socialist forms of measure that's 0.492" or as I like to call it, 0.5 Freedoms.
Tap drill for 1/8" NPT is like 0.339" or something so I'm already oversized for NPT. M14x1.5 is starting to sound better and better.
 I was going to cap that fitting but then I would have just created a cursed water plug, so I think I'm going to destroy that thing and tap the hole for 3/8"NPT or whatever is closest. I have a drill and tap for 3/8 so that would be ultra convenient. I need to take more measurements.
Nah, I've not worked on it yet today. Besides, its not like I would hold you accountable. I make my own mistakes


Reply
0
0
04-26-2015, 02:54 PM
#1106
Elite Member
Thread Starter
iTrader: (37)
Join Date: Apr 2010
Location: Very NorCal
Posts: 10,441
Total Cats: 1,899
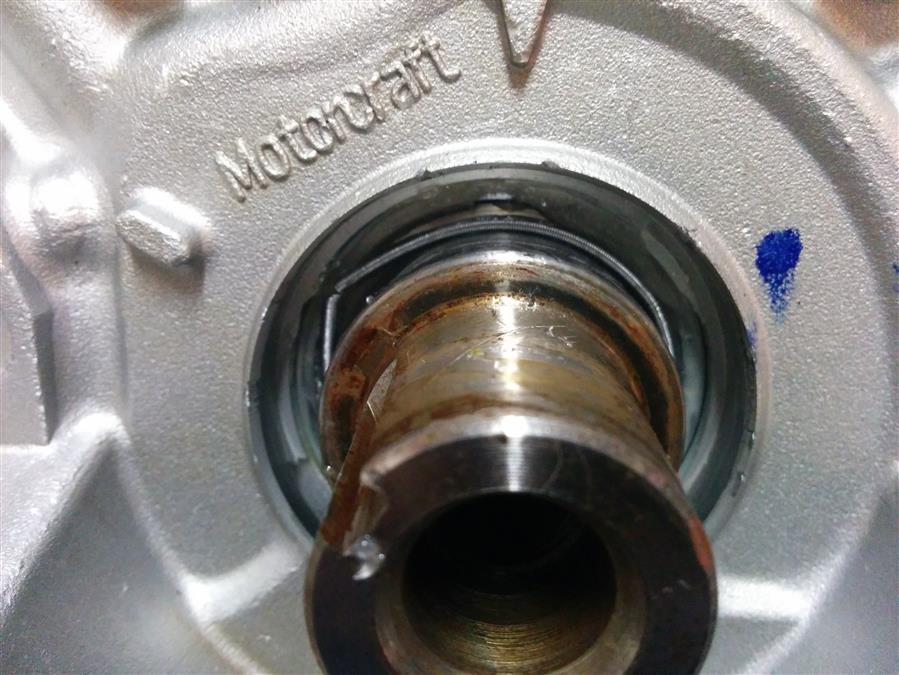
So once the oil pump is installed, can anyone think of a way to confirm that the little spring inside the front main seal is sill in place without removing the pump or the seal? 
Reply
0
0
04-26-2015, 03:32 PM
#1107
Elite Member
Join Date: Mar 2007
Location: Santa Clara, CA
Posts: 5,165
Total Cats: 855
I think the MSM VC should work with the TSE coils given a little bit of time on the mill. Of course, then it wouldn't be quite as pretty.
--Ian
Reply
0
0
04-26-2015, 04:51 PM
#1109
Elite Member
Thread Starter
iTrader: (37)
Join Date: Apr 2010
Location: Very NorCal
Posts: 10,441
Total Cats: 1,899
Unghhhhhhhh. I was afraid someone was going to say this.
The BE pump came with the front main pre-installed. When I tried to slip it over the crank the seal went inverted (if you've ever installed one of these you will know what I'm talking about) and while I'm pretty sure it didn't dump the spring, I cannot confirm that it did not dump the spring. I was going to install the timing set today until I realized this. The 949 damper requires the magical removal tool so if the seal is screwed, I'm down for weeks playing the damper removal game. I'm trying to decide if its worth it to pull the front main and replace it out of spite.
Yeah, this thing is not going on a mill. I like it just the way it is
Perfect, I was pretty sure that's what I had read in the past. I'm not sure I have enough ру́сский in my family tree to handle 25-29psi on this build
The BE pump came with the front main pre-installed. When I tried to slip it over the crank the seal went inverted (if you've ever installed one of these you will know what I'm talking about) and while I'm pretty sure it didn't dump the spring, I cannot confirm that it did not dump the spring.
I was going to install the timing set today until I realized this. The 949 damper requires the magical removal tool so if the seal is screwed, I'm down for weeks playing the damper removal game. I'm trying to decide if its worth it to pull the front main and replace it out of spite.Perfect, I was pretty sure that's what I had read in the past. I'm not sure I have enough ру́сский in my family tree to handle 25-29psi on this build
Reply
1
1

 04-26-2015, 05:55 PM
#1111
Elite Member
Join Date: Mar 2007
Location: Santa Clara, CA
Posts: 5,165
Total Cats: 855
Unghhhhhhhh. I was afraid someone was going to say this.
damper removal game. I'm trying to decide if its worth it to pull the front main and replace it out of spite.
Perfect, I was pretty sure that's what I had read in the past. I'm not sure I have enough ру́сский in my family tree to handle 25-29psi on this build
damper removal game. I'm trying to decide if its worth it to pull the front main and replace it out of spite.
Perfect, I was pretty sure that's what I had read in the past. I'm not sure I have enough ру́сский in my family tree to handle 25-29psi on this build
I put in my 3 bar map sensor yesterday -- the road to 22+ psi is open!
--Ian
Reply
0
0
 04-26-2015, 06:10 PM
#1113
Elite Member
Thread Starter
iTrader: (37)
Join Date: Apr 2010
Location: Very NorCal
Posts: 10,441
Total Cats: 1,899
Oh I will. I wasn't kidding at all when I said I was going to get you to tune it. 
Oh wait... I thought there was a removal tool. Turns out its an installation tool?
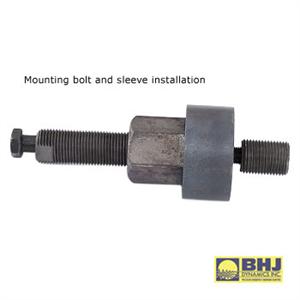
Harmonic Balancer Installer Rental
FML, I'm glad I noticed that before I just sucked it on there with the crank bolt. Time to go find instructions on how this damn thing actually works
I saw that! My MAP sensor only goes to 21psi and I doubt I'll ever see ALLOFIT. I'm interested to see what you end up with out of the "little" GTX compared to my "little" EFR. Regardless, you are still a MUCH better driver than me so don't expect to meet up in a B or A group anytime soon.
Reply
0
0
04-26-2015, 06:45 PM
#1115
Former Vendor
iTrader: (31)

Join Date: Nov 2006
Location: Sunnyvale, CA
Posts: 15,442
Total Cats: 2,099
No removal tool beyond a HF 3-jaw puller. I use the $40 installer tool to install them. You can rent/buy the nice tool if you wish but it's not necessary.
Yes, getting the BE pump in place with the front main pre-installed is pretty finnicky. I usually have a dental screwdriver on hand when I do them.
Yes, getting the BE pump in place with the front main pre-installed is pretty finnicky. I usually have a dental screwdriver on hand when I do them.
Reply
0
0
04-26-2015, 10:26 PM
#1116
Elite Member
Thread Starter
iTrader: (37)
Join Date: Apr 2010
Location: Very NorCal
Posts: 10,441
Total Cats: 1,899
This $40 tool?
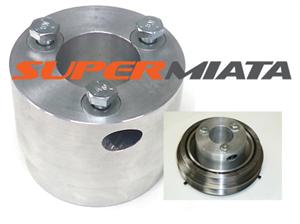
Crank Holder Balancer Miata
Please forgive my unrepentant noobishness but how exactly does that thing work?
Or are we talking about one of these things:
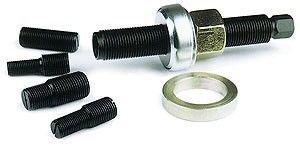
Well, whaddaya know?
Part out avoided. I got a little aggressive with my little screwdriver prying the seal out, but the bore is untouched. I'll take a jewelers file to the little marks and disappear them before I put in a new front main.
Last edited by EO2K; 04-26-2015 at 11:57 PM.
Reply
0
0
04-26-2015, 11:20 PM
#1118
Elite Member
Thread Starter
iTrader: (37)
Join Date: Apr 2010
Location: Very NorCal
Posts: 10,441
Total Cats: 1,899
Also, back to this thing:
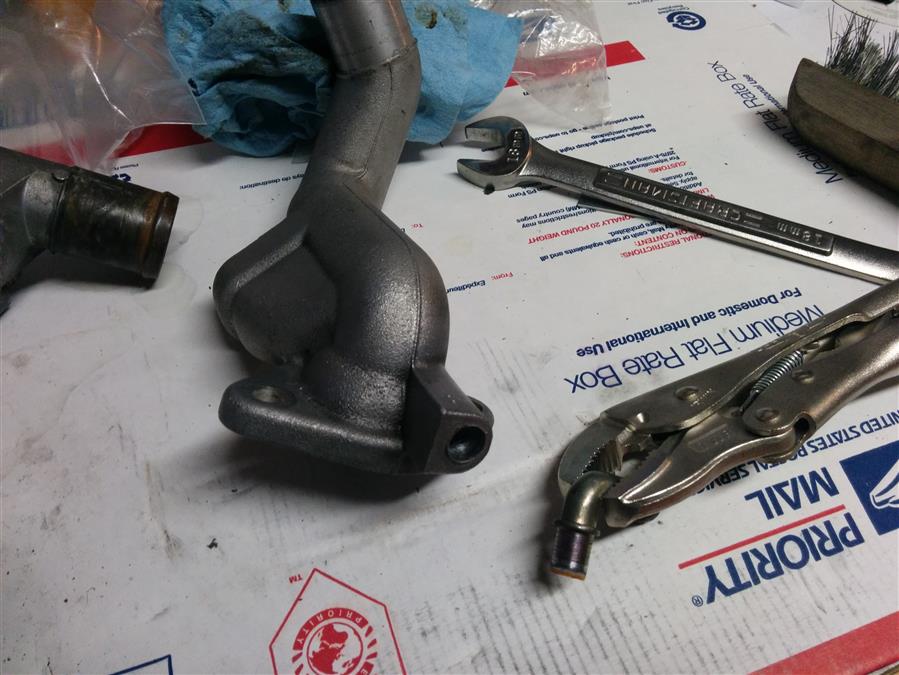
I tossed it in the vice and gave it a twist to break it loose. After that I was able to just work it back and fourth until it popped out. For the record the hole measures just a hair above 10mm. The OEM hole is off center so drilling it out to 1/2" and then tapping it for M14x1.5 is just not going to be an option. After thinking about it for more than 2 minutes it occurs to me that I can also buy Fragola M12x1.5 to -6AN adapters. They are a bastard to find because both Summit and Jegs list them as "carburetor adapters" rather than metric to an fittings.
The tap hole for x1.5 is 10.5mm and because 10.5mm is a drill size I can actually buy from Amazon, M12x1.5 to -6 it is! Hopefully that does not cause too much restriction in the system. I mean I'm sure it'll flow better than a banjo so no harm, no foul.
Last edited by EO2K; 04-26-2015 at 11:57 PM.
Reply
0
0
04-26-2015, 11:26 PM
#1119
Elite Member
Thread Starter
iTrader: (37)
Join Date: Apr 2010
Location: Very NorCal
Posts: 10,441
Total Cats: 1,899
Yeah, the spring is loose in there, its the silver band with the kink in it at about 10 o'clock.
I could probably get away with doing that, but if I *** it up I'm going to be very, very frustrated.
I could probably get away with doing that, but if I *** it up I'm going to be very, very frustrated.
Reply
0
0
04-26-2015, 11:28 PM
#1120
Elite Member
Join Date: Mar 2007
Location: Santa Clara, CA
Posts: 5,165
Total Cats: 855
https://www.holley.com/products/plumbing/
Earl's has 'em in the metric to AN section
https://www.holley.com/products/plum...o_an_adapters/
--Ian
Reply
0
0


