Nothing to see here, just project Sisyphus, move along
 07-17-2015, 12:35 PM
#1561
Elite Member
Thread Starter
iTrader: (37)

Join Date: Apr 2010
Location: Very NorCal
Posts: 10,441
Total Cats: 1,899
Haha, thanks man.  Speaking of OCD, the surface rust on that timing belt tensioner is killing me. Apparently it only shows up on the camera
It's taken a long time to get here so I figure I better cross the Ts and dot the Is. I've got the tools, time and documentation so I damn well better do this right.
Speaking of OCD, the surface rust on that timing belt tensioner is killing me. Apparently it only shows up on the camera It's taken a long time to get here so I figure I better cross the Ts and dot the Is. I've got the tools, time and documentation so I damn well better do this right.

Reply
 0
0

0
 07-17-2015, 01:04 PM
#1563
Elite Member
Thread Starter
iTrader: (37)
Join Date: Apr 2010
Location: Very NorCal
Posts: 10,441
Total Cats: 1,899
But yes, you make a valid point.

Yes I did! I've been intending to PM you and let you know they arrived. Thank you once again

Reply
0
0
 07-19-2015, 06:57 PM
#1566
Elite Member
Thread Starter
iTrader: (37)
Join Date: Apr 2010
Location: Very NorCal
Posts: 10,441
Total Cats: 1,899
All aboard the progress train! Choo choo!
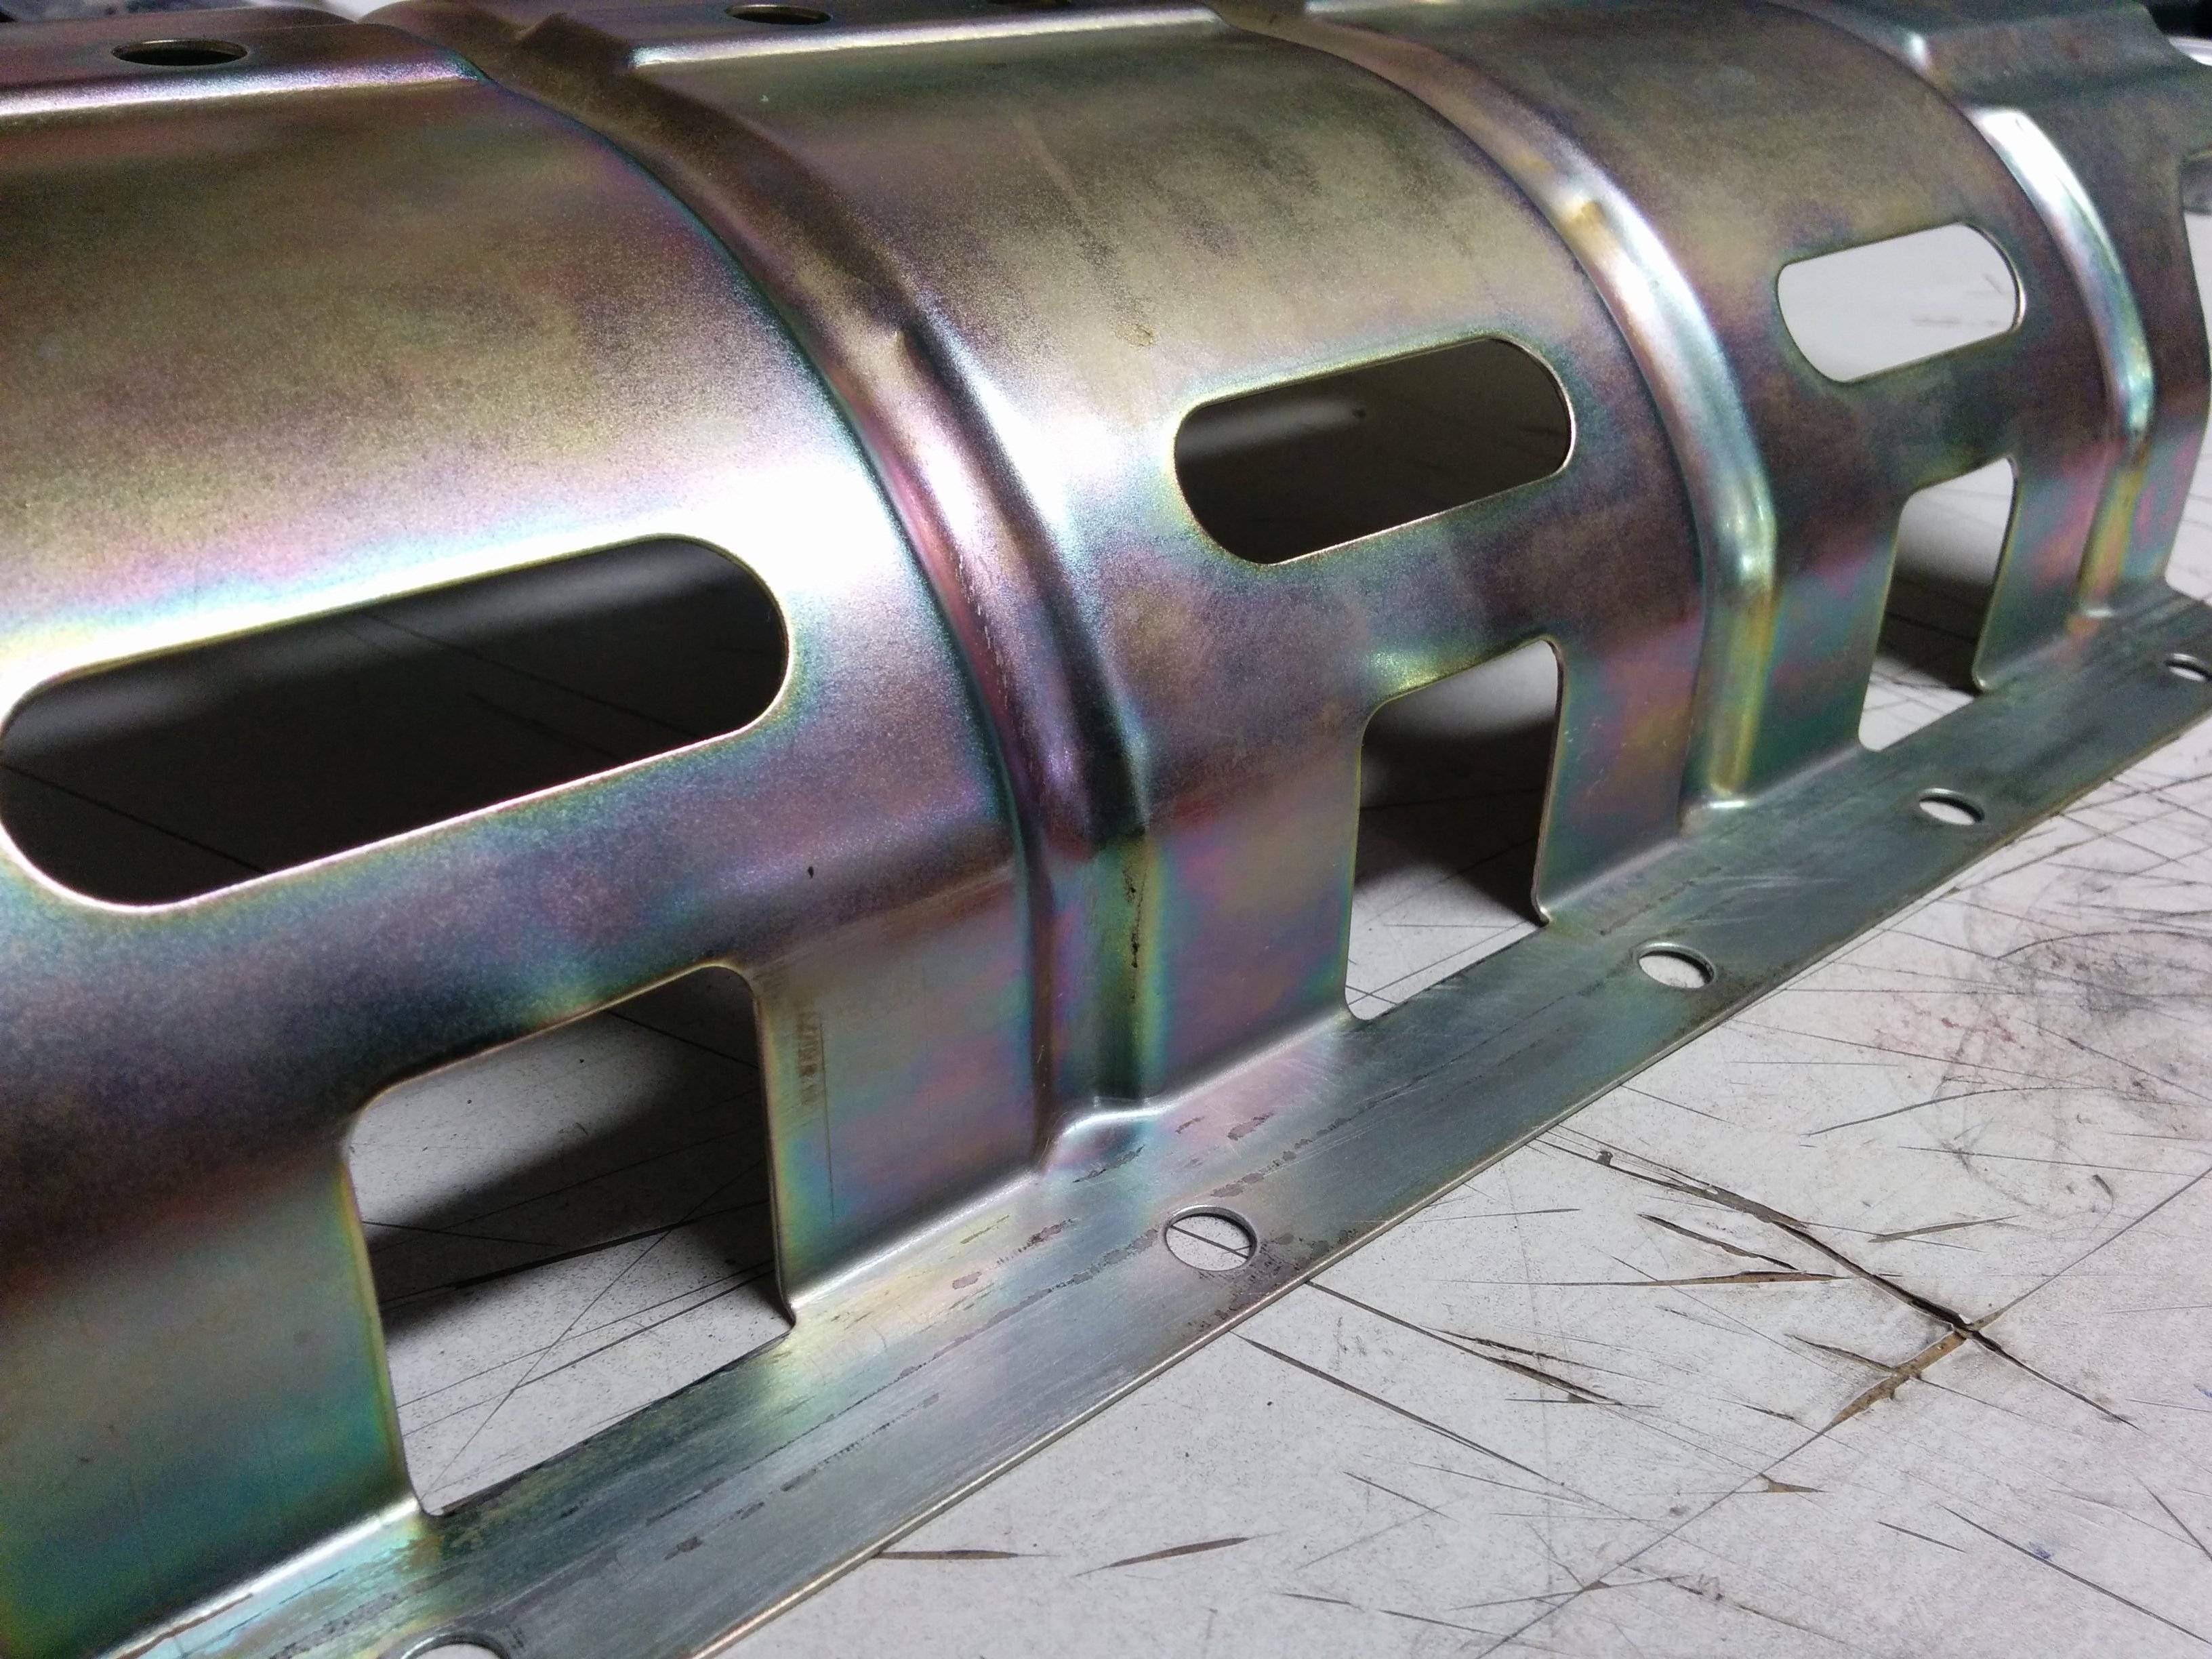
Added some clearance dents to keep the windage tray from touching the backside of the Ishihara-Johnson direct contact crank scraper
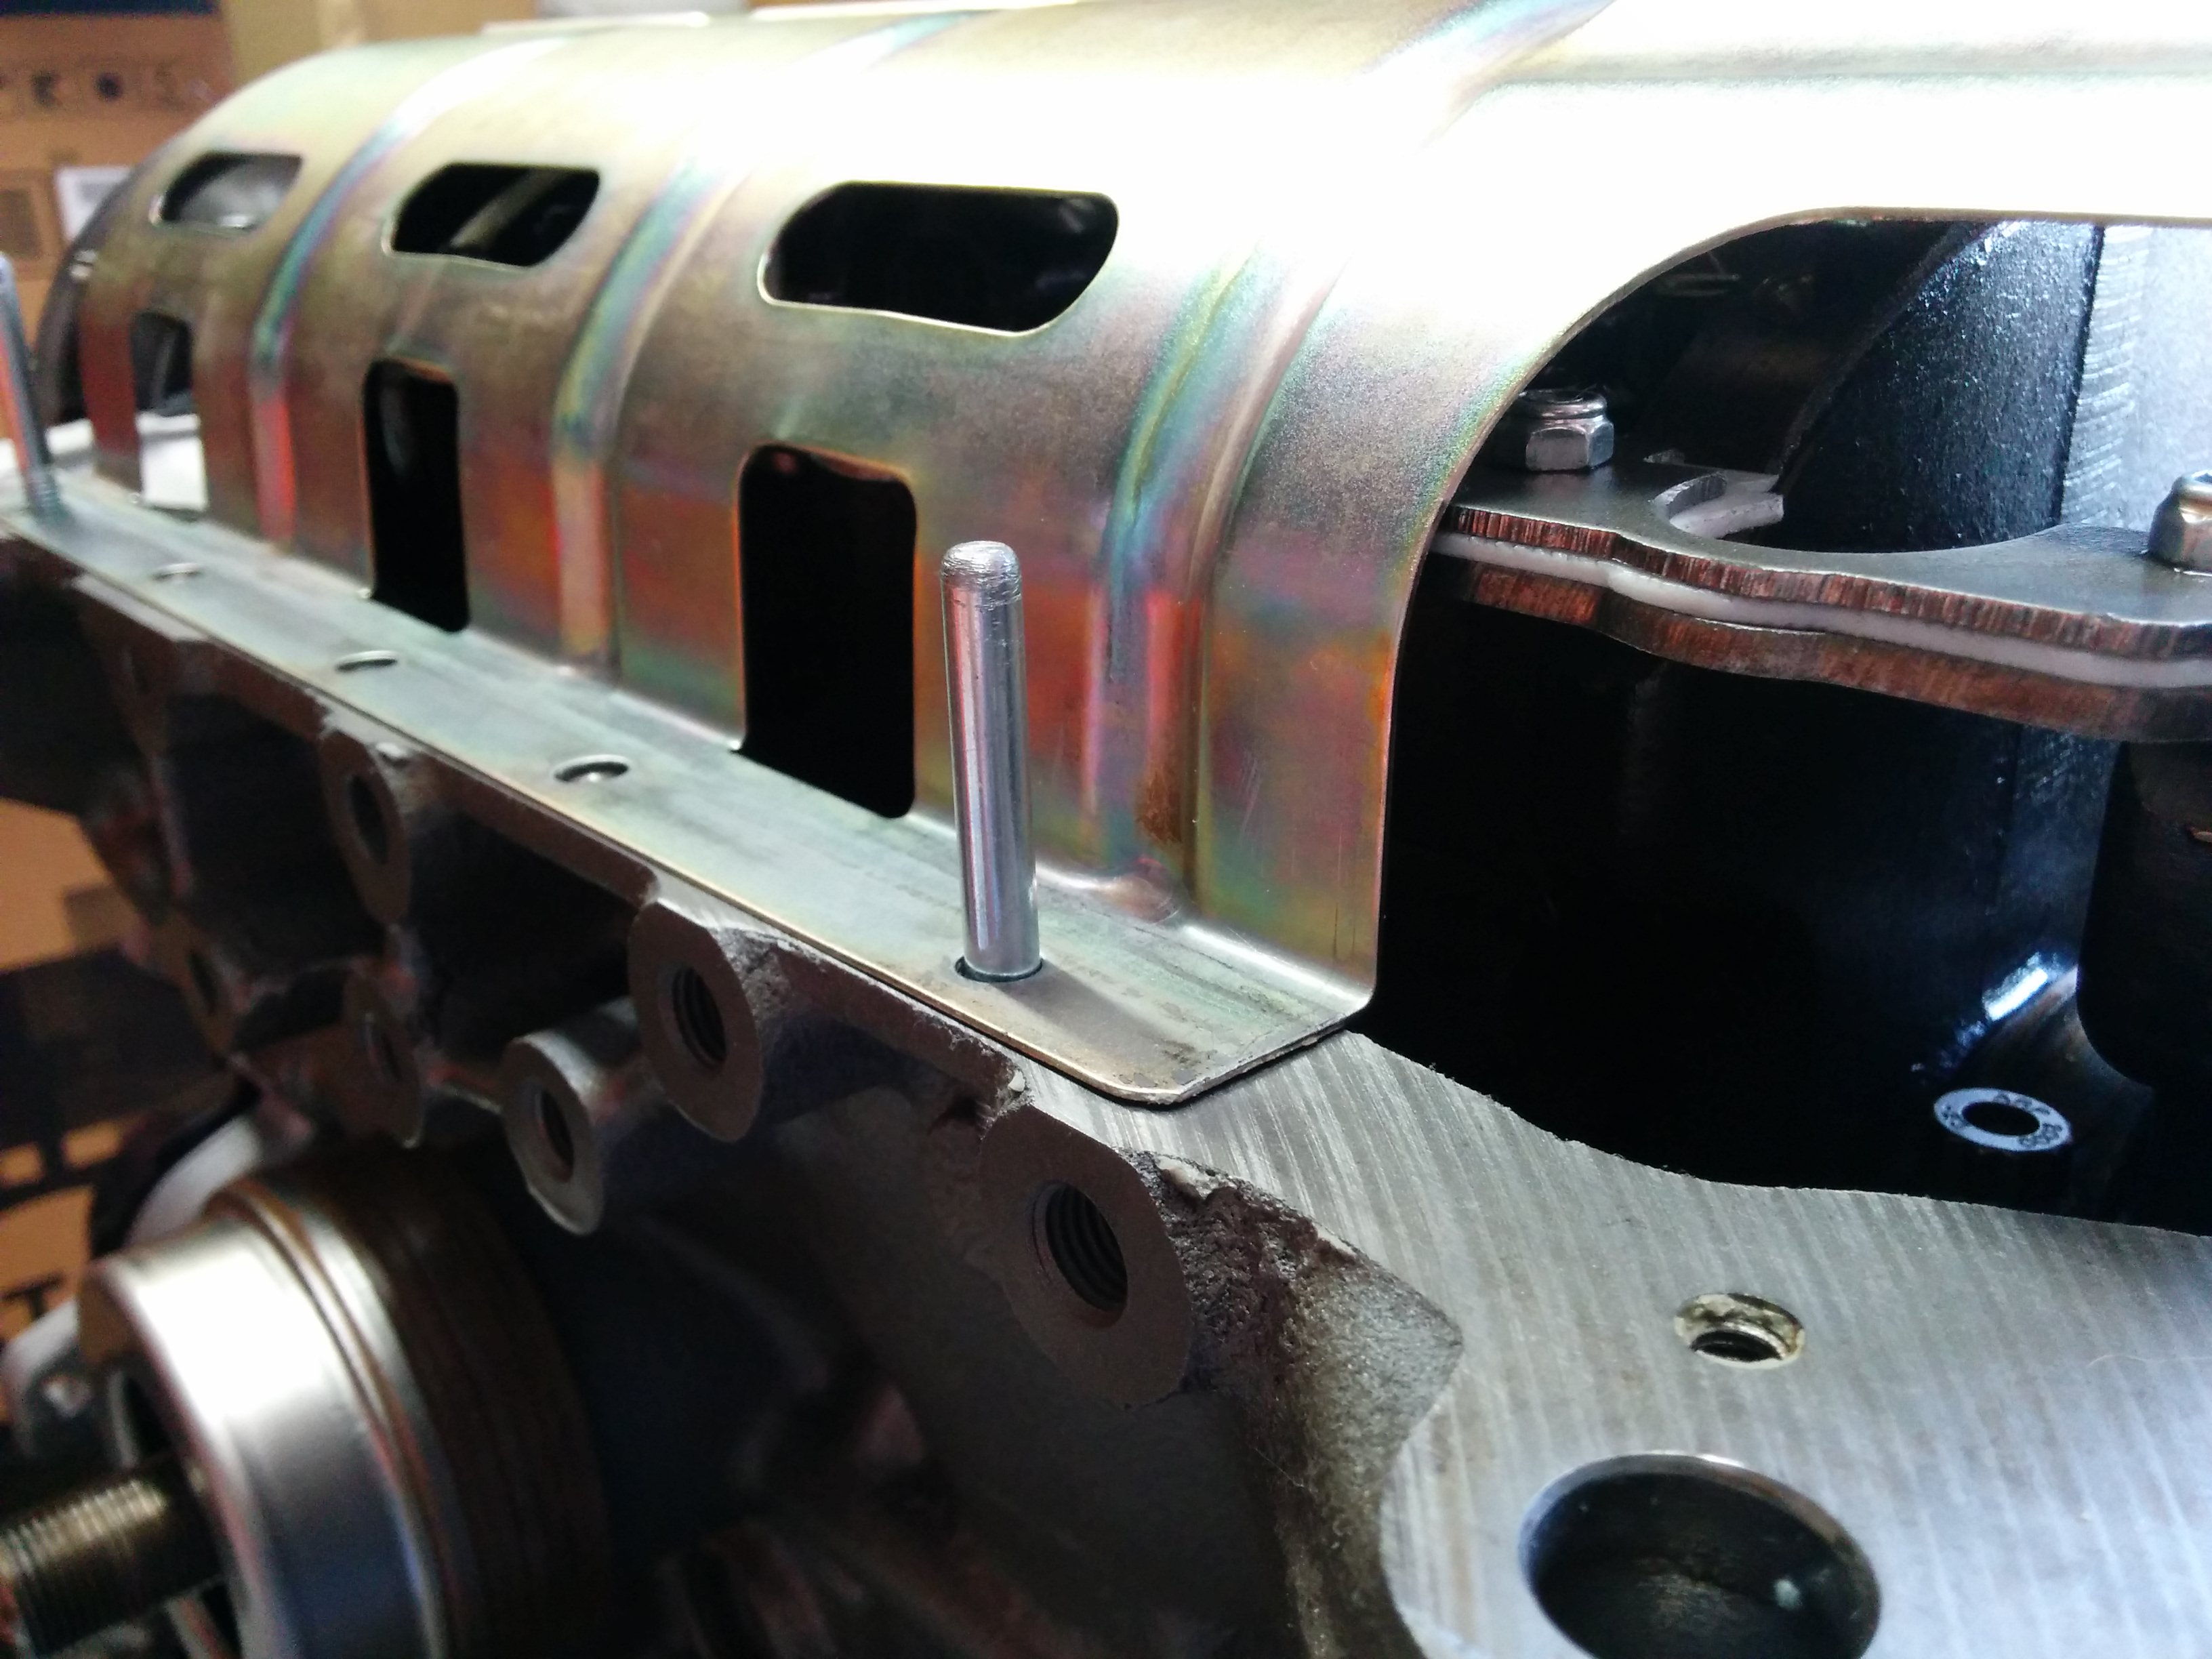
Here you can see the issue pretty clearly while test fitting. I actually had to get slightly more aggressive with the hammer before I got good clearance, but its no big deal. What are those funny studs you might ask?
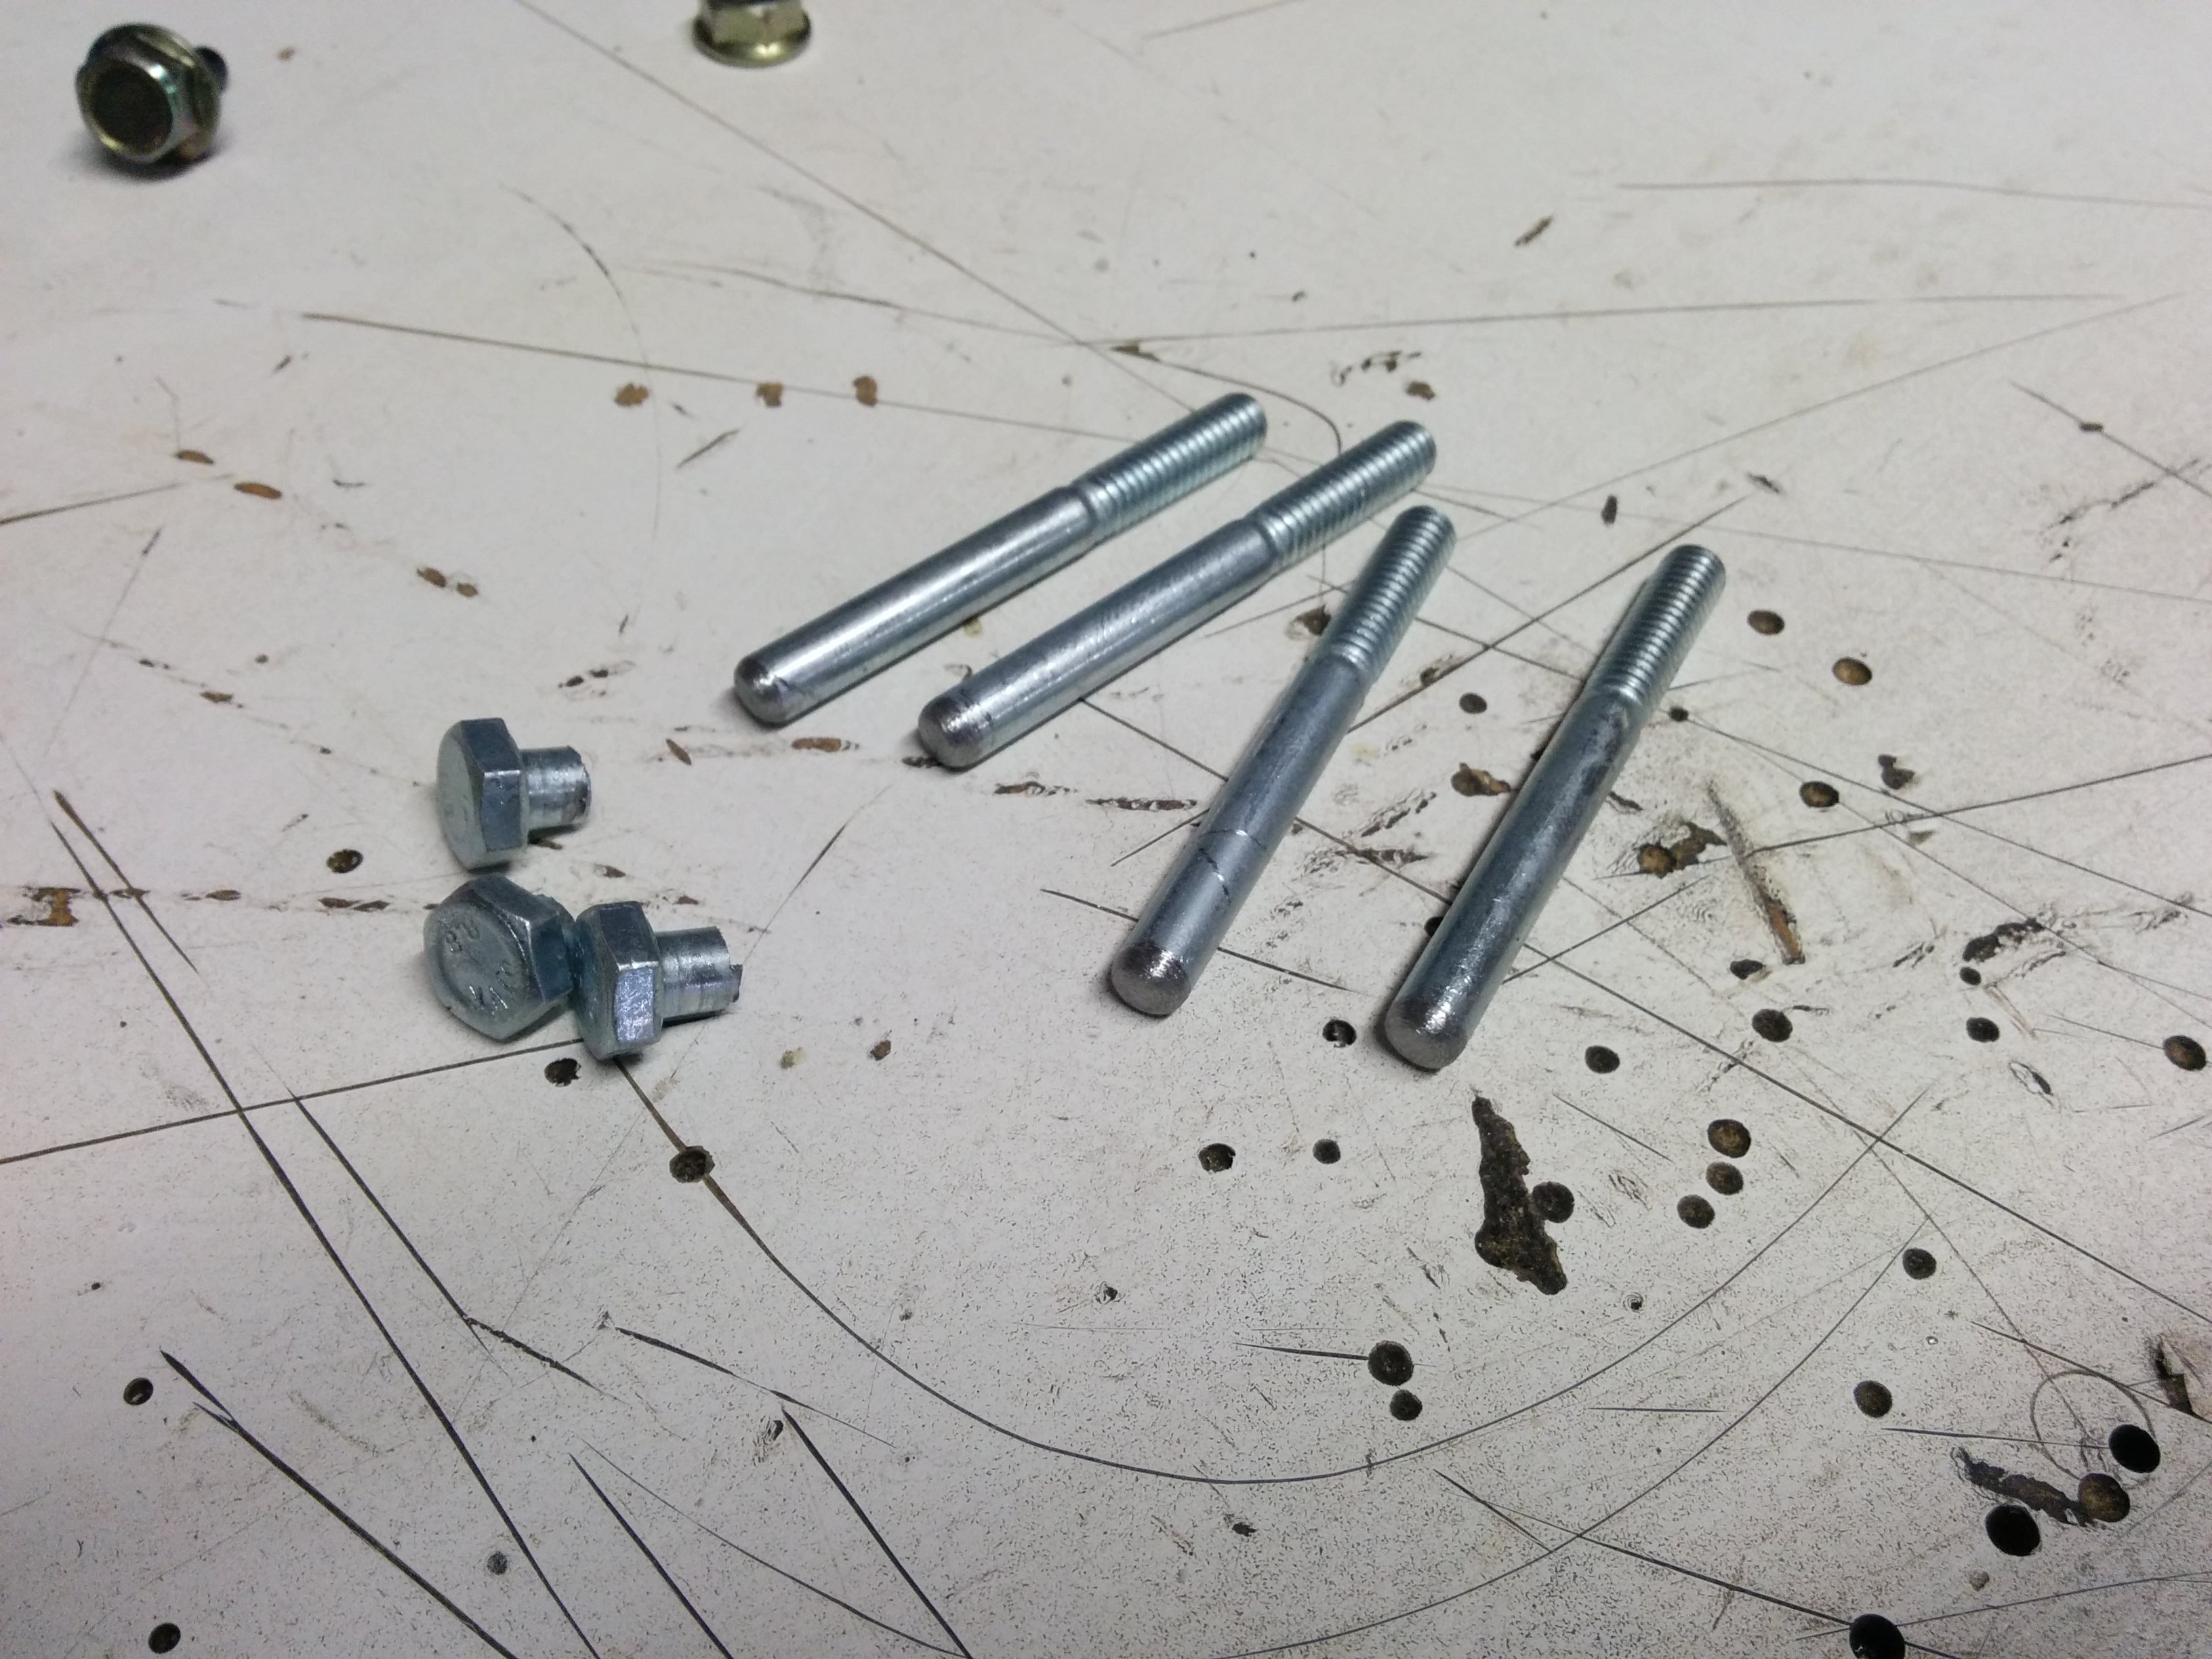
I hate trying to line up that stupid windage tray while trying to install the oil pan so I made these out of a couple bolts. Just a couple minutes with the hacksaw and a file and they became guide studs. Problem solved.
I stopped taking pictures at this point because I had black RTV all over my hands, but needless to say, it worked perfectly and the oil pan is on. w00t! I got a solid and consistent bead of ultra black that squeezed out from around the pan rail when I torqued the bolts so I'm confident it sealed.
If it leaks oil I'm parting out.
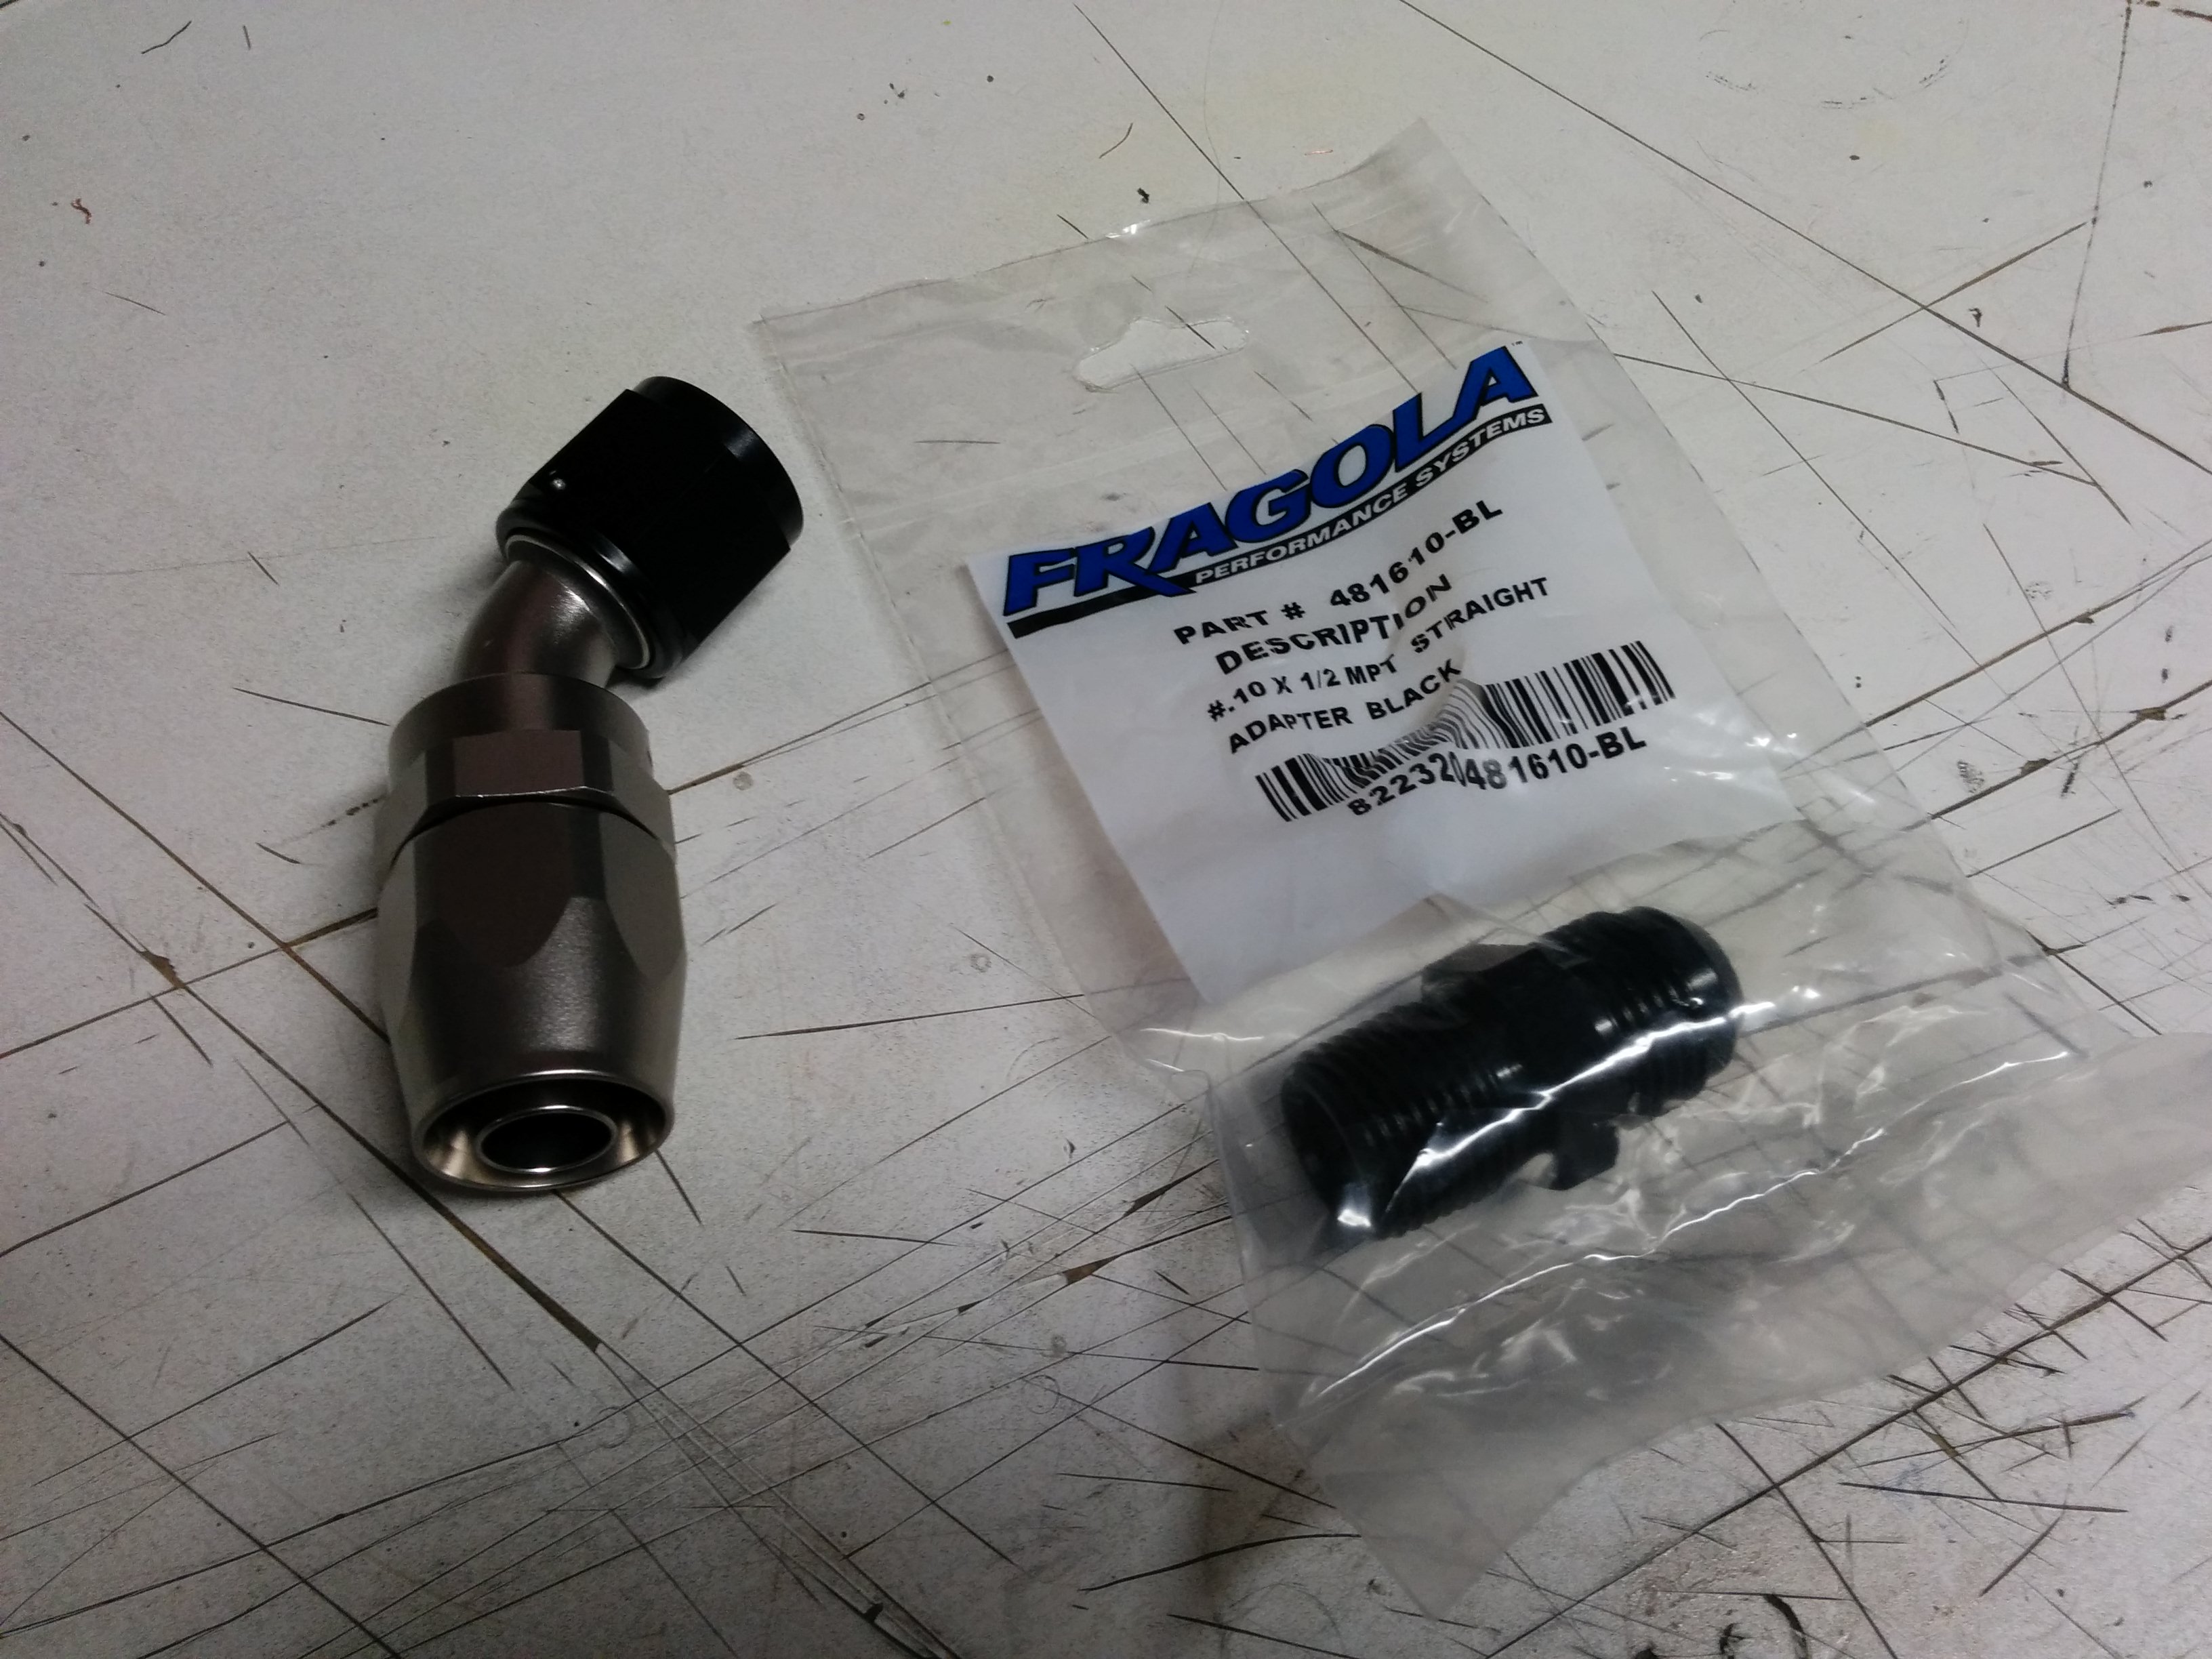
Time to start plumbing the trubo! These go in the pan side of the drain line.
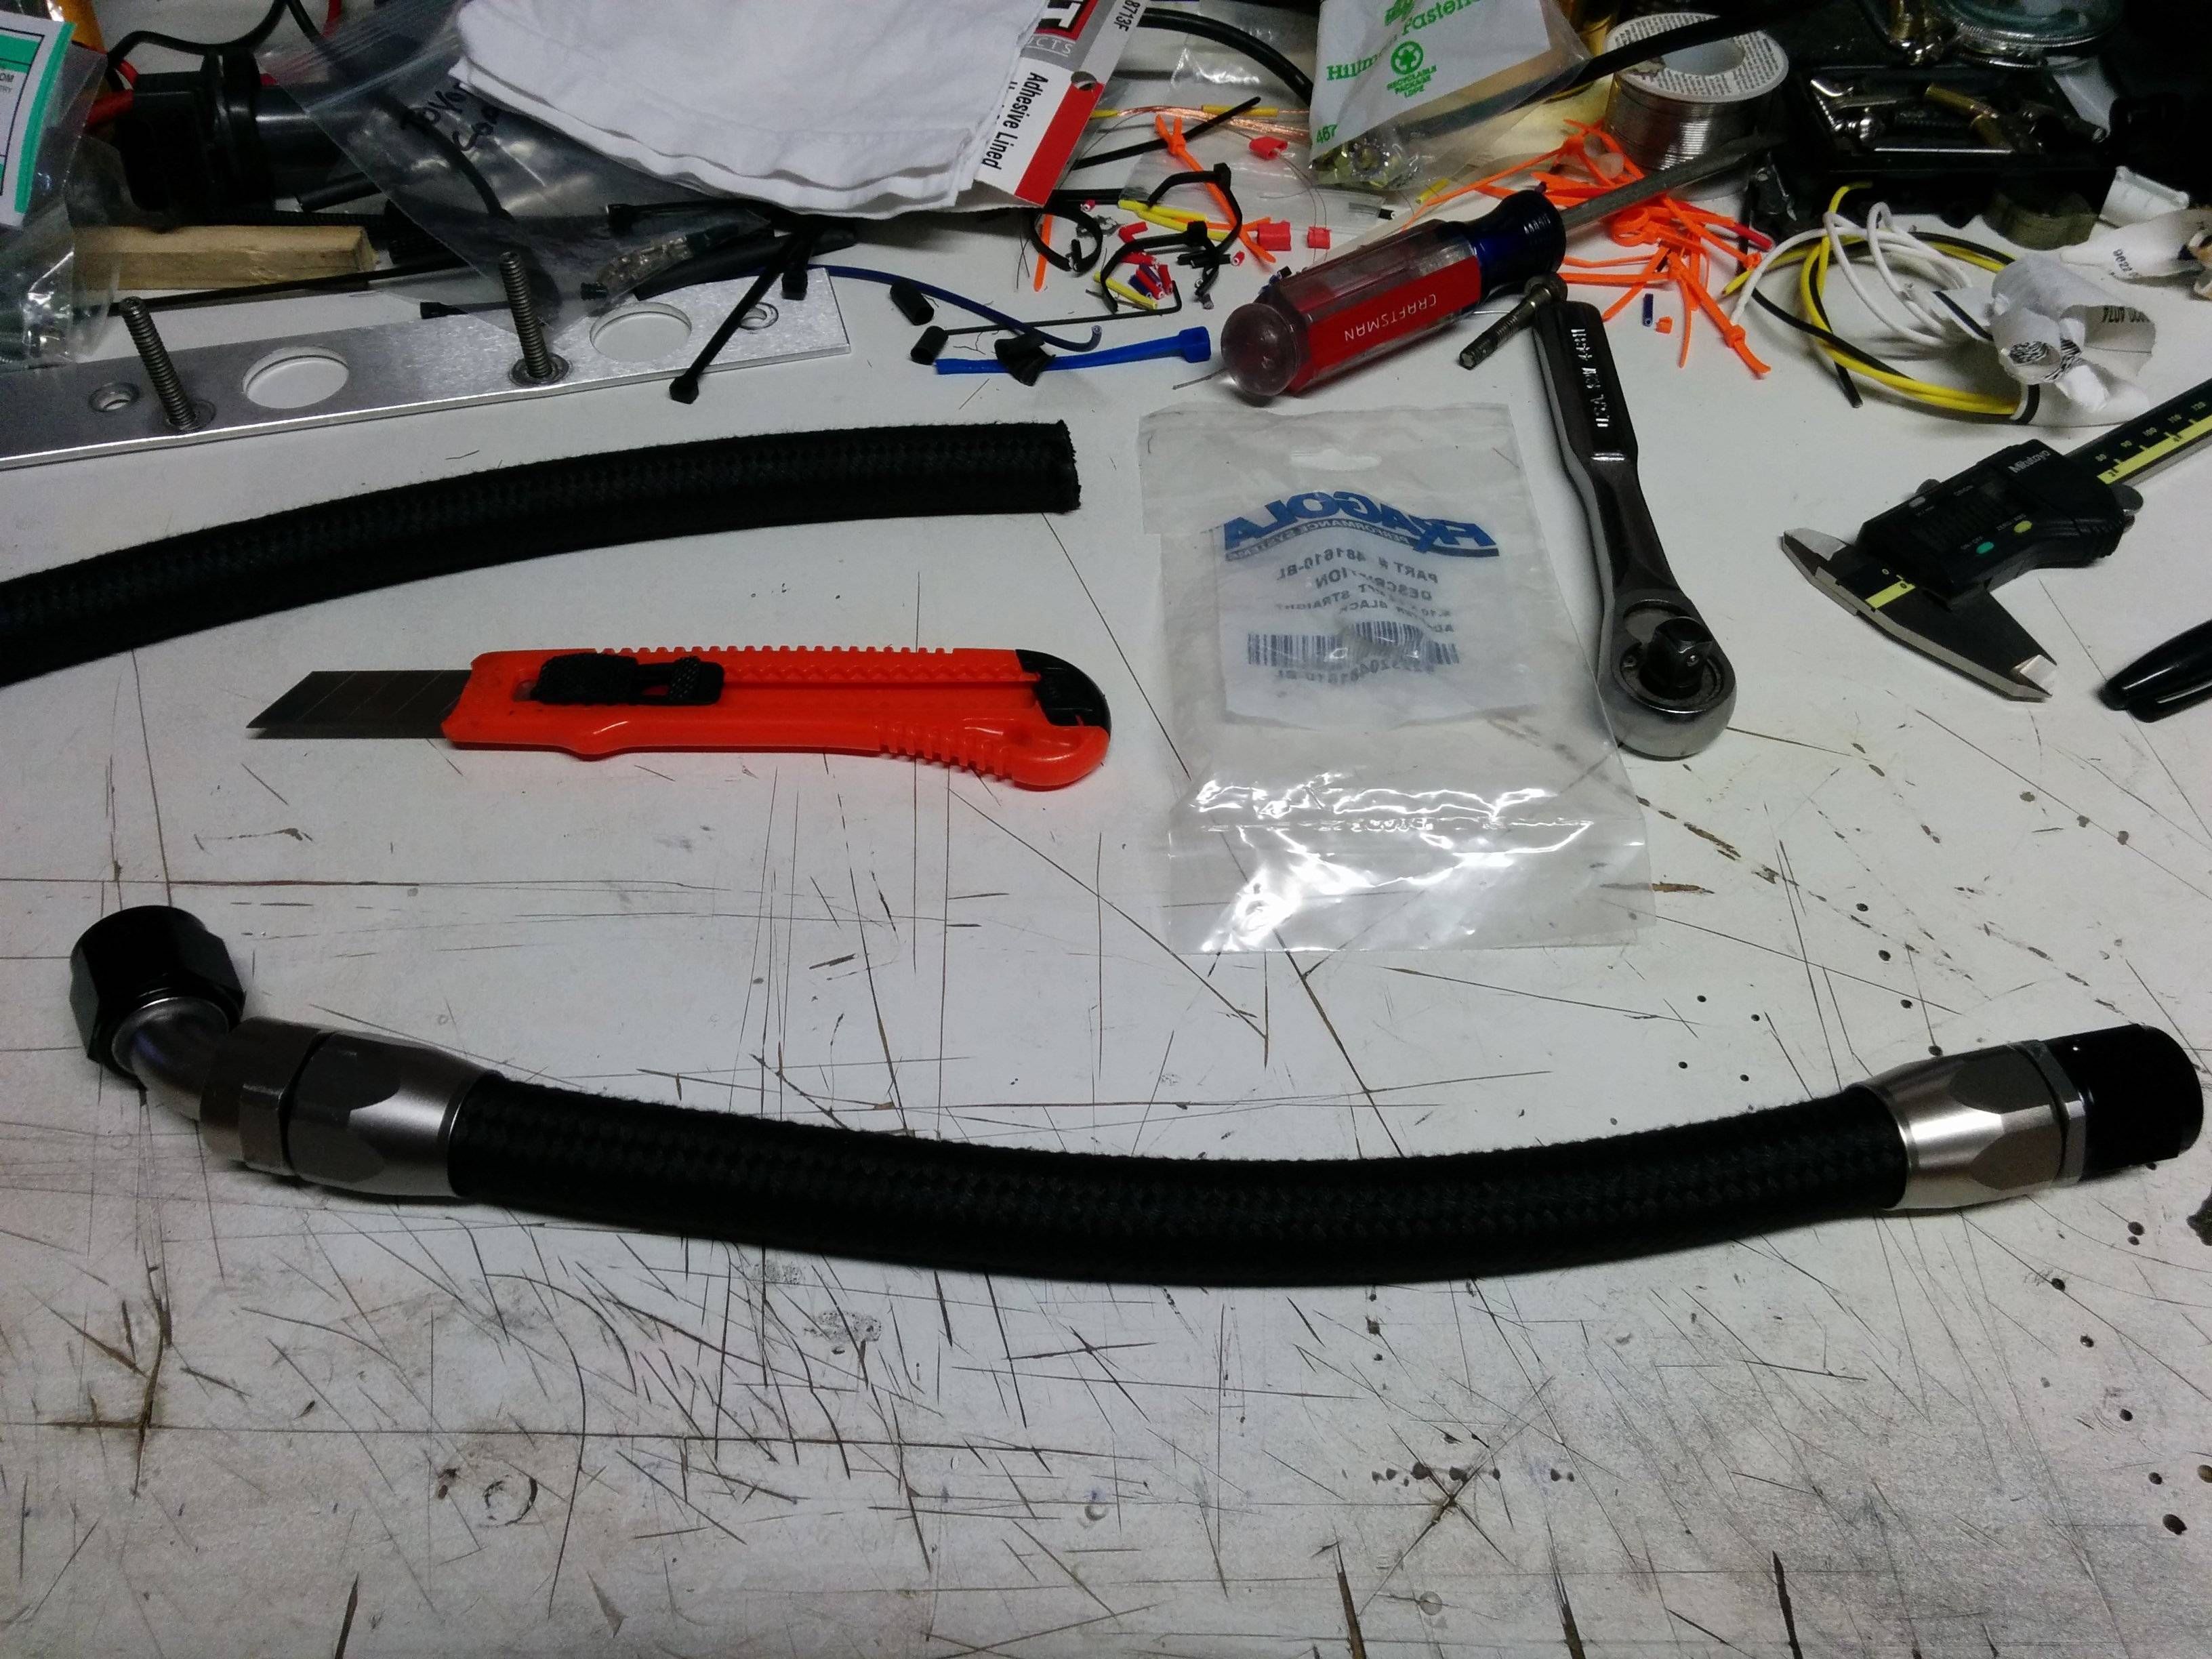
After much careful measuring and many youtube videos later, I made my first AN line.
Its still about 1/2" too long, but it fits and I'm not taking it apart again. If I do that I'm going to order a 30� -10 fitting for the turbo side to replace the straight fitting, just to take some of the curve out of the hose.
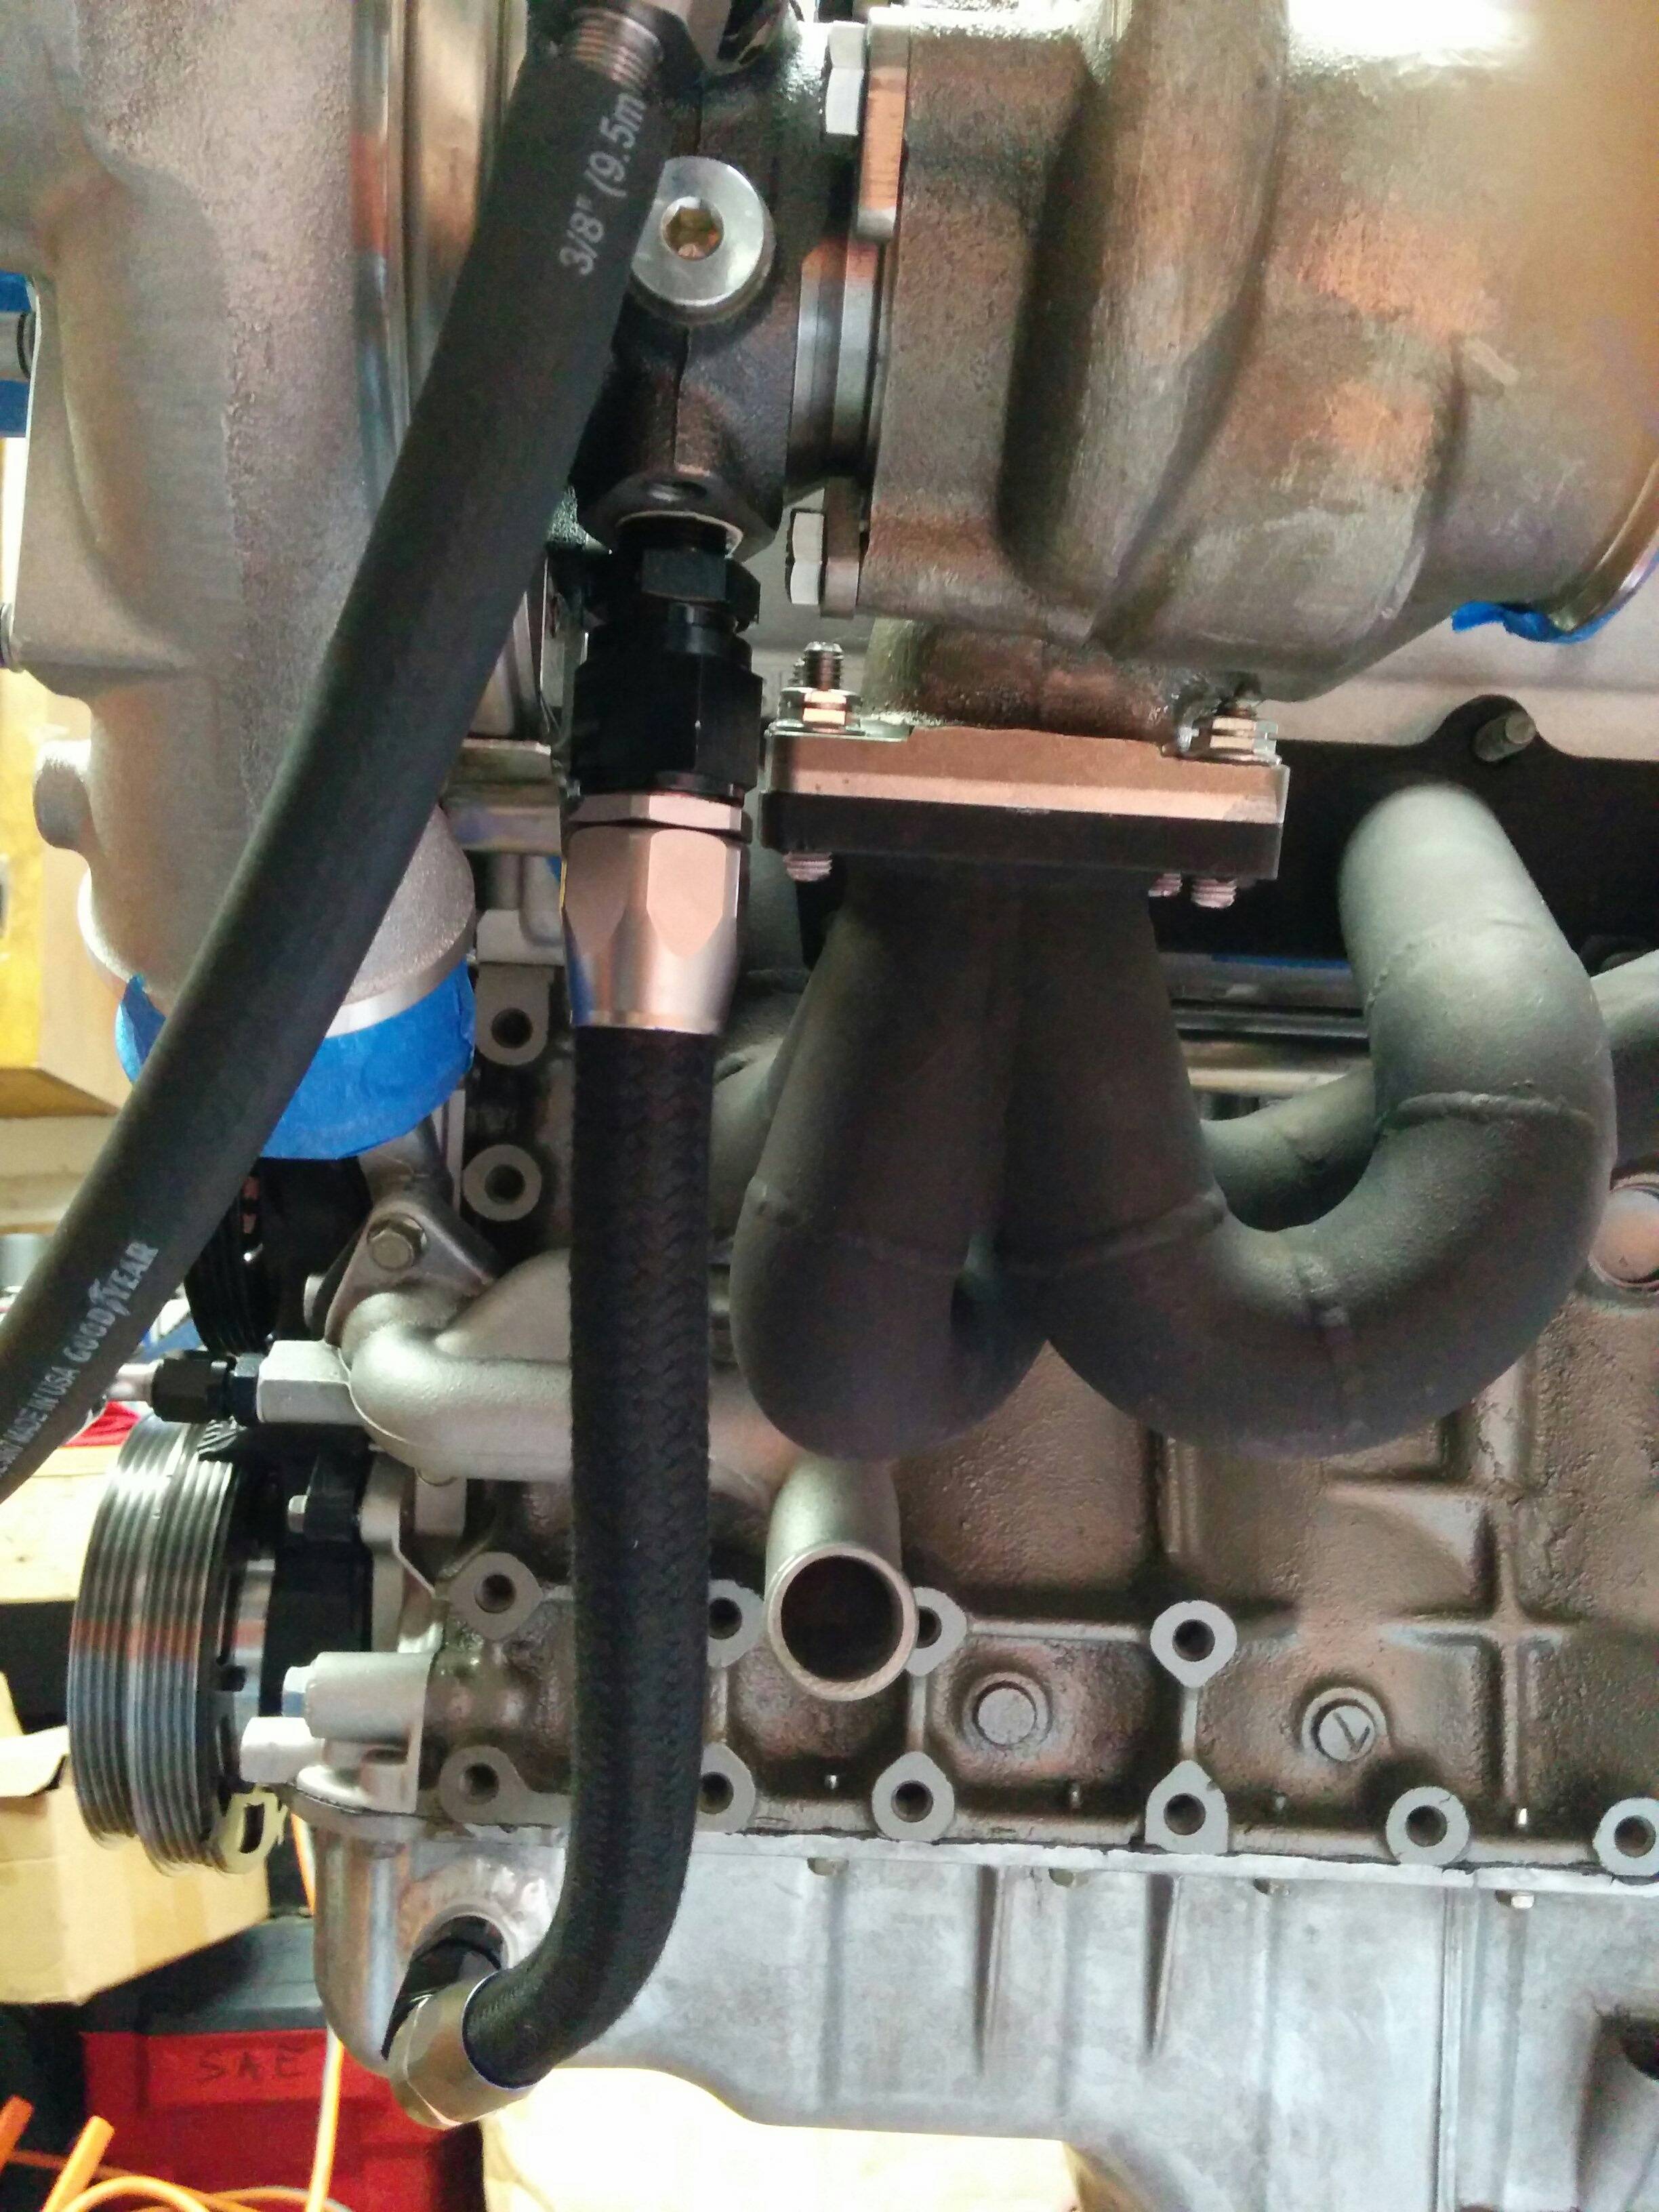
Seen here is the mockup of the coolant return using some Gates fuel line I had lying around. I don't really like having a run that long hanging out in space but I'm not sure what to do about it. 90� -6AN fittings on both ends.
Mockup of the coolant feed. Again, 90� -6AN fittings on both ends.
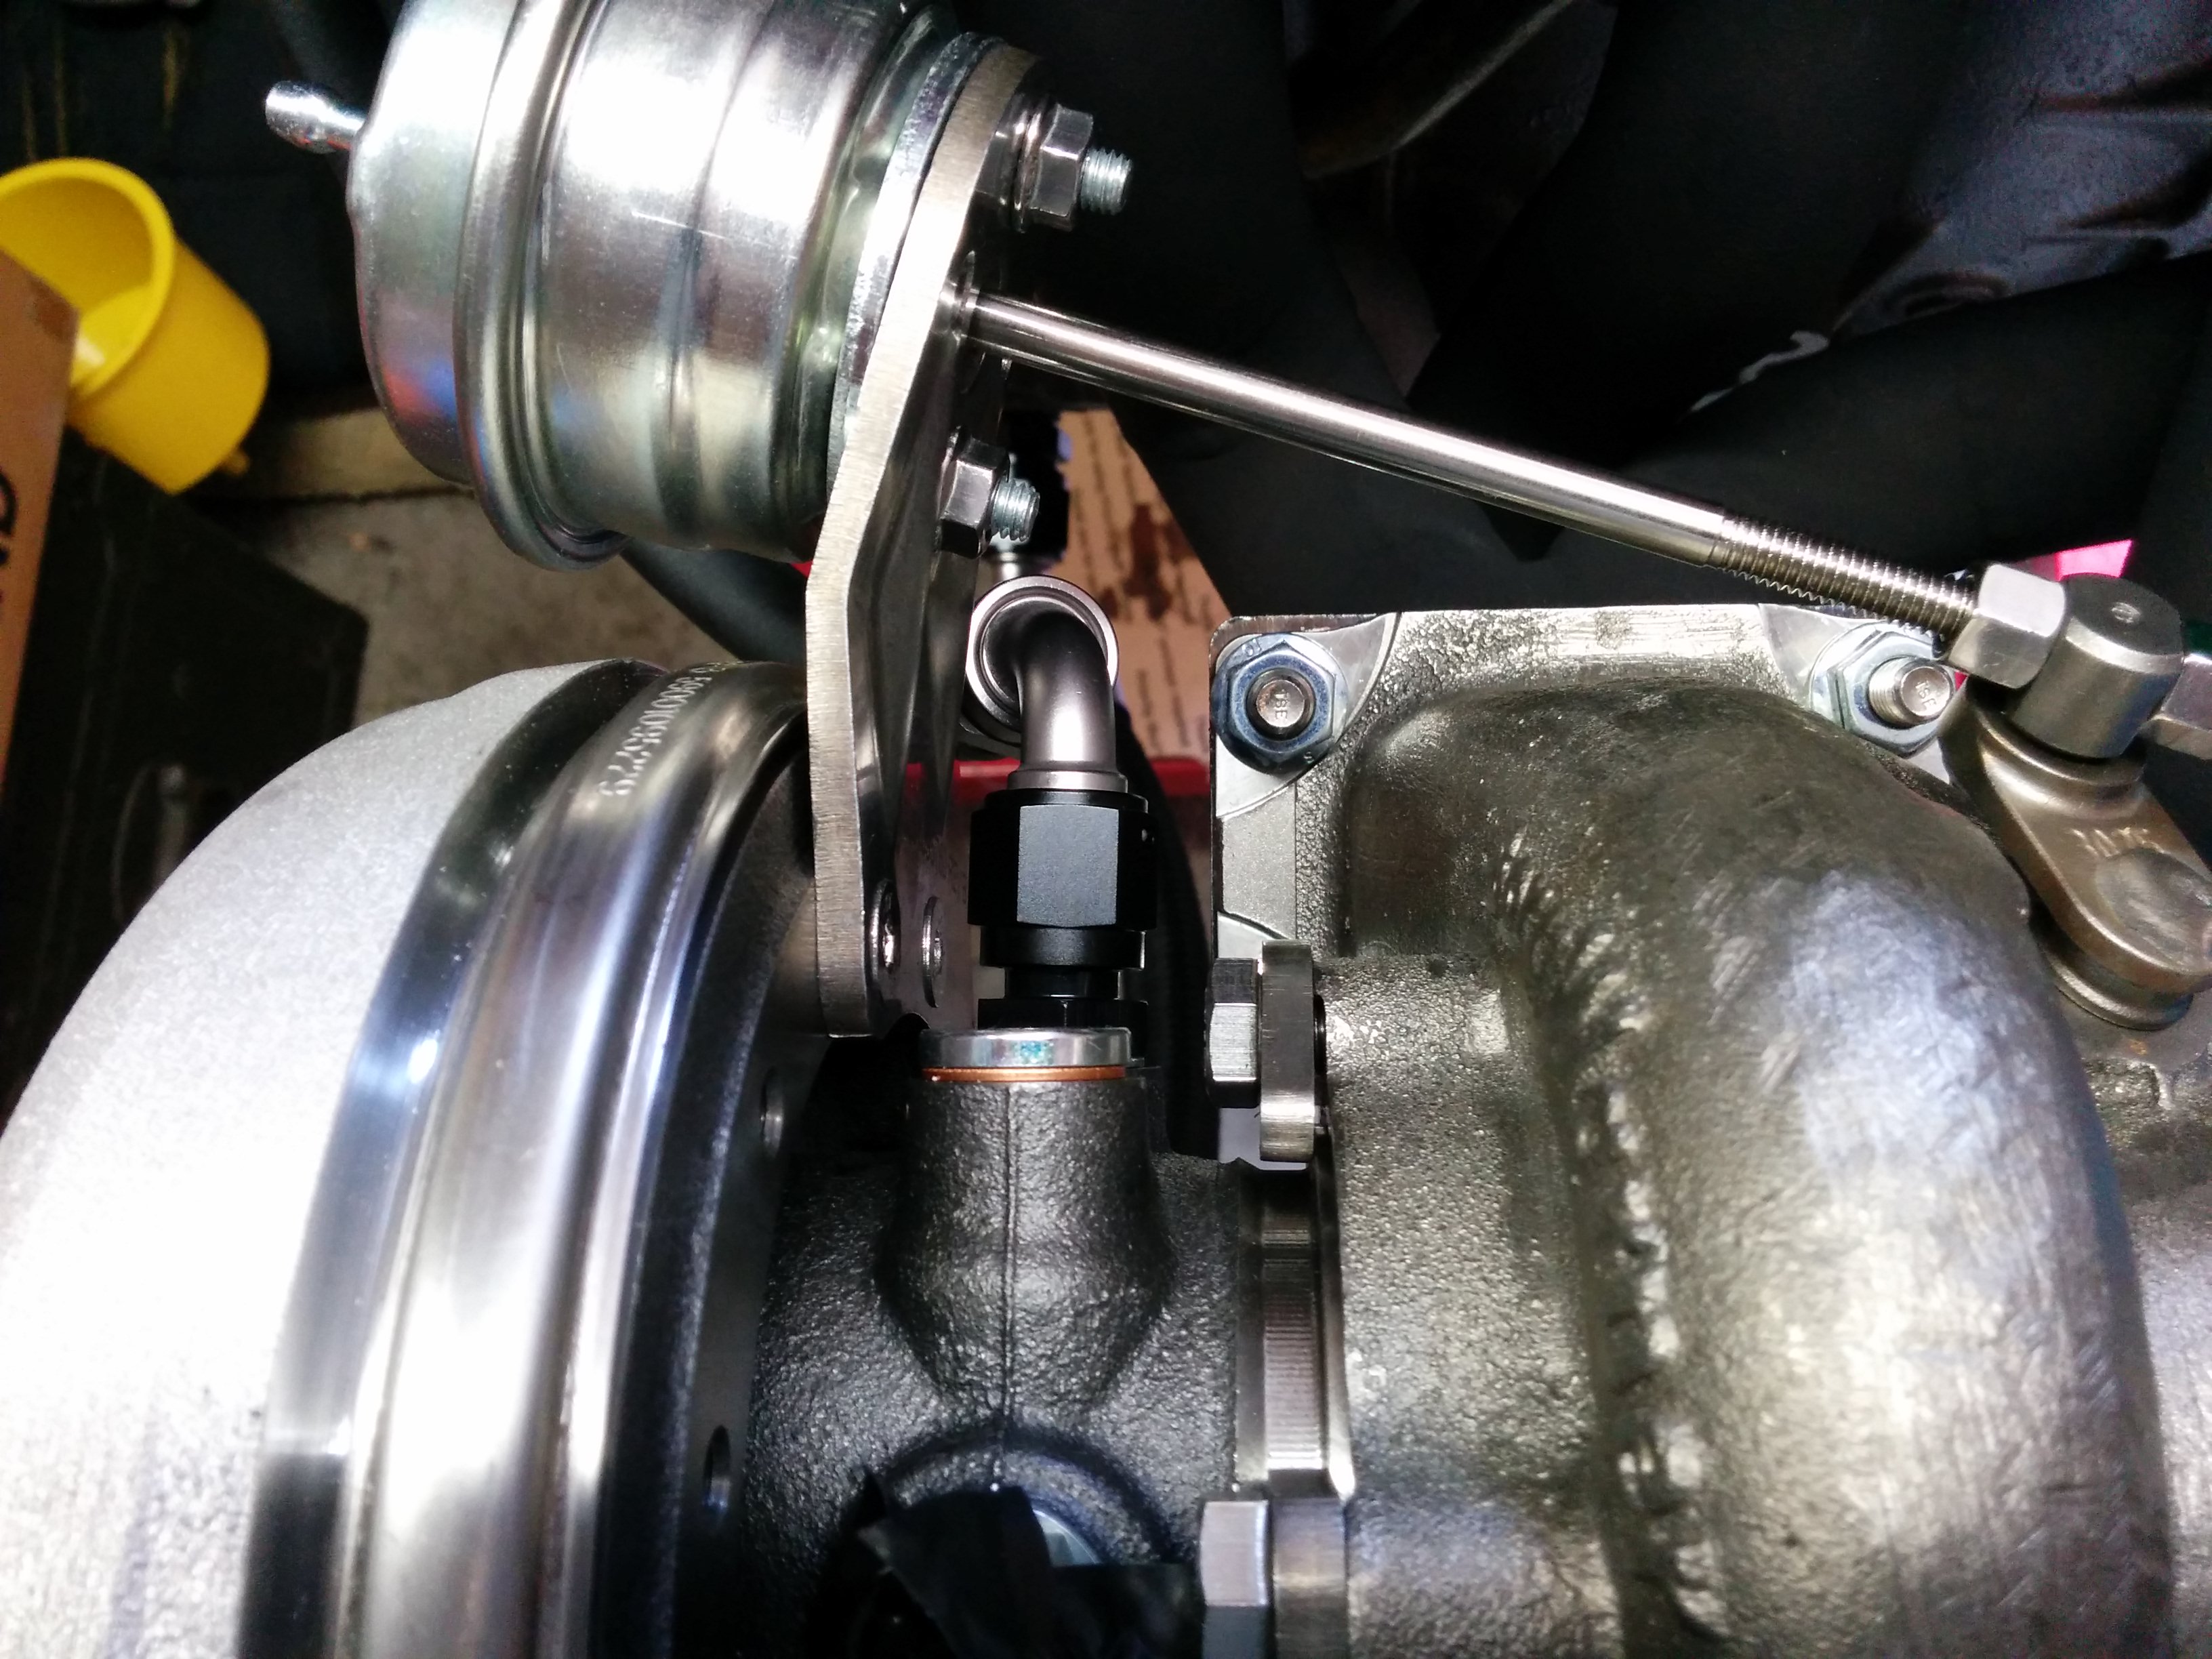
With the external WGA bracket right there, I don't have much of a choice. Also shown: cancer turbine housing.
So I think that's the coolant and oil drain sorted, I just need to order some more -6AN hose and a couple more fittings. Oil feed is the next project.
Added some clearance dents to keep the windage tray from touching the backside of the Ishihara-Johnson direct contact crank scraper
Here you can see the issue pretty clearly while test fitting. I actually had to get slightly more aggressive with the hammer before I got good clearance, but its no big deal. What are those funny studs you might ask?
I hate trying to line up that stupid windage tray while trying to install the oil pan so I made these out of a couple bolts. Just a couple minutes with the hacksaw and a file and they became guide studs. Problem solved.
I stopped taking pictures at this point because I had black RTV all over my hands, but needless to say, it worked perfectly and the oil pan is on. w00t! I got a solid and consistent bead of ultra black that squeezed out from around the pan rail when I torqued the bolts so I'm confident it sealed.
If it leaks oil I'm parting out.
Time to start plumbing the trubo! These go in the pan side of the drain line.
After much careful measuring and many youtube videos later, I made my first AN line.
Its still about 1/2" too long, but it fits and I'm not taking it apart again. If I do that I'm going to order a 30� -10 fitting for the turbo side to replace the straight fitting, just to take some of the curve out of the hose.
Seen here is the mockup of the coolant return using some Gates fuel line I had lying around. I don't really like having a run that long hanging out in space but I'm not sure what to do about it. 90� -6AN fittings on both ends.
Mockup of the coolant feed. Again, 90� -6AN fittings on both ends.
With the external WGA bracket right there, I don't have much of a choice. Also shown: cancer turbine housing.
So I think that's the coolant and oil drain sorted, I just need to order some more -6AN hose and a couple more fittings. Oil feed is the next project.
Reply
0
0
07-19-2015, 07:10 PM
#1568
Elite Member
Thread Starter
iTrader: (37)
Join Date: Apr 2010
Location: Very NorCal
Posts: 10,441
Total Cats: 1,899
Ok, stupid question time:
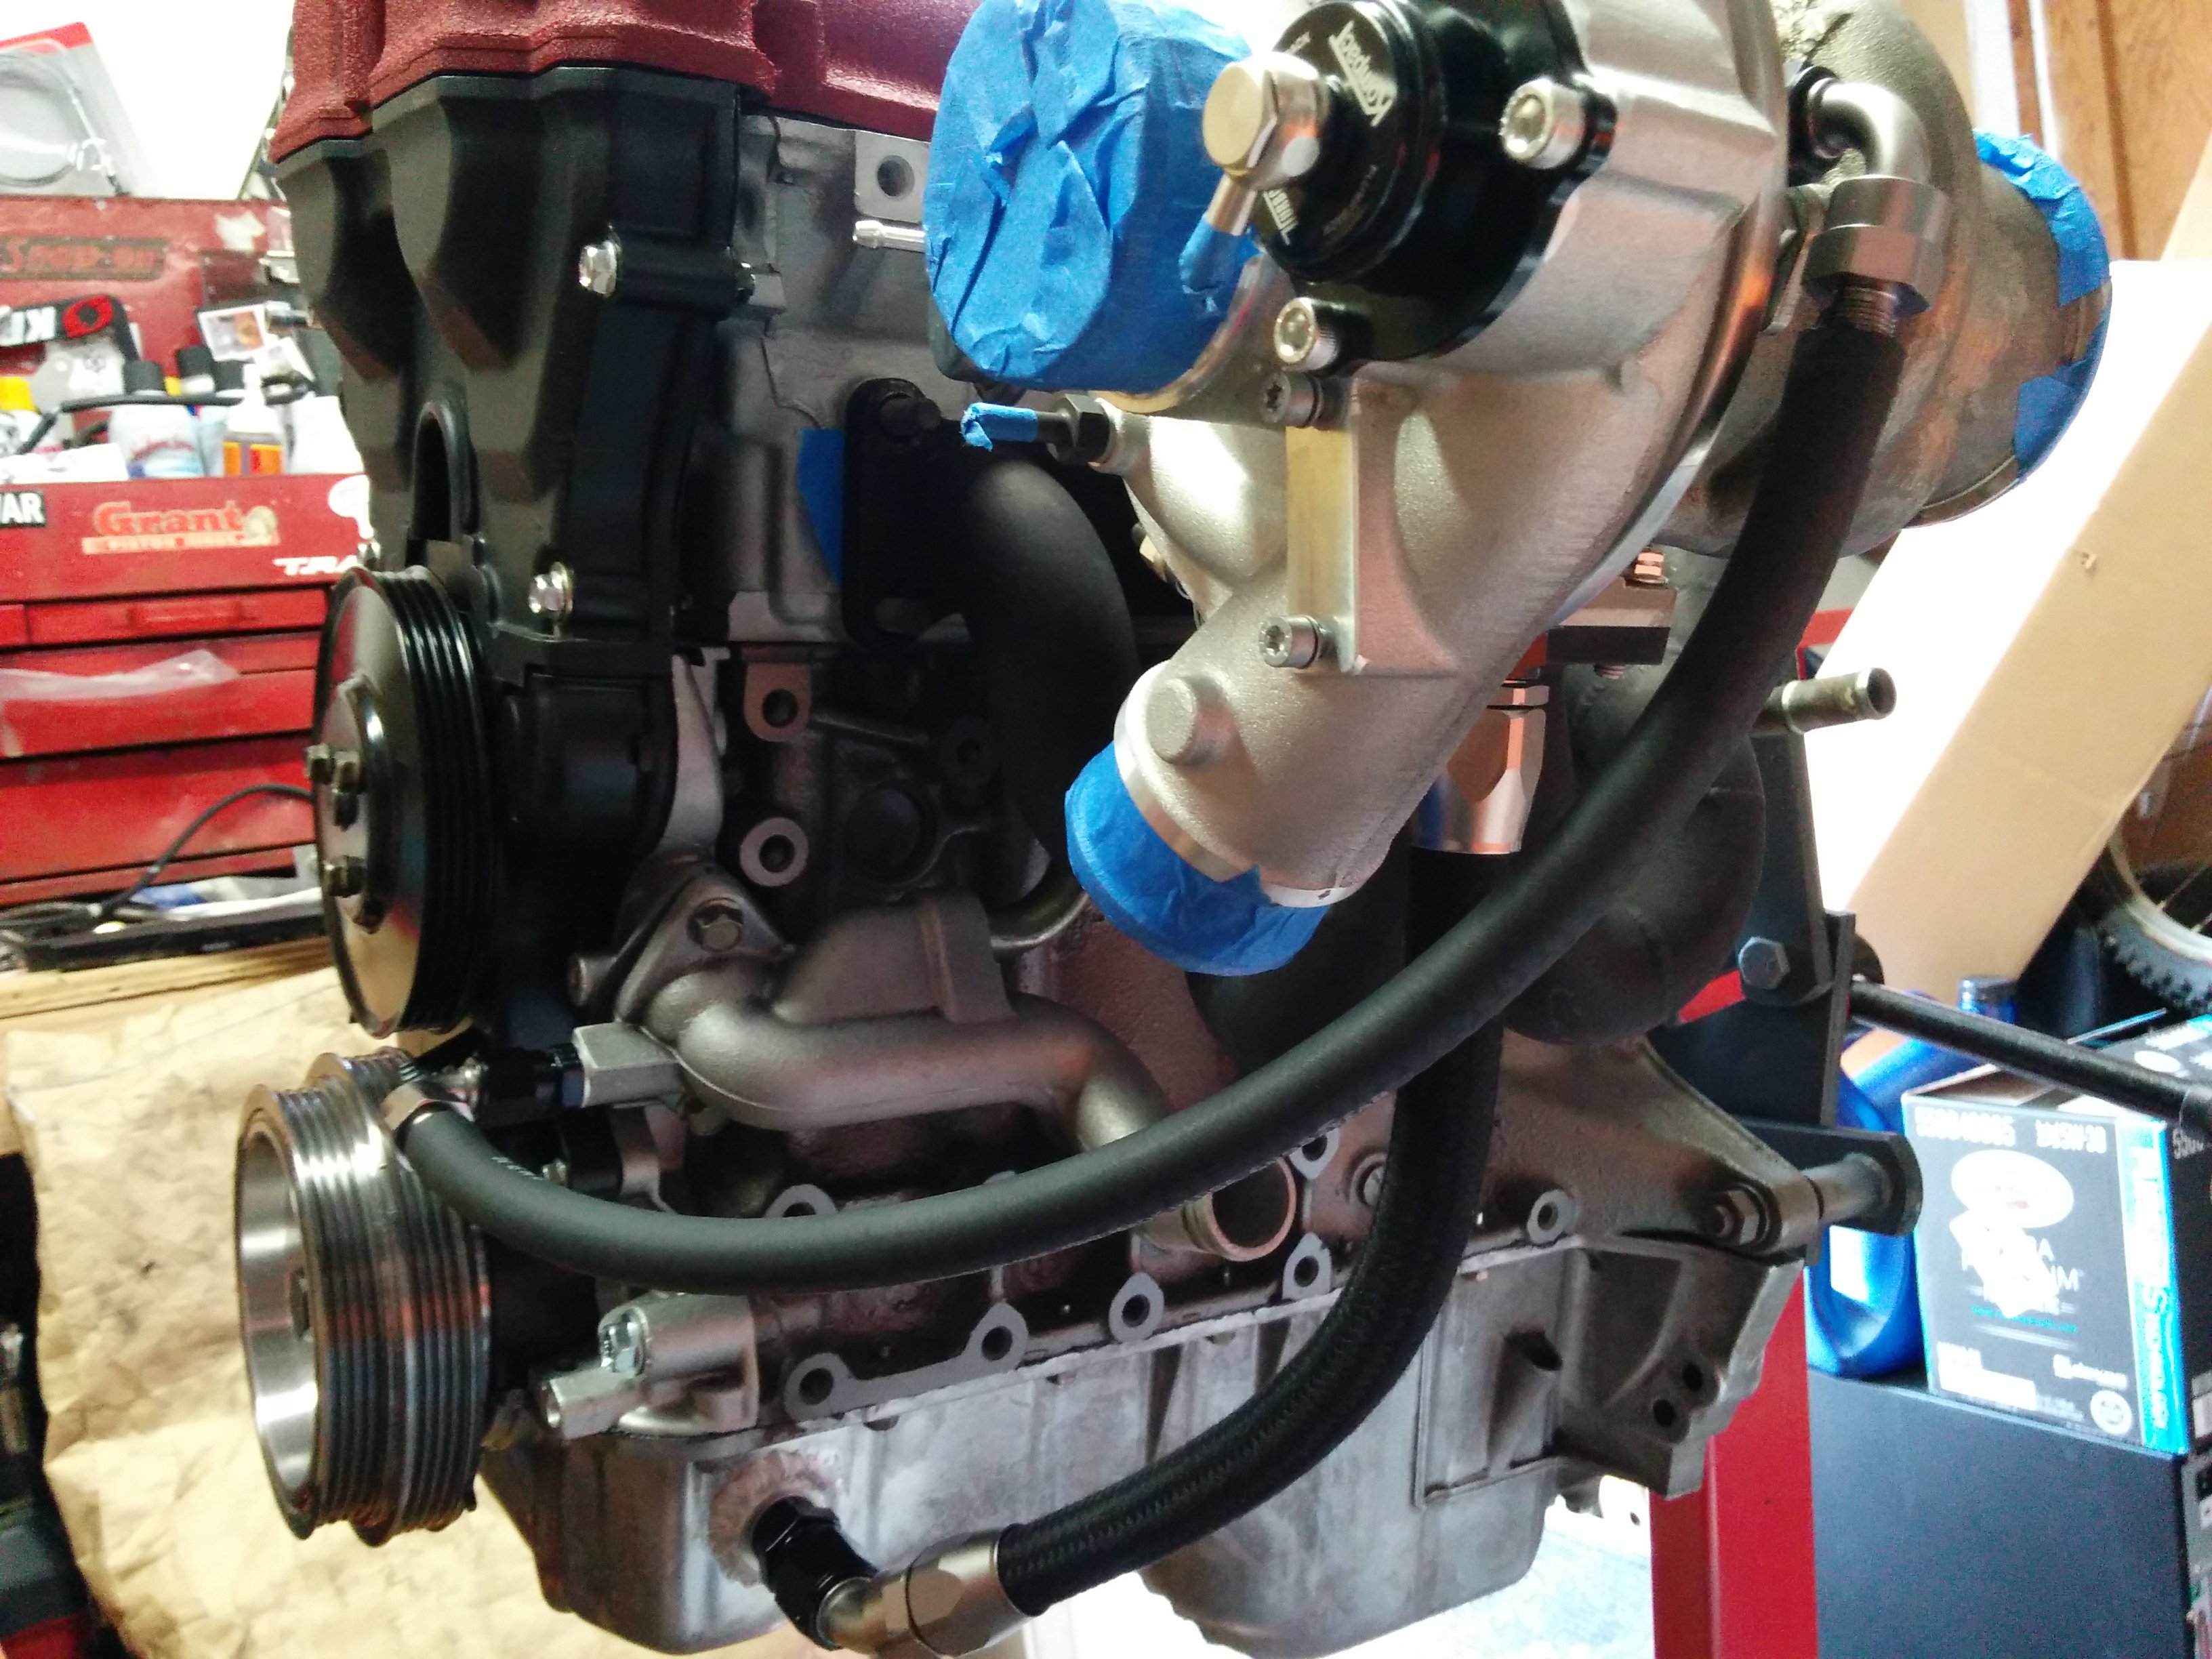
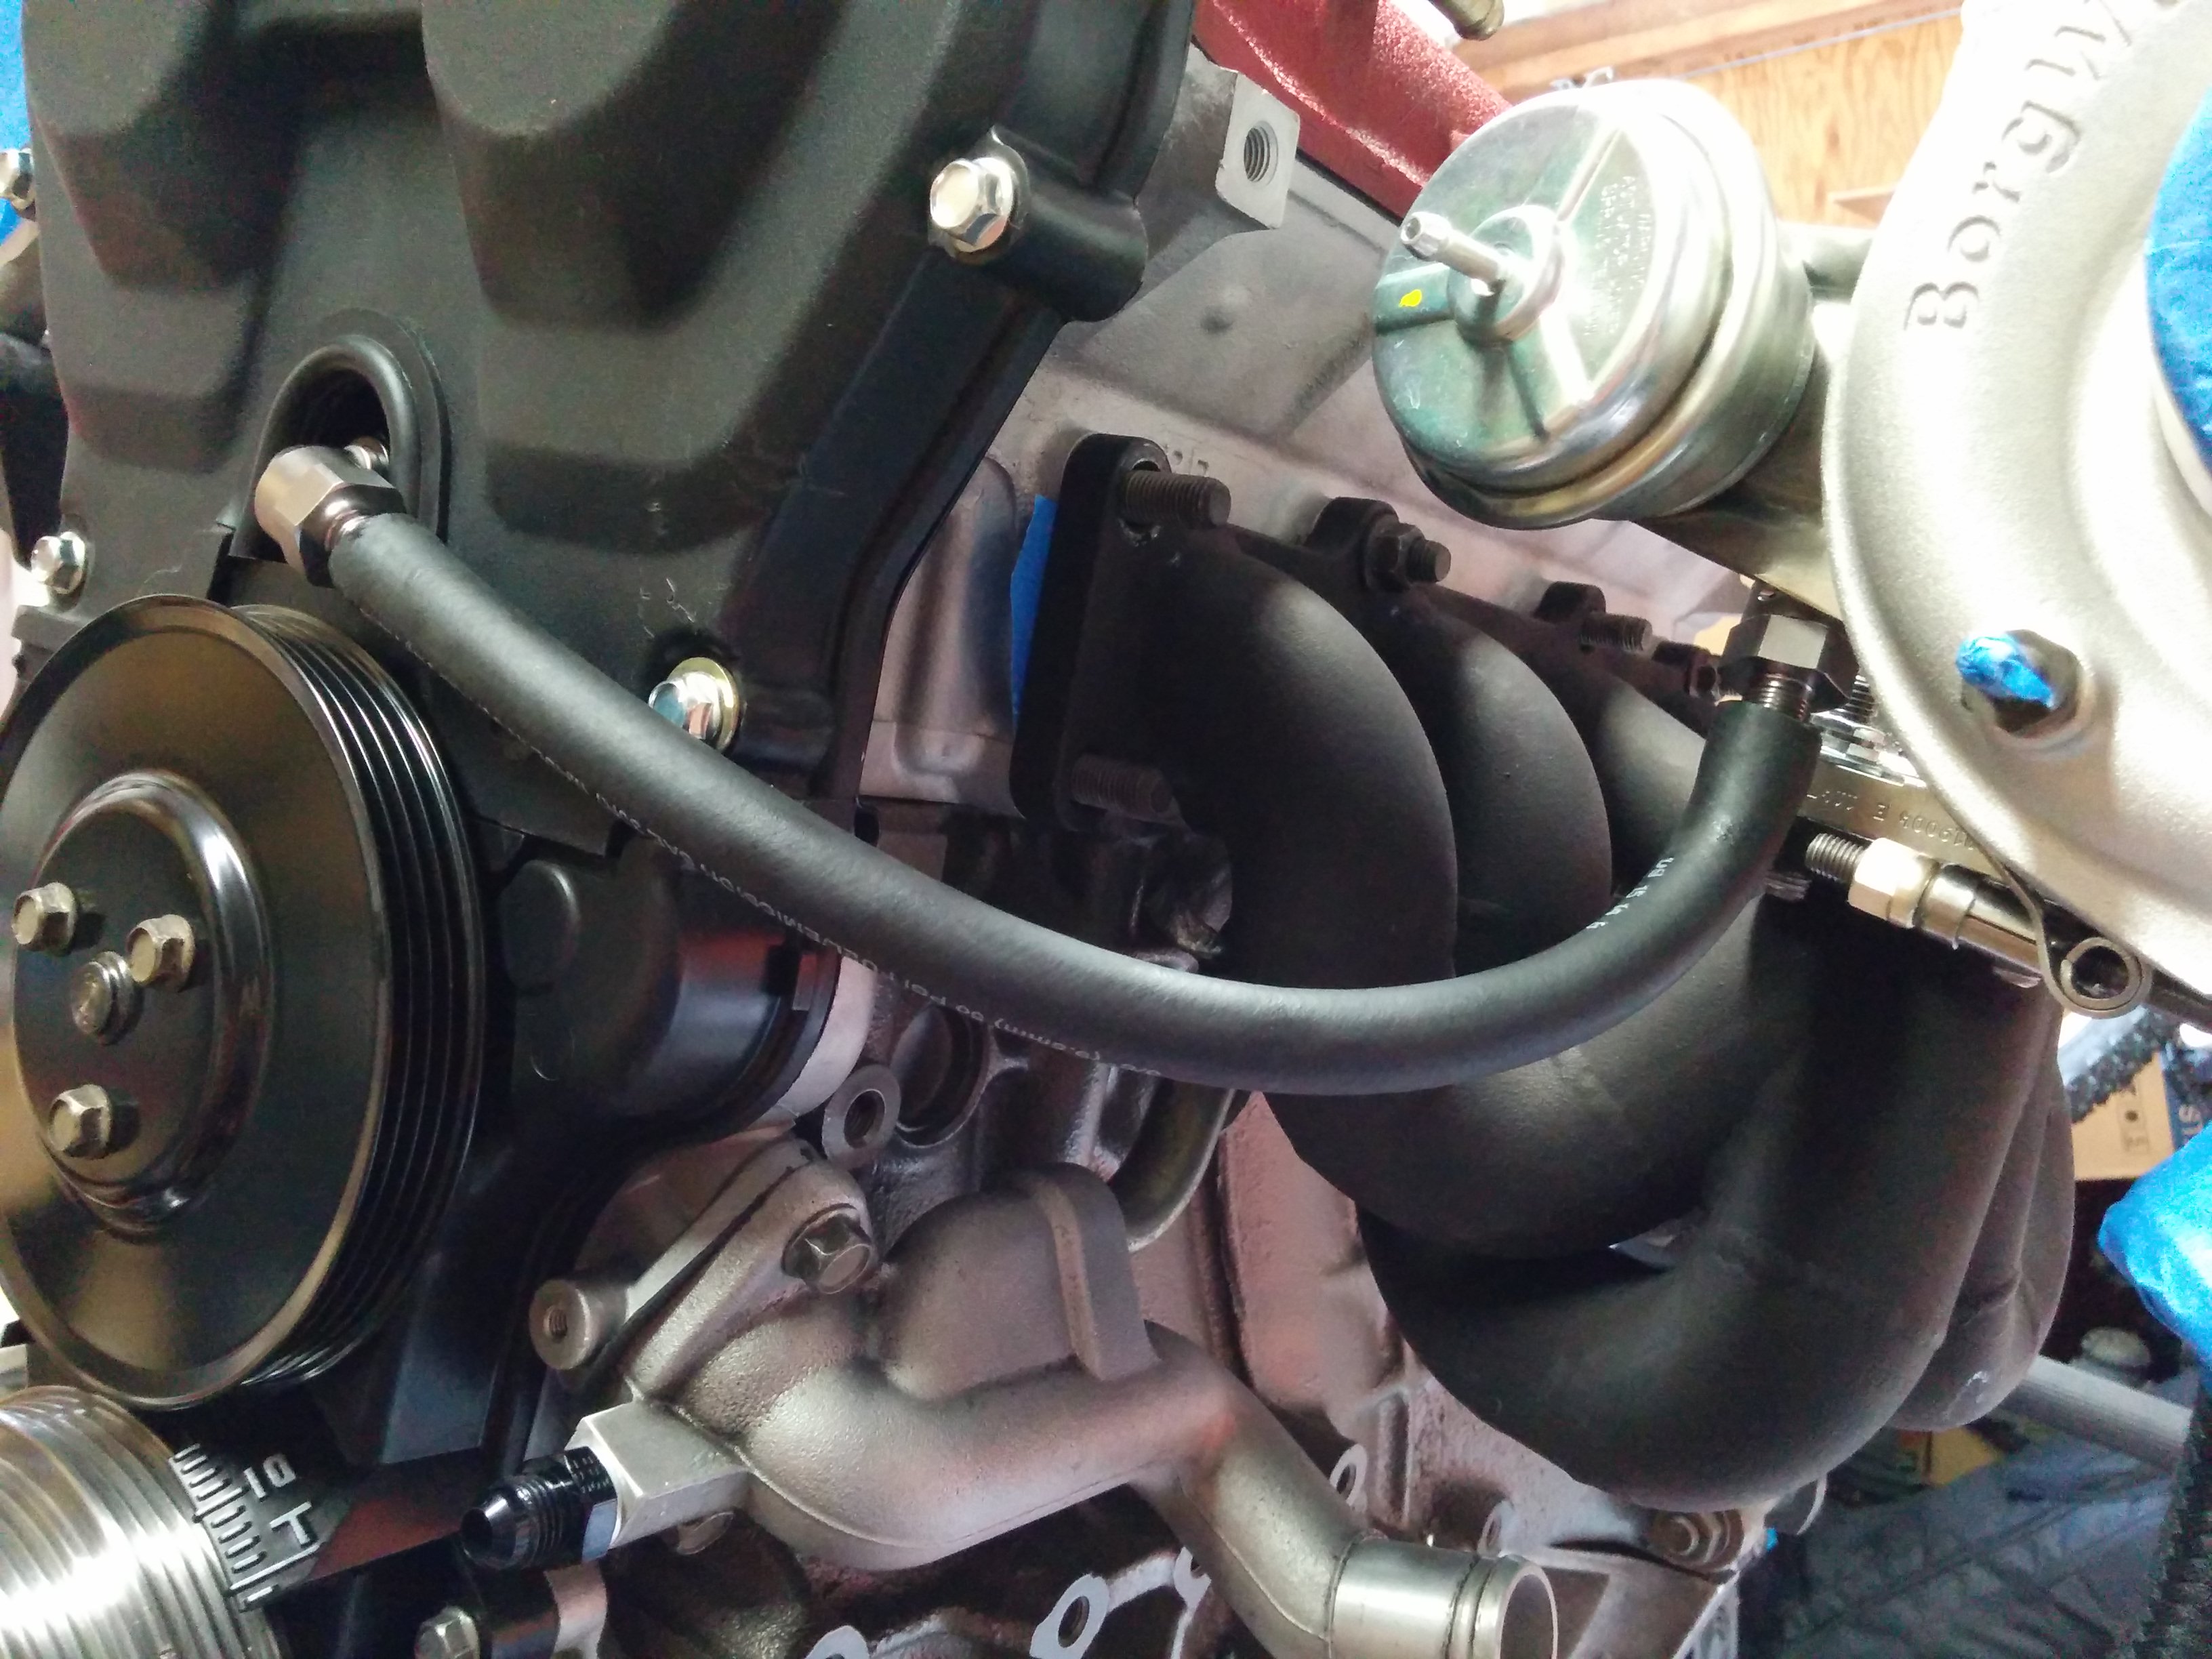
Has anyone ever run the oil feed around the FRONT of the block, in the space between the back of the metal timing cover shield and the block, above the water pump?
Something like this:
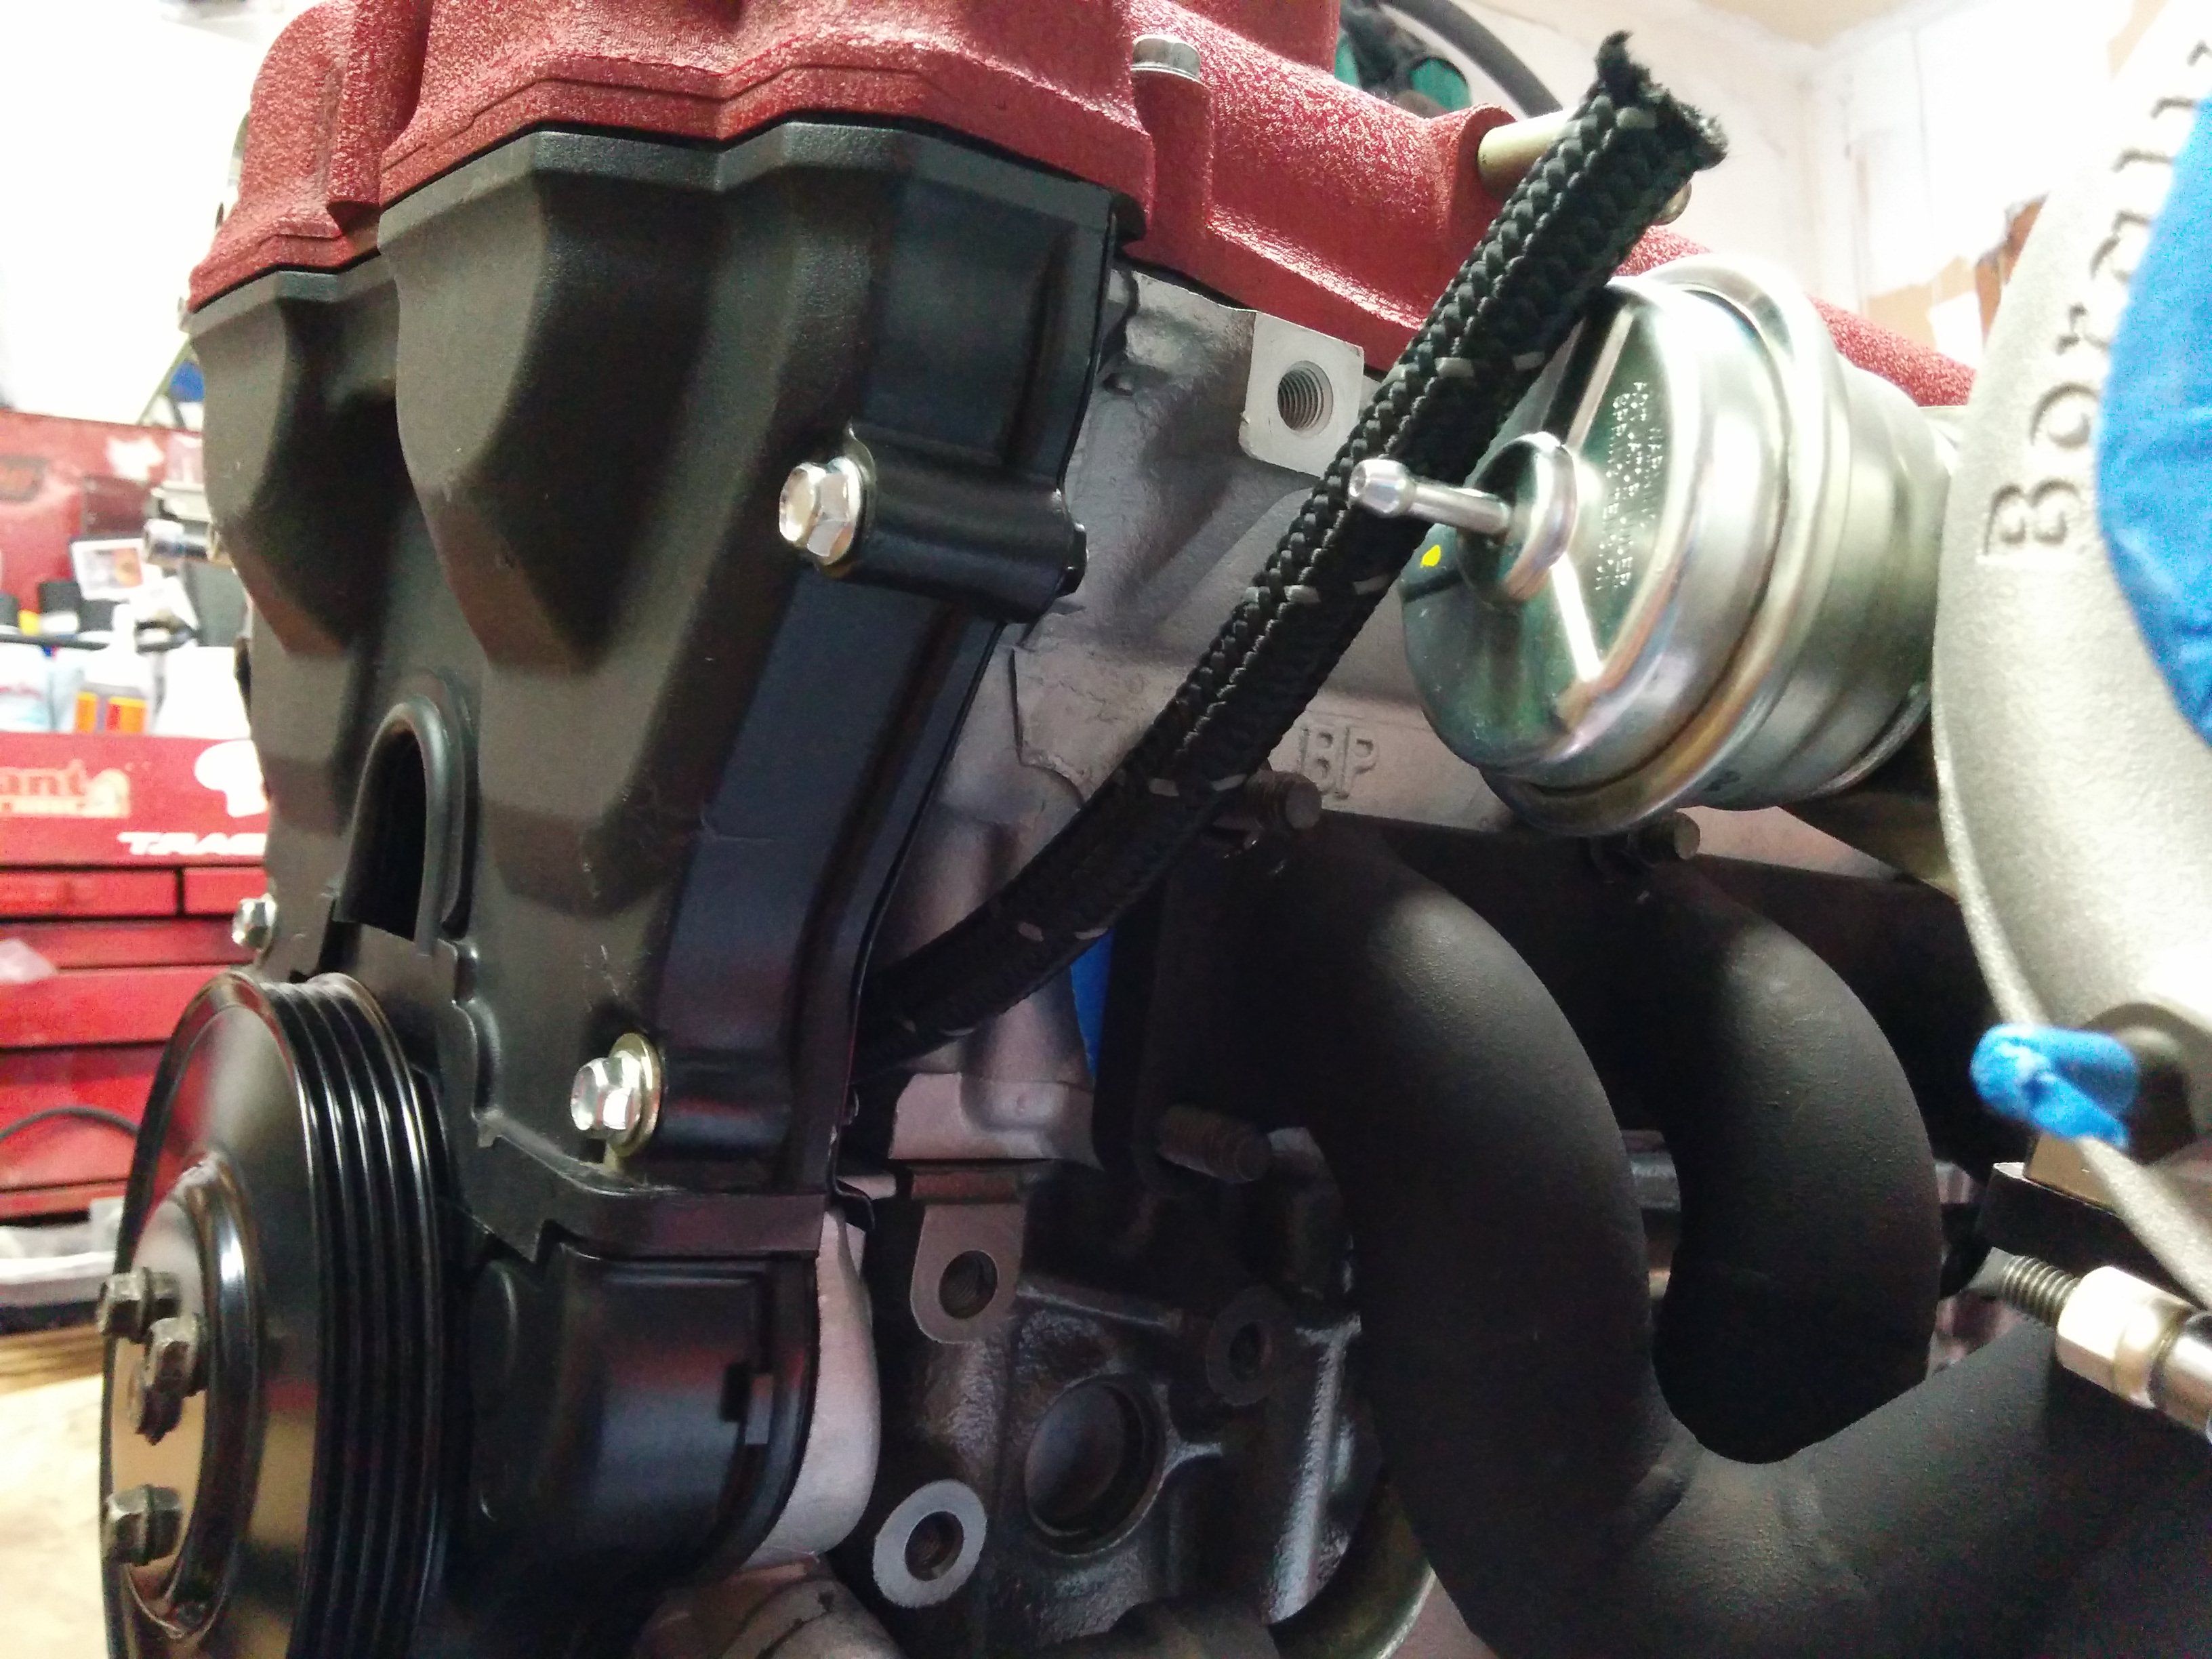
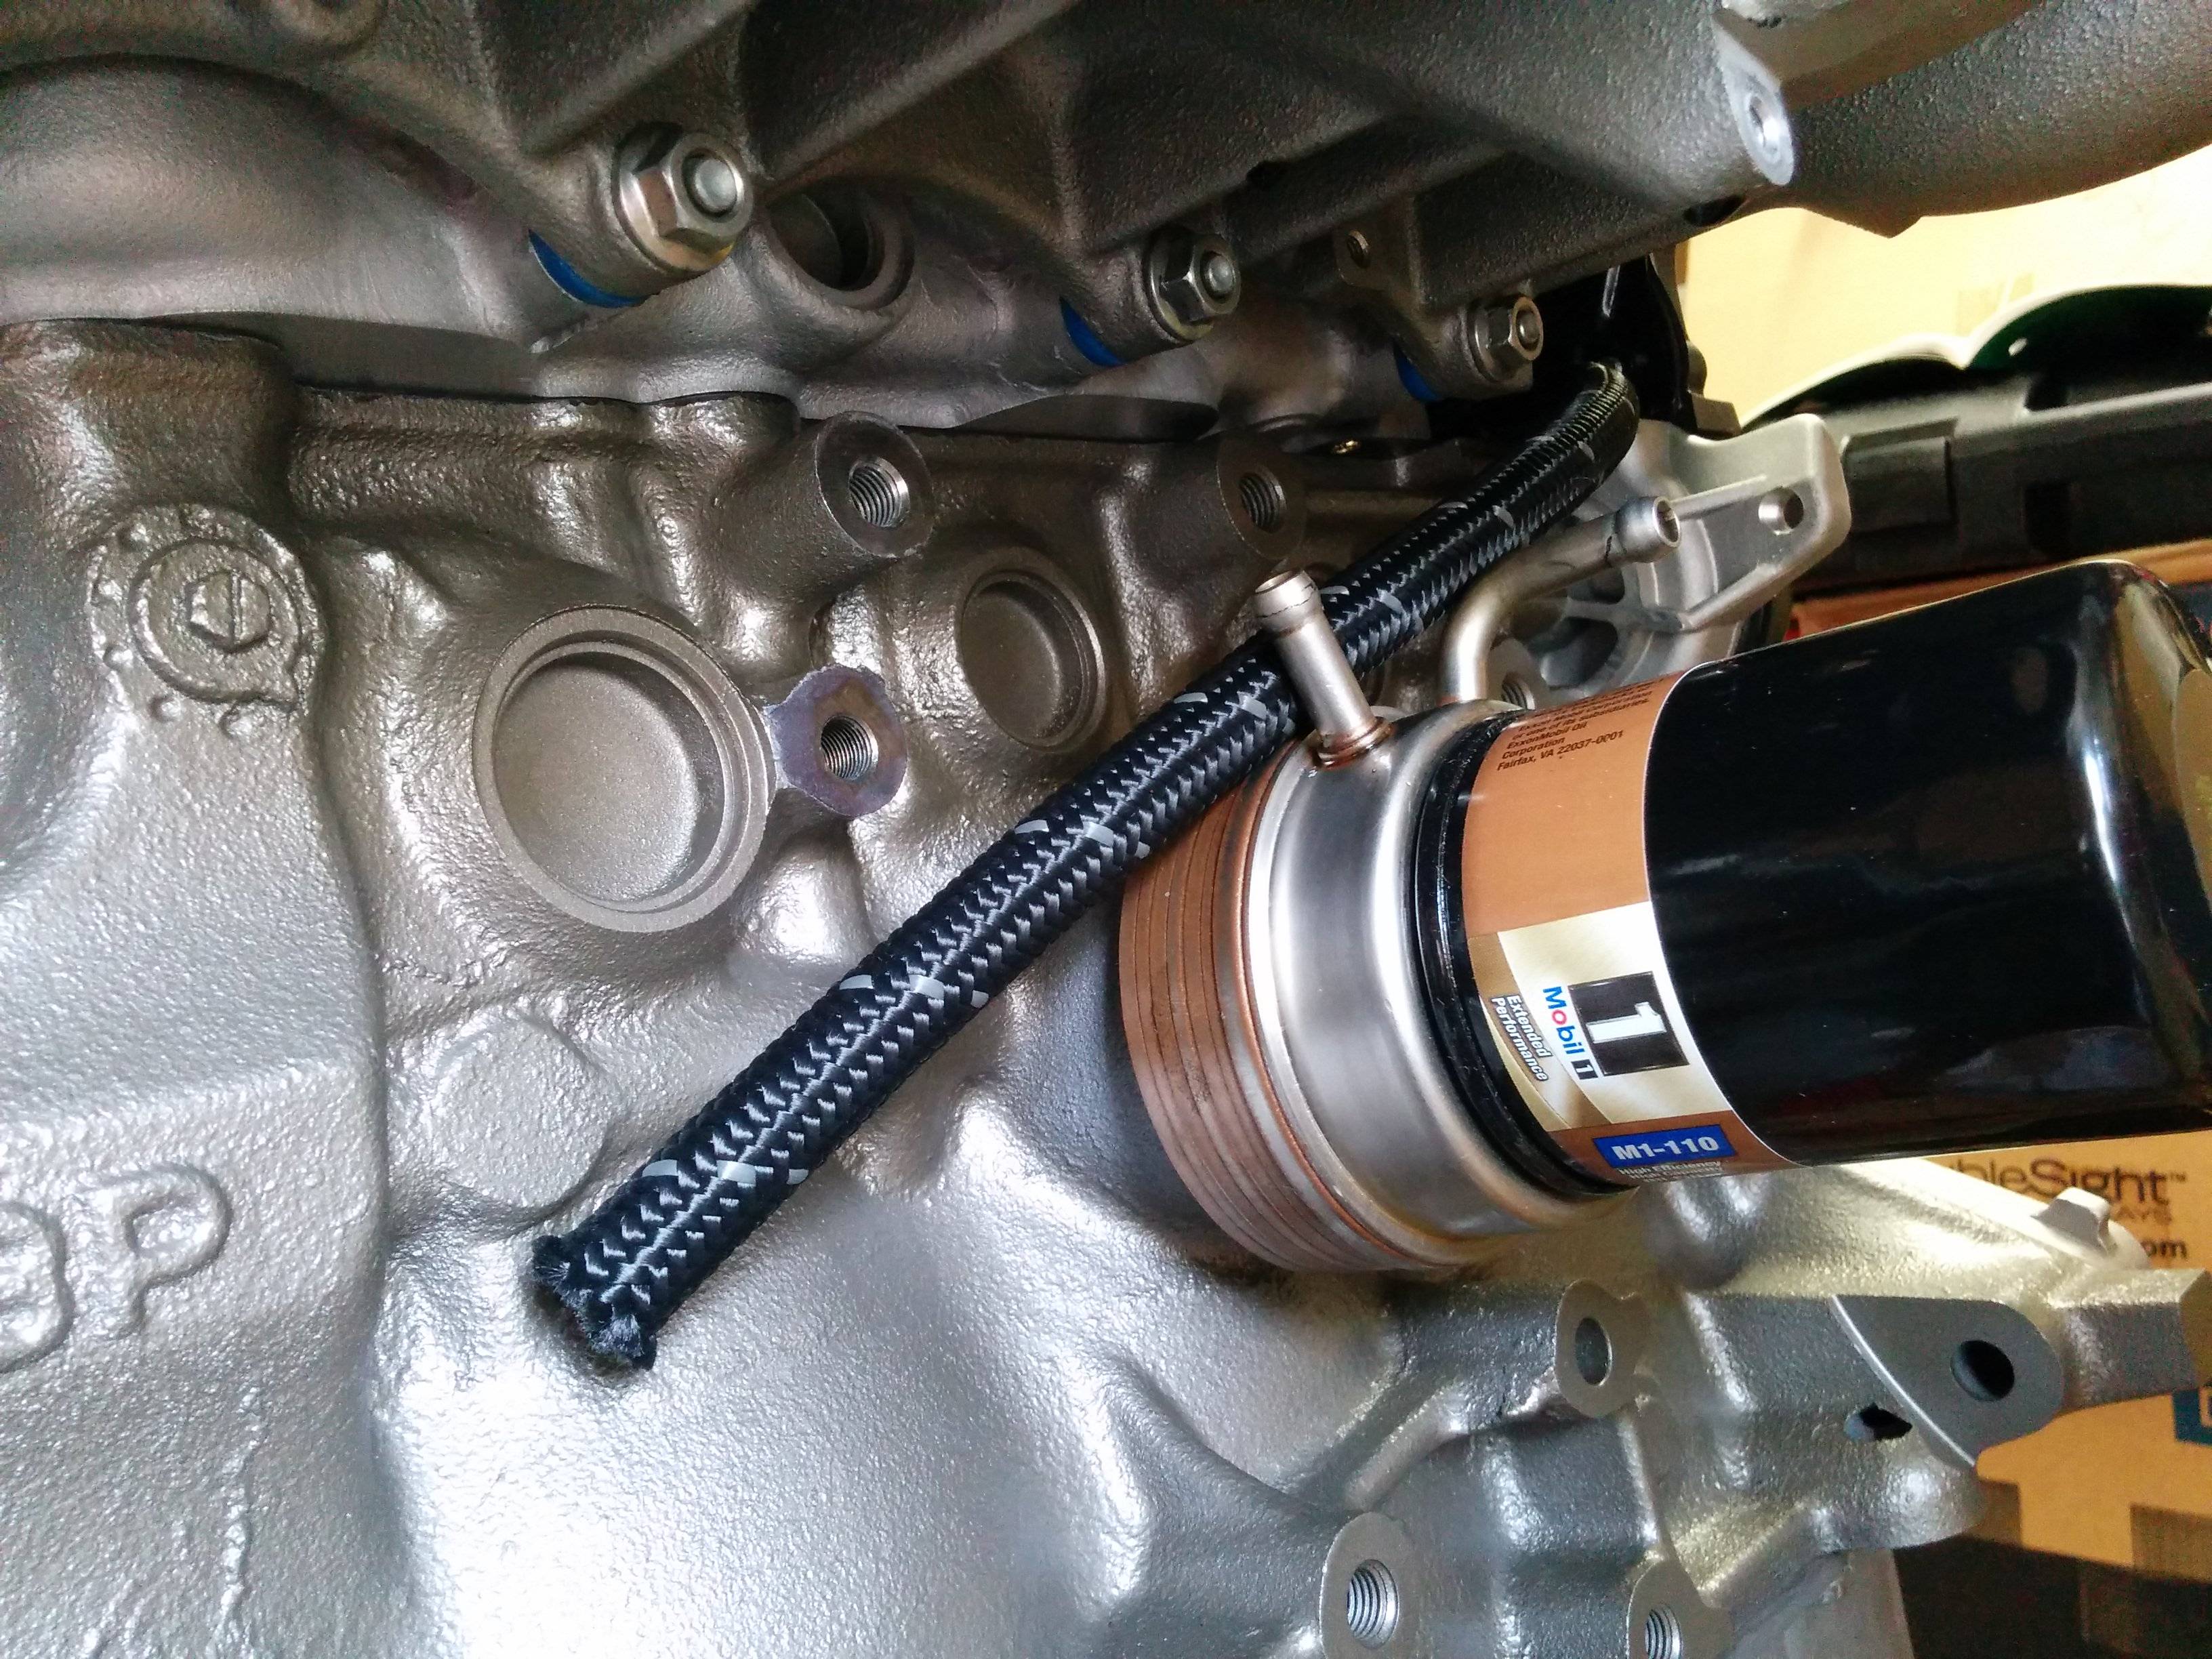
This could potentially remove FEET from my oil feed, especially if I use my sammich plate as a source. For reference, that's a -6 line. It would need to be protected from chaffing in a couple places, but its totally doable. There is even a threaded boss on the bottom of the intake where I could put a support for the oil line.
Someone tell me why I shouldn't do this.
Has anyone ever run the oil feed around the FRONT of the block, in the space between the back of the metal timing cover shield and the block, above the water pump?
Something like this:
This could potentially remove FEET from my oil feed, especially if I use my sammich plate as a source. For reference, that's a -6 line. It would need to be protected from chaffing in a couple places, but its totally doable. There is even a threaded boss on the bottom of the intake where I could put a support for the oil line.
Someone tell me why I shouldn't do this.
Reply
0
0
07-19-2015, 08:46 PM
#1570
Elite Member
Thread Starter
iTrader: (37)
Join Date: Apr 2010
Location: Very NorCal
Posts: 10,441
Total Cats: 1,899
Such clearance, much tight, very wow. Here she is by the numbers:
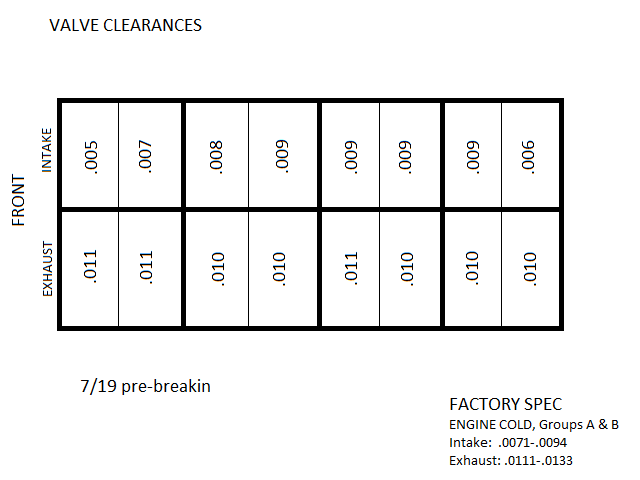
Keep in mind this is the feeler that fits and my feelers are all in .001 steps so there could be another .0005 in there as well. More than half of the exhaust are out of spec, but barely. The only one I feel like I should touch is that .005 on the cyl 1 intake, if I touch anything at all.
This head 5A intake, 4W exhaust and all Supertech hardware; SS +1 on the intake and Inconel +1 on the exhaust, Supertech doubles and TI retainers all around. SUBs were not in the budget when I ordered the head so its factory SOB shims.
Thoughts?
Last edited by EO2K; 07-19-2015 at 09:02 PM.
Reply
0
0
07-19-2015, 10:49 PM
#1572
Such clearance, much tight, very wow. Here she is by the numbers:
...
Keep in mind this is the feeler that fits and my feelers are all in .001 steps so there could be another .0005 in there as well. More than half of the exhaust are out of spec, but barely. The only one I feel like I should touch is that .005 on the cyl 1 intake, if I touch anything at all.
This head 5A intake, 4W exhaust and all Supertech hardware; SS +1 on the intake and Inconel +1 on the exhaust, Supertech doubles and TI retainers all around. SUBs were not in the budget when I ordered the head so its factory SOB shims.
Thoughts?
Any good machine shop can do this. Who did this head? How many miles are on it? Any track time?
EDIT: I used .007 and .0011 I believe, but I can double check if it matters.
Reply
0
0
07-19-2015, 11:17 PM
#1576
Elite Member
Thread Starter
iTrader: (37)
Join Date: Apr 2010
Location: Very NorCal
Posts: 10,441
Total Cats: 1,899
One shim out and its garbage?  Seriously?

Yarr, will shoot him an email and see what he recommends. Its not a big deal, its just not something I was expecting.
I like the way you think.
IF I decide to use this routing, I'll use -4 rather than the -6AN line that is shown in the pic. I was worried before with a 56" -4AN line that is traditionally run with the BP because of what BorgWarner specs for the EFR. With this routing the line will end up being under 30" or so. I'm MUCH more comfortable with 30" -4AN rather than 56" of -4AN.
Seriously? IF I decide to use this routing, I'll use -4 rather than the -6AN line that is shown in the pic. I was worried before with a 56" -4AN line that is traditionally run with the BP because of what BorgWarner specs for the EFR. With this routing the line will end up being under 30" or so. I'm MUCH more comfortable with 30" -4AN rather than 56" of -4AN.
Reply
0
0
07-19-2015, 11:23 PM
#1577
SADFab Destructive Testing Engineer


iTrader: (5)
Join Date: Apr 2014
Location: Beaverton, USA
Posts: 18,642
Total Cats: 1,866
Buy some AN line clamps. Bolt them to the inner timing cover so the oil line is held in place not touching anything.
<br />All this talk makes me want to find a 94 block.
<br />All this talk makes me want to find a 94 block.
Reply
0
0
07-19-2015, 11:25 PM
#1578
Maybe I read it wrong, but you have more than 1 shim out, and they're all over the place. Right? How is that a troll? You asked for opinions BTW, and I machined my cylinder head myself and it works, I know what it takes to do it right. They should not be all over the place like that. If you seriously think that's normal, it's not. Best case is the guy that adjusted the valves did a bad job adjusting them. More likely, bad machine work is causing the tolerances to move. My last reply if you think this is trolling, that's BS, I posted accurate info.
EDIT: And if you don't believe, me just do a search here, there are people on THIS FORUM that have had repeat valves-getting-tight in very short usage (like under 1,000 street miles) due to poor machine shop work. Some of them even checked the clearances when the head was new (they were fine) and then again when the motor had a misfire or burned a valve. Still rediculous I'm posting this after being called a troll, you even said yourself half the exhaust valves are out of spec!
EDIT: And if you don't believe, me just do a search here, there are people on THIS FORUM that have had repeat valves-getting-tight in very short usage (like under 1,000 street miles) due to poor machine shop work. Some of them even checked the clearances when the head was new (they were fine) and then again when the motor had a misfire or burned a valve. Still rediculous I'm posting this after being called a troll, you even said yourself half the exhaust valves are out of spec!
Reply
0
0
07-20-2015, 01:30 AM
#1580
Elite Member
Thread Starter
iTrader: (37)
Join Date: Apr 2010
Location: Very NorCal
Posts: 10,441
Total Cats: 1,899
You basically walked in here and told me my head was garbage and the machinist was incompetent. If that's not trolling I don't know what is.
I'm glad you have the resources to build these things yourself, I don't. For this reason, I checked what I could and I'm realistic about the tolerances of the tools I have available. Some of us don't have the tools or ability to rip apart an entire cylinder head and check every single clearance on every single mating part. For those things I have to trust that the work was done correctly. To this end I've hedged my bets and purchased a head from a trusted source. Don't assume I don't know what I'm doing just because I didn't do the work myself.
Here's the score:
As I feel Ian correctly pointed out, the next step is to contact the guys from whom I purchased the head and ask their advice. They may tell me "Yeah, we run them tight because X" or "Its assumed you are going to re-shim after X hours on the motor once the valves seat" or even "Dear god that's terrible, the responsible parties will be shot at dawn. Here is our FedEx account number, crate your motor and sent it to us and we'll make it right." For all I know they may not be using OEM specs for what are obviously not OEM parts. I'll never know until I ask.
Also, in the interest of accuracy I need to remember to order a set of feelers that have .0005 steps.
I'm glad you have the resources to build these things yourself, I don't. For this reason, I checked what I could and I'm realistic about the tolerances of the tools I have available. Some of us don't have the tools or ability to rip apart an entire cylinder head and check every single clearance on every single mating part. For those things I have to trust that the work was done correctly. To this end I've hedged my bets and purchased a head from a trusted source. Don't assume I don't know what I'm doing just because I didn't do the work myself.
Here's the score:
- the majority of the lifters are on the "tight" end of the spec
- my feelers are .001 steps
- there could very easily be another .0009 on any of these measurements, I don't have the measurement resolution to confirm or deny
- there is one maybe two that are outside my measurement resolution and OEM tolerance
- this head has never been run, I expect these measurements to change after the valves fully seat
As I feel Ian correctly pointed out, the next step is to contact the guys from whom I purchased the head and ask their advice. They may tell me "Yeah, we run them tight because X" or "Its assumed you are going to re-shim after X hours on the motor once the valves seat" or even "Dear god that's terrible, the responsible parties will be shot at dawn. Here is our FedEx account number, crate your motor and sent it to us and we'll make it right." For all I know they may not be using OEM specs for what are obviously not OEM parts. I'll never know until I ask.
Also, in the interest of accuracy I need to remember to order a set of feelers that have .0005 steps.
Reply
0
0


