Pat's Ebay Turbo Compound Boost Build
#781
Elite Member
Thread Starter
iTrader: (16)
Join Date: Aug 2007
Location: Houston, TX
Posts: 9,295
Total Cats: 476
Made some changes to the design for the PWM fan hardware to do the switching on the fan. Old design "worked" but wasn't perfect and could have been better so I made a couple changes.
ith a 40 Amp Load (1 fan) it works great, I tested it for a couple hours. 20*F over ambient on the FET in free air, no convective cooling.
I also decided to stress test it by making 1 controller control both fans for an 80A Load. It worked, though it was pulling so much power, I measured a 0.7V drop in 10 Gauge wires! Only a 0.03V drop on the actual FET doing the switching, and 70*F over ambient in free air, no convective cooling again. The voltage drop is around 0.28V with a single fan using 10 Gauge wires.
Final design will use one FET per fan so I can keep the load/voltage drop low and also have independent fan control.
Also redoing the fuel sending unit once and for all. Pics later when it's done, but it's now got a proper Y-fitting, 6AN bulkhead fitting, and new bulkhead fittings bringing power into the tank to drive the pumps. The stock connector that was driving one of the pumps melted inside the tank... It's no longer being used.
Once the sending unit is back in the car, I'm going to focus on getting my MS wiring and Fan/pumps wiring done.
#783
Elite Member
Thread Starter
iTrader: (16)
Join Date: Aug 2007
Location: Houston, TX
Posts: 9,295
Total Cats: 476
Small update, been busy but got some work done on the car. Auto is only lacking a few tiny things from being finished, mainly all that's left is to finish my relays/fuses for added components, install trans cooler, then reinstall dash and put car back together. And by "finish my relays/fuses for added components" I mean, get started. I never look forward to wiring. Oh well it's gotta get done, once that is finished I'll very close to finished.
#784
Elite Member
Thread Starter
iTrader: (16)
Join Date: Aug 2007
Location: Houston, TX
Posts: 9,295
Total Cats: 476
Update time.
On the fan controller, I made a couple changes to it and got it working at higher frequencies. It is capable of running an 80A Load at 20kHz now with the fans blowing air on the transistor heat sink to cool it. Without airflow and 80A Load it overheats in about 20 seconds, no surprise as this heat sink isn't designed to sink a lot of watts without airflow.
Dropping it to 10kHz drops the temps a lot. Going down to a 40A load (1 fan not 2) really helps. One transistor controlling a 40A load and 10kHz seems to be extremely overkill. Testing showed at worst case PWM loading (40A, 10kHz, high duty but still PWM'ing) it got up to about 40*F over ambient. So that's very safe and should last forever.
So final design will be 10kHz and one controller per fan so I can have independent fan control as I have an oil cooler in front of the passenger fan now.
Update on wiring....
I don't like wiring. But the wiring I put in with the MS3 PRO a few years ago started out with good intentions, but turned into a mess over the years with me adding and removing things. Also my relay/fuse box I made back then worked, but was ugly and not very easy to service at all. So I ripped everything out and started over. It's not finished yet, but a lot of the hard work has been done. New setup is going to have 5 or 6 fuses/relays in the front (fans/fan controller, boost solenoid and controller, MS3 pro, injectors, coils, LC2, warning lights). In the rear there will be I think 5, 2 for fuel pumps, 1 for condenser fans, one for oil pump, and 1 for the power inverter.
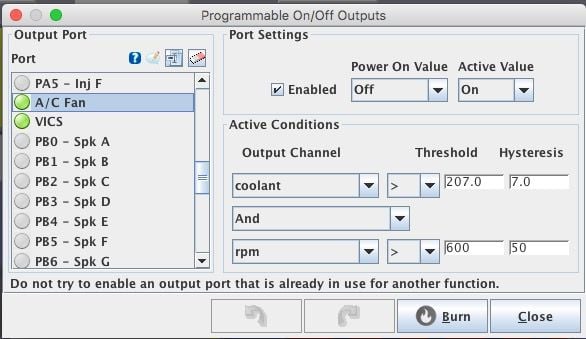
Most of the MS3 wiring is now cleaned up and redone. I now have 4 warning lights in the dash at my disposal! Plan is to do one for AFR safe in boost, one for CLT too hot, and 2 others, not sure what they will be yet. But they are installed in the dash and can now be easily unplugged if I ever have to pull the dash again. In fact a lot of the new wiring is now designed so I can be serviced without cutting wires... It wasn't that way before sadly! Also all the wiring follows the OEM harness, no more wires going everywhere.
Tomorrow I will continue with wiring, but hope to get a lot of it finished. I think I've done 60-70% of the work on the wiring by now for the MS3, the rest is really just fuses/relays and power/ground to the components. All the inputs/outputs/sensor etc are all done and much better than it previously was.
Had to modify the auto dipstick tube so my reroute would fit, that took a while but now it fits. That had me worried, took a solid hour just to get that to fit and not hit the intake or reroute or anything else.
Still gotta redo the boost pipe to clear the auto, and the exhaust as well as I'm pretty sure it won't fit either with the auto.
Can't wait to get it finished! I hate that it's taking so long, but wiring always slows me down to a crawl.
#790
Elite Member
Thread Starter
iTrader: (16)
Join Date: Aug 2007
Location: Houston, TX
Posts: 9,295
Total Cats: 476
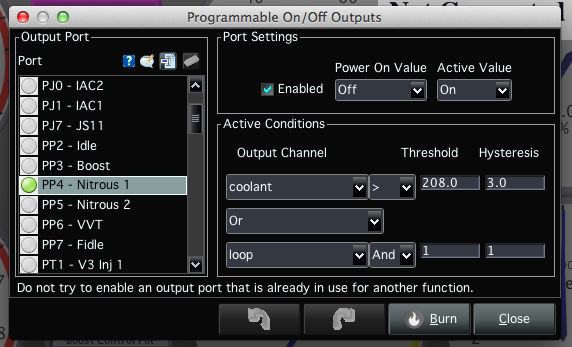
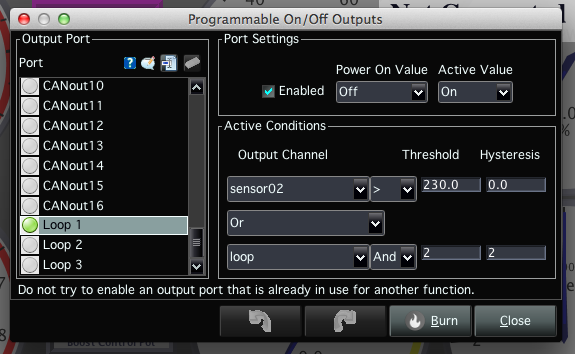
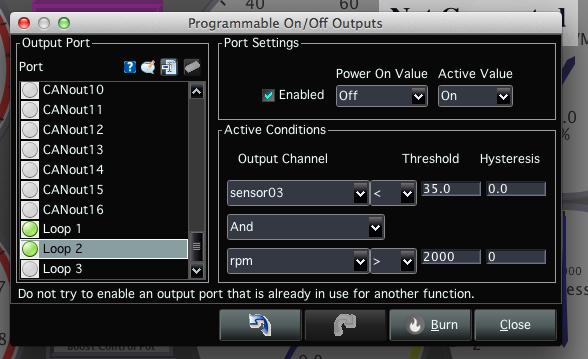
Thanks for the loops info, I too didn't know about that!
I'm thinking for lights it will be CLT high, AFR not safe, Oil temp High, and something else.
So update...
Still doing wiring, but it's coming along nicely. Engine bay wiring is 90% done. I have 5 or 6 ground wires that will connect to the chassis near the factory ground location behind the passengers side head light. crimping and installing those grounds to a terminal is about all it lacks up front, other than installing the fan controller.
Tomorrow I'll get started on the rear wiring in the trunk. That will go faster as it doesn't need to be as pretty since it's hidden, it just needs to be well built so I don't have any problems with it. Hope to get that knocked out tomorrow.
#791
Elite Member
Thread Starter
iTrader: (16)
Join Date: Aug 2007
Location: Houston, TX
Posts: 9,295
Total Cats: 476
Trunk wiring is done. It now has 5 fuses and relays connected. Much nicer than it previously was. Now have 10 gauge wires going to each fuel pump, as well as the power inverter. 12 gauge for oil pump and condenser fans.
Tomorrow I gotta add connectors to hook new wires to sending unit, connect power and ground to power inverter. Then finalize the wiring near the MS3 (basically just connect the power and ground wires for LC2/warning system/boost controller, wires are already there just not hooked up).
Should get wiring finished tomorrow, and then can finish up all the other little stuff. It's almost done! I gotta make a new 6AN hose, install new fuel lab fuel filter, new exhaust and boost pipe, and reinstall intake manifold/valve cover. And mount/connect trans cooler. And install fan controller* Then put car back together I hope!
*Final fan controller hardware is done, will write a bit more software for it and test that, then it's going in an enclosure and on the car.
#792
Elite Member
Thread Starter
iTrader: (16)
Join Date: Aug 2007
Location: Houston, TX
Posts: 9,295
Total Cats: 476
Pics finally!
Got a lot done today. Was able to massage the boost pipe into fitting the auto. Had to redo the exhaust center section, no surprise there. Got that done and got most of my heat shields back on the exhaust. Gotta put an O2 bung in later for the wideband and then install that.
Car is coming together, wiring is about 97% complete. Plan to finish it tomorrow and start putting the car together and finishing up the last bits of fabrication required. Mainly installing the auto trans cooler. Won't be racing it tomorrow but hope to make it to a car meet this Saturday night.
#800
Elite Member
Thread Starter
iTrader: (16)
Join Date: Aug 2007
Location: Houston, TX
Posts: 9,295
Total Cats: 476
Thanks guys! It's VHT wrinkle black. For the OG's that remember my GT3271 build, I used the same can of paint on my wrinkle coated charge pipes back then. It just turned out a lot nicer this time.
I'm betting if the trans is not damaged from mileage or abuse, it will hold 15 PSI but probably slip by 20 or so. I would be very happy if it takes 20 and holds. If it slips before 15 I'm going to assume it's just tired/wore out and needs a rebuild as there's several folks that have put 230-250whp though a stock auto for years without any issues. FM has a few FM2 auto cars out, and several SC'd ones as well but of course those aren't making 250+. I'm installing a transmission cooler 1/2 the size of the radiator, so at least it should stay cool. Said it would cool a motor home transmission!
I will run wastegate on both turbos starting out to see how it does and go from there. Exhaust is done and back on car, boost pipe is in, gotta get back to work. Want to drive it tomorrow.
I will run wastegate on both turbos starting out to see how it does and go from there. Exhaust is done and back on car, boost pipe is in, gotta get back to work. Want to drive it tomorrow.


