Pats Whipple W100AX Street/Track '99 Build Thread
 10-14-2014, 11:06 AM
#22
2 Props,3 Dildos,& 1 Cat


iTrader: (8)
Join Date: Jun 2005
Location: Fake Virginia
Posts: 19,338
Total Cats: 573
I don't believe I can make MS3 PRO return OBD2 codes that say everything passes though. I can make the stock ECU do that, that's the ONLY reason I'm planning to put it back on. That and the stock ecu does do idle/ac idle up and control/alternator control without a hickup.
I do speak from experience. I have run my car with the stock ECU doing these things in addition to an EMS and it DID pass OBDII inspection this way.
HOWEVER...
You will probably fail the catalyst checks. Maybe the airflow checks. It's an iterative process.
Just be aware that if you DO get it to give the all-clear sign with the stock ECU that it will be a) very temporary and b) probably not with your full power tune / setup. See above.
Ultimately I had to simulate the second o2 sensor to get mine to pass.

Reply
 0
0

0
10-14-2014, 11:07 AM
#23
Former Vendor
iTrader: (31)

Join Date: Nov 2006
Location: Sunnyvale, CA
Posts: 15,442
Total Cats: 2,099
Cool build. Big blowers are almost as good as a turbo

Reply
0
0
10-14-2014, 07:42 PM
#24
Senior Member
iTrader: (1)
Join Date: Jan 2011
Location: Chattanooga, Tn
Posts: 1,234
Total Cats: 283
And you are right about the sizing. When I went from a off the shelf header to the one I have, I picked up power everywhere and dropped a little over 1.5 PSI.
Reply
0
0
10-14-2014, 09:13 PM
#25
Elite Member
Thread Starter
iTrader: (16)
Join Date: Aug 2007
Location: Houston, TX
Posts: 9,292
Total Cats: 475
I wouldnt try to let the stock ECU control the idle valve while the standalone is controlling everything else. The stock ecu is going to be expecting plenty of spark advance idle control as well and if you have the MS do that while the stock ecu is controlling the valve they're just going to fight each other. And if you dont have spark advance idle control you'll probably end up with a bunch of weird stall scenarios where the car just cuts out because the iac cant open fast enough.
That is assuming your fuel and spark are precisely tuned at idle. They may do ok.
I do speak from experience. I have run my car with the stock ECU doing these things in addition to an EMS and it DID pass OBDII inspection this way.
HOWEVER...
You will probably fail the catalyst checks. Maybe the airflow checks. It's an iterative process.
Just be aware that if you DO get it to give the all-clear sign with the stock ECU that it will be a) very temporary and b) probably not with your full power tune / setup. See above.
Ultimately I had to simulate the second o2 sensor to get mine to pass.
Why do you say I would probably fail the catalyst checks? Is that just regarding the second O2 sensor? Anything else that's probably gonna be a pain? Seems like EGR will just be reinstall and done, for example.
Idle isn't just controlled by the valve itself, though. The ECU expects to have control over timing to make minute adjustments, so I don't think it's going to work as smoothly as you would expect it to. The dual idle valve thing to combat your fans compounds that issue by 10-fold (stock IAC valve and secondary IAC valve combating each other).
Cool build. Big blowers are almost as good as a turbo
Cool build. Big blowers are almost as good as a turbo
Leafy is hand-grenade close with his math. My header is 1 7/8" Primaries to a 3" Full merge collector then to a convergent/divergent duct before the exhaust.
And you are right about the sizing. When I went from a off the shelf header to the one I have, I picked up power everywhere and dropped a little over 1.5 PSI.
And you are right about the sizing. When I went from a off the shelf header to the one I have, I picked up power everywhere and dropped a little over 1.5 PSI.
Reply
0
0
 10-15-2014, 08:20 PM
#27
2 Props,3 Dildos,& 1 Cat
iTrader: (8)
Join Date: Jun 2005
Location: Fake Virginia
Posts: 19,338
Total Cats: 573
I have no problem simulating things if needed, I just need it to say "pass" when they plug into it.
Why do you say I would probably fail the catalyst checks? Is that just regarding the second O2 sensor? Anything else that's probably gonna be a pain? Seems like EGR will just be reinstall and done, for example.
Why do you say I would probably fail the catalyst checks? Is that just regarding the second O2 sensor? Anything else that's probably gonna be a pain? Seems like EGR will just be reinstall and done, for example.
I always left my EGR running. I welded the bung onto my tubular turbo header and ran the stock pipe to the valve. It just sat there while running the MS alone.
Reply
0
0
10-23-2014, 03:38 PM
#29
Elite Member
Thread Starter
iTrader: (16)
Join Date: Aug 2007
Location: Houston, TX
Posts: 9,292
Total Cats: 475
First idea of implementing my warning system.
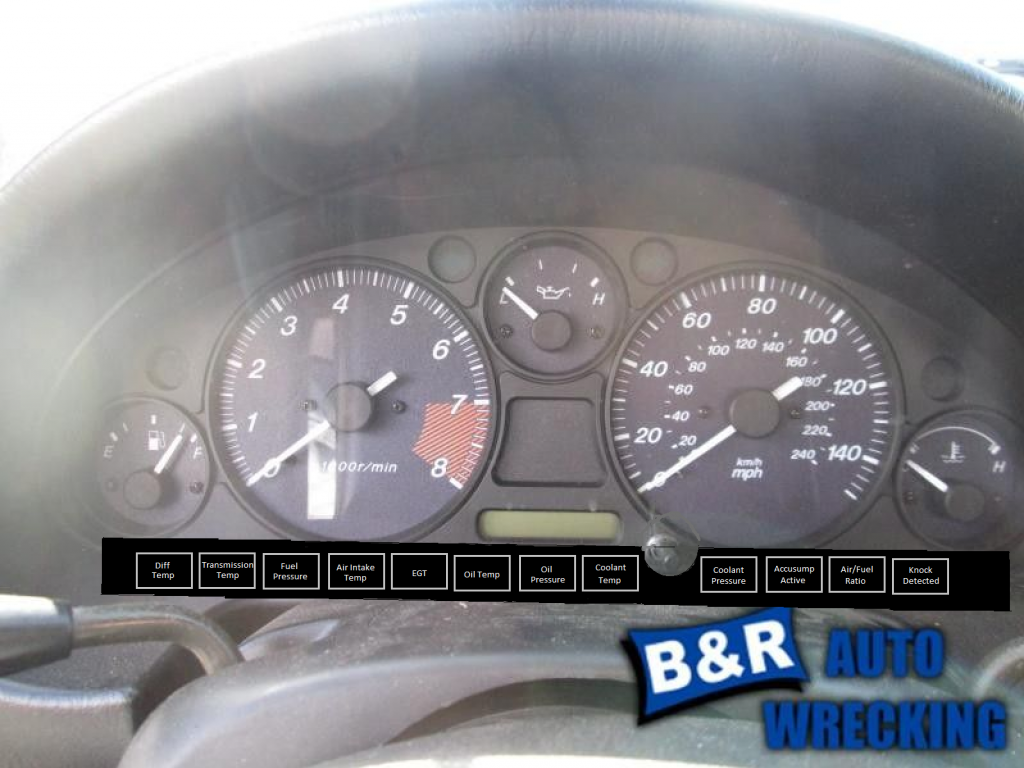
I don't have the hardware design all figured out, but what I'm thinking now is use plexiglass to build a little box there. Design a sticker that looks like the front of the box with all the warnings, have the text cut out of the sticker. Place sticker on front of plexiglass. Use LEDs behind plexiglass to light up the text green/yellow/red depending on if it's good/bad/oh-****-stop-now. Put dividers between sections so no bleed through. Still looking for LEDs that are bright enough, would prefer to use a RGB LED so I can do all colors with one LED.
I don't have the hardware design all figured out, but what I'm thinking now is use plexiglass to build a little box there. Design a sticker that looks like the front of the box with all the warnings, have the text cut out of the sticker. Place sticker on front of plexiglass. Use LEDs behind plexiglass to light up the text green/yellow/red depending on if it's good/bad/oh-****-stop-now. Put dividers between sections so no bleed through. Still looking for LEDs that are bright enough, would prefer to use a RGB LED so I can do all colors with one LED.
Reply
0
0
02-09-2015, 12:51 AM
#30
Elite Member
Thread Starter
iTrader: (16)
Join Date: Aug 2007
Location: Houston, TX
Posts: 9,292
Total Cats: 475
Bump! Decent update.
So, I'm working on the miata again, sorta quit my job. So good news is more time to work on miata!
Gotten a few things done.
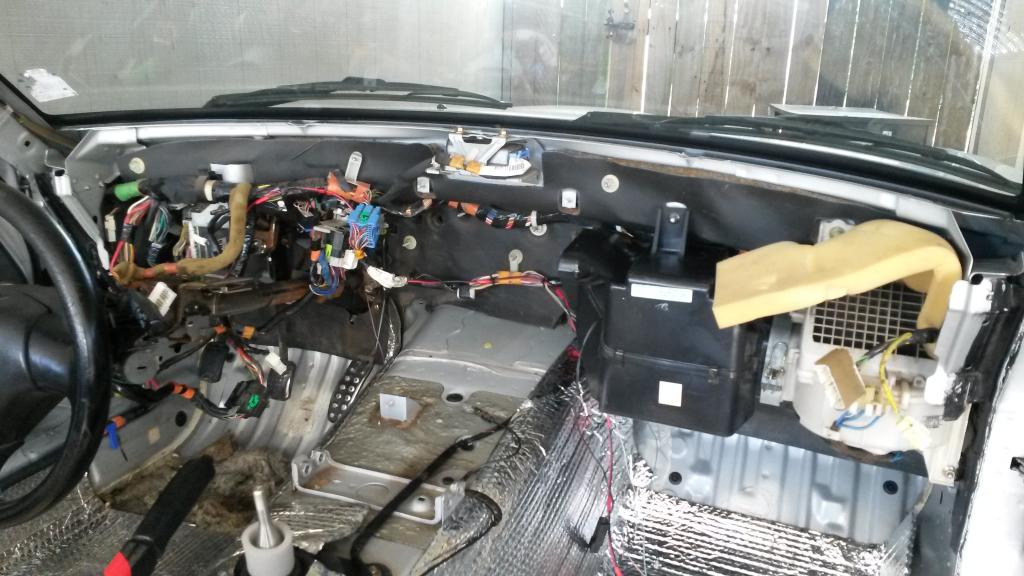
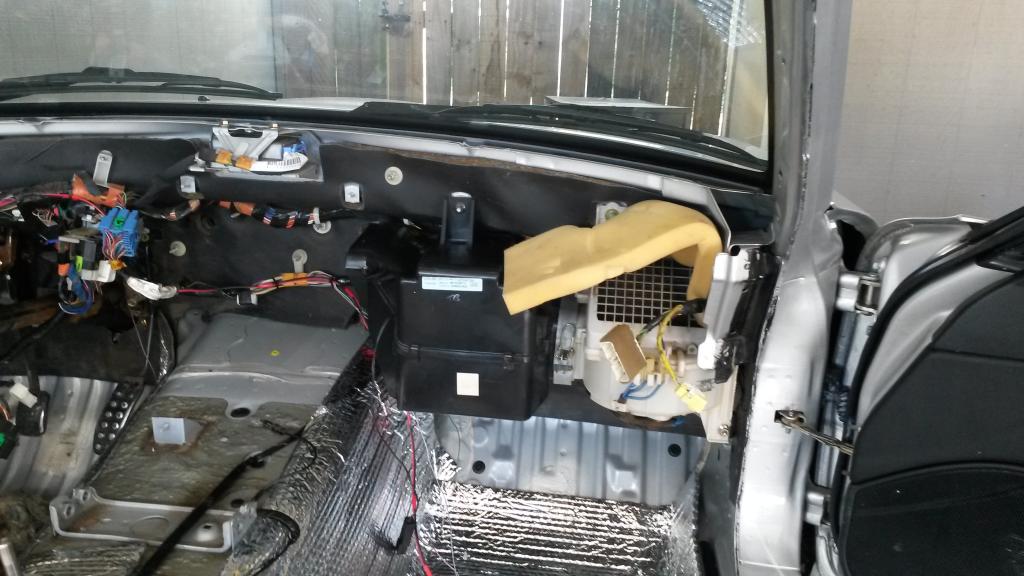
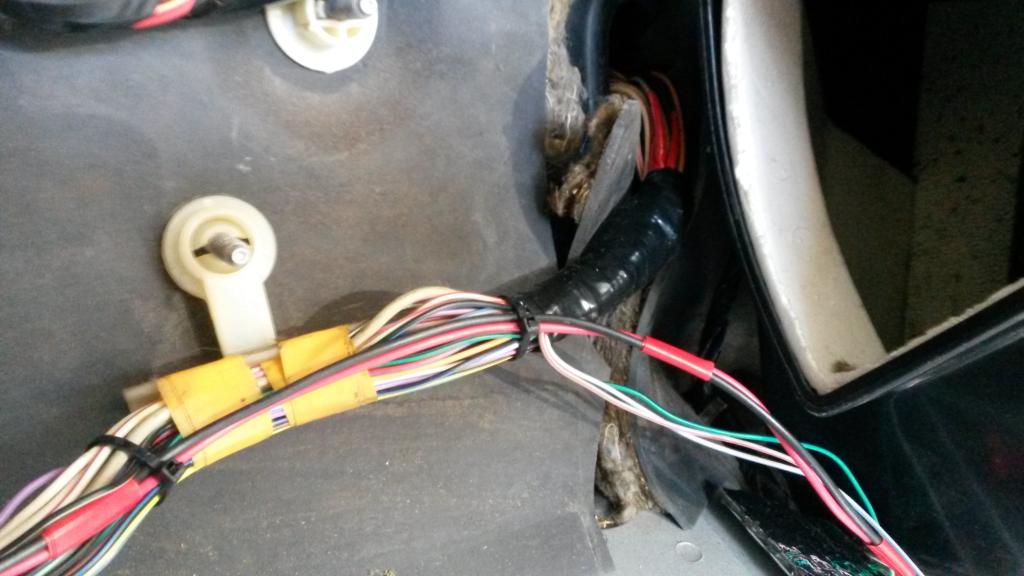
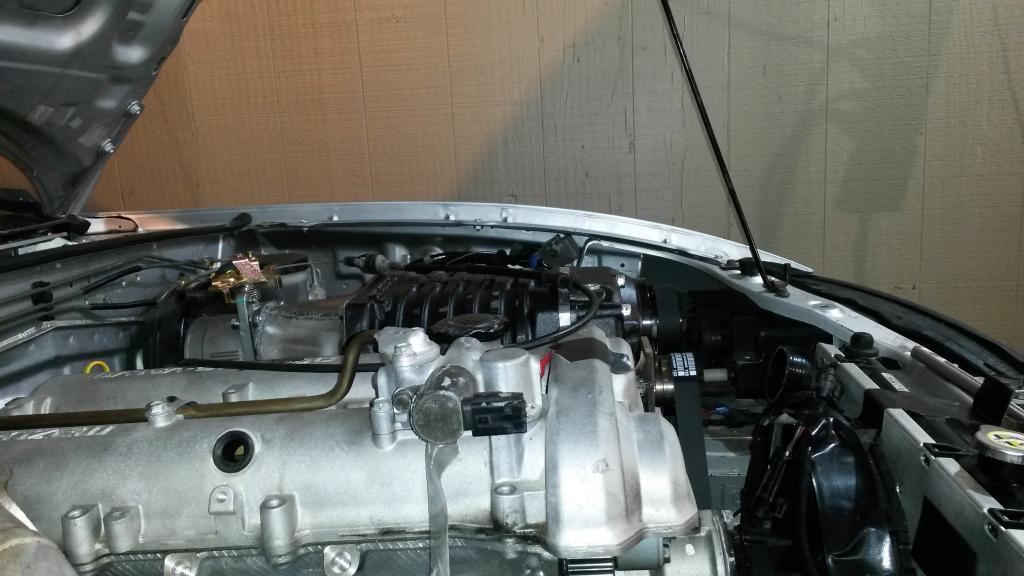
First, I decided to wash the car to clean it up a bit. I ended up getting carried away cleaning.... Tore the entire interior out, changed the carpet, cleaned the dash, cleaned the carpet/seats, replaced the engine main wiring harness that goes from stock ECU to engine.
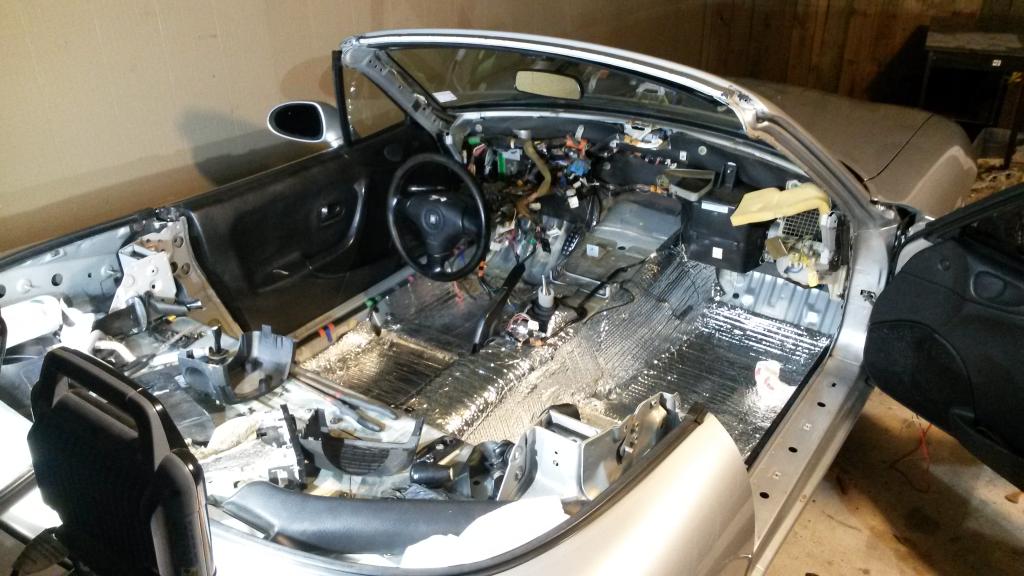
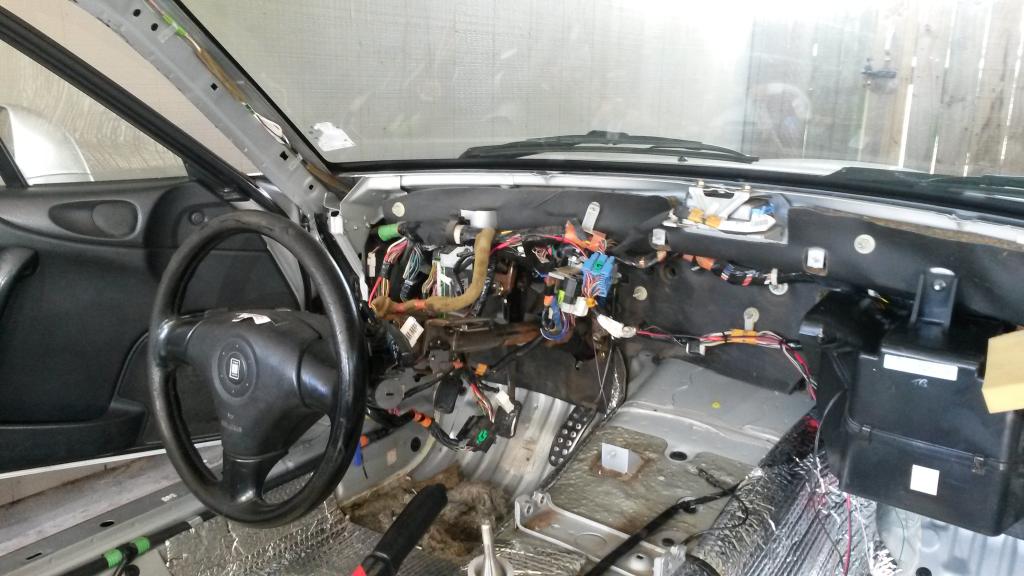
Swapped in a new harness, but tapped 3 wires from it (cam, crank, tps).
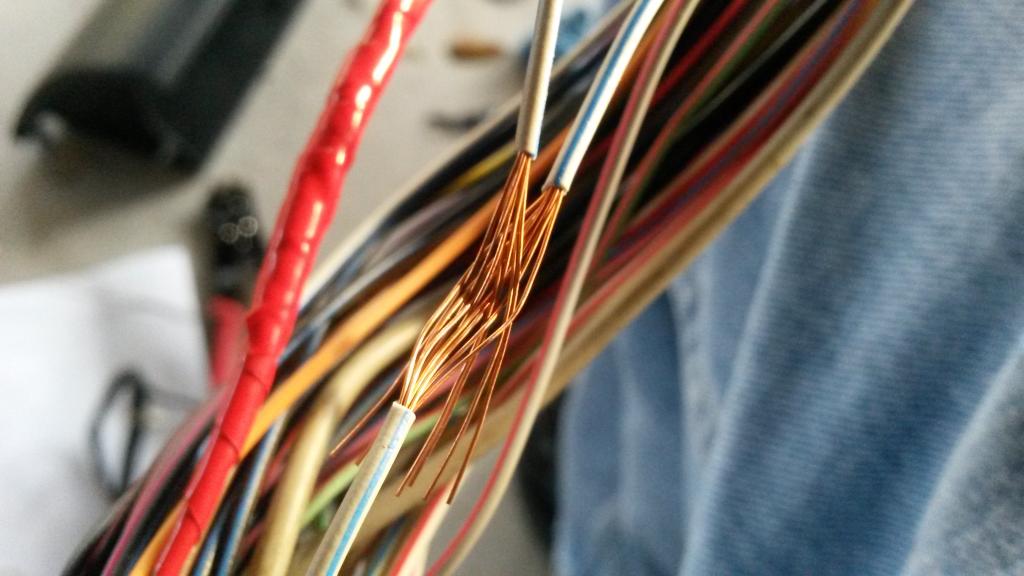
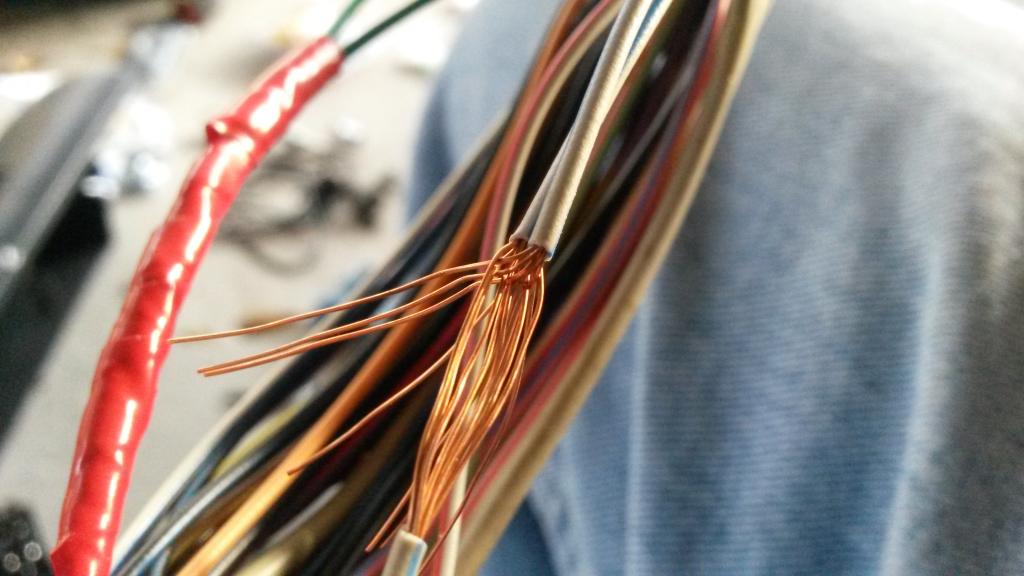
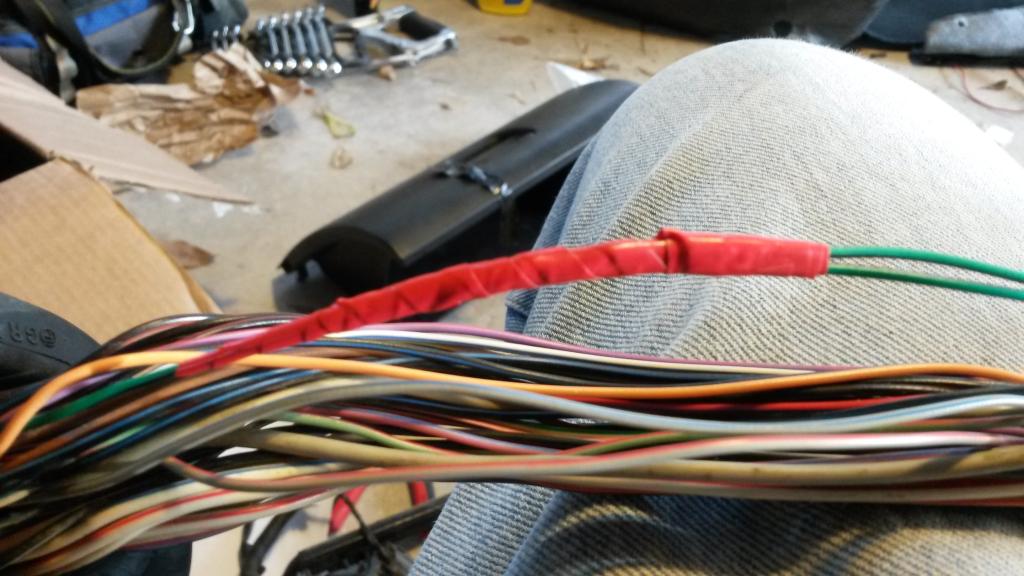
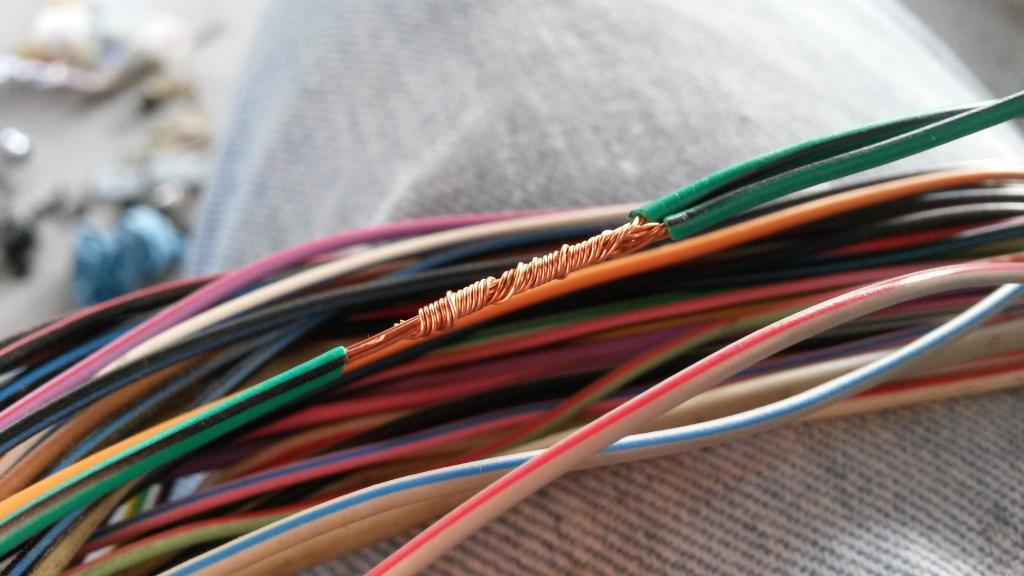
3 wires I tapped. Same color as what they are from factory harness, pulled wire from extra harness! Two extra wires are from ignition switch. for RUN and START conditions.
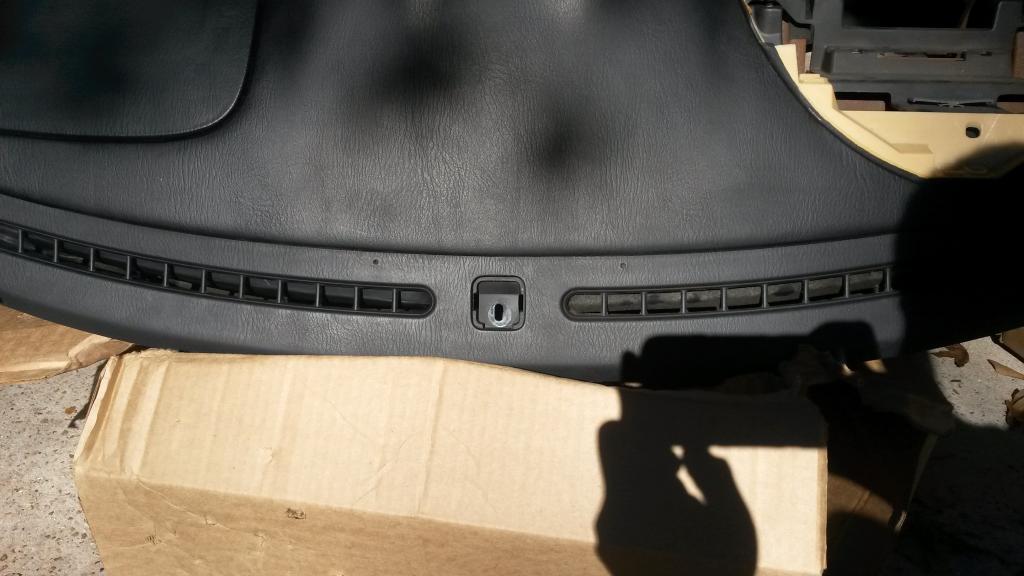
Cleaned up the dash. Before/after vents
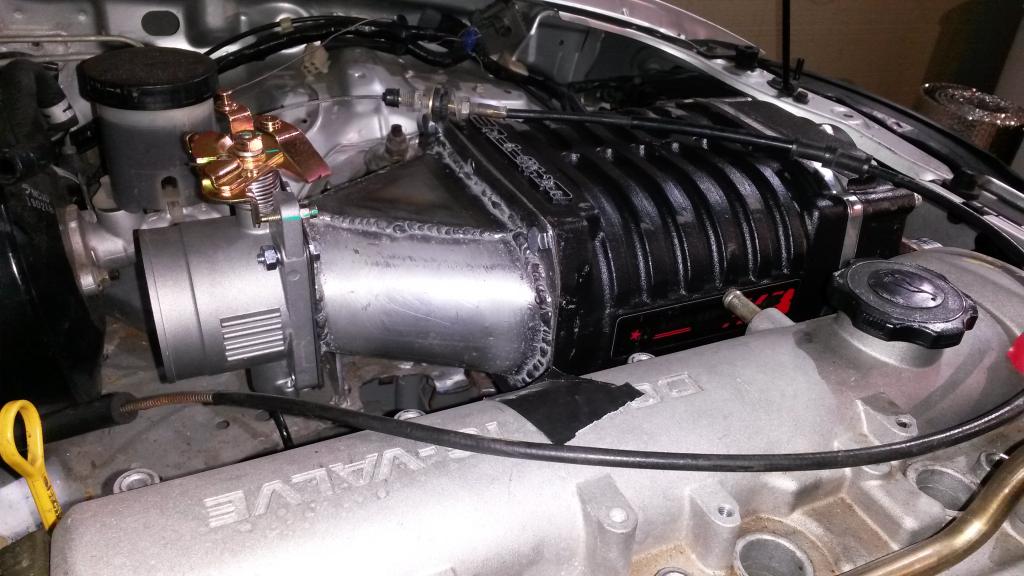
So then got to work on SC stuff yesterday.
First, took some 3" tubing, cut ends at 28* angle vs square, with Length of 4.53" then on one end marked it in the middle, other end, added 1.5 cm to it, drew lines, cut.
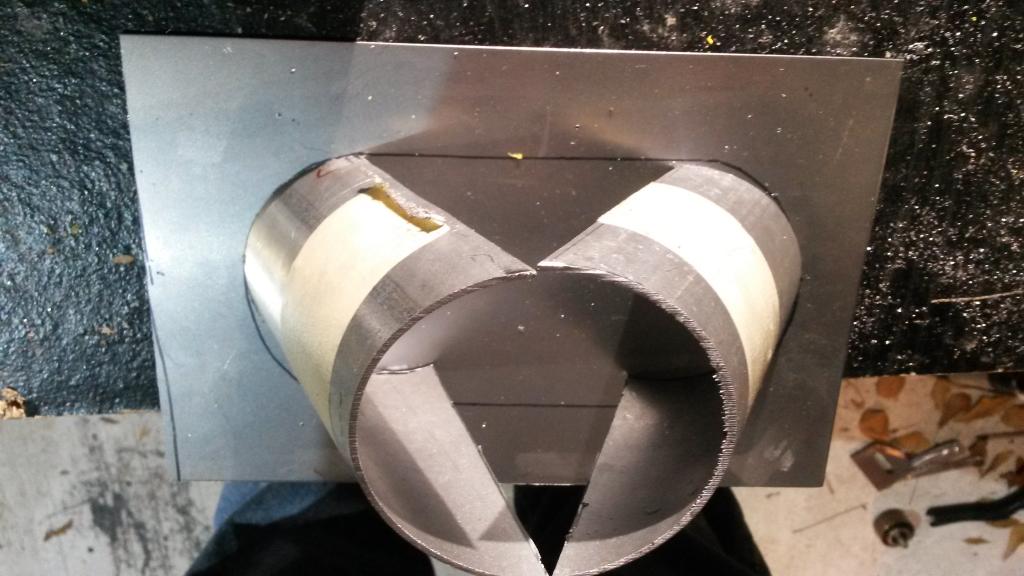
I don't have great pics, but in this one, at the bottom, you can tell tubing doesn't go to bottom line. I manually bent it to make it that shape. Top is 1.5" radius, bottom is 2" radius, so inlet is 3.5" tall using 3" tubing!
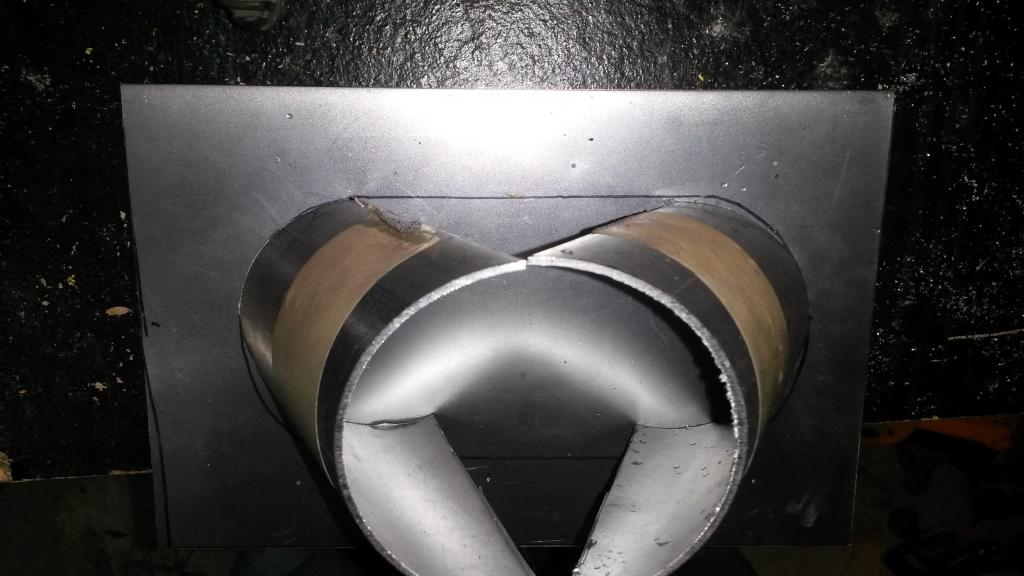
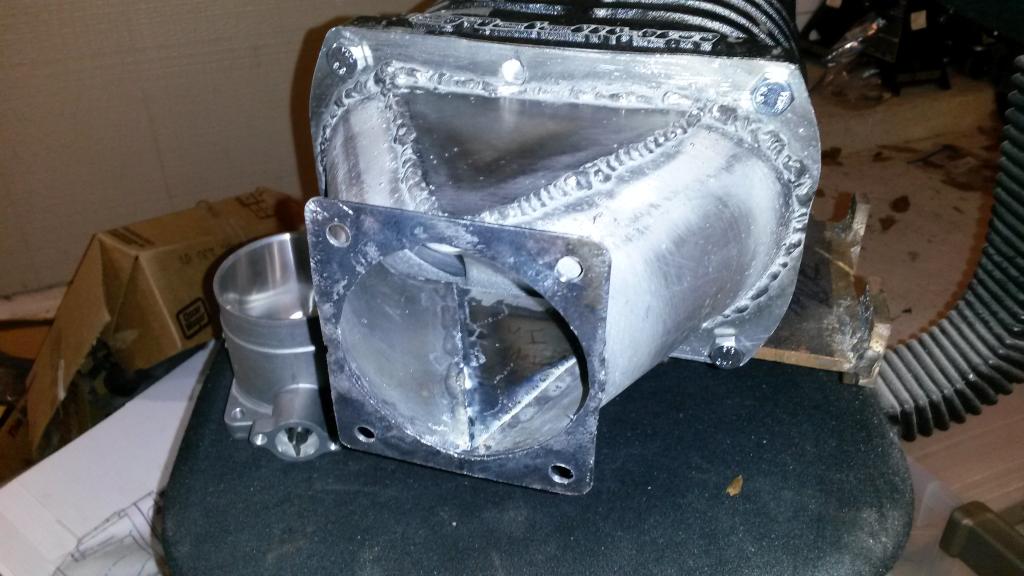
Then forgot to take pics.... But here it is finished. I flux cored it. Everything is 16 gauge mild steel, yes it warped, it was a pain. I set it on a wet towel when I welded, that actually helped a lot.
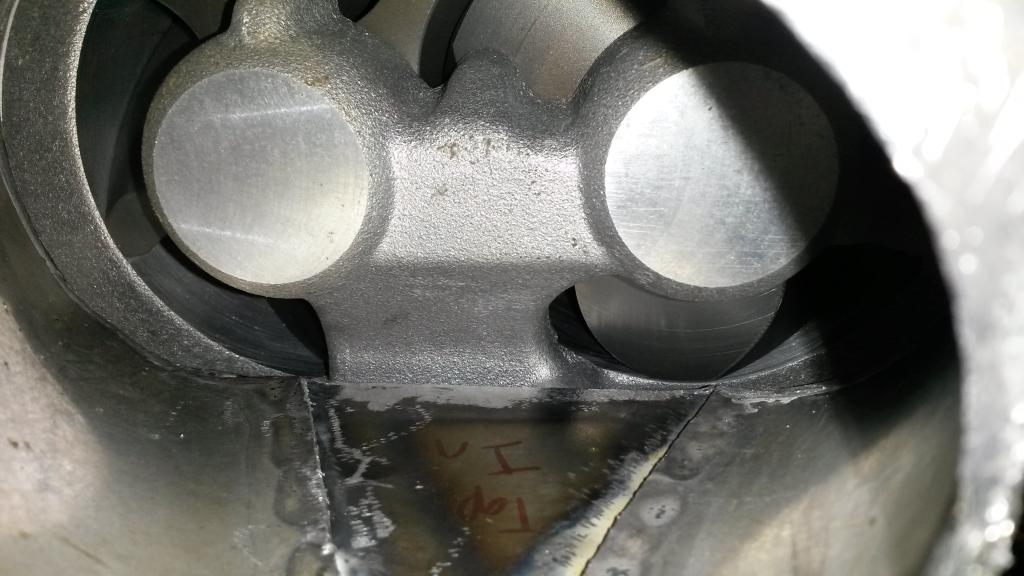
Looking into it.
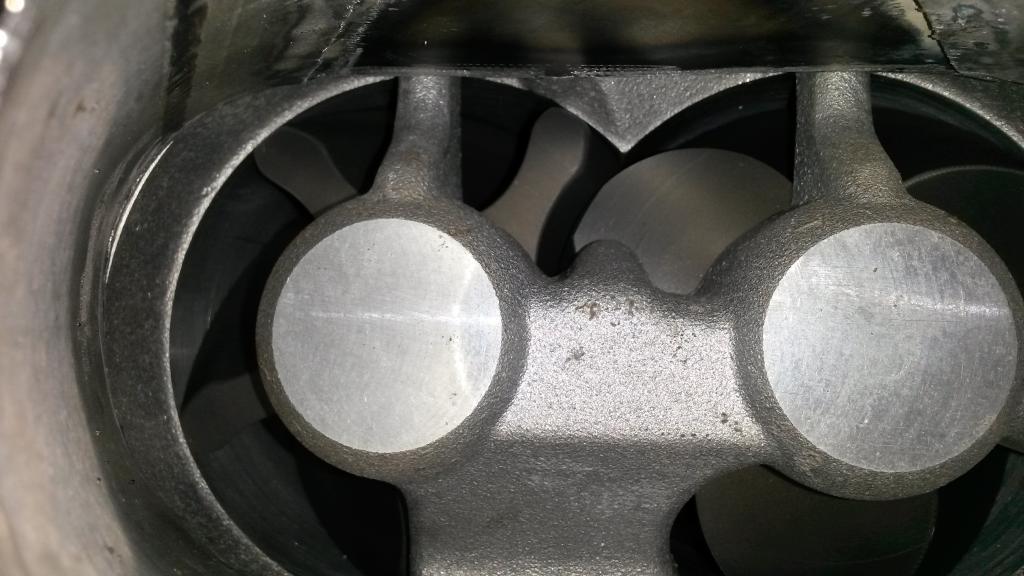

Top view. Smooth transition.
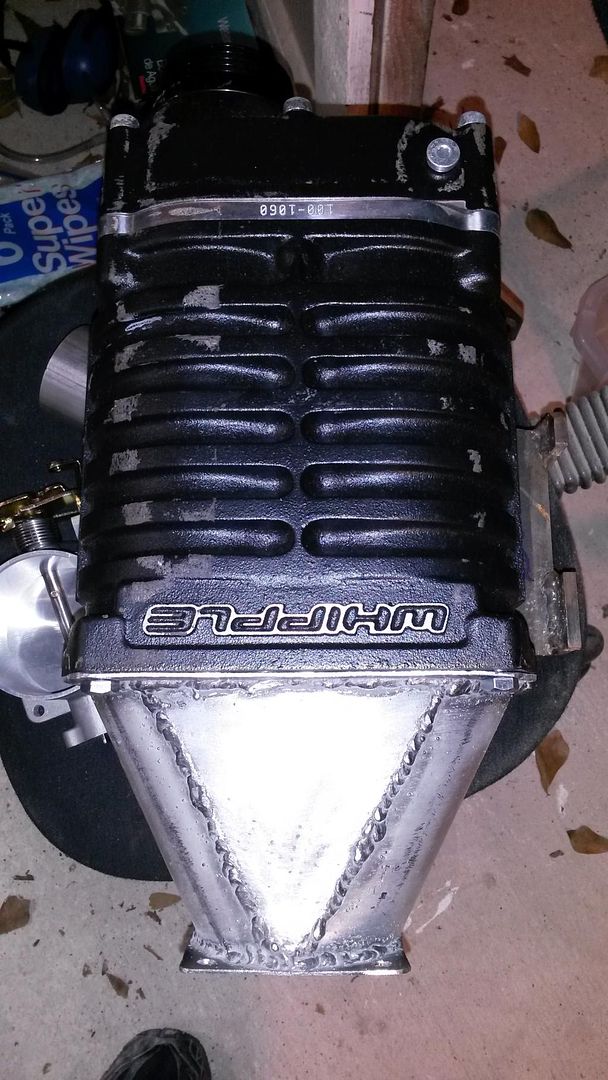
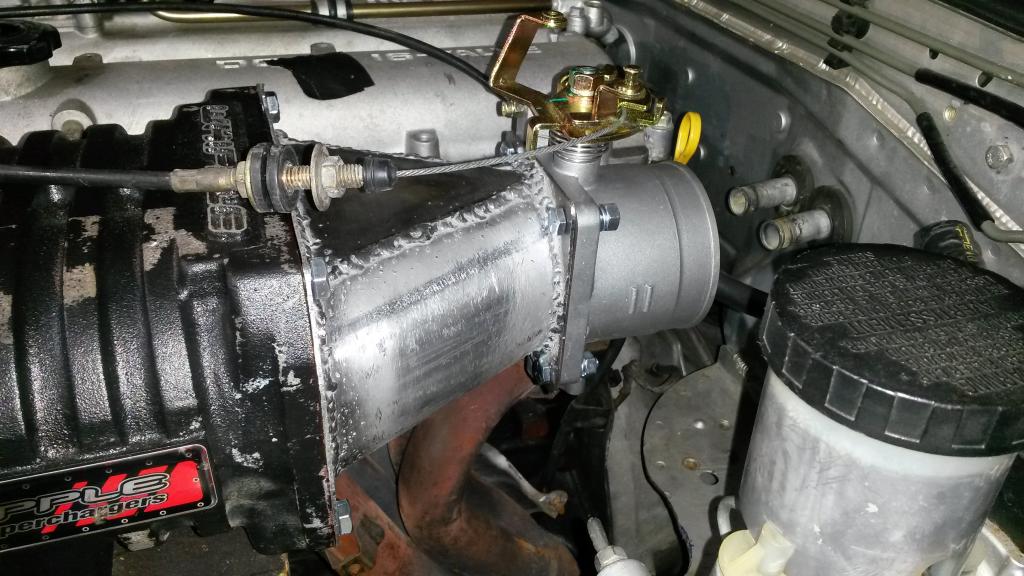
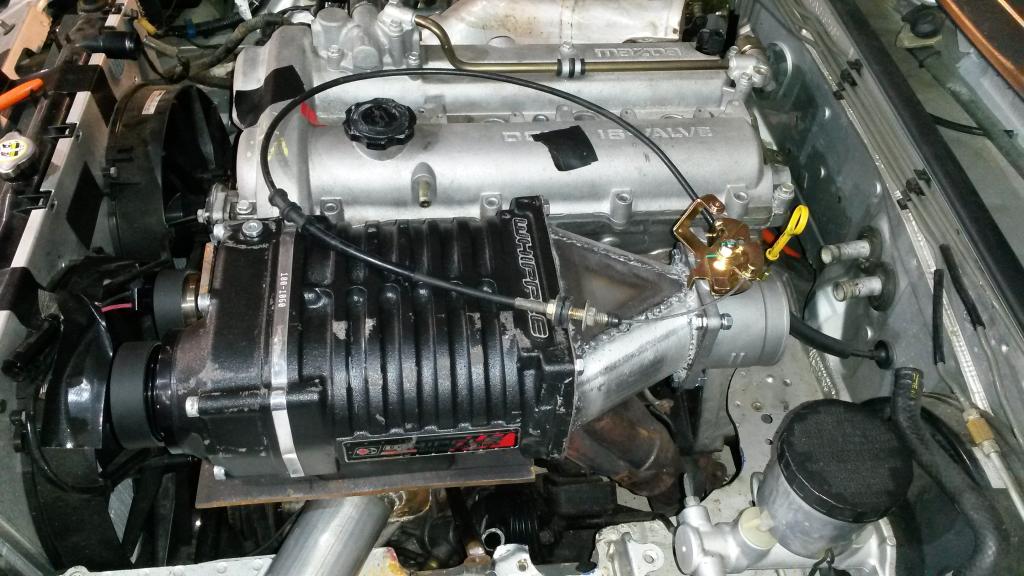
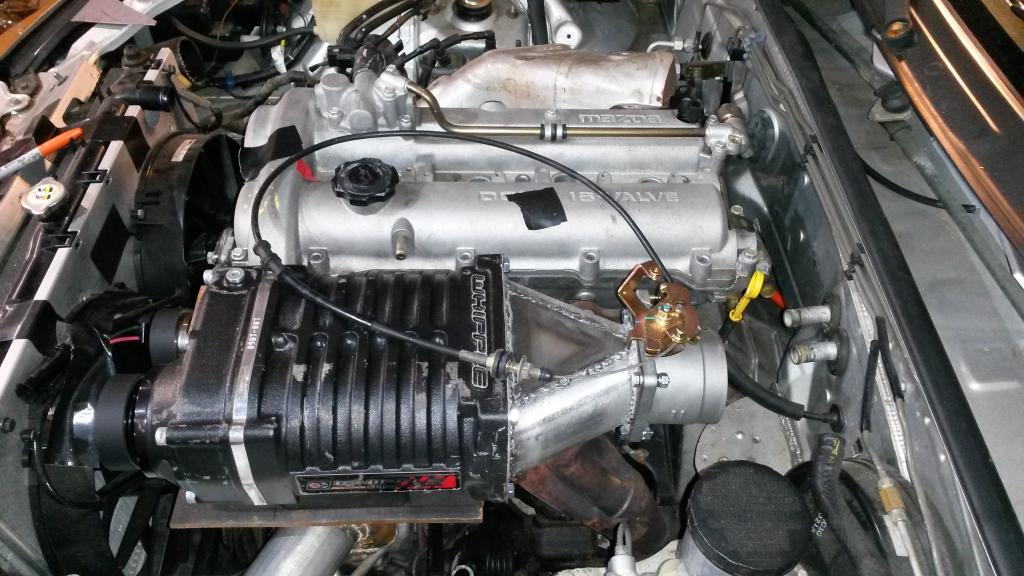
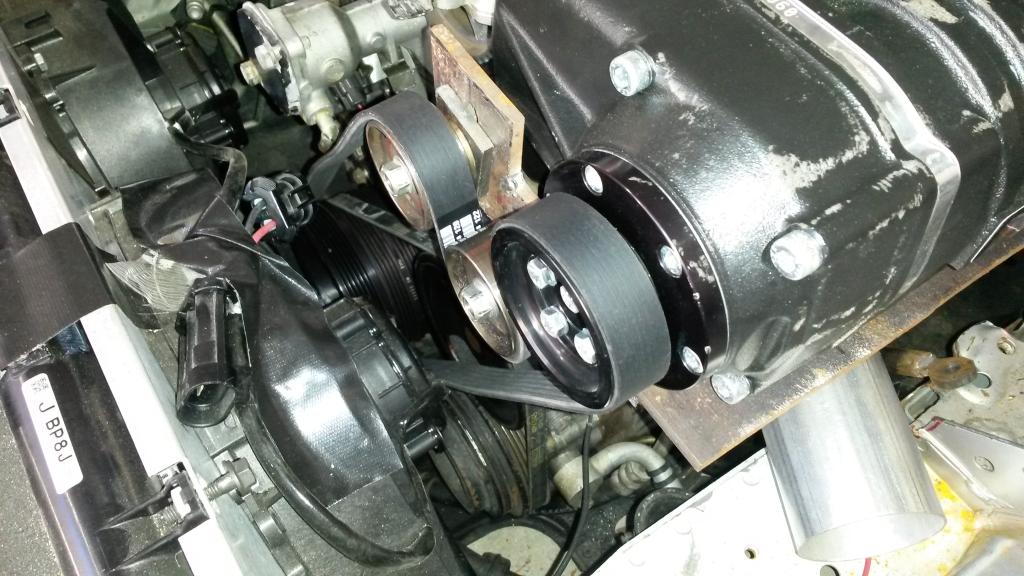
Front view. I finally welded the tensioner on.
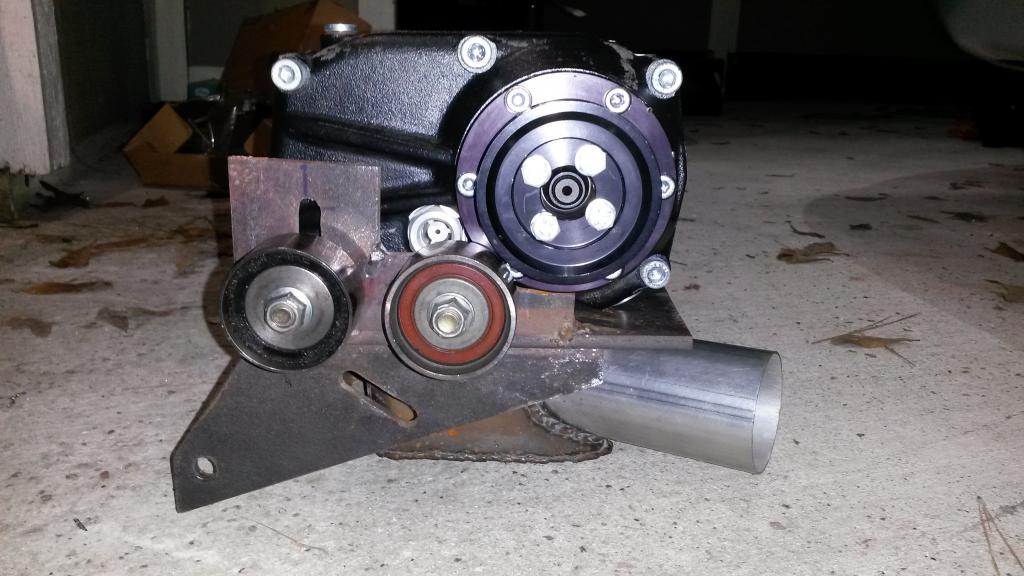
Gave it a test fit, measured and bought a 55.5" 6 rib belt.
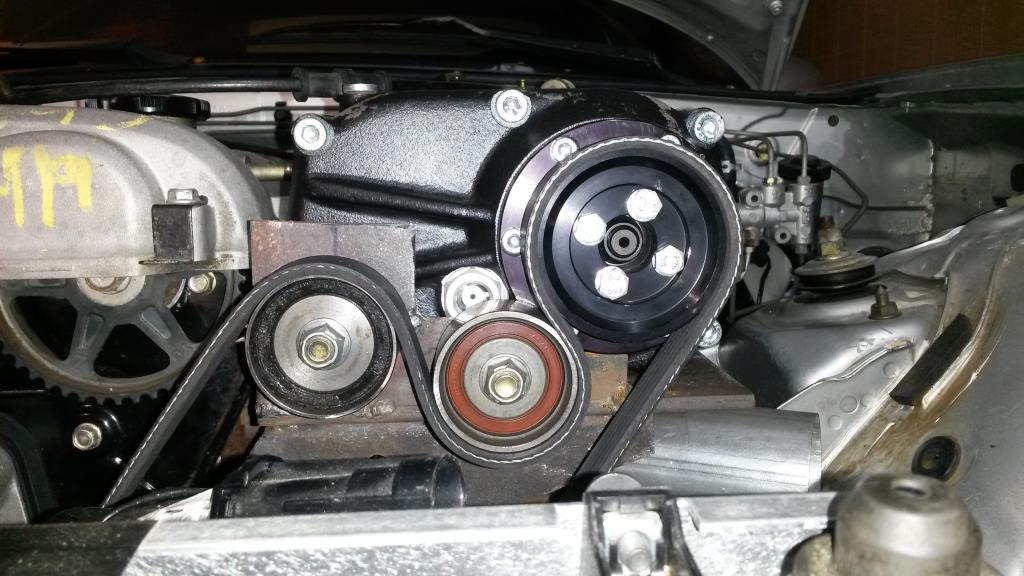
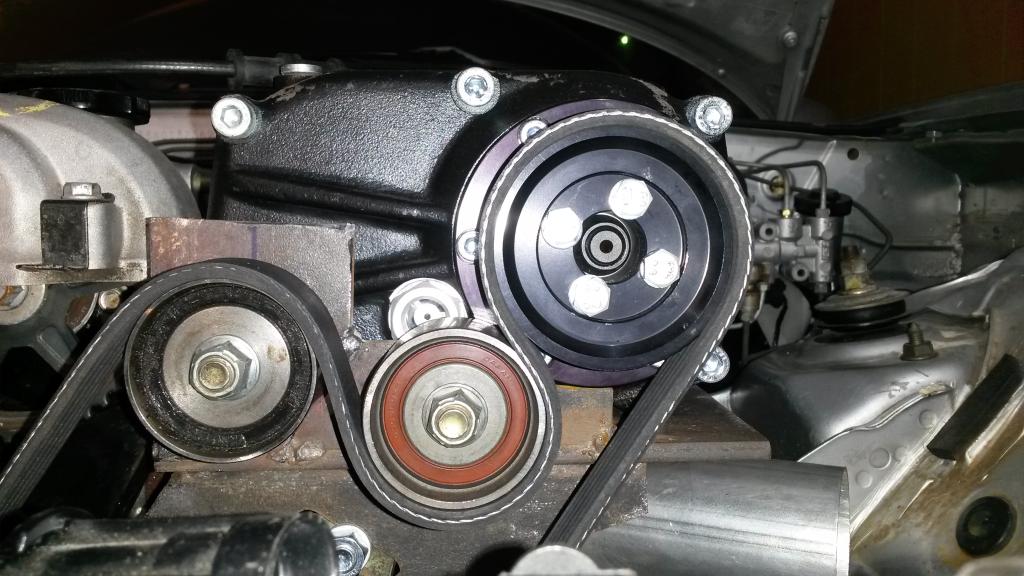
But there was a problem. I hit the starter and discovered the pulley was as alligned-up as I thought it was!
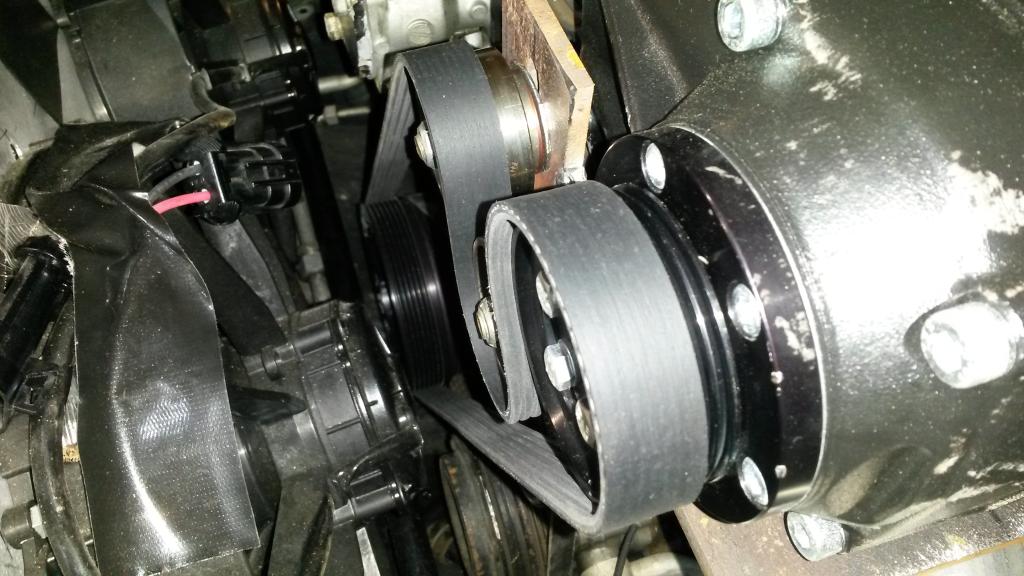
So I flipped the pulley around and...
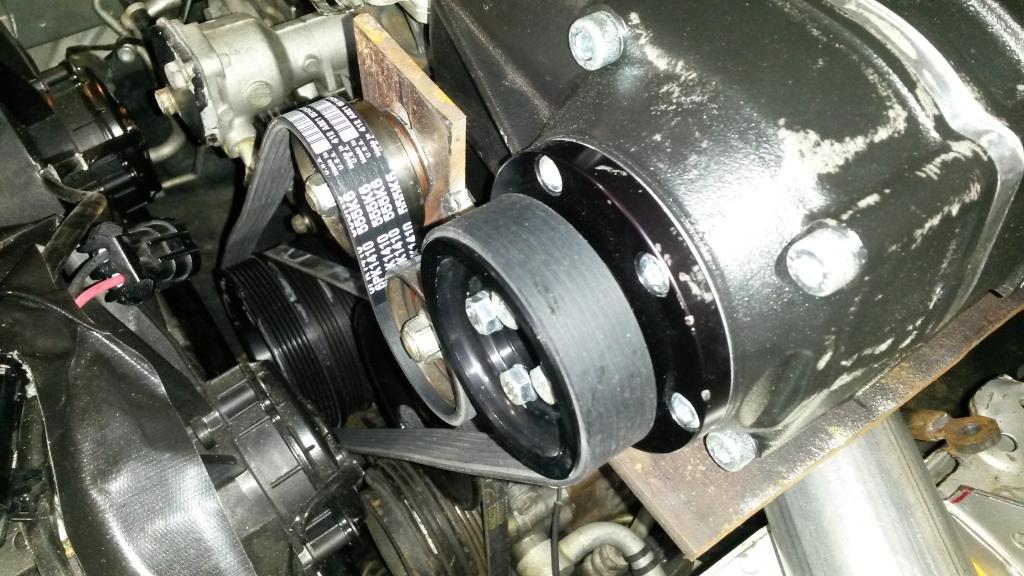
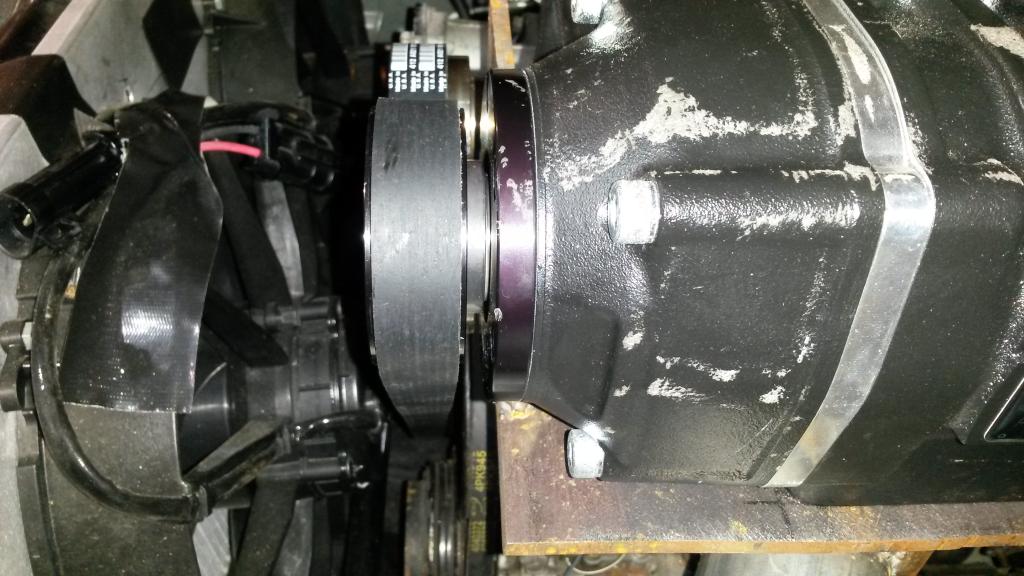
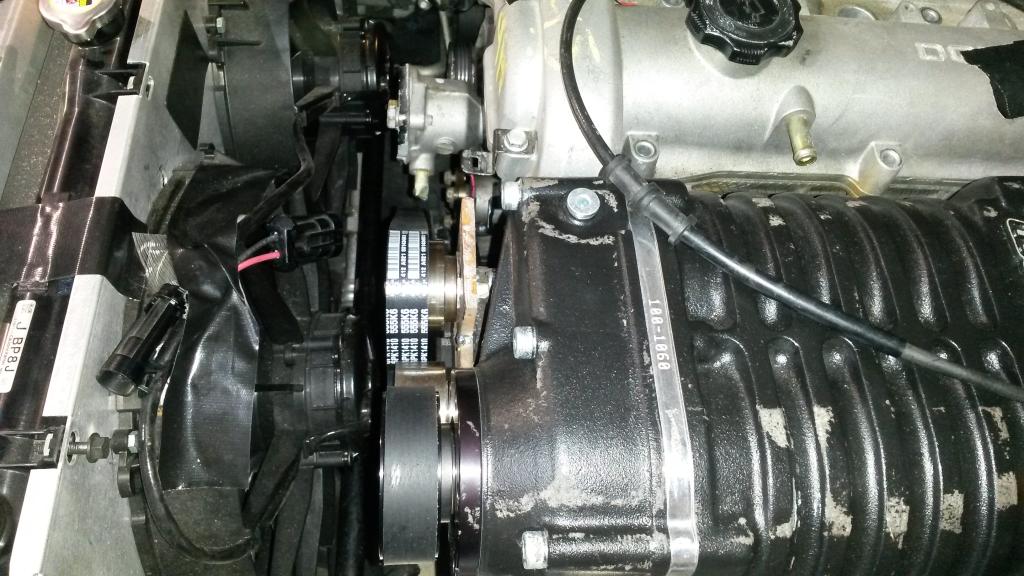
Now just need to space the idler and tensioner forward 1/4". Easy enough to do, just need to make the spacers and then buy some bolts that are 1/4" longer as these will then be too short.
Making progress!
So, I'm working on the miata again, sorta quit my job. So good news is more time to work on miata!
Gotten a few things done.
First, I decided to wash the car to clean it up a bit. I ended up getting carried away cleaning.... Tore the entire interior out, changed the carpet, cleaned the dash, cleaned the carpet/seats, replaced the engine main wiring harness that goes from stock ECU to engine.


Swapped in a new harness, but tapped 3 wires from it (cam, crank, tps).


3 wires I tapped. Same color as what they are from factory harness, pulled wire from extra harness! Two extra wires are from ignition switch. for RUN and START conditions.

Cleaned up the dash. Before/after vents

So then got to work on SC stuff yesterday.
First, took some 3" tubing, cut ends at 28* angle vs square, with Length of 4.53" then on one end marked it in the middle, other end, added 1.5 cm to it, drew lines, cut.

I don't have great pics, but in this one, at the bottom, you can tell tubing doesn't go to bottom line. I manually bent it to make it that shape. Top is 1.5" radius, bottom is 2" radius, so inlet is 3.5" tall using 3" tubing!

Then forgot to take pics.... But here it is finished. I flux cored it. Everything is 16 gauge mild steel, yes it warped, it was a pain. I set it on a wet towel when I welded, that actually helped a lot.

Looking into it.


Top view. Smooth transition.


Front view. I finally welded the tensioner on.

Gave it a test fit, measured and bought a 55.5" 6 rib belt.


But there was a problem. I hit the starter and discovered the pulley was as alligned-up as I thought it was!

So I flipped the pulley around and...


Now just need to space the idler and tensioner forward 1/4". Easy enough to do, just need to make the spacers and then buy some bolts that are 1/4" longer as these will then be too short.
Making progress!
Reply
0
0
 02-09-2015, 10:01 AM
#32
Elite Member
Thread Starter
iTrader: (16)
Join Date: Aug 2007
Location: Houston, TX
Posts: 9,292
Total Cats: 475
As of now, nowhere to put an autotensioner! I may try to add one down the road if I can figure out a good place for it. My fans motors are in the way right now.
Reply
0
0
 02-10-2015, 12:49 AM
#34
Elite Member
Thread Starter
iTrader: (16)
Join Date: Aug 2007
Location: Houston, TX
Posts: 9,292
Total Cats: 475
Today's update:
Spaced out the idler/tensioner pulleys for the SC.

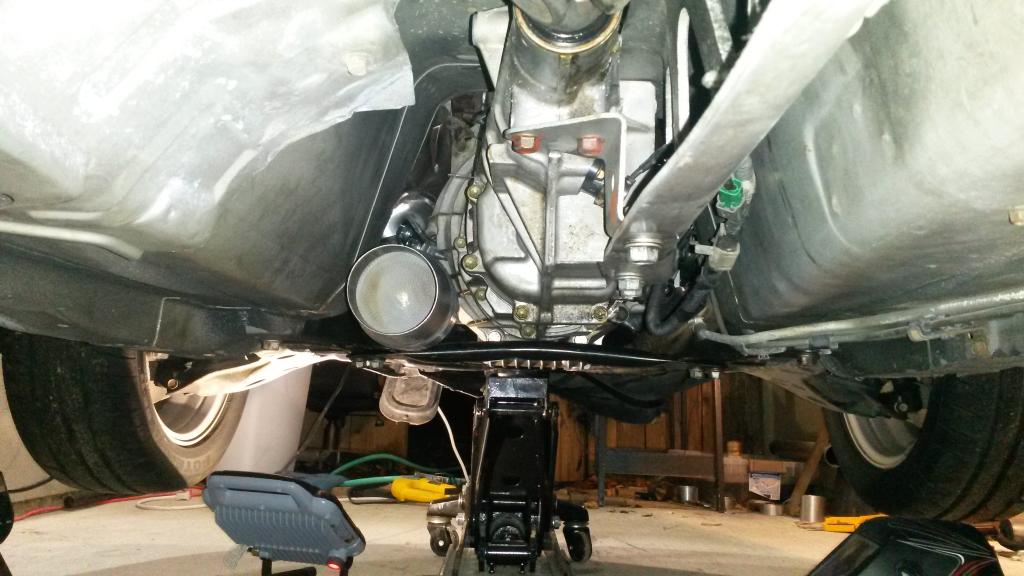
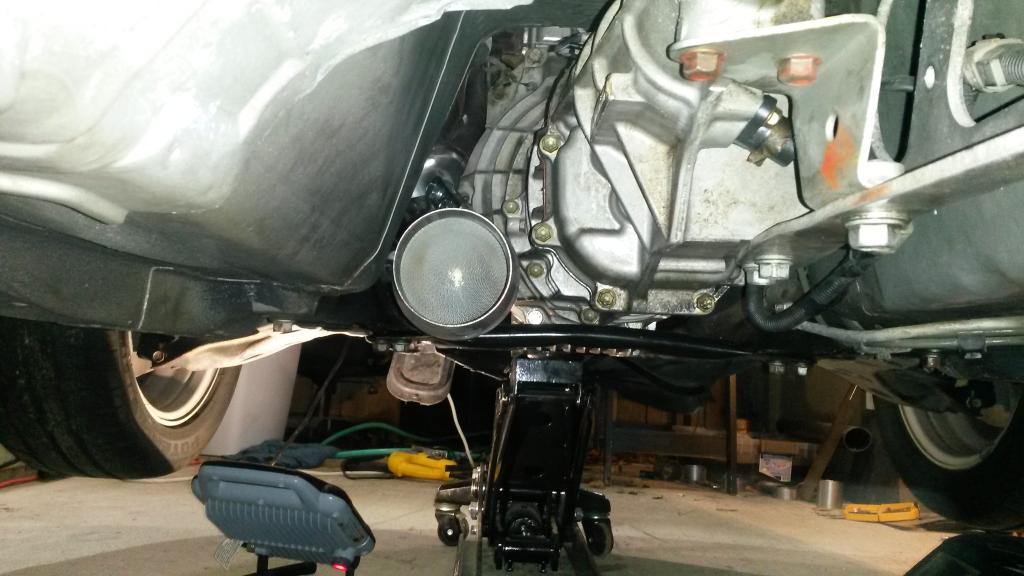
Then forgot I still need to install the bypass valve, so I started on the header/exhaust.
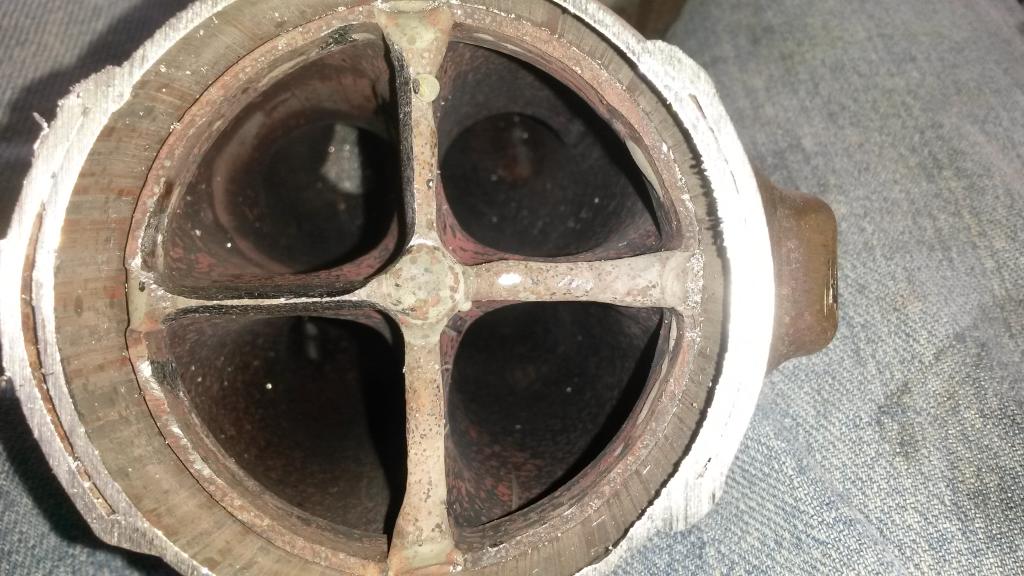
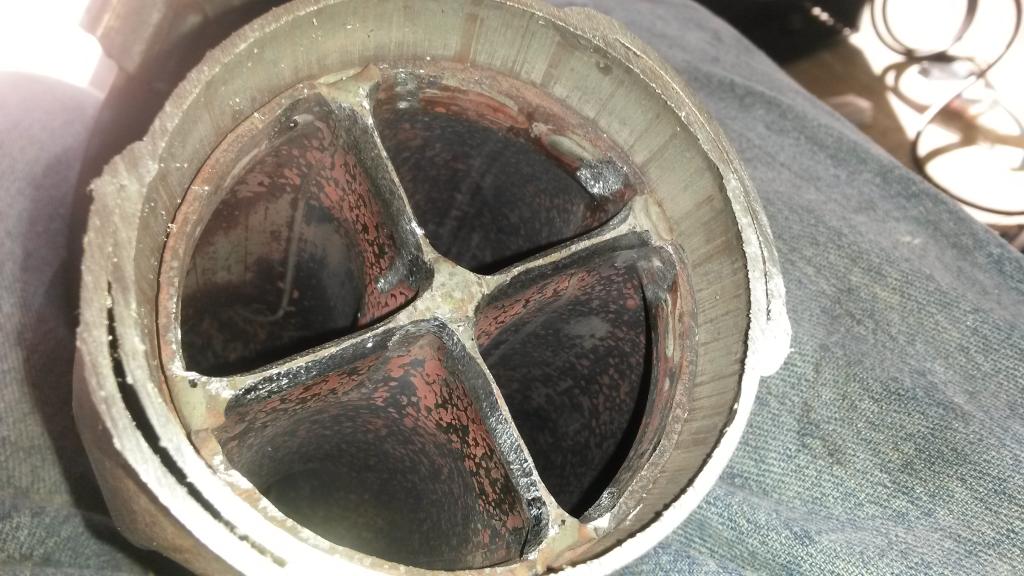
First, measure/mark factory header at merge collector, cut at 3" OD area. Look how tiny the stock choke is!
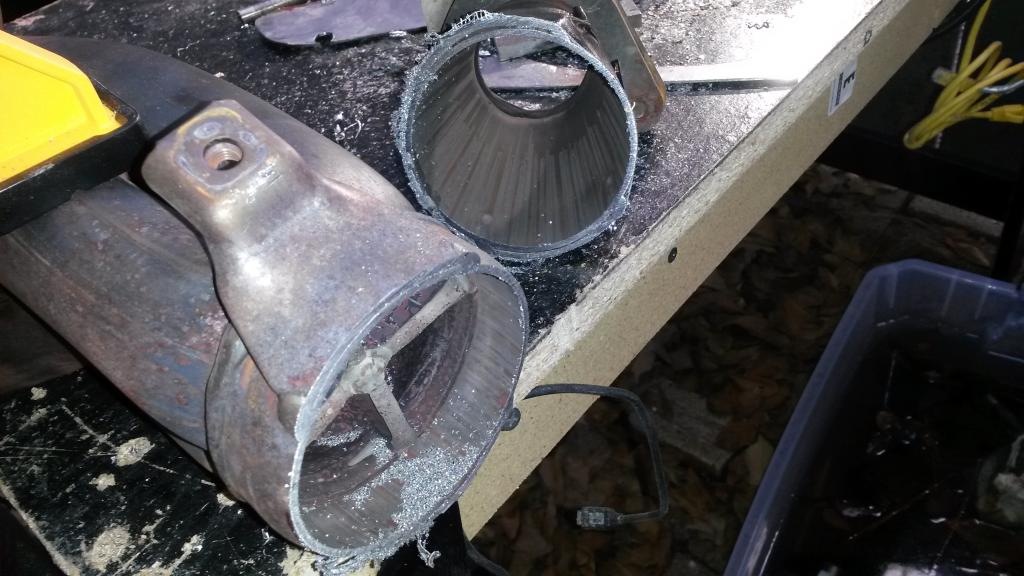
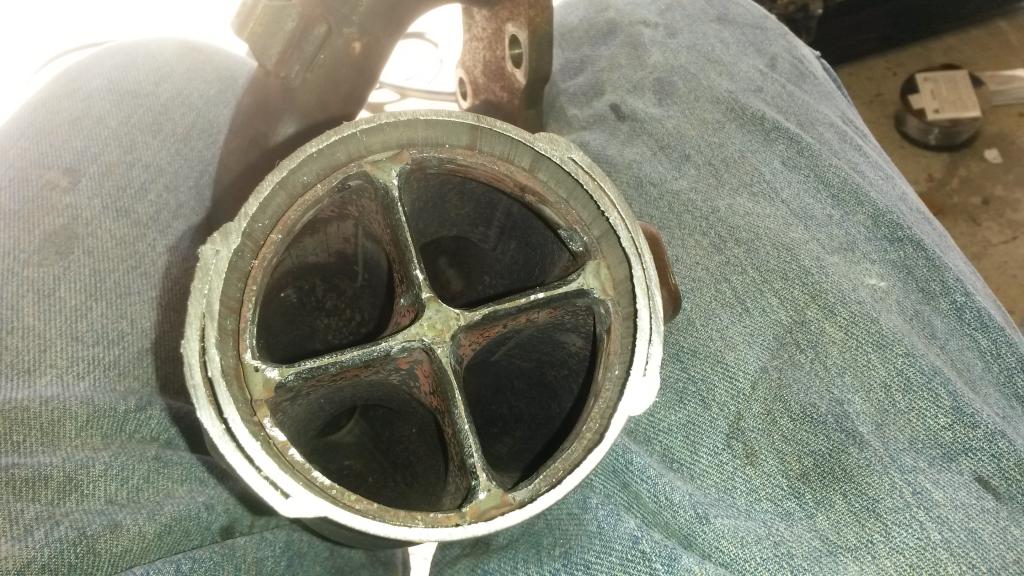
Then I noticed how restrictive the factory welds are, so I adjusted them....
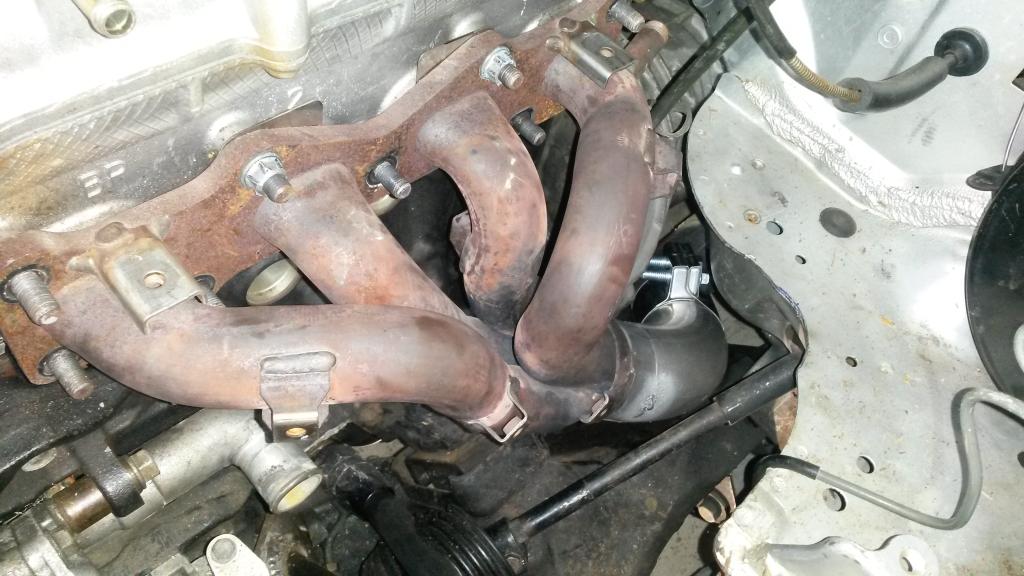
Then started fabing the exhaust below the collector
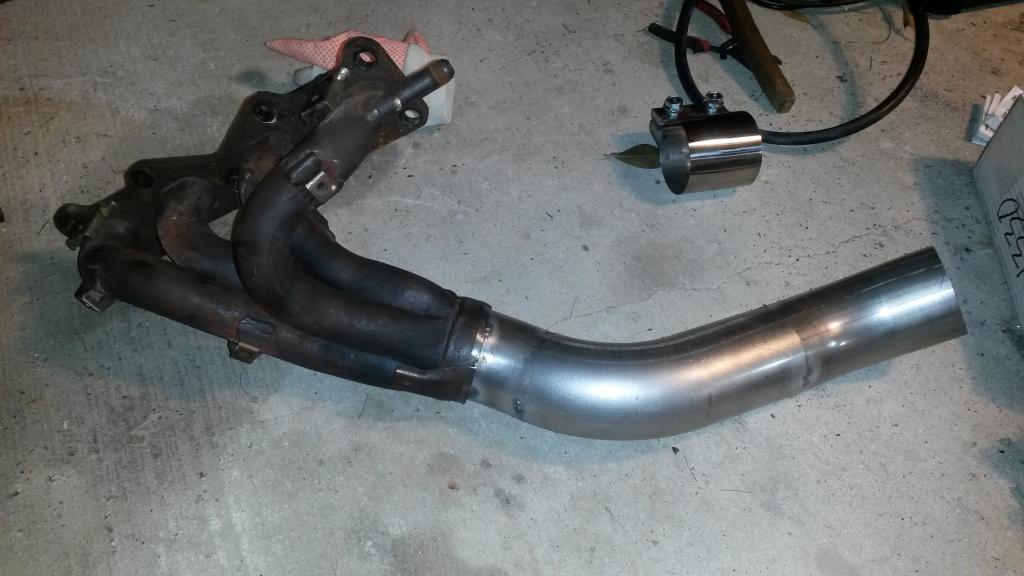
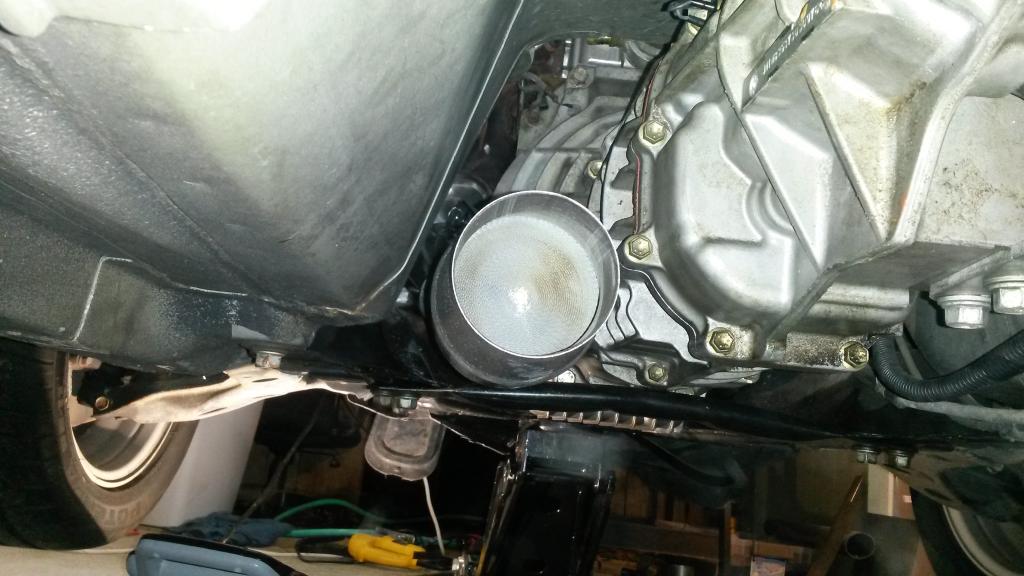
This is 3 pieces tach'd together. At this point, it wouldn't fit in the car as one piece. I decided to cut it in the middle and clamp it back. I already had a split clamp I intended to install once it got down under the car, but since it didn't want to play nice (fit in the car) I put it in the middle of the downpipe.
Can see it here. Also before I cut it, I used a dremel to cut a long "slot" mark on it so it can be lined up as before. Not sure if necessary but figured why not.
Also worth noting, I kept the factory mounting tabs for the factory header heat shields, both of them! And they both fit too...
Catalytic converter! It's the one Leafy said last for several years. It's a 300 cell spiral core metalic. I'm going to weld an O2 bung in the back of it.
Glasspacks GONE! They weighed 27 lbs for those who care. The muffler as pictured with exhaust bends/tip/hangers also weighs 27 lbs.
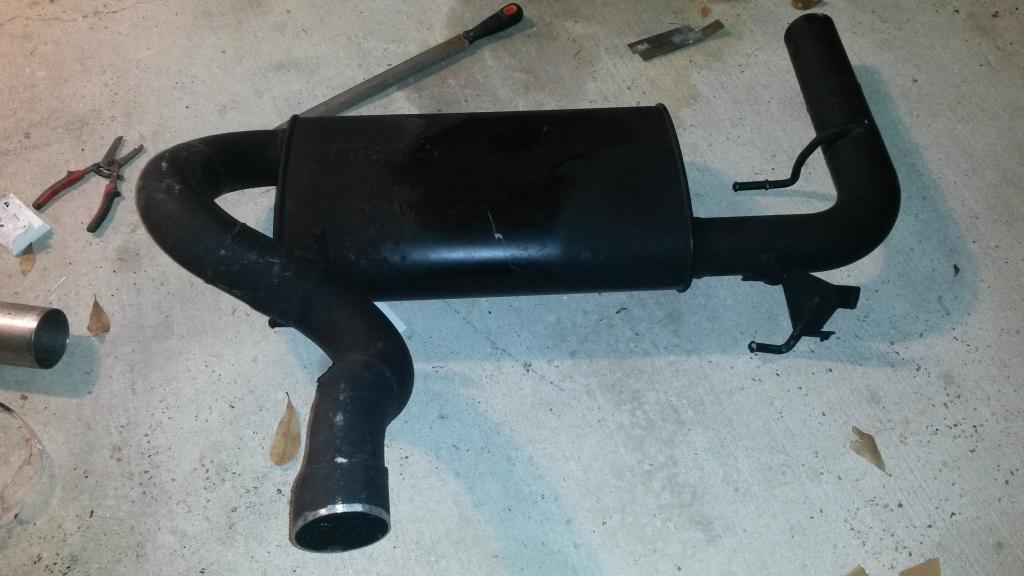
Tomorrow, I resume with finishing the exhaust pipes, figure out where all my O2 sensors need to go and install the bungs/sensors, weld everything out. Then go back and install the bypass valve for the SC so that that will be done!
Spaced out the idler/tensioner pulleys for the SC.


Then forgot I still need to install the bypass valve, so I started on the header/exhaust.
First, measure/mark factory header at merge collector, cut at 3" OD area. Look how tiny the stock choke is!

Then I noticed how restrictive the factory welds are, so I adjusted them....


Then started fabing the exhaust below the collector

This is 3 pieces tach'd together. At this point, it wouldn't fit in the car as one piece. I decided to cut it in the middle and clamp it back. I already had a split clamp I intended to install once it got down under the car, but since it didn't want to play nice (fit in the car) I put it in the middle of the downpipe.
Can see it here. Also before I cut it, I used a dremel to cut a long "slot" mark on it so it can be lined up as before. Not sure if necessary but figured why not.
Also worth noting, I kept the factory mounting tabs for the factory header heat shields, both of them! And they both fit too...

Catalytic converter! It's the one Leafy said last for several years. It's a 300 cell spiral core metalic. I'm going to weld an O2 bung in the back of it.


Glasspacks GONE! They weighed 27 lbs for those who care. The muffler as pictured with exhaust bends/tip/hangers also weighs 27 lbs.

Tomorrow, I resume with finishing the exhaust pipes, figure out where all my O2 sensors need to go and install the bungs/sensors, weld everything out. Then go back and install the bypass valve for the SC so that that will be done!
Reply
0
0
02-12-2015, 09:05 AM
#35
Elite Member
Thread Starter
iTrader: (16)
Join Date: Aug 2007
Location: Houston, TX
Posts: 9,292
Total Cats: 475


Exhaust finished!
Old system weighed 54 lbs + downpipe (est 9lbs) Turbo (25 lbs) + FM manifold/external gate (est 22 lbs) so old system Total = 110 from exhaust manifold flange to tail pipe but includes turbo.
New System weighs:
Header with O2 sensor: 9lbs
Exhaust with 1 O2 sensor: 42 lbs
Total exhaust weight: 51 lbs. Yeah!

I weighted the Supercharger/Mounting base/brace/SC inlet/Throttle body/Idler/Tensioner as an assembly: 29 lbs.
So even with the blower instead of turbo, new weight is 51+29 = 80lbs, still 30 less than before!
Last edited by patsmx5; 02-12-2015 at 09:15 AM. Reason: math is hard
Reply
0
0
02-15-2015, 11:19 PM
#36
Elite Member
Thread Starter
iTrader: (16)
Join Date: Aug 2007
Location: Houston, TX
Posts: 9,292
Total Cats: 475
Update:
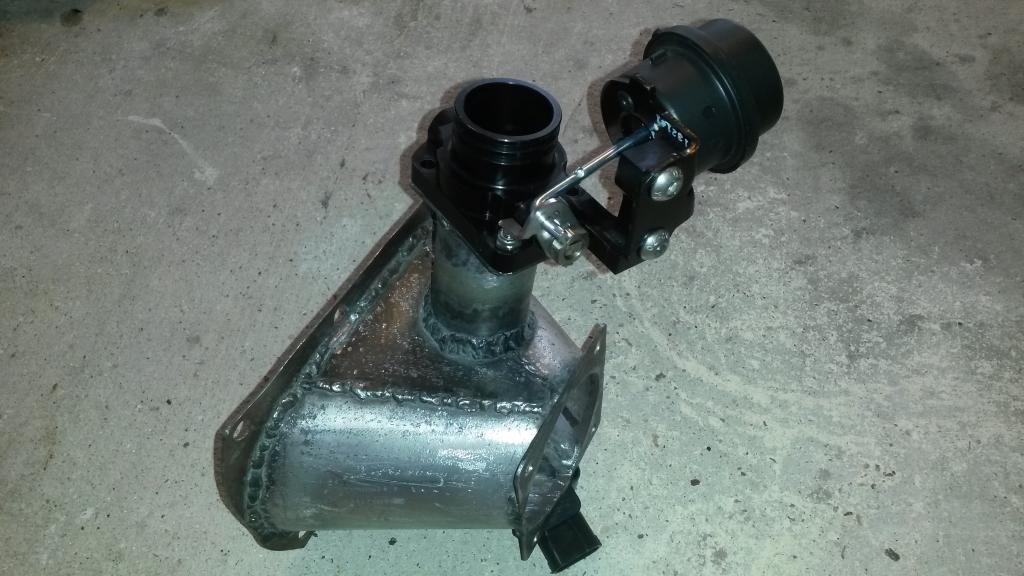
So I got to working on the SC bypass a couple days ago. Its purpose is to open during vacuum so the SC can circulate air through it to keep it from overheating the rotors. I've actually done quite a bit of research on SC's and why they fail, and according to Kenne Bell, they quote 99% of SC failures are due to heat! More on this later, back to bypass valve...
So took me over an hour to find a place for the bypass valve. About 2 hours. it needs to coneect inlet and outlet of SC, less pipe is better, but SC next to header... and can on actuator is plastic so it needs to be away from header. Finally figured out a spot, basically 3/4" away from flange, on the edge, angled 20* from vertical towards drivers side, then twisted at an angle... It fits, hits nothing, can is away from heat. Now waiting on 1.5 to 1.75" 90* silicone transition before I cut and weld the final piece on to complete the bypass.
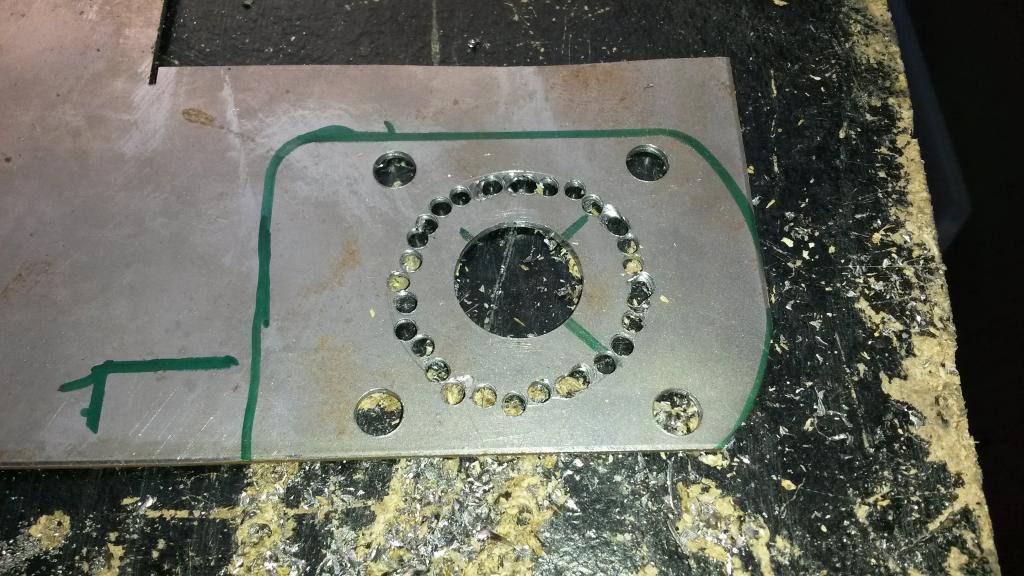
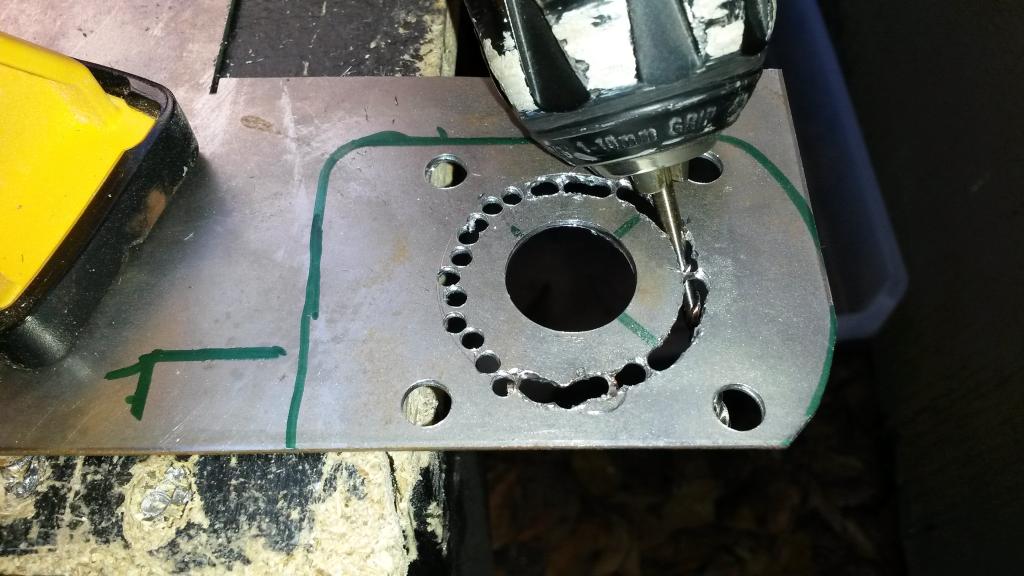
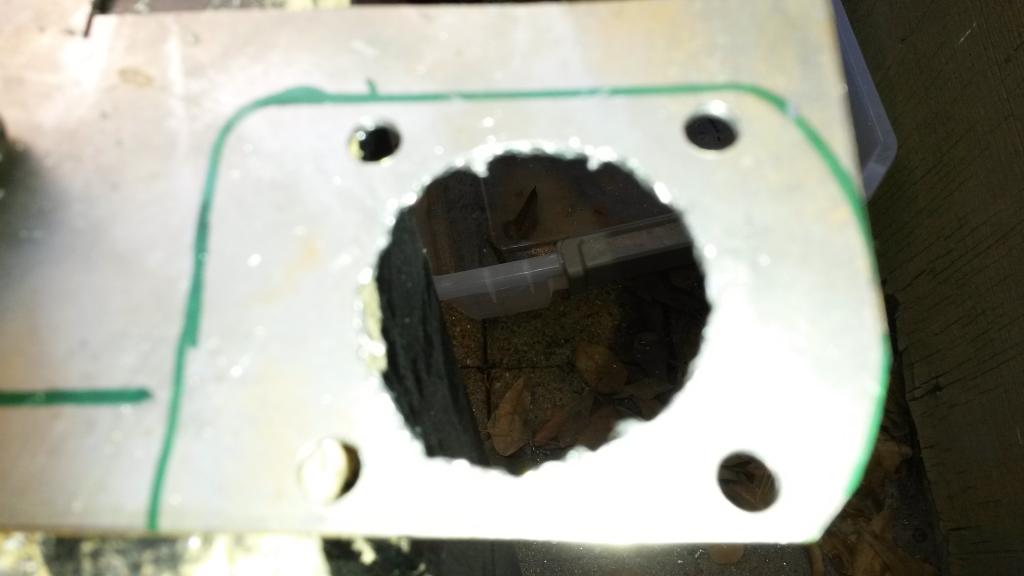
Didin't have a 1.75" drill bit, but did have a 1/8" bit
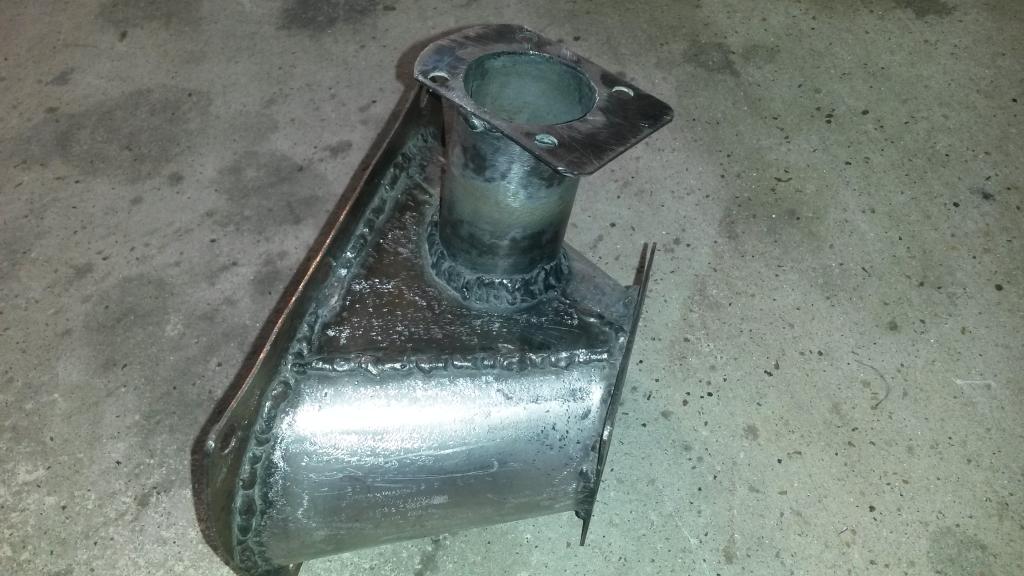
Welded onto pipe. Note: 10' stick of 1.75" tubing fits in my '05 outback.
Bypass valve installed, sorta.
So didn't get anything done yesterday on the miata, but did today.
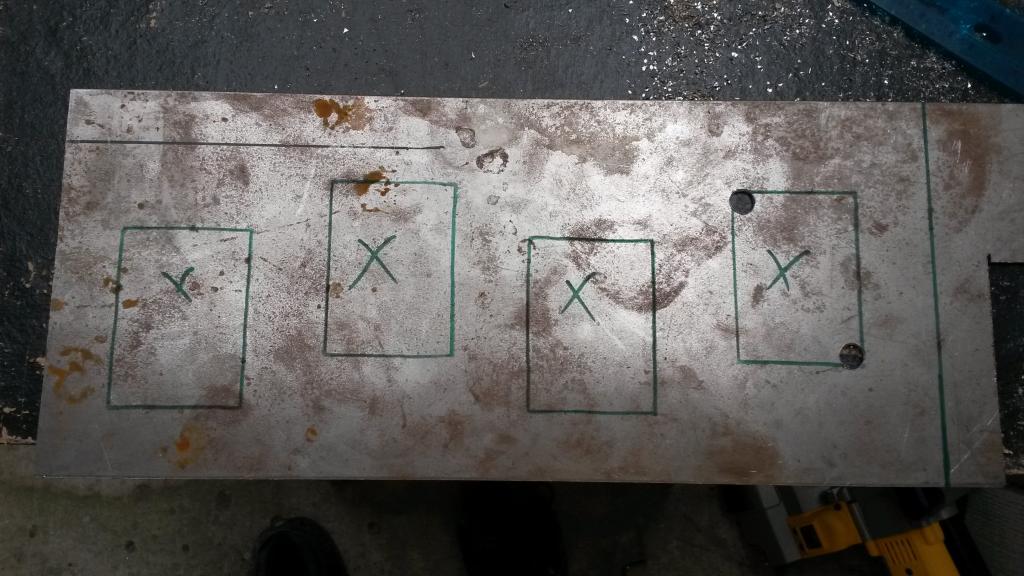
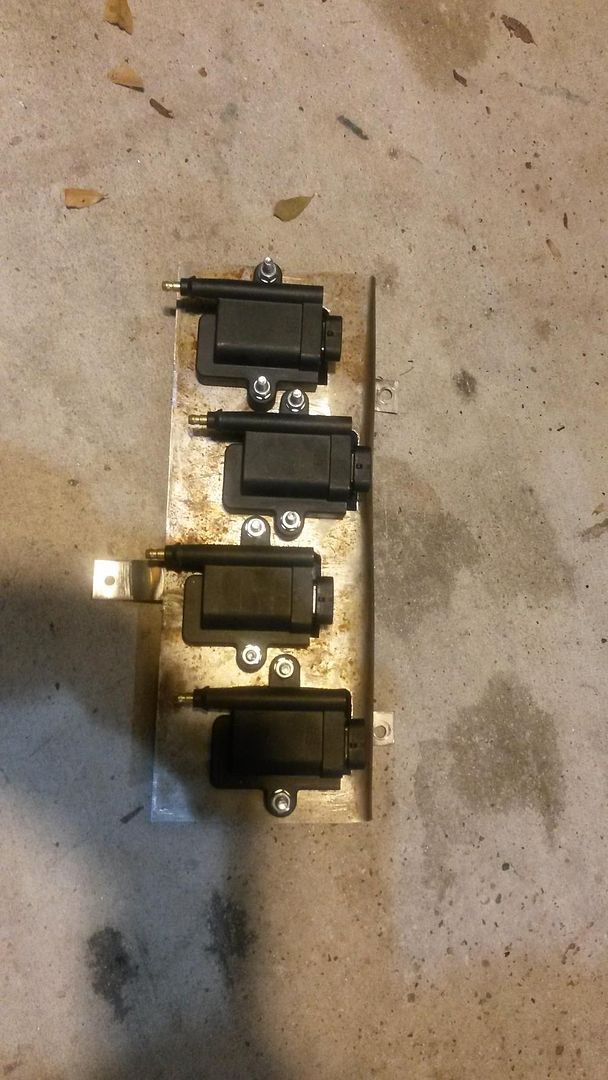
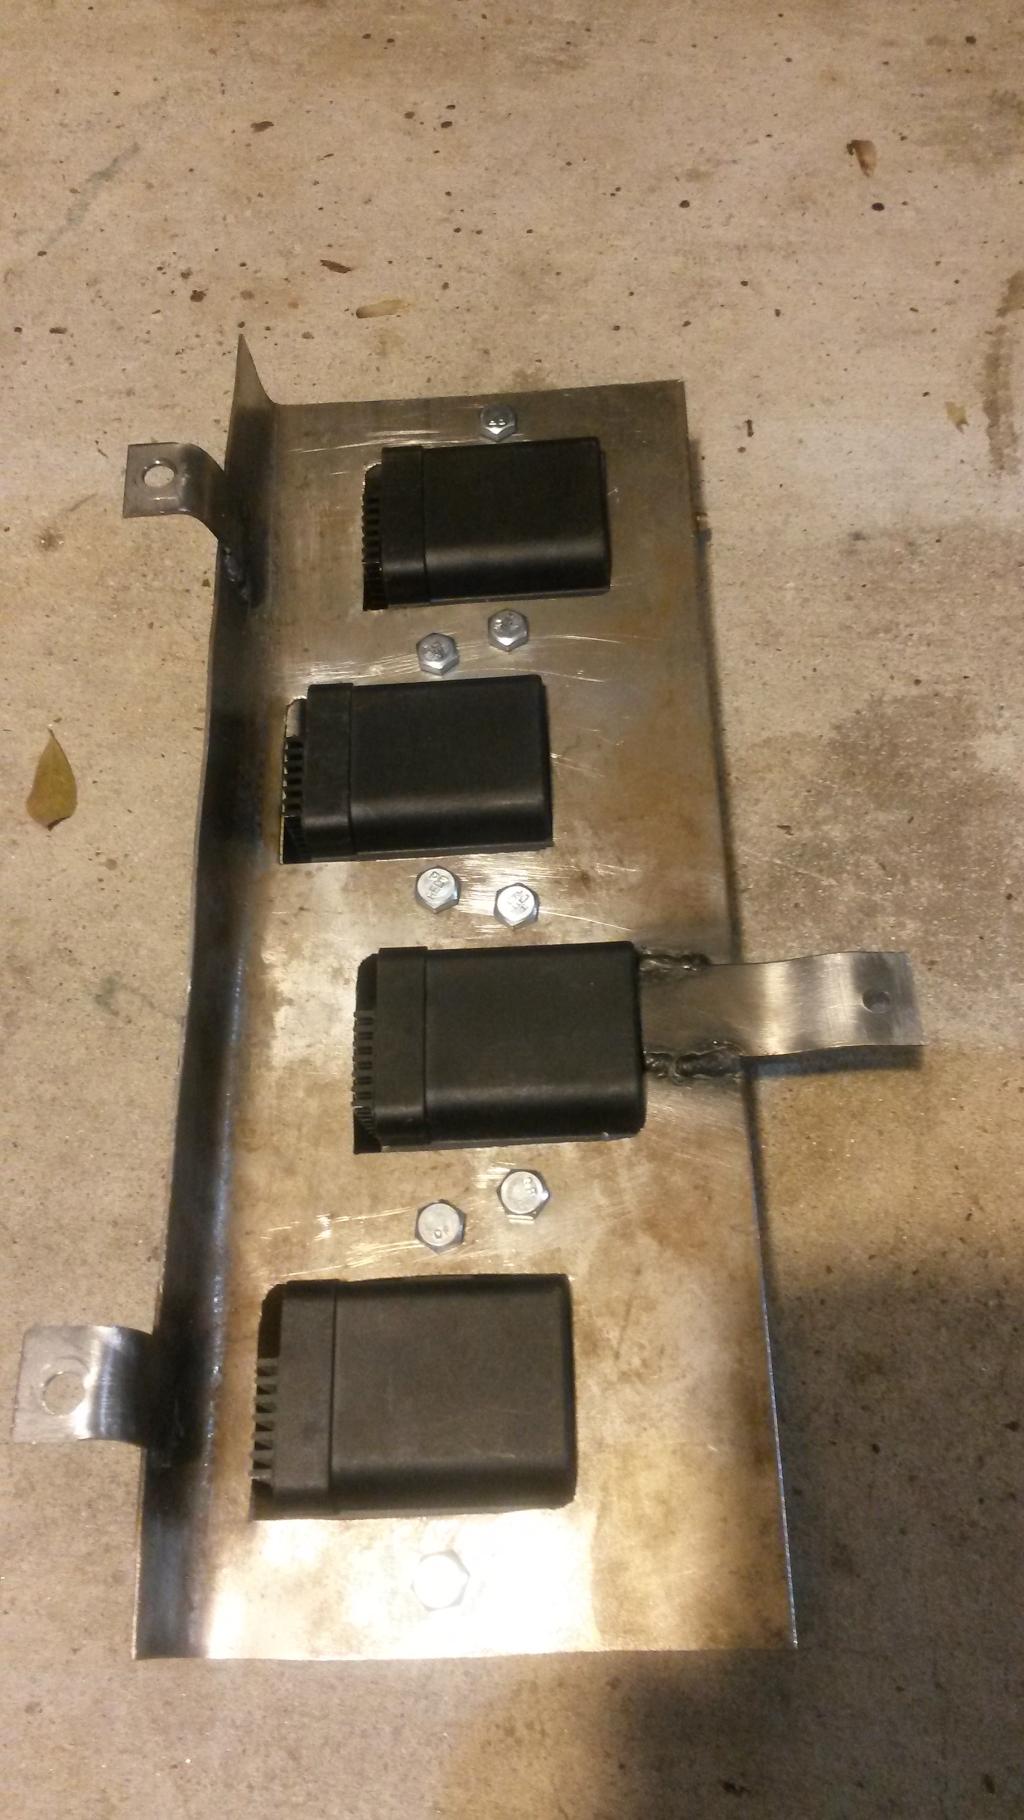
Started on ignition coil mount. These are the IGN1A Race coils, they are too bit to package in stock location. I finally found a way to package them ontop of the valve cover that doesn't interfere with the hood, oil cap, VVT stuff, etc.
Tempate from paper

Onto steel
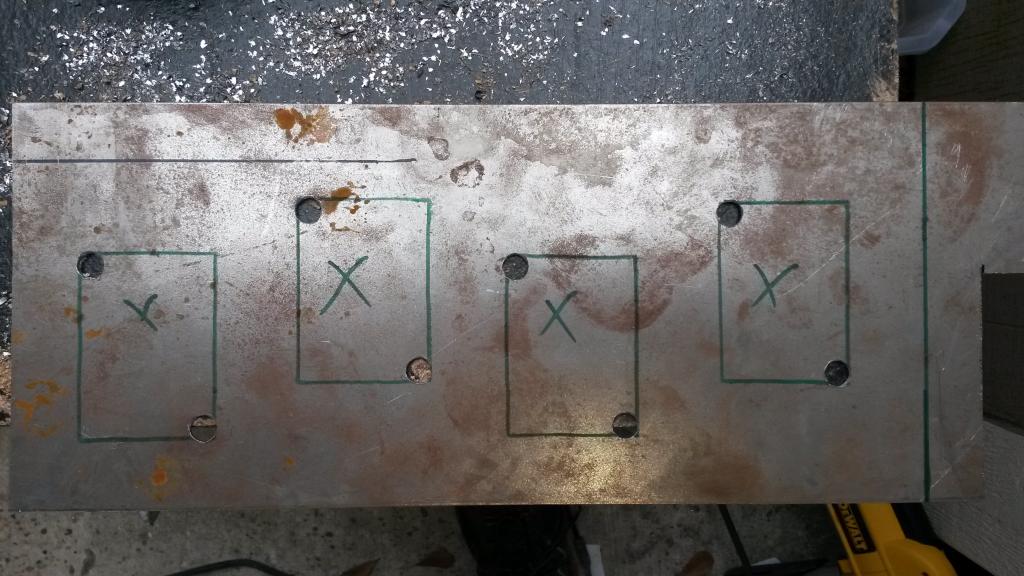
Drill holes in corners to get jig saw bit into
Makeshift brake (this didn't work very well, but oh well, it did work sort of)
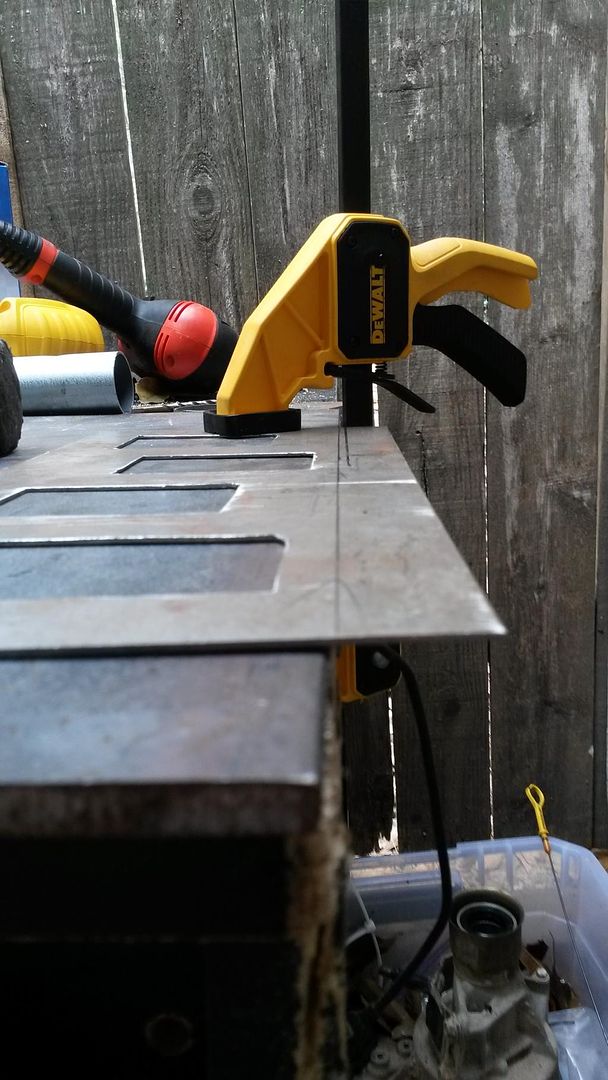
Make shift vice grips!
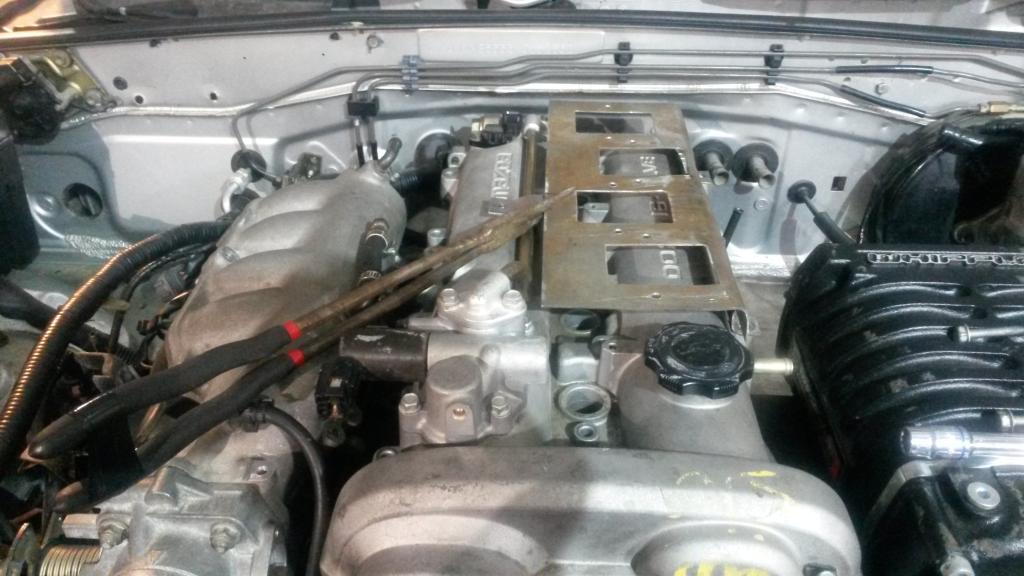
In total there are 3 tabs, 2 go to valve cover bolts, one to VVT oil pipe bolt

Clears the hood
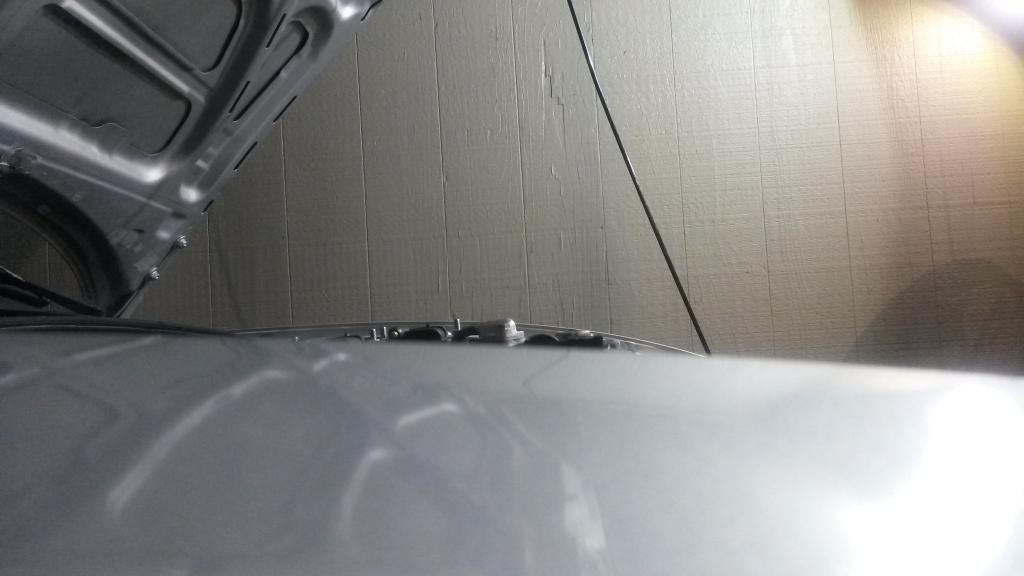

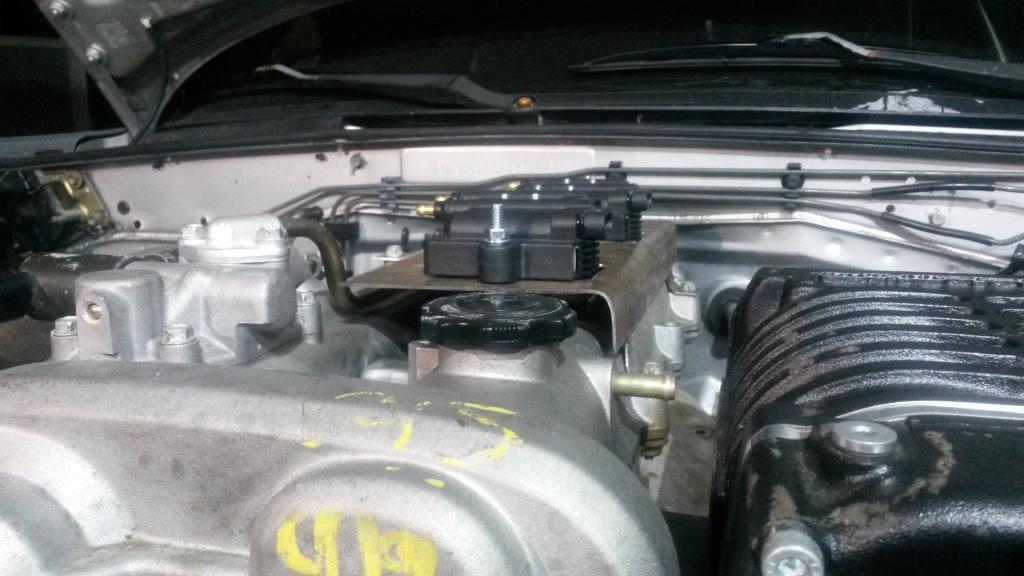
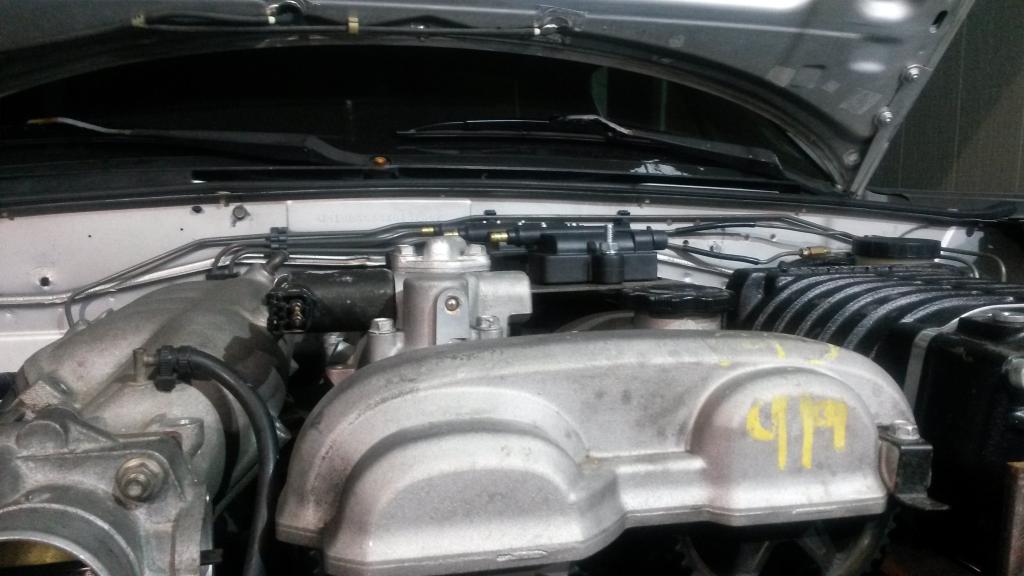
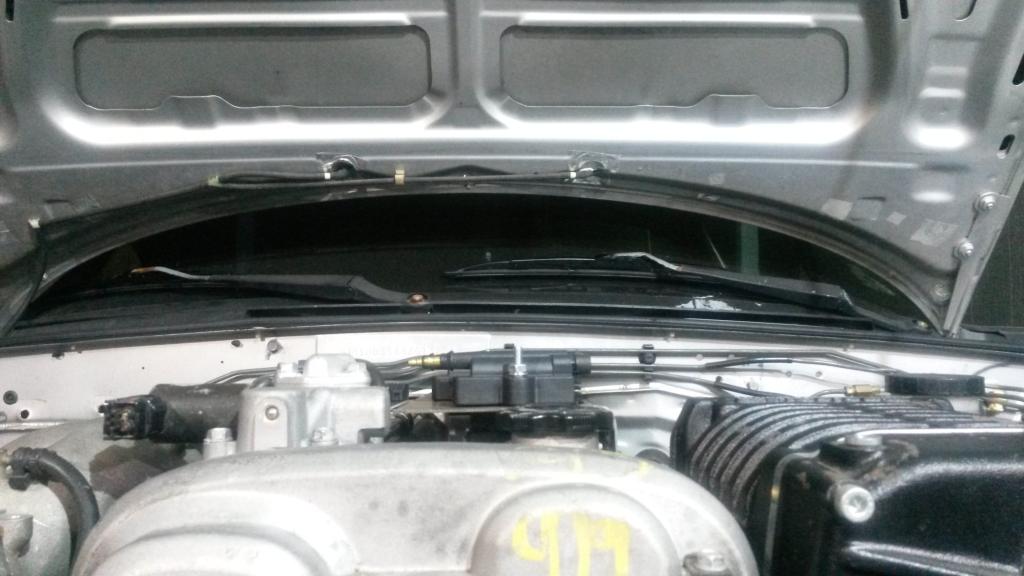
So coil mount is done, just needs paint. It's not perfectly straight, it's made from steel so probably weighs 1/2 a lb, but oh well. I can't weld aluminum with a flux core welder, and at the end of the day it does hold the coils and it's very strong/rigid, and it's only 3 bolts to have the coils out of the way. If I had a sheet metal brake it would be nicer but I think it's fine for a coil mount.
That's where I'm at right now. Next stuff is to mock up emissions equipment. Also need to buy or build a dummy throttle body. Seems moss miata has one for 110 damn dollars! Screw that, will make one if they're more than 20.
So I got to working on the SC bypass a couple days ago. Its purpose is to open during vacuum so the SC can circulate air through it to keep it from overheating the rotors. I've actually done quite a bit of research on SC's and why they fail, and according to Kenne Bell, they quote 99% of SC failures are due to heat! More on this later, back to bypass valve...
So took me over an hour to find a place for the bypass valve. About 2 hours. it needs to coneect inlet and outlet of SC, less pipe is better, but SC next to header... and can on actuator is plastic so it needs to be away from header. Finally figured out a spot, basically 3/4" away from flange, on the edge, angled 20* from vertical towards drivers side, then twisted at an angle... It fits, hits nothing, can is away from heat. Now waiting on 1.5 to 1.75" 90* silicone transition before I cut and weld the final piece on to complete the bypass.
Didin't have a 1.75" drill bit, but did have a 1/8" bit


Welded onto pipe. Note: 10' stick of 1.75" tubing fits in my '05 outback.

Bypass valve installed, sorta.

So didn't get anything done yesterday on the miata, but did today.
Started on ignition coil mount. These are the IGN1A Race coils, they are too bit to package in stock location. I finally found a way to package them ontop of the valve cover that doesn't interfere with the hood, oil cap, VVT stuff, etc.
Tempate from paper

Onto steel

Drill holes in corners to get jig saw bit into

Makeshift brake (this didn't work very well, but oh well, it did work sort of)

Make shift vice grips!

In total there are 3 tabs, 2 go to valve cover bolts, one to VVT oil pipe bolt


Clears the hood


So coil mount is done, just needs paint. It's not perfectly straight, it's made from steel so probably weighs 1/2 a lb, but oh well. I can't weld aluminum with a flux core welder, and at the end of the day it does hold the coils and it's very strong/rigid, and it's only 3 bolts to have the coils out of the way. If I had a sheet metal brake it would be nicer but I think it's fine for a coil mount.
That's where I'm at right now. Next stuff is to mock up emissions equipment. Also need to buy or build a dummy throttle body. Seems moss miata has one for 110 damn dollars! Screw that, will make one if they're more than 20.
Reply
0
0
 02-16-2015, 12:28 AM
#38
Senior Member
iTrader: (2)

Join Date: Oct 2013
Location: Goleta, Southern California
Posts: 520
Total Cats: 27
Nice man. Been following this build.
I've figured out that my car will never really be done. So make it out of steel now, and later when you think you are finished, you can go back and make it from aluminum.
Now get this s bitch on the road so you can make all the turbo guys cry.
I've figured out that my car will never really be done. So make it out of steel now, and later when you think you are finished, you can go back and make it from aluminum.
Now get this s bitch on the road so you can make all the turbo guys cry.
Reply
0
0
02-16-2015, 08:48 AM
#39
Elite Member
Thread Starter
iTrader: (16)
Join Date: Aug 2007
Location: Houston, TX
Posts: 9,292
Total Cats: 475
Thanks williams! I definitely can't wait to get it on the road. I'm thinking still 2 months out, but we will see! In theory it could be done sooner, but in reality, I'm slow at building things.... Especially when I got to figure out the how to do it part first.
I don't think any turbo guys will be crying, this has not been cheap or easy! I am kinda expecting it to make 300 wheel torque or more, would like to see a bit over 300wtq/400whp. But I don't know if that's going to happen!
Reply
0
0


