Pats Whipple W100AX Street/Track '99 Build Thread
 02-21-2015, 01:15 AM
#61
Elite Member
Thread Starter
iTrader: (16)
Join Date: Aug 2007
Location: Houston, TX
Posts: 9,293
Total Cats: 475
I'll post pics tomorrow, didn't get a whole lot done today. I did get the remote oil filter housing mounted to the firewall, and started on mounts for the oil cooler. Gotta get back on it tomorrow! Got distracted today, actually spent last couple hours doing some numbers for engine loading at different RPMs. I may start a thread on that actually, was calculating loading in rod/rod bolts at different RPMs.

Reply
 0
0

0
02-22-2015, 01:46 AM
#63
Elite Member
Thread Starter
iTrader: (16)
Join Date: Aug 2007
Location: Houston, TX
Posts: 9,293
Total Cats: 475
Update:
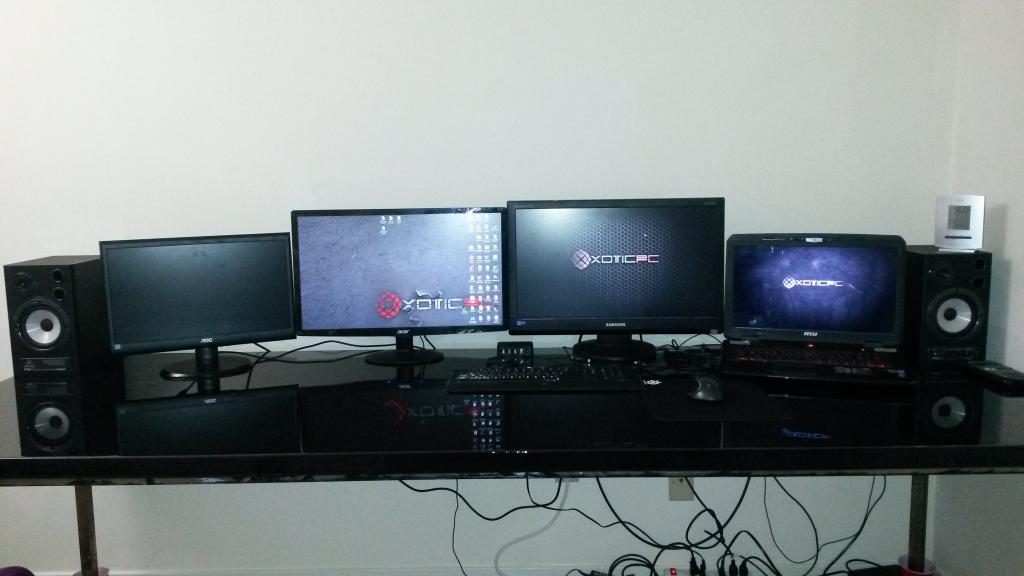
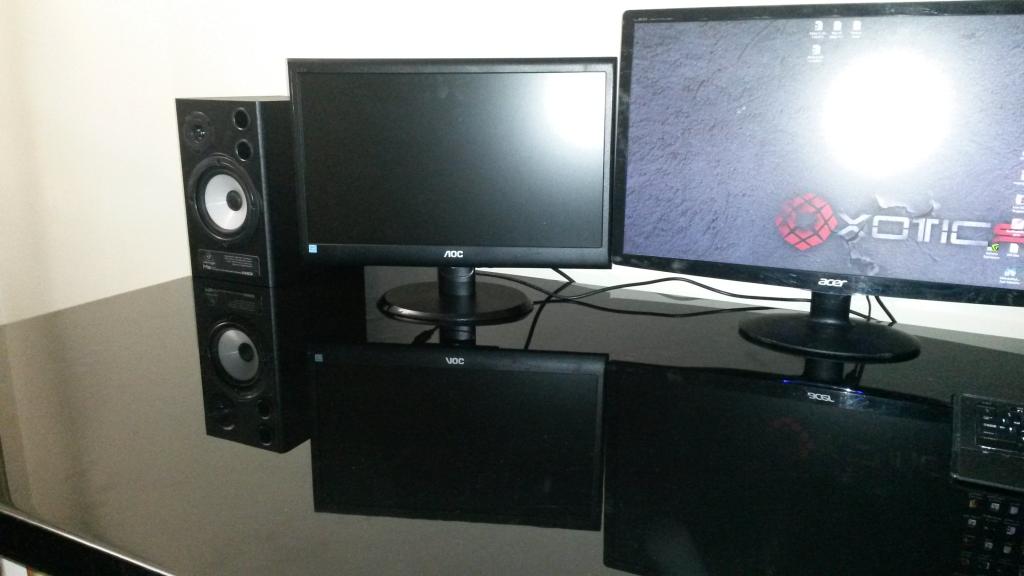
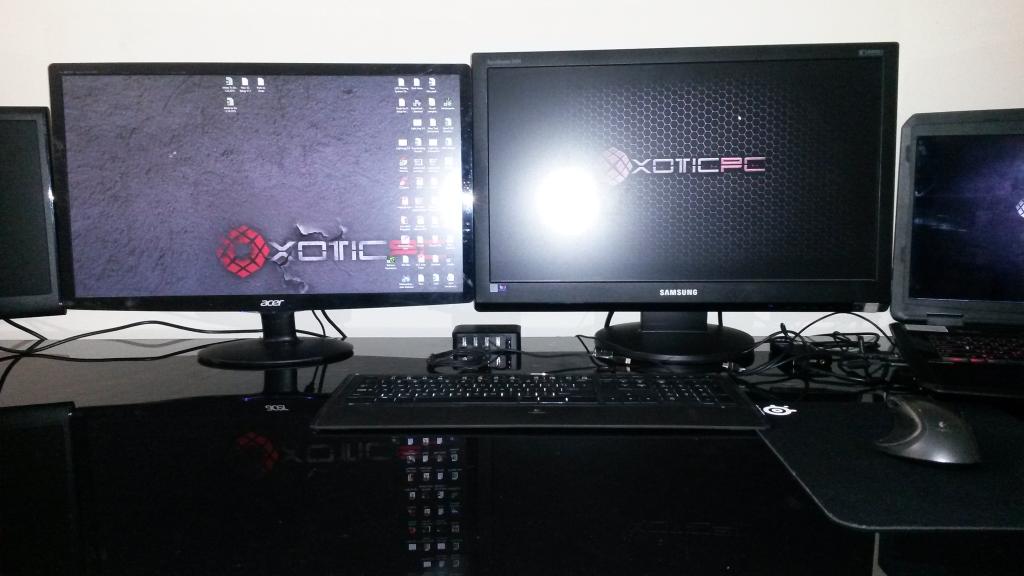
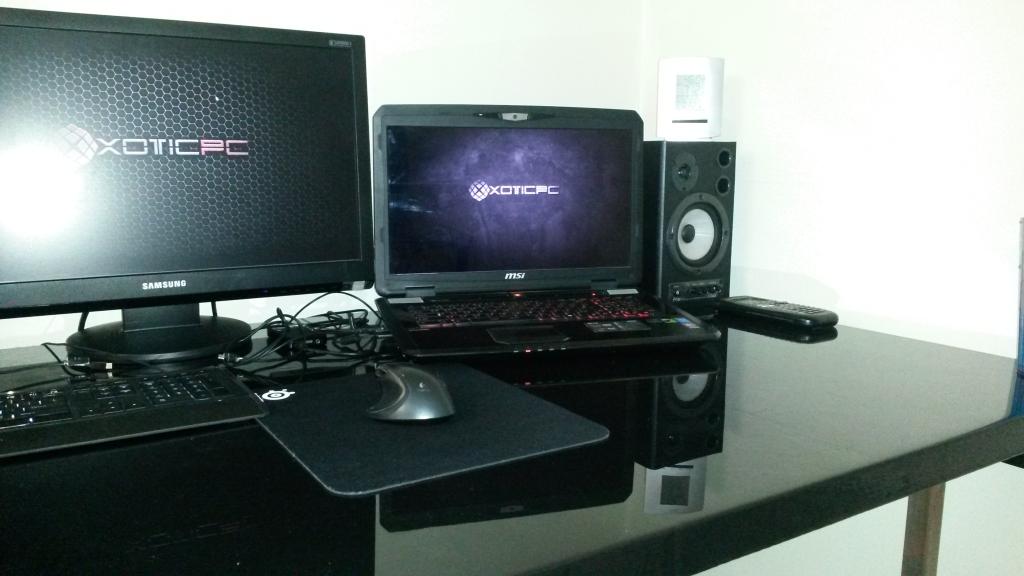
So first update is off topic but why not: My new desk is sorta done now! 8', Piano black finish, legs on corners so nothing to bump into, ergonomically designed for me. 133 hours to build it from start to finish, I need to pain the legs but that's maybe 2hrs work, will do that one day.... Waiting on cable to connect monitor that's off, too short to reach with the one I have. Desk weighs 300+lbs, 1.5" thick hardwood oak, extremely stiff, steel/wood frame... I can post more if anyone likes it, I have pics of the build for it too.
Ok back to miata, good update!
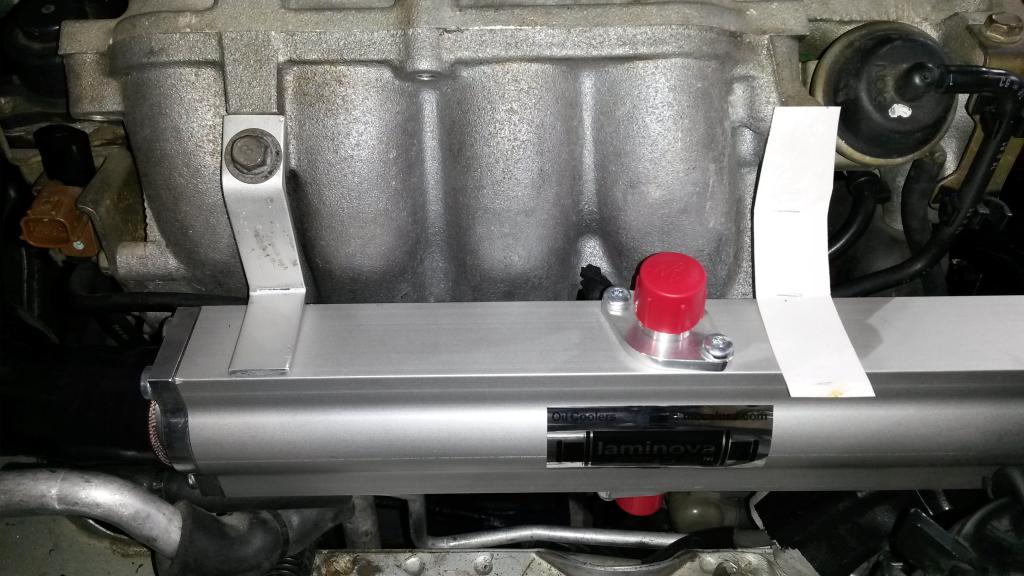
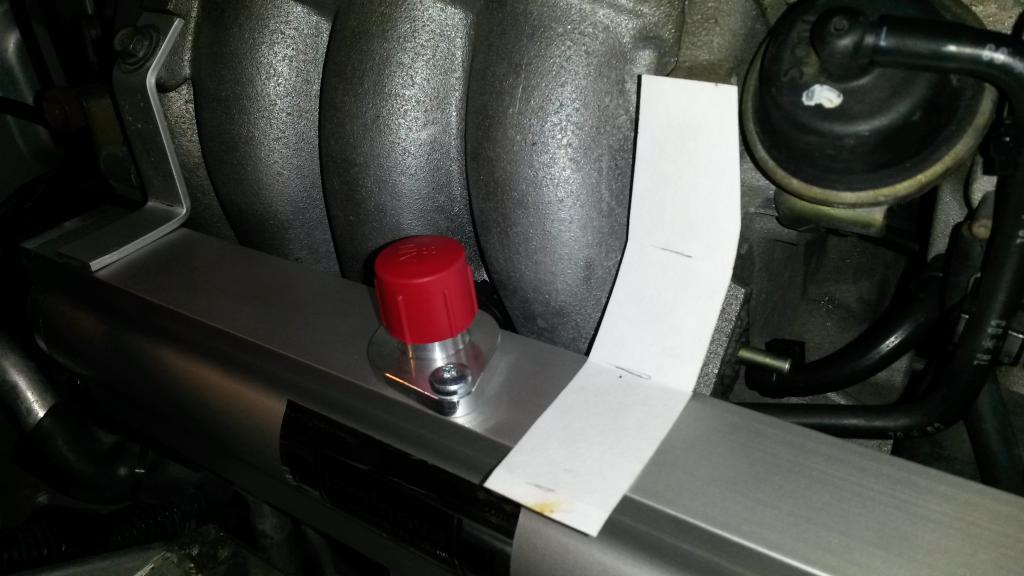
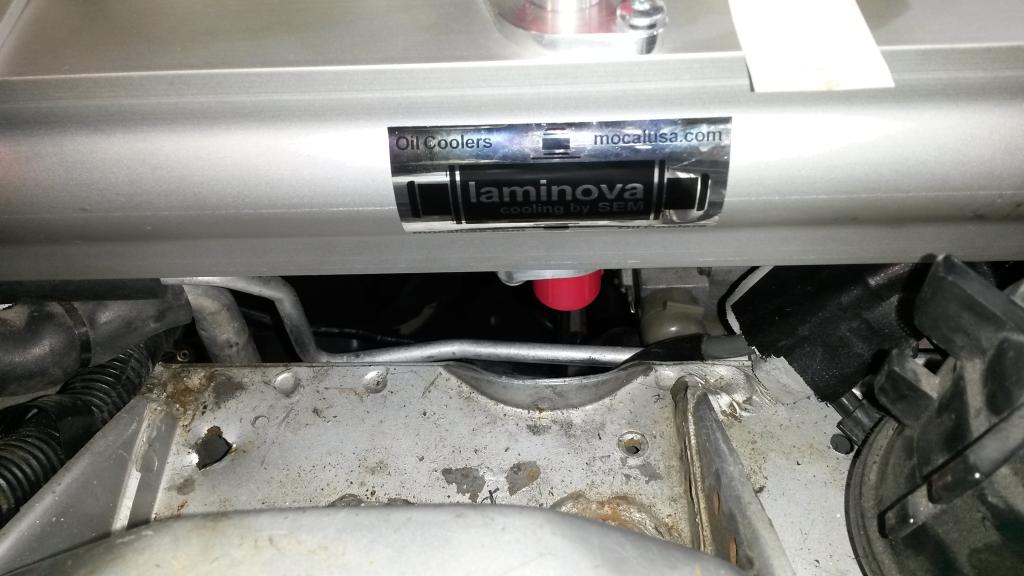
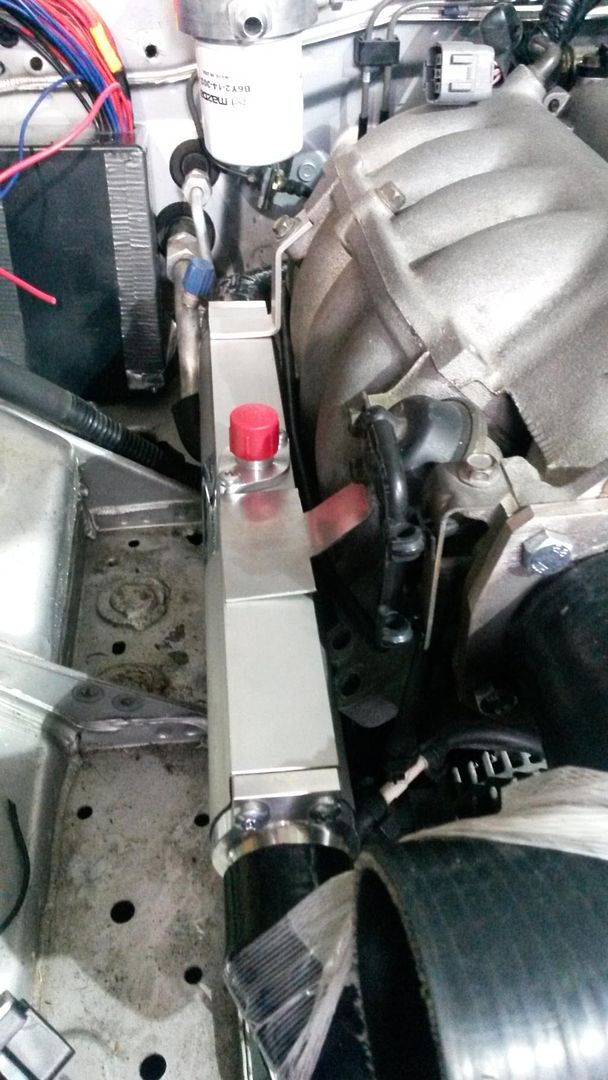
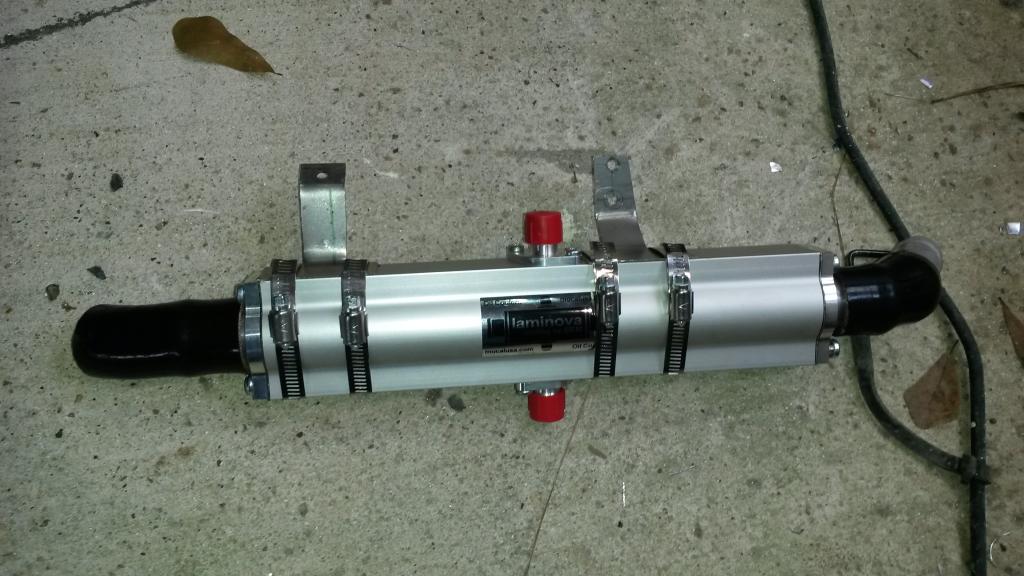
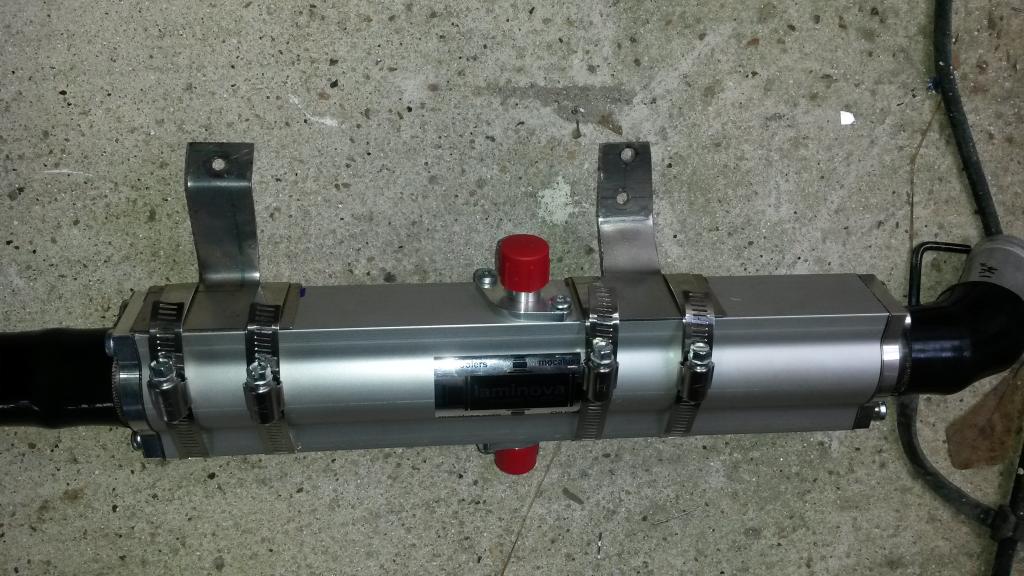
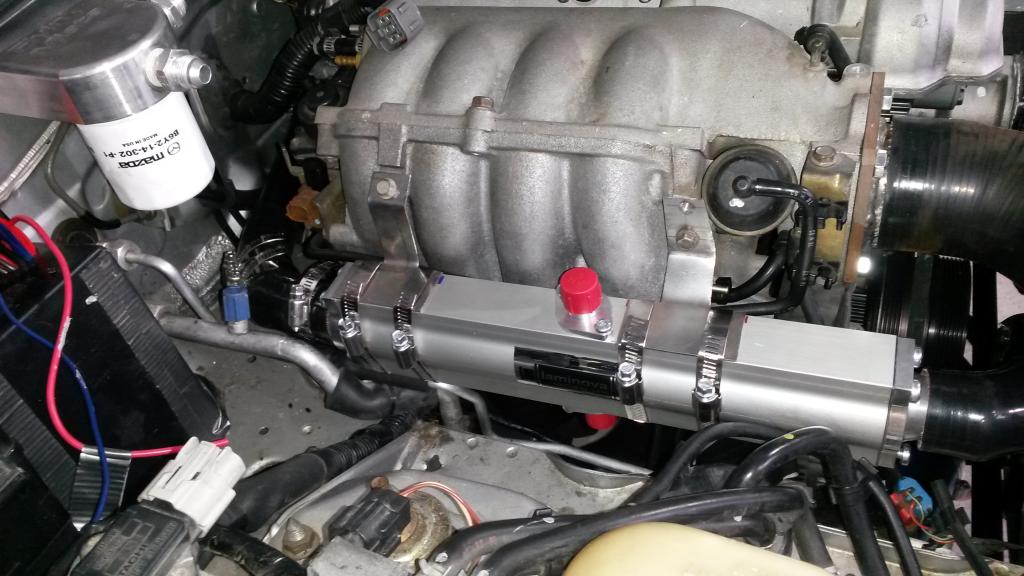
Mounted Mocal Laminar flow Water/Oil Oil cooler. Goes in upper radiator hose.
Oh look, mazda knew...
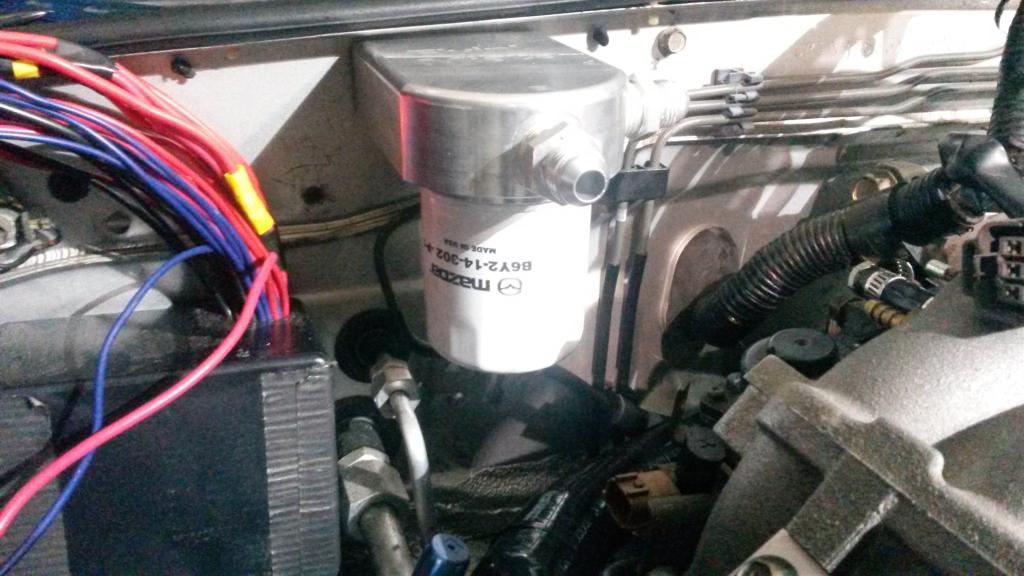
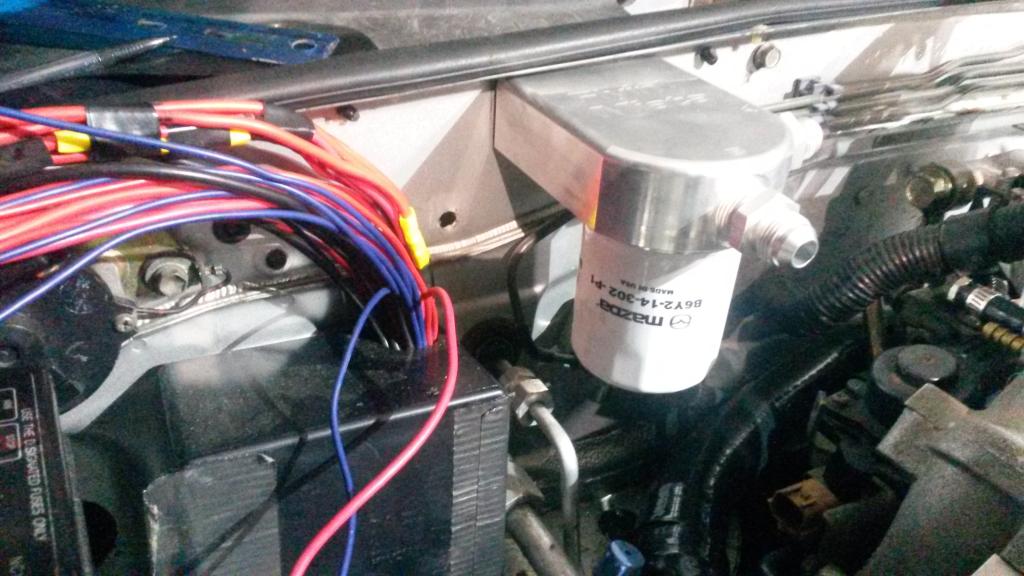
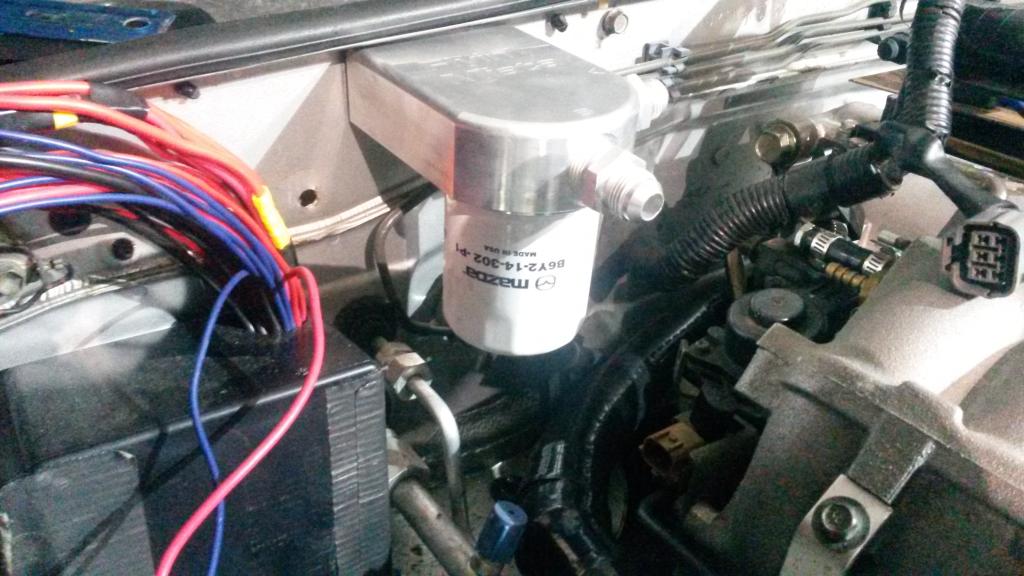
Then stopped and mounted FM oil filter relocation thingy.
Back to oil cooler brackets
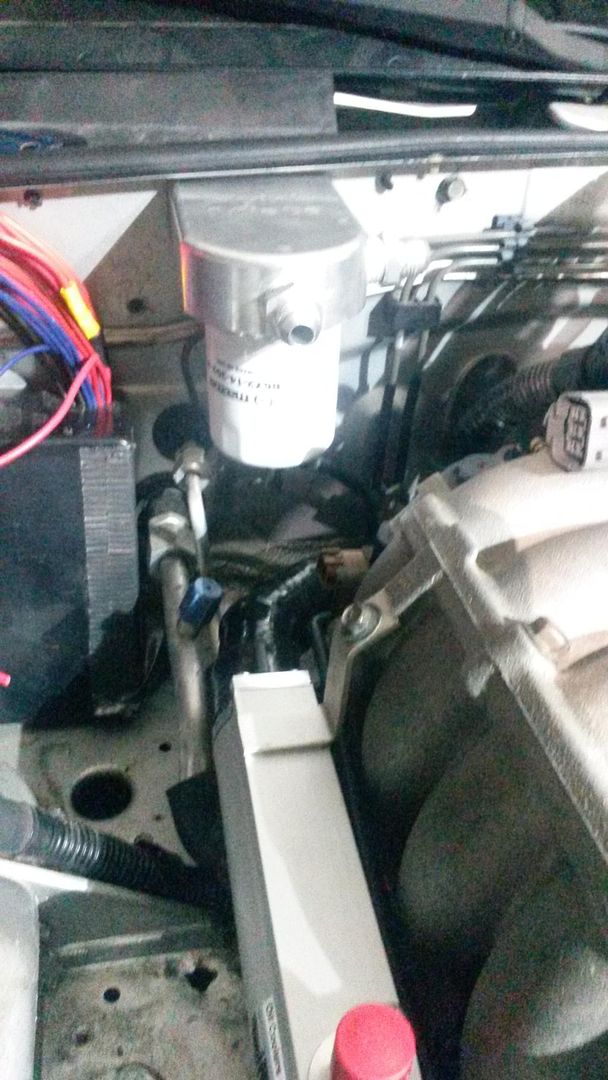
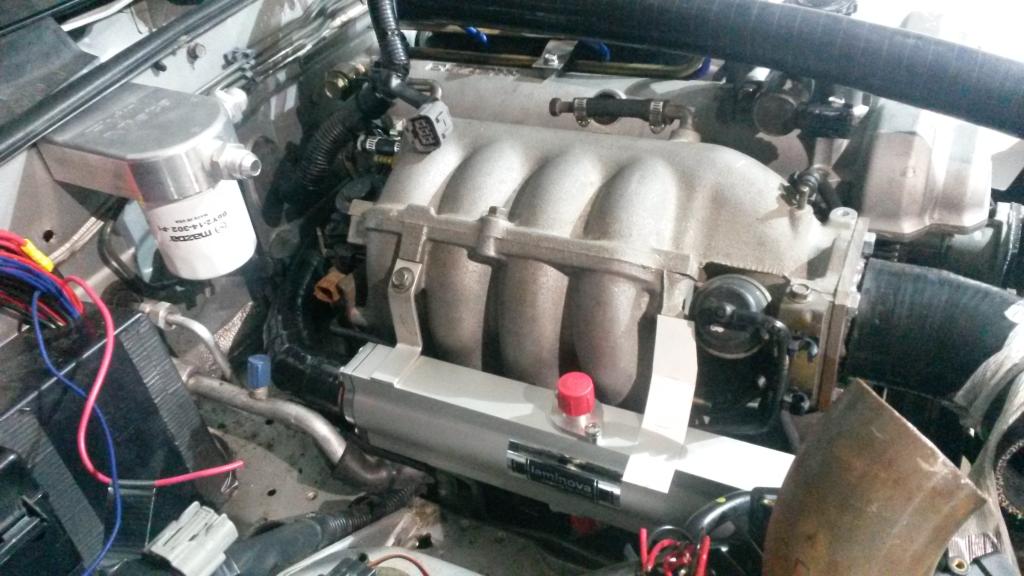

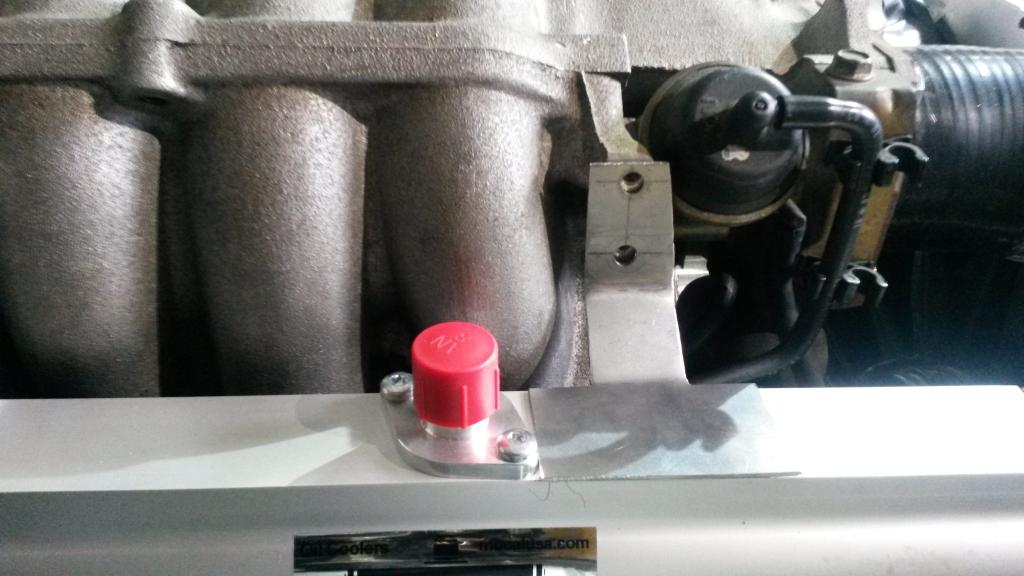
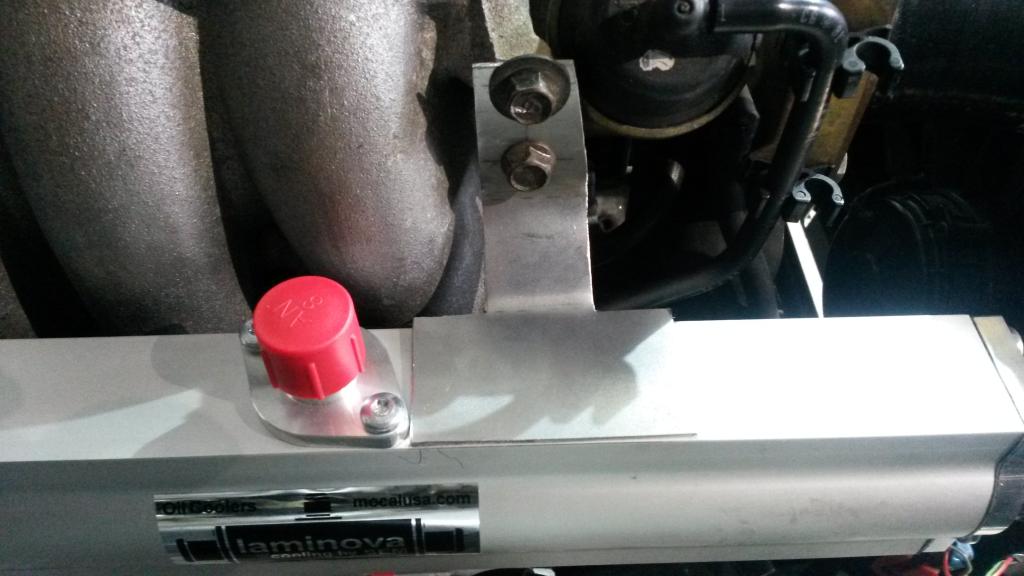
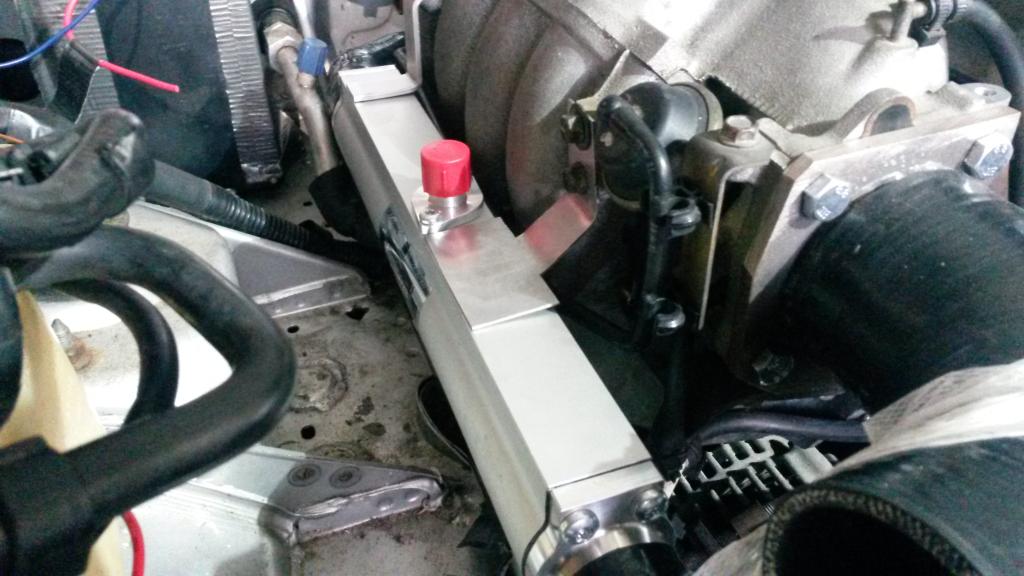
Oil Line will exit filter adapter and go straight to top of oil cooler, down out of oil cooler to adapter that goes to block, with Tee for Accusump
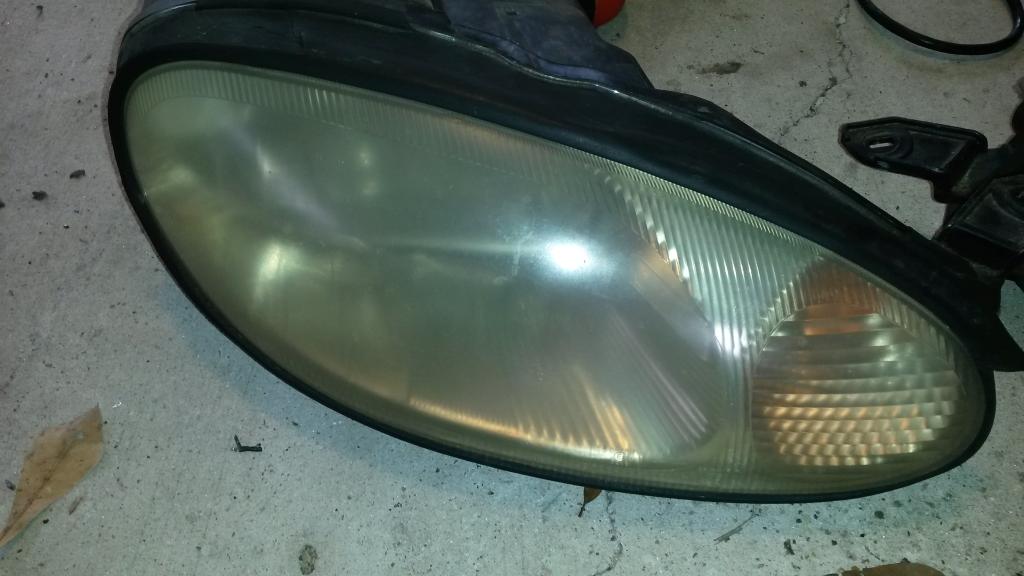
Then I got tired of seeing my yellow head lights so I decided to fix that/make them better.
Before
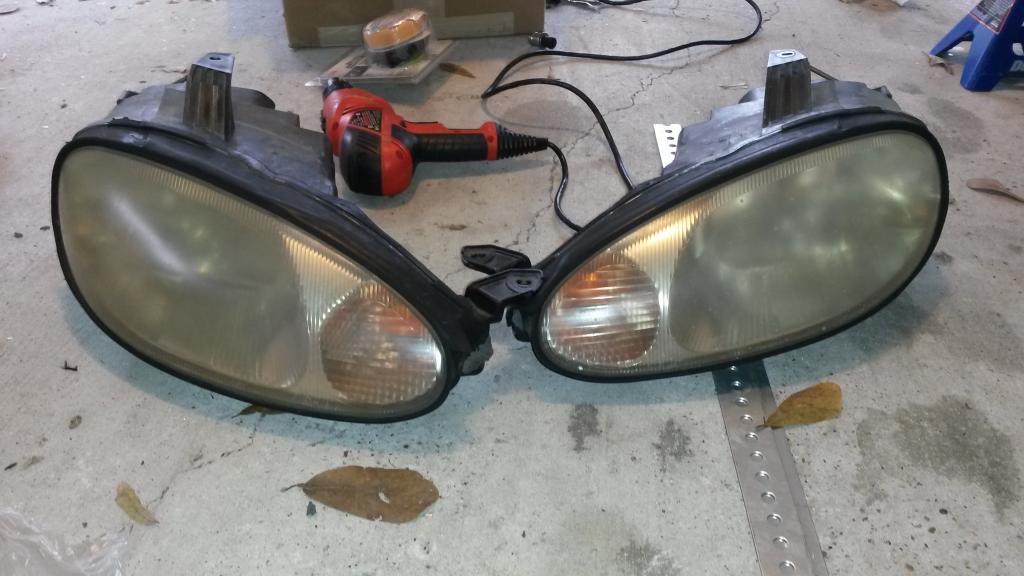
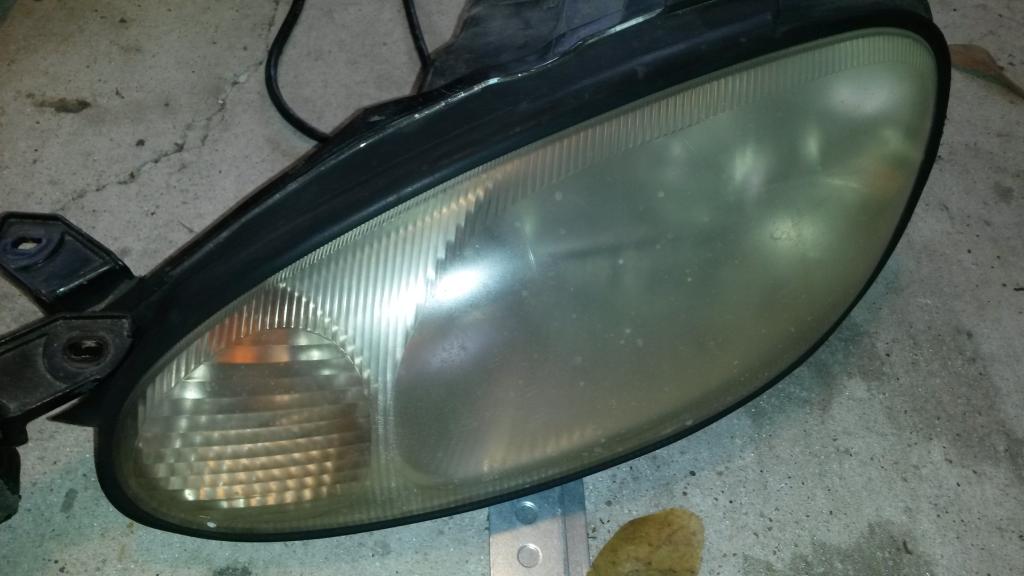
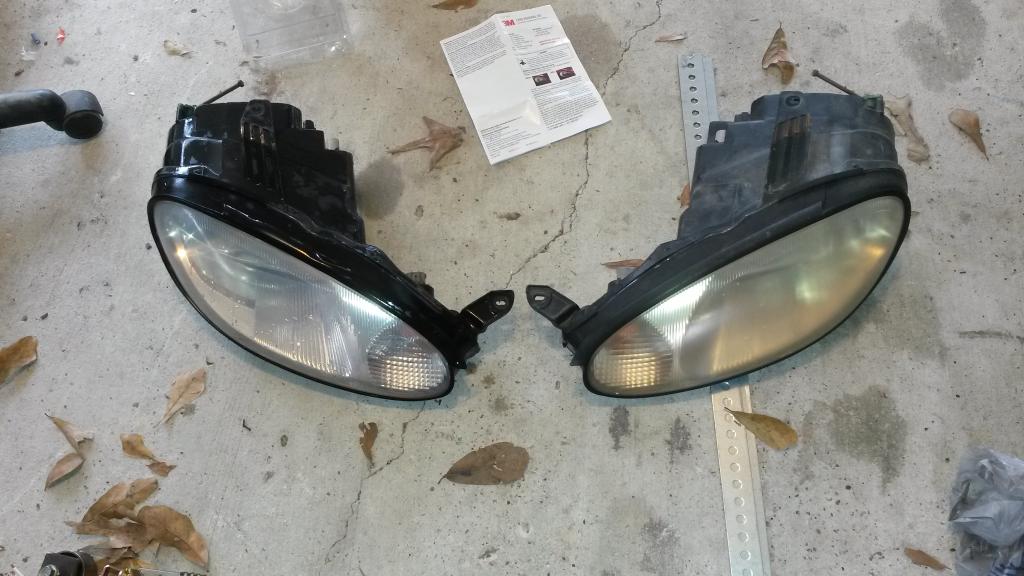
After
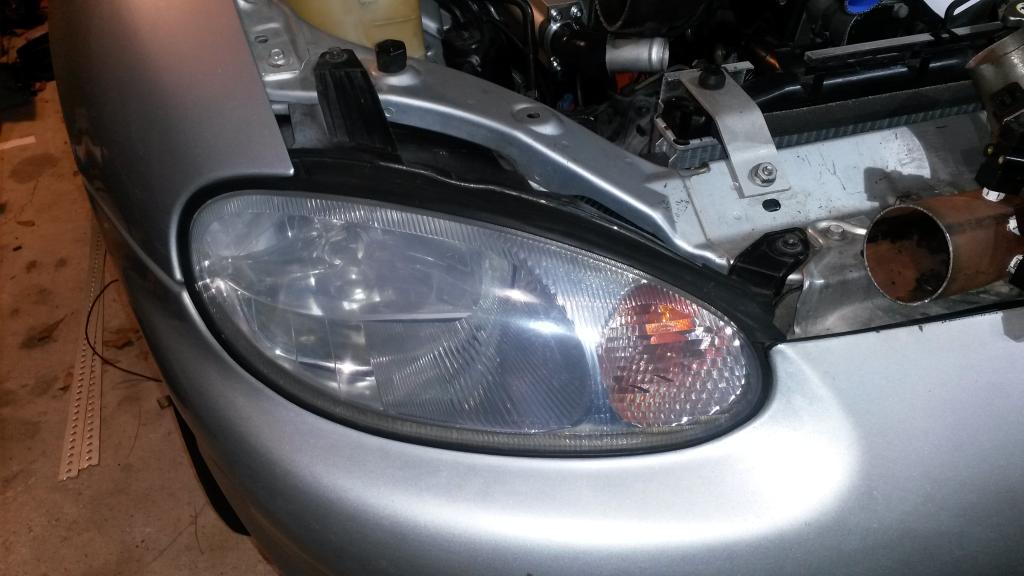

Not perfect, but wayy better. They are clear now instead of literally yellow!
So first update is off topic but why not: My new desk is sorta done now! 8', Piano black finish, legs on corners so nothing to bump into, ergonomically designed for me. 133 hours to build it from start to finish, I need to pain the legs but that's maybe 2hrs work, will do that one day.... Waiting on cable to connect monitor that's off, too short to reach with the one I have. Desk weighs 300+lbs, 1.5" thick hardwood oak, extremely stiff, steel/wood frame... I can post more if anyone likes it, I have pics of the build for it too.


Ok back to miata, good update!
Mounted Mocal Laminar flow Water/Oil Oil cooler. Goes in upper radiator hose.


Oh look, mazda knew...


Then stopped and mounted FM oil filter relocation thingy.


Back to oil cooler brackets


Oil Line will exit filter adapter and go straight to top of oil cooler, down out of oil cooler to adapter that goes to block, with Tee for Accusump


Then I got tired of seeing my yellow head lights so I decided to fix that/make them better.
Before


After


Not perfect, but wayy better. They are clear now instead of literally yellow!
Reply
0
0
02-22-2015, 01:47 AM
#64
Elite Member
Thread Starter
iTrader: (16)
Join Date: Aug 2007
Location: Houston, TX
Posts: 9,293
Total Cats: 475
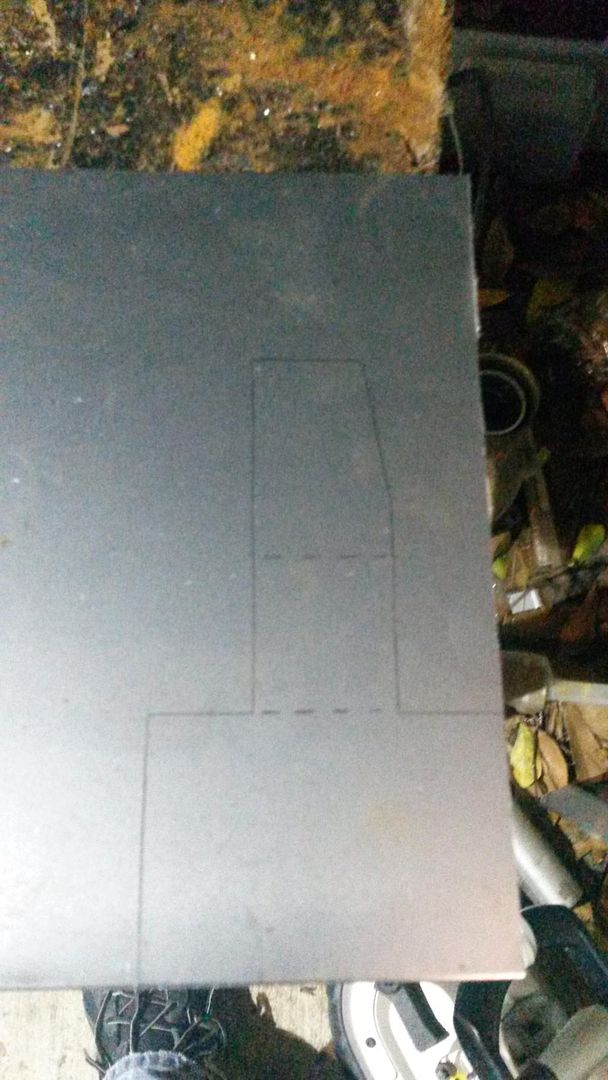
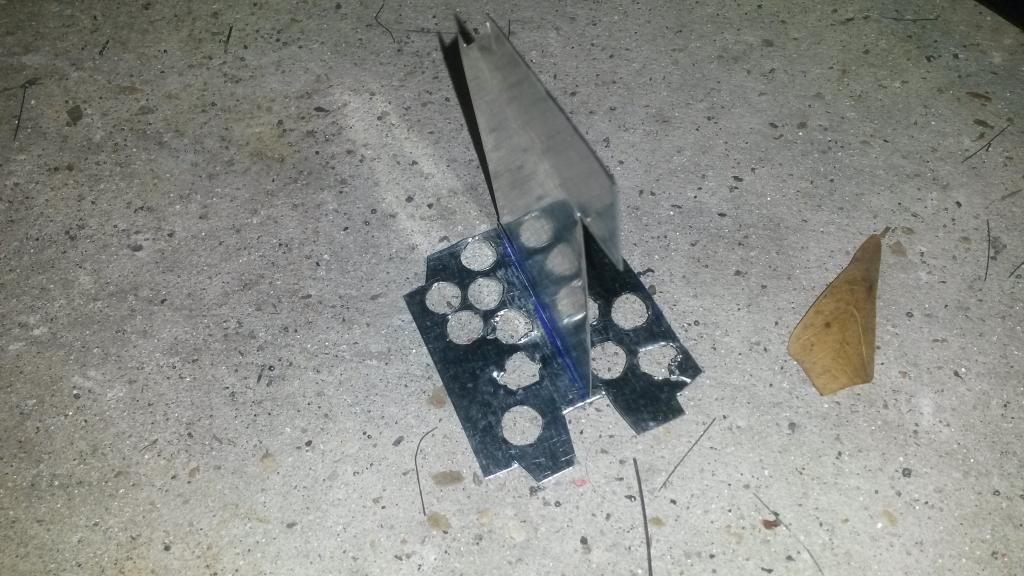
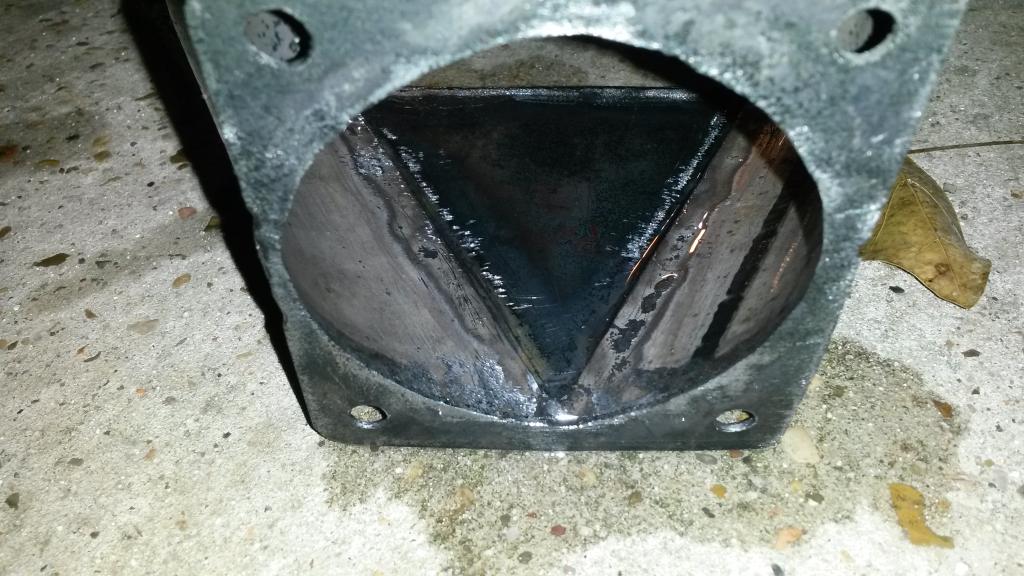
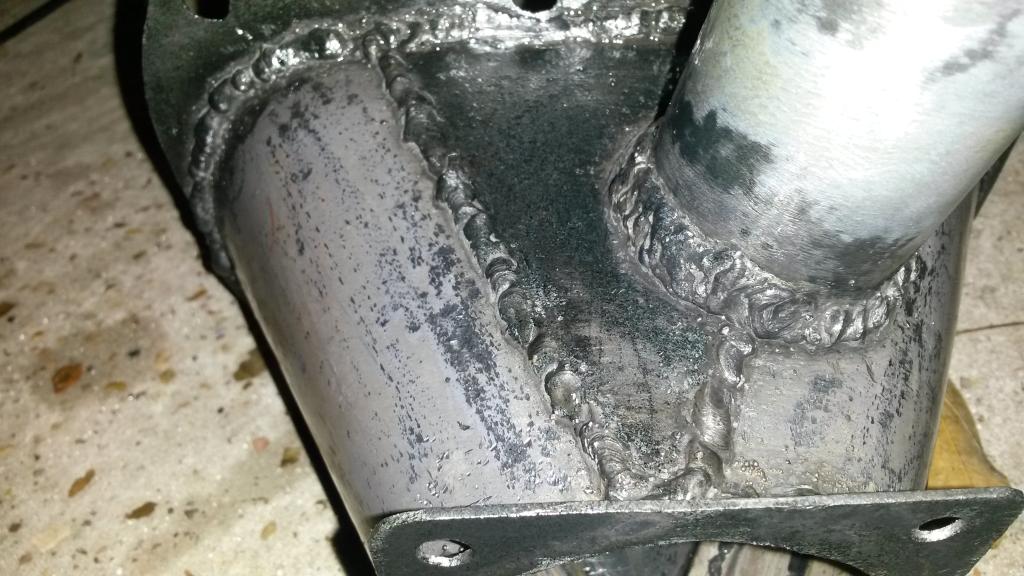
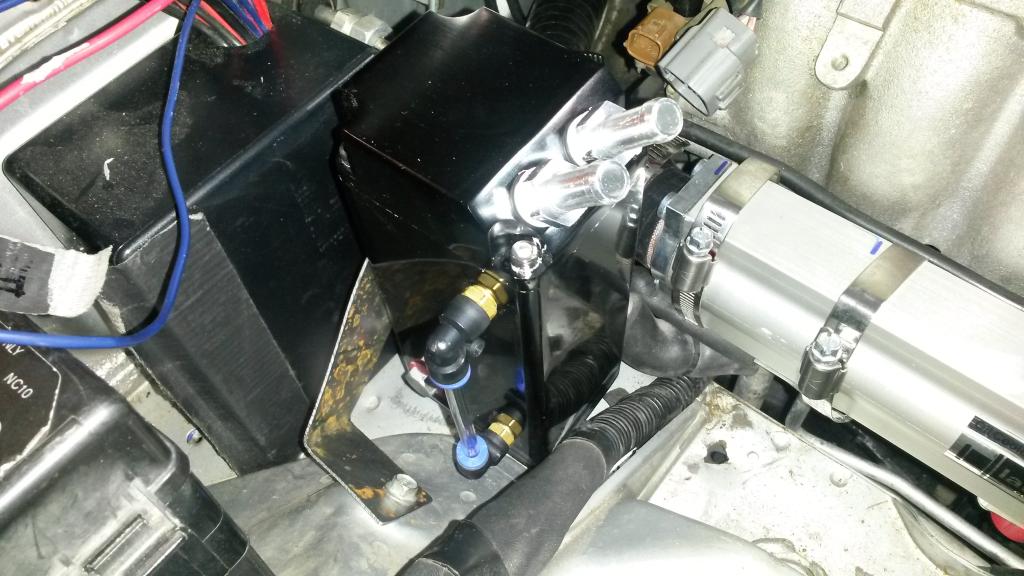
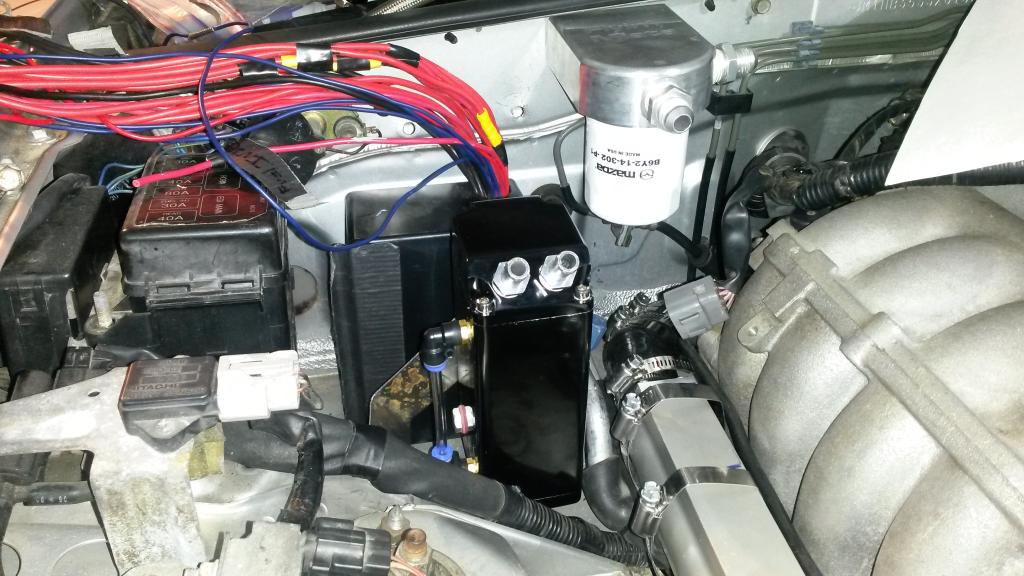
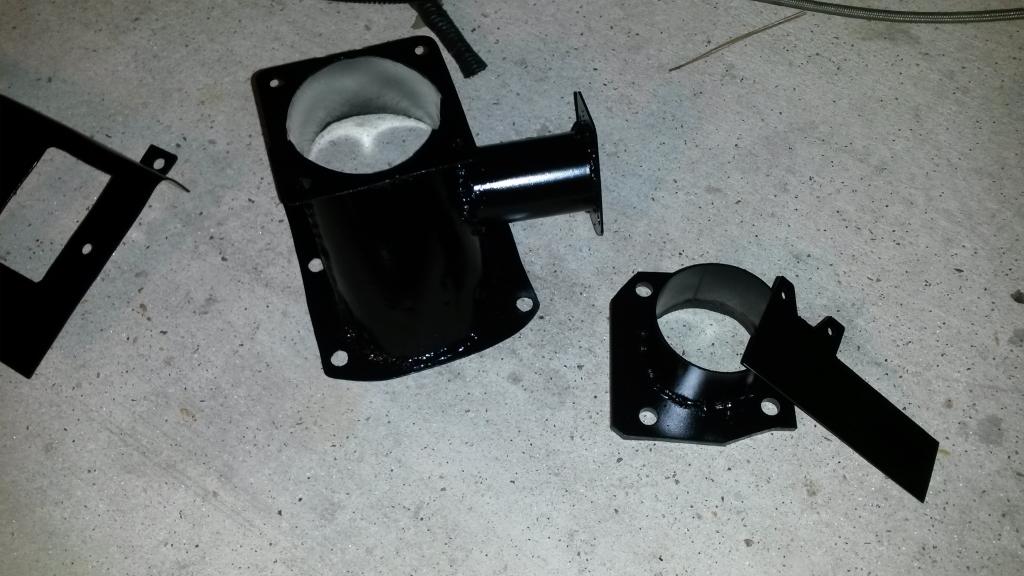
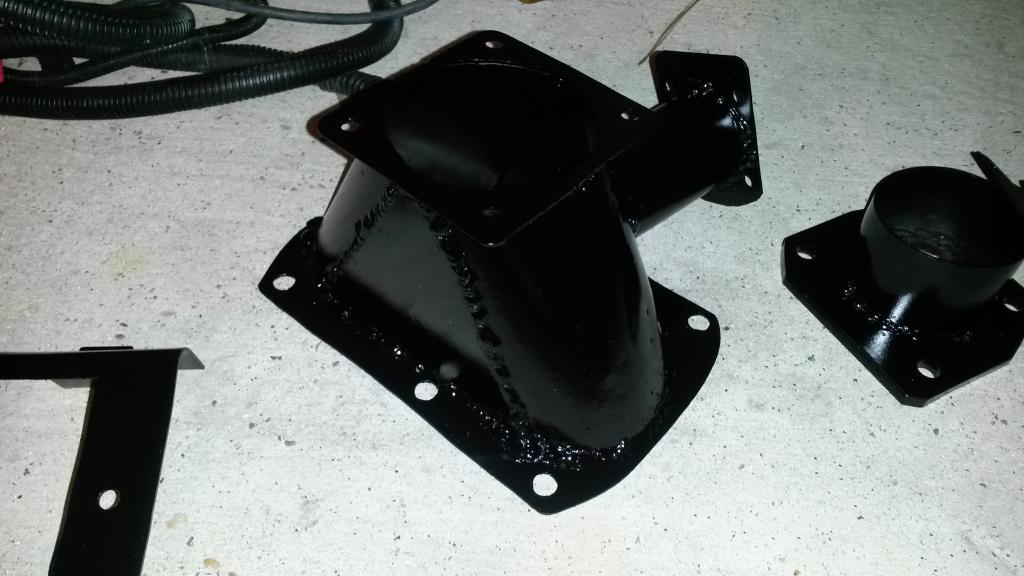
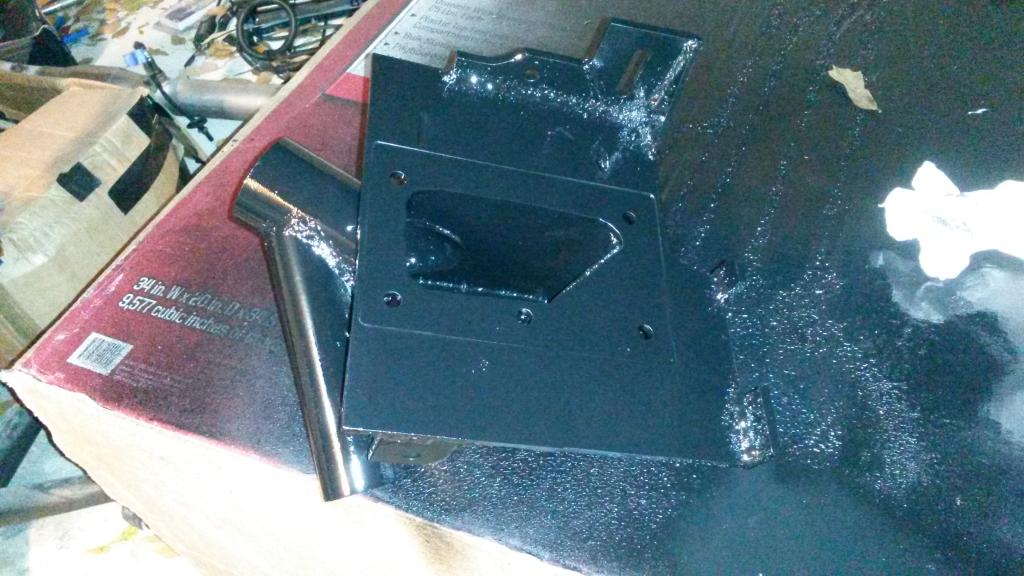
So then, catch can
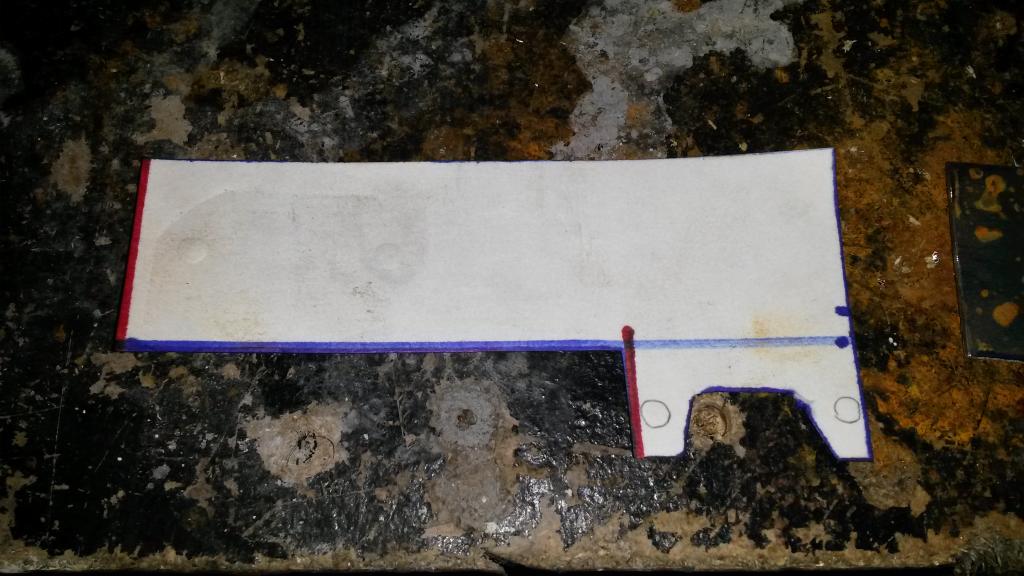
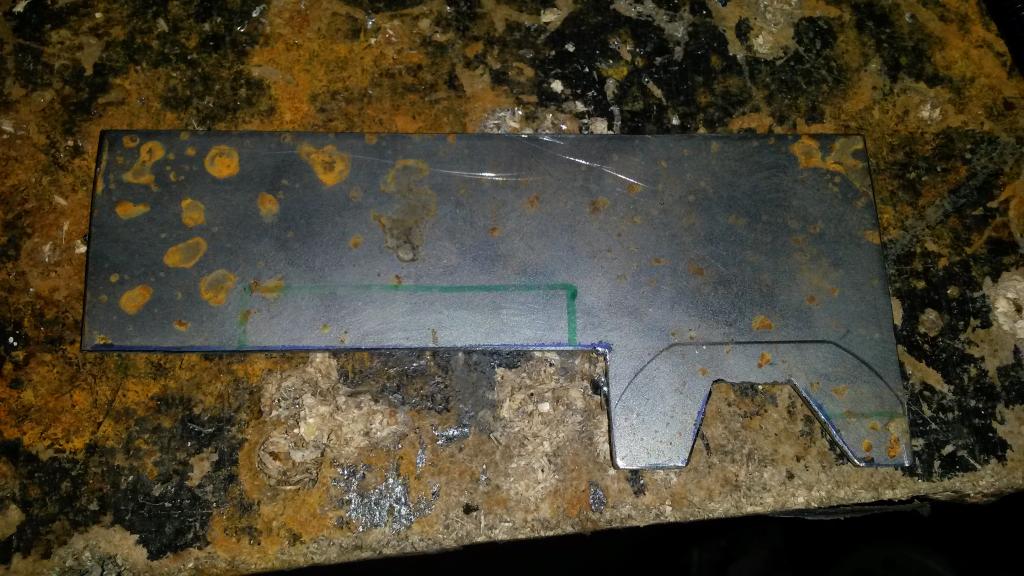
I bought this off ebay as it's large, square, has ports on top, has removable top, has sight tube and drain. But has no baffles. So useless, so I fixed it. I think this is an excellent design from a function standpoint, perhaps not pretty on the inside but functionally this thing will kick *** is my bet.
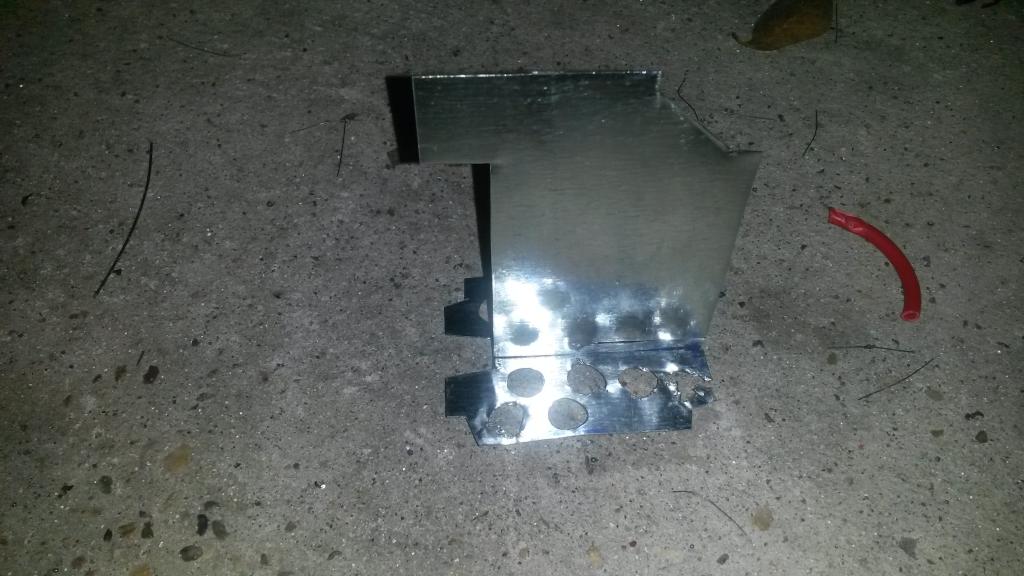
I made baffles/floor from paper, then metal. Was a PAIN getting everything to fit perfect, but eventually I did.
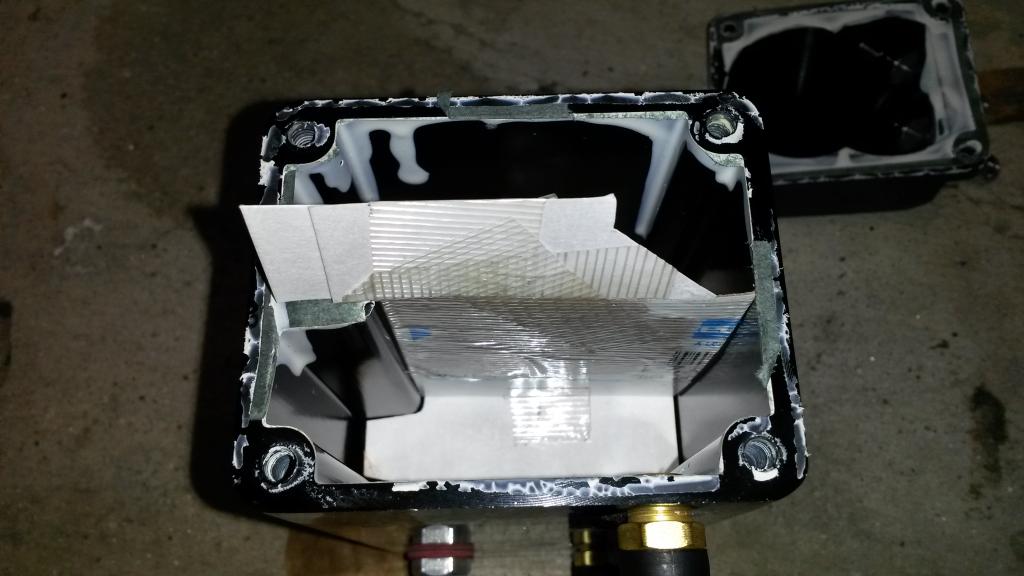
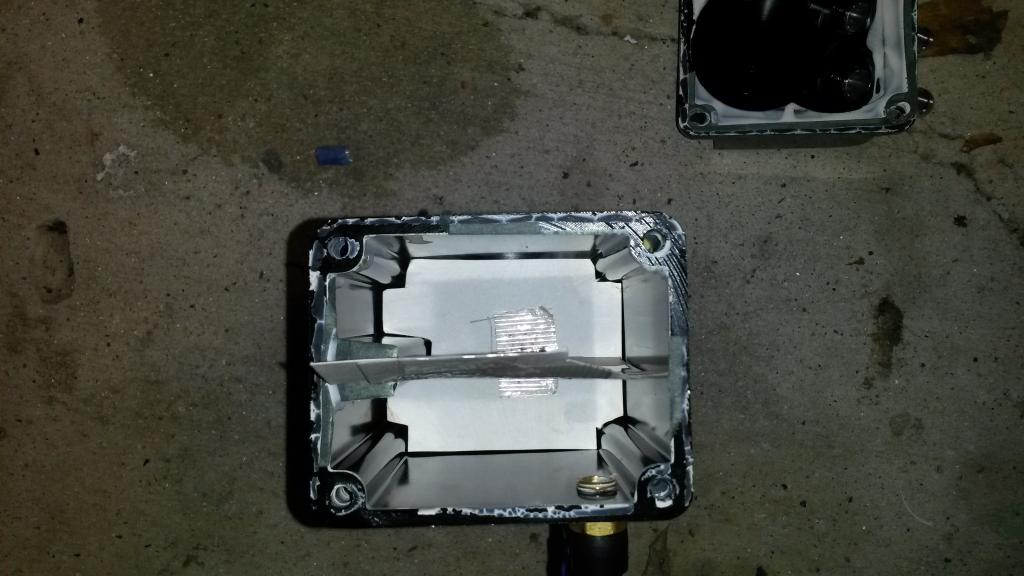
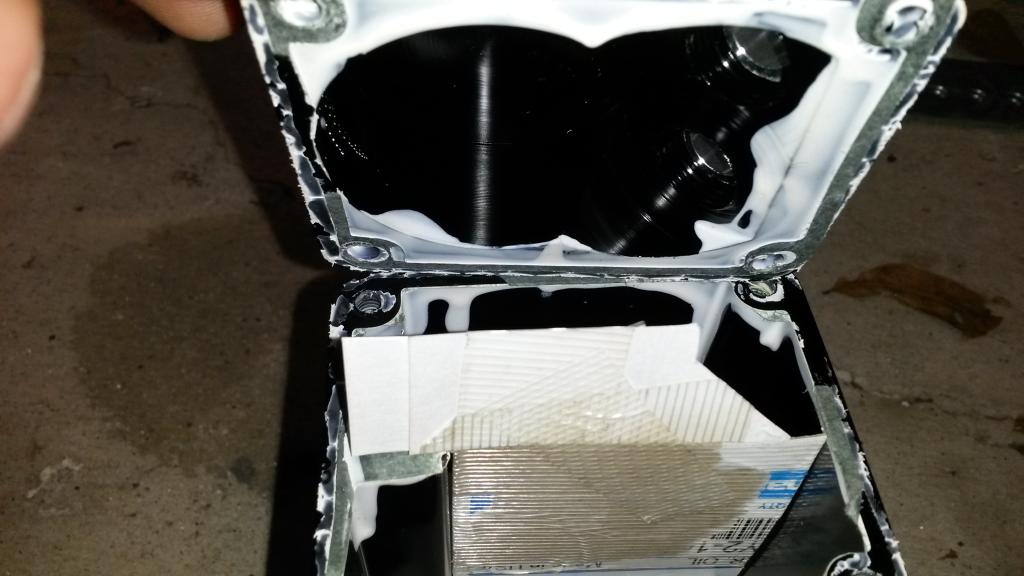
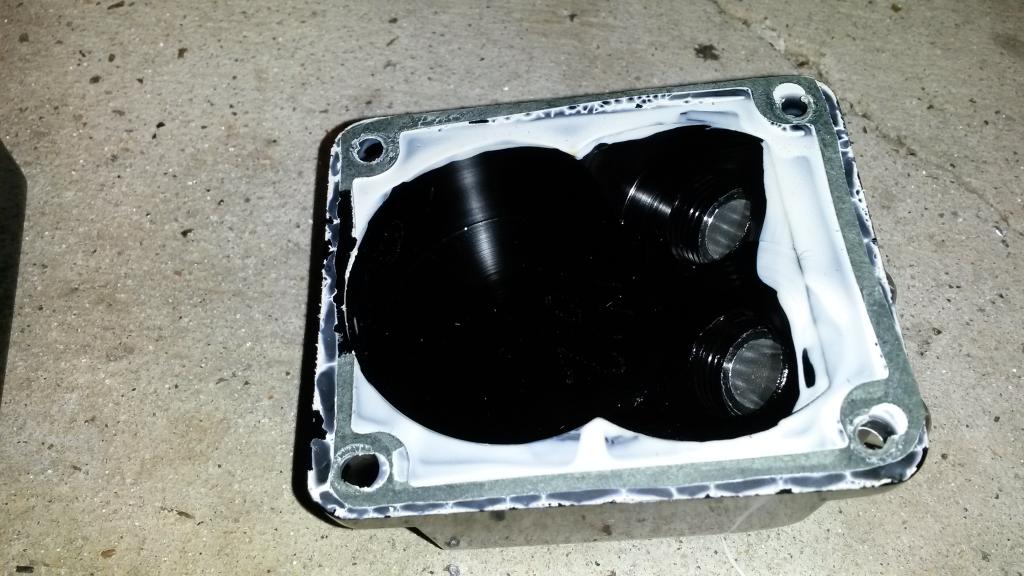
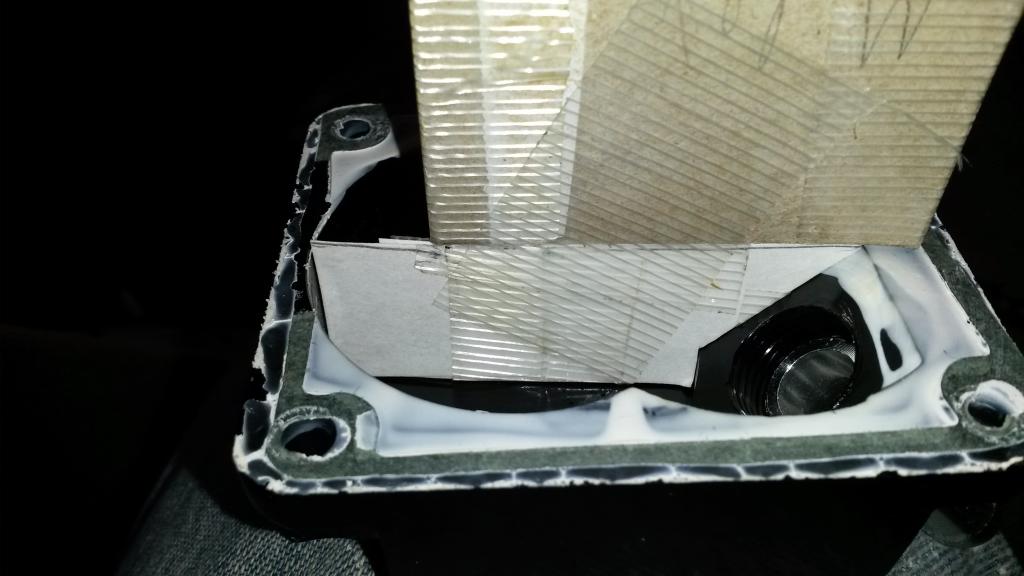
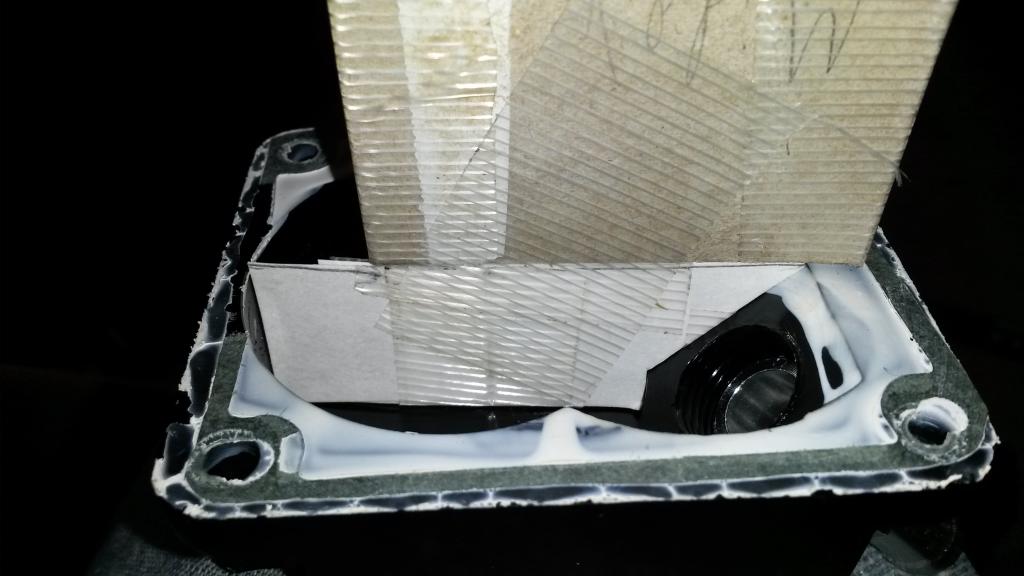
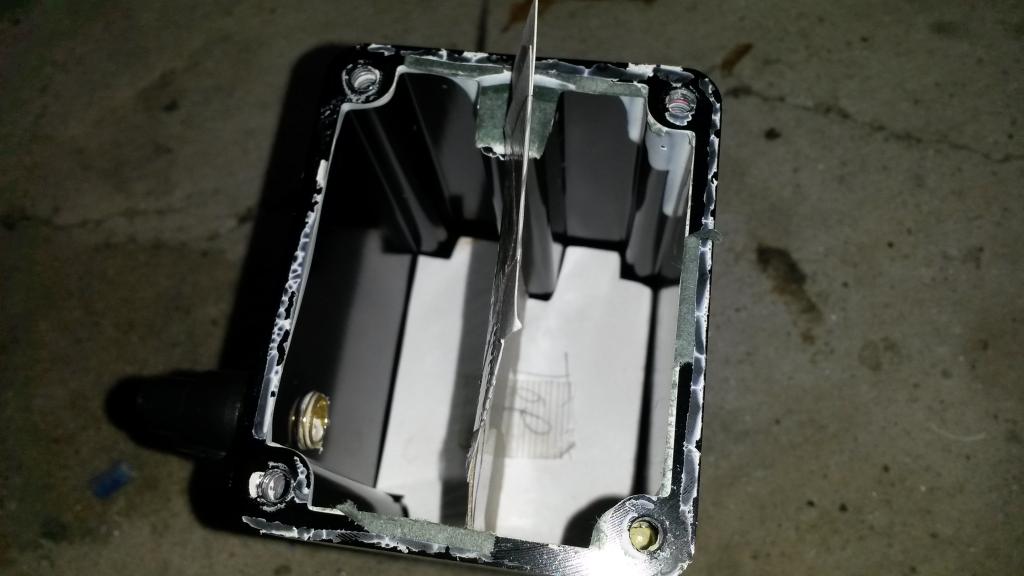
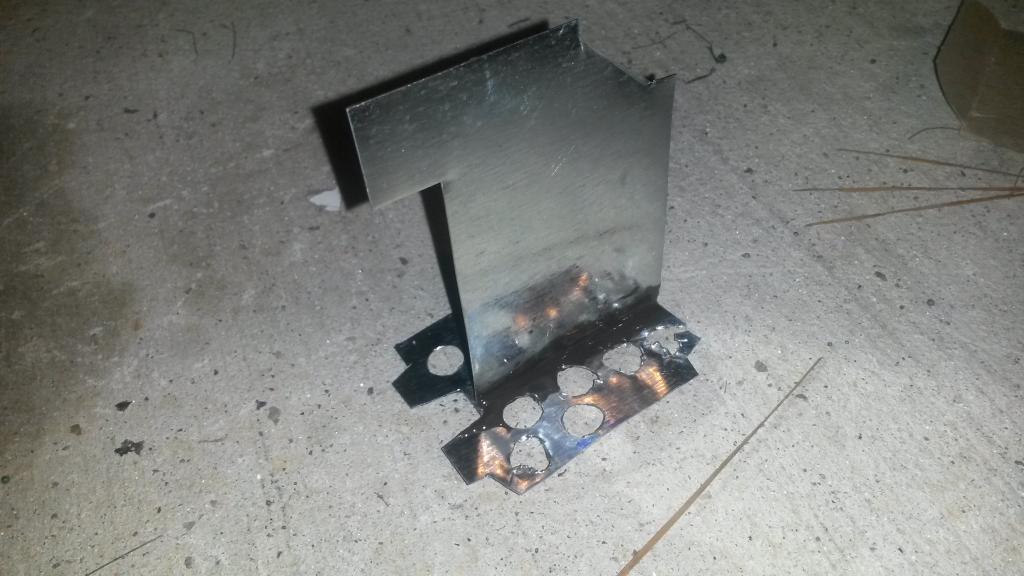
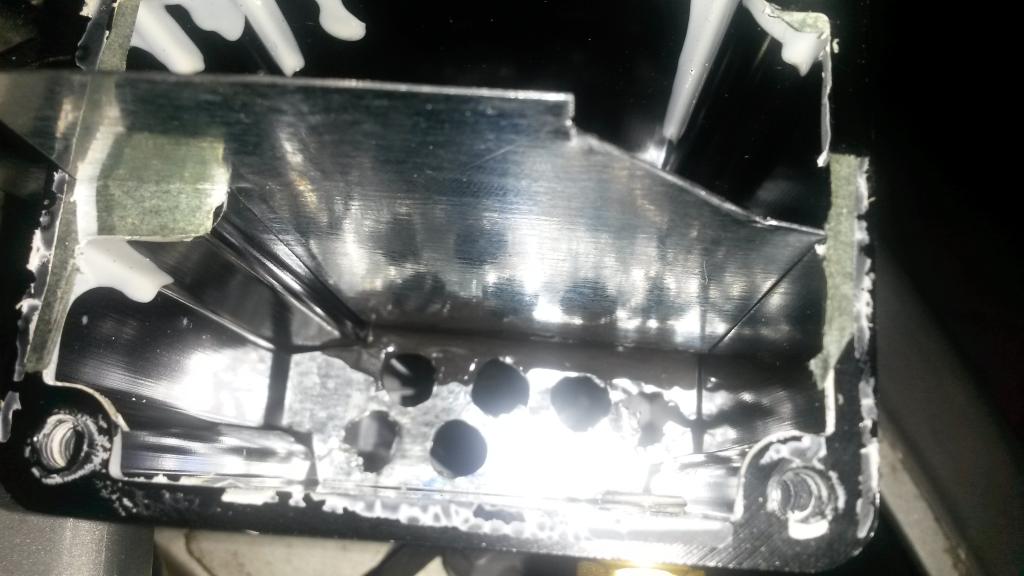
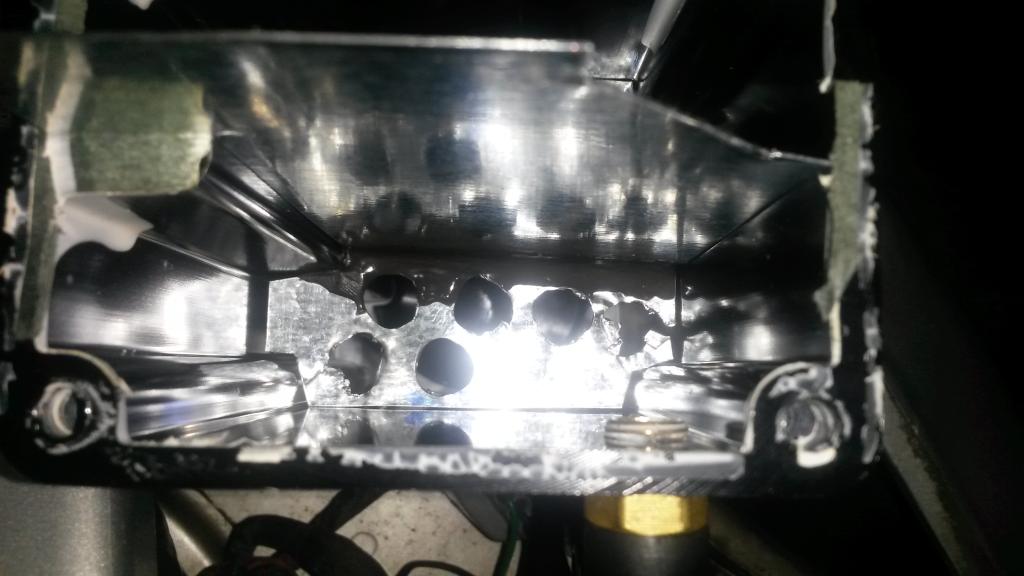
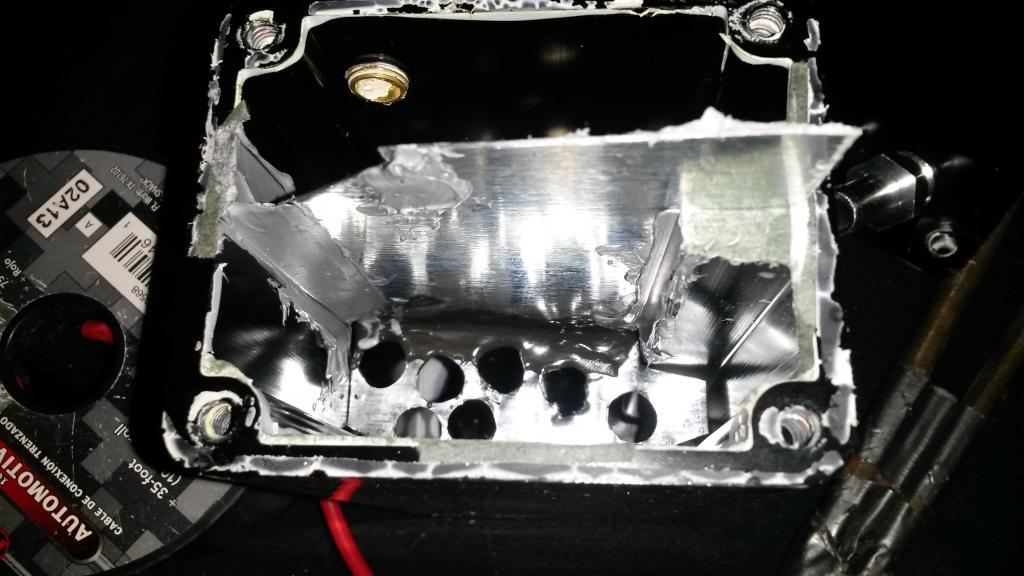
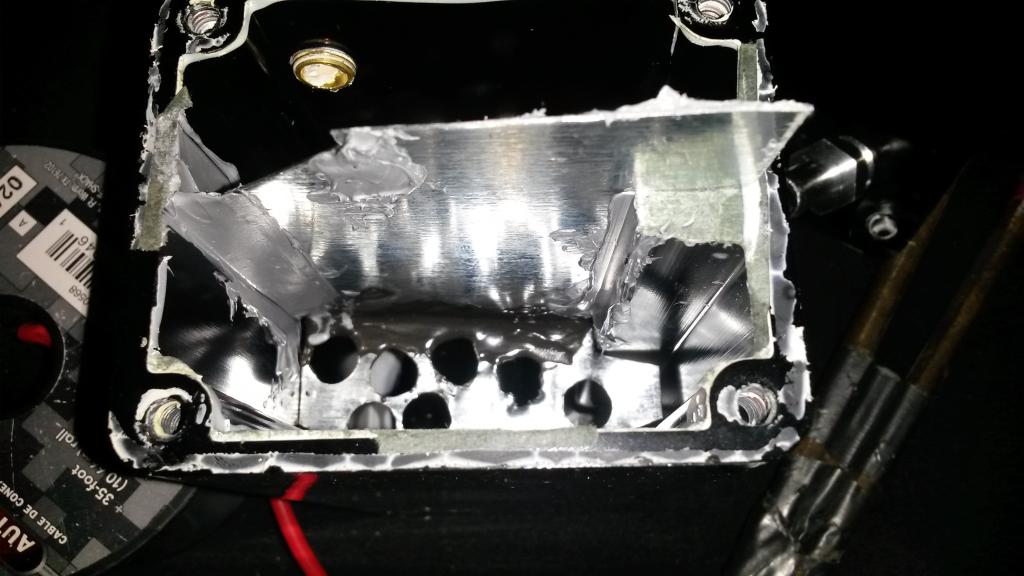
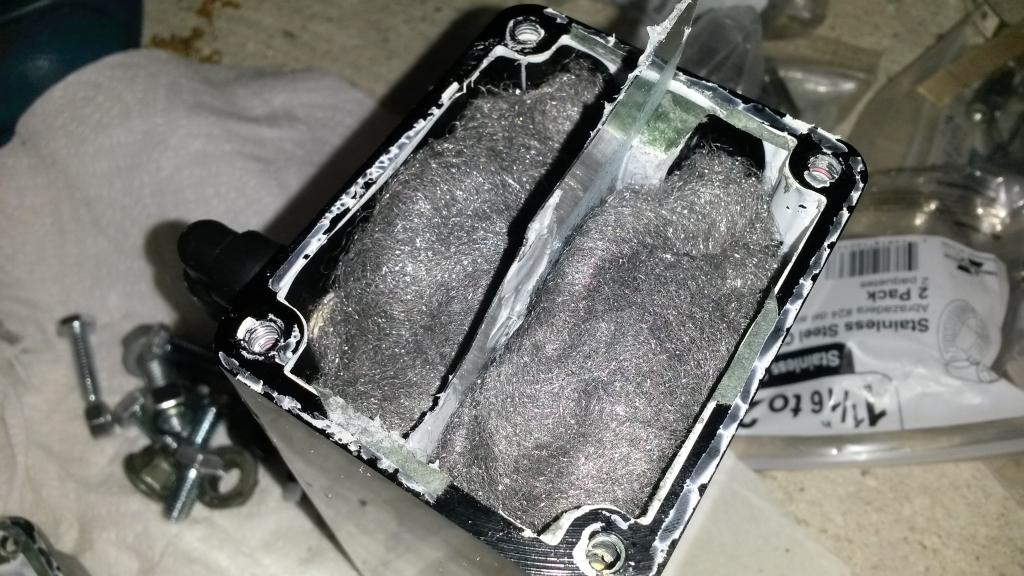
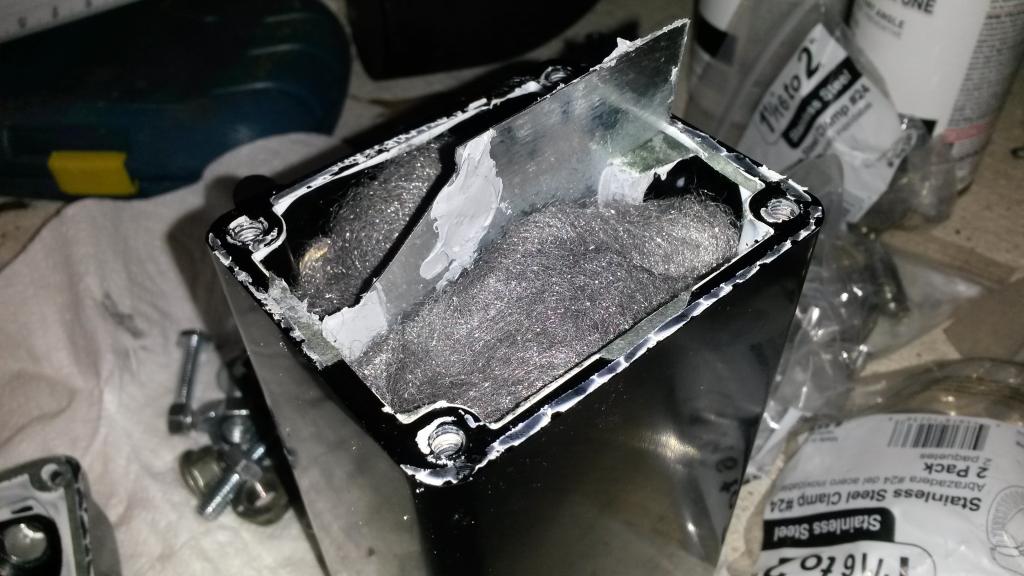

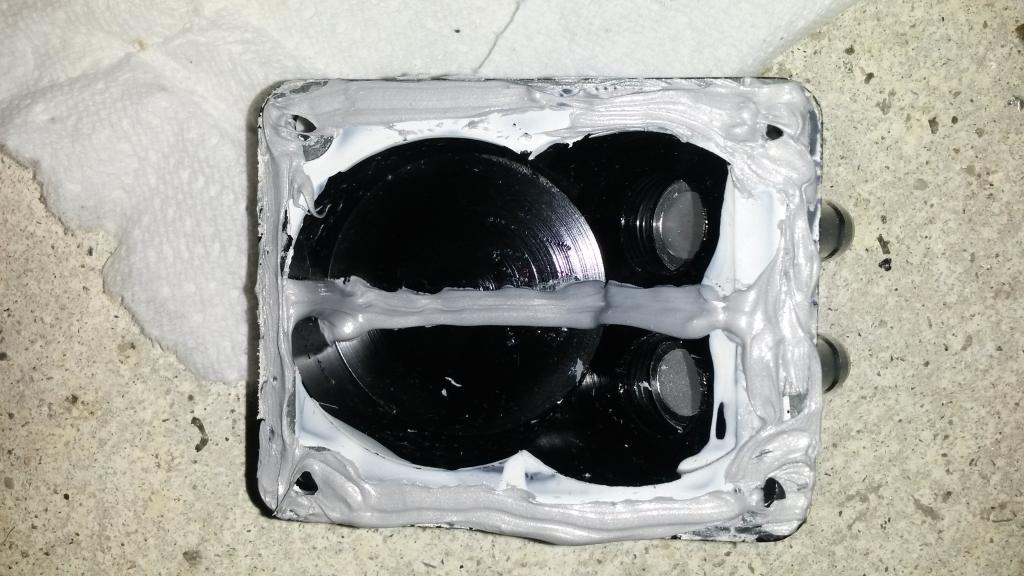
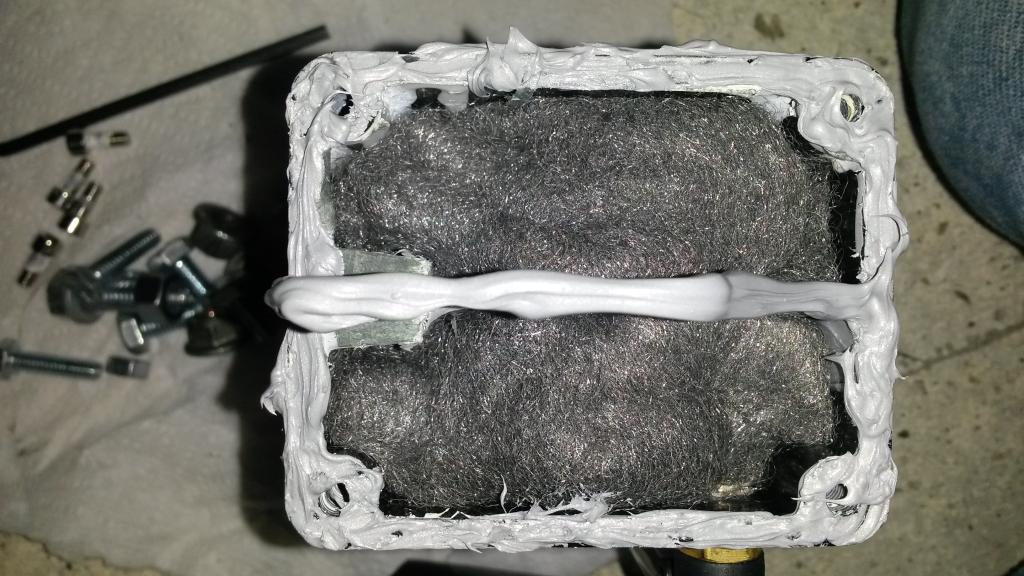
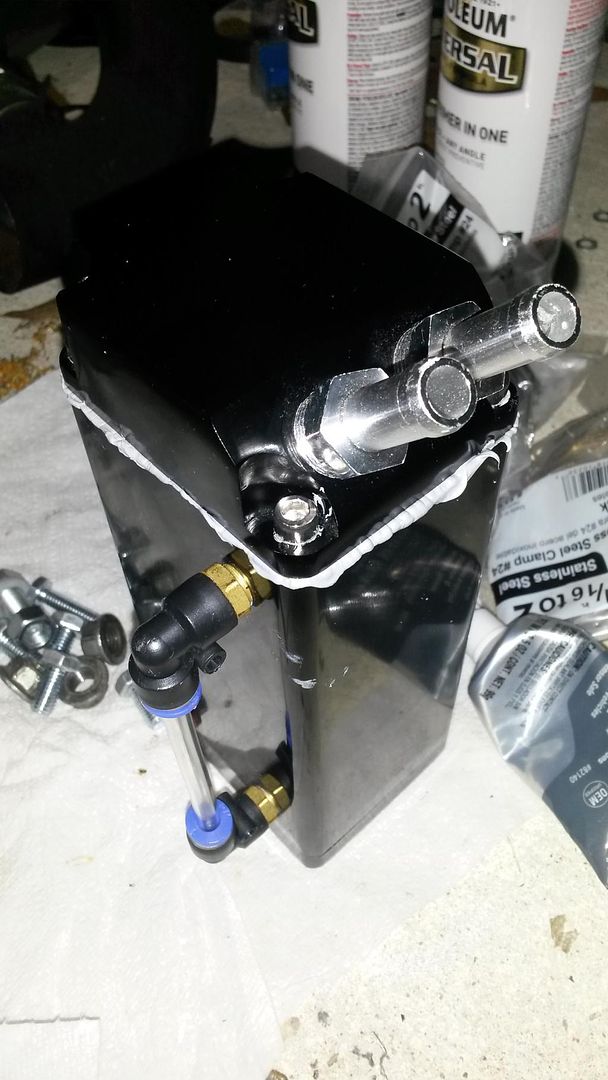
Done. Catch can has two ports, air/oil will enter one port, expand into an open lid that covers that side, then travel down that side, 1/2 way to bottom going through densly packed (2 per side) fine metal scour pads, then hits a floor with holes drilled in it, goes through floor, across bottom, and up through floor on other side, and up again, then out other port.
With densly packed fine metal, it should catch a lot of oil, and bottom 1/2 is empty for it to drip/collect.
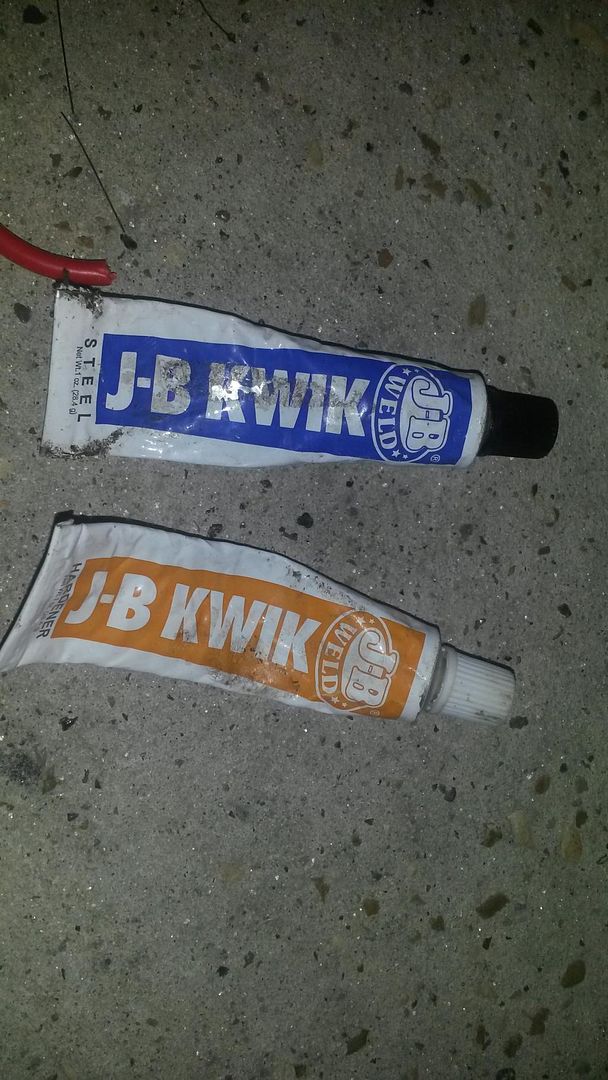
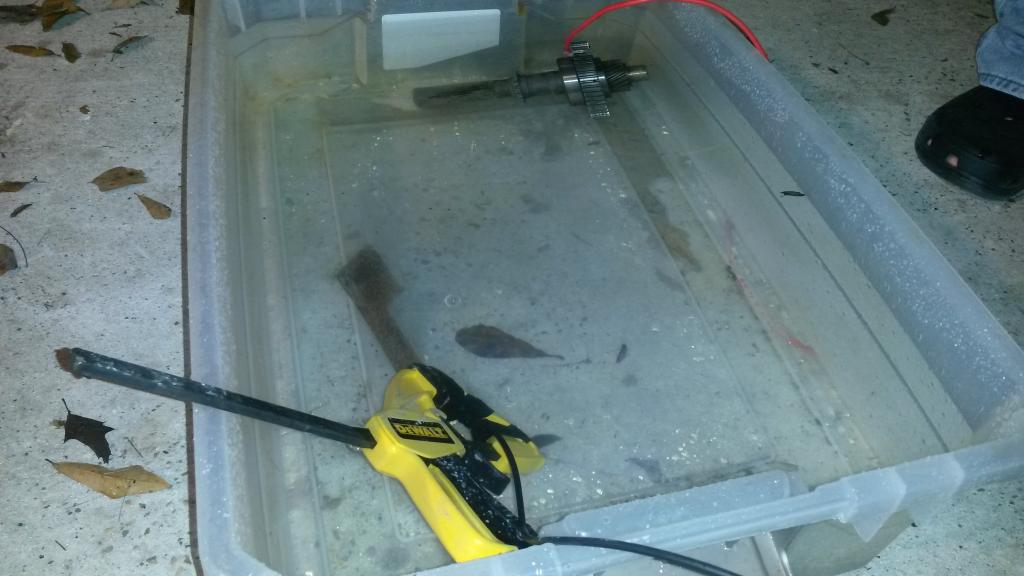
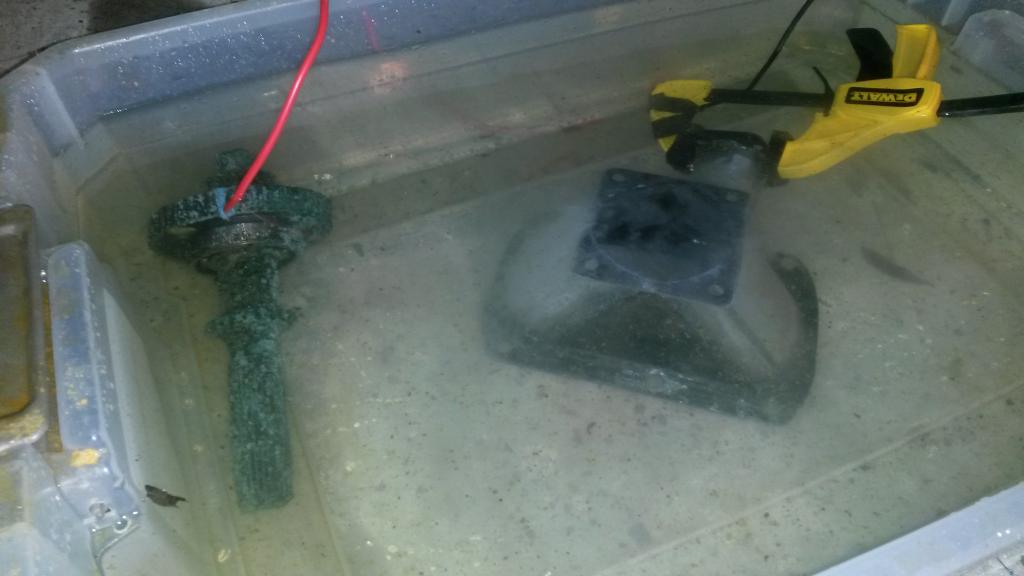
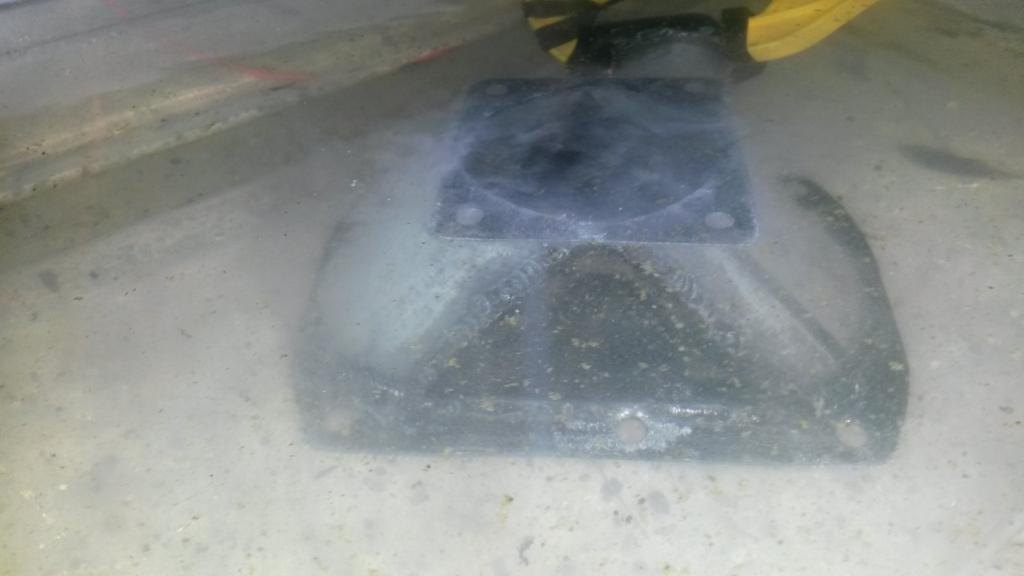
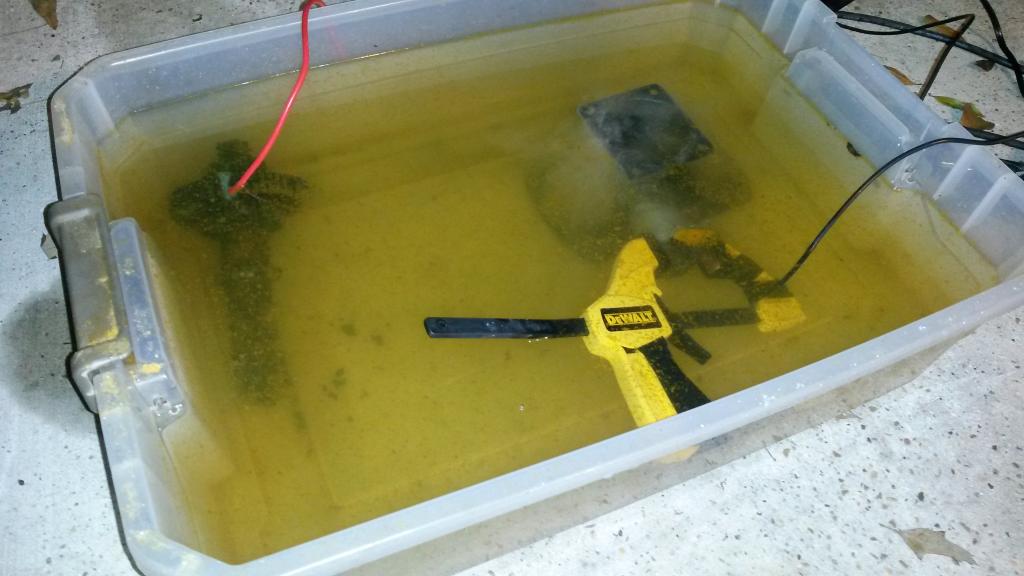
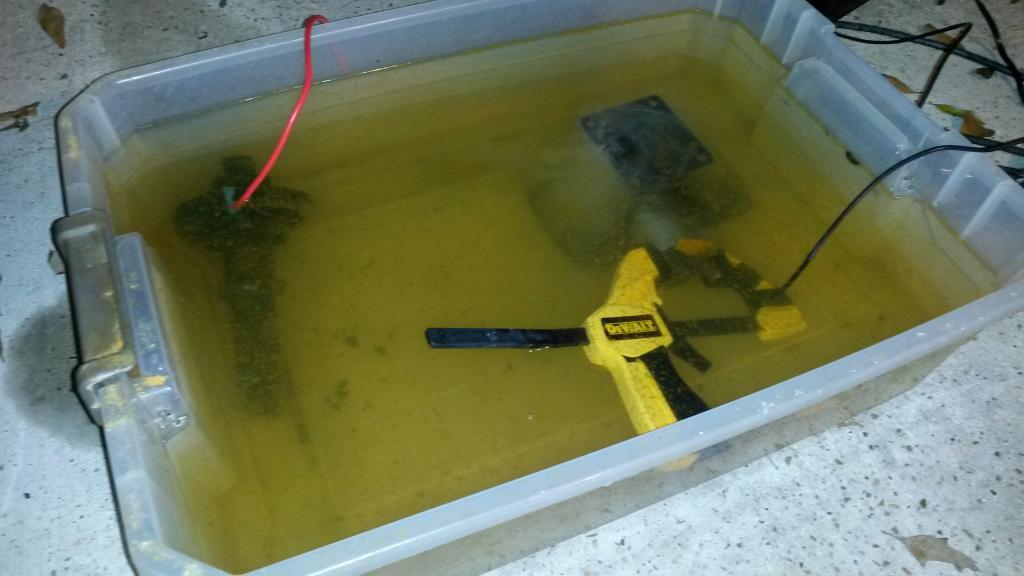
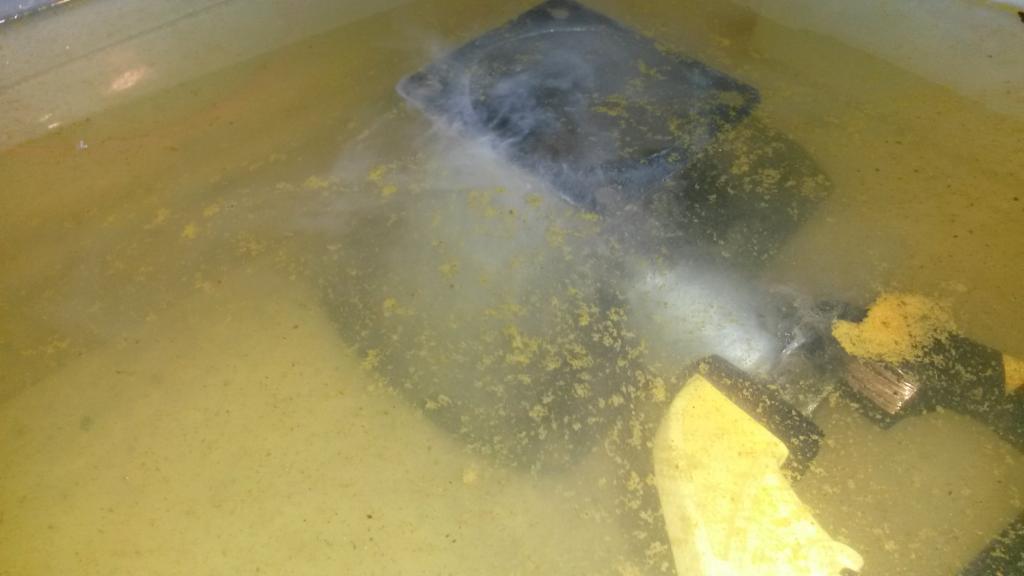
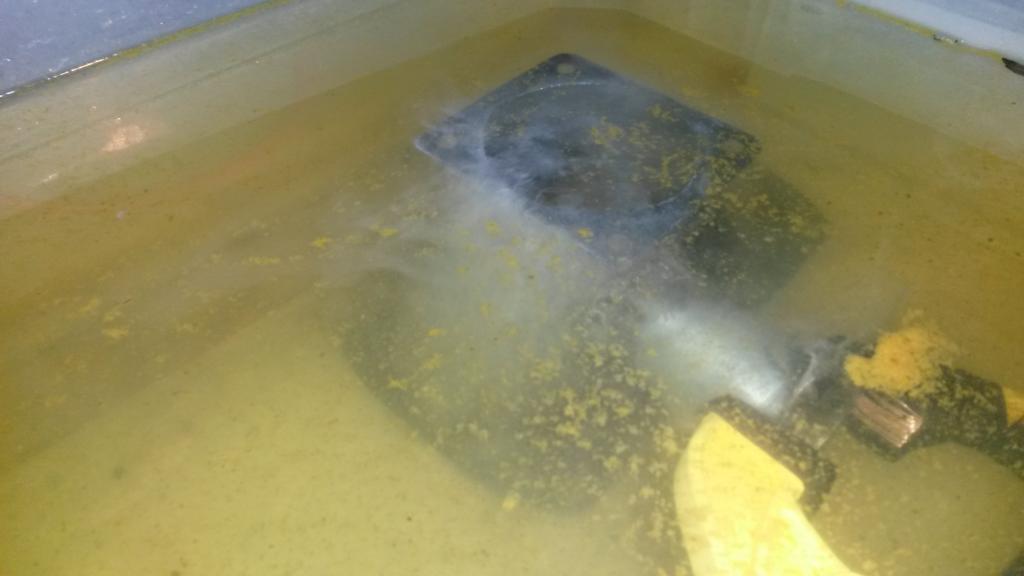
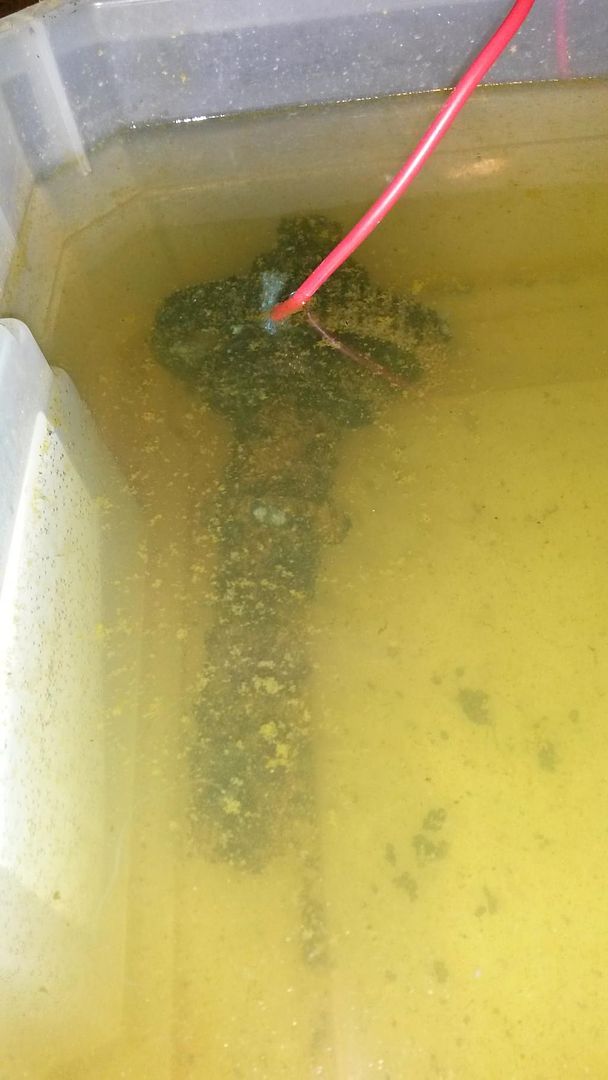
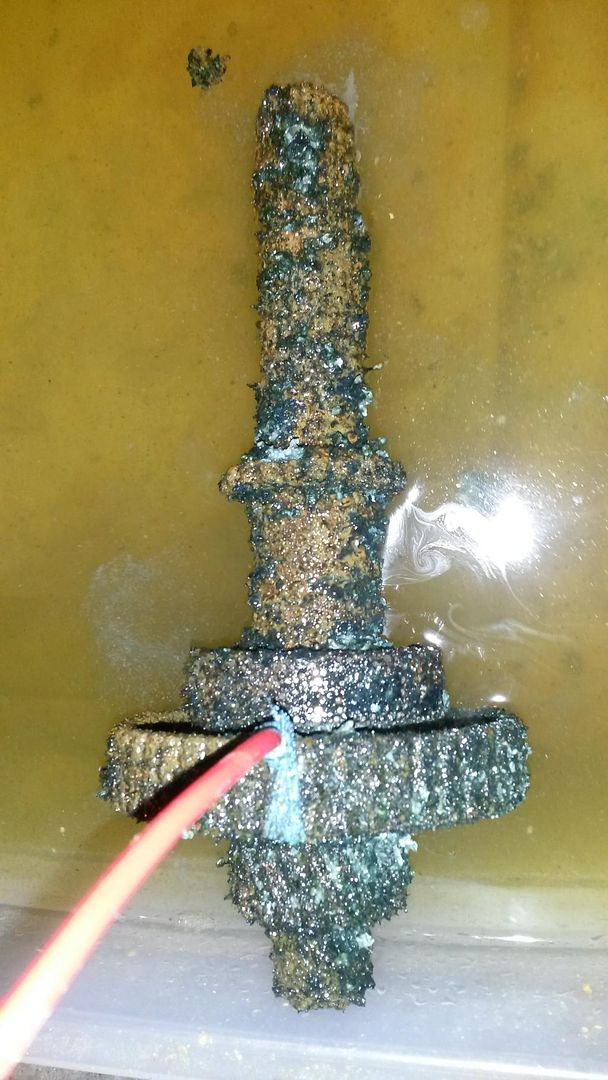
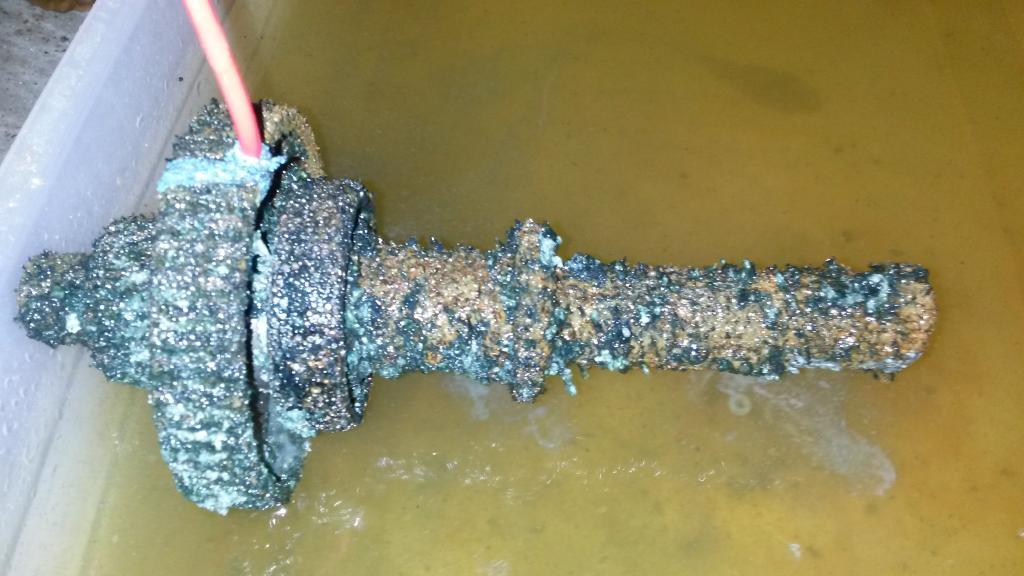
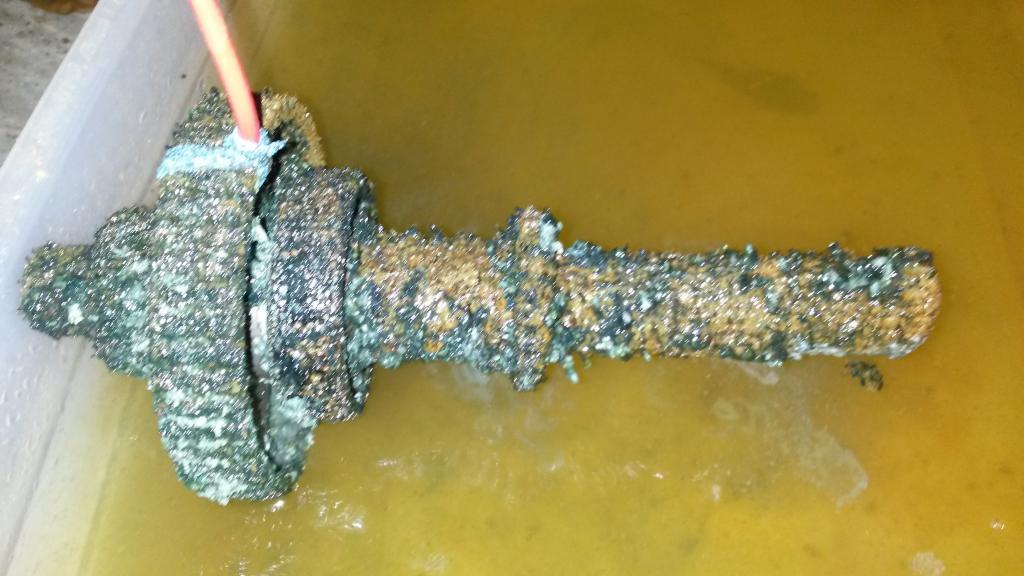
Also decided I'm going to paint all the metal pieces I've made, so decided to do a little electrolysis cleaning.
Setup: plastic tube, 05' subaru outback xt limited tailshaft cathode, 2A 12V power supply, wires, DeWalt plastic clamp to connect to part, Washing Soda via Amazon.
Test piece
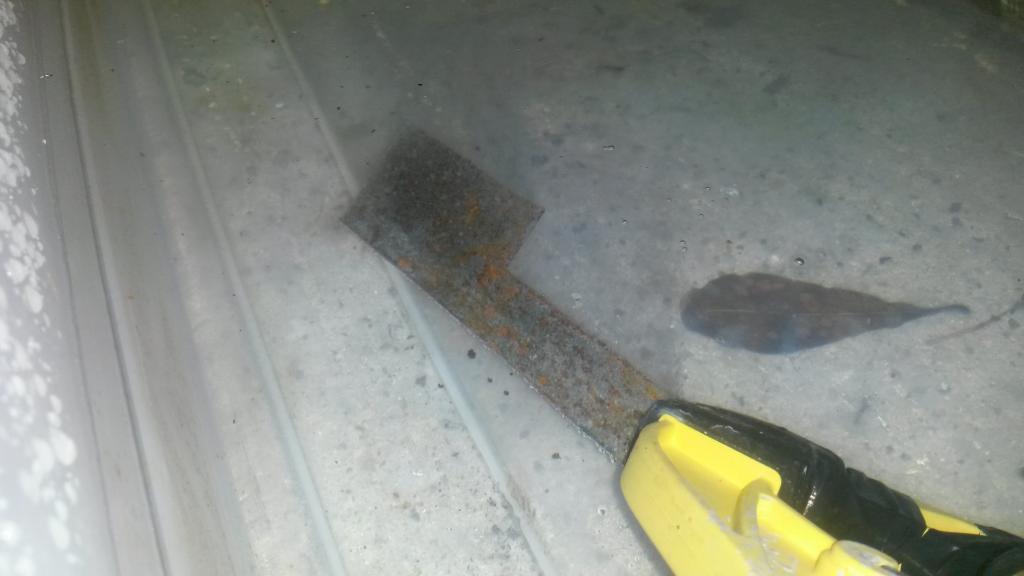
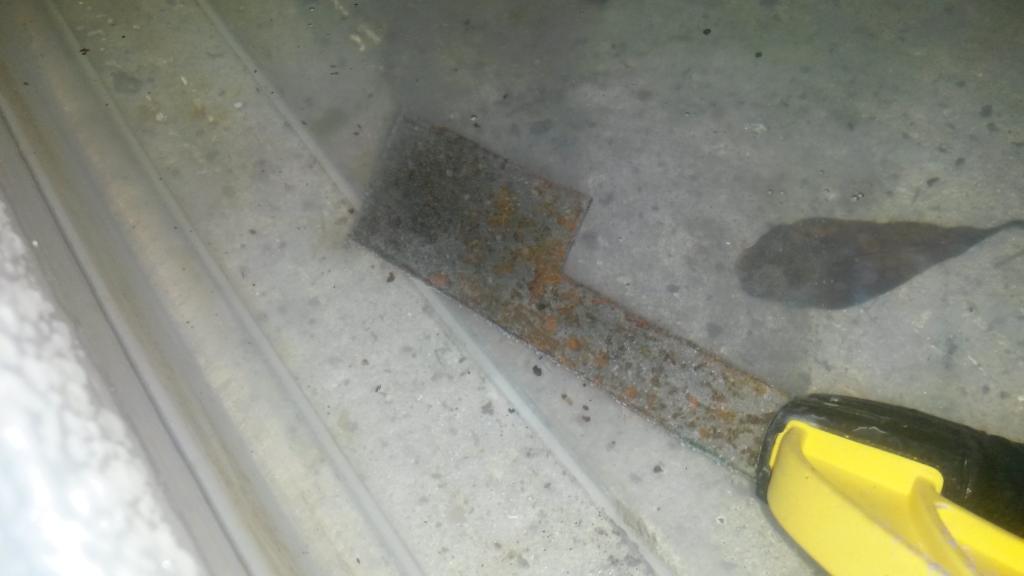
My SC inlet piece, it's rusted a lot so it went first.
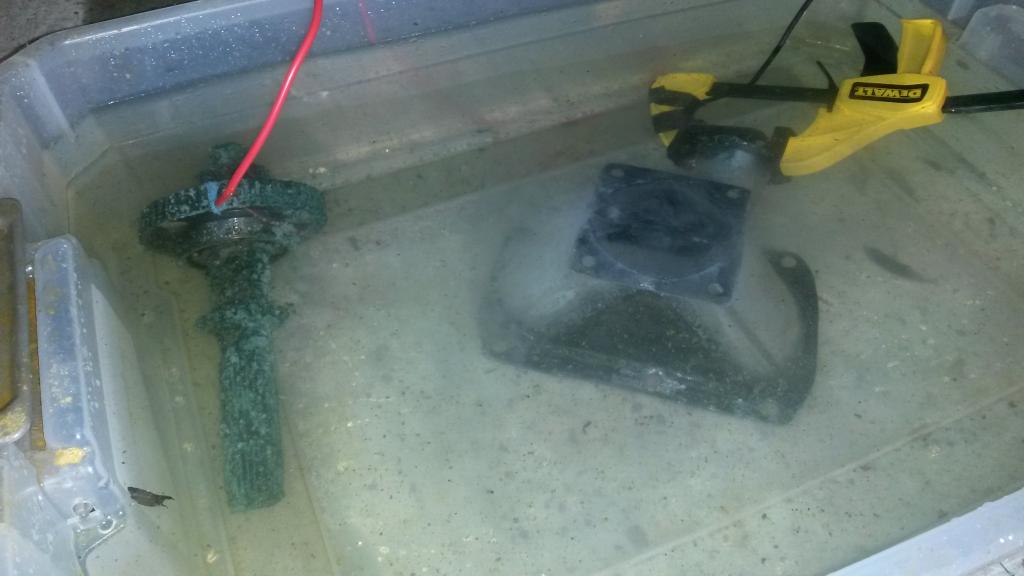
A couple hours later....
Tomorrow I gotta buy 2 more hose clamps to finish Oil cooler mount, then find home/build mount for catch can. Then start on P/S system reinstall....
I bought this off ebay as it's large, square, has ports on top, has removable top, has sight tube and drain. But has no baffles. So useless, so I fixed it. I think this is an excellent design from a function standpoint, perhaps not pretty on the inside but functionally this thing will kick *** is my bet.
I made baffles/floor from paper, then metal. Was a PAIN getting everything to fit perfect, but eventually I did.


Done. Catch can has two ports, air/oil will enter one port, expand into an open lid that covers that side, then travel down that side, 1/2 way to bottom going through densly packed (2 per side) fine metal scour pads, then hits a floor with holes drilled in it, goes through floor, across bottom, and up through floor on other side, and up again, then out other port.
With densly packed fine metal, it should catch a lot of oil, and bottom 1/2 is empty for it to drip/collect.
Also decided I'm going to paint all the metal pieces I've made, so decided to do a little electrolysis cleaning.
Setup: plastic tube, 05' subaru outback xt limited tailshaft cathode, 2A 12V power supply, wires, DeWalt plastic clamp to connect to part, Washing Soda via Amazon.
Test piece


My SC inlet piece, it's rusted a lot so it went first.


A couple hours later....


Tomorrow I gotta buy 2 more hose clamps to finish Oil cooler mount, then find home/build mount for catch can. Then start on P/S system reinstall....
Reply
0
0
02-22-2015, 02:14 AM
#65
Elite Member

Join Date: Apr 2010
Location: Newcastle, Australia
Posts: 2,826
Total Cats: 67
When you post walls of photos try taking them from less close up and adding more spaces between each one, otherway peoples eyes and brain just go "Nope.".
Awesome work so far.
Dann
Awesome work so far.
Dann
Reply
0
0
02-22-2015, 11:06 AM
#66
Senior Member

iTrader: (2)

Join Date: Oct 2013
Location: Goleta, Southern California
Posts: 520
Total Cats: 27
I have a suggestion. On the catch can, I would use something less tightly packed. Say copper dish scrubbers. Also I would keep the scrubbers away from the outlet. That way the oulet hose can't just slurp oil off the top.
Reply
0
0
02-22-2015, 01:09 PM
#67

Thats not a desk thats a command center.
Agree, ditch the tight steel wool. You need chore boy brand copper scrubbies, dontbuy them from walmart, chore boys at walmart are just copper covered steel, the cvs or walgreens ones are 100% copper. I dont know why they sell two different ones in almost identical packaging, but they do. If you cant seem to locate any, ask your friendly local neighborhood crack head, they'll know where to get the good ones they use for their crack pipes.
Agree, ditch the tight steel wool. You need chore boy brand copper scrubbies, dontbuy them from walmart, chore boys at walmart are just copper covered steel, the cvs or walgreens ones are 100% copper. I dont know why they sell two different ones in almost identical packaging, but they do. If you cant seem to locate any, ask your friendly local neighborhood crack head, they'll know where to get the good ones they use for their crack pipes.
Reply
1
1
02-22-2015, 01:34 PM
#68
Elite Member
Join Date: Mar 2007
Location: Santa Clara, CA
Posts: 5,165
Total Cats: 855
TechShop is America's 1st Nationwide Open-Access Public Workshop -- TechShop Locations
--Ian

Reply
0
0
 02-23-2015, 12:55 AM
#70
Elite Member
Thread Starter
iTrader: (16)
Join Date: Aug 2007
Location: Houston, TX
Posts: 9,293
Total Cats: 475
Thats not a desk thats a command center.
Agree, ditch the tight steel wool. You need chore boy brand copper scrubbies, dontbuy them from walmart, chore boys at walmart are just copper covered steel, the cvs or walgreens ones are 100% copper. I dont know why they sell two different ones in almost identical packaging, but they do. If you cant seem to locate any, ask your friendly local neighborhood crack head, they'll know where to get the good ones they use for their crack pipes.
Agree, ditch the tight steel wool. You need chore boy brand copper scrubbies, dontbuy them from walmart, chore boys at walmart are just copper covered steel, the cvs or walgreens ones are 100% copper. I dont know why they sell two different ones in almost identical packaging, but they do. If you cant seem to locate any, ask your friendly local neighborhood crack head, they'll know where to get the good ones they use for their crack pipes.
Also, the inlet/outlet are about .75 inches away from the material.
Reply
0
0
02-23-2015, 01:00 AM
#71
Elite Member
Thread Starter
iTrader: (16)
Join Date: Aug 2007
Location: Houston, TX
Posts: 9,293
Total Cats: 475
Thanks! It's pretty nice so far but not finished. I may go with a different monitor setup down the road, but gonna use these for now since I already got them!
Agreed!!! I gotta get that done once I get my monitors and everything where i want them. I'm gonna have an uninterruptable power supply too hooked up to everything too. Any suggestions on how to do the cables? Maybe a piece of PVC pipe down the back with a slit cut in it... I agree I want that part awesome too!
Agreed!!! I gotta get that done once I get my monitors and everything where i want them. I'm gonna have an uninterruptable power supply too hooked up to everything too. Any suggestions on how to do the cables? Maybe a piece of PVC pipe down the back with a slit cut in it... I agree I want that part awesome too!
Reply
0
0
02-23-2015, 01:08 AM
#72
Elite Member
Thread Starter
iTrader: (16)
Join Date: Aug 2007
Location: Houston, TX
Posts: 9,293
Total Cats: 475
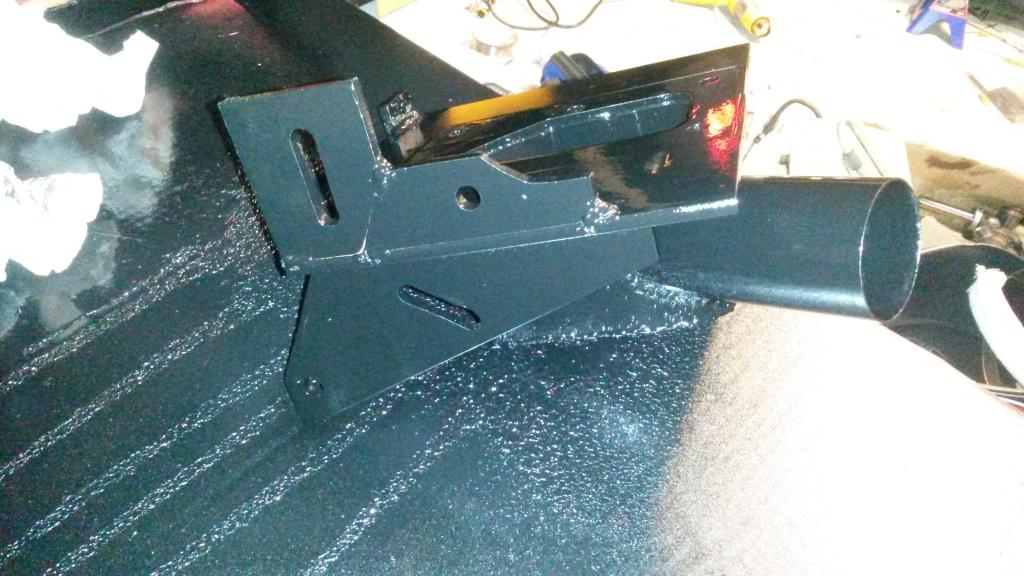
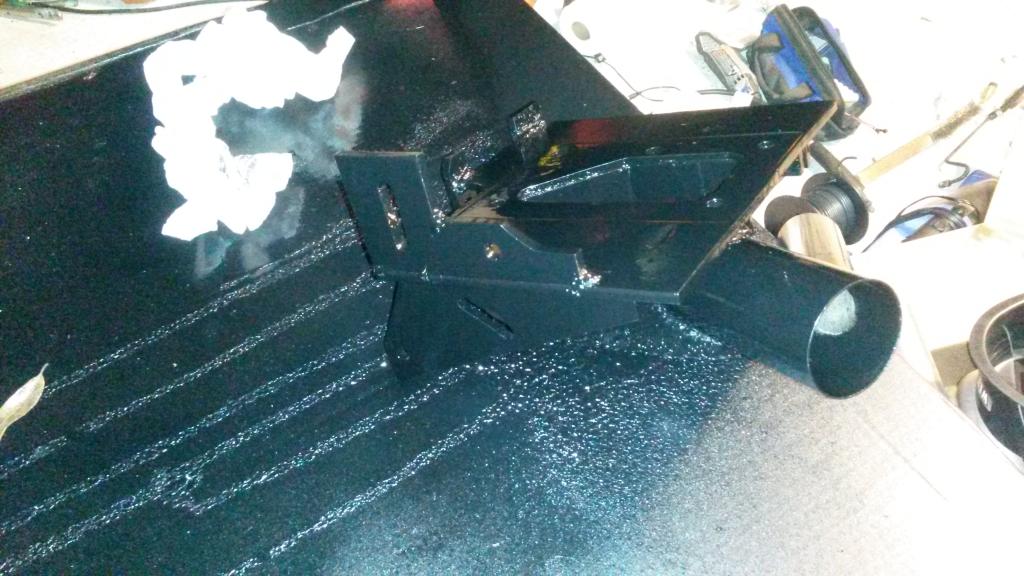
Update:
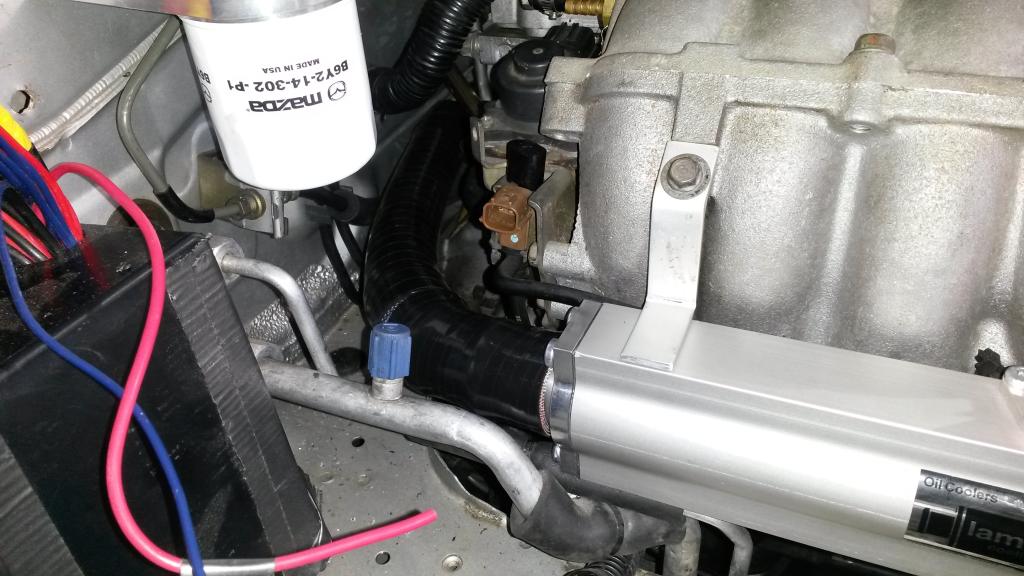
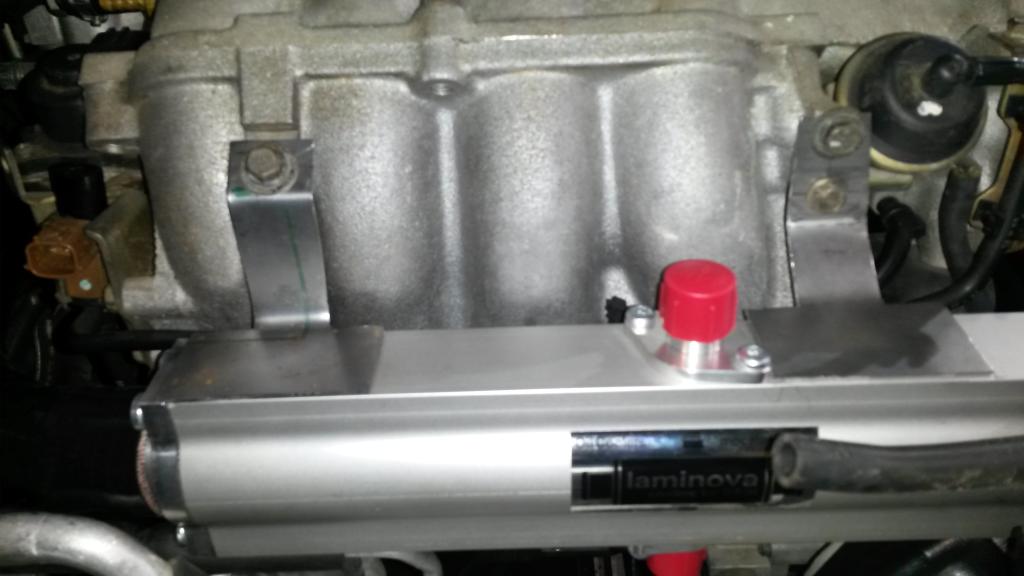
Oil cooler mounts built.
Installed, with hose from back of head to front of cooler installed/clamped.

Installed my ID 1000's, used a 01'+ fuel rail, it don't fit 99' upper intake manifold, no pics, but I had to cut a slot in 99' manifold for it to clear the 01+ fuel rail. I used 01+ Rail as it appears to be a better rail regarding flow/pressure drop between the cylinders based on rail cross sectional area.
I did glue the little plastic spacers in so maybe they'll stop falling out at the worst time.
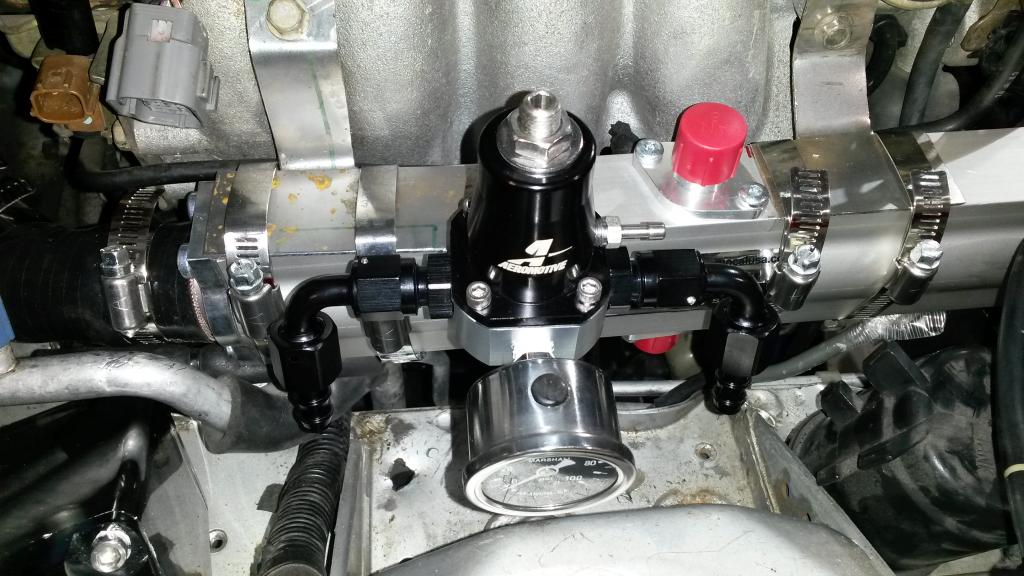
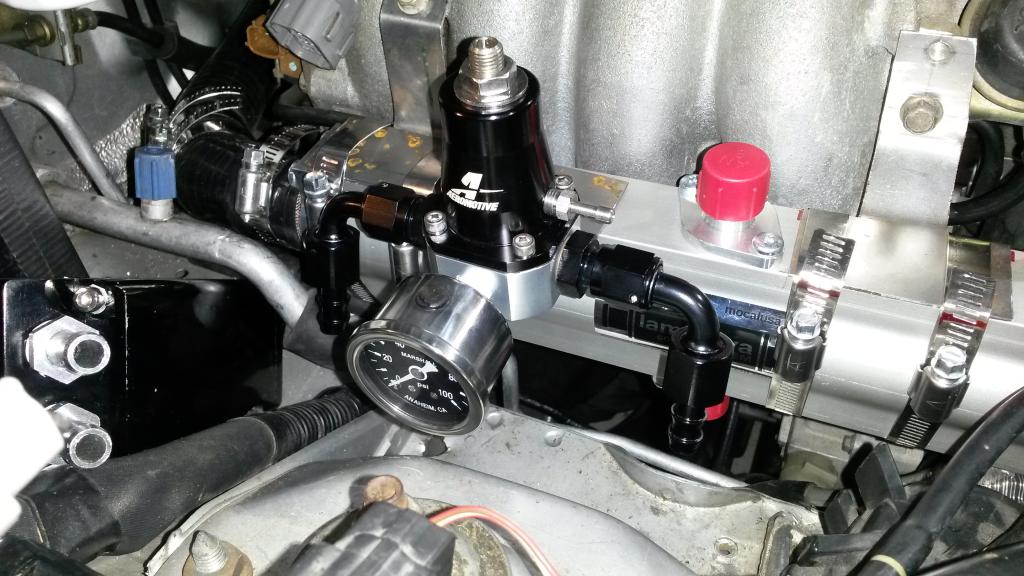
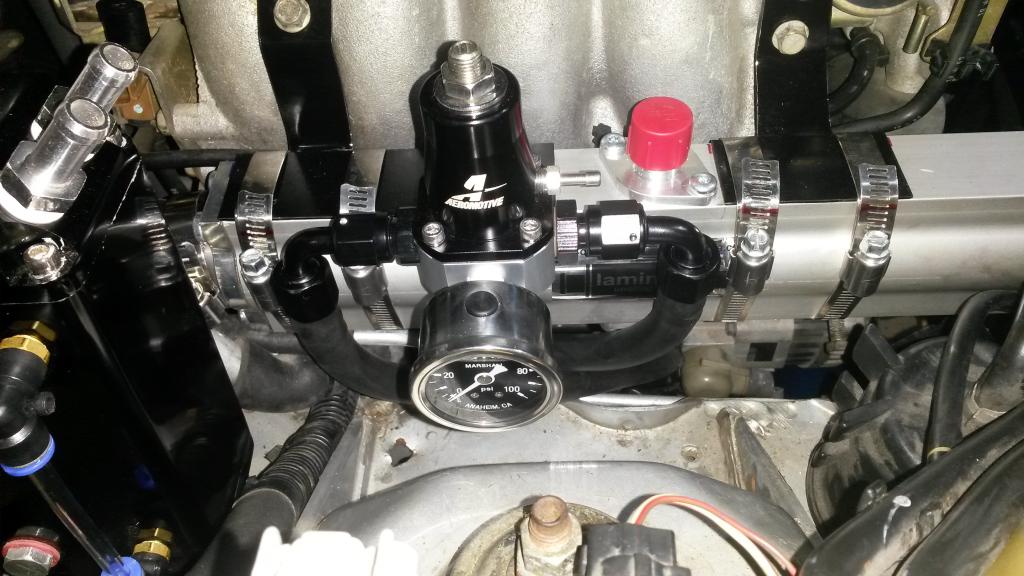
Then made fuel pressure regulator mount
It connects with clamps for HX mount, goes above where factory fuel pressure pulsation thingy went.
Then made mount for catch can. It's not very sturdy, going to brace it or something, not sure yet.
Also electrolysis cleaned a few parts and painted them.
It's getting cold here, so next few days will be less productive I know, I hate the cold. Next steps as of now:
Brace mount for catch can, clean/paint.
Wait for elbow for SC, then weld pipe on, clean/paint.
Install upgraded fuel system, order any fittings I need.
Install oil filter adapter to block, measure and order 3 custom hoses.
Run fittings to Accusump, order custom hose for that too.
Install P/S system. I did buy the fluid for it today, I think it's dexron 3.
Oil cooler mounts built.


Installed, with hose from back of head to front of cooler installed/clamped.


Installed my ID 1000's, used a 01'+ fuel rail, it don't fit 99' upper intake manifold, no pics, but I had to cut a slot in 99' manifold for it to clear the 01+ fuel rail. I used 01+ Rail as it appears to be a better rail regarding flow/pressure drop between the cylinders based on rail cross sectional area.
I did glue the little plastic spacers in so maybe they'll stop falling out at the worst time.

Then made fuel pressure regulator mount


It connects with clamps for HX mount, goes above where factory fuel pressure pulsation thingy went.


Then made mount for catch can. It's not very sturdy, going to brace it or something, not sure yet.


Also electrolysis cleaned a few parts and painted them.


It's getting cold here, so next few days will be less productive I know, I hate the cold. Next steps as of now:
Brace mount for catch can, clean/paint.
Wait for elbow for SC, then weld pipe on, clean/paint.
Install upgraded fuel system, order any fittings I need.
Install oil filter adapter to block, measure and order 3 custom hoses.
Run fittings to Accusump, order custom hose for that too.
Install P/S system. I did buy the fluid for it today, I think it's dexron 3.
Reply
0
0
02-25-2015, 12:41 AM
#74
Elite Member
Thread Starter
iTrader: (16)
Join Date: Aug 2007
Location: Houston, TX
Posts: 9,293
Total Cats: 475
Thanks man! I spent the last 2 days getting my Suburu Outback emptied/cleaned/detailed so it's no longer a work car, now a clean DD. Then this evening once that was done, I cleaned up around the miata as I had crap everywhere. Actually still do, but it's more organized and less crap! I should be back on the miata tomorrow...
Reply
0
0
02-26-2015, 01:07 AM
#75
Elite Member
Thread Starter
iTrader: (16)
Join Date: Aug 2007
Location: Houston, TX
Posts: 9,293
Total Cats: 475
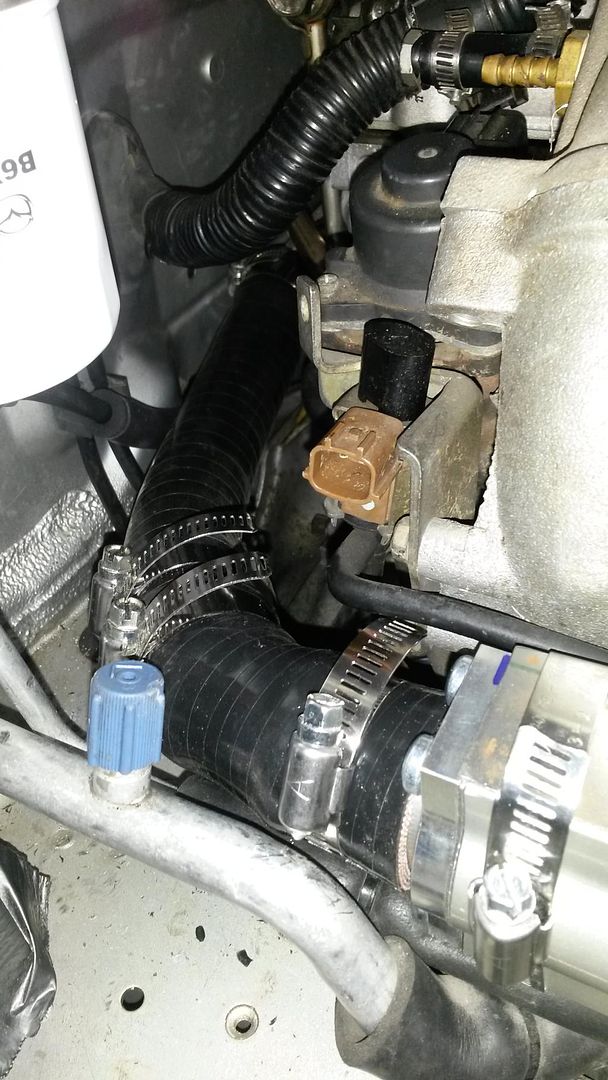
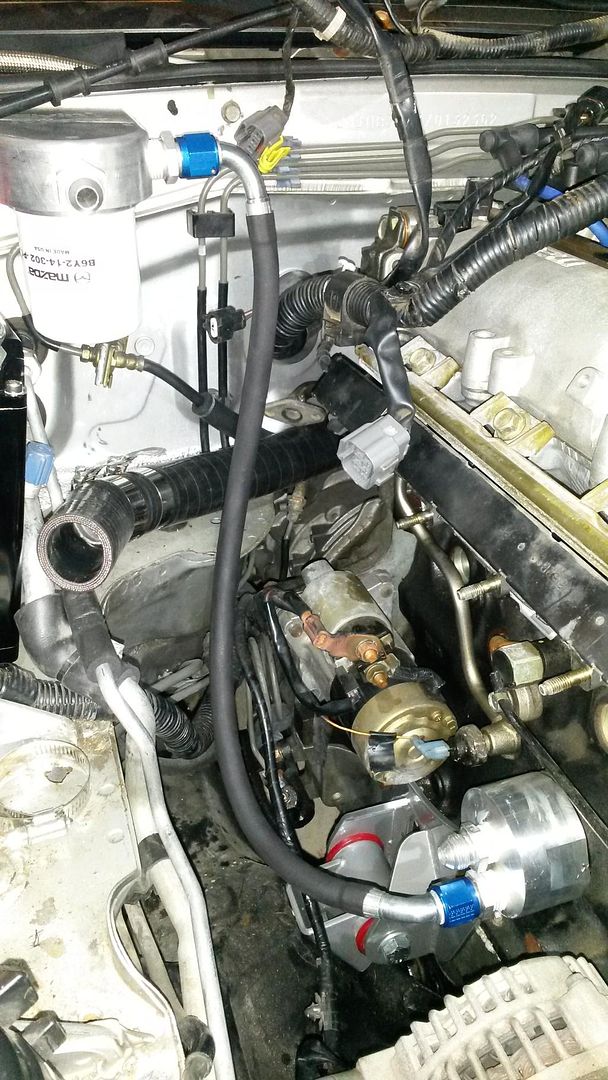
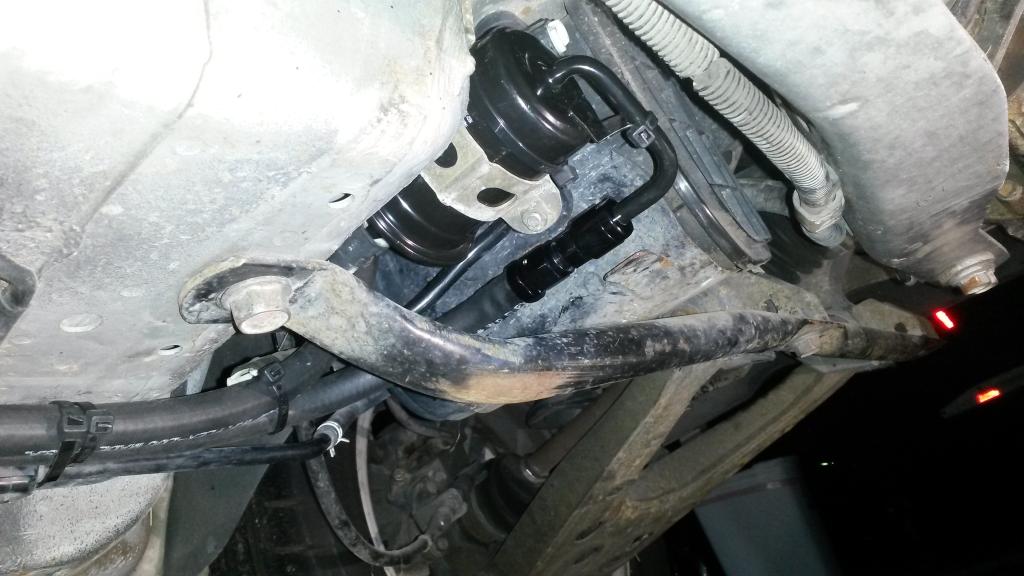
Update:
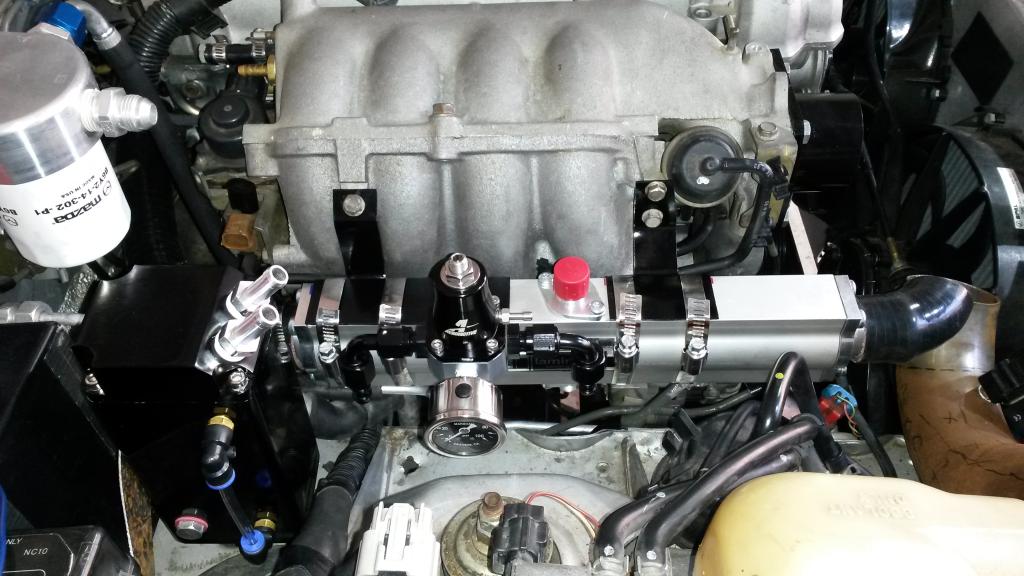
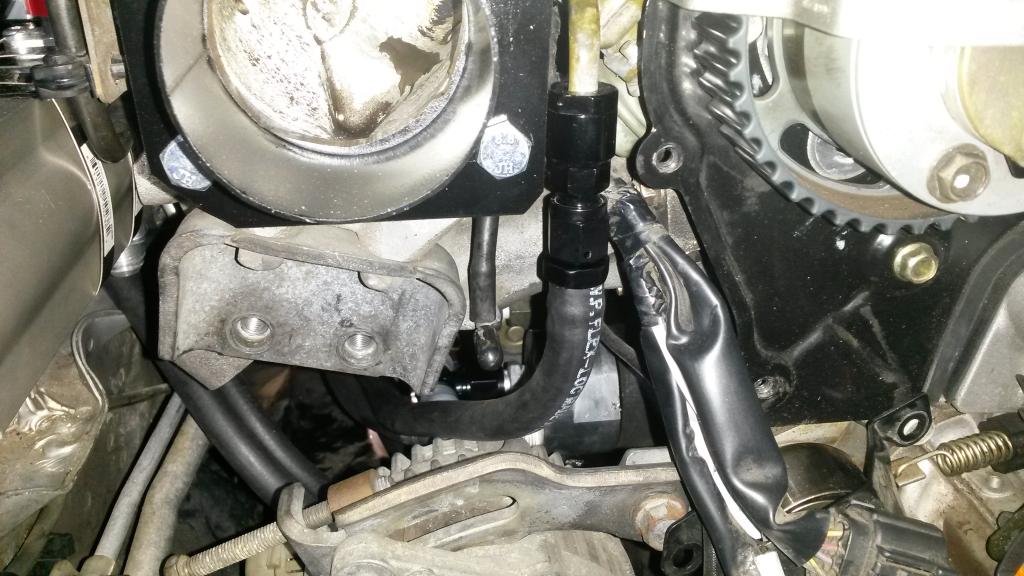
Well I made a little progress. I removed the factory oil cooler, fitting, etc, and installed the subaru adapter linked in this build thread. It worked! Then installed FM adapter to it. Then hooked up hose "A" on teh FM kit. Turns out Hose "B" can be used to connect bottom of oil cooler back to adapter.
I Installed a "Tee" fitting on the filter adapter, so I can connect both the oil cooler and the accusump their. So using this, hose "B" from the FM kit can be used as mentioned, so I only need 2 more hoses. I measured and got specs for each, will order them soon. Need a hose that's 45* to straight, 12.25" long, and another 90* to straight, 43" long, and then a straight 1/2" NPT to 8AN fitting to screw into accusump.
Also found my old Tuner Toys oil adapter and used it to Tee into the block, so I now have my stock oil pressure switch and a 0-100 PSI transducer installed into the oil block gallery for accurate oil pressure.
Fuel system is next, it will be all 6AN hoses that I make, using the push lock fittings rated to 250 PSI. They had good reviews when I bought them, they're all summit brand. Since fuel will be less than 100 PSI it should be fine. Will be much easier to build vs stainless!
Also, I used 1" heat shrink over the stainless AN hoses for abrasion protection.
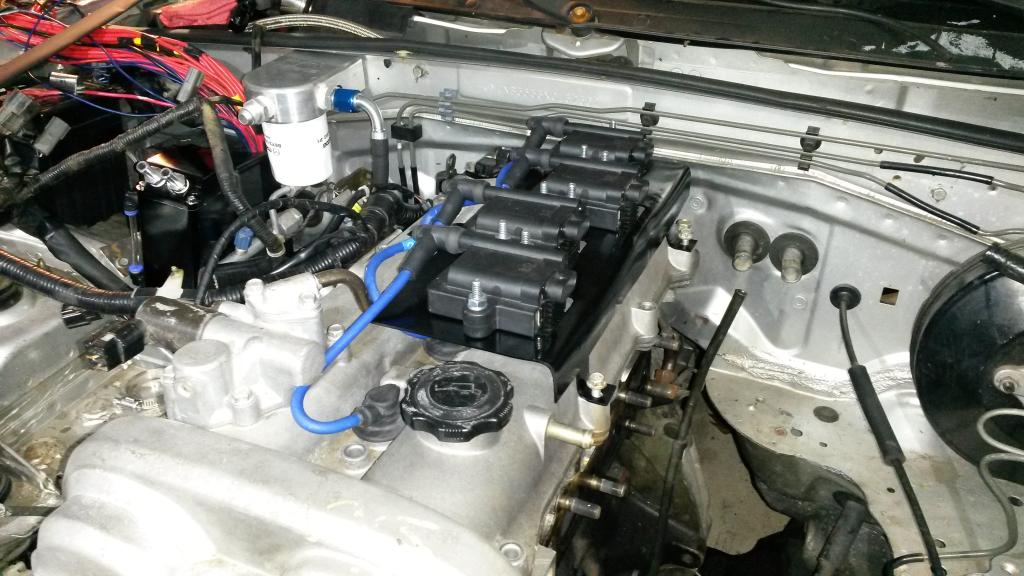
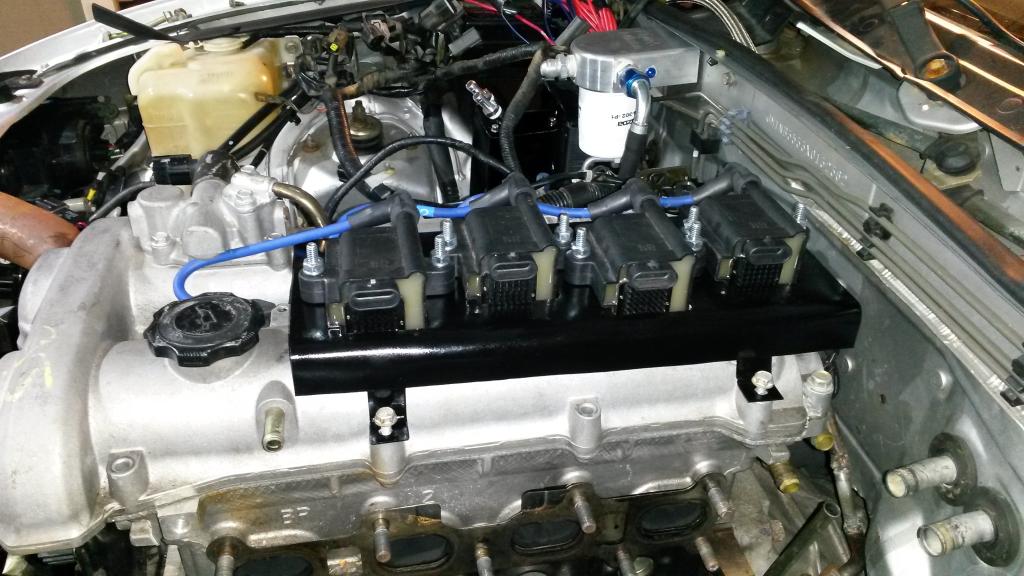
Also ignition system is done! Turned out nice IMO.
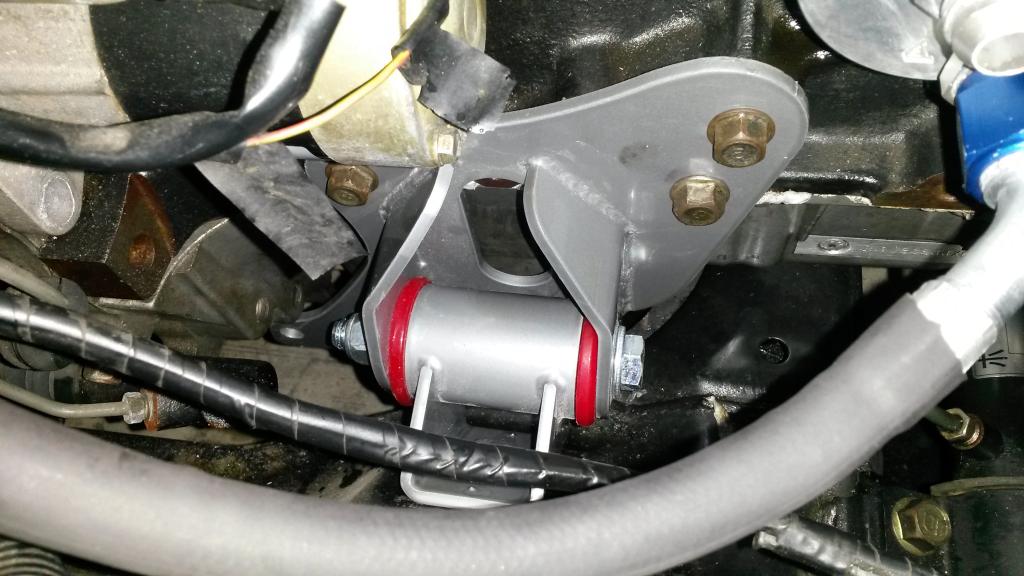
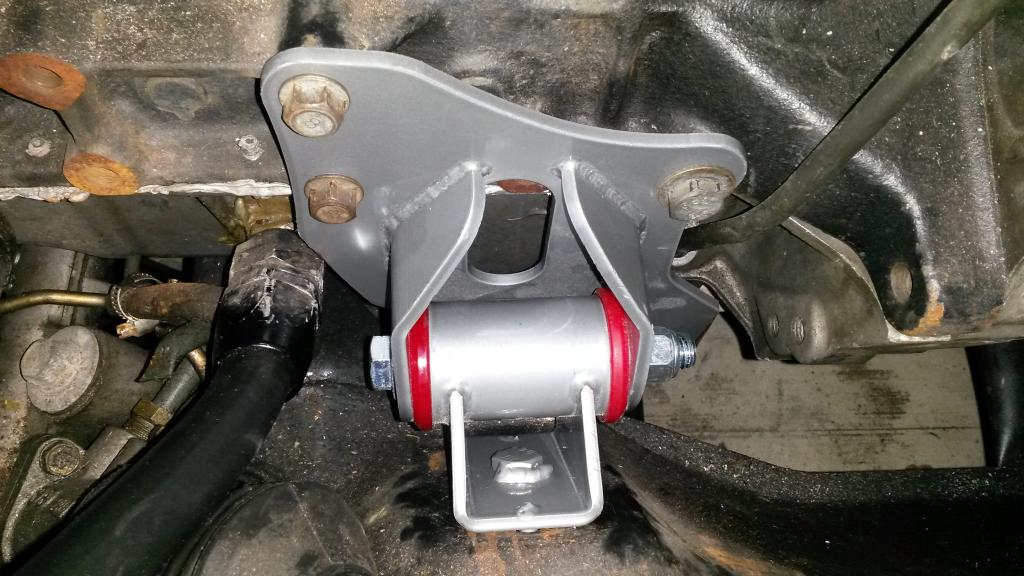
And also installed my new motor mounts, forgot the brand, AWR or something like that, they're pretty stiff. Had to lightweight the drivers side as it's an 01 mount and I have 99' pan = nope! Also it hit my old turbo drain so I cut it there too. Lightweighting FTW....
Pics!
Well I made a little progress. I removed the factory oil cooler, fitting, etc, and installed the subaru adapter linked in this build thread. It worked! Then installed FM adapter to it. Then hooked up hose "A" on teh FM kit. Turns out Hose "B" can be used to connect bottom of oil cooler back to adapter.
I Installed a "Tee" fitting on the filter adapter, so I can connect both the oil cooler and the accusump their. So using this, hose "B" from the FM kit can be used as mentioned, so I only need 2 more hoses. I measured and got specs for each, will order them soon. Need a hose that's 45* to straight, 12.25" long, and another 90* to straight, 43" long, and then a straight 1/2" NPT to 8AN fitting to screw into accusump.
Also found my old Tuner Toys oil adapter and used it to Tee into the block, so I now have my stock oil pressure switch and a 0-100 PSI transducer installed into the oil block gallery for accurate oil pressure.
Fuel system is next, it will be all 6AN hoses that I make, using the push lock fittings rated to 250 PSI. They had good reviews when I bought them, they're all summit brand. Since fuel will be less than 100 PSI it should be fine. Will be much easier to build vs stainless!
Also, I used 1" heat shrink over the stainless AN hoses for abrasion protection.
Also ignition system is done! Turned out nice IMO.
And also installed my new motor mounts, forgot the brand, AWR or something like that, they're pretty stiff. Had to lightweight the drivers side as it's an 01 mount and I have 99' pan = nope! Also it hit my old turbo drain so I cut it there too. Lightweighting FTW....
Pics!


Reply
0
0
02-27-2015, 12:29 PM
#76
Elite Member
Thread Starter
iTrader: (16)
Join Date: Aug 2007
Location: Houston, TX
Posts: 9,293
Total Cats: 475
Fuel system is DONE! Will post pics later, but basically fuel leaves factory sender, down factory hose to new factory filter, then 5/16 adpater to 6 AN, then hose forward to 6an fitting to Aeromotive 1:1 regulator, out of regulator with antoher 6AN fitting/hose to rear, back to sending unit, another 5/16 to 6an adapter and into factory return, removed regulator from tank. Feed comes off regulator, 6an fitting to hose, hose to fititng, fitting to 5/16 to 6an that's hooked to 01'+ fuel rail.
Reply
0
0
02-28-2015, 02:15 AM
#77
Elite Member
Thread Starter
iTrader: (16)
Join Date: Aug 2007
Location: Houston, TX
Posts: 9,293
Total Cats: 475
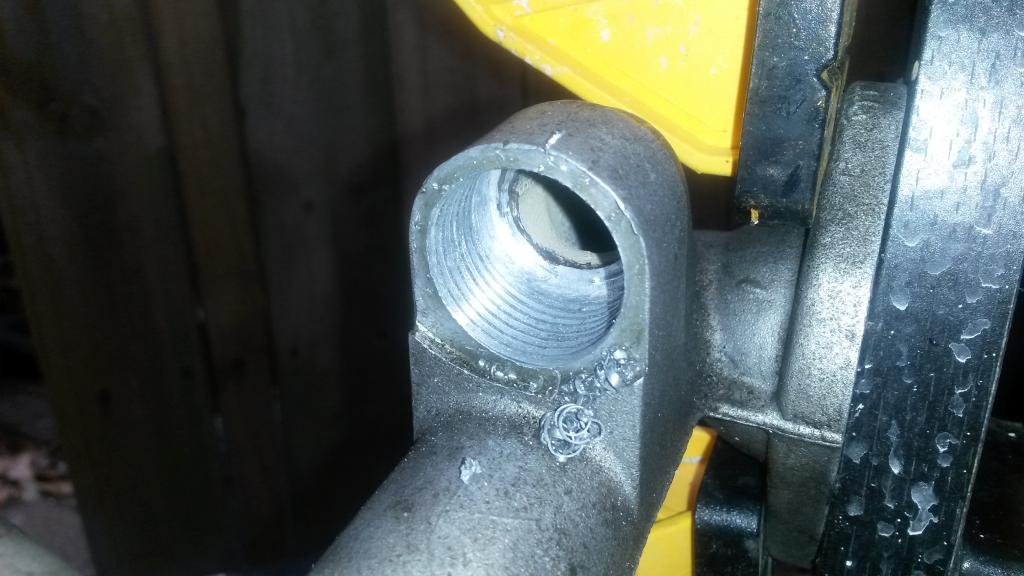
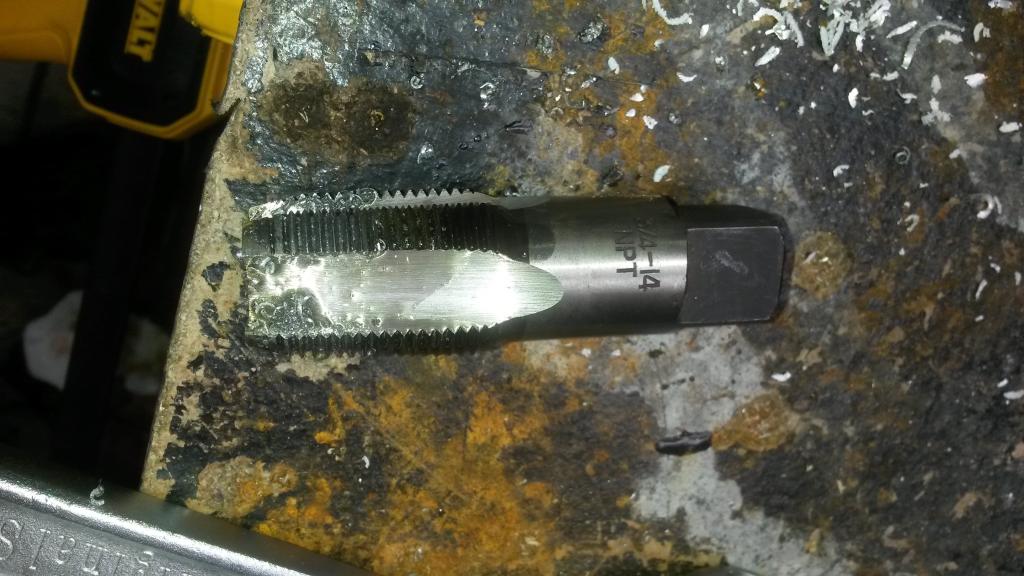
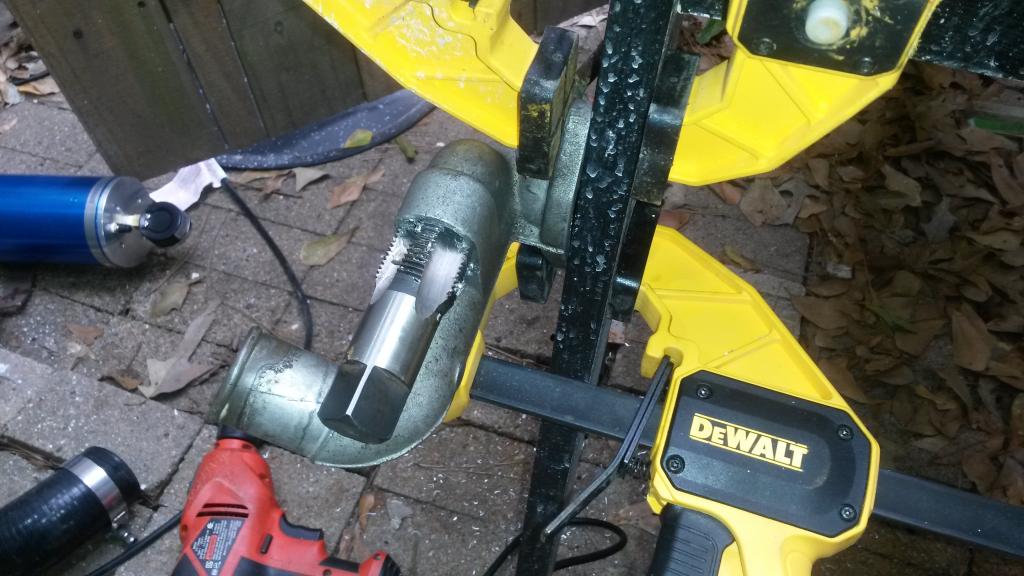
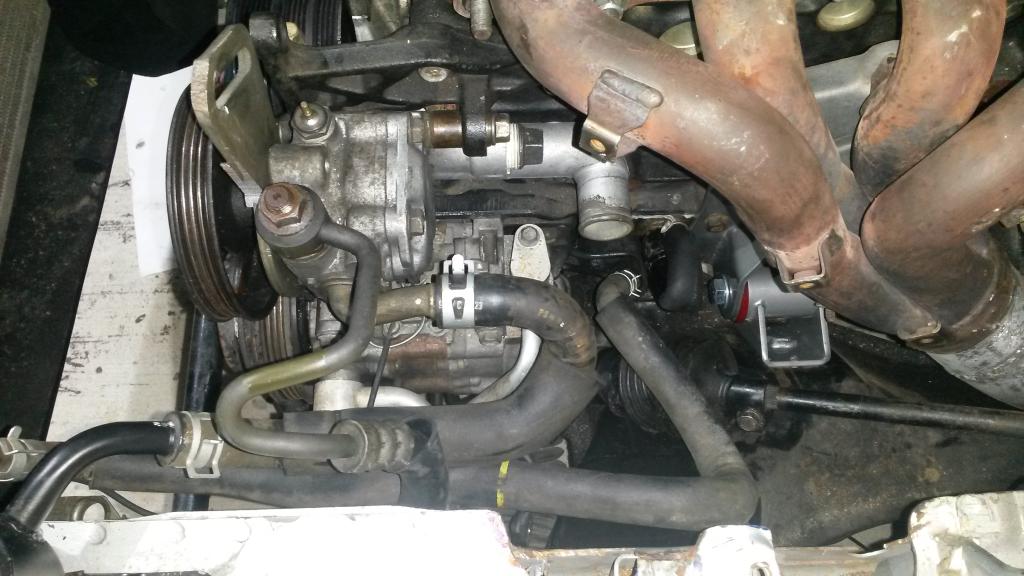
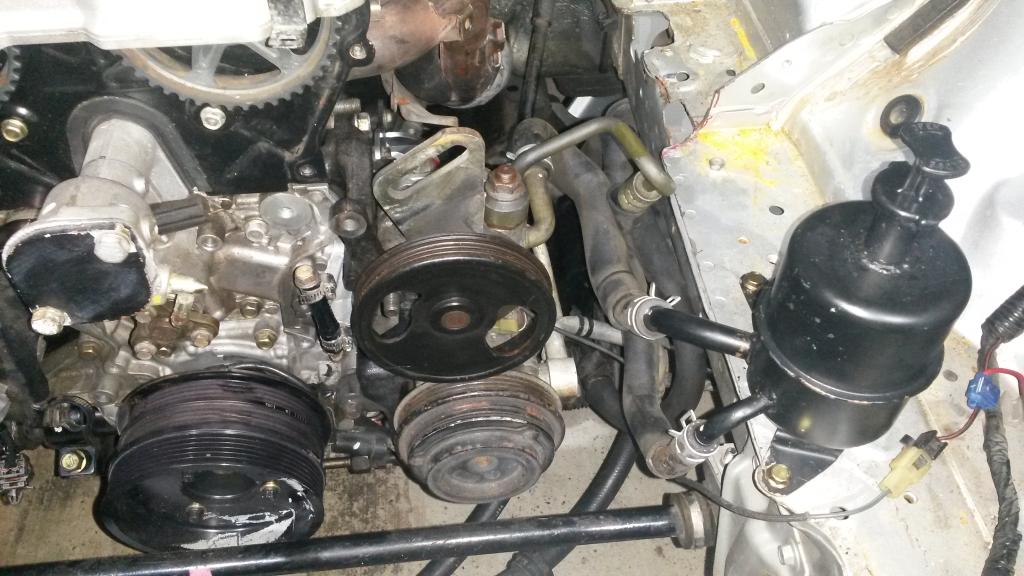
Fuel system done, except I don't have pressure transducer installed yet. Need to order a fitting to Tee it into FPR. Also P/S is installed, just need to add oil/bleed it/tension belt. It fits with my SC too! Barely, but it does!
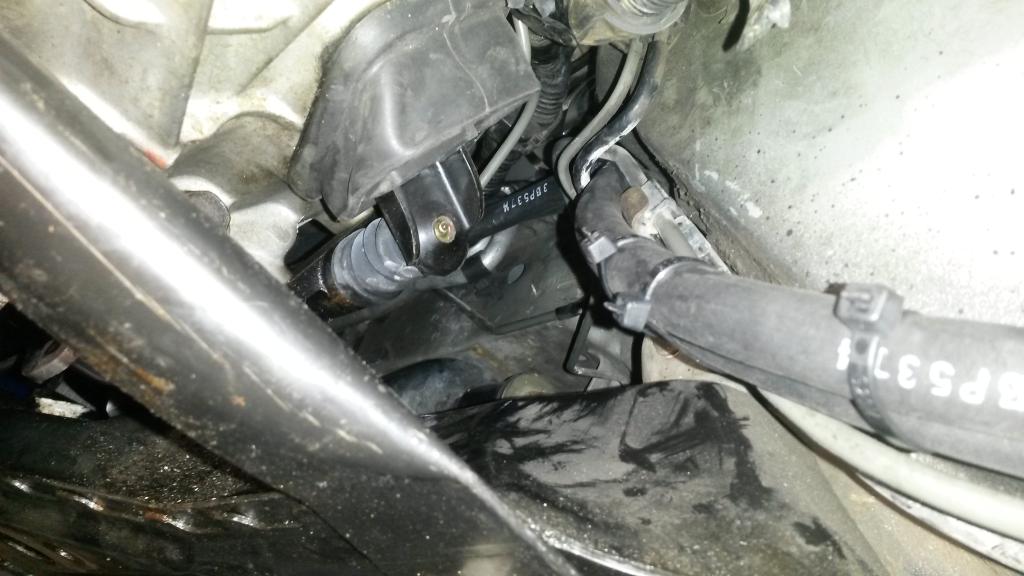
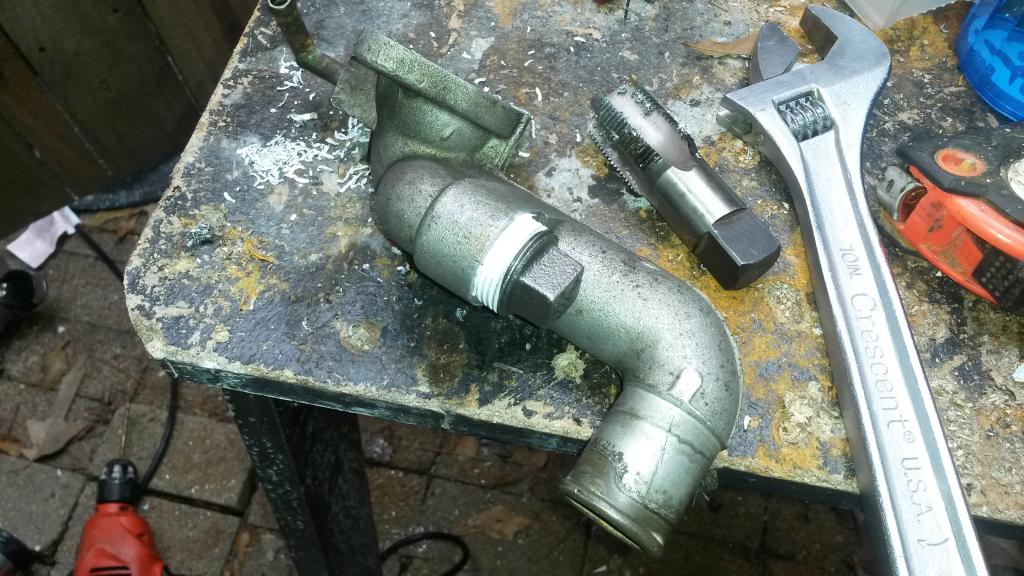
Also drilled/tapped the water inlet piece 3/4 NPT and plugged it as I don't need that water pipe anymore, just used hose and a bolt to plug the little 1/4" pipe on the front.
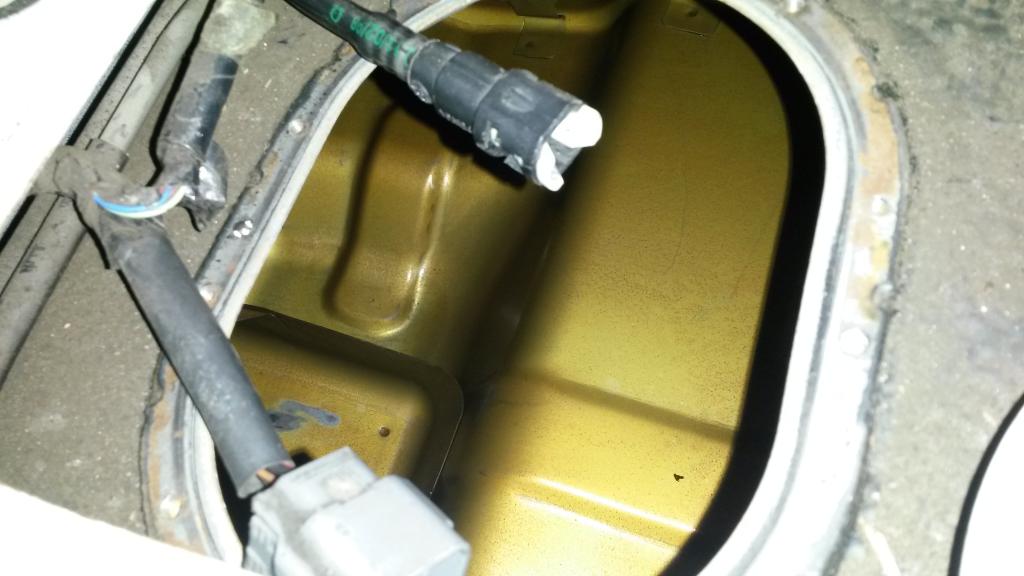
Also drained gas tank, had a full tank of old fuel. Put some in my subaru to get rid of it slowly, put 4 gallons of it in so far, got 5 left...
Waiting on a freeze plug and I'll pull and plug the front water outlet on the head.
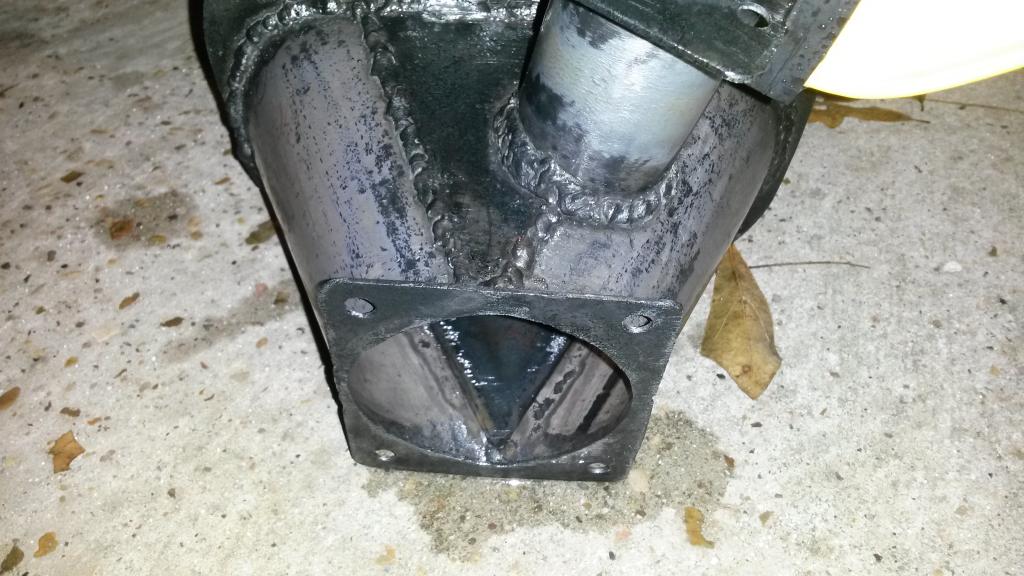
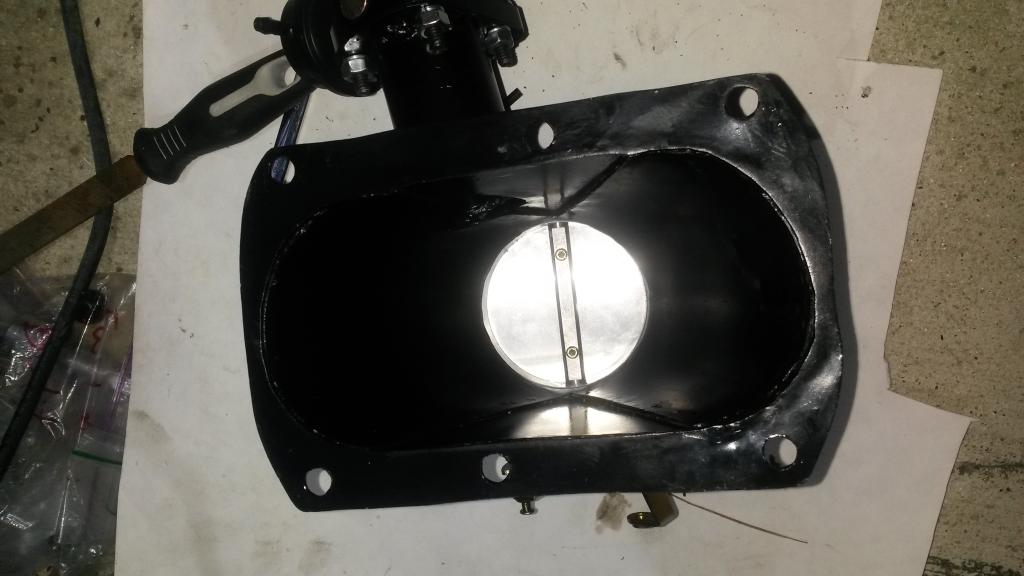
Also got the throttle body and bypass valve permanently installed to the blower inlet piece. Next up is to bolt it onto SC and build/weld the pipe to connect the bypass to the SC outlet piece.
FPR mounted
Tank drained.
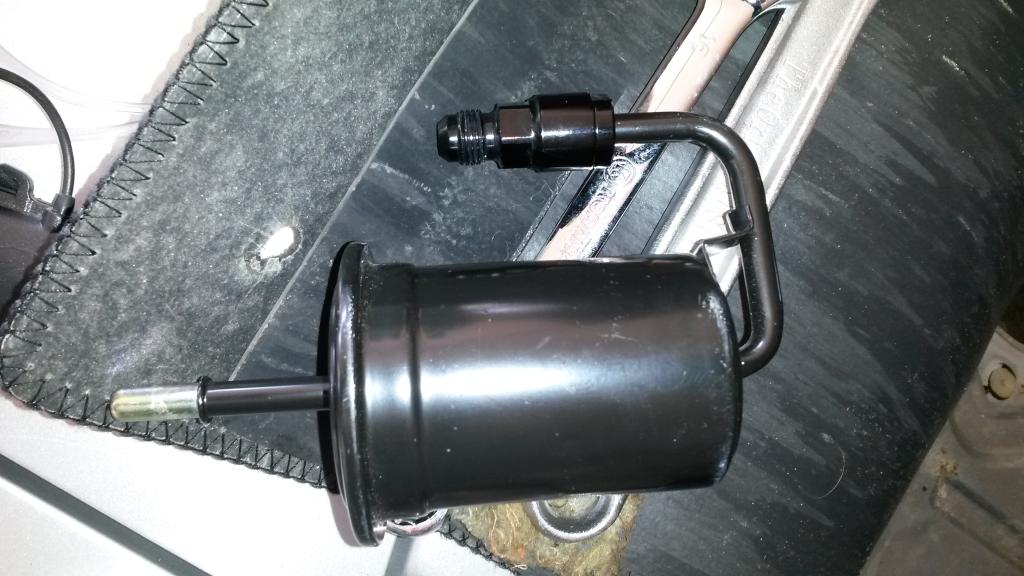
New fuel filter with AN Adapter
FPR with hoses connected

Also a shout out to Treasure Coast miata. They asked if I wanted my P/S system with or without a cooler, I said with. When I went to install I kinda decided I'd rather just not install the cooler line. Turns out Wesley sent both hoses!!!!! Even had bolts and everything in bags, very nice.
Also drilled/tapped the water inlet piece 3/4 NPT and plugged it as I don't need that water pipe anymore, just used hose and a bolt to plug the little 1/4" pipe on the front.
Also drained gas tank, had a full tank of old fuel. Put some in my subaru to get rid of it slowly, put 4 gallons of it in so far, got 5 left...
Waiting on a freeze plug and I'll pull and plug the front water outlet on the head.
Also got the throttle body and bypass valve permanently installed to the blower inlet piece. Next up is to bolt it onto SC and build/weld the pipe to connect the bypass to the SC outlet piece.
FPR mounted

Tank drained.

New fuel filter with AN Adapter

FPR with hoses connected


Also a shout out to Treasure Coast miata. They asked if I wanted my P/S system with or without a cooler, I said with. When I went to install I kinda decided I'd rather just not install the cooler line. Turns out Wesley sent both hoses!!!!! Even had bolts and everything in bags, very nice.
Reply
0
0
03-02-2015, 01:22 AM
#78
Elite Member
Thread Starter
iTrader: (16)
Join Date: Aug 2007
Location: Houston, TX
Posts: 9,293
Total Cats: 475
Small update....
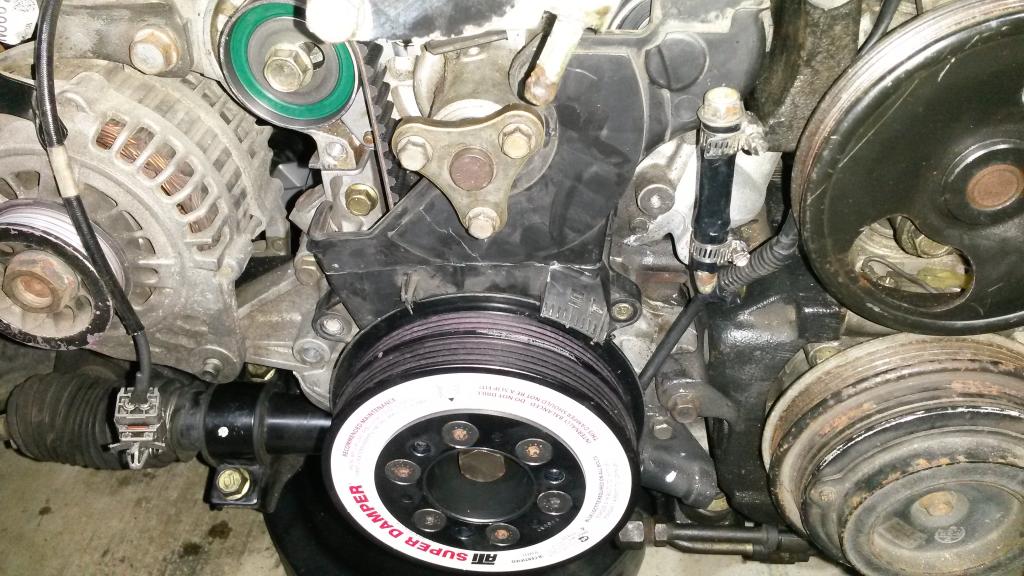
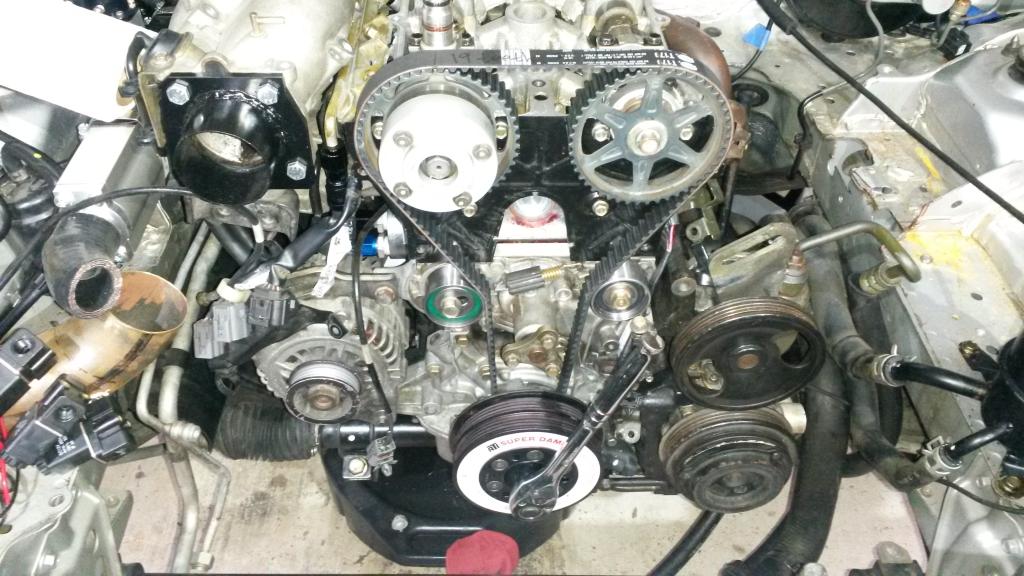
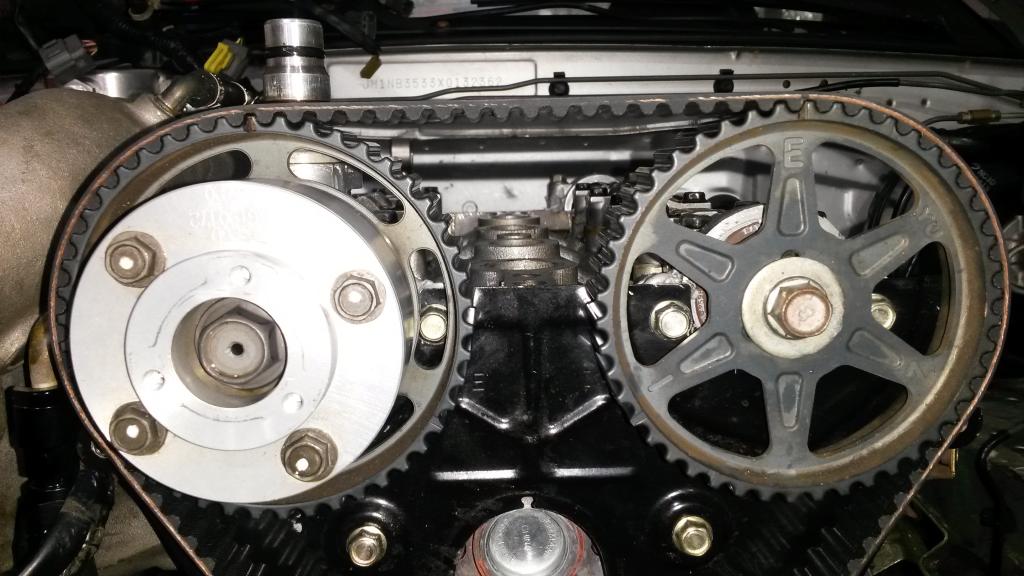
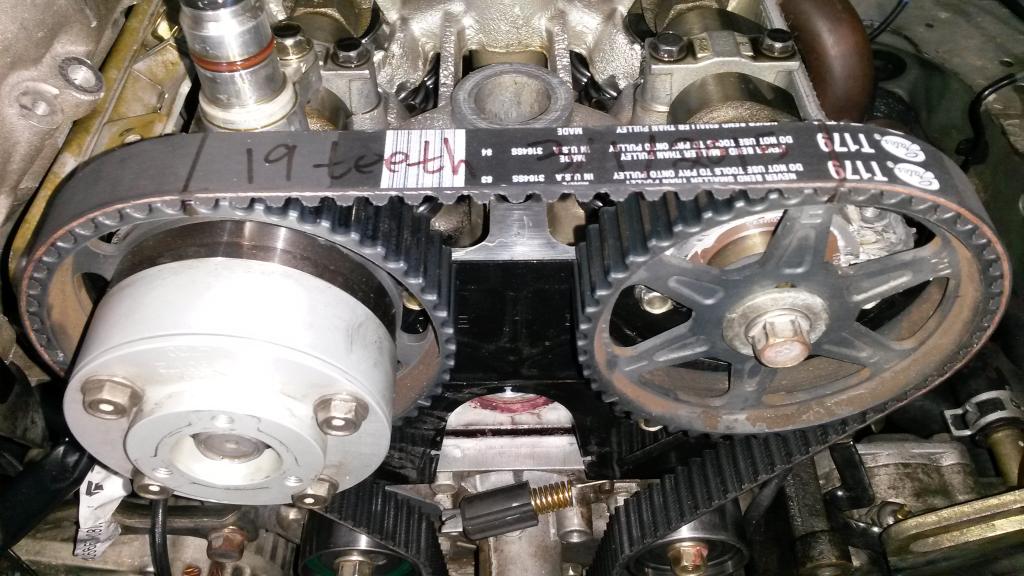
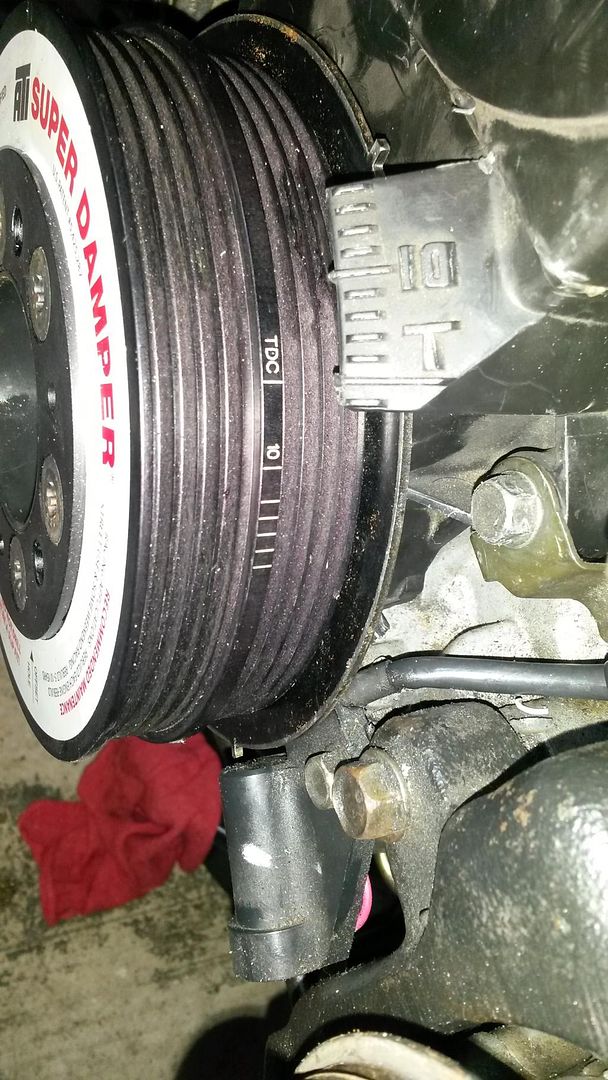
Got the 90* silicone elbow transition I've been waiting for, then got the bypass valve finished. Also got the SC base painted, SC brace, Accusump mount, few other small pieces. I think I'm about done painting crap!
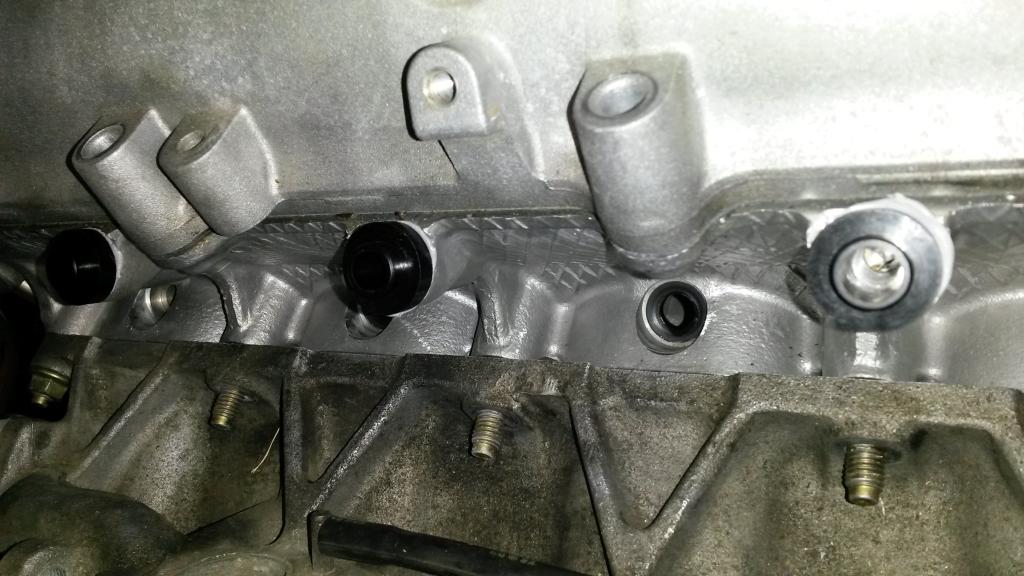
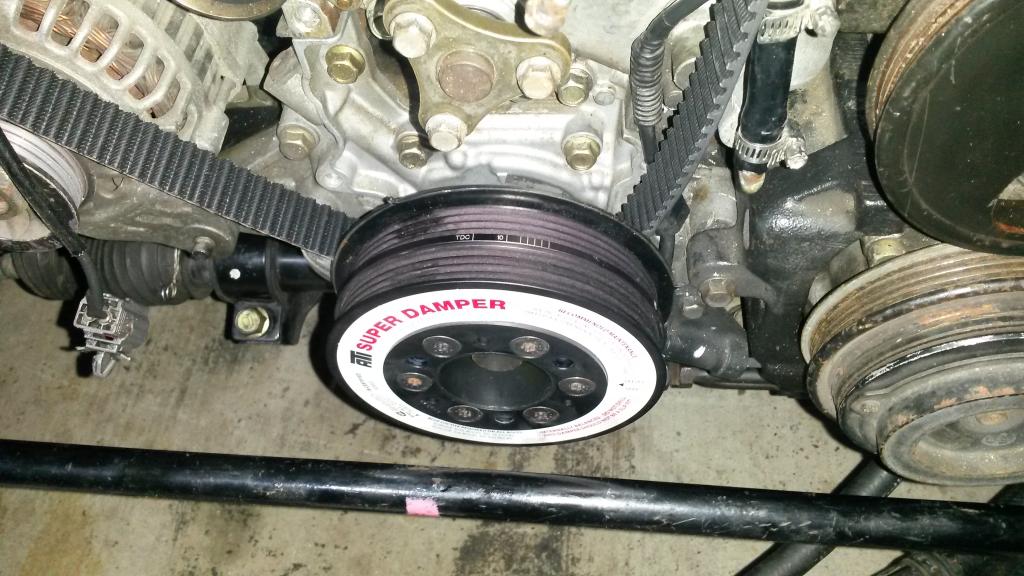
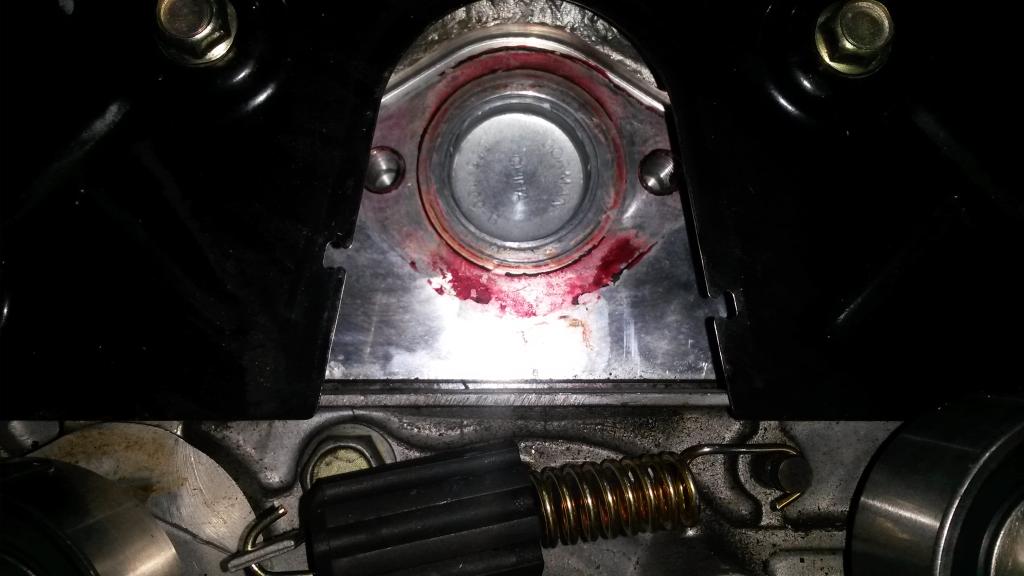
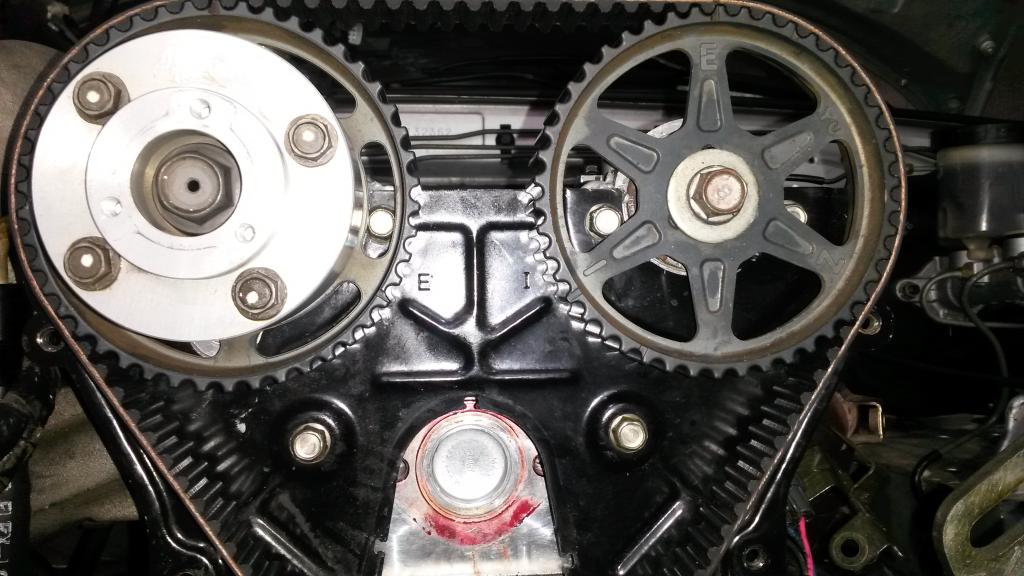
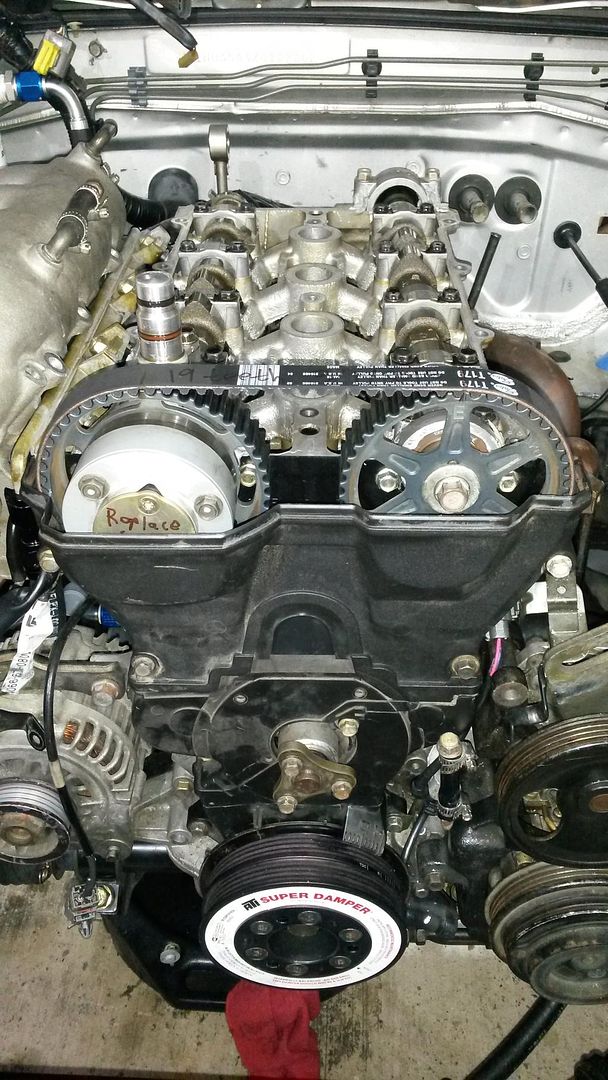
Also pulled the ATI damper and put a new Timing belt and tensioner/idler on. Deleted front water neck, pressed a freeze plug in, 30mm.
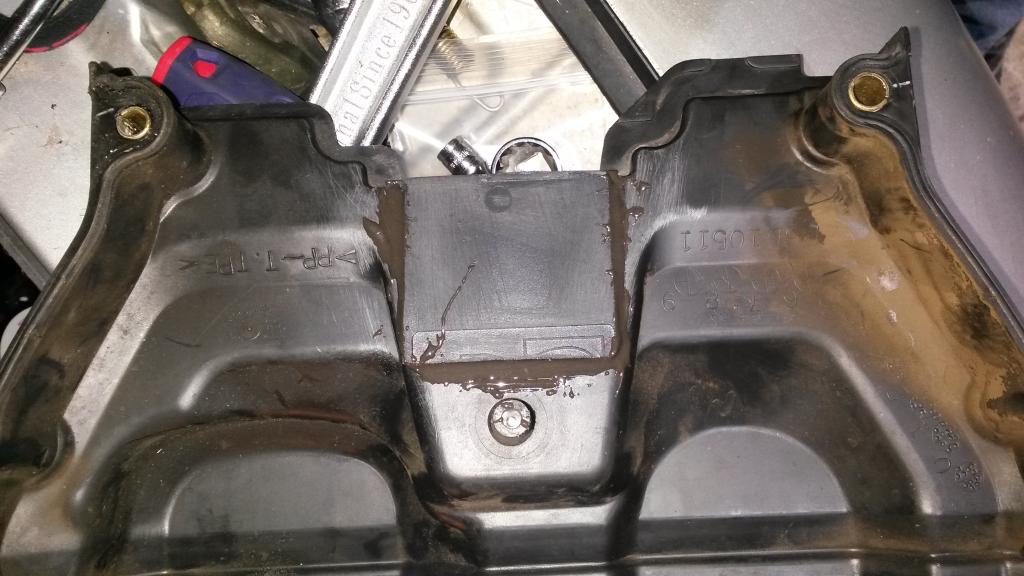
Also since no water neck, I glued a piece of ABS in where the dust cover had a hole for the water neck to keep dust out. I know there's other mazdas that don't have that hole, but I don't have those covers right now!
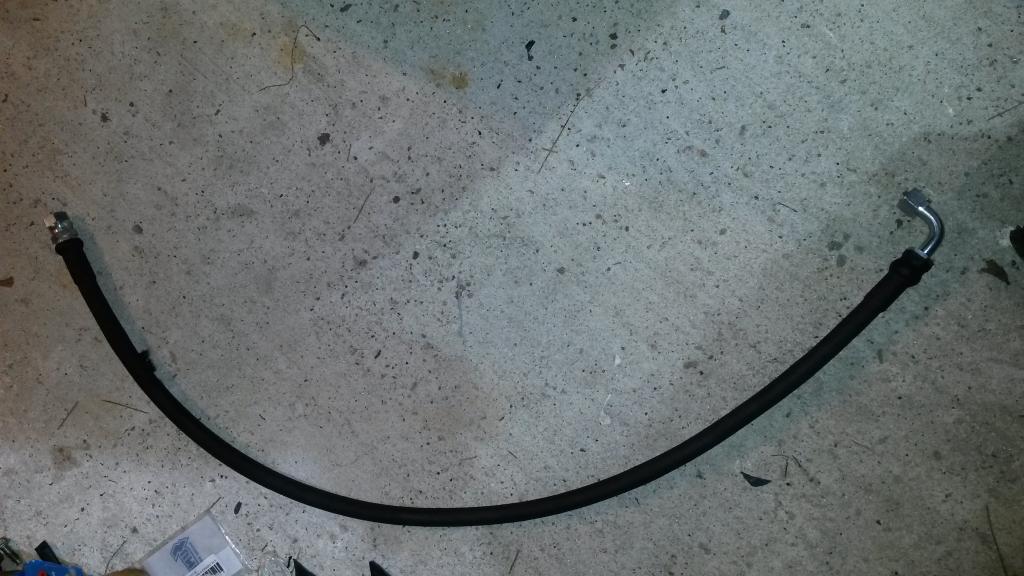
Got my custom oil hoses in, long one is ok, shorter one (should be 12.00") is 13.5", won't work. Gonna email them about it, but will probably buy the fittings and hose on Summit and make that one as I need it to be just right to fit. What's funny is it cost MORE to buy the stuff and do it myself....
Pics! Sorry a couple look like they were taken with a potato...
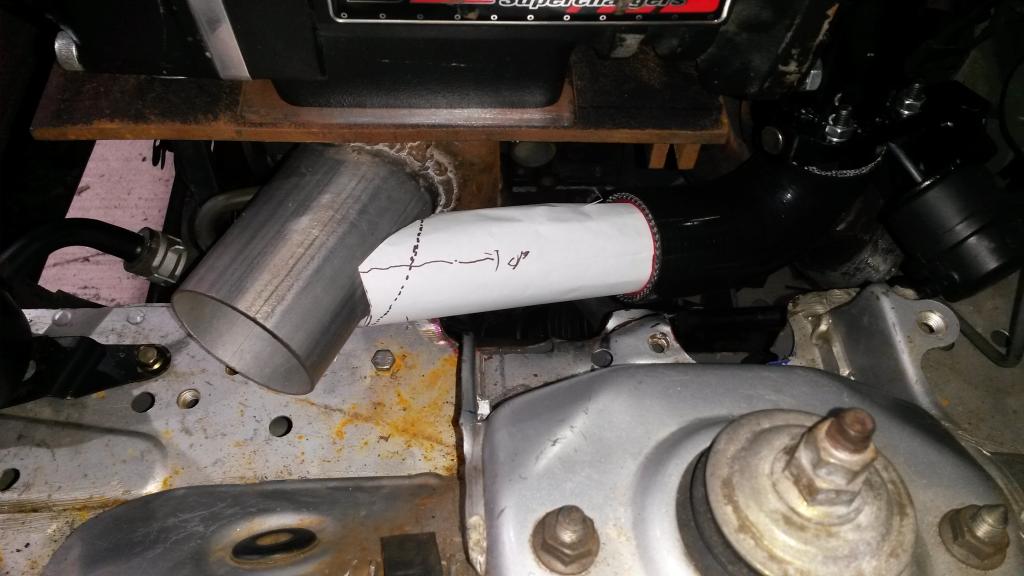
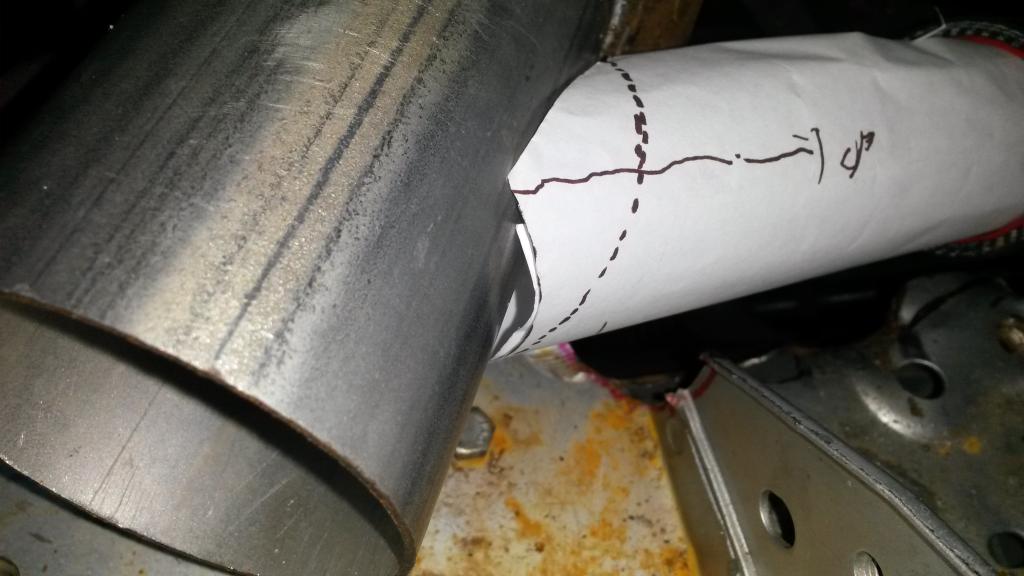
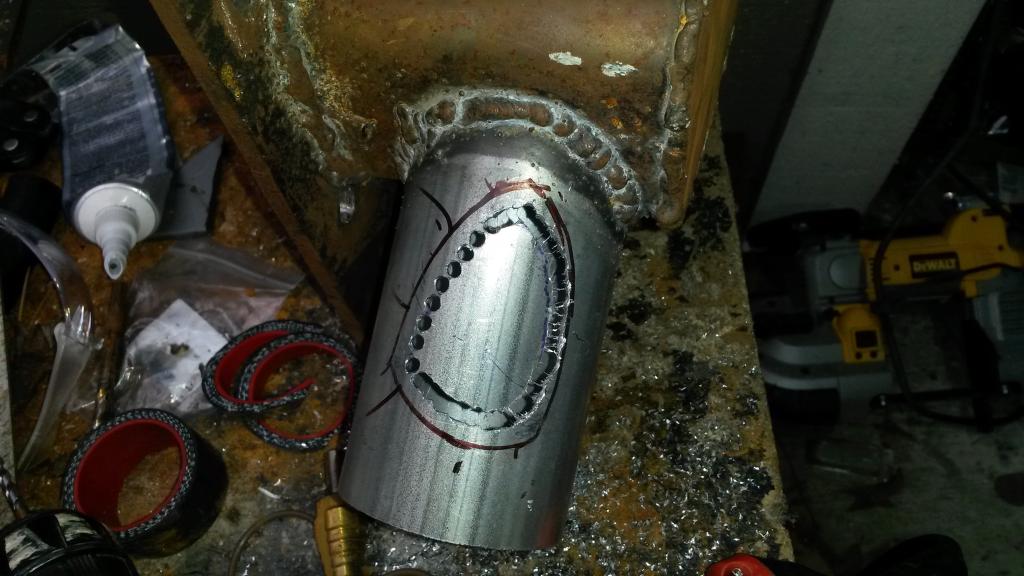
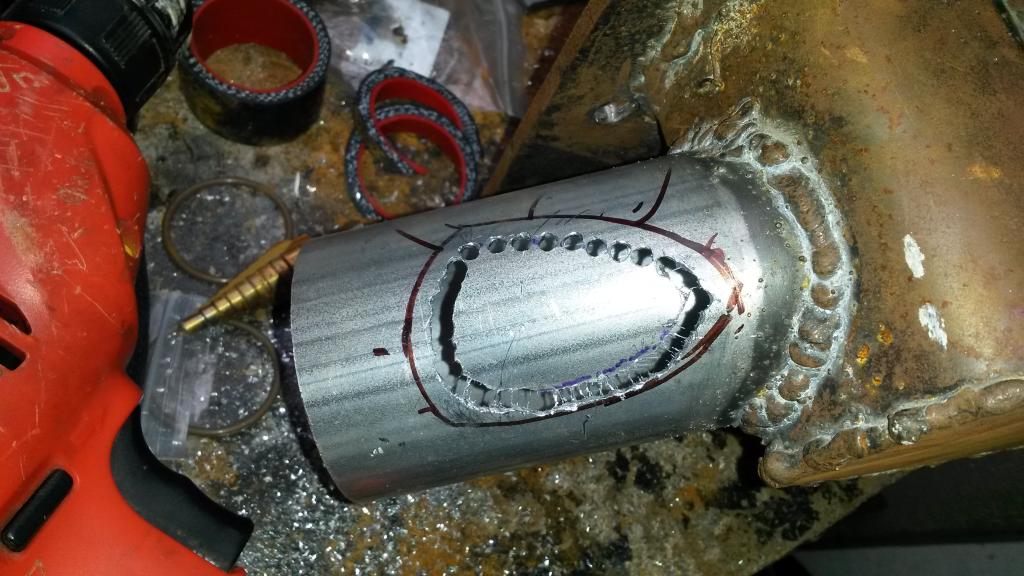
Put heat shrink over all teh AN hoses to stop abrasion.
Got the 90* silicone elbow transition I've been waiting for, then got the bypass valve finished. Also got the SC base painted, SC brace, Accusump mount, few other small pieces. I think I'm about done painting crap!
Also pulled the ATI damper and put a new Timing belt and tensioner/idler on. Deleted front water neck, pressed a freeze plug in, 30mm.
Also since no water neck, I glued a piece of ABS in where the dust cover had a hole for the water neck to keep dust out. I know there's other mazdas that don't have that hole, but I don't have those covers right now!
Got my custom oil hoses in, long one is ok, shorter one (should be 12.00") is 13.5", won't work. Gonna email them about it, but will probably buy the fittings and hose on Summit and make that one as I need it to be just right to fit. What's funny is it cost MORE to buy the stuff and do it myself....
Pics! Sorry a couple look like they were taken with a potato...


Put heat shrink over all teh AN hoses to stop abrasion.

Reply
1
1
 03-02-2015, 01:46 AM
#80
Elite Member
Thread Starter
iTrader: (16)
Join Date: Aug 2007
Location: Houston, TX
Posts: 9,293
Total Cats: 475
Thanks man! I'm trying to do a good job within my means. I don't have every tool in the world, or a limitless budget, but I got time and determination and I wanna go fast!!!!
Reply
0
0


