The Portabull LFX Build
 02-24-2016, 08:28 AM
#61
Newb

Join Date: Jan 2016
Posts: 15
Total Cats: 0
I purchased on of the BMW thermostat housings, nice unit and thanks...BTW, on my last race car, is used one of these 1998 BMW E39 528i Oil Filter Canister Housing 1437582 | eBay. Very efficient, and easy to mount. I treaded the two inlet/outlet holes for AN fittings. Most of the early BMWs had the same unit.

Reply
 0
0

0
02-26-2016, 04:57 AM
#62
Senior Member
Thread Starter

Join Date: May 2007
Location: Atlanta
Posts: 997
Total Cats: 156
Updated the cooling post with more pictures and expanded the expansion tank.
I should probably backtrack real quick and show installing the frame rails and getrag. I can probably post the intake as well. We had a slight delay last week and now we're finishing up the battery cables, power steering, and.. of course, wiring.
I should probably backtrack real quick and show installing the frame rails and getrag. I can probably post the intake as well. We had a slight delay last week and now we're finishing up the battery cables, power steering, and.. of course, wiring.
Reply
0
0
02-28-2016, 07:01 AM
#63
Senior Member
Thread Starter
Join Date: May 2007
Location: Atlanta
Posts: 997
Total Cats: 156
Frame Rails
These are fairly straightforward so I wont spend too much time on them. You will probably need to bust out the BFH to beat your frame rails back into place so the reinforcements can slip over them.
We couldn't find clear documentation of where to place the rail - so we guessed. And we were wrong.
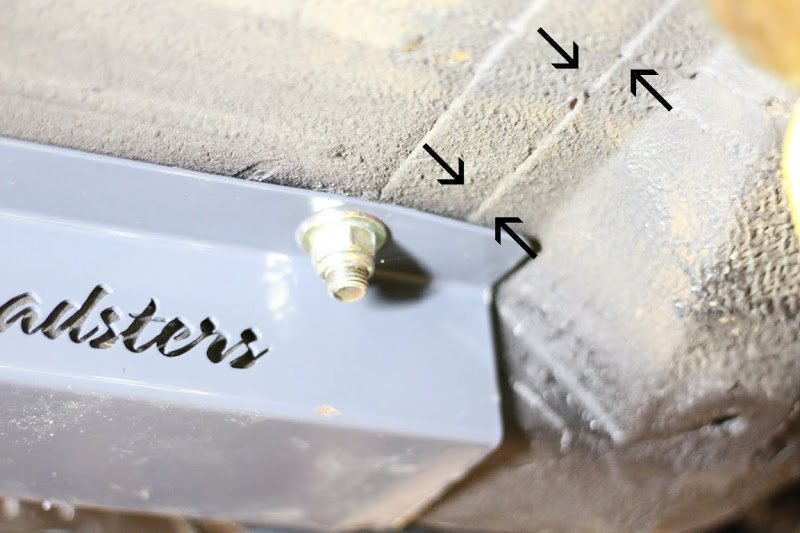
Months later when we put our transmission in the crossmember holes were off. (Note: Crossmember goes *above* the frame rail tabs. This was a quick and dirty fitment.)
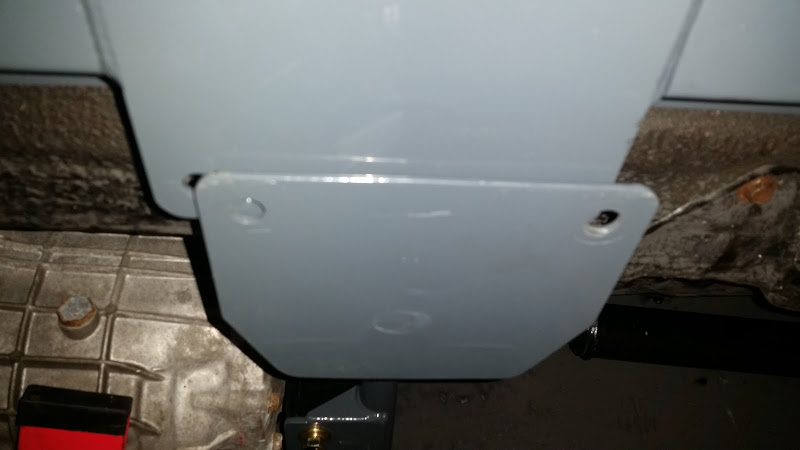
This was pretty easily remedied by redrilling the holes through the crossmember. But it'd be a bit easier to do it right the first time - certainly not worth redrilling the dozen or so holes per side.
Installing the hardware can be done solo if you can get a long enough wrench that'll wedge somewhere on the body to hold the bolt head, but it goes much quicker with 2 people. Snag some undercoat spray to shoot on through the holes and any raw metal on the frame rails.
These are fairly straightforward so I wont spend too much time on them. You will probably need to bust out the BFH to beat your frame rails back into place so the reinforcements can slip over them.
We couldn't find clear documentation of where to place the rail - so we guessed. And we were wrong.
Months later when we put our transmission in the crossmember holes were off. (Note: Crossmember goes *above* the frame rail tabs. This was a quick and dirty fitment.)
This was pretty easily remedied by redrilling the holes through the crossmember. But it'd be a bit easier to do it right the first time - certainly not worth redrilling the dozen or so holes per side.
Installing the hardware can be done solo if you can get a long enough wrench that'll wedge somewhere on the body to hold the bolt head, but it goes much quicker with 2 people. Snag some undercoat spray to shoot on through the holes and any raw metal on the frame rails.
Last edited by gooflophaze; 02-28-2016 at 07:51 PM.
Reply
1
1
02-28-2016, 02:18 PM
#64
Junior Member

Join Date: Jan 2016
Posts: 55
Total Cats: 5
I hope they come up with an installation guide since this is only the second thread I know about.
This came up just recently with a discussion I had with them installing the engine without a lift. Drop the engine and trans down from the top and lower it on to the front subframe. Lift the subframe with the engine up to the body and then mount the cross member and the frame rails. They said they did it this way because some cars are a little off or bent.
This came up just recently with a discussion I had with them installing the engine without a lift. Drop the engine and trans down from the top and lower it on to the front subframe. Lift the subframe with the engine up to the body and then mount the cross member and the frame rails. They said they did it this way because some cars are a little off or bent.
Reply
0
0
02-28-2016, 05:28 PM
#65
Newb

Join Date: Jan 2016
Posts: 21
Total Cats: 10
Definitely thank you very much for the help. We started up ours for the first time today. The video understates how loud the exhaust is (Enthuza single 3"exit exhaust that we modified to fit).
Last edited by 1999LFX; 02-28-2016 at 05:44 PM.
Reply
1
1
02-28-2016, 07:50 PM
#66
Senior Member
Thread Starter
Join Date: May 2007
Location: Atlanta
Posts: 997
Total Cats: 156

Which enthuza is that? I've got my 3 inch turbo with the largest muffler you can stick under the trunk sitting in the corner...
We *almost* fired the engine today. I finished up the battery wiring yesterday and started double checking the harness connections - Turned on the A/C switch, no continuity. WTH. Grounded the fuel pump relay - no whirr. WTF. Okay.. CEL/MIL lamp - end to end continuity, so I got 1 out of 5 wires right...
Long story short - I wasted about 3 hours using the valve cover as a ground. Protip: The valve cover is not a ground. It's insulated as hell.
Reply
0
0
02-28-2016, 08:19 PM
#68
Newb
Join Date: Jan 2016
Posts: 21
Total Cats: 10
It's this guy:
LS Miata Single exit
We let Jason know what we were doing and he sent the exhaust with the y pipe unwelded. With the Kooks downpipes, we were able to shorten the intermediate pipes and make everything work with having flexibility with the angles off the y. It's pretty loud though. With this being a dedicated track car, as long as I'm under max track sound levels, will leave it as is.
Still waiting on the radiator, otherwise we're ready to go once the new brake lines are run.
Reply
0
0
02-28-2016, 08:25 PM
#69
Newb
Join Date: Jan 2016
Posts: 21
Total Cats: 10
It's a V8r harness. But just for clarity's sake, with their harness, you still have to wire in a seperate fuse box and relay bank for your fuel pump and fans. So be prepaired for a decent wait on the order and then some solder action once you get it. I ended up using a painless 8 circuit fuse box and painless three relay bank to finish everything.
Reply
0
0
02-28-2016, 09:10 PM
#71
Newb
Join Date: Jan 2016
Posts: 21
Total Cats: 10
Lol, not sure if you're more insane, but I basically tried to go as standalone as I could. Other than things like headlights, and the starter solenoid wire there really is no factory wiring in front of the firewall or under the car. Anywhere that I needed a connector that wasn't part of the new gm harness, I made a new weatherpack connector. I went with a set of Speedhut gauges to avoid dealing with the factory set.
One dumb mistake I did do however, was for the trigger wire on my auxiliary fuse box and relay bank that powers the complete new drivetrain, I tapped into the cigarette lighter circuit to trigger my relays. When you would turn the key into the "run" position, the gaues would light up, the fuel pump would kick on, everything multimetered out as having powrer, but when you would turn the key to crank the engine - nothing. No fuel, no spark, nothing. Here, that cigarette circuit shuts off during starter operation. So right when you can't be running around testing everything, there was no power to everything because the miata starter wire was triggering the starter solenoid from the "old" system but the new ecu was losing powrer as the cigarette lighter was cut cut. Picked up another ignition on power source to trigger my auxiliary fuse boxes and everything fired right up, but it was at least equal to your three hours on the ground issue.
Reply
0
0
02-28-2016, 09:23 PM
#72
Senior Member
Thread Starter
Join Date: May 2007
Location: Atlanta
Posts: 997
Total Cats: 156
Yeap, difference between the ACC circuit and the IG1 & IG2 circuits. I'm about to redesign the lfx fusebox for the third time because I see a way to use more of the miatas fuses...
Reply
0
0
02-28-2016, 10:13 PM
#74
Senior Member
Thread Starter
Join Date: May 2007
Location: Atlanta
Posts: 997
Total Cats: 156
You can pay $20 for a 3-day subscription to GM's Technet.
https://www.acdelcotds.com/acdelco/action/subscribehome
You need to download a plugin that appears to only work in Internet Explorer. (Yes, I can hear your groans from here).
I printed out most of the diagram and put it in my notebook - and even with the information it can be a pain. For example - in order for me to figure out what F5UA's circuit breaker value was, I'd have to look at the description page, cross reference that by the circuit number on a schematic, then look up the circuit number in the description of the main fuse box.
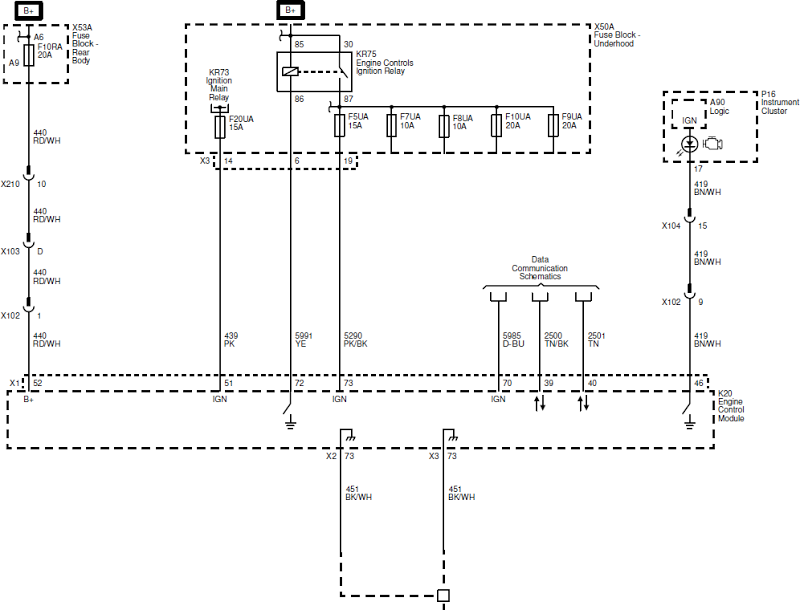
(this is a bad example because the fuse value is obviously right there..)
Most of the circuits appear to be to ground, but I'm fearful of a mix. I'm hoping I'll be able to make this less painful once I verify I'm not going to burn the car to the ground and write it up.
https://www.acdelcotds.com/acdelco/action/subscribehome
You need to download a plugin that appears to only work in Internet Explorer. (Yes, I can hear your groans from here).
I printed out most of the diagram and put it in my notebook - and even with the information it can be a pain. For example - in order for me to figure out what F5UA's circuit breaker value was, I'd have to look at the description page, cross reference that by the circuit number on a schematic, then look up the circuit number in the description of the main fuse box.
(this is a bad example because the fuse value is obviously right there..)
Most of the circuits appear to be to ground, but I'm fearful of a mix. I'm hoping I'll be able to make this less painful once I verify I'm not going to burn the car to the ground and write it up.
Last edited by gooflophaze; 02-28-2016 at 10:46 PM.
Reply
0
0
02-29-2016, 12:35 AM
#75
Junior Member

Join Date: Feb 2016
Location: Livermore, CO
Posts: 193
Total Cats: 84
The video understates how loud the exhaust is (Enthuza single 3"exit exhaust that we modified to fit).
https://youtu.be/pmGnmjufG2E
https://youtu.be/pmGnmjufG2E
Reply
0
0
 02-29-2016, 07:29 AM
#77
Newb
Join Date: Jan 2016
Posts: 21
Total Cats: 10
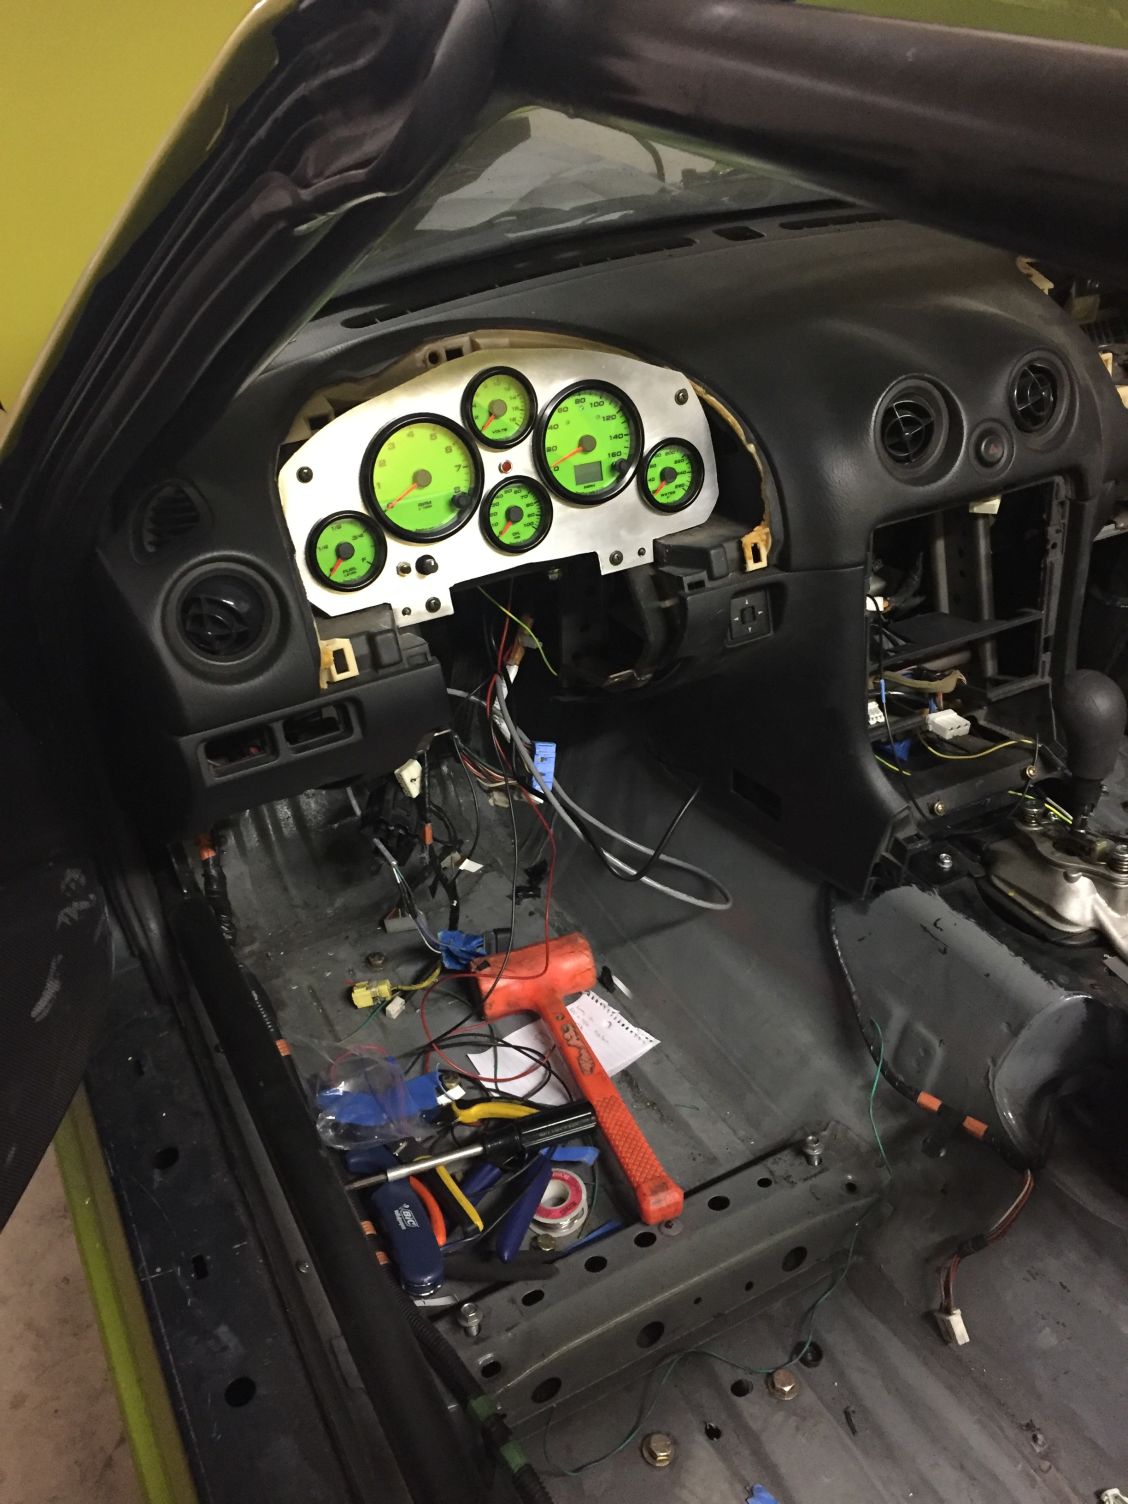
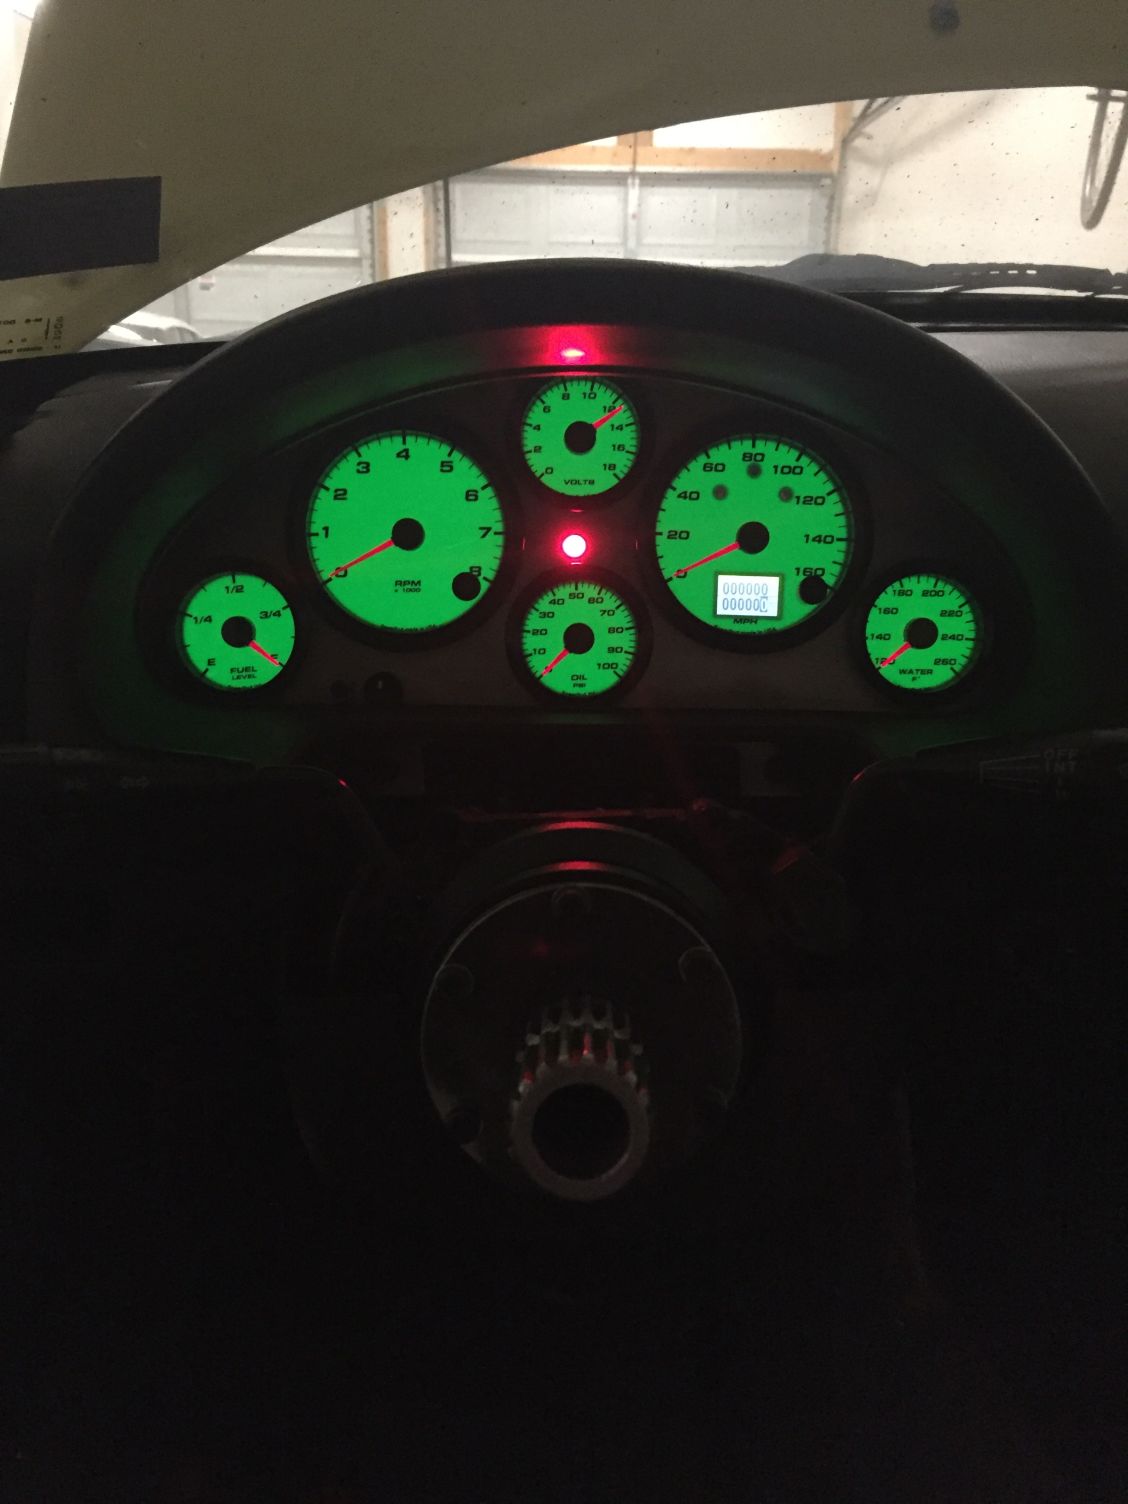
They're Speedhuts. Took about a month to get them once ordered, but you can basically pick any color combo, text font, bezels, and whatnot. They're also fairly shallow gauges, so they fit well in the dash, and are a little more flexible/programable than Autometers (just hoping they're as reliable).
Here's a day shot as I was test fitting them, and a night shot with the brightness turned all the way up.
Reply
1
1
02-29-2016, 08:06 AM
#78
Senior Member
Thread Starter
Join Date: May 2007
Location: Atlanta
Posts: 997
Total Cats: 156
How much did they set you back?
While we're on the issue I feel like I should reveal I'm working on producing my own instrument cluster adapter. On my dads car we'll be reading off the ECM using and outputting it to an NB cluster (In a NA8 chassis.. with a NA6 dash..). I've gotten control of the speedo/tach/coolant already, I'm working on getting the oil pressure gauge to work linearly (will need some modification to the gauge itself - super slow response and only capable of ~50 degrees of movement), and I've already got some experience with CANBus - just need to finish the car so I can use it as a test mule. On the days I'm not wrenching, I'm usually coding this up. The Miata tach is somewhat nefariously inaccurate, but I've written user-settable correction factors every 500rpm, as well as an easy speedo correction.
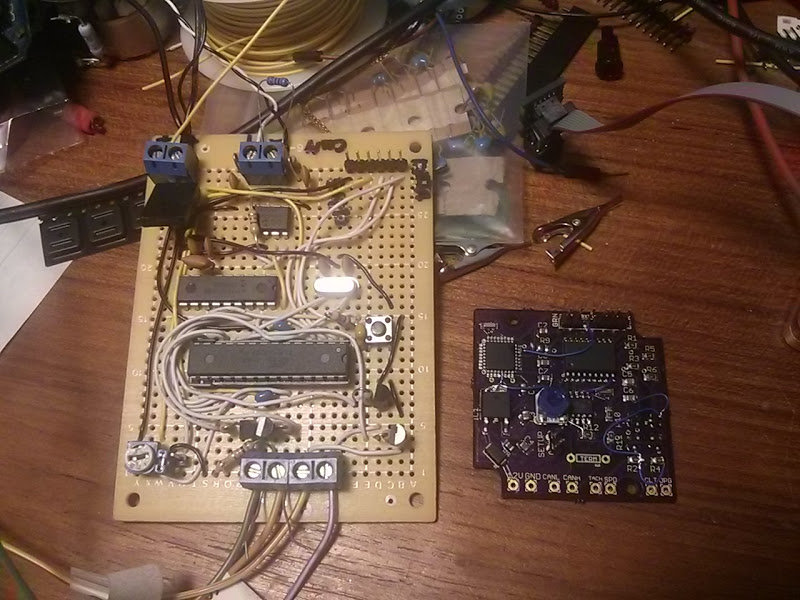
Proto on the left, first board on the right (sent the wrong file to the fab, d0h!).
While we're on the issue I feel like I should reveal I'm working on producing my own instrument cluster adapter. On my dads car we'll be reading off the ECM using and outputting it to an NB cluster (In a NA8 chassis.. with a NA6 dash..). I've gotten control of the speedo/tach/coolant already, I'm working on getting the oil pressure gauge to work linearly (will need some modification to the gauge itself - super slow response and only capable of ~50 degrees of movement), and I've already got some experience with CANBus - just need to finish the car so I can use it as a test mule. On the days I'm not wrenching, I'm usually coding this up. The Miata tach is somewhat nefariously inaccurate, but I've written user-settable correction factors every 500rpm, as well as an easy speedo correction.
Proto on the left, first board on the right (sent the wrong file to the fab, d0h!).
Last edited by gooflophaze; 02-29-2016 at 08:19 AM.
Reply
0
0
02-29-2016, 10:49 AM
#79
Junior Member
Join Date: Feb 2016
Location: Livermore, CO
Posts: 193
Total Cats: 84
1999LFX...
If you dont mind can you do a write up on your cluster and let us know what part numbers were used for your gauges. Things like what sending units were used and where each gauge gets its signal from. I think many will be interested given the challenges of converting rpm signal when using a v6 and the NA folks also have a manual speedo to deal with. We can go to a NB cluster once gooflophaze works his magic down the road but it wold be nice to have a few options documented.
Also...what did you end up doing for your hood?
I want to find a hood scoop that will clear the intake and flow with the lines on the hood without too much cat hair being used.
I must have watched your video a dozen times last night just wishing I had mine running. Nice work....
Last edited by griff; 02-29-2016 at 11:13 AM.
Reply
0
0


