Round 2: Wannabe turbo NB6C


 09-03-2015, 01:10 PM
#63
Junior Member

Thread Starter
Join Date: Aug 2005
Location: Cayman Islands
Posts: 440
Total Cats: 17
the part number I found was supposed to have these show up
No matter, they are cut and I installed them onto the coilovers already. Looks like my brother hasn't sealed any seams yet so I'll be tackling that tomorrow and repulling the motor/trans.
No matter, they are cut and I installed them onto the coilovers already. Looks like my brother hasn't sealed any seams yet so I'll be tackling that tomorrow and repulling the motor/trans.

Reply
 0
0

0
09-05-2015, 09:07 AM
#64
Junior Member
Thread Starter
Join Date: Aug 2005
Location: Cayman Islands
Posts: 440
Total Cats: 17


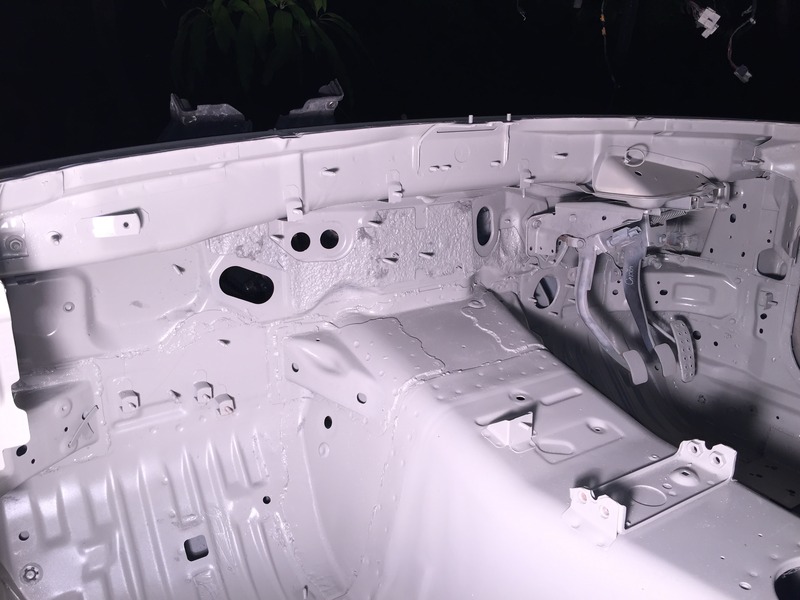
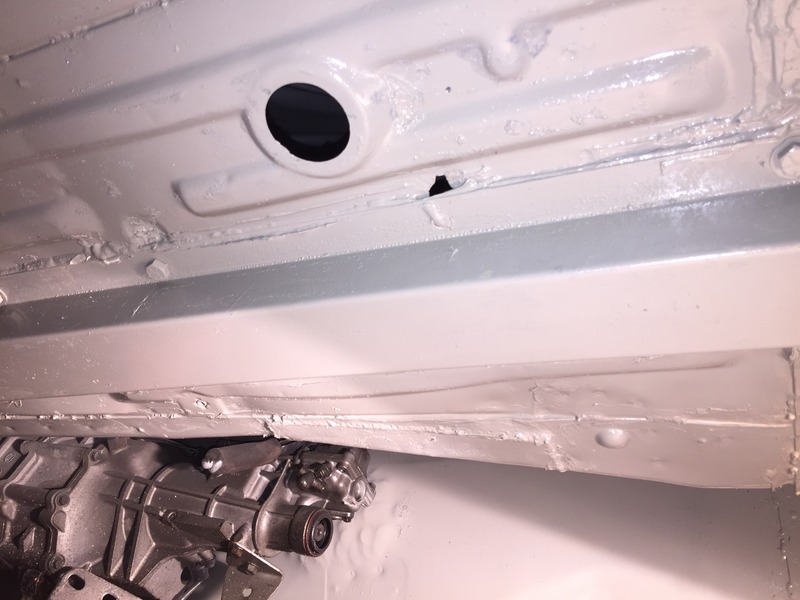
Resealed all the seams on the underside last night. I ran out of sealant so I still have the front passenger wheel well to do

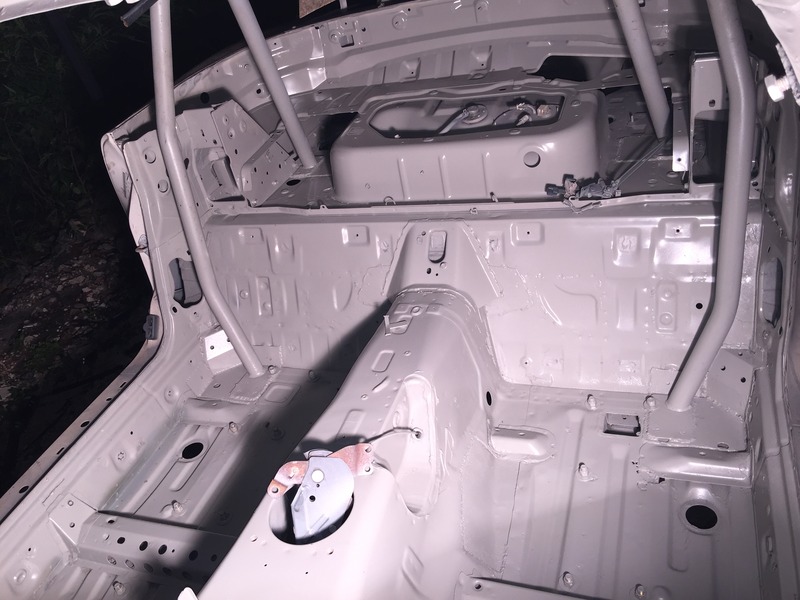
I scrubbed the entire trunk and rear shelf areas and everything in between with degreaser and a scotchbrite pad and painted everything.
Other **** I got done
Installed pedals/master cylinders,
Gas tank and rear subframe back in
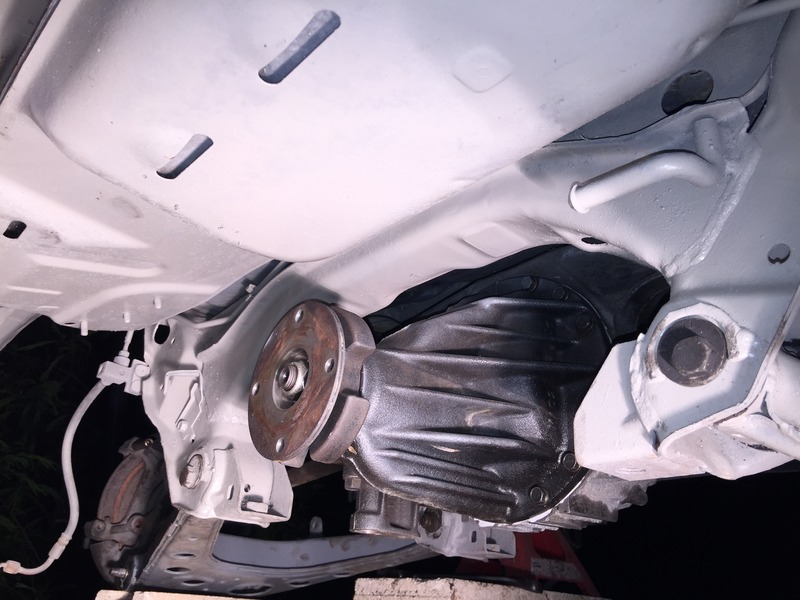
Swapped the diff housing with the ES diff bushings onto the 3.9 torsen.
Today I'll finish the sealing and painting.
Reply
0
0
09-06-2015, 10:16 AM
#65
Junior Member
Thread Starter
Join Date: Aug 2005
Location: Cayman Islands
Posts: 440
Total Cats: 17
More boring paint pictures.

Rear subframe/hubs/control arms put back on. That energy suspension grease is the devil
I got a front fender rolled (brother should be rolling the rest this week) and started to depower the steering rack. I got my engine hoist and engine stand back from a friend who was borrowing them so I'll make that my focus next day off.
It's starting to look like a car again
Last edited by Sirnixalot; 09-06-2015 at 10:44 AM.
Reply
0
0
09-06-2015, 09:18 PM
#66
Junior Member
Thread Starter
Join Date: Aug 2005
Location: Cayman Islands
Posts: 440
Total Cats: 17
We had our first autocross in about a year or so today. Most of the field were new drivers so it was pretty awesome. I got to take my old car for a spin to feel the course lay out since I wasn't competing (I do the time keeping).
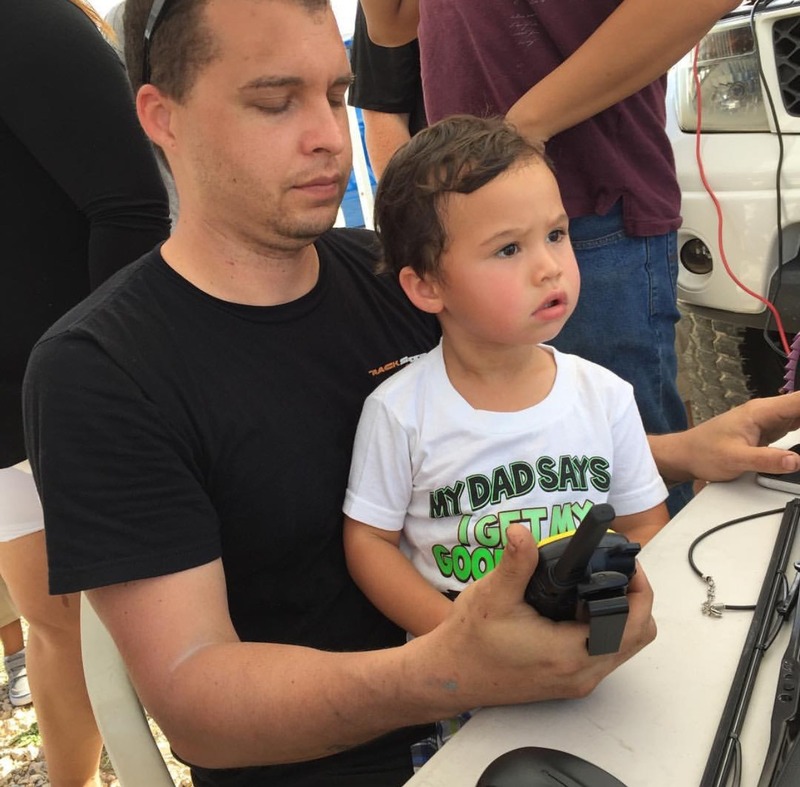
My son helping me out with the time keeping duties
Since I have renewed the crack itch I am trying to get the car finished non-turbo for the next event in 4 weeks. Fingers crossed I can pull it off

My son helping me out with the time keeping duties
Since I have renewed the crack itch I am trying to get the car finished non-turbo for the next event in 4 weeks. Fingers crossed I can pull it off
Reply
0
0
09-14-2015, 02:43 PM
#67
Junior Member
Thread Starter
Join Date: Aug 2005
Location: Cayman Islands
Posts: 440
Total Cats: 17
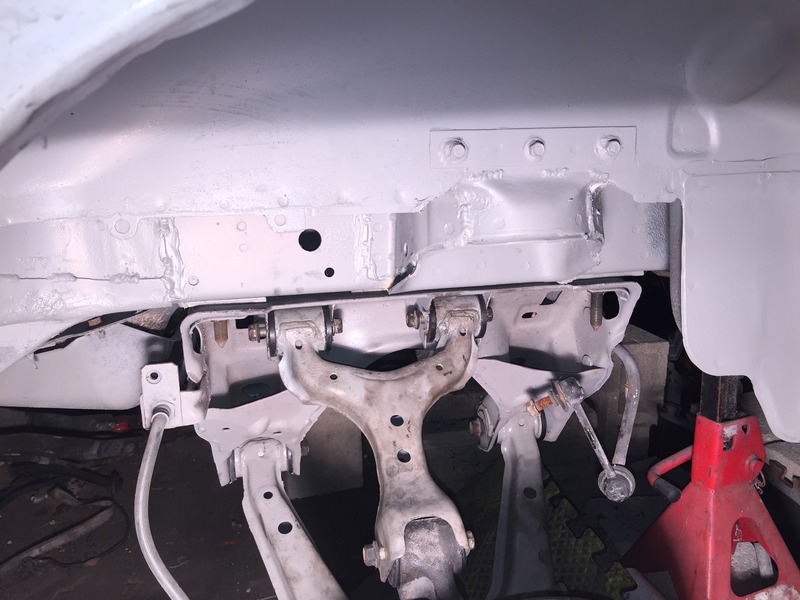
Got some work done yesterday/today. Finished buttoning up the rear subframe/control arms and rear diff. The rear rotors are at the machine shop to be resurfaced, I pick those up tomorrow.
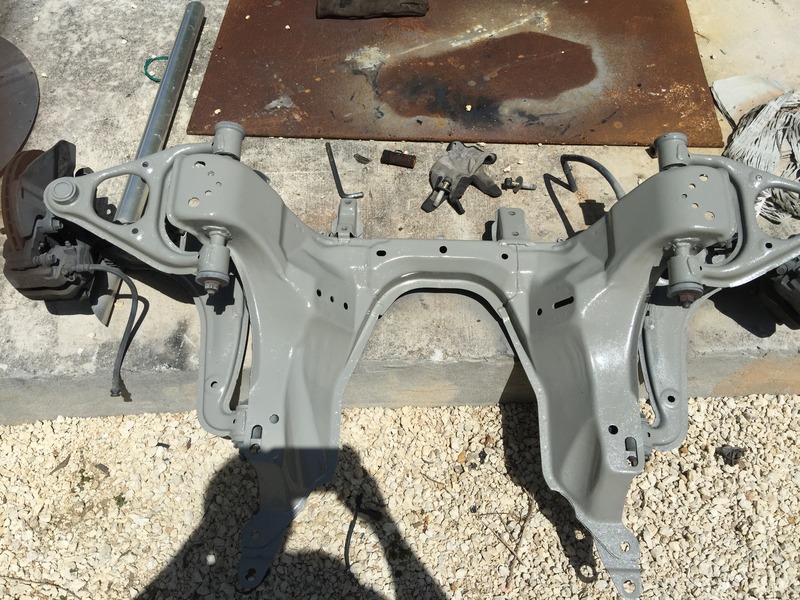
Wirewheeled the front subframe and control arms. I need to paint the underside of the subframe and get it back in the car.
I guess who ever had it before my friend didn't believe in oil changes
Silicone bits were in the bottom of the oil pan and stuck in the strainer. My brother has access to a steam cleaner and will be cleaning everything. I still need to pull the head so he can clean that.
Gave the block a coat of silver paint. Pulled the stock oil pressure sender, autometer 1/8bsp to npt adapter with a -4an 90* adapter. Plan is to run that to a Tee for a real oil pressure gauge and turbo oil feed.
Pulled out that random coolant port that was capped off and tapped it for a 1/8npt plug

My cast aluminum welding looks like ****. -10AN bung for oil drain. I'll cap this off until I'm ready to go turbo
This weekend I'll get the front subframe back in the car and install the suspension to get it to rolling shell status.

Wirewheeled the front subframe and control arms. I need to paint the underside of the subframe and get it back in the car.

I guess who ever had it before my friend didn't believe in oil changes

Silicone bits were in the bottom of the oil pan and stuck in the strainer. My brother has access to a steam cleaner and will be cleaning everything. I still need to pull the head so he can clean that.

Gave the block a coat of silver paint. Pulled the stock oil pressure sender, autometer 1/8bsp to npt adapter with a -4an 90* adapter. Plan is to run that to a Tee for a real oil pressure gauge and turbo oil feed.

Pulled out that random coolant port that was capped off and tapped it for a 1/8npt plug

My cast aluminum welding looks like ****. -10AN bung for oil drain. I'll cap this off until I'm ready to go turbo
This weekend I'll get the front subframe back in the car and install the suspension to get it to rolling shell status.
Last edited by Sirnixalot; 09-15-2015 at 11:52 AM.
Reply
0
0

 09-17-2015, 11:37 AM
#69
Junior Member
Thread Starter
Join Date: Aug 2005
Location: Cayman Islands
Posts: 440
Total Cats: 17
It's kinda convenient being scheduled to work near where the car is at.
Came up early this morning and put another 3 coats of rustoleum on the front subframe and control arms.
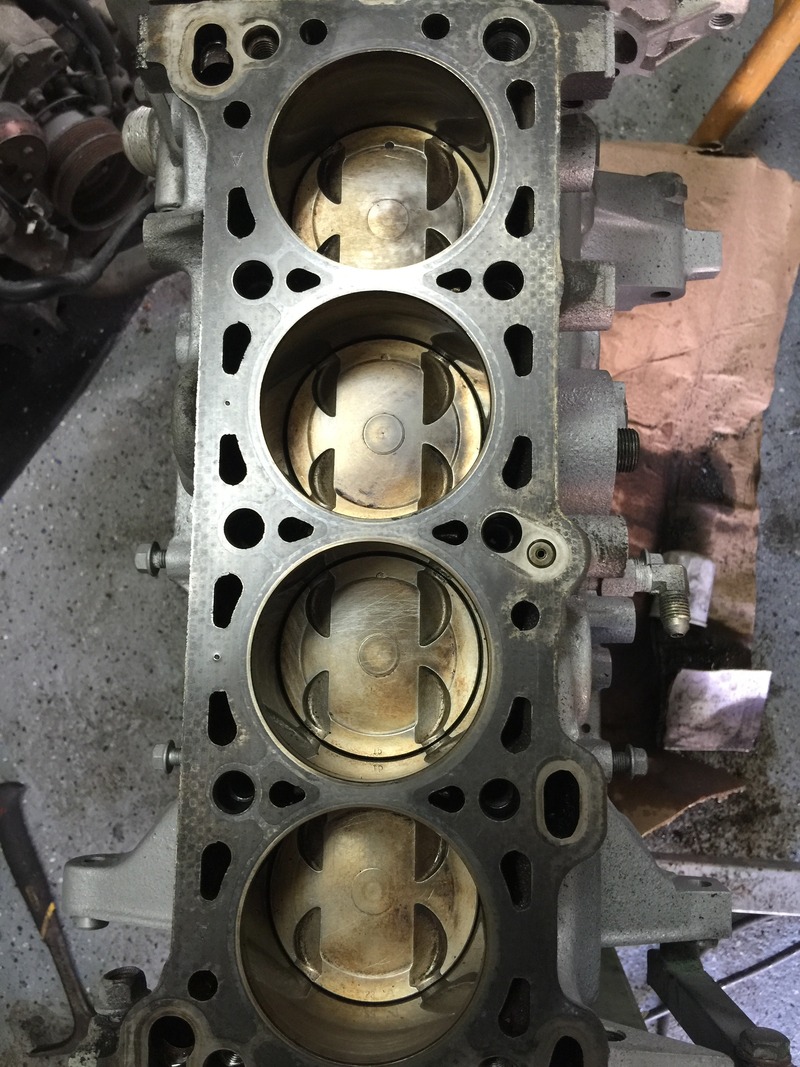
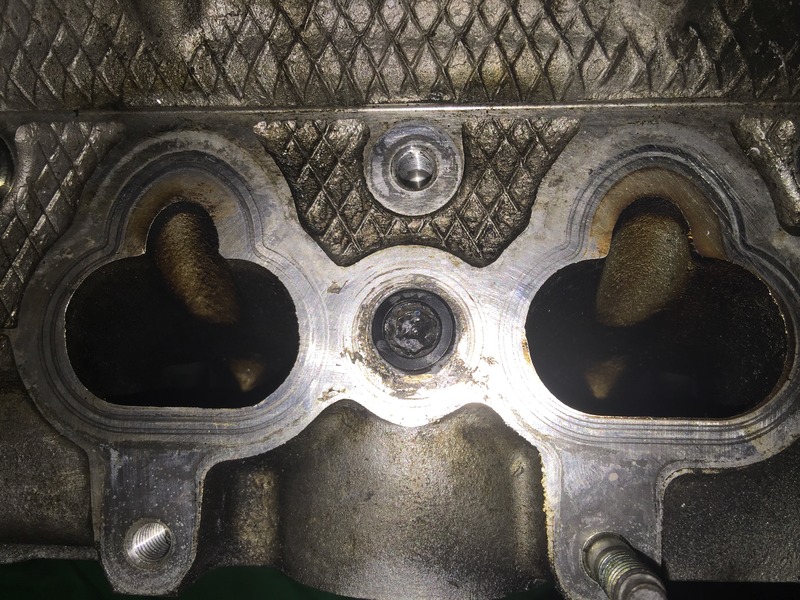
I also cleaned off the old head gasket material and the piston tops
Came up early this morning and put another 3 coats of rustoleum on the front subframe and control arms.
I also cleaned off the old head gasket material and the piston tops

Reply
0
0
09-20-2015, 01:37 AM
#70
Junior Member
Thread Starter
Join Date: Aug 2005
Location: Cayman Islands
Posts: 440
Total Cats: 17
Christ what a lot of beer I had
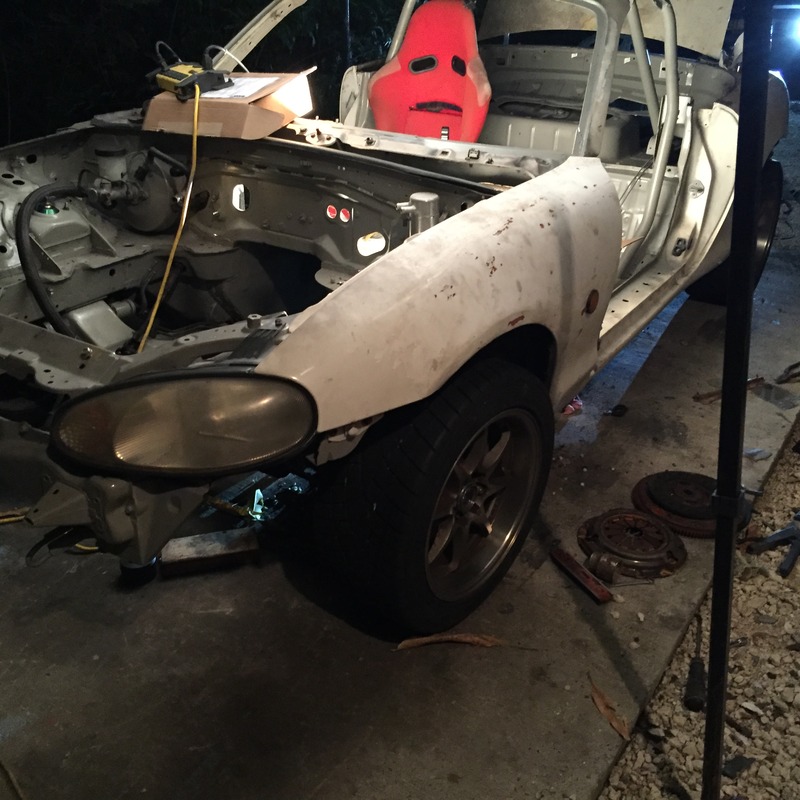
Bs pic of car on wheels.
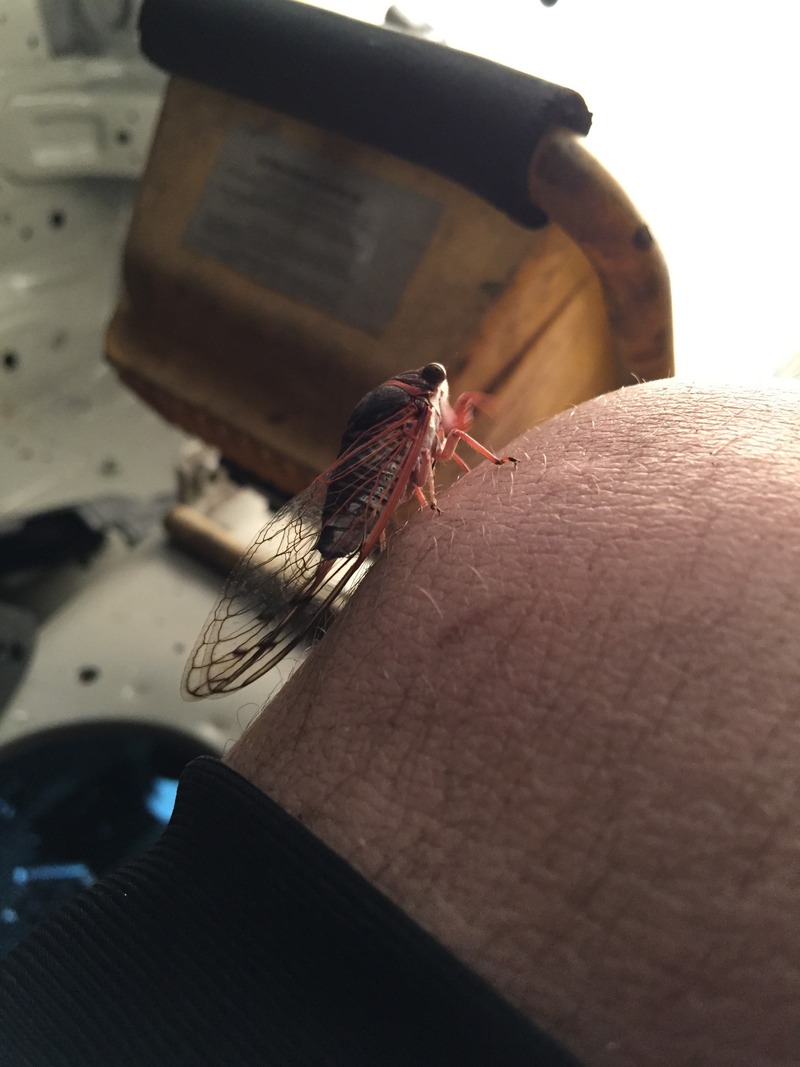
I am one with the cricket
AN fittings installed. Just have to run the lines

Bs pic of car on wheels.

I am one with the cricket

AN fittings installed. Just have to run the lines
Last edited by Sirnixalot; 09-20-2015 at 09:41 AM.
Reply
0
0
09-22-2015, 10:45 AM
#71
Junior Member
Thread Starter
Join Date: Aug 2005
Location: Cayman Islands
Posts: 440
Total Cats: 17
Gave my engine harness to one of the founders of WireWorx on saturday just to have him do the following
Replace stock ECU connectors for the haltech
Swap injector connectors to the EV1
Change stock IAT and MAF connector to the GM IAT and MAP respectively
Use AC trigger pin for boost control solenoid
He messaged me this morning saying since the harness is so compact he will just redo the entire harness in milspec fashion for me for a few dollars extra. WOOT
Reply
0
0
09-27-2015, 02:28 AM
#72
Junior Member
Thread Starter
Join Date: Aug 2005
Location: Cayman Islands
Posts: 440
Total Cats: 17
the steering column is now me least favorite part of a car. 2 hours to get the rack joint connected. Left defeated as i could not get the interior column connected to the shaft that penetrates the fire wall 

what did I get done you say?
brake lines.....brake lines is what I got done. Did a little in the morning then spent the day with the wife. I finished up in the evening.


I also plugged that coolant port in the head
shortly there after the rum won and I called it quits. ps not sure how accessible coconut water is where you're at but coconut water + white rum (appelton genesis, havana club 4 year....any white rum but bacardi) is the drink of kings.
No where on island had valve stem seals or the oil pan half moon gasket. Once those arrive from being ordered which I hope is before friday, I'll get the motor back in the car.
My wiring harness is due to be finished on the 10th and my AEM failsafe gauge is due next weekend. I doubt the car will get painted for the autocross on the 25th of Oct. I dont really give a **** and will race the car with the moldy paint my brother however will probably disown me 
I may have to postpone the debut till november
what did I get done you say?
brake lines.....brake lines is what I got done. Did a little in the morning then spent the day with the wife. I finished up in the evening.


I also plugged that coolant port in the head

shortly there after the rum won and I called it quits. ps not sure how accessible coconut water is where you're at but coconut water + white rum (appelton genesis, havana club 4 year....any white rum but bacardi) is the drink of kings.
No where on island had valve stem seals or the oil pan half moon gasket. Once those arrive from being ordered which I hope is before friday, I'll get the motor back in the car.
My wiring harness is due to be finished on the 10th and my AEM failsafe gauge is due next weekend. I doubt the car will get painted for the autocross on the 25th of Oct. I dont really give a **** and will race the car with the moldy paint
my brother however will probably disown me I may have to postpone the debut till november
Last edited by Sirnixalot; 09-27-2015 at 10:47 AM.
Reply
0
0
09-27-2015, 05:36 PM
#73
Junior Member
Thread Starter
Join Date: Aug 2005
Location: Cayman Islands
Posts: 440
Total Cats: 17
Met up with my friend from WireWorx. Got the harness laid out. I may do a K20 coil on plug conversion.
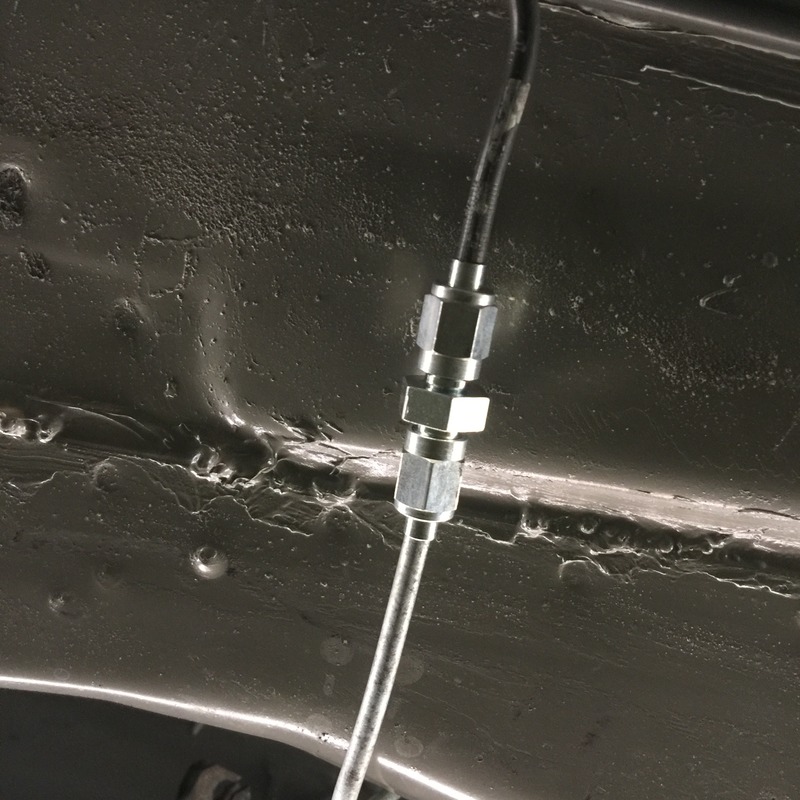
Front brake lines run
Rear brake line join
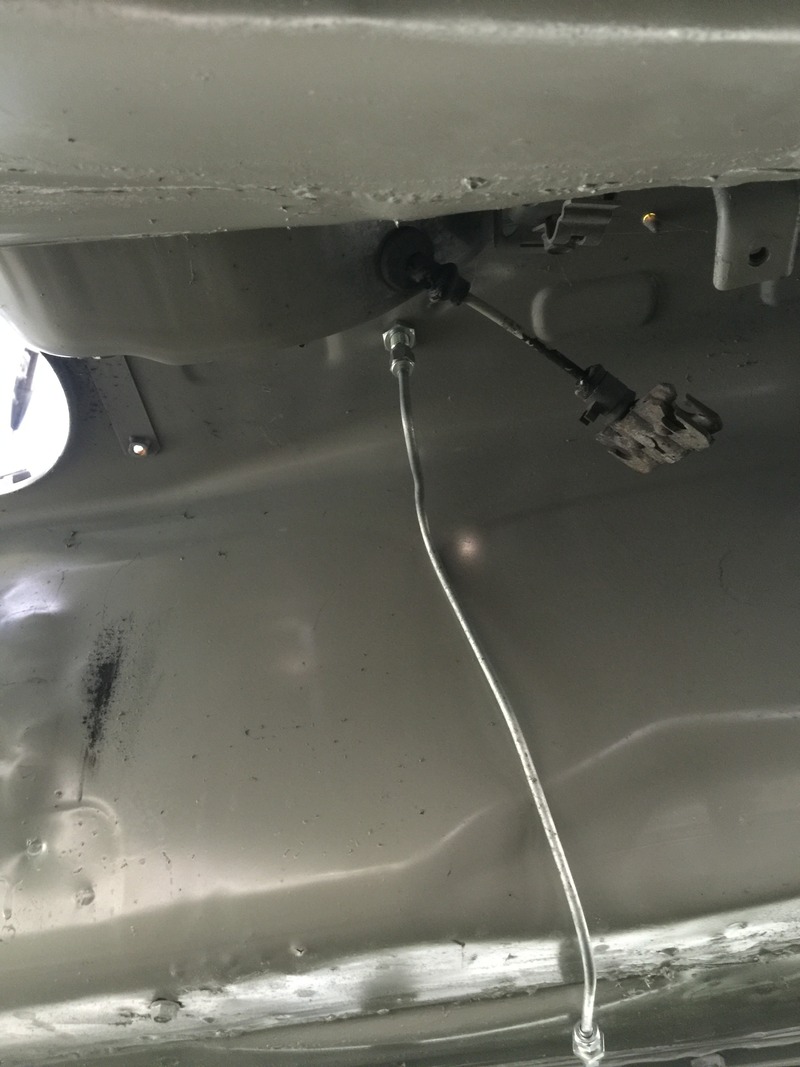
Shot of the line coming through the trans tunnel. I will double check drive shaft clearance once everything is mounted up. I have some P clips to rivet on for all these new lines.
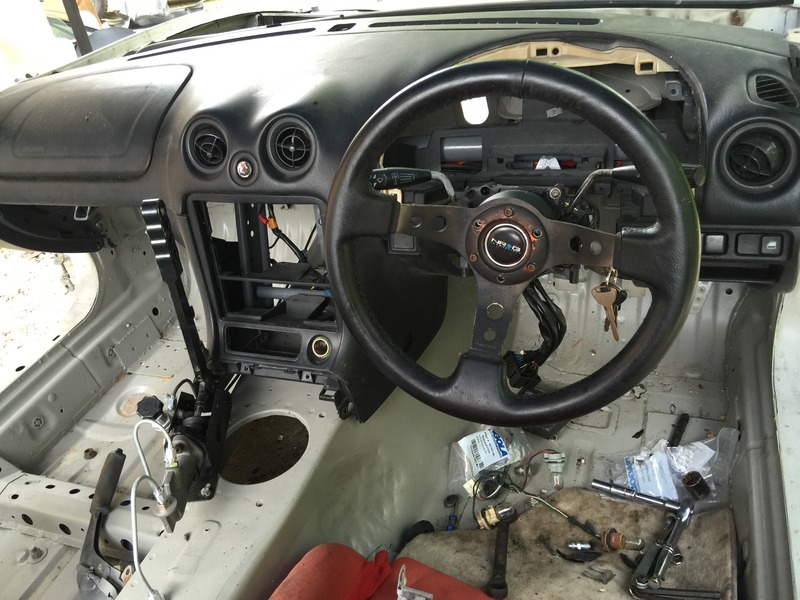
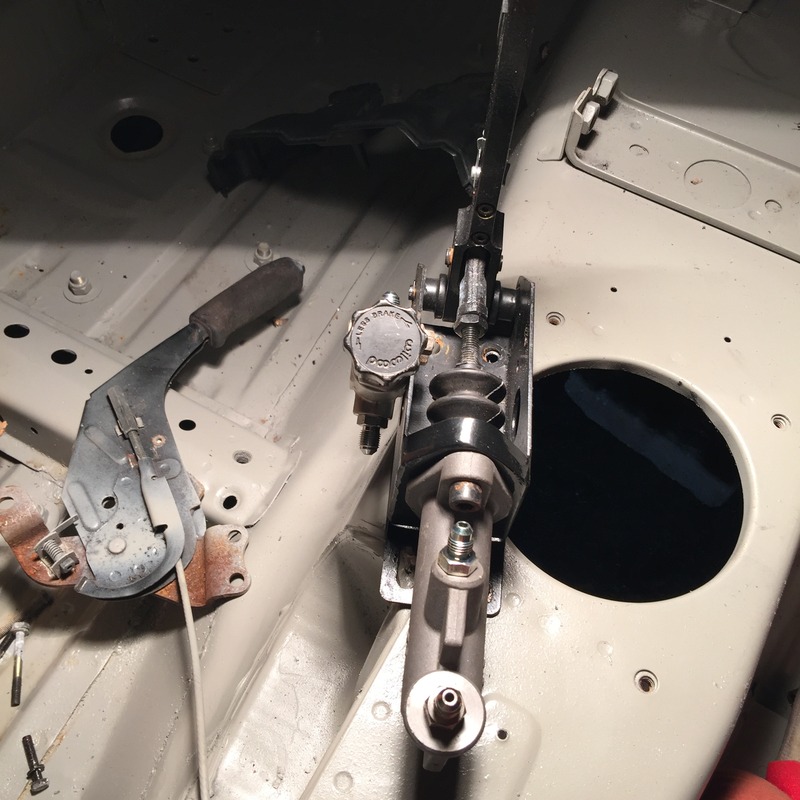
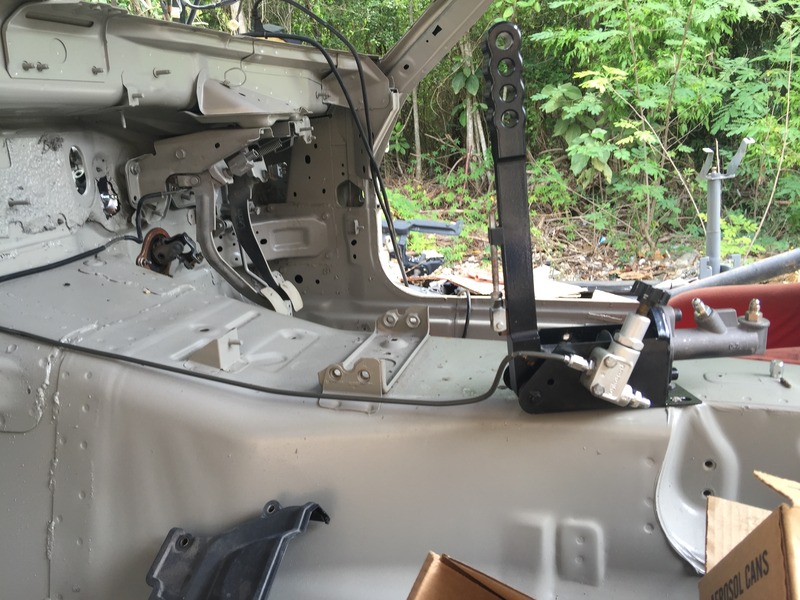
Steering column & NRG wheel/spacer/hub mounted.

Front brake lines run

Rear brake line join

Shot of the line coming through the trans tunnel. I will double check drive shaft clearance once everything is mounted up. I have some P clips to rivet on for all these new lines.

Steering column & NRG wheel/spacer/hub mounted.
Reply
0
0
09-28-2015, 08:55 PM
#74
Junior Member
Thread Starter
Join Date: Aug 2005
Location: Cayman Islands
Posts: 440
Total Cats: 17
Decided to adjust the rear coilovers to match the same height this evening.
They are adjusted to the lowest setting and the wheel gap seems pretty decent. Keeping in mind there is no drive train in the car at the moment. I need to see if I can peek under there and see what the shock travel is like...probably bumpstop city
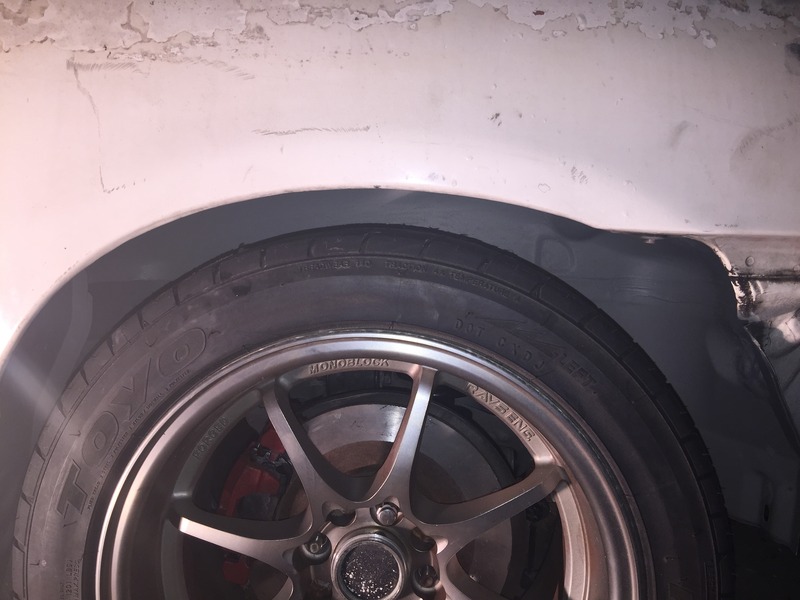
They are adjusted to the lowest setting and the wheel gap seems pretty decent. Keeping in mind there is no drive train in the car at the moment. I need to see if I can peek under there and see what the shock travel is like...probably bumpstop city


Reply
0
0
10-02-2015, 09:48 PM
#75
Junior Member
Thread Starter
Join Date: Aug 2005
Location: Cayman Islands
Posts: 440
Total Cats: 17

The only picture I have for the day is when I mounted the ORC clutch. It's a crime to cover this thing, alas.
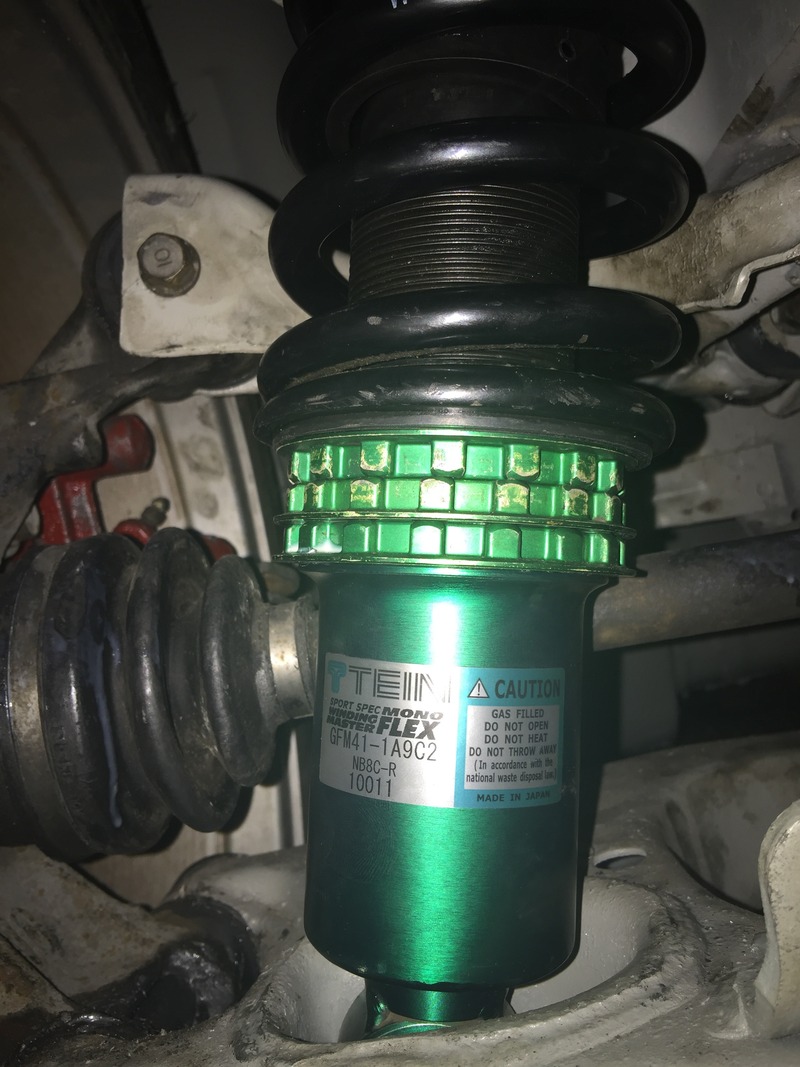
A friend helped me get the motor & trans together and the PPF bolted up etc. We also adjusted the front coilovers.
Some how The ride height with the coilover spring perch adjusted to 2mm preload and the lower mount bottomed out is PERFECT.
In other news we bled the clutch. After which we went to work on his LS swap FD. I had to mount up a 12gal fuel cell in the trunk area
Reply
0
0
10-03-2015, 08:41 PM
#76
Junior Member
Thread Starter
Join Date: Aug 2005
Location: Cayman Islands
Posts: 440
Total Cats: 17

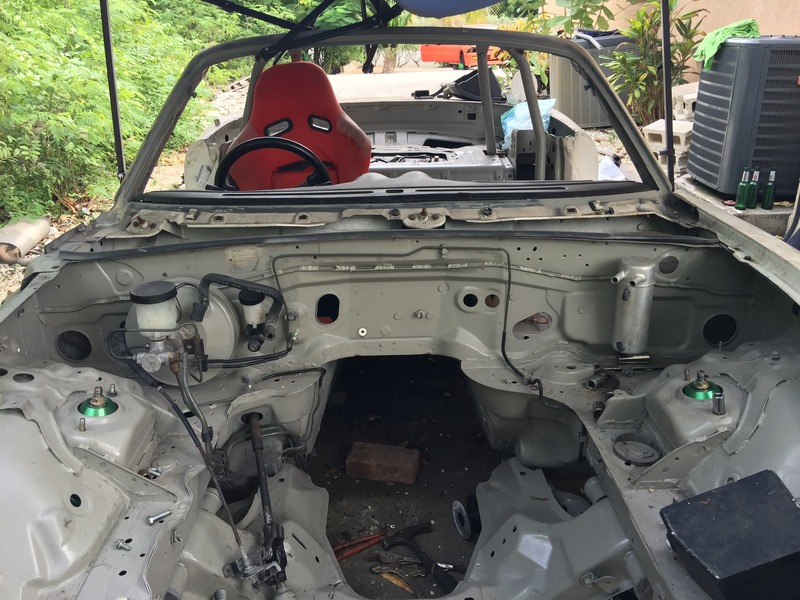
Car is on the ground
 We had a torrential downpour, a tent was sacrificed
Head goes on next week

Braided clutch line. The pedal effort on the ORC clutch is pretty easy, it's a little stiffer than stock.

Front travel looks good. Not much compressing going on with the 12k springs

AEM failsafe gauge, didn't realize it uses an on board MAP sensor, would have preferred to run a wire not a hose.
949 brake lines & valve stem seals are here this coming week, engine harness the week after. Bleeding the brakes should be FUN.
Reply
0
0
10-04-2015, 04:37 PM
#77
Junior Member
Thread Starter
Join Date: Aug 2005
Location: Cayman Islands
Posts: 440
Total Cats: 17

Putting some oven cleaner to work!

After soaking for 2 hours this is all that came off

My brother will be taking it to work tomorrow to use their heated parts washer.
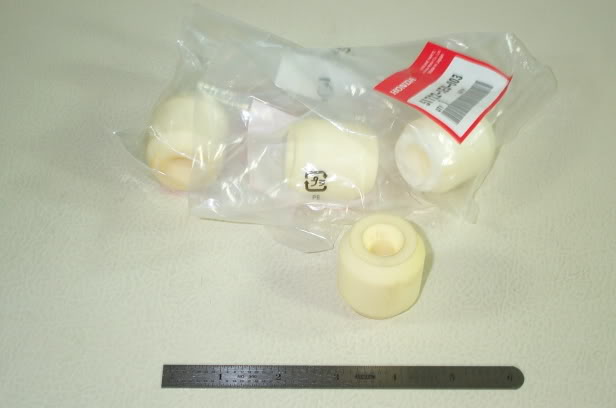
In other news the NB6C front sway bar is smaller than the energy suspension bushings that come in the master kit. Looks like I'll have to get that racingbeat swaybar sooner than planned
Reply
0
0


 10-08-2015, 04:27 PM
#80
Elite Member
iTrader: (37)

Join Date: Apr 2010
Location: Very NorCal
Posts: 10,441
Total Cats: 1,899
Much more prettier 
I'm guessing you guys are going to pull the plugs on all the oil and water passages? Those things are going to need one hell of a cleaning after a soak like that.
I'm guessing you guys are going to pull the plugs on all the oil and water passages? Those things are going to need one hell of a cleaning after a soak like that.
Reply
0
0


