Round 2: Wannabe turbo NB6C
 10-09-2015, 10:00 AM
#81
Junior Member

Thread Starter
Join Date: Aug 2005
Location: Cayman Islands
Posts: 440
Total Cats: 17
Yeah my brother is going to give it a pass in the heated washer after the over night soak with the plugs out some time today.
I got the front calipers cleaned and painted, while they were drying I changed the AC compressor in my wife's CRV, would not wish that job on my worst enemy, the lower bolts are the perfect distance from the front cross member than no combination of 12mm socket or extension would work and required a 12 point spanner with about only 20* of swing.
So by the time I finished installing the demon compressor the calipers were dry enough to handle, installed new pad hardware and stoptech street pads, snugged up the 949 braided lines and went hunting for leaks. Surprisingly all of my first time brake flares were good and only one caliper bleed screw was clogged.
I do however have the handbrake plumbed backwards. Sorting that out later after work.

Reply
 0
0

0

 10-10-2015, 02:39 AM
#83
Junior Member
Thread Starter
Join Date: Aug 2005
Location: Cayman Islands
Posts: 440
Total Cats: 17
Well the head checked out so here is a nights work summed up in 3 pictures.
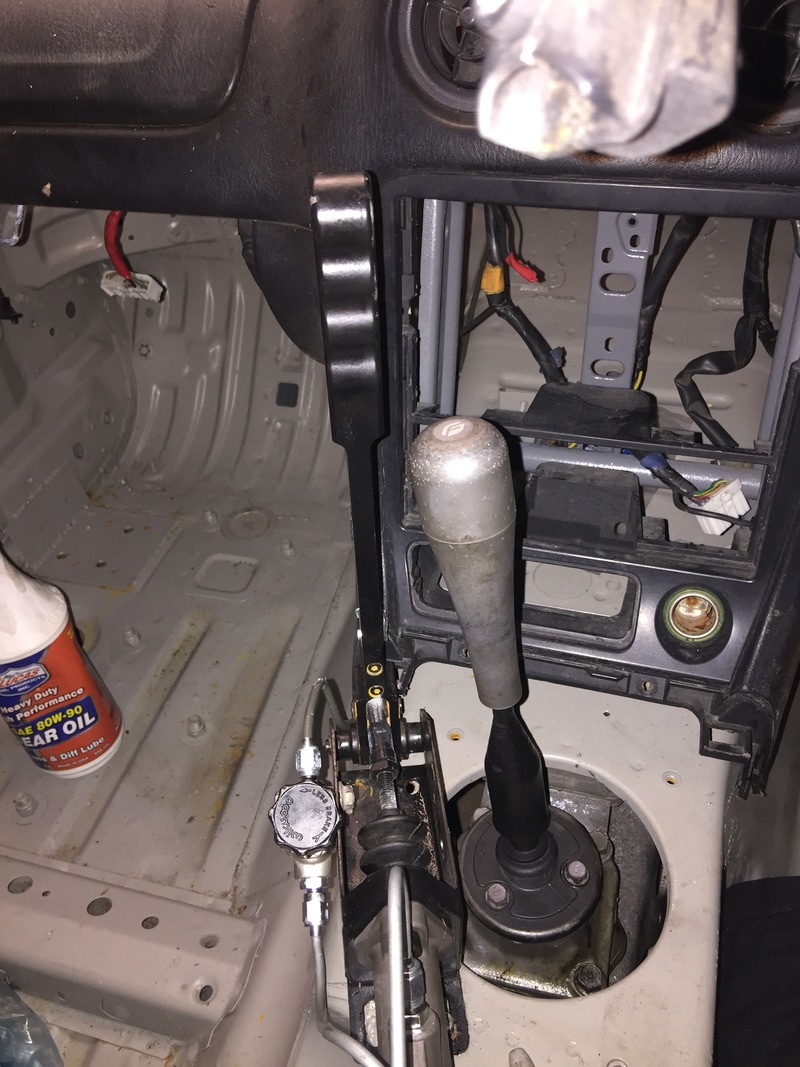
Replumbed the hand brake & decided to try out my figs shift ****. It would definitely need some miata roadster short shifter love, feels like rowing a boat but it does put my hand in a good place between steering wheel and the up to no good brake
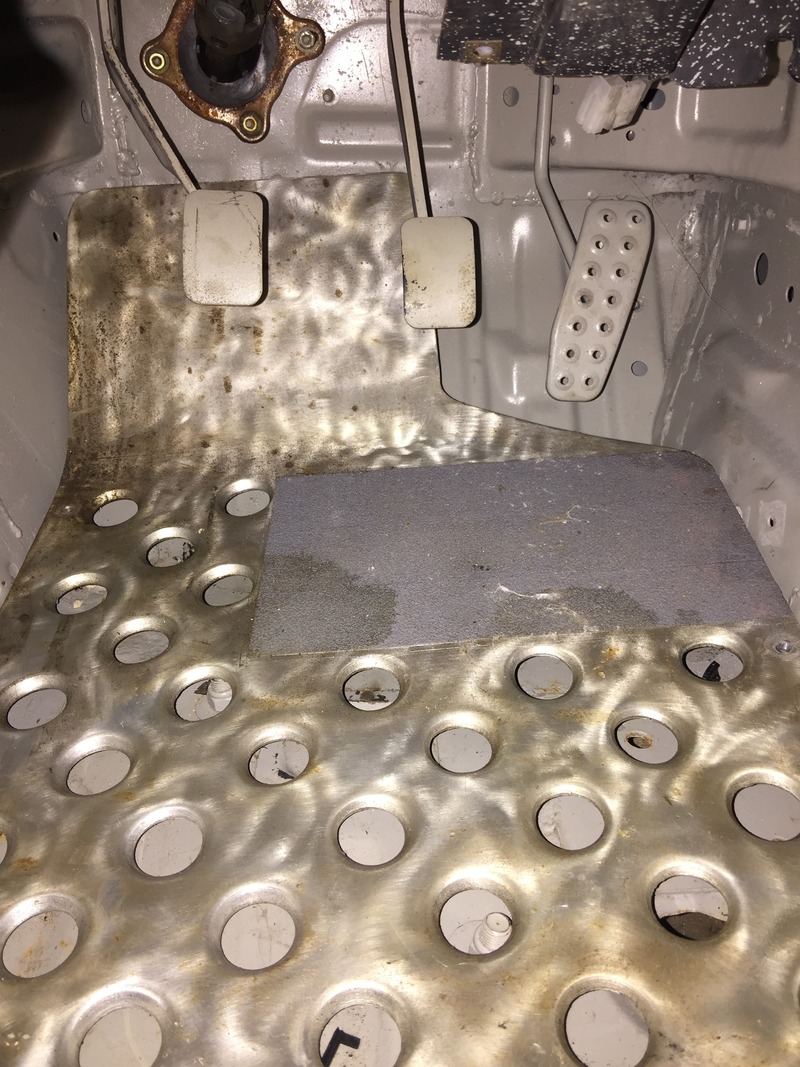
Floor plate thing my brother made from 3/16" aluminum. It's a little heavy. Not sure if I am putting the carpet back in yet. If I don't I'll probably use it.
I got my seat mounted finally with some 2.5" wide pieces of 3/16" aluminum.

It took 3 hours to get to this point. I can officially say I HATE the Miata cylinder head. Trying to get the valve keepers back in
I used some permatex copper gasket spray on the Cometic gasket and torqued the stock head bolts to 60lb/ft. Timing belt went on fairly smoothly.
It's kinda comical how small the B6 is in the engine bay albeit without manifolds and accessories.
notes to self while i remember
starter
alternator
battery wiring along ppf
intake manifold
header
chassis wiring
transmission & diff fluids
spark plugs
engine oil & filter
Reply
0
0
10-11-2015, 05:40 PM
#84
Junior Member
Thread Starter
Join Date: Aug 2005
Location: Cayman Islands
Posts: 440
Total Cats: 17

Dat 949 brass brake distribution block

Red calipers make the car go faster right?

Alternator & starter bolted up. Also put back in the wiring harness

Need some stainless hardware to secure the panels

A duckbill spoiler my brother bought for his e46. Didn't like it so I might rivet it on and get the body shop to make it look half decent. I need to get a new trunk lid anyway.
Reply
0
0
10-18-2015, 09:52 PM
#85
Junior Member
Thread Starter
Join Date: Aug 2005
Location: Cayman Islands
Posts: 440
Total Cats: 17

Craftsquare mirrors meant for an Evo6. Straightened out the stalks to suit the Miata mounting angle. I have some 1/8" stainless that I will make the mounting plates from.

Mounted all the EDFC motors and ran the wires. I am thinking I will probably redo this and run them through the stock wiring harness grommets on either side.

Carpet in, seat finally mounted, cage waiting to be bolted down and wrapped in padding. I also got a Worx Bell quick release which puts the wheel in the perfect spot.

Installed the Cusco shifter bushing and new large boot. Got the handbrake bolted down. The razo shift **** sits too low and the Fig's shift **** so I'll be drilling out the longer Figs shift **** to sit an inch lower.

many CR points

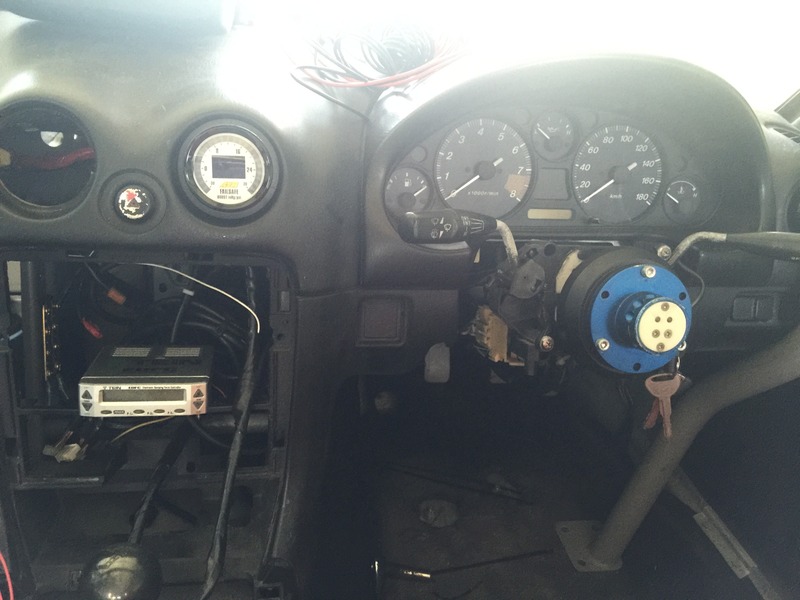
Test fitting the AEM failsafe gauge in one of the AC vents. It sticks out a bit but it's snug and definitely not going anywhere
Other than that, the wiring harness is all secured and back in place. I mounted the drivers door and brought the radio trim piece home to fiber glass over the face of it. I'll cut slots for the EDFC controller, some switches and USB bulkheads for the failsafe and Haltech.
Reply
0
0
10-19-2015, 10:47 PM
#86
Junior Member
Thread Starter
Join Date: Aug 2005
Location: Cayman Islands
Posts: 440
Total Cats: 17
With the torrential downpour we had today I knew the car got soaked :(
I made it to the car lunch time to toss a tarp over it and found the tent had collapsed from the water and wind.
So this evening my buddy with the ls1 rx7 was towing his car to the body shop. I asked if my car could hang out at his house while it was there since he has a proper covered area.
Hope the water dries out this week.....just put the carpet and seat in to damn it
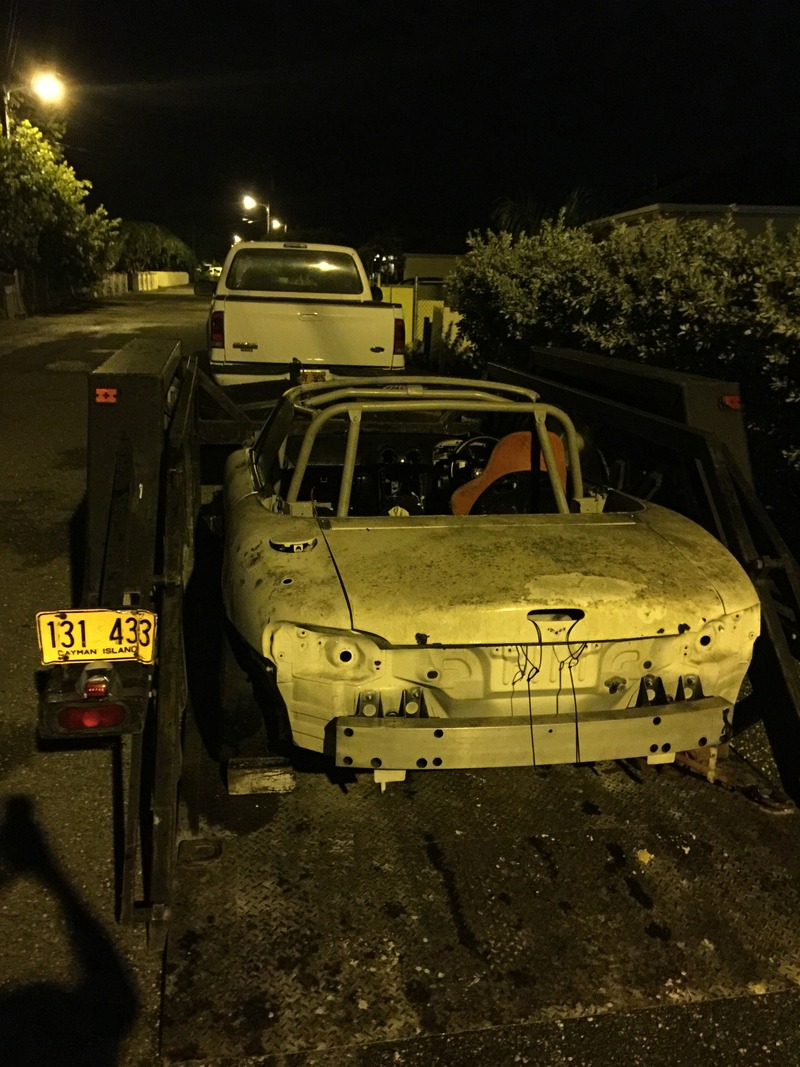
Loaded on a bobcat trailer with inches to spare
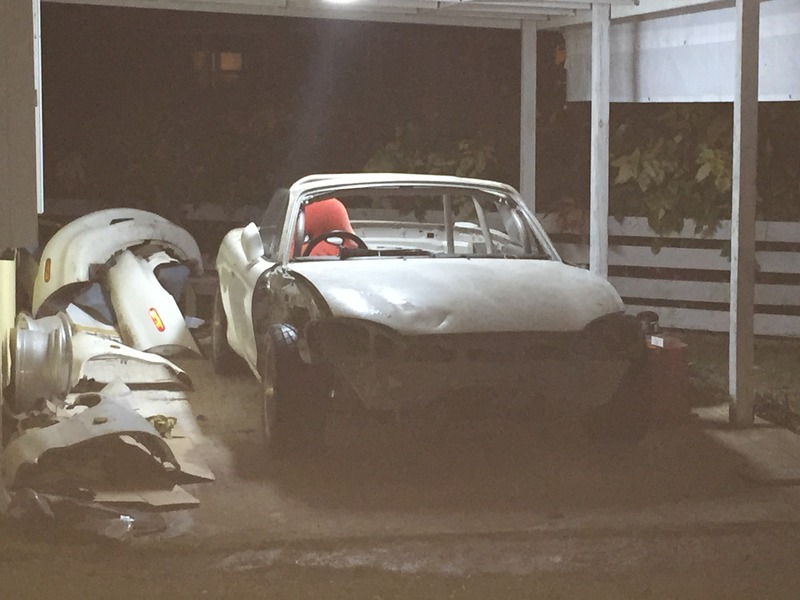
Offloaded in its new temporary home. Bonus, it's closer to where I live now which is nice
Fiberglassed over the front of the radio trim. I'll bondo it smooth and get to mounting stuff there.
My sons birthday is Saturday so the Miata takes a backseat for a week. Trunk lid and front fender rust are next to be tackled
I made it to the car lunch time to toss a tarp over it and found the tent had collapsed from the water and wind.
So this evening my buddy with the ls1 rx7 was towing his car to the body shop. I asked if my car could hang out at his house while it was there since he has a proper covered area.
Hope the water dries out this week.....just put the carpet and seat in to damn it

Loaded on a bobcat trailer with inches to spare

Offloaded in its new temporary home. Bonus, it's closer to where I live now which is nice

Fiberglassed over the front of the radio trim. I'll bondo it smooth and get to mounting stuff there.
My sons birthday is Saturday so the Miata takes a backseat for a week. Trunk lid and front fender rust are next to be tackled
Reply
0
0


 10-22-2015, 11:36 PM
#89
Junior Member
Thread Starter
Join Date: Aug 2005
Location: Cayman Islands
Posts: 440
Total Cats: 17
yeah it's a great piece of work. He still has to swing by the car to repin the dash harness plug that went to the stock ecu.
I reran the front EDFC wires as I thought I would. Looks like I will route the headlight/cooling fan wiring through the front fenders for a little cleaner look. Also got the basic shape for the mirror base plates cut out, they need a visit to the bench grinder to finish them off
Tomorrow I'll pick up the hardware to bolt the front half of the cage together and I might get the intake manifold and header back on.
Reply
0
0
10-27-2015, 12:13 PM
#90
Junior Member
Thread Starter
Join Date: Aug 2005
Location: Cayman Islands
Posts: 440
Total Cats: 17
949 swaybar package, OEM small side skirts and the replica GV front lip ordered!  Spending on large parts is officially over for the year. Just fluids and plugs now (I hope)
Spending on large parts is officially over for the year. Just fluids and plugs now (I hope)
Last edited by Sirnixalot; 10-27-2015 at 01:09 PM.
Reply
0
0
10-28-2015, 07:16 PM
#91
Junior Member
Thread Starter
Join Date: Aug 2005
Location: Cayman Islands
Posts: 440
Total Cats: 17
More work!
Welded up my harness bar. It still needs a hole slotted to bolt down and paint
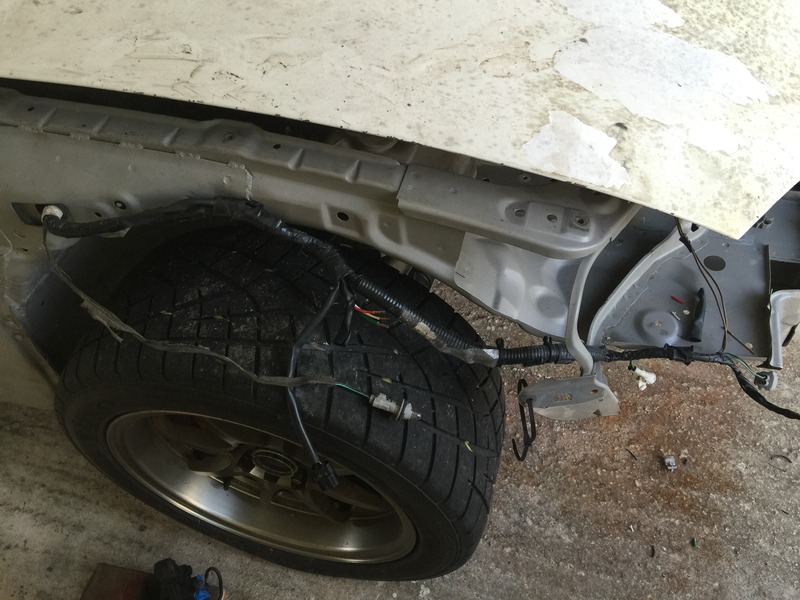
Tucked the engine bay wiring. Head light wires need extending
Intake and exhaust manifolds on, alternator/water pump belt installed, new catch can mounted, washer bottle and wiper motor put back in as well.

Haltech mounted where the passenger airbag was
AEM Failsafe & oil pressure gauge mounted, wiring for the EDFC & gauges tidied up. I also bolted the EDFC down.
Tomorrow the wiring will be buttoned up and if the K20 coils get here I might attempt to start it up!

Welded up my harness bar. It still needs a hole slotted to bolt down and paint

Tucked the engine bay wiring. Head light wires need extending

Intake and exhaust manifolds on, alternator/water pump belt installed, new catch can mounted, washer bottle and wiper motor put back in as well.

Haltech mounted where the passenger airbag was

AEM Failsafe & oil pressure gauge mounted, wiring for the EDFC & gauges tidied up. I also bolted the EDFC down.
Tomorrow the wiring will be buttoned up and if the K20 coils get here I might attempt to start it up!
Reply
0
0
10-29-2015, 08:28 AM
#92
Moderator

iTrader: (12)
Join Date: Nov 2008
Location: Tampa, Florida
Posts: 20,652
Total Cats: 3,011
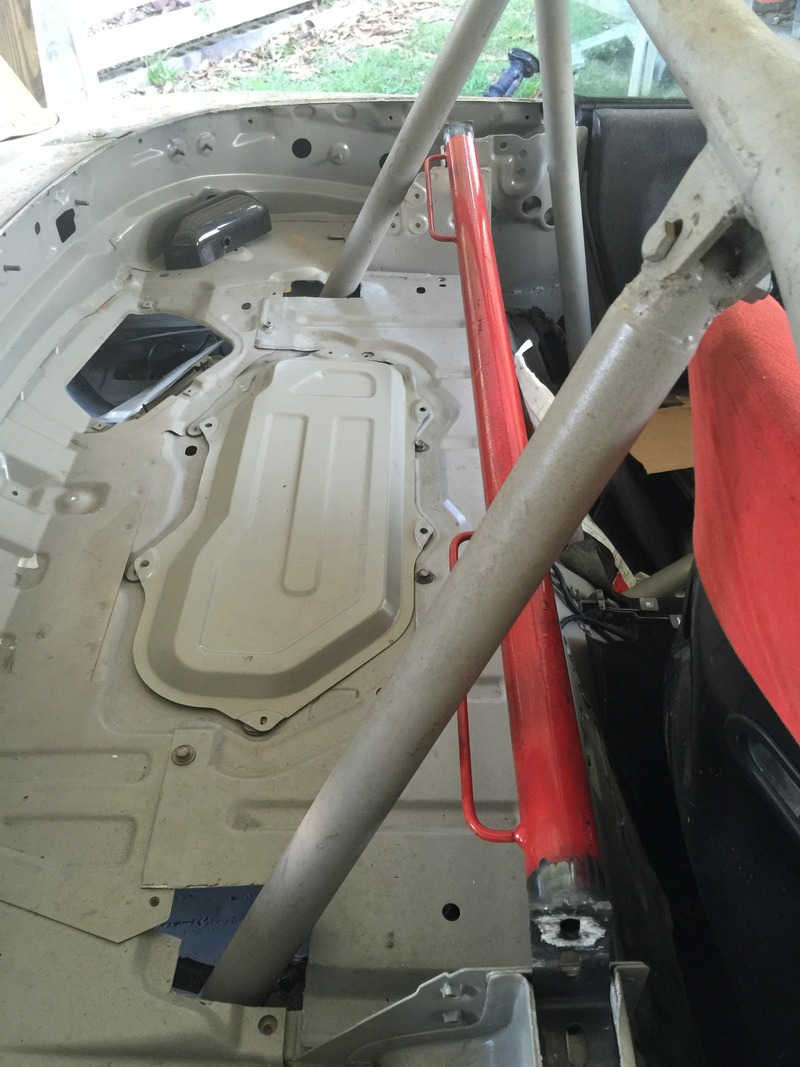
The rear legs on the rollbar have me concerned. Most roll overs involve a side load on the main hoop. I see the hinges making it easier for the device to fold up rather than hold up. Have you considered adding any diagonals? Either from main hoop to main hoop or better yet from rear legs to main hoop? Triangulation is your friend.
Reply
0
0
10-29-2015, 10:44 AM
#93
Junior Member
Thread Starter
Join Date: Aug 2005
Location: Cayman Islands
Posts: 440
Total Cats: 17
I have welded the rear tubes to the main hoop for that reason. The bolt you see through them was just for mock up. I will be adding a proper bolt as a precaution also.
How about adding gussets between the main hoop and "B" pillar and a horizontal between the rear legs?
How about adding gussets between the main hoop and "B" pillar and a horizontal between the rear legs?
Reply
0
0
10-29-2015, 11:51 AM
#94
Moderator
iTrader: (12)
Join Date: Nov 2008
Location: Tampa, Florida
Posts: 20,652
Total Cats: 3,011
Crane booms are full of triangles for a reason.  A horizontal bar between the rear legs wouldn't resist the hoop being folded flat by a side load at the top corner of the main hoop in the same way a diagonal brace would.
I'm no engineer but I've had it explained to me by people who were. That being said, something is obviously better than nothing.
A horizontal bar between the rear legs wouldn't resist the hoop being folded flat by a side load at the top corner of the main hoop in the same way a diagonal brace would.I'm no engineer but I've had it explained to me by people who were. That being said, something is obviously better than nothing.
Reply
0
0
10-29-2015, 11:54 AM
#95
Junior Member
Thread Starter
Join Date: Aug 2005
Location: Cayman Islands
Posts: 440
Total Cats: 17
I see your point yeah.....
I'll order a tubing notcher or make some sort of jig for my drill press. Only tubing I can get on island is sch40 ERW *ugh* hmmm I could have some DOM come with the sways to consolidate shipping.
brb checking ebay
I'll order a tubing notcher or make some sort of jig for my drill press. Only tubing I can get on island is sch40 ERW *ugh* hmmm I could have some DOM come with the sways to consolidate shipping.
brb checking ebay
Reply
0
0
 11-01-2015, 06:24 PM
#97
Junior Member
Thread Starter
Join Date: Aug 2005
Location: Cayman Islands
Posts: 440
Total Cats: 17
Ecu is all wired in! Just need to flash it with the haltech supplied base map now. Coil packs should be here tomorrow/tuesday.
I had to end up rebuilding the starter. Changed the brushes but the solenoid will not complete the circuit to spin the starter still. I need to pull the solenoid off and clean the contacts.
Pulled the valve cover and wiped some brake fluid on the flaking paint to finish the job. Will be spraying on a gun metal color.
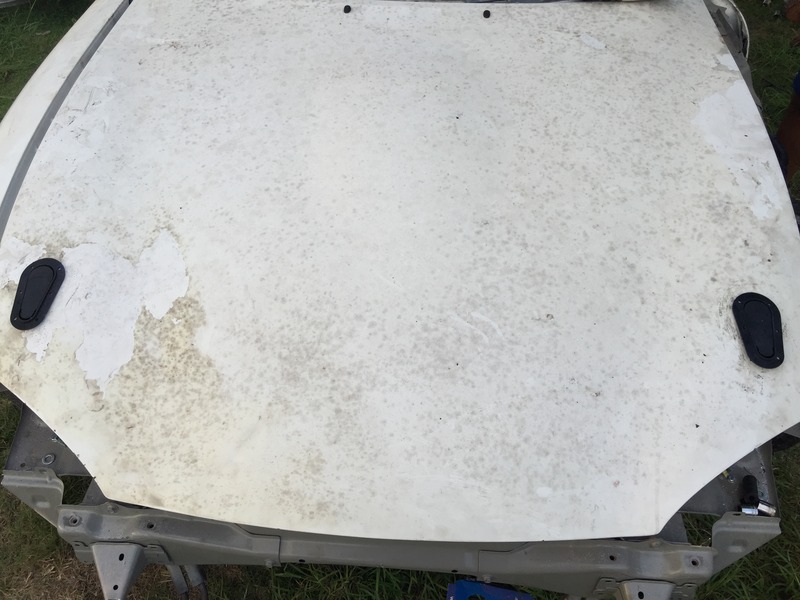
Aerocatch hood latches mounted. These are the flush mount ones so I still need to cut the underside a little wider to slot them in and clean up the edges. I'll be using rivets instead of teh supplied hardware. I'll have the top painted with the rest of the car but I'll use orange or highlighter yellow on the underside so I can tell if they aren't latched
List of **** to complete on Tuesday
Fix starter
Fill gear box
Fill rear diff
Weld radiator hose bungs and fill coolant
Spark plugs
I ended up ordering some delrin steering rack bushings so those are coming with the rest of the stuff. Hopefully everything reaches Miami by tuesday to make it on the boat this week.
Reply
0
0
11-03-2015, 07:24 PM
#98
Junior Member
Thread Starter
Join Date: Aug 2005
Location: Cayman Islands
Posts: 440
Total Cats: 17
Well it rolls over but it doesn't fire. I need to tone out the wiring to make sure the cam and crank signals are going to the right place and then figure out how to log them on start up. The TPS needs adjusting also but it started to rain.
I checked the fuel hoses to make sure they were the right away around and I am getting spark.
Welded up all the -16AN bungs. Getting that re-route spacer setup on with the motor in the car was FUN.
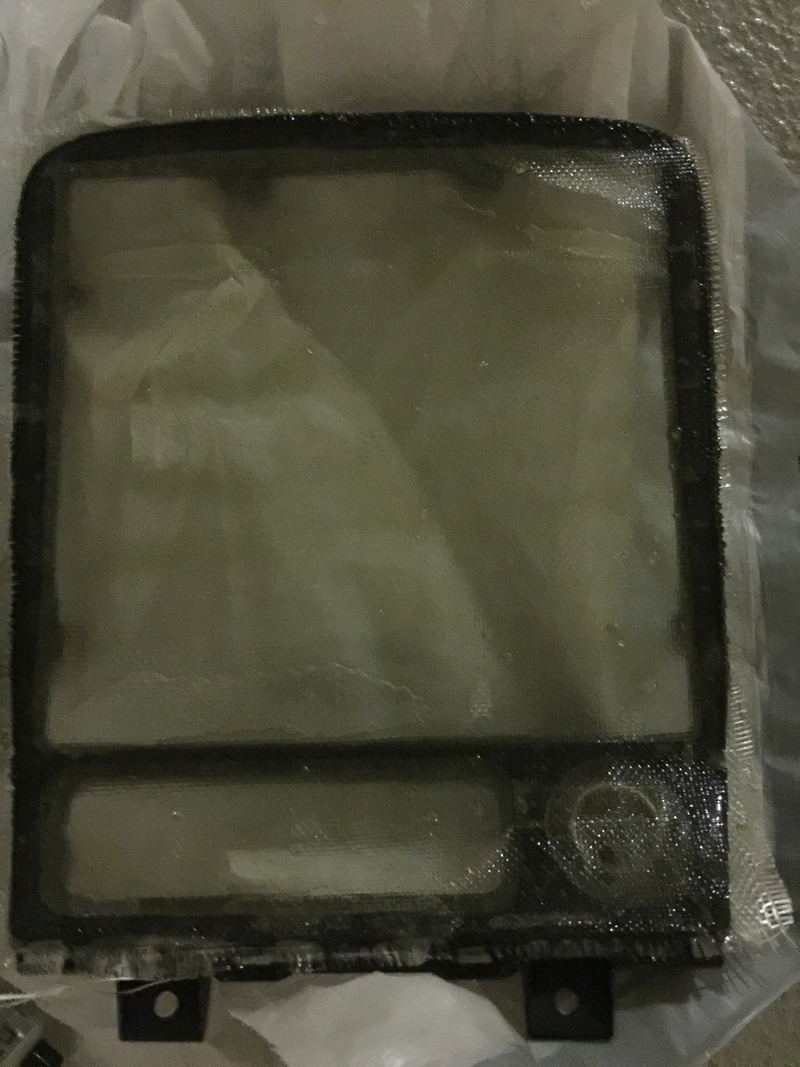
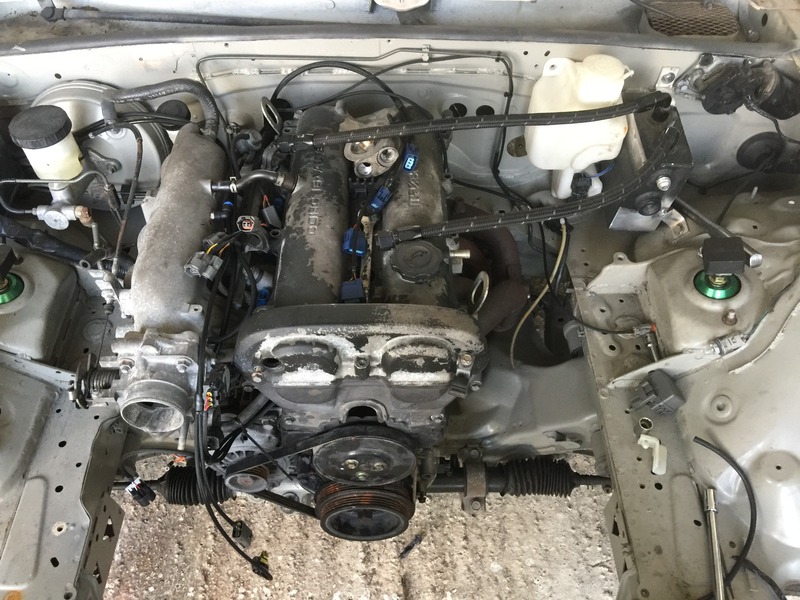
Got some 3/8 aluminum rod, drilled and tapped them for M6 bolts to mount the coil packs. Also welded on a pair of -8AN bungs to the valve cover. I punched out the hole between the baffles as well.
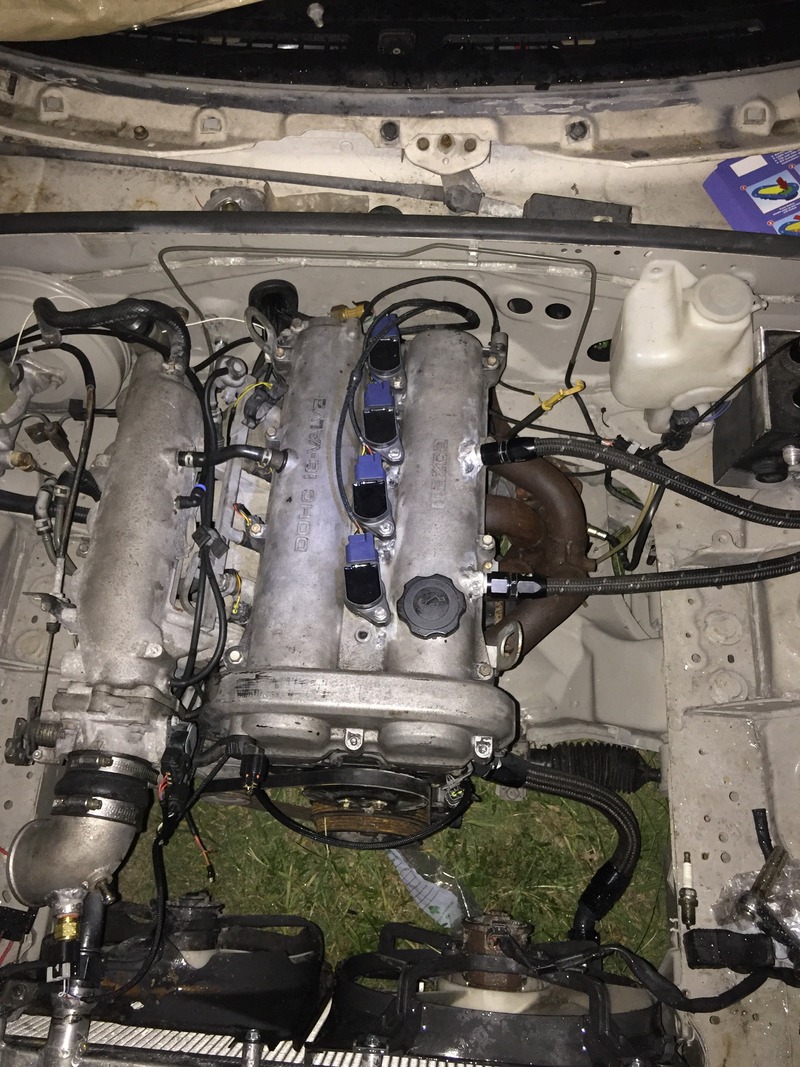
Engine bay shot
Once it starts up I'll pull the valve cover to make it look pretty. The body panels, one door, trunk and bumpers are going to the body shop tomorrow.
I checked the fuel hoses to make sure they were the right away around and I am getting spark.
Welded up all the -16AN bungs. Getting that re-route spacer setup on with the motor in the car was FUN.
Got some 3/8 aluminum rod, drilled and tapped them for M6 bolts to mount the coil packs. Also welded on a pair of -8AN bungs to the valve cover. I punched out the hole between the baffles as well.

Engine bay shot
Once it starts up I'll pull the valve cover to make it look pretty. The body panels, one door, trunk and bumpers are going to the body shop tomorrow.
Reply
0
0
11-07-2015, 08:58 PM
#99
Junior Member
Thread Starter
Join Date: Aug 2005
Location: Cayman Islands
Posts: 440
Total Cats: 17
In my haste i neglected to check if the ignition was set to batch or sequential and burnt up 2 coils. Sacrifices to the god of impatience.
The cam sensor is possibly faulty as well so I need to order those pieces again.
The cam sensor is possibly faulty as well so I need to order those pieces again.
Reply
0
0
11-08-2015, 07:16 PM
#100
Junior Member
Thread Starter
Join Date: Aug 2005
Location: Cayman Islands
Posts: 440
Total Cats: 17
Got some new coils. triple checked everything in the base map. Figured out cam sensor wiring was backwards but still no joy. My brother is going to Tampa for the weekend so he's gonna ferry back a cam sensor for me.
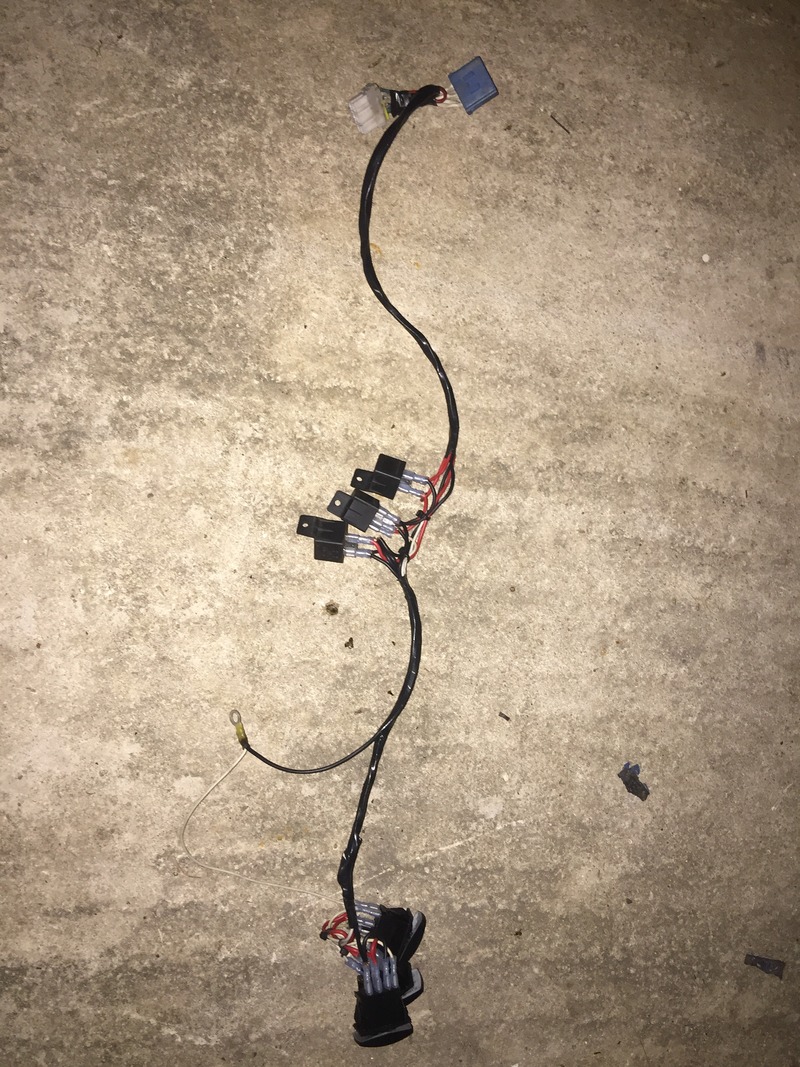
I finished lengthening the headlight wiring and got my acc/on/start switches wired up to a turbo timer harness.
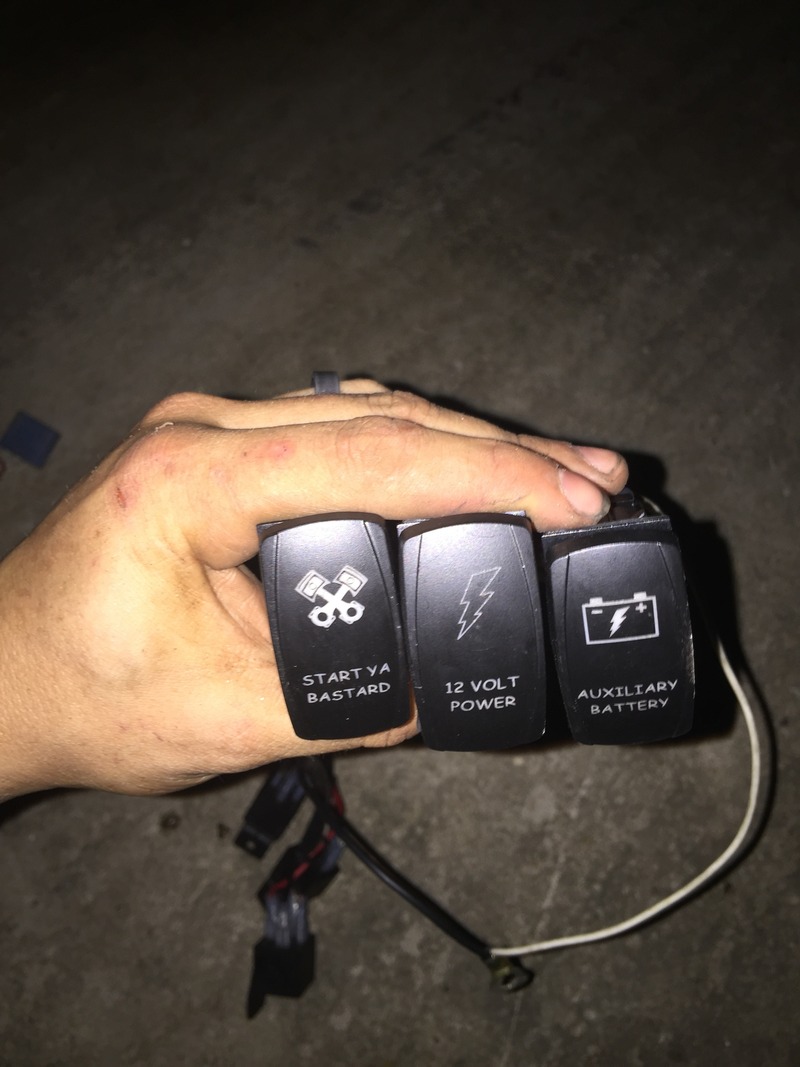
In related news my side skirts got damaged during shipping so the freight forwarder sent them back. The ebay seller is sending out a new set tomorrow while the damaged ones are on their way back to them. I cant risk the sways not showing up in time for the event on the 29th so they're shipping this week.
I finished lengthening the headlight wiring and got my acc/on/start switches wired up to a turbo timer harness.


In related news my side skirts got damaged during shipping so the freight forwarder sent them back. The ebay seller is sending out a new set tomorrow while the damaged ones are on their way back to them. I cant risk the sways not showing up in time for the event on the 29th so they're shipping this week.
Reply
0
0


