Se7en Turbo Build (Was: Thermostat Rerouting)


 07-23-2010, 12:22 PM
#86
Cpt. Slow

iTrader: (25)
Join Date: Oct 2005
Location: Oregon City, OR
Posts: 14,175
Total Cats: 1,129
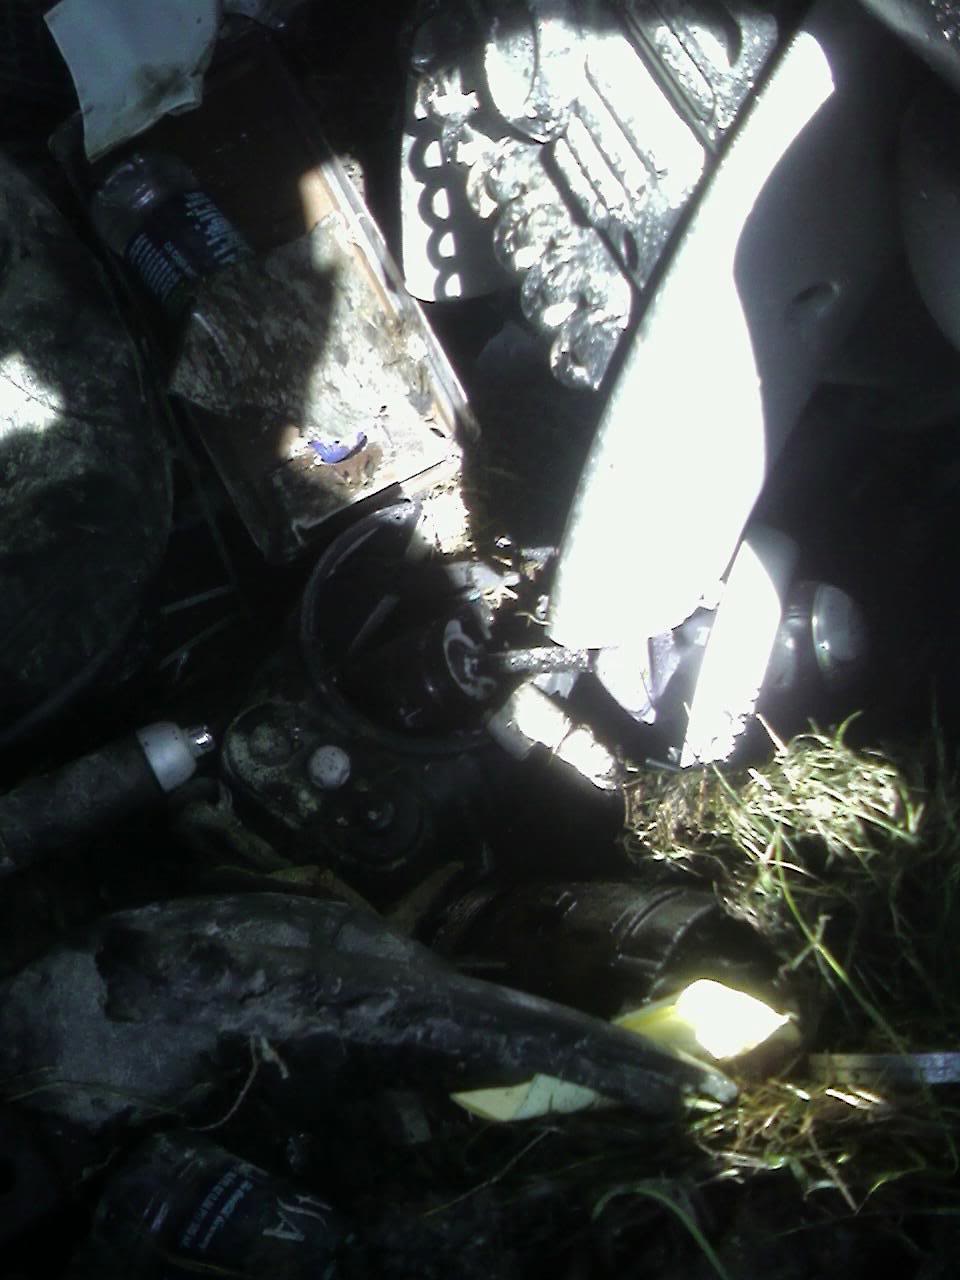
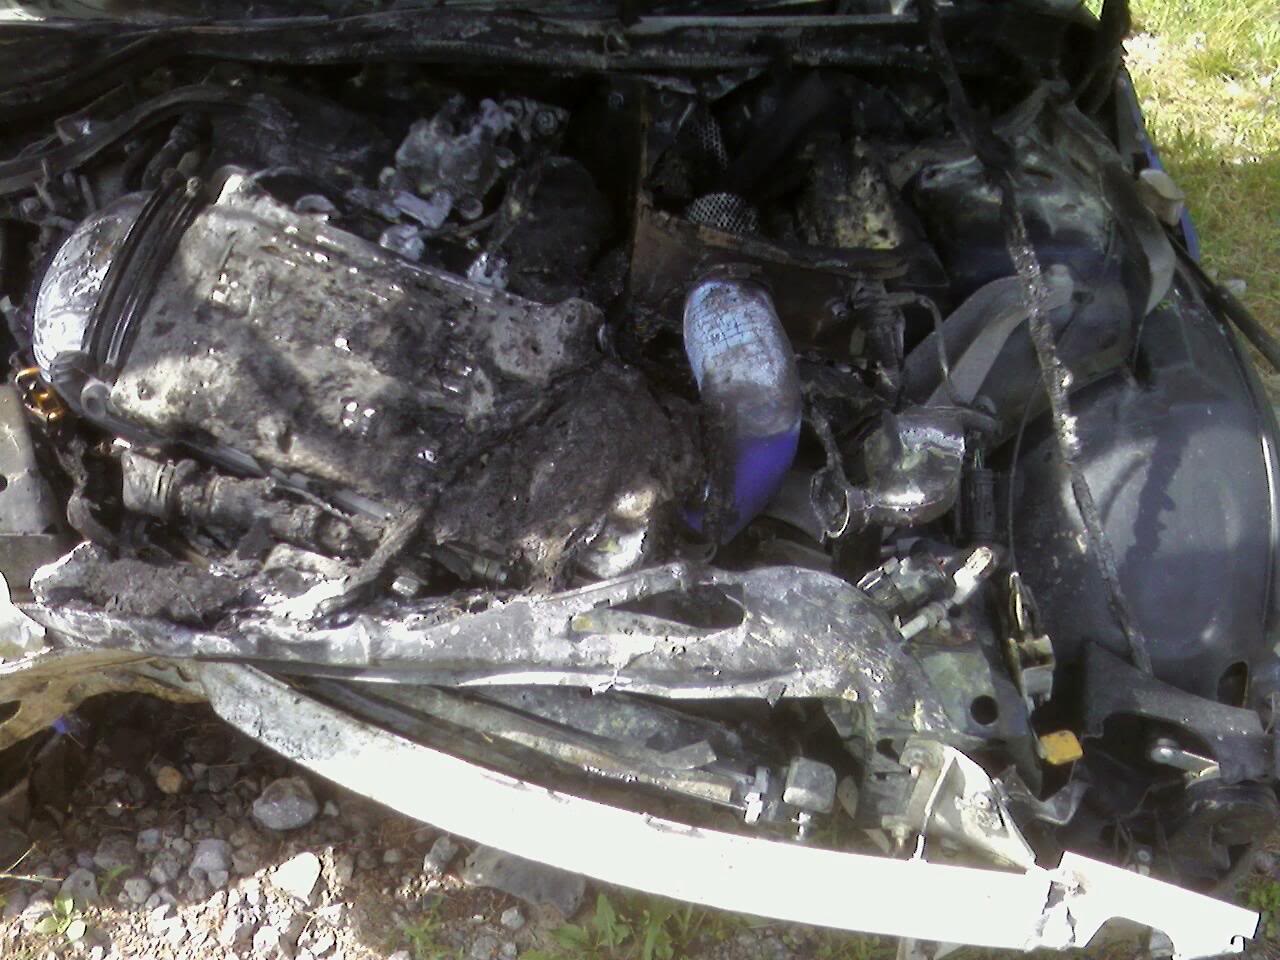
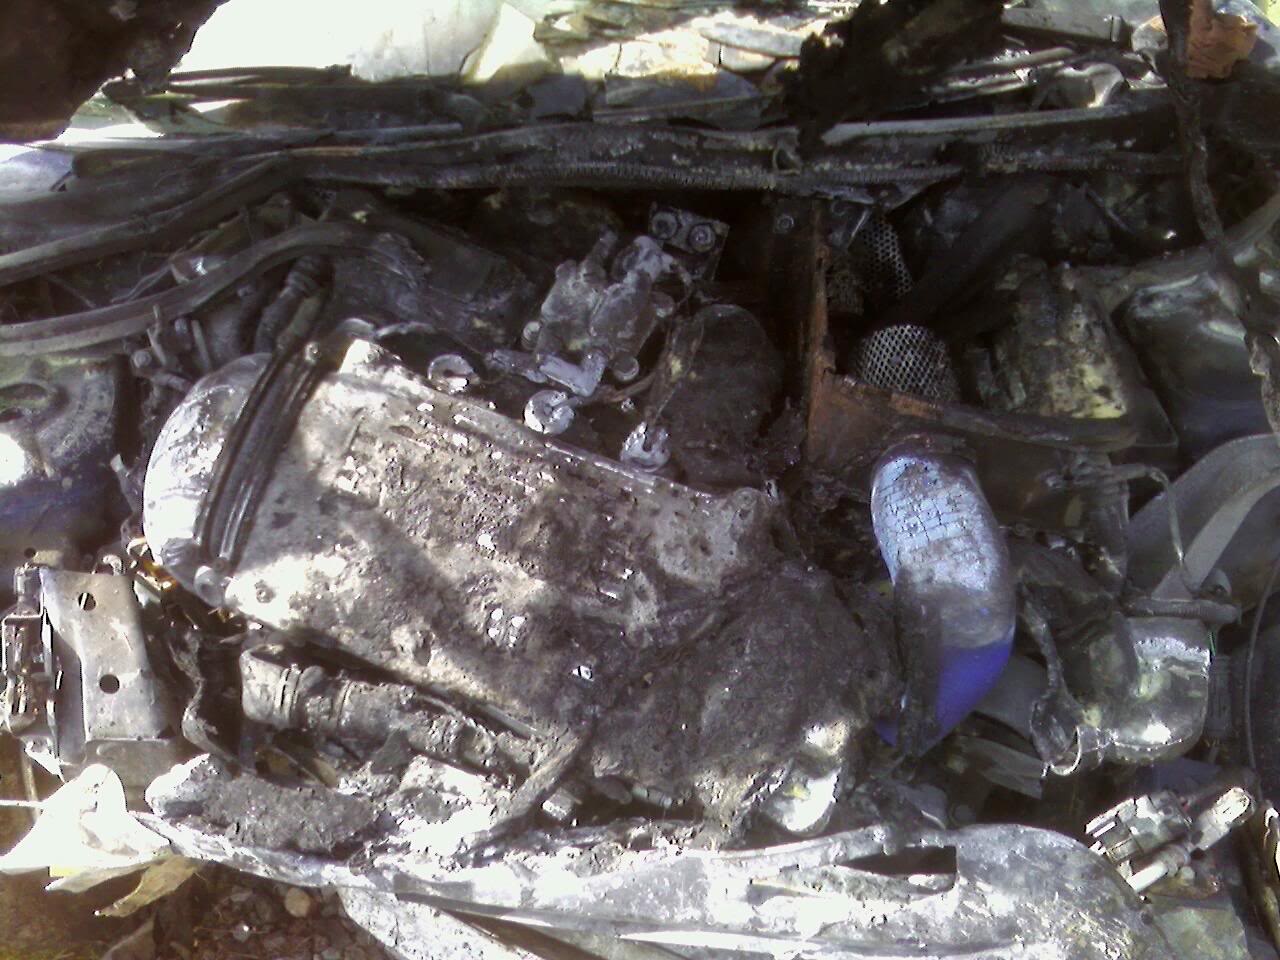
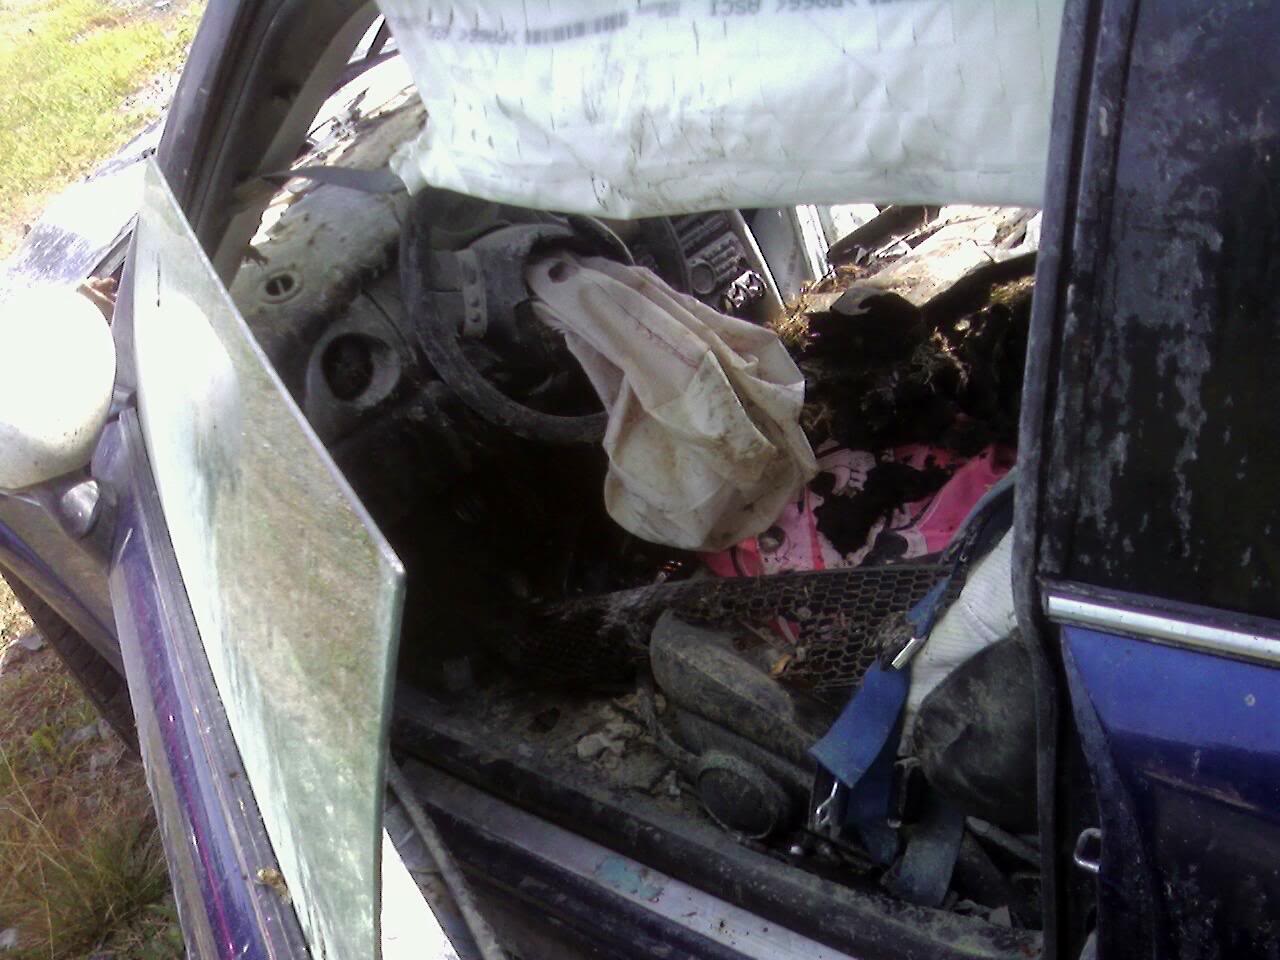
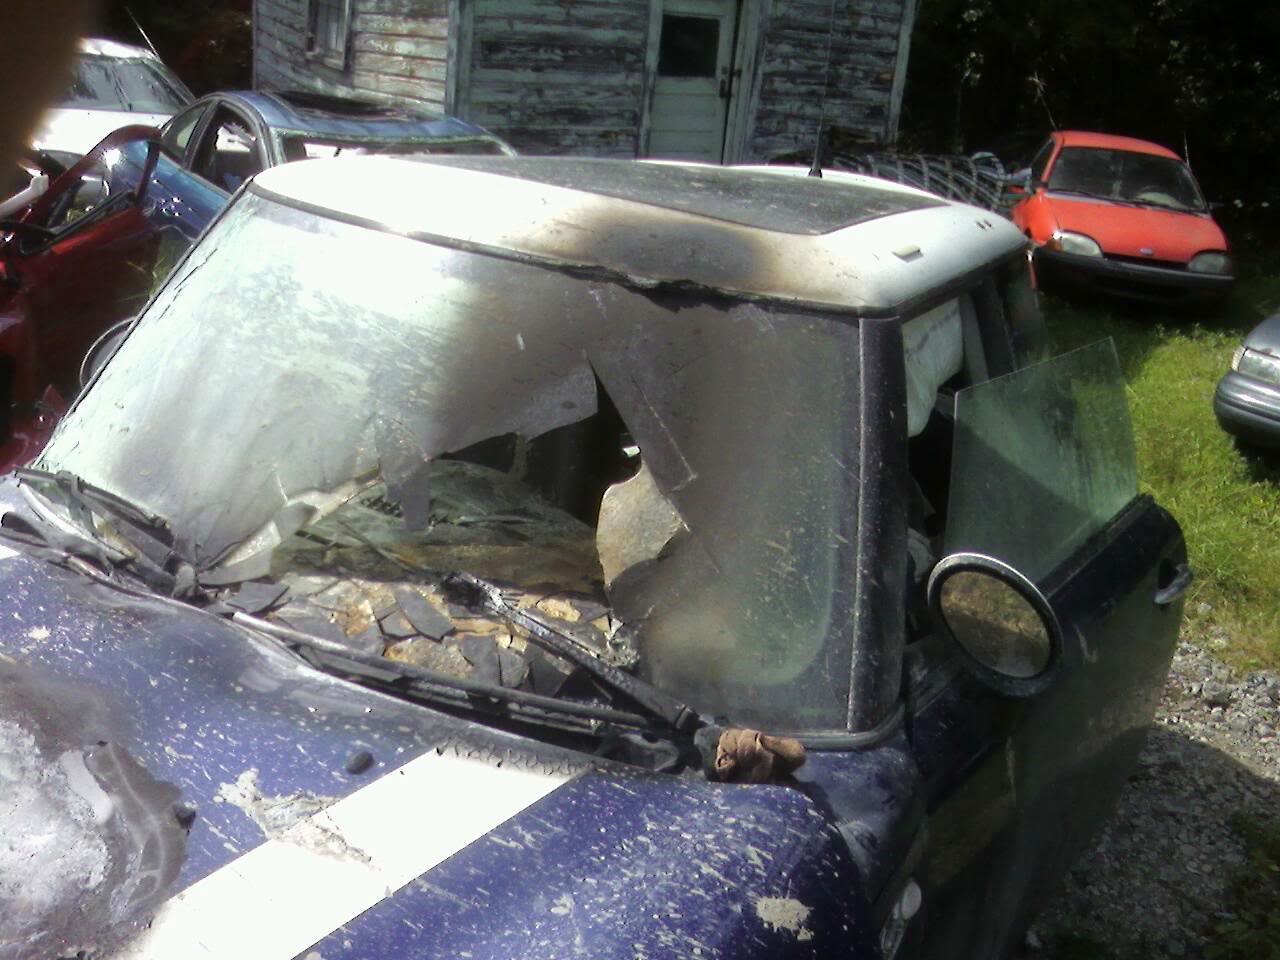
That's so far beyond totaled it's not even funny. I had a similar accident, without the fire, roll over, dirt, and interior damage, and it did $15,000 damage. That's easily 2-3 times as much. See if they'll give you a full estimate, even if they total it, I'd be interested to know.

Reply
 0
0

0


 07-25-2010, 02:17 AM
#90
Junior Member
Thread Starter

Join Date: Oct 2008
Location: Cortland, Ohio
Posts: 113
Total Cats: 5
They totalled it. I haven't been given the value yet.
This isn't the first time. In '06, some girl rear-ended the Mini at 55mph with a F-150 while I was stopped for an accident. I walked away with a herniated disk in that one.
I just want to get the paperwork done so I can get the money, pay off some debts, get another car, and finish the Seven. MegaSquirt, here I come!
Reply
0
0
 07-25-2010, 01:27 PM
#92
Junior Member
Thread Starter
Join Date: Oct 2008
Location: Cortland, Ohio
Posts: 113
Total Cats: 5
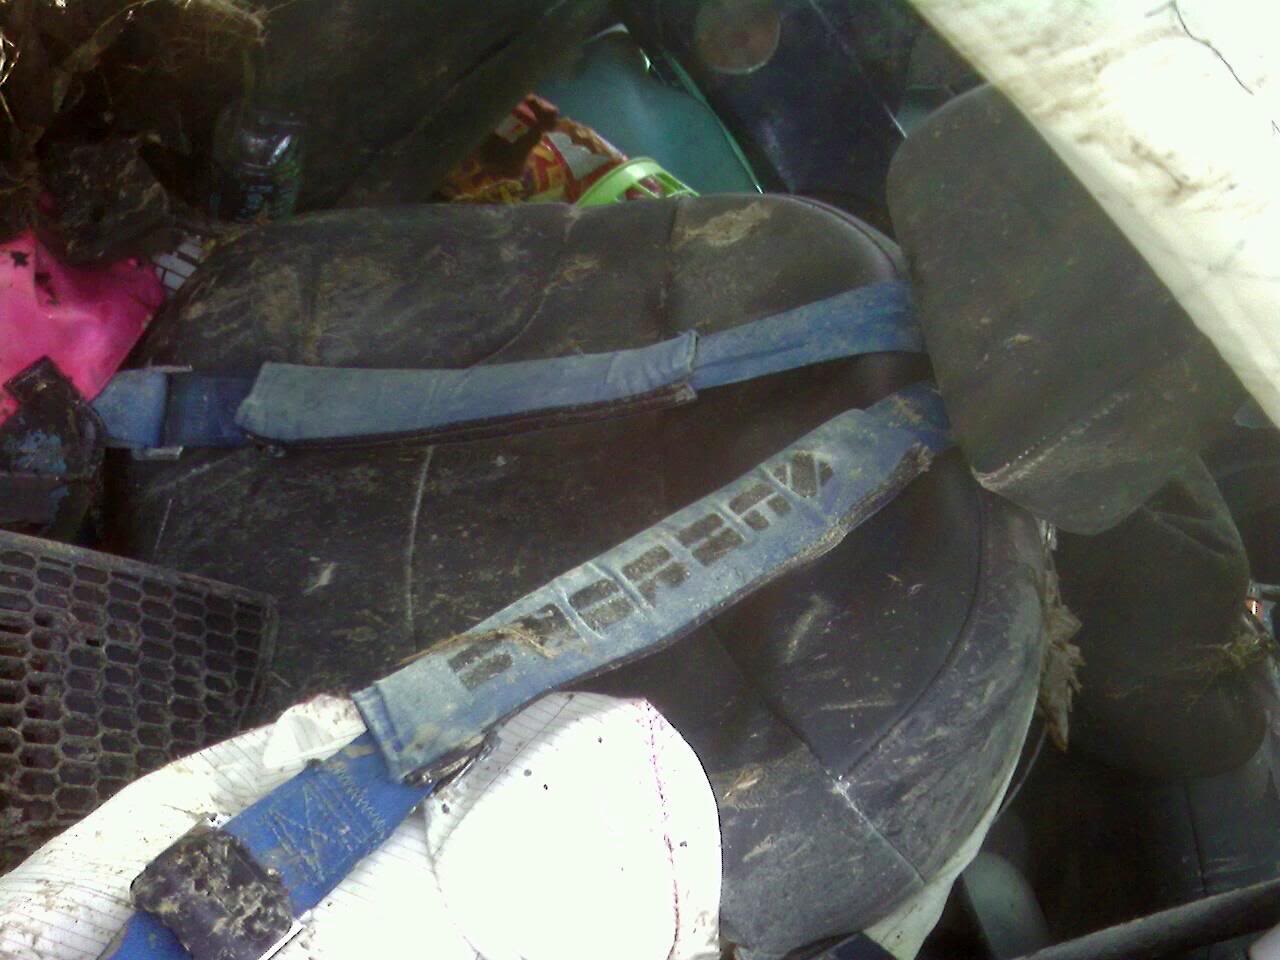
Schroth harnesses generally utilize already present mounting points. The right side mounted to the rear seat belt buckle clip, as did the lap belt, whereas the left rear harness mount as well as the left lap belt mount both bolted where the original seatbelts bolt to the floor. They eash came with lengthened bolts for that purpose. They remained at the correct "45 degree or higher" mounting angle.
Their only problem was the lack of anti-submarining belts. That's why my ribs are s bad--right now I am havng a hard time breathing deeply or picking anything up, probably due to bruising.
Their only problem was the lack of anti-submarining belts. That's why my ribs are s bad--right now I am havng a hard time breathing deeply or picking anything up, probably due to bruising.
Reply
0
0
 08-29-2010, 03:05 AM
#96
Junior Member
Thread Starter
Join Date: Oct 2008
Location: Cortland, Ohio
Posts: 113
Total Cats: 5
Finally! The first of several clips of the Locost meet a few weeks ago in Kentucky. While only two road-going Sevens, we had a lot of fun and a few other cars...
http://www.youtube.com/watch?v=UQ03jNwpllc
http://www.youtube.com/watch?v=UQ03jNwpllc
Reply
0
0
10-05-2010, 06:10 AM
#98
Junior Member
Thread Starter
Join Date: Oct 2008
Location: Cortland, Ohio
Posts: 113
Total Cats: 5
Well, I tried to post a week or two ago, and right when I went to send, it went away. Two hours worth of writing and photos, poof. Almost like a Mac.
Oh well. I'll try to remember. A lot of crap has been going on in the last month or so, I've been sick with something, probably a sinus infection, for the entire time, wife was in the hospital, some fighting... usual junk.
Here's where some of my time goes... Just turned 2, and already over 3 feet tall...


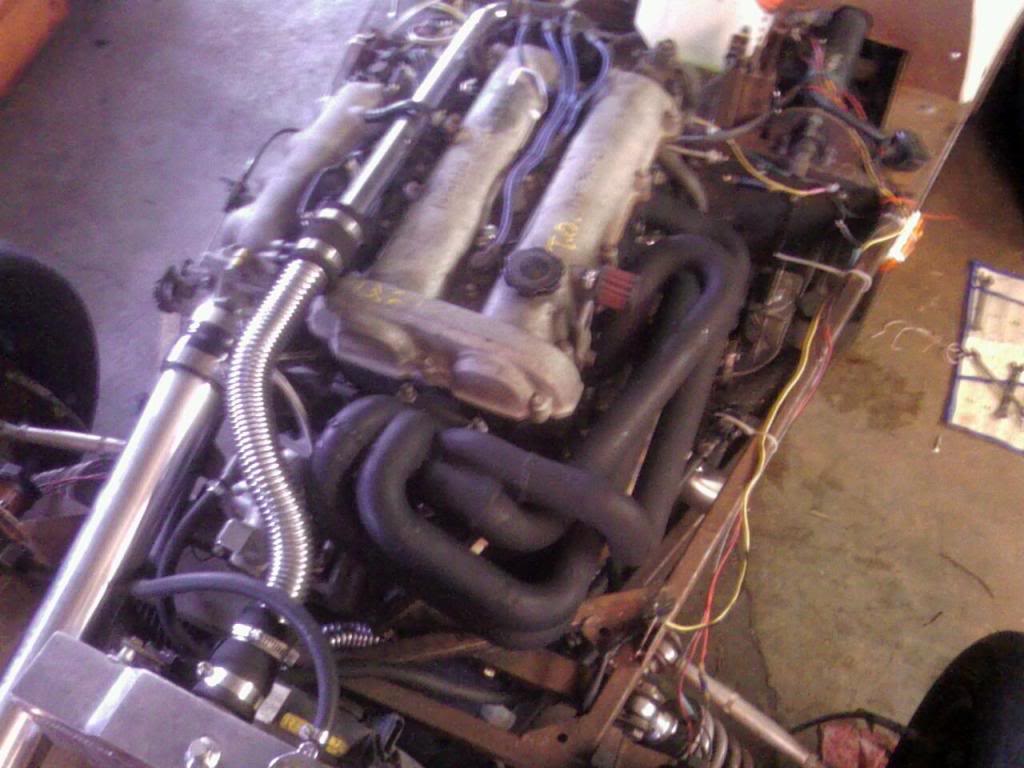
I finally got around to welding the throttle body neck back onto the intake manifold for Other Dave's 4G63...
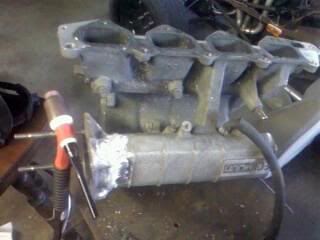
Now, he has to clean it out and I'll TIG the end plate on the opposite end, and it'll be ready to bolt back on.
As for me, I've done some stuff, but mostly not post worthy, per se. Small things, an hour here, hour there. Pulled the seats out, finally finished the tipping die for the bead roller, put it on, and started to run a cutout of the transmission tunnel on the roller. Couldn't figure out why it was warping and rolling out of line. We looked at the roller, and it was flexing back and forth, and couldn't hold any pressure between the dies. So I welded on some triangulation and some tubing on the bottom half and am going to bolt it onto another pedestal. I used .030 wire on this, and it came out very well. Perhaps I'll drop to .030 for Dave's car and see if it comes out less slaggy. I'd rather not grind a lot of excess weld, but I want to make sure penetration is ok. With the .030, I was able to raise the amperage and the wire speed, so it should be good.
I ordered some stuff with some of the money from the accident settlement. Ordered a MegaSquirt III, and am going to have my dad solder it for me, as he's a computer engineer, and can do it better than I would. Just getting time for him to do it is going to be a chore.
I bought tubing for the intake and intercooler plumbing, along with silicone couplers. That's next on the list.
I also bought oil lines for the turbo.
The manifold was starting to rust through the thin coats of the black heat paint, as well as where the welds were, so I bought two more cans and sprayed one can on. It lasted for about 5 coats, and I sprayed one more coat with the second can. It came out well, and no rust since.\
I started finishing up the nose cone. Where the flange is slotted for the Dzus fasteners has been pretty beaten up due to the thin material and the narrow trim. So I welded on some 1/8" aluminum plate, ground the welds down, and then slotted them for the fasteners as well. It was pretty time consuming, but now I don't have to re-bend the flange every time I take the nose cone off, and I don't have to be so careful when doing so.
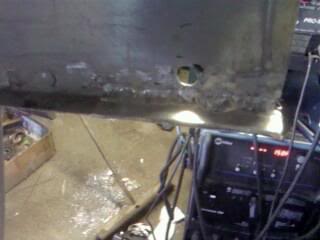
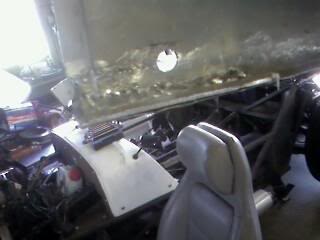
I also removed the original radiator mounts, which were 1/8" strips, and prone to flex and bounce with the car, and welded on tubing with holes drilled in the top for the radiator mount posts. It took three tries to be able to get the nose cone on, but now it goes on and off easier than with the thin strips. The tubing was not just to avoid flex/movement, but to allow me to weld on intercooler brackets off of the radiator mounts.

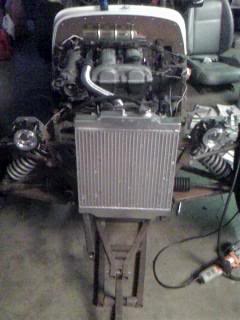
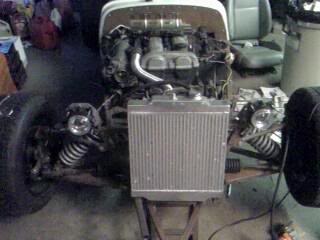
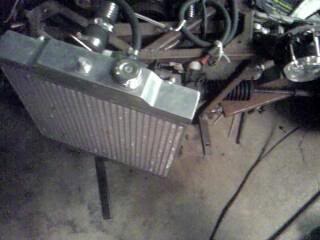
Yes, it is off to one side. That is partially what took the three tries, as I purposefully positioned off to the driver's side as far as possible to allow plumbing for the intercooler.
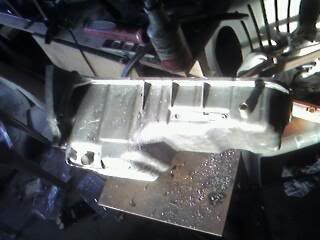
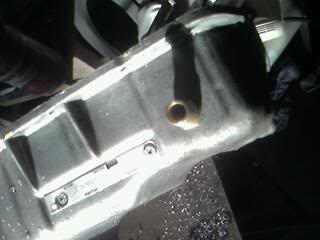
once I received the oil feed and return lines, I had to decide weither to drill and tap the return fitting on the car or drop the oil pan. After removing the bolts and putting them back on twice, I finally decided to take it off.
**NOTE: When removing the Miata oil pan, CAREFULLY check to make sure the baffle pan/windage tray is NOT still sealed onto the oil pan. It is rather thin, and is fastened to the oil pan with the silicone gasket. The oil pan has a step notched into it to allow it, and when you first remove the oil pan, you cannot see the edge of the baffle pan because of the old silicone. When dropping the pan, I shone a flashlight through the .5" gap, and couldn't see what was hanging it up. I could see the crank, but the pan and the oil pickup are bolted to the mains out of sight. After a good bit of prying, and no luck with the pan, I finally figured out about the baffle pan flange and pried it from the oil pan with a knife. Because of the prying, the tray/pan was slightly bent/warped, and it made reinstalling harder than it would be if I had known. You are supposed to run silicone around the tray and stick it onto the block, then bolt on the pickup, and finally bolt on the oil pan. Well, as it was warped, the oil pickup, once tightened to spec, would pull the tray from the block, leaving a .5-.75" gap between the flange and the block. I finally gave up and sandwitched it between the oil pan when tightening it up. It worked out, but took a lot longer than I would have preferred. Also, remember to replace the front and back seals when doing this. I have never seen an oil pan that had the main seals built into it. What a stupid idea.**
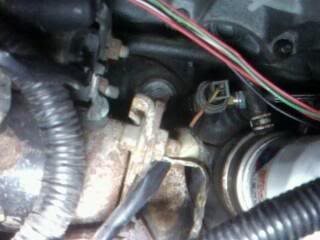
Once I dropped the pan, I cleaned it to the best of my ability, and drilled it and tapped it for the fitting. I used blue loktite to hold it in there, and then replaced the pan. I decided to use the oil sending unit as the location for the feed line, rather than buying a sandwich-type fitting to use where the oil filter sits. With a brass tee and a few adaptors, everything fit into place. I connected the oil and coolant lines to the turbo, and refilled the engine.
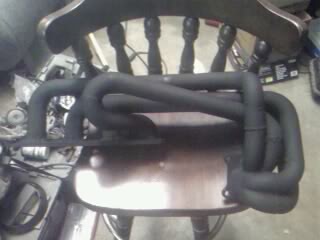
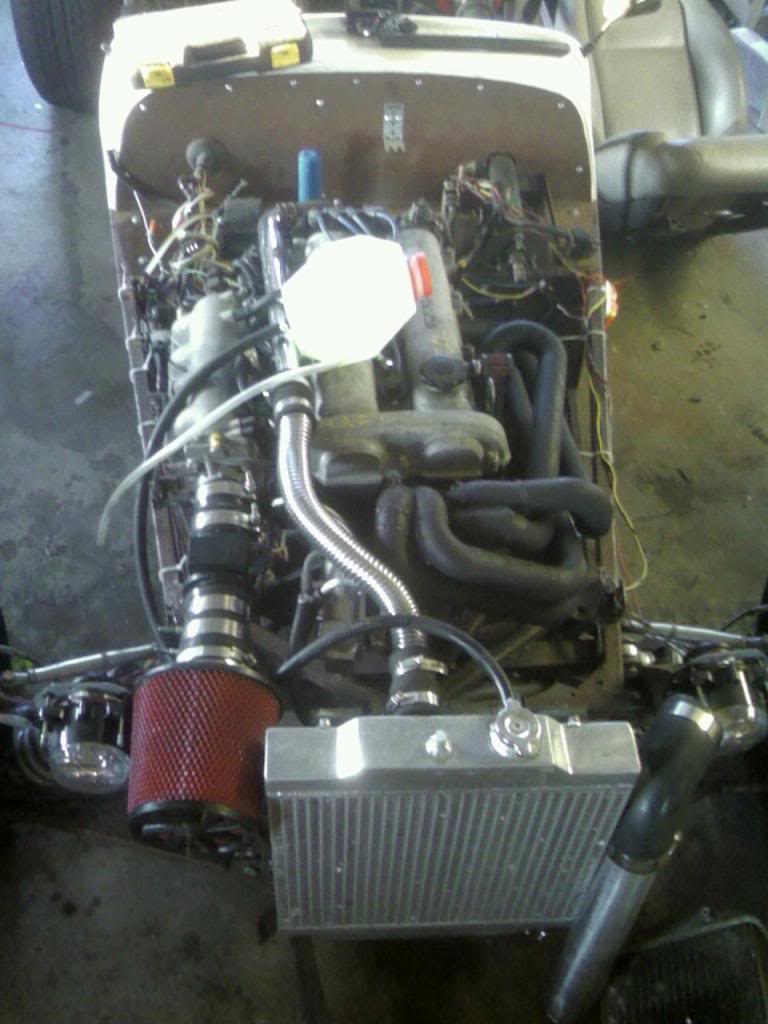
I tightened everything on, and temporarily mounted the intake filter, and started it up. Surprisingly, the side exhaust is not that loud with the long primaries and the turbo. Note, this is with the wastegate wide open, as I have not modified the actuator to fit yet. That should quiet it even more. Can't wait to hear it under boost!
Here is a crappy clip of it starting up:

I went to finish up the bead roller yesterday before work, and my MIG welder died. I'm about 99% sure it's the drive motor, as the relay will click when the trigger is pulled, but nothing happens. Lincoln dealers want 110 for a replacement motor... Grr. I managed to find one on ebay for 85 bucks shipped, so I bought it. Not too happy about it, and if I ever have to replace the welder, I'm buying a Miller. My Miller TIG welder is much nicer quality, and their customer service is amazing. I've dealt with Lincoln Electric's customer service, which is basically an automated service. Miller customer service went way out of their way to research on a 40-year old model I was going to buy second hand before I ended up buying the new Syncrowave 200. It took a week, and researching from their head tech guy to figure out what that old model was. A+.
I will try to get out there in the next few days, I figure I'll weld the intercooler brackets with the TIG welder... a little harder, but at least I can tack them into place until the motor gets here. Then I'll start on the plumbing. As soon as I can get that out of the way, all I will need to do is modify the wastegate actuator, plumb up the vacuum lines, and then I need to start on the MegaSquirt. I bought an electronic boost controller kit for the MS3, so that will save me the money and hassle of buying a stand-alone or a manual controller.
Oh well. I'll try to remember. A lot of crap has been going on in the last month or so, I've been sick with something, probably a sinus infection, for the entire time, wife was in the hospital, some fighting... usual junk.
Here's where some of my time goes... Just turned 2, and already over 3 feet tall...
I finally got around to welding the throttle body neck back onto the intake manifold for Other Dave's 4G63...
Now, he has to clean it out and I'll TIG the end plate on the opposite end, and it'll be ready to bolt back on.
As for me, I've done some stuff, but mostly not post worthy, per se. Small things, an hour here, hour there. Pulled the seats out, finally finished the tipping die for the bead roller, put it on, and started to run a cutout of the transmission tunnel on the roller. Couldn't figure out why it was warping and rolling out of line. We looked at the roller, and it was flexing back and forth, and couldn't hold any pressure between the dies. So I welded on some triangulation and some tubing on the bottom half and am going to bolt it onto another pedestal. I used .030 wire on this, and it came out very well. Perhaps I'll drop to .030 for Dave's car and see if it comes out less slaggy. I'd rather not grind a lot of excess weld, but I want to make sure penetration is ok. With the .030, I was able to raise the amperage and the wire speed, so it should be good.
I ordered some stuff with some of the money from the accident settlement. Ordered a MegaSquirt III, and am going to have my dad solder it for me, as he's a computer engineer, and can do it better than I would. Just getting time for him to do it is going to be a chore.
I bought tubing for the intake and intercooler plumbing, along with silicone couplers. That's next on the list.
I also bought oil lines for the turbo.
The manifold was starting to rust through the thin coats of the black heat paint, as well as where the welds were, so I bought two more cans and sprayed one can on. It lasted for about 5 coats, and I sprayed one more coat with the second can. It came out well, and no rust since.\
I started finishing up the nose cone. Where the flange is slotted for the Dzus fasteners has been pretty beaten up due to the thin material and the narrow trim. So I welded on some 1/8" aluminum plate, ground the welds down, and then slotted them for the fasteners as well. It was pretty time consuming, but now I don't have to re-bend the flange every time I take the nose cone off, and I don't have to be so careful when doing so.
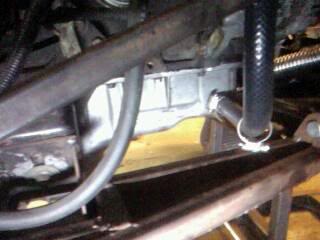
I also removed the original radiator mounts, which were 1/8" strips, and prone to flex and bounce with the car, and welded on tubing with holes drilled in the top for the radiator mount posts. It took three tries to be able to get the nose cone on, but now it goes on and off easier than with the thin strips. The tubing was not just to avoid flex/movement, but to allow me to weld on intercooler brackets off of the radiator mounts.
Yes, it is off to one side. That is partially what took the three tries, as I purposefully positioned off to the driver's side as far as possible to allow plumbing for the intercooler.
once I received the oil feed and return lines, I had to decide weither to drill and tap the return fitting on the car or drop the oil pan. After removing the bolts and putting them back on twice, I finally decided to take it off.
**NOTE: When removing the Miata oil pan, CAREFULLY check to make sure the baffle pan/windage tray is NOT still sealed onto the oil pan. It is rather thin, and is fastened to the oil pan with the silicone gasket. The oil pan has a step notched into it to allow it, and when you first remove the oil pan, you cannot see the edge of the baffle pan because of the old silicone. When dropping the pan, I shone a flashlight through the .5" gap, and couldn't see what was hanging it up. I could see the crank, but the pan and the oil pickup are bolted to the mains out of sight. After a good bit of prying, and no luck with the pan, I finally figured out about the baffle pan flange and pried it from the oil pan with a knife. Because of the prying, the tray/pan was slightly bent/warped, and it made reinstalling harder than it would be if I had known. You are supposed to run silicone around the tray and stick it onto the block, then bolt on the pickup, and finally bolt on the oil pan. Well, as it was warped, the oil pickup, once tightened to spec, would pull the tray from the block, leaving a .5-.75" gap between the flange and the block. I finally gave up and sandwitched it between the oil pan when tightening it up. It worked out, but took a lot longer than I would have preferred. Also, remember to replace the front and back seals when doing this. I have never seen an oil pan that had the main seals built into it. What a stupid idea.**
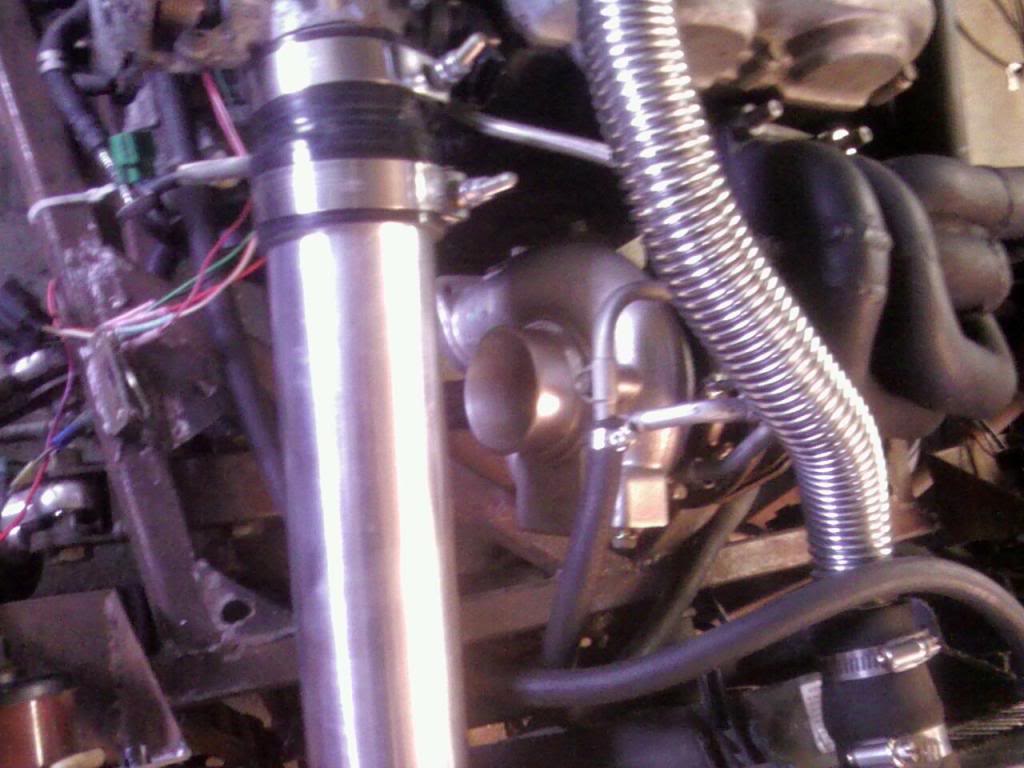
Once I dropped the pan, I cleaned it to the best of my ability, and drilled it and tapped it for the fitting. I used blue loktite to hold it in there, and then replaced the pan. I decided to use the oil sending unit as the location for the feed line, rather than buying a sandwich-type fitting to use where the oil filter sits. With a brass tee and a few adaptors, everything fit into place. I connected the oil and coolant lines to the turbo, and refilled the engine.
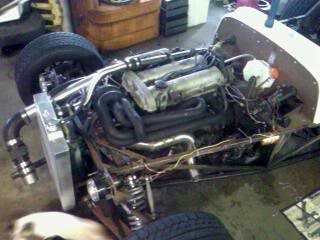
I tightened everything on, and temporarily mounted the intake filter, and started it up. Surprisingly, the side exhaust is not that loud with the long primaries and the turbo. Note, this is with the wastegate wide open, as I have not modified the actuator to fit yet. That should quiet it even more. Can't wait to hear it under boost!
Here is a crappy clip of it starting up:
I went to finish up the bead roller yesterday before work, and my MIG welder died. I'm about 99% sure it's the drive motor, as the relay will click when the trigger is pulled, but nothing happens. Lincoln dealers want 110 for a replacement motor... Grr. I managed to find one on ebay for 85 bucks shipped, so I bought it. Not too happy about it, and if I ever have to replace the welder, I'm buying a Miller. My Miller TIG welder is much nicer quality, and their customer service is amazing. I've dealt with Lincoln Electric's customer service, which is basically an automated service. Miller customer service went way out of their way to research on a 40-year old model I was going to buy second hand before I ended up buying the new Syncrowave 200. It took a week, and researching from their head tech guy to figure out what that old model was. A+.
I will try to get out there in the next few days, I figure I'll weld the intercooler brackets with the TIG welder... a little harder, but at least I can tack them into place until the motor gets here. Then I'll start on the plumbing. As soon as I can get that out of the way, all I will need to do is modify the wastegate actuator, plumb up the vacuum lines, and then I need to start on the MegaSquirt. I bought an electronic boost controller kit for the MS3, so that will save me the money and hassle of buying a stand-alone or a manual controller.
Reply
0
0
 11-14-2011, 02:04 PM
#100
Junior Member
Thread Starter
Join Date: Oct 2008
Location: Cortland, Ohio
Posts: 113
Total Cats: 5
It's been quite some time... I bought a house in June, got screwed (still don't have a kitchen, it's gutted and left by the initial contractor), and am still trying to figure everything out. I am now unemployed, so I have had a little more time to mess around with what I have.
A few days ago, I finished and fastened the side panels on the Seven, and will post pictures once it's nice enough for me to roll it out and take some pictures.
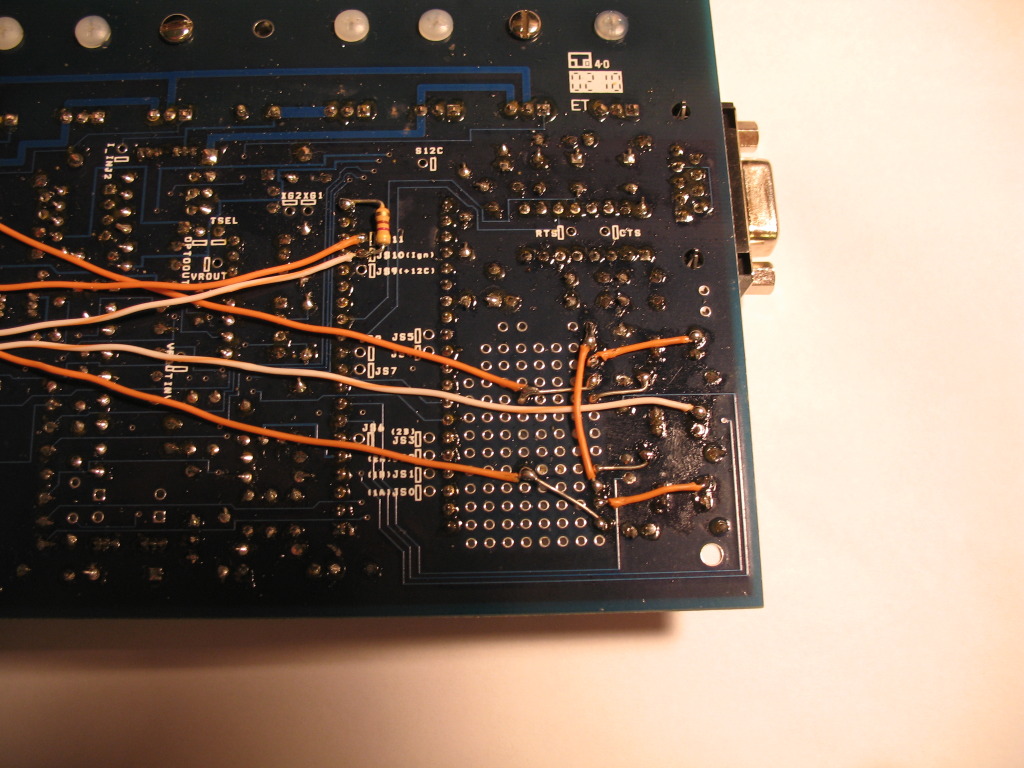
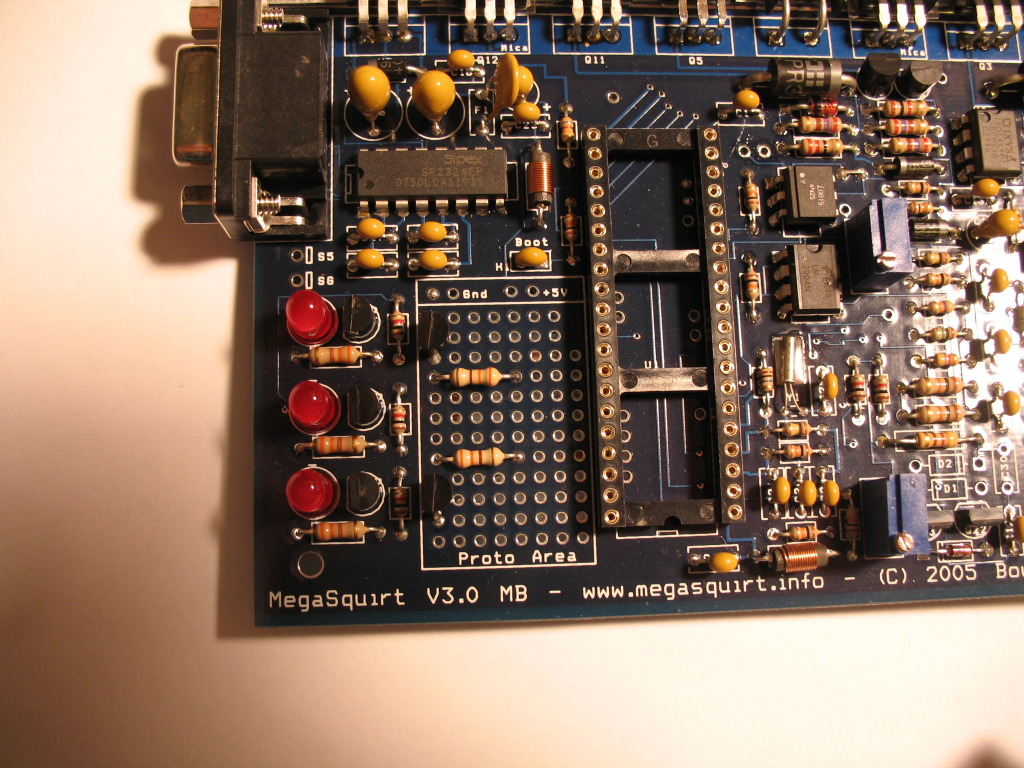
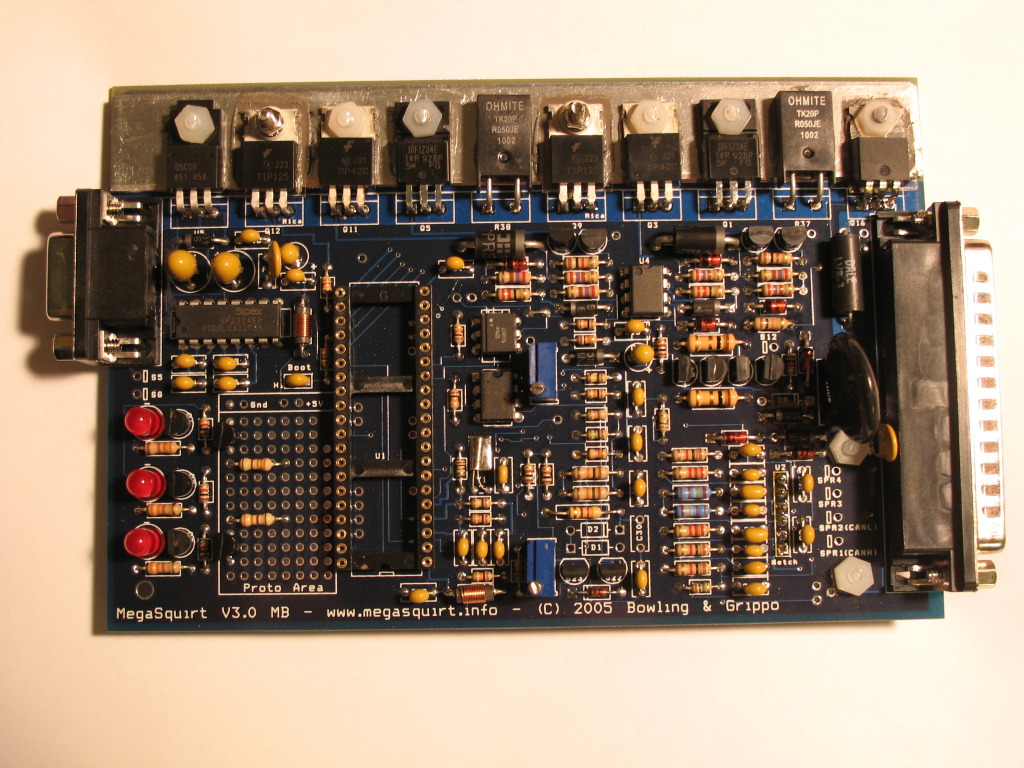
The biggest hangup has been the Megasquirt. I haven't found two plans that a) coincide, and b) show everything in detail. There are some really good instructions, but each one leaves something out, and I don't want to go the same route as some have and try to hodge-podge all the instructions together.
Thankfully, my dad is really good at electronics and wiring, otherwise I'd be lost.
Here's some pictures of the board as of a few months ago. We just went over it again yesterday, and should have some slightly different photos, but most has remained the same.
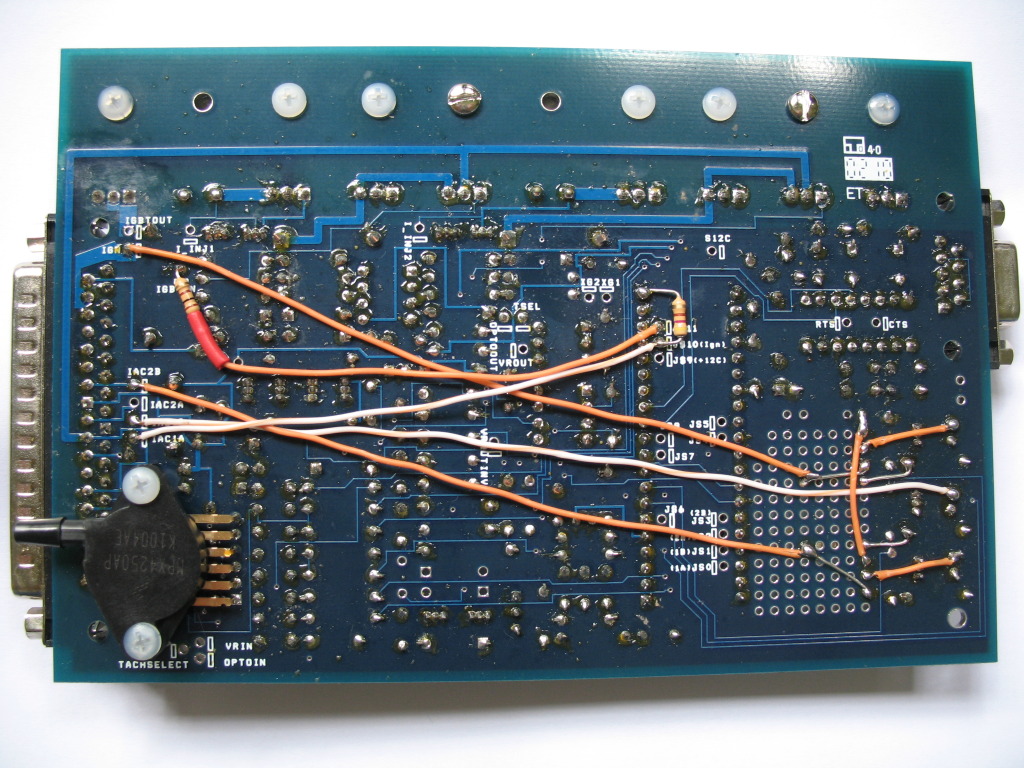
Any comments?
A few days ago, I finished and fastened the side panels on the Seven, and will post pictures once it's nice enough for me to roll it out and take some pictures.
The biggest hangup has been the Megasquirt. I haven't found two plans that a) coincide, and b) show everything in detail. There are some really good instructions, but each one leaves something out, and I don't want to go the same route as some have and try to hodge-podge all the instructions together.
Thankfully, my dad is really good at electronics and wiring, otherwise I'd be lost.
Here's some pictures of the board as of a few months ago. We just went over it again yesterday, and should have some slightly different photos, but most has remained the same.
Any comments?
Reply
0
0


