Shuiend blows motor #5; Naturally Aspirated Glory Incoming
 09-08-2016, 12:00 AM
#1921

Our 36-1 wheel was originally done for a non-MS based ECU. We were working on code with DIY but it proved problematic. We asked FM if they were OK with us using the same pattern (based on an OEM pattern). As the code already existed in MS fro a different platform, it was a simple matter to configure for the Miata sensor package. We only ever sold a handful of the 36-1 so we just replaced them all with 36-2's. Along the way we found a new vendor and cut the price in half.
And yes, they do start and idle better.
And yes, they do start and idle better.
__________________


Reply
 0
0

0
09-08-2016, 12:03 AM
#1922
SADFab Destructive Testing Engineer


iTrader: (5)
Join Date: Apr 2014
Location: Beaverton, USA
Posts: 18,642
Total Cats: 1,866
36-1 should have worked with ms. Soviet had it running with a cam sensor.
36-2 is plug and play though, and it works awesome. Very impressed. Cant wait to get mine on.
36-2 is plug and play though, and it works awesome. Very impressed. Cant wait to get mine on.
Reply
0
0
09-08-2016, 06:56 AM
#1923
Boost Czar

iTrader: (62)
Join Date: May 2005
Location: Chantilly, VA
Posts: 79,493
Total Cats: 4,080
It COULD have worked, but there was no support for the weird 3 pulse cam tooth. the MS developers coded for the 36-2, so there be it. If you happen to have a 36-1 wheel and want to run VVT -- grind off a tooth.
Reply
0
0
 09-08-2016, 12:31 PM
#1928
@psyber_0ptix Do you have a protege 36-1?
If I recall, the 949 bit sits the gap at the bottom of the pulley at TDC.
Reply
0
0
09-08-2016, 12:36 PM
#1929
Sorry wasn't clear. No, I had the 36-1 when the 949 SuperDamper had just come out. At the time I ran just the crank sensor on the BP4W for batch, then switched to an "oem" 4t ring configuration to run the VVT motor. I still have the 36-1 sitting on my floor but didn't think it was indexed the same as the prot�g�/FM trigger wheel.
If I recall, the 949 bit sits the gap at the bottom of the pulley at TDC.
If I recall, the 949 bit sits the gap at the bottom of the pulley at TDC.

We sent a broadcast email out to the 6 or so customers that purchased 36-1 wheels and offered to replace it with a 36-2 at no charge. Contact us via email.
__________________
Reply
0
0
09-08-2016, 12:44 PM
#1930
Boost Czar
iTrader: (62)
Join Date: May 2005
Location: Chantilly, VA
Posts: 79,493
Total Cats: 4,080
even easier. Modding that one may have been tough depending where the missing tooth was. it shouldn't matter really, want the MS really cares about is what happens between the gaps, but you dont want cam stuff happening at the same time as the crank gap.
Reply
0
0
09-08-2016, 08:21 PM
#1932
mkturbo.com
Thread Starter
iTrader: (24)
Join Date: May 2006
Location: Charleston SC
Posts: 15,176
Total Cats: 1,680
So I worked on the car a bit tonight to try to get my oil pressure gauge working. Found 3 things wrong On each side of the dash harness there is a ground. It is helpful when you actually bolt them to some metal. Also I went to check the connector at the sender. It broke off as I was trying to remove it. So I crimped in one off a parts car. Oil pressure gauge was working and no other light issues. Now to fix a fuel leak and 2 oil leaks.
Reply
0
0
 09-13-2016, 09:55 AM
#1935
mkturbo.com
Thread Starter
iTrader: (24)
Join Date: May 2006
Location: Charleston SC
Posts: 15,176
Total Cats: 1,680
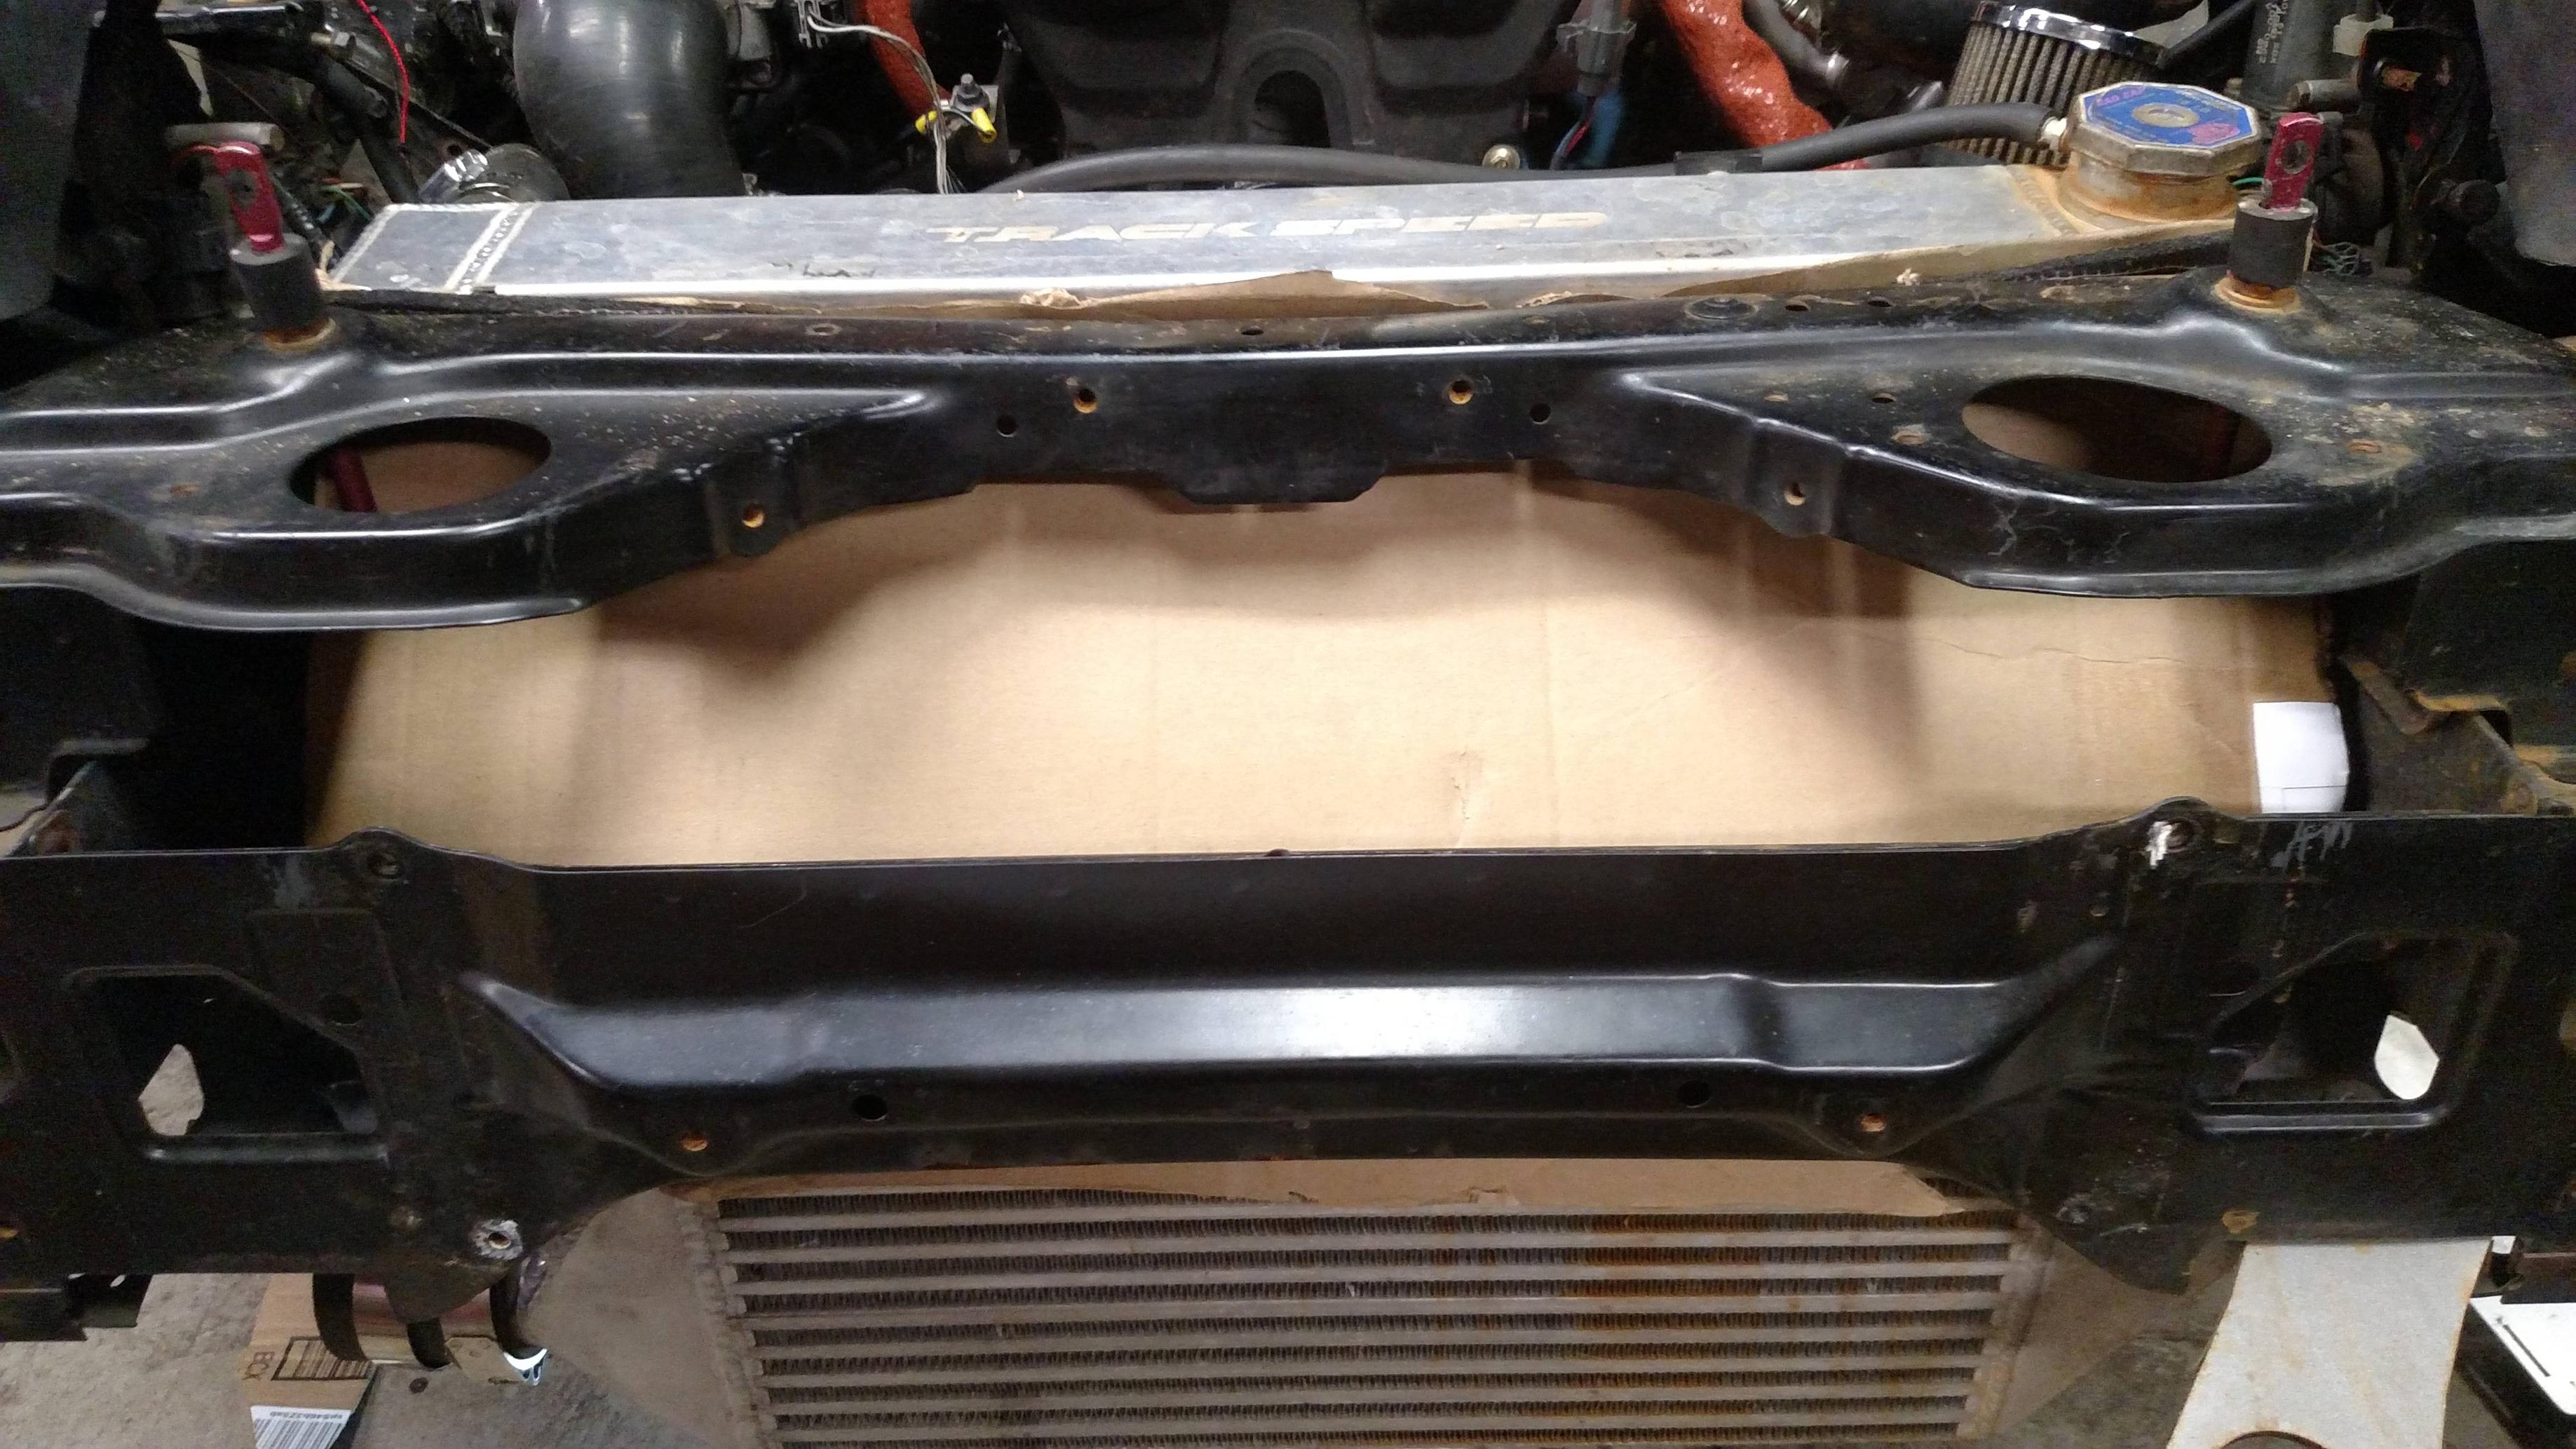
So I have the car in the garage right now to work on some smaller things before I really start driving it. One of the things is getting some ducting installed. I had zero ducting when Braineack and I went to break in the motor. Even with the TSE radiator temps were a little warmer then I would have liked on the street.
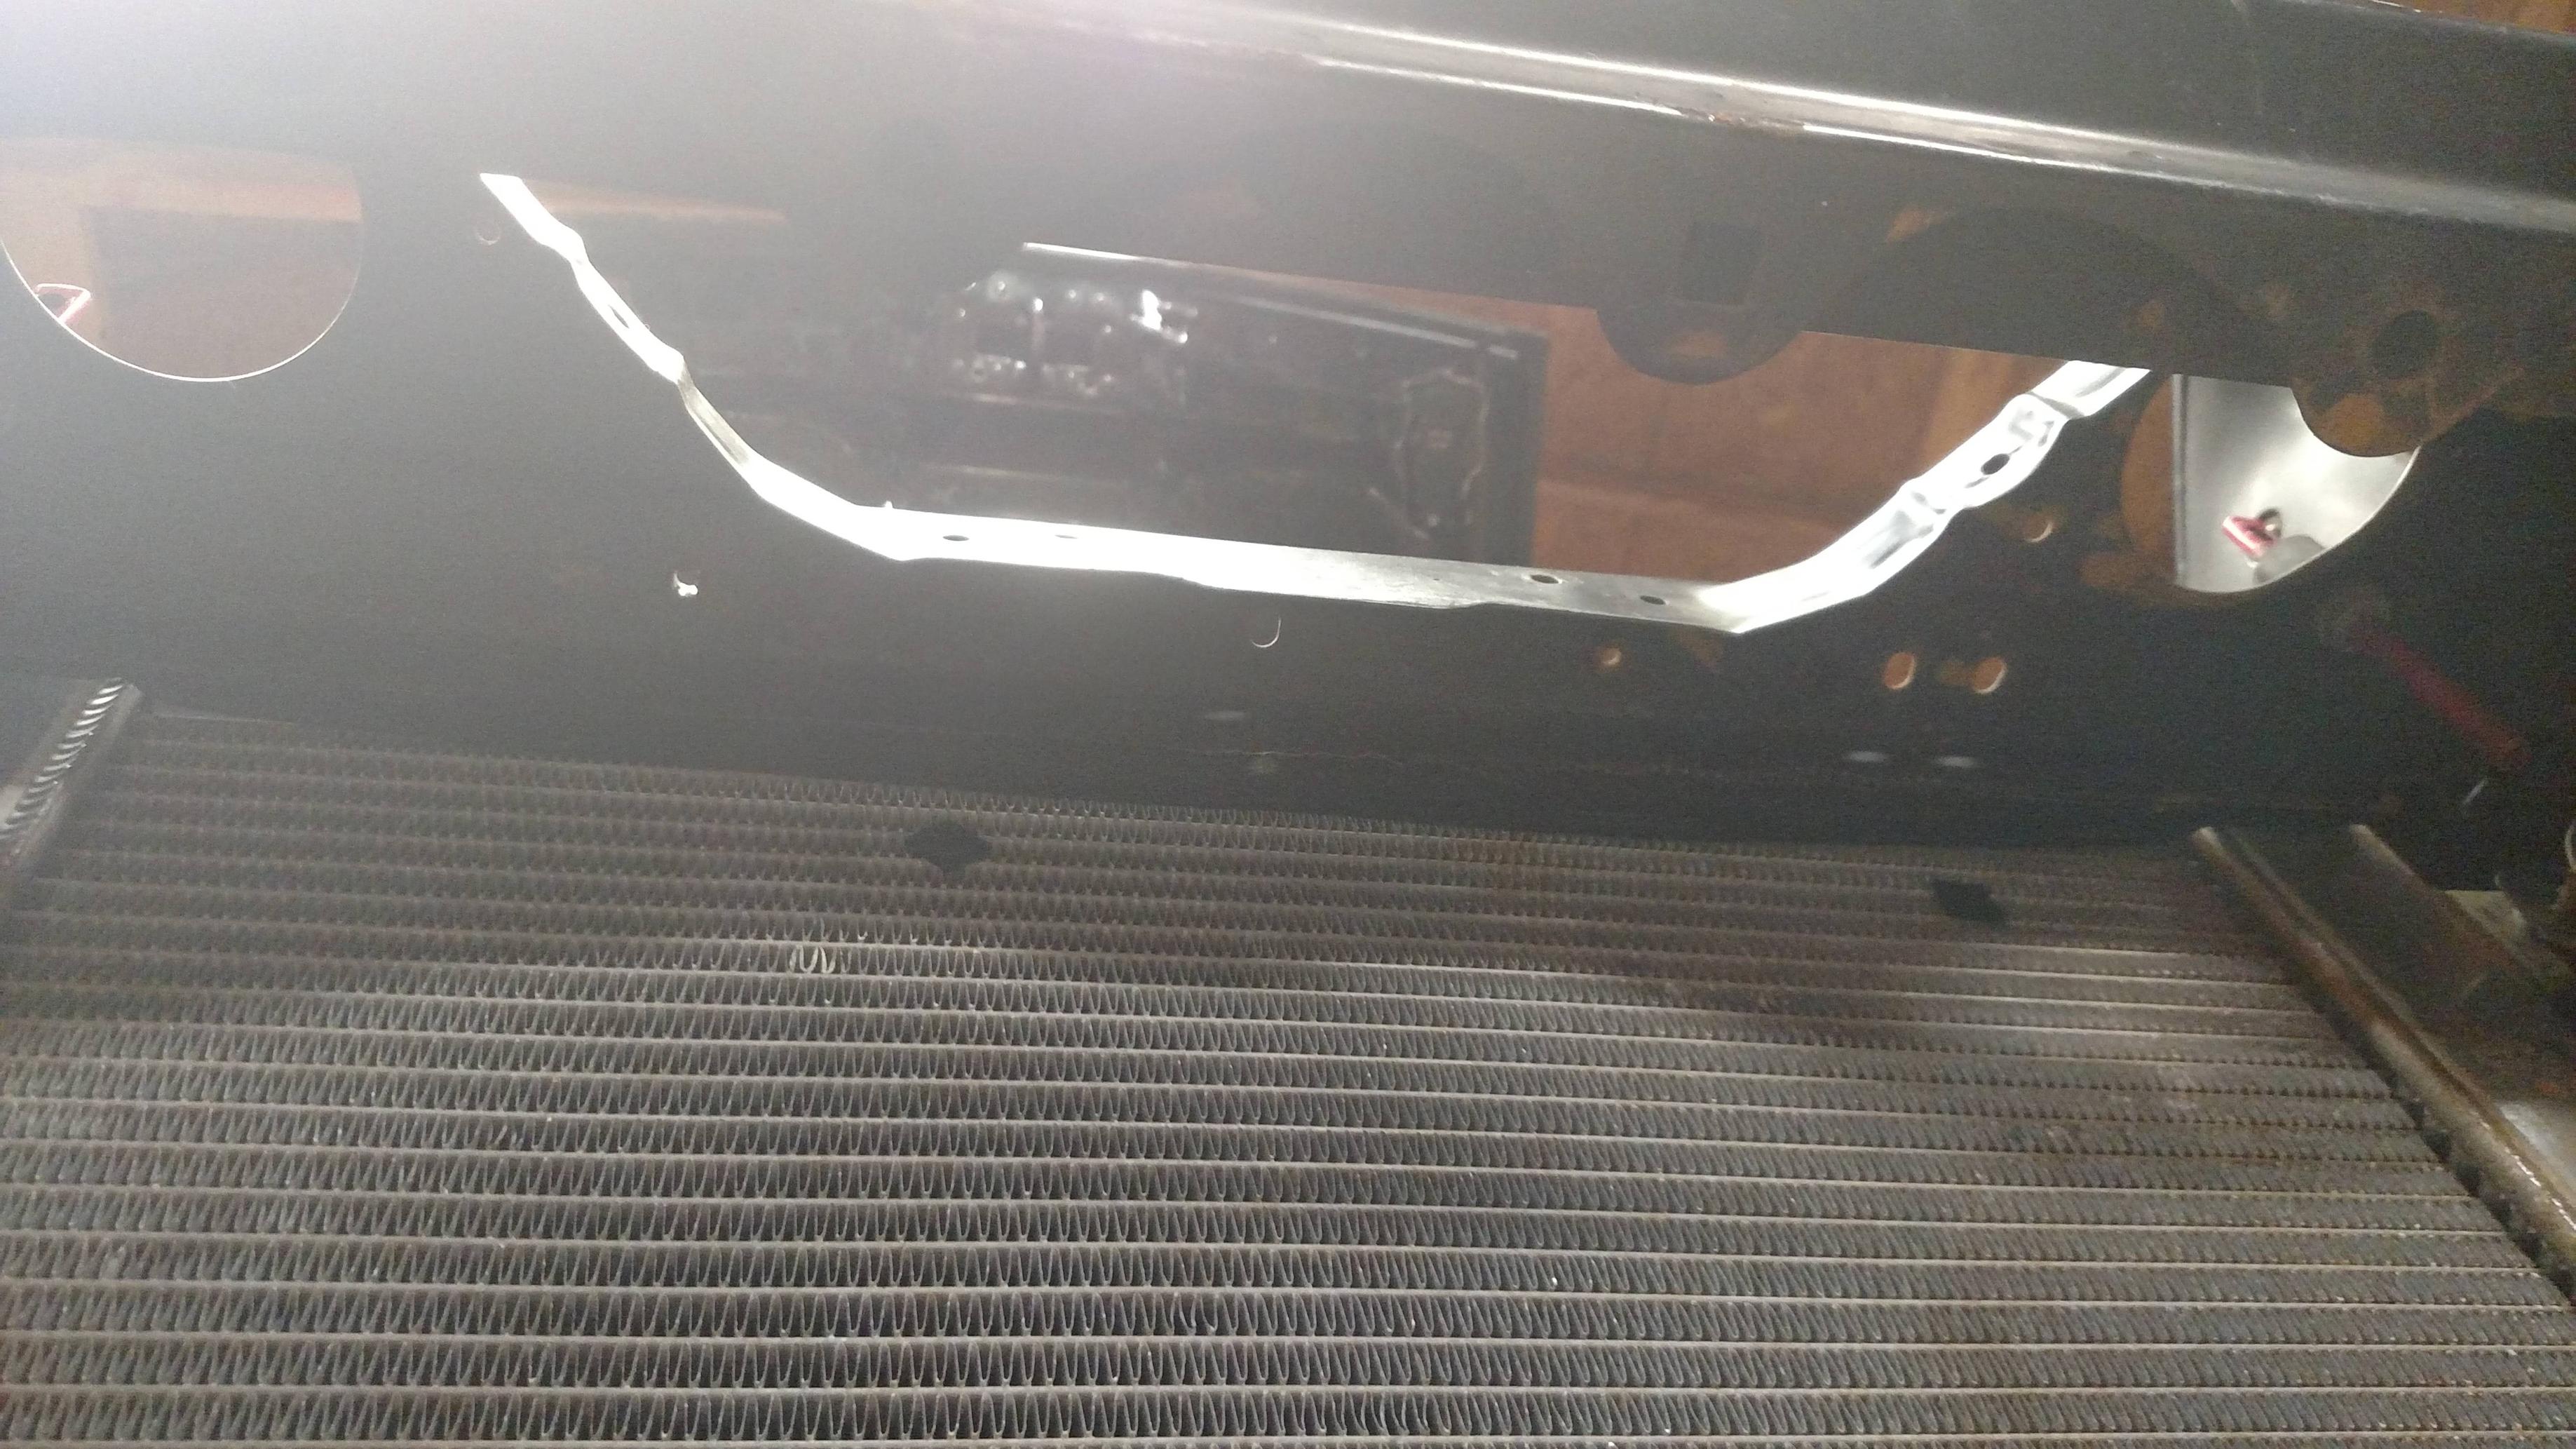
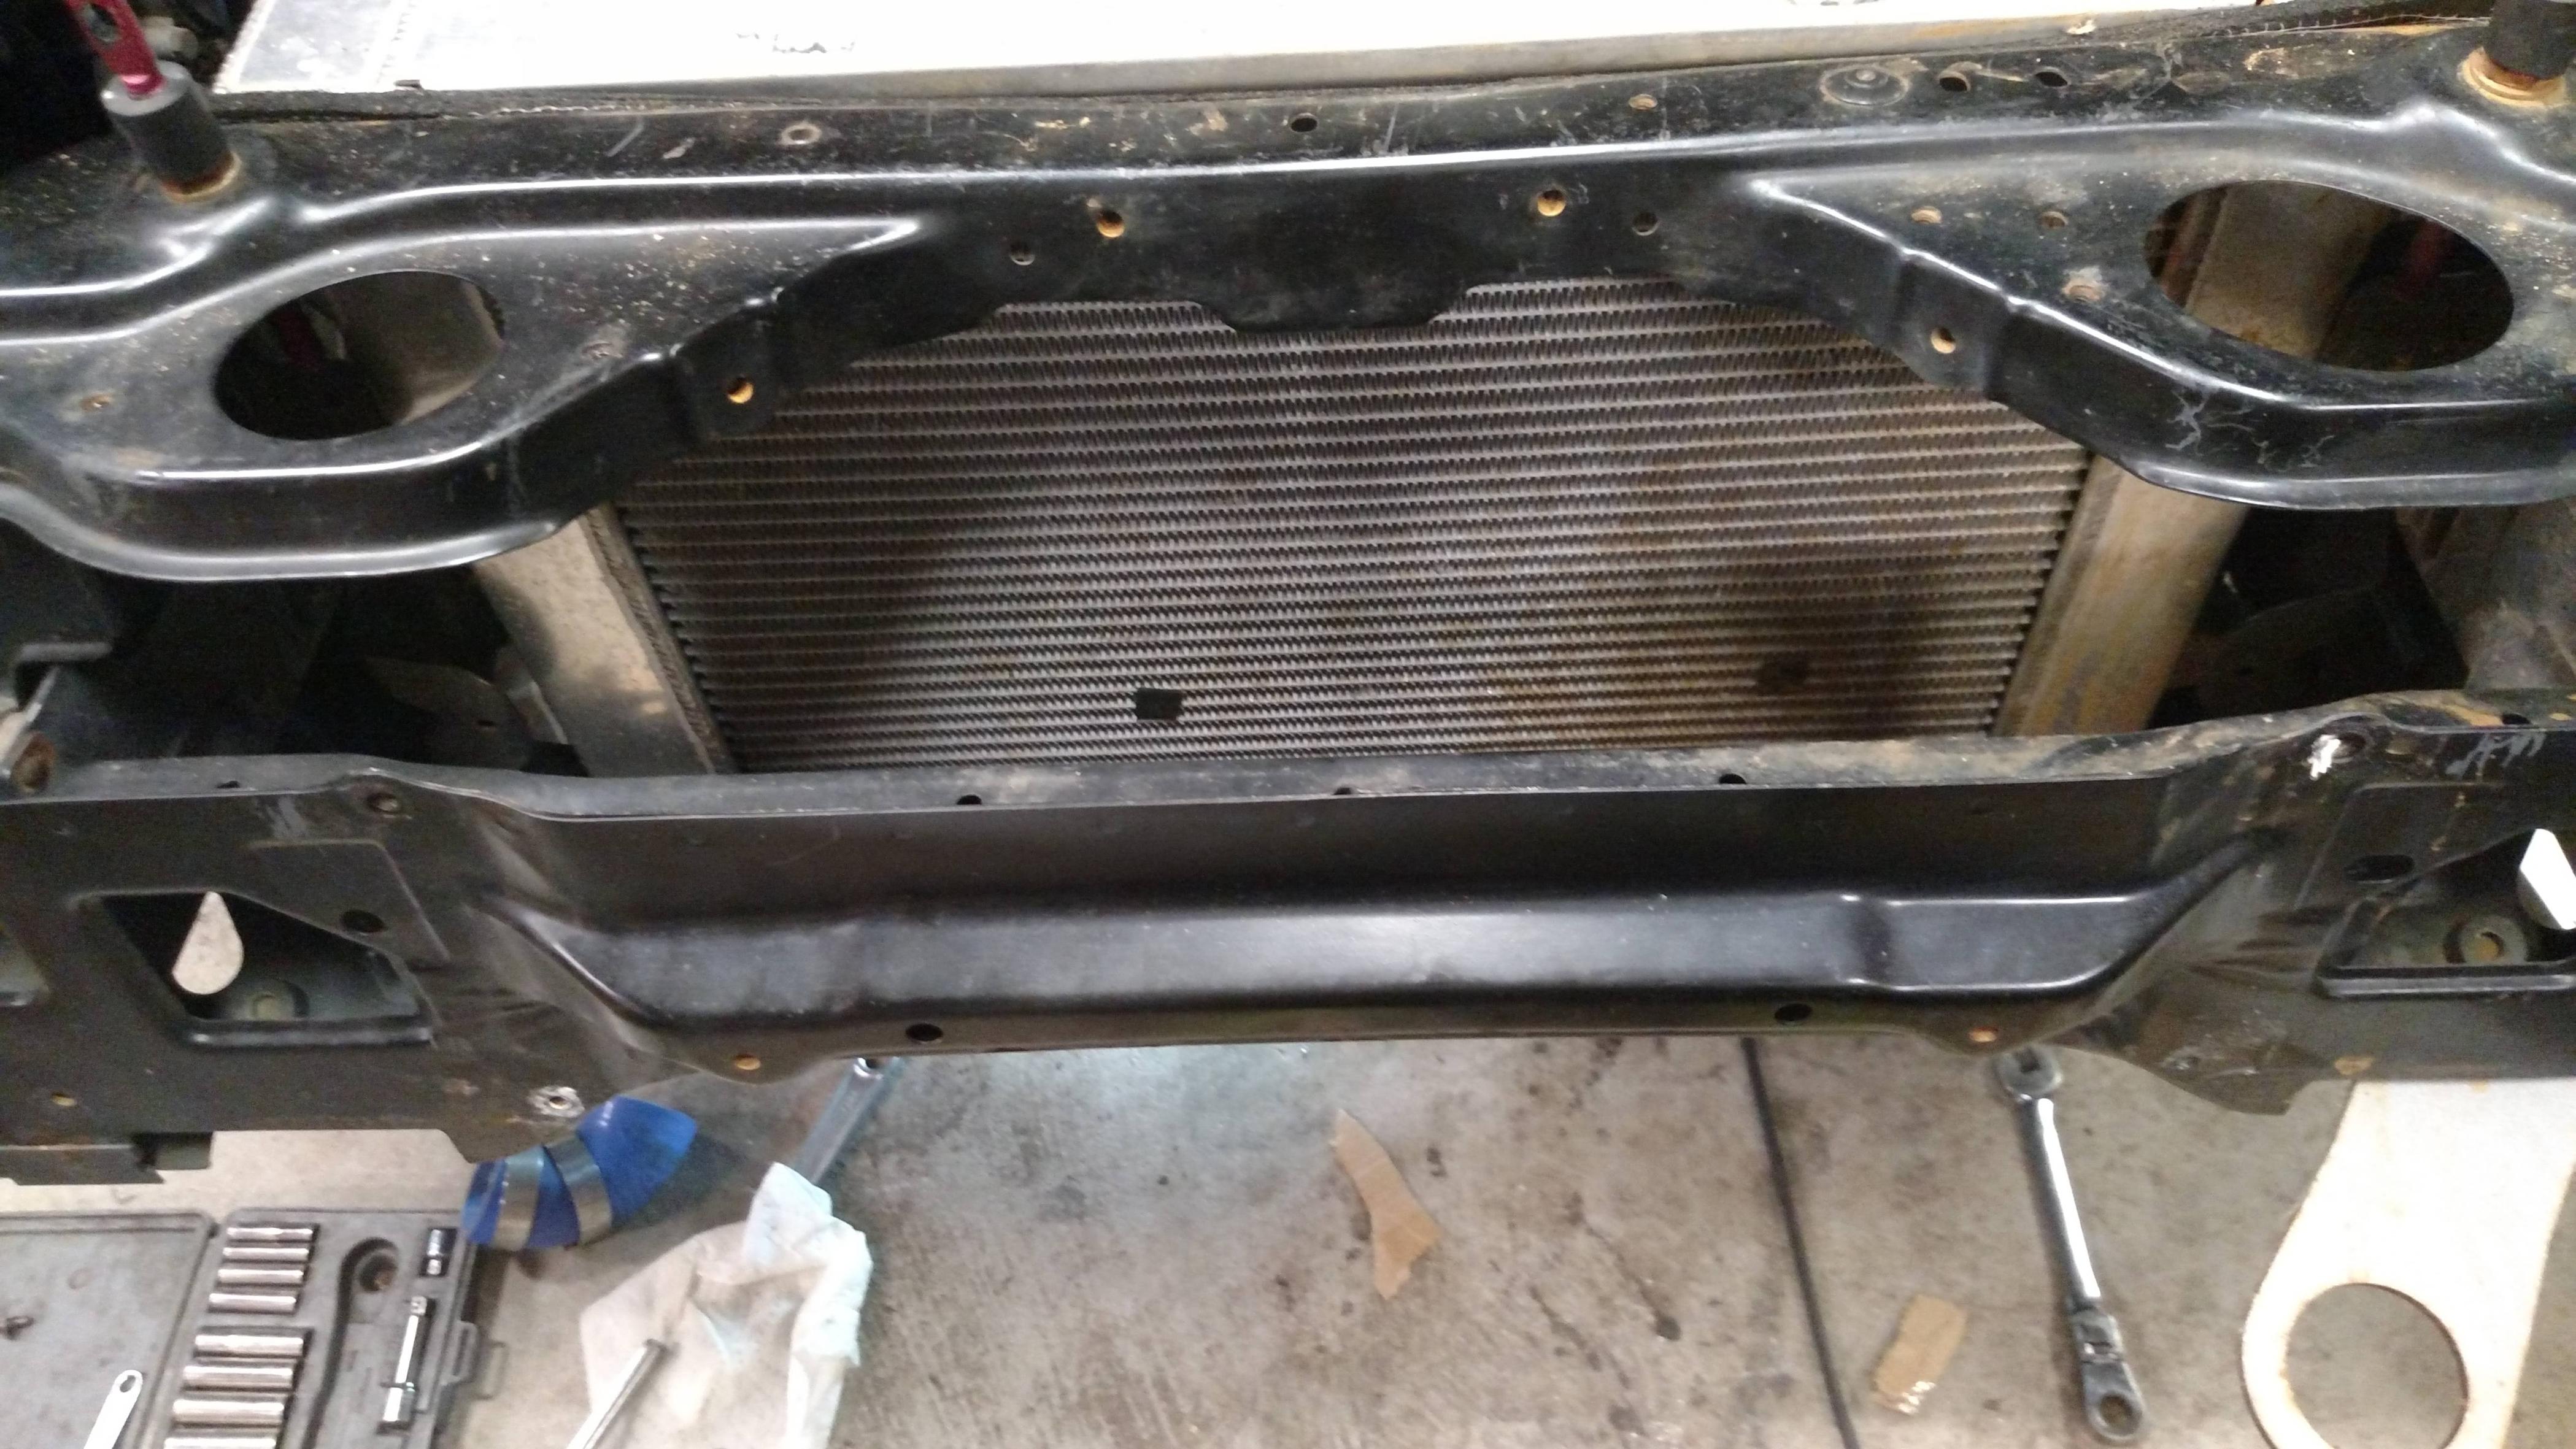
Looking straight down between radiator and intercooler. You can see the ground. There is lots of empty space for air to circulate.
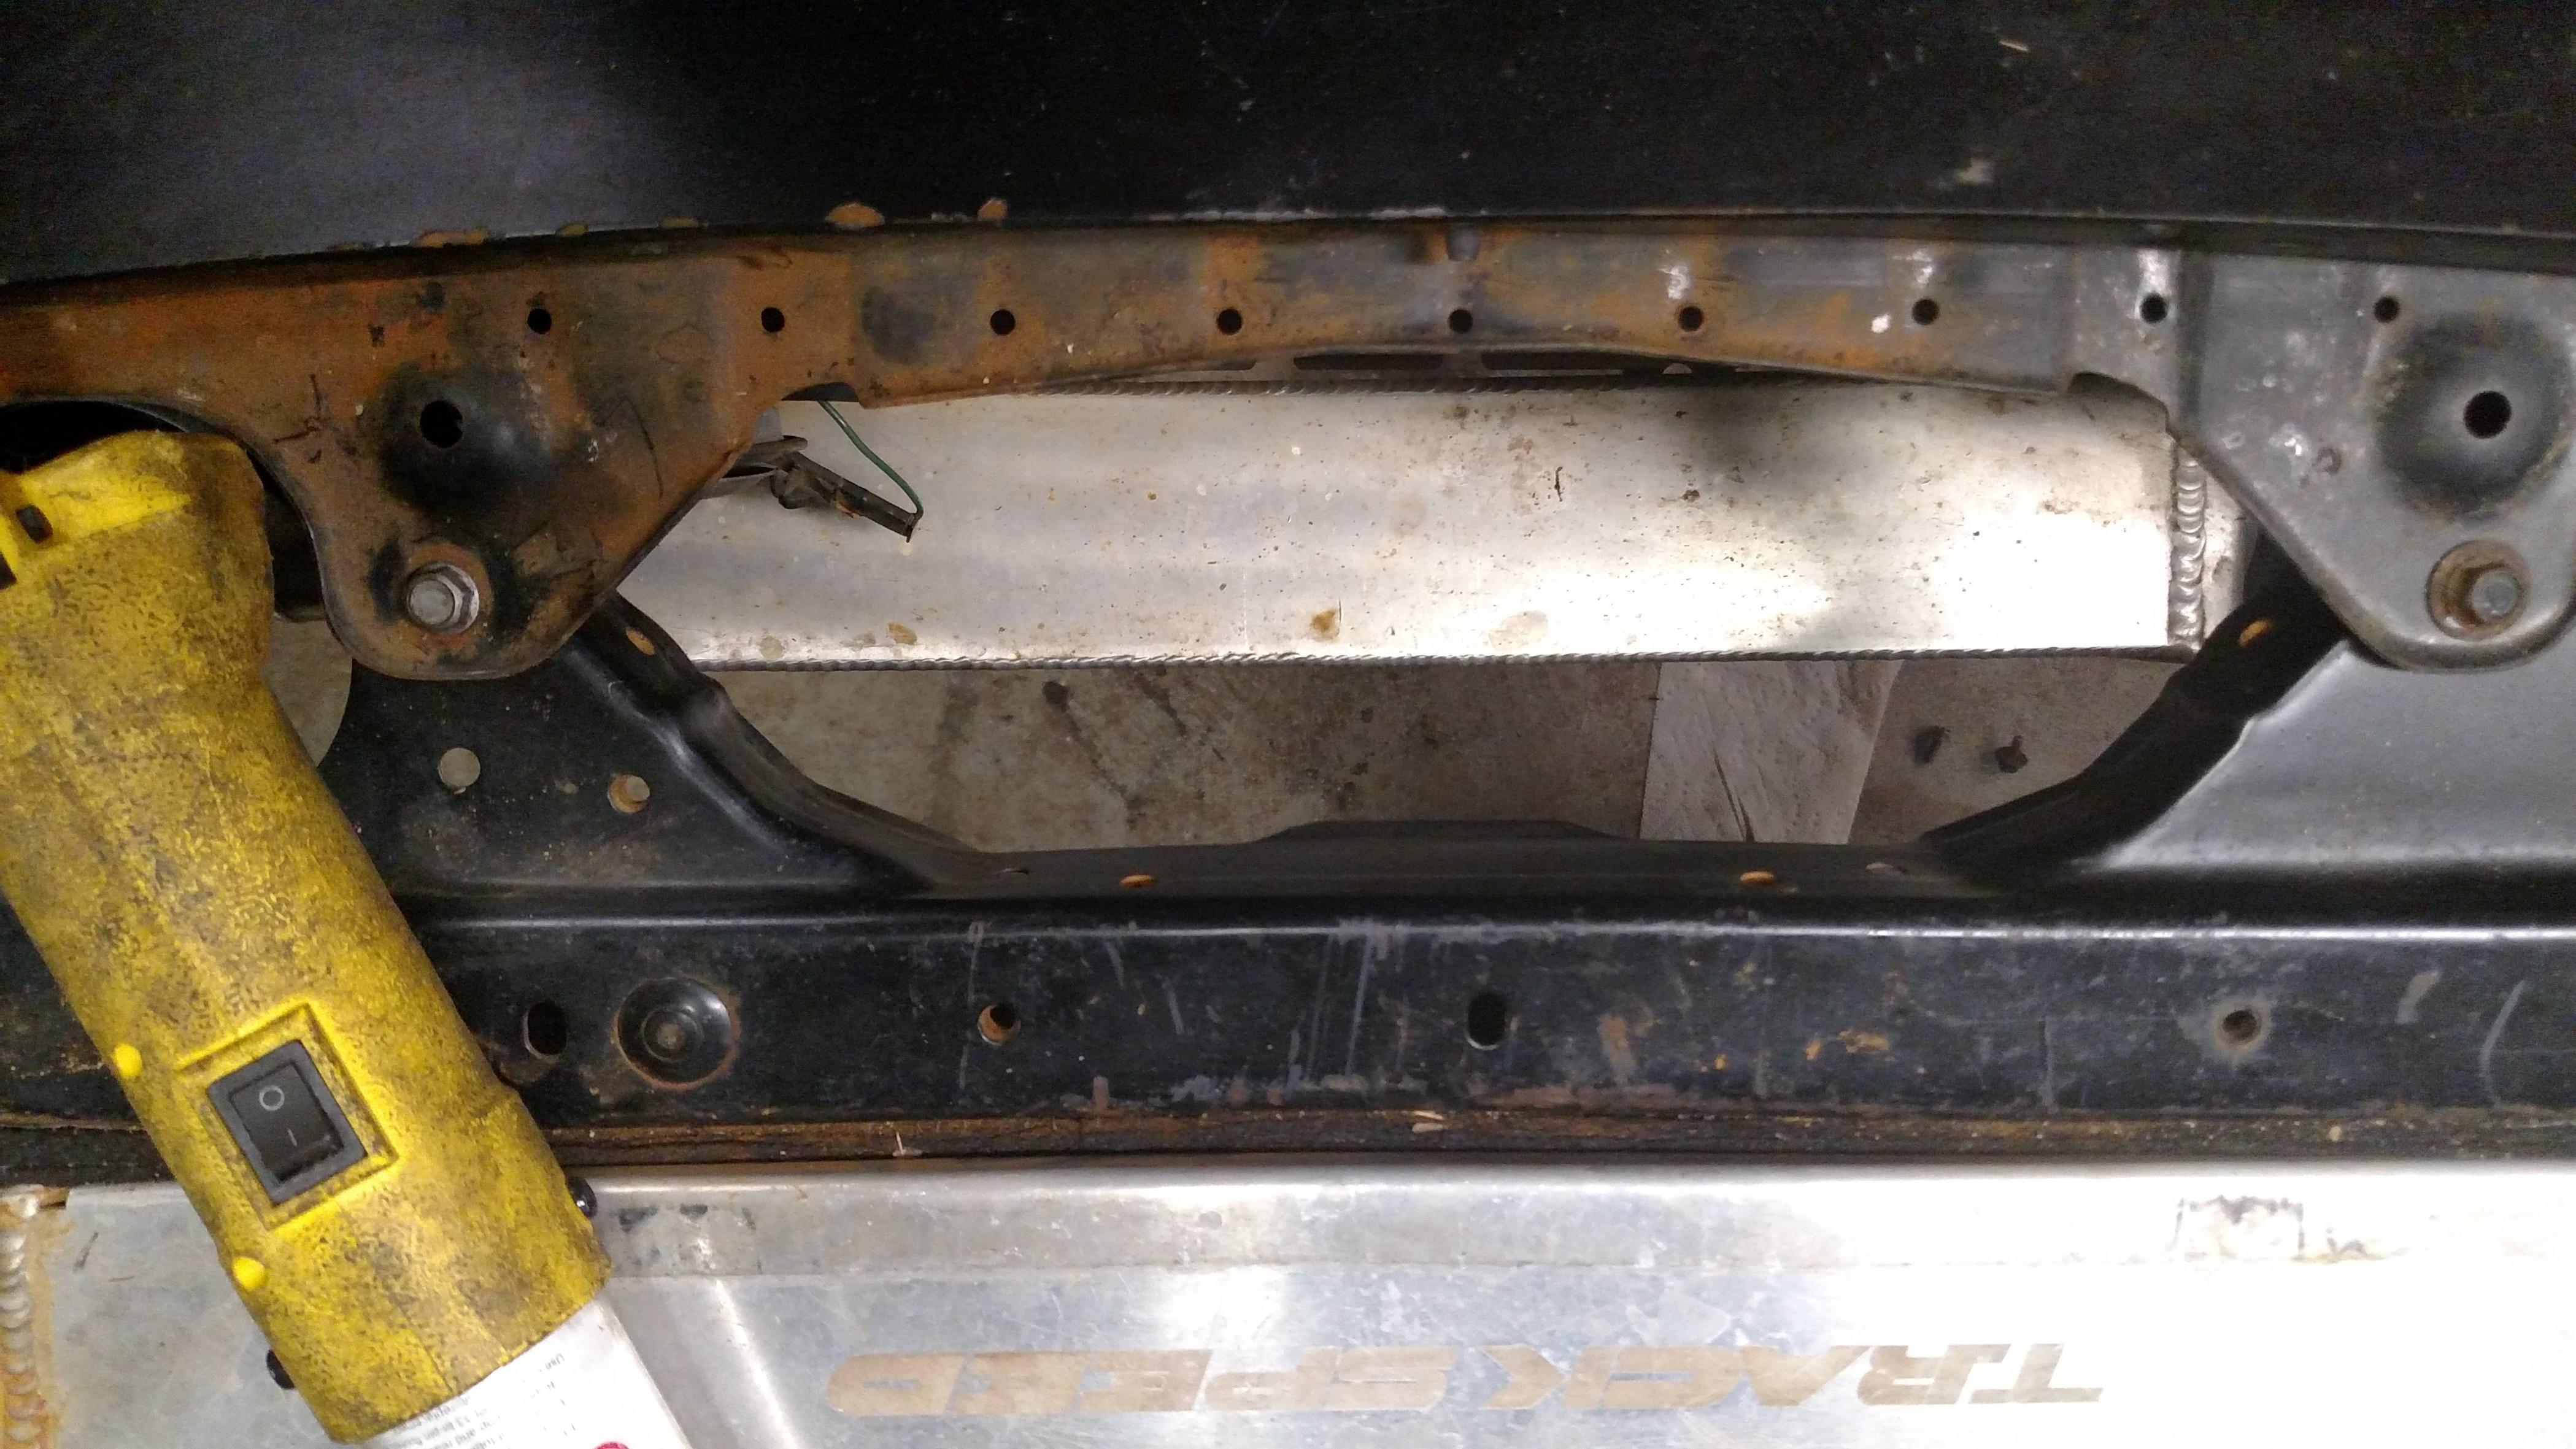
I got out some cardboard and started mocking up a funnel thing to go from the top of the IC to the radiator. This should keep air from moving into other parts of the bumper.
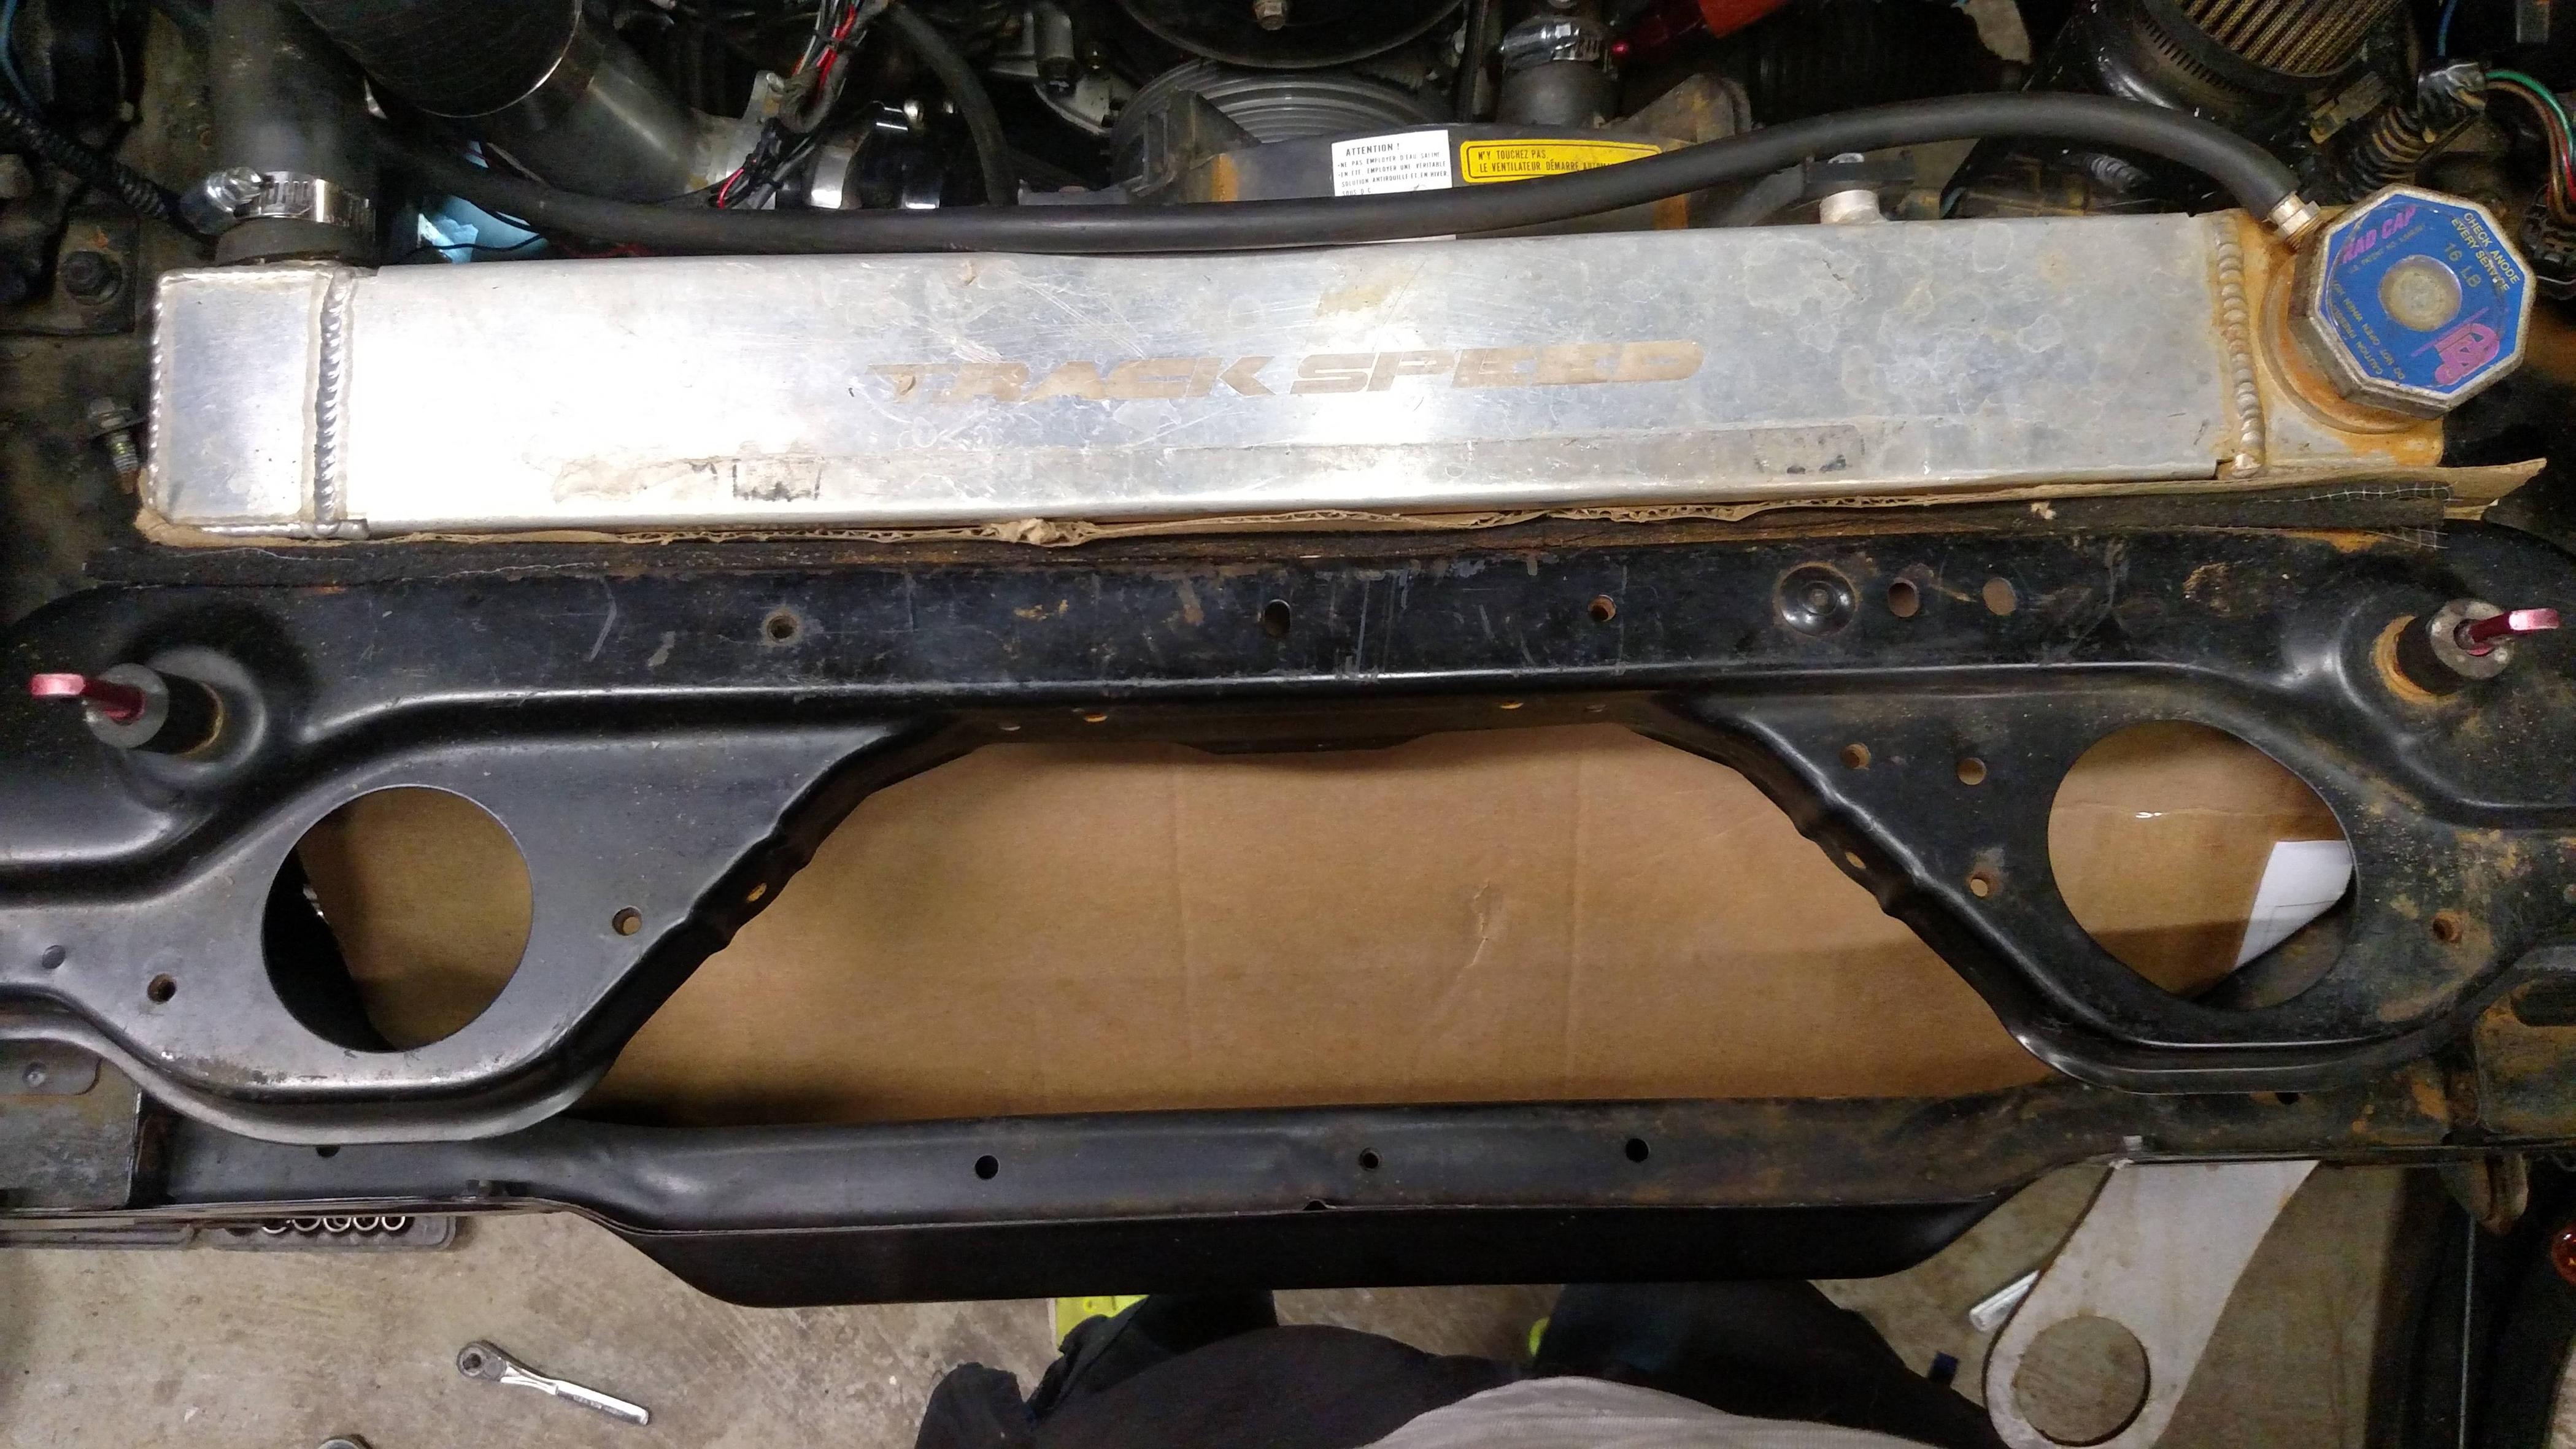
After getting a decent fit with cardboard I pulled it out and traced it onto some cheap sheet metal I picked up at Lowes. I need to pull the metal again tonight to do a little bit more trimming on it to get it just about perfect.
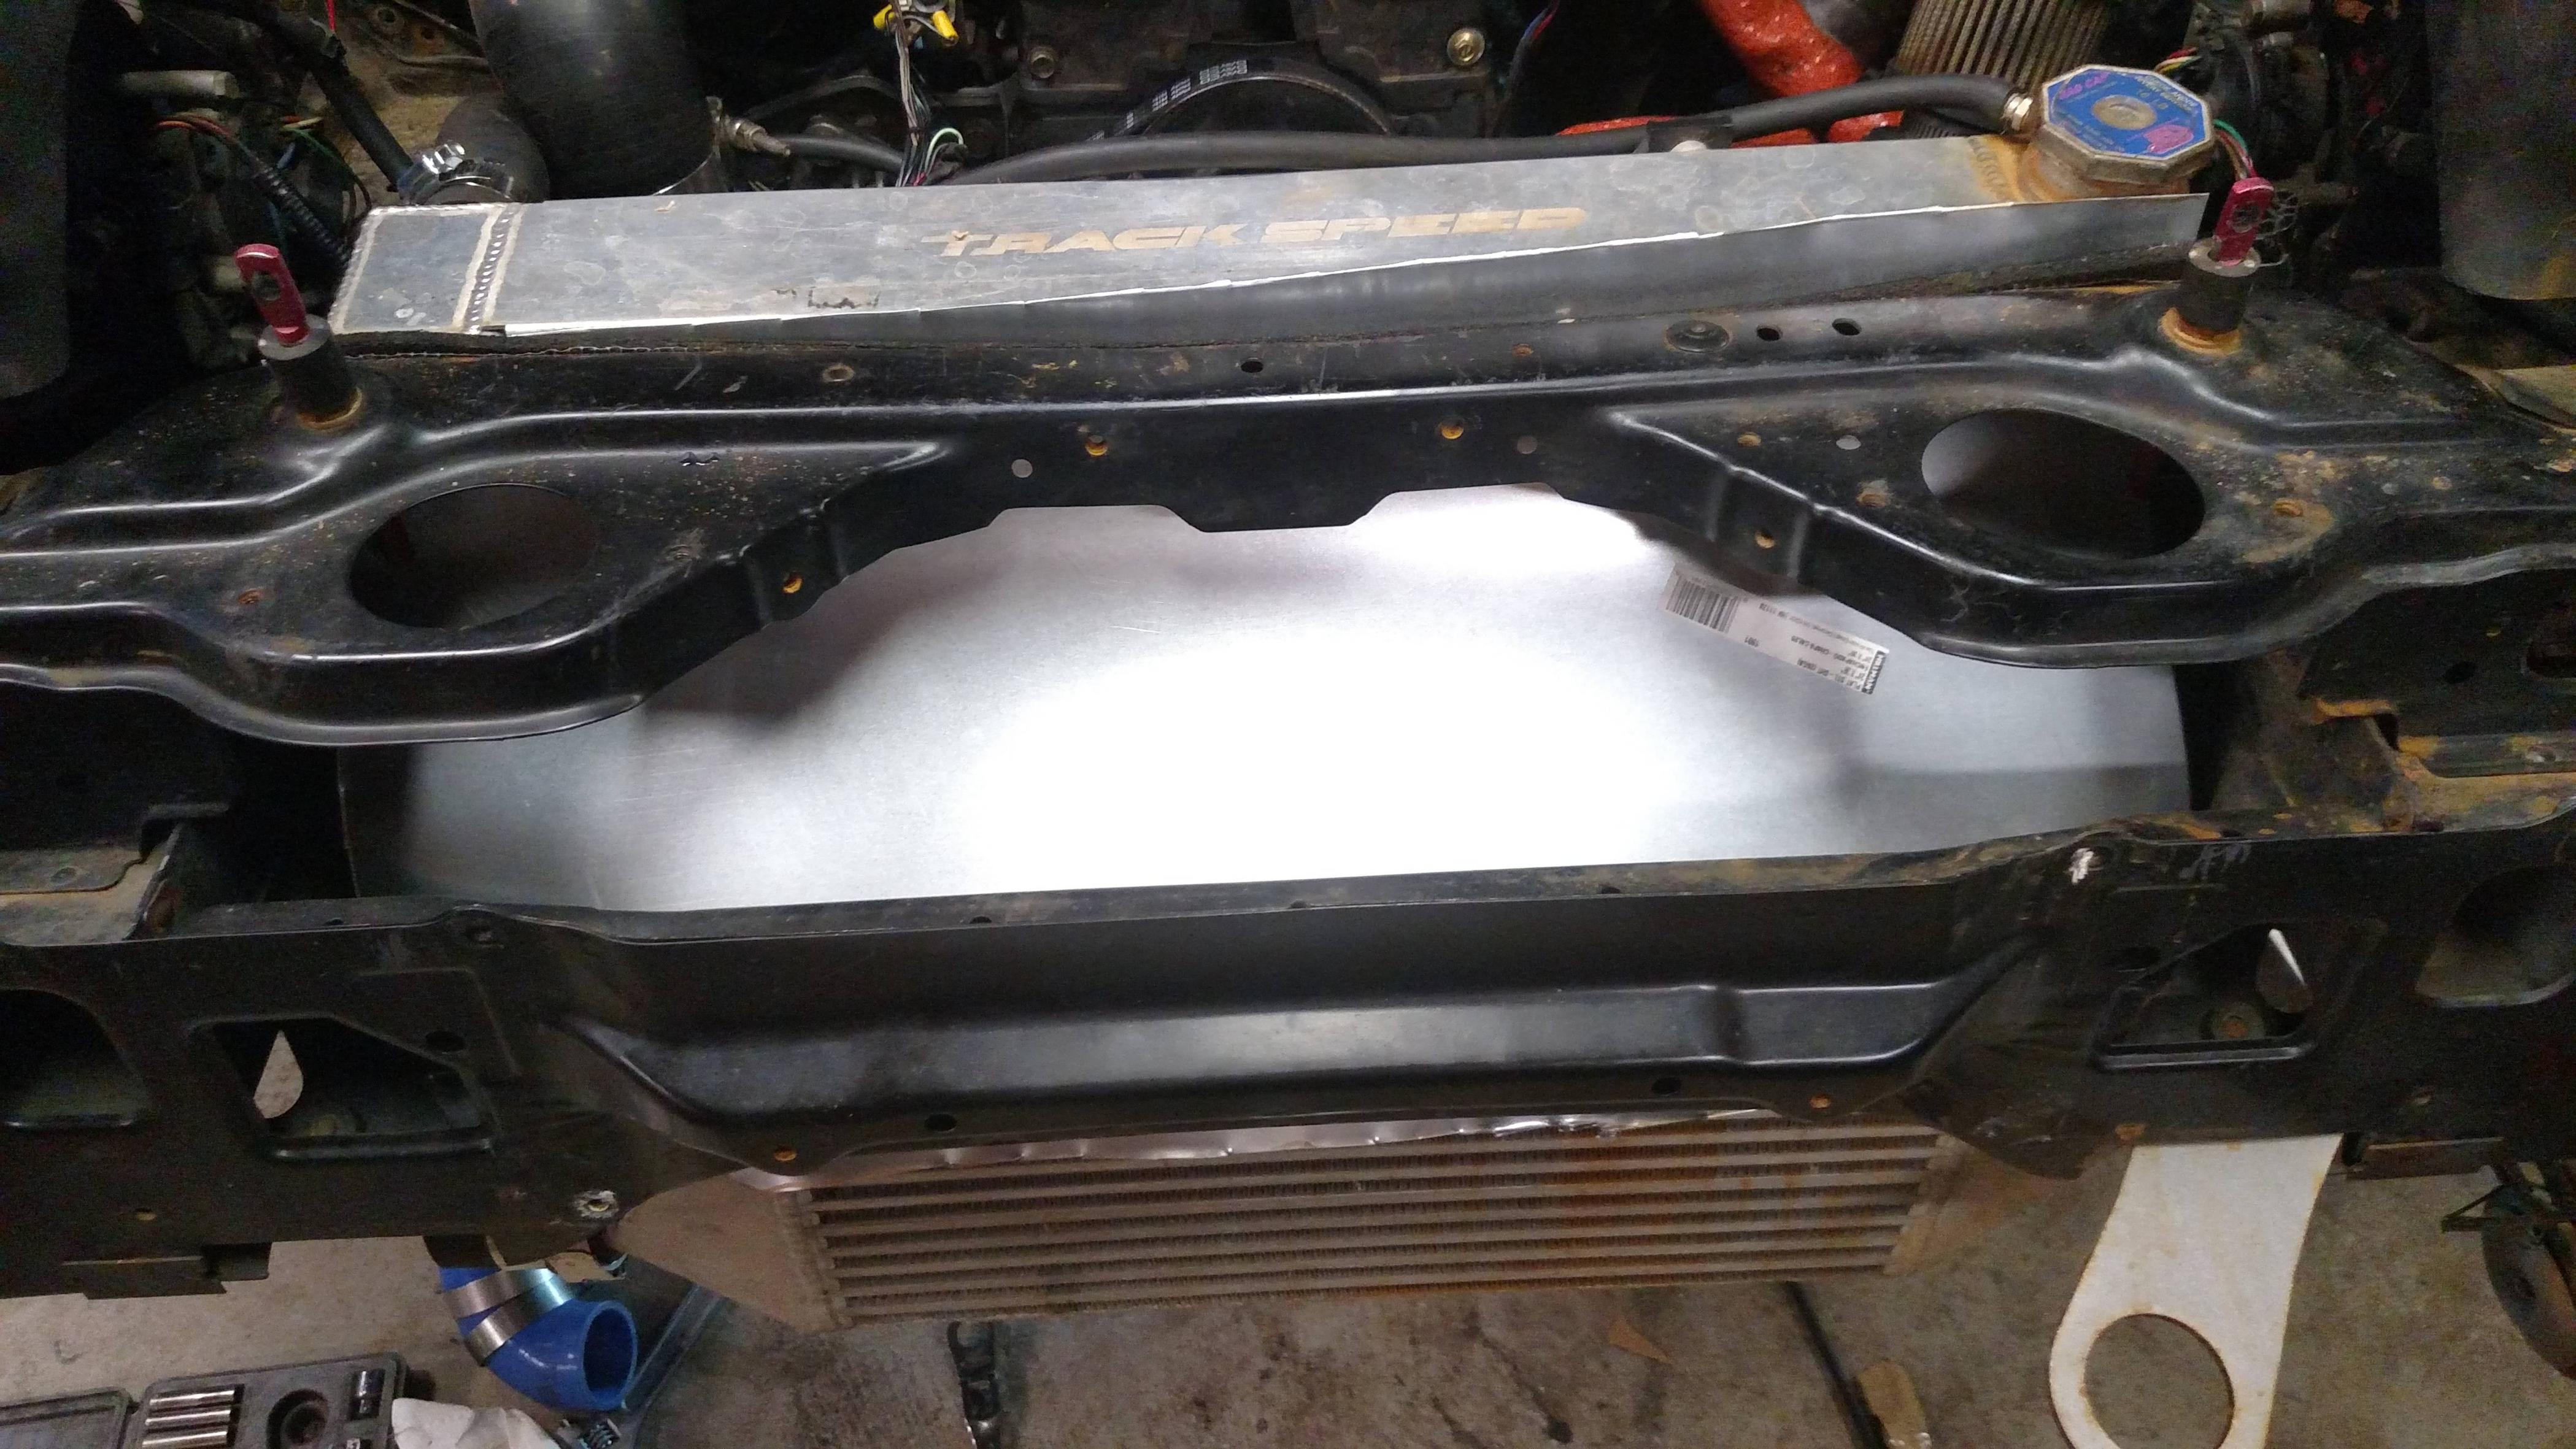
Overall it was not that bad to build and I think it will help greatly. I am running a Begi #3 intercooler so it is a bit big and takes up the full mouth of the bumper. So no air was getting passed it to go straight into the radiator, so I figure with what I build the air would be forced to go through them both and not escape. I have also put the stock under tray back on. I need to build some sides to go around the intercooler, then ducting should be pretty damn good.
Looking straight down between radiator and intercooler. You can see the ground. There is lots of empty space for air to circulate.
I got out some cardboard and started mocking up a funnel thing to go from the top of the IC to the radiator. This should keep air from moving into other parts of the bumper.
After getting a decent fit with cardboard I pulled it out and traced it onto some cheap sheet metal I picked up at Lowes. I need to pull the metal again tonight to do a little bit more trimming on it to get it just about perfect.
Overall it was not that bad to build and I think it will help greatly. I am running a Begi #3 intercooler so it is a bit big and takes up the full mouth of the bumper. So no air was getting passed it to go straight into the radiator, so I figure with what I build the air would be forced to go through them both and not escape. I have also put the stock under tray back on. I need to build some sides to go around the intercooler, then ducting should be pretty damn good.
Reply
0
0
09-13-2016, 10:43 AM
#1936
Elite Member
iTrader: (1)

Join Date: Apr 2014
Location: SF Bay Area, CA
Posts: 3,074
Total Cats: 551
Thanks for posting this, I am working on ducting right now too. I did the bottom first though, I had a similar idea of going under instead on top with the hood latch hole.
Nice work!
Nice work!
Reply
0
0
09-13-2016, 10:58 AM
#1937
mkturbo.com
Thread Starter
iTrader: (24)
Join Date: May 2006
Location: Charleston SC
Posts: 15,176
Total Cats: 1,680
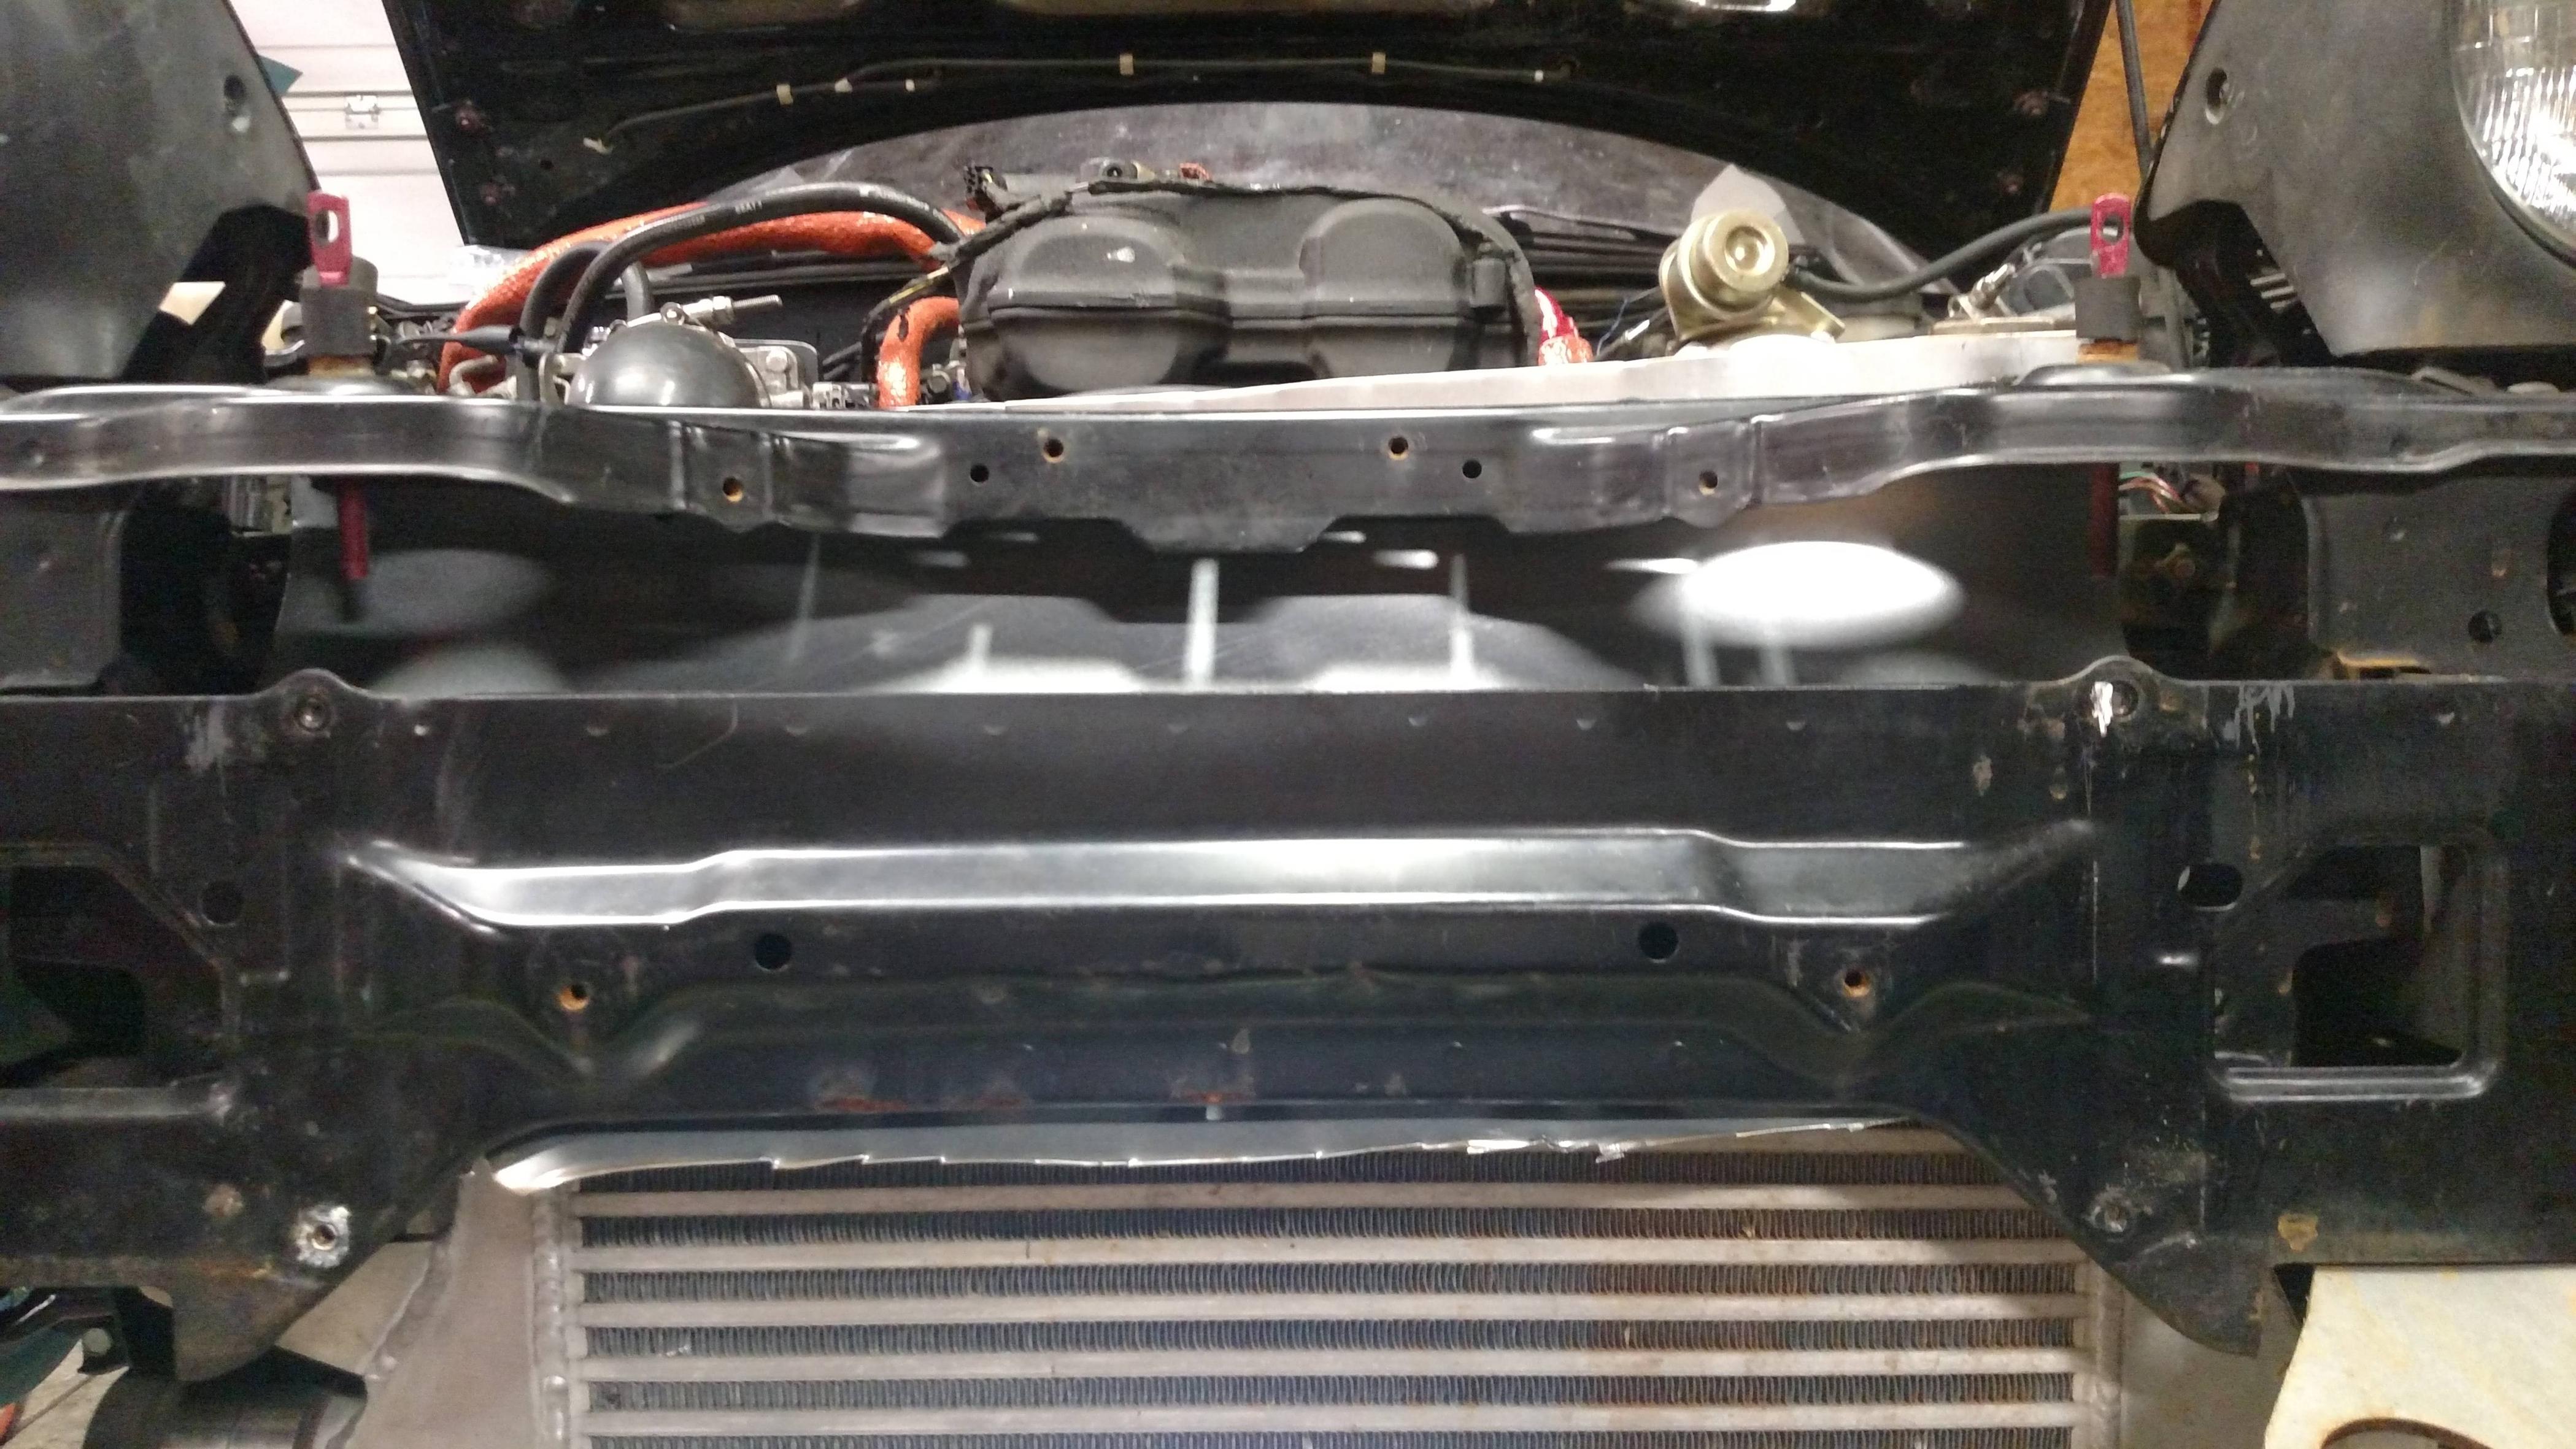
I am going to add on a plate for the top where the hood latch goes, but when I was looking at that area I realized that is a lot of room and space for air to go thats not being forced through the radiator. This ducting thing was relatively easy to do without AC in the way. With AC I think this method becomes a ton harder. The nice thing about how I did it is that it does not need to be bolted in or anything. The top part rests between the radiator and support, the bottom part wraps over the IC. So it is just held in place. Removal or installation is relatively quick and easy.
Reply
0
0
09-13-2016, 11:18 AM
#1939
Elite Member
iTrader: (1)
Join Date: Apr 2014
Location: SF Bay Area, CA
Posts: 3,074
Total Cats: 551
I have to confess that my local shop determined that there was no charge left in my AC so I pulled some of those parts. I had a similar thought about the space in the bumper and how easy it would be to cinch something between the radiator and support like that.
My lower piece is basically an 8.5" wide rectangle folded to fit in the stock under tray with the front corners trimmed a bit.
My lower piece is basically an 8.5" wide rectangle folded to fit in the stock under tray with the front corners trimmed a bit.
Reply
0
0
09-13-2016, 11:30 AM
#1940
Retired Mech Design Engr
iTrader: (3)
Join Date: Jan 2013
Location: Seneca, SC
Posts: 5,009
Total Cats: 856
Very interested to know the results of forcing all through both exchangers. It will help that you have the B3 so perhaps enough air will get though.
You had cooling problems because the FMIC slowed the air going to the radiator, so I presume the thought is that the air was slowed, but then escaped (bypassed) the radiator.
Your hope has to be that, even though the FMIC will restrict flow, there will be enough of it to cool the radiator.
Savington mentions purposefully bypassing 20% of the air around the IC, as Sixshooter has done.
Reply
0
0


