Mazdaspeed meets EFR, ARTech, MS2E
 04-26-2013, 04:08 PM
#1
Senior Member

Thread Starter
iTrader: (4)

Join Date: May 2012
Location: Vallejo, CA
Posts: 541
Total Cats: 48
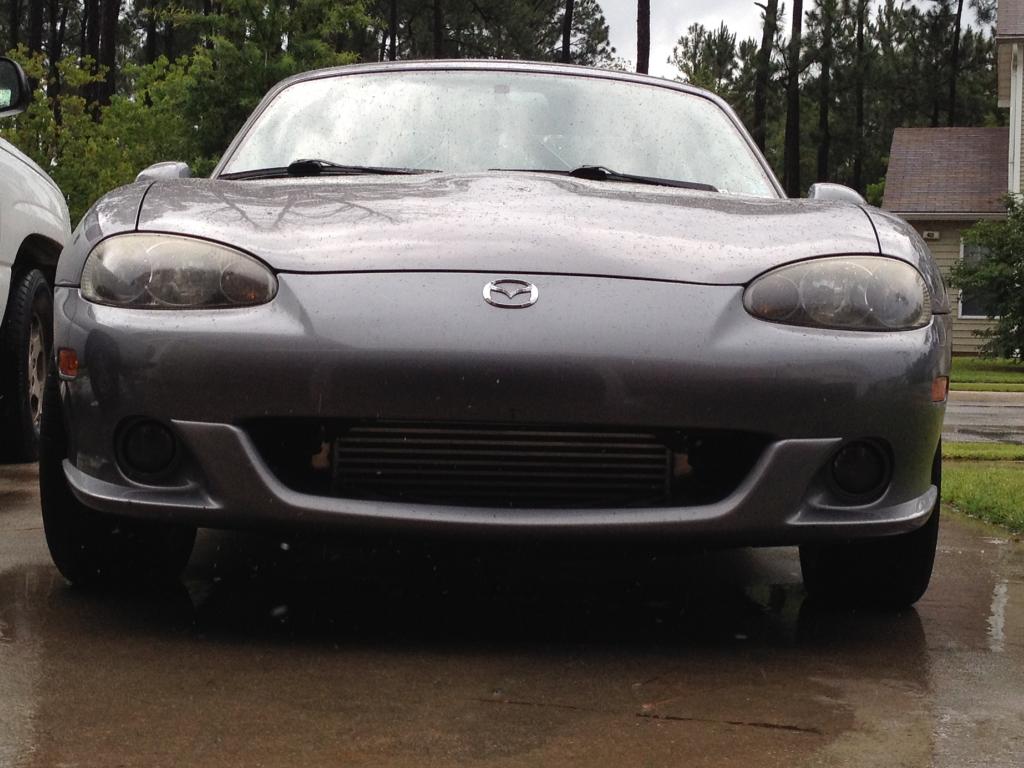
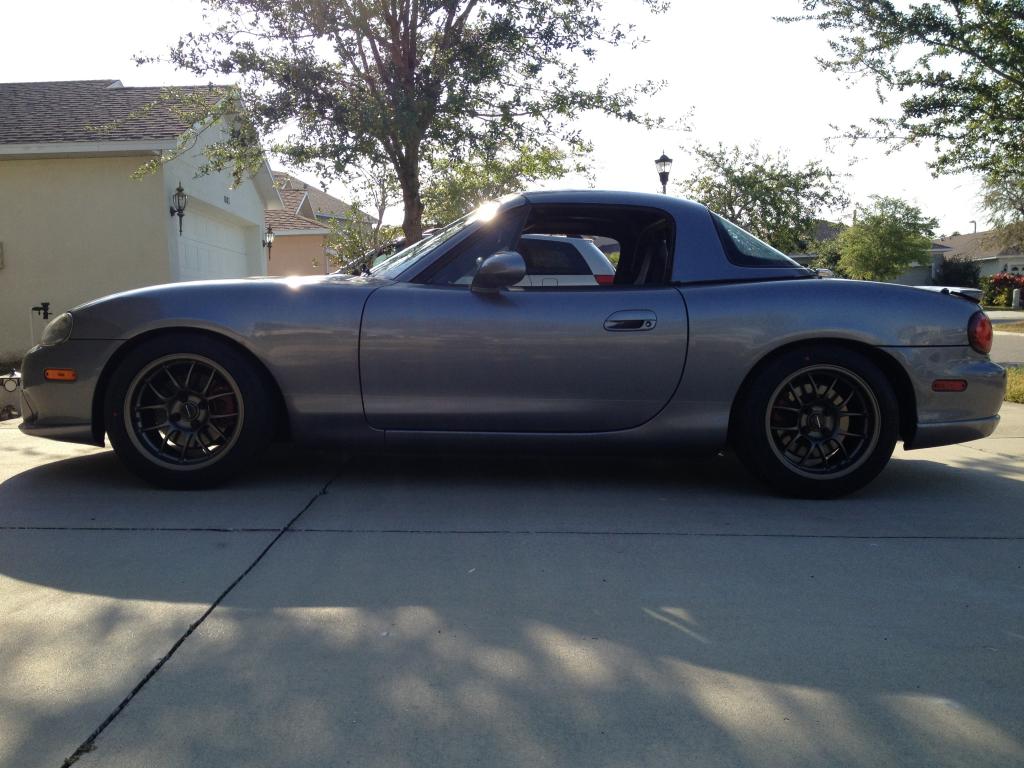
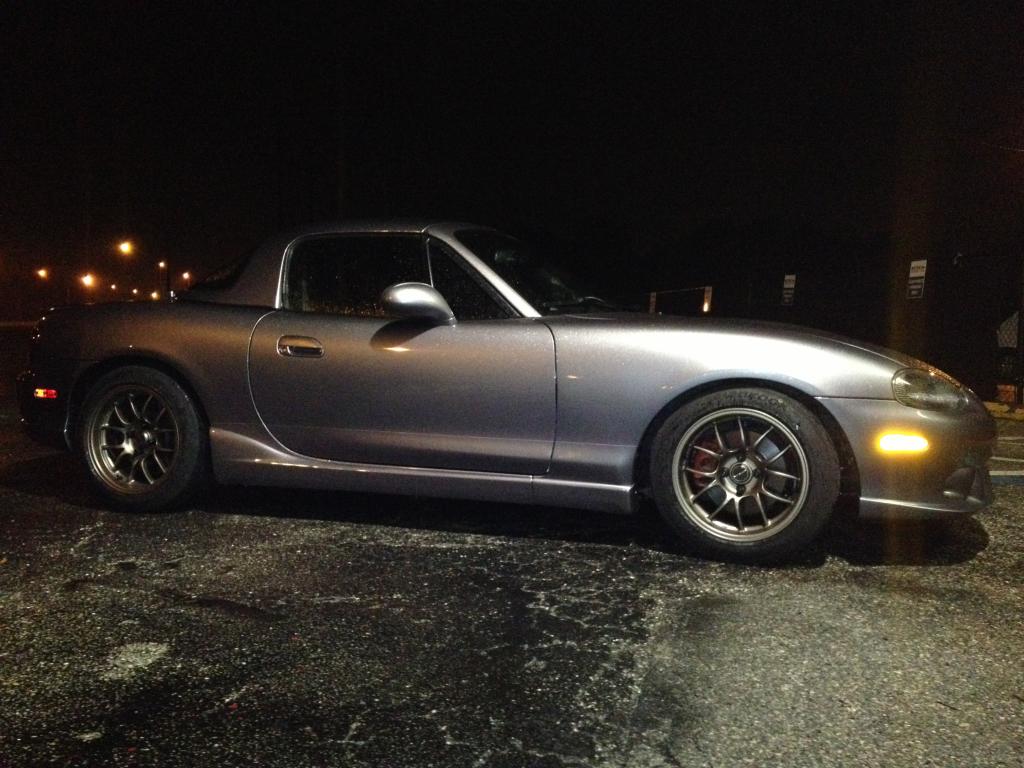
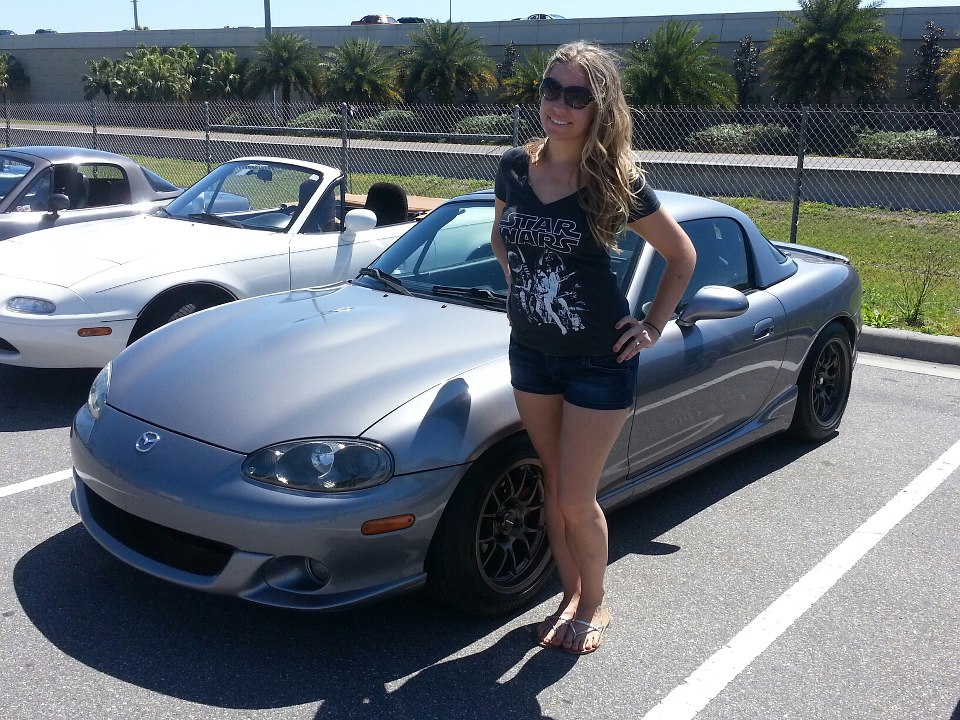
I decided to come out of hiding and start a build thread. I have been looking off and on for a Miata to build since about 2009 and in May 2012 I finally found the right one and purchased my 2004 Titanium Grey Mazdaspeed Miata with 86,000 miles on it. My ultimate goal is to start road racing with the car but while still keeping it streetable.
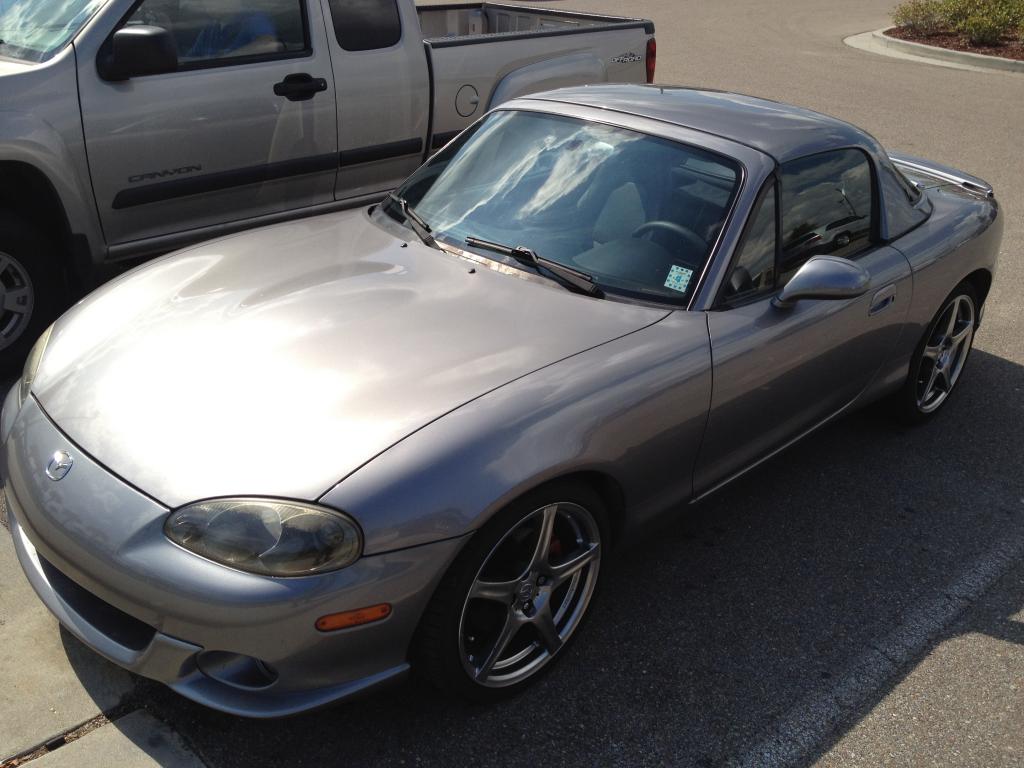
When I bought the car it came with a brand new Robbins Back cloth top, an OEM Hardtop without a rear defroster or headliner as well as a Hard Dog Hard Core Hardtop Roll Bar. But other than that it was stock.
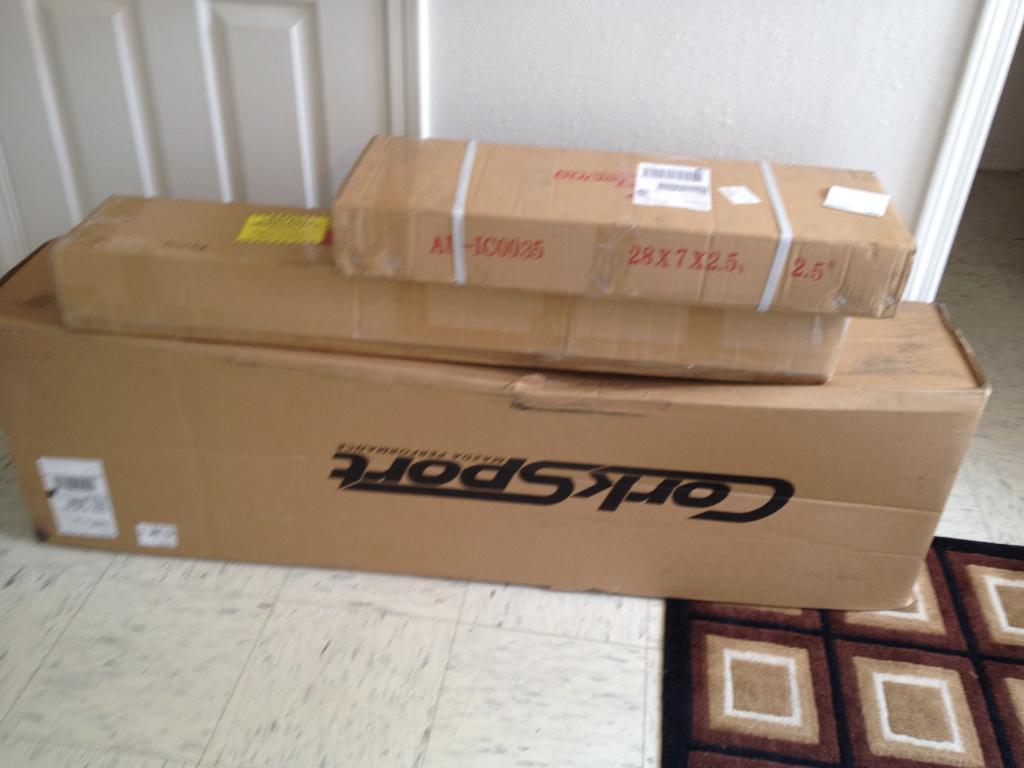
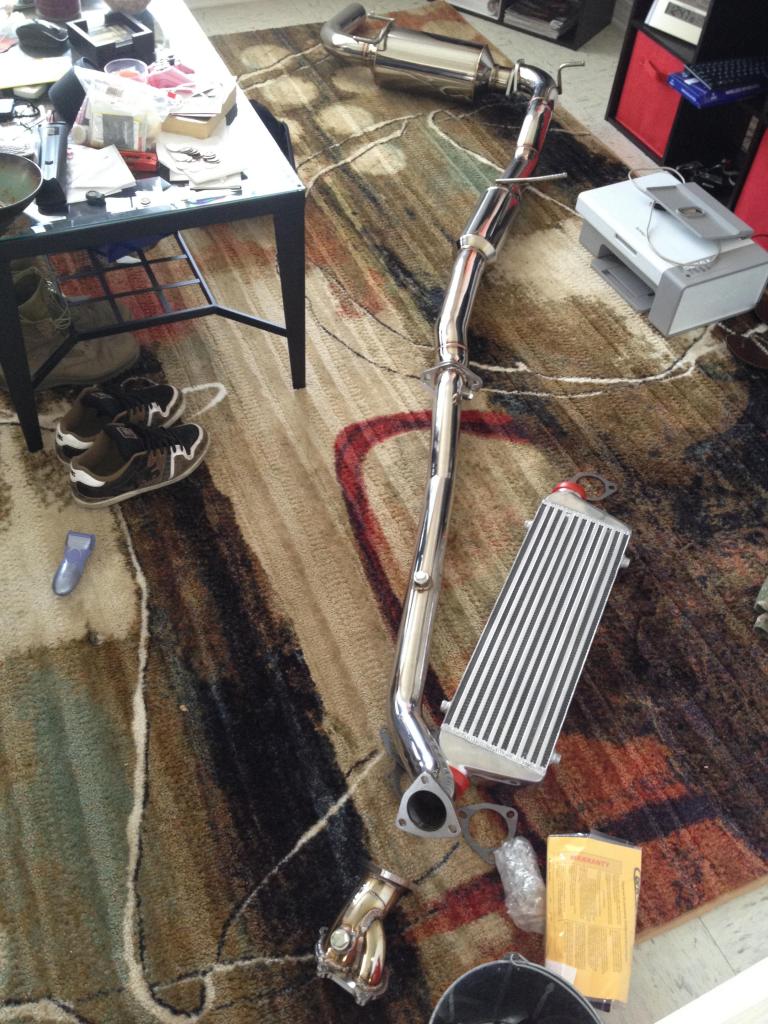
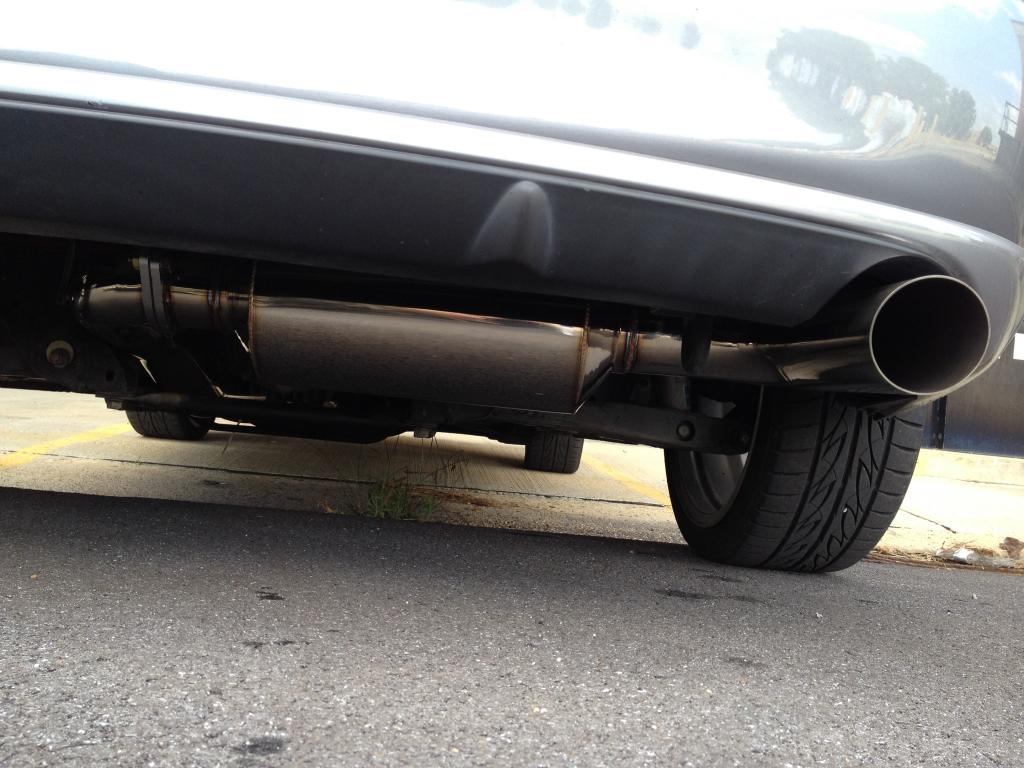
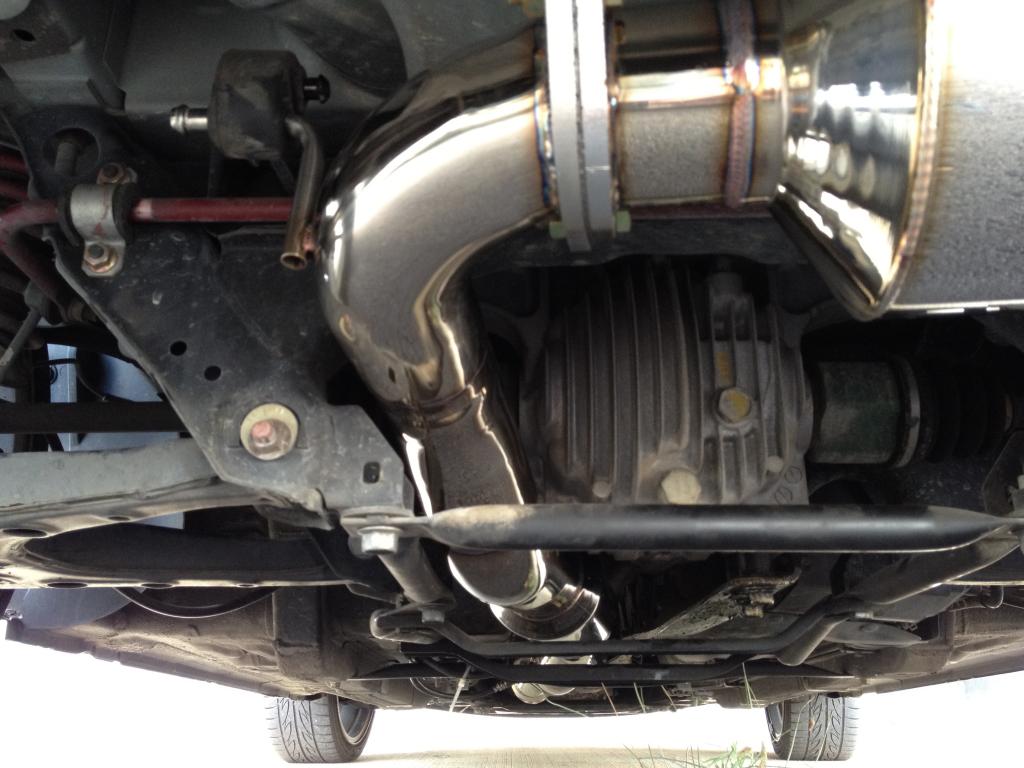
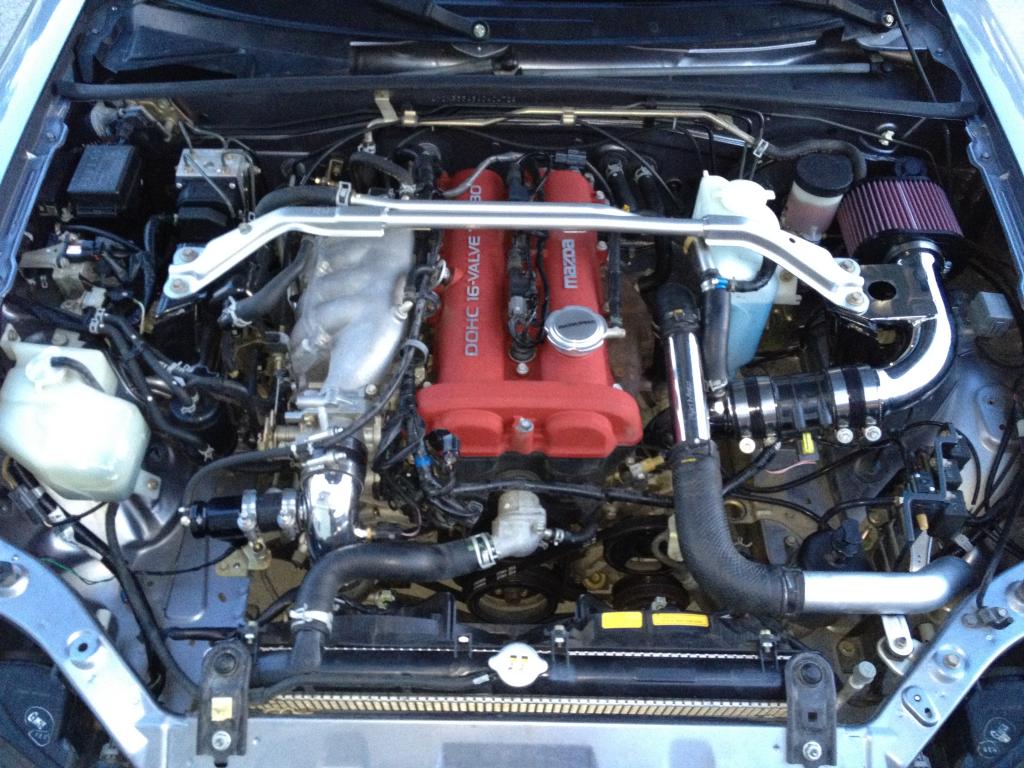
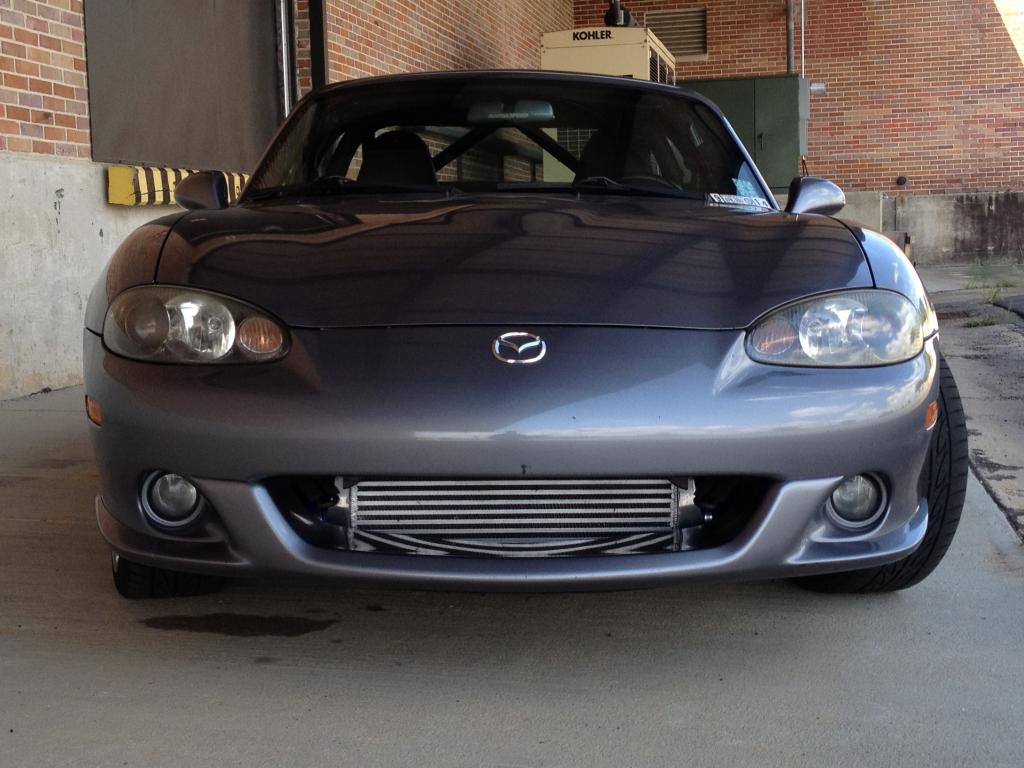
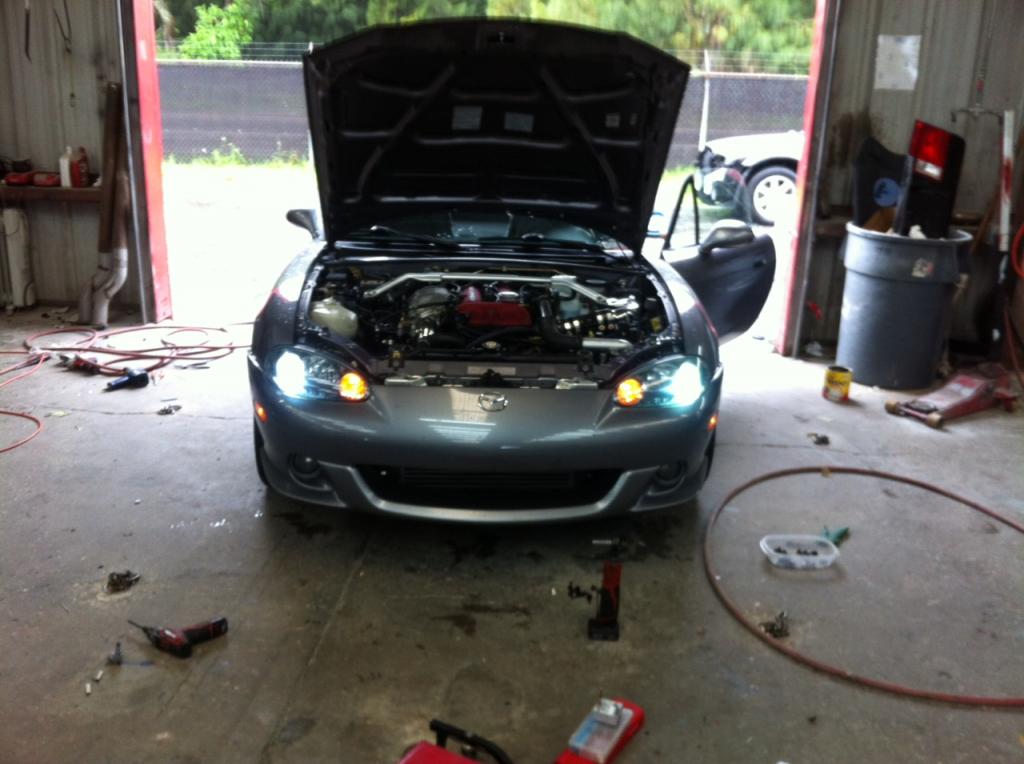
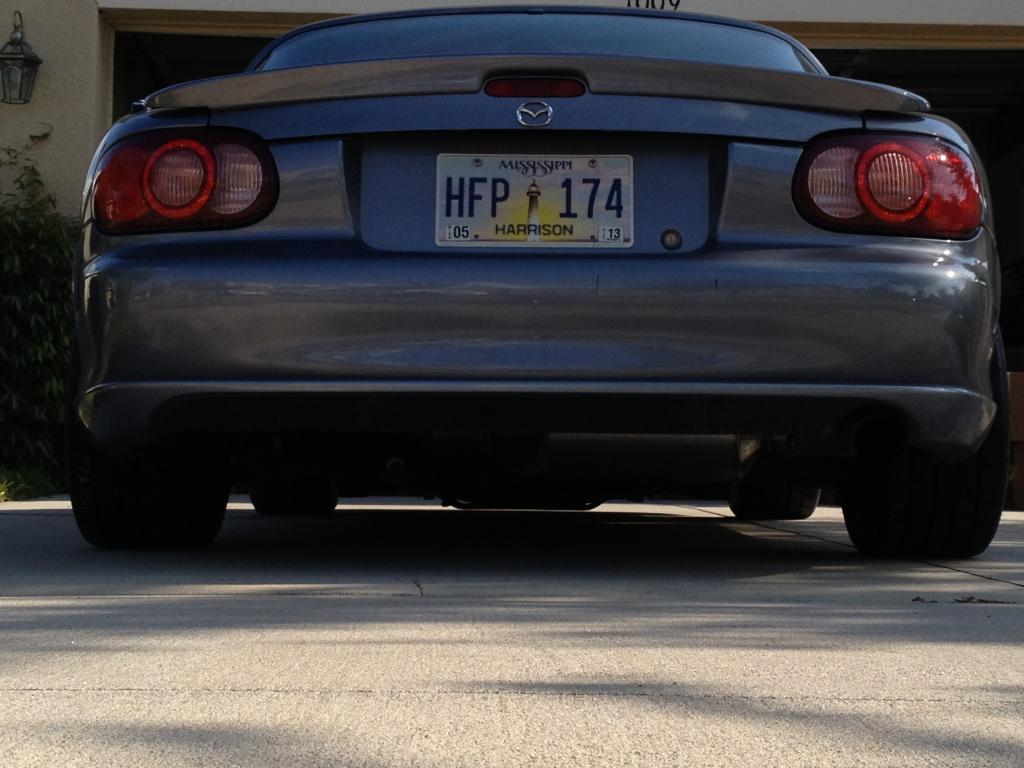
The same day I signed the paperwork for the Miata I had put in and order with Flyin� Miata for the MSM intake kit w/ the O2 Mod. I also purchased the 80mm Catback exhaust from Corksport. Now I knew it was going to be overkill for what was currently done but I was thinking ahead and had always had plans of replacing the factory turbo setup with bigger and better things after my upcoming deployment in August 2012. In the mean time I bought a 2.5� Cat less EBay downpipe with the Elbow that mates to the turbine housing itself. And while I was on EBay I bought a 28�x8�x2.75� Bar and Plate intercooler since I couldn�t justify the price of the Flyin� Miata�s Intercooler upgrade.
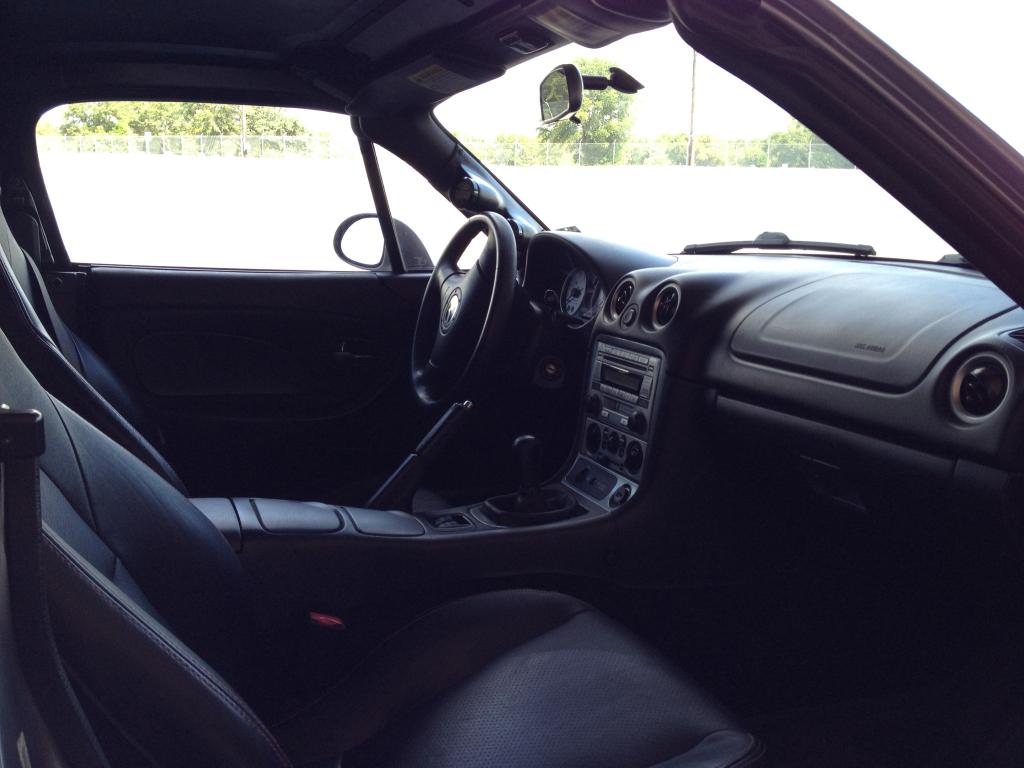
I then ordered a A-pillar gauge pod for two gauges from Speedhut for an NB2 but I believe I received a pod for an NB1 I called them and explained the situation to them (this was a year ago and don�t really remember the details of the conversation) I think they said it should have been the correct part but you might need to modify it to make it fit I�m not really sure but I know I was anxious to get my new parts installed so I just used my wife�s Blow dryer as a makeshift heatgun since I didn�t own one and tried my hardest to be patient with the plastic to keep it from bubbling up . I bought an AEM UEGO wideband A/F gauge and an AEM TRU-BOOST EBC/gauge to fit the pod. I turned up the boost to about 9psi and really enjoyed driving the car for the few months I had before leaving.
While I was gone a friend of mine who does auto body repair got a set of Factory HID�s out of I think a Nissan and installed them for me as a little gift I guess.
Needless to say I had one project back home that kept robbing my bank account while I was deployed. I steadily bought parts throughout deployment in hopes of coming home to the parts waiting for me in the garage with the Miata. It�ll be easier to just list out what I purchased so...
Corksport
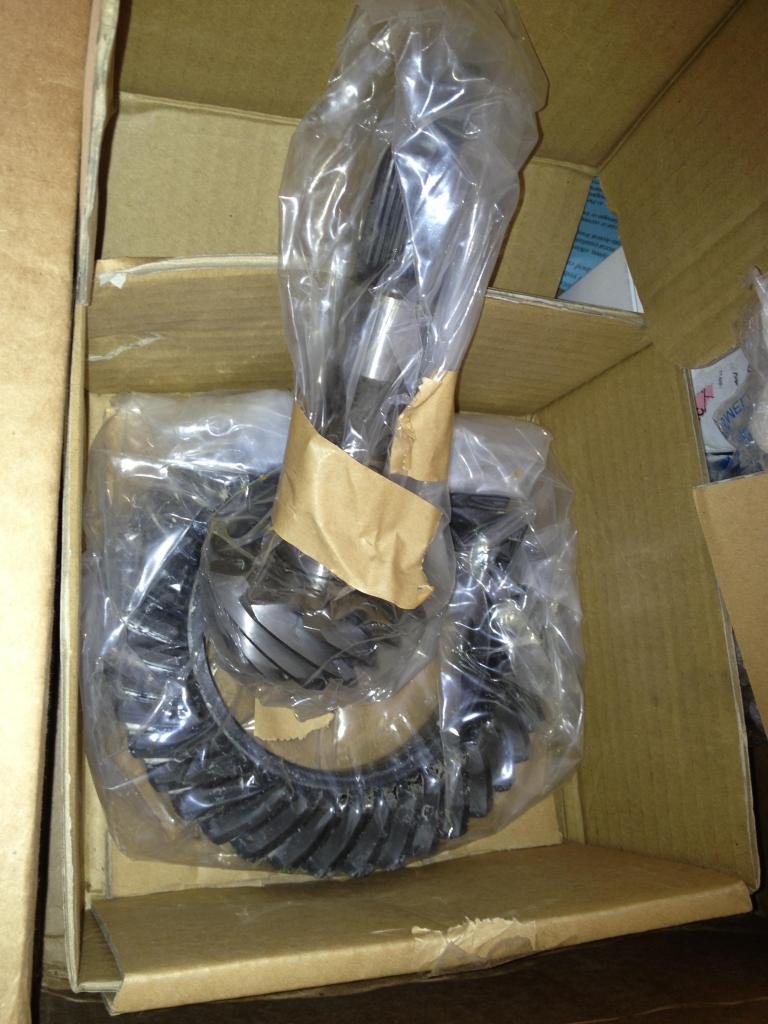
3.363:1 R&P w/ speedo sensor
Miataroadster.com
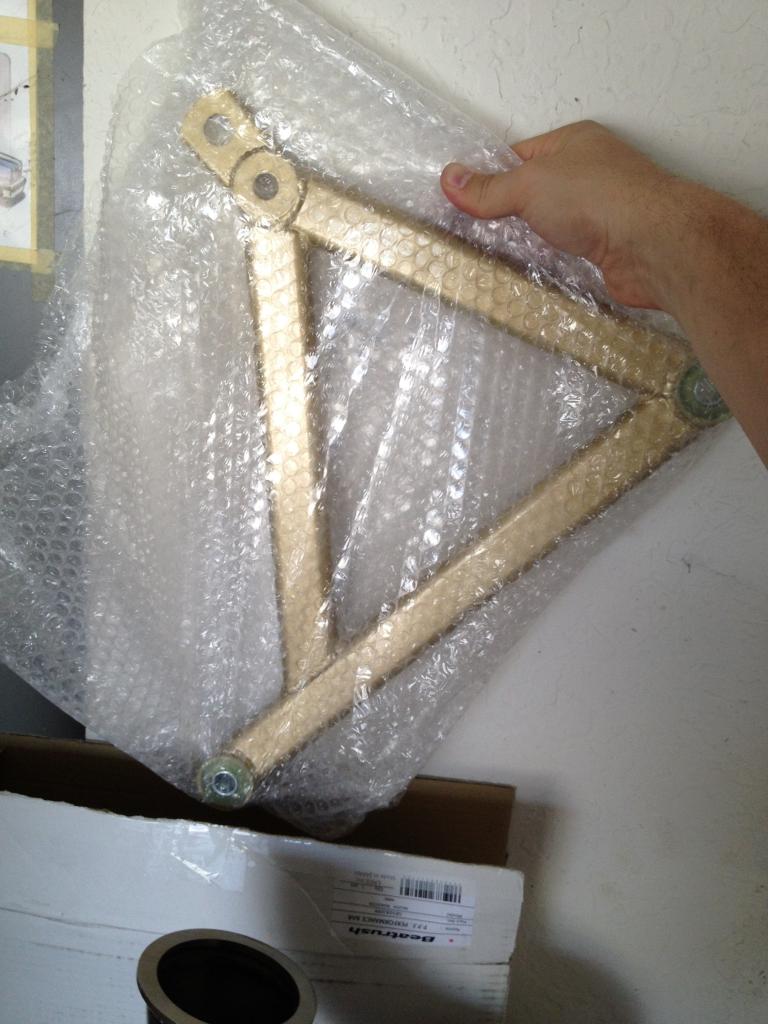
Beatrush PPF brace
Power Steering Delete Plug Kit
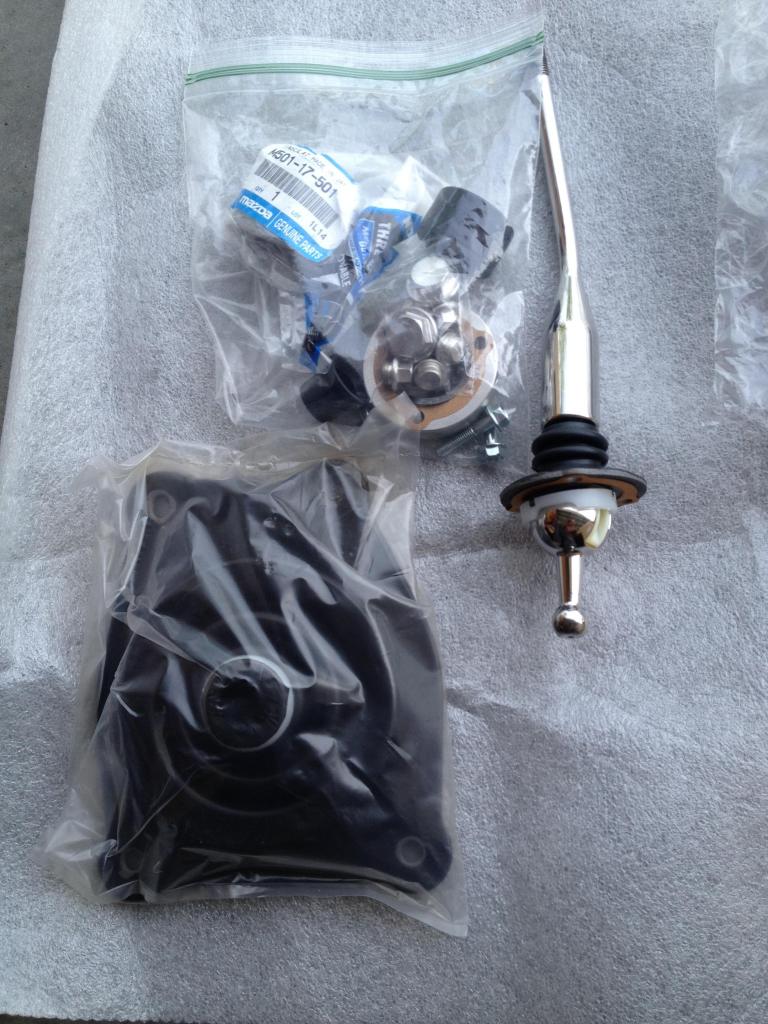
MSM Short shifter kit-Tall/Angled
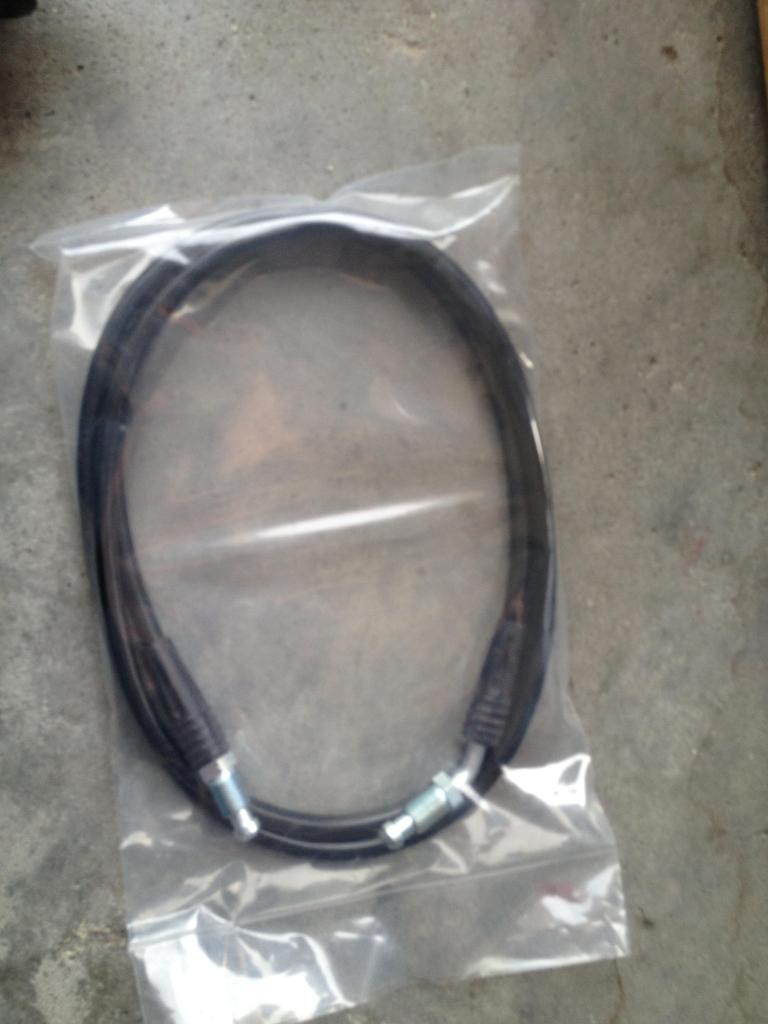
Straight shot clutch line in Black(I wanted regular stainless but he sent me a black line, I didn�t really care too much to send it back so it will do)
Phil�s Tire Service
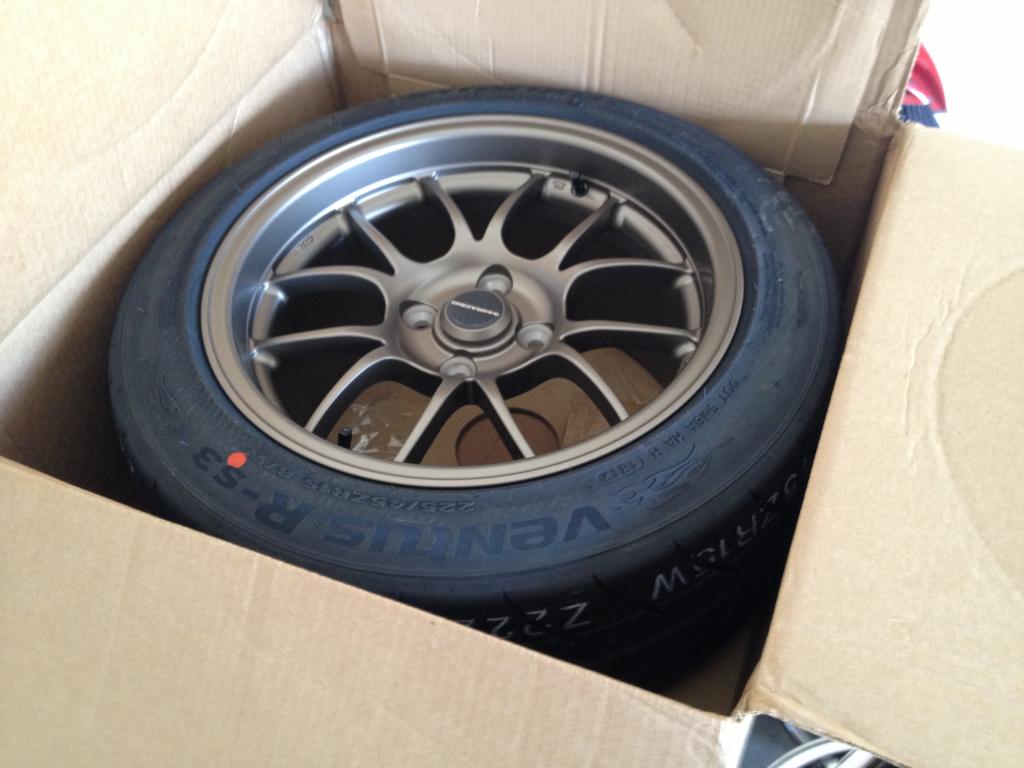
15x9 Bronze Gen 3 6UL�s w/ 225/45zr/15 Hankook RS-3�s
949racing Black valve stems
949racing.com
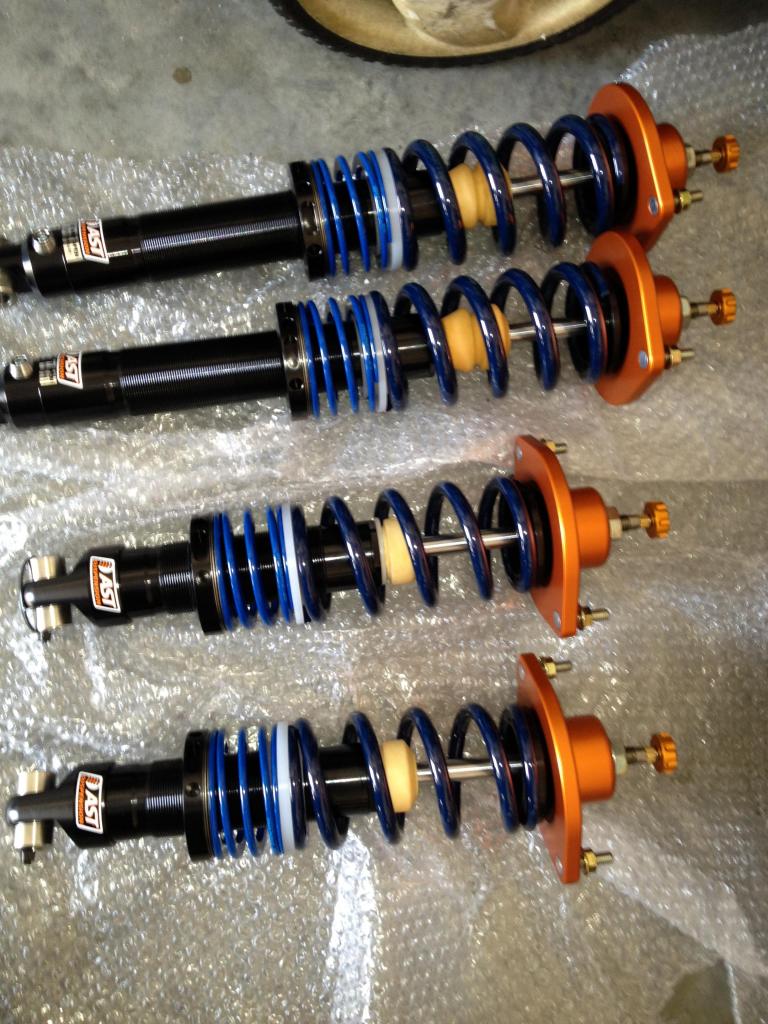
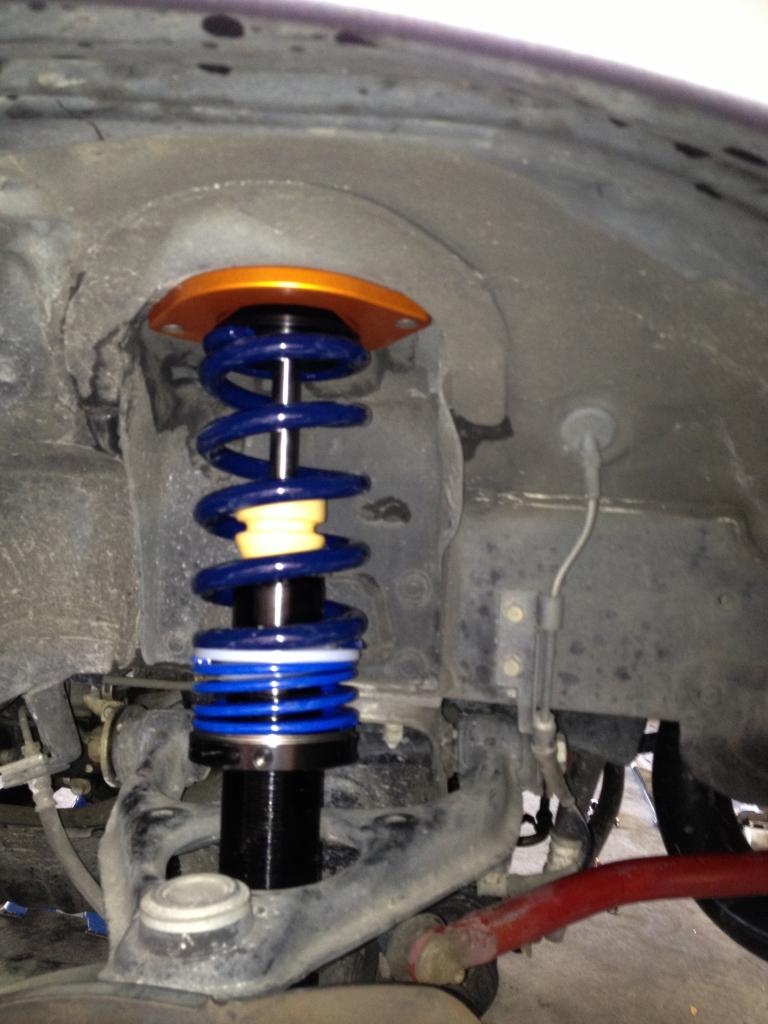
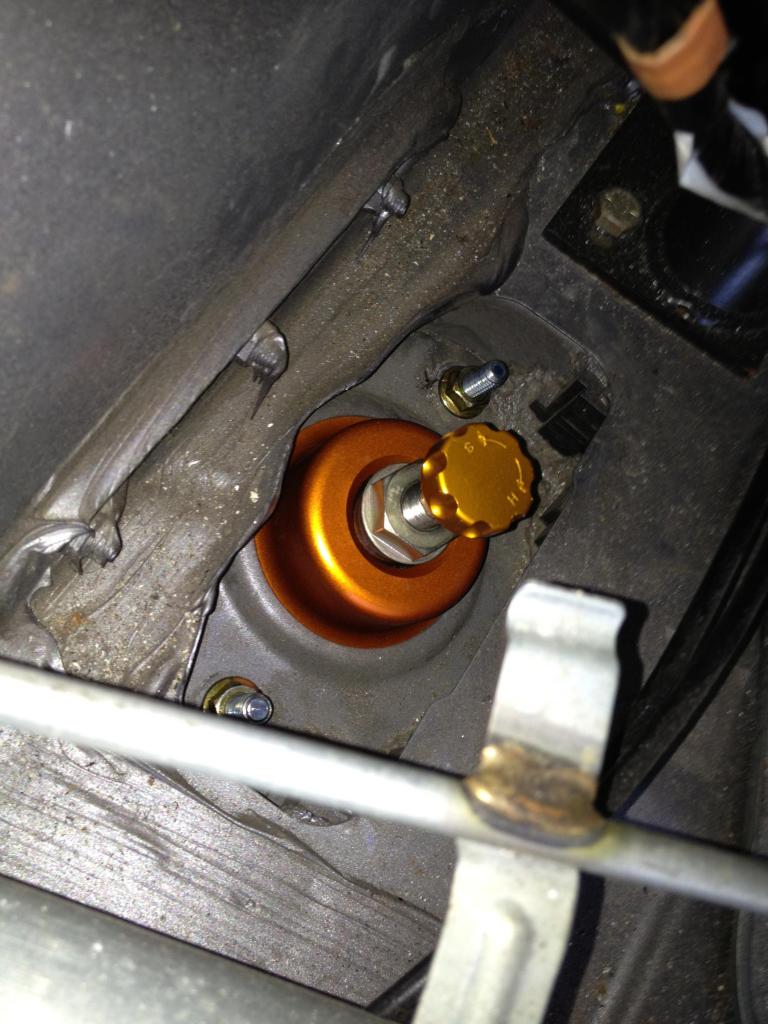
Xida-S w/ spherical bearing mounts (700/400 w/ helper springs)
New camber bolts
949racing Black lug nuts
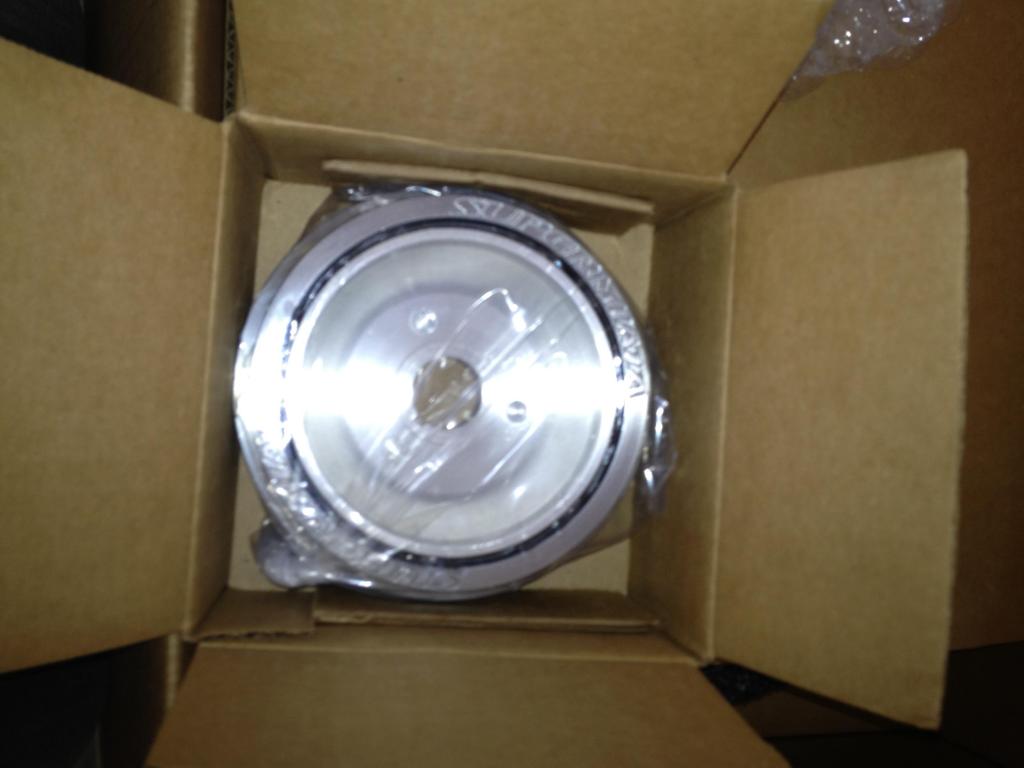
Supermiata Harmonic Balancer
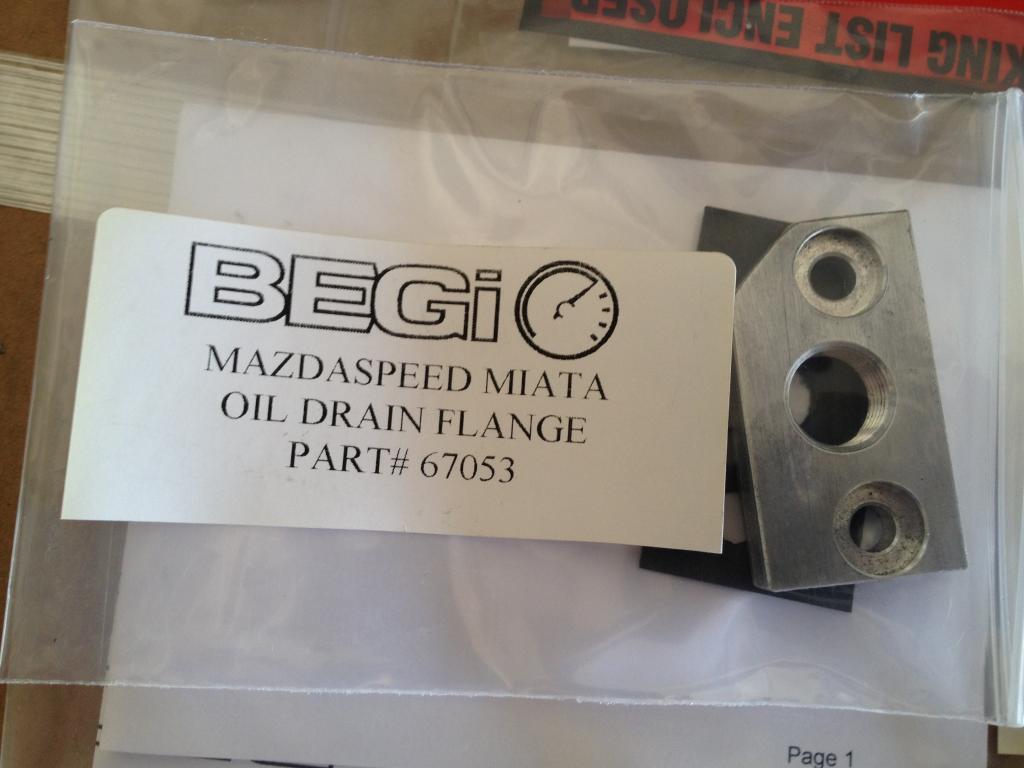
BEGi.com
MSM oil drain pan flange tapped for 3/8� NPT
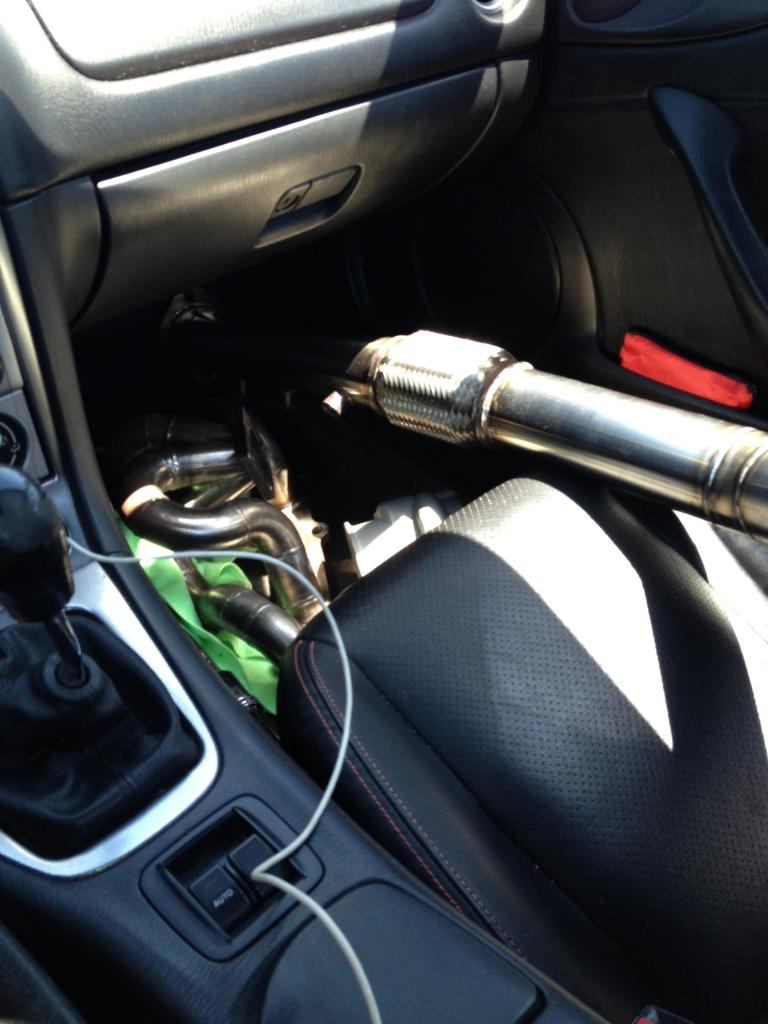
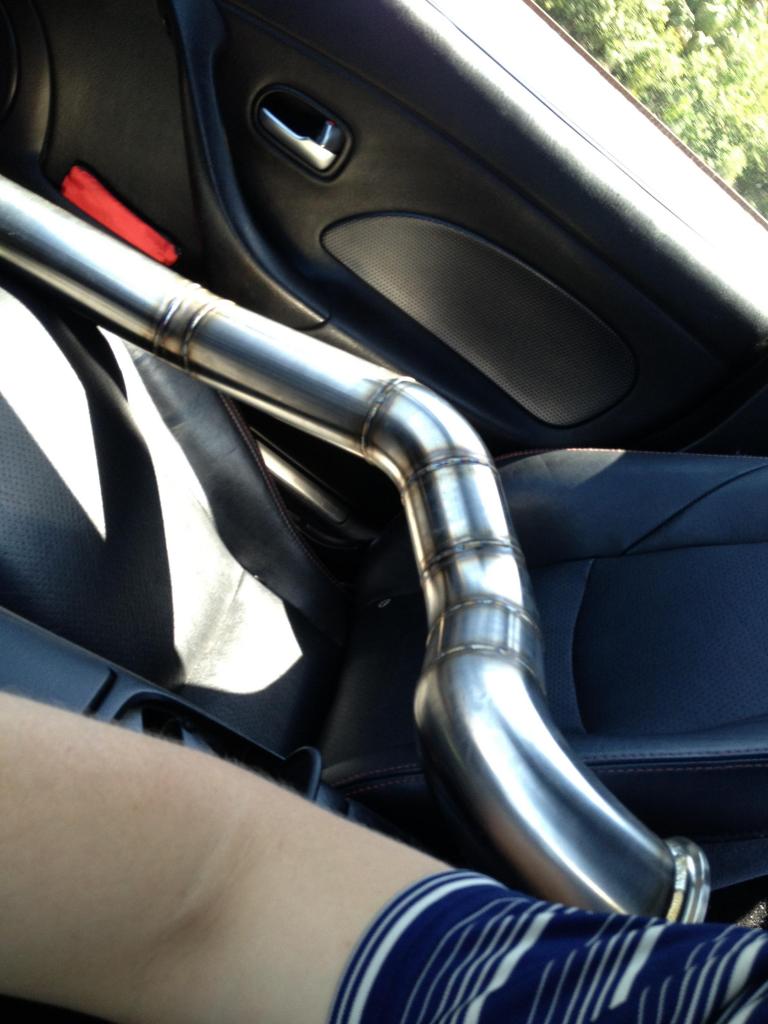
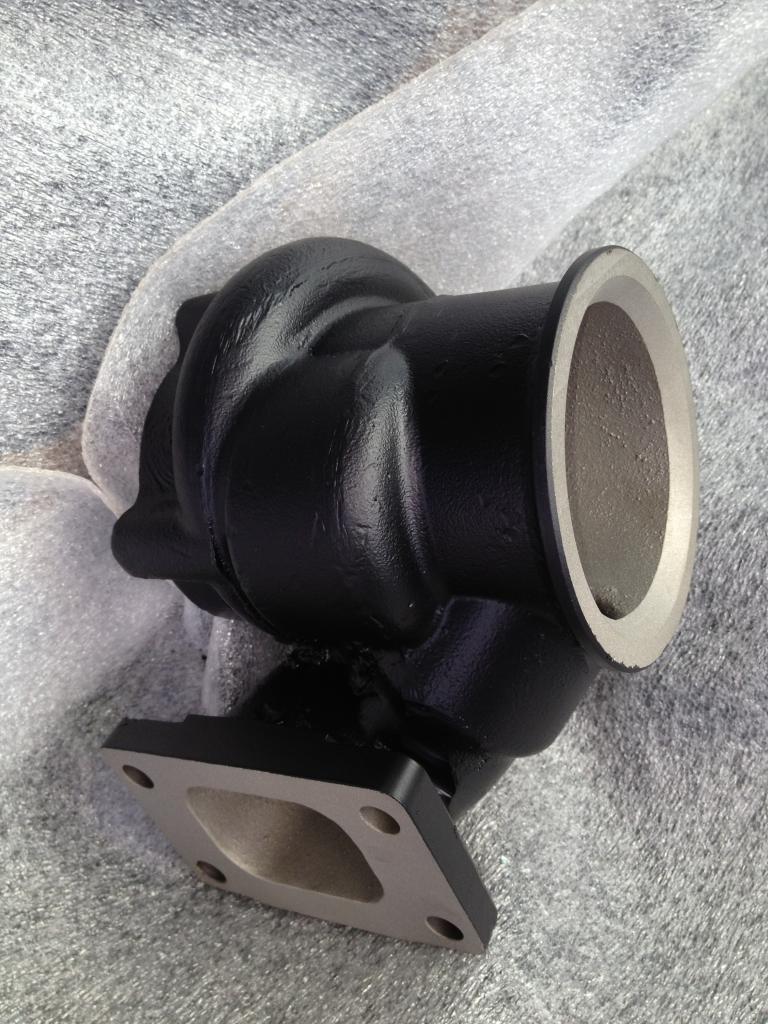
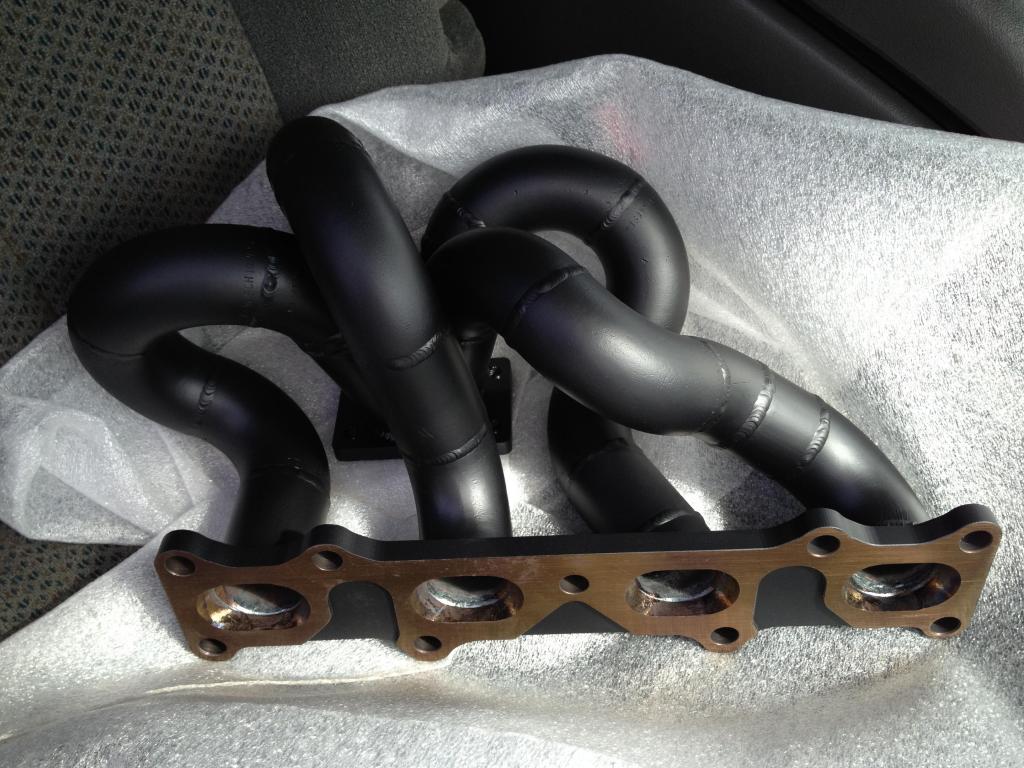
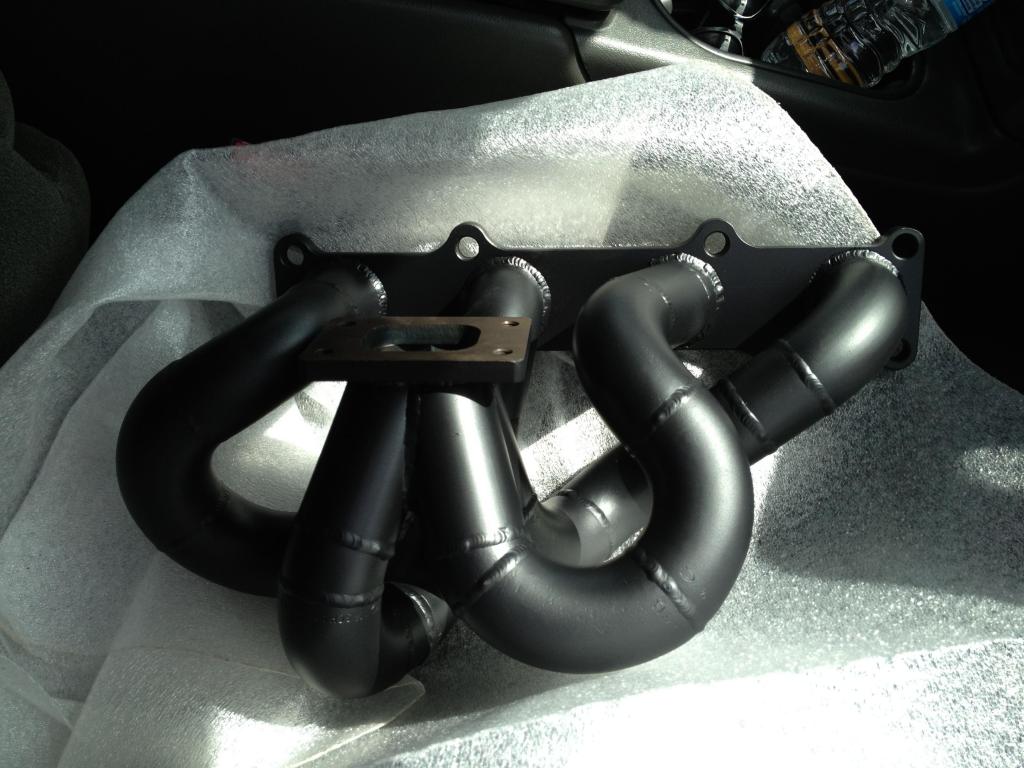
ARTech.com
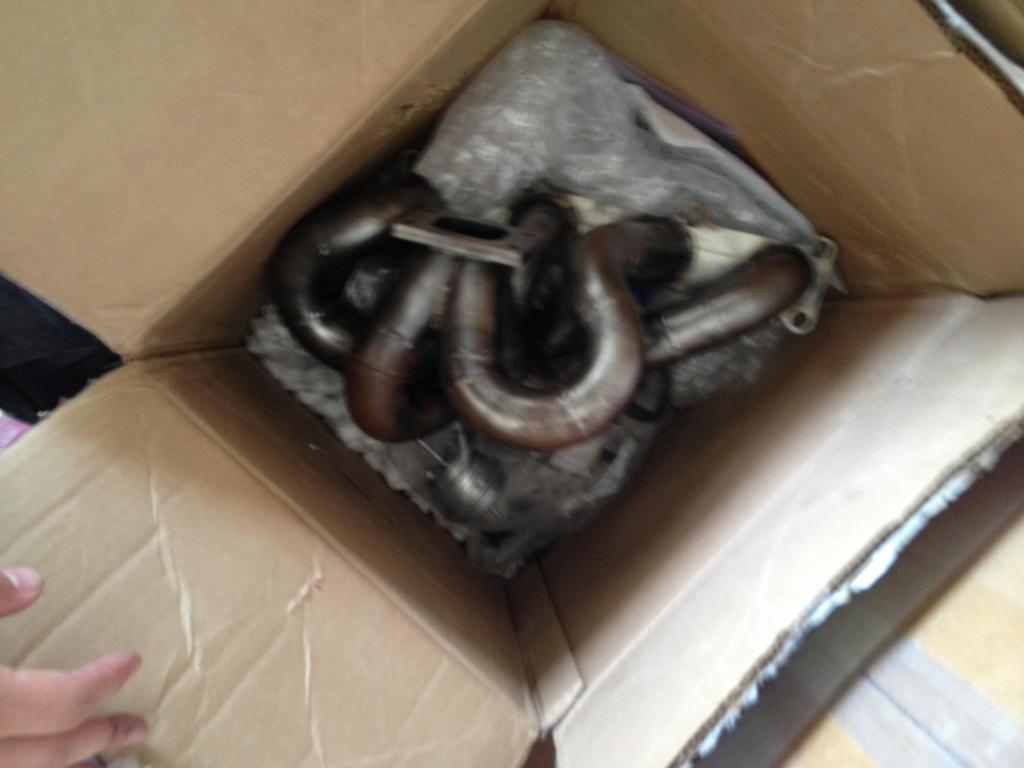
Ramhorn topmount manifold
3� V-band downpipe
MSlabs.com
MS2 Enhanced
Doapparts
FIC 775cc PnP injectors
Walbro 255fpl Fuel pump
Full-race.com
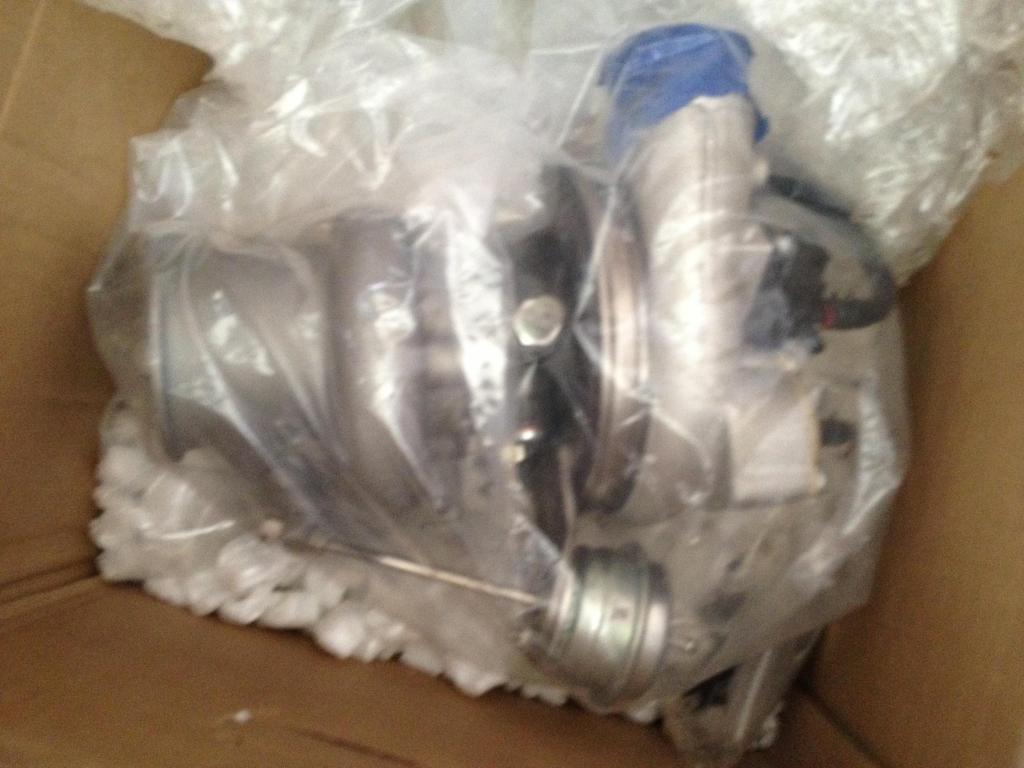
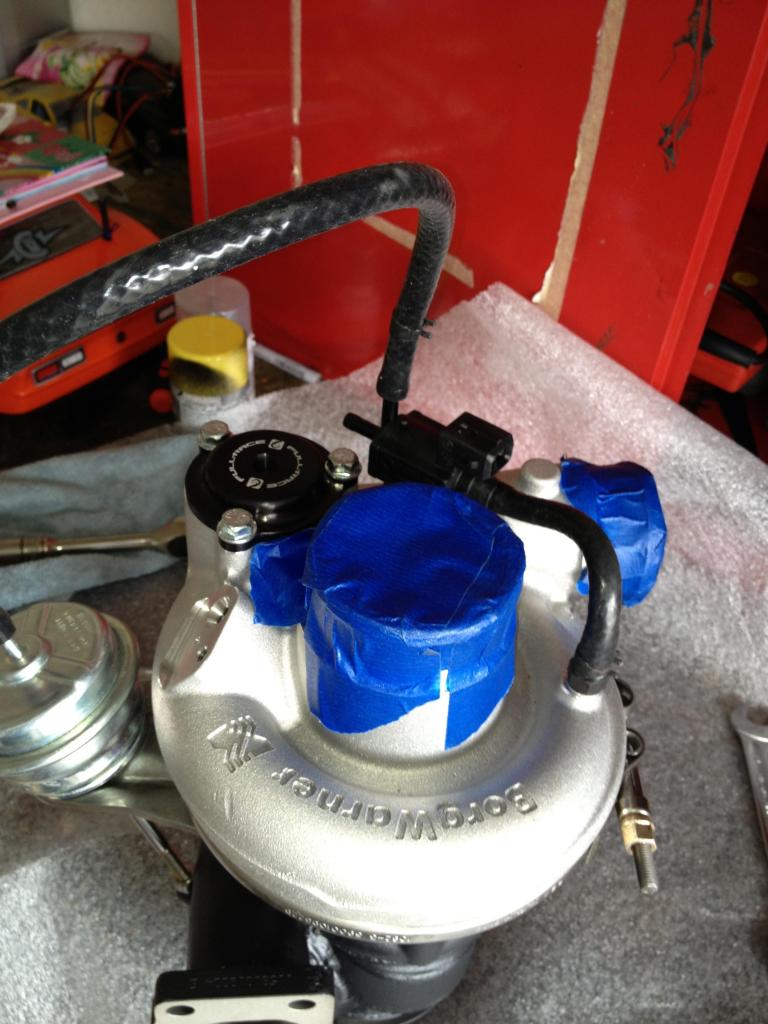
Borg Warner EFR-6258
Full-race replacement aluminum BOV cover
EFR boost solenoid connector
gomiata.com
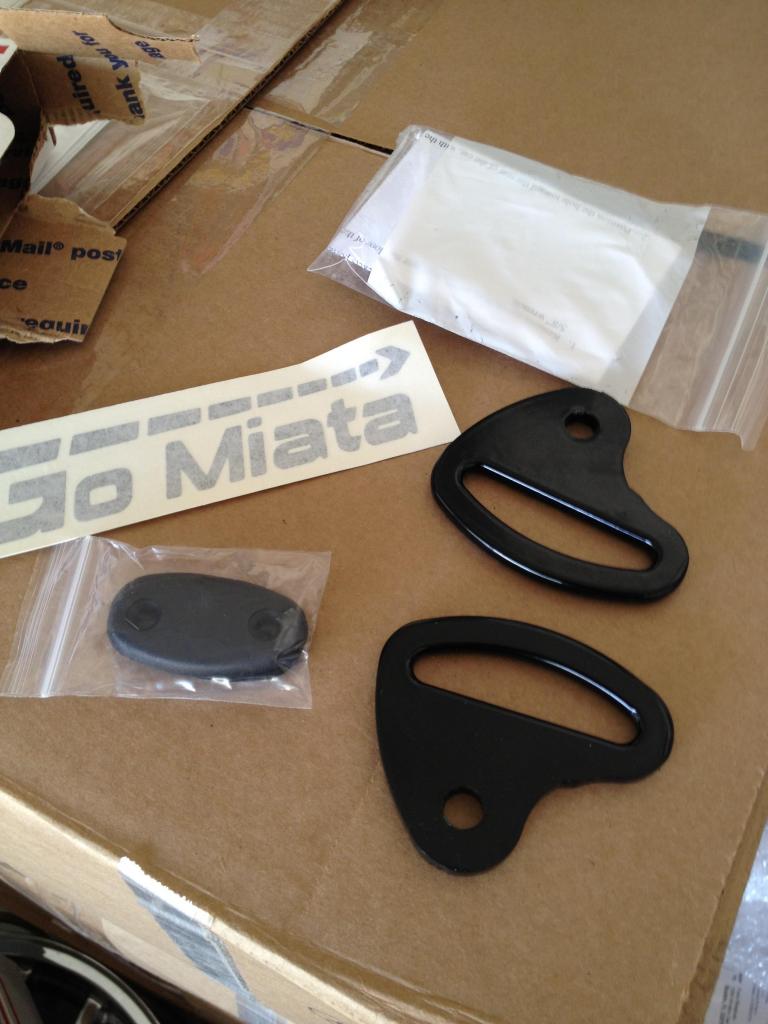
visor blanking plates
bossfrog seatbelt adapters
Miata Forums
Rennenmetal.com front and rear tow hook�s in Black
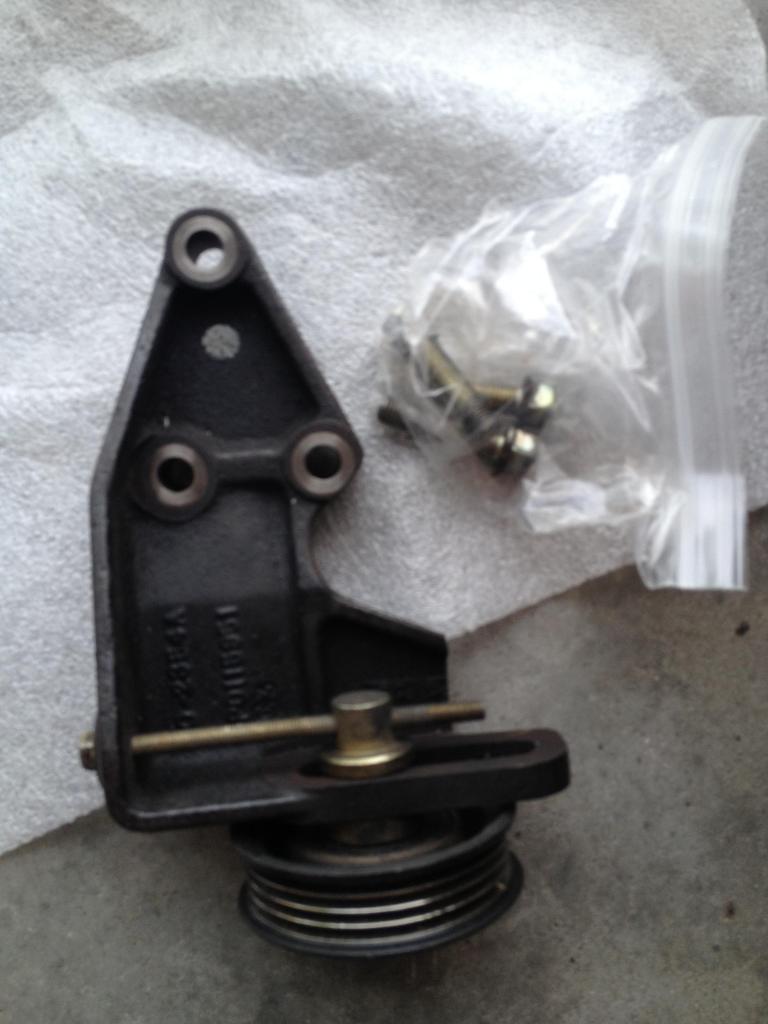
Power steering delete bracket w/ pulley
Derin differential mounts (only received the upper mounts and not the lower two so I later bought a set of Energy Suspension differential mounts for the bottoms)
2� intercooler piping kit( to reroute my hot side piping when I install the EFR)
Oil filter relocation/cooler kit (-8AN lines and fittings)
EBay
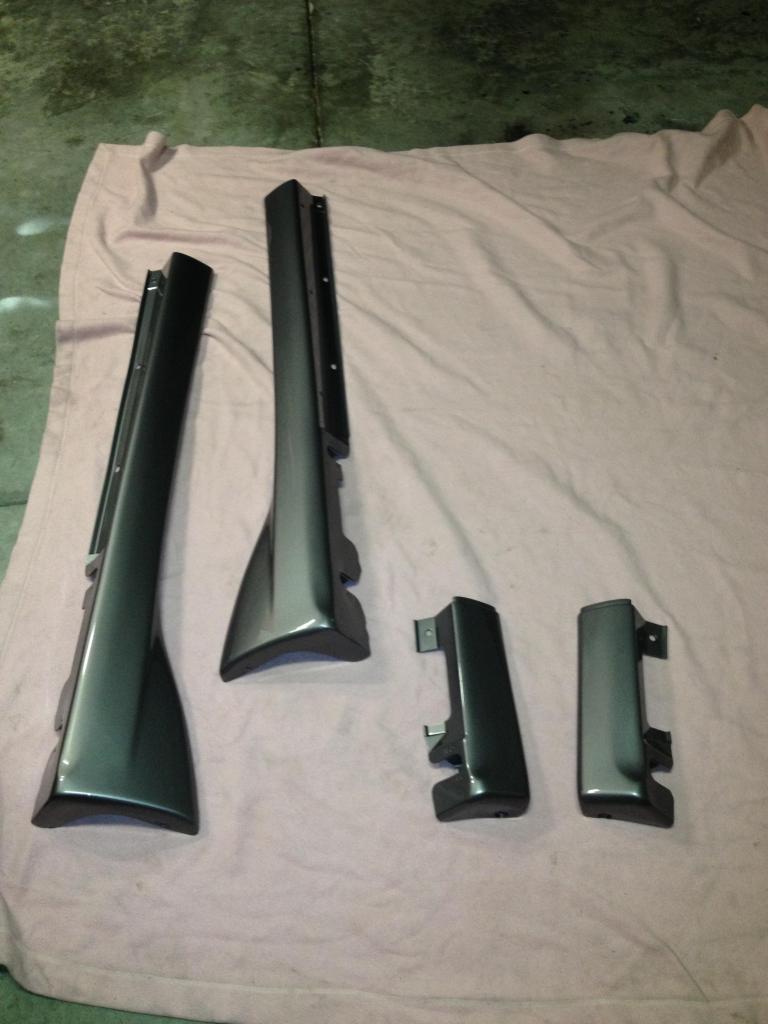
NB small side skirts

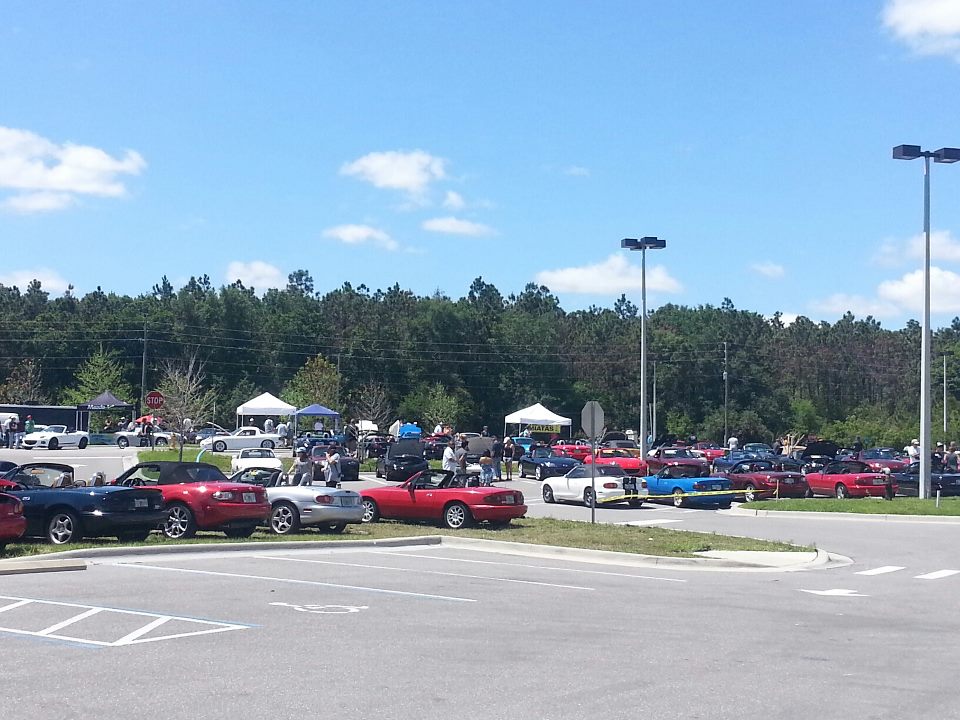
April 2013� deployment ends and I get to working on the MSM so I can go to the Miata meet in Lakeland, FL on April 6th 2013. Both my wife and car were residing in Tampa, FL during deployment so the meet worked out to be perfect timing before we all went back to Gulfport, MS where I�m currently stationed when not deployed.
I wanted to get as much done on the car as I could before the meet. I started with the short shifter kit.
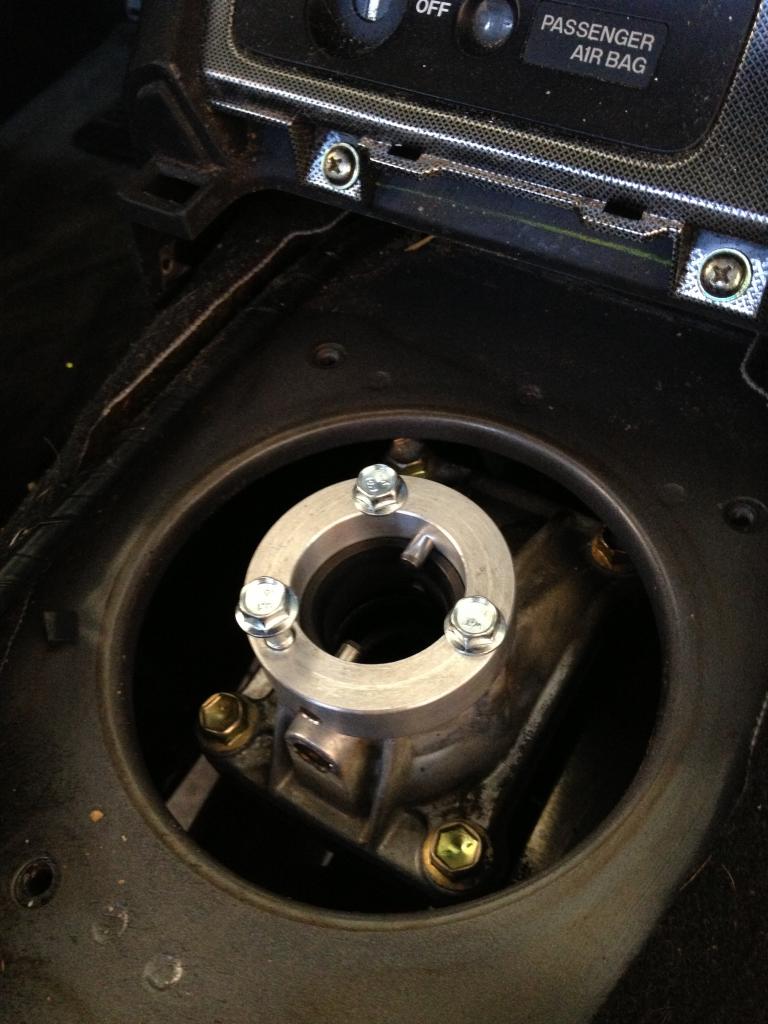
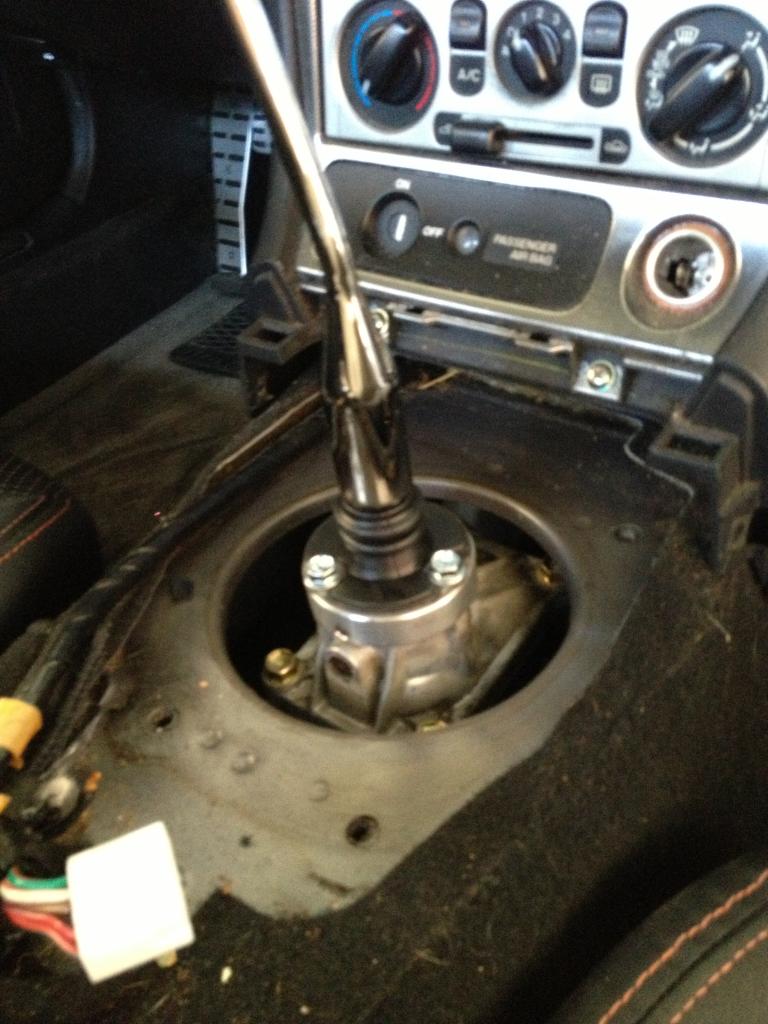
When I went to uninstall the factory shifter I noticed that the 4 bolts on the transmission right below the shifter were all terribly loose allowing the whole assembly to move around as well as allow fliud to leak out of the transmission. The install went smooth and I retorqued the loose bolts and the difference in feel was amazing (how much difference being due to a properly torqued shifter assembly vs. the kit itself I don�t know but I�m happy with it)
The seat belts retracted like crap with the roll bar in and I was hoping these would help out a bit but they really didn�t do that much of anything with the exception of looking better than the factory ones.
I found that the visors were useless and just seemed to get in my way so I installed some of these.
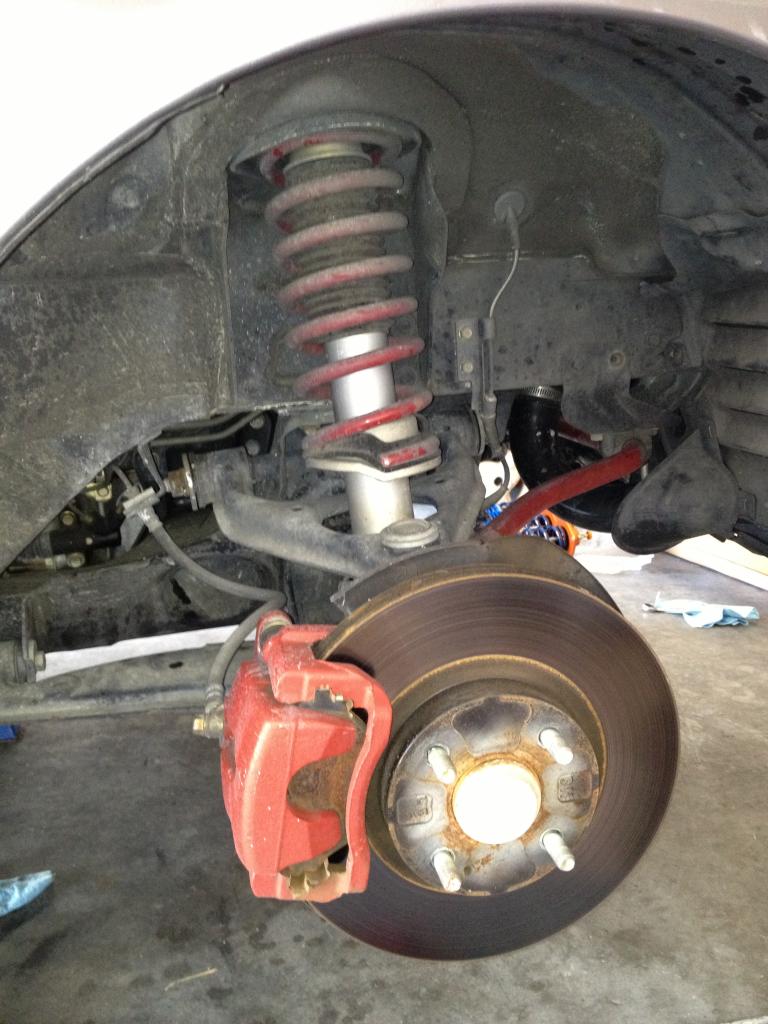
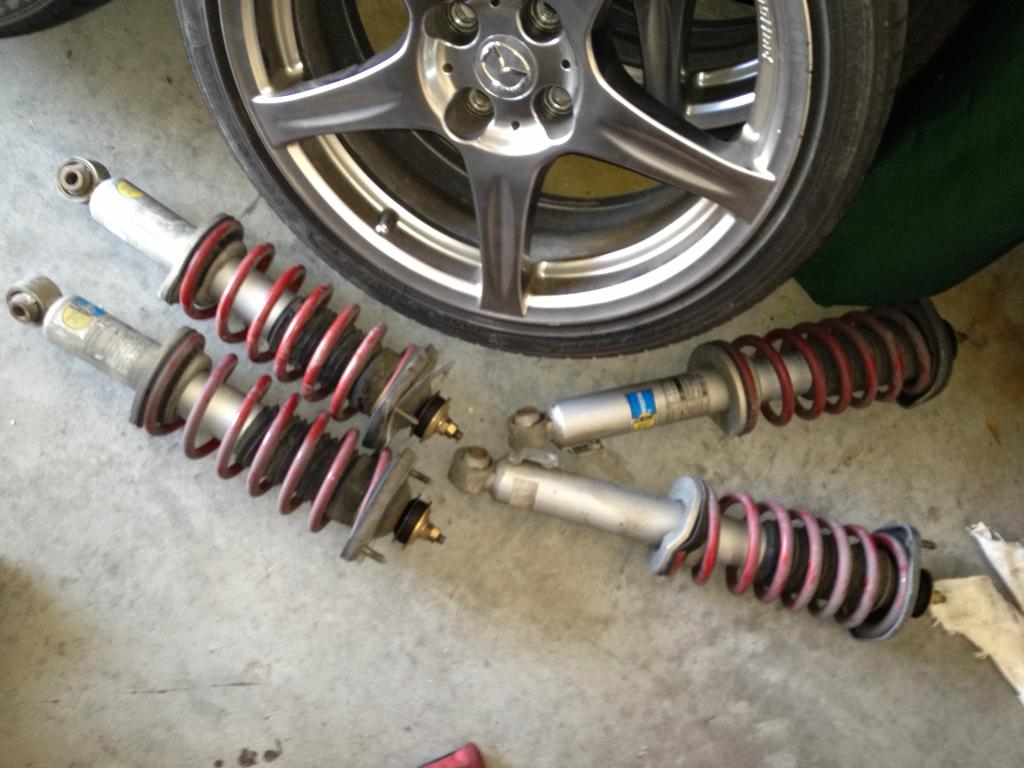
Next was the suspension so I started working on that and knocked it out in a few hours put the 6UL�s on so I could adjust the ride height(ended up with 4.25� pinch welds all around but currently adjusted up to 4.5� all around). I also have the xida�s adjusted 2 clicks from soft.
Unfortunately I had to wait till the following morning to get an alignment done on the car I gave the shop the specs I was looking for from 949racing under the dual purpose alignment and ended up with:
FRONT LEFT
CAMBER -1.8�
CASTER 6.4�
TOE 0.01�
FRONT RIGHT
CAMBER -1.8�
CASTER 6.0�
TOE 0.01�
REAR LEFT
CAMBER -1.8�
TOE 0.04�
REAR RIGHT
CAMBER -1.9�
TOE 0.03�
After the alignment I took my new exhaust bits to a shop in Tampa that does ceramic coating and dropped them off while I was in town.
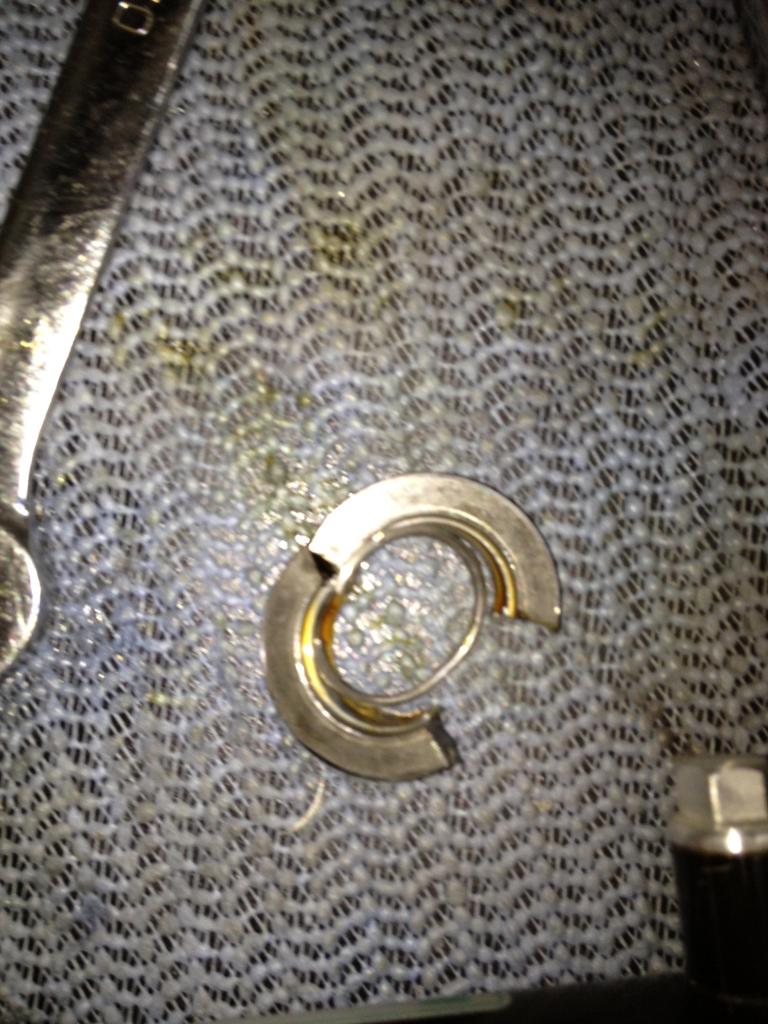
When my friend home from work we started working on deleting the power steering and gutting the rack. I opted to use FM�s method and just cut out the seal and not removed the seals on the shorter piece where I�ve seen others weld the two pieces together. (Worst case scenario I take it back apart remove the seals and it weld up)
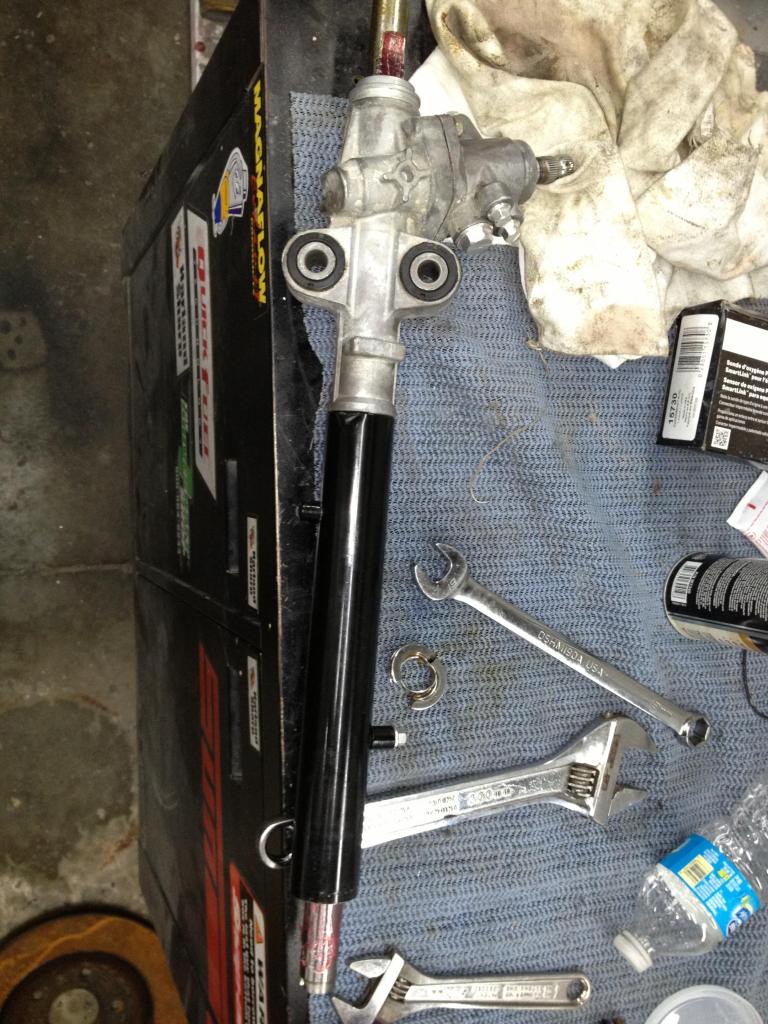
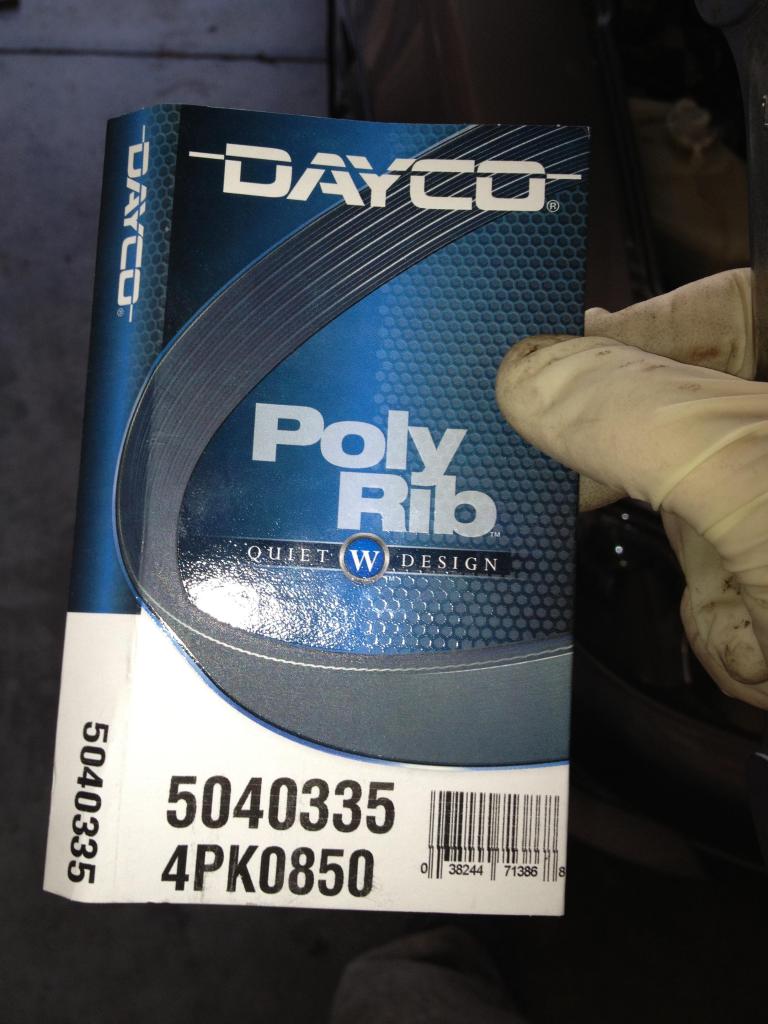
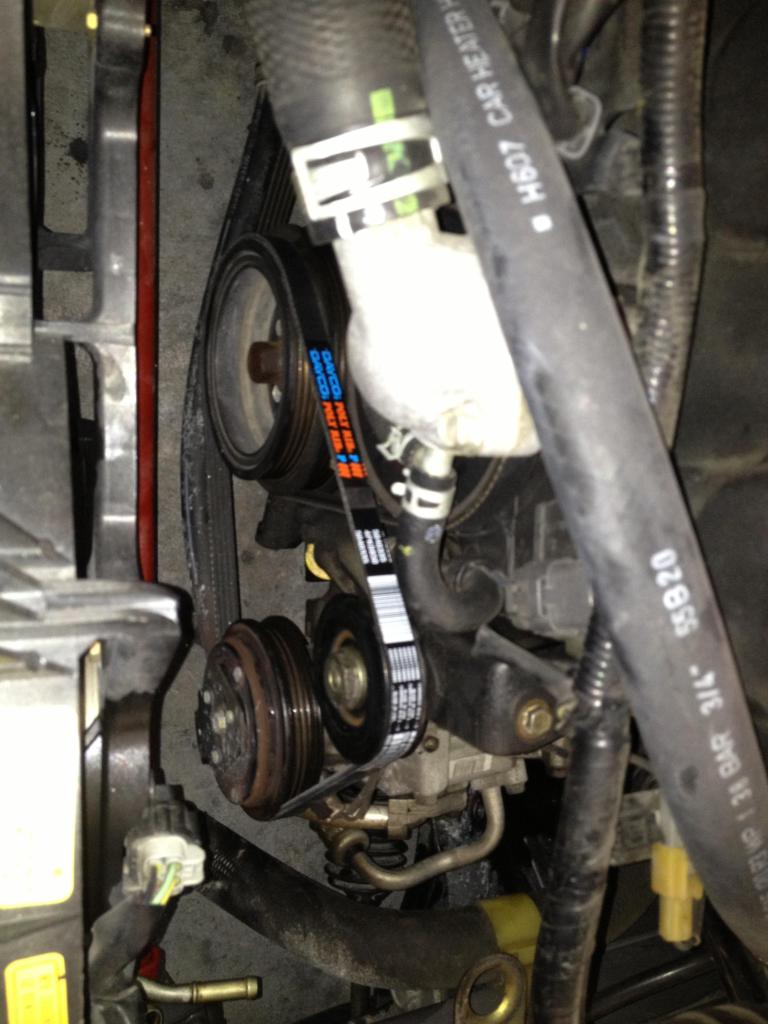
Here is the belt number that worked for me (DAYCO 5040335) in case somebody else is looking to the same delete.
I called all over the area to try and find a shop willing to do my R&P swap but have had no luck. Also since I was only visiting the area on leave I was a little afraid of taking it to a shop and them needing new bearings for it or something and having the car get stuck down in FL.
Well the friend of mine that was helping me work on the Miata did a pretty good job paint matching the side skirts to the car and we installed those the next night.

The Miatapalooza 2013 meet

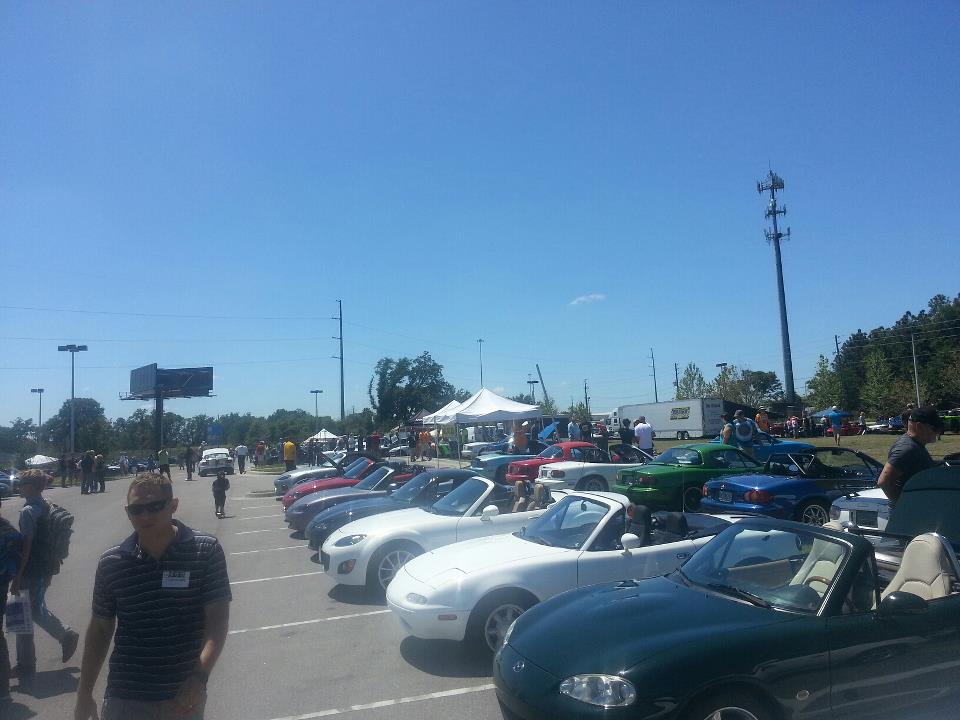
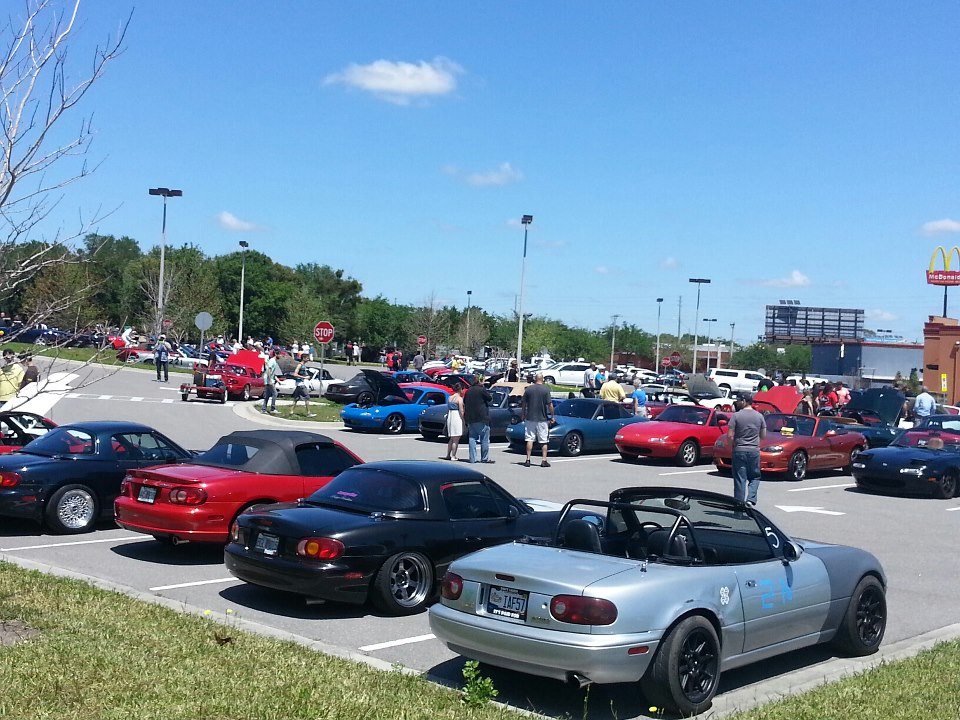
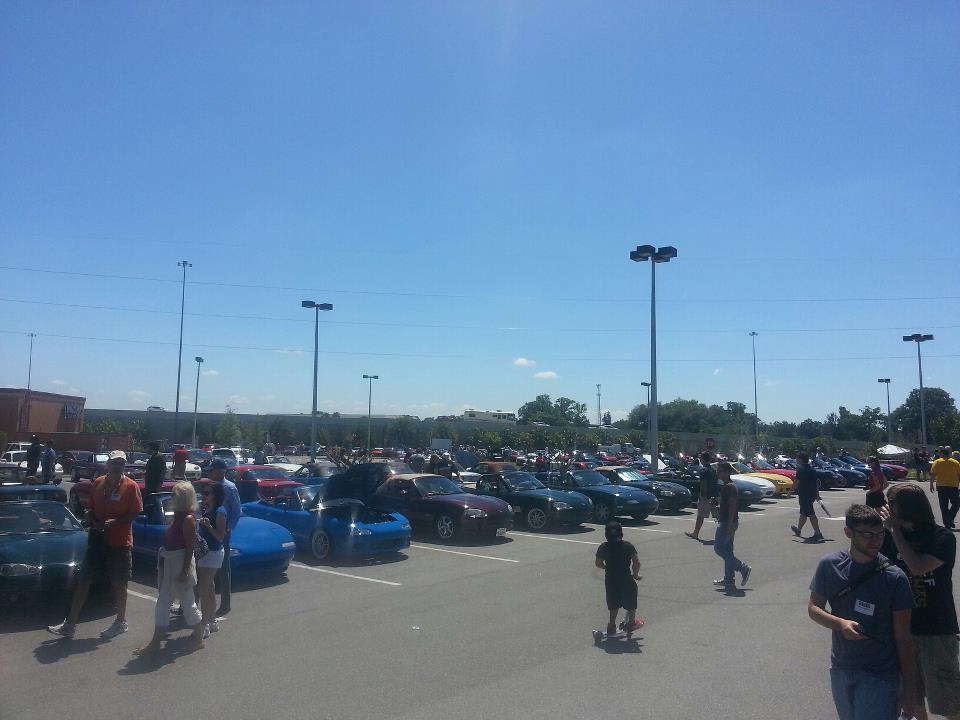
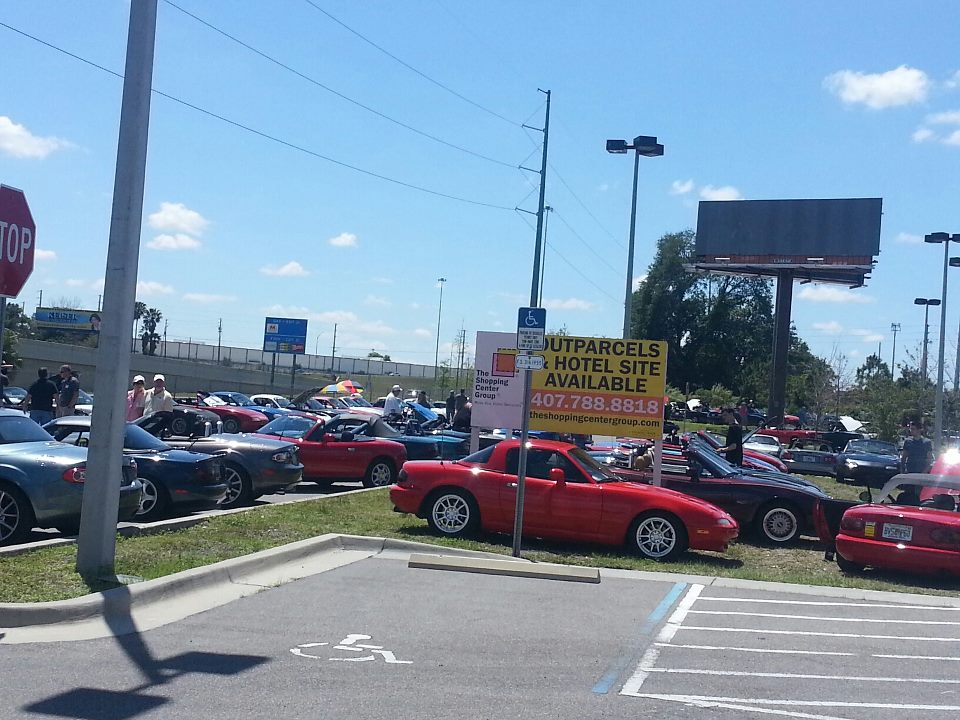
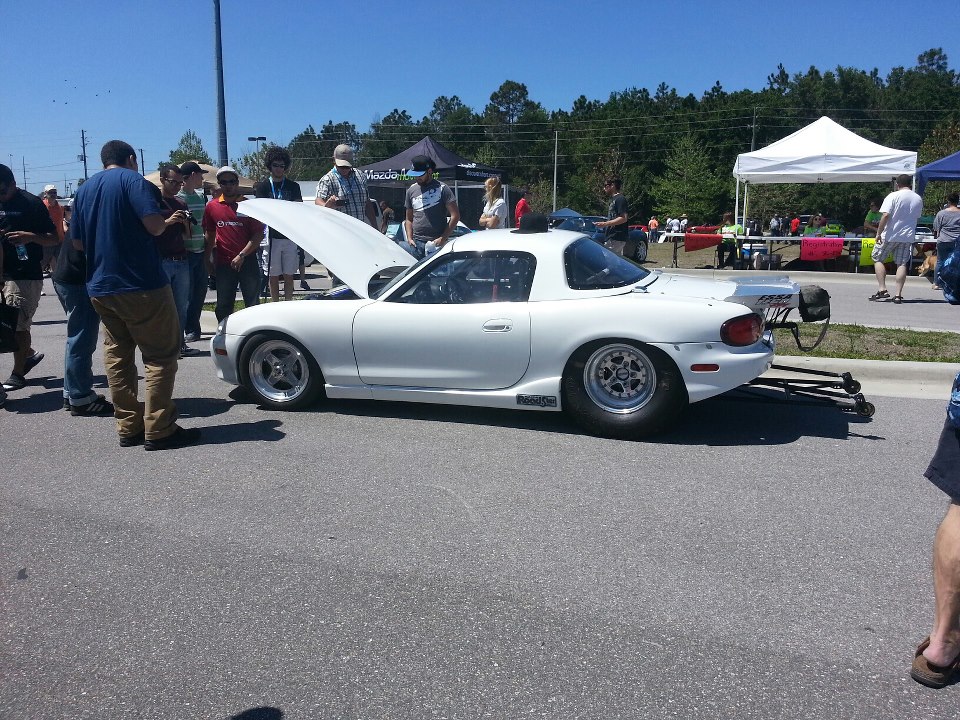
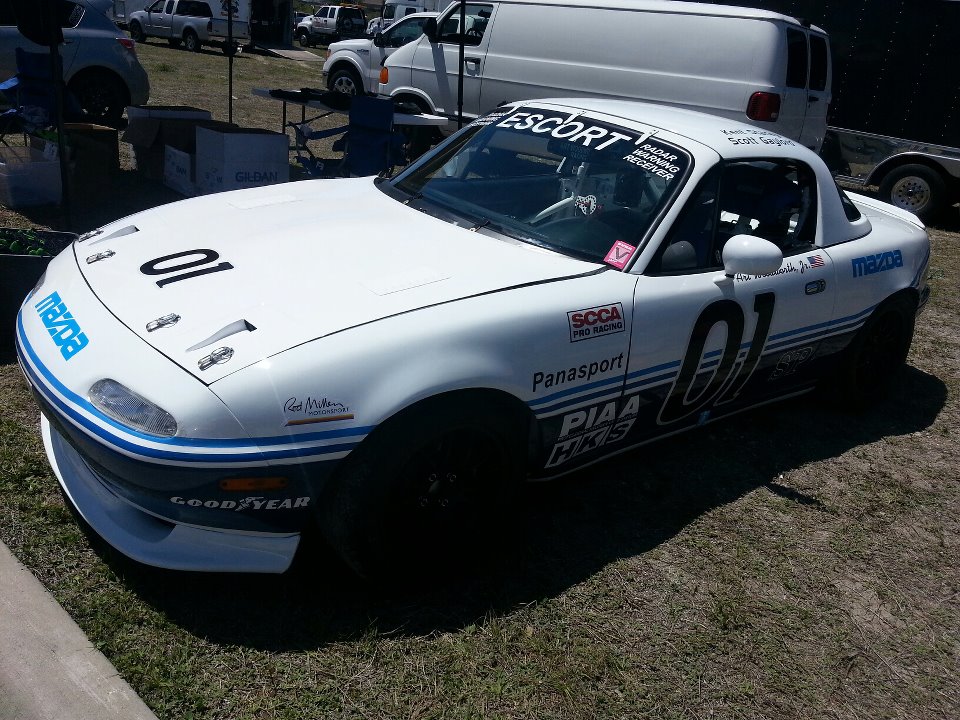
RyanG's 2005 MSM
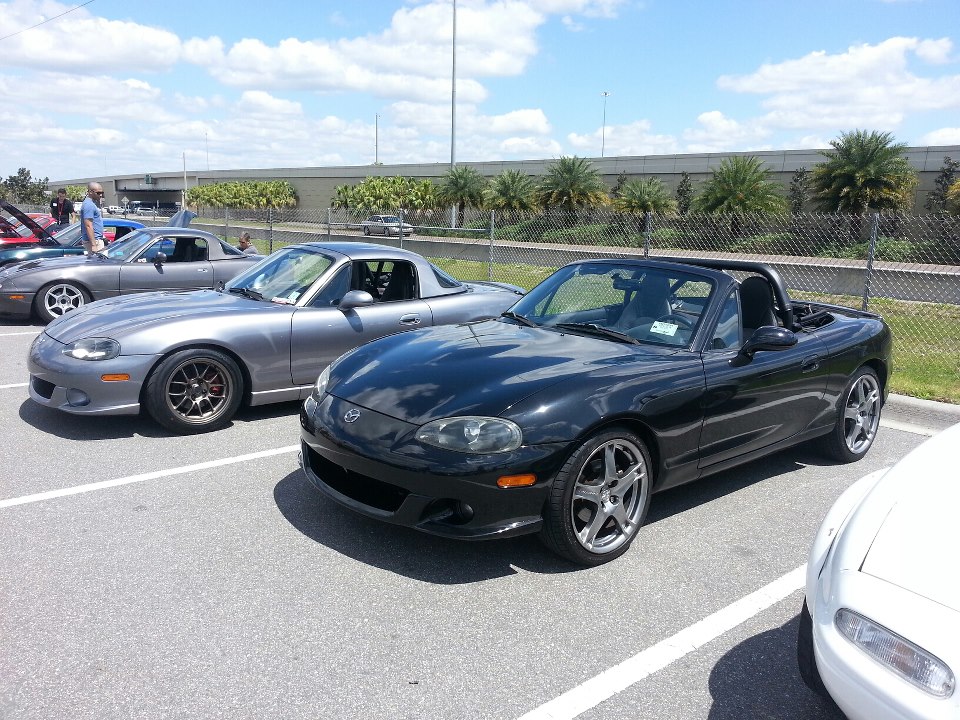
Myself
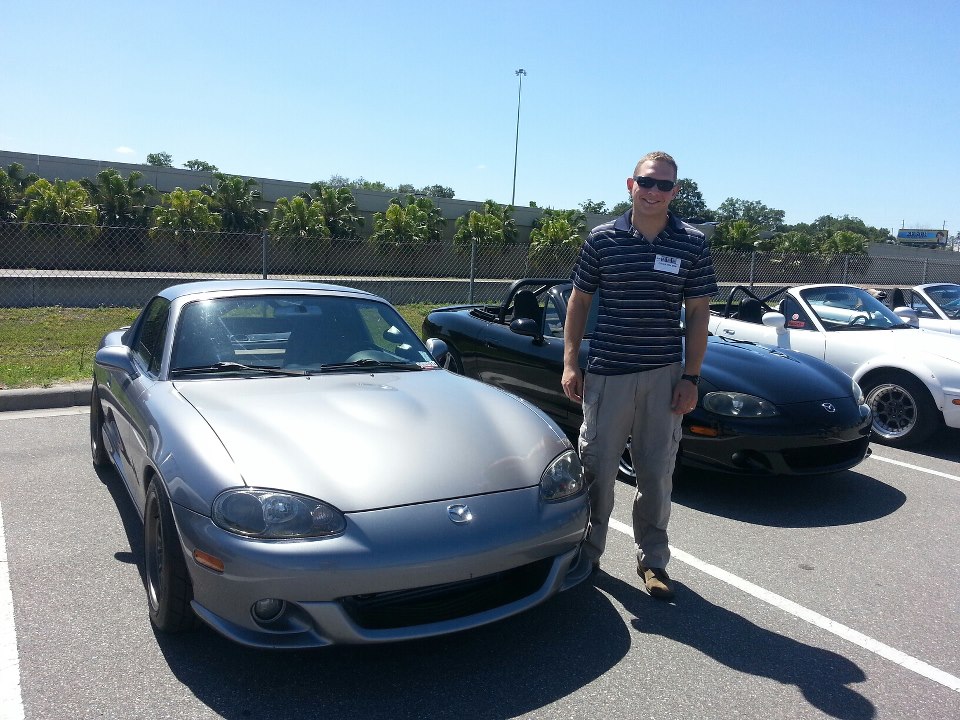
My gorgeous girls(my wife and my car)
I had a good time, had a chance to meet some of the Miataturbo guys in person, see a lot of different style Miata's but enough of the rambling and back to the project.
At the end of the meet there was a raffle and I won a $50.00 gift certificate to Redline Autosports in Kissimmee, FL
Where I was able to pick up another factory A-pllar(regret the pod but not sure what else I want to do)
Gauge hood(in case I move the gauges to here and then don�t like that either)
Black radio trim(I don�t like the MSM�s fake carbon fiber trim piece that doesn�t match anything else in the car)
The Ceramic coating shop called and my parts were done so I went to pick them up and can�t wait to install them once my Megasquirt 2 Enhanced arrives from Reverent.
I look forward to hearing the comments and criticism.
I'll have more once the Megasquirt comes in!
When I bought the car it came with a brand new Robbins Back cloth top, an OEM Hardtop without a rear defroster or headliner as well as a Hard Dog Hard Core Hardtop Roll Bar. But other than that it was stock.
The same day I signed the paperwork for the Miata I had put in and order with Flyin� Miata for the MSM intake kit w/ the O2 Mod. I also purchased the 80mm Catback exhaust from Corksport. Now I knew it was going to be overkill for what was currently done but I was thinking ahead and had always had plans of replacing the factory turbo setup with bigger and better things after my upcoming deployment in August 2012. In the mean time I bought a 2.5� Cat less EBay downpipe with the Elbow that mates to the turbine housing itself. And while I was on EBay I bought a 28�x8�x2.75� Bar and Plate intercooler since I couldn�t justify the price of the Flyin� Miata�s Intercooler upgrade.
I then ordered a A-pillar gauge pod for two gauges from Speedhut for an NB2 but I believe I received a pod for an NB1 I called them and explained the situation to them (this was a year ago and don�t really remember the details of the conversation) I think they said it should have been the correct part but you might need to modify it to make it fit I�m not really sure but I know I was anxious to get my new parts installed so I just used my wife�s Blow dryer as a makeshift heatgun since I didn�t own one and tried my hardest to be patient with the plastic to keep it from bubbling up . I bought an AEM UEGO wideband A/F gauge and an AEM TRU-BOOST EBC/gauge to fit the pod. I turned up the boost to about 9psi and really enjoyed driving the car for the few months I had before leaving.
While I was gone a friend of mine who does auto body repair got a set of Factory HID�s out of I think a Nissan and installed them for me as a little gift I guess.
Needless to say I had one project back home that kept robbing my bank account while I was deployed. I steadily bought parts throughout deployment in hopes of coming home to the parts waiting for me in the garage with the Miata. It�ll be easier to just list out what I purchased so...
Corksport
3.363:1 R&P w/ speedo sensor
Miataroadster.com
Beatrush PPF brace
Power Steering Delete Plug Kit
MSM Short shifter kit-Tall/Angled
Straight shot clutch line in Black(I wanted regular stainless but he sent me a black line, I didn�t really care too much to send it back so it will do)
Phil�s Tire Service
15x9 Bronze Gen 3 6UL�s w/ 225/45zr/15 Hankook RS-3�s
949racing Black valve stems
949racing.com
Xida-S w/ spherical bearing mounts (700/400 w/ helper springs)
New camber bolts
949racing Black lug nuts
Supermiata Harmonic Balancer
BEGi.com
MSM oil drain pan flange tapped for 3/8� NPT
ARTech.com
Ramhorn topmount manifold
3� V-band downpipe
MSlabs.com
MS2 Enhanced
Doapparts
FIC 775cc PnP injectors
Walbro 255fpl Fuel pump
Full-race.com
Borg Warner EFR-6258
Full-race replacement aluminum BOV cover
EFR boost solenoid connector
gomiata.com
visor blanking plates
bossfrog seatbelt adapters
Miata Forums
Rennenmetal.com front and rear tow hook�s in Black
Power steering delete bracket w/ pulley
Derin differential mounts (only received the upper mounts and not the lower two so I later bought a set of Energy Suspension differential mounts for the bottoms)
2� intercooler piping kit( to reroute my hot side piping when I install the EFR)
Oil filter relocation/cooler kit (-8AN lines and fittings)
EBay
NB small side skirts
April 2013� deployment ends and I get to working on the MSM so I can go to the Miata meet in Lakeland, FL on April 6th 2013. Both my wife and car were residing in Tampa, FL during deployment so the meet worked out to be perfect timing before we all went back to Gulfport, MS where I�m currently stationed when not deployed.
I wanted to get as much done on the car as I could before the meet. I started with the short shifter kit.
When I went to uninstall the factory shifter I noticed that the 4 bolts on the transmission right below the shifter were all terribly loose allowing the whole assembly to move around as well as allow fliud to leak out of the transmission. The install went smooth and I retorqued the loose bolts and the difference in feel was amazing (how much difference being due to a properly torqued shifter assembly vs. the kit itself I don�t know but I�m happy with it)
The seat belts retracted like crap with the roll bar in and I was hoping these would help out a bit but they really didn�t do that much of anything with the exception of looking better than the factory ones.
I found that the visors were useless and just seemed to get in my way so I installed some of these.
Next was the suspension so I started working on that and knocked it out in a few hours put the 6UL�s on so I could adjust the ride height(ended up with 4.25� pinch welds all around but currently adjusted up to 4.5� all around). I also have the xida�s adjusted 2 clicks from soft.
Unfortunately I had to wait till the following morning to get an alignment done on the car I gave the shop the specs I was looking for from 949racing under the dual purpose alignment and ended up with:
FRONT LEFT
CAMBER -1.8�
CASTER 6.4�
TOE 0.01�
FRONT RIGHT
CAMBER -1.8�
CASTER 6.0�
TOE 0.01�
REAR LEFT
CAMBER -1.8�
TOE 0.04�
REAR RIGHT
CAMBER -1.9�
TOE 0.03�
After the alignment I took my new exhaust bits to a shop in Tampa that does ceramic coating and dropped them off while I was in town.
When my friend home from work we started working on deleting the power steering and gutting the rack. I opted to use FM�s method and just cut out the seal and not removed the seals on the shorter piece where I�ve seen others weld the two pieces together. (Worst case scenario I take it back apart remove the seals and it weld up)
Here is the belt number that worked for me (DAYCO 5040335) in case somebody else is looking to the same delete.
I called all over the area to try and find a shop willing to do my R&P swap but have had no luck. Also since I was only visiting the area on leave I was a little afraid of taking it to a shop and them needing new bearings for it or something and having the car get stuck down in FL.
Well the friend of mine that was helping me work on the Miata did a pretty good job paint matching the side skirts to the car and we installed those the next night.
The Miatapalooza 2013 meet
RyanG's 2005 MSM
Myself
My gorgeous girls(my wife and my car)
I had a good time, had a chance to meet some of the Miataturbo guys in person, see a lot of different style Miata's but enough of the rambling and back to the project.
At the end of the meet there was a raffle and I won a $50.00 gift certificate to Redline Autosports in Kissimmee, FL
Where I was able to pick up another factory A-pllar(regret the pod but not sure what else I want to do)
Gauge hood(in case I move the gauges to here and then don�t like that either)
Black radio trim(I don�t like the MSM�s fake carbon fiber trim piece that doesn�t match anything else in the car)
The Ceramic coating shop called and my parts were done so I went to pick them up and can�t wait to install them once my Megasquirt 2 Enhanced arrives from Reverent.
I look forward to hearing the comments and criticism.
I'll have more once the Megasquirt comes in!

Reply
 6
6

6

 04-26-2013, 05:08 PM
#5
Senior Member
Thread Starter
iTrader: (4)
Join Date: May 2012
Location: Vallejo, CA
Posts: 541
Total Cats: 48
My plan is to tune the car with the waste gate pressure and leave it there untill I can find someone locally or semi-locally to take my engine to to build it. I have seen posts about this turbo blowing motors at 10psi so hopefully the standard waste gate is set to lower than that and the motor will hold up for the mean time.
Thank you
Thanks Ryan, it took me forever to make the first post. As soon as I can get the motor built I will.
Thanks Ryan, it took me forever to make the first post. As soon as I can get the motor built I will.
Last edited by FrankB; 04-26-2013 at 05:14 PM. Reason: Multi quotes from phone
Reply
0
0
04-26-2013, 05:12 PM
#6
Standard wastegate is like 12psi, depending on preload. You need to separetly buy a low-boost wastegate.
See page 29 and 30 -
http://www.full-race.com/articles/efrturbotechbrief.pdf
See page 29 and 30 -
http://www.full-race.com/articles/efrturbotechbrief.pdf
Reply
0
0
04-26-2013, 05:21 PM
#7
Senior Member
Thread Starter
iTrader: (4)
Join Date: May 2012
Location: Vallejo, CA
Posts: 541
Total Cats: 48
Standard wastegate is like 12psi, depending on preload. You need to separetly buy a low-boost wastegate.
See page 29 and 30 -
http://www.full-race.com/articles/efrturbotechbrief.pdf
See page 29 and 30 -
http://www.full-race.com/articles/efrturbotechbrief.pdf
Reply
0
0
04-26-2013, 08:33 PM
#9
Moderator

iTrader: (12)
Join Date: Nov 2008
Location: Tampa, Florida
Posts: 20,652
Total Cats: 3,011
Ryan brought Frank by and we went together to Miatapalooza. I've known Ryan for awhile but it was my first time meeting Frank. He seems like a helluva nice guy. I know he didn't divulge what he does for a living, but let me say he has his act together. I guess that is obvious from the quality of his build.
Good job on the car. I am looking forward to seeing how it does with a built motor.
Good luck, sir.
Good job on the car. I am looking forward to seeing how it does with a built motor.
Good luck, sir.
Reply
0
0

 04-27-2013, 04:15 AM
#13
Senior Member
Thread Starter
iTrader: (4)
Join Date: May 2012
Location: Vallejo, CA
Posts: 541
Total Cats: 48
Ryan brought Frank by and we went together to Miatapalooza. I've known Ryan for awhile but it was my first time meeting Frank. He seems like a helluva nice guy. I know he didn't divulge what he does for a living, but let me say he has his act together. I guess that is obvious from the quality of his build.
Good job on the car. I am looking forward to seeing how it does with a built motor.
Good luck, sir.
Good job on the car. I am looking forward to seeing how it does with a built motor.
Good luck, sir.
Thank you, I think I did pretty well too!
Last edited by FrankB; 04-27-2013 at 04:58 AM. Reason: Multi quotes from phone
Reply
0
0
 05-07-2013, 07:46 PM
#15
Senior Member
Thread Starter
iTrader: (4)
Join Date: May 2012
Location: Vallejo, CA
Posts: 541
Total Cats: 48
A little update on the car, I talked to Reverent and I am told that my MegaSquirt has been shipped so I'm one step closer with that
I also called Full-Race last week and ordered the low boost wastegate for the EFR along with a T25 inlet gasket but I'm not sure wheather to use the gasket... Seems like everyone runs without them.

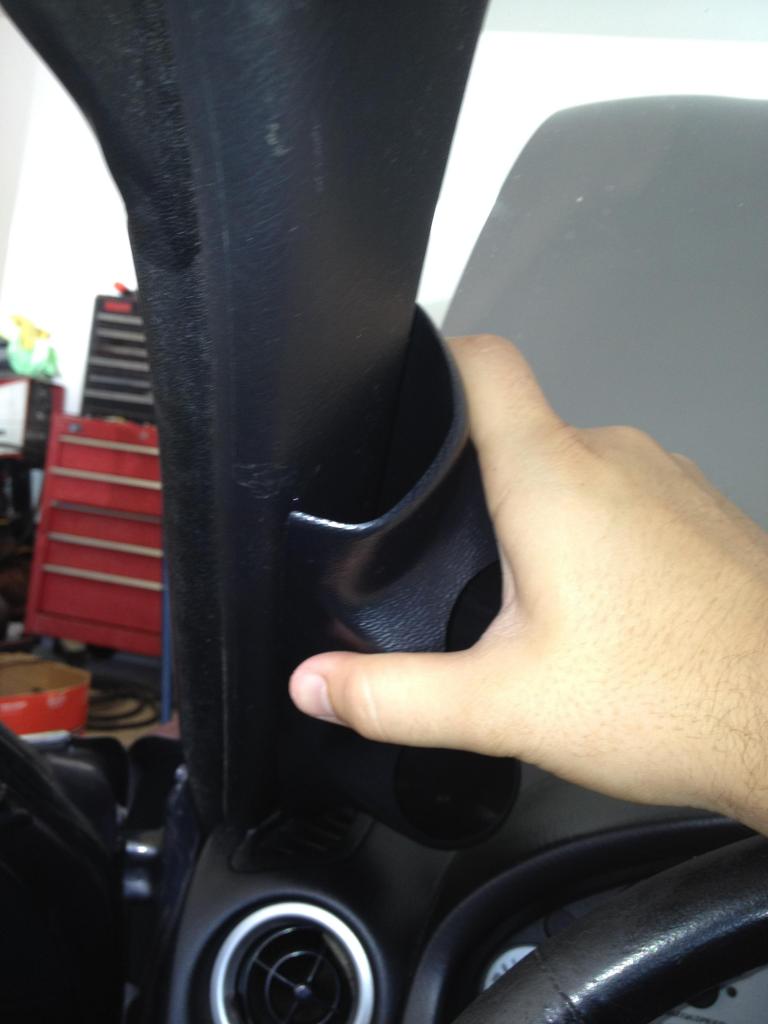
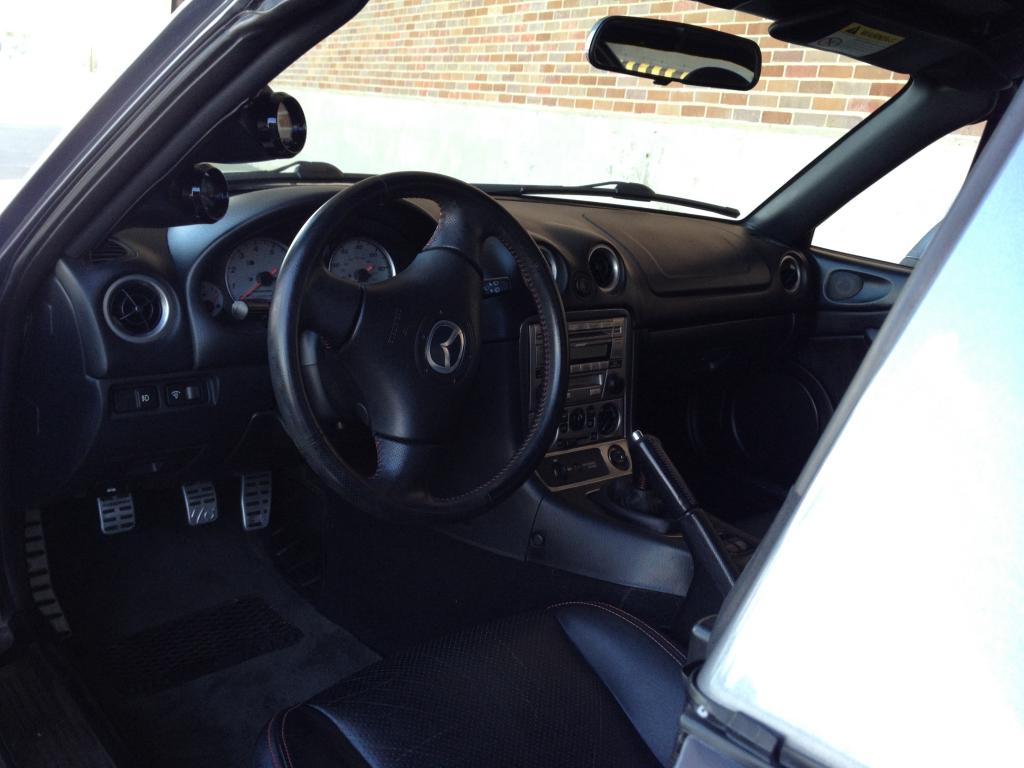
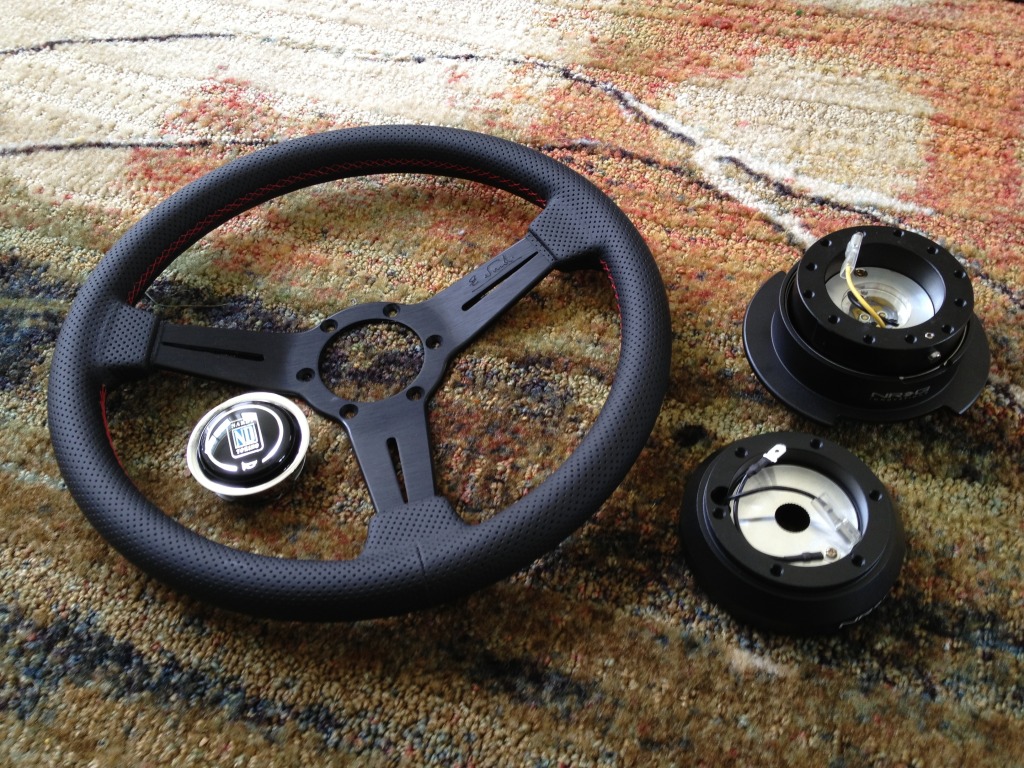
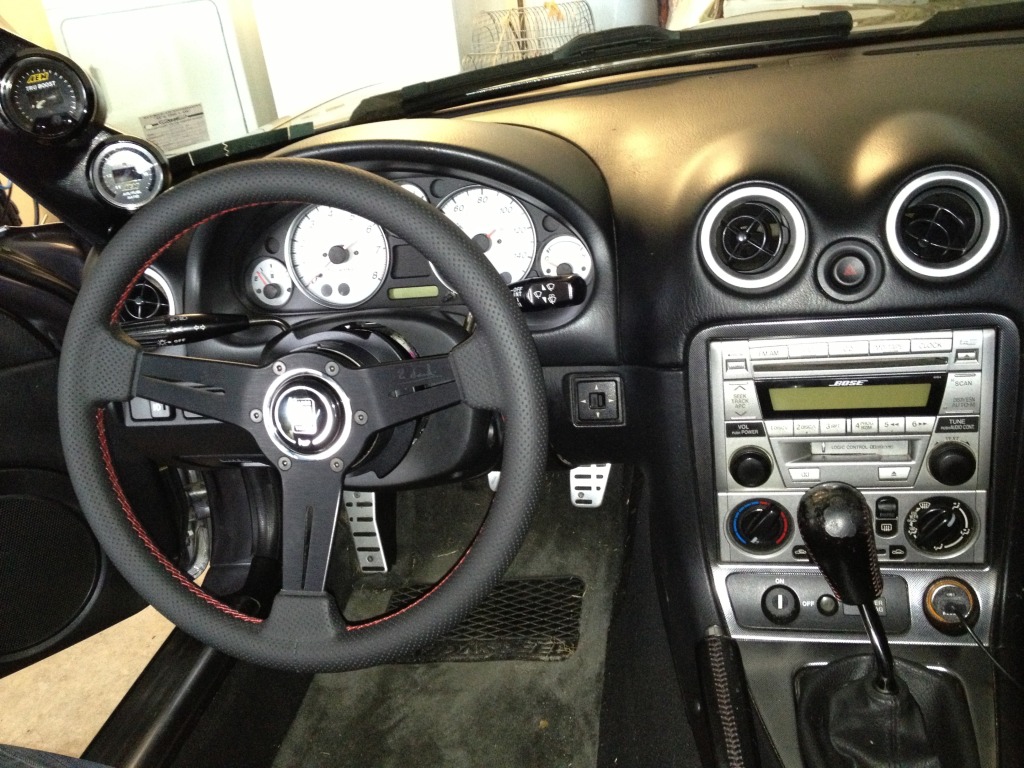
I installed my new steering wheel last week too. However I wasn't able to get the hub to work with the clock spring installed.. :( Unfortunately I wasn't able to find this out until after I had destroyed it. And by that I mean cutting the connectors for the air bag and horn and then bending down the end for the horn. So other then not having a horn at the moment. I like the feel of the 330mm much better then the factory wheel and even with deleted power steering I really don't feel a difference in steering effort between the two. The quick release also makes for an easy swap to the Sparco 383 I plan on getting when it's ready for the track. I do however have quite a few things needing to be done in pretty much every part of the car before that will happen though.
I also called Full-Race last week and ordered the low boost wastegate for the EFR along with a T25 inlet gasket but I'm not sure wheather to use the gasket... Seems like everyone runs without them.
I installed my new steering wheel last week too. However I wasn't able to get the hub to work with the clock spring installed.. :( Unfortunately I wasn't able to find this out until after I had destroyed it. And by that I mean cutting the connectors for the air bag and horn and then bending down the end for the horn. So other then not having a horn at the moment. I like the feel of the 330mm much better then the factory wheel and even with deleted power steering I really don't feel a difference in steering effort between the two. The quick release also makes for an easy swap to the Sparco 383 I plan on getting when it's ready for the track. I do however have quite a few things needing to be done in pretty much every part of the car before that will happen though.
Last edited by FrankB; 05-07-2013 at 08:00 PM.
Reply
0
0

 05-07-2013, 11:48 PM
#18
Elite Member
iTrader: (16)

Join Date: Oct 2006
Location: Las Cruces, NM
Posts: 1,647
Total Cats: 524
Looking good, Frank! Love that steering wheel.
I ended up getting the Forge actuator from Full Race so I can swap springs and not have to worry about cooked actuator diaphragms.
I ended up getting the Forge actuator from Full Race so I can swap springs and not have to worry about cooked actuator diaphragms.
Reply
0
0


