Turbo Smurfette - Build in progress (slow)
 11-09-2015, 04:24 PM
#301
Elite Member
Thread Starter
iTrader: (4)

Join Date: Mar 2012
Location: Northern VA
Posts: 4,648
Total Cats: 544
No more fan cycling since the 180�F thermostat install. The housing is a pain in the *** and I had to buy two PVC wrenches from home depot and the threads leaked. I broke it apart and just Teflon taped the threads without leaving any overhanging into the housing. I'm tired if this janky *** housing. Hopefully I won't have to split it again anytime soon.
It's already dark and cold today, but I want to wire up the LS coils soon. Then ship the car off for tuning.
It's already dark and cold today, but I want to wire up the LS coils soon. Then ship the car off for tuning.

Reply
 0
0

0
11-11-2015, 06:19 PM
#302
Elite Member
Thread Starter
iTrader: (4)
Join Date: Mar 2012
Location: Northern VA
Posts: 4,648
Total Cats: 544

LS2 coil install

LS2 coil install
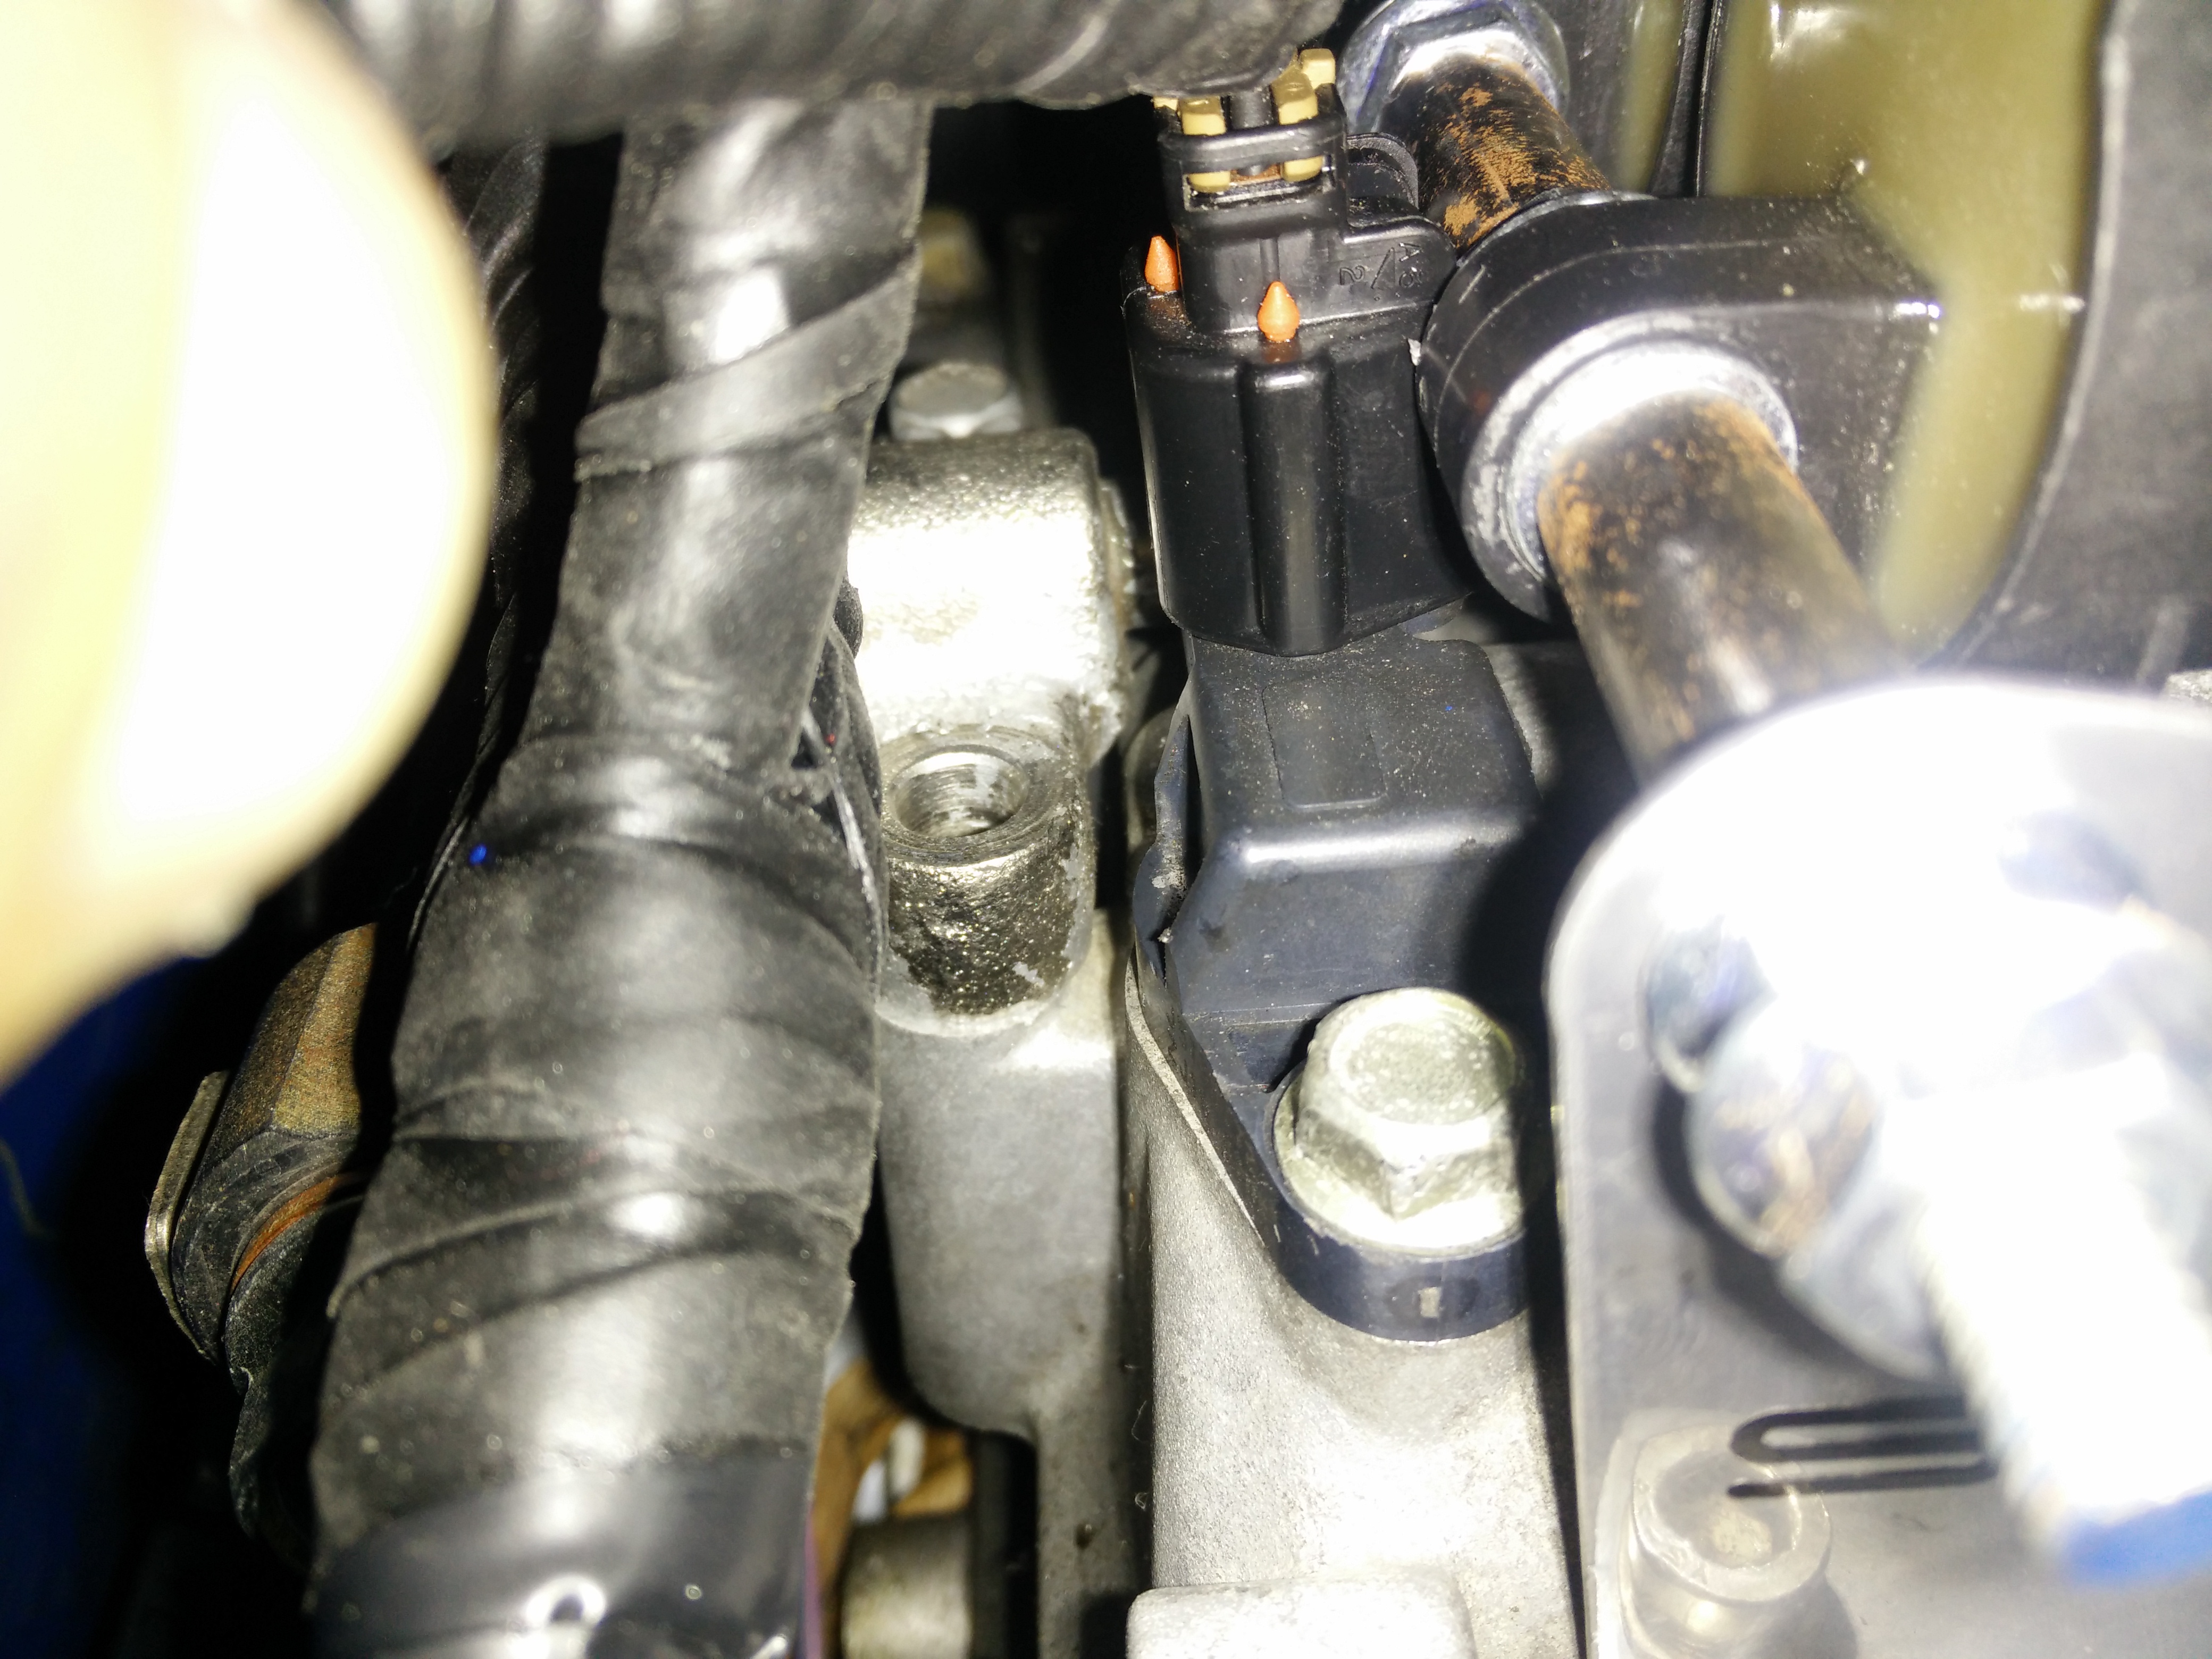
LS2/7 Coil installed today using the Singul�r brackets. THERE IS ONE ISSUE i'm worried about. These brackets position the coils and spacers such that it's pressing against the cam angle sensor connector on the VVT valve cover. I have a spare on hand but I don't know if there's enough space to slot the holes. Hopefully it doesn't break. I had an oops moment with the wiring and it was an interesting time troubleshooting with the output test mode. So firing order was all off initially.
The FM wires may need to be shortened, but they aren't too bad right now
Reply
0
0
 11-11-2015, 06:52 PM
#305
Supporting Vendor


iTrader: (1)
Join Date: Sep 2010
Location: Lake Forest, CA
Posts: 7,949
Total Cats: 1,003
We had the same problem when installing mine.
We pulled off that spacer where it contacts, then took a grinder to the spacer to create clearance.
Edit: also, it's hard to tell from that photo but I'd suggest using locking nuts on the brackets. Mine came loose once after very little driving. Replaced with nylock and have lasted through about 2500 street miles and 3 track days without issue.
Reply
0
0
11-11-2015, 07:38 PM
#306
Elite Member
Thread Starter
iTrader: (4)
Join Date: Mar 2012
Location: Northern VA
Posts: 4,648
Total Cats: 544
Thanks for the input. I suppose I'll be pulling this apart sooner than later.
I have two serrated flanged nuts in a jam nut configuration for now. I'll run out and get some lock nuts tomorrow. I was thinking about trying to drill a hole into the rod for a cotter pin, but probably more trouble than its worth.
Idle is smooth, and these things are loud! But I hope they don't flap out at higher boost like the Fab9's.
Finally, done with all cooling and engine mods to dyno it. I don't think the rings are happy though, I'm scared to do a compression/leakdown test because I don't want to build another motor. It get's kinda puffy early mornings.
TO DO:
I got NB knuckles all around, they just need new bearings and hubs. Control arms came in today with poly bushings. My ball joint's are TOAST. Have Cordycords powdercoated rear subframe on standby. Gotta find a diff/housing to pop the 3.63 ring/pinion into for less downtime.
I'd like to take care of the rear in one go. But fronts take priority.
Reply
0
0
11-12-2015, 02:17 AM
#307
Junior Member

Join Date: Sep 2012
Location: New Zealand Christchurch
Posts: 208
Total Cats: -3
Car looks good  . At what power level did you start having issues with the fab coils? Curious as I am thinking of getting some. Hope your dyno time goes well and you can enjoy the car
. At what power level did you start having issues with the fab coils? Curious as I am thinking of getting some. Hope your dyno time goes well and you can enjoy the car
Reply
0
0
11-12-2015, 07:40 AM
#308
Elite Member
Thread Starter
iTrader: (4)
Join Date: Mar 2012
Location: Northern VA
Posts: 4,648
Total Cats: 544
well, I'm not certain because it's been an uphill battle troubleshooting and getting things to work slowly with this car. Earlier there was no VVT table populated, but it made 301whp @16psi. As soon as I tinkered with VVT, and played with retuning, the FAB9's would flake out at higher RPM under load. I couldn't tell you exactly as eyes where probably deadlocked onto the road. I think it's when the AFR dipped under 12 with full boost (~18-20psi) it would just misfire through that band. I don't want to make it ultra lean up top, I'll leave these adjustments to the tuner.
Reply
0
0
11-12-2015, 03:06 PM
#309
Elite Member
Thread Starter
iTrader: (4)
Join Date: Mar 2012
Location: Northern VA
Posts: 4,648
Total Cats: 544
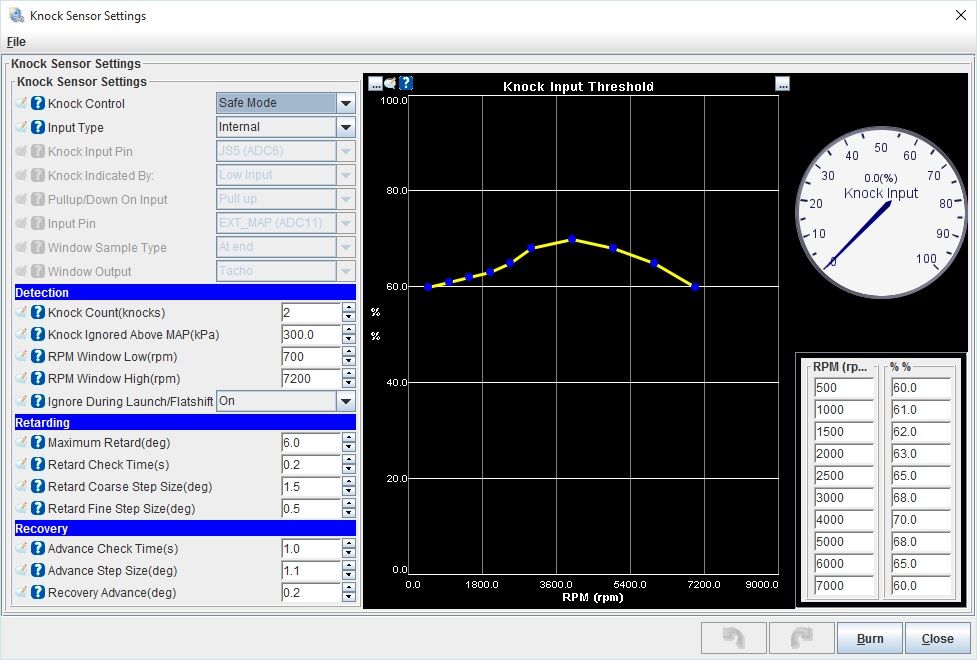
How does one check to see if the Knock sensor is working properly?
I'm about to take my car to a tuner on Saturday, and want to make sure everything is set.
I'm about to take my car to a tuner on Saturday, and want to make sure everything is set.
Reply
0
0
 11-12-2015, 07:27 PM
#316
My opinion is you need to figure out when it's knocking, and then what your knock sensor shows when it's knocking. I did this a couple different ways. One, was just add timing at 2K under load until it knocked. I could hear it, it was bad... knock sensor hit 100% by the time I could hear it. And no knock was under 20% for reference at this same RPM/load.
Second was to read the plugs and determine if it's detonating. I kept getting faint spikes in my log on a couple different cylinders at certain RPMs (6,800 mainly). Figured it was fake knock. Nope, it was real. Checking the porcelien on the plug with a 10x magnification and good lighting showed tiny black specs and aluminum on the plugs. I pulled timing and made per-cylinder adjustments since I had 2 cylinders in particular that were consistenly worse than the others.
Now I can read the plugs and see they're clean, and coorelate no-knock to what the knock sensor says, then adjust the band up about 10-15%. That way if it says knock, it is in fact knock.
Copying other peoples numbers isn't going to get it dialed in unfortunately at least for the threshold.
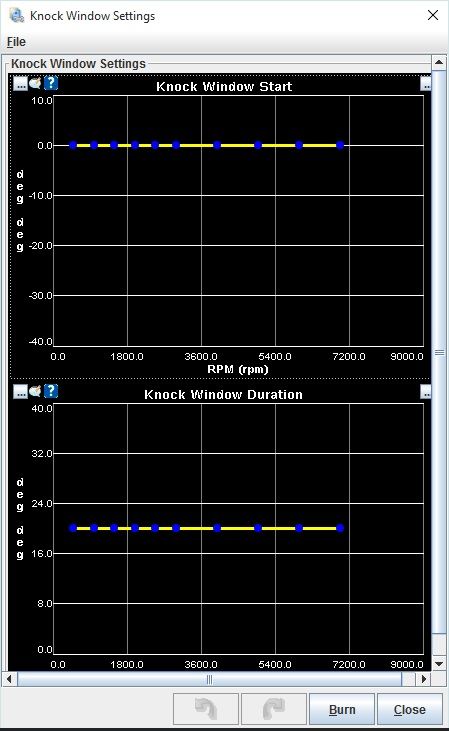
I run my windowing as you posted though, 20* window starting at TDC.
Second was to read the plugs and determine if it's detonating. I kept getting faint spikes in my log on a couple different cylinders at certain RPMs (6,800 mainly). Figured it was fake knock. Nope, it was real. Checking the porcelien on the plug with a 10x magnification and good lighting showed tiny black specs and aluminum on the plugs. I pulled timing and made per-cylinder adjustments since I had 2 cylinders in particular that were consistenly worse than the others.
Now I can read the plugs and see they're clean, and coorelate no-knock to what the knock sensor says, then adjust the band up about 10-15%. That way if it says knock, it is in fact knock.
Copying other peoples numbers isn't going to get it dialed in unfortunately at least for the threshold.
I run my windowing as you posted though, 20* window starting at TDC.
Reply
0
0
11-13-2015, 05:57 PM
#317
Elite Member
Thread Starter
iTrader: (4)
Join Date: Mar 2012
Location: Northern VA
Posts: 4,648
Total Cats: 544
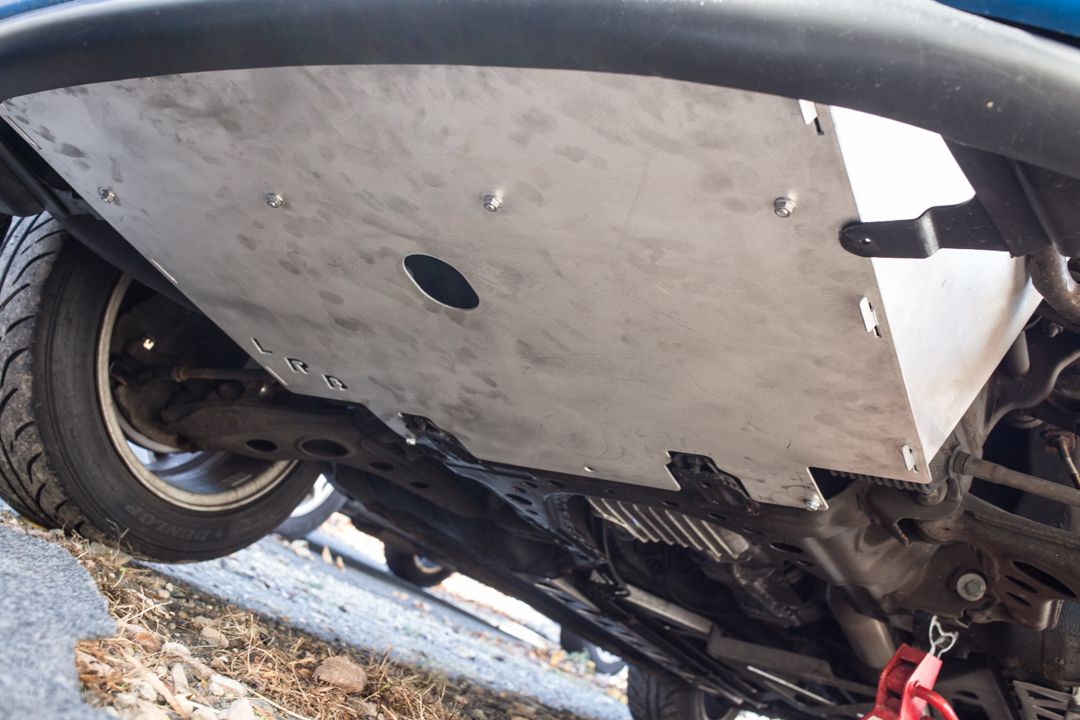
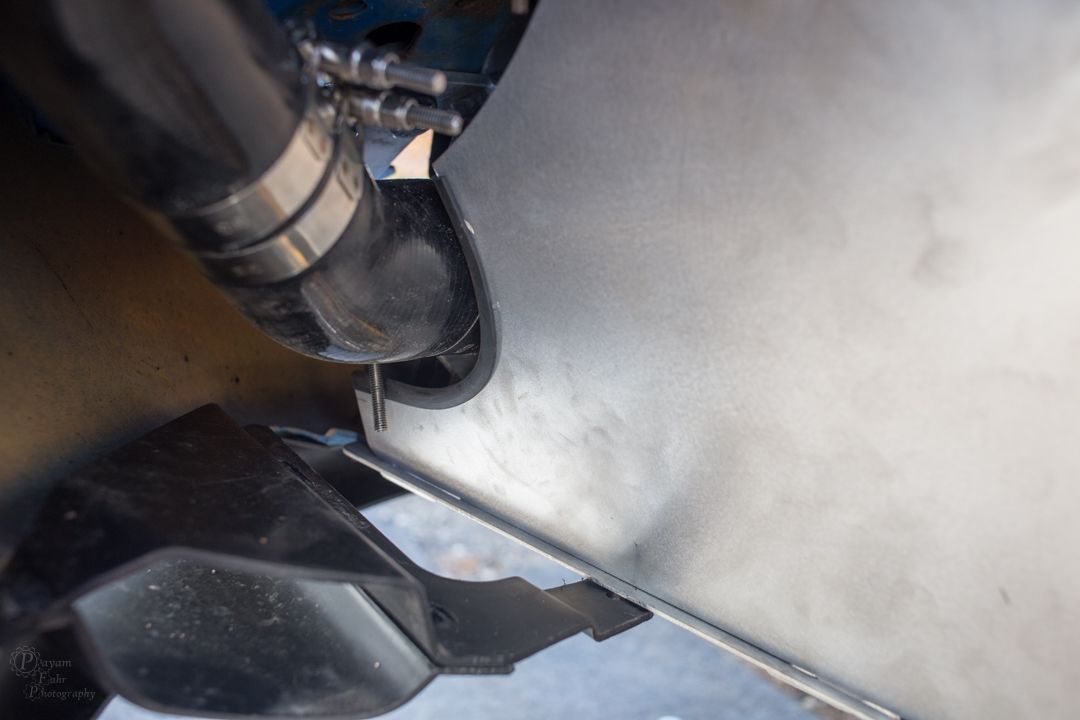
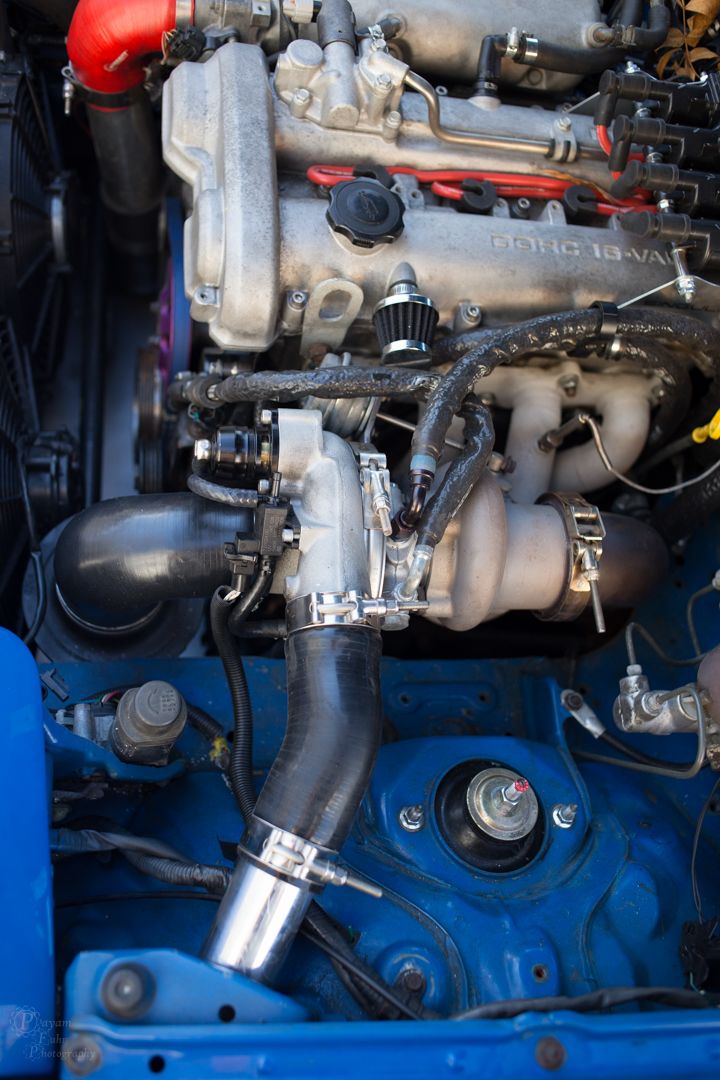
Routed the piping through the fender area, this clears up space near where the A/C compressor will be remounted. For now, I just let the air filter sit downward versus in front of the radiator. Hopefully this helps facilitate some better airflow through the hood vents. I also got the fancy aluminum undertray. Trimmed a bit for my intercooler. Passengerside is a lot more complicated because of the piping is jacked. Hopefully I'll get that side on soon.


Reply
0
0
11-13-2015, 05:58 PM
#318
Elite Member
Thread Starter
iTrader: (4)
Join Date: Mar 2012
Location: Northern VA
Posts: 4,648
Total Cats: 544
Routed the piping through the fender area, this clears up space near where the A/C compressor will be remounted. For now, I just let the air filter sit downward versus in front of the radiator. Hopefully this helps facilitate some better airflow through the hood vents. I also got the fancy aluminum undertray. Trimmed a bit for my intercooler. Passengerside is a lot more complicated because of the piping is jacked. Hopefully I'll get that side on soon.

Reply
0
0
11-13-2015, 06:00 PM
#319
SADFab Destructive Testing Engineer

iTrader: (5)
Join Date: Apr 2014
Location: Beaverton, USA
Posts: 18,642
Total Cats: 1,866
Reply
0
0


