TZ's build-a documentary of adequacy and hopes for more
 02-22-2013, 02:28 AM
#21
Elite Member
Thread Starter
iTrader: (6)

Join Date: May 2011
Location: Albuquerque, NM
Posts: 1,656
Total Cats: 64
I'm leaving in original position to keep the heater stuff and the fitting you're talking about removing is what I had removed/tapped. Just going to do a 180 with the line to the turbo. Simple-ish. Wanted to seal it and make it cleaner route, but wanted to make it easy and reversible if need me.
Edit: I'd take pics, but its buried in a box and lazy
Edit: I'd take pics, but its buried in a box and lazy

Reply
 0
0

0
07-06-2013, 12:11 PM
#22
Elite Member
Thread Starter
iTrader: (6)
Join Date: May 2011
Location: Albuquerque, NM
Posts: 1,656
Total Cats: 64
Well I'm back from my England trip to see the folks and time for my 1,000th post. Yay! Worked on the car a bit before the trip and yesterday after the jet lag wore off.
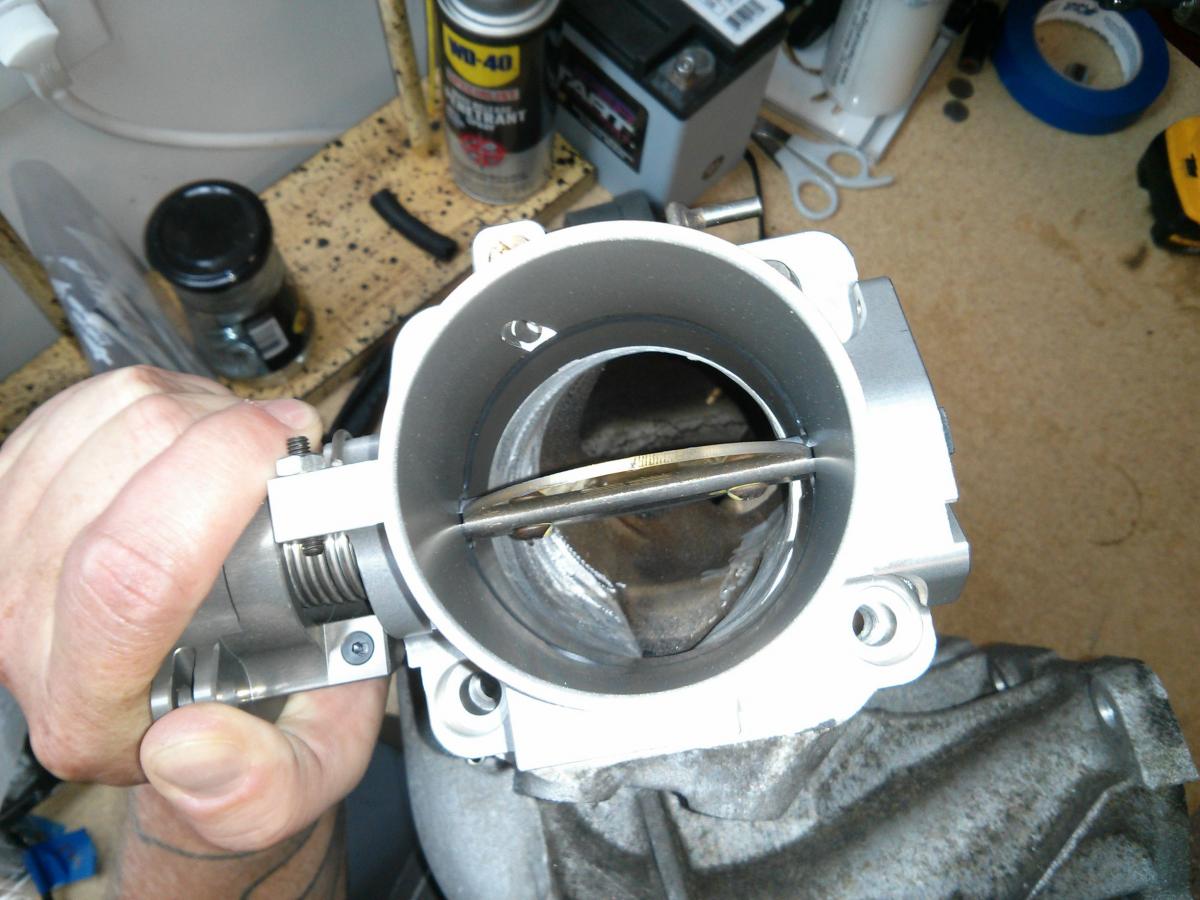
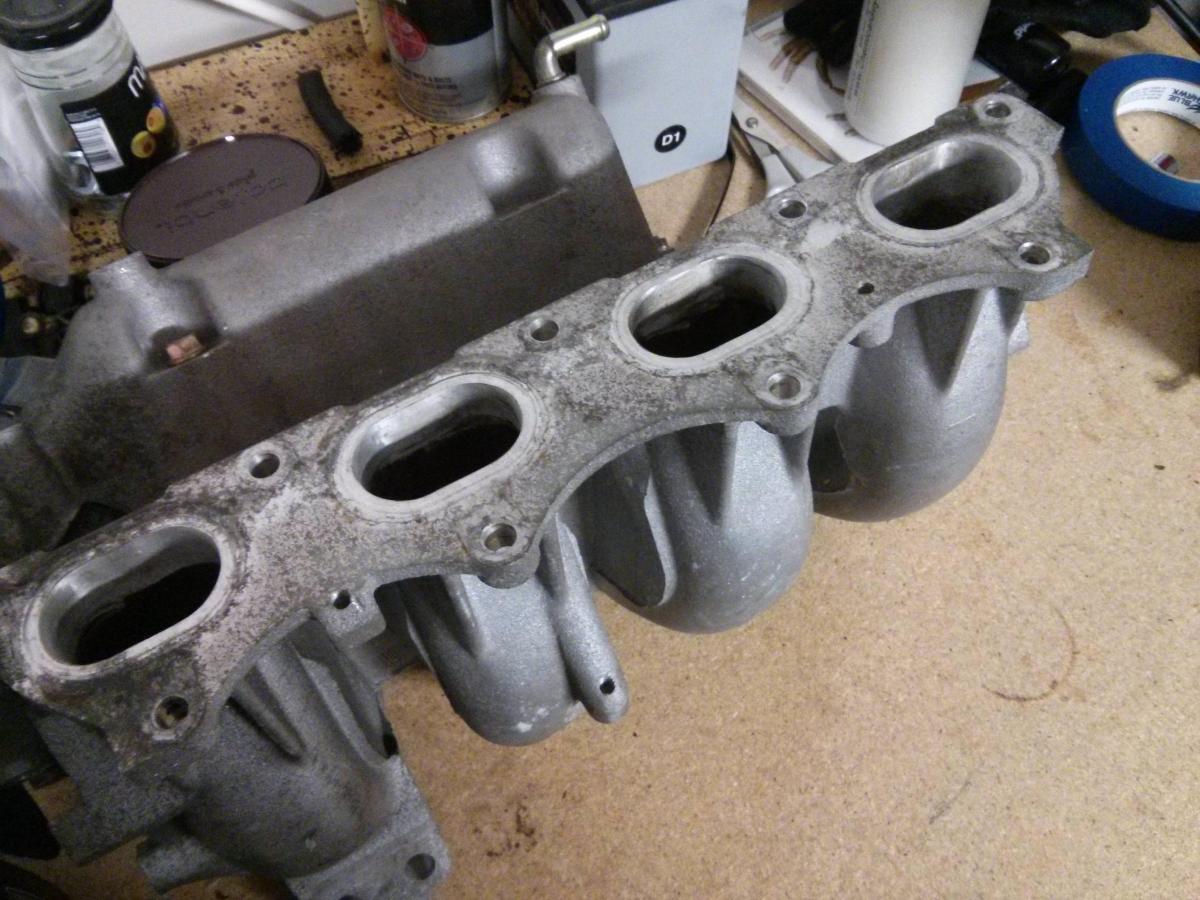
Brought this little gem back with me.
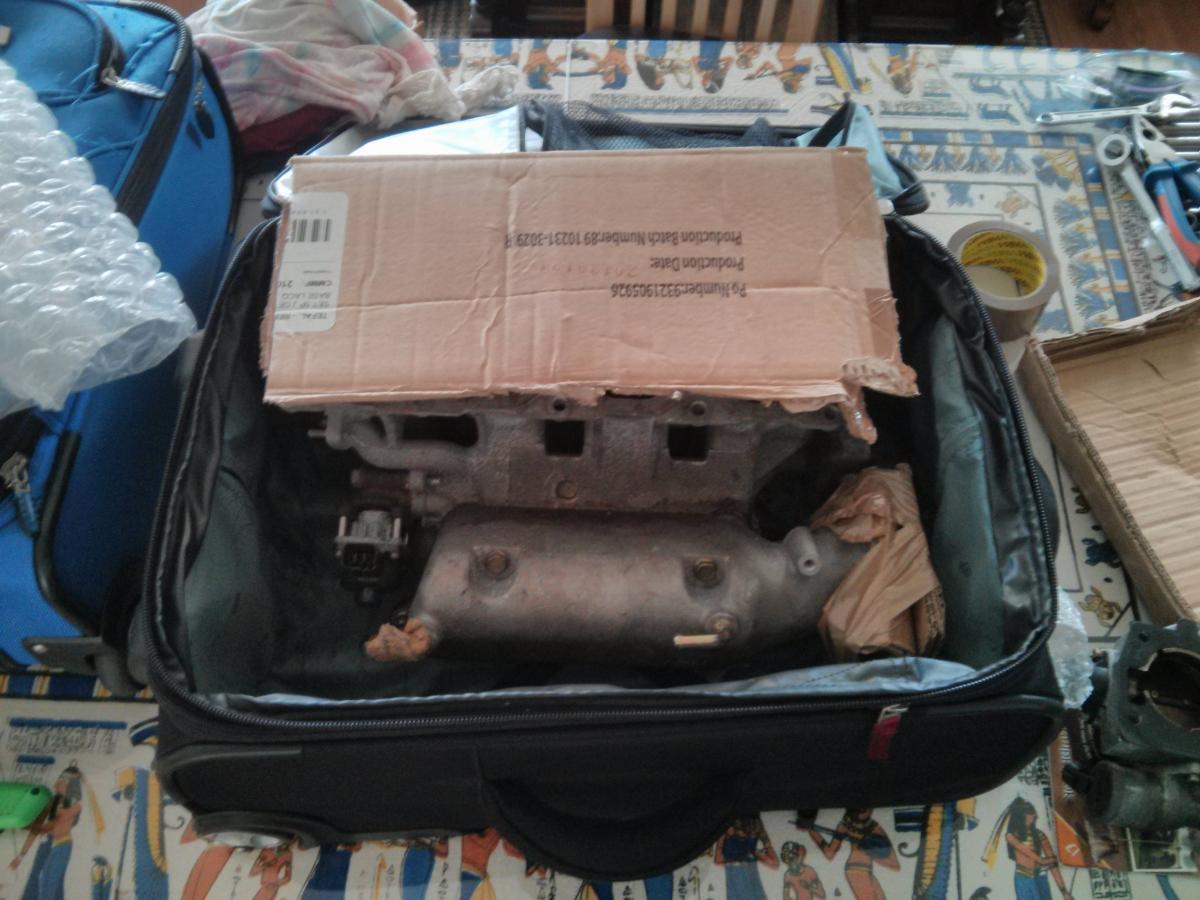
Was a hair worried it might not fit.
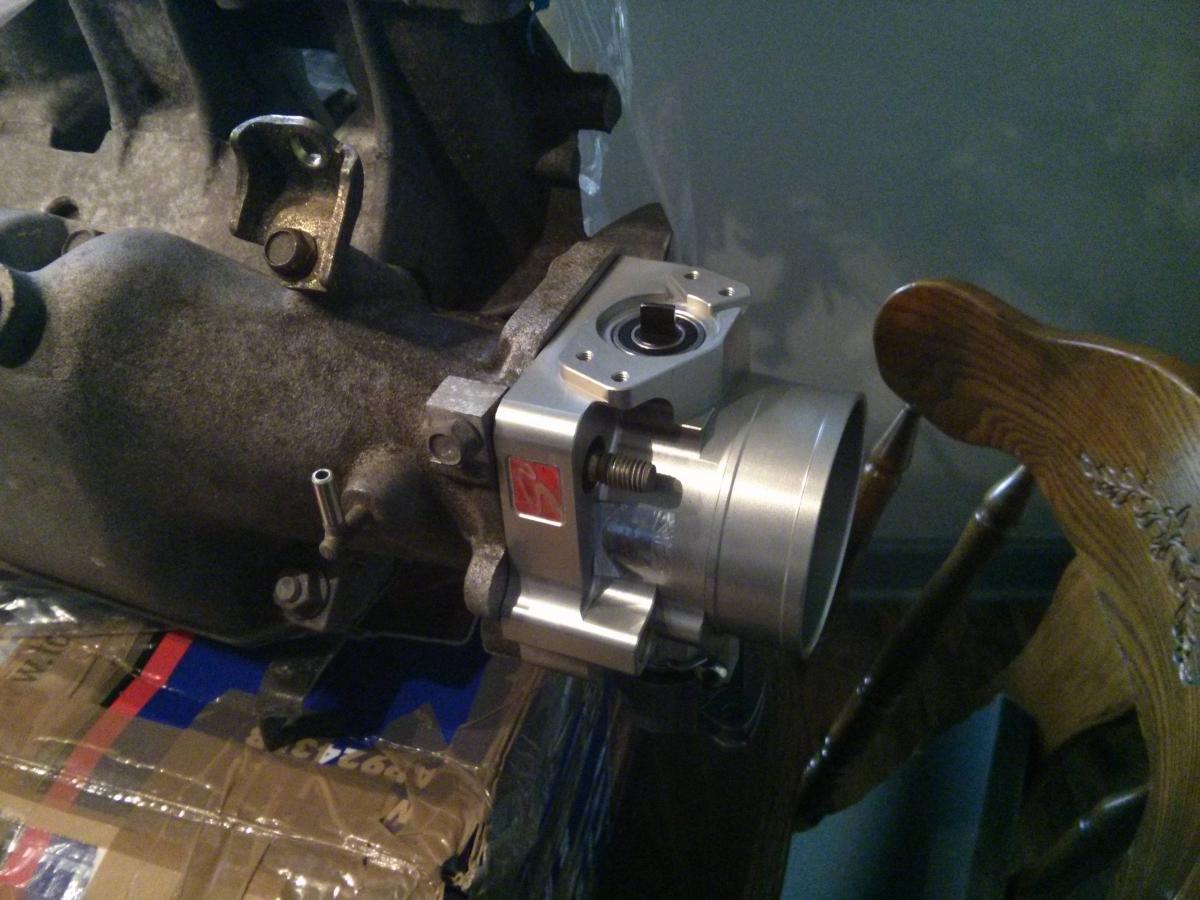
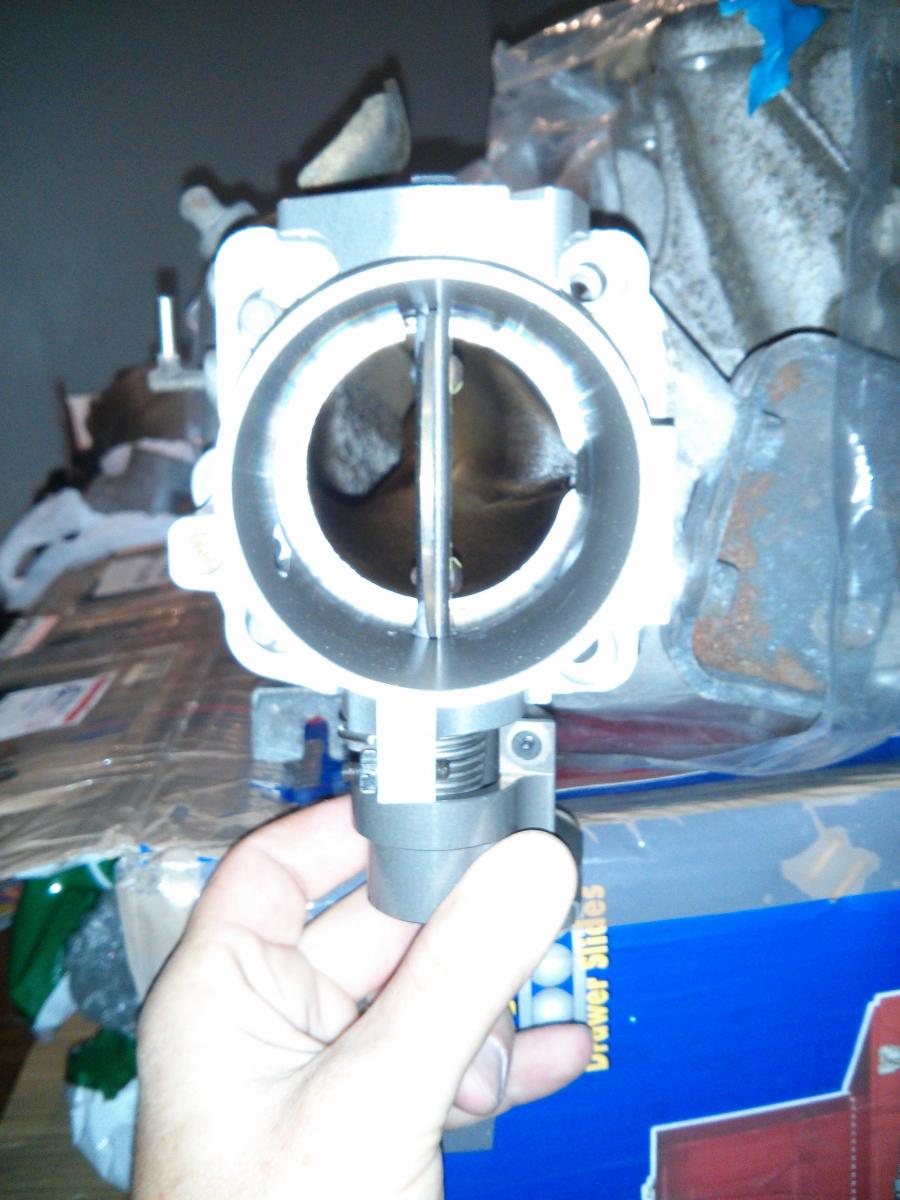
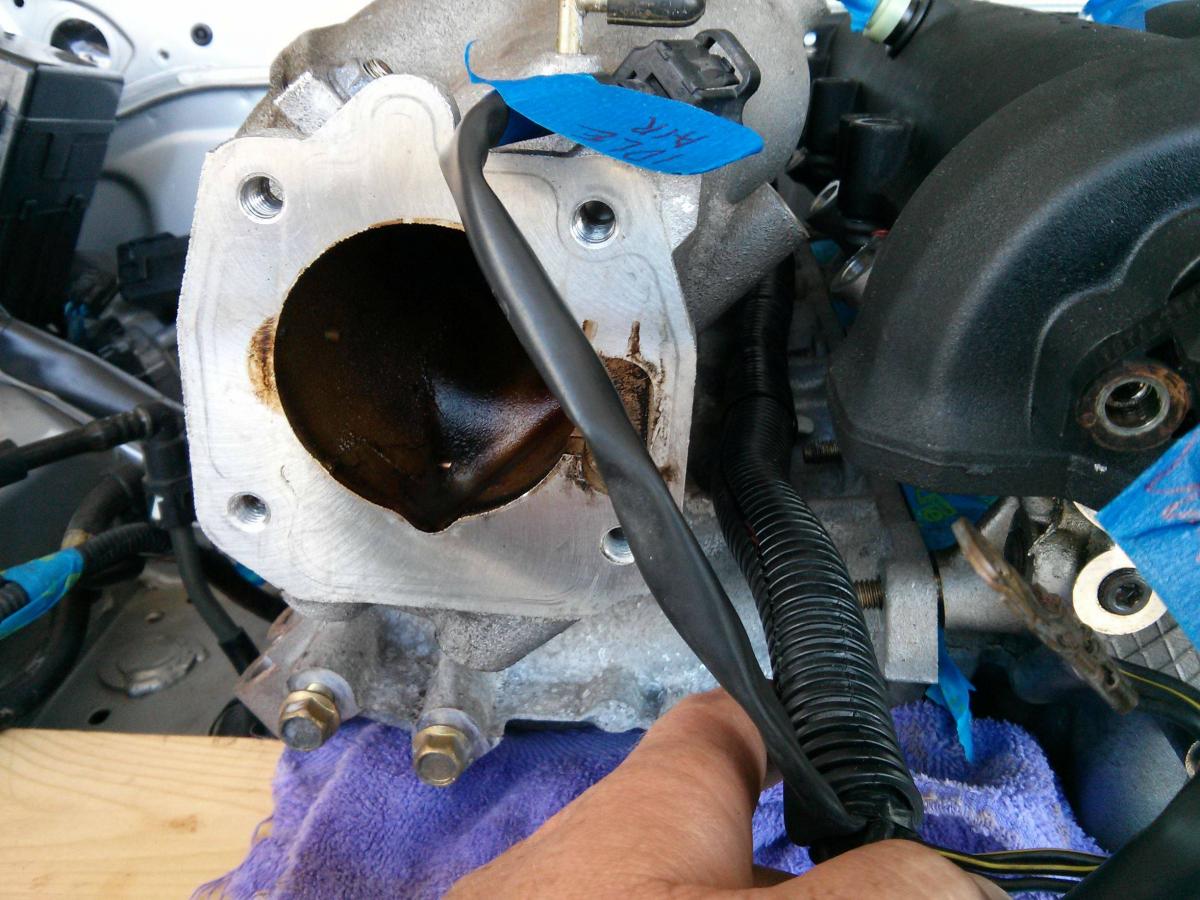
Bore on the Skunk2 throttle is a bit bigger than the mani. Hopefully I can dremel it enough. Crappy air tools are over an hour down the road.
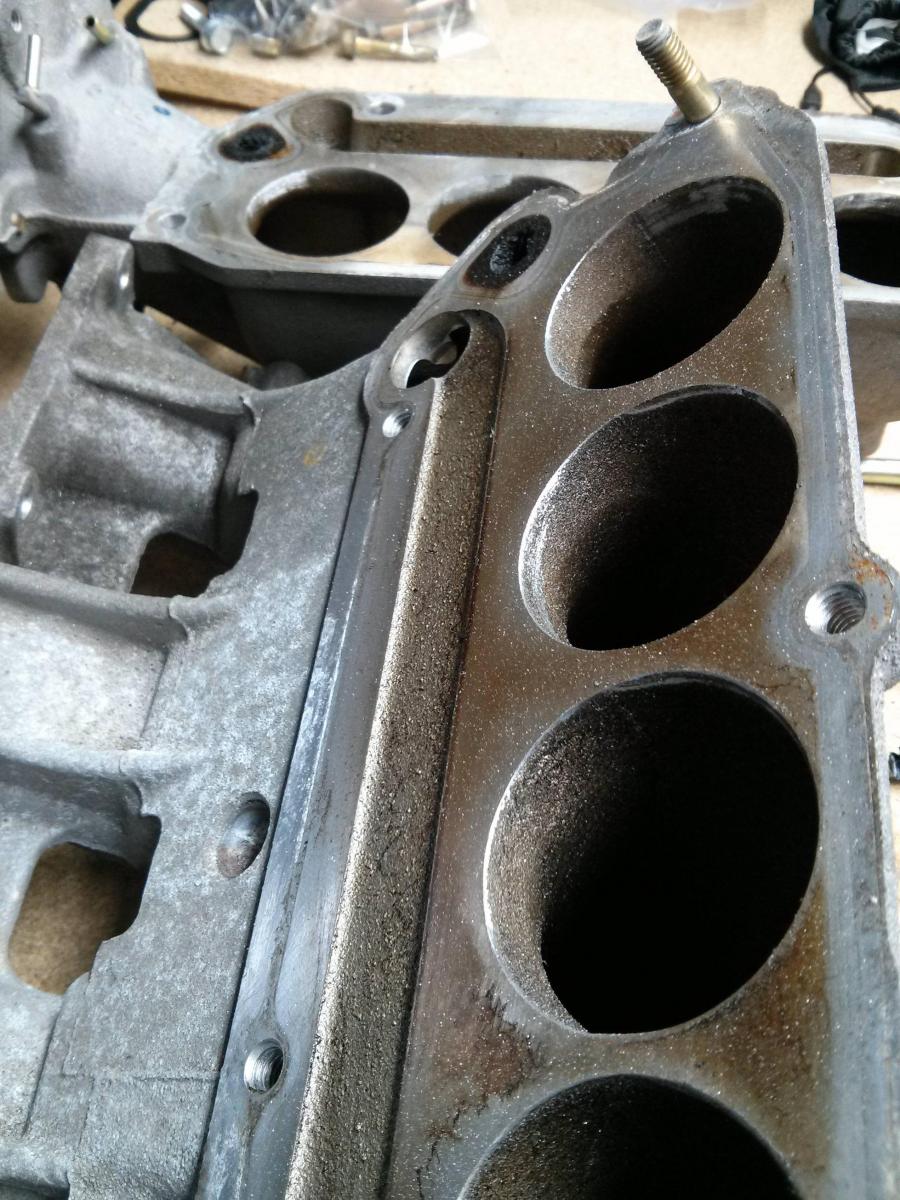
The openings all had a bit of a casting bur an cleaned them up a bit. Not porting it, just cleaning. Going to get it sandblasted and might semi gasket match it a bit. Going to see how the head looks when I get it back.
Laid down some of this on the trans tunnel and had a bunch left over so decided a quiet interior was more important than a couple pounds.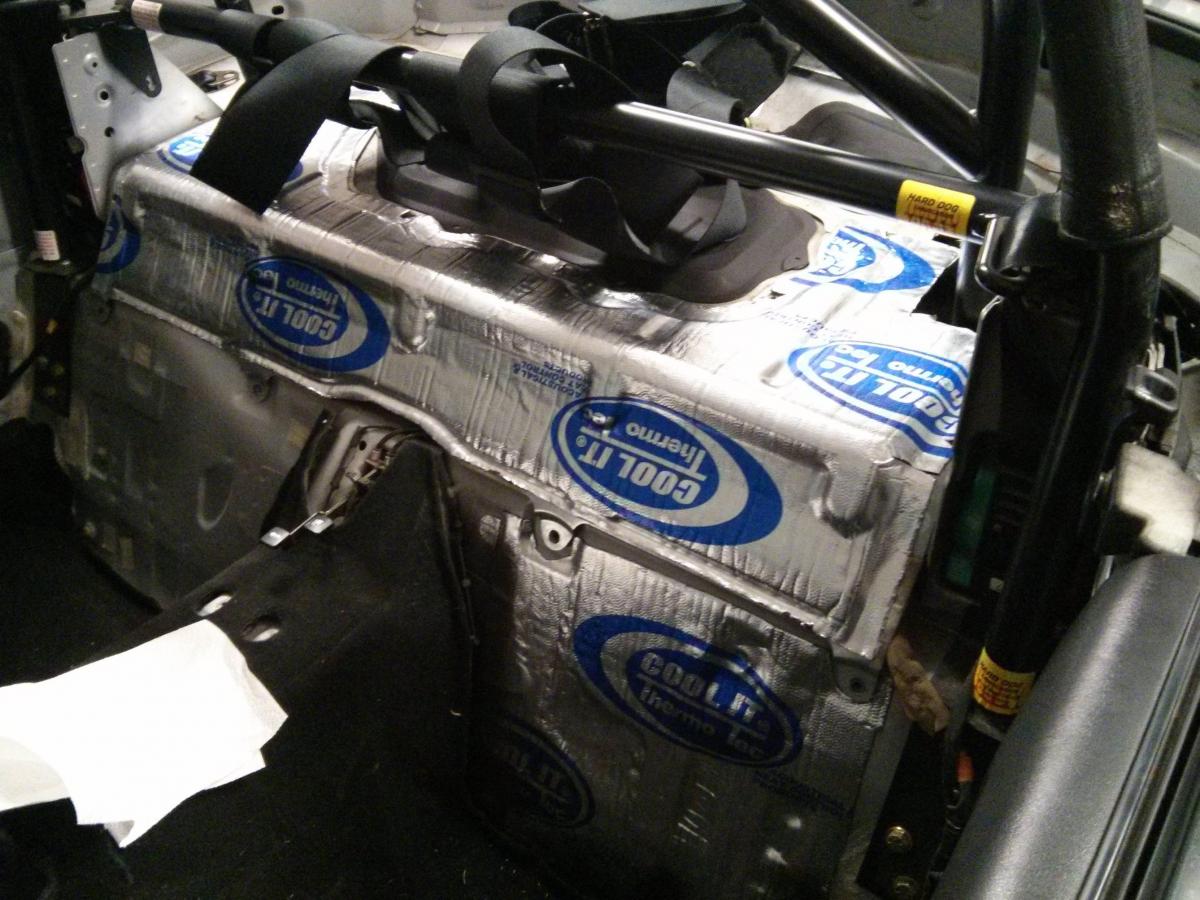
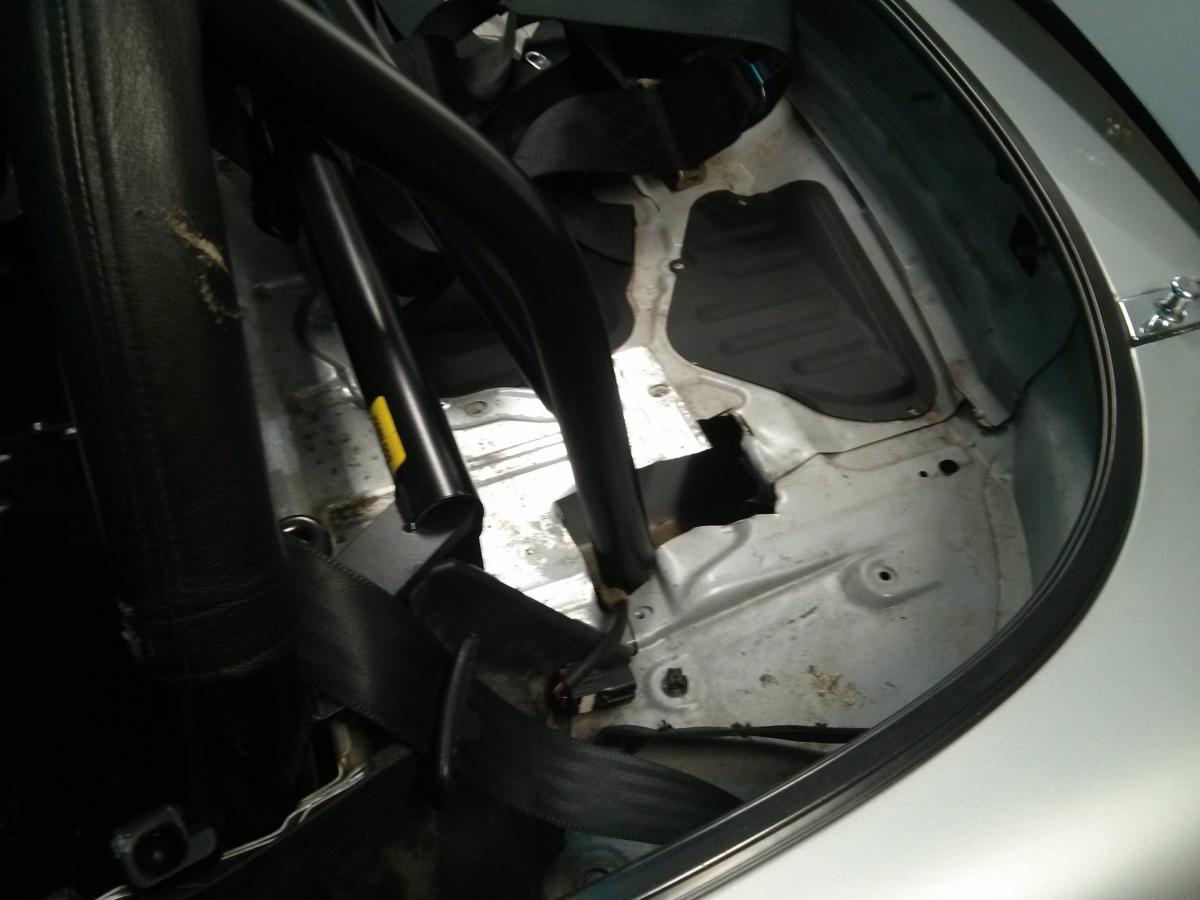
Used some to cover the unsightly and probably loud holes the previous owner left Also did the fuel pump cover too.
Got bored and wiped down the interior. I know it's not glamorous. Chemical Guys interior stuff is killer. No residue or all slimey.
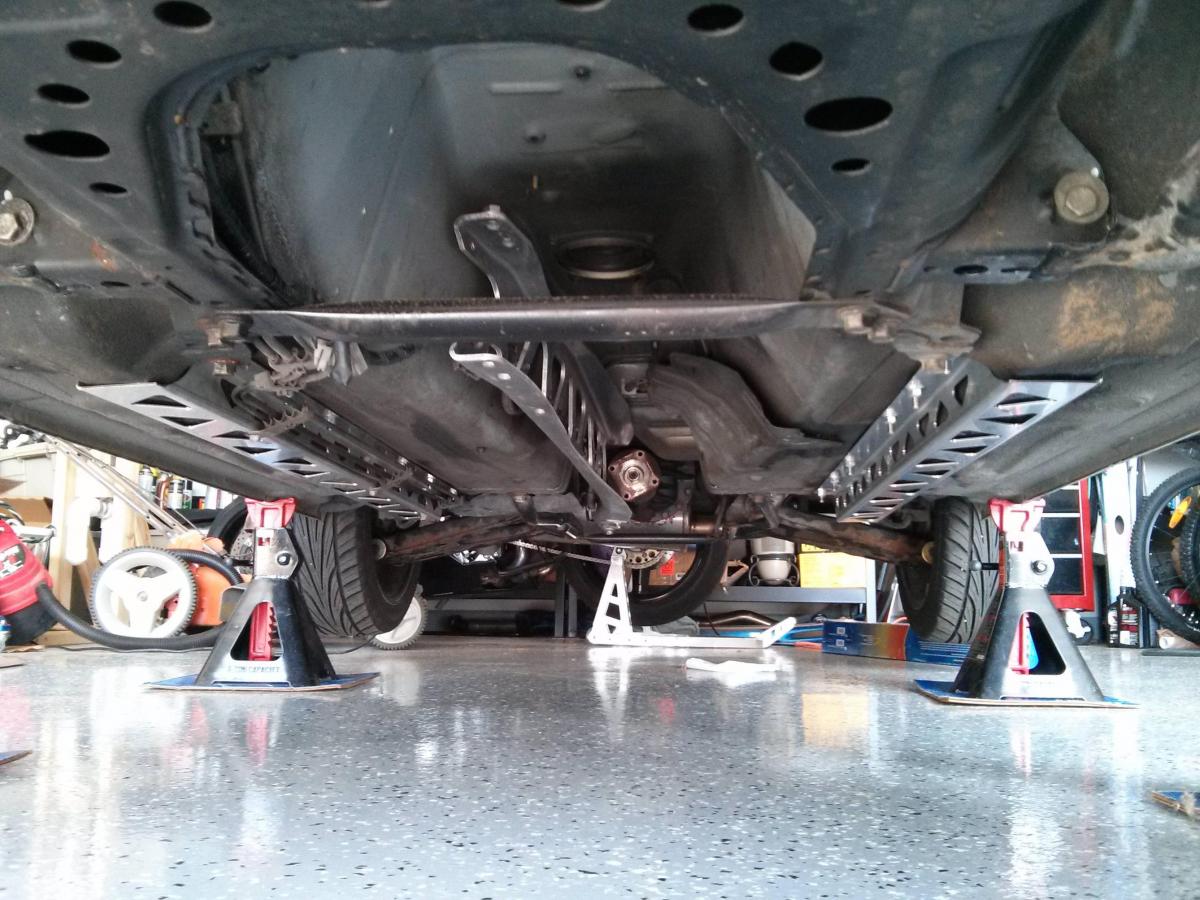
FM rails are in. My buddy is busting my ***** for not doing the butterfly, but it is a pain to work around on my other car. Maybe later. I will admit the Duplicolor sound insulation spray is way easier to work with than under coating stuff.
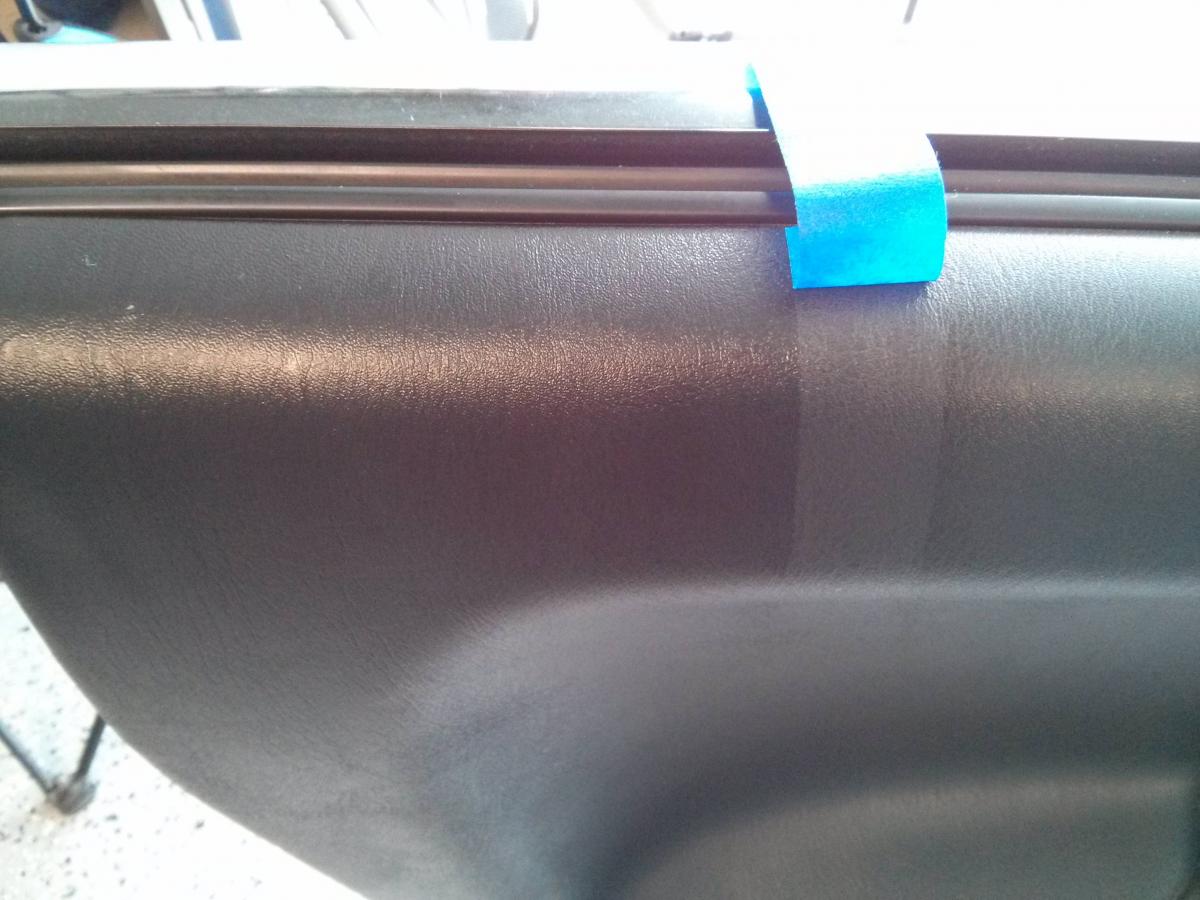
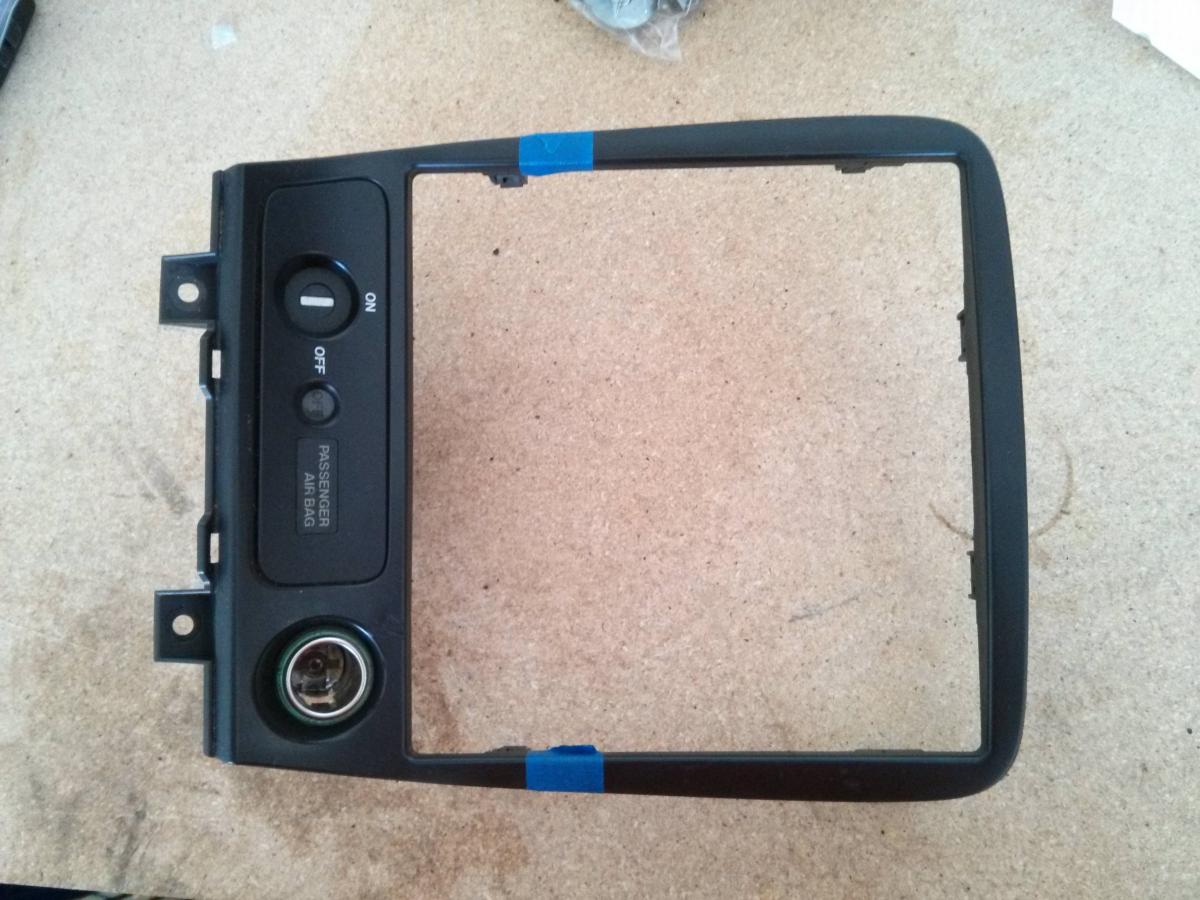
The top of the tape is the top of the HVAC panel. Thinking a 7in tablet might be a good alternative to gauges with the MS3 coming. Hardwire in and run to a 2 channel amp for music. Then just fill the tab with music and tether to the phone for streaming and interwebs. Just thinking.
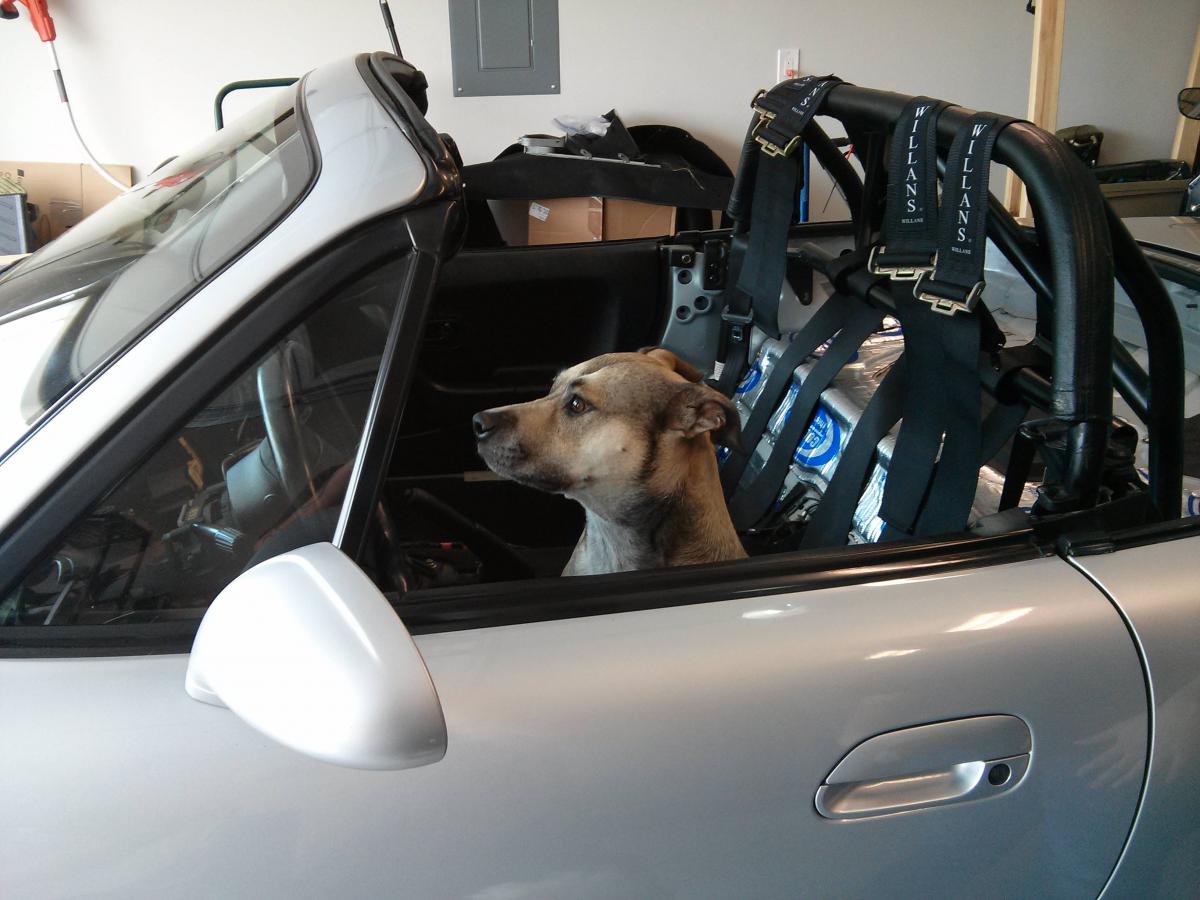
She's getting almost as impatient as I am. She had to visualize the future I guess.
Brought this little gem back with me.
Was a hair worried it might not fit.
Bore on the Skunk2 throttle is a bit bigger than the mani. Hopefully I can dremel it enough. Crappy air tools are over an hour down the road.
The openings all had a bit of a casting bur an cleaned them up a bit. Not porting it, just cleaning. Going to get it sandblasted and might semi gasket match it a bit. Going to see how the head looks when I get it back.
Laid down some of this on the trans tunnel and had a bunch left over so decided a quiet interior was more important than a couple pounds.
Used some to cover the unsightly and probably loud holes the previous owner left
Also did the fuel pump cover too. Got bored and wiped down the interior. I know it's not glamorous. Chemical Guys interior stuff is killer. No residue or all slimey.
FM rails are in. My buddy is busting my ***** for not doing the butterfly, but it is a pain to work around on my other car. Maybe later. I will admit the Duplicolor sound insulation spray is way easier to work with than under coating stuff.
The top of the tape is the top of the HVAC panel. Thinking a 7in tablet might be a good alternative to gauges with the MS3 coming. Hardwire in and run to a 2 channel amp for music. Then just fill the tab with music and tether to the phone for streaming and interwebs. Just thinking.
She's getting almost as impatient as I am. She had to visualize the future I guess.
Reply
2
2
 07-06-2013, 12:34 PM
#24
Elite Member
Thread Starter
iTrader: (6)
Join Date: May 2011
Location: Albuquerque, NM
Posts: 1,656
Total Cats: 64
^Thanks. It's been frustratingly long. Yours has given some good motivation as well as others. I have been trying to do it all proper the first time. The lengthy build does allow me to do things I could not have afforded in a short period of time. Plus patience has seriously rewarded me in finding good deals. Funds may limit a few things in the end, but it will get sorted. Far to detail oriented and ---- retentive. Sometimes the skill and funding limit what I want/could do.
Reply
0
0
 07-10-2013, 01:24 AM
#26
Elite Member
Thread Starter
iTrader: (6)
Join Date: May 2011
Location: Albuquerque, NM
Posts: 1,656
Total Cats: 64
Got a bit of port work done. I didn't try to change much. Just wanted the ledge behind the throttle gone and cleaned up. Also cleaned up the intake to head ports. Had a bunch of burs and matched it to the gasket a bit. I'll clean it up more with the dremel. It feels far smoother than it looks.
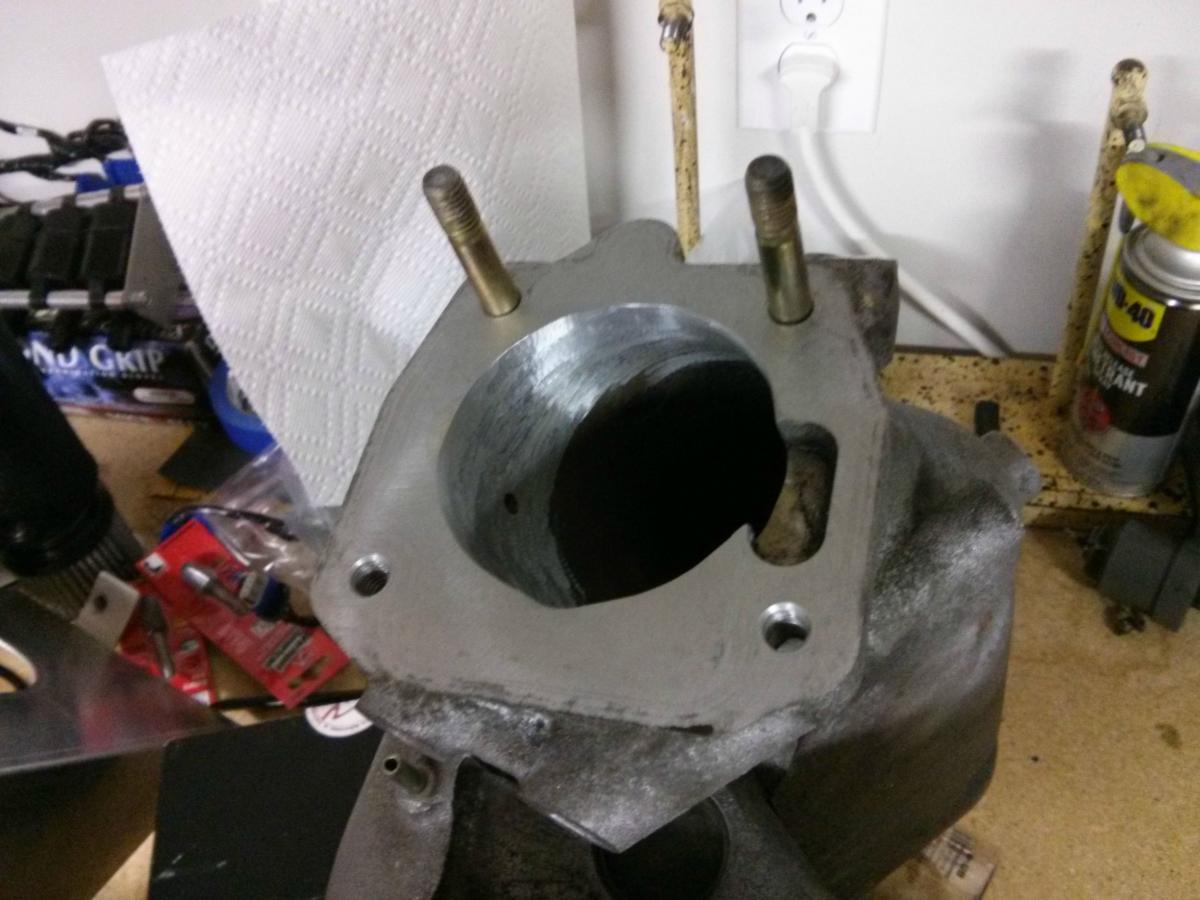
The flash makes it look worse
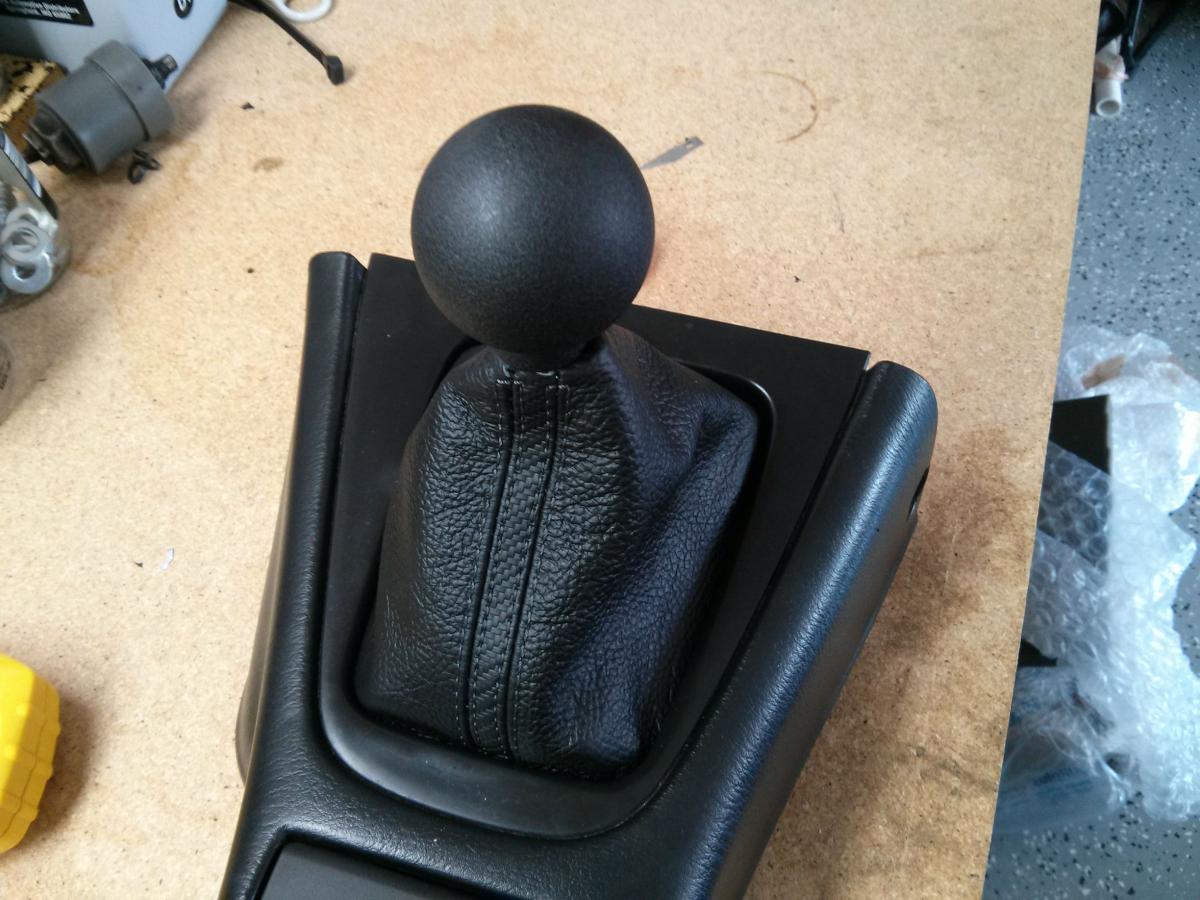
I know it's silly, but the factory vinyl boot was covered in oil and coming apart. Had this one made for cheaper than I found most and actually turned out nice I thing. The redo on the steering wheel will match the pattern. It's looking pretty poor to and will probably be coming apart soon as well. Black leather with a carbon vinyl stripe with charcoal thread.
The holes they put in were a bit off. Nothing a small blade didn't solve.
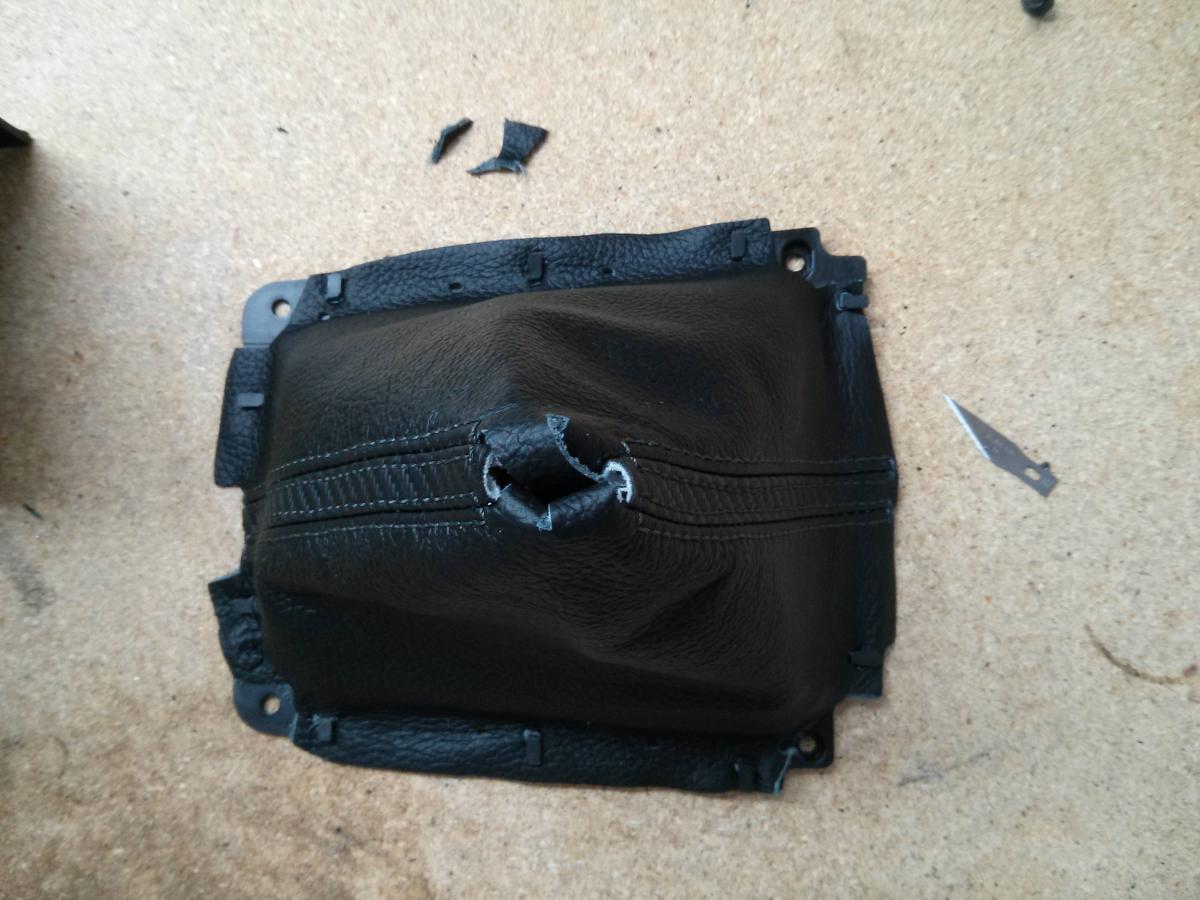
I like it. The gear *** stays. Wife got it for me a few years ago. Pre-wife days.
The flash makes it look worse
I know it's silly, but the factory vinyl boot was covered in oil and coming apart. Had this one made for cheaper than I found most and actually turned out nice I thing. The redo on the steering wheel will match the pattern. It's looking pretty poor to and will probably be coming apart soon as well. Black leather with a carbon vinyl stripe with charcoal thread.
The holes they put in were a bit off. Nothing a small blade didn't solve.
I like it. The gear *** stays. Wife got it for me a few years ago. Pre-wife days.
Reply
0
0
07-10-2013, 01:27 AM
#27
Elite Member
Thread Starter
iTrader: (6)
Join Date: May 2011
Location: Albuquerque, NM
Posts: 1,656
Total Cats: 64
Fun bit is I have to drive over an hour away to use air tools at my mother-in-laws. Yes she has a compressor and I don't. Except I use it more than her and will soon be the new owner of a meh working air compressor with budget tools. Free is still free.
Reply
0
0
07-19-2013, 04:46 PM
#28
Elite Member
Thread Starter
iTrader: (6)
Join Date: May 2011
Location: Albuquerque, NM
Posts: 1,656
Total Cats: 64
Modded the oil pressure gauge to read like it should. Need to order the sender for it or I'll use the earlier one I have. Change the bulbs to red LEDs while I was at it. Do NB oil gauges have a post the rest on when not on? With the mod it rests on the black cover inside and I don't remember it doing that.
I don't know about anyone else, but my gauge cover was scuffed to hell. So before I put it all together I polished it up. I think the PO use scotch britesto clean it.

This is taking so long I'm begining to lose track of the nuts and bolts. No idea where the scurry off to. Everything is in zip locks and labeled and with their respective stuff. Yet they wonder somewhere to the land of socks or something.
I don't know about anyone else, but my gauge cover was scuffed to hell. So before I put it all together I polished it up. I think the PO use scotch britesto clean it.
This is taking so long I'm begining to lose track of the nuts and bolts. No idea where the scurry off to. Everything is in zip locks and labeled and with their respective stuff. Yet they wonder somewhere to the land of socks or something.
Reply
0
0
07-25-2013, 11:14 PM
#29
Elite Member
Thread Starter
iTrader: (6)
Join Date: May 2011
Location: Albuquerque, NM
Posts: 1,656
Total Cats: 64
I've wanted to clean up the harness in the car since there are a bunch of unused connectors now. EGR, A/C, etc. I have an entire extra harness so I'm down to try and not screw this up. Here is the plan.
-De loom entire engine harness
- completely delete unused stuff. All the way down to de-pinning the ECU harness
- shorten inector section so it doesn't go wrong way.
- Re- loom the harness using tips from
https://www.miataturbo.net/engine-pe...harness-73932/
I can't remember how the harness originally laid out. Is it alright to lay it through the valley between intake manifold and head? There seems to be plenty of space.
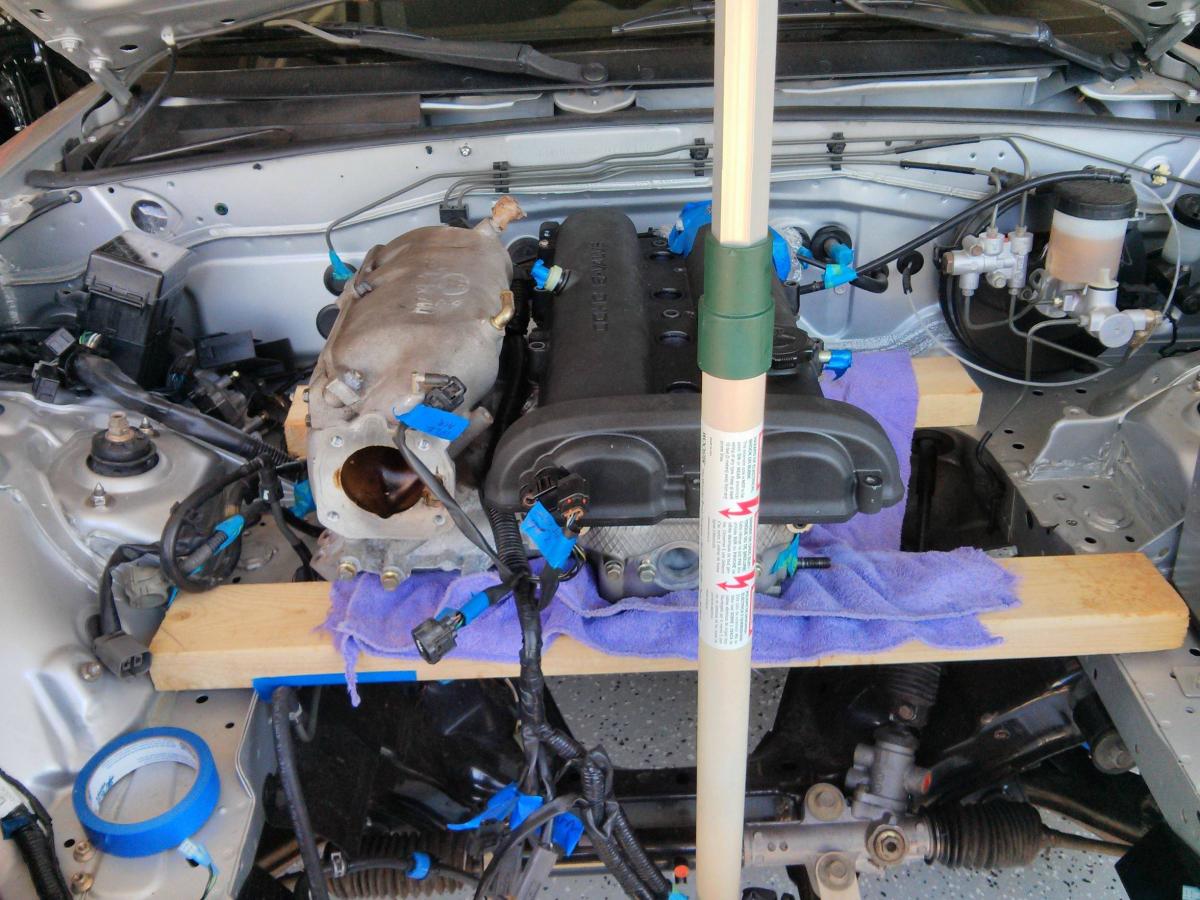
When I re-loom the harness I'll have the ignition and fuel sections come out here instead of going all the way up front and back around. The LS coils will sit on the back of the head here as well.
Here's the big question. What are these three connectors? I think the left is power steering, the middle might be A/C, and no idea what the right one is.
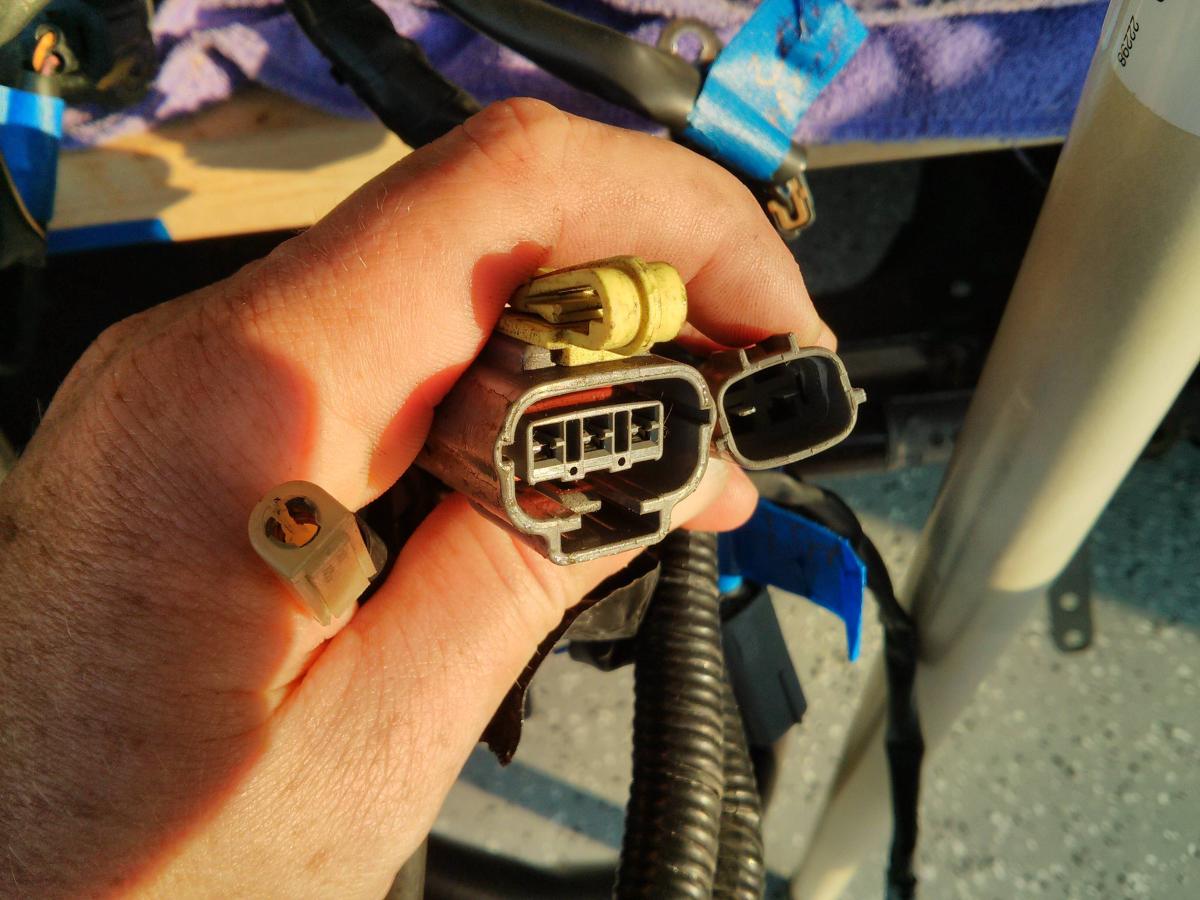
Colors:
Left connector P/S?
- brown only
Middle connector A/C?
- white w/ red stripe
- light green w/ blue stripe
- white w/ pinkish red stripe
Right connector
- black w/ blue stripe
- white
-De loom entire engine harness
- completely delete unused stuff. All the way down to de-pinning the ECU harness
- shorten inector section so it doesn't go wrong way.
- Re- loom the harness using tips from
https://www.miataturbo.net/engine-pe...harness-73932/
I can't remember how the harness originally laid out. Is it alright to lay it through the valley between intake manifold and head? There seems to be plenty of space.
When I re-loom the harness I'll have the ignition and fuel sections come out here instead of going all the way up front and back around. The LS coils will sit on the back of the head here as well.
Here's the big question. What are these three connectors? I think the left is power steering, the middle might be A/C, and no idea what the right one is.
Colors:
Left connector P/S?
- brown only
Middle connector A/C?
- white w/ red stripe
- light green w/ blue stripe
- white w/ pinkish red stripe
Right connector
- black w/ blue stripe
- white
Reply
0
0
 07-26-2013, 10:14 AM
#32
left ps middle maf right knock sensor
also I'm glad my loom thread inspired people
also I'm envious of guys like you who can get away with getting rid of the smog crap
if I could do that, I'd absolutely do what you're doing and completely overhaul the harness getting rid of like half the wiring. kinda like dem768 did - super duper simple and clean
Reply
0
0
07-26-2013, 01:56 PM
#33
Elite Member
Thread Starter
iTrader: (6)
Join Date: May 2011
Location: Albuquerque, NM
Posts: 1,656
Total Cats: 64
Yeah. The only reason I'm going through with it is because I have another harness for just in case I move and have to go back to smog. I'm collecting a small tote of just smog stuff. Plus the empty dead connectors annoy me.
Sure the middle is maf? Its different than the one in my '97. I don't actually have the original maf to check it against.
Sure the middle is maf? Its different than the one in my '97. I don't actually have the original maf to check it against.
Reply
0
0
07-26-2013, 02:36 PM
#34
Elite Member
Thread Starter
iTrader: (6)
Join Date: May 2011
Location: Albuquerque, NM
Posts: 1,656
Total Cats: 64
Oh ****! Nope still at the builders. Just using a spare head to mock up on. I pretty sure the 2x4s locate it pretty close in comparison to the engine in my NA car. Close enough maybe. I plan on leaving decent slack in the harness. Really going for better, not perfect.
Reply
0
0
07-26-2013, 03:23 PM
#35
Elite Member
Thread Starter
iTrader: (6)
Join Date: May 2011
Location: Albuquerque, NM
Posts: 1,656
Total Cats: 64
Sent a message to Rev building the ECU, but asking here too.
EGR
Power steering
MAF
VICS solinoid line
Can any of those handle the current of the VVT line? Can I repin any to become LS coil signal etc? IE: clip the plug off, swap pins in the ECU plug, put proper connector on, and smack a unicorn? Want to minimize crimping and possible fail aids points. So far I should just be deleting, recrimping fuel/ign section, and hopefully re-pinning the ECU car side harness.
Reply
0
0
 07-29-2013, 03:28 AM
#37
Elite Member
Thread Starter
iTrader: (6)
Join Date: May 2011
Location: Albuquerque, NM
Posts: 1,656
Total Cats: 64
Any suggestions on brand or type of senders for oil temp that will work happy with the MS3? Autometer, VDO, or other? Really want oil temp/pressure/EGT to go to the ECU in the easiest, accurate way.
Tell me if I'm wrong.
EGT = 2 wires
Oil temp =1 wire and grounds at mounting location
oil pressure = 1 wire and grounds at mounting location
Tell me if I'm wrong.
EGT = 2 wires
Oil temp =1 wire and grounds at mounting location
oil pressure = 1 wire and grounds at mounting location
Reply
0
0
07-29-2013, 03:48 AM
#38
Elite Member

iTrader: (10)
Join Date: Jun 2006
Location: Athens, Greece
Posts: 5,976
Total Cats: 355
Use any 99-05 coolant sensor as the oil temp sensor.
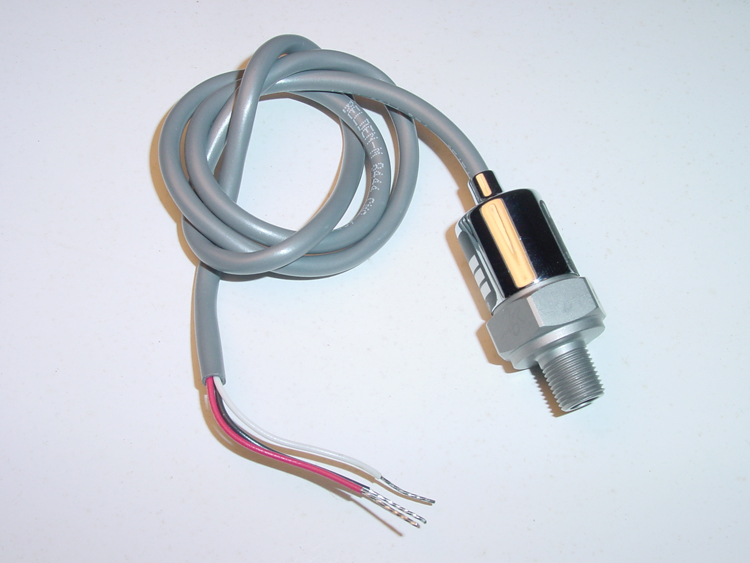
I recommend the MSI 0-100psi transducer for oil pressure. I have one on my car for over 5 years and it works great. Expensive but probably the best.
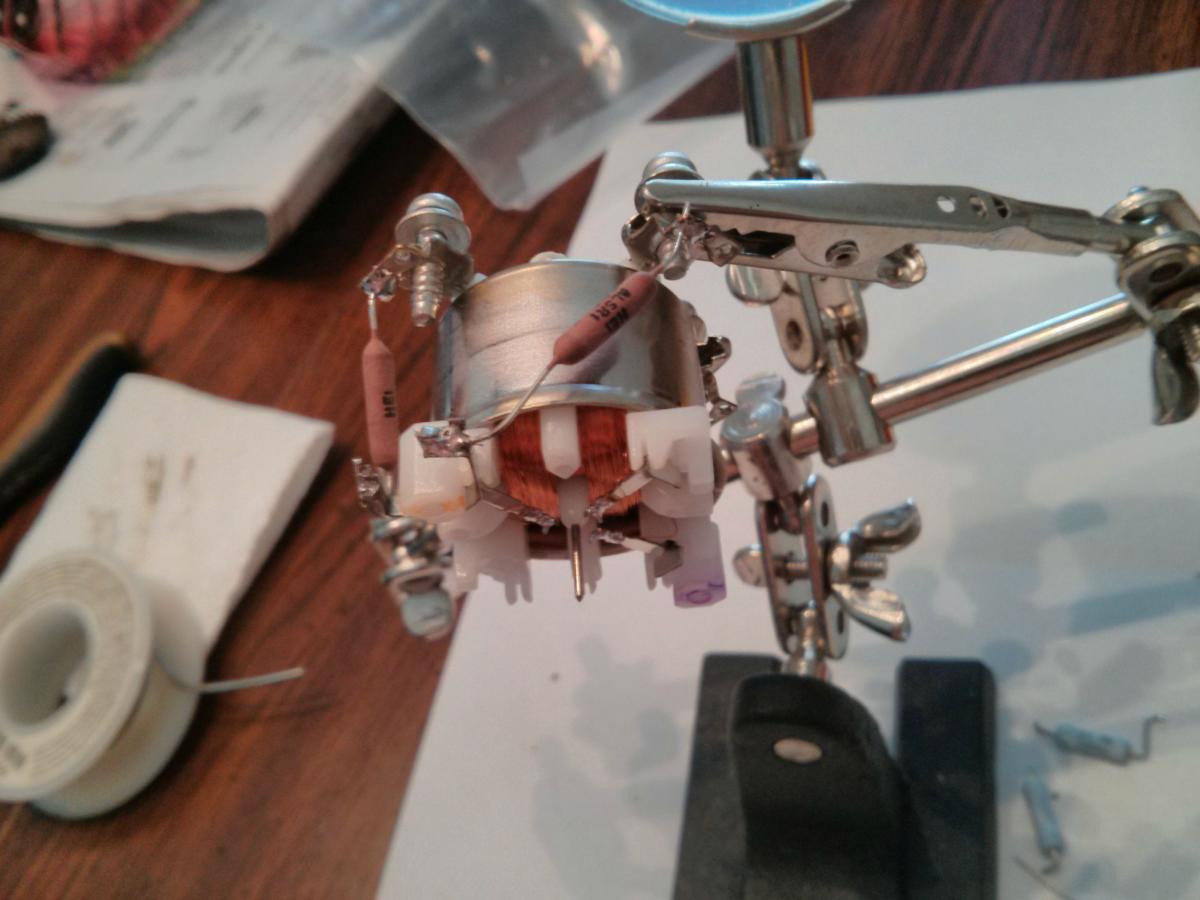
For EGT, you will need a circuit that takes the 2 wires from the EGT sensor and amplifies the signal from the sensor (which is in the microvolt range) to a 0-5V signal.
Dimitris
I recommend the MSI 0-100psi transducer for oil pressure. I have one on my car for over 5 years and it works great. Expensive but probably the best.
For EGT, you will need a circuit that takes the 2 wires from the EGT sensor and amplifies the signal from the sensor (which is in the microvolt range) to a 0-5V signal.
Dimitris
Reply
0
0
07-30-2013, 01:02 AM
#39
Elite Member
Thread Starter
iTrader: (6)
Join Date: May 2011
Location: Albuquerque, NM
Posts: 1,656
Total Cats: 64
Reverant ----
Use any 99-05 coolant sensor as the oil temp sensor.
-Getting one
I recommend the MSI 0-100psi transducer for oil pressure. I have one on my car for over 5 years and it works great. Expensive but probably the best.
- This? Pressure Sensors - Transducers
Bit pricey, but have to pay to play. Is there any suggested sources for these cheaper some where?
For EGT, you will need a circuit that takes the 2 wires from the EGT sensor and amplifies the signal from the sensor (which is in the microvolt range) to a 0-5V signal.
Home brew made, or is there an off the shelf reliable cheap one?
Looks like MAF will be the oil temp (3 wire)
EGR will be VVT and oil pressure maybe
Reply
0
0
08-04-2013, 11:13 AM
#40
Elite Member
Thread Starter
iTrader: (6)
Join Date: May 2011
Location: Albuquerque, NM
Posts: 1,656
Total Cats: 64
New sensor------- Old connector
MAF-----------------Oil temp
EGT-----------------VVT and oil pressure (still trying to find a transducer)
VICS----------------EGT signal (no idea how to put in a amplifier in or where to find)
Any idea where to find the amplifier for the EGT? Weatherpacks fine for all purposes?
EGR has 2 heavier gauge wires that are both white w/ red stipe and 4 smaller gauge wires. I'm told the VVT pulls some decent amps. I might use the 2 white w/ red stripe wires for VVT and if I get them backward just de-pin and swap. No? Use the other 4 for oil temp. The pictures of the transducer looks to be 4 wire. Hope someone knows of a cheaper place to find them.
Also need a coolant temp sensor pigtail.
Reply
0
0


