Just Another DIY Turbo Budget Build
 03-18-2009, 11:23 AM
#1
Newb
Thread Starter

Join Date: Sep 2008
Posts: 20
Total Cats: 0
Hi Everyone,
Just wanted to post some pics of my completed turbo build and also thank everyone for posting some great info. on this site, definitely was a huge help in getting this completed, so thanks everyone
I've been around the car scene for a few years(don't want to put a date on myself)but this was my first attempt with boost, so definitely had to start from scratch on this one. There was alot of headaches with it that involved a blown headgasket, and tearing the block completely down to replace stuck oil control rings, but other than that, I think it went fairly smooth.
The goal was to put a reliable turbo kit together for around $1000 and run about 7-8psi of boost. I can't believe what some companies are charging for turbo kits for these cars, when you can do it yourself for a hell of alot less.
Anyways, I'm glad that I did it, cause the car is an absolute blast to drive!!
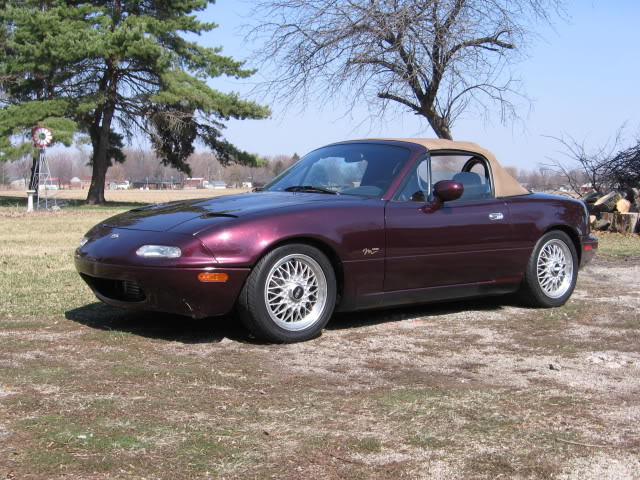
Here's a few pics of my ride. It's an 1995 M-Edition with 85k miles.

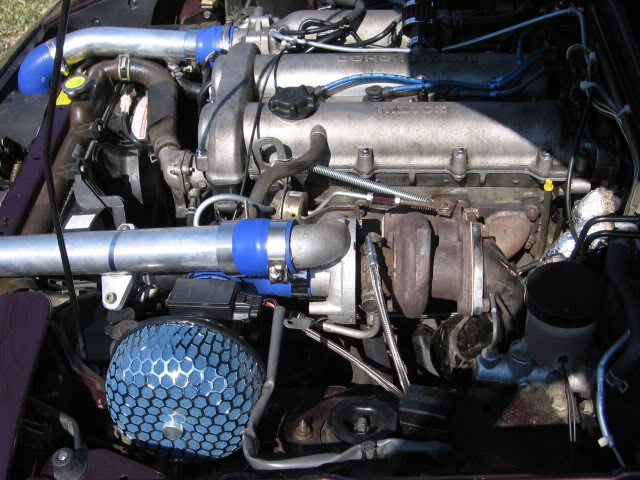
Here are the main components of my kit:
-Homemade TIG welded manifold using Schedule 10 SS pipe fittings
-2g dsm T-25 turbo
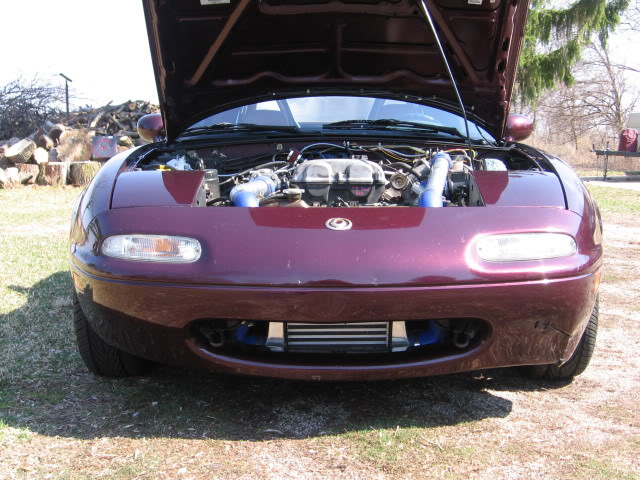
-E-bay FMIC kit
-E-bay 2.5" SS downpipe
-1g dsm BOV
-Olderguy O2 clamp
-MSD ignition timing retard box
-can't remember the name FMU
-VDO boost gauge
-Innovative WB
Obviously, with a budget build I wasn't planning on making huge HP #'s, but just wanted something more and to make what I think is a pretty slow sports car alittle more fun to drive. Getting waxed by SUV's and sedans just doesn't cut it.
Also, for anyone contemplating doing this to their car, I say go for it. Just do alittle research ahead of time and it can be tough at times but also a great learning experience.
Thanks again!
Just wanted to post some pics of my completed turbo build and also thank everyone for posting some great info. on this site, definitely was a huge help in getting this completed, so thanks everyone
I've been around the car scene for a few years(don't want to put a date on myself)but this was my first attempt with boost, so definitely had to start from scratch on this one. There was alot of headaches with it that involved a blown headgasket, and tearing the block completely down to replace stuck oil control rings, but other than that, I think it went fairly smooth.
The goal was to put a reliable turbo kit together for around $1000 and run about 7-8psi of boost. I can't believe what some companies are charging for turbo kits for these cars, when you can do it yourself for a hell of alot less.
Anyways, I'm glad that I did it, cause the car is an absolute blast to drive!!
Here's a few pics of my ride. It's an 1995 M-Edition with 85k miles.
Here are the main components of my kit:
-Homemade TIG welded manifold using Schedule 10 SS pipe fittings
-2g dsm T-25 turbo
-E-bay FMIC kit
-E-bay 2.5" SS downpipe
-1g dsm BOV
-Olderguy O2 clamp
-MSD ignition timing retard box
-can't remember the name FMU
-VDO boost gauge
-Innovative WB
Obviously, with a budget build I wasn't planning on making huge HP #'s, but just wanted something more and to make what I think is a pretty slow sports car alittle more fun to drive. Getting waxed by SUV's and sedans just doesn't cut it.
Also, for anyone contemplating doing this to their car, I say go for it. Just do alittle research ahead of time and it can be tough at times but also a great learning experience.
Thanks again!
Last edited by rxrotorless7; 03-18-2009 at 11:56 AM.

Reply
 0
0

0
 03-18-2009, 01:12 PM
#7
Moderator


iTrader: (12)
Join Date: Nov 2008
Location: Tampa, Florida
Posts: 20,652
Total Cats: 3,011
That's an attractive color in the sunlight. And that's a simple, straightforward build. At those power levels, it should provide you with many years of enjoyment.
Unless, of course, you decide to go to the next level.
Now you get to enjoy it!
Edit: It looks lowered. Did you change the suspension?
Unless, of course, you decide to go to the next level.
Now you get to enjoy it!
Edit: It looks lowered. Did you change the suspension?
Reply
0
0
 03-18-2009, 02:13 PM
#9
Newb
Thread Starter
Join Date: Sep 2008
Posts: 20
Total Cats: 0
What diameter IC pipes did you use? Looks like 2 inches to me. Did you have to chop up the hood to let it close?
I did have to hack into the the hood alittle bit right where the 90deg. bends are going down to the intercooler. I didn't have to remove too much material and the hood seems structually sound.
Edit: It looks lowered. Did you change the suspension?
Reply
0
0

 03-19-2009, 11:05 AM
#19
Newb
Thread Starter
Join Date: Sep 2008
Posts: 20
Total Cats: 0
Can you post a pic of the cut up hood?


Thanks all for the comments!
Reply
0
0

Thread
Thread Starter
Forum
Replies
Last Post
Zaphod
MEGAsquirt
47
10-26-2018 11:00 PM


