How to Turbocharge your NA for 2k, build with TONNES of pics and info.
 07-23-2013, 09:57 PM
#81
Elite Member
Thread Starter

Join Date: Apr 2010
Location: Newcastle, Australia
Posts: 2,826
Total Cats: 67
You are right, its a lot of work for what it is, however Id gladly make the manifold and downpipe and crossover for 700, which is essentially what Im doing for that 700.
In this case Im throwing the install and half an hour street tune in for free.
The reality is that the main reason I'm enjoying doing this is that it helps a lot of people get a lot more comfortable with basic turbo systems, and shows my work off to a LOT of viewers, so its not a cut and dry cheap labour job.
Ive said to the aussies that I would take this job on for an na6 if they supplied a T25/28, for the same price.
So that puts me ahead enough for it to be worth it, Im only 23, doing this for a living is new to me so its still a startup really, and Im just focusing on taking the work as it comes and paying for the stuff my workshop still needs. This job will pay a couple of weeks rent on the workshop and this guy is an excellent returning customer.
Read that how you will, but yes, its probably a bit cheap.
Dann

Reply
 0
0

0
07-23-2013, 10:07 PM
#82
Senior Member

Join Date: Nov 2010
Location: Pittsburgh PA
Posts: 1,163
Total Cats: 12
You are right, its a lot of work for what it is, however Id gladly make the manifold and downpipe and crossover for 700, which is essentially what Im doing for that 700.
In this case Im throwing the install and half an hour street tune in for free.
The reality is that the main reason I'm enjoying doing this is that it helps a lot of people get a lot more comfortable with basic turbo systems, and shows my work off to a LOT of viewers, so its not a cut and dry cheap labour job.
Ive said to the aussies that I would take this job on for an na6 if they supplied a T25/28, for the same price.
So that puts me ahead enough for it to be worth it, Im only 23, doing this for a living is new to me so its still a startup really, and Im just focusing on taking the work as it comes and paying for the stuff my workshop still needs. This job will pay a couple of weeks rent on the workshop and this guy is an excellent returning customer.
Read that how you will, but yes, its probably a bit cheap.
Dann
In this case Im throwing the install and half an hour street tune in for free.
The reality is that the main reason I'm enjoying doing this is that it helps a lot of people get a lot more comfortable with basic turbo systems, and shows my work off to a LOT of viewers, so its not a cut and dry cheap labour job.
Ive said to the aussies that I would take this job on for an na6 if they supplied a T25/28, for the same price.
So that puts me ahead enough for it to be worth it, Im only 23, doing this for a living is new to me so its still a startup really, and Im just focusing on taking the work as it comes and paying for the stuff my workshop still needs. This job will pay a couple of weeks rent on the workshop and this guy is an excellent returning customer.
Read that how you will, but yes, its probably a bit cheap.
Dann
It takes a village....
 Kudos for helping others.
Reply
1
1
07-23-2013, 10:57 PM
#83
Elite Member
Thread Starter
Join Date: Apr 2010
Location: Newcastle, Australia
Posts: 2,826
Total Cats: 67
updates.
This is the o2 bung, where the wideband screws in for tuning and monitoring. This is before the cat but at least a foot preferably 2 after the turbo, the heat will kill it if its too close.
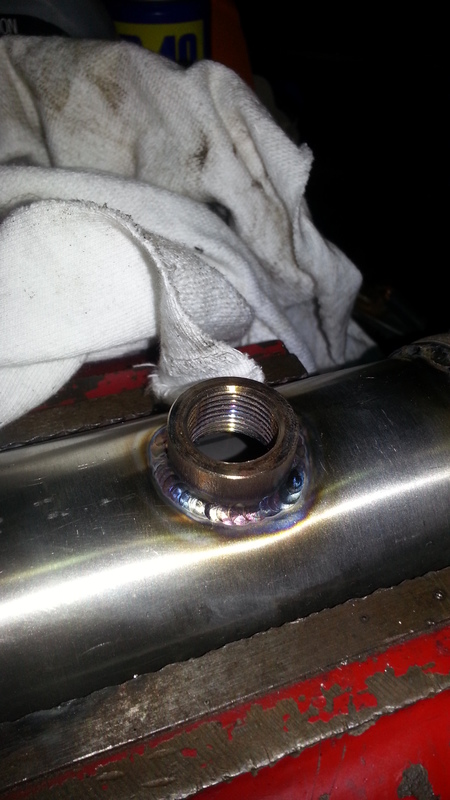
And the AIT (air intake temp) bung. The megasquirt ditches the factory airflow meter and instead uses manifold air pressure (MAP) and AIT along with the tuning tables to determine load and fueling, so it needs the AIT screwed in here. This goes after the intercooler, and somewhere that wont heatsoak (so not in the inlet manifold.)
Just faced these flanges on a fine linisher with a brand new belt, I ran the tap through 1 more time to ensure its nice and clean.

This is a grade 12.9 High tensile Steel bolt, 10x1.5mm thread size. Im cutting the threads off it, to use as turbo studs. the small bottle is Resbond, which is like loctite but for turbo temperatures. This will hold the studs in the manifold. Loctite releases with heat so will not work here. Please note that most turbos need to be drilled to fit the bigger 10mm studs (stock is usually 8mm) AND note that these will NOT work on a track car, the heat will soften them and they will stretch you MUST use Inconel and locking hardware in a track car.
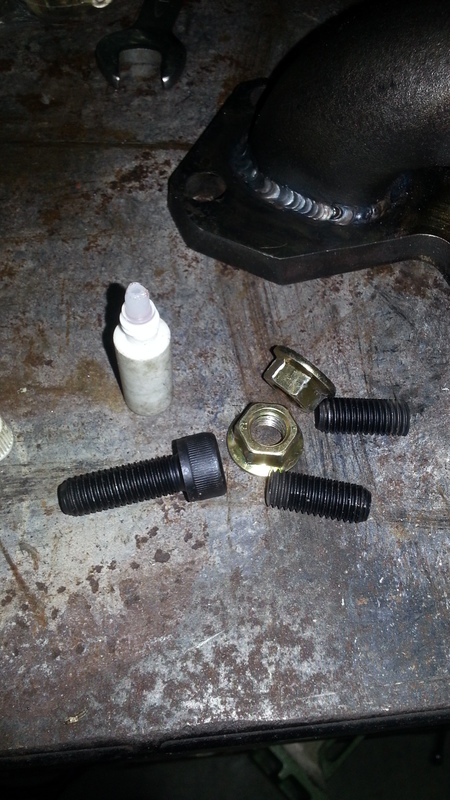
Im threading them in using the double nut method. this is 2 nuts tightened into each other so secure them to the thread and then wound in with the top nut.
Use proper exhaust nuts, flanged and serated flanges.
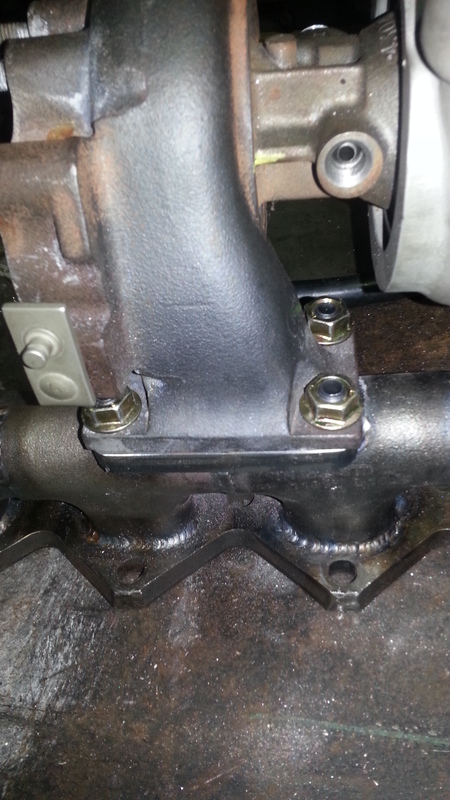
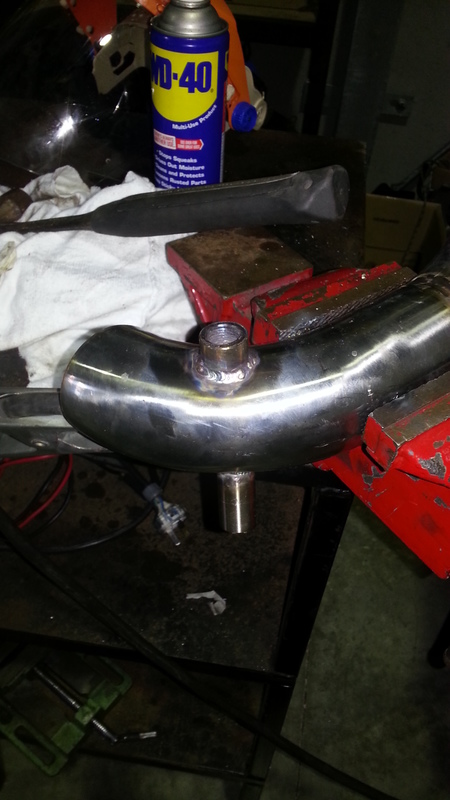
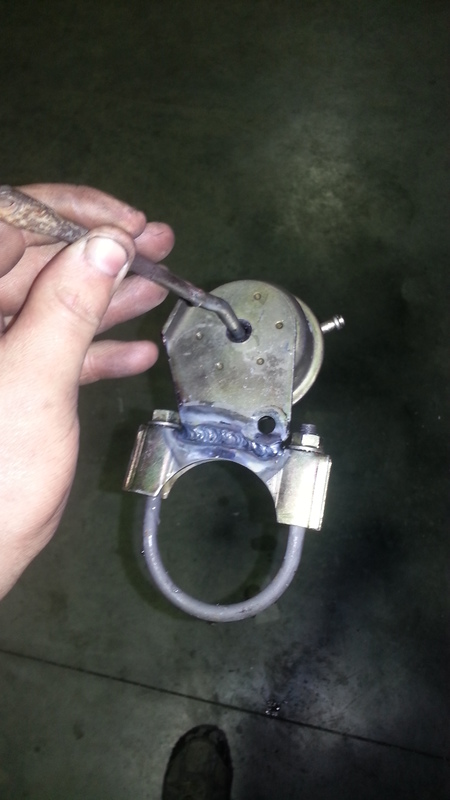
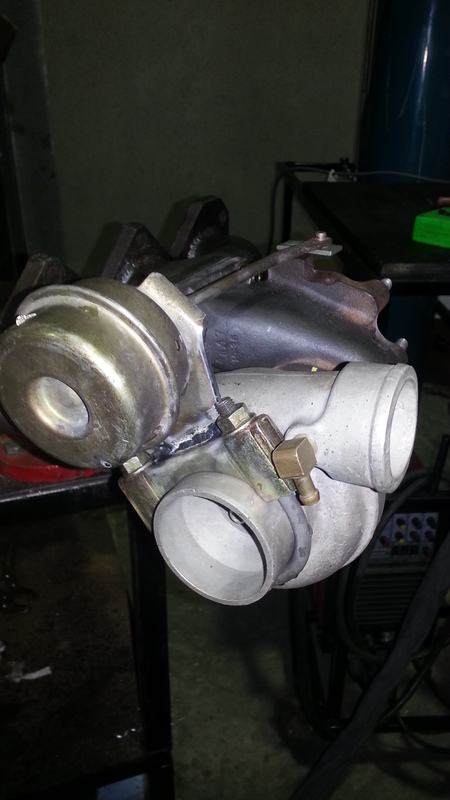
The wastegate solution. Since this turbo has been clocked the wastegate canister will no longer fit, so in this case I've welded the wastegate can to this exhaust clamp and will clapm it to the front of the turbo. Wastegate cans must be fixed very solidly for good boost control so make sure its very stiff.
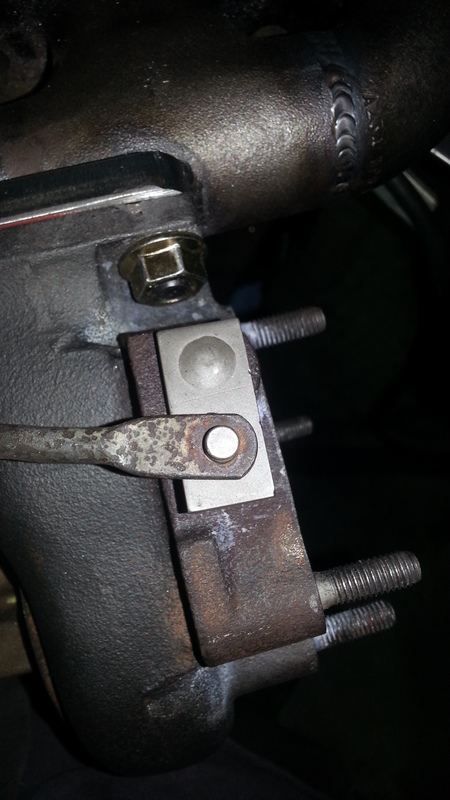
This is the wastegat can rod and the wastegate lever arm. Note that wastegate rod naturally doesnt quite make it onto the arm, this means when I stretch it on there will be a millimetre or 2 preload, this is important to ensure the wastegate flapper inside seals properly when closed.
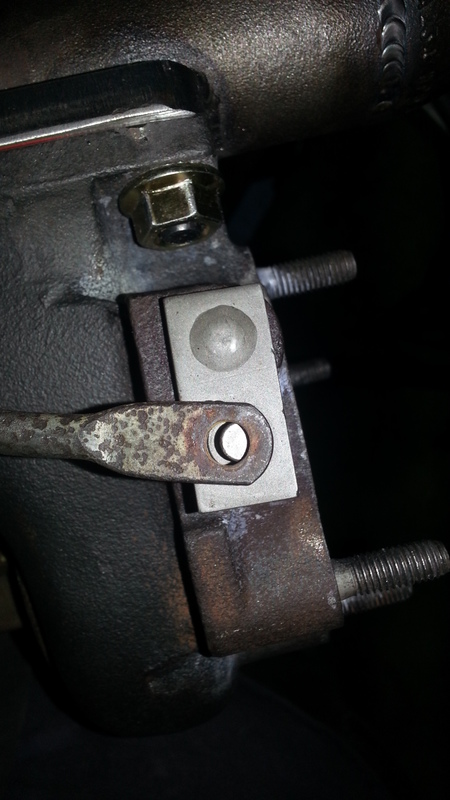
Here it is on. Note that it needs a small E clip to secure it.
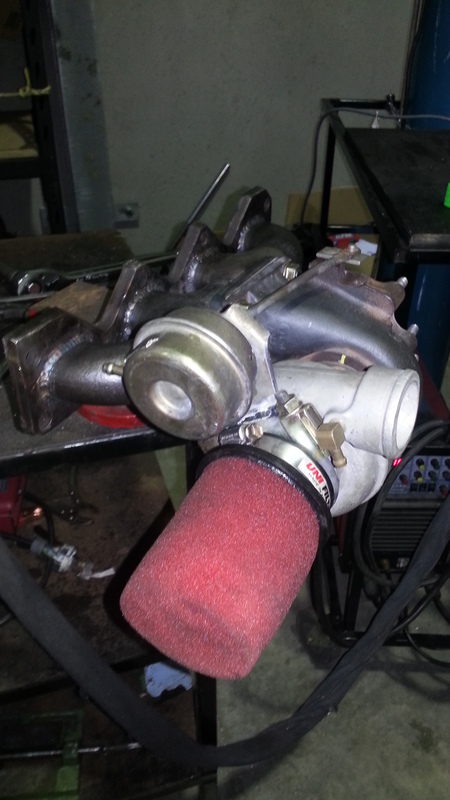
How it sits on the turbo.
And with a small temporary air filter.
Dann
This is the o2 bung, where the wideband screws in for tuning and monitoring. This is before the cat but at least a foot preferably 2 after the turbo, the heat will kill it if its too close.
And the AIT (air intake temp) bung. The megasquirt ditches the factory airflow meter and instead uses manifold air pressure (MAP) and AIT along with the tuning tables to determine load and fueling, so it needs the AIT screwed in here. This goes after the intercooler, and somewhere that wont heatsoak (so not in the inlet manifold.)
Just faced these flanges on a fine linisher with a brand new belt, I ran the tap through 1 more time to ensure its nice and clean.
This is a grade 12.9 High tensile Steel bolt, 10x1.5mm thread size. Im cutting the threads off it, to use as turbo studs. the small bottle is Resbond, which is like loctite but for turbo temperatures. This will hold the studs in the manifold. Loctite releases with heat so will not work here. Please note that most turbos need to be drilled to fit the bigger 10mm studs (stock is usually 8mm) AND note that these will NOT work on a track car, the heat will soften them and they will stretch you MUST use Inconel and locking hardware in a track car.
Im threading them in using the double nut method. this is 2 nuts tightened into each other so secure them to the thread and then wound in with the top nut.
Use proper exhaust nuts, flanged and serated flanges.
The wastegate solution. Since this turbo has been clocked the wastegate canister will no longer fit, so in this case I've welded the wastegate can to this exhaust clamp and will clapm it to the front of the turbo. Wastegate cans must be fixed very solidly for good boost control so make sure its very stiff.
This is the wastegat can rod and the wastegate lever arm. Note that wastegate rod naturally doesnt quite make it onto the arm, this means when I stretch it on there will be a millimetre or 2 preload, this is important to ensure the wastegate flapper inside seals properly when closed.
Here it is on. Note that it needs a small E clip to secure it.
How it sits on the turbo.
And with a small temporary air filter.
Dann
Reply
0
0
07-24-2013, 08:42 AM
#84
Elite Member
Thread Starter
Join Date: Apr 2010
Location: Newcastle, Australia
Posts: 2,826
Total Cats: 67
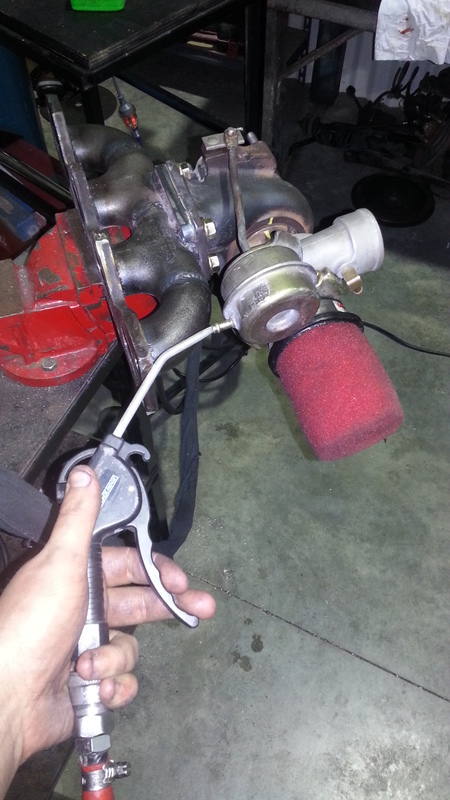
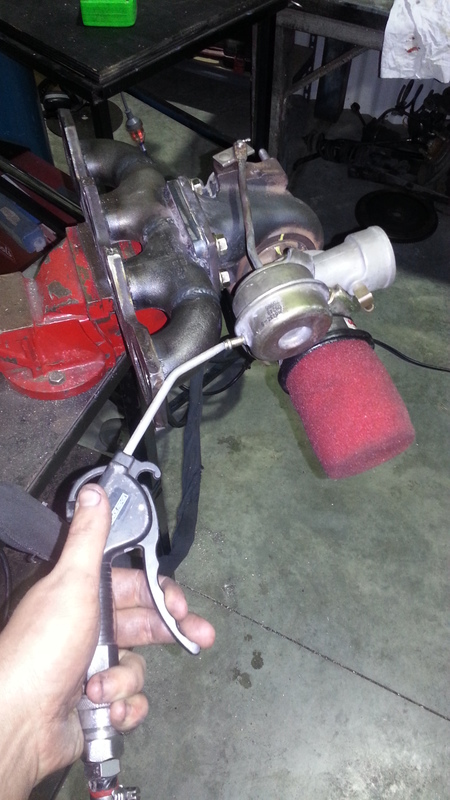
Ive fitted the wastegate actuator can, and need to test. Im using the shop air compressor, be sure to unplug the air compressor and bleed it down to a sensible turbo level of pressure, I used 20psi.
Into the actuator can we blow some air and check a good range of motion, and smooth operation of the wastegate.
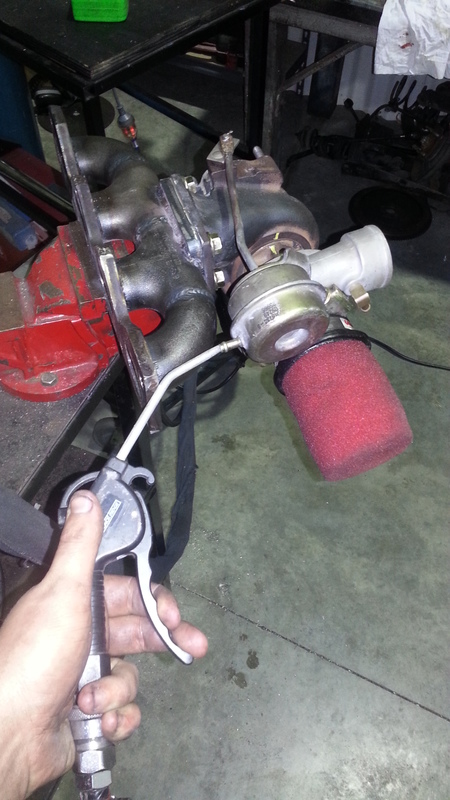
Dann
Into the actuator can we blow some air and check a good range of motion, and smooth operation of the wastegate.
Dann
Reply
0
0
 07-24-2013, 08:43 AM
#86
Elite Member
Thread Starter
Join Date: Apr 2010
Location: Newcastle, Australia
Posts: 2,826
Total Cats: 67
A quick note on the return fitting, you can see the internal angled surfaces it seals with, I will however use some RTV as shown.
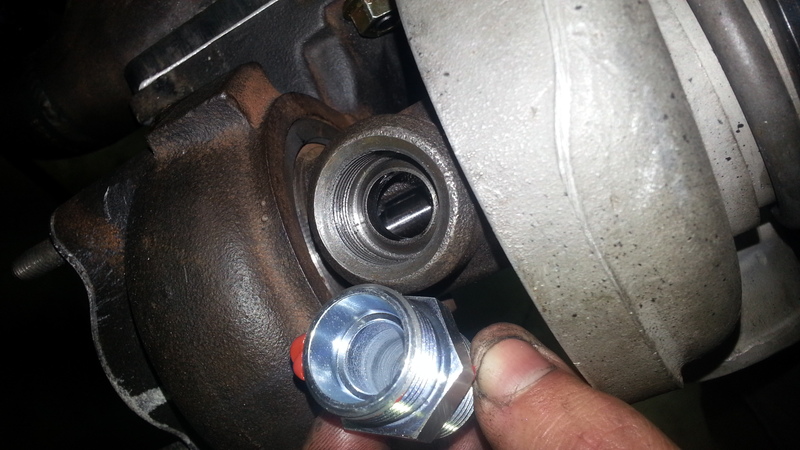
And the completed hotside in all its tiny weenie zero lag low hp high torque glory lol
Dann
And the completed hotside in all its tiny weenie zero lag low hp high torque glory lol
Dann
Reply
0
0
07-24-2013, 08:49 AM
#87
Elite Member
Thread Starter
Join Date: Apr 2010
Location: Newcastle, Australia
Posts: 2,826
Total Cats: 67
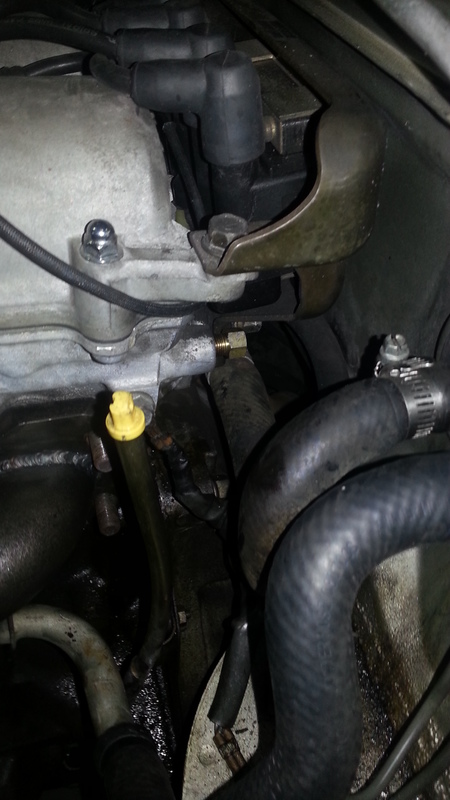
Its very dark but dead centre you can see the oil return hose fitted to the return barb in the sump and clamped, dead centre.

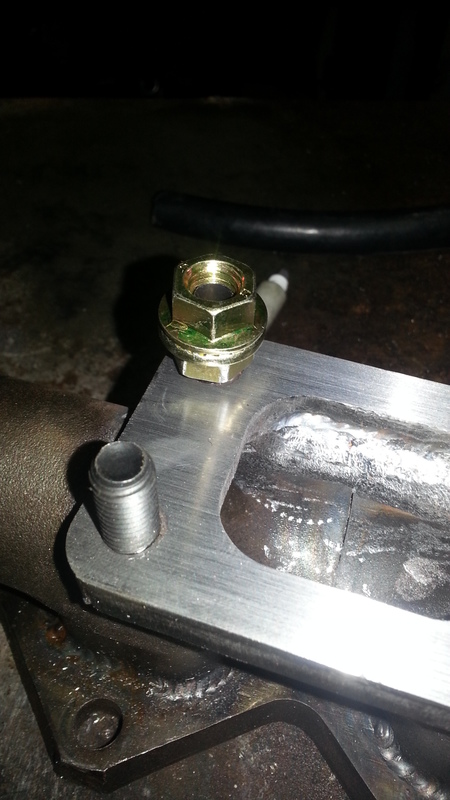
This plug on the back of the head with a 5mm hex head is what we will use to feed the turbo.
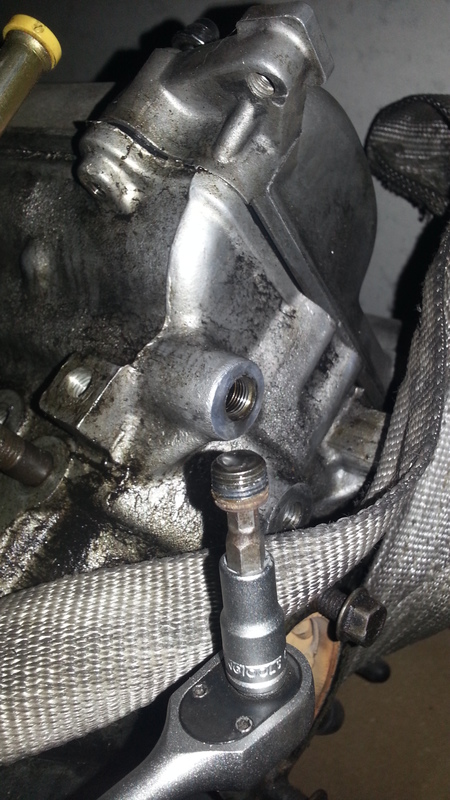
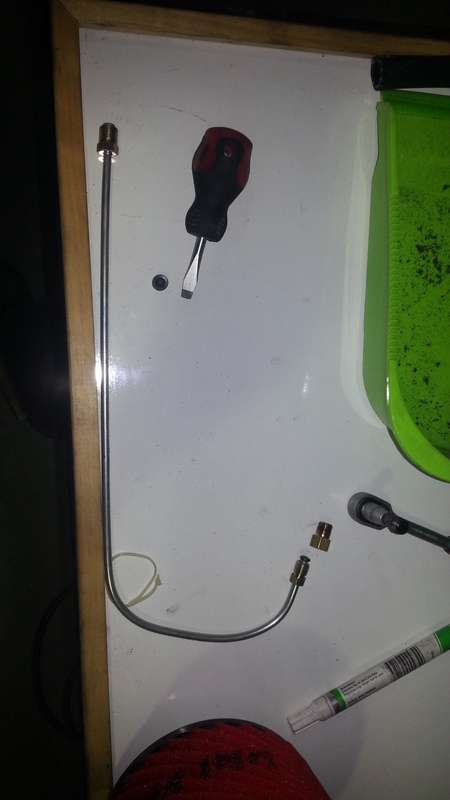
Here is a nice cheap hardline made at a local brake shop for 30 bucks. Ive bent it for a trial fit already. Next to the screwdriver is the plug we just removed, its 1/8th gas threaded, which is a tapered thread.
The top end of the hardline has the fitting for the turbo, and the opposite end has a fitting that threads into the 1/8th gas adaptor, next to it. the adaptor goes into the head first, and then the rest screws on.
Here is the adaptor fitted.
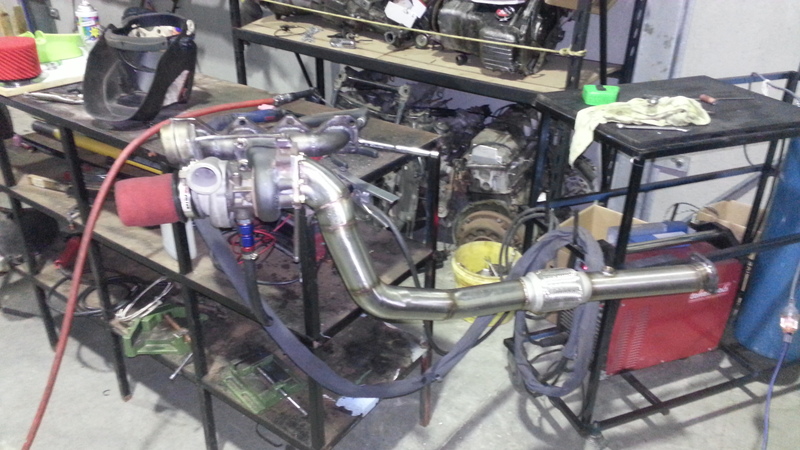
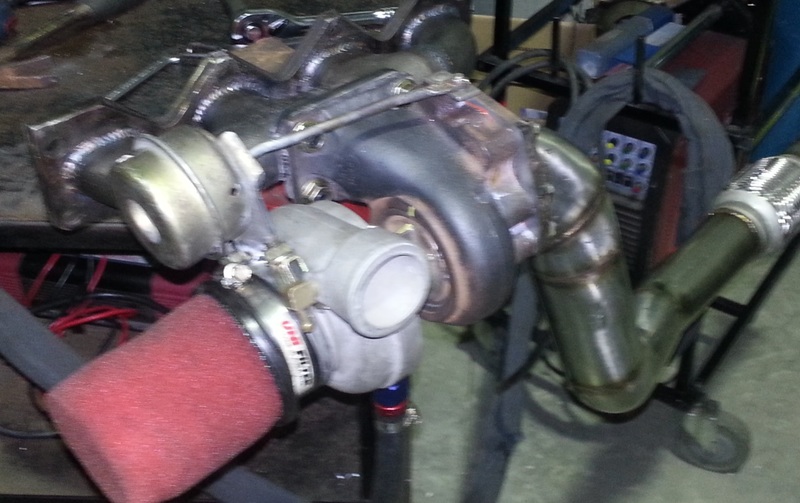
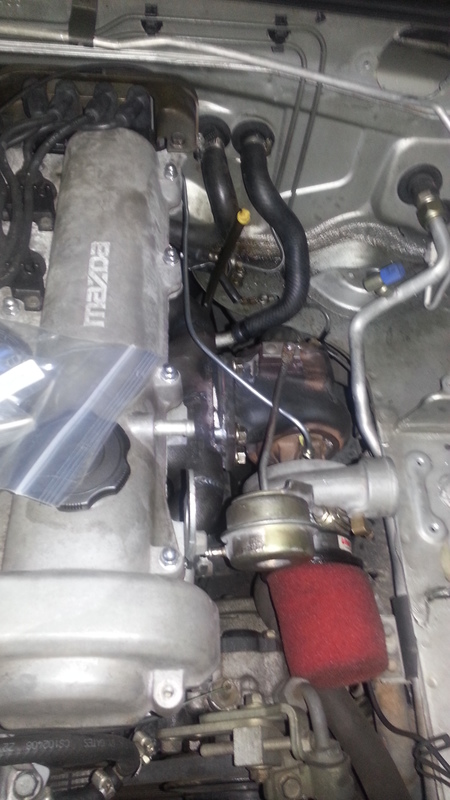
And the whole lot fitted up, with its temporary air filter.
Dann
This plug on the back of the head with a 5mm hex head is what we will use to feed the turbo.
Here is a nice cheap hardline made at a local brake shop for 30 bucks. Ive bent it for a trial fit already. Next to the screwdriver is the plug we just removed, its 1/8th gas threaded, which is a tapered thread.
The top end of the hardline has the fitting for the turbo, and the opposite end has a fitting that threads into the 1/8th gas adaptor, next to it. the adaptor goes into the head first, and then the rest screws on.
Here is the adaptor fitted.
And the whole lot fitted up, with its temporary air filter.
Dann
Reply
0
0

 07-24-2013, 09:24 AM
#91
I'm not sure our vvt heads have that port like that, but I was thinking of tapping into the vvt feed line. Will have to figure something out. I have a ton of braided stainless lines as well as steel and alum hardlines sitting around so might have to experiment a little bit.
Sorry for threadjack,
Back on topic: its coming together pretty clean. when is the dyno? And will you hit up a dynojet this time?
Reply
0
0
07-30-2013, 09:13 AM
#93
Elite Member
Thread Starter
Join Date: Apr 2010
Location: Newcastle, Australia
Posts: 2,826
Total Cats: 67
So this is it, the end of the '2K Turbo NA' build.
The final steps are straight forward. And the owner has recieved it.
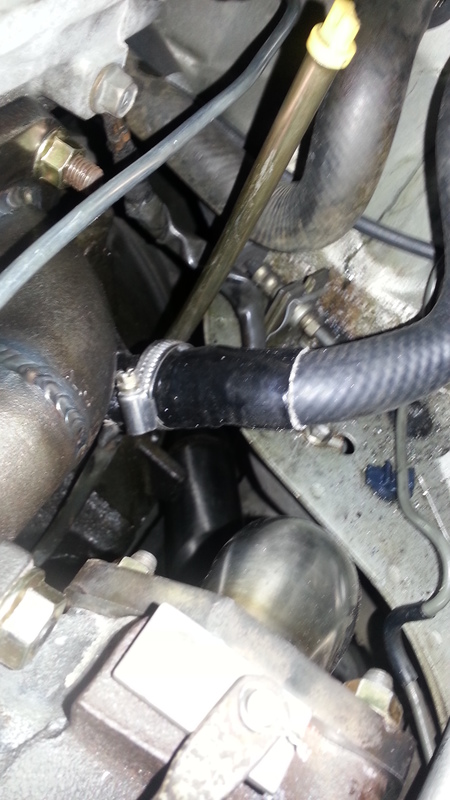
Ive refitted the heater hoses, and here Ive used a little heat proofing for insurance.
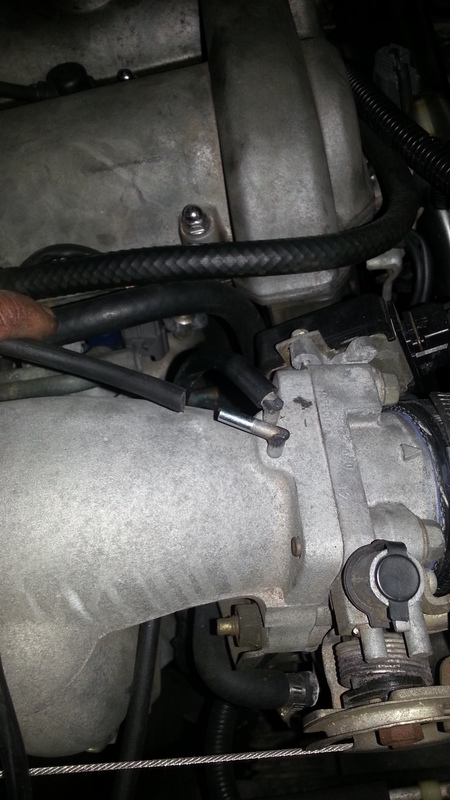
The megasquirt instructions have all of these steps, but here they are, fit the vacuum tube through the firewall.

Here is where it goes on the TB, this has a little blocker from the factory.
The AIT sensor gets plugged in here, the loop joining the last 2 arent needed on new megasquirts as I found out (didnt trust the instructions lol, I was wrong.)
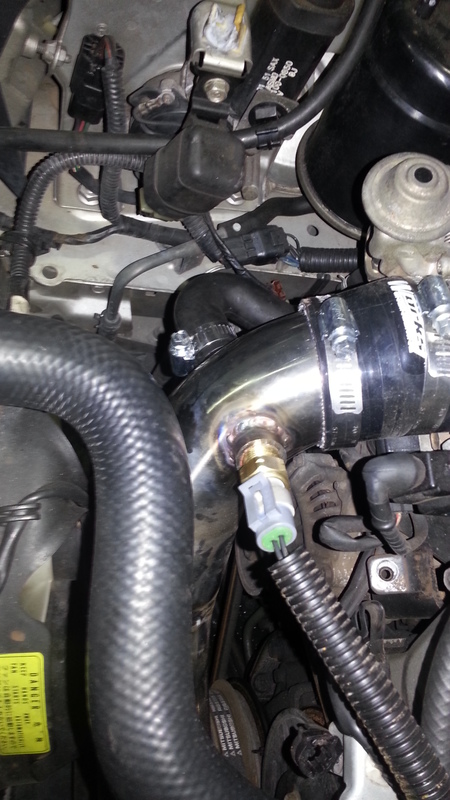
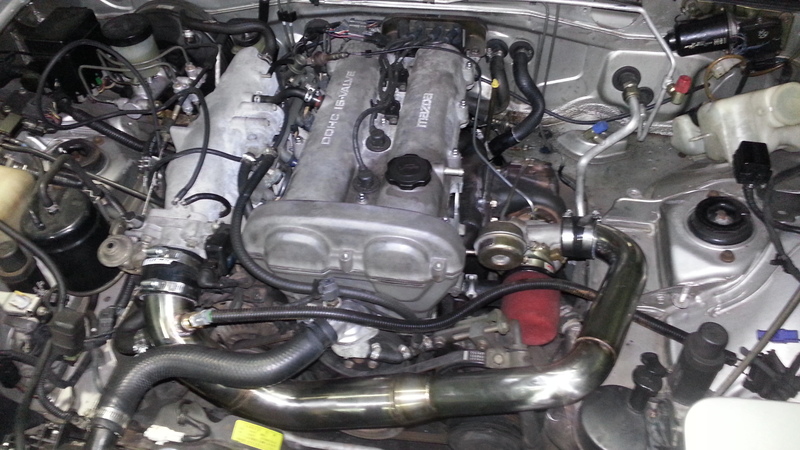
Here is the sensor on the pipe.
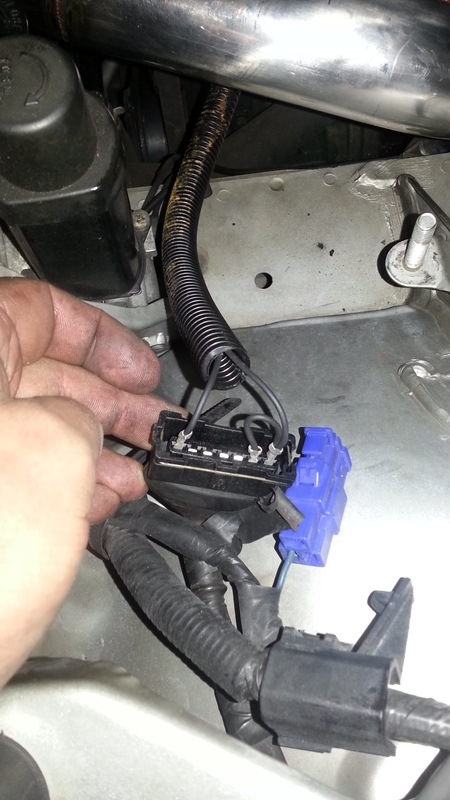
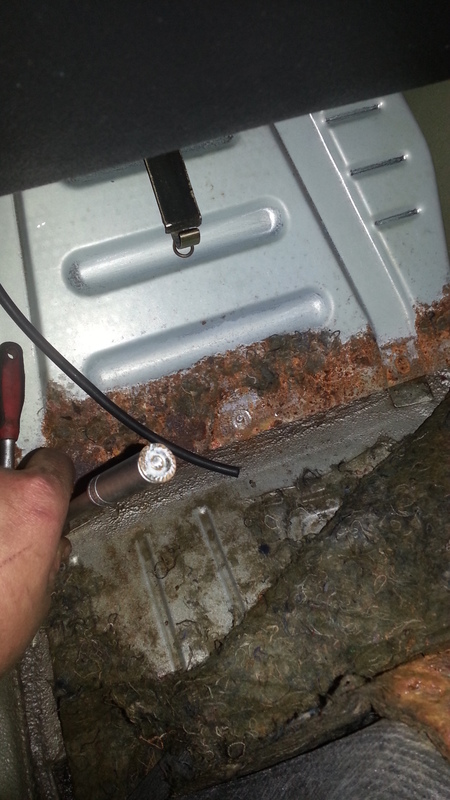
Remove the ECU cover on the passenger side, this rust is OEM, dont believe me, check your NA haha.
Heres the oem ecu.
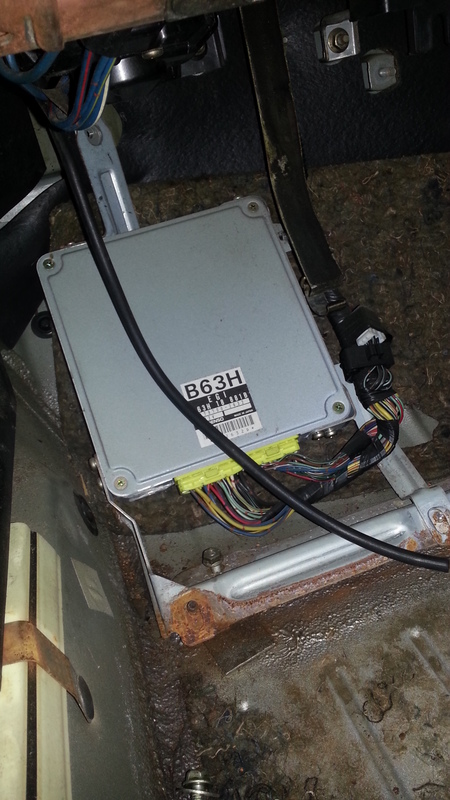
Unplug it.

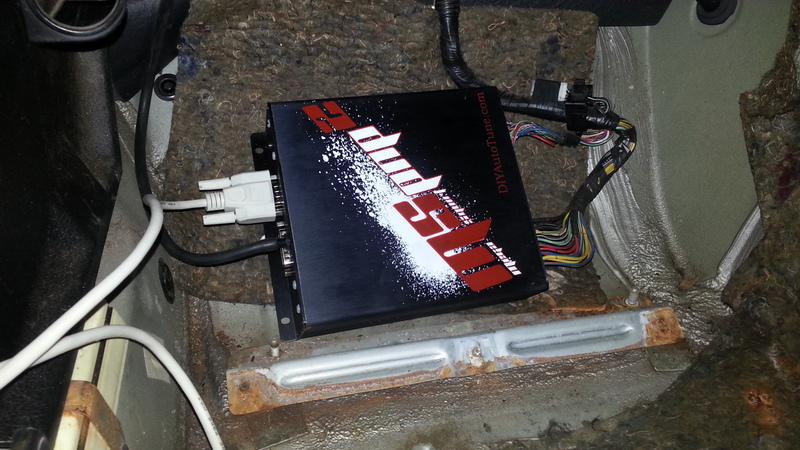
Replace with MS.

Add the serial cable for porting and hook the other end of that vacuum tube to it also.
Worst photo sorry, but here it is all finished.
From here hook up a wideband and street tune as I did or take it to a dyno. This will get tuned at IS Motorsport In Sydney in the next couple of weeks it seems, so we will know for sure exactly how it performs.
This boosts from 1200rpm, with no lag at all.
None.
Zero.
Period.
It feels like a 5L swap or something cruising around in it. Just non stop torque. 7psi at 1500rpm torque. Just a wall of nonstop torque.
If you cruise at 60 in 5th and hit a bump and your foot moves, guess what, 5psi haha.
I hope this helps some people and makes a lot more people comfortable.
It was easy to tune to be safe and still make good power. It runs great, very smooth. No issues without the BOV at all, and no pinging, because it simply has a conservative spark map.
The owner will give me a review in the next couple of days after having it for a bit and Ill post it up.
Dann
The final steps are straight forward. And the owner has recieved it.
Ive refitted the heater hoses, and here Ive used a little heat proofing for insurance.
The megasquirt instructions have all of these steps, but here they are, fit the vacuum tube through the firewall.
Here is where it goes on the TB, this has a little blocker from the factory.
The AIT sensor gets plugged in here, the loop joining the last 2 arent needed on new megasquirts as I found out (didnt trust the instructions lol, I was wrong.)
Here is the sensor on the pipe.
Remove the ECU cover on the passenger side, this rust is OEM, dont believe me, check your NA haha.
Heres the oem ecu.
Unplug it.
Replace with MS.
Add the serial cable for porting and hook the other end of that vacuum tube to it also.
Worst photo sorry, but here it is all finished.
From here hook up a wideband and street tune as I did or take it to a dyno. This will get tuned at IS Motorsport In Sydney in the next couple of weeks it seems, so we will know for sure exactly how it performs.
This boosts from 1200rpm, with no lag at all.
None.
Zero.
Period.
It feels like a 5L swap or something cruising around in it. Just non stop torque. 7psi at 1500rpm torque. Just a wall of nonstop torque.
If you cruise at 60 in 5th and hit a bump and your foot moves, guess what, 5psi haha.
I hope this helps some people and makes a lot more people comfortable.
It was easy to tune to be safe and still make good power. It runs great, very smooth. No issues without the BOV at all, and no pinging, because it simply has a conservative spark map.
The owner will give me a review in the next couple of days after having it for a bit and Ill post it up.
Dann
Reply
1
1
07-31-2013, 04:32 PM
#94
Junior Member

Join Date: May 2011
Location: Signal Hill, CA
Posts: 257
Total Cats: 13
Thanks for such a well documented build!
What would you say the distant is from the head to the turbo? I'm going to venture out, and try and make my own manifold, and I would like to try to minimize build errors lol. I'll be designing it in solidworks.
What would you say the distant is from the head to the turbo? I'm going to venture out, and try and make my own manifold, and I would like to try to minimize build errors lol. I'll be designing it in solidworks.
Reply
0
0


Thread
Thread Starter
Forum
Replies
Last Post


