Pinky's Sweet (Air) Box
 11-27-2013, 03:53 AM
#21

Shouldn't be too much of a problem; my hood has louver vents on both sides, and an elevated cowl "scoop" area, there are plenty of other paths out for air. (Lol - I hope... Remember, I still haven't fired it up yet so this is all just Hopeful Engineering and Wild Guesses at this point.

Reply
 0
0

0
11-27-2013, 07:12 AM
#22
Boost Czar


iTrader: (62)
Join Date: May 2005
Location: Chantilly, VA
Posts: 79,493
Total Cats: 4,080
The Ladies love it when my big toob rubs the box...
I actually hadn't really considered that. Pretty dumb actually, although I have two silicone joints between the "toob" and the turbo inlet, so there may be enough give there. Also, I'm trying to find some edging that's more elegant than split fuel hose to seal around the lower edge of the box and the "toob". Maybe the solution is to add a "bellows/bulbed" style of silicone connector and bolt down the toob to the inner fender.
What say you?
Reply
0
0
11-27-2013, 07:39 AM
#23
Senior Member
Thread Starter
iTrader: (1)

Join Date: Jan 2013
Location: Jacksonville FL
Posts: 648
Total Cats: 216
Pretty sure my Enviably Thick, Massive, Veiny and Throbbing Intake tube is 3", it steps down to 2.5 at a steel elbow by the turbo inlet though, so my best bet would be to find a 3 - 2.5 hump adapter to put there (if such a thing exists..) If not I may just refabricate that inlet elbow with a 3" end and use a regular 3" hump there. The elbow I have has a few ugly now-unused hose nipples on it anyway, and I've got time to kill waiting for my ECU to get here.
Reply
0
0
11-27-2013, 07:51 AM
#24
Senior Member
Thread Starter
iTrader: (1)
Join Date: Jan 2013
Location: Jacksonville FL
Posts: 648
Total Cats: 216
Just checked it out in your build thread- I had a conversation with one of my guys yesterday about how it's too bad that there's no graceful way to pull air from the windshield wiper cowl, and boom, there you've done it. I think I may holesaw a few holes in there myself, just to vent the box some more... Maybe tack some mesh across it too, to keep debris out of the box. Thanks for the idea!!
Reply
0
0
 11-27-2013, 11:28 AM
#27
2 Props,3 Dildos,& 1 Cat

iTrader: (8)
Join Date: Jun 2005
Location: Fake Virginia
Posts: 19,338
Total Cats: 573
hump hose is basically like adding a speed bump to your intake. you know those kayakers who hide behind rocks in the eddies? that's your hump toob.
what you should really do is enlarge the hole the toob passes through to get into the box so that it is sloppy hotdog in a hallway. You'll still have plenty of cold air benefits. if you really want to get crazy-go-nuts fancy, you could put a soft flange on the toob and let that slide against the box opening or add some kind of flexible material between the two. All it has to do is resist airflow a little and you'll still get more cold air than warm.
How about some .030, low durometer silicone sheet cut into a large flange? Stretch the middle over the tube, sandwich the outer diameter to the hole. You could probably even use a rubber glove.
Reply
0
0
 11-27-2013, 12:14 PM
#30

Just checked it out in your build thread- I had a conversation with one of my guys yesterday about how it's too bad that there's no graceful way to pull air from the windshield wiper cowl, and boom, there you've done it. I think I may holesaw a few holes in there myself, just to vent the box some more... Maybe tack some mesh across it too, to keep debris out of the box. Thanks for the idea!!
BTW, siliconeintakes.com sells the shielded air filter I had when I was normally aspirated for cheap. I just got myself a '95 track rat and may do something like that again. Dunno.
I dig your concept though. Air box and heat shield for the brake system. Killing two birds with one stone.

Reply
0
0
11-27-2013, 12:32 PM
#31
2 Props,3 Dildos,& 1 Cat
iTrader: (8)
Join Date: Jun 2005
Location: Fake Virginia
Posts: 19,338
Total Cats: 573
The pipe can't touch the opening because there will not be flex in the system. Good, reinforced silicone couplers aren't good at flex.
Reply
0
0
11-27-2013, 12:35 PM
#32
Engine rocking + length of pipe = way more than 1/8 inch of movement minus whatever size your rubber is. It's going to squeak and stress the joint.
The pipe can't touch the opening because there will not be flex in the system. Good, reinforced silicone couplers aren't good at flex.
The pipe can't touch the opening because there will not be flex in the system. Good, reinforced silicone couplers aren't good at flex.
Reply
0
0
11-27-2013, 02:21 PM
#33
Senior Member
Thread Starter
iTrader: (1)
Join Date: Jan 2013
Location: Jacksonville FL
Posts: 648
Total Cats: 216
Yeah, back in post 12 I was talking about trying to find a suitable edging to go between the box and tube. I ended up splitting some clear plastic tubing, which looks good but still allows the tube some movement. I'm going to count on the flexibility of the couplers and the ability of the tube to move a bit if necessary, and hope that it'll all be cool.
Pics to follow, I'm doing the final install now.
Pics to follow, I'm doing the final install now.
Reply
0
0
11-28-2013, 01:05 PM
#34
Senior Member
Thread Starter
iTrader: (1)
Join Date: Jan 2013
Location: Jacksonville FL
Posts: 648
Total Cats: 216
Ok, now completely installed. A few pics of the mounting for anyone else thinking of a variation on the idea. Separate posts because iPhone.

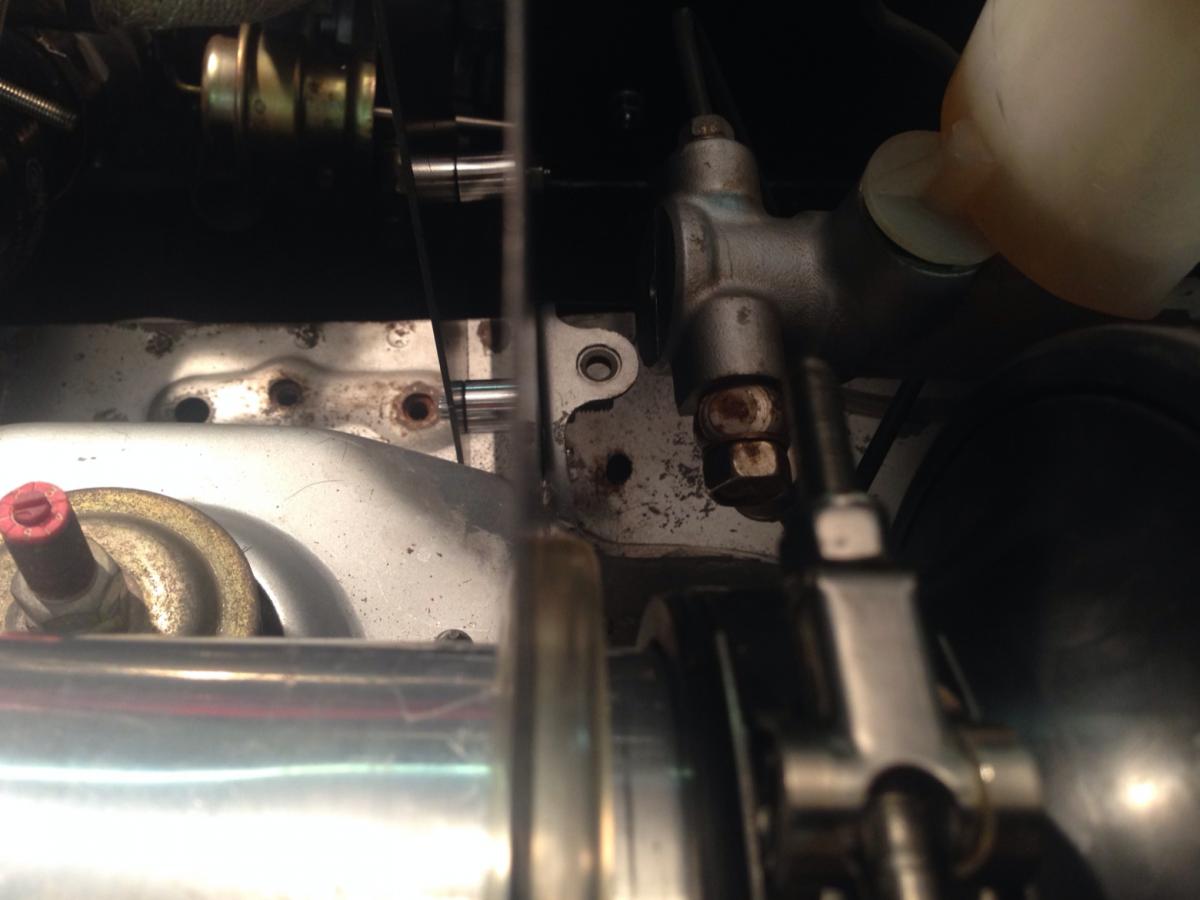
Used some split clear plastic tubing on the edge of the box where the tube passes through, and will keep an eye out for some proper panel edging at a few of my buddy's shops. (I'm not buying a roll for the tiny bit I need..). I also put a short piece of split 3/4 heater hose on the shock tower gusset under the intake tube in case they make contact.
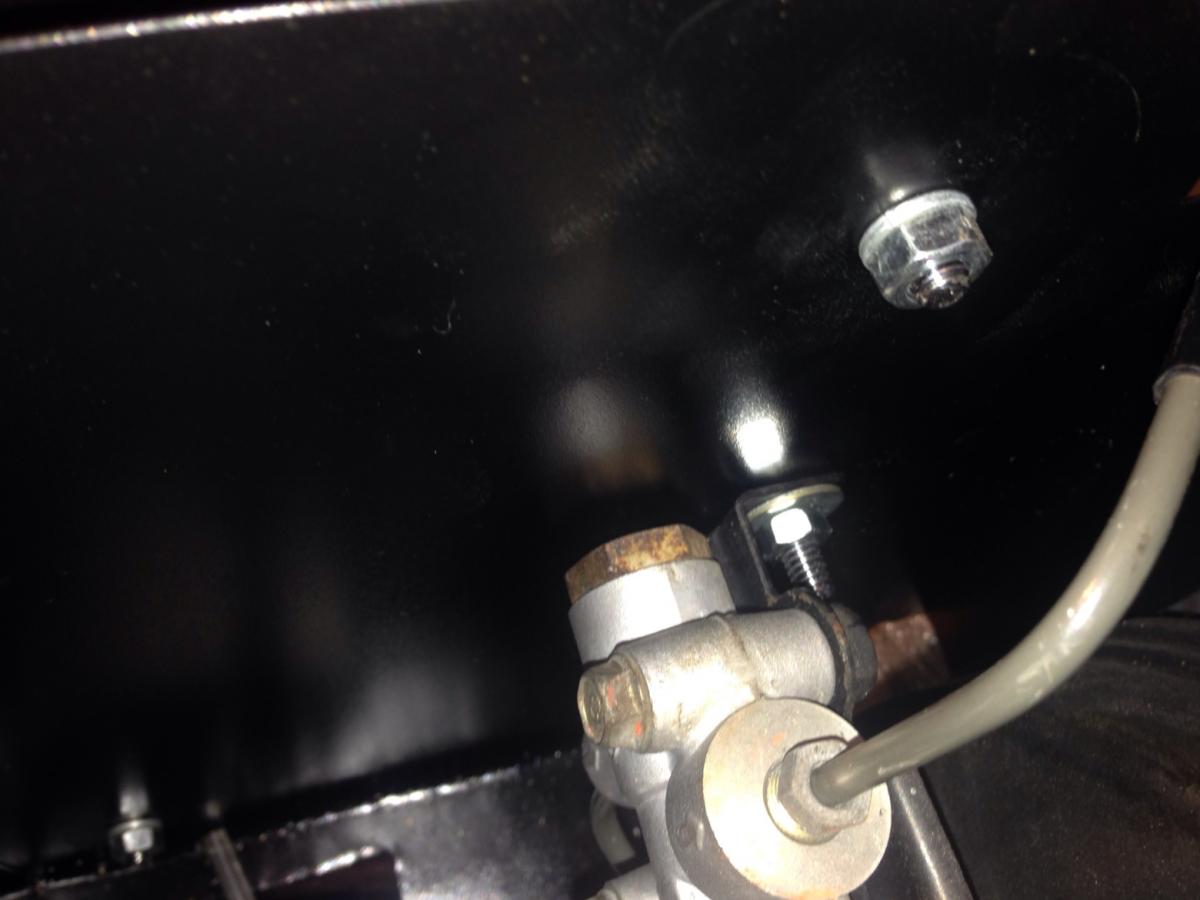
The box is attached at three points; bolted at an existing bracket adjacent to the master cylinder, bolted through the other shock tower gusset (using one of the heat shield bolts), and with a self-tapping screw through a tab on the box which attaches to the inner fender under the hood flange. (To secure the flap that the tube passes through.
Used some split clear plastic tubing on the edge of the box where the tube passes through, and will keep an eye out for some proper panel edging at a few of my buddy's shops. (I'm not buying a roll for the tiny bit I need..). I also put a short piece of split 3/4 heater hose on the shock tower gusset under the intake tube in case they make contact.
The box is attached at three points; bolted at an existing bracket adjacent to the master cylinder, bolted through the other shock tower gusset (using one of the heat shield bolts), and with a self-tapping screw through a tab on the box which attaches to the inner fender under the hood flange. (To secure the flap that the tube passes through.
Reply
0
0
 11-28-2013, 01:24 PM
#36
Senior Member
Thread Starter
iTrader: (1)
Join Date: Jan 2013
Location: Jacksonville FL
Posts: 648
Total Cats: 216
Looking directly down at the gusset attachment point.
If I were making it again I'd change a few things;
- bend a 90 degree flange on the top edge to stiffen the box.
- sandwich some foil back insulation panels between the box and some aluminum panels *inside* the box, using the aforementioned upper flange to cover the upper edge of the panels.
- add a vent hole into the wiper cowl area.
- scribe the upper edges a bit more closely to the bottom of the hood, using the flanges to attach some smooshy weatherstrip.
Reply
0
0
 11-28-2013, 03:42 PM
#39
Senior Member
Thread Starter
iTrader: (1)
Join Date: Jan 2013
Location: Jacksonville FL
Posts: 648
Total Cats: 216
Yup, sure is. I have a theory about all of the ebay manifolds breaking, which is that they seem to fail as a result of stress cycling more than anything else. They simply tear as a result of carrying the weight of the turbo and down pipe in a high heat, high vibration environment. The MSM turbo has very beefy mounts that hold it in place against the engine block, and while mounting the manifold I was careful not put it into any sort of stress. Will it last? Maybe. Maybe not. I have the OEM log I can put back on if necessary, although I suspect I'll quickly outgrow and replace the whole hot side at some point.
We can turn this thread into an eGay manifold bash if you'd like, although it's probably better that it happen in one of the many eGay Manifold Failure threads; feel free to make a "Holy **** Pinky Is Burning Up Like A Hundred Whole Dollars Testing Out His Stupid Stress Failure Theory" if you think it'll add substantively to the discourse. I figured I'd wait until it actually worked or didn't before discussing it.
By the way, you probably ought to report me to The SportMax/XXR Police too. It's true, although they're just old roll arounds I had that I slapped on while I build the rest of the car.
Reply
0
0
11-28-2013, 03:49 PM
#40
Yup, sure is. I have a theory about all of the ebay manifolds breaking, which is that they seem to fail as a result of stress cycling more than anything else. They simply tear as a result of carrying the weight of the turbo and down pipe in a high heat, high vibration environment. The MSM turbo has very beefy mounts that hold it in place against the engine block, and while mounting the manifold I was careful not put it into any sort of stress. Will it last? Maybe. Maybe not. I have the OEM log I can put back on if necessary, although I suspect I'll quickly outgrow and replace the whole hot side at some point.
We can turn this thread into an eGay manifold bash if you'd like, although it's probably better that it happen in one of the many eGay Manifold Failure threads; feel free to make a "Holy **** Pinky Is Burning Up Like A Hundred Whole Dollars Testing Out His Stupid Stress Failure Theory" if you think it'll add substantively to the discourse. I figured I'd wait until it actually worked or didn't before discussing it.
By the way, you probably ought to report me to The SportMax/XXR Police too. It's true, although they're just old roll arounds I had that I slapped on while I build the rest of the car.
We can turn this thread into an eGay manifold bash if you'd like, although it's probably better that it happen in one of the many eGay Manifold Failure threads; feel free to make a "Holy **** Pinky Is Burning Up Like A Hundred Whole Dollars Testing Out His Stupid Stress Failure Theory" if you think it'll add substantively to the discourse. I figured I'd wait until it actually worked or didn't before discussing it.
By the way, you probably ought to report me to The SportMax/XXR Police too. It's true, although they're just old roll arounds I had that I slapped on while I build the rest of the car.

It was a simple question. Although my follow up would have been something along the lines of: why bother with all this stuff when you clearly have the means and resources to run a proper setup?
Its all good.
Reply
0
0


