Tail Lights Bake and Paint
 07-22-2014, 07:21 AM
#1
Newb
Thread Starter

Join Date: Jul 2014
Posts: 2
Total Cats: 2
After painting my headlight housings, I grew all the more self conscious about my tail lights. Those clear white circles Staring at me, mocking me...I never liked the stock tail lights on my 01 and always meant to tint the outside of them ruby red with spray tint or vinyl. But after painting my headlights I thought "Why not paint the insides of my tail lights too." That way I could skip the clear coat and I wouldn't have to worry about the outside elements eventually dulling the paint. So I searched the internet and although I found good info on painting the outside of car tail lights, I couldn't find anything on anyone every attempting to paint them from the inside. So I winged and only managed to break one tail light in the process--more than enough reason to share! I'm not 100% positive, but this process worked for my 01 so I'm assuming that it will be the same for any 99-05 nb miata as well
Pictorial Guide to Painting Inside NB Tail Lights
Recommended things:
-oven
-a sense of time
-cookie sheet big enough for a tail light
-tin foil--to protect your cookie sheet
-something to protect you hands from the heat--latex gloves, rags, oven mitts, good dose of man the **** up, etc.
-tiny flat head screwdriver
-10mm socket wrench
-phillips screwdriver
-T7 sized, 6 point screwdriver
-high temp transparent spray paint
-painters tape
-maaaaaaaybe a cleaning eraser pad
Start by opening your trunk and removing the carpet liner behind the tail lights
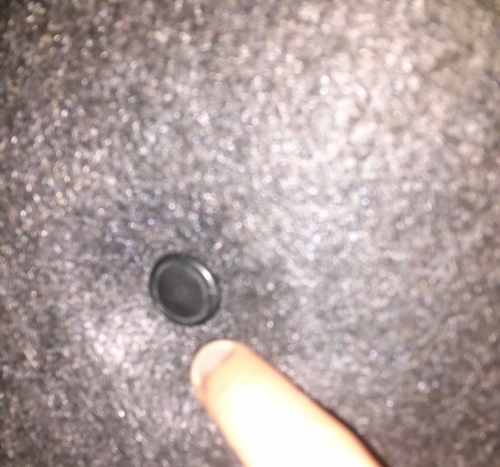
It's held in my a few small plastic tabs. Very easy to remove, just use a small flat head screwdriver to pry up the center circle and pop them off. Pop as many as you feel you need to for adequate workspace behind the tail light.
Unbolt the two 10mm nuts holding in the back of the tail light
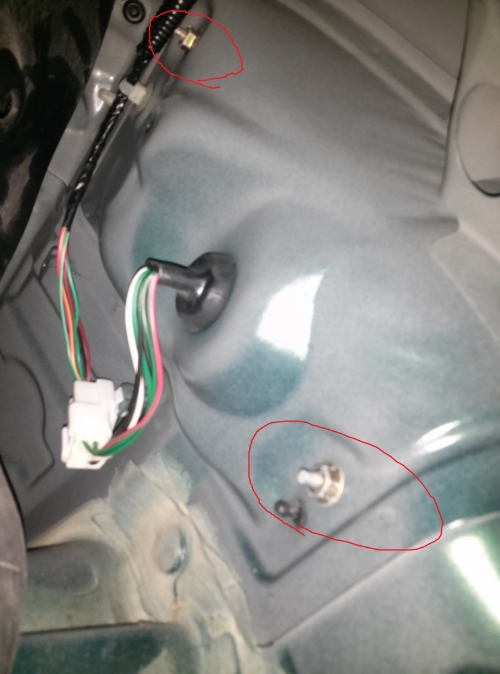
Unscrew the single phillips screw holding the top of the tail light
The tail light should pop right out
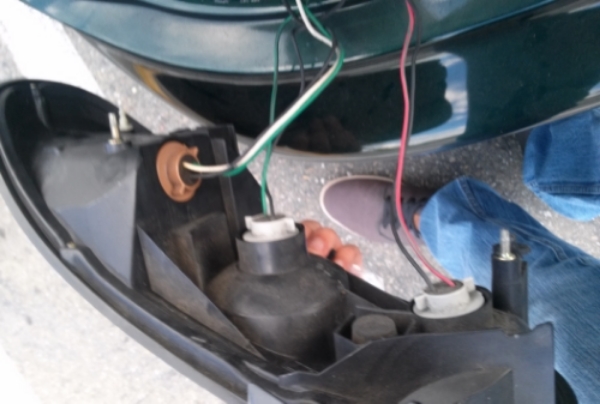
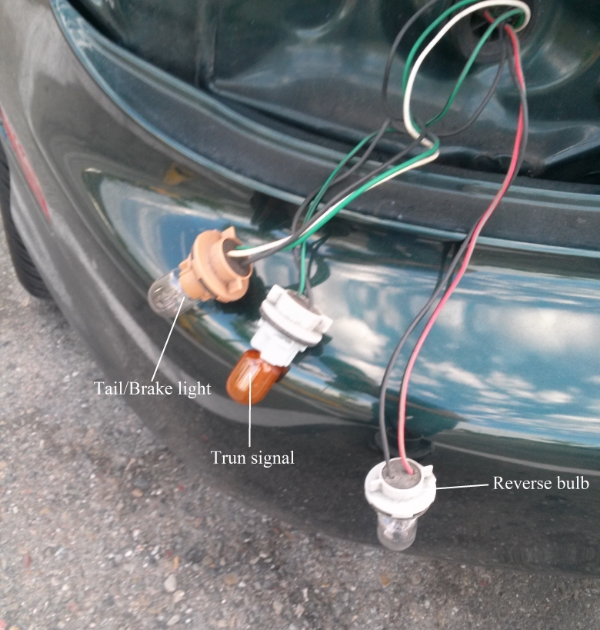
Removes the 3 bulbs by twisting out the sockets. You can keep track of which bulb goes to which socket by the color of the wires
Once the tail light, is free pat yourself on the back and repeat process of the other tail light
Remove the two rubber stopper-like pieces behind each tail light to protect them from the oven. Found here
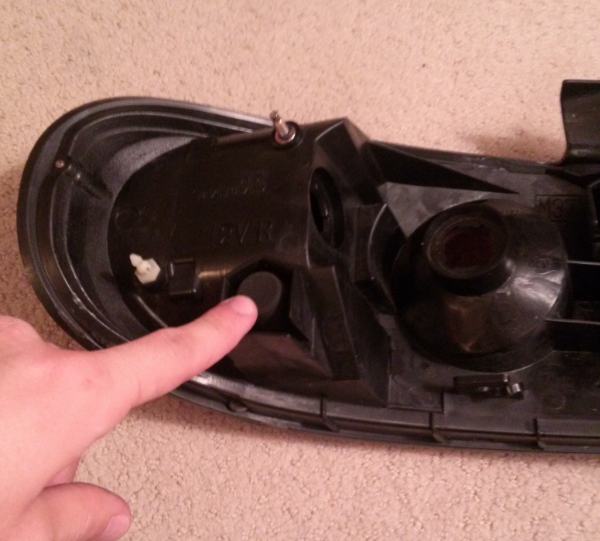
And here

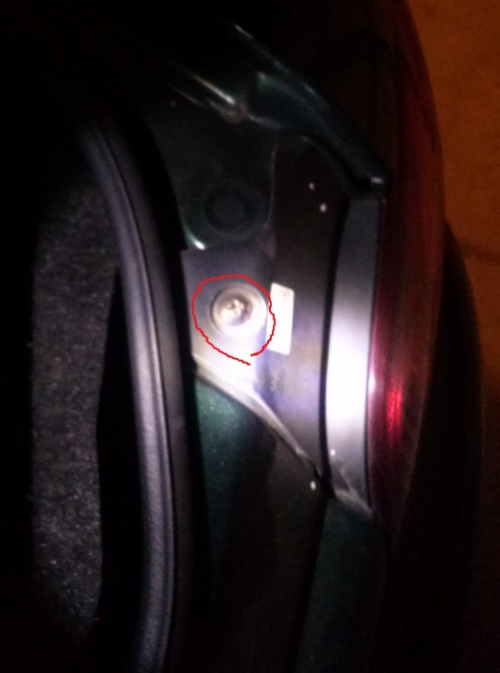
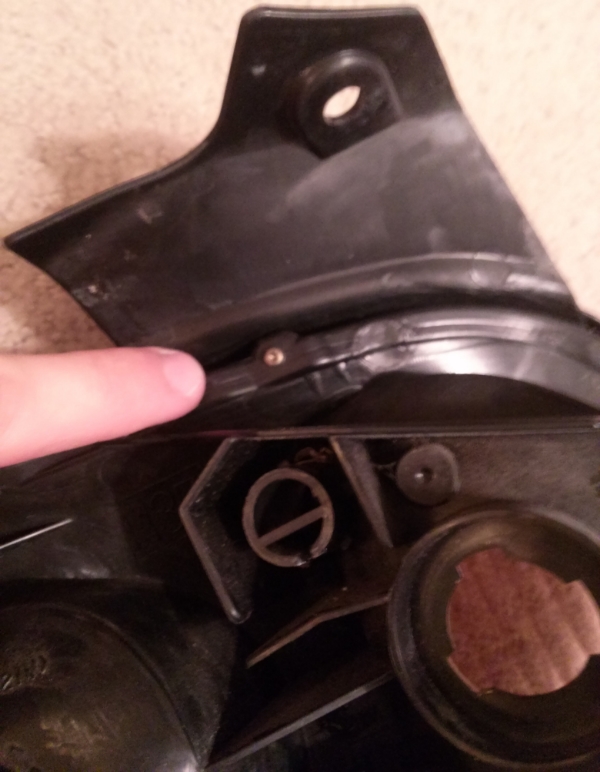
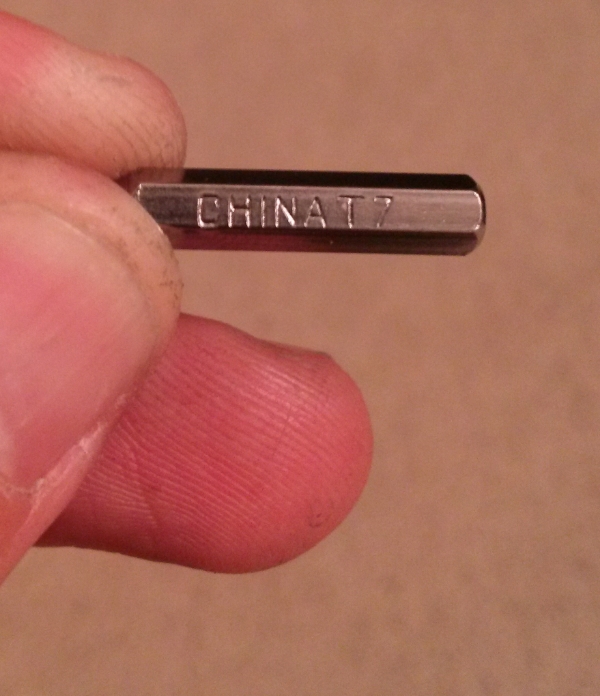
Here's the tricky part, the lens is held to the backing with three 6-point tiny screws, bit size T7, found here
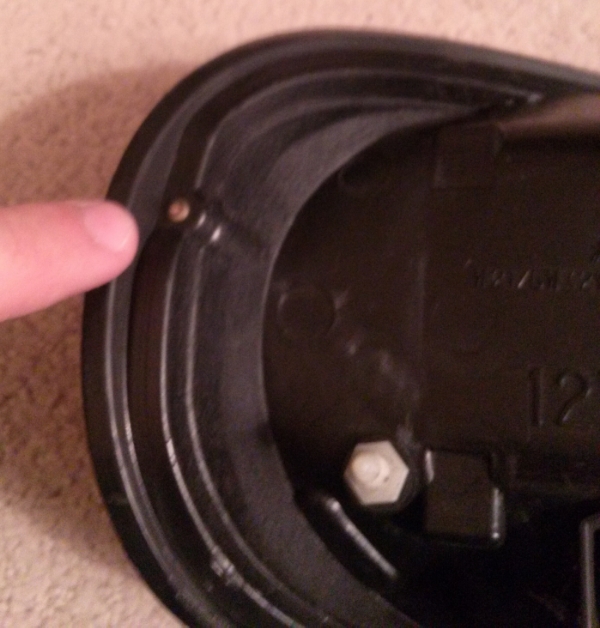
Here
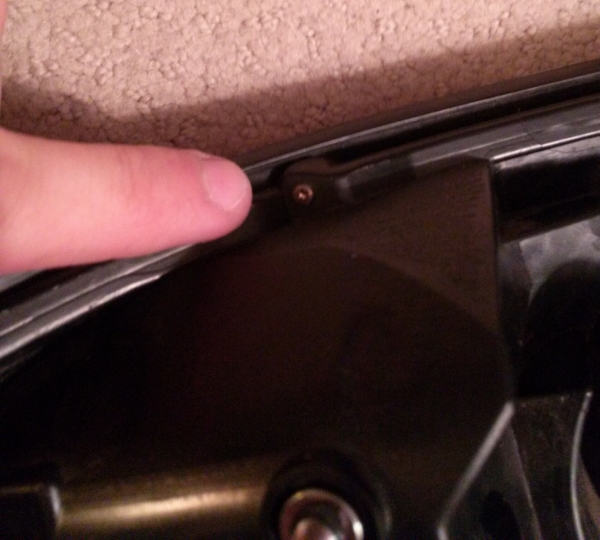
And here
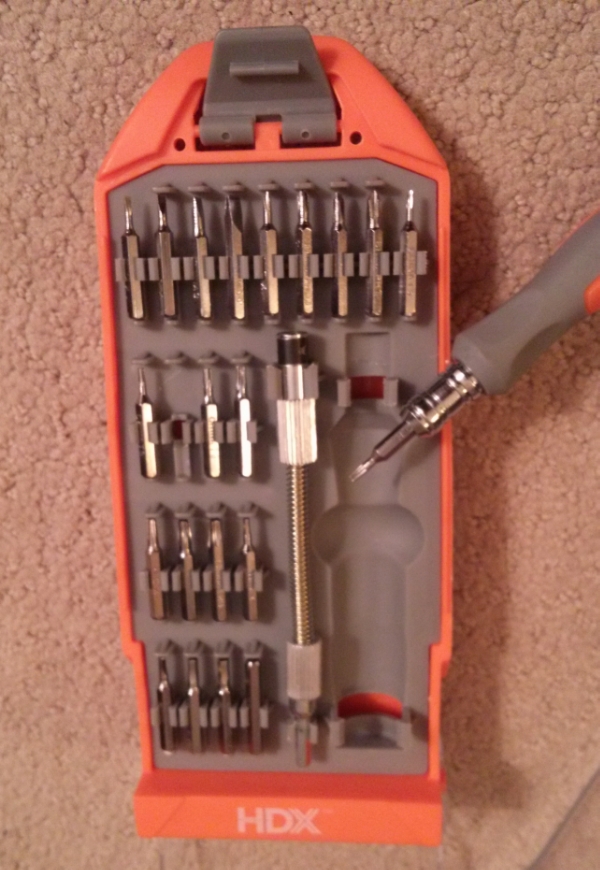
This screwdriver kit I picked up from my local Home Depot worked like a charm and only cost me $5
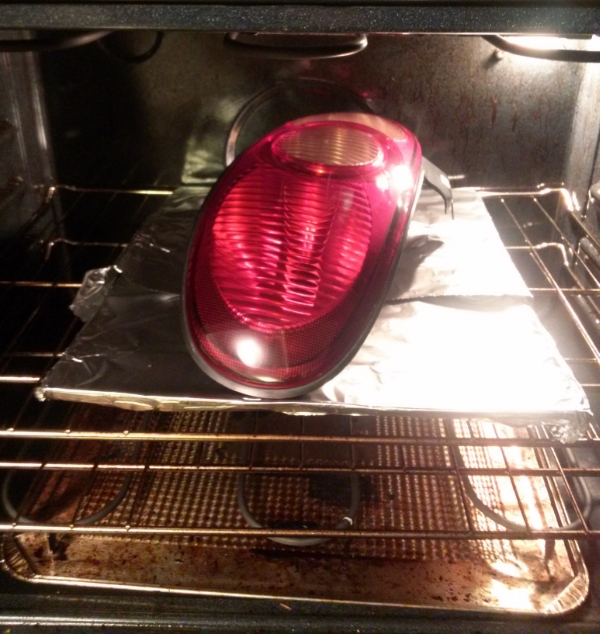
Preheat your oven to 200 degrees F and wrap a cookie sheet with tin foil. Bake each tail light for about 10-20mins depending on your oven.
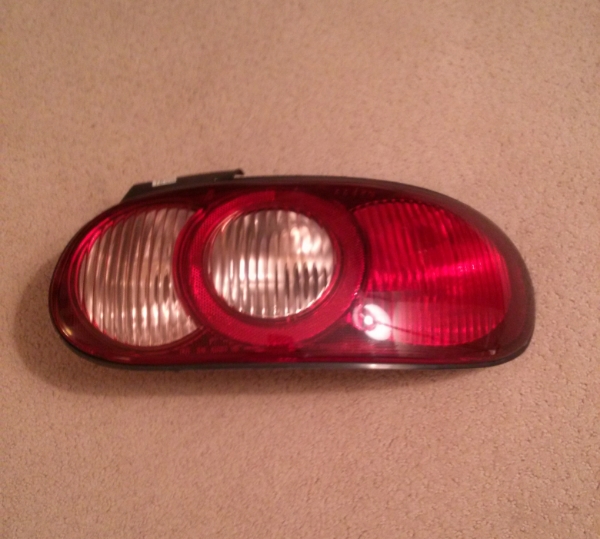
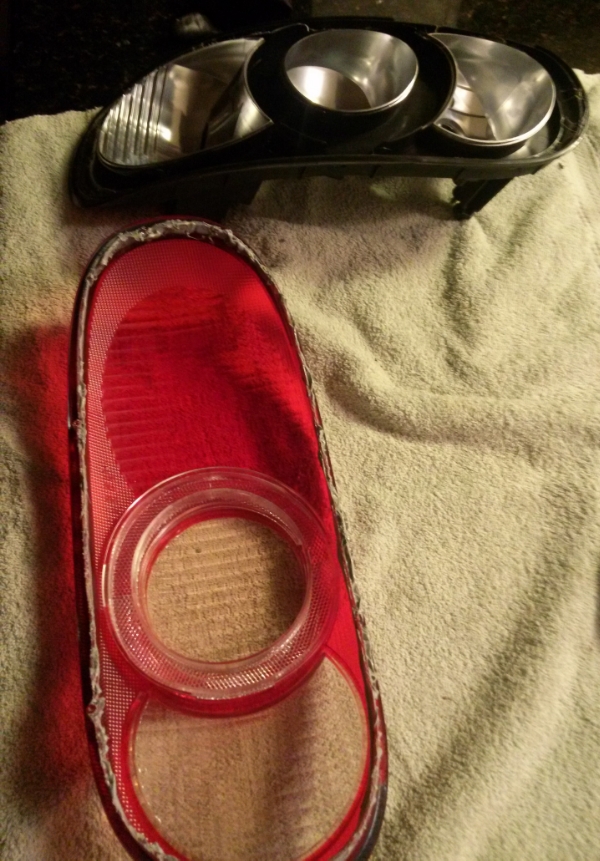
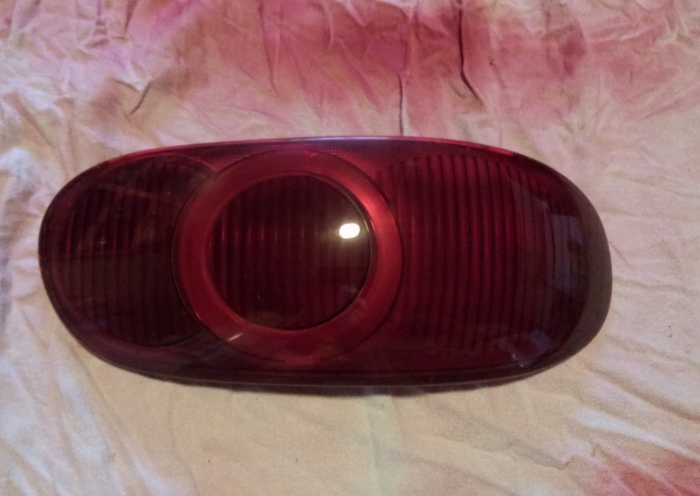
Once the tail light is done use your hands or a small flat head screwdriver to pry apart the lens of the tail light from the backing--pulling slowly and as straight apart as you can to prevent a gooey mess. If the adhesive is still too strong, place back into the oven for another 10mins. If your surgery was successful you should be left with something that looks like this
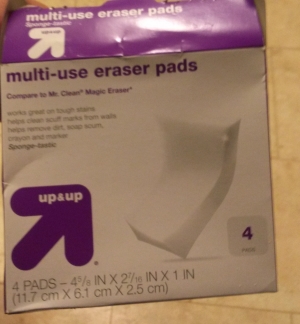
If any of the adhesive gets on the edge of the tail light backing, inside/outside the tail light lens, or anywhere you generally don't want it, try to get it off while its still warm. If you makethe mistake of letting it set and harden like I did, then a cleaning eraser pad could help you scrub it off without scratching the lens.
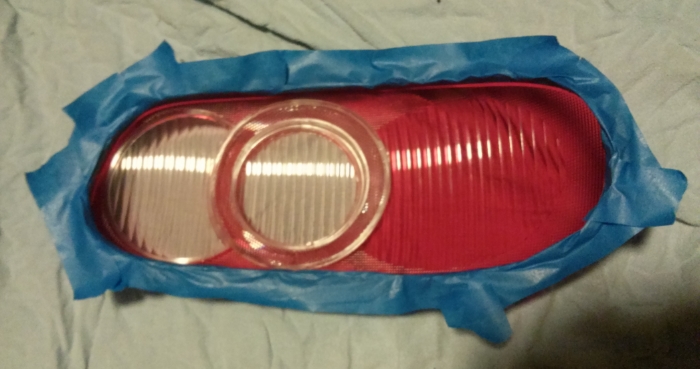
Tape off the adhesive to protect it from paint with painters tape and keep the edges long to protect the outside of the lens. Painters tape will slightly stick to the adhesive, but as long as the adhesive is cold and you remove it slowly it shouldn't pull any of the adhesive off
Use a quality high temp transparent spray paint. I used Dupli-color Metalcast red

Clean the inside lens of fingerprints and start painting. Start with 1 or 2 light coats and continue with medium wet coats, waiting 10mins in between each coat. I'm not too sure on the number of coats I ended up doing, I wanted a Very dark ruby red color so I started with one light coat and did maybe 10 medium coats, I lost count, and then I finished with 2 light dust coats. If you didn't tape off the front of the lens, look at it between coats and gauge your coat levels as you go.
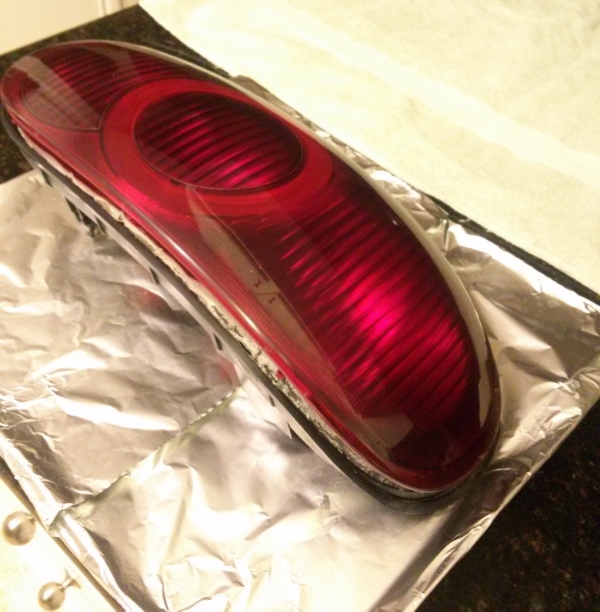
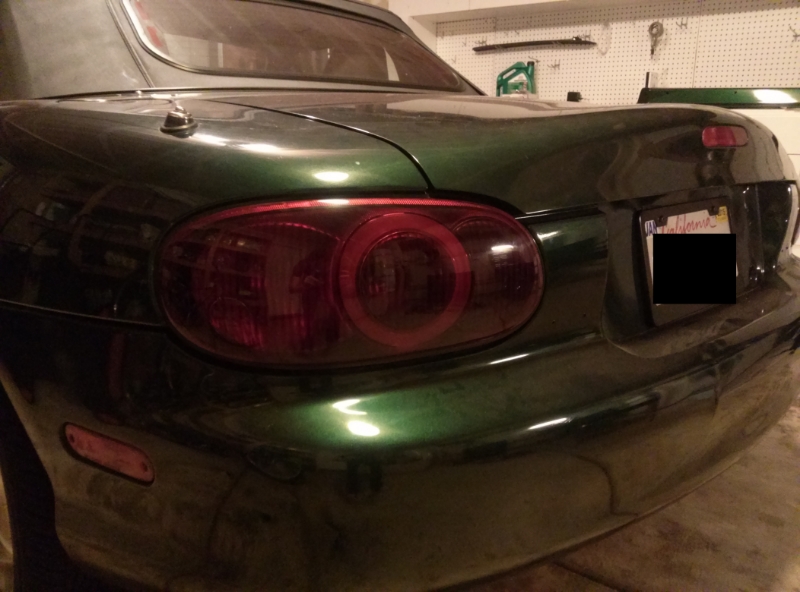
My final product. I let my paint dry a good 24hours, but I'm sure over night will work too.
Once dry, gently aline the lens with the backing and place back into the oven at 200 degrease F for 10-20mins
Press the lens back into place and wellah
When reassembling to the car, be sure to only tighten 10mm the rear nuts snug. I over tightened one very easily and snapped the bolt
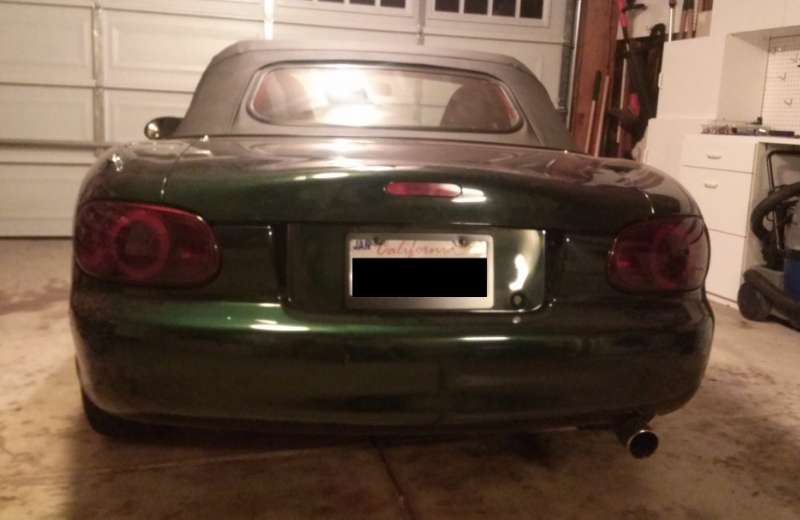
My results
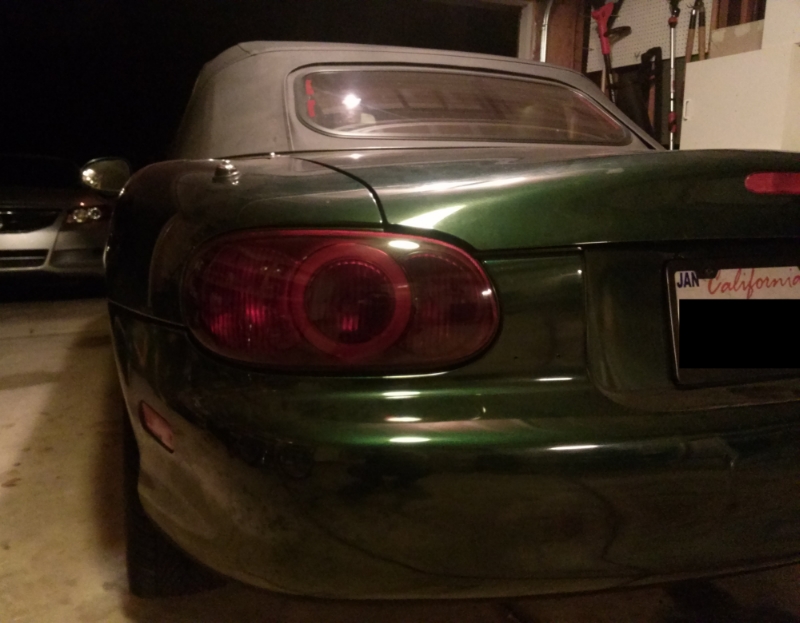
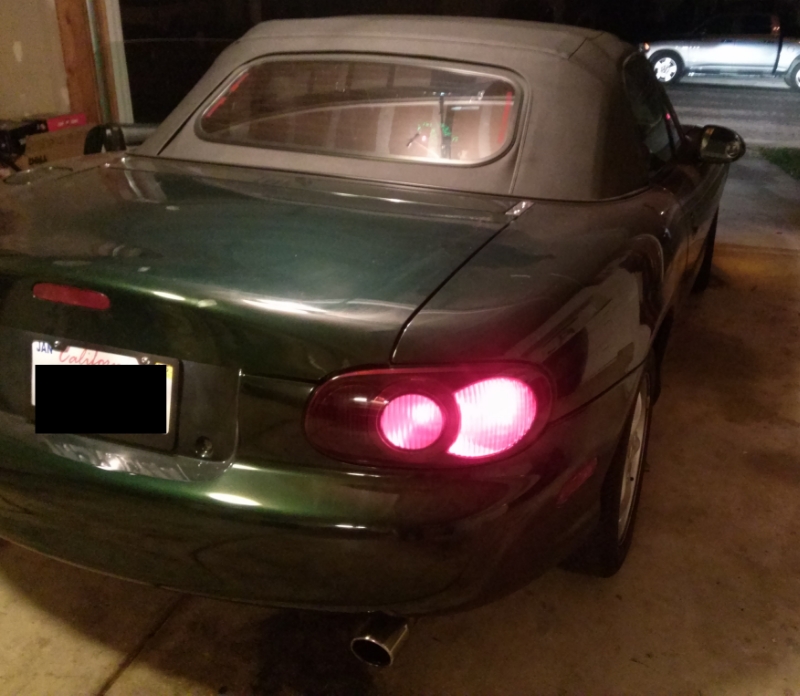
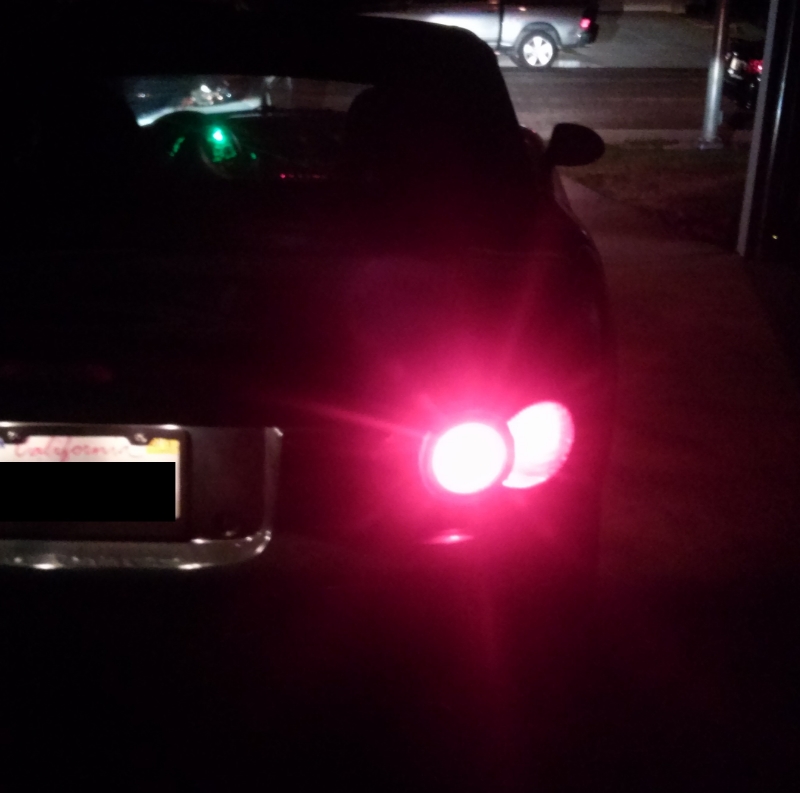
How they look lite up with OEM incandescent bulbs
Big thanks to 18psi from this forum and the miata community in general. I've leached A LOT of information from the miata community, from clutch jobs to turning my side markers into blinkers. Decided to make this pictorial to give a little back and hopefully help some fellow noobs
Pictorial Guide to Painting Inside NB Tail Lights
Recommended things:
-oven
-a sense of time
-cookie sheet big enough for a tail light
-tin foil--to protect your cookie sheet
-something to protect you hands from the heat--latex gloves, rags, oven mitts, good dose of man the **** up, etc.
-tiny flat head screwdriver
-10mm socket wrench
-phillips screwdriver
-T7 sized, 6 point screwdriver
-high temp transparent spray paint
-painters tape
-maaaaaaaybe a cleaning eraser pad
Start by opening your trunk and removing the carpet liner behind the tail lights

It's held in my a few small plastic tabs. Very easy to remove, just use a small flat head screwdriver to pry up the center circle and pop them off. Pop as many as you feel you need to for adequate workspace behind the tail light.
Unbolt the two 10mm nuts holding in the back of the tail light

Unscrew the single phillips screw holding the top of the tail light

The tail light should pop right out

Removes the 3 bulbs by twisting out the sockets. You can keep track of which bulb goes to which socket by the color of the wires

Once the tail light, is free pat yourself on the back and repeat process of the other tail light

Remove the two rubber stopper-like pieces behind each tail light to protect them from the oven. Found here

And here

Here's the tricky part, the lens is held to the backing with three 6-point tiny screws, bit size T7, found here

Here

And here

This screwdriver kit I picked up from my local Home Depot worked like a charm and only cost me $5


Preheat your oven to 200 degrees F and wrap a cookie sheet with tin foil. Bake each tail light for about 10-20mins depending on your oven.

Once the tail light is done use your hands or a small flat head screwdriver to pry apart the lens of the tail light from the backing--pulling slowly and as straight apart as you can to prevent a gooey mess. If the adhesive is still too strong, place back into the oven for another 10mins. If your surgery was successful you should be left with something that looks like this

If any of the adhesive gets on the edge of the tail light backing, inside/outside the tail light lens, or anywhere you generally don't want it, try to get it off while its still warm. If you makethe mistake of letting it set and harden like I did, then a cleaning eraser pad could help you scrub it off without scratching the lens.

Tape off the adhesive to protect it from paint with painters tape and keep the edges long to protect the outside of the lens. Painters tape will slightly stick to the adhesive, but as long as the adhesive is cold and you remove it slowly it shouldn't pull any of the adhesive off

Use a quality high temp transparent spray paint. I used Dupli-color Metalcast red

Clean the inside lens of fingerprints and start painting. Start with 1 or 2 light coats and continue with medium wet coats, waiting 10mins in between each coat. I'm not too sure on the number of coats I ended up doing, I wanted a Very dark ruby red color so I started with one light coat and did maybe 10 medium coats, I lost count, and then I finished with 2 light dust coats. If you didn't tape off the front of the lens, look at it between coats and gauge your coat levels as you go.
My final product. I let my paint dry a good 24hours, but I'm sure over night will work too.

Once dry, gently aline the lens with the backing and place back into the oven at 200 degrease F for 10-20mins

Press the lens back into place and wellah
When reassembling to the car, be sure to only tighten 10mm the rear nuts snug. I over tightened one very easily and snapped the bolt
My results


How they look lite up with OEM incandescent bulbs


Big thanks to 18psi from this forum and the miata community in general. I've leached A LOT of information from the miata community, from clutch jobs to turning my side markers into blinkers. Decided to make this pictorial to give a little back and hopefully help some fellow noobs

Reply
 2
2

2
07-23-2014, 01:11 AM
#2

This is an excellent write up, very detailed with lots of pictures. +1
Red reverse lights. Federally (US) illegal, should be illegal in every US state (AZ law says "white light"). Pretty unsafe, too, think about if you started backing out in a parking lot at night and someone thought they're your brake lights. -1
Net score: 0
Glad to see our tails can survive the oven. Most makes don't. Will need to do this, planning on making myself some custom LED tails.
Reply
0
0

Thread
Thread Starter
Forum
Replies
Last Post
StratoBlue1109
Miata parts for sale/trade
21
09-30-2018 01:09 PM


