
Few small projects done, underhood pictures


Thread Starter
Elite Member
iTrader: (1)
Joined: Jun 2007
Posts: 2,945
Total Cats: 3
From: VA, Germany, Afghanistan
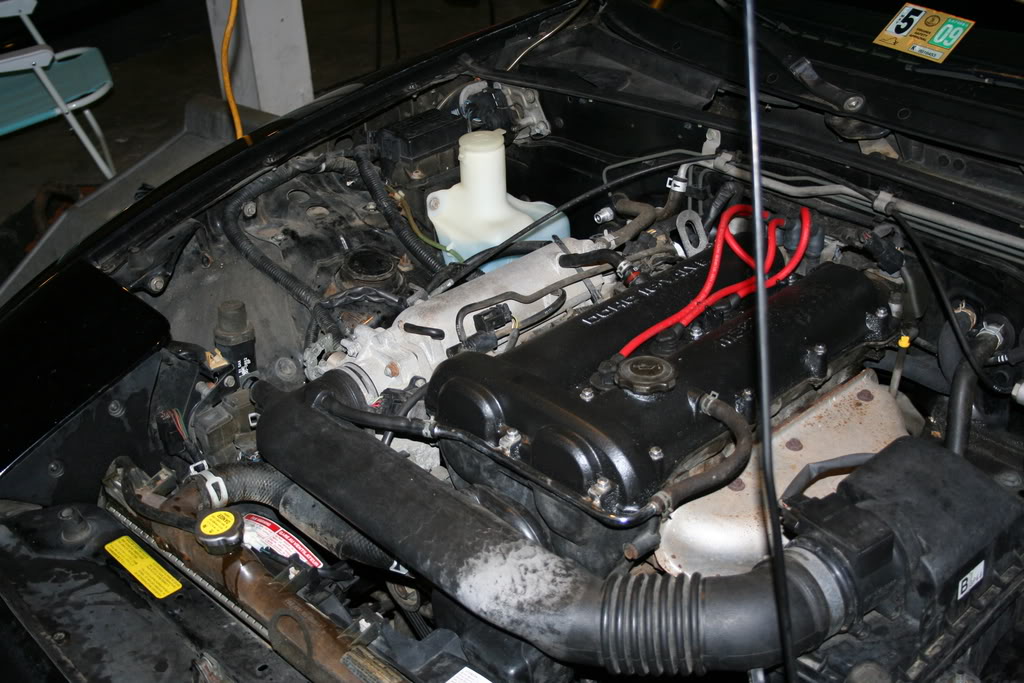
So a couple weeks back i did an half-*** A/C, Power steering delete...today i deleted the charcoal canister and everything that makes it work, moved the coolant resevoir into the bumper to try to get a cleaner bay (cr.net style, i know) Valve cover was painted a while back. Basically just a bunch of small things that really ccomplish nothing, more of an excuse to finally show off some underhood pictures and my new Rebel XT (even though photobucket compresses the hell out of the pictures):

Boost will come soon enough, i have a few more things i want to get squared away with the car first such as supension and engine mangement, i rushed into my first two miatas and boosted them while they were otherwise stock, tgonna take my time and do this one right, next thing to do is REALLY clean the car, inside and out, underneath, under the hood, then move on to the other things.
Boost will come soon enough, i have a few more things i want to get squared away with the car first such as supension and engine mangement, i rushed into my first two miatas and boosted them while they were otherwise stock, tgonna take my time and do this one right, next thing to do is REALLY clean the car, inside and out, underneath, under the hood, then move on to the other things.
Reply
 0
0

0


Any way you can post a picture of the rad overflow for me? I'd love to see it.
 If it doesn't show with my Bomex front nor come close to the tire at any point, I will probably put it on tmr's list. Looking at a clean engine bay with a rad overflow makes me want to roundhouse babies in the neck. I am/was in the process of finding a cheap, universal, cleaner looking catch can. But if this mod hides it well, why not save that $30-$40 for new fuel lines?
 Vash-
Reply
0
0
Thread Starter
Elite Member
iTrader: (1)
Joined: Jun 2007
Posts: 2,945
Total Cats: 3
From: VA, Germany, Afghanistan
I was gonna say, 1 hour with some simple green in the engine bay, will make you want to spend another hour, and so on.
Any way you can post a picture of the rad overflow for me? I'd love to see it. If it doesn't show with my Bomex front nor come close to the tire at any point, I will probably put it on tmr's list. Looking at a clean engine bay with a rad overflow makes me want to roundhouse babies in the neck. I am/was in the process of finding a cheap, universal, cleaner looking catch can. But if this mod hides it well, why not save that $30-$40 for new fuel lines?
Vash-
Any way you can post a picture of the rad overflow for me? I'd love to see it.
If it doesn't show with my Bomex front nor come close to the tire at any point, I will probably put it on tmr's list. Looking at a clean engine bay with a rad overflow makes me want to roundhouse babies in the neck. I am/was in the process of finding a cheap, universal, cleaner looking catch can. But if this mod hides it well, why not save that $30-$40 for new fuel lines? Vash-
And im not really sure why the intake looks the way it does, there's nothing on it, it's just discolored there somehow, has been since i picked her up. doesnt bother me enough to worry about it, i figure it wont be ther but a few more months anyway (hopefully)
Reply
0
0
I unplugged every electrical connection and vacuum line, moved everything out of the way, removed all the brackets and such, then went to town. Take out the rad overflow, take out the charcoal canister, and re-route the wires nicely with zip ties. I also fixed some of wires with new electrical tape for the areas where the tape showed its 18 year age.
But see, I wanted a black bay and had to spray paint my bay flat black. Your lucky enough to have an already black bay. With some work, it'll look new and you'll be this _________________ much happier.....trust me.
Vash-
But see, I wanted a black bay and had to spray paint my bay flat black. Your lucky enough to have an already black bay. With some work, it'll look new and you'll be this _________________ much happier.....trust me.
Vash-
Reply
0
0
Thread Starter
Elite Member
iTrader: (1)
Joined: Jun 2007
Posts: 2,945
Total Cats: 3
From: VA, Germany, Afghanistan
Pretty mcuh where i was headed, i started wiping everything down earlier and did a little more just now...i also took some pictures of a few things that are new to me that im not 100% sure as to what they are (since my first two miata's were 1.6's and they are pictured here, any input is very apprecited:
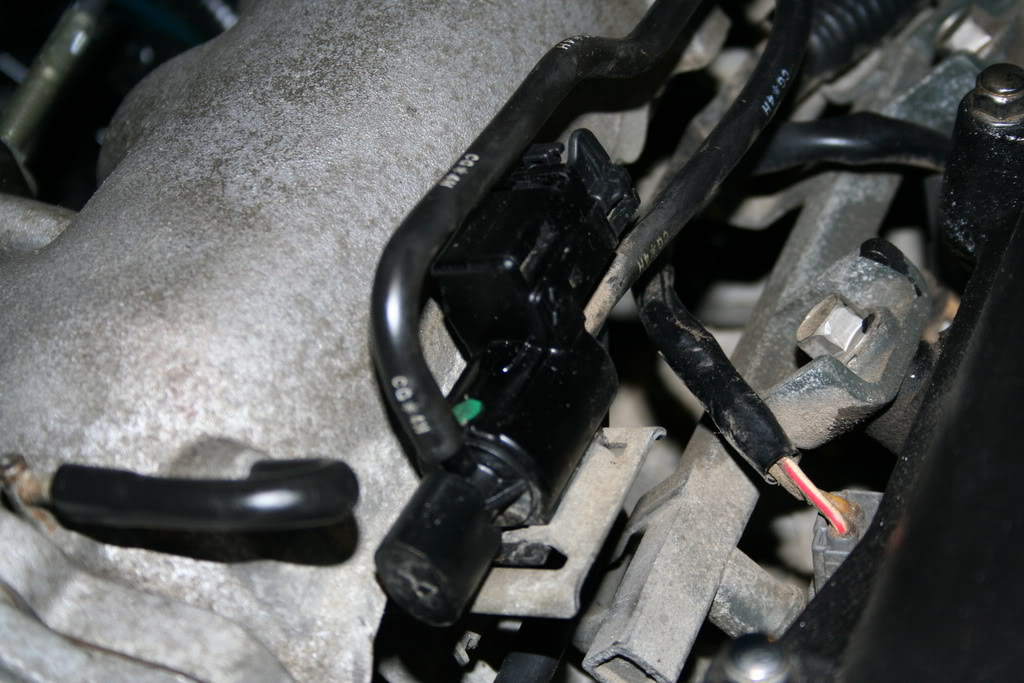
hanging off the intake manifold:
Also on the intake manifold: (im thinking something to do with EGR?)

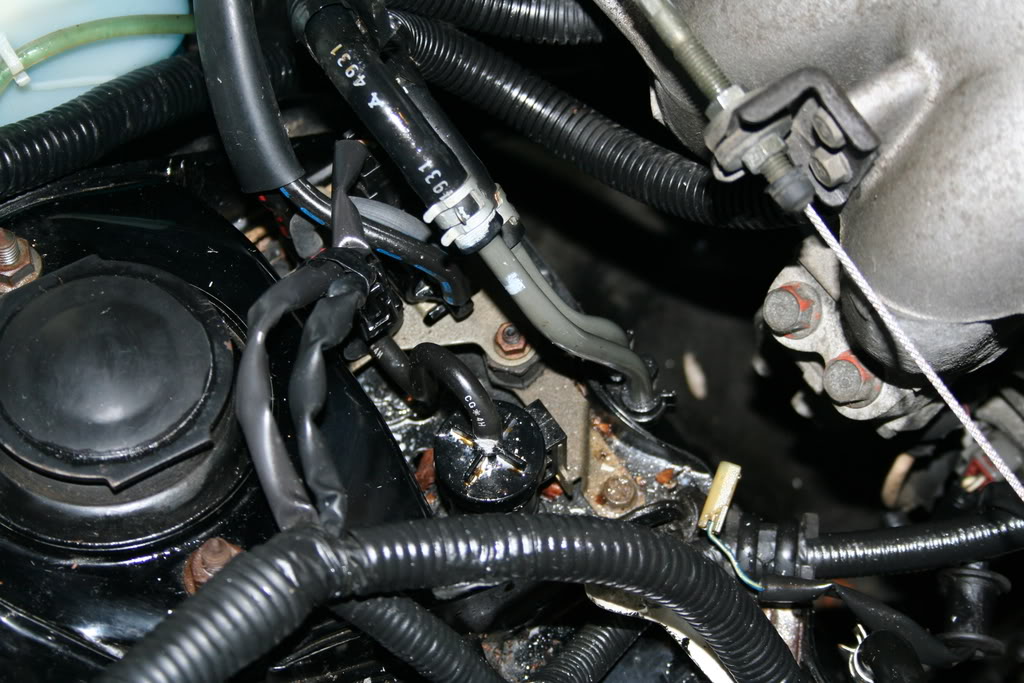
Just below the IM: (all the crapa the charcoal canister was hiding, probably should've circled it)
pics of vash's bay are in this thread: https://www.miataturbo.net/forum/sho...&highlight=56k
hanging off the intake manifold:
Also on the intake manifold: (im thinking something to do with EGR?)
Just below the IM: (all the crapa the charcoal canister was hiding, probably should've circled it)
pics of vash's bay are in this thread: https://www.miataturbo.net/forum/sho...&highlight=56k
Reply
0
0
I only fooled around with a 1.6 before, so I have no idea what any of that **** is. OBD1 FTW For the record, my intake manifold wasn't as bad, but it was on its way. No joke, a couple minutes with one of the 3M Scotchbrite drill attachments and the **** looks new.
18psi, check out my build thread link in my sig. I'm almost done I swear!
Vash-
For the record, my intake manifold wasn't as bad, but it was on its way. No joke, a couple minutes with one of the 3M Scotchbrite drill attachments and the **** looks new. 18psi, check out my build thread link in my sig. I'm almost done I swear!
Vash-
Reply
0
0
Thread Starter
Elite Member
iTrader: (1)
Joined: Jun 2007
Posts: 2,945
Total Cats: 3
From: VA, Germany, Afghanistan
mine's a 95 so OBD1 + .2L more displacement FTMFW.....
looking at it more it's ALL connected every single piece i listed is connected to the others, now i'm just curious what all of this is neccesary, will clen the bay up quite a bit if i can rip it all out!!
the intake manifold is definetly a big eye-sore i'm thinking about taking it out and painting it but i'm not sure if i wanna do all that or just scotch-brite it like you said....time will tell i guess.
Reply
0
0

Senior Member
iTrader: (10)
Joined: Feb 2007
Posts: 1,274
Total Cats: 0
From: South Eastern Wisconsin
Pic 1 is the fuel pressure regulator vacuum solenoid, I forget exactly what its for but I'm pretty sure it cuts off vacuum to the regulator on hot starts. I ran without it with the stock ECU for a few weeks last year with no problems but you may want to keep it. I'm sure someone else will chime in with more info on that one.
Pic 2 is the EGR valve
Pic 3 is the EGR solenoids (Can't tell if an evap solenoid is in the pic as well)
So pretty much all emissions garbage
Pic 2 is the EGR valve
Pic 3 is the EGR solenoids (Can't tell if an evap solenoid is in the pic as well)
So pretty much all emissions garbage
Reply
0
0
Senior Member
iTrader: (10)
Joined: Feb 2007
Posts: 1,274
Total Cats: 0
From: South Eastern Wisconsin
Well you could remove it but you will also have to plug the exhaust manifold, its a pretty big fitting. Other than that, you need two block off plates. Pretty easy to make out of sheet metal.
Reply
0
0
I only fooled around with a 1.6 before, so I have no idea what any of that **** is. OBD1 FTW For the record, my intake manifold wasn't as bad, but it was on its way. No joke, a couple minutes with one of the 3M Scotchbrite drill attachments and the **** looks new.
18psi, check out my build thread link in my sig. I'm almost done I swear!
Vash-
For the record, my intake manifold wasn't as bad, but it was on its way. No joke, a couple minutes with one of the 3M Scotchbrite drill attachments and the **** looks new. 18psi, check out my build thread link in my sig. I'm almost done I swear!
Vash-
Reply
0
0
Senior Member
iTrader: (10)
Joined: Feb 2007
Posts: 1,274
Total Cats: 0
From: South Eastern Wisconsin
You can remove the solenoids and vacuum lines, but thats about it until you have something to plug the EGR ports with, otherwise you'll have a nasty exhaust and intake leak. BTW this also throws a CEL of course.
Reply
0
0
Thread Starter
Elite Member
iTrader: (1)
Joined: Jun 2007
Posts: 2,945
Total Cats: 3
From: VA, Germany, Afghanistan
I'll get some once the new resevoir goes in and it's less "ghetto-rigged" (not quite as bad as a zip-tied soda bottle to the radiaator as i've seen in the past but still not worthy of being posted) but it's just in the nose right in front of (but a couple inches from) the radiator, so it realy wouldn't work for anyone running an i/c of any size at all i wouldnt imagine.
ALso i found out VERY quick that this was a bad idea:

So i just capped off the vaccum source on the right (originally a blue-tracer), what should i do with the hose on the left though (originally had a red tracer on the vac hose) cap it off or not worry about it (it's not capped now with no ill effects while idleing in the garage)
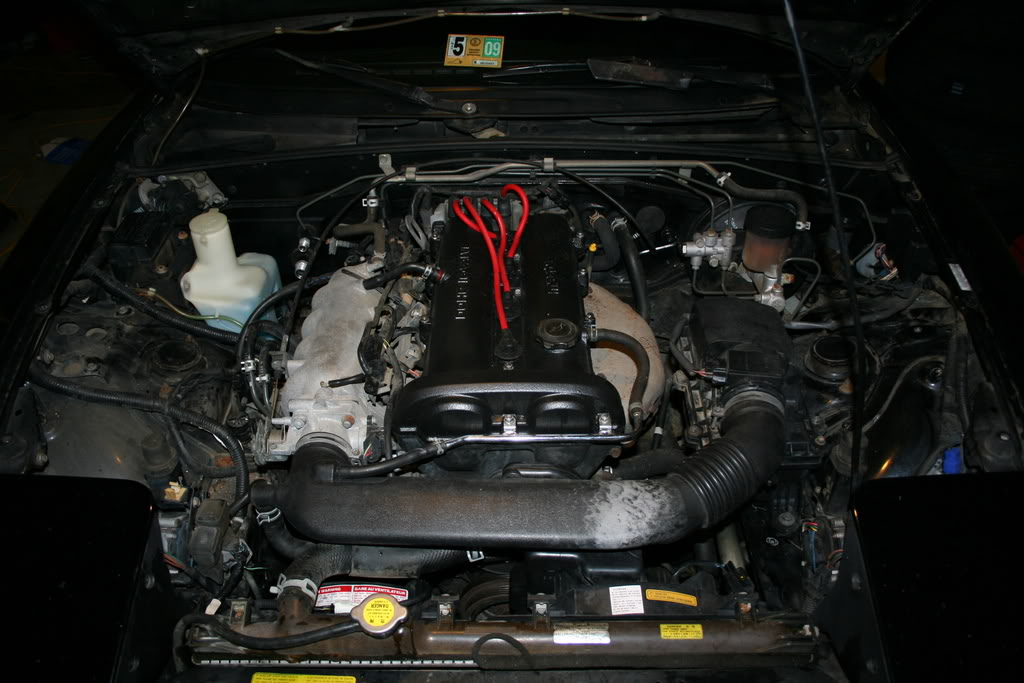
Otherwise here is what the bay looks like now:

And i officially love this F-ing camera, ill be in the garage even more now just so i can have an excuse to take pictures.
ALso i found out VERY quick that this was a bad idea:
So i just capped off the vaccum source on the right (originally a blue-tracer), what should i do with the hose on the left though (originally had a red tracer on the vac hose) cap it off or not worry about it (it's not capped now with no ill effects while idleing in the garage)
Otherwise here is what the bay looks like now:
And i officially love this F-ing camera, ill be in the garage even more now just so i can have an excuse to take pictures.
Reply
0
0


