Rust Repair Pictorial
 03-29-2012, 02:37 AM
#1
Senior Member

Thread Starter
iTrader: (8)

Join Date: Feb 2012
Location: NC
Posts: 619
Total Cats: 53
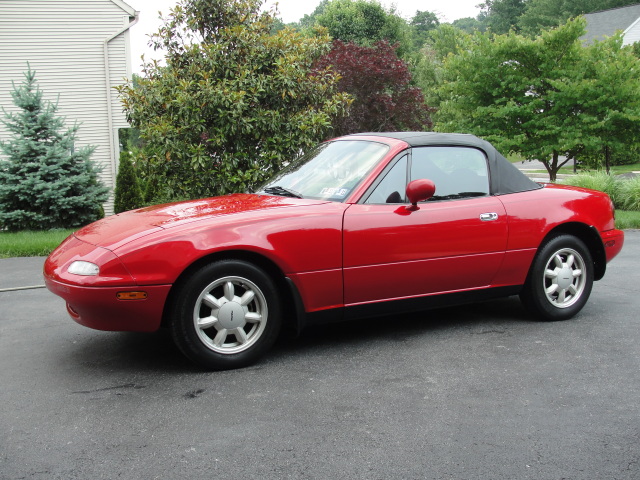
I bought my car a few years ago from a long line of distinguished, undocumented previous owners. It had some faded paint at the time, but that cleaned up well with a good waxing.
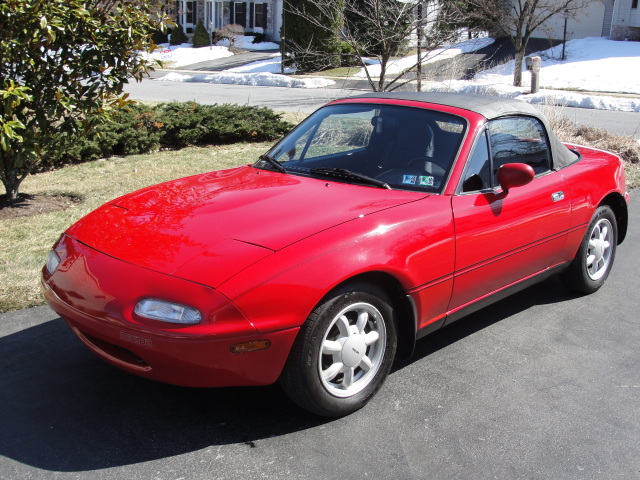
Envy the shmexy side stripes covering up a crappy repaint line.
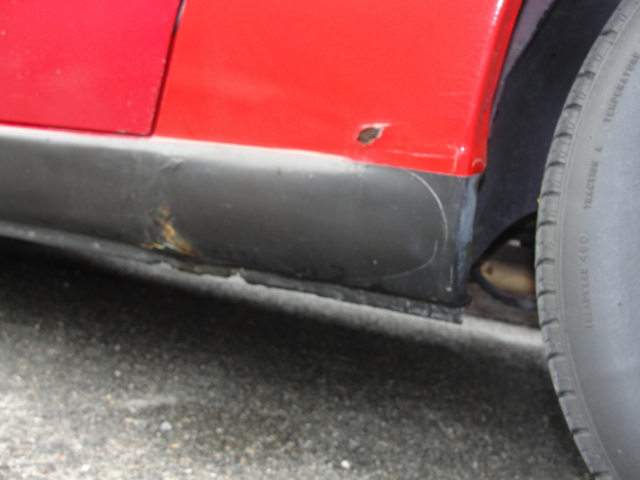
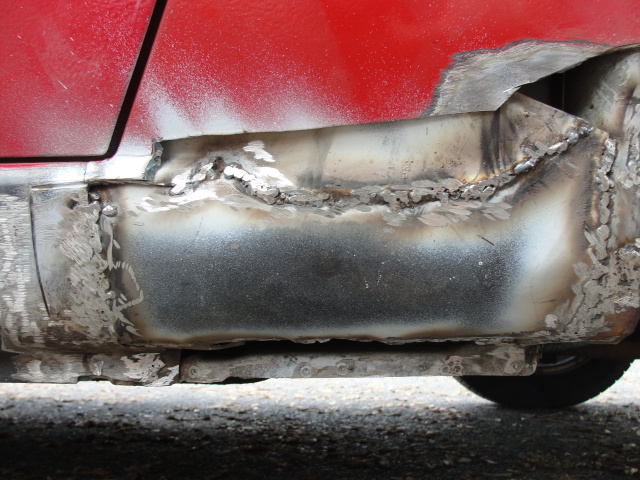
But waxing could only do so much. Last year I started to notice rust creeping out from under my rocker panel paint. With body filler showing alongside a general chalky appearance it was clear that there was a rust repair of questionable quality done by a previous owner... it was terrifying without a way to tell how bad it was underneath.
After lurking MT.net forever I really wanted to start upgrading the car to its potential, but not if it was going to be a rusty tragedy. Thankfully I got a decent price from a small time guy with a body shop. I wanted to see it done and learn some stuff so he allowed me to help out with the repair and we went to work.
After cutting away the outer body layer, we see the previous "repair". I didn't get a pic of it, but the metal replacing the original metal of the body was cut from a bucket and held in place by bondo on both sides.
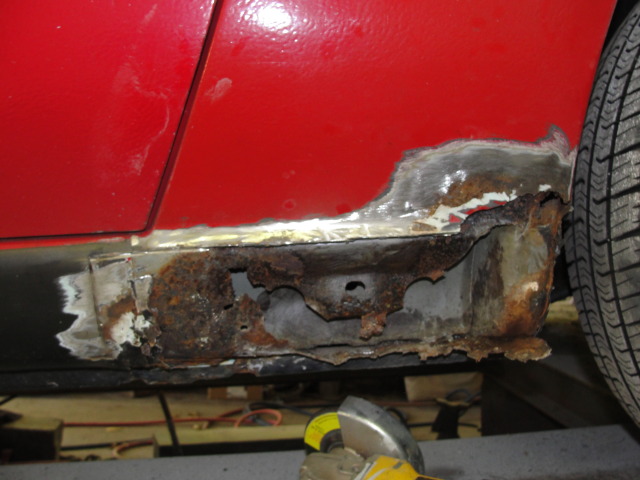
It looked like there was some rust preventing paint splotched about in there as well as some cutting of the structural metal.

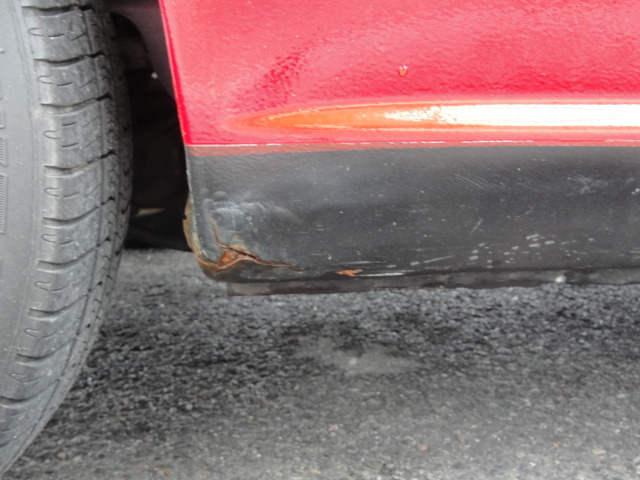
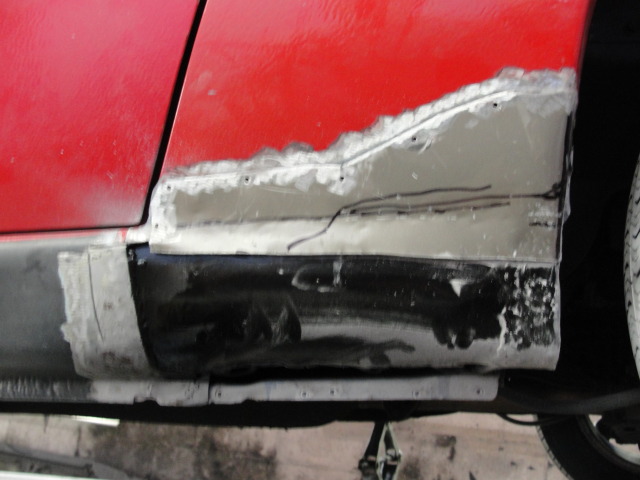
Passenger's side was a little eaten up and also had rust proofing on it. Not a lasting fix, P.O.
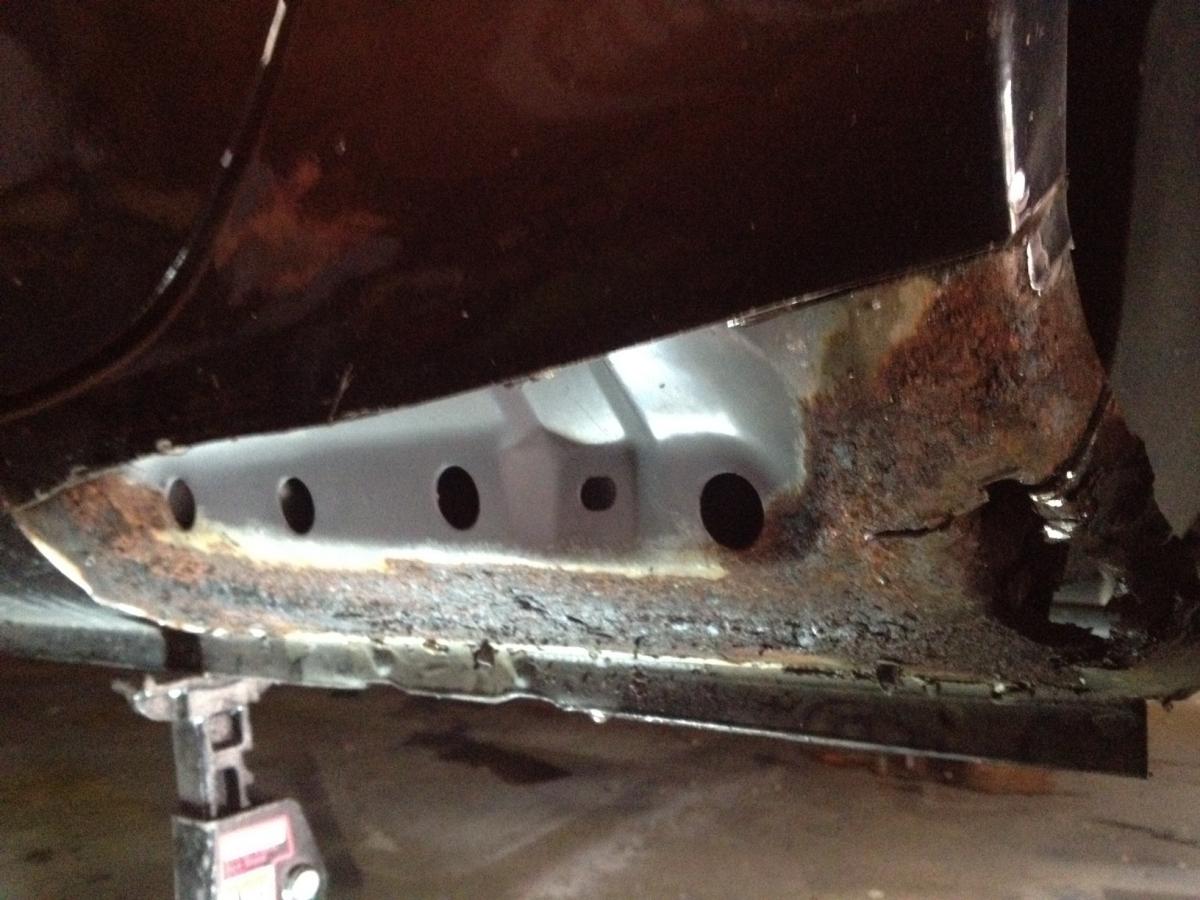
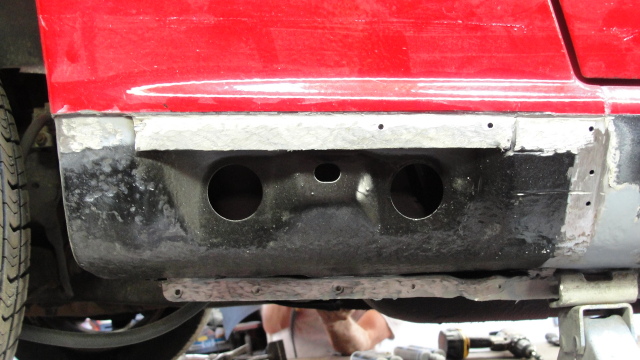
Then we got to cutting out festering metal and revealing all the parts that rust had spread to. The area with the drain holes and jacking point is tricky to figure out. Half of the pinch weld lip lining the bottom of the car is an outer layer of sheet metal and the other half (behind) is an inner layer of structural metal. The body portion has to be removed by drilling out the spot welds holding it on without penetrating the other side, if you can help it (see shiny drill through circles below).

Luckily, the rust on the passenger's side didn't spread too far.
One of the days, while I was waiting for the guy to finish lunch, I decided to make use of the air tools lying around and buff off those shatty 'pinstripes' on the door. I left the actual pinstripes alone because they didn't look too bad and were held on by stuff stronger than sticky note adhesive.
Much better.
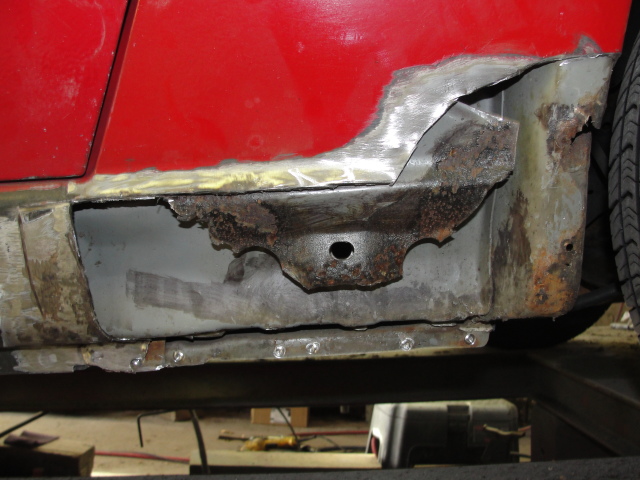
After the last 'repair' the structural part of my driver's side wash trash. Open gaps were present between metal bits that used to be connected. The body flex from this was totally killing my Nurburgring lap times, especially with my trusty 175/65r14 all seasons from the previous owner. We cut most of it out and fabricated our own piece of good steel to be welded in. Chassis rigidity FTW.
Once that steel was welded in place, the nasty bits were ground down to prevent future rust and clean it up a bit. Amateur work I know, but hopefully I won't have to look at this part of the car any time soon.
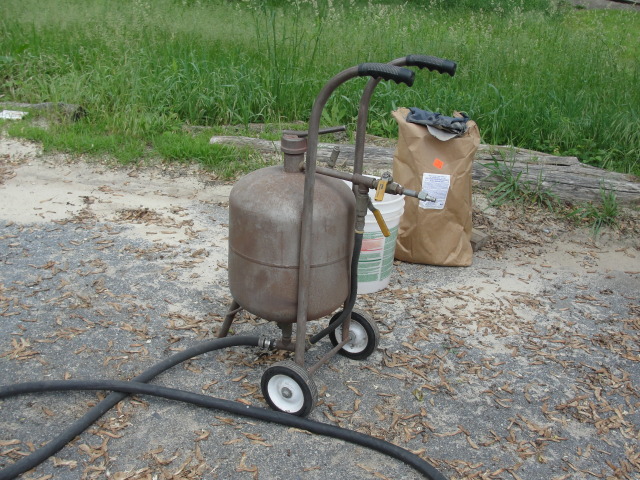
To really clean up the welds and erase surface rust, get your state of the art sand blaster out and go to town. Cover all perishables.
We made sure to get every inch of rust off the passenger side since we were keeping all the original structural metal.

Next we primered all of the newly exposed metal from the sand blasting. You want to protect that cleansed steel from disease as much as possible.
Then we hit it with rust protecting paint.
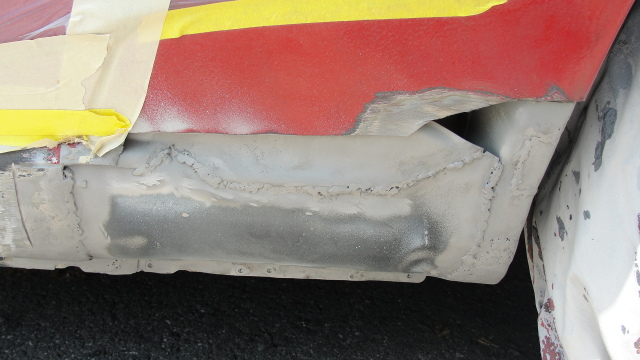
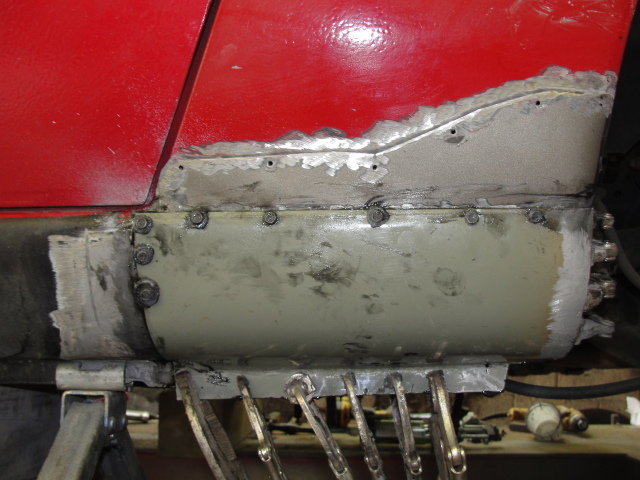
Here we also cut a bit more body away and put fresh sheet metal in its place.
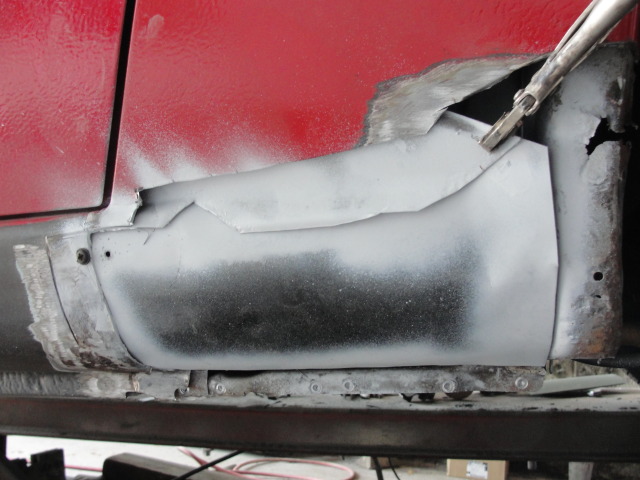
We fabricated our sheet metal from scrap doors he had from a new car with a good layer of primer still on them. Making them fit the space and contour of the car just right is more of an art form. All the body pieces were fastened with hardcore epoxy. I was told it is just as good as a weld and it minimizes future rust. This takes a while to cure... apply vice-grips as needed.
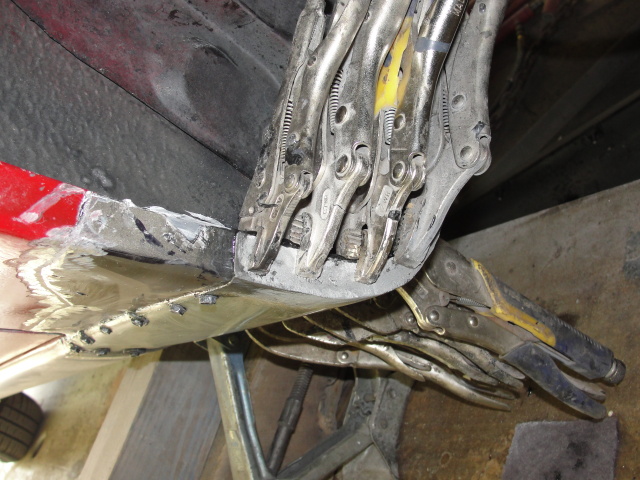
My guy's artistic body shop skills came in handy again to conform that quickly drying paste into the smooth, super aerodynamic tapered notch that's to the right of the door sill on the stock panel.
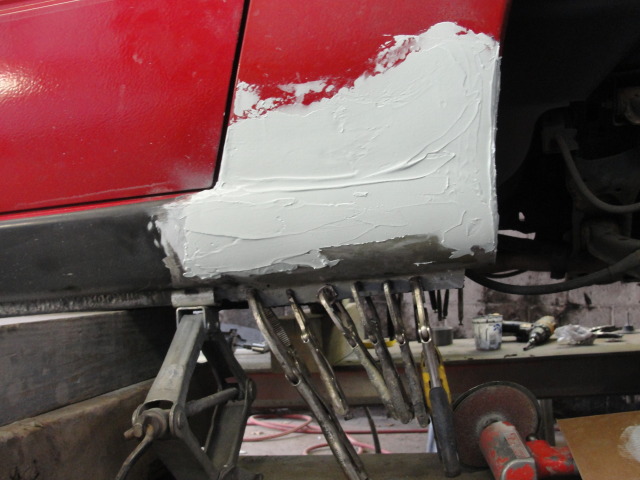
Bondo'd other side to smooth out the rough edges and mate surfaces.
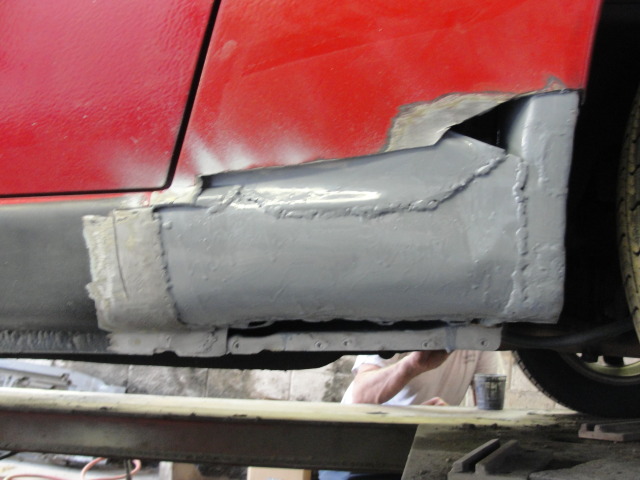
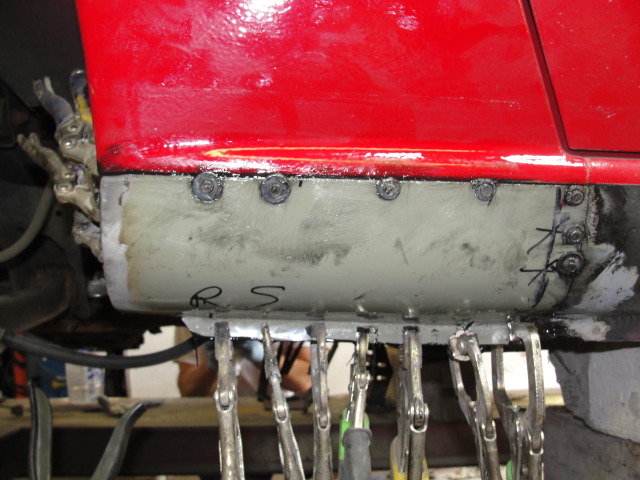
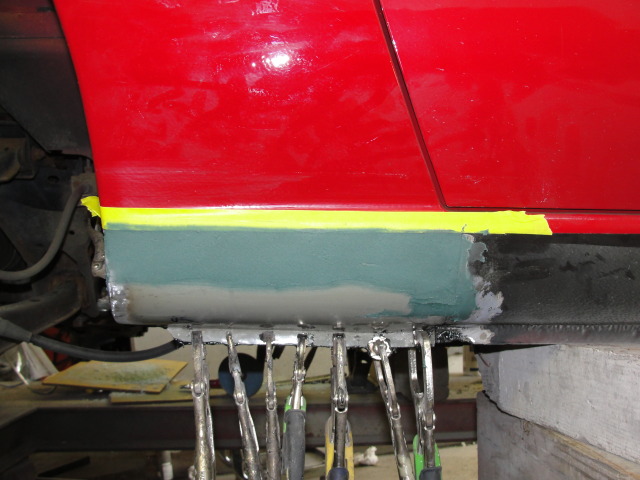
The fixed up and reformed panel was then ready for primer and then paint! Note the recreated panel junction.
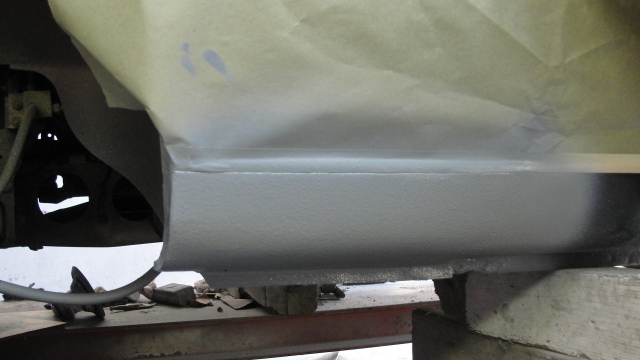
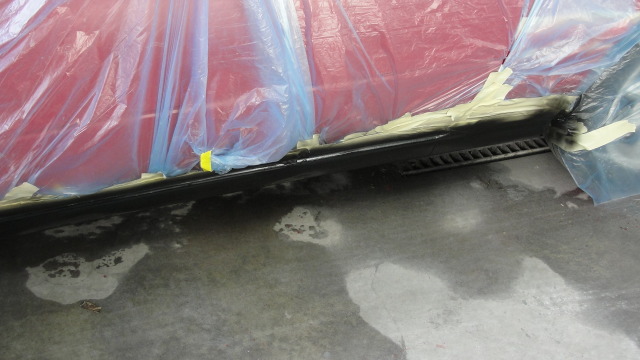
He also sprayed rock-guard paint or whatever its called to give the underbody that textured look again.
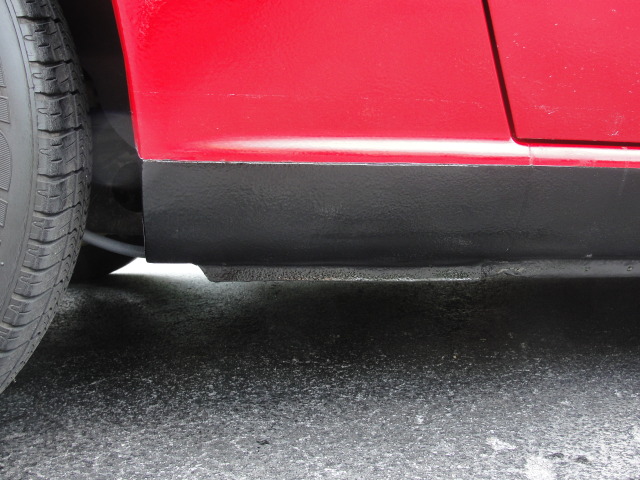
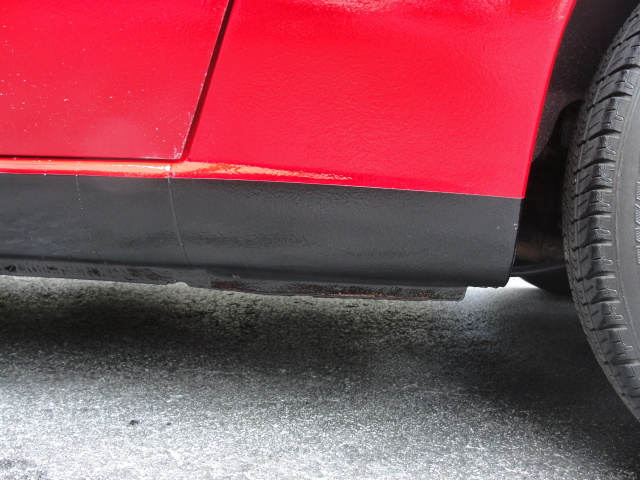
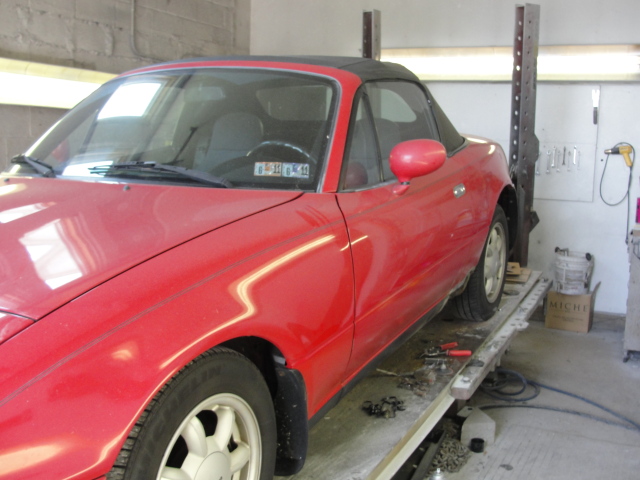
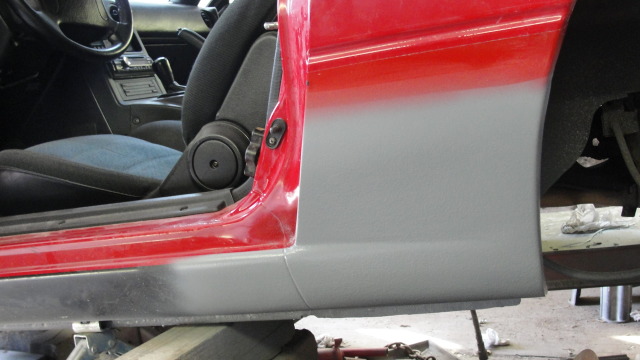
The repaint turned out great. I didn't realize how much the old crap took away from the look. Alas, new life is bestowed to a car that's nearly as old as me!
Finally, I spent the rest of my summer's earnings on things to make it a decent miata.
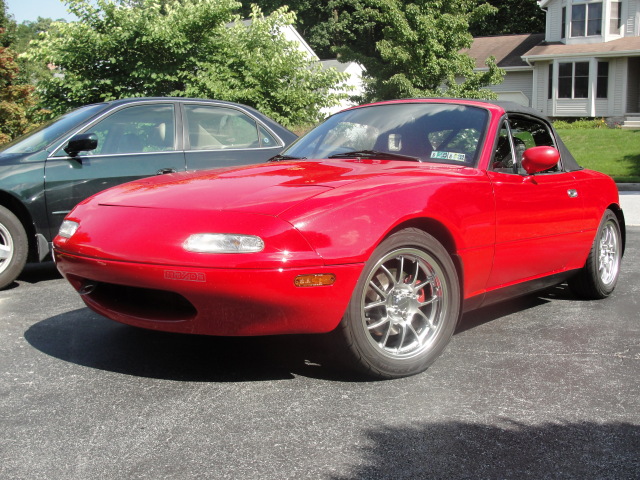
Now to find more money for under the hood.
Envy the shmexy side stripes covering up a crappy repaint line.
But waxing could only do so much. Last year I started to notice rust creeping out from under my rocker panel paint. With body filler showing alongside a general chalky appearance it was clear that there was a rust repair of questionable quality done by a previous owner... it was terrifying without a way to tell how bad it was underneath.
After lurking MT.net forever I really wanted to start upgrading the car to its potential, but not if it was going to be a rusty tragedy. Thankfully I got a decent price from a small time guy with a body shop. I wanted to see it done and learn some stuff so he allowed me to help out with the repair and we went to work.
After cutting away the outer body layer, we see the previous "repair". I didn't get a pic of it, but the metal replacing the original metal of the body was cut from a bucket and held in place by bondo on both sides.
It looked like there was some rust preventing paint splotched about in there as well as some cutting of the structural metal.
Passenger's side was a little eaten up and also had rust proofing on it. Not a lasting fix, P.O.
Then we got to cutting out festering metal and revealing all the parts that rust had spread to. The area with the drain holes and jacking point is tricky to figure out. Half of the pinch weld lip lining the bottom of the car is an outer layer of sheet metal and the other half (behind) is an inner layer of structural metal. The body portion has to be removed by drilling out the spot welds holding it on without penetrating the other side, if you can help it (see shiny drill through circles below).
Luckily, the rust on the passenger's side didn't spread too far.
One of the days, while I was waiting for the guy to finish lunch, I decided to make use of the air tools lying around and buff off those shatty 'pinstripes' on the door. I left the actual pinstripes alone because they didn't look too bad and were held on by stuff stronger than sticky note adhesive.
Much better.
After the last 'repair' the structural part of my driver's side wash trash. Open gaps were present between metal bits that used to be connected. The body flex from this was totally killing my Nurburgring lap times, especially with my trusty 175/65r14 all seasons from the previous owner. We cut most of it out and fabricated our own piece of good steel to be welded in. Chassis rigidity FTW.
Once that steel was welded in place, the nasty bits were ground down to prevent future rust and clean it up a bit. Amateur work I know, but hopefully I won't have to look at this part of the car any time soon.
To really clean up the welds and erase surface rust, get your state of the art sand blaster out and go to town. Cover all perishables.
We made sure to get every inch of rust off the passenger side since we were keeping all the original structural metal.
Next we primered all of the newly exposed metal from the sand blasting. You want to protect that cleansed steel from disease as much as possible.
Then we hit it with rust protecting paint.
Here we also cut a bit more body away and put fresh sheet metal in its place.
We fabricated our sheet metal from scrap doors he had from a new car with a good layer of primer still on them. Making them fit the space and contour of the car just right is more of an art form. All the body pieces were fastened with hardcore epoxy. I was told it is just as good as a weld and it minimizes future rust. This takes a while to cure... apply vice-grips as needed.
My guy's artistic body shop skills came in handy again to conform that quickly drying paste into the smooth, super aerodynamic tapered notch that's to the right of the door sill on the stock panel.
Bondo'd other side to smooth out the rough edges and mate surfaces.
The fixed up and reformed panel was then ready for primer and then paint! Note the recreated panel junction.
He also sprayed rock-guard paint or whatever its called to give the underbody that textured look again.
The repaint turned out great. I didn't realize how much the old crap took away from the look. Alas, new life is bestowed to a car that's nearly as old as me!
Finally, I spent the rest of my summer's earnings on things to make it a decent miata.
Now to find more money for under the hood.
Last edited by petrolmed; 03-29-2012 at 09:47 AM.

Reply
 4
4

4
 03-29-2012, 10:42 AM
#3
Senior Member
Thread Starter
iTrader: (8)
Join Date: Feb 2012
Location: NC
Posts: 619
Total Cats: 53
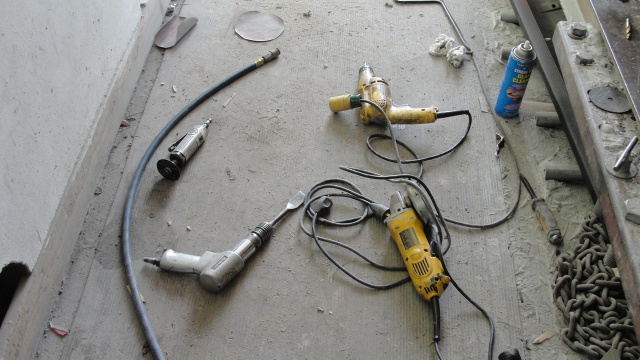
If you have access to air tools and a compressor, use them. It made the work so much easier. You should at least have a good dremel for cutting. Here's what we used for most of the job. That rotary cutting tool on the top left is key and the air hammer below it cuts through stronger metal like its butter. Don't remember the technical names of them though.
Reply
0
0
 03-29-2012, 12:17 PM
#5
Senior Member
Thread Starter
iTrader: (8)
Join Date: Feb 2012
Location: NC
Posts: 619
Total Cats: 53
All of it was done at his shop. While there, I got to do a lot of the prep and straightforward stuff after some instruction from him. He handled things like forming metal parts, welding, epoxying, and painting, but I thought most of that was doable. He had a painting booth next to his garage.
Last edited by petrolmed; 03-29-2012 at 01:44 PM.
Reply
0
0
03-29-2012, 05:48 PM
#7
Senior Member
Thread Starter
iTrader: (8)
Join Date: Feb 2012
Location: NC
Posts: 619
Total Cats: 53
Yeah man! It was pretty fun doing that kind of work myself. Its both scary and empowering when you permanently cut off metal from your precious car while sparks fly everywhere around you.
Reply
0
0
03-29-2012, 06:19 PM
#8
Elite Member
iTrader: (2)

Join Date: Jan 2007
Location: Los Angeles, CA
Posts: 8,682
Total Cats: 130
wow good job captain overkill. it does look good though.
i will be writing a similar "how to remove rust" soon for my NB.
Seriously though, how is that an important structural point? that is just the body.
i will be writing a similar "how to remove rust" soon for my NB.
Seriously though, how is that an important structural point? that is just the body.
Reply
0
0
03-29-2012, 07:46 PM
#9
Senior Member
Thread Starter
iTrader: (8)
Join Date: Feb 2012
Location: NC
Posts: 619
Total Cats: 53
I was being sarcastic about its structural importance. Many at miata.net rant and rave about that metal underneath being structural and that they can 'feel' when rust has weakened it... It is notably thicker and stronger metal than the painted sheet metal but I hardly think it would be a key point. Read it as being important for the shell's structure?
Reply
0
0


 03-30-2012, 11:49 AM
#18
Elite Member
iTrader: (12)

Join Date: Jan 2007
Location: Hermosa Beach, CA
Posts: 2,573
Total Cats: 12
Awesome write up, I have the same rust =(
Reply
0
0
06-05-2012, 12:20 AM
#19
Newb

Join Date: Nov 2010
Posts: 6
Total Cats: -1
petrolmed, that was a great write up of your experience with the repair. I know it was your friends shop but I was wondering how much he would charge the same repair.
I frequently go to VT so I would not be opposed of dropping the car off to him.
I frequently go to VT so I would not be opposed of dropping the car off to him.
Reply
0
0