Post pictures of your DIY style valve covers


 10-12-2008, 04:30 PM
#23
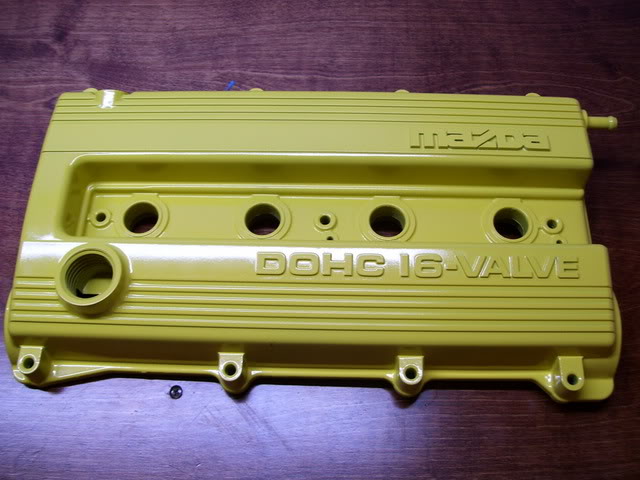
J/K. It's a technique you can use to surface ANYTHING dead flat within .002" or better depending on how you do it. Enough that you can surface your own turbo flanges and things like that.
You wrap a piece of sand paper around something really REALLY flat. Like a 1" thick chunk of glass. Then keep it square to the work and make passes to surface it. For valve covers, I used a piece of 1" thick MDF and wrap 100 grit sand paper around it. And make "light" passes as the wood will bend if you put much pressure. For sanding a head for a small engine, I use a flat piece of granite. Again, very little pressure or you will distort the granite or whatever you're using.
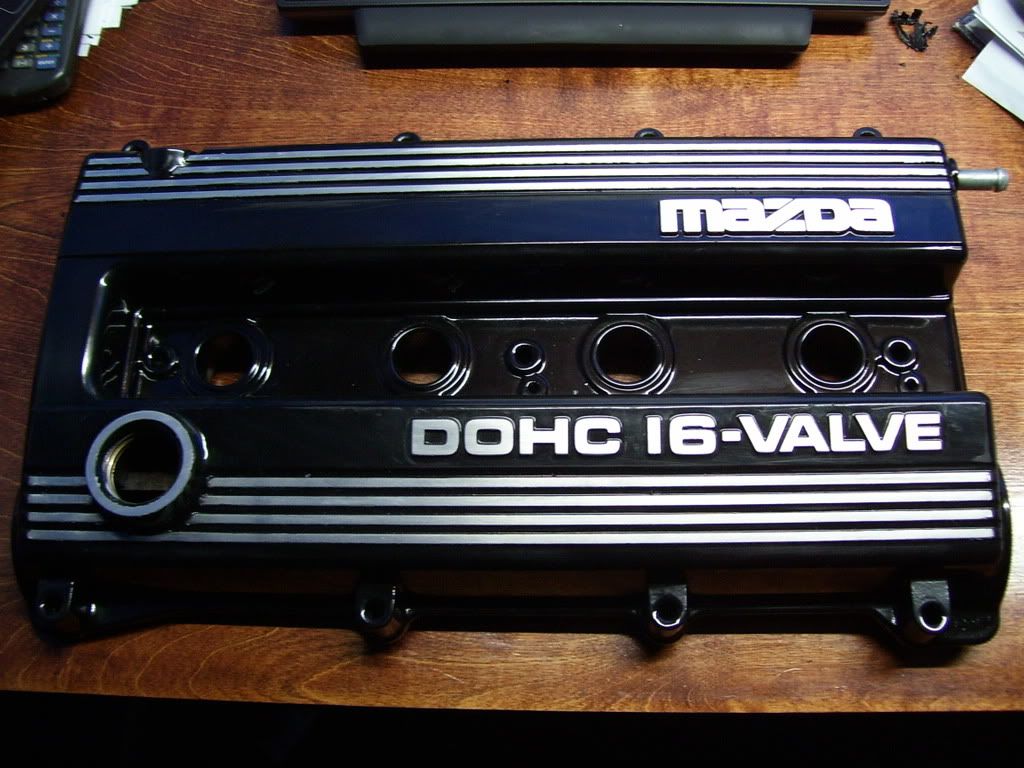
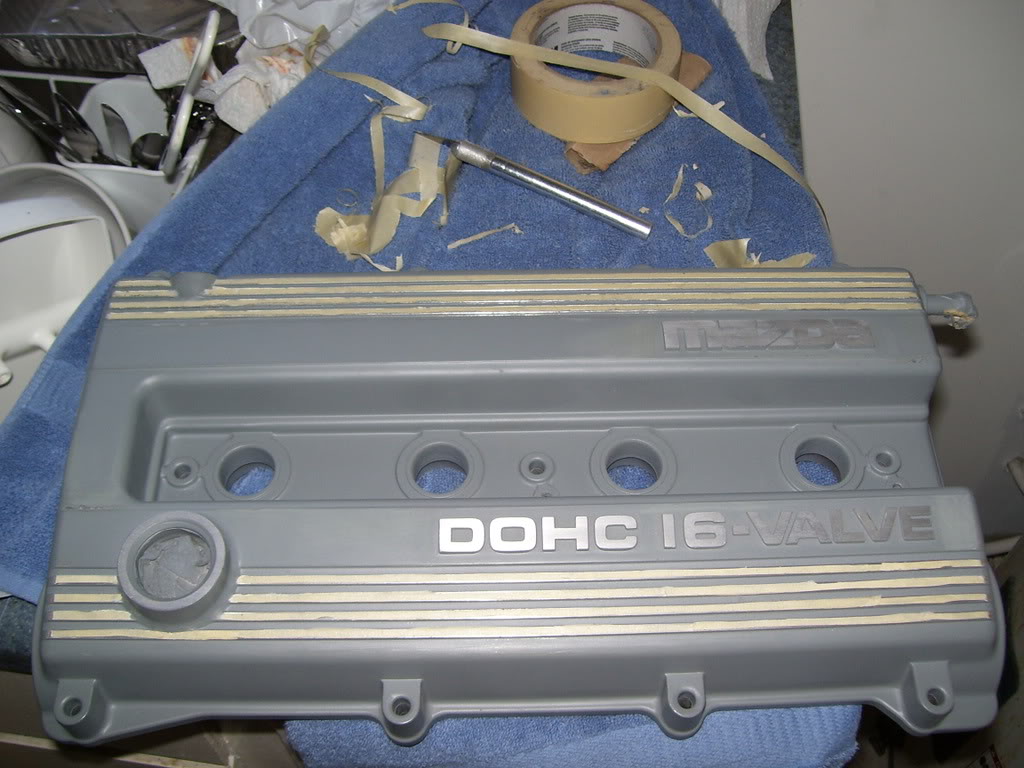
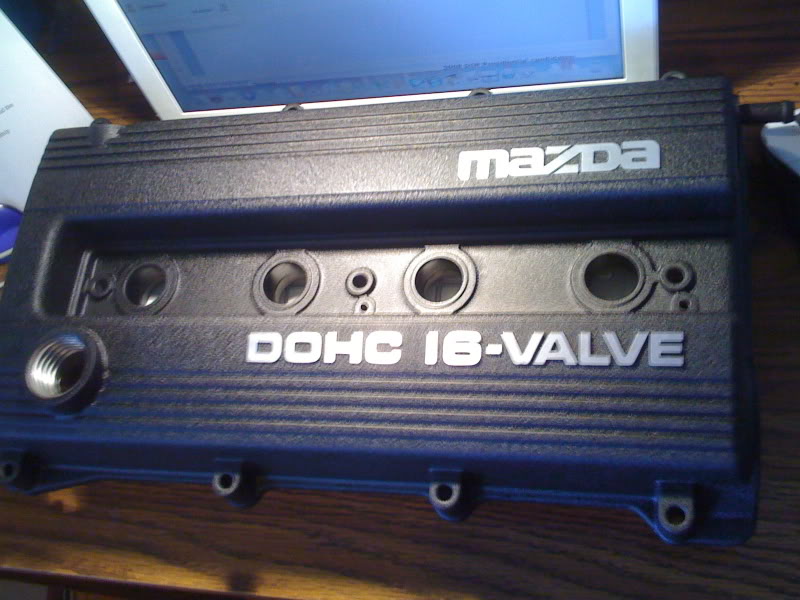
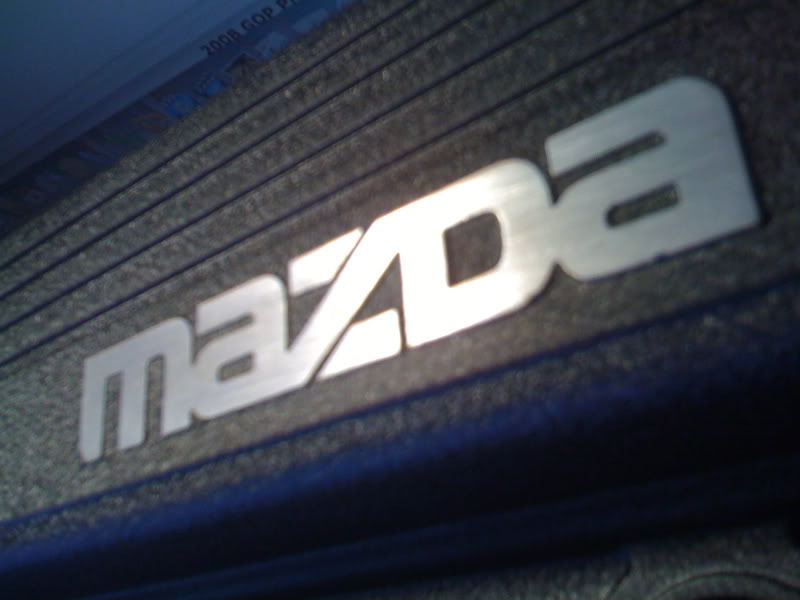
I will say doing the lines is very difficult. The polished lettering is cake compared to the lines. To get the lines you have to polish them, then cut strips of tape and cover up the lines, then prime, paint, and remove the tape after ~2 days of letting the final layer of paint cure.
EDIT: like this:

Reply
 0
0

0
 10-12-2008, 09:32 PM
#26

No pics, but it turned out AWESOME....I washed down the cover using paint thinner and a brown 3M brillo type pad...then let dry...I then sprayed 3 coats of Krylon Wrinkle black paint waiting about 5 minutes between coats...it's good to build up the coats of paint so it can "wrinkle"...THEN put it out in the hot sun which really helped with the "wrinkling". The final result looked like it came from the factory-the wrinkle coating turned out WAY better than I anticipated considering it came out of a $6 can. Only problem is now my intake manifold looks like crap next to the newly painted valve cover.
Reply
0
0
10-12-2008, 09:42 PM
#27
Elite Member
Thread Starter
iTrader: (15)

Join Date: Sep 2007
Location: Incline Village, NV
Posts: 2,034
Total Cats: 5
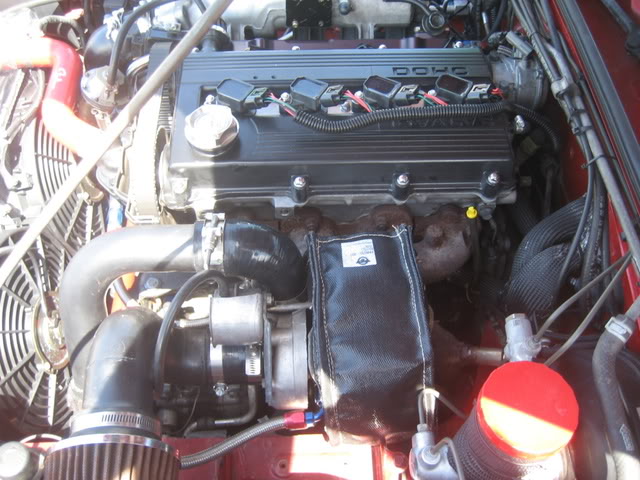
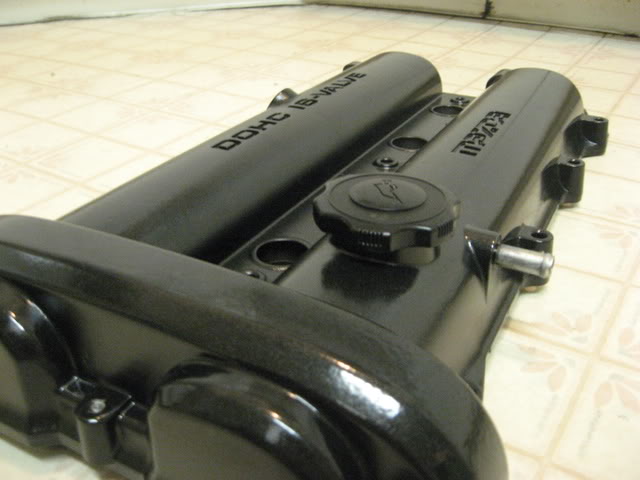
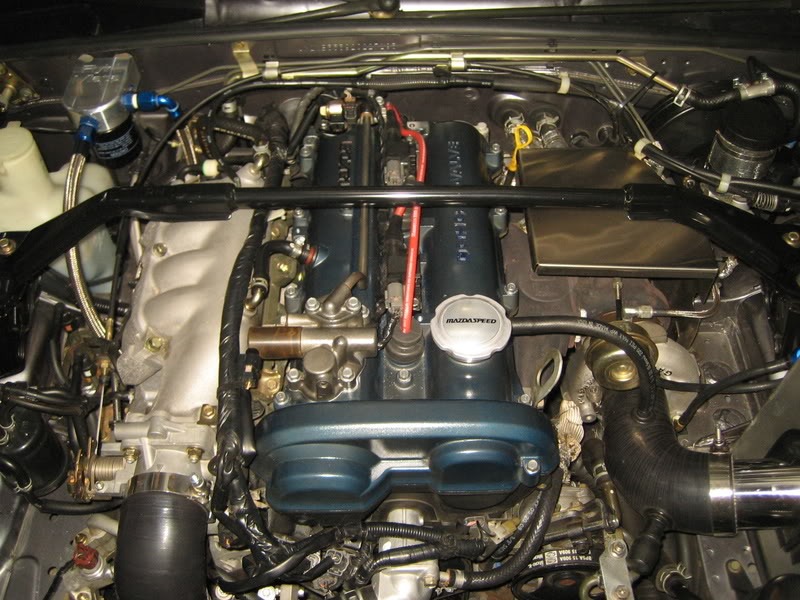
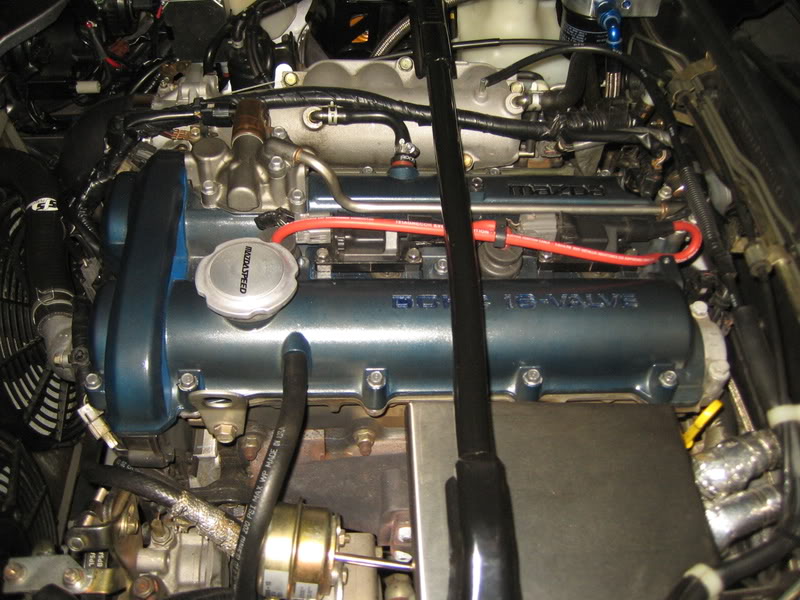
ok, so i did the wrinkly paint job on my 90 original motor and after about a year or so the heat began to chip off.
What are you guys doing for longevity? Any layers of high temp clear coat? Special "high temp" wrinkle paint? On my old valve cover i used high temp primer but no clear coat, im thinking that might be my problem.
Edit:
Here is a picture for reference
Notice the bottom right side of the valve cover beginning to chip. This is about 1.5 years old of a paint job. Used basically the same method as everyone else.
Reply
0
0
 10-14-2008, 01:14 AM
#29

I will say doing the lines is very difficult. The polished lettering is cake compared to the lines. To get the lines you have to polish them, then cut strips of tape and cover up the lines, then prime, paint, and remove the tape after ~2 days of letting the final layer of paint cure.
Reply
0
0
10-14-2008, 09:24 AM
#30
Elite Member
iTrader: (2)

Join Date: May 2007
Location: Cromwell, Connecticut
Posts: 2,604
Total Cats: 16
i just painted my valve cover then took a line sander with some 80 grit to get most of it off, then carefully used my DA with 180 i believe, then hand sanded with some higher grit..
the line sander worked great!
sorry no pics.
btw.. stock 1.8 valve cover
the line sander worked great!
sorry no pics.
btw.. stock 1.8 valve cover
Reply
0
0


 It is overkill, and some of it has been deleted. Did save my butt a while back when I lost two o-rings on the injectors.
10-14-2008, 09:51 AM
It is overkill, and some of it has been deleted. Did save my butt a while back when I lost two o-rings on the injectors.
10-14-2008, 09:51 AM
#33

Shitty pic but you get the idea.
__________________
Best Car Insurance | Auto Protection Today | FREE Trade-In Quote
__________________
Best Car Insurance | Auto Protection Today | FREE Trade-In Quote
Reply
0
0
 11-05-2008, 03:45 PM
#36

Much easier to sand the letters with finishing with fine grit sandpaper prior to paint. Then apply chapstick or some other substance to keep the paint from sticking to that part, then paint and wipe away the area with the substance. Then just let dry and polish.
here is mine currently powder coated black with gold flake
Along with my upper portion Intake manifold
here is mine currently powder coated black with gold flake
Along with my upper portion Intake manifold
Reply
0
0
11-05-2008, 04:23 PM
#37

Doing the stripes is SUPER easy. Just paint the valve cover how you want, let paint dry, put some masking tape over the whole stripe area, and sand away. I've done a dozen of them this way with no problems. The tape comes right off where you put pressure on it, and protects the other areas from small rubs and bumps. I'd post a picture because I have one sitting right next to me half sanded and you can see what I mean... but you ******* can figure it out on your own.
Reply
0
0
 11-05-2008, 06:08 PM
#39
OK, so I finally took a picture of my custom creation. I mixed Metalcast smoke and blue and got this disco color-changing grey to blue flipflip effect. I used just the smoke on the VVT solenoid and polished the oil feed line.
and here is the Protoge one I just did... (for sale)

and here is the Protoge one I just did... (for sale)
Last edited by Doppelg�nger; 11-05-2008 at 06:22 PM.
Reply
0
0


