$30 Wind blocker DIY
 05-09-2016, 06:22 PM
#1
Junior Member
Thread Starter

Join Date: Jan 2009
Location: Springfield nj
Posts: 53
Total Cats: 3
I felt creative last weekend so i made a wind blocker for my rollbar. Everything else on the market was (A) ugly or (B) expensive.
So i made my own.
Everything used that i did not have already cost around $30 at your local hardware store.
WHAT YOU SHOULD HAVE:
A good drill bit set
A power drill
Straight edge
A miata
A rollbar
2-3 hours freetime
WHAT YOU NEED:
Clear Acrylic
Plexiglass knife
small zipties
The rollbar in question:
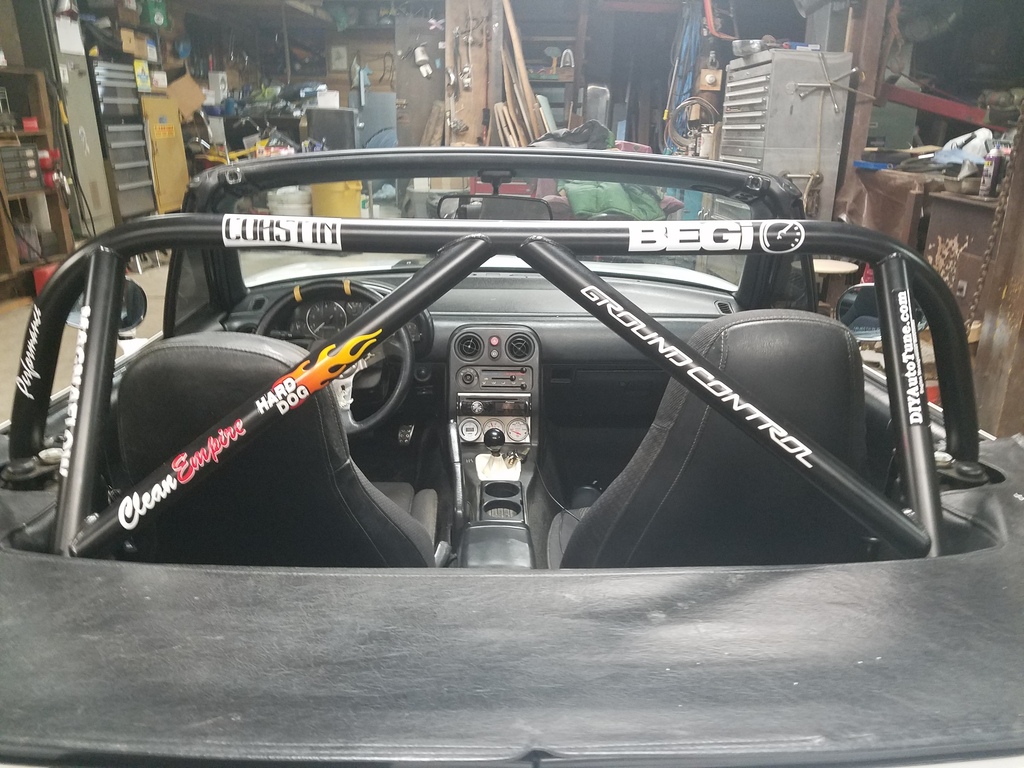
I purchased 3 sheets of clear acrylic. I wanted something with a tint, but it would be available locally. 2 sheets were 12"x18" that were used for the upper corners of the rollbar, and a 18"x32" sheet for the center. Ill have to look at the receipt to verify the sizes of the sheets, but those numbers ring a bell. Afterwords, i could have done it with one big sheet, but acrylic can shatter if your not careful with it. Make sure you leave the protective film on until it is in place; this will prevent any scratches while you are cutting and drilling.
The template for the corner pieces is simple: place it behind the opening, and outline it with a marker. The final shape will have 1/2" of clearance to the rollbar. With your straight edge, use the plastic cutter to make several passes to score the plastic from one side to the other. This allows you to bend the sheet into a clean line. Make sure you cut a line on the other side so that when you break it, the protective film breaks with it. The upper corners of the rollbar have a contour so it is a little harder to score perfectly. You should have something like this:
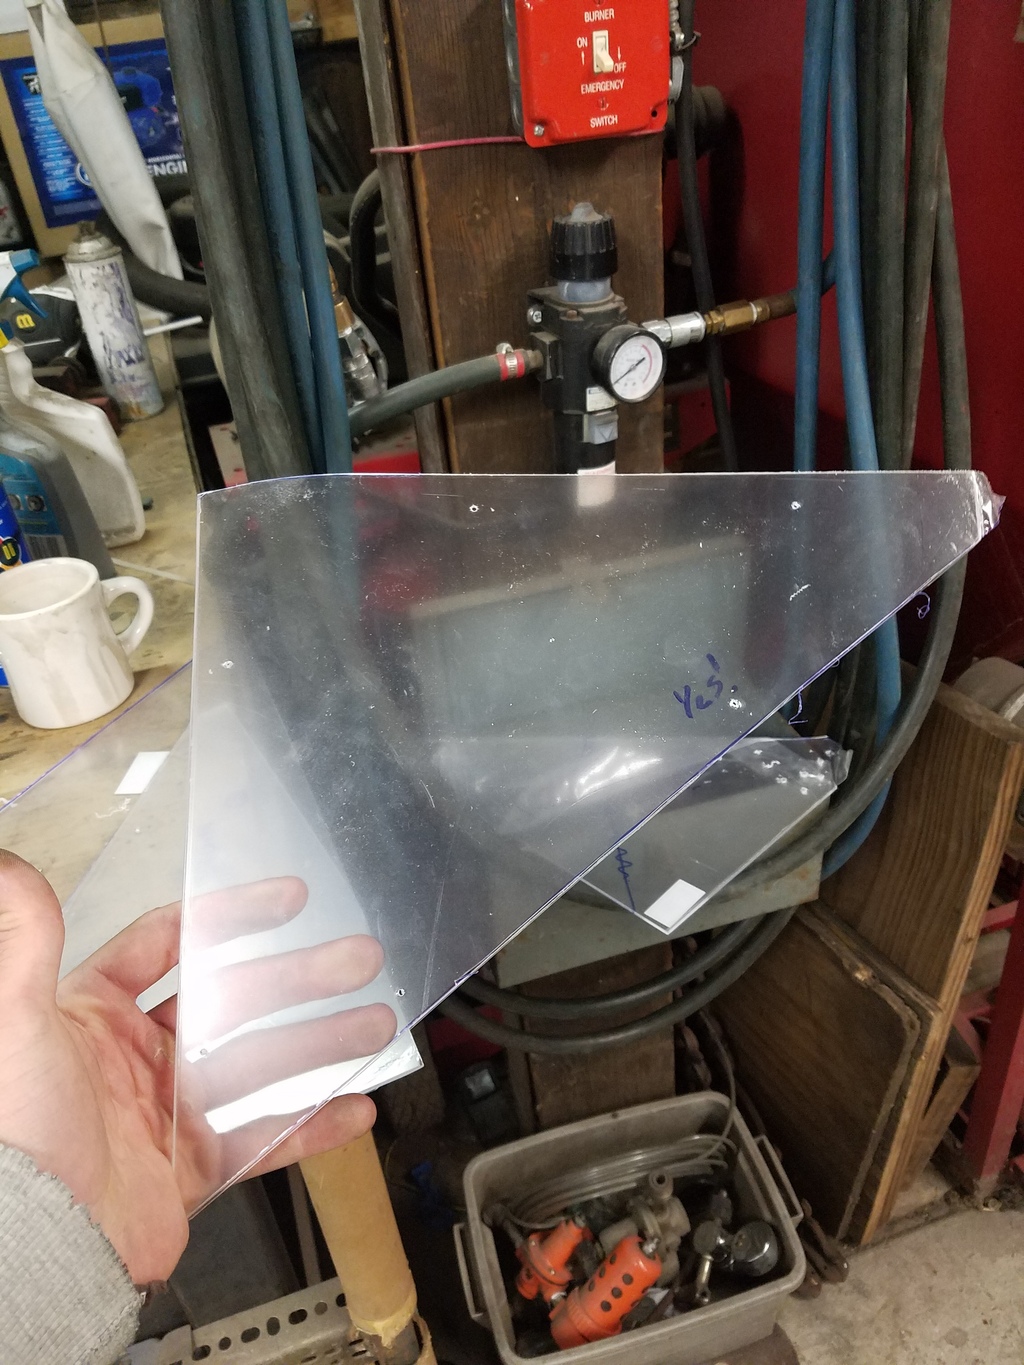
Right? Good.
The side you just did can be used as a template for the other side.
The center piece can be done alone, but it will help to have someone to hold the opposite side while you mark. The 32" sheet does not go from end to end, so try to center it the best you can. extend both lines with your straight edge to it makes an X in the sheet and cut away. which gives you this:
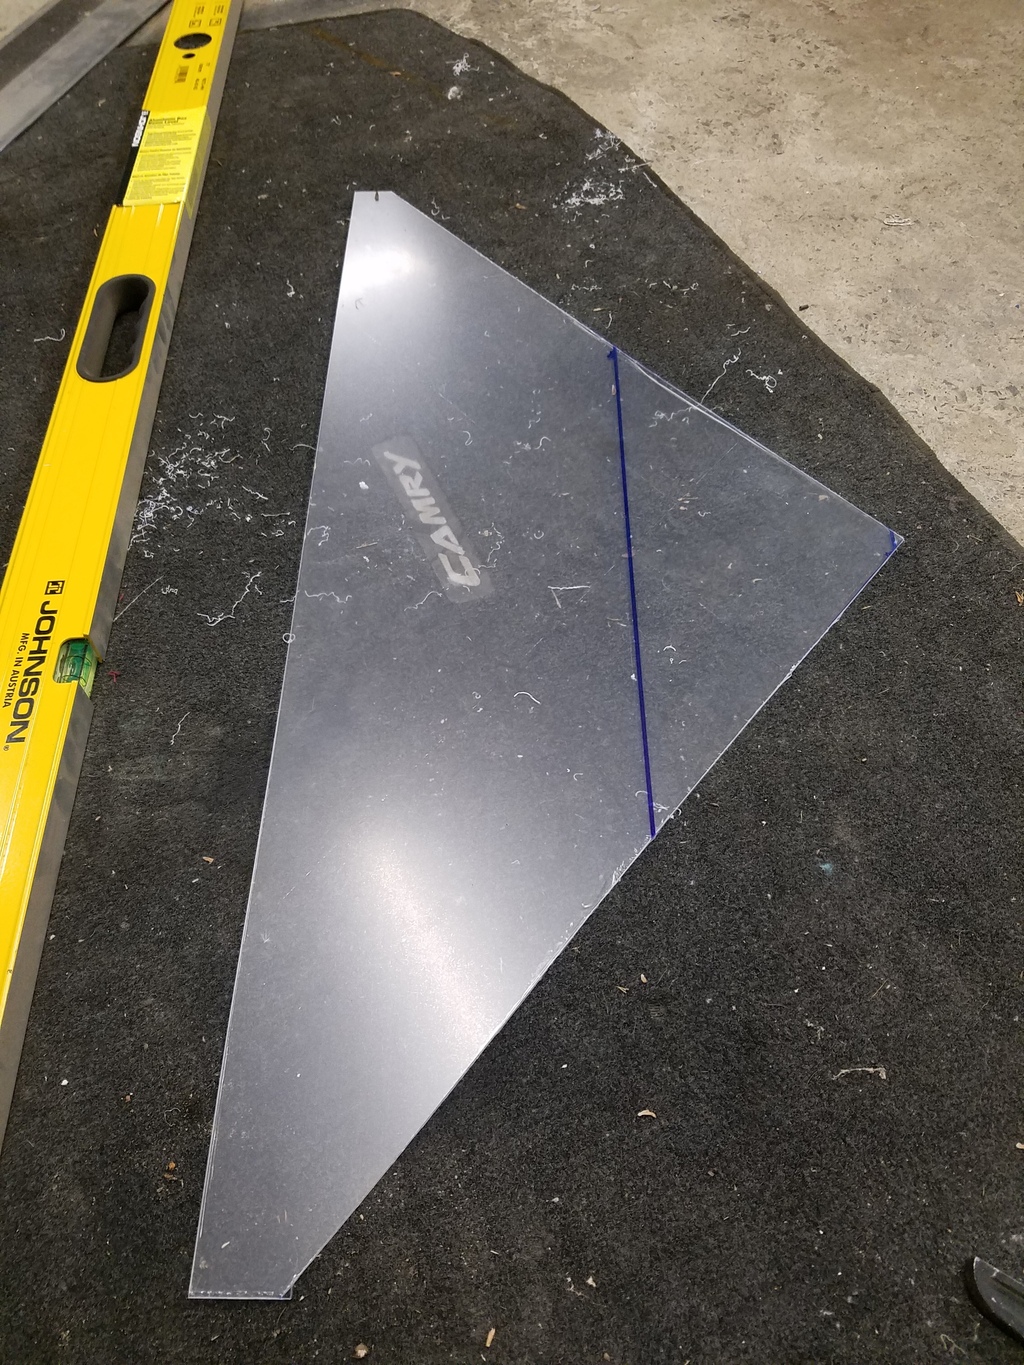
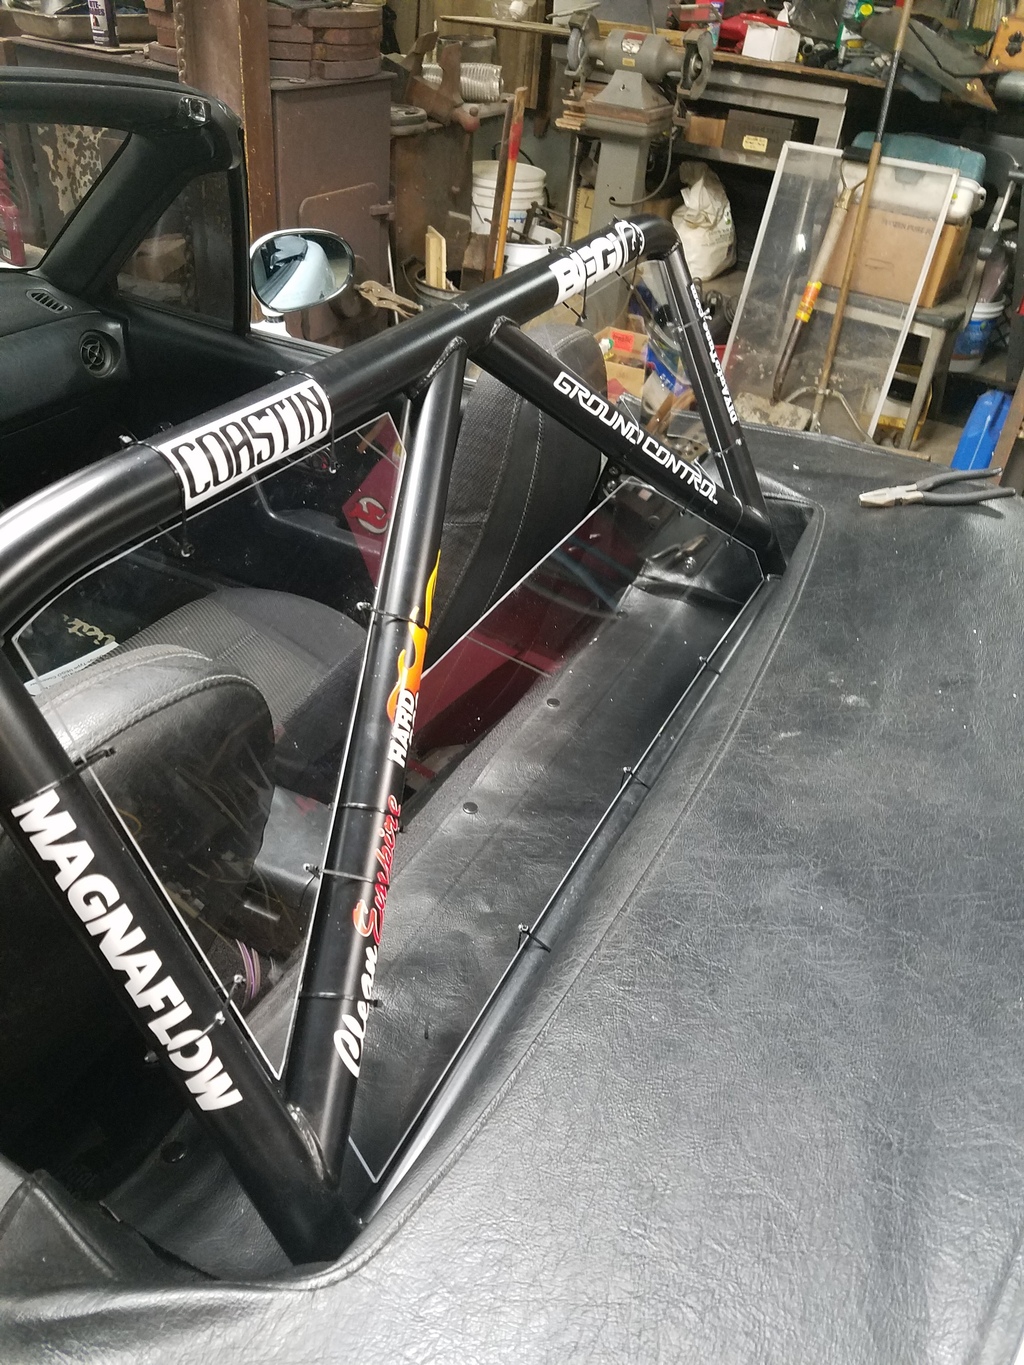
From here you can decide how high up you want the center piece to be. I didn't want to be boxed in so i cut the top half of the sheet off. If you have a hard dog like mine, the line is approx. where the "G" is in their sticker.
Once you have your pieces set, it is time to start filling holes to put your zip ties through. This is the most nerve wrecking part. I marked 2 holes on each side, with 3 alongside the bottom of the center. My marked holes were 1/2" from the edge. To prevent cracking, start stall and GRADUALLY work your way up. this is my pilot hole:
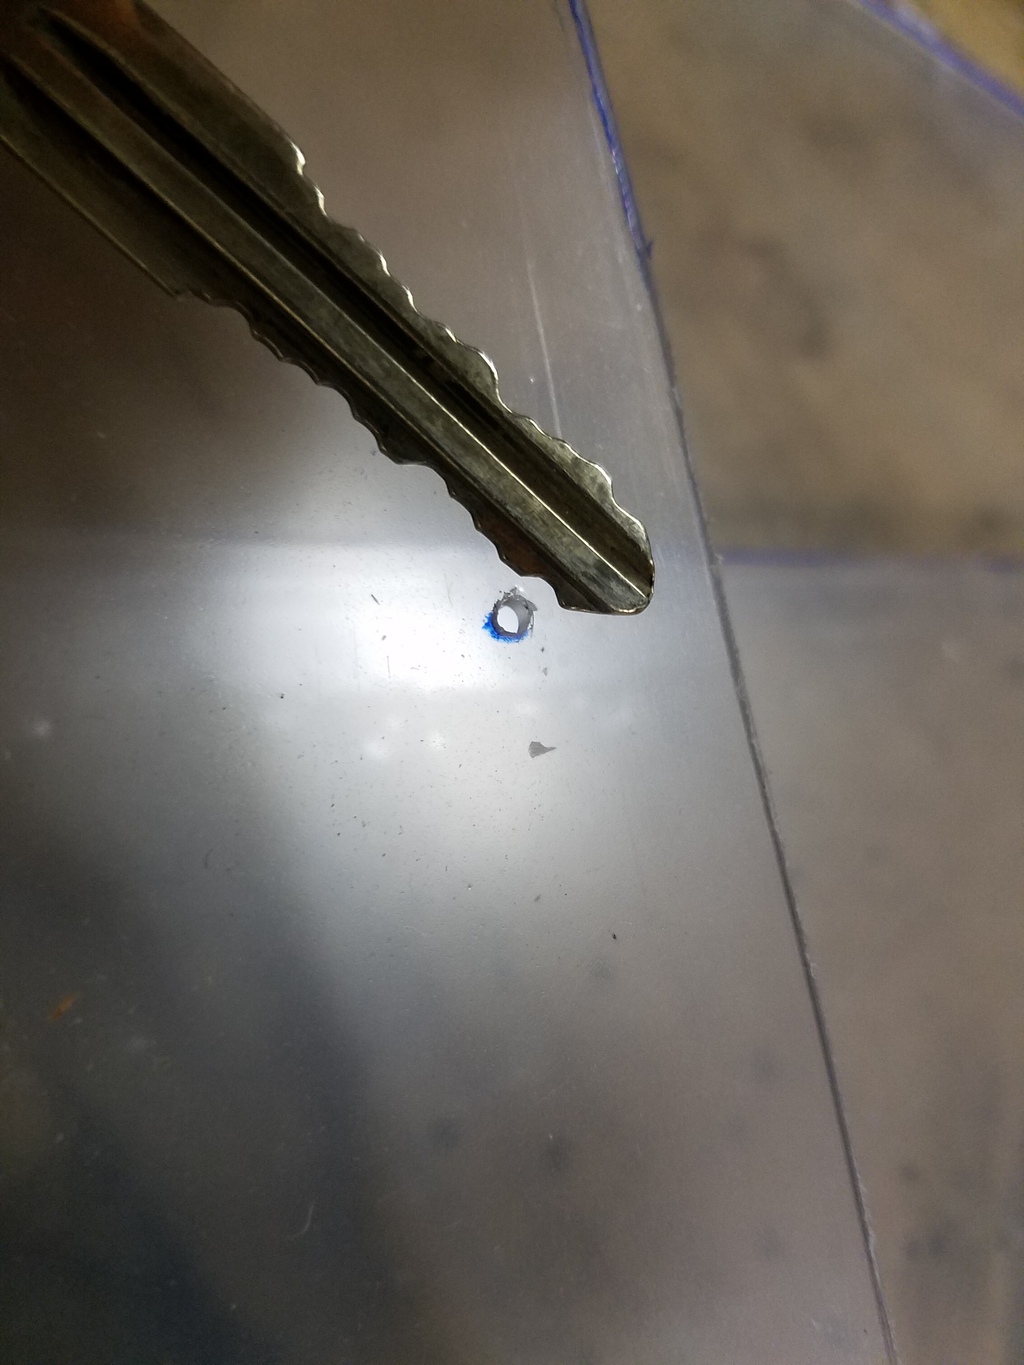
Once your done, take your zip ties, install it, remove your film and voila! your done.

Impressions:
The wind blocker does what it should do, and i do get some wind flow through the cutout in the center, but it is drastically been improved. The acrylic is very clear, and does not impede with visibility. This might pose some difficulty with others that like to unzipper the rear window from the top, but it doesn't apply to me.
So i made my own.
Everything used that i did not have already cost around $30 at your local hardware store.
WHAT YOU SHOULD HAVE:
A good drill bit set
A power drill
Straight edge
A miata
A rollbar
2-3 hours freetime
WHAT YOU NEED:
Clear Acrylic
Plexiglass knife
small zipties
The rollbar in question:
I purchased 3 sheets of clear acrylic. I wanted something with a tint, but it would be available locally. 2 sheets were 12"x18" that were used for the upper corners of the rollbar, and a 18"x32" sheet for the center. Ill have to look at the receipt to verify the sizes of the sheets, but those numbers ring a bell. Afterwords, i could have done it with one big sheet, but acrylic can shatter if your not careful with it. Make sure you leave the protective film on until it is in place; this will prevent any scratches while you are cutting and drilling.
The template for the corner pieces is simple: place it behind the opening, and outline it with a marker. The final shape will have 1/2" of clearance to the rollbar. With your straight edge, use the plastic cutter to make several passes to score the plastic from one side to the other. This allows you to bend the sheet into a clean line. Make sure you cut a line on the other side so that when you break it, the protective film breaks with it. The upper corners of the rollbar have a contour so it is a little harder to score perfectly. You should have something like this:
Right? Good.
The side you just did can be used as a template for the other side.
The center piece can be done alone, but it will help to have someone to hold the opposite side while you mark. The 32" sheet does not go from end to end, so try to center it the best you can. extend both lines with your straight edge to it makes an X in the sheet and cut away. which gives you this:
From here you can decide how high up you want the center piece to be. I didn't want to be boxed in so i cut the top half of the sheet off. If you have a hard dog like mine, the line is approx. where the "G" is in their sticker.
Once you have your pieces set, it is time to start filling holes to put your zip ties through. This is the most nerve wrecking part. I marked 2 holes on each side, with 3 alongside the bottom of the center. My marked holes were 1/2" from the edge. To prevent cracking, start stall and GRADUALLY work your way up. this is my pilot hole:
Once your done, take your zip ties, install it, remove your film and voila! your done.
Impressions:
The wind blocker does what it should do, and i do get some wind flow through the cutout in the center, but it is drastically been improved. The acrylic is very clear, and does not impede with visibility. This might pose some difficulty with others that like to unzipper the rear window from the top, but it doesn't apply to me.

Reply
 2
2

2

Thread
Thread Starter
Forum
Replies
Last Post


