
build a nice under tray tonight out of Dibond

 04-26-2012, 08:50 AM
#23

What thickness did you use and have you checked for any flex at speed? My local shop only has Dibond in 3mm thickness. Would this be strong enough for an undertray and a 3" splitter? I'm thinking of doubling up the thickness at the splitter if I can't find 4mm or a better material locally.

Reply
 0
0

0
 04-26-2012, 09:28 AM
#25
Senior Member
Thread Starter

Join Date: Feb 2012
Location: chicago
Posts: 693
Total Cats: -33
the problem with this material for a splitter is it will bend if it get run into a curbs and rumble strips.you would need to build a support from the frame and also have front struts. perhaps if you used 2 or three layers it would work ok
i will use a big piece of abs plastic 1/2 inch thick for the splitter. think I need a wing before I worry about a splitter.
i will use a big piece of abs plastic 1/2 inch thick for the splitter. think I need a wing before I worry about a splitter.
Reply
0
0
04-26-2012, 09:55 AM
#26

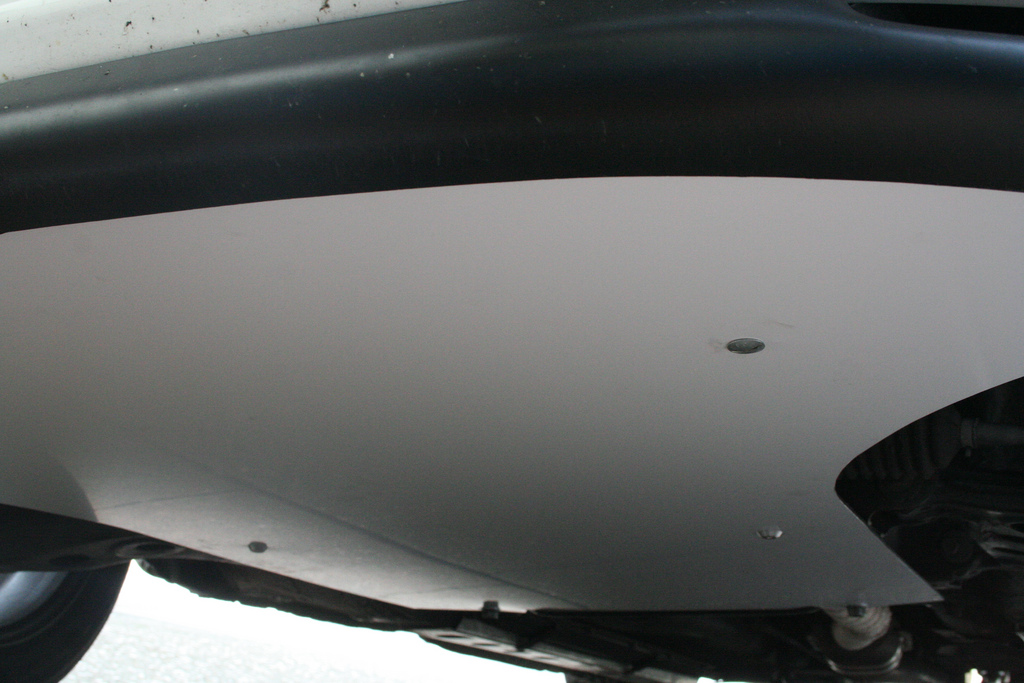
i used a 4x5 sheet. there is nothing holding the tray on at the lip as its tucked under the lip. it allows for flex when needed, iv hit it hard a few times with no damage. i have support coming from the radiator area and used the mounts on the subframe for the oem tray and the rear brace.
Reply
0
0


 04-26-2012, 01:20 PM
#31
Senior Member
Thread Starter
Join Date: Feb 2012
Location: chicago
Posts: 693
Total Cats: -33
I said it several times. the material is used to make signs at a professional sign shop. I doubt you will find it at a hardware store so you need to call a local sign shop.
the dybond I used was 1/8 of a inch thick. I used white but you can get whatever color you want. get a 5x2 sheet or you might need to buy half a sheet which is 2x8 and cost me 25 bucks.
it is not very hard to lay out. take off the bumper trace the contour however you want it. I decided to bolt the dybond in between the bumper and air deflector attached to the bumper. in the rear, i bolted it to the subframe with some stock screw holes. this holes can be reached without jacking the car, so i can still remove the bumper with minimal added work.
lots of different ways to lay out the design. if you are very particular, lay it out and test fit with a piece of cardboard. I changed my design slightly and ended up cutting it a little shorter then I should have. I was in a hurry to get it done, I may not have needed to cut room for the control arm and tie rods but I did, better safe then sorry and I did not want this thing falling off on the race track.
I going to add a recessed washer to make the bolt flush and a bolt lock thing to hold the bolt in the plastic for easy removal. about $1 worth of extra hardware to make sure pieces are not lost or damaged at the track. for a race car, I might buy the full sheet cut an extra for the front and perhaps the rear as well., hell skin the whole bottom. of the car.
Reply
0
0
04-26-2012, 08:29 PM
#32
im not gonna give you guys a template or something. i can offer advise but half the fun of making these is figuring it out. it only takes a couple of hours tops.
mine sits under the lip and is under tension from the front brackets.
i made custom spacers for the middle mounting points. and custom washers for the middle bolts cause they are more aero and i used dzus fasteners up front with L brackets that hang from the ac condenser mounts. and for the rear i used the 2 brace bolts.
im sure measurements will vary slightly so its best to just get under the car and check it out.
Reply
0
0
04-26-2012, 09:36 PM
#33
Senior Member
Thread Starter
Join Date: Feb 2012
Location: chicago
Posts: 693
Total Cats: -33
do it like Mr T, his mounting sounds better, long term but mine is a little simpler and does not require and special hardware so i guess do whatever feels right. I was going to do it more or less how T describes but I knew I wanted to make some sick brackets for a real front splitter and I didnt want to waste material and time making new heavy duty brackets. when I make the brackets for a splitter I will make accommodations for mounting the under tray separate from the bumper.
Reply
0
0

Thread
Thread Starter
Forum
Replies
Last Post
chris101
Miata parts for sale/trade
2
10-09-2015 09:08 AM


