When you click on links to various merchants on this site and make a purchase, this can result in this site earning a commission. Affiliate programs and affiliations include, but are not limited to, the eBay Partner Network.
Good splitter greentee. Now add some aluminium going from the top of the front fender curving down to the splitter, it should follow the outside edge of the tire if you were to look from the front of the car. Off the car it would look like a triangle that had been curved over a 55gal barrel. I'd also ease up on the thickness of your bottom L brackets, it might be a bit over kill using 3/8 alum.
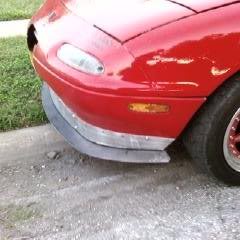
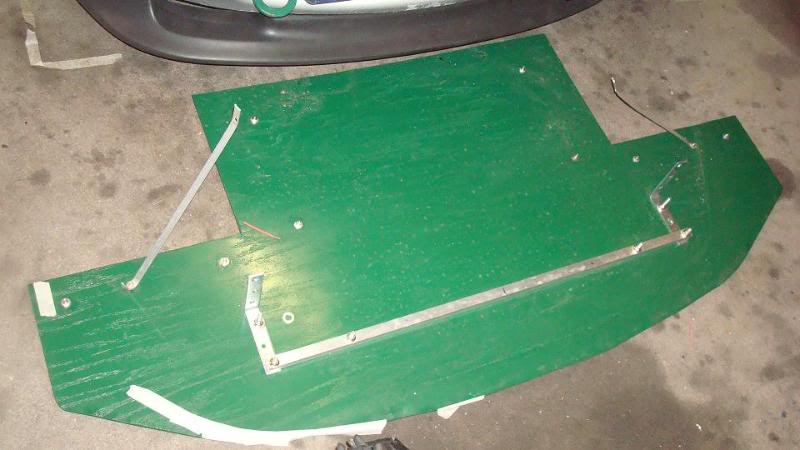
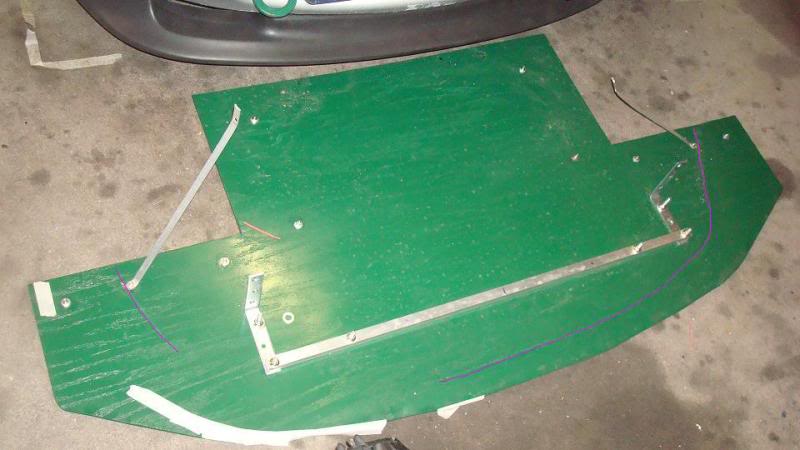
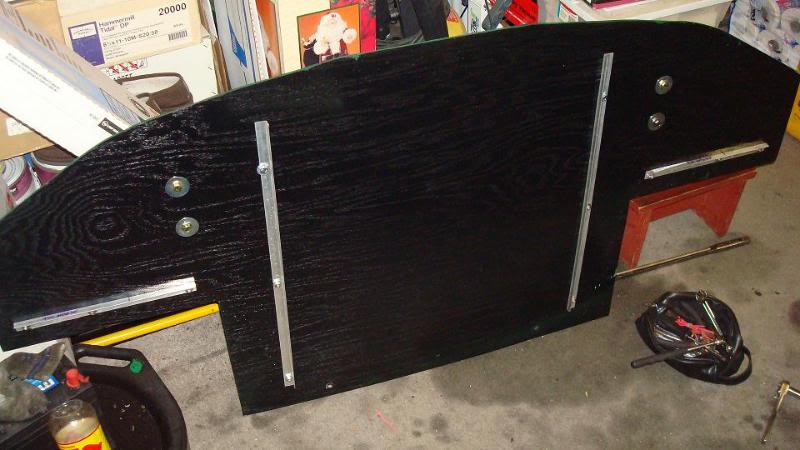
Here is the splitter off the car:
^The tape on the passenger side is an outline of what I may trim off of the splitter...
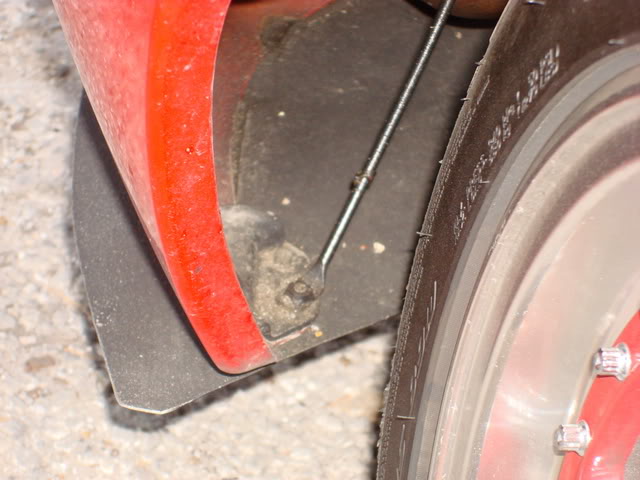
The pink lines are marks from the bottom of the lip:
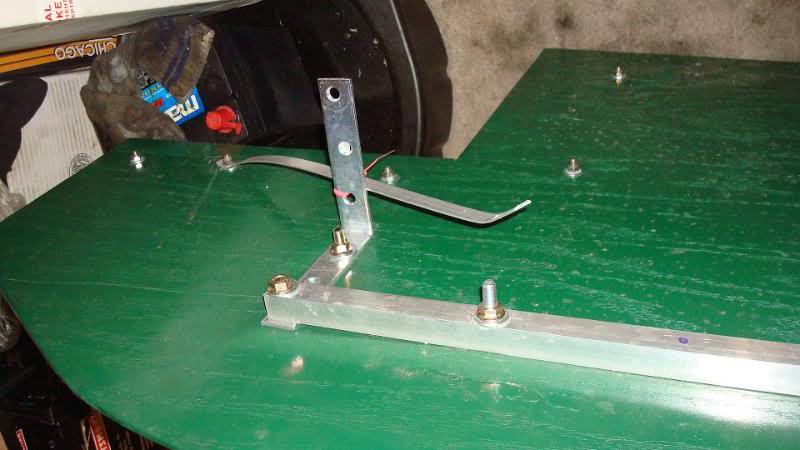
The 3x nut/bolts on the sides that hold the tire deflectors underneath also will be the mounting point for rubber truck splash guards, bolted to the outer exposed mounting point (that is outside of the bumper) and sharing a mounting point with the piece of flat aluminum that bolts to the frame.
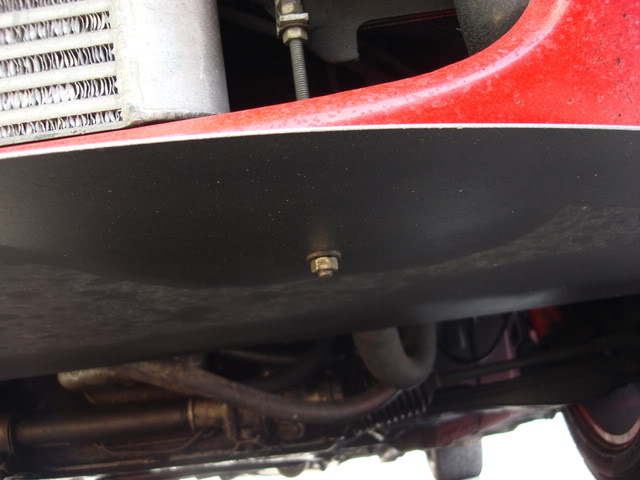
Here is the underside view:
Will not be working on those until I have the protrusion length figured out. There is only about 1.25-1.50" surface area in front of the lip, but in excess of 3-4" sticking out past the sides to cover the tire, but I've been advised to have the protrusion equi-length all around, but no data / reasoning behind that. I will probably shorten the sides, so the final dimensions are not set yet, so I cannot do the tire spats just yet.
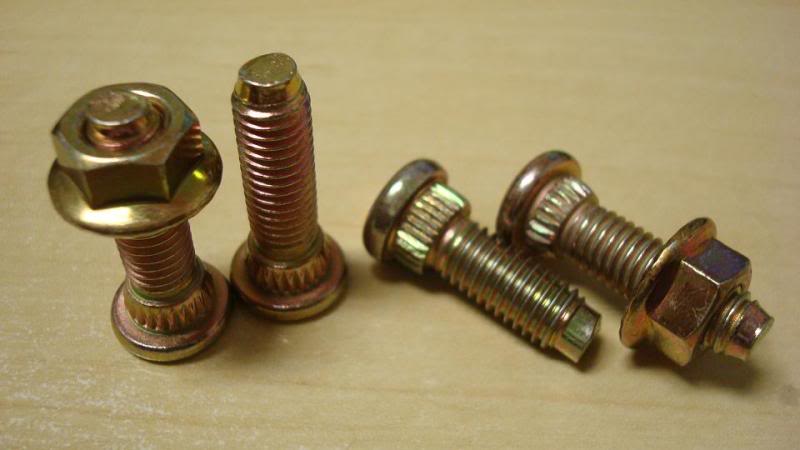
Overkill or not, the L bracket sizes were determined by the hardware size I wanted to use. The 2x bolts that bolt the L bracket to the splitter are M8x1.25, which uses a 12mm socket... all other mounting points/bolts are M6x1.00-- do you think 10mm hardware would be sufficient, even for the main support L brackets?
Here's what scraped off so far in 1-week of cautious daily driving:
I was thinking body panel-wise (edited that post for clarification) I'd have to keep the canopy for what I run - but the body kit in general seems gtg I'm waiting on my mazdaspeed account to be activated - then I can see how much they cost
^The tape on the passenger side is an outline of what I may trim off of the splitter...
The pink lines are marks from the bottom of the lip:
The 3x nut/bolts on the sides that hold the tire deflectors underneath also will be the mounting point for rubber truck splash guards, bolted to the outer exposed mounting point (that is outside of the bumper) and sharing a mounting point with the piece of flat aluminum that bolts to the frame.
Here is the underside view:
Will not be working on those until I have the protrusion length figured out. There is only about 1.25-1.50" surface area in front of the lip, but in excess of 3-4" sticking out past the sides to cover the tire, but I've been advised to have the protrusion equi-length all around, but no data / reasoning behind that. I will probably shorten the sides, so the final dimensions are not set yet, so I cannot do the tire spats just yet.
Overkill or not, the L bracket sizes were determined by the hardware size I wanted to use. The 2x bolts that bolt the L bracket to the splitter are M8x1.25, which uses a 12mm socket... all other mounting points/bolts are M6x1.00-- do you think 10mm hardware would be sufficient, even for the main support L brackets?
Here's what scraped off so far in 1-week of cautious daily driving:
The brackets hanging and fasteners hanging below the plywood will constantly be scraped off. I have 4 button head Allen bolts on mine that most every time I have to pull the thing off the heads are ground to where I can’t get an Allen wrench to work on them and end up grinding away at them. I need to make it so everything is countersunk on the bottom. scraping just the plywood with the fiberglass over it dosn't do much damage. the metal bits really dont like it though.
The brackets hanging and fasteners hanging below the plywood will constantly be scraped off. I have 4 button head Allen bolts on mine that most every time I have to pull the thing off the heads are ground to where I can’t get an Allen wrench to work on them and end up grinding away at them. I need to make it so everything is countersunk on the bottom. scraping just the plywood with the fiberglass over it dosn't do much damage. the metal bits really dont like it though.
Bob
Thanks for the reply. I had M6x1.00 buttonhead allen bolts laying around in case I run into that issue... but I guess they'd scrape away too, along with the alum angle pieces would scrape too.
For the 4x M8x1.25 hardware for the main support braces, I have some hardware that looks like wheel studs but in M8x1.25 that I can use if need be... or do you think M8x1.25 is too much?
I can make everything M6x1.00 (10mm bolt size), including for the L brackets, but I figured it would need the extra strength of the larger M8 hardware.
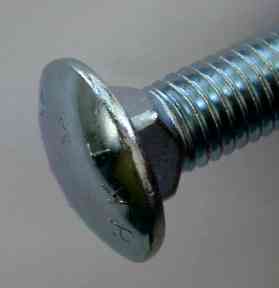
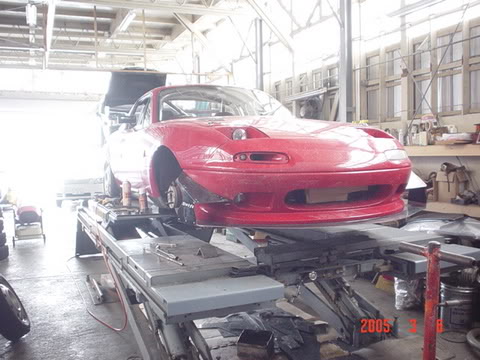
I'll see if I can find pics of the aero on my FFR. 1/2" birch with layer of glass on both sides. I used carriage bolts from the bottom. Strong but will tear right off if you hit something solid. That's exactly what you want...don't want to pull the whole structue off.
one issue i see is that it looks like your splitter doesn't stick out further than the beltline on the bumper. loses effiency big time. it still does something, but when i put the larger birch splitter on mine it was a huge difference.
By belt-line do you mean the front-most part of the bumper? How exactly is it losing efficiency? More drag? I'd imagine a longer splitter, creating a higher psi differential above the splitter, therefore more downforce...
yeah, front most part of bumper. just what the aero phd from the article in grassroots motorsports mag. said. i also know because i had a small aluminum splitter and it made a big difference, but when i went to a birch splitter that went just a inch and a half past the bumper it made a huge difference. i also added a drop vent hood and had to trim the splitter down a little so i could get back to the frt./rr balance i wanted. i didn't have enough wing! it's now even in the front with the front most part of the bumper.
Why dont you guys use the carriage bolts? Cheap and available at any local hardware store. Also the bigger rectangle part will bite into the wood better than the wheel studs.
i use all-thread, cut to a length that i can use the small or large splitter by loosening a couple nuts and moving the all-thread up or down in the bracket.
i have never had a bolt or all-thread rub or scrape under the splitter.
2 all-thread bolts and 2 oem bolt locations at the corners.
simple and works and i bolt it up tight against the bumper and it's solid.
Why dont you guys use the carriage bolts? Cheap and available at any local hardware store. Also the bigger rectangle part will bite into the wood better than the wheel studs.
+1. I am using carriage bolts on my splitter and it works great. Track tested to 140 MPH, no problems. Easy to mount up as well.
So I've always wondered about the shape of the leading edge of on a splitter. Some are curved like a section of a circle, some are pretty square, and some are like greeenteeee's with flat sections on either side. Anyone know the reasoning for this?
Material size? It isn't nearly as important as moving air away from the front tires.
Maybe more surface area (if that's what you mean by material size), could have something to do with more downforce.
Originally Posted by mx5autoxer
So I've always wondered about the shape of the leading edge of on a splitter. Some are curved like a section of a circle, some are pretty square, and some are like greeenteeee's with flat sections on either side. Anyone know the reasoning for this?
As jacob300zx said, covering the tires are important, and is planned for my splitter. That is part of the reason why the sides are long and straight on the sides, I will be covering the tire, with something like what Savington posted. That, as well as the fact that it is easier to cut off than add material if I wanted. (considering some end plates, following the theory behind the use of endplates on wings...they help keep air from spilling over).
Here are some examples I use in designing mine:
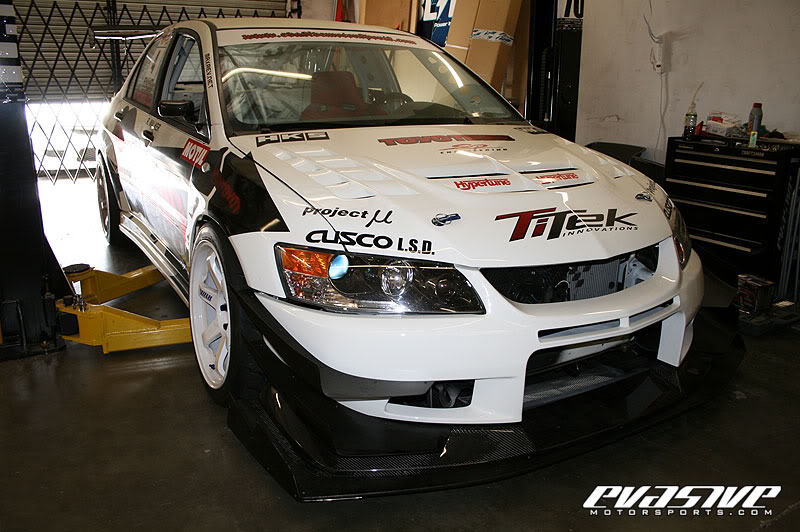
^Note the outsides are pretty straight/squarish if you will. The EVASIVE S2000 has the same shape.
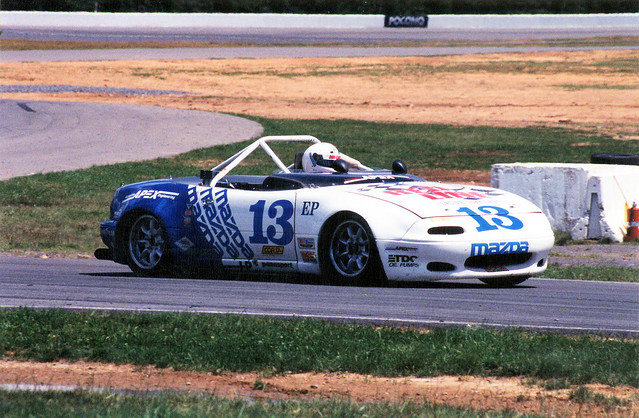
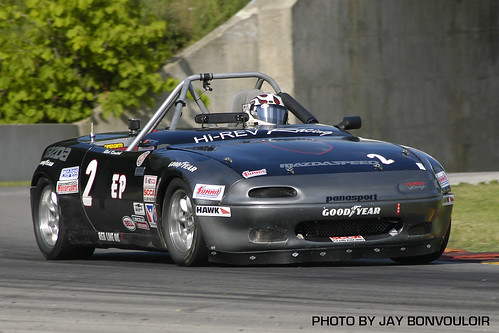
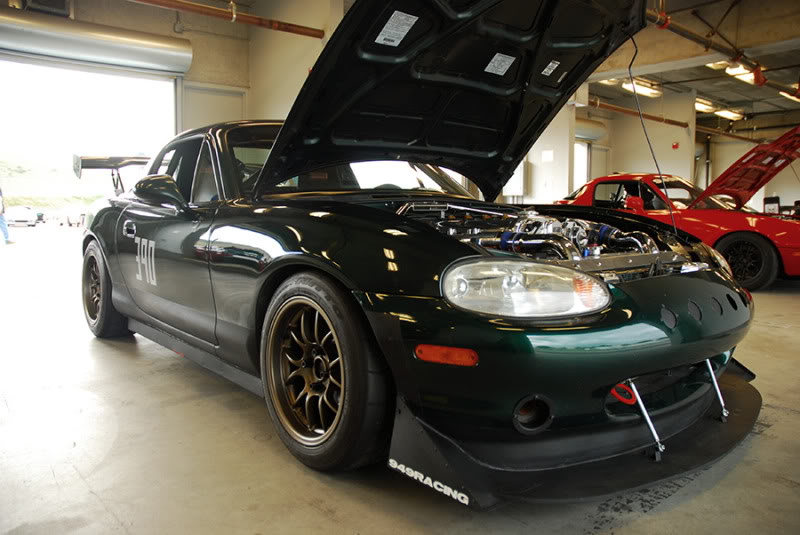
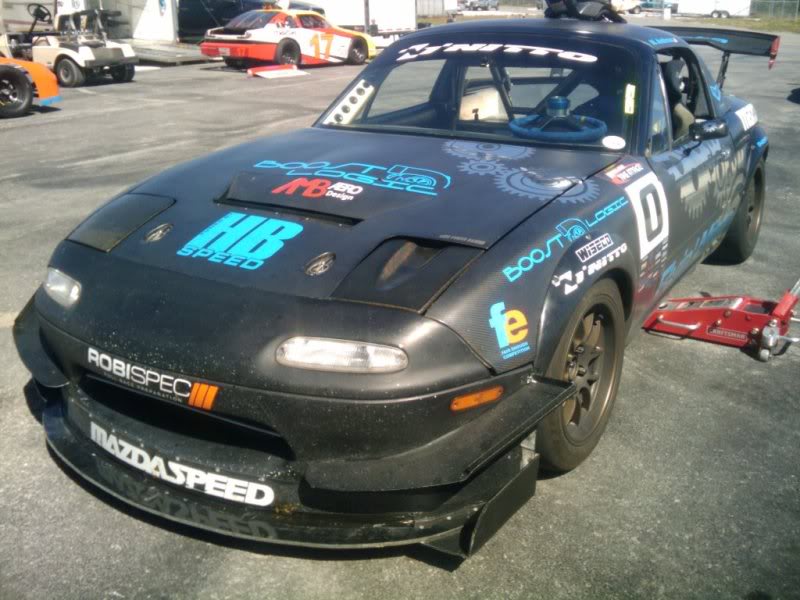
Here's some Miata-specific examples:
Satisaii (he entire undercarriage was covered)
We are almost finished with spoolin2bars front bumper. Need to trim out the radiator/Ic area and finish the pass side canard. Its hard to see in black but the bumper comes straight down with aluminum now from the center line/farthest point forward. No more pack man mouth to catch air.
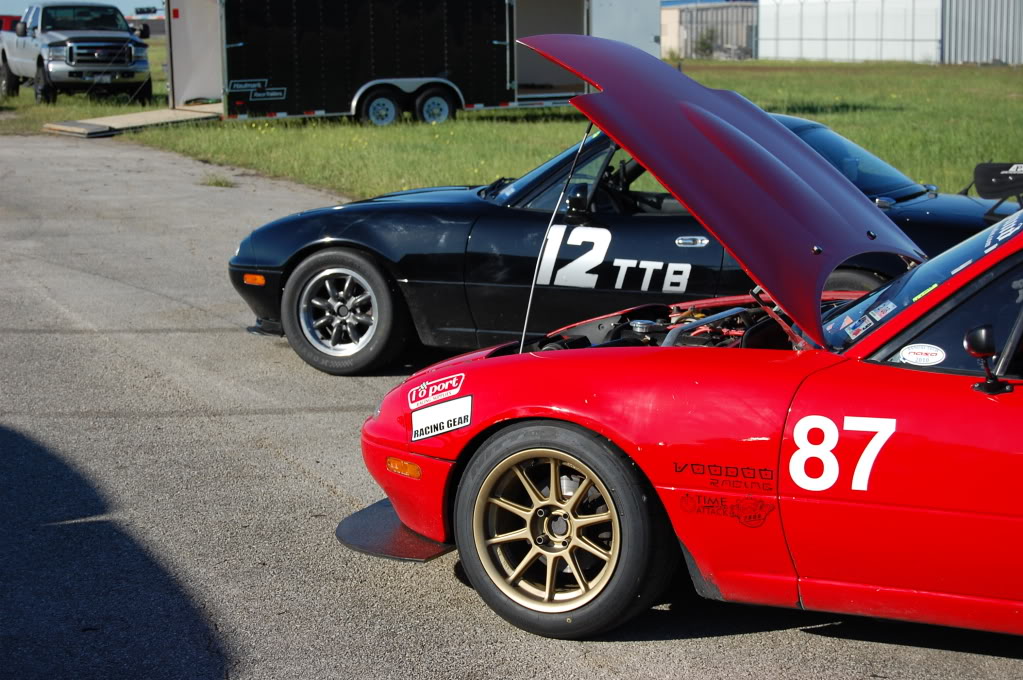
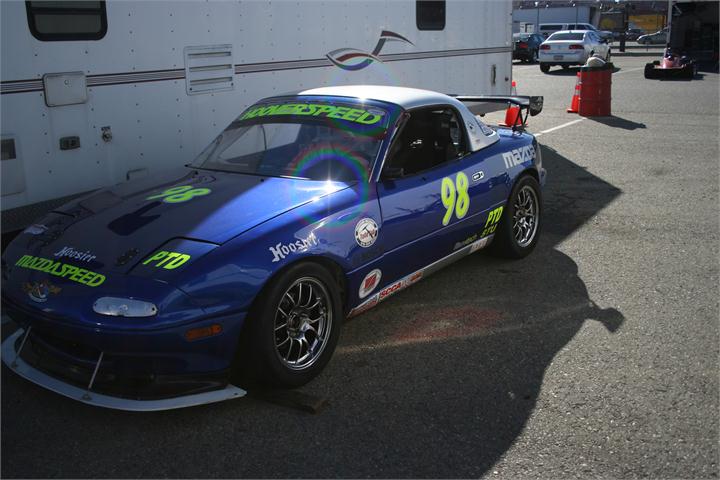
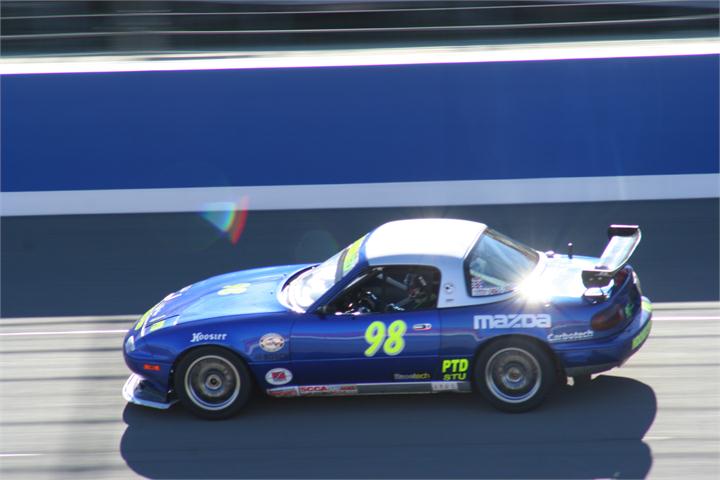
Added some aero to our STU car and it gave us enough addtional speed to set an STU track record at California Speedway. It was fun testing the aero changes..
We only did a splitter and wing but man did they make a difference.

 01-10-2011, 01:50 PM


 1
1