
Post your DIY aero pics
 09-25-2015, 01:31 AM
#941

Some DIY aero pics for you all (more to come):
Front splitter/undertray. Structure is 1" welded aluminum tube. Undertray is 3mm Alupanel. Splitter is 1/2" Russian Birch cut on a CNC router. Quarter turn fasteners are used everywhere on the undertray. The splitter is held on with five 6mm bolts. Brake ducts are 3D printed ABS plastic.

Front splitter/undertray. Structure is 1" welded aluminum tube. Undertray is 3mm Alupanel. Splitter is 1/2" Russian Birch cut on a CNC router. Quarter turn fasteners are used everywhere on the undertray. The splitter is held on with five 6mm bolts. Brake ducts are 3D printed ABS plastic.

Reply
 2
2

2

 09-25-2015, 12:20 PM
#943

Beautiful fab work, but don't expect that frame to last long if you have an off track excursion. I made a splitter support out of 1" square aluminum a couple years ago and it got destroyed the first time I dropped 2 tires over the exit curbing and the outside edge of the splitter dug into the dirt. Your frame work is much nicer than mine, but it mounts to roughly the same locations and will probably break in the same way that mine did.
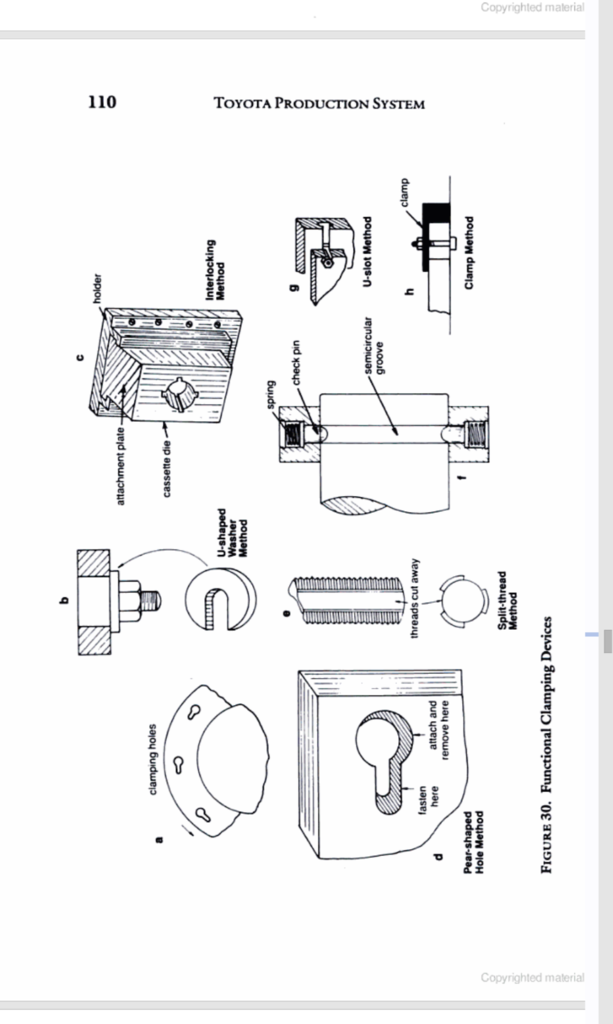
Also, I dig the slotted dharma holes on the splitter but their orientation scares me, since a very light impact with dirt or a curb will push the splitter back to the "remove" position and it will just fall off the bolt heads. Maybe add 2 more plain round bolt holes, so that you can use the 5 dharma holes for easy install and then lock it in position with 2 more bolts? Or you could just cut a new splitter and change it to 3 dharma and 2 round.
Also, I dig the slotted dharma holes on the splitter but their orientation scares me, since a very light impact with dirt or a curb will push the splitter back to the "remove" position and it will just fall off the bolt heads. Maybe add 2 more plain round bolt holes, so that you can use the 5 dharma holes for easy install and then lock it in position with 2 more bolts? Or you could just cut a new splitter and change it to 3 dharma and 2 round.
Reply
0
0
 09-26-2015, 11:54 AM
#946

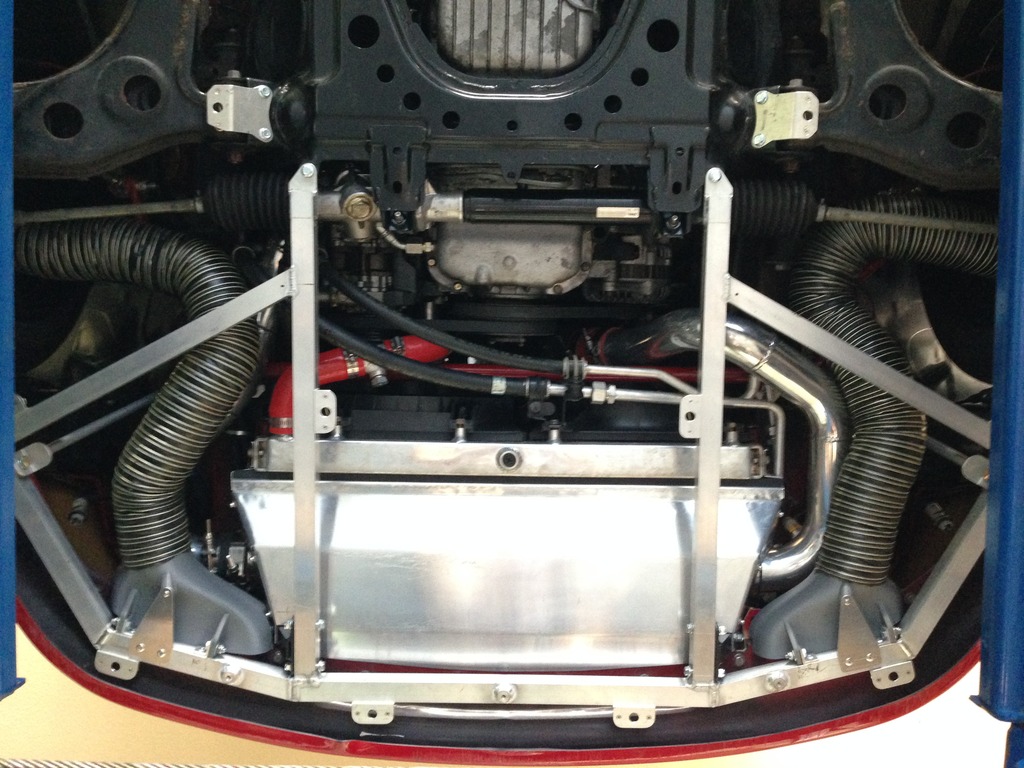
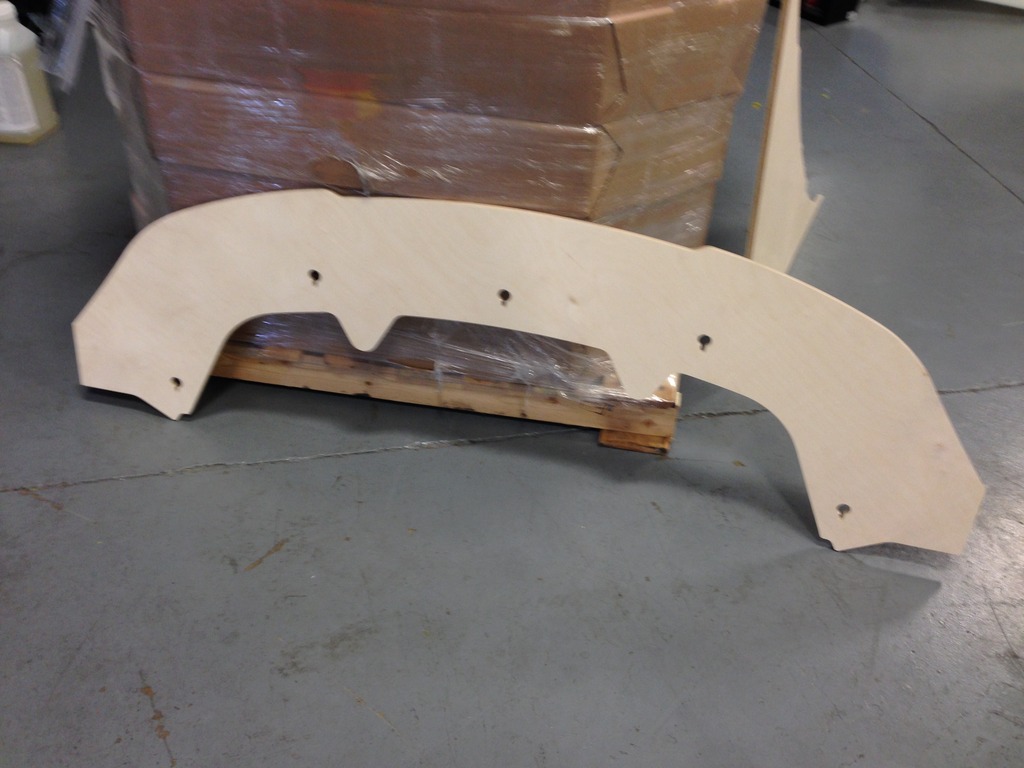
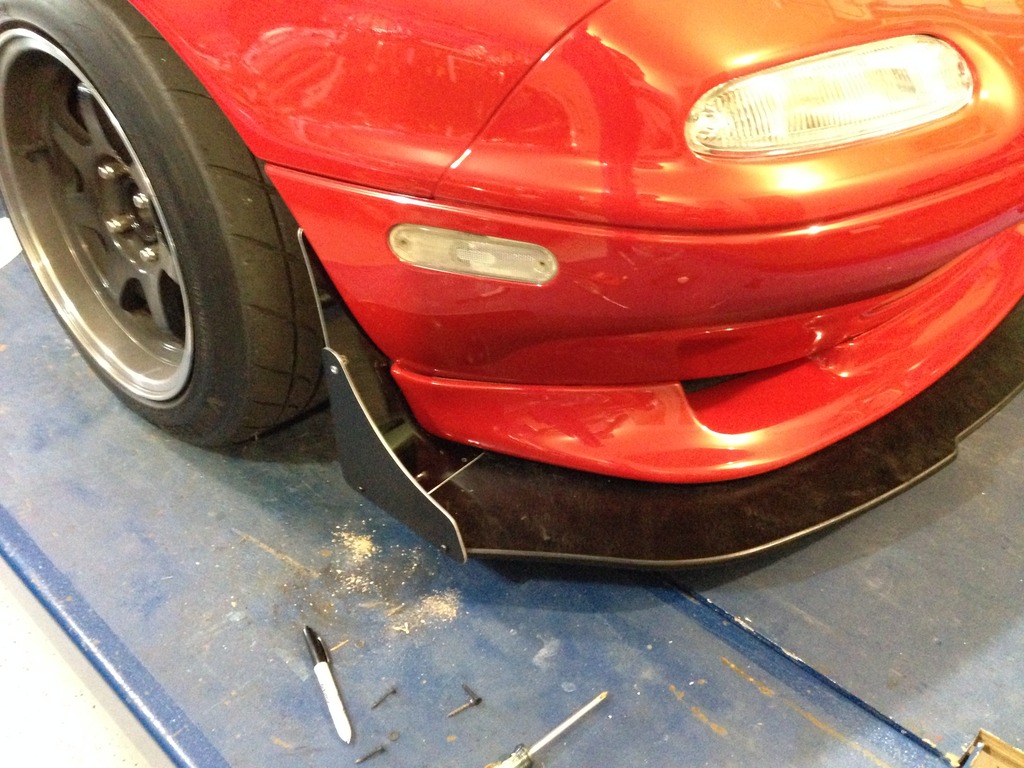
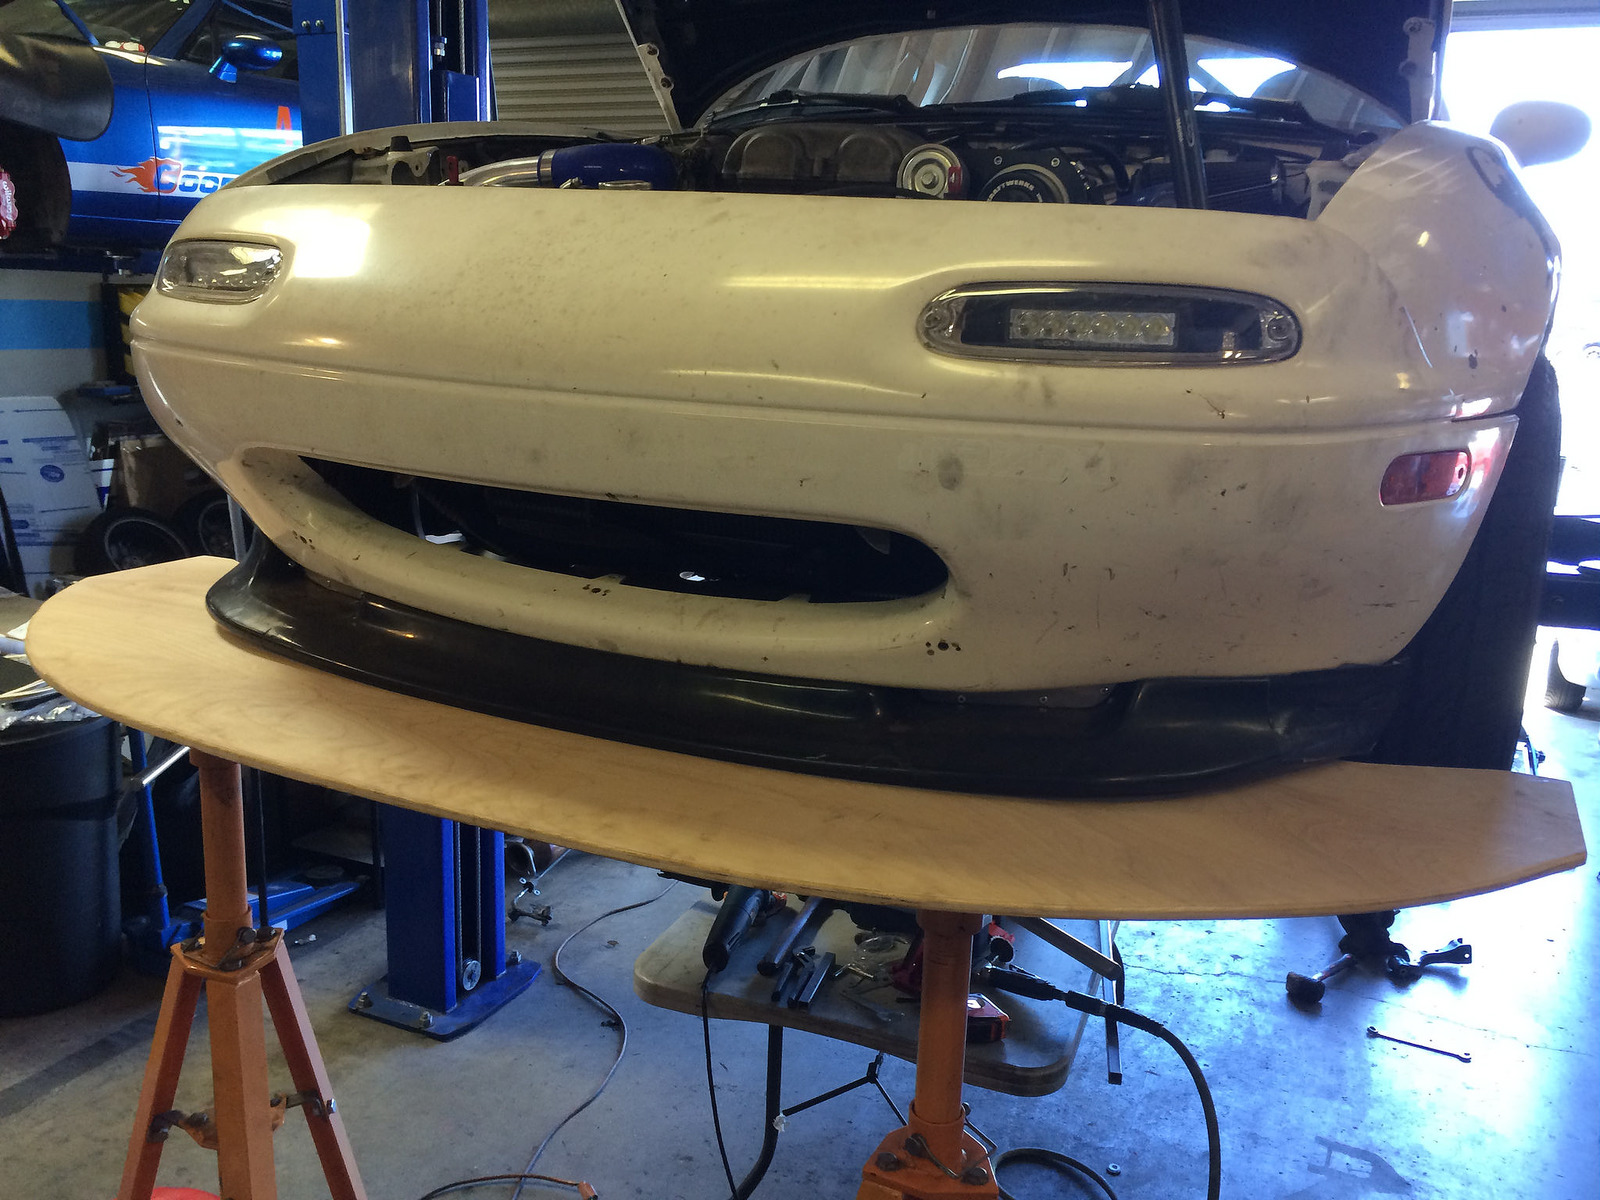
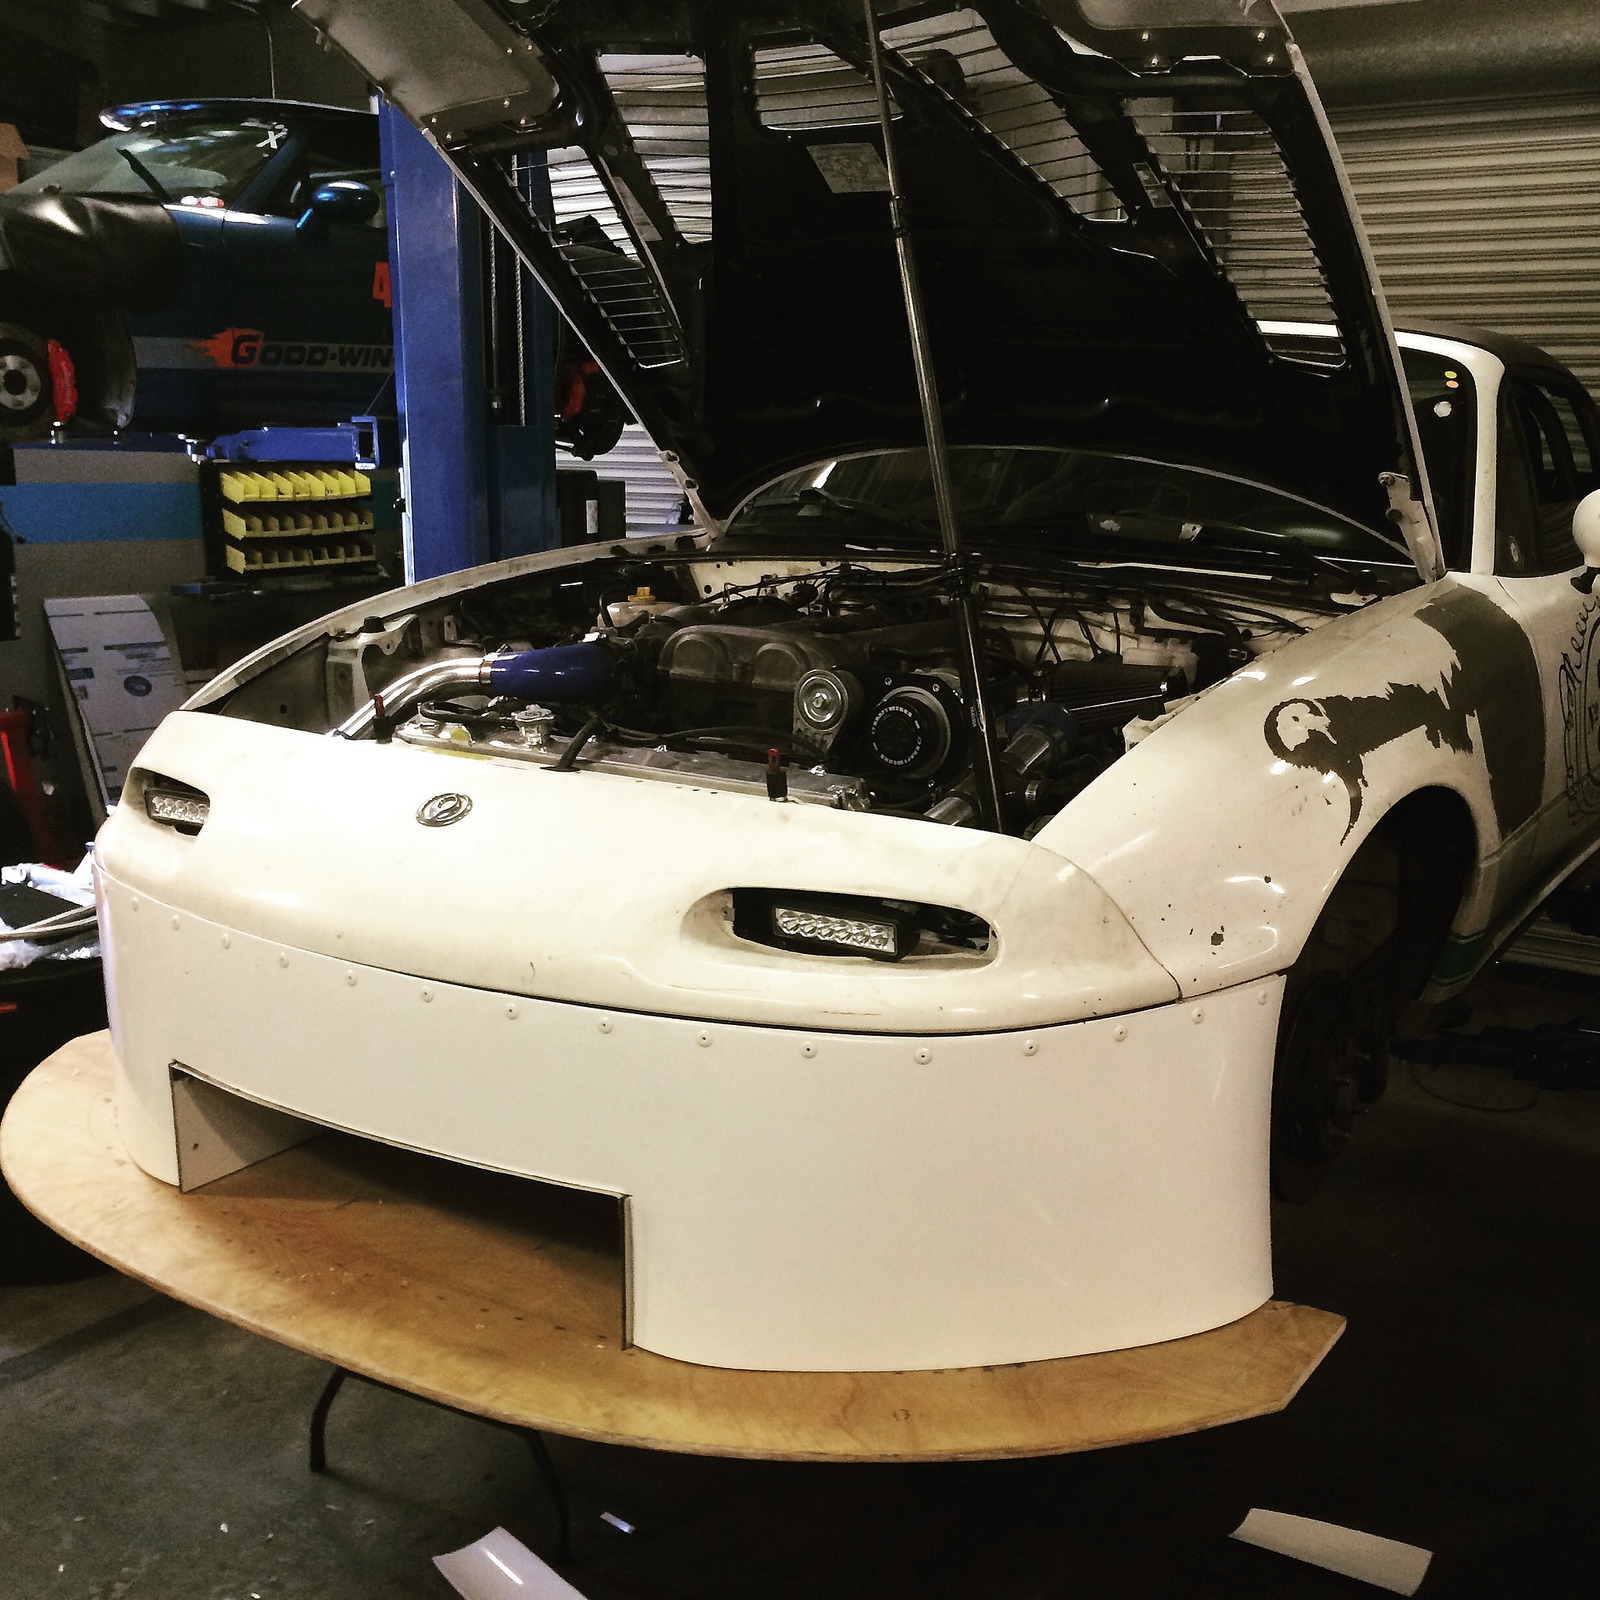
I am excited to finally share my front aero over here after putting the finishing touches on it this week. I am building the car for RTLA and Global Time Attack Street class, so ThePass helped me out to maximize whatever we built for the rule set. According to the rules the splitter cannot extend farther than 5" from your bumper. With that in mind we started by using his old splitter as a template for my new one.
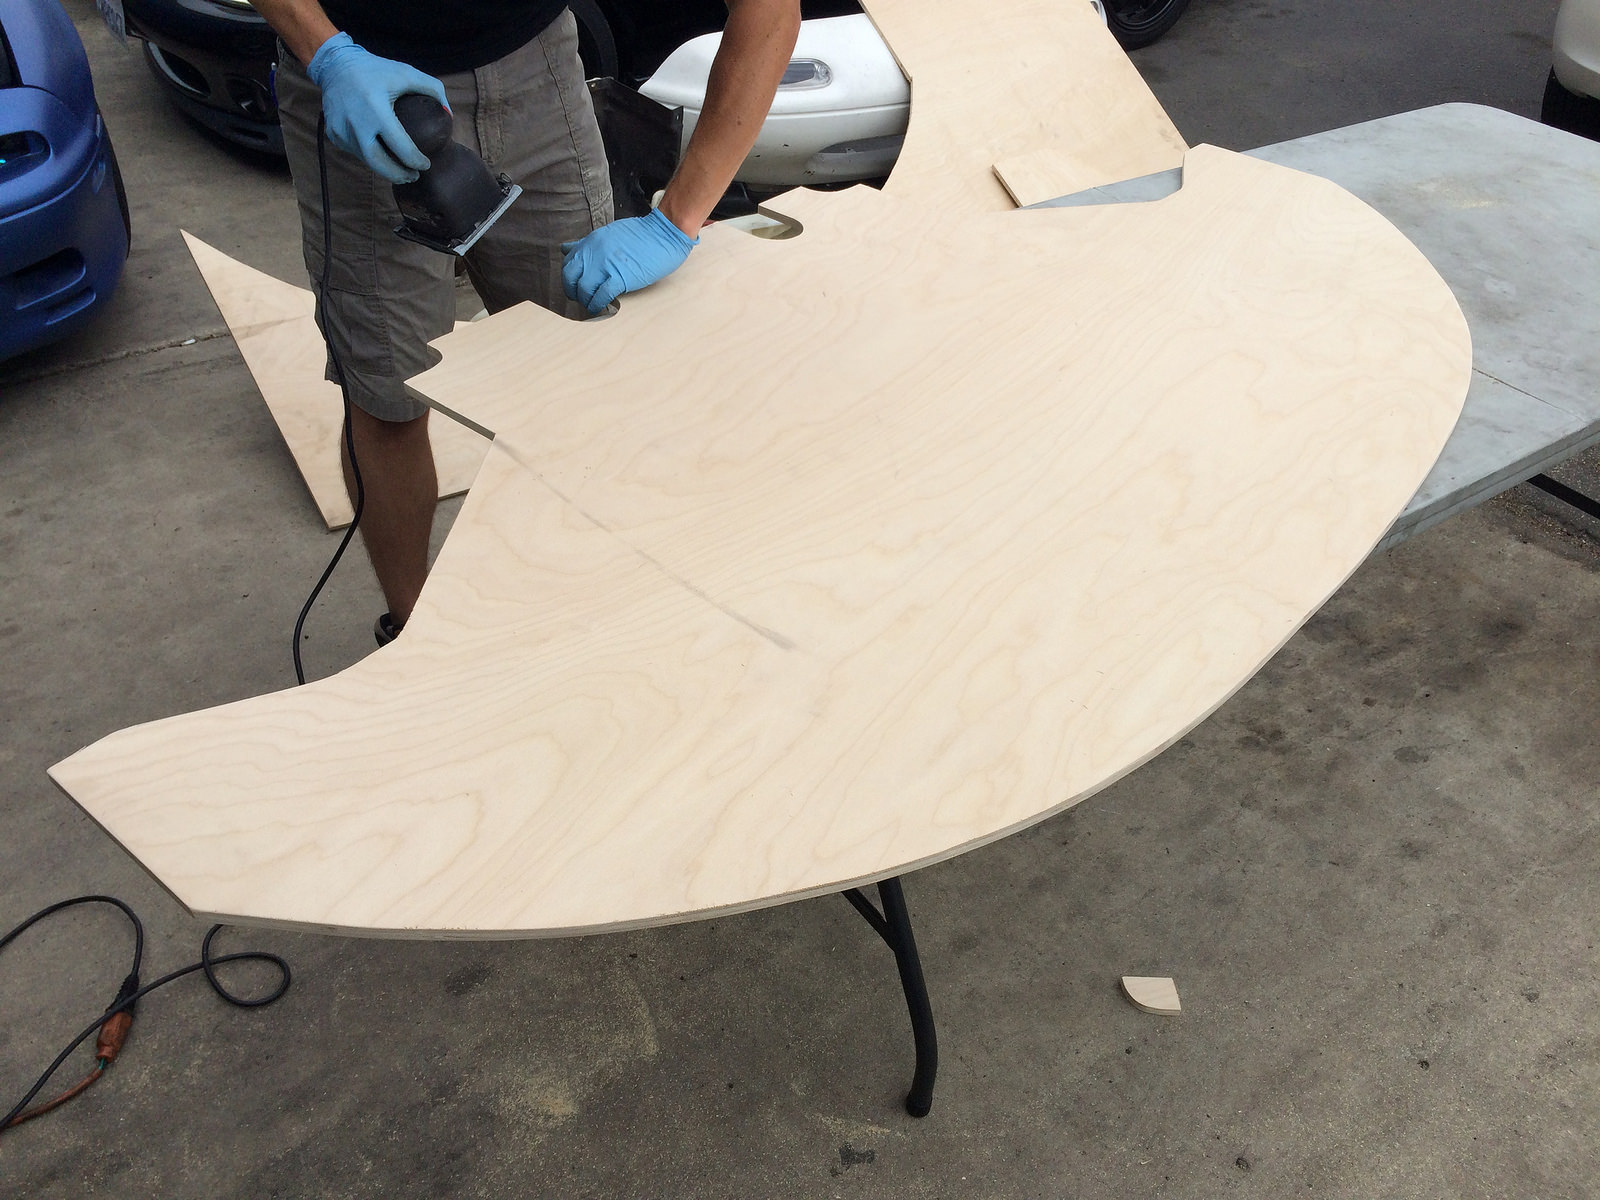
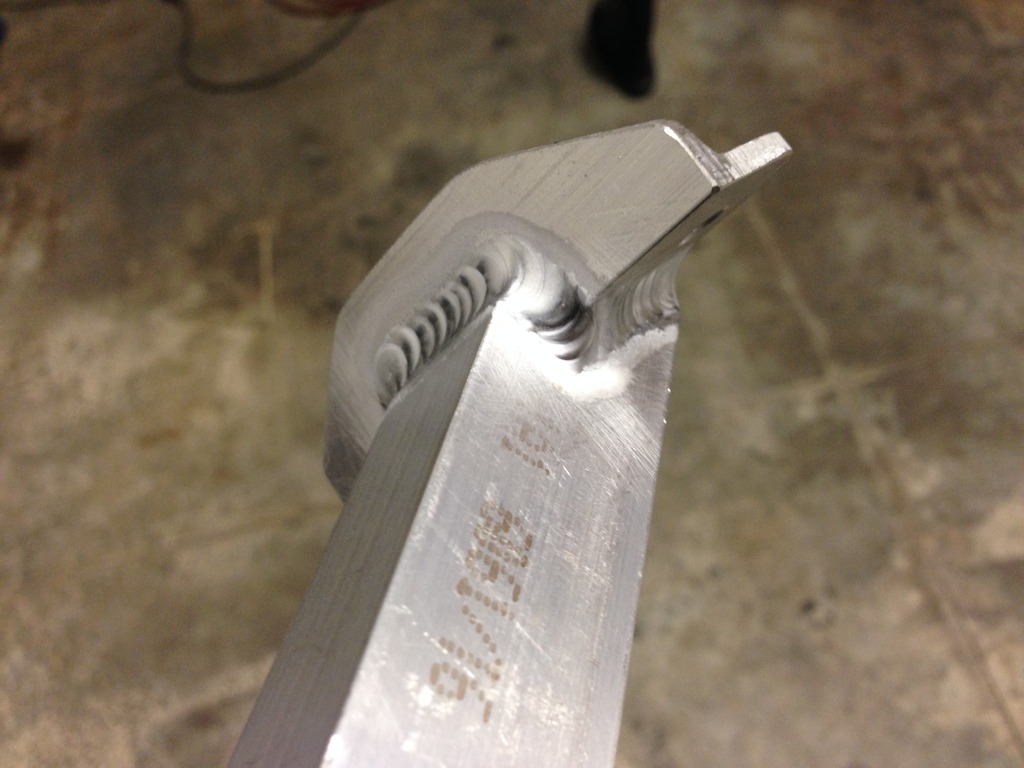
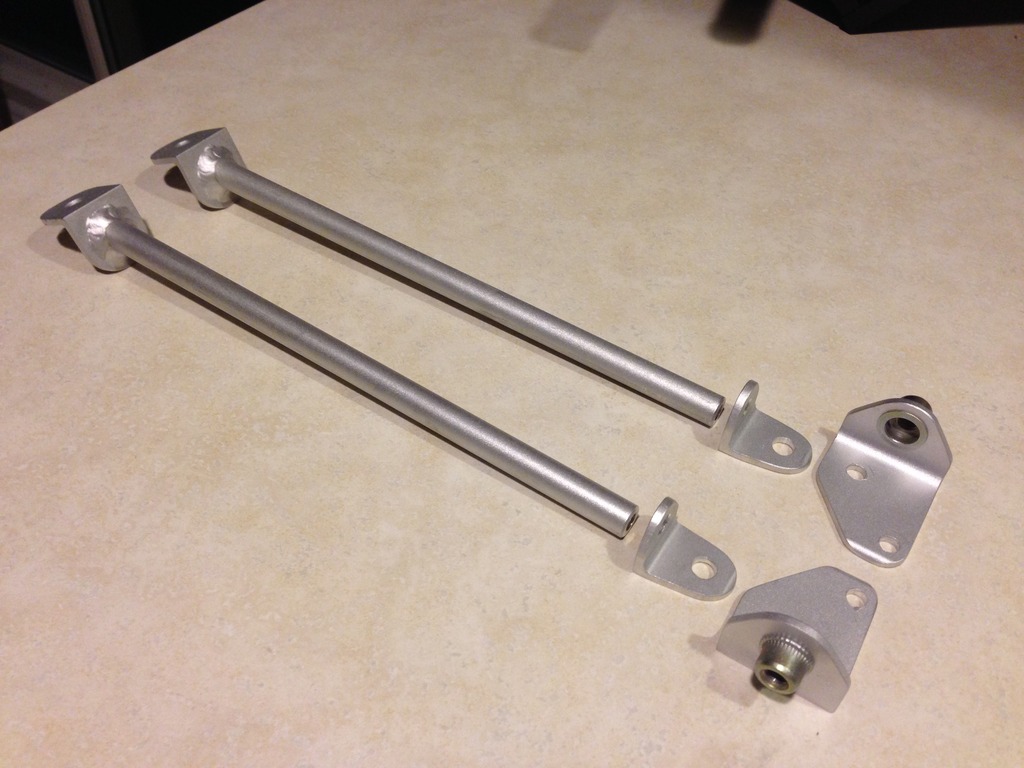
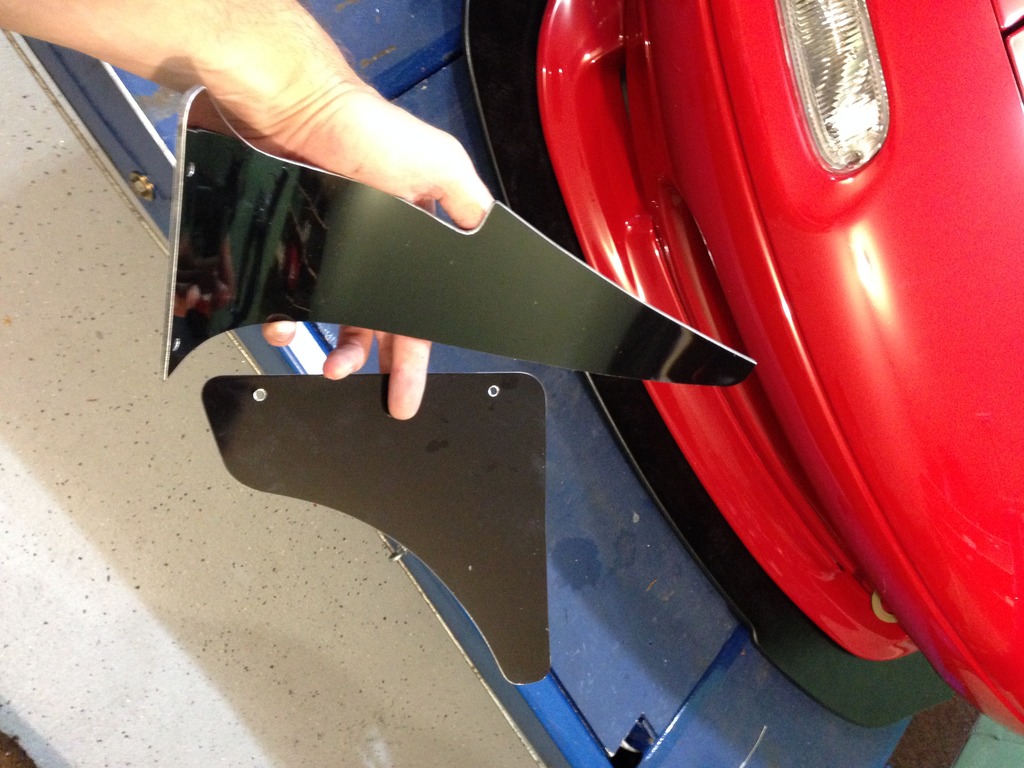
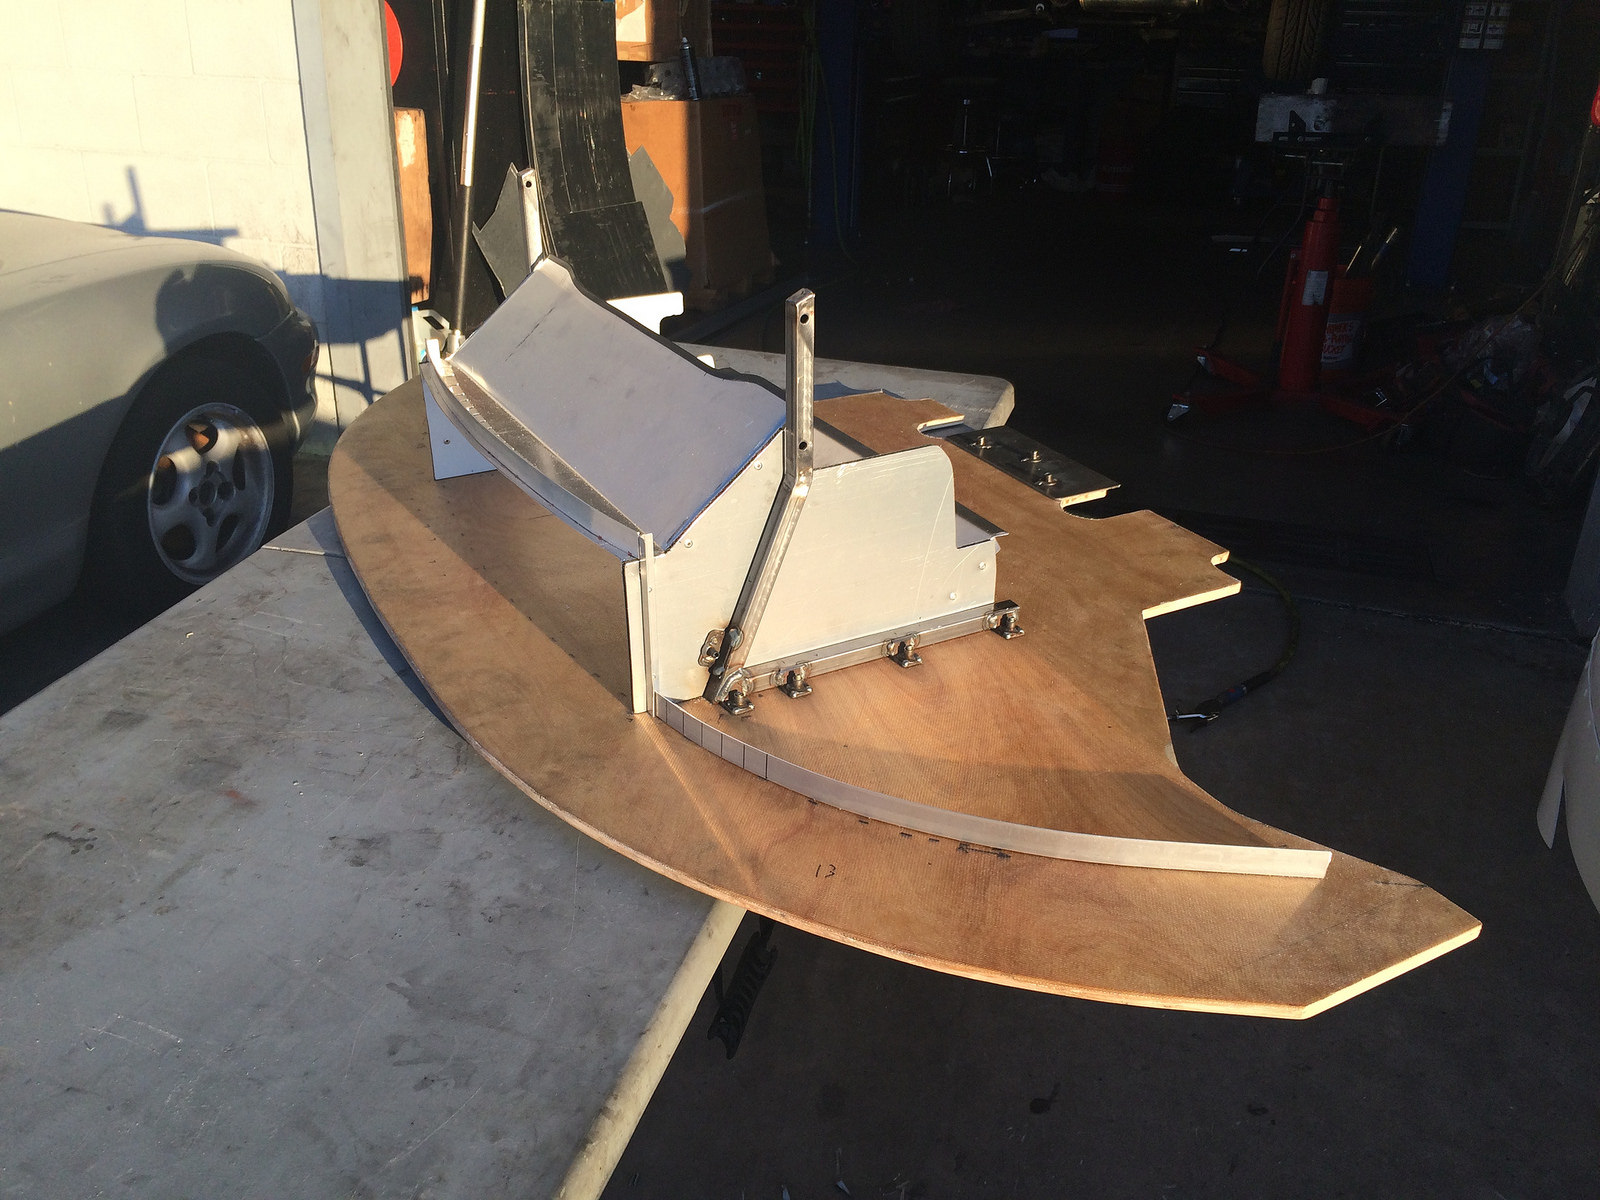
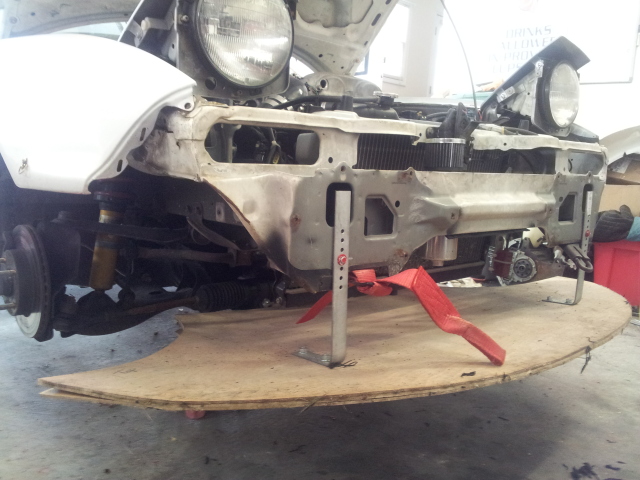
To make things complicated I wanted the splitter to super easy to remove but also be strong. Ryan came up with a "z" bracket and welded some receiver tabs to the front of the car for attachment points.
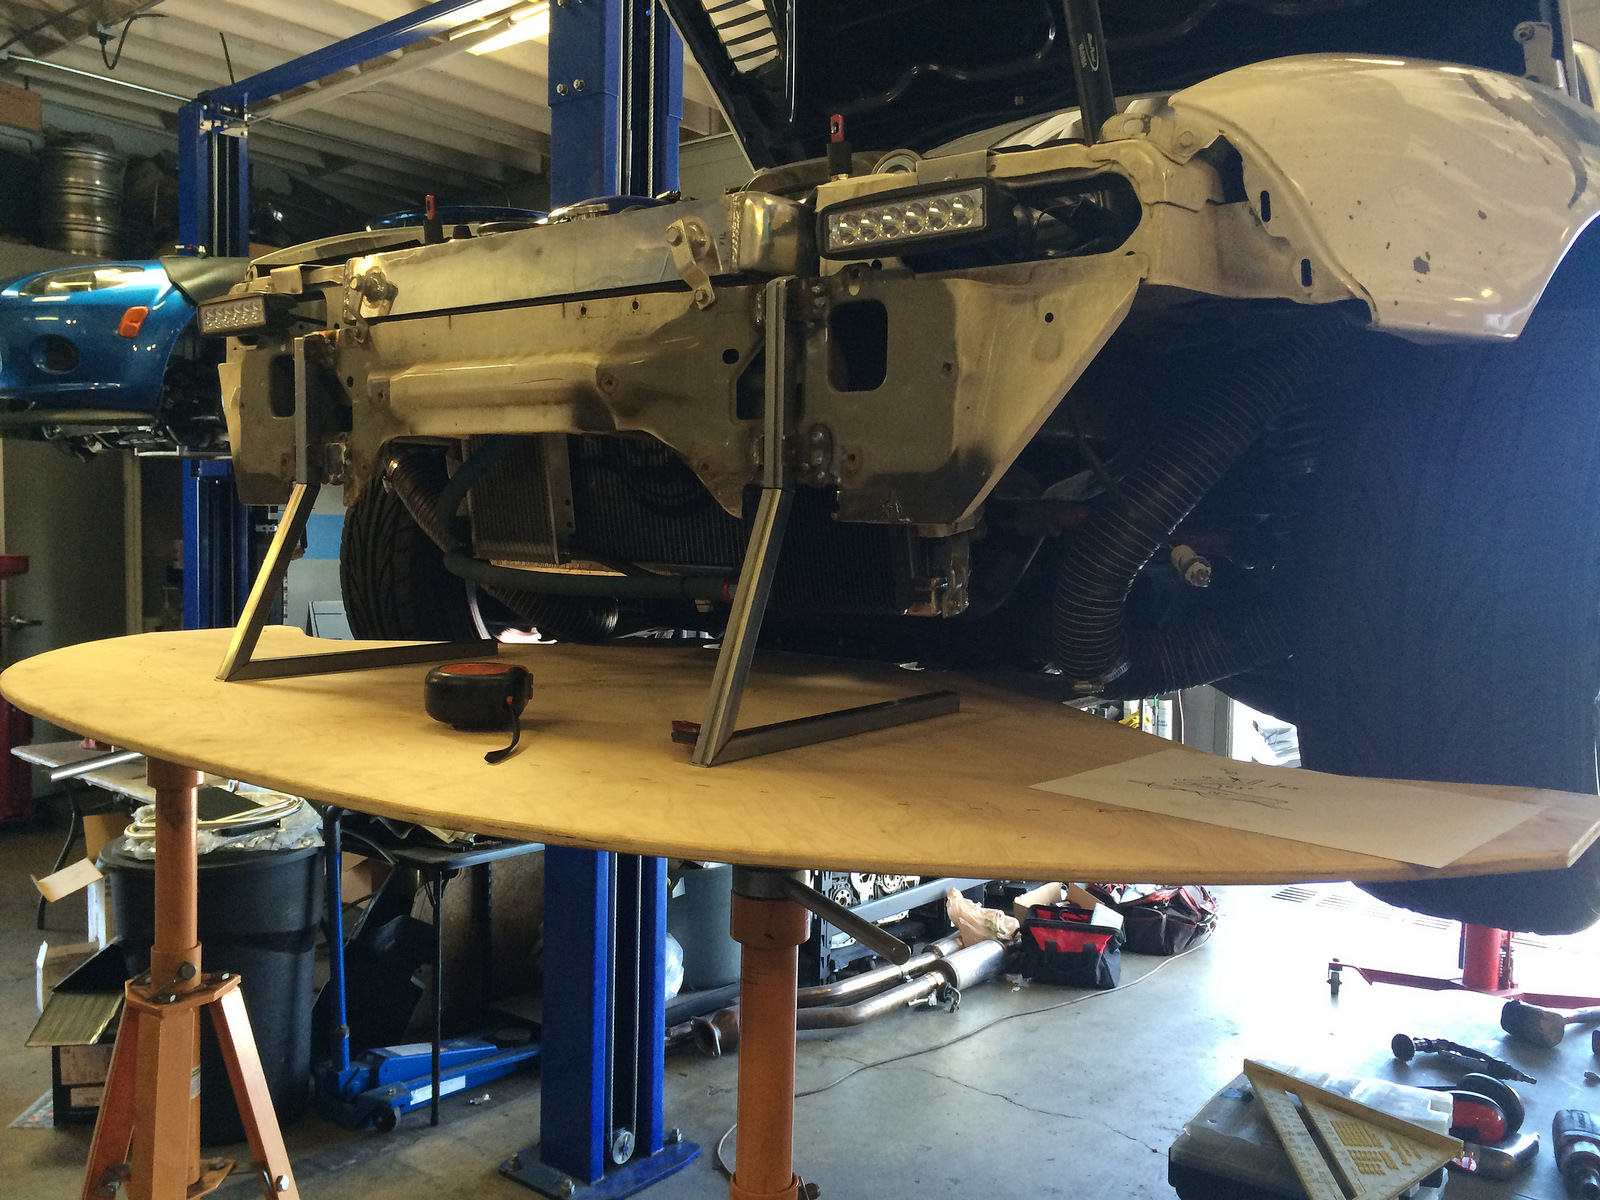
Here is a close up of the mounting point on the front.
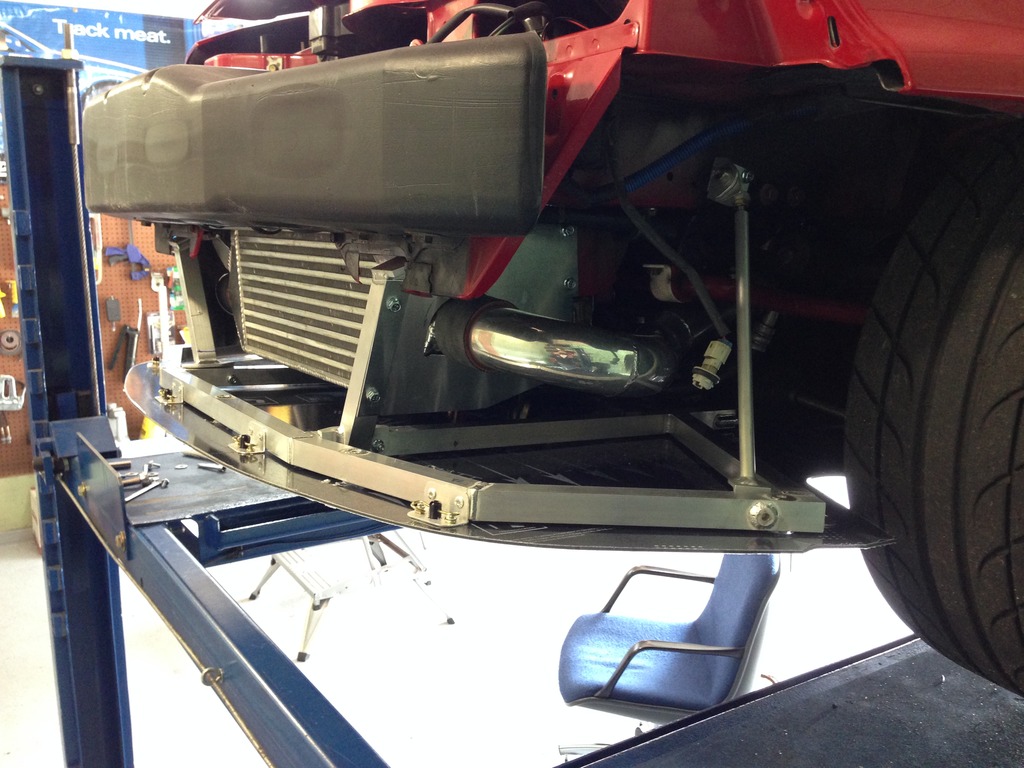
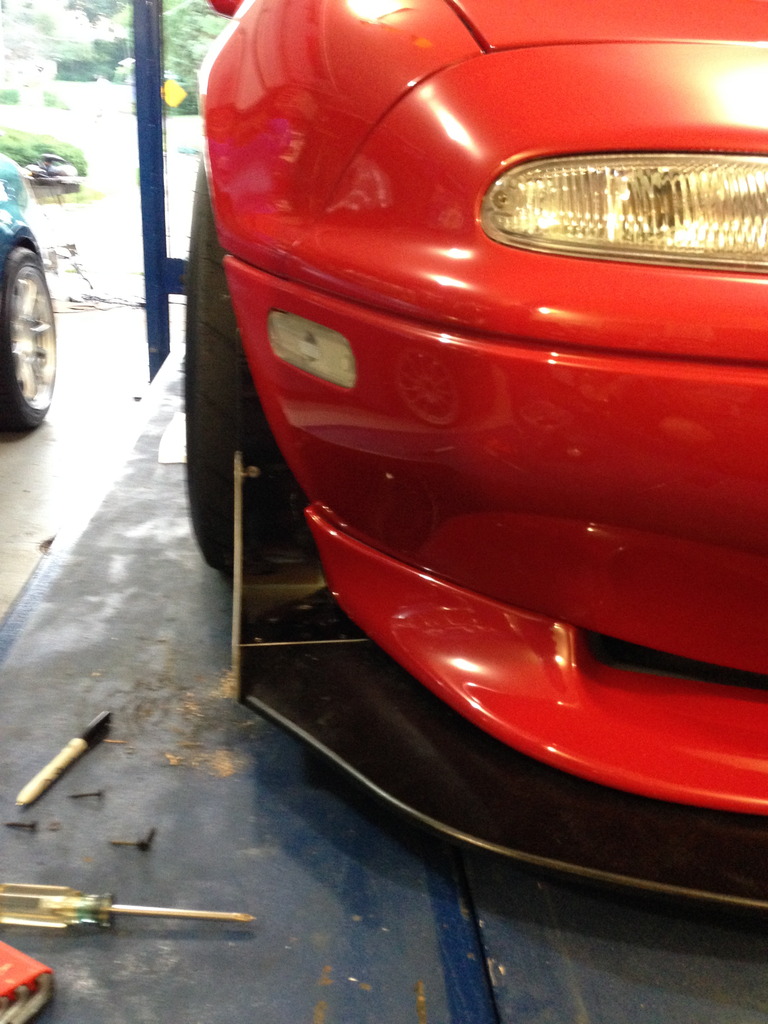
For fun we threw on my street bumper to see how it lined up. It fit surprisingly well with with the GV lip! However, for this splitter we decided to not compromise and also build a EP style air dam on a separate bumper.
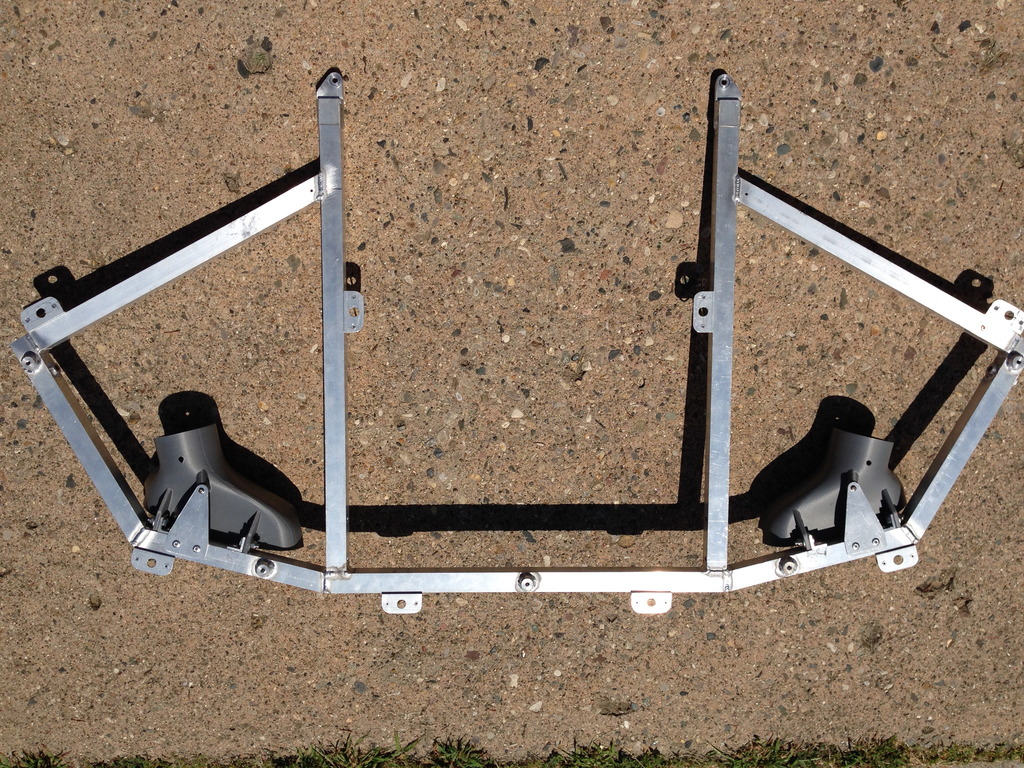
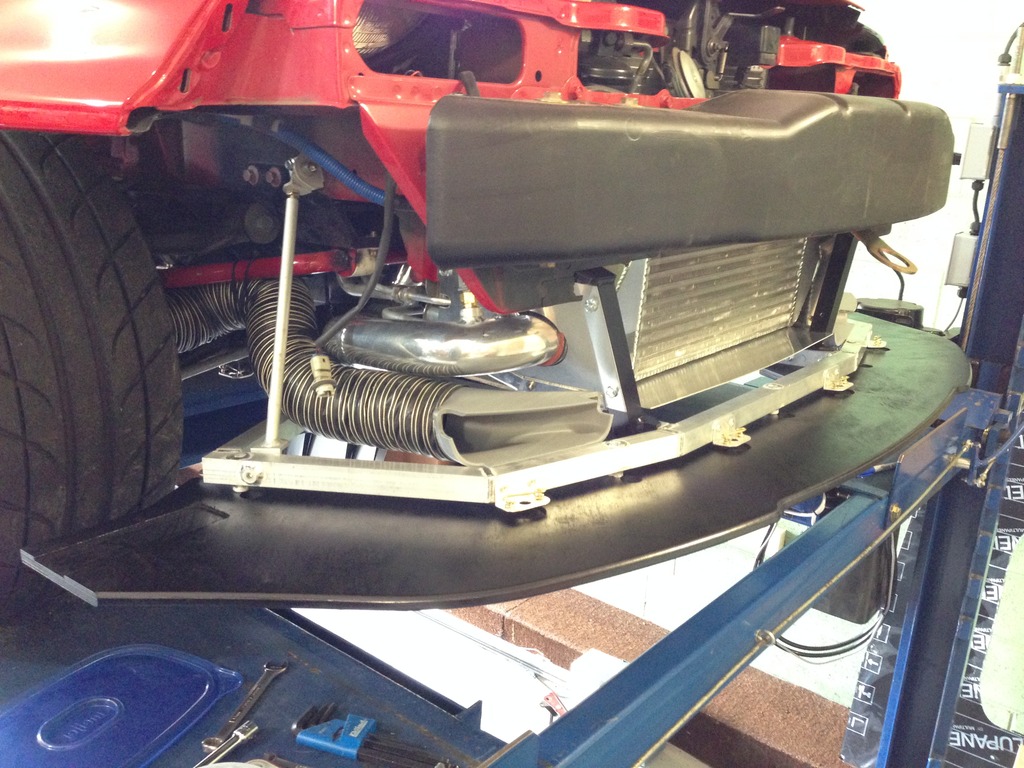
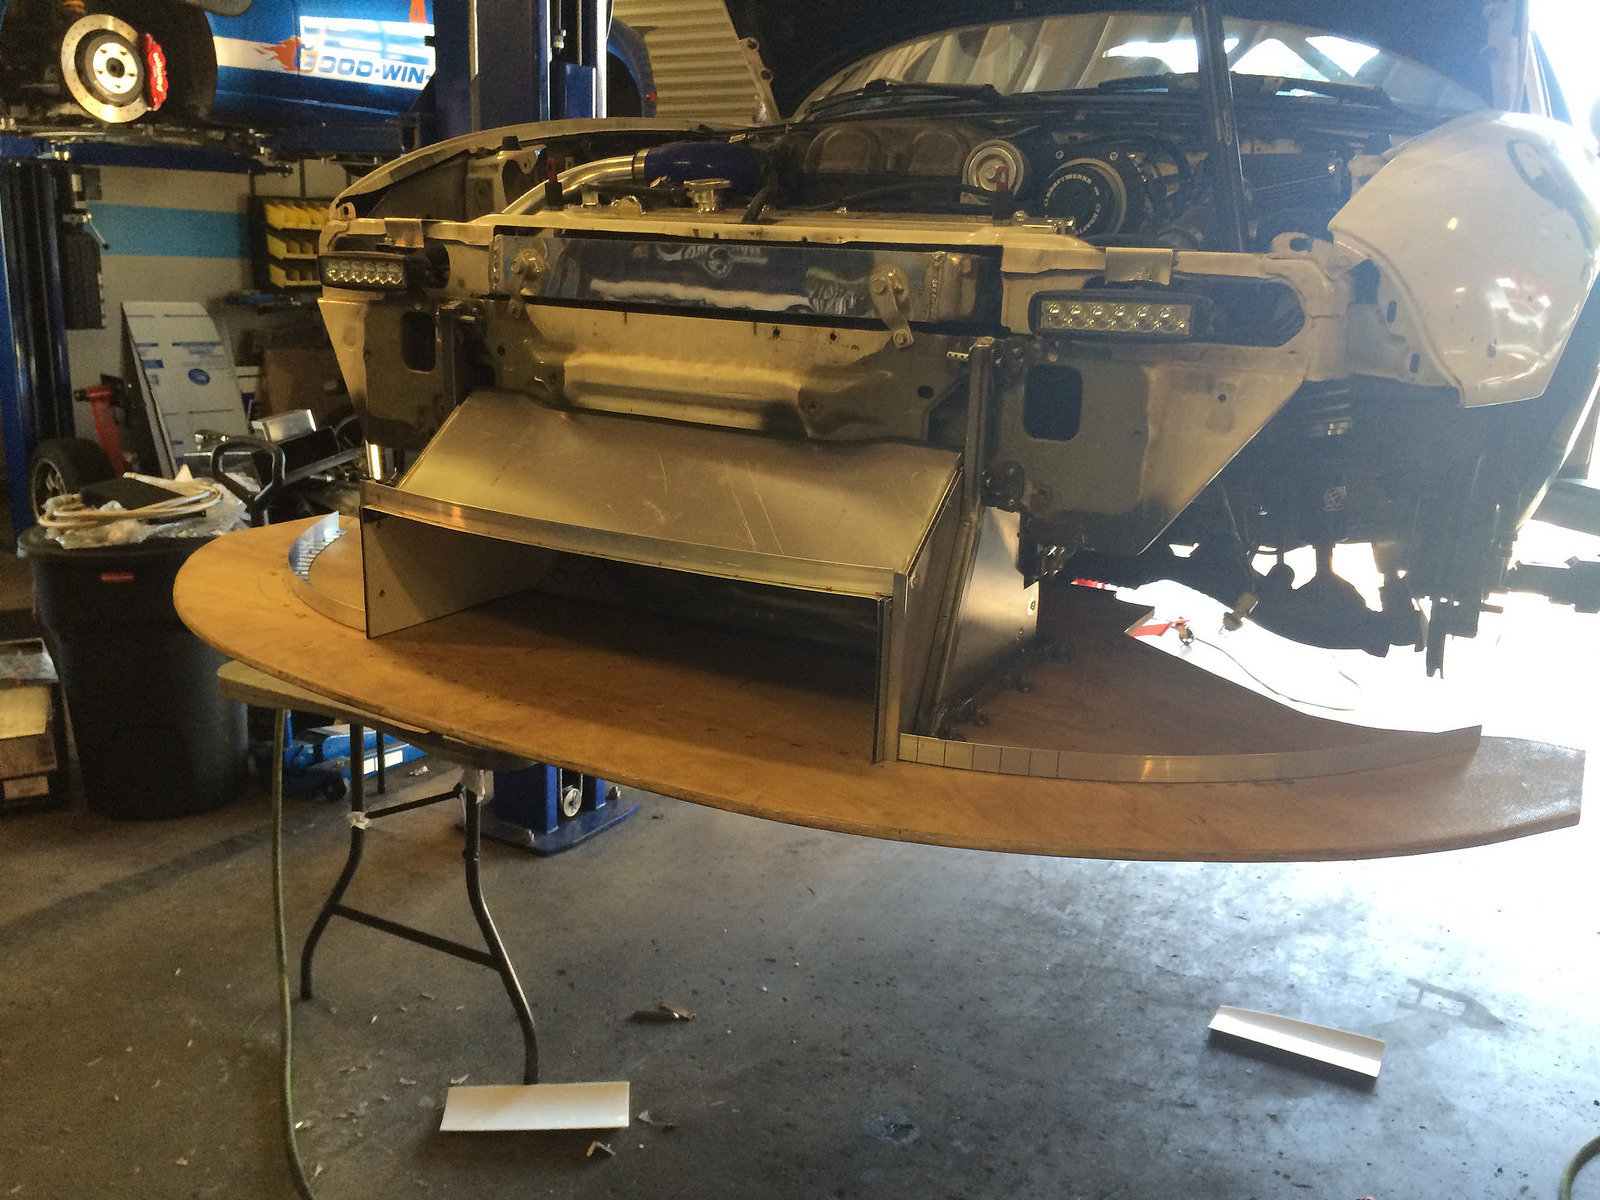
With my "v-mount" set up I also have a bunch of heat exchangers. This made the ducting also a bit of a pain. To make Ryan's life more miserable I wanted to be able to change the car from track use to street use relatively fast. This meant the ducting had to be easily removed as well.
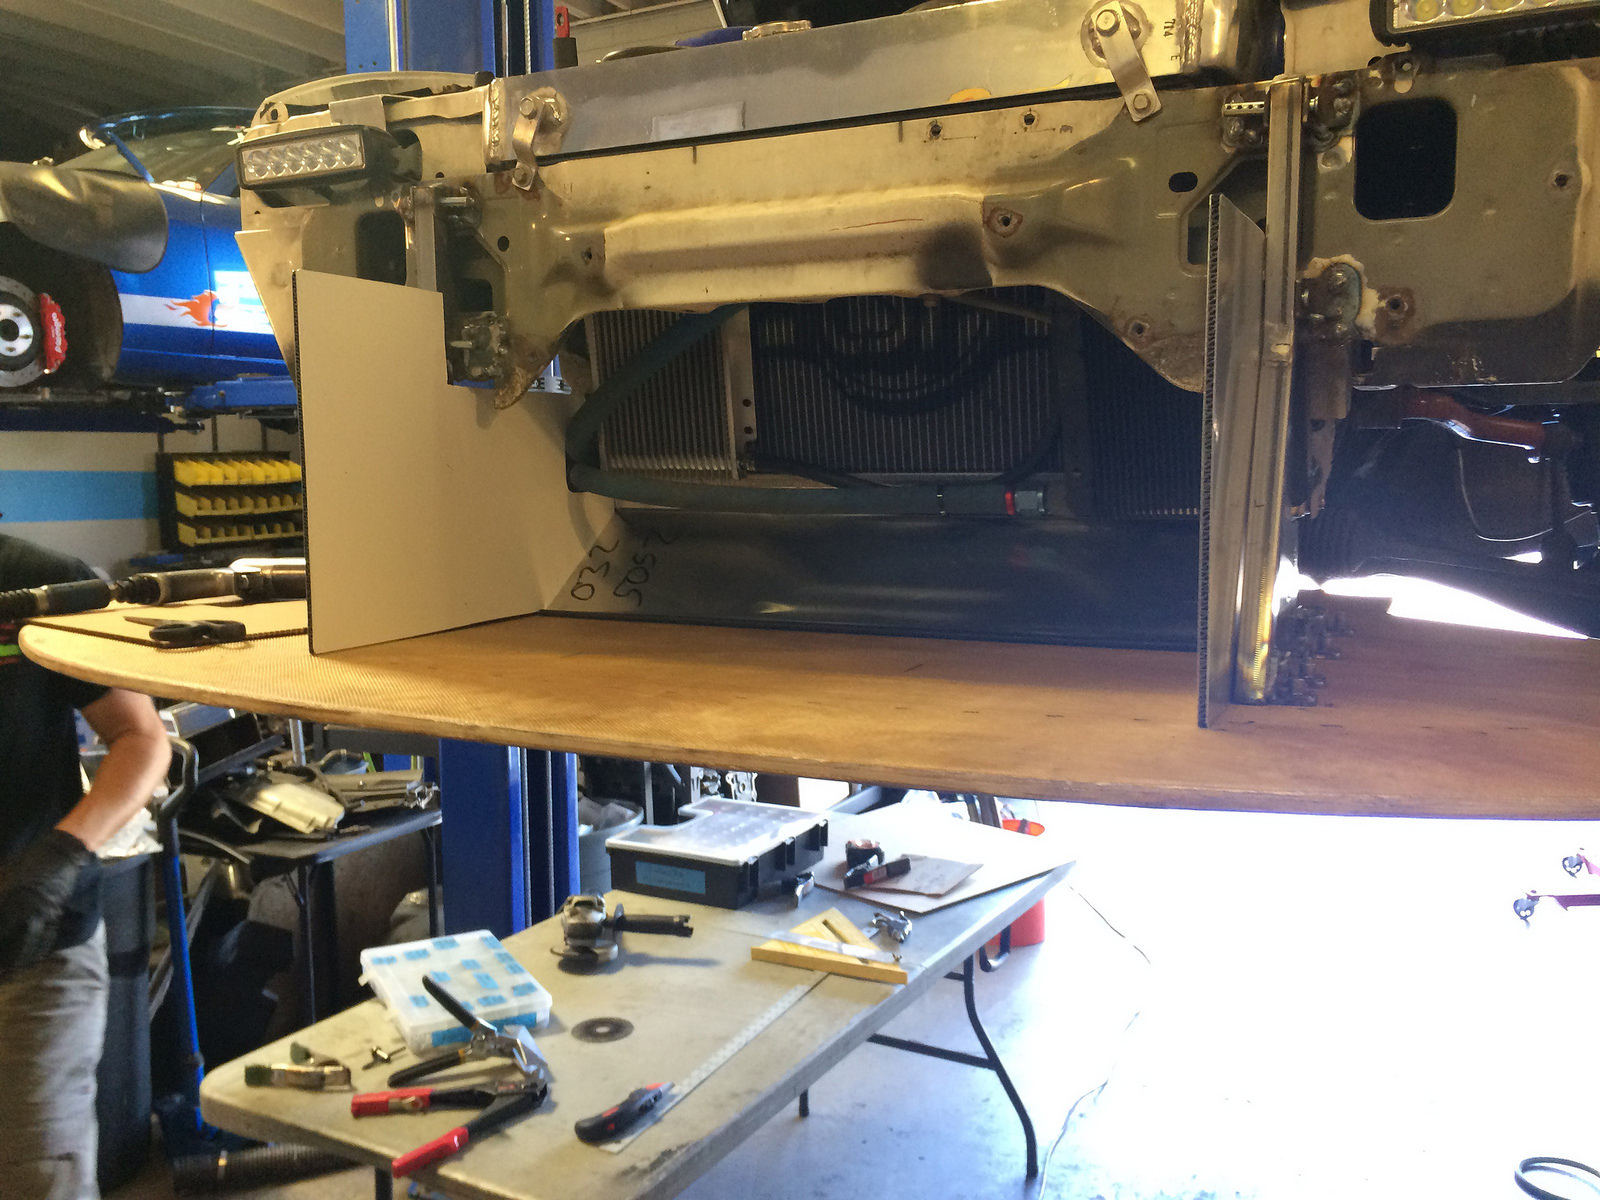
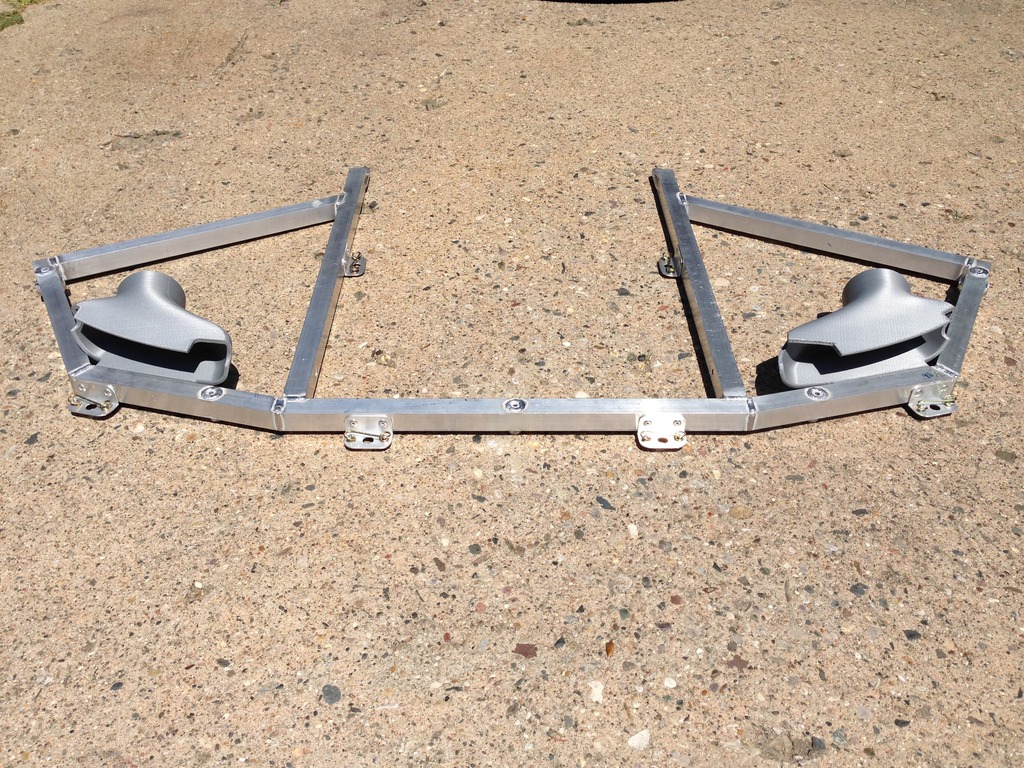
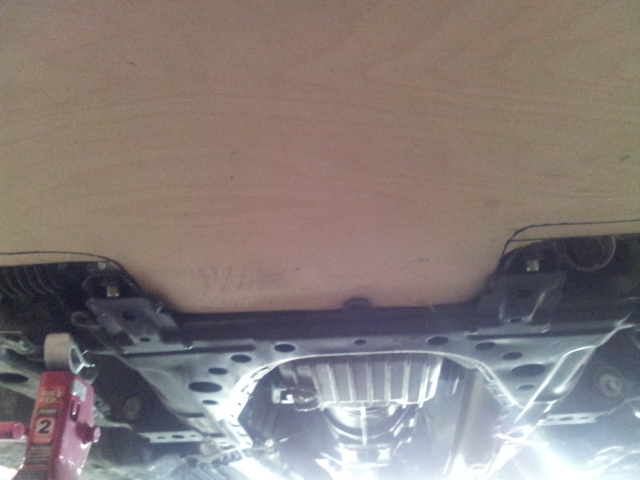
Things are starting to come into share here, we use the bottom of the splitter as a portion of the ducting and attached the ducting to the mounts for the splitter.
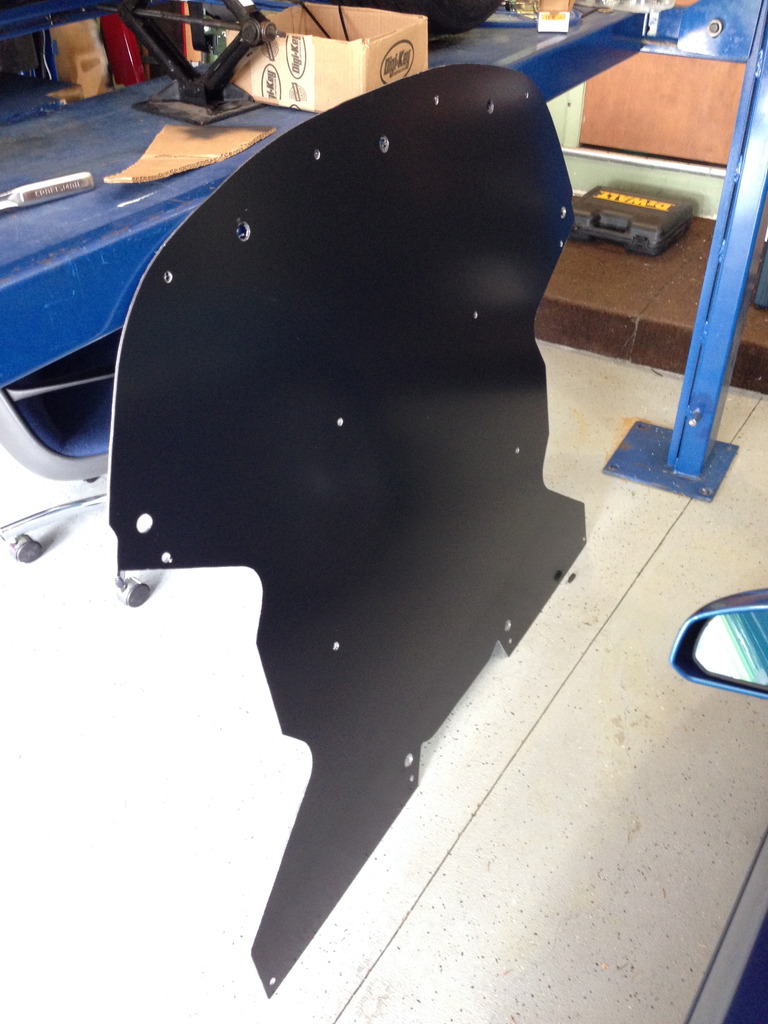
After a long two days in the shop (~35 hours), here is the finished piece before paint. We fiberglassed the top of the splitter to prevent fluids from soaking and add a little strength. Another piece to the splitter, which I didn't mention, is the plate in the rear. The plate is used to slot into the rear subframe for another connection point.
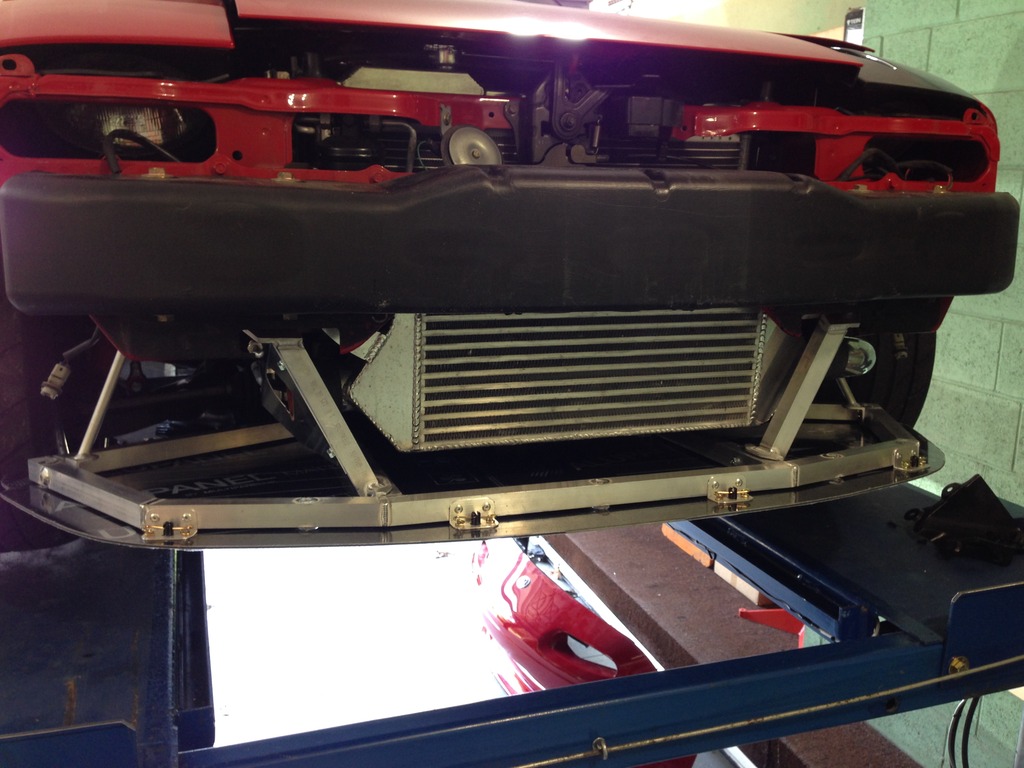
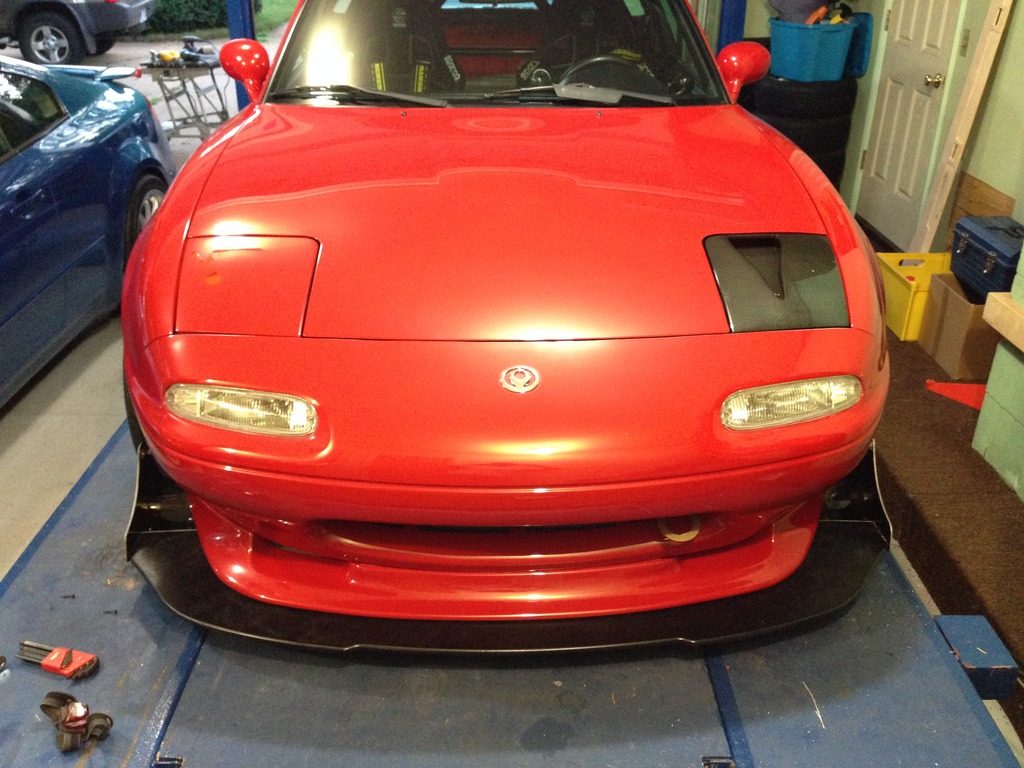
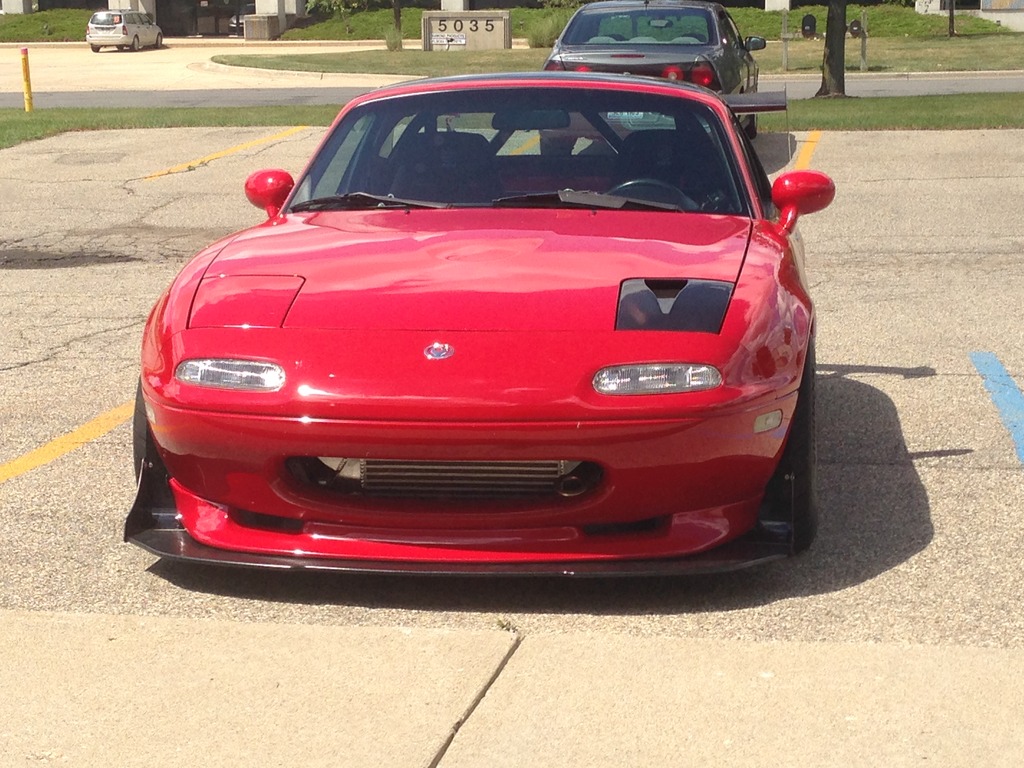
Here is a shot with the finished air dam, the splitter is 5" exactly from the bottom of the air dam.
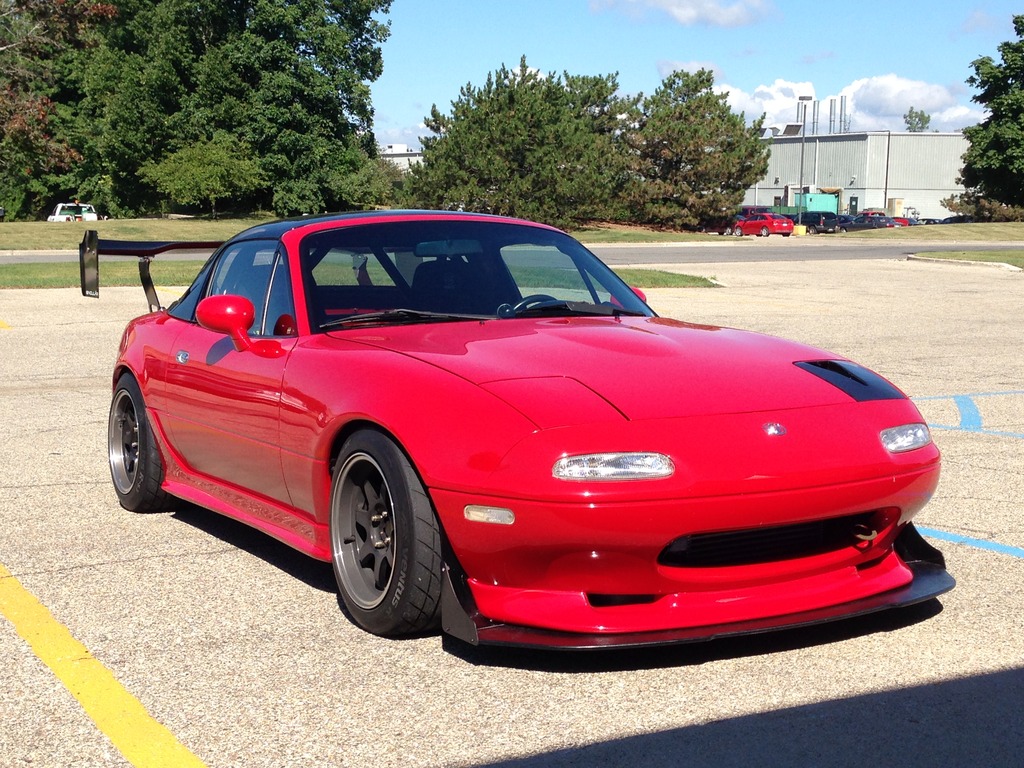
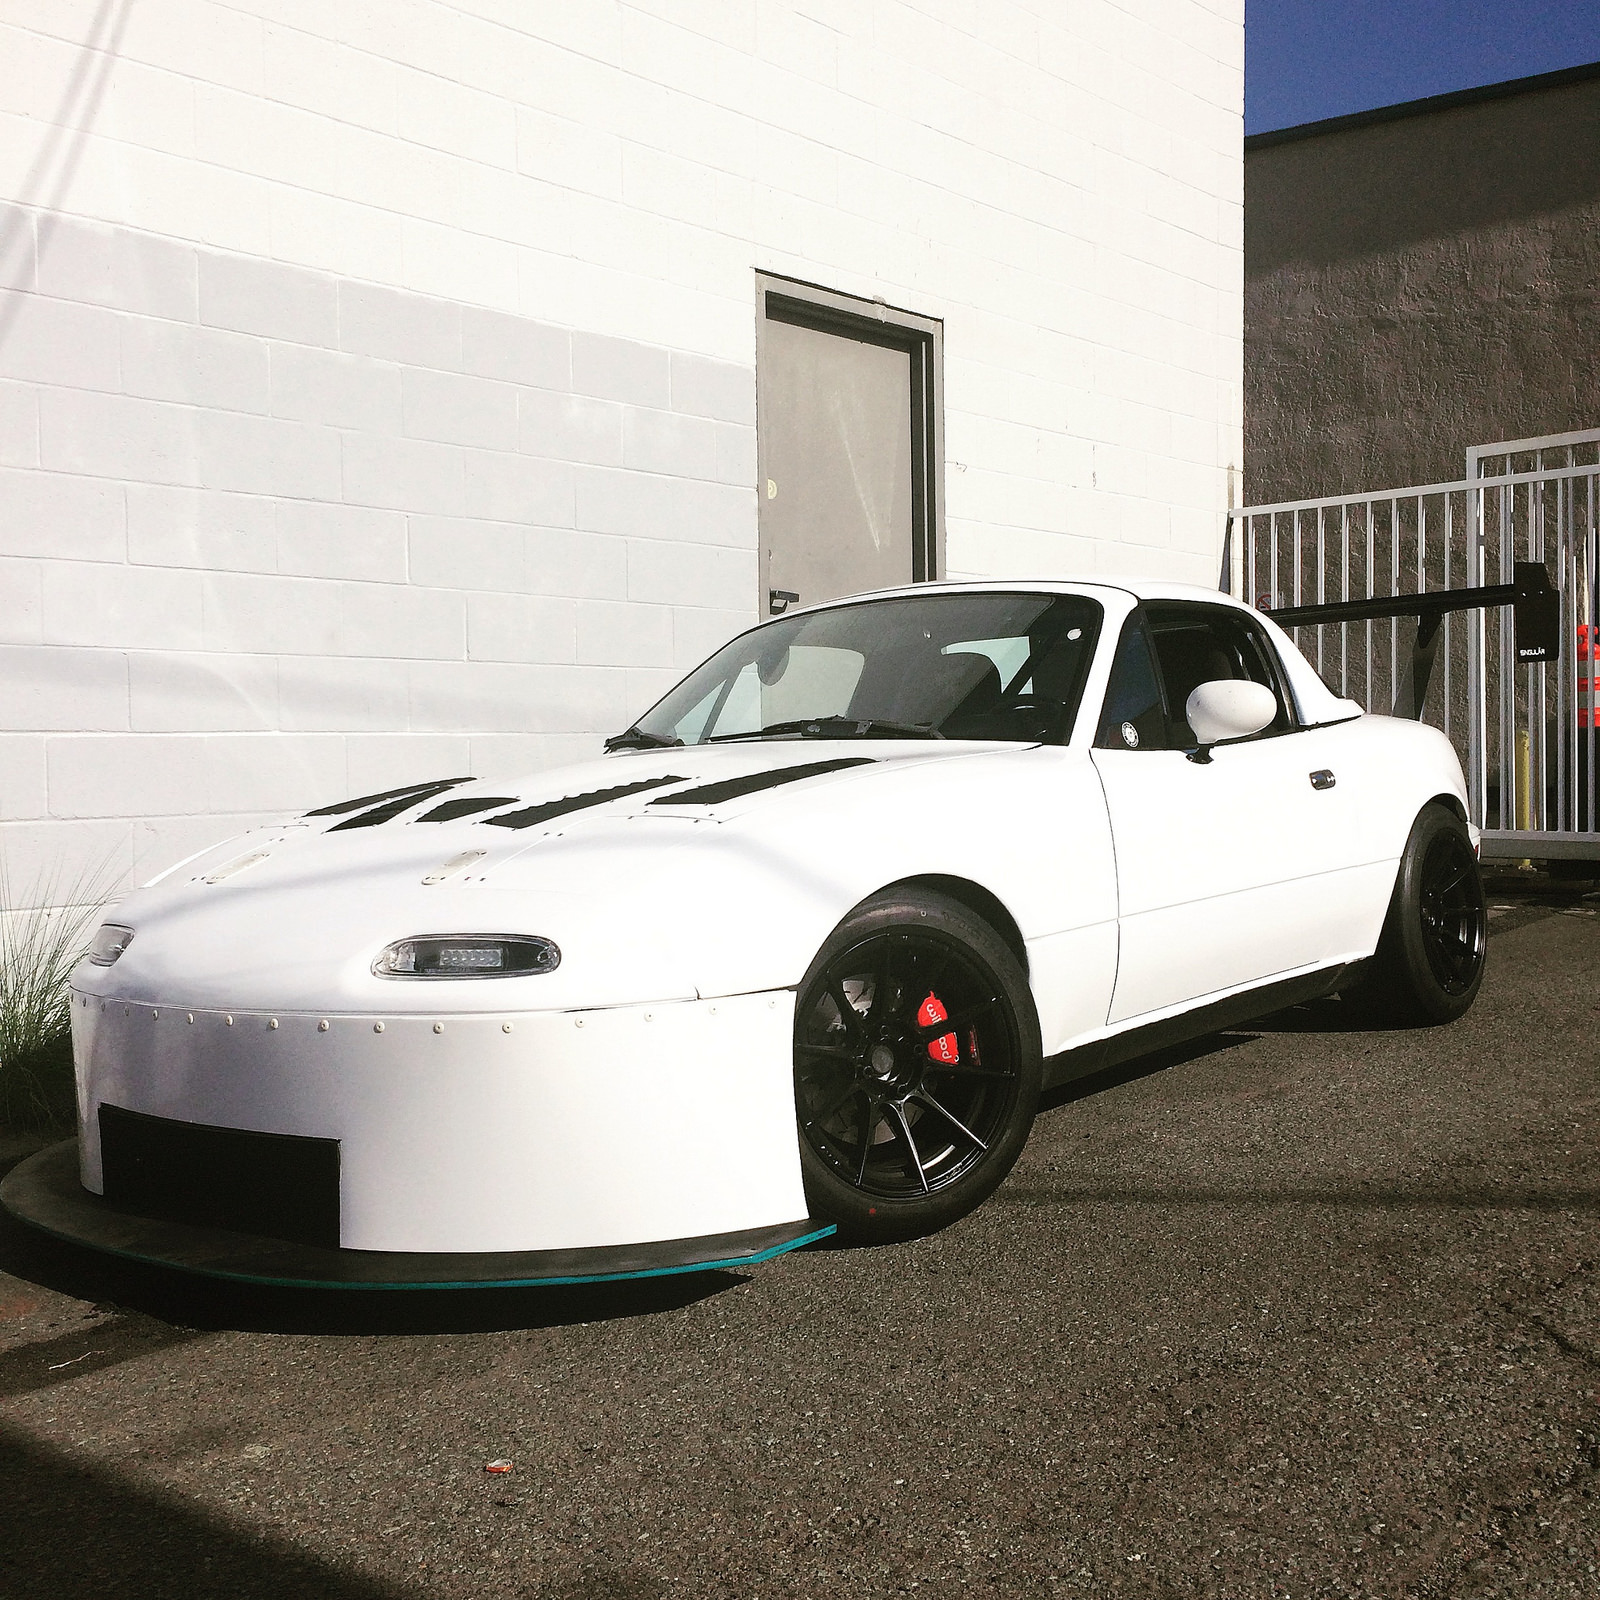
After after some paint for the splitter and the rest of the car...here is the end result.
As for the splitter, we made a quick video to show the removal process. Big shout out and thank you to ThePass for helping on this project, it turned out way better than I could have ever managed on my own.
To make things complicated I wanted the splitter to super easy to remove but also be strong. Ryan came up with a "z" bracket and welded some receiver tabs to the front of the car for attachment points.
Here is a close up of the mounting point on the front.
For fun we threw on my street bumper to see how it lined up. It fit surprisingly well with with the GV lip! However, for this splitter we decided to not compromise and also build a EP style air dam on a separate bumper.
With my "v-mount" set up I also have a bunch of heat exchangers. This made the ducting also a bit of a pain. To make Ryan's life more miserable I wanted to be able to change the car from track use to street use relatively fast. This meant the ducting had to be easily removed as well.
Things are starting to come into share here, we use the bottom of the splitter as a portion of the ducting and attached the ducting to the mounts for the splitter.
After a long two days in the shop (~35 hours), here is the finished piece before paint. We fiberglassed the top of the splitter to prevent fluids from soaking and add a little strength. Another piece to the splitter, which I didn't mention, is the plate in the rear. The plate is used to slot into the rear subframe for another connection point.
Here is a shot with the finished air dam, the splitter is 5" exactly from the bottom of the air dam.
After after some paint for the splitter and the rest of the car...here is the end result.
As for the splitter, we made a quick video to show the removal process. Big shout out and thank you to ThePass for helping on this project, it turned out way better than I could have ever managed on my own.
Reply
1
1
09-26-2015, 12:16 PM
#947
I am excited to finally share my front aero over here after putting the finishing touches on it this week. I am building the car for RTLA and Global Time Attack Street class, so ThePass helped me out to maximize whatever we built for the rule set. ..
To make things complicated I wanted the splitter to super easy to remove but also be strong. Ryan came up with a "z" bracket and welded some receiver tabs to the front of the car for attachment points.
.. The plate is used to slot into the rear subframe for another connection point.
To make things complicated I wanted the splitter to super easy to remove but also be strong. Ryan came up with a "z" bracket and welded some receiver tabs to the front of the car for attachment points.
.. The plate is used to slot into the rear subframe for another connection point.
Take note of just how much ground clearance you have under max braking and try to drive accordingly. On our cars, the splitter is usually set up to run 1/2" of the ground at max braking or cornering G's.
__________________

Reply
0
0
09-26-2015, 12:37 PM
#948

To emilio's point. I noticed that even with 1/2"ish ground clearance under braking that the increased AOA and decreased clearance to the ground increased downforce enough to make the splitter flex enough to touch the ground and stall, bounce back up, make downforce again and stall, repeat. Putting some rub strips on the bottom to prevent it from stalling stopped that.
Reply
0
0
09-26-2015, 12:47 PM
#949
To emilio's point. I noticed that even with 1/2"ish ground clearance under braking that the increased AOA and decreased clearance to the ground increased downforce enough to make the splitter flex enough to touch the ground and stall, bounce back up, make downforce again and stall, repeat. Putting some rub strips on the bottom to prevent it from stalling stopped that.
__________________
Reply
0
0
09-26-2015, 03:06 PM
#950
Beautiful fab work, but don't expect that frame to last long if you have an off track excursion. I made a splitter support out of 1" square aluminum a couple years ago and it got destroyed the first time I dropped 2 tires over the exit curbing and the outside edge of the splitter dug into the dirt. Your frame work is much nicer than mine, but it mounts to roughly the same locations and will probably break in the same way that mine did.
Also, I dig the slotted dharma holes on the splitter but their orientation scares me, since a very light impact with dirt or a curb will push the splitter back to the "remove" position and it will just fall off the bolt heads. Maybe add 2 more plain round bolt holes, so that you can use the 5 dharma holes for easy install and then lock it in position with 2 more bolts? Or you could just cut a new splitter and change it to 3 dharma and 2 round.
Also, I dig the slotted dharma holes on the splitter but their orientation scares me, since a very light impact with dirt or a curb will push the splitter back to the "remove" position and it will just fall off the bolt heads. Maybe add 2 more plain round bolt holes, so that you can use the 5 dharma holes for easy install and then lock it in position with 2 more bolts? Or you could just cut a new splitter and change it to 3 dharma and 2 round.
I rolled this idea around in my head for a while and never really came to a conclusion as to the best way to do it. That's also why I decided to make the undertray and the splitter as separate parts, so that the rigid splitter could be as small as possible and easier to run over if it were to be impacted and ejected. And its why I skipped the turnbuckle style supports that so many people use on the front. The undertray actually tucks under the rear edge of the GV lip, so once the splitter is gone the front edge of the undertray is less likely to catch anything.
All that being said I agree that the aluminum frame will probably be damaged even if the splitter does eject. This is a first attempt, and I learned a lot in the process so there is a good chance I will make some alterations this winter. I could see maybe ditching the rigid attachment members in the front and in the rear corners for something more like a cable or a two piece arm with a hinge the in middle that would allow upward movement of the whole assembly.
Reply
0
0
09-26-2015, 04:14 PM
#953
Actually, the keyholes (dharma holes) are there for that exact reason. I was attempting to create a system where the splitter was more likely to eject in the event of a direct impact. Will it actually work? Who knows, probably not. If it ejects, will it be worse than it would have been had it remained attached? Maybe. I also considered just using smaller fasteners (M4) and hoping they would shear during an impact, which would probably be a quicker and cleaner release than the keyholes.
I used to like the idea of a splitter quickly detaching from the car in an impact, but not after testing that idea in real life. I still feel pretty lucky that none of the 3 cars behind me went off or saw any damage from my splitter coming off.
I know this setup doesn't look as impressive as the beautiful fab work you guys have put into your setups, but it's still functionally my favorite so far. And it's super cheap and easy. The wood "tongue" is wedged into the subframe so that it stays with the car in an impact, but the wood fractures and splinters before damaging any mounting points on the chassis. Emilio uses cables instead of the metal L-brackets that I made and I like that idea even better. My next splitter will be this same thing but with cables.
Reply
0
0
09-26-2015, 06:07 PM
#954
The tongue on the subframe between steering rack mounts is how we do all our splitters and under trays as of around 2011. Makes them easy to remove, supports the weight/load and requires just about zero extra work to dial in. Also, the failure mode is good. Never hurts the car if you smash it into something. For enduros, we would always have a backup made, often the same design for two or more cars. Reduced the numbers of spares needed.
__________________
Reply
1
1
09-27-2015, 02:32 PM
#955
Nice work. Have to be honest though, I don't see that lasting long on track. Rigid mounts are great for pro level cars that have spares and run on smooth tracks. If they have a minor off, pro's are ok with it tearing the car to **** in a sprint race. On a club level car, rigid splitter or air dams are a risk. Drop two wheels and you might grenade that. The first thing those steel tubes will take out is your oil cooler..
To emilio's point. I noticed that even with 1/2"ish ground clearance under braking that the increased AOA and decreased clearance to the ground increased downforce enough to make the splitter flex enough to touch the ground and stall, bounce back up, make downforce again and stall, repeat. Putting some rub strips on the bottom to prevent it from stalling stopped that.
Thanks, and your's looks great too! I've seen both ThePass and Blackbird (Moti) plowing off into the dirt with their set ups and everything worked out OK. Only time will tell.
Reply
0
0
09-27-2015, 03:02 PM
#956

Mine is rigid on the back and using 4 carabiners and steel cable (66# rating) i front, it saves it twice actually! Little aluminum bracket mounts to the steering rack bolts, bends and shear off easily with contact...
Emilio knows his stuff... As a bonus, I can remove it quickly and adjust it in few seconds with the turnbuckles. Will post pics this week...
Emilio knows his stuff... As a bonus, I can remove it quickly and adjust it in few seconds with the turnbuckles. Will post pics this week...
Reply
0
0
09-28-2015, 02:17 PM
#957
Supporting Vendor

iTrader: (3)

Join Date: Jul 2006
Location: San Diego
Posts: 3,303
Total Cats: 1,216
Gonna have to agree to disagree on the solid mount vs. flexi-mount schools of thought for splitters. It's been a long-debated topic on this forum, with plenty of people subscribing to one or the other. Speaking from my own experience, I've been running a solid-mounted splitter (with strong frame) for... years now. Have had lots of big offs, run-ins with boulders at WSIR, full-on splitter dug into the ground at BRP, etc. and zero issues. Ran the same splitter for several seasons, just kept filling in the missing chunks with bondo-glass, only reason I moved on to a new splitter was to make it bigger and badder.
I now run a 2" kevlar strip along the bottom of the leading edge of the new splitter, which has definitely increased the lifespan of the birch from shaving against the ground, but even without that you just fill in the scrapes/gouges with bondo glass between events and keep using the splitter.
Take a walk down the pits of a TUDOR/WEC/etc./etc. race and tally up how many cars have solid fixed splitters with integrated ducting vs. how many have "break away" designs or flexible lines to allow lots of upward flex. I'm not saying the flexible versions can't work when done right - Emilio has a great track record with some precariously loose-mounted splitters, but solid mount is certainly the predominant method in top level cars. Of course the argument is the pros can afford to rebuild it all between races if it breaks, but we're still using birch here, so we're not losing sleep over damaging a splitter if it does happen. Keep in mind also that there are obvious design priority differences between what you need for an enduro car (where priority #1 is to minimize risk of crippling damage) vs. a time attack or HPDE car. Half the aero elements on my car would be designed differently or be non-existant if I was building the car to rub fenders and survive a 25hr race without losing aero balance along the way.
On Sean's setup, which we built to the limits of Time Attack's Street class (5" extension from bumper) we specifically didn't build the frame out to the sides/corners of the splitter because 5" out at the sides is quite a bit of extension and we expect some contact with curbs there, so we left some flex in the sides to accommodate that.

Last edited by ThePass; 09-28-2015 at 02:36 PM.
Reply
0
0
09-28-2015, 02:57 PM
#958
excellent work guys. some of your fab work is really good!!
__________________
OG Racing
Your Source For Motorsports Safety Equipment
WWW.OGRACING.COM
800.934.9112
703.430.3303
info@ogracing.com
OG Racing
Your Source For Motorsports Safety Equipment
WWW.OGRACING.COM
800.934.9112
703.430.3303
info@ogracing.com
Reply
0
0
09-28-2015, 05:06 PM
#959
Newb

Join Date: Jul 2014
Posts: 27
Total Cats: 0
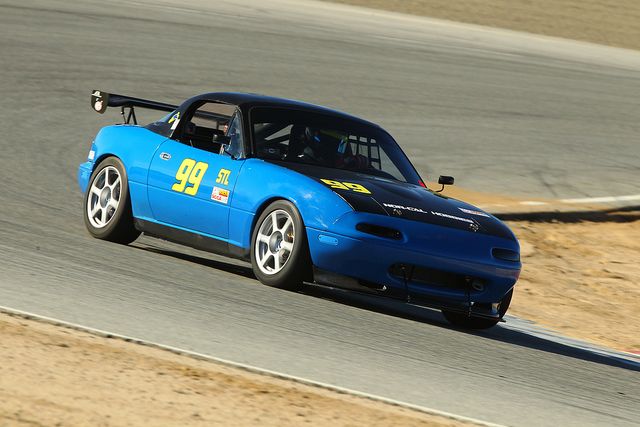
I've had good luck with a fairly solid-mounted birch plywood splitter on my car after reading pretty much every page of this thread and cribbing ideas from it. The splitter is completely separate from the GV air dam. My first and so far only splitter has survived running through the evil gravel-traps at Laguna Seca twice, a Thunderhill turn 1 excursion, and the curbs at Sonoma Raceway. Nor-Cal tracks have really low curbs.
Most importantly the splitter still flexes upward *just* enough at the front to get it onto the trailer at the end of the day (the driveway is another story but nothing some junk plywood ramps won't fix). The only thing I don't like about the GV air dam is it's kind of a pain in the butt to fabricate intakes for the brake ducting.
In SCCA STL racing, the static height for the splitter has to be >= 3" above the ground. At the Runoffs in 2014 I noticed peoples' splitters whacking the ground only at the Corkscrew at Laguna. So for my application a solid mount is probably safe.
Even so, I picked up a cracked bumper cover off of Craigslist last week for $40 (the one currently on the car is just too nice to be chopped up) and will be building a Crusher-like air dam with a 2" splitter sticking out the front instead over the next month. Emilio posted pictures of one of his cars for Oscar Jackson Jr. a while ago and that is the setup I will be emulating for next year's races. I don't like the way it looks but it's gotta have less drag than my current setup.
Mind you, I'm not that analytical of a driver to notice the difference (never raced the car without one), but splitters and air dams sure do look cool. 1.6's in STL need every little bit of help they can get to overcome a serious horsepower deficit.
Reply
0
0


