
Singular Motorsports 2.5" & 3" Brake Ducts

 09-08-2014, 06:17 PM
#22
Elite Member

Join Date: Mar 2008
Location: Enschede, NL
Posts: 2,053
Total Cats: 12
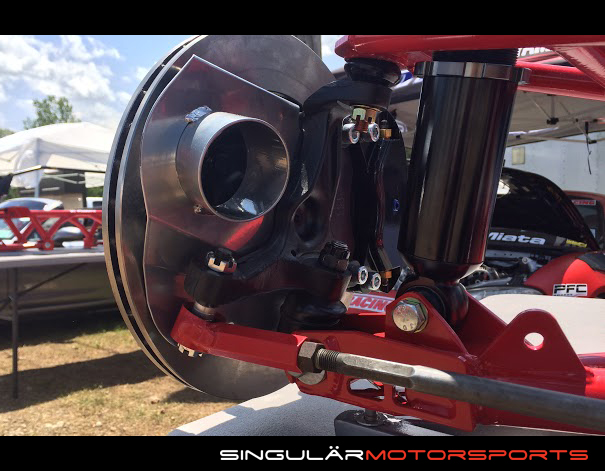
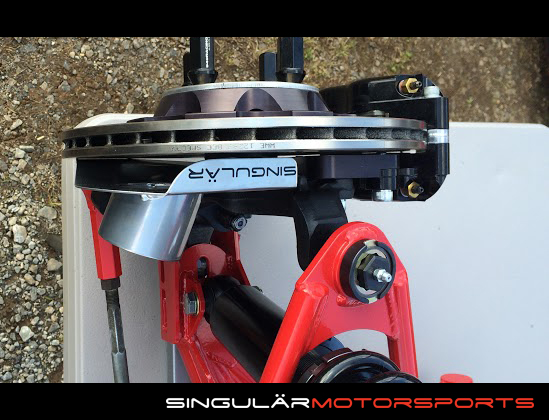
Couple of shots from my setup. Look at the massive difference between the old 2" ducts and the new 3" version.
No trouble routing the 3", but I did have a fight the the ABS sensor wiring. It is a little tight, but not many options...
Track day in about a week.
No trouble routing the 3", but I did have a fight the the ABS sensor wiring. It is a little tight, but not many options...
Track day in about a week.

Reply
 0
0

0
 09-09-2014, 12:40 PM
#24
Supporting Vendor

Thread Starter
iTrader: (3)

Join Date: Jul 2006
Location: San Diego
Posts: 3,303
Total Cats: 1,216
Laur3ns pics a few posts above this show this well.
-Ryan

Reply
0
0
10-03-2014, 06:23 PM
#25
Supporting Vendor
Thread Starter
iTrader: (3)
Join Date: Jul 2006
Location: San Diego
Posts: 3,303
Total Cats: 1,216
We've added a Tech Article section on the website. The first of these articles is on brake cooling.
Not for the TL;DR crowd
My focus with this is to provide an in-depth article about a certain component or system on track/race cars. I'd like to compile all the information and knowledge into one place, trimmed down enough that it is still comprehensive but also easy to follow.
I'll copy it here so that I'm not just linking off-forum...

Brake ducts are a critical part to a car’s braking system when driven or raced on the track. They are found in nearly every form of road racing from the grassroots level up to Formula One. Across this entire range, the goals are the same: to decrease the operating temperature of the braking system.
Highlights of proper brake cooling include:
- Increases pad friction and stopping power
- Longer brake pad and rotor life
- Consistency in feel and performance
- Increased driver confidence
- Brakes generate massive amounts of heat – it is the only system in the car producing heat well over 1,000 degrees F besides the combustion chamber of your motor!
Brake components have a window of temperature which they can operate within, and their performance degrades drastically when they exceed their maximum temperature ratings. The list of problems that arise as the brakes get hotter is scary;
- Glazed brake pads lose grip on the rotor
- Boiling brake fluid
- Calipers will flex and exert uneven pressure on the pads
- Cracked and/or failing rotors
Brake Duct intakes in F1:

The Problem
Brake rotors are designed to dissipate heat, but the air in the wheel well and inside the barrel of the wheel is turbulent and slow-moving, which causes the heat to build up around the brakes and diminishes their ability to shed that heat.
Brake ducts work by channeling air from a high pressure source (usually the front surface of the car) to the brake rotor. The air introduced by the brake ducts is much cooler than the brakes, and the airflow continuously moves hot air away and allows the brakes to shed heat at a faster rate. This dramatically lowers the average temperature that the brakes are operating at.
Maximizing your brake’s performance
There is much more to brake cooling than avoiding catastrophic failure. Cooling the brakes is also essential to getting maximum performance.
Brake pad manufacturers list their pad’s effective operating temperature range. Within that temperature range, the pad’s friction ability (grip on the rotor) is not a constant; it falls off as temperature increases. Even staying within the manufacturer’s stated temperature range, a pad operating closer to its limit performs worse than a cooler pad.
This graph from AP Racing illustrates the relationship between friction (y-axis) and temperature (x-axis) for one of their popular brake pads. You can see the friction drop off significantly even within the approved operating range of the pad:
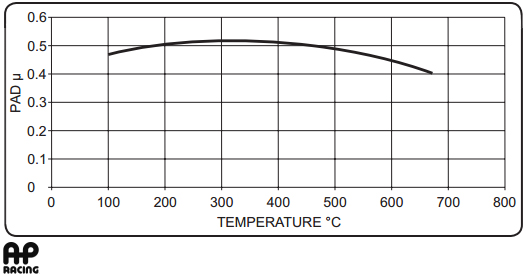
To give some meaning to the numbers above, peak brake temperatures can easily exceed 700 degrees C without any cooling. Even with the best cooling, you’re likely to be above 300 degrees, somewhere on the downward sloping right side of the curve. How far to the right depends on how effective your brake ducting is.
Cooling ducts are critical to getting the best performance from your brakes because they shift the operating temperature leftward on the graph – providing you with more bite and therefore stopping power.
Increasing the lifespan of parts
As the average operating temperature of the brakes increases, the lifespan of the brake pads, rotors, and fluid all decrease.
This issue begins long before you actually exceed the operating range for your brake components.
We see this demonstrated all the time with the difference between a rookie and seasoned driver at the track; For example, in the same car with all the same brake components, a rookie may get 12 track days out of a set of brake pads, whereas the advanced driver is only getting 4 or 5 days from the same setup without ever exceeding the brake’s temperature range.
As your skill increases, you put more heat and stress on the brake components. The average temperature of the brakes rises, and they wear out faster.
Some just accept this as a cost of becoming a faster driver, without realizing that a brake ducting system could get them much of that lifespan back.
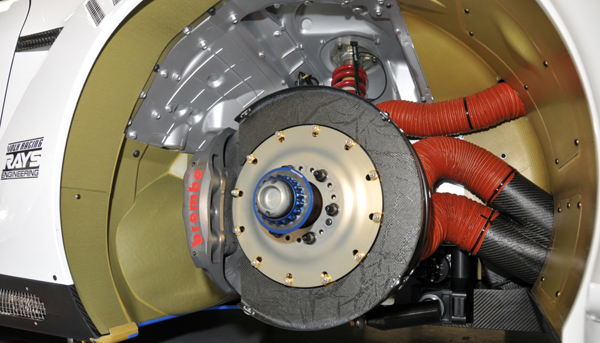
Advanced brake cooling systems may use multiple hoses and ducts to focus air on various components, as seen on this Nismo GTR:
Making a Good Brake Duct System
There are three main portions to a brake duct system in a production car with enclosed wheels: The inlet, the hose, and the spindle adapter/outlet.
Inlet
The key for the inlet is for it to be in a high-pressure location. Any inlet on the front of the car will work to a degree. They will be more effective the closer to the center of the bumper you can put them. As you move away from center, the air is traveling sideways over the bumper, not straight on, so inlets further to the sides are less effective. There are lots of DIY solutions out there for the air source, and lots of universal inlets available on the market that you can get creative with.
In racing applications, the inlets are often very low on the bumper, just above the splitter surface because the splitter makes this is a very high pressure area. For cars without a splitter, it is ideal to have the inlets higher up as there is much less pressure along the lower edge of the bumper.
Hose
Hose is the most common method of getting the air from the inlet to the brakes as it is flexible, so it can be routed around the suspension and other obstacles and it can also flex as the wheels turn and the suspension moves.
Hose is available from many online retailers – it’s important to get the kind that is heat resistant. We like the 2-ply neoprene or silicone versions, which can handle direct temperature of 300-500 degrees F depending on the specific construction.
Most hose with a steel spiral-wound support has an accordion shape both inside and out. While this allows the flexibility which is needed in some areas, the downside is that the ridges on the inside create turbulence and slow the airflow. For this reason, many well developed brake duct systems use a combination of smoothly formed tubes where flexibility is not needed, with shorter sections of the flexible hose for the portions which need to articulate.
Size
Choosing a hose size that is too small can handicap your entire brake cooling system.
For the flexible hose, the accordion shape which decreases airflow makes the hose perform as if it is smaller than its actual dimensions. Additionally, any bends in the hose drastically reduce the airflow. Bending the hose is nearly unavoidable though, because the hose must route around obstacles and then turn towards the rotor.
There is one sure way to directly combat these drawbacks – increase the hose diameter. The airflow through the hose increases as a square of the diameter, so even a �” increase in hose size actually produces a very significant difference, and this highlights why the hose size is so important.
The largest difficulty that arises as hose size increases is getting the orientation just right between the wheel, spindle, sway bar, etc. since tolerances are slim – so a specialized part that locates the hose and its outlet position becomes more critical. That brings us to…
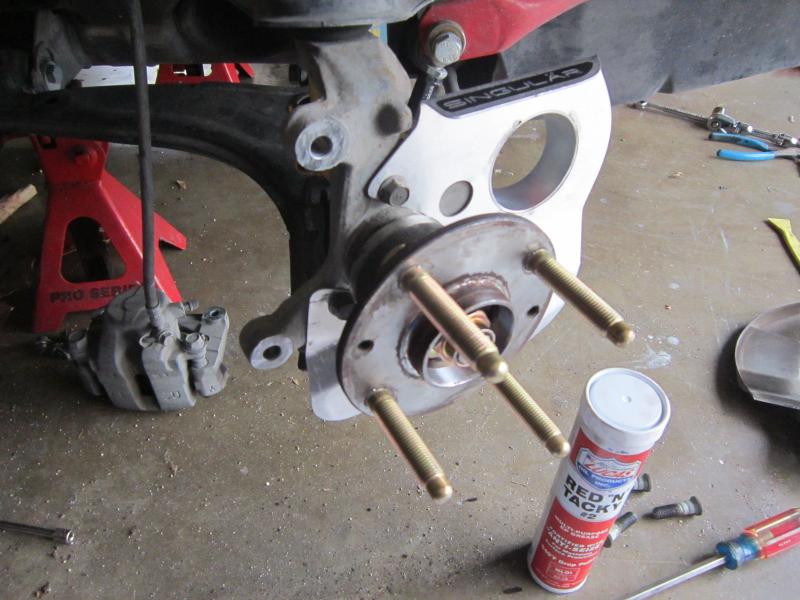
Outlet
This is the part which is usually designed for a specific car, and it does the job of getting the air as close to the brakes as possible. It also locates the hose at a precise orientation to avoid binding or interfering with all of the various moving parts in this area.
Brake rotors are designed to vent air from their center outwards, so the closer to the center of the rotor you can get the air, the better. This is why the Singular Motorsports Brake Ducts are designed with diverter flaps which direct the air towards the center of the rotor even after the air leaves the outlet.
Some DIY solutions try to avoid having an outlet piece, and just place the end of the hose close to the brakes. It’s important to understand that this has safety risks; brake duct hose is wound with steel wire, and while it is nicely contained within the hose along the hose’s length, at the end of the hose it is exposed and it can easily unravel from the hose if it catches on something. We’ve seen more than one catastrophic failure with sudden tire and brake line damage as a result of this. When the hose is clamped to an outlet, the clamp holds the wire in place and prevents this possibility.
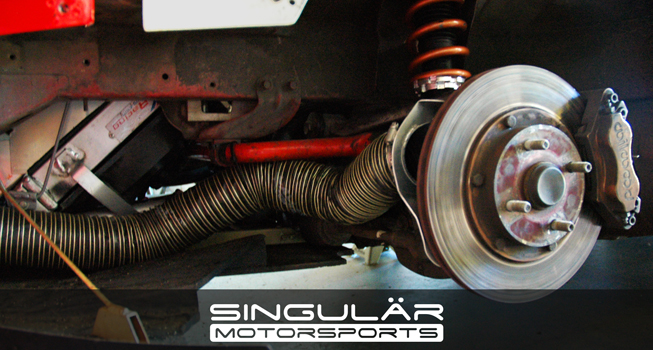
3″ Singular Motorsports brake ducts for the Mazda Miata:
Why it makes sense to run brake ducts on nearly ANY track-driven car:
A) Even if you aren’t at the limit of the brake pad/fluid’s operating temperature, decreasing the temps of the brakes can drastically increase their lifespan – in many cases pad life can nearly double (In other words, these pay for themselves over time)
B) A low-power car may be able to run track-only pads and avoid reaching the limits of the pad, but many people in the double-duty street/track category want to run a less than full-track pad that can be used everywhere. In these cases, really good brake ducting can be the key to keeping those pads within their operating temperature range and not destroying them.
3″ Brake Duct vs. “No Duct” Test at Singular Motorsports
I recently ran our 3” version vs. no ducting at the track (taped over the duct inlet on one side of the car). Following a brief half-session, and after a cool down lap which allowed temps to come down and stabilize a bit, on the non-ducted side we saw caliper temps of 585 degrees F. For those of you keeping score, that’s just a breath away from the boiling point of the Motul RBF600.
On the ducted side of the car, the caliper was 445 degrees F. Perfectly happy.
I had intended to do more testing with the side that was blocked off, but after seeing those temps I aborted that plan and kept both sides ducted the rest of the day. I literally would not run my car without these.
Not for the TL;DR crowd
My focus with this is to provide an in-depth article about a certain component or system on track/race cars. I'd like to compile all the information and knowledge into one place, trimmed down enough that it is still comprehensive but also easy to follow.
I'll copy it here so that I'm not just linking off-forum...
Brake ducts are a critical part to a car’s braking system when driven or raced on the track. They are found in nearly every form of road racing from the grassroots level up to Formula One. Across this entire range, the goals are the same: to decrease the operating temperature of the braking system.
Highlights of proper brake cooling include:
- Increases pad friction and stopping power
- Longer brake pad and rotor life
- Consistency in feel and performance
- Increased driver confidence
- Brakes generate massive amounts of heat – it is the only system in the car producing heat well over 1,000 degrees F besides the combustion chamber of your motor!
Brake components have a window of temperature which they can operate within, and their performance degrades drastically when they exceed their maximum temperature ratings. The list of problems that arise as the brakes get hotter is scary;
- Glazed brake pads lose grip on the rotor
- Boiling brake fluid
- Calipers will flex and exert uneven pressure on the pads
- Cracked and/or failing rotors
Brake Duct intakes in F1:
The Problem
Brake rotors are designed to dissipate heat, but the air in the wheel well and inside the barrel of the wheel is turbulent and slow-moving, which causes the heat to build up around the brakes and diminishes their ability to shed that heat.
Brake ducts work by channeling air from a high pressure source (usually the front surface of the car) to the brake rotor. The air introduced by the brake ducts is much cooler than the brakes, and the airflow continuously moves hot air away and allows the brakes to shed heat at a faster rate. This dramatically lowers the average temperature that the brakes are operating at.
Maximizing your brake’s performance
There is much more to brake cooling than avoiding catastrophic failure. Cooling the brakes is also essential to getting maximum performance.
Brake pad manufacturers list their pad’s effective operating temperature range. Within that temperature range, the pad’s friction ability (grip on the rotor) is not a constant; it falls off as temperature increases. Even staying within the manufacturer’s stated temperature range, a pad operating closer to its limit performs worse than a cooler pad.
This graph from AP Racing illustrates the relationship between friction (y-axis) and temperature (x-axis) for one of their popular brake pads. You can see the friction drop off significantly even within the approved operating range of the pad:
To give some meaning to the numbers above, peak brake temperatures can easily exceed 700 degrees C without any cooling. Even with the best cooling, you’re likely to be above 300 degrees, somewhere on the downward sloping right side of the curve. How far to the right depends on how effective your brake ducting is.
Cooling ducts are critical to getting the best performance from your brakes because they shift the operating temperature leftward on the graph – providing you with more bite and therefore stopping power.
Increasing the lifespan of parts
As the average operating temperature of the brakes increases, the lifespan of the brake pads, rotors, and fluid all decrease.
This issue begins long before you actually exceed the operating range for your brake components.
We see this demonstrated all the time with the difference between a rookie and seasoned driver at the track; For example, in the same car with all the same brake components, a rookie may get 12 track days out of a set of brake pads, whereas the advanced driver is only getting 4 or 5 days from the same setup without ever exceeding the brake’s temperature range.
As your skill increases, you put more heat and stress on the brake components. The average temperature of the brakes rises, and they wear out faster.
Some just accept this as a cost of becoming a faster driver, without realizing that a brake ducting system could get them much of that lifespan back.
Advanced brake cooling systems may use multiple hoses and ducts to focus air on various components, as seen on this Nismo GTR:
Making a Good Brake Duct System
There are three main portions to a brake duct system in a production car with enclosed wheels: The inlet, the hose, and the spindle adapter/outlet.
Inlet
The key for the inlet is for it to be in a high-pressure location. Any inlet on the front of the car will work to a degree. They will be more effective the closer to the center of the bumper you can put them. As you move away from center, the air is traveling sideways over the bumper, not straight on, so inlets further to the sides are less effective. There are lots of DIY solutions out there for the air source, and lots of universal inlets available on the market that you can get creative with.
In racing applications, the inlets are often very low on the bumper, just above the splitter surface because the splitter makes this is a very high pressure area. For cars without a splitter, it is ideal to have the inlets higher up as there is much less pressure along the lower edge of the bumper.
Hose
Hose is the most common method of getting the air from the inlet to the brakes as it is flexible, so it can be routed around the suspension and other obstacles and it can also flex as the wheels turn and the suspension moves.
Hose is available from many online retailers – it’s important to get the kind that is heat resistant. We like the 2-ply neoprene or silicone versions, which can handle direct temperature of 300-500 degrees F depending on the specific construction.
Most hose with a steel spiral-wound support has an accordion shape both inside and out. While this allows the flexibility which is needed in some areas, the downside is that the ridges on the inside create turbulence and slow the airflow. For this reason, many well developed brake duct systems use a combination of smoothly formed tubes where flexibility is not needed, with shorter sections of the flexible hose for the portions which need to articulate.
Size
Choosing a hose size that is too small can handicap your entire brake cooling system.
For the flexible hose, the accordion shape which decreases airflow makes the hose perform as if it is smaller than its actual dimensions. Additionally, any bends in the hose drastically reduce the airflow. Bending the hose is nearly unavoidable though, because the hose must route around obstacles and then turn towards the rotor.
There is one sure way to directly combat these drawbacks – increase the hose diameter. The airflow through the hose increases as a square of the diameter, so even a �” increase in hose size actually produces a very significant difference, and this highlights why the hose size is so important.
The largest difficulty that arises as hose size increases is getting the orientation just right between the wheel, spindle, sway bar, etc. since tolerances are slim – so a specialized part that locates the hose and its outlet position becomes more critical. That brings us to…
Outlet
This is the part which is usually designed for a specific car, and it does the job of getting the air as close to the brakes as possible. It also locates the hose at a precise orientation to avoid binding or interfering with all of the various moving parts in this area.
Brake rotors are designed to vent air from their center outwards, so the closer to the center of the rotor you can get the air, the better. This is why the Singular Motorsports Brake Ducts are designed with diverter flaps which direct the air towards the center of the rotor even after the air leaves the outlet.
Some DIY solutions try to avoid having an outlet piece, and just place the end of the hose close to the brakes. It’s important to understand that this has safety risks; brake duct hose is wound with steel wire, and while it is nicely contained within the hose along the hose’s length, at the end of the hose it is exposed and it can easily unravel from the hose if it catches on something. We’ve seen more than one catastrophic failure with sudden tire and brake line damage as a result of this. When the hose is clamped to an outlet, the clamp holds the wire in place and prevents this possibility.
3″ Singular Motorsports brake ducts for the Mazda Miata:
Why it makes sense to run brake ducts on nearly ANY track-driven car:
A) Even if you aren’t at the limit of the brake pad/fluid’s operating temperature, decreasing the temps of the brakes can drastically increase their lifespan – in many cases pad life can nearly double (In other words, these pay for themselves over time)
B) A low-power car may be able to run track-only pads and avoid reaching the limits of the pad, but many people in the double-duty street/track category want to run a less than full-track pad that can be used everywhere. In these cases, really good brake ducting can be the key to keeping those pads within their operating temperature range and not destroying them.
3″ Brake Duct vs. “No Duct” Test at Singular Motorsports
I recently ran our 3” version vs. no ducting at the track (taped over the duct inlet on one side of the car). Following a brief half-session, and after a cool down lap which allowed temps to come down and stabilize a bit, on the non-ducted side we saw caliper temps of 585 degrees F. For those of you keeping score, that’s just a breath away from the boiling point of the Motul RBF600.
On the ducted side of the car, the caliper was 445 degrees F. Perfectly happy.
I had intended to do more testing with the side that was blocked off, but after seeing those temps I aborted that plan and kept both sides ducted the rest of the day. I literally would not run my car without these.
Last edited by ThePass; 10-03-2014 at 06:48 PM.
Reply
1
1
01-20-2015, 10:45 PM
#26
Supporting Vendor
Thread Starter
iTrader: (3)
Join Date: Jul 2006
Location: San Diego
Posts: 3,303
Total Cats: 1,216
We now have 3" brake ducts for the Keisler spindles!
Full post about them is in the brakes/suspension section:
Brake Ducts for Keisler Spindles by Singular Motorsports

Full post about them is in the brakes/suspension section:
Brake Ducts for Keisler Spindles by Singular Motorsports
Reply
0
0

 01-31-2015, 08:23 PM
#30

Just thought I would share pics of my installed Singular Motorsports 2.5'' brake ducts that I bought thru Goodwin Racing:
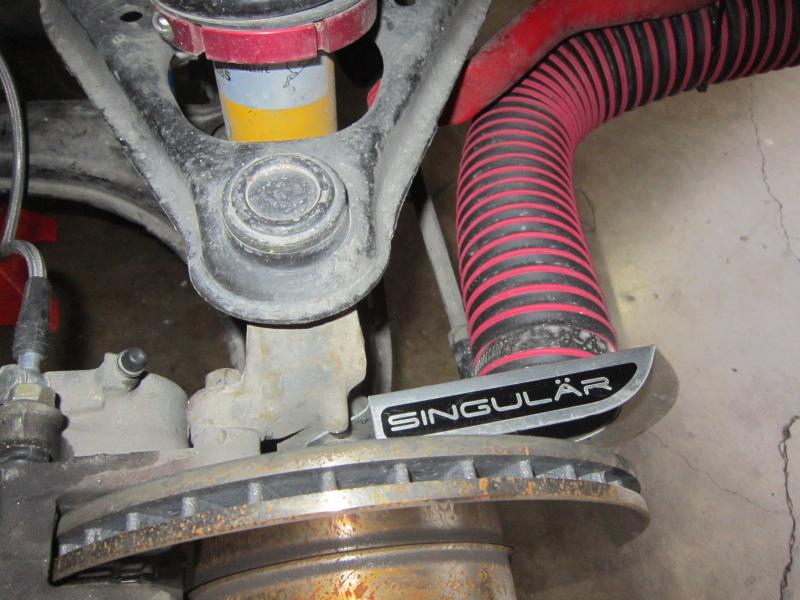
...front inlets for 2.5'' brake ducting...
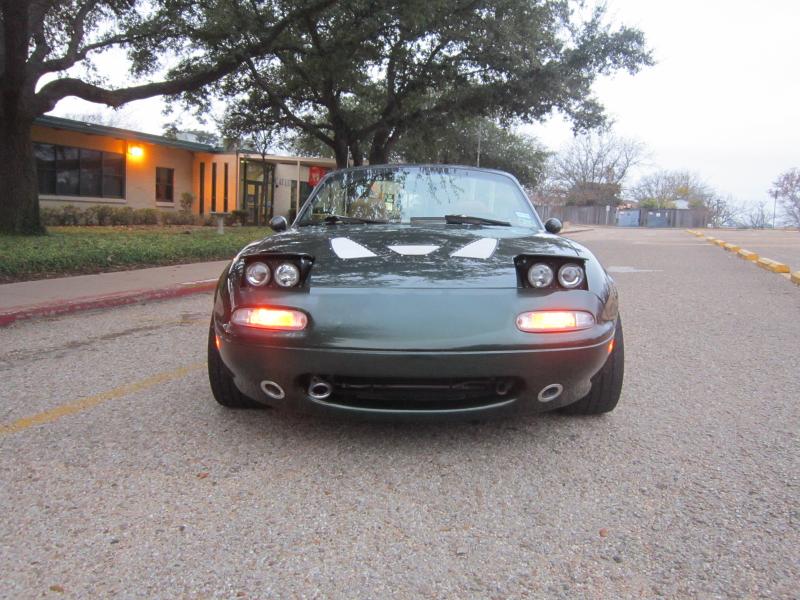
Great fit and finish and the second(also have SM hood louvers that I love!) Singular Motorsports product I have purchased and have been thoroughly pleased with, I look forward to new products from Singular Motorsports.


...front inlets for 2.5'' brake ducting...

Great fit and finish and the second(also have SM hood louvers that I love!) Singular Motorsports product I have purchased and have been thoroughly pleased with, I look forward to new products from Singular Motorsports.
Reply
0
0
02-01-2015, 12:59 AM
#32
Thanks Steven! Very jealous of your LE, its my favorite factory miata!
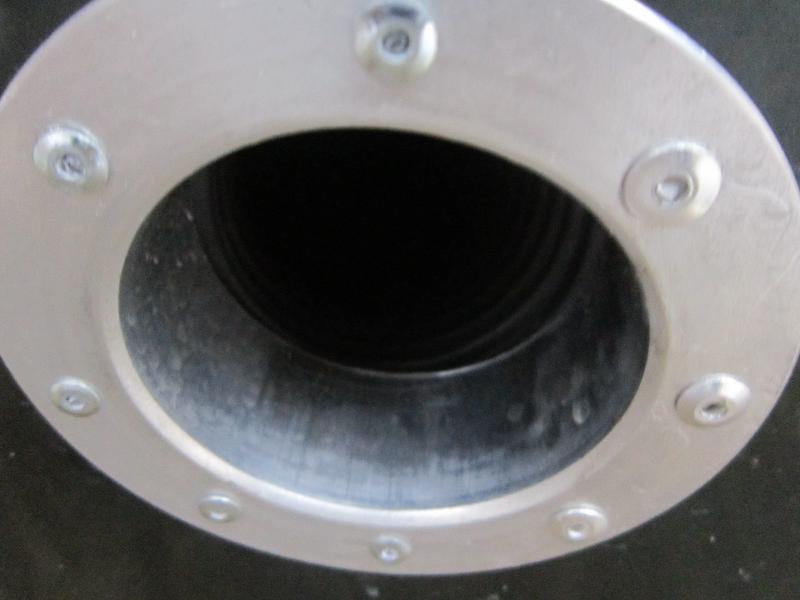
Bought the aluminum flanges right hur:
ALUMINUM FLANGES FOR DUCTING from Aircraft Spruce
Have purchased several other items from them, always shipped quickly!
Bought the aluminum flanges right hur:
ALUMINUM FLANGES FOR DUCTING from Aircraft Spruce
Have purchased several other items from them, always shipped quickly!
Reply
0
0
02-01-2015, 01:19 AM
#33
Elite Member

Join Date: May 2008
Location: Canada
Posts: 1,983
Total Cats: 2,230
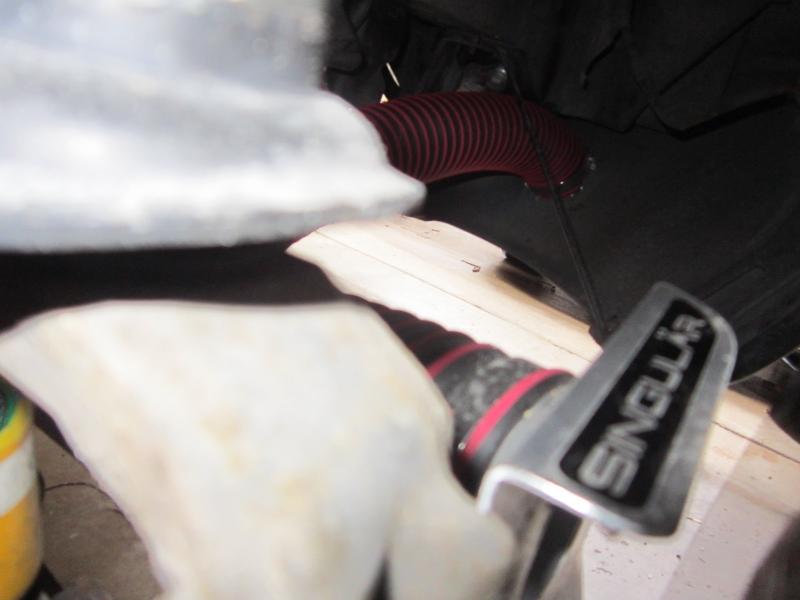
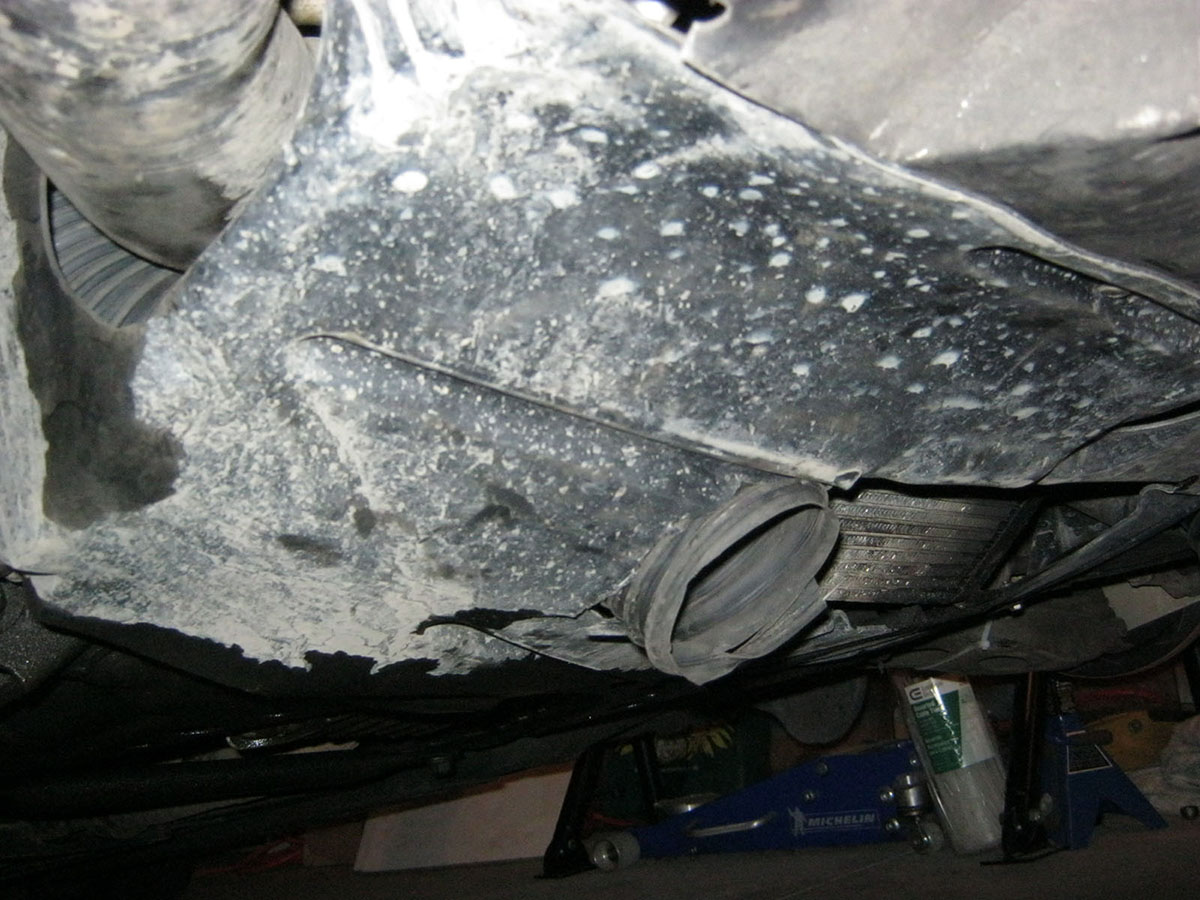
Thanks. My 3" ducting currently exits out the belly pan (next to the oil cooler). It's decidedly not pretty (and almost certainly not that efficient) but I was in a hurry before the last track day of last fall and didn't have time to disassemble the entire belly pan and find a better route. Suffice to say that it's a difficult fitment when your have to share limited space with intercooler tubing.
Reply
0
0
 02-09-2015, 11:24 AM
#35
Former Vendor

iTrader: (31)

Join Date: Nov 2006
Location: Sunnyvale, CA
Posts: 15,442
Total Cats: 2,099
Our ducting kits include 11ft. You need high-temp silicone hose, not dryer duct from HDM. We have it here:
Trackspeed Engineering - 2.5" Singular ducts + hoses
Trackspeed Engineering - 3.0" Singular ducts + hoses
Trackspeed Engineering - 2.5" Singular ducts + hoses
Trackspeed Engineering - 3.0" Singular ducts + hoses
Reply
0
0
02-09-2015, 02:19 PM
#36
Supporting Vendor
Thread Starter
iTrader: (3)
Join Date: Jul 2006
Location: San Diego
Posts: 3,303
Total Cats: 1,216
^Yep, 11' should cover any routing method someone comes up with, and $80/$85 is a great price for that quality of hose.
Depends on undertray and inlet location, some routes use a little less length but the last thing you want is to buy just barely enough to save a few bucks and then find out you need another 6", and then you're buying another full length all over again.
-Ryan
Depends on undertray and inlet location, some routes use a little less length but the last thing you want is to buy just barely enough to save a few bucks and then find out you need another 6", and then you're buying another full length all over again.
-Ryan
Reply
0
0
02-09-2015, 05:04 PM
#37
Former Vendor
iTrader: (31)
Join Date: Nov 2006
Location: Sunnyvale, CA
Posts: 15,442
Total Cats: 2,099
Yep. I can do a car with about ~4ft on each side, but it will depend on exact routing, IC pipes, etc. 11ft makes it easy (and the ducting comes in 11ft sticks). I use the excess to duct remote-mounted oil coolers. 
Reply
0
0
 04-27-2015, 02:14 PM
#40
^ i see my car
__________________
OG Racing
Your Source For Motorsports Safety Equipment
WWW.OGRACING.COM
800.934.9112
703.430.3303
info@ogracing.com
OG Racing
Your Source For Motorsports Safety Equipment
WWW.OGRACING.COM
800.934.9112
703.430.3303
info@ogracing.com
Reply
0
0


